Chargin' Chuck: Difference between revisions
FanOfYoshi (talk | contribs) m (→Names in other languages: I found it on Model Resource, but it only contains the texturing names. I wonder about the actual filename though.) |
No edit summary |
||
| (319 intermediate revisions by 98 users not shown) | |||
| Line 1: | Line 1: | ||
{{species | {{species infobox | ||
|image=[[File:MKT Artwork CharginChuck.png|250px]]<br>Artwork of Chargin' Chuck from ''[[Mario Kart Tour]]'' | |||
|image=[[File: | |||
|first_appearance=''[[Super Mario World]]'' ([[List of games by date#1990|1990]]) | |first_appearance=''[[Super Mario World]]'' ([[List of games by date#1990|1990]]) | ||
|latest_appearance=''[[Mario | |latest_appearance=''[[Mario Kart Tour]]'' ([[Los Angeles Tour (2022)|Los Angeles Tour]]) (2022) | ||
|variant_of=[[Koopa (species)|Koopa]] | |||
|relatives=[[Boom Boom]]<br>[[Sumo Bro]] | |||
|comparable=[[Broozer]]<br>[[Bulrush]]<br>[[Shova]] | |||
}} | }} | ||
{{quote| | {{quote|Hm? Did [[Wendy|you]] say something?|Chargin' Chuck|Mario & Luigi: Superstar Saga + Bowser's Minions}} | ||
'''Chargin' Chucks''' are large, burly [[Koopa (species)|Koopas]] that wear {{wp|gridiron football}} gear, debuting in ''[[Super Mario World]]''. They wear white helmets with a blue and orange stripe, blue shoulder pads, red spiked cleats, and black shells, and have chubby, infant-like faces and small squinting black eyes. In ''[[Super Mario 3D World]]'', when their helmets are off, it is revealed that they have two spiky tufts of blue hair. Their most common method of attack as enemies is charging towards the player in a manner not unlike [[Boom Boom]], as referenced by their [[#Names in other languages|Japanese name]]. Like the [[Hammer Bro]]s. and their variations, Chargin' Chucks also often appear as duos, or sometimes even larger groups. | |||
'''Chargin' Chucks''' are large, burly [[Koopa (species)| | |||
==History== | ==History== | ||
===''Super Mario'' series=== | ===''Super Mario'' series=== | ||
| Line 16: | Line 15: | ||
|align=left | |align=left | ||
|direction=horizontal | |direction=horizontal | ||
|footer=Chargin' Chucks from ''Super Mario World'' | |||
|footer=Chargin' Chucks from ''Super Mario World'' | |image1=Mario charginChuck.gif | ||
|image1= | |||
|width1=24 | |width1=24 | ||
|image2=Football-Chuck.gif | |image2=Football-Chuck.gif | ||
|width2=26 | |width2=26 | ||
}} | }} | ||
Chargin' Chucks first appeared in ''[[Super Mario World]]'' as common enemies who are quite durable against damage. Chargin' Chucks can attack in a variety of ways, including throwing | Chargin' Chucks first appeared in ''[[Super Mario World]]'' as common enemies who are quite durable against damage. Chargin' Chucks can attack in a variety of ways, including throwing [[baseball (object)|baseball]]s, kicking footballs and flinging [[Boulder|rocks]] with a shovel. They can also break through [[Rotating Block]]s and [[Grab Block]]s. Chargin' Chucks also act more aggressively when [[Mario]] is with [[Yoshi]]. Yoshi cannot eat this enemy, however. Other types have less direct attack patterns, such as splitting into three and charging forward and summoning or alerting other nearby enemies, such as [[Super Koopa (enemy)|Super Koopa]]s and [[Rip Van Fish]], using a whistle; one type of Chargin' Chuck also has the habit of jumping in place and clapping. Aside from the whistling Chargin' Chucks, all Chargin' Chucks, once jumped on, revert to simply trying to tackle the player. They are often found at the end of a [[level]] defending the [[Giant Gate]]. It takes three jumps on a Chargin' Chuck's head to defeat it for 800 [[point]]s, with each stomp stunning them and leaving them invulnerable to the next stomp for several seconds, in a similar manner to [[Boom Boom]] from ''[[Super Mario Bros. 3]]''. [[Fire Mario]] can defeat a Chargin' Chuck with five [[fireball]]s for 1000 points (or 2000 points and three coins in the [[Super Mario World: Super Mario Advance 2|Game Boy Advance reissue]]), as can Yoshi by spitting fireballs produced from eating a [[Red Shell]] at him. [[Cape Mario|Caped Mario]] can defeat them with one swing for 100 points. Chargin' Chucks can also be defeated in one stomp if first hit by at least two fireballs by Fire Mario. | ||
{{br|left}} | {{br|left}} | ||
[[File: | [[File:Chargin' Chuck Mario Mania.png|thumb|Descriptions of a variety of Chargin' Chucks]] | ||
In the Nintendo ''[[Mario Mania]]'' Player's Guide, the different types of Chargin' Chucks (except the whistling Chargin' Chucks) are each given individual | In the Nintendo ''[[Mario Mania]]'' Player's Guide, the different types of Chargin' Chucks (except the bouncing and the whistling Chargin' Chucks) are each given an individual name: | ||
*'''Lookout Chuck''': The basic variant that always charges and tackles. Found in [[Yoshi's Island 2]], [[Vanilla Dome 2]], [[Forest of Illusion 4]], [[Chocolate Secret]], and [[Valley of Bowser 1]]. | |||
* '''Lookout Chuck''': The basic variant that always charges and tackles. | *'''Confused Chuck:''' Rapidly throws baseballs in a straight line towards the player, and jumps if the player does. Found in [[Donut Plains 1]], [[Chocolate Island 2]], [[Tubular]], [[Groovy]], and [[Funky (level)|Funky]]. | ||
* '''Confused Chuck:''' Rapidly throws baseballs in a straight line towards the player, and jumps if the player does. | *'''Passin' Chuck:''' Stands in place and kicks footballs that bounce along the ground, and bounce higher and more erratically based on the terrain. Found in [[Donut Plains 2]], [[Vanilla Dome 1]], [[Vanilla Secret 1]], Chocolate Secret, and Tubular. | ||
* '''Passin' Chuck:''' Stands in place and kicks footballs that bounce along the ground, and bounce higher and more erratically based on the terrain. | *'''Clappin' Chuck:''' Stands in place, jumping up to clap if the player does, making it hard to jump over it safely. Found in [[Yoshi's Island 1]], [[Chocolate Island 1]], [[Chocolate Island 4]], [[Chocolate Island 5]], and Tubular. | ||
* '''Clappin' Chuck:''' Stands in place, jumping up to clap if the player does, making it hard to jump over it safely. | *'''Splittin' Chuck:''' Stands still, but upon approaching, splits into three to attack. It is possible to defeat it before it splits. Found only in Vanilla Dome 2, [[Vanilla Secret 2]], and [[Forest of Illusion 3]]. | ||
* '''Splittin' Chuck:''' Stands still, but upon approaching, splits into three to attack. It is possible to defeat it before it splits. Found only in | *'''Diggin' Chuck:''' Stands still, digging rocks that roll slowly on the ground and can only be spin jumped on. Found only in [[Valley of Bowser 4]]. | ||
* '''Diggin' Chuck:''' Stands still, digging rocks that roll slowly on the ground and can only be spin jumped on. Found only in [[Valley of Bowser 4]]. | *An unnamed type that moves around by doing high leaps, like the Splittin' Chuck. Found only in [[Cookie Mountain]] and room 8 of [[Front Door|Bowser's Castle]]. | ||
* | *An unnamed type that does not attack even after being stomped, but whistles to summon enemies. In [[Forest of Illusion 2]], it wakes up the [[Rip Van Fish]] above it, and in Funky, it summons [[Super Koopa (enemy)|Super Koopas]]. | ||
* | |||
====''Super Mario Advance 4: Super Mario Bros. 3''==== | ====''Super Mario Advance 4: Super Mario Bros. 3''==== | ||
[[File:SMA4 Chargin' Chuck.jpg|thumb|Chargin' Chuck in ''Super Mario Advance 4: Super Mario Bros. 3'']] | |||
The rushing Chargin' Chucks and the clapping variety also appear in the [[e-Reader]] accessible level "[[Vegetable Volley]]" in ''[[Super Mario Advance 4: Super Mario Bros. 3]]''. | The rushing Chargin' Chucks and the clapping variety also appear in the [[e-Reader]] accessible level "[[Vegetable Volley]]" in ''[[Super Mario Advance 4: Super Mario Bros. 3]]''. | ||
====''Super Mario 3D World''==== | ====''Super Mario 3D World'' / ''Super Mario 3D World + Bowser's Fury''==== | ||
[[File:SM3DW Chargin Chucks Back.png|thumb|left|Chargin' Chucks in ''Super Mario 3D World'']] | |||
Chargin' Chucks return in ''[[Super Mario 3D World]]'' and its [[Nintendo Switch]] [[Super Mario 3D World + Bowser's Fury|port]], which marks their first appearance in a 3D ''Super Mario'' game. Like in ''Super Mario World'', Chargin' Chucks cannot normally be defeated with a single stomp, and jumping on them once causes their helmets to fly off their heads. After the first hit, they will become faster and after several seconds, put their helmets back on. Unlike in ''Super Mario World'', it takes two normal hits to defeat a Chargin' Chuck, but a single [[Ground Pound]] will instantly defeat it. Likewise, certain items can take out a Chargin' Chuck with one blow, such as a [[Bob-omb]]. | |||
They retain their original dashing sounds and use the ''Super Mario World'' hit sound when defeated. | |||
====''Super Mario Odyssey''==== | ====''Super Mario Odyssey''==== | ||
[[File:Chargin' Chuck Icon SMO.png|100px|thumb]] | [[File:Chargin' Chuck Icon SMO.png|100px|thumb]] | ||
Chargin' Chucks return in ''[[Super Mario Odyssey]]'' | Chargin' Chucks return in ''[[Super Mario Odyssey]]'' as enemies in the Underground Moon Caverns of the [[Moon Kingdom]] and a secret area in the [[Ruined Kingdom]] that can be reached using a [[Moon Pipe]]. As they wear a helmet, Mario must first remove it from their heads before [[Capture|capturing]] them, either with a jump or a hat throw attack. While capturing a Chargin' Chuck, Mario can charge through [[boulder]]s and enemies at a high speed, but he is unable to [[jump]]. | ||
===''Super Mario- | ===''Super Mario-kun''=== | ||
[[File:Chargin'Chuck SuperMarioKun.jpg|thumb|left]] | [[File:Chargin'Chuck SuperMarioKun.jpg|thumb|left]] | ||
Chargin' Chucks appear in ''[[Super Mario- | Chargin' Chucks appear in ''[[Super Mario-kun]]''{{'}}s first 6 volumes, in the ''Super Mario World'' arc. In the very first chapter, the last enemy Mario, [[Luigi]], and Yoshi face is a Chuck that almost succeeds in killing Mario by shoving him off a cliff. Yoshi jumps off to save Mario and, by eating a blue Koopa Troopa, they emerge in time and burn him with their fire power. | ||
A Chuck is later met in the 13th chapter, where a duplicating Chuck is, once again, the last enemy. He faces the Mario at the end of the "Infernal Athletic Level", one step from the [[Giant Gate]]. Mario manages to locate the real Chuck with the false promise of a [[Super Nintendo Entertainment System|SNES]]. Enraged, the Chuck tosses to them a spiny football and Mario is tossed into a ? Block which contains a Super Star but, unable to reach it, Mario tosses his cape. The cape comes to life and beats the Chuck. | |||
In the first chapter of volume 2, a Chuck is (once again) the last enemy of the chapter. Kamek (who disguised himself as Yoshi), unable to convince the Mario Bros. he is the real deal, is used as a club to defeat the last Chuck remaining, breaking Kamek's disguise spell. | |||
In volume 6, while Mario, Luigi, and Yoshi are in [[Balloon Mario|balloon form]], they attempt to hinder their progress by throwing a football at Mario, but the football bounces and hits one of its friends. It then throws a spiked football at Mario, making Mario fall into a [[Warp Pipe]]. Mario, however, collects a star, fires from the warp pipe, and then punches them in the face, defeating them. | |||
{{br}} | {{br}} | ||
===''Super Mario World'' television series=== | ===''Super Mario World'' television series=== | ||
[[File:KoopaFootballPlayer.jpg|thumb|left|A Koopa Football Player from the ''Super Mario World'' television series | [[File:KoopaFootballPlayer.jpg|thumb|left|A Koopa Football Player from the ''Super Mario World'' television series]] | ||
{{quote|Koopa | {{quote|Koopa football players grabbed the princess!|Luigi|Mama Luigi}} | ||
Chargin' Chucks also appear in the ''[[Super Mario World (television series)|Super Mario World]]'' animated series, where they are referred to as '''Koopa | Chargin' Chucks also appear in the ''[[Super Mario World (television series)|Super Mario World]]'' animated series, where they are referred to as '''Koopa football players'''. Due to the fact that they appear throughout several episodes of the series, they appear to have replaced [[Goomba]]s and [[Koopa Troopa]]s, who make relatively few appearances on the show, as [[Bowser]]'s main shock troops. Much like their in-game sprite, they are green with orange sleeves, but their helmet, shell, arms, and legs are green, while the stripe on their helmet is red, the star on their helmet is white, and the rim of their helmet are orange. | ||
===Nintendo Adventure Books=== | ===''Nintendo Adventure Books''=== | ||
In ''[[Dinosaur Dilemma]]'', a group of Chargin' Chucks | In ''[[Dinosaur Dilemma]]'', a group of Chargin' Chucks ambushes Mario and Yoshi while they are traveling through a forest, but they can be beaten if Mario grabs the [[Green Shell]] they are using as a ball, leads them to a clearing, and jumps out of the way when they charge at him, causing them all to collide and knock themselves out. In ''[[Brain Drain]]'', some Chargin' Chucks are spotted milling about the WMUSH radio station after [[Iggy Koopa]] takes it over, and chase Luigi out of the building if he steals some Fungus Up cola from the [[Synapse Switcher]]. | ||
===''Super Mario Adventures''=== | ===''Super Mario Adventures''=== | ||
[[File:ComicChucks.JPG|thumb | [[File:ComicChucks.JPG|thumb|200px|Several Chargin' Chucks from ''Super Mario Adventures'']] | ||
In the ''[[Super Mario Adventures]]'' comic, several Chargin' Chucks, along with several [[Thwomp]]s, are summoned by [[Wendy O. Koopa]] to attack | In the ''[[Super Mario Adventures]]'' comic, several Chargin' Chucks, along with several [[Thwomp]]s, are summoned by [[Wendy O. Koopa]] to attack Mario, Luigi, [[Princess Peach|Princess Toadstool]], [[Toad]] and [[Friendly Floyd]] during the battle in the Koopaling's Tower. | ||
===''Yoshi's Safari''=== | ===''Yoshi's Safari''=== | ||
[[File:Safari Chuck.png|thumb|left|A Chargin' Chuck as it appears in ''Yoshi's Safari''.]] | [[File:Safari Chuck.png|thumb|left|A Chargin' Chuck as it appears in ''Yoshi's Safari''.]] | ||
In ''[[Yoshi's Safari]]'', a Chargin' Chuck, who attacks | In ''[[Yoshi's Safari]]'', a Chargin' Chuck, who attacks Mario and Yoshi by throwing [[Bomb (object)|bombs]] while jumping from side-to-side, appears as the boss of [[Float Castle II]]. | ||
{{br}} | {{br}} | ||
===''Captain Toad: Treasure Tracker''=== | ===''Captain Toad: Treasure Tracker''=== | ||
Chargin' Chucks reappear as enemies in ''[[Captain Toad: Treasure Tracker]]''. They behave the same as in ''Super Mario 3D World''. Chargin' Chucks can be quite devastating, due to needing to be hit twice and constantly putting back on the helmet while Captain Toad | Chargin' Chucks reappear as enemies in ''[[Captain Toad: Treasure Tracker]]'' and its Nintendo Switch and [[Nintendo 3DS]] [[Captain Toad: Treasure Tracker (Nintendo Switch / Nintendo 3DS)|ports]]. They behave the same as in ''Super Mario 3D World''. Chargin' Chucks can be quite devastating, due to needing to be hit twice and constantly putting back on the helmet while Captain Toad and Toadette are unable to jump on them (although they can fall from a higher ledge onto the Chargin' Chuck). They are more often used to be lured to break [[Rock Block]]s or topple [[Mud Trooper]]s at a high risk. Tapping Chargin' Chucks on the [[Wii U#Wii U GamePad|GamePad]] makes their helmets temporarily fall off. | ||
===''Mario & Luigi'' series=== | ===''Mario & Luigi'' series=== | ||
====''Mario & Luigi: Paper Jam''==== | ====''Mario & Luigi: Paper Jam''==== | ||
Chargin' Chucks debut in the ''[[Mario & Luigi (series)|Mario & Luigi]]'' series in ''[[Mario & Luigi: Paper Jam]].'' A group of them, known as the Chargin' Chuck Corps, are treated as a boss in a large mass, like the [[Dream World]] enemies in ''[[Mario & Luigi: Dream Team]]''. | {{quote|Hey! Those are the goons who dragged us off to prison!|Starlow|Mario & Luigi: Paper Jam}} | ||
Chargin' Chucks debut in the ''[[Mario & Luigi (series)|Mario & Luigi]]'' series in ''[[Mario & Luigi: Paper Jam]].'' A group of them, known as the '''Chargin' Chuck Corps''', are treated as a boss in a large mass, like the [[Dream World]] enemies in ''[[Mario & Luigi: Dream Team]]''. | |||
They are first seen after Mario, Luigi, and [[Paper Mario (character)|Paper Mario]] first cross [[Doop Doop Dunes]], where the Chargin' Chuck Corps take them away to the [[Twinsy Tropics Dungeon]]. Later, they are seen again when the trio are traversing Doop Doop Dunes for the second time, where they chase them down before proceeding to battle the group. | They are first seen after Mario, Luigi, and [[Paper Mario (character)|Paper Mario]] first cross [[Doop Doop Dunes]], where the Chargin' Chuck Corps take them away to the [[Twinsy Tropics Dungeon]] under [[Roy Koopa|Roy]]'s orders. Later, they are seen again when the trio are traversing Doop Doop Dunes for the second time, where they chase them down before proceeding to battle the group. | ||
In battle, they attack by charging into a brother from the front and behind, which must be avoided using a [[Jump]]. When some Chargin' Chucks are defeated, the remaining ones will call for backup; causing more Chucks to appear. When enough Chargin' Chucks are defeated, they will become enraged | In battle, they attack by charging into a brother from the front and behind, which must be avoided using a [[Jump]]. Nine of them may also line up three in a row, one in each row will hold a gridiron-type football briefly, then they will all shuffle at which point the player must keep track of the ones who held the football. They will then throw their footballs at a bro, who must counter them with the hammer. Where the Chargin’ Chuck who held the football was in each row will determine which bro the football will be thrown at: The top Chuck will throw it at Mario, the middle one will throw it at Paper Mario, and the bottom one will throw it at Luigi. When some Chargin' Chucks are defeated, the remaining ones will call for backup; causing more Chucks to appear. They also have a chase sequence, with five of them throwing American footballs at Mario and Luigi who must hold onto Paper Mario in his airplane form to avoid them. The Chargin' Chucks may also throw their American footballs directly at Paper Mario, who must evade them. After a while, the Chargin' Chucks will fall over, allowing Paper Mario to stomp on them all at once. When enough Chargin' Chucks are defeated, they will become enraged and immediately do one last call of reinforcements, maxing out at 16 total. Once defeated, the trio continue back to the Twinsy Tropics Dungeon. The Chargin' Chucks can all be defeated by using the [[Trio Whirligig]] [[Trio Attack]]. | ||
====''Mario & Luigi: Superstar Saga + Bowser's Minions''==== | ====''Mario & Luigi: Superstar Saga + Bowser's Minions''==== | ||
[[File:MLSSBMChargin'Chuck.png|thumb]] | [[File:MLSSBMChargin'Chuck.png|thumb]] | ||
Chargin' Chucks appear in ''[[Mario & Luigi: Superstar Saga + Bowser's Minions]]'', where they are enemies and recruitable allies in ''Minion Quest: The Search for Bowser''. They are melee troopers with high defense and power, and they attack by charging into enemies. Their [[Special Skill]] is Air Bash. Chargin' Chucks are weak against [[Mechakoopa]]s. | Chargin' Chucks appear in ''[[Mario & Luigi: Superstar Saga + Bowser's Minions]]'', where they are enemies and recruitable allies in ''Minion Quest: The Search for Bowser''. They are melee troopers with high defense and power, and they attack by charging into enemies. Their [[Special Skill (Mario & Luigi series)|Special Skill]] is Air Bash. Chargin' Chucks are weak against [[Mechakoopa]]s. One is also seen alongside Wendy, a [[Boomerang Bro]], a [[Bob-omb]], and a [[Koopa Paratroopa]], being knocked away by Wendy for interrupting her. Another one's helmet is used to repair the [[Koopa Cruiser]] in [[Joke's End]]. It is also the first game in which a Chargin Chuck is seen speaking. | ||
====''Mario & Luigi: Bowser's Inside Story + Bowser Jr.'s Journey''==== | ====''Mario & Luigi: Bowser's Inside Story + Bowser Jr.'s Journey''==== | ||
In ''[[Mario & Luigi: Bowser's Inside Story + Bowser Jr.'s Journey]]'', Chargin' Chucks appear in the ''Bowser Jr.'s Journey'' mode, where they are enemies and recruitable allies. | In ''[[Mario & Luigi: Bowser's Inside Story + Bowser Jr.'s Journey]]'', Chargin' Chucks appear in the ''Bowser Jr.'s Journey'' mode, where they are enemies and recruitable allies. Their Special Skill in this game is Smack Back Attack. | ||
===''Super Mario Party''=== | ===''Super Mario Party''=== | ||
[[File:SMP - Pep Rally Boo.jpg|thumb|Chargin' Chucks in the ''Super Mario Party'' minigame Pep Rally]] | |||
Chargin' Chucks make their ''[[Mario Party (series)|Mario Party]]'' series debut in ''[[Super Mario Party]]'' as non-playable characters. Several Chargin' Chucks appear in the minigame [[Rattle and Hmmm]], where they appear along with a [[Grrrol]] and a [[Wiggler]], and [[Gridiron Gauntlet]], where the players must dodge them as they charge through certain areas. Two Chargin' Chucks also appear running on treadmills in the background of the beginning and end cutscenes in the minigame [[Looking for Love]]. Four Chargin' Chucks appear in the background of the minigame [[Pep Rally]]. | Chargin' Chucks make their ''[[Mario Party (series)|Mario Party]]'' series debut in ''[[Super Mario Party]]'' as non-playable characters. Several Chargin' Chucks appear in the minigame [[Rattle and Hmmm]], where they appear along with a [[Grrrol]] and a [[Wiggler]], and [[Gridiron Gauntlet]], where the players must dodge them as they charge through certain areas. Two Chargin' Chucks also appear running on treadmills in the background of the beginning and end cutscenes in the minigame [[Looking for Love]]. Four Chargin' Chucks appear in the background of the minigame [[Pep Rally]]. | ||
===''Super Smash Bros. Ultimate''=== | ===''Super Smash Bros. Ultimate''=== | ||
A Chargin' Chuck appears as | A Chargin' Chuck appears in ''[[Super Smash Bros. Ultimate]]'' as a Novice-class Attack-type primary [[Spirit (Super Smash Bros. Ultimate)|spirit]] with one support slot. The spirit simply raises the power of its user without granting them any special effects during battle. In [[Super Smash Bros. Ultimate#Adventure Mode: World of Light|World of Light]], the spirit is found south-west on the Light Realm map, on the giant yellow mushroom in the mushroom gorge area. The corresponding spirit battle involves a team of four [[Wario]]s fought on the Battlefield form of the [[Super Mario Maker (stage)|Super Mario Maker]] stage, set in ''Super Mario World'' style. | ||
===''Paper Mario: The Origami King''=== | |||
[[File:PMOK Chargin Chuck.jpg|thumb|An origami Chargin' Chuck in ''Paper Mario: The Origami King'']] | |||
{{quote|WE'RE SHREDDED ALL RIGHT!|Chargin' Chuck|Paper Mario: The Origami King}} | |||
[[File:PMTOK Chargin Chucks in spring.jpg|thumb|left|Three Chargin' Chucks occupying the [[Spring of Purification]]]] | |||
Chargin' Chucks make their debut in the ''[[Paper Mario (series)|Paper Mario]]'' series in ''[[Paper Mario: The Origami King]]'', where origami Chargin' Chucks are enemies. In the game, Mario encounters and fights only a single group of Chargin' Chucks in [[Shangri-Spa]], where three of them are seen occupying the [[Spring of Purification]] after [[Bowser Jr.]] and his [[Junior Clown Car]] are cut into pieces by [[Scissors (boss)|Scissors]]. It is also the second game in which they are seen speaking. | |||
{{br}} | |||
===''Mario Golf: Super Rush''=== | |||
A Chargin' Chuck appears as a playable character in ''[[Mario Golf: Super Rush]]'', marking his first appearance in the ''[[Mario Golf (series)|Mario Golf]]'' series and his first stand-alone playable appearance overall (excluding [[Capture|capturing]] one in ''[[Super Mario Odyssey]]''). He is a Power character with the lowest Spin of any character, tied with [[King Bob-omb]]. His Special Shot is Scrimmage Stinger, and his Special Dash is known as End-Zone Dash. | |||
Chargin' Chuck also appears in Golf Adventure mode. He is first seen at the player's house, then he goes to the clubhouse to speak to the Head Coach. He is the first to be called. He is then seen at the [[Bonny Greens]] practice area practicing swings. He also appears as a rival along with [[Boo]] during Speed Golf in Balmy Dunes. | |||
===''Mario Kart Tour''=== | |||
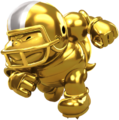
Chargin' Chuck makes his playable debut in the ''[[Mario Kart (series)|Mario Kart]]'' series in ''[[Mario Kart Tour]]'', starting from the [[Los Angeles Tour (2022)|2022 Los Angeles Tour]]. He is classified as a High-End driver, and his [[Special skill (Mario Kart Tour)|special skill]] is the [[Lucky Seven]]. Starting from the [[Peach vs. Bowser Tour (May 2022)|May 2022 Peach vs. Bowser Tour]], Chargin' Chuck is available in regular tour pipes, including the All-Clear Pipe; and starting with the [[Animal Tour]], he also has his own [[Chargin' Chuck Cup|self-named cup]]. The [[Bowser Tour (2022)|2022 Bowser Tour]] introduced a gold variant of Chargin' Chuck with a golden helmet with a silver stripe, named '''Chargin' Chuck (Gold)''', which is also classified as a High-End, but utilizes the [[Coin Box]] as his special item. | |||
==Profiles and statistics== | |||
===''Super Mario'' series=== | |||
====''Super Mario World''==== | |||
*'''''Super Mario World'' instruction booklet:''' ''These All-Stars always seem to bar Mario's way just when he's within sight of the goal. They use a variety of bull-headed attacks, so you'll really have a tough time checking Chargin' Chuck.''<ref>{{cite| title = ''Super Mario World'' instruction booklet | page = 26 }}</ref> | |||
*'''''[[Mario Mania]]'':''' ''Helmeted and heavily padded, Chargin' Chuck is well protected. It takes three hits to sideline him. Watch out for his blitz—don't get sacked!''<ref>{{cite| title = Nintendo ''Mario Mania'' Player's Guide | page = 50 }}</ref> | |||
====''Super Mario World: Super Mario Advance 2''==== | |||
*'''''Denizens of Dinosaur Land'' poster:''' ''If there's a goal in sight, you're bound to meet up with a Chargin' Chuck. These tough brutes will try to bar your way with a variety of attacks, and they're persistent, too.'' | |||
===''[[Perfect Ban Mario Character Daijiten]]''=== | |||
'''<big>ブル</big><br> | |||
'''{{ruby|種族|しゅぞく}}''' カメ{{ruby|族|ぞく}}<br> | |||
'''{{ruby|性格|せいかく}}''' {{ruby|猪突猛進型|ちょとつもうしんがた}}<br> | |||
'''{{ruby|登場|とうじょう}}ゲーム''' ワールド<br> | |||
'''<big>{{ruby|多彩|たさい}}な{{ruby|攻撃|こうげき}}パターンのブル</big><br> | |||
アメフトスタイルのたくましいカメ。{{ruby|攻撃|こうげき}}パターンが{{ruby|豊富|ほうふ}}で、{{ruby|突進|とっしん}}してきたり、ボールを{{ruby|投|な}}げてきたりとその{{ruby|数|かず}}なんと8{{ruby|種類|しゅるい}}。3{{ruby|回踏|かいふ}}みつければ{{ruby|倒|たお}}せるが、マントなら1{{ruby|発|ぱつ}}だ。<ref>{{cite| date = 1994 | title = 「パーフェクト版 マリオキャラクター大事典」 (''Perfect Ban Mario Character Daijiten'') | page = [https://i.imgur.com/cywm43f.jpeg 195] | publisher = Shogakukan }}</ref> | |||
'''''<big>Chargin' Chuck</big>'''''<br> | |||
''Tribe: Turtle clan''<br> | |||
''Disposition: Headstrong and hot-tempered''<br> | |||
''Game appearances: World''<br> | |||
'''''<big>Chargin' Chuck with a variety of attack patterns</big><br> | |||
''A tough, football-style turtle. It has eight different attack patterns, including rushing and throwing balls, and can be defeated by stomping on it three times, but only one shot is needed if you use a Cape.'' | |||
===''Mario Kart Tour''=== | |||
====Chargin' Chuck==== | |||
{{MKT profile | |||
|collapse=y | |||
|item=Lucky Seven | |||
|I1.1=3DS Wario Shipyard R|R1.1=[[3DS Wario Shipyard|3DS Wario Shipyard R]] | |||
|I1.2=Los Angeles Laps 2T|R1.2=[[Los Angeles Laps|Los Angeles Laps 2T]] | |||
|I1.3=Los Angeles Laps 2|R1.3=[[Los Angeles Laps|Los Angeles Laps 2]] | |||
|I1.4=Wii DK Summit R|R1.4=[[Wii DK Summit|Wii DK Summit R]] | |||
|I1.5=3DS Wario Shipyard|R1.5=[[3DS Wario Shipyard]] | |||
|I1.6=3DS Rock Rock Mountain R|R1.6=[[3DS Rock Rock Mountain|3DS Rock Rock Mountain R]] | |||
|I1.7=N64 Kalimari Desert 2RT|R1.7=[[N64 Kalimari Desert|N64 Kalimari Desert 2R/T]] | |||
|I1.8=RMX Mario Circuit 1R|R1.8=[[RMX Mario Circuit 1|RMX Mario Circuit 1R]] | |||
|I1.9=DS Airship Fortress RT|R1.9=[[DS Airship Fortress|DS Airship Fortress R/T]] | |||
|I1.10=Wii Mushroom Gorge R|R1.10=[[Wii Mushroom Gorge|Wii Mushroom Gorge R]] | |||
|I1.11=3DS Bowser's Castle T|R1.11=[[3DS Bowser's Castle|3DS Bowser's Castle T]] | |||
|I1.12=Wii Mushroom Gorge T|R1.12=[[Wii Mushroom Gorge|Wii Mushroom Gorge T]] | |||
|I1.13=3DS Wario Shipyard RT|R1.13=[[3DS Wario Shipyard|3DS Wario Shipyard R/T]] | |||
|I1.14=DS Airship Fortress|R1.14=[[DS Airship Fortress]] | |||
|I1.15=SNES Donut Plains 2|R1.15=[[SNES Donut Plains 2]] | |||
|I1.16=SNES Choco Island 1|R1.16=[[SNES Choco Island 1]] | |||
|I1.17=Amsterdam Drift T|R1.17=[[Tour Amsterdam Drift|Amsterdam Drift T]] | |||
|I1.18=GBA Bowser's Castle 1R|R1.18=[[GBA Bowser's Castle 1|GBA Bowser's Castle 1R]] | |||
|I1.19=SNES Donut Plains 1|R1.19=[[SNES Donut Plains 1]] | |||
|I1.20=Wii Coconut Mall|R1.20=[[Wii Coconut Mall]] | |||
|I1.21=Wii Koopa Cape|R1.21=[[Wii Koopa Cape]] | |||
|I1.22=Wii Koopa Cape R|R1.22=[[Wii Koopa Cape|Wii Koopa Cape R]] | |||
|I1.23=Berlin Byways|R1.23=[[Tour Berlin Byways|Berlin Byways]] | |||
|I1.24=Berlin Byways R|R1.24=[[Tour Berlin Byways|Berlin Byways R]] | |||
|I1.25=GBA Bowser's Castle 3T|R1.25=[[GBA Bowser's Castle 3|GBA Bowser's Castle 3T]] | |||
|I1.26=N64 Choco Mountain RT|R1.26=[[N64 Choco Mountain|N64 Choco Mountain R/T]] | |||
|I1.27=Berlin Byways 3|R1.27=[[Tour Berlin Byways|Berlin Byways 3]] | |||
|I1.28=New York Minute B|R1.28=[[Tour New York Minute|New York Minute B]] | |||
|I1.29=DS Waluigi Pinball RT|R1.29=[[DS Waluigi Pinball|DS Waluigi Pinball R/T]] | |||
|I1.30=Tokyo Blur 4|R1.30=[[Tour Tokyo Blur|Tokyo Blur 4]] | |||
|I1.31=SNES Mario Circuit 1|R1.31=[[SNES Mario Circuit 1]] | |||
|I2.1=GBA Cheep-Cheep Island|R2.1=[[GBA Cheep-Cheep Island]]* | |||
|I2.2=Wii DK Summit T|R2.2=[[Wii DK Summit|Wii DK Summit T]]* | |||
|I2.3=Los Angeles Laps 3|R2.3=[[Los Angeles Laps|Los Angeles Laps 3]]** | |||
|I2.4=Los Angeles Laps 3T|R2.4=[[Los Angeles Laps|Los Angeles Laps 3T]] | |||
|I2.5=3DS Wario Shipyard T|R2.5=[[3DS Wario Shipyard|3DS Wario Shipyard T]]** | |||
|I2.6=3DS Rock Rock Mountain T|R2.6=[[3DS Rock Rock Mountain|3DS Rock Rock Mountain T]]*** | |||
|I2.7=GBA Sky Garden|R2.7=[[GBA Sky Garden]] | |||
|I2.8=RMX Mario Circuit 1|R2.8=[[RMX Mario Circuit 1]] | |||
|I2.9=SNES Koopa Troopa Beach 2T|R2.9=[[SNES Koopa Troopa Beach 2|SNES Koopa Troopa Beach 2T]] | |||
|I2.10=SNES Koopa Troopa Beach 2R|R2.10=[[SNES Koopa Troopa Beach 2|SNES Koopa Troopa Beach 2R]] | |||
|I2.11=SNES Donut Plains 2R|R2.11=[[SNES Donut Plains 2|SNES Donut Plains 2R]] | |||
|I2.12=SNES Choco Island 1R|R2.12=[[SNES Choco Island 1|SNES Choco Island 1R]] | |||
|I2.13=GBA Bowser's Castle 1|R2.13=[[GBA Bowser's Castle 1]] | |||
|I2.14=Berlin Byways 2T|R2.14=[[Tour Berlin Byways|Berlin Byways 2T]] | |||
|I2.15=Berlin Byways T|R2.15=[[Tour Berlin Byways|Berlin Byways T]] | |||
|I2.16=N64 Kalimari Desert T|R2.16=[[N64 Kalimari Desert|N64 Kalimari Desert T]] | |||
|I2.17=Singapore Speedway 2T|R2.17=[[Tour Singapore Speedway|Singapore Speedway 2T]] | |||
|I2.18=GCN Daisy Cruiser R|R2.18=[[GCN Daisy Cruiser|GCN Daisy Cruiser R]] | |||
|I2.19=SNES Choco Island 2RT|R2.19=[[SNES Choco Island 2|SNES Choco Island 2R/T]] | |||
|I2.20=SNES Ghost Valley 2T|R2.20=[[SNES Ghost Valley 2|SNES Ghost Valley 2T]] | |||
|I2.21=Los Angeles Laps 3RT|R2.21=[[Los Angeles Laps|Los Angeles Laps 3R/T]] | |||
|I2.22=Singapore Speedway 2RT|R2.22=[[Tour Singapore Speedway|Singapore Speedway 2R/T]] | |||
|I2.23=GBA Battle Course 1|R2.23=[[GBA Battle Course 1]] | |||
|I2.24=SNES Mario Circuit 1R|R2.24=[[SNES Mario Circuit 1|SNES Mario Circuit 1R]] | |||
|I2.25=SNES Mario Circuit 1T|R2.25=[[SNES Mario Circuit 1|SNES Mario Circuit 1T]] | |||
|I2.26=Squeaky Clean Sprint T|R2.26=[[Squeaky Clean Sprint|Squeaky Clean Sprint T]] | |||
}} | |||
====Chargin' Chuck (Gold)==== | |||
{{MKT profile | |||
|collapse=y | |||
|item=Coin Box | |||
|I1.1=RMX Bowser's Castle 1T|R1.1=[[RMX Bowser's Castle 1|RMX Bowser's Castle 1T]] | |||
|I1.2=RMX Bowser's Castle 1R|R1.2=[[RMX Bowser's Castle 1|RMX Bowser's Castle 1R]] | |||
|I1.3=N64 Choco Mountain RT|R1.3=[[N64 Choco Mountain|N64 Choco Mountain R/T]] | |||
|I1.4=Wii Mushroom Gorge T|R1.4=[[Wii Mushroom Gorge|Wii Mushroom Gorge T]] | |||
|I1.5=SNES Ghost Valley 2R|R1.5=[[SNES Ghost Valley 2|SNES Ghost Valley 2R]] | |||
|I1.6=GCN Daisy Cruiser R|R1.6=[[GCN Daisy Cruiser|GCN Daisy Cruiser R]] | |||
|I1.7=Sydney Sprint 3T|R1.7=[[Tour Sydney Sprint|Sydney Sprint 3T]] | |||
|I1.8=Sydney Sprint 3R|R1.8=[[Tour Sydney Sprint|Sydney Sprint 3R]] | |||
|I1.9=Los Angeles Laps 3RT|R1.9=[[Los Angeles Laps|Los Angeles Laps 3R/T]] | |||
|I1.10=GBA Sunset Wilds R|R1.10=[[GBA Sunset Wilds|GBA Sunset Wilds R]] | |||
|I1.11=3DS Wario Shipyard T|R1.11=[[3DS Wario Shipyard|3DS Wario Shipyard T]] | |||
|I1.12=RMX Donut Plains 1RT|R1.12=[[RMX Donut Plains 1|RMX Donut Plains 1R/T]] | |||
|I1.13=SNES Rainbow Road RT|R1.13=[[SNES Rainbow Road|SNES Rainbow Road R/T]] | |||
|I1.14=SNES Donut Plains 3T|R1.14=[[SNES Donut Plains 3|SNES Donut Plains 3T]] | |||
|I1.15=Los Angeles Laps T|R1.15=[[Los Angeles Laps|Los Angeles Laps T]] | |||
|I1.16=Los Angeles Laps 2T|R1.16=[[Los Angeles Laps|Los Angeles Laps 2T]] | |||
|I1.17=3DS Rock Rock Mountain T|R1.17=[[3DS Rock Rock Mountain|3DS Rock Rock Mountain T]] | |||
|I1.18=GCN DK Mountain|R1.18=[[GCN DK Mountain]] | |||
|I1.19=GCN DK Mountain R|R1.19=[[GCN DK Mountain|GCN DK Mountain R]] | |||
|I1.20=3DS Bowser's Castle T|R1.20=[[3DS Bowser's Castle|3DS Bowser's Castle T]] | |||
|I1.21=Amsterdam Drift 3R|R1.21=[[Tour Amsterdam Drift|Amsterdam Drift 3R]] | |||
|I1.22=GBA Snow Land RT|R1.22=[[GBA Snow Land|GBA Snow Land R/T]] | |||
|I1.23=Merry Mountain|R1.23=[[Merry Mountain]] | |||
|I1.24=N64 Kalimari Desert RT|R1.24=[[N64 Kalimari Desert|N64 Kalimari Desert R/T]] | |||
|I1.25=3DS Rainbow Road RT|R1.25=[[3DS Rainbow Road|3DS Rainbow Road R/T]] | |||
|I1.26=Wii Rainbow Road|R1.26=[[Wii Rainbow Road]] | |||
|I1.27=Bangkok Rush 3|R1.27=[[Tour Bangkok Rush|Bangkok Rush 3]] | |||
|I1.28=Bangkok Rush 2RT|R1.28=[[Tour Bangkok Rush|Bangkok Rush 2R/T]] | |||
|I1.29=Bangkok Rush 3T|R1.29=[[Tour Bangkok Rush|Bangkok Rush 3T]] | |||
|I1.30=Piranha Plant Cove 2T|R1.30=[[Piranha Plant Cove|Piranha Plant Cove 2T]] | |||
|I1.31=Wii Coconut Mall T|R1.31=[[Wii Coconut Mall|Wii Coconut Mall T]] | |||
|I1.32=SNES Mario Circuit 3R|R1.32=[[SNES Mario Circuit 3|SNES Mario Circuit 3R]] | |||
|I1.33=Wii Dry Dry Ruins T|R1.33=[[Wii Dry Dry Ruins|Wii Dry Dry Ruins T]] | |||
|I1.34=Ninja Hideaway T|R1.34=[[Ninja Hideaway|Ninja Hideaway T]] | |||
|I1.35=GBA Yoshi Desert RT|R1.35=[[GBA Yoshi Desert|GBA Yoshi Desert R/T]] | |||
|I1.36=Yoshi's Island R|R1.36=[[Tour Yoshi's Island|Yoshi's Island R]] | |||
|I1.37=GBA Yoshi Desert R|R1.37=[[GBA Yoshi Desert|GBA Yoshi Desert R]] | |||
|I1.38=London Loop 2T|R1.38=[[Tour London Loop|London Loop 2T]] | |||
|I1.39=Athens Dash RT|R1.39=[[Athens Dash|Athens Dash R/T]] | |||
|I1.40=Athens Dash 2|R1.40=[[Athens Dash|Athens Dash 2]] | |||
|I1.41=RMX Bowser's Castle 1RT|R1.41=[[RMX Bowser's Castle 1|RMX Bowser's Castle 1R/T]] | |||
|I1.42=GCN Mushroom Bridge T|R1.42=[[GCN Mushroom Bridge|GCN Mushroom Bridge T]] | |||
|I1.43=Wii Daisy Circuit T|R1.43=[[Wii Daisy Circuit|Wii Daisy Circuit T]] | |||
|I1.44=GCN Waluigi Stadium T|R1.44=[[GCN Waluigi Stadium|GCN Waluigi Stadium T]] | |||
|I1.45=GCN Waluigi Stadium R|R1.45=[[GCN Waluigi Stadium|GCN Waluigi Stadium R]] | |||
|I1.46=Rome Avanti 2RT|R1.46=[[Rome Avanti|Rome Avanti 2R/T]] | |||
|I1.47=SNES Koopa Troopa Beach 2T|R1.47=[[SNES Koopa Troopa Beach 2|SNES Koopa Troopa Beach 2T]] | |||
|I1.48=Squeaky Clean Sprint RT|R1.48=[[Squeaky Clean Sprint|Squeaky Clean Sprint R/T]] | |||
|I1.49=Madrid Drive RT|R1.49=[[Madrid Drive|Madrid Drive R/T]] | |||
|I1.50=RMX Vanilla Lake 2T|R1.50=[[RMX Vanilla Lake 2|RMX Vanilla Lake 2T]] | |||
|I1.51=Rome Avanti 3|R1.51=[[Rome Avanti|Rome Avanti 3]] | |||
|I2.1=3DS Neo Bowser City|R2.1=[[3DS Neo Bowser City]]* | |||
|I2.2=SNES Choco Island 1RT|R2.2=[[SNES Choco Island 1|SNES Choco Island 1R/T]]* | |||
|I2.3=Wii Mushroom Gorge R|R2.3=[[Wii Mushroom Gorge|Wii Mushroom Gorge R]]** | |||
|I2.4=GBA Bowser's Castle 3T|R2.4=[[GBA Bowser's Castle 3|GBA Bowser's Castle 3T]] | |||
|I2.5=RMX Bowser's Castle 1|R2.5=[[RMX Bowser's Castle 1]]*** | |||
|I2.6=GBA Bowser's Castle 3R|R2.6=[[GBA Bowser's Castle 3|GBA Bowser's Castle 3R]]** | |||
|I2.7=SNES Ghost Valley 2T|R2.7=[[SNES Ghost Valley 2|SNES Ghost Valley 2T]] | |||
|I2.8=Los Angeles Laps 3|R2.8=[[Los Angeles Laps|Los Angeles Laps 3]] | |||
|I2.9=Los Angeles Laps 3R|R2.9=[[Los Angeles Laps|Los Angeles Laps 3R]] | |||
|I2.10=Sydney Sprint 3|R2.10=[[Tour Sydney Sprint|Sydney Sprint 3]] | |||
|I2.11=GCN Cookie Land|R2.11=[[GCN Cookie Land]] | |||
|I2.12=SNES Donut Plains 1RT|R2.12=[[SNES Donut Plains 1|SNES Donut Plains 1R/T]] | |||
|I2.13=GBA Battle Course 1|R2.13=[[GBA Battle Course 1]] | |||
|I2.14=DS Twilight House|R2.14=[[DS Twilight House]] | |||
|I2.15=SNES Donut Plains 3R|R2.15=[[SNES Donut Plains 3|SNES Donut Plains 3R]] | |||
|I2.16=Los Angeles Laps 2RT|R2.16=[[Los Angeles Laps|Los Angeles Laps 2R/T]] | |||
|I2.17=3DS Rock Rock Mountain R|R2.17=[[3DS Rock Rock Mountain|3DS Rock Rock Mountain R]] | |||
|I2.18=3DS Bowser's Castle|R2.18=[[3DS Bowser's Castle]] | |||
|I2.19=Amsterdam Drift 3|R2.19=[[Tour Amsterdam Drift|Amsterdam Drift 3]] | |||
|I2.20=GBA Snow Land T|R2.20=[[GBA Snow Land|GBA Snow Land T]] | |||
|I2.21=Merry Mountain R|R2.21=[[Merry Mountain|Merry Mountain R]] | |||
|I2.22=GBA Bowser's Castle 3RT|R2.22=[[GBA Bowser's Castle 3|GBA Bowser's Castle 3R/T]] | |||
|I2.23=RMX Rainbow Road 1|R2.23=[[RMX Rainbow Road 1]] | |||
|I2.24=Wii Rainbow Road T|R2.24=[[Wii Rainbow Road|Wii Rainbow Road T]] | |||
|I2.25=Wii Rainbow Road R|R2.25=[[Wii Rainbow Road|Wii Rainbow Road R]] | |||
|I2.26=Bangkok Rush|R2.26=[[Tour Bangkok Rush|Bangkok Rush]] | |||
|I2.27=Bangkok Rush R|R2.27=[[Tour Bangkok Rush|Bangkok Rush R]] | |||
|I2.28=Bangkok Rush 3R|R2.28=[[Tour Bangkok Rush|Bangkok Rush 3R]] | |||
|I2.29=Bangkok Rush 2T|R2.29=[[Tour Bangkok Rush|Bangkok Rush 2T]] | |||
|I2.30=Bangkok Rush 3RT|R2.30=[[Tour Bangkok Rush|Bangkok Rush 3R/T]] | |||
|I2.31=SNES Mario Circuit 3T|R2.31=[[SNES Mario Circuit 3|SNES Mario Circuit 3T]] | |||
|I2.32=Wii Dry Dry Ruins R|R2.32=[[Wii Dry Dry Ruins|Wii Dry Dry Ruins R]] | |||
|I2.33=Berlin Byways 2RT|R2.33=[[Tour Berlin Byways|Berlin Byways 2R/T]] | |||
|I2.34=Athens Dash|R2.34=[[Athens Dash]] | |||
|I2.35=Athens Dash 2RT|R2.35=[[Athens Dash|Athens Dash 2R/T]] | |||
|I2.36=GBA Bowser's Castle 2R|R2.36=[[GBA Bowser's Castle 2|GBA Bowser's Castle 2R]] | |||
|I2.37=N64 Mario Raceway|R2.37=[[N64 Mario Raceway]] | |||
|I2.38=GCN Waluigi Stadium|R2.38=[[GCN Waluigi Stadium]] | |||
|I2.39=Wii Moonview Highway|R2.39=[[Wii Moonview Highway]] | |||
|I2.40=Rome Avanti 2T|R2.40=[[Rome Avanti|Rome Avanti 2T]] | |||
|I2.41=Rome Avanti T|R2.41=[[Rome Avanti|Rome Avanti T]] | |||
|I2.42=Piranha Plant Pipeline T|R2.42=[[Piranha Plant Pipeway|Piranha Plant Pipeline T]] | |||
|I2.43=GBA Lakeside Park|R2.43=[[GBA Lakeside Park]] | |||
|I2.44=SNES Koopa Troopa Beach 2RT|R2.44=[[SNES Koopa Troopa Beach 2|SNES Koopa Troopa Beach 2R/T]] | |||
|I2.45=Madrid Drive 2R|R2.45=[[Madrid Drive|Madrid Drive 2R]] | |||
|I2.46=RMX Vanilla Lake 2RT|R2.46=[[RMX Vanilla Lake 2|RMX Vanilla Lake 2R/T]] | |||
|I2.47=Rome Avanti 3RT|R2.47=[[Rome Avanti|Rome Avanti 3R/T]] | |||
}} | |||
===''Mario & Luigi'' series=== | |||
====''Mario & Luigi: Paper Jam''==== | |||
{{:Mario & Luigi: Paper Jam bestiary|transcludesection=Chargin' Chuck Corps|image=[[File:CharginChuckPaperJam.gif]]|align=horizontal}} | |||
{{:Mario & Luigi: Paper Jam bestiary|transcludesection=Chargin' Chuck Corps (Boss Battle Ring)|image=[[File:CharginChuckPaperJam.gif]]|align=horizontal}} | |||
====''Mario & Luigi: Superstar Saga + Bowser's Minions'' / ''Mario & Luigi: Bowser's Inside Story + Bowser Jr.'s Journey''==== | |||
*'''''Minion Quest: The Search for Bowser'' / ''Bowser Jr.'s Journey'' profile:''' ''That padding makes for high POW and DEF. They tend to go overboard with their brawn and are weak against <font color=blue>Mechakoopas</font>.'' | |||
===''Super Smash Bros. Ultimate'' spirit=== | |||
{|align=center width=100% cellspacing=0 border=1 cellpadding=3 style="text-align:center;border-collapse:collapse;font-family:Arial;font-size:85%;" | |||
|- | |||
!rowspan=2 width=3%|# | |||
!rowspan=2 width=8%|Name | |||
!rowspan=2 class=unsortable width=10%|Image | |||
!rowspan=2 width=8%|Series / game | |||
!rowspan=2 width=5%|Type | |||
!rowspan=2 width=5%|Class | |||
!rowspan=2 width=8%|Strength / effect(s) | |||
!rowspan=2 width=13%|How to obtain | |||
!colspan=4 width=40%|Spirit battle | |||
|- | |||
!width=7%|Opponent(s) | |||
!class=unsortable width=19%|Battle conditions | |||
!width=7%|Stage | |||
!width=7%|Song | |||
|- | |||
|59 | |||
!Chargin' Chuck | |||
|[[File:SSBU Chargin' Chuck Spirit.png|100px]] | |||
|''[[Super Mario (series)|Super Mario]]'' Series | |||
|Primary (1) | |||
|Novice | |||
|'''{{color|Attack|red}}''' | |||
|World of Light (Light Realm); Spirit Board | |||
|[[Wario]] ×4 | |||
| | |||
*The enemy favors dash attacks | |||
|[[Super Mario Maker (stage)|Super Mario Maker]] (Battlefield, ''[[Super Mario World]]'' style) | |||
|Ground Theme - Super Mario World | |||
|} | |||
===''Paper Mario: The Origami King''=== | |||
{{:Paper Mario: The Origami King bestiary|transcludesection=Chargin' Chuck|align=horizontal}} | |||
==Game appearances== | |||
{|class="wikitable sortable" | |||
!Title!!Description!!Date!!System | |||
|- | |||
|''[[Super Mario World]]''||Enemy||November 21, 1990||[[Super Nintendo Entertainment System|SNES]] | |||
|- | |||
|''[[Yoshi's Safari]]''||Enemy||July 14, 1993||SNES | |||
|- | |||
|''[[Super Mario All-Stars + Super Mario World]]''||Enemy||December 1994||SNES | |||
|- | |||
|''[[Super Mario World: Super Mario Advance 2]]''||Enemy||December 14, 2001||[[Game Boy Advance|GBA]] | |||
|- | |||
|''[[Super Mario Advance 4: Super Mario Bros. 3]]''||Enemy in [[E-Reader]] level||July 11, 2003||GBA | |||
|- | |||
|''[[Super Mario 3D World]]''||Enemy||November 21, 2013||[[Wii U]] | |||
|- | |||
|''[[Captain Toad: Treasure Tracker]]''||Enemy||November 13, 2014||Wii U | |||
|- | |||
|''[[Mario & Luigi: Paper Jam]]''||Boss||December 3, 2015||[[Nintendo 3DS|3DS]] | |||
|- | |||
|''[[Mario & Luigi: Superstar Saga + Bowser's Minions]]''||Enemy, recruitable ally||October 5, 2017||3DS | |||
|- | |||
|''[[Super Mario Odyssey]]''||Enemy||October 27, 2017||[[Nintendo Switch]] | |||
|- | |||
|''[[Captain Toad: Treasure Tracker (Nintendo Switch / Nintendo 3DS)|Captain Toad: Treasure Tracker]]''||Enemy||July 13, 2018||Nintendo Switch, 3DS | |||
|- | |||
|''[[Super Mario Party]]''||Non-playable character||October 5, 2018||Nintendo Switch | |||
|- | |||
|''[[Super Smash Bros. Ultimate]]''||Cameo as Spirit||December 7, 2018||Nintendo Switch | |||
|- | |||
|''[[Mario & Luigi: Bowser's Inside Story + Bowser Jr.'s Journey]]||Enemy, recruitable ally||December 27, 2018||3DS | |||
|- | |||
|''[[Paper Mario: The Origami King]]''||Enemy||July 12, 2020||Nintendo Switch | |||
|- | |||
|''[[Super Mario 3D World + Bowser's Fury]]''||Enemy||February 21, 2021||Nintendo Switch | |||
|- | |||
|''[[Mario Golf: Super Rush]]''||Playable character||June 25, 2021||Nintendo Switch | |||
|- | |||
|''[[Mario Kart Tour]]''||Playable character||February 8, 2022||{{wp|iOS}}, {{wp|Android (operating system)|Android}} | |||
|} | |||
==Gallery== | |||
{{main-gallery}} | |||
<gallery> | |||
SMW Art - Chargin Chucks.png|''[[Super Mario World]] '' | |||
Chargin' Chuck Artwork - Super Mario 3D World.png|''[[Super Mario 3D World]]'' | |||
MLBISBJJCharginChuck.png|''[[Mario & Luigi: Bowser's Inside Story + Bowser Jr.'s Journey]]'' | |||
MGSR Character Personalities - Chargin' Chuck.png|''[[Mario Golf: Super Rush]]'' | |||
MKT Artwork CharginChuckGold.png|''[[Mario Kart Tour]]'' (Gold) | |||
</gallery> | |||
==Names in other languages== | ==Names in other languages== | ||
===Chargin' Chuck=== | |||
{{foreign names | {{foreign names | ||
|Jap=ブル | |Jap=ブル | ||
|JapR=Buru | |JapR=Buru | ||
|JapM=Bull; romanized as "Bul" in ''Super Mario World'', and as "Bull" in | |JapM=Bull; romanized as "Bul" in ''Super Mario World'', and as "Bull" in ''Super Mario 3D World'', ''Super Mario Odyssey'', and ''Paper Mario: The Origami King'' game files; may refer to its charging behavior similar to that of a bull, and may be evocative of [[Boom Boom#Names in other languages|Boom Boom]] and/or [[Hammer Bro#Names in other languages|Bros.]] | ||
| | |ChiS=头盔布鲁<ref>{{cite| author = 无敌阿尔宙斯 | date = August 28, 2013 | url = tieba.baidu.com/p/2560204606 | title = 神游 超级马力欧世界 敌人官译 | publisher = Baidu Tieba | accessdate = February 2, 2017 }}</ref> | ||
| | |ChiSR=Tóukuī Bùlǔ | ||
| | |ChiSM=Helmeted Bull | ||
| | |ChiS2=布鲁 <small>(since ''Super Mario Party'')</small> | ||
| | |ChiS2R=Bùlǔ | ||
| | |ChiS2M=Bull | ||
|ChiT=布魯 | |||
|ChiTR=Bùlǔ | |||
|ChiTM=Bull | |||
|Dut=Chargin' Chuck | |||
|FreA=Fred Lafonce | |||
|FreAM=From ''foncer'' ("to dash") combined with male name "Fred" | |||
|FreA2=Charlie le Chargeur <small>(''Super Mario World'' manual)</small> | |||
|FreA2M=Charlie the Charger | |||
|FreE=Bill Dozer | |||
|FreEM=Play on "Bill" and "bulldozer" | |||
|Ger=Football-Chuck | |Ger=Football-Chuck | ||
| | |Ita=Plakkoopa | ||
| | |ItaM=Pun on ''placcare'' ("to tackle") and "Koopa" | ||
|Ita2=Giocatore di Football di Attila <small>(''Super Mario World'' television series)</small> | |||
| | |Ita2M=Koopa's Football Player | ||
| | |||
|Kor=불 | |Kor=불 | ||
|KorR=Bul | |KorR=Bul | ||
|KorM=Transliteration of the Japanese name | |KorM=Transliteration of the Japanese name | ||
| | |PorA=Toni Trombada | ||
| | |PorAM=From "Toni" (common male nickname) and ''trombar'' ("to bump into something") | ||
| | |PorE=Demolikoopa | ||
|Rom=Jucător de fotbal Koopa (''Super Mario World'' television series) | |PorEM=Portmanteau of ''demolir'' ("demolish") and "Koopa" | ||
|Rom=Jucător de fotbal Koopa <small>(''Super Mario World'' television series)</small> | |||
|RomM=Koopa Football Player | |RomM=Koopa Football Player | ||
|Rus=Нападающий Чак | |||
|RusR=Napadauchiy Chak | |||
|RusM=Striker Chuck | |||
|Rus2=Купы-футболисты <small>(''Super Mario World'' television series)</small> | |||
|Rus2R=Kupy-futbolisty | |||
|Rus2M=Koopa Football Players | |||
|Spa=Placapum | |||
|SpaM=From ''placaje'' ("tackle") and ''catapum'' (onomatopoeic word that indicates a crash, an impact or an explosion) | |||
}} | |||
===Chargin' Chuck (Gold)=== | |||
{{foreign names | |||
|Jap=ブル (ゴールド) | |||
|JapR=Buru (Gōrudo) | |||
|JapM=Chargin' Chuck (Gold) | |||
|ChiS=布鲁 (金色) | |||
|ChiSR=Bùlǔ (Jīnsè) | |||
|ChiSM=Chargin' Chuck (Gold) | |||
|ChiT=布魯 (金色) | |||
|ChiTR=Bùlǔ (Jīnsè) | |||
|ChiTM=Chargin' Chuck (Gold) | |||
|FreE=Bill Dozer (or) | |||
|FreEM=Chargin' Chuck (gold) | |||
|Ger=Football-Chuck (Gold) | |||
|GerM=Chargin' Chuck (Gold) | |||
|Ita=Plakkoopa (oro) | |||
|ItaM=Chargin' Chuck (gold) | |||
|Kor=불(골드) | |||
|KorR=Bul (Goldeu) | |||
|KorM=Chargin' Chuck (Gold) | |||
|PorA=Toni Trombada (ouro) | |||
|PorAM=Chargin' Chuck (gold) | |||
|SpaA=Placapum (dorado) | |||
|SpaAM=Chargin' Chuck (gold) | |||
|SpaE=Placapum (Dorado) | |||
|SpaEM=Chargin' Chuck (Gold) | |||
}} | }} | ||
==Trivia== | ==Trivia== | ||
*In ''[[Super Mario World]]'' and in [[Super Mario World (television series)|the television series]], the football gear they wear is green, but other sources depict it as blue. In the credits of the original ''Super Mario World'', Chargin' Chucks wear blue gear. | *In ''[[Super Mario World]]'' and in [[Super Mario World (television series)|the television series]], the football gear they wear is green, but other sources depict it as blue. In the credits of the original ''Super Mario World'', Chargin' Chucks wear blue gear. | ||
*Chargin' Chucks are similar to [[Broozer]]s; they are both able to break through blocks, both take a few jumps to defeat, and both chase Mario if he gets close to them. They also have the same Special Skills in ''Minion Quest: The Search for Bowser'' and ''Bowser Jr.'s Journey'' | **Similarly, the star on the left side of their helmets is absent in all depictions as of ''Super Mario 3D World''. | ||
*Chargin' Chucks are similar to [[Broozer]]s; they are both able to break through blocks, both take a few jumps to defeat, and both chase Mario if he gets close to them. They also have the same Special Skills in ''Minion Quest: The Search for Bowser'' and ''Bowser Jr.'s Journey''. | |||
==References== | ==References== | ||
| Line 140: | Line 488: | ||
{{nav templates| | {{nav templates| | ||
{{Koopas}} | {{Misc Koopas}} | ||
{{SMW}} | {{SMW}} | ||
{{Yoshi's Safari}} | {{Yoshi's Safari}} | ||
{{ | {{SMW TV}} | ||
{{SMB3}} | {{SMB3}} | ||
{{SM3DW}} | {{SM3DW}} | ||
| Line 151: | Line 499: | ||
{{SMO}} | {{SMO}} | ||
{{SMP}} | {{SMP}} | ||
{{M&LBIS}}}} | {{M&LBIS}} | ||
{{PMTOK}} | |||
{{MGSR}} | |||
{{MKT}}}} | |||
[[Category:Koopas]] | [[Category:Koopas]] | ||
[[Category:Bosses]] | [[Category:Bosses]] | ||
[[Category:Capturable]] | [[Category:Capturable]] | ||
[[Category:Bowser Jr.'s Journey | [[Category:Playable characters]] | ||
[[Category:Brain Drain | [[Category:Bowser Jr.'s Journey allies]] | ||
[[Category:Captain Toad: Treasure Tracker | [[Category:Brain Drain enemies]] | ||
[[Category:Dinosaur Dilemma | [[Category:Captain Toad: Treasure Tracker enemies]] | ||
[[Category:Mario & Luigi: Paper Jam | [[Category:Dinosaur Dilemma enemies]] | ||
[[Category:Mario & Luigi: Paper Jam | [[Category:Mario & Luigi: Paper Jam bosses]] | ||
[[Category:Minion Quest: The Search for Bowser | [[Category:Mario & Luigi: Paper Jam enemies]] | ||
[[Category:Super Mario 3D World | [[Category:Mario Golf: Super Rush characters]] | ||
[[Category:Super Mario Advance 4: Super Mario Bros. 3 | [[Category:Mario Kart Tour characters]] | ||
[[Category:Super Mario Odyssey | [[Category:Minion Quest: The Search for Bowser allies]] | ||
[[Category:Super Mario World | [[Category:Paper Mario: The Origami King enemies]] | ||
[[Category:Super Mario 3D World enemies]] | |||
[[Category:Super Mario Advance 4: Super Mario Bros. 3 enemies]] | |||
[[Category:Super Mario Odyssey enemies]] | |||
[[Category:Super Mario World enemies]] | |||
[[Category:Super Mario World (television series)]] | [[Category:Super Mario World (television series)]] | ||
[[Category:Super Smash Bros. Ultimate | [[Category:Super Smash Bros. Ultimate spirits]] | ||
[[Category:Yoshi's Safari | [[Category:Yoshi's Safari bosses]] | ||
[[de:Football-Chuck]] | [[de:Football-Chuck]] | ||
[[it:Plakkoopa]] | [[it:Plakkoopa]] | ||
Latest revision as of 08:55, March 2, 2024
| Chargin' Chuck | |||
|---|---|---|---|
 Artwork of Chargin' Chuck from Mario Kart Tour | |||
| First appearance | Super Mario World (1990) | ||
| Latest appearance | Mario Kart Tour (Los Angeles Tour) (2022) | ||
| Variant of | Koopa | ||
| |||
| |||
- “Hm? Did you say something?”
- —Chargin' Chuck, Mario & Luigi: Superstar Saga + Bowser's Minions
Chargin' Chucks are large, burly Koopas that wear gridiron football gear, debuting in Super Mario World. They wear white helmets with a blue and orange stripe, blue shoulder pads, red spiked cleats, and black shells, and have chubby, infant-like faces and small squinting black eyes. In Super Mario 3D World, when their helmets are off, it is revealed that they have two spiky tufts of blue hair. Their most common method of attack as enemies is charging towards the player in a manner not unlike Boom Boom, as referenced by their Japanese name. Like the Hammer Bros. and their variations, Chargin' Chucks also often appear as duos, or sometimes even larger groups.
History[edit]
Super Mario series[edit]
Super Mario World / Super Mario World: Super Mario Advance 2[edit]
Chargin' Chucks first appeared in Super Mario World as common enemies who are quite durable against damage. Chargin' Chucks can attack in a variety of ways, including throwing baseballs, kicking footballs and flinging rocks with a shovel. They can also break through Rotating Blocks and Grab Blocks. Chargin' Chucks also act more aggressively when Mario is with Yoshi. Yoshi cannot eat this enemy, however. Other types have less direct attack patterns, such as splitting into three and charging forward and summoning or alerting other nearby enemies, such as Super Koopas and Rip Van Fish, using a whistle; one type of Chargin' Chuck also has the habit of jumping in place and clapping. Aside from the whistling Chargin' Chucks, all Chargin' Chucks, once jumped on, revert to simply trying to tackle the player. They are often found at the end of a level defending the Giant Gate. It takes three jumps on a Chargin' Chuck's head to defeat it for 800 points, with each stomp stunning them and leaving them invulnerable to the next stomp for several seconds, in a similar manner to Boom Boom from Super Mario Bros. 3. Fire Mario can defeat a Chargin' Chuck with five fireballs for 1000 points (or 2000 points and three coins in the Game Boy Advance reissue), as can Yoshi by spitting fireballs produced from eating a Red Shell at him. Caped Mario can defeat them with one swing for 100 points. Chargin' Chucks can also be defeated in one stomp if first hit by at least two fireballs by Fire Mario.

In the Nintendo Mario Mania Player's Guide, the different types of Chargin' Chucks (except the bouncing and the whistling Chargin' Chucks) are each given an individual name:
- Lookout Chuck: The basic variant that always charges and tackles. Found in Yoshi's Island 2, Vanilla Dome 2, Forest of Illusion 4, Chocolate Secret, and Valley of Bowser 1.
- Confused Chuck: Rapidly throws baseballs in a straight line towards the player, and jumps if the player does. Found in Donut Plains 1, Chocolate Island 2, Tubular, Groovy, and Funky.
- Passin' Chuck: Stands in place and kicks footballs that bounce along the ground, and bounce higher and more erratically based on the terrain. Found in Donut Plains 2, Vanilla Dome 1, Vanilla Secret 1, Chocolate Secret, and Tubular.
- Clappin' Chuck: Stands in place, jumping up to clap if the player does, making it hard to jump over it safely. Found in Yoshi's Island 1, Chocolate Island 1, Chocolate Island 4, Chocolate Island 5, and Tubular.
- Splittin' Chuck: Stands still, but upon approaching, splits into three to attack. It is possible to defeat it before it splits. Found only in Vanilla Dome 2, Vanilla Secret 2, and Forest of Illusion 3.
- Diggin' Chuck: Stands still, digging rocks that roll slowly on the ground and can only be spin jumped on. Found only in Valley of Bowser 4.
- An unnamed type that moves around by doing high leaps, like the Splittin' Chuck. Found only in Cookie Mountain and room 8 of Bowser's Castle.
- An unnamed type that does not attack even after being stomped, but whistles to summon enemies. In Forest of Illusion 2, it wakes up the Rip Van Fish above it, and in Funky, it summons Super Koopas.
Super Mario Advance 4: Super Mario Bros. 3[edit]

The rushing Chargin' Chucks and the clapping variety also appear in the e-Reader accessible level "Vegetable Volley" in Super Mario Advance 4: Super Mario Bros. 3.
Super Mario 3D World / Super Mario 3D World + Bowser's Fury[edit]

Chargin' Chucks return in Super Mario 3D World and its Nintendo Switch port, which marks their first appearance in a 3D Super Mario game. Like in Super Mario World, Chargin' Chucks cannot normally be defeated with a single stomp, and jumping on them once causes their helmets to fly off their heads. After the first hit, they will become faster and after several seconds, put their helmets back on. Unlike in Super Mario World, it takes two normal hits to defeat a Chargin' Chuck, but a single Ground Pound will instantly defeat it. Likewise, certain items can take out a Chargin' Chuck with one blow, such as a Bob-omb.
They retain their original dashing sounds and use the Super Mario World hit sound when defeated.
Super Mario Odyssey[edit]
Chargin' Chucks return in Super Mario Odyssey as enemies in the Underground Moon Caverns of the Moon Kingdom and a secret area in the Ruined Kingdom that can be reached using a Moon Pipe. As they wear a helmet, Mario must first remove it from their heads before capturing them, either with a jump or a hat throw attack. While capturing a Chargin' Chuck, Mario can charge through boulders and enemies at a high speed, but he is unable to jump.
Super Mario-kun[edit]

Chargin' Chucks appear in Super Mario-kun's first 6 volumes, in the Super Mario World arc. In the very first chapter, the last enemy Mario, Luigi, and Yoshi face is a Chuck that almost succeeds in killing Mario by shoving him off a cliff. Yoshi jumps off to save Mario and, by eating a blue Koopa Troopa, they emerge in time and burn him with their fire power.
A Chuck is later met in the 13th chapter, where a duplicating Chuck is, once again, the last enemy. He faces the Mario at the end of the "Infernal Athletic Level", one step from the Giant Gate. Mario manages to locate the real Chuck with the false promise of a SNES. Enraged, the Chuck tosses to them a spiny football and Mario is tossed into a ? Block which contains a Super Star but, unable to reach it, Mario tosses his cape. The cape comes to life and beats the Chuck.
In the first chapter of volume 2, a Chuck is (once again) the last enemy of the chapter. Kamek (who disguised himself as Yoshi), unable to convince the Mario Bros. he is the real deal, is used as a club to defeat the last Chuck remaining, breaking Kamek's disguise spell.
In volume 6, while Mario, Luigi, and Yoshi are in balloon form, they attempt to hinder their progress by throwing a football at Mario, but the football bounces and hits one of its friends. It then throws a spiked football at Mario, making Mario fall into a Warp Pipe. Mario, however, collects a star, fires from the warp pipe, and then punches them in the face, defeating them.
Super Mario World television series[edit]

- “Koopa football players grabbed the princess!”
- —Luigi, Mama Luigi
Chargin' Chucks also appear in the Super Mario World animated series, where they are referred to as Koopa football players. Due to the fact that they appear throughout several episodes of the series, they appear to have replaced Goombas and Koopa Troopas, who make relatively few appearances on the show, as Bowser's main shock troops. Much like their in-game sprite, they are green with orange sleeves, but their helmet, shell, arms, and legs are green, while the stripe on their helmet is red, the star on their helmet is white, and the rim of their helmet are orange.
Nintendo Adventure Books[edit]
In Dinosaur Dilemma, a group of Chargin' Chucks ambushes Mario and Yoshi while they are traveling through a forest, but they can be beaten if Mario grabs the Green Shell they are using as a ball, leads them to a clearing, and jumps out of the way when they charge at him, causing them all to collide and knock themselves out. In Brain Drain, some Chargin' Chucks are spotted milling about the WMUSH radio station after Iggy Koopa takes it over, and chase Luigi out of the building if he steals some Fungus Up cola from the Synapse Switcher.
Super Mario Adventures[edit]

In the Super Mario Adventures comic, several Chargin' Chucks, along with several Thwomps, are summoned by Wendy O. Koopa to attack Mario, Luigi, Princess Toadstool, Toad and Friendly Floyd during the battle in the Koopaling's Tower.
Yoshi's Safari[edit]

In Yoshi's Safari, a Chargin' Chuck, who attacks Mario and Yoshi by throwing bombs while jumping from side-to-side, appears as the boss of Float Castle II.
Captain Toad: Treasure Tracker[edit]
Chargin' Chucks reappear as enemies in Captain Toad: Treasure Tracker and its Nintendo Switch and Nintendo 3DS ports. They behave the same as in Super Mario 3D World. Chargin' Chucks can be quite devastating, due to needing to be hit twice and constantly putting back on the helmet while Captain Toad and Toadette are unable to jump on them (although they can fall from a higher ledge onto the Chargin' Chuck). They are more often used to be lured to break Rock Blocks or topple Mud Troopers at a high risk. Tapping Chargin' Chucks on the GamePad makes their helmets temporarily fall off.
Mario & Luigi series[edit]
Mario & Luigi: Paper Jam[edit]
- “Hey! Those are the goons who dragged us off to prison!”
- —Starlow, Mario & Luigi: Paper Jam
Chargin' Chucks debut in the Mario & Luigi series in Mario & Luigi: Paper Jam. A group of them, known as the Chargin' Chuck Corps, are treated as a boss in a large mass, like the Dream World enemies in Mario & Luigi: Dream Team.
They are first seen after Mario, Luigi, and Paper Mario first cross Doop Doop Dunes, where the Chargin' Chuck Corps take them away to the Twinsy Tropics Dungeon under Roy's orders. Later, they are seen again when the trio are traversing Doop Doop Dunes for the second time, where they chase them down before proceeding to battle the group.
In battle, they attack by charging into a brother from the front and behind, which must be avoided using a Jump. Nine of them may also line up three in a row, one in each row will hold a gridiron-type football briefly, then they will all shuffle at which point the player must keep track of the ones who held the football. They will then throw their footballs at a bro, who must counter them with the hammer. Where the Chargin’ Chuck who held the football was in each row will determine which bro the football will be thrown at: The top Chuck will throw it at Mario, the middle one will throw it at Paper Mario, and the bottom one will throw it at Luigi. When some Chargin' Chucks are defeated, the remaining ones will call for backup; causing more Chucks to appear. They also have a chase sequence, with five of them throwing American footballs at Mario and Luigi who must hold onto Paper Mario in his airplane form to avoid them. The Chargin' Chucks may also throw their American footballs directly at Paper Mario, who must evade them. After a while, the Chargin' Chucks will fall over, allowing Paper Mario to stomp on them all at once. When enough Chargin' Chucks are defeated, they will become enraged and immediately do one last call of reinforcements, maxing out at 16 total. Once defeated, the trio continue back to the Twinsy Tropics Dungeon. The Chargin' Chucks can all be defeated by using the Trio Whirligig Trio Attack.
Mario & Luigi: Superstar Saga + Bowser's Minions[edit]

Chargin' Chucks appear in Mario & Luigi: Superstar Saga + Bowser's Minions, where they are enemies and recruitable allies in Minion Quest: The Search for Bowser. They are melee troopers with high defense and power, and they attack by charging into enemies. Their Special Skill is Air Bash. Chargin' Chucks are weak against Mechakoopas. One is also seen alongside Wendy, a Boomerang Bro, a Bob-omb, and a Koopa Paratroopa, being knocked away by Wendy for interrupting her. Another one's helmet is used to repair the Koopa Cruiser in Joke's End. It is also the first game in which a Chargin Chuck is seen speaking.
Mario & Luigi: Bowser's Inside Story + Bowser Jr.'s Journey[edit]
In Mario & Luigi: Bowser's Inside Story + Bowser Jr.'s Journey, Chargin' Chucks appear in the Bowser Jr.'s Journey mode, where they are enemies and recruitable allies. Their Special Skill in this game is Smack Back Attack.
Super Mario Party[edit]

Chargin' Chucks make their Mario Party series debut in Super Mario Party as non-playable characters. Several Chargin' Chucks appear in the minigame Rattle and Hmmm, where they appear along with a Grrrol and a Wiggler, and Gridiron Gauntlet, where the players must dodge them as they charge through certain areas. Two Chargin' Chucks also appear running on treadmills in the background of the beginning and end cutscenes in the minigame Looking for Love. Four Chargin' Chucks appear in the background of the minigame Pep Rally.
Super Smash Bros. Ultimate[edit]
A Chargin' Chuck appears in Super Smash Bros. Ultimate as a Novice-class Attack-type primary spirit with one support slot. The spirit simply raises the power of its user without granting them any special effects during battle. In World of Light, the spirit is found south-west on the Light Realm map, on the giant yellow mushroom in the mushroom gorge area. The corresponding spirit battle involves a team of four Warios fought on the Battlefield form of the Super Mario Maker stage, set in Super Mario World style.
Paper Mario: The Origami King[edit]

- “WE'RE SHREDDED ALL RIGHT!”
- —Chargin' Chuck, Paper Mario: The Origami King

Chargin' Chucks make their debut in the Paper Mario series in Paper Mario: The Origami King, where origami Chargin' Chucks are enemies. In the game, Mario encounters and fights only a single group of Chargin' Chucks in Shangri-Spa, where three of them are seen occupying the Spring of Purification after Bowser Jr. and his Junior Clown Car are cut into pieces by Scissors. It is also the second game in which they are seen speaking.
Mario Golf: Super Rush[edit]
A Chargin' Chuck appears as a playable character in Mario Golf: Super Rush, marking his first appearance in the Mario Golf series and his first stand-alone playable appearance overall (excluding capturing one in Super Mario Odyssey). He is a Power character with the lowest Spin of any character, tied with King Bob-omb. His Special Shot is Scrimmage Stinger, and his Special Dash is known as End-Zone Dash.
Chargin' Chuck also appears in Golf Adventure mode. He is first seen at the player's house, then he goes to the clubhouse to speak to the Head Coach. He is the first to be called. He is then seen at the Bonny Greens practice area practicing swings. He also appears as a rival along with Boo during Speed Golf in Balmy Dunes.
Mario Kart Tour[edit]
Chargin' Chuck makes his playable debut in the Mario Kart series in Mario Kart Tour, starting from the 2022 Los Angeles Tour. He is classified as a High-End driver, and his special skill is the Lucky Seven. Starting from the May 2022 Peach vs. Bowser Tour, Chargin' Chuck is available in regular tour pipes, including the All-Clear Pipe; and starting with the Animal Tour, he also has his own self-named cup. The 2022 Bowser Tour introduced a gold variant of Chargin' Chuck with a golden helmet with a silver stripe, named Chargin' Chuck (Gold), which is also classified as a High-End, but utilizes the Coin Box as his special item.
Profiles and statistics[edit]
Super Mario series[edit]
Super Mario World[edit]
- Super Mario World instruction booklet: These All-Stars always seem to bar Mario's way just when he's within sight of the goal. They use a variety of bull-headed attacks, so you'll really have a tough time checking Chargin' Chuck.[1]
- Mario Mania: Helmeted and heavily padded, Chargin' Chuck is well protected. It takes three hits to sideline him. Watch out for his blitz—don't get sacked![2]
Super Mario World: Super Mario Advance 2[edit]
- Denizens of Dinosaur Land poster: If there's a goal in sight, you're bound to meet up with a Chargin' Chuck. These tough brutes will try to bar your way with a variety of attacks, and they're persistent, too.
Perfect Ban Mario Character Daijiten[edit]
ブル
アメフトスタイルのたくましいカメ。
Chargin' Chuck
Tribe: Turtle clan
Disposition: Headstrong and hot-tempered
Game appearances: World
Chargin' Chuck with a variety of attack patterns
A tough, football-style turtle. It has eight different attack patterns, including rushing and throwing balls, and can be defeated by stomping on it three times, but only one shot is needed if you use a Cape.
Mario Kart Tour[edit]
Chargin' Chuck[edit]
Chargin' Chuck (Gold)[edit]
| Special skill | ||||||||||||||||||||||||||||||||||||||||||||||||||||
| Favorite courses (Three items per Item Box) |
| |||||||||||||||||||||||||||||||||||||||||||||||||||
|---|---|---|---|---|---|---|---|---|---|---|---|---|---|---|---|---|---|---|---|---|---|---|---|---|---|---|---|---|---|---|---|---|---|---|---|---|---|---|---|---|---|---|---|---|---|---|---|---|---|---|---|---|
| Favored courses (Two items per Item Box) |
| |||||||||||||||||||||||||||||||||||||||||||||||||||
|
* indicates a favored course upgraded to a favorite course after reaching level 3. ** indicates a favored course upgraded to a favorite course after reaching level 6. | ||||||||||||||||||||||||||||||||||||||||||||||||||||
Mario & Luigi series[edit]
Mario & Luigi: Paper Jam[edit]
| Mario & Luigi: Paper Jam enemy | ||||||||||
|---|---|---|---|---|---|---|---|---|---|---|
| Chargin' Chuck | ||||||||||

|
HP | 105 | POW | 122 (112) | Defense | 150 (114) | Speed | 112 | ||
| Role | Boss | Type | Shelled | Weakness | None | Location(s) | Doop Doop Dunes | |||
| Level | 20 | Experience | 1600 (1595) | Coins | 550 | Item drop | None - 0% Blunt Hammer - 100% | |||
| Notice: Stats in parentheses are from the game's Easy Mode. | ||||||||||
| Mario & Luigi: Paper Jam enemy | ||||||||||
|---|---|---|---|---|---|---|---|---|---|---|
| Chargin' Chuck (Boss Battle Ring) | ||||||||||
|
|
HP | 189 | POW | 300 (250) | Defense | 295 (230) | Speed | 225 | ||
| Role | Battle Ring boss | Type | Normal | Weakness | None | Location(s) | Arcade | |||
| Level | 30 | Experience | 0 (0) | Coins | 0 | Item drop | None - 0% None - 0% | |||
| Notice: Stats in parentheses are from the game's Easy Mode. | ||||||||||
Mario & Luigi: Superstar Saga + Bowser's Minions / Mario & Luigi: Bowser's Inside Story + Bowser Jr.'s Journey[edit]
- Minion Quest: The Search for Bowser / Bowser Jr.'s Journey profile: That padding makes for high POW and DEF. They tend to go overboard with their brawn and are weak against Mechakoopas.
Super Smash Bros. Ultimate spirit[edit]
| # | Name | Image | Series / game | Type | Class | Strength / effect(s) | How to obtain | Spirit battle | |||
|---|---|---|---|---|---|---|---|---|---|---|---|
| Opponent(s) | Battle conditions | Stage | Song | ||||||||
| 59 | Chargin' Chuck | 
|
Super Mario Series | Primary (1) | Novice | Attack | World of Light (Light Realm); Spirit Board | Wario ×4 |
|
Super Mario Maker (Battlefield, Super Mario World style) | Ground Theme - Super Mario World |
Paper Mario: The Origami King[edit]
| Paper Mario: The Origami King enemy | |||||||||
|---|---|---|---|---|---|---|---|---|---|
| Chargin' Chuck | |||||||||

|
HP | 40 | Moves | Location(s) | |||||
| Type | Shelled | Tackle (?), Forward Pass (?), Touchdown (?) | Shangri-Spa | ||||||
| Item drops | Mushroom | ||||||||
| Always energetic and ready to roll, these hot-spring aficionados favor team tackles. | |||||||||
Game appearances[edit]
| Title | Description | Date | System |
|---|---|---|---|
| Super Mario World | Enemy | November 21, 1990 | SNES |
| Yoshi's Safari | Enemy | July 14, 1993 | SNES |
| Super Mario All-Stars + Super Mario World | Enemy | December 1994 | SNES |
| Super Mario World: Super Mario Advance 2 | Enemy | December 14, 2001 | GBA |
| Super Mario Advance 4: Super Mario Bros. 3 | Enemy in E-Reader level | July 11, 2003 | GBA |
| Super Mario 3D World | Enemy | November 21, 2013 | Wii U |
| Captain Toad: Treasure Tracker | Enemy | November 13, 2014 | Wii U |
| Mario & Luigi: Paper Jam | Boss | December 3, 2015 | 3DS |
| Mario & Luigi: Superstar Saga + Bowser's Minions | Enemy, recruitable ally | October 5, 2017 | 3DS |
| Super Mario Odyssey | Enemy | October 27, 2017 | Nintendo Switch |
| Captain Toad: Treasure Tracker | Enemy | July 13, 2018 | Nintendo Switch, 3DS |
| Super Mario Party | Non-playable character | October 5, 2018 | Nintendo Switch |
| Super Smash Bros. Ultimate | Cameo as Spirit | December 7, 2018 | Nintendo Switch |
| Mario & Luigi: Bowser's Inside Story + Bowser Jr.'s Journey | Enemy, recruitable ally | December 27, 2018 | 3DS |
| Paper Mario: The Origami King | Enemy | July 12, 2020 | Nintendo Switch |
| Super Mario 3D World + Bowser's Fury | Enemy | February 21, 2021 | Nintendo Switch |
| Mario Golf: Super Rush | Playable character | June 25, 2021 | Nintendo Switch |
| Mario Kart Tour | Playable character | February 8, 2022 | iOS, Android |
Gallery[edit]
- For this subject's image gallery, see Gallery:Chargin' Chuck.
Mario Kart Tour (Gold)


Names in other languages[edit]
Chargin' Chuck[edit]
| Language | Name | Meaning |
|---|---|---|
| Japanese | ブル Buru |
Bull; romanized as "Bul" in Super Mario World, and as "Bull" in Super Mario 3D World, Super Mario Odyssey, and Paper Mario: The Origami King game files; may refer to its charging behavior similar to that of a bull, and may be evocative of Boom Boom and/or Bros. |
| Chinese (simplified) | 头盔布鲁[4] Tóukuī Bùlǔ 布鲁 (since Super Mario Party) Bùlǔ |
Helmeted Bull Bull |
| Chinese (traditional) | 布魯 Bùlǔ |
Bull |
| Dutch | Chargin' Chuck |
- |
| French (NOA) | Fred Lafonce Charlie le Chargeur (Super Mario World manual) |
From foncer ("to dash") combined with male name "Fred" Charlie the Charger |
| French (NOE) | Bill Dozer |
Play on "Bill" and "bulldozer" |
| German | Football-Chuck |
- |
| Italian | Plakkoopa Giocatore di Football di Attila (Super Mario World television series) |
Pun on placcare ("to tackle") and "Koopa" Koopa's Football Player |
| Korean | 불 Bul |
Transliteration of the Japanese name |
| Portuguese (NOA) | Toni Trombada |
From "Toni" (common male nickname) and trombar ("to bump into something") |
| Portuguese (NOE) | Demolikoopa |
Portmanteau of demolir ("demolish") and "Koopa" |
| Romanian | Jucător de fotbal Koopa (Super Mario World television series) |
Koopa Football Player |
| Russian | Нападающий Чак Napadauchiy Chak Купы-футболисты (Super Mario World television series) Kupy-futbolisty |
Striker Chuck Koopa Football Players |
| Spanish | Placapum |
From placaje ("tackle") and catapum (onomatopoeic word that indicates a crash, an impact or an explosion) |
Chargin' Chuck (Gold)[edit]
| Language | Name | Meaning |
|---|---|---|
| Japanese | ブル (ゴールド) Buru (Gōrudo) |
Chargin' Chuck (Gold) |
| Chinese (simplified) | 布鲁 (金色) Bùlǔ (Jīnsè) |
Chargin' Chuck (Gold) |
| Chinese (traditional) | 布魯 (金色) Bùlǔ (Jīnsè) |
Chargin' Chuck (Gold) |
| French (NOE) | Bill Dozer (or) |
Chargin' Chuck (gold) |
| German | Football-Chuck (Gold) |
Chargin' Chuck (Gold) |
| Italian | Plakkoopa (oro) |
Chargin' Chuck (gold) |
| Korean | 불(골드) Bul (Goldeu) |
Chargin' Chuck (Gold) |
| Portuguese (NOA) | Toni Trombada (ouro) |
Chargin' Chuck (gold) |
| Spanish (NOA) | Placapum (dorado) |
Chargin' Chuck (gold) |
| Spanish (NOE) | Placapum (Dorado) |
Chargin' Chuck (Gold) |
Trivia[edit]
- In Super Mario World and in the television series, the football gear they wear is green, but other sources depict it as blue. In the credits of the original Super Mario World, Chargin' Chucks wear blue gear.
- Similarly, the star on the left side of their helmets is absent in all depictions as of Super Mario 3D World.
- Chargin' Chucks are similar to Broozers; they are both able to break through blocks, both take a few jumps to defeat, and both chase Mario if he gets close to them. They also have the same Special Skills in Minion Quest: The Search for Bowser and Bowser Jr.'s Journey.
References[edit]
| Links to related articles | ||||||||||||||||||||||||||||||||||||||||||||||||||||||||||||||||||||||||||||||||||||||||||||||||||||||||||||||||||||||||||||||||||||||||||||||||||||||||||||||||||||||||||||||||||||||||||||||||||||||||||||||||||||||||||||||||||||||||||||||||||||||||||||||||||||||||||||||||||||||||||||||||||||||||||||||||||||||||||||||||||||||||||||||||||||||||||||||||||||||||||||||||||||||||||||||||||||||||||||||||||||||||||||||||||||||||||||||||||||||||||||||||||||||||||||||||||||||||||||||||||||||||||||||||||||||||||||||||||||||||||||||||||||||||||||||||||||||||||||||||||||||||||||||||||||||||||||||||||||||||||||||||||||||||||||||||||||||||||||||||||||||||||||||||||||||||||||||||||||||||||||||||||||||||||||||||||||||||||||||||||||||||||||||||||||||||||||||||||||||||||||||||||||||||||||||||||||||||||||||||||||||||||||||||||||||||||||||||||||||||||||||||||||||||||||||||||||||||||||||||||||||||||||||||||||||||||||||||||||||||||||||||||||||||||||||||||||||||||||||||||||||||||
|---|---|---|---|---|---|---|---|---|---|---|---|---|---|---|---|---|---|---|---|---|---|---|---|---|---|---|---|---|---|---|---|---|---|---|---|---|---|---|---|---|---|---|---|---|---|---|---|---|---|---|---|---|---|---|---|---|---|---|---|---|---|---|---|---|---|---|---|---|---|---|---|---|---|---|---|---|---|---|---|---|---|---|---|---|---|---|---|---|---|---|---|---|---|---|---|---|---|---|---|---|---|---|---|---|---|---|---|---|---|---|---|---|---|---|---|---|---|---|---|---|---|---|---|---|---|---|---|---|---|---|---|---|---|---|---|---|---|---|---|---|---|---|---|---|---|---|---|---|---|---|---|---|---|---|---|---|---|---|---|---|---|---|---|---|---|---|---|---|---|---|---|---|---|---|---|---|---|---|---|---|---|---|---|---|---|---|---|---|---|---|---|---|---|---|---|---|---|---|---|---|---|---|---|---|---|---|---|---|---|---|---|---|---|---|---|---|---|---|---|---|---|---|---|---|---|---|---|---|---|---|---|---|---|---|---|---|---|---|---|---|---|---|---|---|---|---|---|---|---|---|---|---|---|---|---|---|---|---|---|---|---|---|---|---|---|---|---|---|---|---|---|---|---|---|---|---|---|---|---|---|---|---|---|---|---|---|---|---|---|---|---|---|---|---|---|---|---|---|---|---|---|---|---|---|---|---|---|---|---|---|---|---|---|---|---|---|---|---|---|---|---|---|---|---|---|---|---|---|---|---|---|---|---|---|---|---|---|---|---|---|---|---|---|---|---|---|---|---|---|---|---|---|---|---|---|---|---|---|---|---|---|---|---|---|---|---|---|---|---|---|---|---|---|---|---|---|---|---|---|---|---|---|---|---|---|---|---|---|---|---|---|---|---|---|---|---|---|---|---|---|---|---|---|---|---|---|---|---|---|---|---|---|---|---|---|---|---|---|---|---|---|---|---|---|---|---|---|---|---|---|---|---|---|---|---|---|---|---|---|---|---|---|---|---|---|---|---|---|---|---|---|---|---|---|---|---|---|---|---|---|---|---|---|---|---|---|---|---|---|---|---|---|---|---|---|---|---|---|---|---|---|---|---|---|---|---|---|---|---|---|---|---|---|---|---|---|---|---|---|---|---|---|---|---|---|---|---|---|---|---|---|---|---|---|---|---|---|---|---|---|---|---|---|---|---|---|---|---|---|---|---|---|---|---|---|---|---|---|---|---|---|---|---|---|---|---|---|---|---|---|---|---|---|---|---|---|---|---|---|---|---|---|---|---|---|---|---|---|---|---|---|---|---|---|---|---|---|---|---|---|---|---|---|---|---|---|---|---|---|---|---|---|---|---|---|---|---|---|---|---|---|---|---|---|---|---|---|---|---|---|---|---|---|---|---|---|---|---|---|---|---|---|---|---|---|---|---|---|---|---|---|---|---|---|---|---|---|---|---|---|---|---|---|---|---|---|---|---|---|---|---|---|---|---|---|---|---|---|---|---|---|---|---|---|---|---|---|---|---|---|---|---|---|---|---|---|---|---|---|---|---|---|---|---|---|---|---|---|---|---|---|---|---|---|---|---|---|---|---|---|---|---|---|---|---|---|---|---|---|---|---|---|---|---|---|---|---|---|---|---|---|---|---|---|---|---|---|---|---|---|---|---|---|---|---|---|---|---|---|---|---|---|---|---|---|---|---|---|---|---|---|---|---|---|---|---|---|---|---|---|---|---|---|---|---|---|---|---|---|---|---|---|---|---|---|---|---|---|---|---|---|---|---|---|---|---|---|---|---|---|---|---|---|---|---|---|---|---|---|---|---|---|---|---|---|---|---|---|---|---|---|---|---|---|---|---|---|---|---|---|---|---|---|---|---|---|---|---|---|---|---|---|---|---|---|---|---|---|---|---|---|---|---|---|---|---|---|---|---|---|---|---|---|---|---|---|---|---|---|---|---|---|---|---|---|---|---|---|---|---|---|---|---|---|---|---|---|---|---|---|---|---|---|---|---|---|---|---|---|---|---|---|---|---|---|---|---|---|---|---|---|---|---|---|---|---|---|---|---|---|---|---|---|---|---|---|---|---|---|---|---|---|---|---|---|---|---|---|---|---|---|---|---|---|---|---|---|---|---|---|---|---|---|---|---|---|---|---|---|---|---|---|---|---|---|---|---|---|---|---|---|---|---|---|---|---|---|---|---|---|
| ||||||||||||||||||||||||||||||||||||||||||||||||||||||||||||||||||||||||||||||||||||||||||||||||||||||||||||||||||||||||||||||||||||||||||||||||||||||||||||||||||||||||||||||||||||||||||||||||||||||||||||||||||||||||||||||||||||||||||||||||||||||||||||||||||||||||||||||||||||||||||||||||||||||||||||||||||||||||||||||||||||||||||||||||||||||||||||||||||||||||||||||||||||||||||||||||||||||||||||||||||||||||||||||||||||||||||||||||||||||||||||||||||||||||||||||||||||||||||||||||||||||||||||||||||||||||||||||||||||||||||||||||||||||||||||||||||||||||||||||||||||||||||||||||||||||||||||||||||||||||||||||||||||||||||||||||||||||||||||||||||||||||||||||||||||||||||||||||||||||||||||||||||||||||||||||||||||||||||||||||||||||||||||||||||||||||||||||||||||||||||||||||||||||||||||||||||||||||||||||||||||||||||||||||||||||||||||||||||||||||||||||||||||||||||||||||||||||||||||||||||||||||||||||||||||||||||||||||||||||||||||||||||||||||||||||||||||||||||||||||||||||||||
- Koopas
- Bosses
- Capturable
- Playable characters
- Bowser Jr.'s Journey allies
- Brain Drain enemies
- Captain Toad: Treasure Tracker enemies
- Dinosaur Dilemma enemies
- Mario & Luigi: Paper Jam bosses
- Mario & Luigi: Paper Jam enemies
- Mario Golf: Super Rush characters
- Mario Kart Tour characters
- Minion Quest: The Search for Bowser allies
- Paper Mario: The Origami King enemies
- Super Mario 3D World enemies
- Super Mario Advance 4: Super Mario Bros. 3 enemies
- Super Mario Odyssey enemies
- Super Mario World enemies
- Super Mario World (television series)
- Super Smash Bros. Ultimate spirits
- Yoshi's Safari bosses