The Great Sea
- This article is about the location in Paper Mario: The Origami King. For the stage in the Super Smash Bros. series, see Pirate Ship.
| The Great Sea | |
|---|---|

| |
| Collectible Treasures | 10 |
| Enemies | Cheep Cheeps Bloopers Fly Guys |
| Purple Streamer | |
- “WOOOOOW! The Great Sea is SOOO big! This breeze feels SOOO good! *sniff* Why does it smell SOOO salty? It's so endlessly big... The only word you could use to describe it is EPIC! Well, that and "great," I guess.”
- —Olivia, Paper Mario: The Origami King
The Great Sea is a purple streamer area seen in Paper Mario: The Origami King. It acts as a hub, connecting the 11 islands in the area and the Princess Peach. It can be accessed as early as after Bob-omb rejoins Mario and Olivia in Chestnut Valley (after which an engine for a boat docked at Toad Town is ready, provided that Mario has rescued the Sea Captain Toad in Autumn Mountain by that point), but is not fully explored until after the yellow streamer area is cleared. Additionally, Mario and Bob-omb are required to venture into the Great Sea after Olivia is trapped under a boulder in Sweetpaper Valley. There are no ? Blocks or Not-Bottomless Holes in the Great Sea itself; however, there are numerous treasures to be found in its depths. Additionally, while no Toads are directly rescued here, it is required to collect the Big Shell to free the Toad's BBQ Foodeatery caretaker in the Whispering Woods.
Layout[edit]


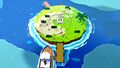
The Great Sea is a large, ocean-like area connecting several islands. It is navigated using Sea Captain Toad's boat. When first accessed, a thick, impassable fog covers most of the sea, concealing everything but Scuffle Island and the Princess Peach. After completing the puzzles at Bonehead Island, the fog clears, allowing access to all the other islands. Several enemies are seen roaming around the ocean, and will fight Mario if the boat gets too close.
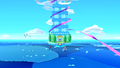
Mario is required to enter the Great Sea to reach the Princess Peach and get a spare fuse for Bob-omb. Mario later returns to the Great Sea after rescuing Captain T. Ode and getting his Sea Chart, which allows the party to travel through the fog to Bonehead Island. The purple streamer is shown cutting through the sea floor at multiple points, but eventually leads to the top of the Sea Tower.
Several Toads on islands in the Great Sea will mark spots on the Sea Chart to dive for treasures as thanks for Mario rescuing them. The Super Marino is required to dive at those spots to search for and grab the treasures. Additional items that can be collected from the sea floor include a Heavy Bag, a Canned Heart, a Big Shell, and some coins.
Islands[edit]
Mario can access a total of 11 islands in the Great Sea. Each island, with an exception of the Sea Tower, has a stone Toad statue that Mario can examine. If Mario finds all Toad statues across the Great Sea, he is rewarded with Collectible Treasure No. 80: Shangri-Spa Toad Statue.
The Sea Tower
Crescent Moon/Full Moon Island


The Great Sea also contains the cruise liner the Princess Peach.
Collectibles[edit]
NOTE: Items not included here: Coins dropped by a Gold Fish.
Diving treasures[edit]
There is a random mechanic that allows Mario to salvage treasures when he submerges the Super Marino. This usually gives a small amount of coins, but there are rare chances for Mario to dig up valuable items. The first time Mario dives, he will always get 100 Coins. The treasures marked on the Sea Chart are pre-determined for each X mark. In addition to the Collectibles Treasures and Useful Items, four spots give bags of 10,000 coins.
If he is not diving on a marked treasure, Mario will get a random item depending on the square of the map he is in. There are five sets of items: set 1 goes to A1, set 2 goes to A2, and so on until set 5 goes to A5. Afterwards, the sets loop, with set 1 going to A6, set 2 going to A7, set 3 going to B1, all the way until the final square. The only exceptions are squares D7 and D8, which both use set 3. Diving in the same square twice in a row does not give anything.
| Random Set 1 A1, A6, B4, C2, C7, D5, E3, F1, F6, G4 |
Item 1 | Item 2 | Item 3 |
|---|---|---|---|
| Item Name | 10 Coins | ||
| Drop Chance | 0.4% | 1.6% | 98% |
| Random Set 2 A2, A7, B5, C3, D1, D6, E4, F2, F7, G5 |
Item 1 | Item 2 | Item 3 |
|---|---|---|---|
| Item Name | 10 Coins | ||
| Drop Chance | 0.4% | 1.6% | 98% |
| Random Set 3 A3, B1, B6, C4, D2, D7, D8, E5, F3, G1, G6 |
Item 1 | Item 2 | Item 3 |
|---|---|---|---|
| Item Name | 10 Coins | ||
| Drop Chance | 0.4% | 1.6% | 98% |
| Random Set 4 A4, B2, B7, C5, D3, E1, E6, F4, G2, G7 |
Item 1 | Item 2 | Item 3 |
|---|---|---|---|
| Item Name | 10 Coins | ||
| Drop Chance | 0.4% | 1.6% | 98% |
| Random Set 5 (drops 5 items) A5, B3, C1, C6, D4, E2, E7, F5, G3 |
Item 1 | Item 2 | Item 3 |
|---|---|---|---|
| Item Name | 5 Coins | 20 Coins | 10 Coins |
| Drop Chance | 20% | 20% | 60% |
Additionally, there is a "rare" set that has a 40% chance to drop 10 Coins, and a 60% chance to drop nothing
Collectible Treasures[edit]
| Treasure | Description | Image |
|---|---|---|
| 10 treasures | ||
 Shangri-Spa Toad |
A treasure awarded upon interacting with all 10 Toad Statues throughout the Great Sea. These statues can be found on each island except for the Sea Tower. This image shows the treasure awarded at Mushroom Island. | 
|
 Paper Macho Mummy Goomba |
Chart Position: 5E Once rescued, the Toad on Bonehead Island shares the location of this treasure on the Sea Chart, a diving spot circled by rocks. |

|
 Healing Hearts |
Chart Position: Between 3D and 3E The Toad hiding in a chest on Heart Island reveals a diving spot for this treasure on the Sea Chart after being rescued. |

|
 Spade Island Barrel |
Chart Position: 2D The Toad stuck in the barrel on Spade Island shows the location of this treasure on Mario's Sea Chart after being rescued. |

|
 DJ Booth |
Chart Position: 3G Joy from Club Island marks the treasure spot after saving the Feelin' Fungi. |

|
 Training Mannequin |
Chart Position: 3B The Toad caught at the fishing spot on Crescent/Full Moon Island marks the treasure on the Sea Chart after being rescued. |

|
 Origami Workbench |
Chart Position: 6D The origami fish Toad flopping in the backyard of the Mushroom Island house reveals where to find this treasure once saved. |

|
 Paper Macho Stone Spike |
Chart Position: 6F The Toad turned into a sign at the peak of ? Island marks a spot on the Sea Chart after being unfolded. |

|
 King Shroomses's Coffin |
Chart Position: 1A The hidden Toad on Hammer Island reveals the location of this treasure after being rescued. |

|
 Paper Macho Gooper Blooper |
Chart Position: 7G Marked by a Blooper in the corner of the Sea Chart, this treasure can be found submerged beneath the opening of a rocky feature resembling a Blooper. |

|
Sea Chart marked non-Collectible Treasures[edit]
| Item | Location | Image |
|---|---|---|
Big Shell |
Chart Position: Between 3C and 3D There is a Shy Guy on the small island, admiring a shell in the water. By diving in front of him, Mario can pick up the shell for himself. |
.png)
|
Canned Heart |
Chart Position: Between 6A, 6B, 7A and 7B Mario has to sail to the center of the Super Star on the Sea Chart and find a Shy Guy on a small island. By diving in front of him, he can find a can on the sea floor. |
.png)
|
100-Coin |
Chart Position: 3G Joy from Club Island marks the treasure spot after saving the Feelin' Fungi. Together with the treasure, there are two rocks, each one containing a single 100-Coin. |
|
| Chart Position: 5E Once rescued, the Toad on Bonehead Island shares the location of a treasure on the Sea Chart, a diving spot circled by rocks. Together with the treasure, there is a single rock, which contains a 100-Coin. |
| |
| Chart Position: 6D The origami fish Toad flopping in the backyard of the Mushroom Island house reveals where to find a treasure once saved. Together with the treasure, there are three rocks, each one containing a single 100-Coin. |
| |
Coin Bag |
Chart Position: Between 1E, 1F, 2E and 2F Diving spot found exactly at the intersection of 4 sections on the Sea Chart. There is a treasure chest containing a Coin Bag to be found there. |
.png)
|
| Chart Position: 1G A diving spot in the circle of rocks. There is a treasure chest containing a Coin Bag to be found there. |
.png)
| |
| Chart Position: 2A A diving spot in the triangle made out of three island made of jagged rocks. There is a treasure chest containing a Coin Bag to be found there, first hidden by the rightmost group of Cheep-Cheeps. |
.png)
| |
| Chart Position: 5B A diving spot in the circle of rocks. There is a treasure chest containing a Coin Bag to be found there. |
.png)
| |
| Chart Position: 5D A diving spot in the southeastern corner of the 5D section of the Sea Chart, previously unmarked. There is a treasure chest containing a Coin Bag to be found there. |
.png)
| |
| Chart Position: 7D After finding the Heavy Bag at the diving spot and giving it back to the Shy Guy, Mario gets a Coin Bag as a reward. |
.png)
| |
Heavy Bag |
Chart Position: 7D There is a Shy Guy on the small island, complaining that he dropped something. By diving in front of him, Mario can find a Heavy Bag item on the sea floor. |
.png)
|
Multimedia[edit]
| File info |
| File info |
Names in other languages[edit]
| Language | Name | Meaning | Note(s) | Ref. |
|---|---|---|---|---|
| Japanese | 大海原 Ō Unabara |
The Vast Ocean | [?] | |
| Chinese | 汪洋 Wāngyáng |
The Vast Ocean | [?] | |
| Dutch | De Grote Zee | The Great Sea | [?] | |
| French | Vaste Mer | Vast Sea | [?] | |
| German | Der Weite Ozean | The Vast Ocean | [?] | |
| Italian | Mar Grande | Great Sea | [?] | |
| Korean | 망망대해 Mangmang-daehae |
Boundless Sea | [?] | |
| Spanish | Océano Eterno | Eternal Ocean | [?] |
Notes[edit]
- The Great Sea is largely based on the overworld of the same name in The Legend of Zelda: The Wind Waker, sharing the same English and Japanese names as well as many similar mechanics, which the place itself also appeared in the Pirate Ship stage in the Super Smash Bros. series.