Temple of Shrooms
| Temple of Shrooms | |
|---|---|

| |
| Toads | 41 |
| Not-Bottomless Holes | 21 |
| Collectible Treasures | 2 |
| ? Blocks | 6 |
| Enemies | Black Shy Guys Bone Goombas Boos Co Gasagoso Dry Bones Hammer Bros. Goombas Scuttlebugs Shy Guys Mechakoopa (at random) Hole Punch |
| Yellow Streamer | |
- “This temple is pretty creepy, but I think the professor is hamming it up just a little bit...”
- —Olivia, Paper Mario: The Origami King
The Temple of Shrooms is a location in Paper Mario: The Origami King, containing the spool of the yellow streamer. It is a haunted Egyptian-style temple with several traps operated by Black Shy Guys.
History[edit]

After Professor Toad digs up four jewels (which are the Diamond Jewel, the Triangle Jewel, the Round Jewel, and the Square Jewel), Mario goes to the desert towers and puts the jewels in each of their missing eyes. After Mario inserts them, the towers will shoot lasers into the middle of Scorching Sandpaper Minor, creating a Magic Circle for Olivia to use the Earth Vellumental power. Doing so will make the Temple of Shrooms rise out of the sand, with the yellow streamer wrapped around it.
Layout[edit]
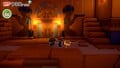
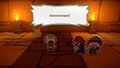
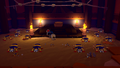
The first room in the Temple of Shrooms has eight pillars, four on each side and Egyptian-themed art of Toads on the walls. This room also has Co Gasagoso in it. When Mario enters the second room, he is surrounded by spikes, forcing him to move forward to a Scuttlebug that he is forced to fight. Around the front of the room are two Toad statues, each holding a platform, that are facing away from each other. If Mario stands on one, it will move the plate down allowing Professor Toad to read the text on the wall. The one on the right reads, "The left sign is more useful." If Professor Toad digs in the sand furthest to the left, he will dig up a Magic Circle, allowing Mario to use the 1,000-Fold Arms that enables him to pull down a staircase to reach the left platform. If Professor Toad tries to read it, he states that he needs a lot of time to properly decipher it. While Professor Toad stays on the platform to the left trying to work out the message, Mario can stand on the platform to the right the door, allowing it to open. If Professor Toad reads the left sign again from this point, it reads "Thgir ngis thgir eht si!? Thgir dna tfel eht htob no teg tsuj rood eht nepo ot ecno ta sdnah."
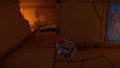
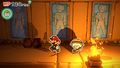
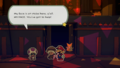
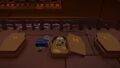
When Mario enters the third room, it will be dark. After moving left a bit, a torch will light up, scaring Professor Toad. At the end of the hall, the shadow of a faceless Toad will appear, causing Professor Toad to think there is a ghost. A Black Shy Guy will come out of one of the statues and slap Mario with a paper fan. Mario will then continue to the next room, which he can not leave unless he progresses to one after. If Mario tries to leave, two Paper Macho Mummy Goombas will appear out of coffins. If Mario hits the floor instead of the Paper Macho Goombas, he will create a 4x4 grid of holes that, if Mario falls in, he will struggle to get out of.
After entering the next room, there will be a Toad getting eaten by Co Gasagoso. After defeating all of them, it will reveal that the Toad is actually a faceless Toad. The room also has three coffins and four buttons in each corner, and each button has a different amount of triangles on it. The coffin on top says, "Personal Internment Number: 1 4 2 3" and Mario needs to hit the buttons with that amount of triangles in that order to open the coffin at the top. The coffins to the left and right can also be entered to reveal a secret room or to go back to the previous room to get music discs. Going back to the previous room leads to a treasure chest containing a disc "Heartbeat Skipper" and a Warp Pipe connecting to a disco room; however, the Pipe is blocked until Mario peels off the King Tape from the other end of the Pipe in the disco room. The room to the right has a Scuttlebug and a Boo in it.
The next room is a hall of statues, and at the end of the room, there are three faceless Toads hanging from spider webs that Mario can pull down. The next room is very small, being just a bridge to another room with a bigger spider web that has twenty-four faceless Toads hanging on it, as well as a Boo and a Black Shy Guy. The next room has falling statues that Mario must avoid. A few of them have things inside like Dry Bones, Not-Bottomless Holes, Boos, the entrance to another room, and the final one has the music disc "Deep, Deep Vibes".
The next room has cylinders poking out of the ground. Hammering these cylinders will make them go into the ground and glow, and a few of them are trapping faceless Toads. At the front of the room is a Not-Bottomless Hole that Mario must repair to reveal a hint that says, "A star lights your way..." Mario needs to hammer the cylinders in a shape that looks like a star to raise a staircase leading to the next room, which is a small room where Black Shy Guys must be fought.
The next room has disco floor, a Save Block, a Warp Pipe, more faceless Toads, and the entrance to the other side of the room with the large spiderweb trapping faceless Toads. DJ Toad needs Mario to find the music disc "Thrills at Night" and all 40 faceless Toads to start a party. After finding the disc, Mario needs to go around the temple to bring every faceless Toad in the temple to the dance floor. There a few Toads in the coffins that require 10 faceless Toads to push open. Coffins with Toads inside will start shaking to alert that those are the correct coffins.

After going through the coffin with a moon on its lid in the second row, Mario reaches the bottom of the room with a final coffin, right below the spider web. If Mario gets too close to it, he will get attacked by many Scuttlebugs. If Mario opens the coffin, he can get a Super Star to defeat them. After all the Scuttlebugs are defeated, a Magic Circle appears, allowing Mario to use the 1,000-Fold Arms to get all the Toads down by pulling down the spider web. After all the Toads are brought to the dance floor, they will start a party. This will make Hole Punch come out of his room and start a boss fight. Upon defeat, Hole Punch explodes, releasing the faceless Toads' faces that are subsequently restored to them. Also, a Magic Circle spawns in Hole Punch's room, allowing Mario to use the 1,000-Fold Arms to destroy a spool for the yellow streamer in the same room. With the streamer cleared, a disco ball drops to the floor and shatters, releasing a sun that subsequently floats back into its place in the sky over the Scorching Sandpaper Desert.
Collectibles[edit]
NOTE: Items not included here: Confetti and random coins from hammering random objects and random coins from using Professor Toad to dig at the sandy parts of the floor.
Field/Objects[edit]
| Item | Location | Image |
|---|---|---|
Big Bag of Confetti |
In the third inside scene, in the first vase. | .png)
|
| 6x 6 Coins |
In the room right of the room with the first faceless Toad, on the path behind the wall leading to the upper chest. | .png)
|
10-Coin and Big Bag of Confetti |
In the room with falling Toad statues, at the start in the vases. | .png)
|
| In the room with coffins, in the right set of vases. | .png)
| |
| 2x 2 100-Coins |
In the third inside scene, between the panel hiding the Black Shy Guy with a paper fan and third Not-Bottomless Hole. | .png)
|
"Deep, Deep Vibes" |
In the dead-end room with the falling Toad statues. Mario must walk to the right end of the room. When the last sarcophagus falls, it reveals the disc. | 
|
Healing Heart |
In the room with the falling Toad statues, at the very end. | .png)
|
"Heartbeat Skipper" |
In a chest on a high ledge with a pipe. Mario must walk through the open sarcophagus in the west wall of the room where the first faceless Toad is found. | 
|
"M-A-X Power!" |
Found in the room with the matching coffins, located exposed on top of the sarcophagus in the southeast corner. | 
|
Max UP Heart |
In the crypt beyond the dance floor, Mario can find it within the coffin marked with a heart. | 
|
Shiny Hammer |
In the second inside scene, found in the first patch of sand. Professor Toad need to dig it out. | .png)
|
Small Bag of Confetti |
4 inside the vases found in the outside scene. | .png)
|
| In the second inside scene, in the patch of sand left of the stairs. | .png)
| |
Super Star |
At the bottom of the room with the giant spiderweb, inside the coffin. | .png)
|
"Thrills at Night" |
In the room with hallways with the Toad statues, found right of the sacrophagi room. Mario must use 1,000-Fold Arms (the Magic Circle appears after hitting the last statue with a hammer) to take it, since trying to take it normally results in Black Shy Guy with a fan appearing and hitting Mario. Required to progress. | 
|
Hidden Toads[edit]
| Form | Description | Necessity | Image |
|---|---|---|---|
| 41 Hidden Toads | |||
1 Toad |
The first faceless Toad is encountered in the triangle switch puzzle room, caught in a swarm of Mini Scuttlebugs. | Required | 
|
1 Toad |
After rescuing the first faceless Toad, Mario can break the coffin on the right-side wall, opening a passage to a hidden room. Inside, Mario can navigate up a staircase in the back and open a chest to free another faceless Toad. | Required | 
|
3 Toads |
Upon completing the triangle switch puzzle, the north coffin should open. When Mario walks down the passage and a trio of Toads bound by webs will drop down. | Required | 
|
3 Toads |
Following this, Mario comes across a room full of cylinders, which must be pressed down with Mario's hammer. Another trio of faceless Toads can be released from these cylinders. | Required | 
|
6 Toads |
Inside the disco hall, Mario can find two groups of faceless Toads spinning the Paper Macho Shy Guys on both sides of the dance floor. | Required | 
|
2 Toads |
Required: "Thrills at Night" + 10 faceless Toads Down the stairs from the disco hall is a large area lined with coffins. Two of these coffins will shake if music is playing from the boombox, and will both release faceless Toads when opened. |
Required | 
|
24 Toads |
Required: "Thrills at Night" + 10 faceless Toads After opening the moon-branded coffin in the second row and descending into the main tomb. Mario will be ambushed by Scuttlebugs. Defeating the swarm will release a Magic Circle, allowing Mario to free 24 faceless Toads from a giant web using the 1,000-Fold Arms. |
Required | 
|
DJ Toad |
Required: "Thrills at Night" + 40 faceless Toads After bringing all faceless Toads to the dancefloor, Mario convinces Hole Punch to enter the room. Upon defeat their faces are restored, and the group, along with the DJ Toad, are able to leave the temple. |
Required | 
|
Not-Bottomless Holes[edit]
| Description | Necessity | Image |
|---|---|---|
| 21 Holes | ||
| Right at the start of the area, on the left on the wall. | Optional | 
|
| In the second room, seen right away on the right on the wall. | Optional | 
|
| In the same room, on the left in the pillar. | Optional | 
|
| In the third room, on the ground in the corridor. | Required | 
|
| Continuing forward, next one is on the wall. | Optional | 
|
| On the ground in the same corridor as last two. | Required | 
|
| Last in this corridor, in front of the Save Block. | Optional | 
|
| In the fourth room (the one with Paper Macho Mummy Goombas), seen right away on the wall as Mario enters. | Optional | 
|
| In the same room, on the right wall. | Optional | 
|
| Two in the room right of the room where the first faceless Toad have been encountered, surrounding a Collectible Treasure chest. | Optional | 
|
| In the room after the room where the party sees faceless Toads in a huge spiderweb for the first time, right as Mario enters. | Optional | 
|
| In the same room, seen after the second statue falls down and breaks. | Optional | 
|
| In the same room, at the right end. | Optional | 
|
| Two in the next room (the one where Mario has to hammer a star to make stairs appear), seen right as Mario enters. | Optional | 
|
| In the same room, on the left next to the ? Block. | Optional | 
|
| In the room with boss arena, left of the right inactive Paper Macho Shy Guy. | Optional | 
|
| In the room with 15 pushable sarcophagi, on the left wall. | Optional | 
|
| In the same room, on the right wall. | Optional | 
|
| In the next room (the one with Thrills at Night disc), seen on the ground. | Optional | 
|
Collectible Treasures[edit]
| Treasure | Description | Image |
|---|---|---|
| 2 treasures | ||
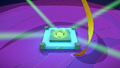
 Fire Vellumental Statue |
Found in the room right of the room where the first faceless Toad is encountered, between two Not-Bottomless Holes. |
|
 Temple of Shrooms |
In the room with rows of sealed sarcophagi, opening the ☾ coffin in the middle row reveals a staircase to King Shroomses tomb. In the southeastern corner is a square patch of sand, where Professor Toad can dig up the treasure. | 
|
? Blocks[edit]
| Hidden | Item | Description | Image |
|---|---|---|---|
| 6 blocks | |||
Shiny Mushroom |
In the room with Toad statues holding platforms, a block rests against the left wall and across from a spike pit. |
| |
100-Coin |
At the beginning of the hallway lined with collapsing sarcophagi, there is another block. |
| |
100-Coin |
There is a ? Block near a Not-Bottomless Hole in the cylinder puzzle room. |
| |
Coin Bag ×2 |
Within the disco hall, one block floats above sand near the entrance and another is found in the southeast corner near the inactive Paper Macho Shy Guy. |
| |
100-Coin |
In the room with rows of sealed sarcophagi, Mario must hammer a torch to slide it onto a dark panel. Doing so causes the wall to spin, granting access to both a ? Block and hidden hallway on the other side. | 
| |
Profiles[edit]
- Collectible Treasure No. 73: "King Shroomses's Temple of Shrooms. It recedes into the sand when it's dark out, like a reverse vampire."
Multimedia[edit]
| File info |
| File info |
| File info |
| File info |
| File info |
| File info |
| File info |
| File info |
| File info |
| File info |
Gallery[edit]
The hidden entrance to the Temple
A sealed door with a pair of Toad statues.

The sealed door unlocked.
Mario sees a shadow of a faceless Toad
Toad murals
Mario encounters the first faceless Toad
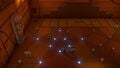
Mario completes the star puzzle

The disco hall
DJ Toad asks for help
Mario opens a coffin
Scuttlebugs and Co Gasagoso

Mario and faceless Toads having a disco

The faceless Toads have their faces returned


Names in other languages[edit]
| Language | Name | Meaning | Note(s) | Ref. |
|---|---|---|---|---|
| Japanese | キノピチュいせき Kinopichu iseki |
Portmanteau of「キノピオ」(Kinopio, Toad) and "Machu Picchu" +「いせき」(iseki, ruins) | [?] | |
| Chinese (Simplified) | 奇诺比丘遗迹 Qínuòbǐqiū Yíjì |
"Kino Picchu" Ruins | [?] | |
| Chinese (Traditional) | 奇諾比丘遺跡 Qínuòbǐqiū Yíjì |
"Kino Picchu" Ruins | [?] | |
| Dutch | Tempel van Zwamses | Temple of (King) Shroomses; a combination of "zwam" (mushroom) and "Ramses" | [?] | |
| French | Temple Champi | Shroom Temple | [?] | |
| German | Tempel von Chamses | Temple of (King) Shroomses; a combination of "champignon" (mushroom) and "Ramses" | [?] | |
| Italian | Tempio di Fungis | Temple of Mushroom | [?] | |
| Korean | 키노픽추 유적 Kinopikchu Yujeok |
"Kino Picchu" Ruins | [?] | |
| Spanish | Templo Champi | Shroom Temple | [?] |