Paper Mario: The Thousand-Year Door: Difference between revisions
m (Text replacement - "\|type(\d+)=([^\n]+) " to "") |
(Added enemy list and boss images.) Tag: Disambiguation links |
||
| (143 intermediate revisions by 57 users not shown) | |||
| Line 1: | Line 1: | ||
{{italic title}} | {{italic title}} | ||
{{ | {{construction}} | ||
{{ | {{about|2004 [[Nintendo GameCube]] game|the [[Nintendo Switch]] remake|[[Paper Mario: The Thousand-Year Door (Nintendo Switch)]]}} | ||
{{game infobox | |||
|image=[[File:PMTTYD.jpg|250px]] | |image=[[File:PMTTYD.jpg|250px]] | ||
|developer=[[Intelligent Systems]] | |developer=[[Intelligent Systems]] | ||
|publisher=[[Nintendo]] | |publisher=[[Nintendo]] | ||
|platforms=[[Nintendo GameCube]] | |platforms=[[Nintendo GameCube]] | ||
| | |release='''Original release'''<br>{{release|Japan|July 22, 2004|USA|October 11, 2004|Europe|November 12, 2004|Australia|November 18, 2004<ref>[http://themushroomkingdom.net/games/pmttyd Release dates from TMK], retrieved 7-22-2008</ref>}} '''[[Player's Choice]]'''<br>{{release|USA|April 24, 2006}} | ||
|languages={{languages|en_us=y|es_es=y|fr_fr=y|de=y|it=y|jp=y}} | |||
|genre=RPG | |genre=RPG | ||
|modes=Single player | |modes=Single player | ||
|ratings={{ratings|esrb=E|pegi=3|cero=A|acb=PG}} | |ratings={{ratings|esrb=E|pegi=3|cero=A|acb=PG}} | ||
|media={{media|gcn=1}} | |media={{media|gcn=1}} | ||
|input={{input| | |input={{input|gcn=1}} | ||
}} | }} | ||
'''''Paper Mario: The Thousand-Year Door''''' is the second installment in the [[Paper Mario (series)|''Paper Mario'' series]] | '''''Paper Mario: The Thousand-Year Door''''' is the second installment in the [[Paper Mario (series)|''Paper Mario'' series]]. Released for the [[Nintendo GameCube]] in [[List of games by date#2004|2004]], the game is an RPG as the first ''[[Paper Mario]]'', featuring both turn-based battles and puzzle and platforming-focused challenges on the overworld as well as collaborating with a party of friendly characters that subsequently join on the quest, known as [[Party member|partners]]. | ||
The story has [[Mario]] travel to the ramshackle town of [[Rogueport]] to meet [[Princess Peach]] after news she acquired a map leading to an ancient treasure. He soon finds that Peach has been kidnapped again, and comes in conflict with the [[X-Nauts (organization)|X-Nauts]], a malevolent secret society. Mario's quest has him collect the seven [[Crystal Stars]], mysterious artifacts of great power that are linked to an ancient evil sealed deep below Rogueport. | |||
''Paper Mario: The Thousand-Year Door'' greatly expands on the battle system, with new features such as more fleshed-out partners who now have their own health pool, and the ability to negate all damage inflicted by enemy attacks through [[Superguard]]ing. An [[audience]] now watches the battles — spectators may mess with the fights in ways that help or hinder the player. On the overworld, Mario now has the ability to fold into various paper forms, allowing him to explore deeper and solve puzzles. The game also has intermissions between each Chapter, in which the player assumes the role of Peach, as well as of [[Bowser]], both of whom have their own stories that complement the main plot. | |||
A follow-up titled ''[[Super Paper Mario]]'' was released for the [[Wii]] in 2007. ''Paper Mario: The Thousand-Year Door'' is the only game in the series to share the same battle system as the original ''Paper Mario'', as ''Super Paper Mario'' is a platformer with RPG elements and subsequent installments (starting with 2012's ''[[Paper Mario: Sticker Star]]'') retooled many aspects of the series. | |||
A [[Paper Mario: The Thousand-Year Door (Nintendo Switch)|remake of the same name]] is set to be released on the [[Nintendo Switch]] on May 23, 2024. | |||
==Plot== | ==Plot== | ||
===Prologue: A Rogue's Welcome=== | ===Prologue: A Rogue's Welcome=== | ||
[[File:PMTTYD Peach and the Glowing Box.png|thumb|left|Peach receiving the box.]] | [[File:PMTTYD Peach and the Glowing Box.png|thumb|left|Peach receiving the box.]] | ||
[[File:PMTTYD prologue screenshot.png|thumb|upright=1.05|Mario and Goombella about to be jumped by the X-Nauts.]] | [[File:PMTTYD prologue screenshot.png|thumb|upright=1.05|Mario and Goombella about to be jumped by the X-Nauts.]] | ||
The adventure begins when [[Princess Peach]] goes on a cruise to [[Rogueport]] where she meets a [[Beldam|hooded woman]], and buys a box which contains a [[Magical Map|map]]. She sends this to [[Mario]], along with a letter asking him to help her search for the map's treasure. Soon after that, she is kidnapped by [[Sir Grodus]]. Mario receives the letter with the map and decides to help her, and thus boards a ship to Rogueport. | The adventure begins when [[Princess Peach]] goes on a cruise to [[Rogueport]] where she meets a [[Beldam|hooded woman]], and buys a box which contains a [[Magical Map|map]]. She sends this to [[Mario]], along with a letter asking him to help her search for the map's treasure. Soon after that, unbeknownst to Mario and the player, she is kidnapped by [[Sir Grodus]]. Mario receives the letter with the map and decides to help her, and thus boards a ship to Rogueport. | ||
Shortly after Mario reaches Rogueport, he finds [[Lord Crump]] attempting to interrogate [[Goombella]] about the [[Crystal Stars]]. Mario intervenes and Lord Crump tries to defeat him. After defeating the X-Naut general and escaping from the X-Nauts, Goombella introduces herself, and Mario explains his quest to her. As Goombella is also searching for the map's treasure, she decides to join Mario. Then, Goombella suggests to go to [[Professor Frankly]]'s house, to consult him and show him the map. At the professor's house, Frankly explains that the map is related to the legend of the treasure of [[the Thousand-Year Door]], and that, to obtain the treasure, one must first open the door with the seven [[Crystal Stars]]. Said objects can be found by holding the Magical Map before the Thousand-Year Door, which is located in the [[Rogueport Sewers|town's sewers]]. So, Mario holds the map before the Thousand-Year Door, revealing the [[Hooktail Castle|location]] of the [[Diamond Star|first Crystal Star]]. | Shortly after Mario reaches Rogueport, he finds [[Lord Crump]] attempting to interrogate [[Goombella]] about the [[Crystal Stars]]. Mario intervenes and Lord Crump tries to defeat him. After defeating the X-Naut general and escaping from the X-Nauts, Goombella introduces herself, and Mario explains his quest to her. As Goombella is also searching for the map's treasure, she decides to join Mario. Then, Goombella suggests to go to [[Professor Frankly]]'s house, to consult him and show him the map. At the professor's house, Frankly explains that the map is related to the legend of the treasure of [[the Thousand-Year Door]], and that, to obtain the treasure, one must first open the door with the seven [[Crystal Stars]]. Said objects can be found by holding the Magical Map before the Thousand-Year Door, which is located in the [[Rogueport Sewers|town's sewers]]. So, Mario holds the map before the Thousand-Year Door, revealing the [[Hooktail Castle|location]] of the [[Diamond Star|first Crystal Star]]. | ||
| Line 29: | Line 38: | ||
|JapM=Prologue: Welcome to Rogueport! | |JapM=Prologue: Welcome to Rogueport! | ||
|Spa=Prólogo: Bienvenidos a Villa Viciosa | |Spa=Prólogo: Bienvenidos a Villa Viciosa | ||
|SpaM=Prologue: Welcome to | |SpaM=Prologue: Welcome to Rogueport | ||
|Ita=Prologo: Benvenuti a Fannullopoli | |Ita=Prologo: Benvenuti a Fannullopoli | ||
|ItaM=Prologue: Welcome to | |ItaM=Prologue: Welcome to Rogueport | ||
|Ger=Prolog: Willkomen in Rohlingen | |Ger=Prolog: Willkomen in Rohlingen | ||
|GerM=Prologue: Welcome to | |GerM=Prologue: Welcome to Rogueport | ||
| | |Fre=Prologue: Bienvenue à Port-Lacanaïe! | ||
| | |FreM=Prologue: Welcome to Rogueport | ||
}} | }} | ||
===Chapter 1: Castle and Dragon=== | ===Chapter 1: Castle and Dragon=== | ||
[[File:Hooktail PMTTYD encounter.png|thumb|left|Mario and | [[File:Hooktail PMTTYD encounter.png|thumb|left|Mario and Koops encountering Hooktail.]] [[File:PMTTYD Petalburg screenshot.png|thumb|Petalburg.]] | ||
Mario and Goombella show the updated map to Professor Frankly, who reveals that the first Crystal Star is in [[Petal Meadows]]. To reach this place, they must find a [[Warp Pipe|pipe]] in Rogueport Sewers. After finding it, Mario and Goombella arrive in Petal Meadows, where they see [[Hooktail]] and [[Hooktail Castle|her castle]]. The duo stops at a nearby village called [[Petalburg]] and discover from the [[Kroop|mayor]] that the dragon Hooktail has been terrorizing the village. The mayor tells them that Hooktail guards | Mario and Goombella show the updated map to Professor Frankly, who reveals that the first Crystal Star is in [[Petal Meadows]]. To reach this place, they must find a [[Warp Pipe|pipe]] in Rogueport Sewers. After finding it, Mario and Goombella arrive in Petal Meadows, where they see [[Hooktail]] and [[Hooktail Castle|her castle]]. The duo stops at a nearby village called [[Petalburg]] and discover from the [[Kroop|mayor]] that the dragon Hooktail has been terrorizing the village. The mayor tells them that Hooktail guards a Crystal Star in her castle, and that to access it, they must obtain the [[Sun Stone|two]] [[Moon Stone|stone]] keys in [[Shhwonk Fortress]], an ancient stone fort past Petalburg. After finding them, Mario and Goombella march to Hooktail's castle, with [[Koops]] in tow (who wants to defeat Hooktail to avenge his dead father and become stronger). After navigating through the castle's traps with the help of Koops, they encounter the dragon and defeat her, allowing [[Koopley|Koops's father]] to get out of the dragon's gut and present Mario with the [[Diamond Star]]. | ||
Somewhere else, it is revealed that [[Princess Peach]] was abducted by the X-Nauts. When an X-Naut tells [[Sir Grodus]] someone got the first Crystal Star, Peach accidentally blurts out Mario's name. Grodus hears this and orders the [[Shadow Sirens]] to steal the map in Mario's possession. Peach then meets [[TEC-XX]], the X-Naut base's computer, who develops an interest in Peach's concept of love, and asks for her help in understanding it. Peach agrees; in exchange, TEC lets her send [[Mailbox SP|e-mails]] to Mario. | |||
Afterward, the scene focuses on [[Bowser's Castle]], where [[Kammy Koopa]] tells [[Bowser]] about Mario's quest to find the Crystal Stars and Peach's abduction, things that motivate Bowser to hunt for the Crystal Stars and kidnap Peach back. Bowser, with his [[Koopa Clown Car]], and Kammy then head for Rogueport. He goes through a grassfield level based on ''Super Mario Bros.'' | |||
Back in Petalburg, the group receives an e-mail from Peach, who | Back in Petalburg, after Koops promises to return as a stronger Koopa like his dad, the group receives an e-mail from Peach, who informs them that she has been kidnapped. Mario and company head back to the Thousand-Year Door to reveal the location of the next Crystal Star. | ||
'''Storyline text''' | '''Storyline text''' | ||
| Line 50: | Line 61: | ||
''[[Mario]] and friends finally got [[Diamond Star|a Crystal Star]] in [[Hooktail Castle|the castle]] after defeating [[Hooktail]]. [[Koops]] even reunited with [[Koopley|his long-lost father]], whom he thought was dead. Yet they were unable to learn anything about the whereabouts of [[Princess Peach|the princess]]. Where could Princess Peach be? Yes... Mario's adventure has only just begun.'' | ''[[Mario]] and friends finally got [[Diamond Star|a Crystal Star]] in [[Hooktail Castle|the castle]] after defeating [[Hooktail]]. [[Koops]] even reunited with [[Koopley|his long-lost father]], whom he thought was dead. Yet they were unable to learn anything about the whereabouts of [[Princess Peach|the princess]]. Where could Princess Peach be? Yes... Mario's adventure has only just begun.'' | ||
</blockquote> | </blockquote> | ||
'''Names in other languages''' | '''Names in other languages''' | ||
{{foreign names | {{foreign names | ||
|Jap=ステージ1 マリオとお城とドラゴンと | |Jap=ステージ1 マリオとお城とドラゴンと | ||
|JapR=Sutēji 1: Mario to Oshiro to Doragon to | |JapR=Sutēji 1: Mario to Oshiro to Doragon to | ||
|JapM=Stage 1: | |JapM=Stage 1: Mario, the castle and the dragon | ||
|Spa=Acto 1: El bueno, el feo y el malo | |Spa=Acto 1: El bueno, el feo y el malo | ||
|SpaM=Act 1: The Good, The Ugly and The Bad | |SpaM=Act 1: The Good, The Ugly and The Bad | ||
| Line 61: | Line 71: | ||
|ItaM=Scene 1: Mario, the castle and the dragon | |ItaM=Scene 1: Mario, the castle and the dragon | ||
|Ger=Kapitel 1: Lohgards Drachenburg | |Ger=Kapitel 1: Lohgards Drachenburg | ||
|GerM=Chapter 1: | |GerM=Chapter 1: Hooktail's Dragon Castle<br> | ||
| | |Fre=Chapitre 1: Mario + château + dragon | ||
| | |FreM=Chapter 1: Mario + castle + dragon | ||
}} | }} | ||
===Chapter 2: The Great Boggly Tree=== | ===Chapter 2: The Great Boggly Tree=== | ||
[[File:BogglyWoods.png|thumb|left|Boggly Woods]][[File:The Great Tree Entrance.png|thumb|The Great Boggly Tree.]] | [[File:BogglyWoods.png|thumb|left|Boggly Woods]][[File:The Great Tree Entrance.png|thumb|The Great Boggly Tree.]] | ||
The [[Emerald Star|second Crystal Star]] is revealed to be in [[the Great Tree]], home of small creatures known as [[Puni|Punies]], deep inside [[Boggly Woods]]. When searching for the pipe leading to Boggly Woods in [[Rogueport Sewers]], Mario and his partners encounter [[Punio]], who tells them that the [[X-Nauts (organization)|X-Nauts]] have invaded the Great Tree, capturing most of the Punies and that the [[Jabbies]], the Punies' enemies, have allied with the X-Nauts and are trying to | The [[Emerald Star|second Crystal Star]] is revealed to be in [[the Great Tree]], home of small creatures known as [[Puni|Punies]], deep inside [[Boggly Woods]]. When searching for the pipe leading to Boggly Woods in [[Rogueport Sewers]], Mario and his partners encounter [[Punio]], who tells them that the [[X-Nauts (organization)|X-Nauts]] have invaded the Great Tree, capturing most of the Punies and that the [[Jabbies]], the Punies' enemies, have allied with the X-Nauts and are trying to kick the Punies out of the Great Tree. Mario and company decide to help out the Punies, and therefore Punio leads the group to the Boggly Woods. After getting there, Mario and company encounter the [[Shadow Sirens]] with a [[Necklace (Paper Mario: The Thousand-Year Door)|necklace]] that Vivian found, who do not recognize him due to having lost a sketch of him, which Beldam accuses Vivian of losing. The group continues and arrives at the Great Tree. However, they realize that the tree is locked. Punio suggests they find [[Flurrie|Madame Flurrie]], who can help them find the Tree's secret entrance. Despite this, upon reaching her home, Flurrie reveals she has lost her necklace and does not want anyone to see her without it. Thus, Mario and friends return to the Shadow Sirens and defeat them, this way retrieving the necklace. After returning it to Flurrie, she joins them in their quest. The group finds the secret entrance with her help and manages to enter the Tree; after freeing the locked Punies with the aid of a [[Puni Orb|special orb]] and after solving the Great Tree's puzzles and defeating the [[Jabbies]], they reveal the second Crystal Star at the bottom of the Tree. There, Lord Crump snatches it, and activates a time bomb to blow up the Tree. Upon following him to the entrance, he stops the bomb and uses [[Magnus von Grapple]] to fight the heroes, but he is defeated by the group. As a result, the X-Nauts evacuate the Tree and Mario and company obtain the [[Emerald Star]]. | ||
At the X-Naut headquarters, the X-Nauts | At the X-Naut headquarters, the X-Nauts notify Sir Grodus that Mario has taken the Emerald Star, and has also defeated Lord Crump and the Shadow Sirens. He asks them about the other Crystal Stars, but they have no luck in finding them. Grodus believes that Mario must have the map. Meanwhile, TEC-XX calls for the Princess, and, hearing her desire to dance at the Mushroom Ball, asks her to dance with him, using a hologram of Peach herself, and having to press the buttons on the screen. TEC then lets Peach e-mail Mario. | ||
Bowser | Meanwhile, Bowser heads for Petalburg, since Kammy tells him that Peach was seen there. After crossing [[World 1 (Paper Mario: The Thousand-Year Door)|Petal Meadows]], he arrives in the town, scaring the main Koopa Troopa, and upon spotting what he thinks is Peach, he tries talking to her, but she is revealed to be merely a poster owned by a local Koopa Troopa. | ||
As Mario and his team move on, they receive another e-mail from Peach, who tells them that the X-Nauts are searching for the [[Crystal Stars]]. Mario and his team reveal the location of the next Crystal Star, and they visit Professor Frankly for details. | As Mario and his team move on, they receive another e-mail from Peach, who tells them that the X-Nauts are also searching for the [[Crystal Stars]]. Mario and his team reveal the location of the next Crystal Star, and they visit Professor Frankly for details. | ||
'''Storyline text''' | '''Storyline text''' | ||
| Line 80: | Line 90: | ||
''And so, after pummeling [[Lord Crump]], [[Mario]] obtained [[Emerald Star|the second Crystal Star]]... With the [[X-Naut]]s gone, peace once again prevailed throughout [[the Great Tree]]. The [[Boggly Woods]] echoed with the [[Puni]] songs of joy. But... this may not be the last our hero hears from the vile X-Nauts. They will surely continue to stand in Mario's way and try to put a stop to his efforts...'' | ''And so, after pummeling [[Lord Crump]], [[Mario]] obtained [[Emerald Star|the second Crystal Star]]... With the [[X-Naut]]s gone, peace once again prevailed throughout [[the Great Tree]]. The [[Boggly Woods]] echoed with the [[Puni]] songs of joy. But... this may not be the last our hero hears from the vile X-Nauts. They will surely continue to stand in Mario's way and try to put a stop to his efforts...'' | ||
</blockquote> | </blockquote> | ||
'''Names in other languages''' | '''Names in other languages''' | ||
{{foreign names | {{foreign names | ||
| Line 91: | Line 100: | ||
|ItaM=Scene 2: The Great Oak of the Mysterious Forest | |ItaM=Scene 2: The Great Oak of the Mysterious Forest | ||
|Ger=Kapitel 2: Der Baum der Bubus | |Ger=Kapitel 2: Der Baum der Bubus | ||
|GerM=Chapter 2: The | |GerM=Chapter 2: The Tree of the Punies | ||
| | |Fre=Chapitre 2: Un grand arbre | ||
| | |FreM=Chapter 2: A great tree | ||
}} | }} | ||
===Chapter 3: Of Glitz and Glory=== | ===Chapter 3: Of Glitz and Glory=== | ||
[[File:Glitz Pit.png|thumb|left|Glitz Pit.]][[File: | [[File:Glitz Pit.png|thumb|left|Glitz Pit.]][[File:Rawk Hawk TTYD artwork.jpg|200px|thumb|Rawk Hawk.]] | ||
The [[Gold Star|third Crystal Star]] appears in a [[Glitz Pit|large arena]] on a [[Glitzville|floating town]]. To reach Glitzville, Mario and the gang must visit [[Don Pianta]]. He offers them the ticket they need after doing him a favor. Once Mario and his team arrive in Glitzville, they enter the Glitz Pit, a popular place in which fighters brawl, and spot the Crystal Star on the [[Champ's Belt]], held by [[Rawk Hawk]], the current champion. They sign up in the Pit, battle through the ranks, and eventually gain a [[Mini-Yoshi|newborn Yoshi]] as a partner. Soon, a mysterious figure known only as "X" starts sending cryptic e-mails to Mario. The e-mails lead Mario and his partners to discover that the Star on the belt is a fake, and that the real Crystal Star is being used by [[Grubba]], the promoter of the Glitz Pit. Mario | The [[Gold Star|third Crystal Star]] appears in a [[Glitz Pit|large arena]] on a [[Glitzville|floating town]]. To reach Glitzville, Mario and the gang must visit [[Don Pianta]]. He offers them the ticket they need after doing him a favor. Once Mario and his team arrive in Glitzville, they enter the Glitz Pit, a popular place in which fighters brawl, and spot the Crystal Star on the [[Champ's Belt]], held by [[Rawk Hawk]], the current champion. They sign up in the Pit, battle through the ranks, and eventually gain a [[Mini-Yoshi|newborn Yoshi]] as a partner after obtaining his egg from [[Mr. Hoggle]]. Soon, a mysterious figure known only as "X" starts sending cryptic e-mails to Mario. The e-mails lead Mario and his partners to discover that the Star on the belt is a fake, and that the real Crystal Star is being used by [[Grubba]], the promoter of the Glitz Pit, who has been using it to drain fighters of their energy to keep himself young and powerful. Mario and company expose his wrongdoings and chase him into the arena, where he transforms into [[Macho Grubba]] in order to eliminate Mario and his friends. Nonetheless, the group manages to defeat him. After the battle, [[Jolene]], Grubba's assistant, appears and reveals herself as the mysterious X, explains her story, reunites with her brother [[Prince Mush]], and gives Mario the [[Gold Star]]. | ||
At the X-Naut base, Sir Grodus berates the Shadow Sirens for failing to defeat Mario. Beldam assures him that the sisters will take care of Mario with their new weapon. TEC-XX asks Peach to go ask Grodus a question relating to his plans. The Princess, while annoyed, soon goes undercover in an X-Naut disguise (despite the X-Nauts being roughly half Peach's size, she somehow still fits in the outfit) and learns that Grodus is plotting to use the Crystal Stars to take over the world, but he refuses to say why he's keeping Peach locked up, and finding something strange about her voice while disguised. TEC allows her to send this message to Mario. | |||
Meanwhile, Bowser and Kammy are searching for one of the Crystal Stars in the Great Tree, where they discover that Mario already obtained it. Kammy Koopa gets into an argument with the Puni Elder, which leads to Bowser saying to himself "You're BOTH too old! Har!" or "It's Hag vs. Hag! Awesome!" Bowser is angered that Mario is one step ahead of him again. | |||
Mario | After saying goodbye to everyone at Glitzville, with Rawk Hawk promising to not cheat anymore, King K. thanking Mario for saving him, and Jolene taking over as the new Glitz Pit manager, Mario and company receive Peach's message; they promptly reveal the [[Ruby Star|fourth Crystal Star's]] [[Creepy Steeple|location]]. | ||
'''Storyline text''' | '''Storyline text''' | ||
<blockquote> | <blockquote> | ||
''[[Glitzville]]'s seamy underside was a dark, dangerous place seething with conspiracy... With the help of the lovely [[Ms. Jolene]], [[Mario]] revealed [[Grubba]]'s true identity... And acquired [[Gold Star|the third Crystal Star]] by defeating the monstrous [[Macho Grubba]]. Grubba had used the power of the [[Crystal Star]] to run his power-draining machine... What other hidden powers might these strange and mystical items possess?'' | ''[[Glitzville]]'s seamy underside was a dark, dangerous place seething with conspiracy... With the help of the lovely [[Jolene|Ms. Jolene]], [[Mario]] revealed [[Grubba]]'s true identity... And acquired [[Gold Star|the third Crystal Star]] by defeating the monstrous [[Macho Grubba]]. Grubba had used the power of the [[Crystal Star]] to run his power-draining machine... What other hidden powers might these strange and mystical items possess?'' | ||
</blockquote> | </blockquote> | ||
'''Names in other languages''' | '''Names in other languages''' | ||
{{foreign names | {{foreign names | ||
| Line 120: | Line 130: | ||
|Ger=Kapitel 3: Kampf der Champions | |Ger=Kapitel 3: Kampf der Champions | ||
|GerM=Chapter 3: Clash of the Champions | |GerM=Chapter 3: Clash of the Champions | ||
| | |Fre=Chapitre 3: Vas-y champion! | ||
| | |FreM=Chapter 3: Go champion! | ||
}} | }} | ||
| Line 127: | Line 137: | ||
[[File:Creepy Steeple.jpg|thumb|left|upright=1.1|Creepy Steeple's front yard]] | [[File:Creepy Steeple.jpg|thumb|left|upright=1.1|Creepy Steeple's front yard]] | ||
[[File:PMTTYD Doopliss Artwork.png|thumb|[[Doopliss]]]] | [[File:PMTTYD Doopliss Artwork.png|thumb|[[Doopliss]]]] | ||
Professor Frankly tells the group that the [[Ruby Star|Crystal Star]] is located in [[Creepy Steeple]], near [[Twilight Town]]. When Mario | Professor Frankly tells the group that the [[Ruby Star|Crystal Star]] is located in [[Creepy Steeple]], near [[Twilight Town]]. When Mario and company arrive in Twilight Town, they discover that the village is under a curse cast by a [[Doopliss|monster]] who lives in the steeple. Using a new [[Tube Mode|power]], the group reaches the steeple, and battles the monster. During the battle, the monster uses an ability to steal Mario's name and body, while Mario is transformed into a shadowy version of himself. Mario's partners claim the Crystal Star and leave with whom they think is Mario. All the while, the [[Shadow Sirens]] are in Twilight Town, planning on defeating Mario and his partners with their new weapon: the [[Superbombomb]]. In spite of this, [[Beldam]] seems to have lost it, prompting her to blame [[Vivian]] and to force her to search for it. The real Mario returns to Twilight Town, and helps [[Vivian]] with her problem. Out of gratitude, she joins Mario's party. They eventually discover from the monster's [[Parrot (character)|parrot]] that the monster's name is Doopliss. After telling Doopliss his name, he is weakened and flees to Creepy Steeple. Mario and Vivian chase him there and they fight once more. Mario and his new partner defeat Doopliss, allowing Mario to regain his name and body and obtain the [[Ruby Star]]. | ||
At the X-Naut base, an X-Naut PhD tells Sir Grodus that he's done a lot of research on the Thousand-Year Door, whose sealing power is weakening. This delights Grodus, since this means his plan will succeed, and he will soon create a new, perfect world. TEC-XX requests the Princess to participate in a sort of "quiz show" with him, which soon gets creepier with the answers that Peach somehow knows. By doing this, she discovers what the "treasure" of [[the Thousand-Year Door]] really is: the soul of an [[Shadow Queen|ancient demon]]. The Princess, although concerned if it was a good idea for TEC to tell her these things, then relays this information to Mario. | |||
In the meantime, [[Bowser]] continues his quest for the Crystal Stars by flying to [[Glitzville]] in his Koopa Clown Car, although Kammy Koopa was attempting to buy blimp tickets. It malfunctions halfway there, though, and he must [[World 2 (Paper Mario: The Thousand-Year Door)|travel underwater]] in order to return to Rogueport. After he gets there and meets up with Kammy, who has traveled to Glitzville, finding the fights amazing, and the hot Dogs delicious. After burning her offerings, and angry enough from what he went through while swimming, Bowser orders her to continue her research on Peach and the Crystal Stars. | |||
Back in Twilight Town, Mario and his friends receive the message from Peach. They reveal the next Crystal Star and visit Professor Frankly for details. | Back in Twilight Town, Mario and his friends receive the message from Peach. They reveal the whereabouts of the next Crystal Star and visit Professor Frankly for details. | ||
The English name for | The English name for Chapter 4, as well as its Japanese, Spanish, Italian, and French translations, are referencing the Ernest Hemingway novel, ''{{wp|For Whom the Bell Tolls}}''. The Japanese name is also possibly a reference to the Japan-exclusive game ''{{wp|Kaeru no Tame ni Kane wa Naru}}'' co-developed by [[Intelligent Systems]], which involves a bell capable of transforming frogs into people. | ||
'''Storyline text''' | '''Storyline text''' | ||
| Line 139: | Line 151: | ||
'''(fake)''' ''Mario defeated [[Doopliss|the scourge of Creepy Steeple]] and found the fourth [[Crystal Stars|Crystal Star]]. The people of [[Twilight Town]] have surely recovered from their awful curse by now. At this rate, Mario's quest to collect all seven Crystal Stars will be done in no time! With his back to [[Creepy Steeple]], Mario sets out toward his bright future...'' | '''(fake)''' ''Mario defeated [[Doopliss|the scourge of Creepy Steeple]] and found the fourth [[Crystal Stars|Crystal Star]]. The people of [[Twilight Town]] have surely recovered from their awful curse by now. At this rate, Mario's quest to collect all seven Crystal Stars will be done in no time! With his back to [[Creepy Steeple]], Mario sets out toward his bright future...'' | ||
'''(real)''' '' | '''(real)''' ''Mario defeated the rogue who had stolen his name and appearance. Now Mario has four [[Crystal Stars]]. That leaves a mere three more to find! And THAT means his quest to collect all of the Crystal Stars is more than half over! Now Mario heads off toward his next adventure with his new friend, [[Vivian]]... ...But what about [[Beldam]] and [[Marilyn]]? And what became of the doppelganger, Doopliss?'' | ||
</blockquote> | </blockquote> | ||
'''Names in other languages''' | '''Names in other languages''' | ||
{{foreign names | {{foreign names | ||
|Jap=ステージ4 ブタのためにカネはなる | |Jap=ステージ4 ブタのためにカネはなる | ||
|JapR=Sutēji 4: Buta no Tame ni Kane wa Naru | |JapR=Sutēji 4: Buta no Tame ni Kane wa Naru | ||
|JapM=Stage 4: For Pigs the Bell Tolls; | |JapM=Stage 4: For Pigs the Bell Tolls; parody on ''{{wp|For Whom the Bell Tolls}}'' and ''{{wp|Kaeru no Tame ni Kane wa Naru}}'' | ||
|Spa=Acto 4: ¿Por quién dobla la campana? | |Spa=Acto 4: ¿Por quién dobla la campana? | ||
|SpaM=Act 4: For Whom the Bell | |SpaM=Act 4: For Whom Does the Bell Toll? | ||
|Ita=Scena IV: Per chi suona la campana | |Ita=Scena IV: Per chi suona la campana | ||
|ItaM=Scene 4: For whom the bell tolls | |ItaM=Scene 4: For whom the bell tolls | ||
|Ger=Kapitel 4: Die Glocke der Spukabtei | |Ger=Kapitel 4: Die Glocke der Spukabtei | ||
|GerM=Chapter 4: The bell of the Spook Abbey | |GerM=Chapter 4: The bell of the Spook Abbey | ||
| | |Fre=Chapitre 4: La cloche à cochons | ||
| | |FreM=Chapter 4: The pig bell | ||
}} | }} | ||
===Chapter 5: The Key to Pirates=== | ===Chapter 5: The Key to Pirates=== | ||
[[File:Keelhaul Key TTYD.png|200px|thumb|left|Keelhaul Key]][[File:Cortez.png|thumb | [[File:Keelhaul Key TTYD.png|200px|thumb|left|Mario and Yoshi in Keelhaul Key]][[File:Cortez.png|thumb|275px|Cortez]] | ||
The [[Sapphire Star|fifth Crystal Star]] is located deep within a [[Pirate's Grotto|pirate lair]] on the southern island of [[Keelhaul Key]]. To reach the island, Mario enlists the help of [[Flavio]] and [[Admiral Bobbery]]. They sail to the island with some Toads, [[Pa-Patch]], and [[Lord Crump]] in disguise (known as "Four-Eyes"). On their way there, Mario and company are attacked by Cortez's [[Ember]]s, which shipwreck them on Keelhaul Key. Later on, some of the crew members are attacked by more Embers, and Bobbery sacrifices himself to save them. Bobbery says he is close to death, and after giving him [[Chuckola Cola (Paper Mario: The Thousand-Year Door)|his last request]], they find out that he just fell asleep. As soon as Mario wakes him, he joins Mario's party. With the aid of Bobbery, and Flavio's [[Skull Gem]], Mario and company enter Pirate's Grotto. After solving some puzzles, and gaining another [[Boat Mode|ability]] from a [[black chest]], they finally enter [[Cortez]]'s [[Black Skull|ship]]. Following a battle, Cortez gives Mario his [[Sapphire Star]]. Subsequently, Lord Crump abandons his disguise and tells Mario that he will attack him with [[X-Ship|his ship]]'s cannons until he hands over the Crystal Star. With the help of Cortez's ship and Flavio's Skull Gem, they defeat the invading X-Nauts, along with their leader. | |||
Back at the X-Naut base, Sir Grodus is ashamed of Lord Crump for failing him again, and orders him to stand by until then. Summoning another X-Naut, he orders him to tell the Shadow Sirens (without Vivian) to attack Mario again, without failing. TEC-XX wishes to gain access to a disk in [[Sir Grodus]]'s room, since he can't access the data of computers that aren't linked his network, and requests Peach to help him. When she gets into a lab, TEC gives her instructions to make a potion. After Peach turns invisible, she has no choice but to take off her clothes, so she can sneak in the base unnoticed. After entering Grodus's room, she secures the disk for TEC, and thus he promises to analyze the data. Peach then gets dressed and turns visible again with the green potion, then sends yet another e-mail to Mario, informing him of this development. | |||
Meanwhile, in Twilight Town, [[Bowser]], who is creeped out by the place, and [[Kammy Koopa]] run into Lord Crump, who is looking for the Superbombomb like Vivian was earlier. The three get into an argument, which escalates to an armed confrontation between the [[Koopa Troop]] and the X-Nauts. Bowser inadvertently ends up igniting the bomb after Lord Crump throws it at him, knocking out both armies. | |||
Back at Keelhaul Key, Cortez ferries Mario and his teammates to Rogueport. Mario gets the e-mail from Peach, telling them about what TEC is analyzing. Mario and his team then reveal the next Crystal Star's location, and visit Professor Frankly for information. | Back at Keelhaul Key, Cortez ferries Mario and his teammates to Rogueport. Mario gets the e-mail from Peach, telling them about what TEC is analyzing. Mario and his team then reveal the next Crystal Star's location, and visit Professor Frankly for information. | ||
| Line 168: | Line 182: | ||
''[[Cortez]], scourge of the seas... [[Mario]] soundly defeated this fearful spirit and claimed [[Sapphire Star|the Crystal Star]]. Perhaps the peaceful citizens of the world no longer need fear Cortez and his fell ship... The only problem remaining is how Mario will escape [[Keelhaul Key|this isolated island]]... And could there be another problem still, hiding beneath our hero's nose?'' | ''[[Cortez]], scourge of the seas... [[Mario]] soundly defeated this fearful spirit and claimed [[Sapphire Star|the Crystal Star]]. Perhaps the peaceful citizens of the world no longer need fear Cortez and his fell ship... The only problem remaining is how Mario will escape [[Keelhaul Key|this isolated island]]... And could there be another problem still, hiding beneath our hero's nose?'' | ||
</blockquote> | </blockquote> | ||
'''Names in other languages''' | '''Names in other languages''' | ||
{{foreign names | {{foreign names | ||
|Jap=ステージ5 トロピコアイランドの大海賊 | |Jap=ステージ5 トロピコアイランドの大海賊 | ||
|JapR=Sutēji 5: Toropiko Airando no Dai Kaizoku | |JapR=Sutēji 5: Toropiko Airando no Dai Kaizoku | ||
|JapM=Stage 5: The Great Pirate of the | |JapM=Stage 5: The Great Pirate of the Keelhaul Key | ||
|Spa=Acto 5: La isla del tesoro | |Spa=Acto 5: La isla del tesoro | ||
|SpaM=Act 5: Treasure Island | |SpaM=Act 5: Treasure Island | ||
|Ita=Scena V: Il grande pirata dell'Isola Tropico | |Ita=Scena V: Il grande pirata dell'Isola Tropico | ||
|ItaM=Scene 5: The Great Pirate of | |ItaM=Scene 5: The Great Pirate of Keelhaul Key | ||
|Ger=Kapitel 5: Der Schatz des Piraten | |Ger=Kapitel 5: Der Schatz des Piraten | ||
|GerM=Chapter 5: The pirate's treasure | |GerM=Chapter 5: The pirate's treasure | ||
| | |Fre=Chapitre 5: Pirate de Tropatroce | ||
| | |FreM=Chapter 5: Pirate of Keelhaul Key | ||
}} | }} | ||
===Chapter 6: 3 Days of Excess=== | ===Chapter 6: 3 Days of Excess=== | ||
[[File:PMTTYD Smorg screenshot.png|thumb|upright=1.1 | [[File:PMTTYD Smorg screenshot.png|thumb|upright=1.1|Mario meets the Smorgs.]] | ||
The [[Garnet Star|sixth Crystal Star]] is in [[Poshley Sanctum]] in the town [[Poshley Heights]]. The only way to | The [[Garnet Star|sixth Crystal Star]] is in [[Poshley Sanctum]], located in the ritzy town of [[Poshley Heights]]. The only way to get there is by riding on the famous [[Excess Express]]. After doing [[Don Pianta]] another favor, after which he retires from his position and gives it to Frankie, he gives Mario a train ticket. | ||
During the first day on the Excess Express, Mario and his team | During the first day on the Excess Express, Mario and his team witness several mysterious events, including thefts of items and messages threatening to blow up the train. On their second day of travel, [[Pennington]], a [[Bumpty|penguin]] detective, helps Mario and his friends solve the crimes, and together, they manage to capture a fake [[Zip Toad]] who was really Doopliss in disguise, and the one who attempted to halt the train by causing an explosion with some stolen items. At sundown, when the train stops at [[Riverside Station]] for refuel, Doopliss escapes capture. Mario and company find that the drawbridge has been lifted, preventing the Excess Express from continuing its route. The gang enters Riverside Station and flips the switch to bring the drawbridge back down. Also, they discover that a group of [[Smorg]]s had lifted the bridge. On the third and final day of the journey, a stowaway [[Smorg|Smorg monster]] attacks the train, kidnapping all of its passengers. Mario and his friends defeat the creature, rescuing the passengers in the process, and finally reach Poshley Heights. They venture into Poshley Sanctum, a museum that happens to belong to Pennington. The [[Shadow Sirens]], who happen to be already inside, snatch what appears to be the [[Garnet Star]] and flee. However, Pennington reveals that what they stole was a fake, and lets Mario find where the real Crystal Star is. After some exploring, Mario and company manage to find the real Garnet Star. | ||
[[File:Pennington.png|thumb|Pennington, the Penguin with the Improbably Large Brain | [[File:Pennington.png|thumb|Pennington, the "Penguin with the Improbably Large Brain"]] | ||
Back at the [[X-Naut]] base, the X-Nauts tell [[Grodus]] that Mario | Back at the [[X-Naut]] base, the X-Nauts tell [[Grodus]] that Mario now possesses six of the seven [[Crystal Stars]], and he is furious that his crew were fooled by the fake Crystal Star. They also tell him of TEC's betrayal. Just then, TEC makes the information he gained from Grodus's data disk known to the Princess, and prepares to help Peach escape. Before he is able to, and while Peach tries to send another e-mail to Mario, Grodus enters with two X-Nauts and orders them to initiate a data-wipe procedure of TEC's memory. TEC tells Peach "I love you" just before he is shut down. | ||
Meanwhile, Bowser is searching for another Crystal Star | Meanwhile, Bowser is searching for another Crystal Star, and upon clearing an [[World 3 (Paper Mario: The Thousand-Year Door)|underground course]] that resembles the [[Bowser's Castle]] levels, he reaches Rawk Hawk's workout room, where he stumbles across the [[Champ's Belt]]. Rawk Hawk performs a slide attack on Bowser, who quickly squishes him. He quickly learns that it does not bear a real Crystal Star, just a glass fake, just like Mario and his partners did in Chapter 3. Rawk Hawk informs Bowser that Gonzales (Mario) has it. | ||
Mario and his team return to [[Rogueport]] and receive an e-mail from Peach, telling them about what the X-Nauts plan to do with her, but | Mario and his team return to [[Rogueport]] and receive an e-mail from Peach, telling them about her being held on the [[Moon#Paper Mario: The Thousand-Year Door|moon]], and what the X-Nauts plan to do with her, but the last and most grim part of the message is cut off due to TEC being shut down. Back in Rogueport, Mario and company reveal the next Crystal Star's location and visit Professor Frankly for details. | ||
Chapter 6 appears to allude to ''{{wp|Murder on the Orient Express}}'', which also involves several peculiar passengers on a train where a crime takes place. | Chapter 6 appears to allude to ''{{wp|Murder on the Orient Express}}'', which also involves several peculiar passengers on a train where a crime takes place. | ||
| Line 201: | Line 214: | ||
''[[Mario]] found [[Garnet Star|the sixth Crystal Star]], hidden craftily in the [[Poshley Heights]] sanctum. Now only one [[Crystal Stars|Crystal Star]] remains... But our hero still does not know where [[Princess Peach]] is being held. Where could the last Crystal Star be? And where is Peach being held? Hoping this Crystal Star might yield answers, Mario and friends return to [[Pennington]].'' | ''[[Mario]] found [[Garnet Star|the sixth Crystal Star]], hidden craftily in the [[Poshley Heights]] sanctum. Now only one [[Crystal Stars|Crystal Star]] remains... But our hero still does not know where [[Princess Peach]] is being held. Where could the last Crystal Star be? And where is Peach being held? Hoping this Crystal Star might yield answers, Mario and friends return to [[Pennington]].'' | ||
</blockquote> | </blockquote> | ||
'''Names in other languages''' | '''Names in other languages''' | ||
{{foreign names | {{foreign names | ||
|Jap=ステージ6 リッチリッチエクスプレス3日間 | |Jap=ステージ6 リッチリッチエクスプレス3日間 | ||
|JapR=Sutēji 6: Ritchi Ritchi Ekusupuresu Mikka-kan | |JapR=Sutēji 6: Ritchi Ritchi Ekusupuresu Mikka-kan | ||
|JapM=Stage 6: The | |JapM=Stage 6: The Excess Express 3 days | ||
|Spa=Acto 6: Misterio en el Ricachón Exprés | |Spa=Acto 6: Misterio en el Ricachón Exprés | ||
|SpaM=Act 6: Mystery in the | |SpaM=Act 6: Mystery in the Excess Express | ||
|Ita=Scena VI: Tre giorni sul Fasto-Express | |Ita=Scena VI: Tre giorni sul Fasto-Express | ||
|ItaM=Scene 6: Three days on the | |ItaM=Scene 6: Three days on the Excess Express | ||
|Ger=Kapitel 6: Reise im Glimmer-Liner | |Ger=Kapitel 6: Reise im Glimmer-Liner | ||
|GerM=Chapter 6: Travel in the Excess Express | |GerM=Chapter 6: Travel in the Excess Express | ||
| | |Fre=Chapitre 6: Dans le Crésus Express! | ||
| | |FreM=Chapter 6: On the Excess Express! | ||
}} | }} | ||
===Chapter 7: Mario Shoots the Moon=== | ===Chapter 7: Mario Shoots the Moon=== | ||
[[File:General White.png|thumb|General White.]][[File:PMTTYD X-Naut Fortress screenshot.png|thumb|left|Mario in the X-Naut Fortress | [[File:General White.png|thumb|General White.]][[File:PMTTYD X-Naut Fortress screenshot.png|thumb|left|Mario and Koops in the X-Naut Fortress]] | ||
The last Crystal Star appears to be on the [[Moon#Paper Mario: The Thousand-Year Door|moon]]. To reach it, Mario and his companions travel to [[Fahr Outpost]] to find a [[big bomb cannon|cannon]] to shoot them there. After searching for [[Goldbob]] and [[General White]], whose blessings are needed to operate the firearm, Mario and company enter the cannon and are shot to the moon. | |||
Once there, the group discovers the [[X-Naut Fortress]]. After arriving at its deepest part, they face Lord Crump, who brags about his latest creation — [[Magnus von Grapple 2.0]], and tries once again to defeat Mario and company. Even so, he is thwarted, and the [[Crystal Star]] in his possession is claimed by them. | |||
At the same time, Bowser is looking for another Crystal Star in the Poshley Sanctum. A [[Paragoomba]] flies in and reports to Bowser that Mario has collected every Crystal Star and is heading for the Thousand-Year Door, which contains a great treasure. Bowser announces that he will steal this treasure and trounce Mario. | |||
As Mario and his allies prepare to leave the fortress, they discover that all of the doors have been locked, except for one. In this room, the heroes find TEC, who is running on backup power. He recognizes Mario and tells him to rescue the Princess, who has been taken to the [[Palace of Shadow]], a place that lies beyond the Thousand-Year Door. He then activates an emergency transporter. The group is transported to a room in [[Rogueport Sewers]]. After exiting the room, Professor Frankly meets them | As Mario and his allies prepare to leave the fortress, they discover that all of the doors have been locked, except for one. In this room, the heroes find TEC, who is running on backup power. He recognizes Mario and tells him to rescue the Princess, who has been taken to the [[Palace of Shadow]], a place that lies beyond the Thousand-Year Door. He then activates an emergency transporter, which Mario and company employ, right before the fortress explodes, along with TEC. The group is transported to a room in [[Rogueport Sewers]]. After exiting the room, Doopliss disguised as Professor Frankly meets them and urges them to open the Thousand-Year Door, lying that Grodus went through it with Peach. | ||
'''Storyline text''' | '''Storyline text''' | ||
| Line 229: | Line 242: | ||
''[[Crystal Star|The last Crystal Star]] had been hidden in [[X-Naut Fortress|the X-Naut hideout]] on the [[moon]]... But by the time [[Mario]] recovered it, [[Princess Peach|Peach]] had already been taken away... Where could Peach be now? And what of the elusive [[Grodus]]? Perhaps he holds the key to the remaining puzzle... Mario finally has all seven [[Crystal Stars]]... Where will they lead him next?'' | ''[[Crystal Star|The last Crystal Star]] had been hidden in [[X-Naut Fortress|the X-Naut hideout]] on the [[moon]]... But by the time [[Mario]] recovered it, [[Princess Peach|Peach]] had already been taken away... Where could Peach be now? And what of the elusive [[Grodus]]? Perhaps he holds the key to the remaining puzzle... Mario finally has all seven [[Crystal Stars]]... Where will they lead him next?'' | ||
</blockquote> | </blockquote> | ||
'''Names in other languages''' | '''Names in other languages''' | ||
{{foreign names | {{foreign names | ||
| Line 241: | Line 253: | ||
|Ger=Kapitel 7: Der Weg zum Mond | |Ger=Kapitel 7: Der Weg zum Mond | ||
|GerM=Chapter 7: The Way to the Moon | |GerM=Chapter 7: The Way to the Moon | ||
| | |Fre=Chapitre 7: Voyage sur la Lune | ||
| | |FreM=Chapter 7: Journey to the Moon | ||
}} | }} | ||
===Chapter 8: The Thousand-Year Door=== | ===Chapter 8: The Thousand-Year Door=== | ||
[[File:PMTTYD Shadow Queen closeup.png|thumb|upright=1.4|The queen is unleashed.]]After Mario has | [[File:PMTTYD Shadow Queen closeup.png|thumb|upright=1.4|The queen is unleashed.]] | ||
After Mario has obtained all seven [[Crystal Stars]], the time has come to open [[the Thousand-Year Door]] and enter the [[Palace of Shadow]] to rescue [[Princess Peach]] from [[Sir Grodus]]. | |||
Mario and his friends open the Thousand-Year Door with the seven Crystal Stars, allowing them to enter the [[Palace of Shadow]]. The palace itself is full of enemies, puzzles, and traps. Eventually, Mario and | Mario and his friends open the Thousand-Year Door with the seven Crystal Stars, allowing them to enter the [[Palace of Shadow]]. The palace itself is full of enemies, puzzles, and traps. Eventually, Mario and company battle and beat a dragon named [[Gloomtail]], Hooktail's older brother, this way making him relinquish the key to access the [[Riddle Tower]]. Upon solving the Tower's puzzles, a secret passage — which leads deeper into the Palace — is opened. Mario and his party continue down that path, but not before defeating the [[Shadow Sirens]], who try to get rid of them. Finally, Mario and company enter the throne room of the Palace, where they confront [[Sir Grodus]], whom they engage in a long and difficult battle. They are able to best him, yet Grodus reveals a captive Peach, whom he uses as a hostage to freely attack Mario and company. Suddenly, [[Bowser]] and [[Kammy]] drop in unexpectedly and land on top of Grodus. The duo seizes the opportunity to fight Mario, but are foiled in the end. Nevertheless, Grodus uses the distraction of the battle to bring Princess Peach into the deepest part of the Palace. There, he opens a sealed coffin and frees the [[Shadow Queen]], the ancient demon of legend. [[Beldam]] appears all of a sudden and announces that she was the one who orchestrated the plot to free her mistress. The Shadow Queen refuses to be controlled by Grodus, and fries him with a lightning bolt, apparently killing him, leaving only his head. The Queen proceeds to possess Princess Peach, using her as a vessel to sustain her life. The world is then covered in darkness. Mario and his allies challenge the Queen, but she eventually decides to fight in her real form, in which she is invincible. She proves too much for the group to handle, until the Crystal Stars abruptly react to the evil of the Queen and fly throughout the world, each returning to where they were found, giving the people of the world a chance to cheer on Mario and his party. Their hope breaks through the Queen's invulnerability, and this also lets Peach give the heroes the last of her power. Strengthened, the heroes seal the Shadow Queen forever, saving the world. | ||
[[File: | [[File:PMTTYD Farewell to friends.png|thumb|250px|Princess Peach bids farewell to Mario's friends.]] | ||
[[Goombella]] later sends Mario a message, explaining what everyone has done: she now works with Professor Frankly, while [[Koops]] plans on becoming the mayor of Petalburg. [[Flurrie]] has returned to the stage and enacts "Paper Mario" as her comeback smash, and Doopliss plays the role of Mario. The [[Mini-Yoshi|Yoshi]] fights in the Glitz Pit as the "Great Gonzales Jr.", whereas [[Vivian]] has forgiven her sisters and lives in Twilight Town. [[Admiral Bobbery]] sails the seas with Cortez, and [[Ms. Mowz]] still runs her [[Lovely Howz of Badges]]. [[Lord Crump]], Grodus and the [[X-Naut]]s survived and are spending their time, without causing trouble, in [[Poshley Heights]]. Somehow, TEC survived as well, and hopes to see the Princess again one day. The game ends when the Princess visits the Mario Bros. with another treasure map, and requests Mario's help in finding it. | |||
'''Names in other languages''' | '''Names in other languages''' | ||
| Line 256: | Line 270: | ||
|Jap=ステージ8 スターストーンと伝説の宝 | |Jap=ステージ8 スターストーンと伝説の宝 | ||
|JapR=Sutēji 8: Sutā Sutōn to Densetsu no Takara | |JapR=Sutēji 8: Sutā Sutōn to Densetsu no Takara | ||
|JapM=Stage 8: The | |JapM=Stage 8: The Crystal Stars and the Legendary Treasure | ||
|Spa=Acto 8: El destino en sus manos | |Spa=Acto 8: El destino en sus manos | ||
|SpaM=Act 8: The fate in their hands | |SpaM=Act 8: The fate in their hands | ||
|Ita=Scena VIII: Le Gemme Stella e il Tesoro Leggendario | |Ita=Scena VIII: Le Gemme Stella e il Tesoro Leggendario | ||
|ItaM=Scene 8: The | |ItaM=Scene 8: The Crystals Stars and the Legendary Treasure | ||
|Ger=Kapitel 8: Die Legende vom Schatz | |Ger=Kapitel 8: Die Legende vom Schatz | ||
|GerM=Chapter 8: The treasure's legend | |GerM=Chapter 8: The treasure's legend | ||
| | |Fre=Chapitre 8: Le trésor légendaire | ||
| | |FreM=Chapter 8: The legendary treasure | ||
}} | }} | ||
==Gameplay== | ==Gameplay== | ||
[[File:PMTTYD Background.png|thumb|Mario wandering around in the background scenery.]] | |||
''Paper Mario: The Thousand-Year Door'' brings over all the core mechanics of the Nintendo 64 original, with the absence of the [[Spin Dash]] being the most notable exception in the overworld. All other moves return, as well as the party member system, and once again partners can be used outside of battle to overcome obstacles and reach items from a distance. Several partners have the same abilities to ones seen in ''Paper Mario'', like [[Koops]] being the counterpart of [[Kooper]]. | |||
The | An element introduced in ''Paper Mario: The Thousand-Year Door'' is the capability to explore backgrounds, which are accessible to Mario through certain pipes. These sections are entirely 2D, working as short side-scrolling platforming sections. Several places which only appear in the background can be visited this way, some of which include Hooktail Castle, the Great Tree, the X-Naut Fortress, and [[Merlee]]'s house in the Rogueport Sewers. This feature was carried over to the next game in the series, ''[[Super Paper Mario]]''. Certain abilities are disabled here, however: Mario's partners cannot be used in the background, Mario cannot move to a different screen/area, and he also cannot walk past any buildings. | ||
While the game features turn-based battles like ''Paper Mario'', these went through the most noticeable changes in gameplay. Unlike the original, where partners had a simple fine/injured status system, this game gives partners their own Heart Points. As such, partners can fall in battle, and items such as the [[Mushroom]] can be used on them as well. Battles also take place on a stage, which incorporates the [[audience]] and scenery hazard elements to them. More information is available in the [[Paper Mario: The Thousand-Year Door#Battle system|battle system]] section. | |||
''Paper Mario | |||
=== | ===Controls=== | ||
[[File:PMTTYD | {|width=100% | ||
|width=33% style="vertical-align:top;"| | |||
'''Overworld''' | |||
*{{button|gcn|stick}} – Move | |||
*{{button|gcn|a}} – Jump / Interact | |||
**{{button|gcn|a}} + {{button|gcn|a}} – Spin Jump | |||
**{{button|gcn|a}} + {{button|gcn|stick}} (rotate) – Spring Jump | |||
*{{button|gcn|b}} – Hammer | |||
**{{button|gcn|b}} + {{button|gcn|stick}} (rotate) – Spinning hammer | |||
*{{button|gcn|r}} – Paper Mode | |||
**{{button|gcn|r}} + {{button|gcn|stick}} (rotate) – Tube Mode | |||
*{{button|gcn|x}} – Partner ability | |||
*{{button|gcn|y}} (on panel) – Plane Mode/Boat Mode | |||
*{{button|gcn|start}} – Open menu | |||
*{{button|gcn|Pad}} – Open menu | |||
|width=33% style="vertical-align:top;"| | |||
'''Menu''' | |||
*{{button|gcn|stick}} – Move cursor | |||
*{{button|gcn|a}} – Select | |||
*{{button|gcn|b}} – Return | |||
*{{button|gcn|c}} (up/down) – Scroll text | |||
'''Battle''' | |||
*{{button|gcn|stick}} – Move cursor / Action Commands | |||
*{{button|gcn|a}} – Select / Action Commands / Guard | |||
*{{button|gcn|b}} – Cancel / Action Commands / Superguard | |||
*{{button|gcn|y}} – Change attack order | |||
*{{button|gcn|x}} – Attack audience member | |||
|width=33% style="vertical-align:top;"| | |||
'''Peach intermissions''' | |||
*{{button|gcn|stick}} – Move | |||
*{{button|gcn|a}} – Interact | |||
'''Bowser intermissions''' | |||
*{{button|gcn|stick}} – Move | |||
*{{button|gcn|a}} – Jump | |||
**{{button|gcn|a}} + {{button|gcn|a}} – Ground Pound | |||
*{{button|gcn|b}} – Fire Breath | |||
|} | |||
===Mario's stats=== | |||
{|width=90% align="center" cellpadding=8 cellspacing=1 style="margin:auto; text-align:center; border:1px solid lightgray" | |||
|-style="background:lightgray" | |||
|width=10% rowspan=12|[[File:PMTTYD Mario Idle Sprite.png|80px]]<br><br>[[File:PMTTYD Mario Menu Icon.png|72px|link=Mario]] | |||
!width=12% colspan=2|Stat | |||
!width=4%|Initial value | |||
!width=4%|Min. value | |||
!width=4%|Max. value | |||
!Description | |||
|-style="background:#f8f9fa | |||
|width=2%|[[File:PMTTYD level icon.png|20px]] | |||
|[[Level up|Level]] | |||
|colspan=2|1 | |||
|99 | |||
|align=left|Indicates Mario's progress, increased by 1 every time he collects 100 [[Star Point]]s. | |||
|- | |||
|[[File:PMTTYD rank icon.png]] | |||
|[[Rank|Star rank]] | |||
|colspan=2|Rising star | |||
|Superstar | |||
|align=left|Determines the maximum attendance of the audience. | |||
*Levels 1-9: '''Rising star''' | |||
*Levels 10-19: '''B-list star''' | |||
*Levels 20-29: '''A-list star''' | |||
*Levels 30-99: '''Superstar''' | |||
|-style="background:#f7d2d8 | |||
|[[File:Heart Point.png|20px]] | |||
|[[Heart Point|HP]] | |||
|10 | |||
|5 | |||
|200{{footnote|main|*}} | |||
|align=left|Mario's health. Can be increased by 5 when Mario levels up, and with [[HP Plus (badge)|HP Plus]] badges. | |||
|-style="background:#fcf7d7 | |||
|[[File:Flower Point.png|20px]] | |||
|[[Flower Point|FP]] | |||
|colspan=2|5 | |||
|200{{footnote|main|*}} | |||
|align=left|Mario's reserve for moves. Can be increased by 5 when Mario levels up, and with [[FP Plus]] badges. | |||
|-style="background:#dfeef2 | |||
|[[File:BadgePointPM2.png|20px]] | |||
|[[Badge Point|BP]] | |||
|colspan=2|3 | |||
|99{{footnote|main|*}} | |||
|align=left|Mario's capacity to equip [[Badge]]s. Can be increased by 3 when Mario levels up. | |||
|- | |||
|[[File:PMTTYD SP.png|20px]] | |||
|[[Star Power]] | |||
|colspan=2|0 | |||
|8 | |||
|align=left|Mario's capacity to perform [[Paper Mario: The Thousand-Year Door#Crystal Stars|special moves]], increased by 1 everytime he collects a [[Crystal Stars|Crystal Star]]. | |||
|-style="background:#f8f9fa | |||
|[[File:Starpoint.gif|20px]] | |||
|[[Star Point]]s | |||
|colspan=2|0 | |||
|99 | |||
|align=left|Points obtained by winning battles that level Mario up if he collects 100 of them. | |||
|- | |||
|[[File:SPMCoin.gif|20px]] | |||
|[[Coin]]s | |||
|100 | |||
|0 | |||
|999 | |||
|align=left|Used to buy items, badges and services. | |||
|-style="background:#f8f9fa | |||
|[[File:PMTTYD-Star-Piece-icon.gif|20px]] | |||
|[[Star Piece (Paper Mario series)|Star Piece]]s | |||
|colspan=2|0 | |||
|100 | |||
|align=left|Collectibles that can be traded for badges with [[Dazzle]]. | |||
|- | |||
|[[File:Shine Sprite TTYD.png|20px]] | |||
|[[Shine Sprite]]s | |||
|colspan=2|0 | |||
|42 | |||
|align=left|Collectibles that can be traded for partner level-ups with [[Merlon]]. | |||
|-style="background:#f8f9fa | |||
|[[File:PMTTYD time icon.png|20px]] | |||
|Play time | |||
|colspan=2|00:00 | |||
|99:59 | |||
|align=left|Amount of time spent on the save file. | |||
|} | |||
{{footnote|note|*|Maximum HP, FP and BP are not mutually achievable.}} | |||
====Boots and hammer==== | |||
Mario begins the game equipped with his basic [[Boots]] and [[Hammer]], which grant no special abilities in the overworld, and deal the least amount of damage in battle (1 point for a normal attack, and 2 points with a successful action command). The player will find upgraded versions of both as they progress, which are mandatory as they allow access to important areas. | |||
<center> | |||
{|width=95% cellspacing=0 border=1 cellpadding=3 class="wikitable"style="border-collapse:collapse;" | |||
|- | |||
!width=8%|Image | |||
!width=15%|Equipment | |||
!width=20%|Location found | |||
!Additional abilities | |||
|- | |||
|align=center|[[File:Boots TTYD.png|50px]] | |||
|align=center|'''[[Boots]]''' | |||
|Equipped from the start | |||
| | |||
*'''Overworld:''' Allows Mario to perform simple [[jump]]s only. | |||
*'''Battle:''' Allows Mario to perform only a simple jump attack for no FP, which deals a base 1 point of damage. | |||
|- | |||
|align=center|[[File:Super Boots.png|50px]] | |||
|align=center|'''[[Super Boots]]''' | |||
|[[The Great Tree]] (Chapter 2) | |||
| | |||
*'''Overworld:''' Allows Mario to perform a [[Ground Pound|Spin Jump]] to break through trapdoors and press big switches. | |||
*'''Battle:''' Allows Mario to perform a Spin Jump for 2 FP, which deals a base 2 points of damage. | |||
|- | |||
|align=center|[[File:Ultra Boots TTYD.png|50px]] | |||
|align=center|'''[[Ultra Boots]]''' | |||
|[[Riverside Station]] (Chapter 6) | |||
| | |||
*'''Overworld:''' Allows Mario to perform a [[Spring Jump]] to reach high points and cling onto pipes and bars. | |||
*'''Battle:''' Allows Mario to perform a Spring Jump for 4 FP, which deals a base 3 points of damage. | |||
|- | |||
|align=center|[[File:Hammer TTYD.png|40px]] | |||
|align=center|'''[[Hammer]]''' | |||
|Equipped from the start | |||
| | |||
*'''Overworld:''' Allows Mario to perform a basic hammer attack that breaks small [[yellow block]]s. | |||
*'''Battle:''' Allows Mario to perform only a simple hammer attack for no FP, which deals a base 1 point of damage. | |||
|- | |||
|align=center|[[File:Super Hammer TTYD.png|40px]] | |||
|align=center|'''[[Super Hammer]]''' | |||
|[[Glitzville]] (Chapter 3) | |||
| | |||
*'''Overworld:''' Allows Mario to break big [[yellow block]]s. | |||
*'''Battle:''' Allows Mario to perform a Super Hammer move for 2 FP, which knocks the enemy in front into others behind it, dealing them 1 point of damage each. | |||
|- | |||
|align=center|[[File:Ultra Hammer TTYD.png|40px]] | |||
|align=center|'''[[Ultra Hammer]]''' | |||
|[[Rogueport]] (Ultra Boots required) | |||
| | |||
*'''Overworld:''' Allows Mario to break [[stone block]]s. | |||
*'''Battle:''' Allows Mario to perform an Ultra Hammer move for 4 FP, which knocks the enemy in front into others behind it, dealing them 3 points of damage each. | |||
|} | |||
</center> | |||
====Paper abilities==== | |||
Like the boots and hammer upgrades, the player encounters [[black chest]]s throughout the story, whose beings trapped inside give Mario special abilities to use in the overworld upon release. All of these abilities are based on the paper element of the game's graphics. | |||
<center> | |||
{|width=95% cellspacing=0 border=1 cellpadding=3 class="wikitable"style="border-collapse:collapse;" | |||
|- | |||
!width=8%|Icon | |||
!width=8%|Paper ability | |||
!width=20%|Location received | |||
!Ability gained | |||
|- | |||
|align=center|[[File:PMTTYD plane icon.png]] | |||
|style="text-align:center;"|[[Plane Mode]] | |||
|[[Rogueport Sewers]] (Prologue) | |||
|Allows Mario to fold himself into a paper airplane while standing on marked platforms called [[plane panel]]s, granting him the ability to fly over large gaps. | |||
|- | |||
|align=center|[[File:PMTTYD paper icon.png]] | |||
|style="text-align:center;"|[[Paper Mode]] | |||
|[[Hooktail Castle]] (Chapter 1) | |||
|Allows Mario to turn sideways. Due to being paper-thin, he is able to squeeze through certain narrow passages. | |||
|- | |||
|align=center|[[File:PMTTYD tube icon.png]] | |||
|style="text-align:center;"|[[Tube Mode]] | |||
|[[Twilight Town]] (Chapter 4) | |||
|Allows Mario to roll up into a short tube, this way being able to fit in low passageways. | |||
|- | |||
|align=center|[[File:PMTTYD boat icon.png]] | |||
|style="text-align:center;"|[[Boat Mode]] | |||
|[[Pirate's Grotto]] (Chapter 5) | |||
|Allows Mario can turn into a paper boat while standing on wooden docks called [[boat panel]]s, granting him the ability to cross bodies of water. | |||
|} | |||
<gallery> | |||
File:PMTTYD Mario airplane.png|Plane Mode | |||
File:PMTTYD Paper Mode First Obstacle.png|Paper Mode | |||
File:Tube Mode PMTTYD.png|Tube Mode | |||
File:Boat Mario.png|Boat Mode | |||
</gallery> | |||
</center> | |||
{{br}} | |||
===Objects=== | |||
{{Construction}} | |||
{|width=100% | |||
|width=50% style="vertical-align:top;"| | |||
'''Assistance objects''' | |||
{|width=100% cellspacing=0 border=1 cellpadding=3 class="wikitable"style="border-collapse:collapse;text-align:center" | |||
|- | |||
!width=9%|Image | |||
!width=20%|Object | |||
!width=71%|Description | |||
|- | |||
|[[File:PMTTYD Question Mark Block Sprite.png|40px]] | |||
|[[? Block]] | |||
|align=left|Common blocks that contain coins or items. Red ? Blocks contain badges. | |||
|- | |||
|[[File:Boat Panel.png|40px]] | |||
|[[Boat panel]] | |||
|align=left|Wooden platforms by bodies of water. Allow Mario to use the [[Boat Mode]] once he learns it. | |||
|- | |||
|[[File:PMTTYD brick block.png|40px]] | |||
|[[Brick Block]] | |||
|align=left|Common, breakable blocks. | |||
|- | |||
|[[File:PMTTYDHeartBlock.png|40px]] | |||
|[[Recovery block|Heart Block]] | |||
|align=left|Found in several key locations, these blocks allow the player to completely recover Mario's HP and FP for a variable amount of coins. | |||
|- | |||
|[[File:PMTTYD jump pad.png|40px]] | |||
|[[Trampoline|Jump pad]] | |||
|align=left|Springy platforms that make Mario jump higher. Red variants bounce Mario all the way to another section of the level. | |||
|- | |||
|[[File:Plane Panel.png|40px]] | |||
|[[Plane panel]] | |||
|align=left|Platforms in elevated places. Allow Mario to use the [[Plane Mode]] once he learns it. | |||
|- | |||
|[[File:PMTTYDSaveBlock.png|40px]] | |||
|[[Save Block]] | |||
|align=left|Found in several key locations, these blocks allow the player to save the game state when hit. | |||
|- | |||
|[[File:PMTTYD Shine Block.png|40px]] | |||
|[[Shine Block]] | |||
|align=left|Special blocks that contain a [[Shine Sprite]]. | |||
|- | |||
|[[File:PMTTYD chest.png|40px]] | |||
|[[Treasure chest]] | |||
|align=left|Uncommon objects that hold badges and important items. Large treasure chests contain upgraded boots and hammers. | |||
|- | |||
|[[File:Blue Pipe.png|40px]] | |||
|[[Warp Pipe]] | |||
|align=left|Serve as a travel method between two different areas. While ordinary ones are green, blue Warp Pipes connect remote locations. Other colors are occasionally used for different areas. | |||
|} | |||
|width=50% style="vertical-align:top;"| | |||
'''Obstacles''' | |||
{|width=100% cellspacing=0 border=1 cellpadding=3 class="wikitable"style="border-collapse:collapse;text-align:center" | |||
|- | |||
!width=9%|Image | |||
!width=20%|Object | |||
!width=71%|Description | |||
|- | |||
!colspan=3|Blocks | |||
|- | |||
|[[File:PMTTYD yellow block.png|40px]] | |||
|[[Yellow block]] | |||
|align=left|Blocks that can be destroyed with Mario's basic hammer move. | |||
|- | |||
|[[File:PMTTYD big yellow block.png|40px]] | |||
|Yellow block (giant) | |||
|align=left|Blocks that can be destroyed with Mario's spinning hammer move, available when he acquires the Super Hammer. | |||
|- | |||
|[[File:Ttyd stoneblock.png|40px]] | |||
|[[Stone block]] | |||
|align=left|Blocks that can be destroyed with Mario's [[Ultra Hammer]]. | |||
|- | |||
|[[File:Giantstoneblock.png|40px]] | |||
|Stone block (giant) | |||
|align=left|Blocks that can be destroyed with Mario's spinning Ultra Hammer. | |||
|- | |||
|[[File:Ttyd metalblock.png|40px]] | |||
|[[Metal block]] | |||
|align=left|Rare blocks that cannot be destroyed normally. | |||
|- | |||
!colspan=3|Miscellaneous | |||
|- | |||
|[[File:PMTTYD ! Switch.png|40px]] | |||
|[[! Switch]] | |||
|align=left|Switches that causes an event to happen. Blue variants cause permanent changes; red ones are temporary and do not disappear. | |||
|} | |||
|} | |||
===Intermissions=== | ===Intermissions=== | ||
After each Chapter is completed, two intermission scenes precede the beginning of the next. The player can save their progress before and after each intermission. | |||
After each | |||
== | ====Princess Peach intermissions==== | ||
[[File:PMTTYD Peach TEC-XX First Encounter.png|thumb|left|Princess Peach encountering TEC-XX for the first time]] | |||
The first intermission after each chapter allows the player to control [[Princess Peach]], similarly to the intermissions from ''Paper Mario''. These intermissions follow Peach as she is held captive in the [[X-Naut Fortress]], as well as her interactions with the fortress's main computer, [[TEC-XX]], who had a malfunction upon discovering her, causing him to fall in love with her. The intermissions also provide more context to the [[X-Nauts (organization)|X-Nauts]], their motive for kidnapping Peach, and their greater overall plans. At the end of each intermission, Peach sends a message to [[Mario]]'s [[Mailbox SP]] with TEC-XX's assistance. | |||
{{br}} | |||
[[ | ====Bowser intermissions==== | ||
[[File:PMTTYD Bowser intermission.png|thumb|Bowser in World 1]] | |||
The Peach intermission is followed by a [[Bowser]] intermission, a new addition to ''Paper Mario: The Thousand-Year Door''. These intermissions serve as {{wp|comic relief}} to contrast the more serious nature of the Peach sequences. Each intermission follows Bowser and [[Kammy Koopa]]; having discovered that Mario is collecting the [[Crystal Stars]] and Princess Peach has been kidnapped, Bowser sets off to find the Crystal Stars first and kidnap Peach himself. However, he usually visits the places Mario has been to one chapter before, and his search for Peach and the Crystal Stars in each location he visits ends to no avail. | |||
[[ | The Bowser intermissions at the end of Chapter 2, Chapter 4, and Chapter 6 include a side-scrolling [[Genre#Platform|platformer]] level in the style of ''[[Super Mario Bros.]]'' The levels are called [[World 1 (Paper Mario: The Thousand-Year Door)|World 1-X]], [[World 2 (Paper Mario: The Thousand-Year Door)|World 2-X]], and [[World 3 (Paper Mario: The Thousand-Year Door)|World 3-X]], in reference to the world numbering of ''Super Mario Bros.'', with the X being replaced by the number of attempts Bowser has used for the level. Bowser has unlimited [[Extra life|lives]] during each level. Each level is themed after a basic environment from ''Super Mario Bros.'' and plays an arrangement of music from that game. Each level also has a [[Time Limit|time limit]] of 180 seconds, which kills Bowser if time runs out. If only 30 seconds remain, the "Hurry up!" jingle from ''Super Mario Bros.'' plays and the music speeds up. Bowser can also earn [[point]]s and collect [[coin]]s in these levels; however, these elements have no effect on gameplay. Each coin Bowser collects is worth 500 points, with the coin count being retained after dying. If the coin count reaches 99, it simply reverts to 0 upon collecting the next coin, without any special effect. | ||
In these levels, Bowser can press {{button|gcn|A}} to jump, and can perform a [[Ground Pound]] by pressing {{button|gcn|A}} again in mid-air. He also has the ability to breathe fire by holding {{button|gcn|B}}, which can defeat enemies and destroy blocks, although he cannot breathe fire in mid-air. The only [[item]] that appears in these levels is [[Meat]], which allows Bowser to radically increase his size and take an extra hit from hazards, similar to the effects of a [[Super Mushroom]]. However, touching [[lava]] or falling into a [[Pit|bottomless pit]] immediately kills Bowser. Bowser has four possible sizes: | |||
*An extremely small size, which Bowser reverts to after taking a hit while at his default size. | |||
[[ | *A medium size, the default size at which Bowser starts each level. | ||
*A large size, which Bowser grows to after using a piece of Meat from his default size. At this size, Bowser flattens enemies if he stomps on them. | |||
*A gigantic size, which Bowser grows to after using a piece of Meat from his large size. At this size, Bowser starts flashing yellow and becomes [[Invincible Mario|invincible]] similarly to [[Mega Mario]], allowing him to crush everything in his way, including enemies, blocks, and [[Warp Pipe]]s. | |||
Enemies react to Bowser in different ways: while [[X-Naut]]s charge at Bowser, [[Goomba]]s are scared by him and run away when he approaches them. The end of each level features a [[Goal Pole|flagpole]]; reaching it completes the level and briefly displays the word "FINISH". There is also a small [[castle]] next to the flagpole, as another reference to ''Super Mario Bros.'' If Bowser is at an extremely small or medium size, he descends the flagpole and enters the castle; however, if he is large or gigantic, he destroys the flagpole and simply stands next to the castle. | |||
[[ | |||
[[ | |||
Bowser says a short line when beginning each new attempt of a level.<ref>[https://dialoguetree.net/ttyd/?bowser02 Dialogue Tree - Paper Mario: The Thousand-Year Door]</ref> Below is each line in order: | |||
The | |||
{|width=100% class="wikitable mw-collapsible mw-collapsed"style="border-collapse:collapse; margin:0;" | |||
|- | |||
!colspan=5|Bowser's starting lines | |||
|- | |||
| | |||
<div style="column-count:3"> | |||
#Ready to roll! | |||
#Lemme at 'em! | |||
#Inconceivable! (World 1 and World 3)/Watery ears! (World 2 only) | |||
#I'm on fire! | |||
#I'm hungry! | |||
#Next time! | |||
#Ain't over yet! | |||
#Charge! (World 1 and World 3)/Beware squids! (World 2 only) | |||
#Good to go! | |||
#Relax! | |||
#Hoo... I'm tired. | |||
#Still in it! | |||
#Rampage time! | |||
#Eh... OK. | |||
#Go time! | |||
#Feel it! | |||
#I'm sleepy... | |||
#Timing, baby! | |||
#Rhythm, baby! | |||
#Feeling good! | |||
#Concentrate! | |||
#GAAAAAAAH! | |||
#Too close! | |||
#Last...gasp! | |||
#Break time. | |||
#Here goes! | |||
#Once more! | |||
#I'm still OK! | |||
#Never give up! | |||
#Gotta do it! | |||
</div> | |||
|} | |||
After 30 attempts, Bowser will always say "Gotta do it!" when beginning each subsequent attempt. | |||
== | ==Party members== | ||
On his adventure, [[Mario]], just like the past game, uses partners. They possess diverse abilities, useful both in and out of battle. [[Merlon]] can upgrade a partner by giving him 3 [[Shine Sprite]]s. Every partner knows two moves at the time of joining the party, learns the third after being upgraded to Super Rank, and masters the final move upon attaining Ultra Rank. Initially, each partner may only be upgraded once, but if Mario finds the [[Up Arrow]] in Hooktail's Castle and shows it to Merlon, the wizard will remember that he has an [[Ultra Stone]], subsequently allowing the player to upgrade a partner for a second time. | |||
In the following table, attributes attained by leveling up to Super Rank are indicated by [[File:Shine Sprite TTYD.png|15px]]. Attributes attained by leveling up to Ultra Rank are indicated by [[File:Shine Sprite TTYD.png|15px]][[File:Shine Sprite TTYD.png|15px]]. | |||
{| | <center> | ||
{|style="width:80%;margin:0 auto;border-collapse:collapse;border:silver;"border="1"cellpadding="4"cellspacing="1" | |||
|-style="background-color:silver;" | |||
!width=14%|Name | |||
!Joins in | |||
!width=60%|Summary | |||
!width=12%|HP | |||
|- | |- | ||
! | !rowspan=2|[[File:PMTTYD Goombella Sprite.png|80px]]<br>'''[[Goombella]] | ||
|[[Rogueport]]<br>(Prologue) | |||
|A sassy [[Goomba]] who studies at the [[List of implied organizations#University of Goom|University of Goom]]. She is the first character to join Mario (shortly after he defeats [[Lord Crump]]), since she, too, is looking for the legendary treasure. She has the same ability to uncover an [[Paper Mario: The Thousand-Year Door bestiary|enemy's stats]] as [[Goombario]] does. | |||
|10<br>20 [[File:Shine Sprite TTYD.png|15px]]<br>30 [[File:Shine Sprite TTYD.png|15px]][[File:Shine Sprite TTYD.png|15px]] | |||
|- | |- | ||
|colspan=3| | |||
| | {|style="width:100%;margin:0 auto;border-collapse:collapse;border:silver;" class="mw-collapsible mw-collapsed" border="1"cellpadding="4"cellspacing="1" | ||
|- | |- | ||
| | !colspan=2 style="background-color:silver;"|Goombella's abilities | ||
|- | |- | ||
| [[ | |align=center width=16%|'''[[Headbonk]]'''<br>0 FP | ||
|Hits one enemy twice. Does not work on fire enemies, or those with a spiky top. | |||
|- | |- | ||
| [[ | |align=center|'''[[Tattle]]'''<br>0 FP | ||
|Analyzes one enemy and reveals their [[Heart Point|HP]] and other statistics. | |||
|- | |- | ||
! rowspan= | |align=center|'''[[Multibonk]]''' [[File:Shine Sprite TTYD.png|15px]]<br>3 FP | ||
| | |Attacks one enemy repeatedly for diminishing damage (minimum 1 HP per hit). Does not work on fire enemies, or those with a spiky top. | ||
|- | |||
|align=center|'''[[Rally Wink]]''' [[File:Shine Sprite TTYD.png|15px]][[File:Shine Sprite TTYD.png|15px]]<br>4 FP||Allows [[Mario]] to perform a second action, at the expense of her own. | |||
| [[ | |} | ||
|- | |||
!rowspan=2|[[File:KoopsPMTTYD.png|80px]]<br>'''[[Koops]] | |||
|[[Petalburg]]<br>(Chapter 1) | |||
|A timid Koopa Troopa who lives in [[Petalburg]]. To prove to Petalburg that he is not a coward, and to avenge the death of his father, [[Koopley]], he joins Mario's team. He has the same ability [[Kooper]] has outside of battle: using his shell toss move to activate switches, grab items and attack enemies, but with a slight upgrade — he can hold his shell in place and then launch it back in the opposite direction. Koops has a Defense Power of 1. | |||
|10<br>15 [[File:Shine Sprite TTYD.png|15px]]<br>25 [[File:Shine Sprite TTYD.png|15px]][[File:Shine Sprite TTYD.png|15px]] | |||
|- | |||
|colspan=3| | |||
{|style="width:100%;margin:0 auto;border-collapse:collapse;border:silver;" class="mw-collapsible mw-collapsed" border="1"cellpadding="4"cellspacing="1" | |||
|- | |||
!colspan=2 style="background-color:silver;"|Koops' abilities | |||
|- | |||
|align=center width=16%|'''[[Shell Toss]]'''<br>0 FP | |||
|Attacks the frontmost ground-bound or low-hovering enemy. Does not take contact damage from spikes, fire, or electrification. | |||
|- | |||
|align=center|'''[[Power Shell]]'''<br>3 FP | |||
|Attacks all ground-bound and low-hovering enemies. Does not take contact damage from spikes, fire, or electrification. | |||
|- | |||
|align=center|'''[[Shell Shield]]''' [[File:Shine Sprite TTYD.png|15px]]<br>4 FP | |||
|Summons a [[Green Shell|Koopa Shell]] to protect Mario from attacks until it breaks. | |||
|- | |||
|align=center|'''[[Shell Slam]]''' [[File:Shine Sprite TTYD.png|15px]][[File:Shine Sprite TTYD.png|15px]]<br>6 FP | |||
|Attacks all ground-bound and low-hovering enemies, ignoring their Defense Power. Does not take contact damage from spikes, fire, or electrification. | |||
|} | |||
|- | |||
!rowspan=2|[[File:PMTTYD Flurrie Sprite.png|80px]]<br>'''[[Flurrie|Madame Flurrie]] | |||
|[[Boggly Woods]]<br>(Chapter 2) | |||
|A slightly pompous wind spirit and an actress on hiatus that Mario meets in Boggly Woods. Out of battle, she can blow wind at enemies to make them dizzy and stun them, and also to strip fake walls away, revealing secret passages. She joins Mario only after he returns her her lost [[Necklace (Paper Mario: The Thousand-Year Door)|Necklace]], which [[Vivian]] innocently picked up. | |||
|15<br>25 [[File:Shine Sprite TTYD.png|15px]]<br>35 [[File:Shine Sprite TTYD.png|15px]][[File:Shine Sprite TTYD.png|15px]] | |||
|- | |||
|colspan=3| | |||
{|style="width:100%;margin:0 auto;border-collapse:collapse;border:silver;" class="mw-collapsible mw-collapsed" border="1"cellpadding="4"cellspacing="1" | |||
|- | |||
!colspan=2 style="background-color:silver;"|Madame Flurrie's abilities | |||
|- | |||
|align=center width=16%|'''[[Body Slam (Paper Mario: The Thousand-Year Door)|Body Slam]]'''<br>0 FP | |||
|Attacks one enemy. Does not work on fire enemies, or those with a spiky top. | |||
|- | |||
|align=center|'''[[Gale Force]]'''<br>4 FP | |||
|Blows enemies away from battle, earning Star Points in the process. This move is particularly effective against aerial foes, and those who have a level lower than Mario's. In addition, this move clears fog. | |||
|- | |||
|align=center|'''[[Lip Lock]]''' [[File:Shine Sprite TTYD.png|15px]]<br>3 FP | |||
|Transfers an enemy's HP to Flurrie's HP. This move pierces Defense Power. Does not work on fire enemies, or those with lateral spikes. | |||
|- | |||
|align=center|'''[[Dodgy Fog]]''' [[File:Shine Sprite TTYD.png|15px]][[File:Shine Sprite TTYD.png|15px]]<br>4 FP | |||
|Makes Mario [[dodgy]] for a few turns, so that attacks directed at him miss sometimes. | |||
|} | |||
|- | |||
!rowspan=2|[[File:BabyYoshiPMTTYD.png|80px]]<br>'''[[Mini-Yoshi|Yoshi]] | |||
|[[Glitzville]]<br>(Chapter 3) | |||
|This belligerent, spunky [[Baby Yoshi|Yoshi baby]] hatches from an [[Yoshi's Egg|egg]] rescued by Mario and friends. The player can press {{button|gcn|X}} to ride on his back like most Yoshis. He can run much faster than Mario can, and float in the air for a moment to cross gaps; this is similar to [[Parakarry]]'s ability from ''Paper Mario''. The Yoshi's color will vary depending on how many minutes pass before he hatches. He allows Mario to name him. | |||
|10<br>20 [[File:Shine Sprite TTYD.png|15px]]<br>30 [[File:Shine Sprite TTYD.png|15px]][[File:Shine Sprite TTYD.png|15px]] | |||
|- | |||
|colspan=3| | |||
{|style="width:100%;margin:0 auto;border-collapse:collapse;border:silver;" class="mw-collapsible mw-collapsed" border="1"cellpadding="4"cellspacing="1" | |||
|- | |||
!colspan=2 style="background-color:silver;"|Yoshi's abilities | |||
|- | |- | ||
| [[ | |align=center width=16%|'''[[Ground Pound]]'''<br>0 FP | ||
|Attacks one enemy multiple times, for 1 HP of damage per hit. Does not work on fire enemies, or those with a spiky top. | |||
|- | |- | ||
| [[ | |align=center|'''[[Gulp]]'''<br>4 FP | ||
|Swallows the frontmost ground-bound enemy and spits it at the ground-bound foe right behind it (if there is one), damaging both of them. This move ignores Defense Power. Does not work on certain bosses. | |||
|- | |- | ||
| [[ | |align=center|'''[[Mini-Egg]]''' [[File:Shine Sprite TTYD.png|15px]]<br>3 FP | ||
|Throws a set amount of eggs at randomly-chosen enemies, dealing 1 HP of damage per hit. This attack may make them [[Tiny (status effect)|tiny]]. | |||
|- | |- | ||
|align=center|'''[[Stampede (Paper Mario: The Thousand-Year Door)|Stampede]]''' [[File:Shine Sprite TTYD.png|15px]][[File:Shine Sprite TTYD.png|15px]]<br>6 FP | |||
|Calls a herd of [[Yoshi (species)|Yoshi]]s to attack all enemies, no matter where they are located on the stage. | |||
|} | |||
|- | |- | ||
| [[ | !rowspan=2|[[File:PMTTYD Vivian Sprite.png|80px]]<br>'''[[Vivian]] | ||
|[[Twilight Town]]<br>(Chapter 4) | |||
|The youngest member of the [[Shadow Sirens]]. At first, she works for [[Sir Grodus]], but eventually joins Mario's party to help him get his name, body, and teammates back, because Mario is kinder to her than her sisters. Since he is prevented from telling her who he is as a result of having his identity stolen, she does not realize he is her enemy until their final confrontation with the body thief. She retreats from battle upon learning this, but quickly returns after deciding that Mario has earned her loyalty. She can pull Mario into the shadows with her Veil technique, which is for all practical purposes identical to [[Lady Bow]]'s [[Outta Sight]] move from ''Paper Mario''. | |||
|15<br>20 [[File:Shine Sprite TTYD.png|15px]]<br>30 [[File:Shine Sprite TTYD.png|15px]][[File:Shine Sprite TTYD.png|15px]] | |||
|- | |- | ||
| | |colspan=3| | ||
{|style="width:100%;margin:0 auto;border-collapse:collapse;border:silver;" class="mw-collapsible mw-collapsed" border="1"cellpadding="4"cellspacing="1" | |||
|- | |- | ||
| | !colspan=2 style="background-color:silver;"|Vivian's abilities | ||
|- | |- | ||
|align=center width=16%|'''[[Shade Fist]]'''<br>0 FP | |||
| | |Punches an enemy and leaves it magically [[burn]]ed. Does not work on fire enemies, and those with lateral spikes. The burn inflicted will detonate bomb-type creatures. | ||
|- | |- | ||
| [[ | |align=center|'''[[Veil]]'''<br>1 FP | ||
|[[Invisible|Hides Mario and herself in the shadows to negate all damage for one turn]]. Next turn, Vivian will not be able to act. If Mario acts before Vivian uses this move, he will also be unable to act the following turn. | |||
|- | |- | ||
| [[ | |align=center|'''[[Fiery Jinx]]''' [[File:Shine Sprite TTYD.png|15px]]<br>6 FP | ||
|Attacks all enemies with fire, penetrating their Defense Power and leaving them burned. This move is particularly effective against ice and undead enemies, heals fire foes, has no effect on [[Buzzy Beetle]]s, [[Cleft]]s, [[Bristle]]s, and [[Chomp]]s, and detonates bomb-type creatures. | |||
|- | |- | ||
| [[ | |align=center|'''[[Infatuate]]''' [[File:Shine Sprite TTYD.png|15px]][[File:Shine Sprite TTYD.png|15px]]<br>4 FP | ||
|Blows kisses at all enemies, possibly [[Confused|confusing]] them. | |||
|} | |||
|- | |- | ||
!rowspan=2|[[File:PMTTYD Admiral Bobbery Sprite.png|100px]]<br>'''[[Admiral Bobbery]] | |||
|[[Keelhaul Key]]<br>(Chapter 5) | |||
|A retired [[Bob-omb]] admiral who at first refuses to help Mario reach [[Keelhaul Key]], but changes his mind when Mario delivers his late wife's letter to him. After Mario saves him from Cortez's underlings and gives him [[Chuckola Cola (Paper Mario: The Thousand-Year Door)|Chuckola Cola]], he joins Mario's team. He possesses the same ability [[Bombette]] has outside of battle: with his bomb attack, he can destroy cracked walls, activate switches and attack enemies. However, he can be tossed upwards to walk on elevated ledges, and Mario can hold {{button|gcn|X}} without releasing the button to make Bobbery explode without being tossed first. Bobbery's [[Appeal]] tactic clears fog. | |||
|20<br>30 [[File:Shine Sprite TTYD.png|15px]]<br>40 [[File:Shine Sprite TTYD.png|15px]][[File:Shine Sprite TTYD.png|15px]] | |||
|- | |- | ||
|colspan=3| | |||
| | {|style="width:100%;margin:0 auto;border-collapse:collapse;border:silver;" class="mw-collapsible mw-collapsed" border="1"cellpadding="4"cellspacing="1" | ||
|- | |- | ||
| | !colspan=2 style="background-color:silver;"|Admiral Bobbery's abilities | ||
|- | |- | ||
| [[ | |align=center width=16%|'''[[Bomb (Paper Mario series)|Bomb]]'''<br>0 FP | ||
|Attacks the frontmost ground-bound enemy. This move is particularly effective against fire and undead enemies, can flip Clefts, detonates bomb-type foes, and clears fog, but has no effect on Buzzy Beetles. | |||
|- | |- | ||
| [[ | |align=center|'''[[Bomb Squad]]'''<br>3 FP | ||
|Sets up three time bombs to explode on the next turn. | |||
|- | |- | ||
|align=center|'''[[Hold Fast]]''' [[File:Shine Sprite TTYD.png|15px]]<br>4 FP | |||
|[[Payback|Damages all enemies that make contact with Bobbery]]. | |||
|- | |- | ||
| [[ | |align=center|'''[[Bob-ombast]]''' [[File:Shine Sprite TTYD.png|15px]][[File:Shine Sprite TTYD.png|15px]]<br>9 FP | ||
|Powerfully bombs all enemies. This move will ground all foes, flip Clefts, detonate bomb-type creatures, and clear fog, but will not damage Buzzy Beetles. | |||
|} | |||
|- | |- | ||
| [[ | !rowspan=2|[[File:MowzPMTTYD.png|100px]]<br>'''[[Ms. Mowz]] | ||
|Rogueport<br>(optional) | |||
|A flirty [[Little Mouser|Squeek]] cat burglar and badge hunter and the manager of the [[Lovely Howz of Badges]]. Mario and his teammates cross paths with her at [[Hooktail Castle]], [[the Great Tree]], and the [[Glitz Pit]] storeroom. She is an optional partner who joins Mario if he chooses to solve her trouble at the [[Trouble Center]] in [[Rogueport]]. To help her, Mario has to get the Attack FX B badge in Hooktail's lair and give it to Ms. Mowz. | |||
She can also seek out hidden items and badges, and penetrate enemies' defenses like [[Watt]] from the first ''Paper Mario'' does, although the specifics are considerably different. She is the first partner in the ''Paper Mario'' series who does not have to join Mario's party in order for him to complete his quest. | |||
|15<br>20 [[File:Shine Sprite TTYD.png|15px]]<br>25 [[File:Shine Sprite TTYD.png|15px]][[File:Shine Sprite TTYD.png|15px]] | |||
|- | |- | ||
| | |colspan=3| | ||
{|style="width:100%;margin:0 auto;border-collapse:collapse;border:silver;" class="mw-collapsible mw-collapsed" border="1"cellpadding="4"cellspacing="1" | |||
|- | |- | ||
! | !colspan=2 style="background-color:silver;"|Ms. Mowz's abilities | ||
|- | |- | ||
| [[ | |align=center width=16%|'''[[Love Slap]]'''<br>0 FP | ||
|Attacks one ground-based enemy, ignoring their Defense Power. Does not work on fire enemies, and those with lateral spikes. | |||
|- | |- | ||
| [[Tease]]<br>3 FP | |align=center|'''[[Kiss Thief]]'''<br>2 FP | ||
|Steals a ground-bound enemy's held badge or item. | |||
|- | |||
|align=center|'''[[Tease]]''' [[File:Shine Sprite TTYD.png|15px]]<br>3 FP | |||
|Makes all enemies [[dizzy]]. This move is particularly effective on aerial enemies. | |||
|- | |||
|align=center|'''[[Smooch (Paper Mario: The Thousand-Year Door)|Smooch]]''' [[File:Shine Sprite TTYD.png|15px]][[File:Shine Sprite TTYD.png|15px]]<br>10 FP | |||
|If successful, Mario recovers up to 10 HP. | |||
|} | |||
|- | |- | ||
|} | |} | ||
</center> | |||
==Crystal Stars== | ==Crystal Stars== | ||
{| | The [[Crystal Stars]] are the principal collectibles in the game. Retrieving one marks the end of a chapter, gifts Mario one additional unit in his [[Star Power]] gauge and teaches him a special move. | ||
|- style="background-color: | |||
<center> | |||
{|style="width:90%;margin:0 auto;border-collapse:collapse;border:silver;text-align:center;"border="1"cellpadding="4"cellspacing="1" | |||
|-style="background-color:silver;" | |||
!width=11%|Crystal Star | !width=11%|Crystal Star | ||
!width= | !width=15%|Location | ||
!width= | !width=20%|Guarded by | ||
!width=11%|Power & SP needed | !width=11%|Power & SP needed | ||
!width= | !width=43%|Description | ||
|- | |- | ||
|[[Magical Map]] | |||
---- | ---- | ||
[[File:Mario Map Artwork.png|40px]] | [[File:Mario Map Artwork.png|40px]] | ||
|[[Rogueport]] | |[[Rogueport]] | ||
|[[Beldam|Mysterious merchant]]<br>(obtained by Peach) | |||
|[[Sweet Treat]] | |[[Sweet Treat]]<br>1 SP | ||
|Replenishes up to 7 HP for both party members and 8 FP, | |align=left|Replenishes up to 7 HP for both party members and 8 FP, and cures all status ailments (except Immobilized and [[Down]]). | ||
|- | |- | ||
| | |style="background-color:beige"|[[Diamond Star]] | ||
---- | ---- | ||
[[File:Diamond Star TTYD.png]] | [[File:Diamond Star TTYD.png]] | ||
|[[Hooktail Castle]] | |[[Hooktail Castle]] | ||
|[[Hooktail]] | |[[Hooktail]] | ||
|[[Earth Tremor]] | |[[Earth Tremor]]<br>2 SP | ||
| | |align=left|Creates an earthquake that damages enemies, piercing defense and ignoring evasion. If at least one gauge of the Action Command is completed, the tremor damages all grounded and low-hovering enemies. If done perfectly (all gauges completed), deals 6 HP of damage to all foes. | ||
|- | |- | ||
| | |style="background-color:#DFF9E2"|[[Emerald Star]] | ||
---- | ---- | ||
[[File:Emerald Star TTYD.png]] | [[File:Emerald Star TTYD.png]] | ||
|[[The Great Tree]] | |[[The Great Tree]] | ||
| | |Punies (original keepers)<br>[[Magnus von Grapple]] (boss) | ||
|[[Clock Out]] | |[[Clock Out]]<br>2 SP | ||
|If successful, [[Immobilized|immobilizes]] all enemies | |align=left|If successful, [[Immobilized|immobilizes]] all enemies for a few turns. | ||
|- | |- | ||
| | |style="background-color:#FEFCE7"|[[Gold Star]] | ||
---- | ---- | ||
[[File:Gold Star TTYD.png]] | [[File:Gold Star TTYD.png]] | ||
|[[Glitz Pit]] | |[[Glitz Pit]] | ||
|[[Macho Grubba]] | |[[Macho Grubba]] | ||
|[[Power Lift]] | |[[Power Lift]]<br>3 SP | ||
|Boosts Mario and his partner's Attack and Defense Power for a | |align=left|[[POW-Up|Boosts Mario and his partner's Attack]] [[DEF-Up|and Defense Power]] for a few turns. | ||
|- | |- | ||
| | |style="background-color:#F9E0EA"|[[Ruby Star]] | ||
---- | ---- | ||
[[File:Ruby Star TTYD.png]] | [[File:Ruby Star TTYD.png]] | ||
|[[Creepy Steeple]] | |[[Creepy Steeple]] | ||
|[[Doopliss]] | |[[Doopliss]] | ||
|[[Art Attack]] | |[[Art Attack]]<br>4 SP | ||
| | |align=left|The amount of damage dealt depends on how many times the player circles around the enemies using the {{button|gcn|Stick}}. This special move pierces Defense Power and ignores enemies' invisibility. | ||
|- | |- | ||
| | |style="background-color:#E6F2F5"|[[Sapphire Star]] | ||
---- | ---- | ||
[[File:Sapphire Star TTYD.png]] | [[File:Sapphire Star TTYD.png]] | ||
|[[Pirate's Grotto]] | |[[Pirate's Grotto]] | ||
|[[Cortez]] | |[[Cortez]] | ||
|[[Sweet Feast]] | |[[Sweet Feast]]<br>5 SP | ||
|Much like Sweet Treat, the player can replenish up to 24 HP and 24 FP for each party member. | |align=left|Much like Sweet Treat, the player can replenish up to 24 HP and 24 FP for each party member, as well as cure all status ailments (except Immobilized and Down). | ||
|- | |- | ||
| | |style="background-color:#FFFAEC"|[[Garnet Star]] | ||
---- | ---- | ||
[[File:Garnet Star TTYD.png]] | [[File:Garnet Star TTYD.png]] | ||
|[[Poshley Sanctum]] | |[[Poshley Sanctum]] | ||
| | |[[Pennington]] (original keeper)<br>[[Smorg]] (boss) | ||
|[[Showstopper]] | |[[Showstopper]]<br>2 SP | ||
|If successful, defeats all enemies | |align=left|If successful, instantly defeats all enemies. Does not work on enemies with more than 12 HP, mini-bosses, and bosses. | ||
|- | |- | ||
| | |style="background-color:#FBE8F9"|[[Crystal Star]] | ||
---- | ---- | ||
[[File:Crystal Star TTYD.png]] | [[File:Crystal Star TTYD.png]] | ||
|[[X-Naut Fortress | |[[X-Naut Fortress]] | ||
| | |[[Magnus von Grapple 2.0]] | ||
|[[Supernova]] | |[[Supernova]]<br>6 SP | ||
|Does up to 15 damage to all enemies. The damage increases by 3 each time the player fills | |align=left|Does up to 15 HP of damage to all enemies. The damage increases by 3 each time the player fills one gauge. This special move pierces Defense Power and ignores enemies' invisibility. | ||
|} | |} | ||
</center> | |||
== | ==Battle system== | ||
''Paper Mario: The Thousand-Year Door'' features a turn-based battle system. A normal battle is triggered when Mario touches an enemy in the overworld. Mario's party goes first every turn, being allowed two consecutive actions — one by Mario and one by the active partner. The order can be switched with {{button|gcn|y}}; this also causes the first one to be in front, and thus more likely to be the target of the enemies later in the turn. Mario or his partner can perform an extra [[First Strike]] if they trigger the battle by attacking the enemy; conversely, the enemy can also attack Mario first and trigger the inverse situation. | |||
[[File:Magnusbattle.png|thumb|200px|Mario selecting an action.]] | |||
The player is given the following actions to choose from: | |||
*'''Attack:''' The character's available moves. For Mario, this action is split into '''Jump''' and '''Hammer''' options. | |||
*'''Items:''' Mario or his partner can use an item from Mario's inventory. | |||
*'''Special:''' Exclusive to Mario, the selection of [[Paper Mario: The Thousand-Year Door#Crystal Stars|special moves]], which use [[Star Power]]. | |||
*'''Tactics:''' An assortment of non-offensive actions. | |||
**'''Swap partner:''' Changes the active party member. While this action normally costs one turn, the [[Quick Change]] badge allows the player to switch freely. | |||
**'''[[Appeal]]:''' The character poses for the audience to recover a greater amount of Star Power | |||
**'''Defend:''' Increases the character's defense for the remainder of the turn. | |||
**'''Run away:''' If successful, lets Mario flee from battle. It cannot be used in most boss battles. | |||
**'''Charge:''' Increases the character's attack power for the next turn. It is only available when the player has equipped the [[Charge (badge)|Charge]] badge for Mario, or [[Charge P]] for partners. | |||
Battles take place on a [[Stage (Paper Mario: The Thousand-Year Door)|stage]]. Sometimes the impact of an attack causes props to fall (damaging all characters on stage and possibly making them [[dizzy]]), while devices such as fire nozzles and falling objects are triggered at random times. The audience helps Mario gain Star Power and may throw him useful items or pelt Mario and his partners with garbage (which they can prevent by pressing {{button|gcn|x}} to attack the audience member). Lastly, some bosses even exploit the audience for their own benefit (for example, [[Hooktail]] will eventually eat some of the audience members to regain 10 HP, which causes all the other spectators to flee, therefore making it impossible to gain any Star Power). | |||
===Attacking enemies=== | |||
While Mario and his partners are battling enemies, their attacks will deal extra damage and receive Star Power from an excited audience if the [[Action Command]] displayed onscreen is correctly performed. [[Stylish move]]s are extra Action Commands that, if executed, thrill the crowd even more, thus yielding even more Star Power: one must press {{button|gcn|A}} at the right moment during a move. However, the game will never tell the player about Stylish moves, or when should one perform them, unless [[Eddy the Mask]] is talked to and the [[Timing Tutor]] badge is equipped. | |||
===Guarding=== | |||
[[File:PMTTYD Guard.png|thumb|200px|The Guard move in ''Paper Mario: The Thousand-Year Door''.]] | |||
To perform the Guard Action Command, one must press {{button|gcn|A}} or {{button|gcn|B}} when Mario's opponent is about to strike him. Guarding reduces the damage he takes from enemy attacks and allows the player to resist status effects. The player must time it right, though. | |||
[[Guard]]: To perform a Guard move, the player must press {{button|gcn|A}} to block enemy attacks, reducing the damage they deal by 1 HP, and also protecting Mario from negative status effects. The player has 8 frames (roughly 2/15 of a second) to Guard. | |||
[[Superguard]]: To perform a Superguard move, the player must press {{button|gcn|B}} to block enemy attacks, negating the attack completely and sometimes damaging the attacker — generally a Superguard deals 1 HP of damage to a foe who employs a contact attack and none to foes who attack from a distance, but it does deflect [[Pokey]]s' ranged attacks back at them. The player only has 3 frames (or 1/20 of a second) to Superguard, making it more difficult to time than a regular Guard. | |||
[[ | |||
{{ | |||
== | ===Status effects=== | ||
Status effects are effects that alter a character's stats or behavior in battle. Since they can only occur within battles, they are automatically removed or healed once Mario and partners win a fight. | |||
Below is a list of status effects and what inflicts them. Please note that, unless stated otherwise, positive status changes are always targeted at the user or someone in their party, while negative status changes are targeted at the opposing party. Since stage effects are triggered randomly, they can affect any participants in the battle. If a boss is fought more than once or has multiple forms, the battle in which they can inflict the status effect is specified in parentheses. | |||
== | <center> | ||
{|style="width:90%;margin:0 auto;border-collapse:collapse;border:silver;"border="1"cellpadding="4"cellspacing="1" | |||
[[File: | |-style="background-color:silver;" | ||
!width=8%|Name | |||
!Effect | |||
!width=52%|Inflicters | |||
|- | |||
|style="text-align:center;"|[[File:Allergic.gif]]<br>[[Allergic]] | |||
|Becomes unaffected by status effects, both positive and negative. | |||
| | |||
*'''Enemies:''' [[Beldam]] (2), [[Shadow Queen]] (1) | |||
*'''Items:''' [[Space Food]] | |||
|- | |||
|style="text-align:center;"|[[File:Burn.png]]<br>[[Burn]] | |||
|style="text-align:left;"|Loses 1 HP each turn. Is removed by a randomly-occurring stage effect involving falling water, and by the Frozen status ailment. Fire foes are immune to this ailment. | |||
| | |||
*'''Enemies:''' [[Fire Bro]]s, [[Lava Bubble]]s, [[Ember]]s, [[Phantom Ember]]s, [[X-Naut PhD]]s, [[Sir Grodus]] | |||
*'''Allies:''' Vivian ([[Shade Fist]], [[Fiery Jinx]]) | |||
*'''Badges:''' [[Fire Drive]] | |||
*'''Stage:''' fire nozzle | |||
|- | |||
|style="text-align:center;"|[[File:Confused.png]]<br>[[Confused]] | |||
|The victim has an approximately 50% chance each turn to ignore the AI or the player's orders and do something random and unexpected, including attacking allies. | |||
| | |||
*'''Enemies:''' [[Boo#Paper Mario: The Thousand-Year Door|Atomic Boo]], Shadow Queen (1) | |||
*'''Allies:''' Vivian ([[Infatuate]]) | |||
*'''Badges:''' [[Head Rattle]] | |||
*'''Items:''' [[Ruin Powder]] | |||
*'''Stage:''' large bug, small bugs, Bowser statue | |||
|- | |||
|style="text-align:center;"|[[File:PMTTYD_DEF-Up_Battle_Icon.png]]<br>[[DEF-Up]] | |||
|Raises [[Defense|Defense Power]]. | |||
| | |||
*'''Enemies:''' [[Magikoopa]]s, [[Red Magikoopa]]s, [[Bulky Bob-omb]]s, [[Bob-ulk]]s, [[Wizzerd]]s, [[Elite Wizzerd]]s, [[Macho Grubba]], [[Kammy Koopa]], Shadow Queen (1, 2) | |||
*'''Allies:''' Mario ([[Power Lift]]) | |||
*'''Items:''' [[Courage Shell]] | |||
|- | |||
|style="text-align:center;"|[[File:Dizzy PMTTYD icon.png]]<br>[[Dizzy]] | |||
|The victim's attacks have a 50% chance of missing their target. | |||
| | |||
*'''Allies:''' Ms. Mowz ([[Tease]]) | |||
*'''Items:''' [[Dizzy Dial]] | |||
*'''Stage:''' bucket, basin, meteor | |||
|- | |||
|style="text-align:center;"|[[File:Dodgy TTYD.png]]<br>[[Dodgy]] | |||
|The affected character has a 50% chance to dodge incoming attacks. | |||
| | |||
*'''Enemies:''' Magikoopas, X-Naut PhDs, Macho Grubba, Sir Grodus | |||
*'''Allies:''' Flurrie ([[Dodgy Fog]] (to Mario)) | |||
*'''Badges:''' [[Lucky Start]] (possibly) | |||
*'''Items:''' [[Repel Cape]], [[Peach Tart]] (possibly) | |||
|- | |||
|style="text-align:center;"|[[File:Electrifying.png]]<br>[[Electrified]] | |||
|The affected character will deal 1 HP of damage to attackers who make contact, and will often interrupt their attack — assuming the attackers are not electrified as well. | |||
| | |||
*'''Enemies:''' Magikoopas, [[Green Magikoopa]]s, [[Dark Puff]]s, [[Ruff Puff]]s, Elite Wizzerds, Kammy Koopa | |||
*'''Badges:''' [[Zap Tap]], Lucky Start (possibly) | |||
*'''Items:''' [[Volt Shroom]], [[Electro Pop]], [[Love Pudding]] (possibly), [[Peach Tart]] (possibly) | |||
*'''Stage:''' stage light | |||
|- | |||
|style="text-align:center;"|[[File:Fast TTYD Status.png]]<br>[[Fast]] | |||
|Allows the affected character to perform two actions each turn. | |||
| | |||
*'''Enemies:''' Macho Grubba, Beldam (2) | |||
*'''Allies:''' Goombella ([[Rally Wink]] (to Mario)) | |||
|- | |||
|style="text-align:center;"|[[File:Frozen Block.png]]<br>[[Frozen]] | |||
|The affected character is unable to do anything, and will take 1 HP of damage when the status expires. This ailment is negated if the Burn status is inflicted. Ice foes are immune to this ailment. | |||
| | |||
*'''Enemies:''' [[Ice Puff]]s, [[Frost Piranha]]s, Beldam (2), [[Bonetail]] | |||
*'''Badges:''' [[Ice Smash]] | |||
*'''Items:''' [[Ice Storm]], [[Icicle Pop]] (self-infliction, possibly), [[Zess Frappe]] (self-infliction, possibly), [[Snow Bunny]] (self-infliction) | |||
*'''Stage:''' freeze nozzle | |||
|- | |||
|style="text-align:center;"|[[File:Huge TTYD.png]]<br>[[Huge]] | |||
|Attack Power is raised by 2. | |||
| | |||
*'''Enemies:''' [[X-Naut]], [[Elite X-Naut]]s, [[Red Magikoopa]]s, Wizzerds, Dark Wizzerds, Elite Wizzerds, Kammy Koopa, Beldam (1) | |||
*'''Items:''' [[Power Punch]] | |||
|- | |||
|style="text-align:center;"|[[File:Immobilize.png]]<br>[[Immobilized]] | |||
|The affected character is unable to do anything. | |||
| | |||
*'''Enemies:''' [[X-Yux]]es, Atomic Boo, Sir Grodus | |||
*'''Allies:''' Mario ([[Clock Out]] (possible self-infliction)) | |||
*'''Items:''' [[Stop Watch]] | |||
|- | |||
|style="text-align:center;"|[[File:Invisible icon TTYD.png]]<br>[[Invisible]] | |||
|The affected character cannot be attacked at all. | |||
| | |||
*'''Enemies:''' [[Boo]], [[Dark Boo]], Green Magikoopas, Kammy Koopa | |||
*'''Items:''' [[Boo's Sheet]], Love Pudding (possibly) | |||
|- | |||
|style="text-align:center;"|[[File:SpitePaybacktime.png]]<br>[[Payback]] | |||
|Attackers who make contact with the affected character will take half the damage dealt. | |||
| | |||
*'''Enemies:''' Sir Grodus | |||
*'''Allies:''' Bobbery ([[Hold Fast]]) | |||
*'''Items:''' [[Spite Pouch]] | |||
|- | |||
|style="text-align:center;"|[[File:Poison.png]]<br>[[Poison (status effect)|Poison]] | |||
|style="text-align:left;"|Loses 1 HP each turn. | |||
| | |||
*'''Enemies:''' [[Putrid Piranha]]s, [[Poison Pokey]]s, [[Poison Puff]]s, [[Bowser]] (1, 2), [[Cortez]]'s Hook, Beldam (2), [[Gloomtail]], Shadow Queen (1, 2) | |||
*'''Items:''' [[Poison Mushroom]] (self-infliction) | |||
|- | |||
|style="text-align:center;"|[[File:PMTTYD POW-Up Battle Icon.png]]<br>[[POW-Up]] | |||
|Attack Power is raised. | |||
| | |||
*'''Enemies:''' [[Hyper Goomba]]s, [[Hyper Paragoomba]]s, [[Hyper Spiky Goomba]]s, [[Hyper Cleft]]s, [[Hyper Bald Cleft]]s, Bulky Bob-ombs, Bob-ulks, Koopatrols, [[Dark Koopatrol]]s, [[Dark Lakitu]]s, [[Sky-Blue Spiny|Sky-Blue Spiny]]s, [[Marilyn]] (1, 2), Cortez | |||
*'''Allies:''' Mario (Power Lift) | |||
|- | |||
|style="text-align:center;"|[[File:Sleeping.png]]<br>[[Sleep]] | |||
|The victim is unable to do anything, but there is a chance that they will wake up prematurely if attacked. | |||
| | |||
*'''Enemies:''' [[Crazee Dayzee]]s, [[Amazy Dayzee]]s, Bonetail | |||
*'''Badges:''' [[Sleepy Stomp]] | |||
*'''Items:''' [[Sleepy Sheep]], [[Love Pudding]] (possibly), [[Peach Tart]] (possibly) | |||
|- | |||
|style="text-align:center;"|[[File:Slowstatus.png]]<br>[[Slow]] | |||
|The victim can only perform an action every two turns. The Fast status negates Slow. | |||
| | |||
*'''Enemies:''' Beldam (2) | |||
|- | |||
|style="text-align:center;"|[[File:PMTTYD DEF-Down Battle Icon.png]]<br>[[DEF-Down|Soft]] | |||
|Lowers Defense Power by 3. | |||
| | |||
*'''Badges:''' [[Soft Stomp]] | |||
*'''Items:''' [[Mr. Softener]] | |||
|- | |||
|style="text-align:center;"|[[File:Tiny.png]]<br>[[Tiny (status effect)|Tiny]] | |||
|Lowers Attack Power by 2. | |||
| | |||
*'''Enemies:''' X-Naut PhDs, Beldam (1), Bonetail | |||
*'''Allies:''' Yoshi ([[Mini-Egg]]) | |||
*'''Items:''' [[Mini Mr. Mini]] | |||
|- | |||
|} | |||
</center> | |||
== | ===Leveling up=== | ||
====Star Points==== | |||
{{main|List of Star Point amounts in Paper Mario: The Thousand-Year Door}} | {{main|List of Star Point amounts in Paper Mario: The Thousand-Year Door}} | ||
[[File:Starpoint.gif|frame|Star Point]] | |||
{{ | Every time Mario wins a battle, he earns [[Star Point]]s. The amount he earns from each enemy or boss depends on his current level compared to the enemies he earns them from; as his level goes up, he earns less Star Points from them. If Mario's level is just under, matches or exceeds the enemy's, or reaches the maximum level, 99, he does not earn any Star Points from them at all. When Mario's Star Point meter reaches 100, the player can choose whether to upgrade Mario's [[Heart Point|'''H'''eart '''P'''oints]], [[Flower Point|'''F'''lower '''P'''oints]], or [[Badge Point|'''B'''adge '''P'''oints]]. Upgrading HP or FP increases the upgraded stat by 5, and choosing BP raises Mario's BP by 3. Level 99 is the highest Mario can be at. Each stat has its own maximum value, which it cannot be upgraded beyond. For HP and FP, this value is 200, but for BP, this value is 99; however, it is impossible for the player to have all three stats simultaneously be at their maximum value at any one time, since the lack of level ups impedes at least one of the stats from being at its maximum. | ||
====Shine Sprites==== | |||
{{main|List of Shine Sprites in Paper Mario: The Thousand-Year Door}} | |||
[[File:Shine Sprite TTYD.png|frame|right|Shine Sprite]] | |||
[[File:PMTTYD Shine Sprite RogueEastRoof.png|left|thumb|[[Mario]] and [[Mini-Yoshi|Yoshi]] collecting the [[Shine Sprite]] on top of the red roof in the east of [[Rogueport]].]] | |||
Much like ''Paper Mario'', there are items found in the overworld of ''Paper Mario: The Thousand-Year Door'' that, when collected, allow Mario to upgrade his partners to learn new moves and increase their HP. In this game, [[Shine Sprite]]s fulfill this purpose. The price of upgrading a partner is always three Shine Sprites. There are 42 Shine Sprites altogether in the game. | |||
===The Audience=== | |||
{{main|Audience}} | |||
[[File:PMTTYD2.png|thumb|Every audience member.]] | |||
The [[Audience]] determines how much [[Star Power]] Mario recovers. It consists of various enemies and allies, and sits and cheers as the group attacks. If Mario or his allies use the [[Appeal]] action or a [[Stylish move]], they recover more Star Power. The audience is even exploited by various bosses: [[Hooktail]], [[Cortez]], and the [[Shadow Queen]] consume audience members to restore their HP, whereas [[Magnus von Grapple 2.0]] uses spectators as ammo by launching them at Mario and his partners. | |||
The Audience occasionally takes active participation in the battles; some spectators will attempt to toss Mario helpful items or pelt him with garbage, others will get on stage and cause a prop to fall or make combatants invisible, while others may incapacitate fellow audience members, making Star Power recovery more complicated. | |||
===Bingo!=== | |||
{{main|Bingo!}} | |||
An icon appears next to Mario's Star Power Gauge whenever the player successfully uses the Action Command of an attack. If the player has two matching icons and if the player executes an additional Action Command, Mario can take the Bingo wheel for a spin. | |||
==Items== | |||
Items are objects that, if used, help Mario and his partners on their journey. They can restore their stats (HP and FP), boost stats (attack and defense) and cause certain status changes in-battle. Many can be used on enemies to negatively affect their status, and also to cause damage. Mario can hold up to 10 items in his inventory, but he can store a maximum of 31 items at any [[Item Shop]] and withdraw them at any time he wishes to. The amount of items Mario can hold is doubled as soon as he collects the [[Strange Sack]]. | |||
Non-boss enemies can hold items in battle, which they will use, usually as soon as they get a turn. | |||
{|width=100% | |||
|width=33% style="vertical-align:top;"| | |||
'''HP-restoring items''' | |||
*[[File:Mushroom TTYD.png|20px]] [[Mushroom]] (5 HP) | |||
*[[File:Super Shroom TTYD.png|20px]] [[Super Mushroom|Super Shroom]] (10 HP) | |||
*[[File:Ultra Shroom TTYD.png|20px]] [[Ultra Mushroom|Ultra Shroom]] (50 HP) | |||
*[[File:Life Shroom TTYD.png|20px]] [[Life Shroom]] (10 HP revive) | |||
*[[File:Slow Shroom TTYD.png|20px]] [[Slow Shroom]] (20 HP gradual) | |||
*[[File:Dried Bouquet TTYD.png|20px]] [[Dried Bouquet]] (1 HP) | |||
*[[File:Horsetail TTYD.png|20px]] [[Horsetail]] (3 HP) | |||
*[[File:Mystic Egg TTYD.png|20px]] [[Mystic Egg]] (5 HP) | |||
*[[File:Keel Mango TTYD.png|20px]] [[Keel Mango]] (5 HP) | |||
*[[File:Space Food TTYD.png|20px]] [[Space Food]] (5 HP) | |||
'''FP-restoring items''' | |||
*[[File:Honey Syrup TTYD.png|20px]] [[Honey Syrup]] (5 FP) | |||
*[[File:Maple Syrup TTYD.png|20px]] [[Maple Syrup]] (10 FP) | |||
*[[File:Jammin Jelly TTYD.png|20px]] [[Jammin' Jelly]] (50 FP) | |||
*[[File:Gradual Syrup TTYD.png|20px]] [[Gradual Syrup]] (20 FP gradual) | |||
*[[File:Cake Mix TTYD.png|20px]] [[Cake Mix]] (1 FP) | |||
*[[File:Turtley Leaf TTYD.png|20px]] [[Turtley Leaf]] (5 FP) | |||
*[[File:Golden Leaf TTYD.png|20px]] [[Golden Leaf]] (10 FP) | |||
|width=33% style="vertical-align:top;"| | |||
'''HP and FP-restoring items''' | |||
*[[File:Hot Dog TTYD.png|20px]] [[Hot Dog (item)|Hot Dog]] (5 HP, 5 FP) | |||
*[[File:Peachy Peach TTYD.png|20px]] [[Peachy Peach]] (1 HP, 2 FP) | |||
*[[File:Fresh Pasta TTYD.png|20px]] [[Fresh Pasta Bunch|Fresh Pasta]] (10 HP, 5 FP) | |||
*[[File:Whacka Bump TTYD.png|20px]] [[Whacka Bump]] (25 HP, 25 FP) | |||
'''Other status-altering items''' | |||
*[[File:Boos Sheet TTYD.png|20px]] [[Boo's Sheet]] | |||
*[[File:Courage Shell TTYD.png|20px]] [[Courage Shell]] | |||
*[[File:Hot Sauce TTYD.png|20px]] [[Hot Sauce]] | |||
*[[File:Point Swap TTYD.png|20px]] [[Point Swap]] | |||
*[[File:Power Punch TTYD.png|20px]] [[Power Punch]] | |||
*[[File:Repel Cape TTYD.png|20px]] [[Repel Cape]] | |||
*[[File:Tasty Tonic TTYD.png|20px]] [[Tasty Tonic]] | |||
*[[File:Volt Shroom TTYD.png|20px]] [[Volt Shroom]] | |||
'''Enemy-targetting items''' | |||
*[[File:Coconut TTYD.png|20px]] [[Coconut]] | |||
*[[File:Dizzy Dial TTYD.png|20px]] [[Dizzy Dial]] | |||
*[[File:Earth Quake TTYD.png|20px]] [[Earth Quake]] | |||
|width=33% style="vertical-align:top;"| | |||
*[[File:Fire Flower TTYD.png|20px]] [[Fire Flower]] | |||
*[[File:Fright Mask TTYD.png|20px]] [[Fright Mask]] | |||
*[[File:HP Drain item.png|20px]] [[HP Drain (item)|HP Drain]] | |||
*[[File:Ice Storm TTYD.png|20px]] [[Ice Storm]] | |||
*[[File:Mini Mr Mini TTYD.png|20px]] [[Mini Mr. Mini]] | |||
*[[File:Mr Softener TTYD.png|20px]] [[Mr. Softener]] | |||
*[[File:POW Block TTYD.png|20px]] [[POW Block]] | |||
*[[File:Shooting Star TTYD.png|20px]] [[Shooting Star (item)|Shooting Star]] | |||
*[[File:Sleepy Sheep TTYD.png|20px]] [[Sleepy Sheep]] | |||
*[[File:Spite Pouch TTYD.png|20px]] [[Spite Pouch]] | |||
*[[File:Stop Watch TTYD.png|20px]] [[Stop Watch]] | |||
*[[File:Thunder Bolt TTYD.png|20px]] [[Thunder Bolt (item)|Thunder Bolt]] | |||
*[[File:Thunder Rage TTYD.png|20px]] [[Thunder Rage]] | |||
'''Miscellaneous''' | |||
*[[File:Gold Bar TTYD.png|20px]] [[Gold Bar]] | |||
*[[File:Gold Bar x3 TTYD.png|20px]] [[Gold Bar x3]] | |||
*[[File:Inn Coupon TTYD.png|20px]] [[Inn Coupon]] | |||
*[[File:Mystery TTYD.png|20px]] [[Mystery Box (item)|Mystery]] | |||
|} | |||
==Zess T. | ===Zess T. recipes=== | ||
{{main|List of Zess T. recipes}} | {{main|List of Zess T. recipes}} | ||
[[Mario]] | [[Zess T.]] is a [[Toad (species)|Toad]] chef who lives in the westernmost house in Rogueport Plaza. [[Mario]] accidentally breaks her contact lens when he approaches the entrance of Rogueport's west side, and in retaliation, she blocks the entrance until he makes it up to her. After Chapter 1, Mario can buy her a [[Contact Lens|new one]], and upon receiving it, she frees the way and goes home, where Mario can always ask her to cook him something with one ingredient. If her [[Trouble Center]] [[Seeking Legendary Book!|trouble]] is completed (available after finishing Chapter 4), she is able to cook with two ingredients at once. | ||
{{ | |||
===Important Things=== | |||
Important Things are irreplaceable items that cannot be sold or used in battle, and are in majority mandatory for story progression. These items occupy their own section in Mario's inventory. | |||
{|width=100% | |||
|width=50% style="vertical-align:top;"| | |||
'''Prologue''' | |||
*[[File:Mailbox SP TTYD.png|15px]] [[Mailbox SP]] - Mario's e-mail reader | |||
*[[File:Black Key TTYD.png|15px]] [[Black Key]] - Opens the [[black chest]] in Rogueport Sewers | |||
'''Chapter 1''' | |||
*[[File:Sun Stone TTYD.png|15px]] [[Sun Stone]] - A key to [[Hooktail Castle]], guarded in [[Shhwonk Fortress]] | |||
*[[File:Moon Stone TTYD.png|15px]] [[Moon Stone]] - A key to Hooktail Castle, guarded in Shhwonk Fortress | |||
*[[File:Castle Key.png|15px]] [[Castle Key (Paper Mario: The Thousand-Year Door)|Castle Key]] (x4) - Used to unlock doors in Hooktail Castle | |||
*[[File:Black Key TTYD.png|15px]] Black Key - Opens the black chest in Hooktail Castle | |||
*[[File:Contact Lens.png|10px]] [[Contact Lens]] - Replacement for [[Zess T.]]'s original one, which Mario broke | |||
'''Chapter 2''' | |||
*[[File:Necklace TTYD.png|15px]] [[Necklace (Paper Mario: The Thousand-Year Door)|Necklace]] - Flurrie's lost necklace. She joins the party when returned | |||
*[[File:Red Key TTYD.png|15px]] [[Red Key (Paper Mario: The Thousand-Year Door)|Red Key]] - Opens the red cage in [[The Great Tree]] | |||
*[[File:Puni Orb TTYD.png|15px]] [[Puni Orb]] - When placed into a pedestal, it attracts all Punies to it | |||
*[[File:Blue Key TTYD.png|15px]] [[Blue Key (Paper Mario: The Thousand-Year Door)|Blue Key]] - Opens the blue cage in The Great Tree | |||
*[[File:Blimp Ticket.png|15px]] [[Blimp Ticket|Blimp Ticket]] - Gives Mario's party access to [[Glitzville]] | |||
'''Chapter 3''' | |||
*[[File:Dubious Paper TTYD.png|15px]] [[Dubious Paper]] - A document containing information about the Crystal Stars | |||
*[[File:PMTTYD Champ's Belt Sprite.png|15px]] [[Champ's Belt]] - The Glitz Pit champion's belt, earned after defeating [[Rawk Hawk]] | |||
'''Chapter 4''' | |||
*[[File:Shop Key.png|15px]] [[Shop Key]] - Unlocks the storage in [[Twilight Town]]'s shop | |||
*[[File:Black Key TTYD.png|15px]] Black Key - Opens the black chest in Twilight Town | |||
*[[File:Steeple Key TTYD.png|15px]] [[File:Steeple Key basement.png|15px]] [[Steeple Key]] - Two keys that unlock doors in the Creepy Steeple | |||
*[[File:Superbombomb.png|15px]] [[Superbombomb]] - A weapon Mario helps Vivian retrieve | |||
*[[File:Letter P TTYD.png|15px]] [[The letter "p"]] - Needed to spell Doopliss' name and break his curse | |||
*[[File:Old Letter.png|15px]] [[Old Letter]] - A letter from Admiral Bobbery's late wife to him, kept by [[Podley]] | |||
'''Chapter 5''' | |||
*[[File:Chuckola Cola TTYD.png|15px]] [[Chuckola Cola (Paper Mario: The Thousand-Year Door)|Chuckola Cola]] - Motivates Admiral Bobbery to join the party | |||
*[[File:Skull Gem TTYD.png|15px]] [[Skull Gem]] - [[Flavio]]'s treasure. Opens the entrance to [[Pirate's Grotto]] | |||
*[[File:Grotto Key TTYD.png|15px]] [[Grotto Key]] - Opens a locked door in Pirate's Grotto | |||
*[[File:Black Key TTYD.png|15px]] Black Key - Opens the black chest in Pirate's Grotto | |||
*[[File:Gate Handle.png|15px]] [[Gate Handle]] - Must be inserted into the contraption to open the floodgates | |||
*[[File:Wedding Ring.png|15px]] [[Wedding Ring]] - Francesca's ring, lost in Keelhaul Key | |||
*[[File:Train Ticket.png|15px]] [[Train Ticket]] - Lets Mario ride the [[Excess Express]] | |||
'''Chapter 6''' | |||
*[[File:Galley Pot TTYD.png|15px]] [[Galley Pot]] - [[Chef Shimi]]'s pot, taken by [[Heff T.]] | |||
*[[File:Vital Paper TTYD.png|15px]] [[Vital Paper]] - A piece of evidence found in [[Zip Toad]]'s room | |||
*[[File:Briefcase.png|15px]] [[Briefcase]] - The Businessman's briefcase, stolen by Doopliss | |||
|width=50% style="vertical-align:top;"| | |||
*[[File:Gold Ring.png|15px]] [[Gold Ring (item)|Gold Ring]] - [[Toodles]]'s ring, stolen by Doopliss | |||
*[[File:Shell Earrings.png|15px]] [[Shell Earrings]] - The [[Excess Express waitress|waitress]]' earrings, stolen by Doopliss | |||
*[[File:Autograph TTYD.png|15px]] [[Autograph]] - A gift for [[Bub]], signed by the [[Excess Express engineer|engineer]] | |||
*[[File:Ragged Diary TTYD.png|15px]] [[Ragged Diary]] - [[Ghost T.]]'s diary, to be returned in exchange missing blanket | |||
*[[File:Blanket.png|15px]] [[Blanket]] - Given by Ghost T. Must be returned to the conductor | |||
*[[File:Station Key alt.png|15px]][[File:Station Key.png|15px]] [[Station Key]] - Two keys that unlock doors in Riverside Station | |||
*[[File:Elevator Key RS TTYD.png|15px]] [[Elevator Key (Riverside Station)|Elevator Key]] - Operates the elevator in Riverside Station | |||
'''Chapter 7''' | |||
*[[File:Goldbob Guide.png|15px]] [[Goldbob Guide]] - Needed to operate the [[Big bomb cannon|cannon]] in [[Fahr Outpost]] | |||
*[[File:Card Key purple.png|15px]][[File:Card Key green.png|15px]][[File:Card Key yellow.png|15px]][[File:Card Key blue.png|15px]] [[Card Key (Paper Mario: The Thousand-Year Door)|Card Key]] - Used to navigate the X-Naut Fortress | |||
*[[File:Elevator Key XNaut TTYD blue.png|15px]][[File:Elevator Key XNaut TTYD red.png|15px]] [[Elevator Key (X-Naut Fortress)|Elevator Key]] - Used to operate the elevators in the X-Naut Fortress | |||
*[[File:Cog TTYD.png|15px]] [[Cog (Paper Mario: The Thousand-Year Door)|Cog]] - Needed to operate a device in an optional room | |||
'''Chapter 8''' | |||
*[[File:Palace Key gray.png|15px]] [[Palace Key (Paper Mario: The Thousand-Year Door)|Palace Key]] (x3) - Three keys that unlock doors in the Palace of Shadow. | |||
*[[File:Star Key.png|15px]] [[Star Key]] - Activates the key pedestals in [[Riddle Tower]] | |||
*[[File:Palace Key blue.png|15px]] Palace Key (x8) - Eight keys from the Riddle Tower | |||
'''Side quests''' | |||
*[[File:Box TTYD.png|15px]] [[Box]] - [[McGoomba]]'s delivery to [[Goomfrey]] in a [[Safe Delivery...|Trouble Center trouble]] | |||
*[[File:Cookbook TTYD.png|15px]] [[Cookbook]] - Allows Zess T. to cook with two ingredients | |||
*[[File:Gold Card TTYD.png|15px]] [[Golden Card]] - Reward for solving [[important Thing!|Frankie's trouble]] | |||
*[[File:House Key TTYD.png|15px]] [[House Key (Paper Mario: The Thousand-Year Door)|House Key]] - [[Garf]]'s lost key in a [[Need a Key!|Trouble Center trouble]] | |||
*[[File:Lottery Pick.png|15px]] [[Lottery Pick]] - Received if Mario decides to participate in the [[Happy Lucky Lottery]] | |||
*[[File:Box TTYD.png|15px]] [[Package (Paper Mario: The Thousand-Year Door)|Package]] - Goldbob's delivery to General White in a [[Delivery, please!|Trouble Center trouble]] | |||
*[[File:Platinum Card.png|15px]] [[Platinum Card]] - Reward for solving [[I must have that book.|Toodles' trouble]] | |||
*[[File:Present TTYD.png|15px]] [[Present (Paper Mario: The Thousand-Year Door)|Present]] - Bub's present to [[Sylvia (Paper Mario: The Thousand-Year Door)|his mother]] in a [[Help me make up.|Trouble Center trouble]] | |||
*[[File:Routing Slip.png|15px]] [[Routing Slip]] - [[Mayor Dour]]'s delivery to the Puni elder in a [[Newsletter...|Trouble Center trouble]] | |||
*[[File:Silver Card TTYD.png|15px]] [[Silver Card]] - Reward for solving [[Help my Daddy!|Pine T. Jr.'s trouble]] | |||
*[[File:Special Card TTYD.png|15px]] [[Special Card]] - Reward for solving [[Try to find me!|Koopook's trouble]] | |||
*[[File:Strange Sack TTYD.png|15px]] [[Strange Sack]] - Increases Mario's item capacity to 20 | |||
*[[File:Super Luigi series Vol 1 TTYD.png|15px]][[File:Super Luigi series Vol 2 TTYD.png|15px]][[File:Super Luigi series Vol 3 TTYD.png|15px]][[File:Super Luigi series Vol 4 TTYD.png|15px]][[File:Super Luigi series Vol 5 TTYD.png|15px]] [[Super Luigi (series)|Super Luigi]] - Novelization of Luigi's adventures | |||
*[[File:Up Arrow.png|15px]] [[Up Arrow]] - Reminds Merlon of the Ultra Stone in his house | |||
*[[File:Wrestling Mag.png|15px]] [[Wrestling Mag]] - [[Jolene]]'s return to Toodles in a [[I must have that book.|Trouble Center trouble]] | |||
'''Items used by other characters''' | |||
*[[File:Data Disk.png|15px]] [[Data Disk]] - An item Peach retrieves so [[TEC-XX]] can read it | |||
*[[File:Blue Potion.png|15px]] [[Blue Potion]] - One of the ingredients to turn Peach invisible | |||
*[[File:Green Potion.png|15px]] [[Green Potion]] - One of the ingredients to turn Peach invisible | |||
*[[File:Orange Potion TTYD.png|12px]] [[Orange Potion]] - One of the ingredients to turn Peach invisible | |||
*[[File:Red Potion.png|15px]] [[Red Potion]] - One of the ingredients to turn Peach invisible | |||
*[[File:Ultra Stone TTYD.png|15px]] [[Ultra Stone]] - [[Merlon]] can use it to upgrade partners to Ultra Rank | |||
|} | |||
==Badges== | |||
{{main|List of badges in Paper Mario: The Thousand-Year Door}} | |||
Badges are objects that Mario and his partners can equip, and therefore benefit from, throughout the course of the game. They can be purchased at the Lovely Howz of Badges or from [[Charlieton]], traded for [[Star Piece (Paper Mario series)|Star Pieces]] through [[Dazzle]], won at the [[Pianta Parlor]], or found in one of the places Mario and company visit. The ? Blocks containing badges in the field are red in color, unlike normal ? Blocks, which are yellow and contain coins or items. | |||
When leveling up, Mario can gain Badge Points (BP), which allow him to equip badges he has already found. Some of the badges add new [[Jump]] or [[Hammer]] moves to Mario's commands during battle, among other abilities. | |||
Badges can also affect Mario and his partners outside of battles. Certain badges can increase the amount of coins, flowers, [[Heart_(item)#Paper_Mario_series|heart]]s, or items that enemies drop after they are defeated. Foes might also carry badges in battle, which only [[Ms. Mowz]] can steal right away, though there is a likelihood that they might leave them behind once they are beaten. | |||
Two special badges, the W Emblem and the L Emblem, can change Mario's clothing. With the W Emblem, Mario gets [[Wario]]'s clothing, with the L Emblem, it results in [[Luigi]]'s, and with both Emblems combined, he wears [[Waluigi]]'s clothes. | |||
If multiple copies of the same jump or hammer-based badge are worn at once, the FP requirement increases exponentially, whereas the Attack Power increases linearly. | |||
==Bestiary (Tattle Log)== | ==Enemies and obstacles== | ||
===Bestiary (Tattle Log)=== | |||
{{main|Paper Mario: The Thousand-Year Door bestiary}} | {{main|Paper Mario: The Thousand-Year Door bestiary}} | ||
{|style="width:55%;margin:0 auto;border-collapse:collapse;border:silver;text-align:center;"border="1"cellpadding="4"cellspacing="1" | |||
|-style="background-color:silver;" | |||
!width=20%|Image!!width=25%|Name!!width=10%|HP!!width=10%|Attack!!width=10%|Defense!!width=25%|Location | |||
|- | |||
|[[File:Goomba sprite PMTTYD.png|25px]]||[[Goomba]]||2||1||0||[[Rogueport Sewers]]<br>[[Petal Meadows]]<br>[[Glitz Pit]]<br>[[Pit of 100 Trials (Paper Mario: The Thousand-Year Door)|Pit of 100 Trials]] | |||
|- | |||
|[[File:PMTTYD Paragoomba Sprite.png|35px]]||[[Paragoomba]]||2||1||0||rowspan=2|Rogueport Sewers<br>Petal Meadows<br>[[Hooktail Castle]] | |||
|- | |||
|[[File:PMTTYDSpikyGoomba.png|25px]]||[[Spiked Goomba|Spiky Goomba]]||2||2||0 | |||
|- | |||
|[[File:Spinia.png|35px]]||[[Spinia]]||3||1||0||Rogueport Sewers<br>Glitz Pit<br>Pit of 100 Trials | |||
|- | |||
|[[File:PMTTYD Red Koopa Troopa Sprite.png|35px]]||[[Koopa Troopa]]||4||2||1||Petal Meadows<br>Hooktail Castle<br>Rogueport Sewers | |||
|- | |||
|[[File:Bald Cleft TTYD.png|35px]]||[[Bald Cleft]]||2||1||2||Petal Meadows | |||
|- | |||
|[[File:Bristle.png|50px]]||[[Bald Cleft]]||2||1||4||Petal Meadows<br>Glitz Pit | |||
|- | |||
|[[File:Cleft TTYD sprite.png|35px]]||[[Cleft]]||2||2||2||Petal Meadows<br>[[Boggly Woods]]<br>Pit of 100 Trials | |||
|- | |||
|[[File:PMTTYD Fuzzy.png|30px]]||[[Fuzzy]]||3||1||0||[[Shhwonk Fortress]]<br>Glitz Pit<br>Pit of 100 Trials | |||
|- | |||
|[[File:PMTTYD Red Paratroopa Sprite.png|40px]]||[[Koopa Paratroopa|Paratroopa]]||4||2||1||Hooktail Castle<br>Rogueport Sewers | |||
|- | |||
|[[File:PMTTYDDullBones.png|35px]]||[[Dull Bones]]||1||2||1||Hooktail Castle<br>Glitz Pit<br>[[Palace of Shadow]]<br>Pit of 100 Trials | |||
|- | |||
|[[File:Spania.png|35px]]||[[Spania]]||3||1||0||Rogueport Sewers<br>Glitz Pit<br>Pit of 100 Trials | |||
|- | |||
|[[File:Pale Piranha.png|40px]]||[[Piranha Plant|Pale Piranha]]||4||2||0||Boggly Woods<br>[[The Great Tree]]<br>Glitz Pit | |||
|- | |||
|[[File:DarkPuff.png|40px]]||[[Dark Puff]]||3||2||0||Boggly Woods<br>Glitz Pit<br>Pit of 100 Trials | |||
|- | |||
|[[File:PMTTYD X-Naut Sprite.png|40px]]||[[X-Naut]]||4||3||0||rowspan=3|The Great Tree<br>[[X-Naut Fortress]] | |||
|- | |||
|[[File:PPTTYDYux.png|40px]]||[[Yux]]||3||2||0 | |||
|- | |||
|[[File:Mini-Yux.png|20px]]||[[Mini-Yux]]||1||0||0 | |||
|- | |||
|[[File:Pider PMTTYD.png|40px]]||[[Pider]]||5||2||0||The Great Tree<br>Glitz Pit<br>Pit of 100 Trials | |||
|- | |||
|[[File:KP Koopa TTYD.png|35px]]||[[KP Koopa]]||4||2||1||rowspan=2|Glitz Pit | |||
|- | |||
|[[File:Yellow Paper Paratroopa.png|45px]]||[[KP Paratroopa]]||4||2||1 | |||
|- | |||
|[[File:PMTTYD Pokey.png|25px]]||[[Pokey]]||4||3||0||rowspan=5|Glitz Pit<br>Pit of 100 Trials | |||
|- | |||
|[[File:Spiny PMTTYD.png|35px]]||[[Spiny]]||3||3||3 | |||
|- | |||
|[[File:Lakitu.png|40px]]||[[Lakitu]]||5||2||0 | |||
|- | |||
|[[File:Red Bandit.png|35px]]||[[Bandit]]||5||2||0 | |||
|- | |||
|[[File:Big Bandit.png|35px]]||[[Bandit]]||8||3||0 | |||
|- | |||
|[[File:Cleftor.png|35px]]||[[Hyper Bald Cleft|H. Bald Cleft]]||3||2||2||Glitz Pit | |||
|- | |||
|[[File:Bob-omb.png|35px]]||[[Bob-omb]]||4||2||1||Glitz Pit<br>Pit of 100 Trials | |||
|- | |||
|[[File:TTYD Swooper.png|40px]]||[[Swoop|Swooper]]||6||3||0||Glitz Pit<br>[[Creepy Steeple]] | |||
|- | |||
|[[File:PMTTYD Red Spike Top Sprite.png|30px]]||[[Spike Top|R. S. Buzzy]]||5||3||4||Glitz Pit | |||
|- | |||
|[[File:Sky Blue Troopa.png|35px]]||[[Shady Koopa]]||8||3||1||Glitz Pit<br>Pit of 100 Trials | |||
|- | |||
|[[File:ShadyParatroopa.png|45px]]||[[Shady Paratroopa|S. Paratroopa]]||8||3||1||Glitz Pit | |||
|- | |||
|[[File:Green Fuzzy.png|30px]]||[[Green Fuzzy]]||5||3||0||Glitz Pit<br>[[Keelhaul Key]] | |||
|- | |||
|[[File:Pink Fuzzyball.png|30px]]||[[Flower Fuzzy]]||6||3||0||Glitz Pit<br>Keelhaul Key<br>Pit of 100 Trials | |||
|- | |||
|[[File:Red Magi Koopa.png|50px]]||[[Red Magikoopa|R. Magikoopa]]||7||4||0||rowspan=3|Glitz Pit | |||
|- | |||
|[[File:White Magi Koopa.png|50px]]||[[White Magikoopa|W. Magikoopa]]||7||4||0 | |||
|- | |||
|[[File:PMTTYD Green Magikoopa Sprite.png|50px]]||[[Green Magikoopa|G. Magikoopa]]||7||4||0 | |||
|- | |||
|[[File:Hamma Jamma.png|42px]]||[[Hammer Bro]]||7||4||1||Glitz Pit<br>Rogueport Sewers | |||
|- | |||
|[[File:TTYD Boomerang Bro.png|46px]]||[[Boomerang Bro]]||7||2||1||rowspan=2|Glitz Pit | |||
|- | |||
|[[File:PMTTYD Fire Bro Sprite.png|35px]]||[[Hammer Bro]]||7||3||1 | |||
|- | |||
|[[File:Dark Craw.png|40px]]||[[Dark Craw]]||20||6||0||rowspan=3|Glitz Pit<br>Pit of 100 Trials | |||
|- | |||
|[[File:Red Chomp.png|70px]]||[[Red Chomp]]||6||5||3 | |||
|- | |||
|[[File:Dark Koopatrol.png|40px]]||[[Dark Koopatrol|D. Koopatrol]]||25||5||2 | |||
|- | |||
|[[File:PMTTYDHyperGoomba.png|25px]]||[[Hyper Goomba]]||7||1||0||rowspan=4|[[Twilight Trail]] | |||
|- | |||
|[[File:Hyper Paragoomba Sprite.png|35px]]||[[Hyper Paragoomba]]||8||2||0 | |||
|- | |||
|[[File:Crazee.png|30px]]||[[Crazee Dayzee]]||7||2||0 | |||
|- | |||
|[[File:Hyper Spiky Goomba.png|25px]]||[[Hyper Spiky Goomba|H. S. Goomba]]||8||3||0 | |||
|- | |||
|[[File:Amazee Dayzee TTYD sprite.png|30px]]||[[Amazy Dayzee]]||20||20||1||rowspan=2|Twilight Trail<br>Pit of 100 Trials | |||
|- | |||
|[[File:Hyper Cleft.png|35px]]||[[Hyper Cleft]]||4||3||3 | |||
|- | |||
|[[File:PMTTYD Buzzy Beetle Sprite.png|31px]]||[[Buzzy Beetle]]||5||3||4||rowspan=3|Creepy Steeple | |||
|- | |||
|[[File:PMTTYD Spike Top Sprite.png|31px]]||[[Spike Top]]||5||3||4 | |||
|- | |||
|[[File:PMTTYD Boo Sprite.png|40px]]||[[Boo]]||7||3||0 | |||
|- | |||
|[[File:Ember.png|27px]]||[[Ember]]||8||3||0||Keelhaul Key<br>[[Pirate's Grotto]] | |||
|- | |||
|[[File:Putrid Piranha.png|40px]]||[[Putrid Piranha]]||8||3||0||Keelhaul Key | |||
|- | |||
|[[File:Lava Bubble.png|27px]]||[[Lava Bubble]]||6||4||0||Pirate's Grotto<br>Pit of 100 Trials | |||
|- | |||
|[[File:PMTTYD Bullet Bill Sprite.png|35px]]||[[Bullet Bill]]||2||4||1||rowspan=2|Pirate's Grotto | |||
|- | |||
|[[File:PMTTYD Bill Blaster Sprite.png|45px]]||[[Bill Blaster]]||5||0||2 | |||
|- | |||
|[[File:Bulky Bob-omb.png|50px]]||[[Bulky Bob-omb]]||6||2||1||rowspan=2|Pirate's Grotto<br>Pit of 100 Trials | |||
|- | |||
|[[File:PMTTYD Parabuzzy Sprite.png|31px]]||[[Para-Beetle|Parabuzzy]]||5||3||4 | |||
|- | |||
|[[File:PMTTYD Blue Magikoopa Sprite.png|50px]]||[[Magikoopa]]||7||4||0||rowspan=2|Rogueport Sewers | |||
|- | |||
|[[File:Koopatrol.png|40px]]||[[Koopatrol]]||6||4||2 | |||
|- | |||
|[[File:Spunia.png|35px]]||[[Spunia]]||12||7||2||Rogueport Sewers<br>Pit of 100 Trials | |||
|- | |||
|[[File:Ruff Puff.png|40px]]||[[Dark Puff]]||7||4||0||[[Riverside Station]] | |||
|- | |||
|[[File:Poison Pokey.png|25px]]||[[Poison Pokey]]||8||4||0||rowspan=2|Riverside Station<br>Pit of 100 Trials | |||
|- | |||
|[[File:PMTTYD Spiky Parabuzzy Sprite.png|31px]]||[[Spiky Parabuzzy|S. Parabuzzy]]||5||3||4 | |||
|- | |||
|[[File:PMTTYD Dark Boo Sprite.png|40px]]||[[Dark Boo]]||8||5||0||[[Poshley Sanctum]]<br>Pit of 100 Trials | |||
|- | |||
|[[File:IcePuff.png|40px]]||[[Ice Puff]]||9||4||0||rowspan=2|[[Fahr Outpost]]<br>Pit of 100 Trials | |||
|- | |||
|[[File:PMTTYD Frost Piranha.png|40px]]||[[Putrid Piranha]]||10||5||0 | |||
|- | |||
|[[File:Hyper Cleft.png|35px]]||[[Hyper Cleft]]||6||5||5||The [[Moon]]<br>Pit of 100 Trials | |||
|- | |||
|[[File:Z Yux.png|40px]]||[[Z-Yux]]||7||4||0||rowspan=2|The Moon<br>X-Naut Fortress | |||
|- | |||
|[[File:MiniZYux.png|20px]]||[[Mini-Z-Yux]]||2||0||0 | |||
|- | |||
|[[File:Elite X Naut.png|40px]]||[[Elite X-Naut]]||10||5||1||rowspan=4|X-Naut Fortress | |||
|- | |||
|[[File:X Yux.png|40px]]||[[X-Yux]]||10||3||0 | |||
|- | |||
|[[File:MiniXYux.png|20px]]||[[Mini-X-Yux]]||1||0||0 | |||
|- | |||
|[[File:XnautPhD.png|40px]]||[[X-Naut PhD]]||9||4||0 | |||
|- | |||
|[[File:Swoopula.png|40px]]||[[Swoopula]]||9||4||0||rowspan=2|Palace of Shadow<br>Pit of 100 Trials | |||
|- | |||
|[[File:Paper Dry Bones.png|35px]]||[[Dry Bones]]||8||5||2 | |||
|- | |||
|[[File:PMTTYD Bombshell Bill Sprite.png|35px]]||[[Bombshell Bill]]||3||6||2||rowspan=2|Palace of Shadow | |||
|- | |||
|[[File:Bomb Shell Bill.png|45px]]||[[B. Bill Blaster]]||10||0||4 | |||
|- | |||
|[[File:Phantom Ember.png|27px]]||[[Phantom Ember]]||10||5||0||Palace of Shadow<br>Pit of 100 Trials | |||
|- | |||
|[[File:PMTTYDDarkBones.png|35px]]||[[Dark Bones]]||20||5||2||Palace of Shadow | |||
|- | |||
|[[File:Chain Chomp PMTTYD sprite.png|70px]]||[[Chain-Chomp]]||7||6||5||rowspan=2|Palace of Shadow<br>Pit of 100 Trials | |||
|- | |||
|[[File:DarkWizzerd.png|60px]]||[[Dark Wizzerd]]||10||5||2 | |||
|- | |||
|[[File:PMTTYDGloomba.png|25px]]||[[Gloomba]]||7||3||0||rowspan=16|Pit of 100 Trials | |||
|- | |||
|[[File:PMTTYD Paragloomba Sprite.png|35px]]||[[Paragloomba]]||7||3||0 | |||
|- | |||
|[[File:Spiked Gloomba.png|25px]]||[[Spiky Gloomba]]||7||4||0 | |||
|- | |||
|[[File:Purple Koopa troopa.png|35px]]||[[Dark Koopa]]||8||4||2 | |||
|- | |||
|[[File:DarkParatroopa.png|40px]]||[[D. Paratroopa]]||8||4||2 | |||
|- | |||
|[[File:Badge Bandit.png|35px]]||[[Badge Bandit]]||12||5||0 | |||
|- | |||
|[[File:PMTTYD Dark Lakitu.png|40px]]||[[Dark Lakitu]]||13||5||0 | |||
|- | |||
|[[File:SkyblueSpiny.png|35px]]||[[Sky-Blue Spiny|S. Blue Spiny]]||6||6||4 | |||
|- | |||
|[[File:Wizzered.png|60px]]||[[Wizzerd]]||10||6||3 | |||
|- | |||
|[[File:Piranha Plant PMTTYD.png|40px]]||[[Piranha Plant (Pit of 100 Trials)|Piranha Plant]]||15||9||0 | |||
|- | |||
|[[File:PMTTYD Dark Bristle.png|50px]]||[[Dark Bristle]]||8||8||4 | |||
|- | |||
|[[File:Arantula TTYD sprite.png|40px]]||[[Arantula]]||16||7||0 | |||
|- | |||
|[[File:EliteWizzerd.png|60px]]||[[Elite Wizzerd]]||12||8||5 | |||
|- | |||
|[[File:Swampire.png|40px]]||[[Swampire]]||20||6||0 | |||
|- | |||
|[[File:PMTTYDPoisonPuff.png|40px]]||[[Poison Puff]]||15||8||0 | |||
|- | |||
|[[File:PMTTYD Bob-ulk Sprite.png|50px]]||[[Bob-ulk]]||10||4||2 | |||
|} | |||
== | ===Enemy formations=== | ||
{{main| | {{main|List of enemy formations in Paper Mario: The Thousand-Year Door}} | ||
In [[Mario]]'s adventure in ''Paper Mario: The Thousand-Year Door'', he encounters enemies on the field. When he engages battle with them, there are often other enemies that accompany the one that Mario encountered on the field. | |||
In [[ | {{br}} | ||
==Bosses== | ===Bosses=== | ||
'''Bold''' signifies chapter bosses. | '''Bold''' signifies chapter bosses. | ||
{| style=" | {|style="width:80%;margin:0 auto;border-collapse:collapse;border:silver;text-align:center;"border="1"cellpadding="4"cellspacing="1" | ||
|-style="background: | |-style="background-color:silver;" | ||
!Chapter!!Name!!HP!!Attack!!Defense!!Location | !width=17%|Chapter!!width=18%|Image!!width=17%|Name!!width=8%|HP!!width=8%|Attack!!width=8%|Defense!!width=12%|Location | ||
|- | |- | ||
|rowspan=3|Prologue | |rowspan=3|'''Prologue'''<br>A Rogue's Welcome||[[File:Crump.png|90px]]||[[Lord Crump]] (1)||5||1||0||rowspan=2|[[Rogueport]] | ||
|- | |- | ||
|[[Gus]] (optional)||20||3||0 | |[[File:Gus.png|70px]]||[[Gus]] (optional)||20||3||0 | ||
|- | |- | ||
|'''[[Blooper]]'''||12||1||0||[[Rogueport Sewers]] | |[[File:First Blooper.png|120px]]||'''[[Big Blooper|Blooper]]'''||12||1||0||[[Rogueport Sewers]] | ||
|- | |- | ||
|rowspan=5|Chapter 1 | |rowspan=5|'''Chapter 1'''<br>Castle and Dragon||rowspan=2|[[File:PMTTYD Gold Fuzzy Sprite.png|45px]]<br>[[File:PMTTYD Fuzzy.png|45px]]||rowspan=2|[[Gold Fuzzy]]<br>[[Fuzzy Horde]]||10||1||0||rowspan=2|[[Shhwonk Fortress]] | ||
|- | |- | ||
|20||1 (per attack)||0 | |20||1 (per attack)||0 | ||
|- | |- | ||
|rowspan=2|[[Red Bones]]<br>Four [[Dull Bones]]||5||3||1||[[Hooktail Castle]] | |rowspan=2|[[File:PMTTYDRedBones.png|55px]]<br>[[File:PMTTYDDullBones.png|55px]]||rowspan=2|[[Red Bones]]<br>Four [[Dull Bones]]||5||3||1||rowspan=3|[[Hooktail Castle]] | ||
|- | |- | ||
|1 (each)||2 (each)||1 (each) | |1 (each)||2 (each)||1 (each) | ||
|- | |- | ||
|'''[[Hooktail]]'''||20||5||1 | |[[File:PMTTYD Hooktail Head Sprite.png]]||'''[[Hooktail]]'''||20||5||1 | ||
|- | |- | ||
|rowspan=4|Chapter 2 | |rowspan=4|'''Chapter 2'''<br>The Great Boggly Tree||rowspan=3 style="text-align:bottom"|[[File:PMTTYD Vivian Sprite.png|67px]]<br>[[File:Marilyn.png|82px]]<br>[[File:Beldam sprite PMTTYD.png|49px]]||rowspan=3|[[Vivian]]<br>[[Marilyn]] (1)<br>[[Beldam]] (1)||10||1||0||rowspan=3|[[Boggly Woods]] | ||
|- | |- | ||
|12||2||0 | |12||2||0 | ||
|- | |- | ||
|9||1||0 | |9||1||0 | ||
|- | |- | ||
|'''[[Magnus von Grapple]]'''||30||2||1||[[The Great Tree]] | |[[File:Magnus Von Grapple.png|120px]]||'''[[Magnus von Grapple]]'''||30||2||1||[[The Great Tree]] | ||
|- | |- | ||
|rowspan=4|Chapter 3 | |rowspan=4|'''Chapter 3'''<br>Of Glitz and Glory||[[File:Iron Cleft Red.png|60px]]<br>[[File:Iron Cleft Green.png|60px]]||[[Armored Harriers]]||6 (each)||4 (each)||??? (each)||rowspan=4|[[Glitz Pit]] | ||
|- | |- | ||
|[[Bowser]] (1)||30||3||1 | |[[File:PMTTYD Bowser Sprite.png|120px]]||[[Bowser]] (1)||30||3||1 | ||
|- | |- | ||
|[[Rawk Hawk]]||40||4||0 | |[[File:Rawk Hawk TTYD artwork.jpg|90px]]||[[Rawk Hawk]]||40||4||0 | ||
|- | |- | ||
|'''[[Macho Grubba]]'''||60||4||0 | |[[File:MachoGrubba.png|120px]]||'''[[Macho Grubba]]'''||60||4||0 | ||
|- | |- | ||
|rowspan=3|Chapter 4 | |rowspan=3|'''Chapter 4'''<br>For Pigs the Bell Tolls||[[File:Atomic Boo.png|120px]]||[[Big Boo|Atomic Boo]] (optional)||40||4||0||rowspan=3|[[Creepy Steeple]] | ||
|- | |- | ||
|[[Doopliss]] (1)||40||4||0 | |[[File:Doopliss.png|80px]]||[[Doopliss]] (1)||40||4||0 | ||
|- | |- | ||
|'''[[Doopliss]] (2)'''||40||4||0 | |[[File:Doopliss as Mario.png|50px]]||'''[[Doopliss]] (2)'''||40||4||0 | ||
|- | |- | ||
|rowspan=4|Chapter 5 | |rowspan=4|'''Chapter 5'''<br>The Key to Pirates||[[File:Ember.png|30px]]||Three [[Ember]]s||8 (each)||3 (each)||0 (each)||[[Keelhaul Key]] | ||
|- | |- | ||
|'''[[Cortez]]'''||20 x 3||4||1||[[Pirate's Grotto]] | |[[File:Cortez.png|120px]]||'''[[Cortez]]'''||20 x 3||4||1||[[Pirate's Grotto]] | ||
|- | |- | ||
|rowspan=2|[[Lord Crump]] (2)<br>[[X-Naut]]s||30||3||0||[[X-Ship]] | |rowspan=2|[[File:Crump.png|90px]]<br>[[File:PMTTYD X-Naut Sprite.png|60px]]||rowspan=2|[[Lord Crump]] (2)<br>[[X-Naut]]s||30||3||0||rowspan=2|[[X-Ship]] | ||
|- | |- | ||
|6 (stack) | |6 (stack)<br>10 (horde)||3 (stack)<br>5 (horde)||0 (both) | ||
|- | |- | ||
|Chapter 6 | |'''Chapter 6'''<br>Three Days of Excess||[[File:PMTTYD Smorg Artwork.jpg|120px]]||'''[[Smorg]]'''||50||5||1||[[Excess Express]] | ||
|- | |- | ||
|rowspan=2|Chapter 7 | |rowspan=2|'''Chapter 7'''<br>Mario Shoots the Moon||[[File:Elite X Naut.png|60px]]||Two [[Elite X-Naut]]s||10 (each)||5 (each)||1 (each)||rowspan=2|[[X-Naut Fortress]] | ||
|- | |- | ||
|'''[[Magnus von Grapple 2.0]]'''||70||6||2 | |[[File:PMTTYD Tattle Log - Magnus 2.png|120px]]||'''[[Magnus von Grapple 2.0]]'''||70||6||2 | ||
|- | |- | ||
|rowspan=11|Chapter 8 | |rowspan=11|'''Chapter 8'''<br>The Thousand-Year Door||rowspan=2|[[File:PMTTYDDarkBones.png|55px]]<br>[[File:Paper Dry Bones.png|55px]]||rowspan=2|[[Dark Bones]]<br>Four [[Dry Bones]]||20||5||2||rowspan=11|[[Palace of Shadow]] | ||
|- | |- | ||
|8 (each)||5 (each)||2 (each) | |8 (each)||5 (each)||2 (each) | ||
|- | |- | ||
|[[Gloomtail]]||80||8||2 | |[[File:Gloomtail.png|150px]]||[[Gloomtail]]||80||8||2 | ||
|- | |- | ||
|rowspan=3|[[Doopliss]] (3)<br>[[Marilyn]] (2)<br>[[Beldam]] (2) || 40 || 6 || 0 | |rowspan=3|[[File:Doopliss.png|80px]]<br>[[File:Marilyn.png|82px]]<br>[[File:Beldam sprite PMTTYD.png|49px]]||rowspan=3|[[Doopliss]] (3)<br>[[Marilyn]] (2)<br>[[Beldam]] (2) || 40 || 6 || 0 | ||
|- | |- | ||
|40||7||0 | |40||7||0 | ||
|- | |- | ||
|30||5||0 | |30||5||0 | ||
|- | |- | ||
|rowspan=2|'''[[Sir Grodus]]'''<br>[[Grodus X]]||50||7||1 | |rowspan=2|[[File:PMTTYD Grodus Artwork.png|110px]]<br>[[File:Grodus X.png|20px]]||rowspan=2|'''[[Sir Grodus]]'''<br>[[Grodus X]]||50||7||1 | ||
|- | |- | ||
|3 (each)||4 (each)||0 (each)||[[Palace of Shadow]] | |3 (each)||4 (each)||0 (each) | ||
|- | |||
|rowspan=2|[[File:PMTTYD Bowser Sprite.png|120px]]<br>[[File:KammyTTYDsprite.png|100px]]||rowspan=2|[[Bowser]] (2)<br>[[Kammy Koopa]]||70||7||2 | |||
|- | |||
|50||5||0 | |||
|- | |||
|[[File:Shadow Queen Talk.png|60px]]<br>[[File:PMTTYD Shadow Queen True Form Render.png|100px]]||'''[[Shadow Queen]]'''||150||7||1 | |||
|- | |||
|[[Pit of 100 Trials (Paper Mario: The Thousand-Year Door)|Pit of 100 Trials]]||[[File:Bonetail.png|150px]]||[[Bonetail]] (optional)||200||8 ||2||[[Pit of 100 Trials (Paper Mario: The Thousand-Year Door)|Pit of 100 Trials]] | |||
|} | |||
===Environmental hazards=== | |||
{|style="width:80%;margin:0 auto;border-collapse:collapse;border:silver;text-align:center;"border="1"cellpadding="4"cellspacing="1" | |||
|-style="background-color:silver;" | |||
!Image | |||
!width=20%|Hazard | |||
!Description | |||
|- | |||
|[[File:PMTTYD Star Piece RogueSewerWestBackground.png|100px]] | |||
|[[Pit]] | |||
|Falling into a pit causes Mario to lose 1 HP; this is only possible in background sections in Rogueport Sewers and Boggly Woods. During Bowser's platform levels, it immediately defeats Bowser, forcing him to start over. | |||
|- | |||
|[[File:PMTTYD X-Naut Fortress screenshot.png|100px]] | |||
|{{Conjectural|Electric tile}} | |||
|Part of a puzzle in X-Naut Fortress, where stepping on the wrong tiles cause Mario to lose 1 HP. | |||
|- | |||
|[[File:PMTTYDHiddenBlocks14.png|100px]] | |||
|[[Fire Bar]] | |||
|Spinning flames found in the Palace of Shadow that will force Mario back to the start if touched. They also appear in Bowser's third platforming level, where it can be destroyed by his fire breath. | |||
|- | |||
|[[File:PMTTYD Bowser World 3.png|100px]] | |||
|[[Lava]] | |||
|Only appears in Bowser's level 3-X, functioning the same as a pit. | |||
|- | |- | ||
|[[File:PM-TTYD Retractable Spike Trap at the Palace of Shadow.png|100px]] | |||
|[[Spike Trap]] | |||
|Two kinds of spike traps are encountered: retractable ones that cause Mario to lose 1 HP upon touching them, and stationary ones that block the way and cannot be touched at all since they are on raised platforms. | |||
|- | |- | ||
| | |[[File:PM-TTYD Spiked Ceiling at Hooktail Castle.png|100px]] | ||
|{{Conjectural|Spiked ceiling}} | |||
|Part of a puzzle in Hooktail Castle, a ceiling covered in spikes which will lower gradually. If Mario doesn't escape in time, it will cause a Game Over. | |||
|- | |- | ||
| | |[[File:PMTTYD Shine Sprite RogueSewerEastSea.png|100px]] | ||
|[[Water]] | |||
|Mario must use his Boat Mode transformation to traverse bodies of water. If he falls in water in any other instance, he is attacked by [[Nibbles]], losing 1 HP. | |||
|- | |- | ||
|[[ | |[[File:PM-TTYD Waves at Pirate's Grotto.png|100px]] | ||
|[[Wave]] | |||
|Seen in Pirate's Grotto, they swallow Boat Mario and force him to restart the section. | |||
|} | |||
==World== | |||
{{PMTTYD map}} | |||
The events of ''Paper Mario: The Thousand-Year Door'' take place primarily in [[Rogueport]] and its surrounding areas. Rogueport is the hub location, and where the titular [[The Thousand-Year Door|Thousand-Year Door]] is found. | |||
{|width=70% | |||
|width=25% style="vertical-align:top;"| | |||
*[[Rogueport]] | |||
**[[Happy Lucky Lottery]] | |||
**[[Lovely Howz of Badges]] | |||
**[[Pianta Parlor]] | |||
**[[Podley's Place]] | |||
**[[Toad Bros. Bazaar]] | |||
**[[Trouble Center]] | |||
*[[Rogueport Sewers]] | |||
**[[Deepdown Depot]] | |||
**[[Herb T.'s place]] | |||
**[[The Thousand-Year Door]] | |||
|width=25% style="vertical-align:top;"| | |||
*[[Petal Meadows]] | |||
**[[Hooktail Castle]] | |||
**[[Petalburg]] | |||
**[[Shhwonk Fortress]] | |||
*[[Boggly Woods]] | |||
**[[Flurrie's House]] | |||
**[[The Great Tree]] | |||
*[[Glitzville]] | |||
**[[Fresh Juice Shop]] | |||
**[[Glitz Pit]] | |||
**[[Souvenir shop (Paper Mario: The Thousand-Year Door)|Souvenir shop]] | |||
|width=25% style="vertical-align:top;"| | |||
*[[Twilight Town]] | |||
**[[Twilight Shop]] | |||
*[[Twilight Trail]] | |||
**[[Creepy Steeple]] | |||
*[[Keelhaul Key]] | |||
**[[Keelhaul Galleria]] | |||
**[[Pirate's Grotto]] | |||
*[[Excess Express]] | |||
*[[Poshley Heights]] | |||
**[[Poshley Sanctum]] | |||
*[[Fahr Outpost]] | |||
|width=25% style="vertical-align:top;"| | |||
*[[Moon]] | |||
**[[X-Naut Fortress]] | |||
*[[Palace of Shadow]] | |||
**[[Riddle Tower]] | |||
|} | |} | ||
== | ===Notable characters=== | ||
[[File: | ====Optional helpful characters==== | ||
The [[Pit of 100 Trials (Paper Mario: The Thousand-Year Door)|Pit of 100 Trials]] is an optional challenge. Before or after saving the world, Mario can take on the enemies found in the 100-basement floor area known as the Pit of 100 Trials. The enemies located on levels 51-99 are especially strong. Upon reaching floor 100, Mario discovers [[Bonetail]], the long-lost relative of Hooktail and Gloomtail. After defeating Bonetail, Mario receives the [[Return Postage]] | {|style="width:80%;margin:0 auto;border-collapse:collapse;border:silver;text-align:left;"border="1"cellpadding="4"cellspacing="1" | ||
|-style="background-color:silver;text-align:center" | |||
!width=14%|Character | |||
!width=18%|Found in/<br>Availability | |||
!Service | |||
|- | |||
|align=center|[[File:Charlieton PM.png|50px]]<br>'''[[Charlieton]]''' | |||
|[[Rogueport]] Plaza | |||
|Sells Mario a rotating set of items and badges, many of them rare or exclusive to him. His listing is updated every time Mario returns to Rogueport. | |||
|- | |||
|align=center|[[File:Chet Rippo.png|50px]]<br>'''[[Chet Rippo]]''' | |||
|[[Rogueport Sewers]]<br>(Bobbery needed) | |||
|Raises one of Mario's stats (HP, FP or BP) while decreasing another, for 39 coins. He can do the same with partner ranks. | |||
|- | |||
|align=center|[[File:Dazzle.png|50px]]<br>'''[[Dazzle]]''' | |||
|Rogueport Sewers<br>(from the start) | |||
|Trades Star Pieces for badges. | |||
|- | |||
|align=center|[[File:Grifty.png|50px]]<br>'''[[Grifty]]''' | |||
|Rogueport east side<br>(Yoshi needed) | |||
|Tells Mario Rogueport's detailed backstory. | |||
|- | |||
|align=center|[[File:Lucky.png|50px]]<br>'''[[Lucky]]''' | |||
|Rogueport west side<br>(after Chapter 1) | |||
|Invites Mario to participate in the [[Happy Lucky Lottery]]. | |||
|- | |||
|align=center|[[File:Lumpy.png|50px]]<br>'''[[Lumpy]]''' | |||
|Rogueport dock area | |||
|Asks Mario to invest coins in his oil search endeavor. If Mario accepts the offer, Lumpy will return later in the game to hand him his share. | |||
|- | |||
|align=center|[[File:Merlee.png|50px]]<br>'''[[Merlee]]''' | |||
|Rogueport Sewers<br>(Paper Mode needed) | |||
|Casts a spell on Mario that grants him random lucky events (e.g. increased attack power, more SP) in a number of random battles. Mario can pay her 5, 20 or 50 coins; the higher the price, the more times the events occur. | |||
|- | |||
|align=center|[[File:PMTTYD Merluvlee.png|50px]]<br>'''[[Merluvlee]]''' | |||
|Rogueport Sewers<br>(from the start) | |||
|Tells Mario the location of Star Pieces, Shine Sprites, or where to go to progress the story, for different amounts of coins. | |||
|- | |||
|align=center|[[File:Merlon.png|50px]]<br>'''[[Merlon]]''' | |||
|Rogueport east side<br>(from the start) | |||
|Upgrades a partner's rank for three Shine Sprites. Can upgrade each partner a second time after Mario retrieves the [[Up Arrow]]. | |||
|- | |||
|align=center|[[File:Whacka PMTTYD.png|50px]]<br>'''[[Whacka]]''' | |||
|[[Keelhaul Key]] | |||
|A one-of-a-kind creature that drops a [[Whacka Bump]] when struck. After eight hits, it is permanently gone. | |||
|- | |||
|align=center|[[File:Wonky.png|50px]]<br>'''[[Wonky]]''' | |||
|[[Herb T.'s place]]<br>(after Chapter 1) | |||
|Gives Mario hints for five coins. | |||
|- | |||
|align=center|[[File:Zess T.png|50px]]<br>'''[[Zess T.]]''' | |||
|Rogueport Plaza<br>(after Chapter 1) | |||
|Cooks a recipe with an item given by Mario. After receiving the [[Cookbook]], she can cook with two ingredients. | |||
|} | |||
====Major characters==== | |||
{{multiple image | |||
|align=right | |||
|width=200 | |||
|direction=vertical | |||
|image1=PMTTYD Frankly Mail.png | |||
|caption1=Professor Frankly lives in Rogueport and guides Mario's party throughout their quest. | |||
|image2=Don Pianta TTYD desk.png | |||
|caption2=Don Pianta and his [[Pianta syndicate|family]] recurringly exchange favors with Mario. | |||
|footer= | |||
}} | |||
These are friendly characters that play a part in the story of each chapter or are otherwise recurring and unique, but are not fought at any point. | |||
{|width=70% | |||
|width=25% style="vertical-align:top;"| | |||
'''Prologue''' | |||
*[[Toadsworth]] | |||
*[[Professor Frankly]] | |||
'''Chapter 1''' | |||
*[[Koopie Koo]] | |||
*[[Koopley]] | |||
*[[Kroop]] | |||
'''Chapter 2''' | |||
*[[Jabble]] | |||
*[[Petuni]] | |||
*[[Puni elder]] | |||
*[[Punio]] | |||
|width=25% style="vertical-align:top;"| | |||
'''Chapter 3''' | |||
*[[Don Pianta]] | |||
*[[Frankie]] | |||
*[[Francesca]] | |||
*[[Grubba]] | |||
*[[Ishnail]] | |||
*[[Jolene]] | |||
*[[Mr. Hoggle]] | |||
'''Chapter 4''' | |||
*[[The Creepy Steeple Boo]] | |||
*[[Darkly]] | |||
*[[Mayor Dour]] | |||
*[[Parrot (character)|Parrot]] | |||
|width=25% style="vertical-align:top;"| | |||
'''Chapter 5''' | |||
*[[Flavio]] | |||
*[[Pa-Patch]] | |||
*[[Podley]] | |||
'''Chapter 6''' | |||
*[[Bub]] | |||
*[[Chef Shimi]] | |||
*[[Excess Express conductor]] | |||
*[[Excess Express engineer]] | |||
*[[Excess Express waitress]] | |||
*[[Ghost T.]] | |||
*[[Heff T.]] | |||
*[[Pennington]] | |||
|width=25% style="vertical-align:top;"| | |||
*[[Toodles]] | |||
*[[Zip Toad]] | |||
'''Chapter 7''' | |||
*[[Fahr Outpost mayor]] | |||
*[[General White]] | |||
*[[Goldbob]] | |||
'''Other recurring characters''' | |||
*[[Dupree]] | |||
*[[TEC-XX]] | |||
*[[Toadette]] | |||
*[[Traveling Sisters 3]] | |||
|} | |||
{{br}} | |||
==Hidden block locations== | |||
[[File:PMTTYDHiddenBlocks1R.png|thumb|250px|[[Mario]] and [[Goombella]] revealing a hidden ? Block in [[Rogueport Sewers]]]] | |||
{{main|List of hidden blocks in Paper Mario: The Thousand-Year Door}} | |||
In ''Paper Mario: The Thousand-Year Door'', Mario can discover hidden [[? Block]]s throughout the game. [[Ms. Mowz]]'s overworld sniffing ability is helpful in determining where they are. There are 15 invisible ? Blocks in total. | |||
{{br}} | |||
==Selling prices== | |||
{{main|List of selling prices in Paper Mario: The Thousand-Year Door}} | |||
[[File:TTYDSellingPrice.png|thumb|Mario selling an Ultra Shroom at [[Toad Bros. Bazaar]] in Rogueport.|250px]] | |||
In ''Paper Mario: The Thousand-Year Door'', [[Mario]] can sell items from his inventory to shopkeepers in the item [[List of shops in Paper Mario: The Thousand-Year Door|shops]] in the game. Most items can be sold to the shopkeepers for a set price at every shop, however, some items sell at a higher price depending on the location of the shop and the item itself. Mario can make a profit if he purchases an item at a low price from one store, and sells it to another that buys it from him at a higher price. One [[Trouble Center]] trouble exploits this fact. | |||
{{br}} | |||
==Side activities== | |||
===Star Pieces=== | |||
[[File:PMTTYD Star Piece RogueportZessTRoofTop.png|thumb|300px|[[Mario]] and [[Goombella]] getting the [[Star Piece (Paper Mario series)|Star Piece]] above Zess T.'s house in [[Rogueport]].]] | |||
{{main|List of Star Pieces in Paper Mario: The Thousand-Year Door}} | |||
During the adventure, [[Mario]] and co. can collect [[Star Piece (Paper Mario series)|Star Pieces]] by finding them in hidden spots, underneath chambers which he can use the Spin Jump to reveal, and earning them from other characters. [[Ms. Mowz]] is useful in finding the overworld Star Pieces. Mario can then trade them with [[Dazzle]] for [[Badge]]s. There are 100 Star Pieces in the game. | |||
{{br}} | |||
===Trouble Center=== | |||
{{main|Trouble Center}} | |||
[[File:Trouble Center.png|thumb|Inside the Trouble Center in East Rogueport|250px]] | |||
In [[Rogueport]], there is a Trouble Center which offers the citizens' troubles for Mario to solve. An [[Elusive Badge!|anonymous quest]] comes from [[Ms. Mowz]] and requires Mario to find a badge she is looking for but can not find. After this quest is completed, she joins Mario's team. | |||
{{br}} | |||
===The Pit of 100 Trials=== | |||
[[File:MeetBonetail.png|thumb|250 px|Mario confronting Bonetail]] | |||
The [[Pit of 100 Trials (Paper Mario: The Thousand-Year Door)|Pit of 100 Trials]] is an optional challenge. Before or after saving the world, Mario can take on the enemies found in the 100-basement floor area known as the Pit of 100 Trials. The enemies located on levels 51-99 are especially strong. Upon reaching floor 100, Mario discovers [[Bonetail]], the long-lost relative of Hooktail and Gloomtail. After defeating Bonetail, Mario receives the [[Return Postage]] badge. | |||
{{br}} | {{br}} | ||
==Similarities to ''Paper Mario''== | ==Similarities to ''Paper Mario''== | ||
There are many similarities between the original ''Paper Mario'' and ''Paper Mario: The Thousand-Year Door'', including these elements: | There are many similarities between the original ''Paper Mario'' and ''Paper Mario: The Thousand-Year Door'', including these elements: | ||
*Both games have an opening introduction before the title screen. | |||
*The opening is identical to that of the previous game, right down to [[Parakarry]] delivering a letter from Princess Peach. | *The opening is identical to that of the previous game, right down to [[Parakarry]] delivering a letter from Princess Peach. | ||
*The first partner of both games is a Goomba that | *The first partner of both games is a Goomba that gives Mario information about enemies, characters, and locations. They both have [[Headbonk]], [[Tattle]], and [[Multibonk]] as attacks. | ||
*The second partner of both games is a Koopa Troopa. Both | *The second partner of both games is a Koopa Troopa. Both are obtained during Chapter 1, able to be shot out to hit switches and grab distant items, and use [[Shell Toss]] and [[Power Shell]] in battle. | ||
*Both games have partners obtained in [[#Chapter 3: Of Glitz and Glory|Chapter 3]] that have first and last attacks that deal multiple low | *Both games have partners obtained in [[#Chapter 3: Of Glitz and Glory|Chapter 3]] that have first and last attacks that deal multiple low-powered hits: Lady Bow with [[Smack|her]] [[Fan Smack|attacks]], and Yoshi Kid with his [[Ground Pound#Paper Mario: The Thousand-Year Door|Ground Pound]] and [[Stampede (Paper Mario: The Thousand-Year Door)|Stampede]] attacks. | ||
*The fourth partner of each game | *The fourth partner of each game allows the player to travel across gaps: Parakarry and Yoshi, respectively. | ||
*Both games have a Bob-omb | *Both games have a Bob-omb partner who is able to destroy cracked surfaces: Bombette and Bobbery, respectively. | ||
*The fifth partner of both games allows Mario to become invisible to enemies | *The fifth partner of both games allows Mario to become invisible to enemies: Bow and Vivian, respectively. | ||
*Both games have a partner who is able to uncover hidden items, and whose basic attack pierces through | *Both games have a partner who is able to uncover hidden items, and whose basic attack pierces through Defense Power: Watt and Ms. Mowz, respectively. | ||
*Both games have a partner who has betrayed an enemy to join Mario's party | *Both games have a partner who has betrayed an enemy to join Mario's party: Lakilester and Vivian, respectively. | ||
*Both games have a partner who lets Mario | *Both games have a partner who lets Mario ride them to move faster: Lakilester and Yoshi, respectively. | ||
*Both games have some way to let Mario traverse through water | *Both games have some way to let Mario traverse through water: the partner [[Sushie]] and Boat Mode, respectively. Additionally, both abilities are obtained during Chapter 5 and can only be used to that end when a specific panel is stepped on. | ||
*The main plot point of both games is to find seven star-shaped entities, each granting Mario special abilities. | *The main plot point of both games is to find seven star-shaped entities, each granting Mario special abilities. | ||
*Both games have an upgrade system for Mario's Jump and Hammer attacks. | *Both games have an upgrade system for Mario's Jump and Hammer attacks. | ||
*In both games the player is able to play as Peach between | *In both games the player is able to play as Peach between Chapters. The player is required to dress Peach up as an enemy to learn secrets at one point. However, in ''Paper Mario: The Thousand-Year Door'', Bowser's side-quest is separated from Peach's, as he is not the one who kidnapped her. | ||
*As with the first ''Paper Mario'' game, a main antagonist | *As with the first ''Paper Mario'' game, a main antagonist encounters Peach disguised as a minion, and remarks on how she smells "too nice". | ||
*Mario and Peach contact each other using friendly characters in both games. [[Twink]] | *Mario and Peach contact each other using friendly characters in both games. [[Twink]] helps her in ''Paper Mario'', while TEC-XX does so in ''The Thousand-Year Door''. In the end, both Twink and TEC develop feelings for Peach. | ||
*Mario must solve a mystery in both games. A [[Bumpty]] is Mario's fellow detective in both. | *Mario must solve a mystery in both games. A [[Bumpty|penguin]] is Mario's fellow detective in both. | ||
*At one point in the games, Mario falls for a ploy created by the boss of | *At one point in the games, Mario falls for a ploy created by the boss of a Chapter, which leads him to be confined in a cage alongside several other prisoners. The trap is a ? Block in ''Paper Mario'', and a fake Puni pedestal in ''The Thousand-Year Door''. | ||
*[[#Chapter 1: Castle and Dragon|Chapter 1]] in both games features a | *[[#Chapter 1: Castle and Dragon|Chapter 1]] in both games features a fortress as the location of the boss, with both being located in peaceful, green plains. Additionally, both bosses terrorize the denizens of the local town ([[Koopa Village]] and [[Petalburg]], which are both largely inhabited by [[Koopa Troopa]]s). Both towns feature a distinctive, elderly Koopa Troopa ([[Koopa Koot]] and [[Kroop]]). | ||
*The partner acquired in [[#Chapter 2: The Great Boggly Tree|Chapter 2]] in both games | *The partner acquired in [[#Chapter 2: The Great Boggly Tree|Chapter 2]] in both games requires Mario to bring them an item. | ||
*An oversized [[Clubba]] is the boss of Chapter 3 in both games, and both have a secret that involves making themselves powerful. Both are sought after by persistent female characters interested in finding lost persons (Bow and Jolene | *An oversized [[Clubba]] is the boss of Chapter 3 in both games, and both have a secret that involves making themselves powerful. Both are sought after by persistent female characters interested in finding lost persons (Lady Bow and Jolene). Furthermore, both Clubba characters have positioned security units to guard certain areas ([[Sentinel]]s and [[Glitz Pit Security]]). | ||
*In both games, at one point, Mario has to chase the Chapter 3 bosses ( | *In both games, at one point, Mario has to chase the Chapter 3 bosses ([[Tubba's Heart]] and [[Grubba]]). | ||
*Chapter 4 in both games involves Mario accessing the storage room of a certain shop to make progress. It also involves widespread (and comical) mischief in a town; | *Chapter 4 in both games involves Mario accessing the storage room of a certain shop to make progress. It also involves widespread (and comical) mischief in a town; in ''Paper Mario'', it is the [[Shy Guy]] frenzy that takes place in [[Toad Town]], while in ''Paper Mario: The Thousand-Year Door'', the denizens of Twilight Town are being turned into pigs at the toll of Creepy Steeple's bell. | ||
*[[Moustafa]] and [[Flavio]] both give the player stones needed to reach an ancient, rumored to be haunted, place. Also both of the | *[[Moustafa]] and [[Flavio]] both give the player stones needed to reach an ancient, and rumored to be haunted, place. Also, both of the ghostly bosses (Tutankoopa and Cortez) try to intimidate Mario by uttering threats as he progresses through the level. | ||
*Buying a [[Dried Shroom]] and another certain item along with it | *Buying a [[Dried Shroom]] and another certain item along with it is a secret password in both games that must be entered in order to reach Moustafa and Don Pianta. | ||
*[[#Chapter 5: The Key to Pirates|Chapter 5]] takes place on a tropical island with coconuts in both games and both involve an expedition. Also, in both games this is when Mario's oldest partner joins him, and they both have to be rescued from being stuck in a tree before they do so. | *[[#Chapter 5: The Key to Pirates|Chapter 5]] takes place on a tropical island with coconuts in both games, and both involve embarking on an expedition with one non-party character interested in treasure (Kolorado and Flavio). Also, in both games, this is when Mario's oldest partner joins him, and they both have to be rescued from being stuck in a tree before they do so (Sushie and Bobbery). | ||
*The Chapter 5 bosses, [[Lava Piranha]] and [[Cortez]], | *The Chapter 5 bosses, [[Lava Piranha]] and [[Cortez]], resemble each other, as Cortez's spine in his first form and Lava Piranha's stem are in the exact same position, and both of them have multiple forms. They are also accompanied by multiple entities, each with their own mechanics, attacks, and HP. | ||
*In both games, Princess Peach must make something. Also, in both games, if she makes a mistake | *In both games, Princess Peach must make something. Also, in both games, if she makes a mistake during the process of making it, it comes out wrong (making a cake for [[Gourmet Guy]] and making the invisibility potion, respectively). | ||
*After the battle against Cortez | *After the battle against Cortez is over, one of the [[Toad (species)|Toad]] sailors tells everyone that he feels a "slight wind" coming from the cracked wall, just as [[Misstar]] does in the first game. The Bob-omb partner of both games is needed to blow the wall up. Also, the most frequently fought boss of both games (Jr. Troopa and Crump, respectively) shows up after Chapter 5 is completed. | ||
*Chapter 6 takes place in a beautiful area and has a boss that can | *Chapter 6 takes place in a beautiful area and has a boss that can deal a high amount of damage when charged up: 12 for [[Huff N. Puff]], 10 for [[Smorg]]. Also, both are blob-shaped and made up of a smaller species. Moreover, [[Ruff Puff]]s appear in the sixth Chapter of both games. | ||
*Chapter 7 features a snowy region. | *Chapter 7 features a snowy region. | ||
*Chapter 8 includes a | *Chapter 8 includes a fight against Bowser before the final battle, and Kammy Koopa is fought in both games. | ||
*Both games contain puzzles in some places that are solved identically or similarly. | *Both games contain puzzles in some places that are solved identically or similarly. | ||
**The [[Riddle Tower]] | **The [[Riddle Tower]] shares many puzzles with the [[Crystal Palace]], including blowing up cracked spots and walking through seemingly solid walls. | ||
**The [[Palace of Shadow]] has puzzles and traps from [[Bowser's Castle]], including an area wherein Mario only makes progress by following a pattern (though this is actually taken from the final castle level in ''Super Mario Bros.'') | **The [[Palace of Shadow]] has puzzles and traps from [[Bowser's Castle]], including an area wherein Mario only makes progress by following a pattern (though this is actually taken from the final castle level in ''Super Mario Bros.''). | ||
**Both dungeons in the final | **Both dungeons in the final Chapters have rooms with stairs where Mario has to defeat [[B. Bill Blaster]]s to reach the next room. | ||
*The main villain of both games ( | *The main villain of both games (those who kidnap Peach) has to be chased through a long stairway in the eighth Chapter. | ||
*Mario's final battle is divided into multiple parts. At one point, each boss is invincible and Peach plays an integral role in negating that invincibility. | *Mario's final battle is divided into multiple parts. At one point, each boss is invincible and Peach plays an integral role in negating that invincibility. | ||
*Peach conveniently gets taken away in both games right before Mario and company reach the hideaways of the games' main antagonists. | *Peach conveniently gets taken away in both games, right before Mario and company reach the hideaways of the games' main antagonists. | ||
*In both games, there is a | *In both games, there is a room where Mario can turn into 8-bit Mario, complete with ''[[Super Mario Bros.]]'' level 1-1 music playing. | ||
*Both games have [[Merlon]] standing outside his house, waiting for Mario and his partners to show up, where he | *Both games have [[Merlon]] standing outside his house, waiting for Mario and his partners to show up, where he tells them about a dream that he had, and tells them to let him know if they find out the meaning of it. Afterward, an item that Merlon stored at the top of his house is retrieved by him. | ||
*Both games have a spike room where Bow's Outta Sight or Vivian's Veil must be used, and the position of the paths across the spikes are identical. | *Both games feature a cooking system, and elderly, female Toad chefs, whose backstories involve deceased husbands and cakes. | ||
*Both games feature a boss who poses a threat by eating people (Tubba Blubba and Hooktail), and both of these | *Both games have a spike-filled room where Bow's Outta Sight or Vivian's Veil must be used, and the position of the paths across the spikes are identical. | ||
*Both games include a test during the Chapter 5 interlude that Princess Peach has to take and | *Both games feature a boss who poses a threat by eating people (Tubba Blubba and Hooktail), and both of these have a secret weakness. | ||
*Both games end with a [[victory parade|parade]] led by Luigi (though in ''Paper Mario: The Thousand-Year Door'' it is not a traditional parade, and is mainly a line of all the | *Both games include a test during the Chapter 5 interlude that Princess Peach has to take, and that holds information that helps Mario in the future. | ||
*Both games end with a [[victory parade|parade]] led by Luigi (though in ''Paper Mario: The Thousand-Year Door'', it is not a traditional parade, and is mainly a line of all of the characters' silhouettes, used as a way to show everyone). | |||
*Both games' endings feature a scene in which Mario, after returning [[Mario Bros.' House|home]] from his travels, is shown hanging around with Luigi, having just told his brother the story of his adventure. | *Both games' endings feature a scene in which Mario, after returning [[Mario Bros.' House|home]] from his travels, is shown hanging around with Luigi, having just told his brother the story of his adventure. | ||
==Quotes== | |||
{{main|List of Paper Mario: The Thousand-Year Door quotes}} | |||
*"''Omigosh! Is… Isn't that a treasure map?! You HAVE to tell me where you got that!''" - [[Goombella]] | |||
*"''And with that...pow! I'm gone!''" - [[Lord Crump]] | |||
*"''Mmmmmmwee hee hee hee! I have no quarrel with [[Mario|you]]...but I simply can't allow you to hunt for the [[Crystal Stars]].''" - [[Beldam]] | |||
*"''And then I, Grodus, will build a new world! A perfect, ideal world... Yes. A world made by me, about me, and for me! GAAACK ACK ACK ACK ACK!''" - [[Sir Grodus]] | |||
*"''I'm... I'm sorry [[Beldam|Sis]]. This [[Mario]] is the only person who's ever been kind to me...''" - [[Vivian]] | |||
==Regional differences== | ==Regional differences== | ||
{{more images|section=yes|Images showcasing some of the differences}} | |||
===Title theme=== | ===Title theme=== | ||
{{media table | {{media table | ||
|file1=PPTTYD J Title Theme.oga | |file1=PPTTYD J Title Theme.oga | ||
|title1=Japanese '' | |title1=Japanese ''{{FULLPAGENAME}}'' Title Theme | ||
|description1=Different than localized version | |description1=Different than localized version | ||
|file2=PPTTYD U Title Theme.oga | |file2=PPTTYD U Title Theme.oga | ||
|title2=Localized '' | |title2=Localized ''{{FULLPAGENAME}}'' Title Theme | ||
|description2=Different than Japanese version | |description2=Different than Japanese version | ||
}} | }} | ||
| Line 688: | Line 1,912: | ||
*There is no delay for when the player can press start on the title screen in the Japanese version. | *There is no delay for when the player can press start on the title screen in the Japanese version. | ||
*Holding {{button|gcn|a}} when the player does not have the Ultra Boots prevents Mario from moving in the Japanese version. | *Holding {{button|gcn|a}} when the player does not have the Ultra Boots prevents Mario from moving in the Japanese version. | ||
**Similarly, holding {{button|gcn|b}} when the player does not have the Super Hammer prevents Mario from moving in the Japanese version. | |||
*On the Level Up screen, the cursor is set to FP by default in the Japanese version, while in the international versions, the player has to manually move the cursor to either HP or BP. | *On the Level Up screen, the cursor is set to FP by default in the Japanese version, while in the international versions, the player has to manually move the cursor to either HP or BP. | ||
*In the Japanese version, Mario and his partners are fully healed at the end of Chapter 1, but at the end of all the other chapters, they do not get healed at all. In the international | *In the Japanese version, Mario and his partners are fully healed at the end of Chapter 1, but at the end of all the other chapters, they do not get healed at all. In the international versions, Mario and his partners are fully healed at the end of each chapter except Chapter 8.<ref>[http://papermariorta.wikia.com/wiki/Paper_Mario:_The_Thousand_Year_Door#Version_Differences Paper Mario RTA Wiki]</ref> | ||
*The international versions have more Stylish moves than the Japanese version. For example, there is no second Stylish after a normal jump in the Japanese version. | *The international versions have more Stylish moves than the Japanese version. For example, there is no second Stylish after a normal jump in the Japanese version. | ||
*Many of the items at the Pianta Parlor have different positioning in the menu in the Japanese version. | *Many of the items at the Pianta Parlor have different positioning in the menu in the Japanese version. | ||
*The backtrace screen has some additional functionality in the international versions. In the international versions, the entire screen is used and also scrolls, while in the Japanese version only a part of the screen is used and it does not scroll. | *The backtrace screen has some additional functionality in the international versions. In the international versions, the entire screen is used and also scrolls, while in the Japanese version only a part of the screen is used and it does not scroll. | ||
*The | *The Japanese version is missing the number of obtained badges/recipes and total badges/recipes on the Badges and Recipes screen. | ||
*In the Pit of 100 Trials, when a player defeats an enemy, the pipes show up faster in the Japanese version. | *In the Pit of 100 Trials, when a player defeats an enemy, the pipes show up faster in the Japanese version. | ||
*Koopook is moved to a different position (further to the left) in Hooktail Castle during his trouble in the Japanese version. | *Koopook is moved to a different position (further to the left) in Hooktail Castle during his trouble in the Japanese version. | ||
| Line 699: | Line 1,924: | ||
*The English script mistakenly says the [[Zess Frappe]] and [[Icicle Pop]] restore 20 and 10 [[Heart Point|HP]] when they restore 20 and 15 [[Flower Point|FP]] in all versions, respectively. | *The English script mistakenly says the [[Zess Frappe]] and [[Icicle Pop]] restore 20 and 10 [[Heart Point|HP]] when they restore 20 and 15 [[Flower Point|FP]] in all versions, respectively. | ||
*During pre-Chapter 5, Swindell the Bandit is moved to the far side of East Rogueport near the barrels. In the international versions, there is one less barrel, and Swindell's position is slightly altered. | *During pre-Chapter 5, Swindell the Bandit is moved to the far side of East Rogueport near the barrels. In the international versions, there is one less barrel, and Swindell's position is slightly altered. | ||
*Giving [[ | *Giving [[Lumpy]] 200 coins early in the game leaves Mario with 500 [[coin]]s later in the Japanese version and 600 coins later in international versions. | ||
*All Fuzzies have horrible vision in the Japanese version, as they often do not even notice Mario when he goes by them. In the international versions, the Fuzzies have better vision and thus notice Mario more quickly. In addition, the Fuzzies move slower in the international versions. | *All Fuzzies have horrible vision in the Japanese version, as they often do not even notice Mario when he goes by them. In the international versions, the Fuzzies have better vision and thus notice Mario more quickly. In addition, the Fuzzies move slower in the international versions. | ||
*There is no slowdown when moving up slopes on rooftops with Yoshi in the Japanese version. | *There is no slowdown when moving up slopes on rooftops with Yoshi in the Japanese version. | ||
*At the end of Bowser's levels, fireworks are fired in the Japanese version but not in the international versions. | *At the end of Bowser's levels, fireworks are fired in the Japanese version but not in the international versions. | ||
*In the original Japanese script and every other translation of the game, the final [[Rogueport Direct Mail Service|RDM]] email [[List of e-mails in | *In the original Japanese script and every other translation of the game, the final [[Rogueport Direct Mail Service|RDM]] email [[List of e-mails in Paper Mario: The Thousand-Year Door#"Surprise!" section|features an additional "hidden" section if the player scroll downs for an extended period of time]]. This portion was removed from the English translation, despite retaining the statement hinting at its existence. | ||
*In the Japanese version, some item combinations that are given to Zess T. give different recipe results. | |||
{|class="wikitable"style="text-align: left; margin: auto;" | |||
!'''Item Combination''' | |||
!Japan | |||
!International | |||
|- | |||
|'''Poison Shroom + Turtley Leaf''' | |||
|Mistake | |||
|Shroom Broth | |||
|- | |||
|'''Mushroom + Keel Mango''' | |||
|Mistake | |||
|Zess Dinner | |||
|- | |||
|'''[Mushroom/Life Shroom] + Peachy Peach''' | |||
|Mistake | |||
|Zess Dinner | |||
|- | |||
|'''Ultra Shroom + Peachy Peach''' | |||
|Zess Dinner | |||
|Zess Special | |||
|- | |||
|'''[Dried Shroom/Mushroom/Super Shroom/Life Shroom] + Fresh Pasta''' | |||
|Zess Dinner | |||
|Zess Special | |||
|- | |||
|'''Ultra Shroom + Fresh Pasta''' | |||
|Zess Special | |||
|Zess Deluxe | |||
|- | |||
|'''Poison Shroom + Point Swap''' | |||
|Ultra Shroom | |||
|Mushroom | |||
|- | |||
|'''Slow Shroom + Jammin' Jelly''' | |||
|Maple Super | |||
|Jelly Super | |||
|- | |||
|'''Mushroom + [Turtley Leaf/Golden Leaf]''' | |||
|Life Shroom | |||
|Shroom Fry | |||
|- | |||
|'''Super Shroom + [Turtley Leaf/Golden Leaf]''' | |||
|Life Shroom | |||
|Shroom Roast | |||
|- | |||
|'''[Life Shroom/Ultra Shroom] + [Turtley Leaf/Golden Leaf]''' | |||
|Life Shroom | |||
|Shroom Steak | |||
|- | |||
|'''Thunder Bolt + Thunder Rage''' | |||
|Trial Stew | |||
|Mistake | |||
|} | |||
*In the Japanese version, some items sell for different prices (in coins). | |||
{|class="wikitable"style="text-align: left; margin: auto;" | |||
!'''Item Name''' | |||
!Shop It's Sold At | |||
!Japan | |||
!International | |||
|- | |||
|'''Couple's Cake''' | |||
|All shops | |||
|30 | |||
|10 | |||
|- | |||
|'''Gradual Syrup''' | |||
|Toad Bros. Bazaar | |||
|7 | |||
|8 | |||
|- | |||
|'''Healthy Salad''' | |||
|All Shops | |||
|10 | |||
|5 | |||
|- | |||
|'''Koopasta''' | |||
|All shops | |||
|25 | |||
|60 | |||
|- | |||
|'''Meteor Meal''' | |||
|All shops | |||
|20 | |||
|40 | |||
|- | |||
|'''Shroom Broth''' | |||
|All shops | |||
|33 | |||
|20 | |||
|- | |||
|'''Shroom Crepe''' | |||
|All shops | |||
|50 | |||
|100 | |||
|- | |||
|'''Spicy Soup''' | |||
|All shops except Northwinds Mart | |||
|10 | |||
|5 | |||
|- | |||
|'''Zess Dinner''' | |||
|All shops except Souvenir Shop | |||
|10 | |||
|7 | |||
|- | |||
|'''Zess Dynamite''' | |||
|All shops except Deepdown Depot | |||
|30 | |||
|20 | |||
|- | |||
|'''Zess Tea''' | |||
|All shops | |||
|10 | |||
|6 | |||
|} | |||
===Area changes=== | ===Area changes=== | ||
| Line 710: | Line 2,051: | ||
*The X-Nauts who jump on Mario in the Prologue move faster in the Japanese version. | *The X-Nauts who jump on Mario in the Prologue move faster in the Japanese version. | ||
*In the Japanese version, the moving platforms in the Rogueport Underground (the one in the first area and the two in the room with the pipe to Petal Meadows) do not move as far to the left and right as the ones in the international versions. | *In the Japanese version, the moving platforms in the Rogueport Underground (the one in the first area and the two in the room with the pipe to Petal Meadows) do not move as far to the left and right as the ones in the international versions. | ||
====Chapter 1==== | ====Chapter 1==== | ||
*Question #2 of the Thwomp quiz in Shhwonk's Fortress asks for the price of a Mushroom and a Fire Flower in the Japanese, French, German, Italian, and Spanish versions, as opposed to the price of a Mr. Softener and a Fire Flower in the English version. However, in the US ''Paper Mario: The Thousand-Year Door'' demo included in the Nintendo GameCube's Demo Disc Version 18, this question asked for the price of a Mushroom and a Fire Flower like in the other versions. | *Question #2 of the Thwomp quiz in Shhwonk's Fortress asks for the price of a Mushroom and a Fire Flower in the Japanese, French, German, Italian, and Spanish versions, as opposed to the price of a Mr. Softener and a Fire Flower in the English version. However, in the US ''Paper Mario: The Thousand-Year Door'' demo included in the Nintendo GameCube's Demo Disc Version 18, this question asked for the price of a Mushroom and a Fire Flower like in the other versions. | ||
====Chapter 2==== | ====Chapter 2==== | ||
*In the Japanese version, the right Pale Piranha on the screen where the Shadow Sirens are fought in Boggly Woods acts differently from the one in the international versions. | *In the Japanese version, the right Pale Piranha on the screen where the Shadow Sirens are fought in Boggly Woods acts differently from the one in the international versions. | ||
*In the Japanese version, when unlocking the blue cage door in the Great Tree, the game checks for and removes the Strange Sack from Mario's inventory if he has it (which | *In the Japanese version, when unlocking the blue cage door in the Great Tree, the game checks for and removes the Strange Sack from Mario's inventory if he has it (which permanently prevents it from being obtained again as there is only one in the game). This does not happen in the international versions. Also in the Japanese version, after unlocking the blue cage door, there are several frames where Mario is able to move around freely. | ||
*In the Japanese version, Punio's textbox when he thinks about how to reveal the secret entrance | *In the Japanese version, Punio's textbox when he thinks about how to reveal the secret entrance does not pause. | ||
*In the room where the player has to hammer the switches to gain access to the Super Boots room, in the Japanese version the 4 statues all have Punis on them before hitting the switches, but in the international versions the 4 statues have the following (left to right) on them before hitting the switches: Puni, Star, Moon, Sun. | |||
====Chapter 3==== | ====Chapter 3==== | ||
| Line 721: | Line 2,065: | ||
*In the Japanese version, when returning to Rogueport from Glitzville, the entire cutscene is about 7 seconds longer than in the international versions. | *In the Japanese version, when returning to Rogueport from Glitzville, the entire cutscene is about 7 seconds longer than in the international versions. | ||
*During Peach's section right after Chapter 3, when leaving the dressing room to return to TEC after talking to Grodus, the player can move while the door is opening in the Japanese version. | *During Peach's section right after Chapter 3, when leaving the dressing room to return to TEC after talking to Grodus, the player can move while the door is opening in the Japanese version. | ||
====Chapter 5==== | ====Chapter 5==== | ||
*In the Japanese version, Mario can get the Keel Mango from the trees at Keelhaul Key at any time. In the international versions, the chapter must be completed first. This was most likely changed to ensure that Flavio ends up getting the Coconut rather than the Keel Mango as both items are tropical food and giving Flavio any food item that | *In the Japanese version, Mario can get the Keel Mango from the trees at Keelhaul Key at any time. In the international versions, the chapter must be completed first. This was most likely changed to ensure that Flavio ends up getting the Coconut rather than the Keel Mango as both items are tropical food and giving Flavio any food item that is not a Coconut results in him asking for something more tropical. | ||
*One Flower Fuzzy on the screen with the blue pipe in Keelhaul Key was removed in the international versions. | *One Flower Fuzzy on the screen with the blue pipe in Keelhaul Key was removed in the international versions. | ||
*The Flower Fuzzy on the screen with the two Putrid Piranhas | *The Flower Fuzzy on the screen with the two Putrid Piranhas continues to move around if it falls down in the Japanese version, while it stays still in the international versions. | ||
*In Pirate's Grotto, the chest behind the waterfall contains a Damage Dodge P in the Japanese version. In the international versions, this is a Defend Plus P. | *In Pirate's Grotto, the chest behind the waterfall contains a Damage Dodge P in the Japanese version. In the international versions, this is a Defend Plus P. | ||
*In the black chest room in Pirate's Grotto, when Mario defeats the Embers, the key | *In the black chest room in Pirate's Grotto, when Mario defeats the Embers, the key randomly falls to the left or right in the Japanese version. In the international versions, it simply falls straight down. | ||
====Chapter 6==== | ====Chapter 6==== | ||
*On Day 3 of the Excess Express, Mario gets an email in the dining car in the Japanese version. In the international versions, Mario gets this email to the right of his room. | *On Day 3 of the Excess Express, Mario gets an email in the dining car in the Japanese version. In the international versions, Mario gets this email to the right of his room. | ||
*When the Smorgs appear when talking to the Engineer, they | *When the Smorgs appear when talking to the Engineer, they do not cover the right part of the window in the Japanese version. | ||
*In the outside room at Riverside Station with the Poison Pokeys and Ruff Puffs, there is a block that can be jumped on to hit a hidden block that contains a Thunder Rage. In the Japanese version, this block is a breakable block, and breaking it | *In the outside room at Riverside Station with the Poison Pokeys and Ruff Puffs, there is a block that can be jumped on to hit a hidden block that contains a Thunder Rage. In the Japanese version, this block is a breakable block, and breaking it causes it to stay broken until the player leaves Riverside Station. The international versions made this block unbreakable. | ||
====Chapter 7==== | ====Chapter 7==== | ||
*[[X-Naut Fortress]]'s third puzzle room has a safe path two squares long in the Japanese version and three squares long in the international version, thus slightly reducing its difficulty. | *[[X-Naut Fortress]]'s third puzzle room has a safe path two squares long in the Japanese version and three squares long in the international version, thus slightly reducing its difficulty. | ||
*On the moon, on the screen with the pipe, blowing up the rock containing the pipe causes a small cutscene to play in the Japanese version. This cutscene does not occur in the international versions. | *On the moon, on the screen with the pipe, blowing up the rock containing the pipe causes a small cutscene to play in the Japanese version. This cutscene does not occur in the international versions. | ||
====Chapter 8==== | ====Chapter 8==== | ||
The changes made consist of the fight against the Shadow Queen: | The changes made consist of the fight against the Shadow Queen: | ||
| Line 743: | Line 2,090: | ||
*Some items were redesigned in international versions: | *Some items were redesigned in international versions: | ||
**[[Super Luigi (series)#Super Luigi 5|Super Luigi 5]] is red instead of orange. | **[[Super Luigi (series)#Super Luigi 5|Super Luigi 5]] is red instead of orange. | ||
**The | **The katakana on the [[Wrestling Mag]] are replaced with scribbles. | ||
**The Power Rush [[badge]] has a different letter for every language. | **The Power Rush [[badge]] has a different letter for every language. | ||
**Vintage Red was renamed [[Chuckola Cola (Paper Mario: The Thousand-Year Door)|Chuckola Cola]] and recolored purple to resemble soda instead of wine. | **Vintage Red was renamed [[Chuckola Cola (Paper Mario: The Thousand-Year Door)|Chuckola Cola]] and recolored purple to resemble soda instead of wine. | ||
| Line 751: | Line 2,098: | ||
*In the English and German scripts, [[Vivian]] is referred to with feminine pronouns and has no mention of being a male-to-female {{wp|gender dysphoria|gender dysphoric}}. | *In the English and German scripts, [[Vivian]] is referred to with feminine pronouns and has no mention of being a male-to-female {{wp|gender dysphoria|gender dysphoric}}. | ||
*The [[Shadow Queen]] is slightly more formal and condescending in the English script. | *The [[Shadow Queen]] is slightly more formal and condescending in the English script. | ||
*Before the battle against Shadow Queen, if Mario chooses to be her servant, after her spell has casted on Mario, Mario's sprite | *Before the battle against Shadow Queen, if Mario chooses to be her servant, after her spell has casted on Mario, Mario's sprite changes to the same as Doopliss's appearance when impersonating as him in the Japanese version, notably for the evil-looking appearance, and the effects from L Emblem and W Emblem are also removed (like how Doopliss's fake copy of Mario cannot change colors either). However, in the international version, Mario keeps the same angry pose before the spell, and his appearance and color remain unchanged. | ||
*A few cutscenes involving flashing lights were edited down in the international versions, probably to reduce the chance of players getting epileptic seizures: | *A few cutscenes involving flashing lights were edited down in the international versions, probably to reduce the chance of players getting epileptic seizures: | ||
**The flashing lights during the first Shadow Queen cutscene were reduced. | **The flashing lights during the first Shadow Queen cutscene were reduced. | ||
**The flashing lights during the cutscene in the room that makes the Emerald Star appear were reduced. | **The flashing lights during the cutscene in the room that makes the Emerald Star appear were reduced. | ||
**However, the animation for Showstopper, which despite being arguably | **However, the animation for Showstopper, which despite being arguably worse than the two stated above, was not edited. | ||
*PAL versions have additional differences from all NTSC versions. Only NTSC versions can be played in progressive scan mode, and only PAL versions can be played in 50Hz mode, using the same method to activate each. The American and Japanese versions have their languages locked to English and Japanese, respectively, while the PAL version can additionally be played in Spanish, French, Italian and German depending on the GameCube settings. Also, in NTSC versions, Mario has two different talking animations, one involving him raising his hand and one involving him moving his mouth, and each one is used in different scenarios. Only the "mouth moving" one is used in the PAL version, however, to avoid resemblance to the Nazi salute. | *PAL versions have additional differences from all NTSC versions. Only NTSC versions can be played in progressive scan mode, and only PAL versions can be played in 50Hz mode, using the same method to activate each. The American and Japanese versions have their languages locked to English and Japanese, respectively, while the PAL version can additionally be played in Spanish, French, Italian and German depending on the GameCube settings. Also, in NTSC versions, Mario has two different talking animations, one involving him raising his hand and one involving him moving his mouth, and each one is used in different scenarios. Only the "mouth moving" one is used in the PAL version, however, to avoid resemblance to the Nazi salute.{{ref needed}} | ||
==Pre-release and unused content== | |||
{{main|List of Paper Mario: The Thousand-Year Door pre-release and unused content}} | |||
===Reveal trailer=== | |||
This game was initially titled ''Paper Mario 2'' and featured a far different logo, one reminiscent of the original ''Paper Mario''{{'}}s logo. | |||
Part of the original trailer shows an extra ledge above the pipe in the room directly east of the Thousand-Year Door, with an [[HP Plus (badge)|HP Plus]] badge on it. It could be accessed via a moving platform which had a wall over it halfway, which appeared to be passable with help from [[Vivian]]. Also, [[Beldam]] and [[Doopliss]] were originally going to be fought somewhere in [[Riverside Station]]. The trailer also showed that [[Item Shop]]s would be labeled with Mushrooms, much as in ''[[Super Paper Mario]]'', rather than the [[Fire Flower]]s seen in the final game. [[Red Bones]] was initially named "Red Koopa Skeleton." In the same trailer, one can see that "Tornado Jump" was initially called "Hurrican Jump".{{sic}} The status element Slow had a different icon, a snail instead of a sad purple face. | |||
<gallery> | |||
PM2 BetaLogo.jpg|The game's original logo before the final version of the game. | |||
PMTTYD Prerelease Sewers Screenshot.png|An early location of the [[HP Plus (badge)|HP Plus Badge]]. | |||
Hooktail Castle.jpg|[[Hooktail Castle]] Notice how the final game, the door is just open from the start. | |||
Beta Battle.png|A battle in [[Hooktail's Castle]]. Notice Hurricane is spelled wrong. | |||
</gallery> | |||
==Glitches== | |||
{{main|List of Paper Mario: The Thousand-Year Door glitches}} | |||
[[File:PMTTYD Koops Splashing Glitch.gif|thumb|upright=1.66|The glitch performed on the {{wp|Dolphin (emulator)|Dolphin}} emulator]] | |||
===Koops splashing on dry land=== | |||
At any location where Mario can fall into the river and the player can talk to an NPC, the player should stand near the river and use [[Shell Toss|Koops's ability]], holding {{button|gcn|X}} so he remains in place. Without letting go of the button, the player should walk away so that Koops is offscreen, and talk to a character in the same area. When the player is done, Koops respawns next to Mario. There is a splash animation even on dry land. | |||
== | ==Staff== | ||
{{main|List of Paper Mario: The Thousand-Year Door staff}} | |||
[[Intelligent Systems]] developed the game with [[Nintendo]] publishing it. The music is credited to Yoshito Hirano and [[Yuka Tsujiyoko]]. | |||
==Reception== | ==Reception== | ||
Overall, ''Paper Mario: The Thousand-Year Door'' received very positive reviews from critics, who praised its | Overall, ''Paper Mario: The Thousand-Year Door'' received very positive reviews from critics, who praised its enjoyable story, characters, and humor, in addition to its battling system, multiple side-quests, and soundtrack. | ||
{| class="wikitable reviews" | |||
{| class="wikitable | !colspan="4"style="font-size:120%; text-align:center; background-color:silver;"|Reviews | ||
!colspan="4" style="font-size:120%; text-align:center; background-color:silver;"|Reviews | |||
|-style="background-color:#E6E6E6" | |-style="background-color:#E6E6E6" | ||
|Release | |Release | ||
| Line 797: | Line 2,142: | ||
|Peer Schneider,<br>[https://www.ign.com/articles/2004/10/12/paper-mario-2-the-thousand-year-door IGN] | |Peer Schneider,<br>[https://www.ign.com/articles/2004/10/12/paper-mario-2-the-thousand-year-door IGN] | ||
|9.1/10 | |9.1/10 | ||
|''With Mario & Luigi: Superstar Saga finished and stashed away, I was ready for another opportunity to venture into Mario's RPG realm. While there's plenty of room for better presentation (Paper Mario Revolution, anyone), this game is an absolute blast to play. Get past the slow-moving first chapter and some clunky NPC path finding routines in chapter 2 and you'll be hooked. The story is funny, the gameplay varied, and the world so charming, you'll want to explore every last corner of it. Add to that plenty of playable characters and sidekicks, some great cameos, a memorable score loaded with classic melodies, and a quest that runs a good 30 hours long, and you've got another winning offshoot in the mighty Mario franchise.Paper Mario: The Thousand-Year Door improves on its predecessor in every way and takes the cake as the best Mario RPG yet. Highly recommended.'' | |''With Mario & Luigi: Superstar Saga finished and stashed away, I was ready for another opportunity to venture into Mario's RPG realm. While there's plenty of room for better presentation (Paper Mario Revolution, anyone), this game is an absolute blast to play. Get past the slow-moving first chapter and some clunky NPC path finding routines in chapter 2 and you'll be hooked. The story is funny, the gameplay varied, and the world so charming, you'll want to explore every last corner of it. Add to that plenty of playable characters and sidekicks, some great cameos, a memorable score loaded with classic melodies, and a quest that runs a good 30 hours long, and you've got another winning offshoot in the mighty Mario franchise. Paper Mario: The Thousand-Year Door improves on its predecessor in every way and takes the cake as the best Mario RPG yet. Highly recommended.'' | ||
|- | |- | ||
|[[Nintendo GameCube]] | |[[Nintendo GameCube]] | ||
| Line 814: | Line 2,159: | ||
|''If I had to fault Paper Mario: The Thousand-Year Door on something, it would be its reliance on backtracking. You have to do a frightful amount of it in most of the scenarios. At best, doing so allows you to access spots in previous areas that you perhaps weren't able to before. At worst? You'll have to perform some tricky platforming one time more than you feel you should. But in the end, this is what the games that inform its design are like, so I guess we have to take the good with the bad. And when it comes to Paper Mario: The Thousand-Year Door, it's mostly all good. If you have a history of playing 2D side-scrollers, this game will make you remember just why you loved them. And if you have a soul, then this game will make it feel all warm and fuzzy.'' | |''If I had to fault Paper Mario: The Thousand-Year Door on something, it would be its reliance on backtracking. You have to do a frightful amount of it in most of the scenarios. At best, doing so allows you to access spots in previous areas that you perhaps weren't able to before. At worst? You'll have to perform some tricky platforming one time more than you feel you should. But in the end, this is what the games that inform its design are like, so I guess we have to take the good with the bad. And when it comes to Paper Mario: The Thousand-Year Door, it's mostly all good. If you have a history of playing 2D side-scrollers, this game will make you remember just why you loved them. And if you have a soul, then this game will make it feel all warm and fuzzy.'' | ||
|- | |- | ||
!colspan="4" style="font-size:120%; text-align:center; background-color:silver;"|Aggregators | !colspan="4"style="font-size:120%; text-align:center; background-color:silver;"|Aggregators | ||
|-style="background-color:#E6E6E6" | |-style="background-color:#E6E6E6" | ||
|colspan=2|Compiler | |colspan=2|Compiler | ||
| Line 825: | Line 2,170: | ||
|colspan=2|[https://www.gamerankings.com/gamecube/920182-paper-mario-the-thousand-year-door/index.html 88.05%] | |colspan=2|[https://www.gamerankings.com/gamecube/920182-paper-mario-the-thousand-year-door/index.html 88.05%] | ||
|} | |} | ||
==Gallery== | |||
{{main-gallery}} | |||
<gallery> | |||
PMTTYD Mario Thinking Artwork.png|[[Mario]] | |||
PMTTYD Princess Peach Artwork.png|[[Princess Peach]] | |||
PMTTYD Goombella Reading Artwork.png|[[Goombella]] | |||
PMTTYD Bowser Artwork.png|[[Bowser]] | |||
PMTTYD Grodus Artwork.png|[[Sir Grodus]] | |||
PMTTYD Hooktail Artwork.png|[[Hooktail]] | |||
</gallery> | |||
==Media== | ==Media== | ||
{{main-media}} | {{main-media}} | ||
{{media table | {{media table | ||
| Line 833: | Line 2,188: | ||
|title1=Battle Theme | |title1=Battle Theme | ||
|description1=The theme when the player is battling a normal enemy. | |description1=The theme when the player is battling a normal enemy. | ||
|length1=0: | |length1=0:15 | ||
|file2=Rawk Hawk ROCK.oga | |file2=Rawk Hawk ROCK.oga | ||
|title2=Rawk Hawk Battle | |title2=Rawk Hawk Battle | ||
|description2=Rawk Hawk's theme. | |description2=Rawk Hawk's theme. | ||
|length2= | |length2=0:30 | ||
|file3=Macho Grubba Battle.oga | |file3=Macho Grubba Battle.oga | ||
|title3=Macho Grubba Battle | |title3=Macho Grubba Battle | ||
|description3=Macho Grubba's theme. | |description3=Macho Grubba's theme. | ||
|length3= | |length3=0:30 | ||
}} | }} | ||
== | ==References to other games== | ||
[[File:Paper Mario TTYD Parakarry Beginning.png|thumb|Parakarry in the intro of the game]] | |||
*''[[Donkey Kong (game)|Donkey Kong]]'': One of the badges is named "Jumpman", referencing to how Mario was alternatively named in this game. An audience member in the Glitz Pit also calls out Jumpman when Mario reaches Rawk Hawk a second time. In addition, although not in the game itself, the Official Nintendo Power Player's Guide alluded to Mario's encounters with the titular ape from the game where they mentioned that the X-Nauts thought they could dissuade Mario with various platforms at high places, but they had not heard of his exploits against "a certain ape." | |||
This game was | *''[[Super Mario Bros.]]'': At the X-Naut Fortress in the Changing Room, Mario and company can change into an 8-bit sprite of themselves, along with the ''Super Mario Bros.'' music playing in the background. [[Hamma, Bamma, and Flare|Hamma]] also mentioned that his grandfather was at World 7-1. Bowser's gameplay is also a direct parody of this game. In the Japanese and French versions of the game, the video-game obsessed Toad from Petalburg refers to ''Super Mario Bros'' as his favorite game for the Famicom and Nintendo Entertainment System, respectively, also urging Mario to play it in the latter version. Bowser's level segments also play very similarly to how they did in ''Super Mario Bros.'', including the Overworld and Underwater themes that play. | ||
*[[Family Computer Disk System|Famicom Disk System]] boot up: During the Peach transition scene for Chapter 5, when Peach is invisible and retrieves a disc from Grodus's office, the computer screen displays a scene of Mario and Luigi fighting over a light switch, referring to the boot up screen for the Famicom Disk System if the player did not input a disk beforehand. | |||
*''[[Super Mario Bros. 3]]'': The [[Grass Land]] theme is arranged as part of the music that plays during the opening cutscene. Whenever Jolene (while under the alias of "X") sent Mario an e-mail, the [[Ice Land]] map screen theme would play. The music that plays when Mario is riding the blimp is a cover of the athletic theme from this game. This game also included [[Boomerang Bro]]s., [[Fire Bro]]s., and [[Boo]]s, which originated from this game. Also, the "king saved" music can be heard in Luigi's story telling theme. Also like ''Super Mario Bros. 3'', the game's story is implied to be a stage play (although it is more direct than in the former game, as it was only stated by Shigeru Miyamoto in the former case). In addition, Peach after each chapter ends up sending (e-)mail to Mario with advice for the next level, with her final mail upon completing all objectives being intercepted by the main villain, similar to in ''Super Mario Bros. 3''. Bowser's theme song contains a cover of the castle theme. | |||
*''[[Super Mario World]]'': Whenever Peach sends Mario an e-mail, the title screen theme would play. Whenever Mario gets an e-mail from other people, part of the epilogue theme (from when a [[Koopalings|Koopaling]] castle is beaten) plays. When Mario wins a battle, the "level clear" sound plays. | |||
*''[[Super Mario World 2: Yoshi's Island]]'': Blue [[Bandit]]s appear as NPCs. [[Atomic Boo]] closley resembles [[Bigger Boo]] from this game. | |||
*''[[Super Mario 64]]'': In the first [[Princess Peach]] interlude, Peach is singing the Inside the Castle Walls theme from this game when she is in the shower. | |||
*''[[Paper Mario]]'': [[Parakarry]] makes a brief cameo at the beginning of the game, and delivers a letter to Mario from Peach, just like the previous game. [[Lady Bow]] also makes a cameo appearance, and makes a direct reference to [[Boo's Mansion]], as well as the adventure they had. There is also a random [[Toad (species)|Toad]] at the Excess Express (after Chapter 6 is completed) that asks Mario a quiz question, ("What did Bowser steal in the first Paper Mario?"), and the answer is, "[[Star Rod (Paper Mario)|Star Rod]]". The video game-obsessed Toad kid from Petalburg also mentions that he has been playing the game, describing Bow as the "cutest Boo of ALL TIME!!!" [[Jr. Troopa]] also appears in the background in the picture that Zip Toad attached to his e-mail. [[Gulpit]]s are also given a reference when Grubba exclaims, "GREAT-GALLOPIN' GULPITS!". A [[Lumpy|Ratooey]] at Rogueport Harbor who went on a quest for oil in [[Dry Dry Desert (Paper Mario)|Dry Dry Desert]] can tell Mario about this adventures at the end of the game. Every part is a chapter of [[Paper Mario]] game. In the email he sends to Mario after finding him, [[Koopook]] says he is now hiding in [[Crystal Palace]] in the Japanese version; however, this last reference is lost in the English translation, as Crystal Palace is instead translated as "Goomstar Temple". [[Kolorado]] was a student of [[Professor Frankly]], and the former's [[Kolorado's father|deceased father]] appears as a crumpled [[Dull Bones]] in Hooktail's Castle, which [[Koops]] confuses for his own father. One of the houses in Poshley Heights has a model of the K64. | |||
*''[[Mario Kart (series)|Mario Kart]]'': During Luigi's story about Circuit Break Island, he tells Mario he had to sign up for a Kart race, and mentions he had driven karts before, giving reference to the Mario Kart series. | |||
*''[[Luigi's Mansion]]'': A crow in [[Twilight Town]] says he will set up an estate pay site named Luigi's Mansion, and his crow friend says that "he's heard that name somewhere before", referencing this game. | |||
*''[[Super Smash Bros. Melee]]'': In the Spanish version of the game, Rawk Hawk's victory gloat after beating [[The Koopinator]] specifically referenced ''Super Smash Bros. Melee'' (in all other versions, he simply says they are better off playing video games without naming one in particular). | |||
*''[[Super Mario Sunshine]]'': [[Toadsworth]], [[Pianta]]s, and Shine Sprites appear in the game to upgrade Mario's partners. The parrot in Creepy Steeple randomly says the infamous translation of "Shine get!". | |||
*''[[Mario & Luigi: Superstar Saga]]'': [[Chuckola Cola (Paper Mario: The Thousand-Year Door)|Chuckola Cola]] is an item in this game, referring to the game it has been appeared first. The "Super-Guarding" ability was likely inspired by the ability to counter enemies' attacks in ''Superstar Saga''. Mario gaining field abilities to use in battle (Spin Jump, Spring Jump, Super/Ultra (spin) hammer) as special FP consuming attacks were also likely inspired by field abilities in ''Superstar Saga'' being used in battle as Bros. Attacks. One of Bowser's options during his conversation with [[Pennington]] during the Chapter 7 interlude is The Shadow Thief, a reference to [[Popple]]. The difference of the naming methods between the English and Japanese titles are similar to this game, as the English titles of both games have a subtitle under the series names (''Mario & Luigi'' and ''Paper Mario'' respectively), while the Japanese titles simply have the term "RPG" under the series names. | |||
==References in later games== | |||
[[File:SPM Francis 2nd Room.png|thumb|''Super Paper Mario'' references.]] | |||
*''[[Super Paper Mario]]'': This game is alluded to by a video game-obsessed Toad in Petalburg. At the end of the game, he states that he has been playing "the new ''Paper Mario'' game" called ''Super Paper Mario'', which was released in 2007 for the [[Wii]], and that it will be pleasing to fans of [[Luigi]], which hints that the game was already in production and/or planning stages at the time ''Paper Mario: The Thousand-Year Door'' was in development. All seven partners from ''Paper Mario: The Thousand-Year Door'' make cameo appearances as [[Catch Card]]s that are won by completing the [[Duel of 100]] at [[Sammer's Kingdom]]. [[Francis]] also has plush toys of the Yoshi (in all colors), Vivian, Bobbery, and Pennington, along with a poster of Petuni. In Francis' list of things to buy, Rawk Hawk was given a reference when he stated that he wants a DVD called, "''Harder than Bedrawk: The Rawk Hawk Story''". Francis also stated that he wants a Ms. Mowz doll with "real-smooching action", an Excess Express train set, and a Magnus Von Grapple action figure. Francis also happens to watch "''[[List of implied entertainment#Starship X-Naut|Starship X-Naut]]''" and "''[[List of implied entertainment#The Grodus Chronicles|The Grodus Chronicles]]''". Also, [[Fracktail]] and [[Wracktail]], themselves are homages to Hooktail and Bonetail. Additonally, there is also a [[Sammer Guy]] who calls himself "Laughing X-Naut" and another who calls himself "The Thousand Year Roar". Lastly, Slim's ability to make Mario, Peach, Bowser, or Luigi thin is a reference to the second curse in ''Paper Mario: The Thousand-Year Door''. | |||
*''[[Super Smash Bros. Brawl]]'': Goombella, Mini-Yoshi, Vivian, and Rawk Hawk appear as [[Sticker (Super Smash Bros. Brawl)|Sticker]]s. Goombella also has her own trophy. Also, the words, "CRUMP" and "RAWK" appear in the random name selection, which are possible references to Lord Crump and Rawk Hawk. | |||
*''[[Paper Mario: Sticker Star]]'': In the level [[Shy Guy Jungle]], there is a pile of garbage with many letters. One letter is written by [[Goombella]] and it states: "Observations on the Ancient Civilization of the [[Chomp Ruins]]." | |||
*''[[Super Smash Bros. for Nintendo 3DS]]'': The [[S.S. Flavion]] appears as a variation of a ''Paper Mario'' stage in this game. A [[Big Blooper]] based on the boss also appears in the stage variation's background. An arrangement of the Rogueport theme is also part of the stage's main song. | |||
*''[[Super Mario 3D World]]'': The [[Fuzzy Horde]], which debuted in this game, returns in several levels. | |||
*''[[Mario & Luigi: Paper Jam]]'': Paper Mario's Airplane and Paper Modes return. During Trio Grab, Paper Mario turns into a tube, similar to Tube Mode. He can also turn into a paper drill during Trio Drill, which is similar in concept to the paper abilities from this game. When Paper Mario meets the Mario Bros., he performs a Spring Jump. Paper Mario borrows his blocking and KO'd animations from this game. The trio gains Star Points by performing Action Commands correctly, which is similar to how Paper Mario and his partners had to appeal to the audience by doing the same thing, and by also being stylish. The stage where Mario, Luigi and Paper Mario stand when they level up is similar to the stage from this game's battles, down to the yellow stripes on the curtains. | |||
*''[[Paper Mario: Color Splash]]'': Peach summons Mario over to the current destination due to a discovery she made (although in this case Peach personally has Mario come along). Peach also ended up abducted shortly after bringing Mario along (although in that case, Mario does witness Peach's abduction). She also sends mail giving some hints about the main villain's plan and the next destination that Mario should head towards in the form of [[Holo-Peach]]es, and her last mail has Peach's message being cut off by the main antagonist (Black Bowser) just as Peach was about to give key details about his villainous plan. In addition, a character gets possessed by a grave evil (in this case, Bowser via Black Paint, while in ''Paper Mario: The Thousand-Year Door'', it was Peach who was possessed by the Shadow Queen). Also, the Big Paint Stars serve a similar function to the Crystal Stars. | |||
*''[[Paper Mario: The Origami King]]'': Peach's design from ''The Thousand-Year Door'' appears as a photo. Additionally, when Mario and [[Bob-omb (Paper Mario: The Origami King)|Bob-omb]] interact with the steering wheel on [[the Princess Peach]], the latter mentions that he dreams of being an admiral someday, in reference to [[Admiral Bobbery]]. | |||
[[ | |||
* | |||
* | |||
==Names in other languages== | ==Names in other languages== | ||
| Line 891: | Line 2,230: | ||
|Jap=ペーパーマリオRPG | |Jap=ペーパーマリオRPG | ||
|JapR=Pēpā Mario Āru Pī Jī | |JapR=Pēpā Mario Āru Pī Jī | ||
|JapM=Paper Mario RPG<br>This naming method is similar to the Japanese name of ''[[Mario & Luigi: Superstar Saga]]''. | |JapM=Paper Mario RPG<br>This naming method is similar to ''[[Super Mario RPG: Legend of the Seven Stars|Super Mario RPG]]'' and the Japanese name of ''[[Mario & Luigi: Superstar Saga]]''. | ||
| | |ChiT=紙片瑪利歐RPG<ref>[https://www.nintendo.com.hk/switch/mario/history/index.html Official Chinese website for the ''Super Mario Bros.'' 35th Anniversary]. Retrieved October 23, 2020.</ref> | ||
| | |ChiTR=Zhǐpiàn Mǎlì'ōu RPG | ||
|ChiTM=Paper Mario RPG | |||
|Fre=Paper Mario: La Porte Millénaire | |||
|FreM=Paper Mario: The Millennium Door | |||
|Ger=Paper Mario: Die Legende vom Äonentor | |Ger=Paper Mario: Die Legende vom Äonentor | ||
|GerM=Paper Mario: The Legend of the Aeon Gate | |GerM=Paper Mario: The Legend of the Aeon Gate | ||
|Ita=Paper Mario: Il Portale Millenario | |Ita=Paper Mario: Il Portale Millenario | ||
|ItaM=Paper Mario: The Millennium Portal | |ItaM=Paper Mario: The Millennium Portal | ||
| | |Kor=페이퍼 마리오 1000년의 문 | ||
| | |KorR=Peipeo Mario 1000(Cheon)nyeon-ui Mun | ||
| | |KorM=Paper Mario The Thousand-Year Door | ||
|SpaE=Paper Mario: La Puerta Milenaria | |||
|SpaEM=Paper Mario: The Millennium Door | |||
}} | }} | ||
| Line 915: | Line 2,257: | ||
{{PMTTYD}} | {{PMTTYD}} | ||
{{ | {{Super Mario games}} | ||
{{ | {{GCN}} | ||
[[de:Paper Mario: Die Legende vom Äonentor]] | [[de:Paper Mario: Die Legende vom Äonentor]] | ||
[[it:Paper Mario: Il Portale Millenario]] | [[it:Paper Mario: Il Portale Millenario]] | ||
[[Category:Paper Mario: The Thousand-Year Door|*]] | [[Category:Paper Mario: The Thousand-Year Door|*]] | ||
[[Category:Games]] | [[Category:Games]] | ||
[[Category:Nintendo GameCube | [[Category:Nintendo GameCube games]] | ||
[[Category: | [[Category:Role-playing games]] | ||
[[Category:Player's Choice]] | [[Category:Player's Choice]] | ||
[[Category:2004 games]] | [[Category:2004 games]] | ||
Latest revision as of 15:00, April 29, 2024
This article is under construction. Therefore, please excuse its informal appearance while it is being worked on. We hope to have it completed as soon as possible.
- This article is about 2004 Nintendo GameCube game. For the Nintendo Switch remake, see Paper Mario: The Thousand-Year Door (Nintendo Switch).
| Paper Mario: The Thousand-Year Door | |||||||||
|---|---|---|---|---|---|---|---|---|---|
 For alternate box art, see the game's gallery. | |||||||||
| Developer | Intelligent Systems | ||||||||
| Publisher | Nintendo | ||||||||
| Platform(s) | Nintendo GameCube | ||||||||
| Release date | Original release Player's Choice | ||||||||
| Language(s) | Deutsch English (United States) Español (España) Français (France) Italiano 日本語 | ||||||||
| Genre | RPG | ||||||||
| Rating(s) |
| ||||||||
| Mode(s) | Single player | ||||||||
| Media | Nintendo GameCube:
| ||||||||
| Input | Nintendo GameCube:
| ||||||||
Paper Mario: The Thousand-Year Door is the second installment in the Paper Mario series. Released for the Nintendo GameCube in 2004, the game is an RPG as the first Paper Mario, featuring both turn-based battles and puzzle and platforming-focused challenges on the overworld as well as collaborating with a party of friendly characters that subsequently join on the quest, known as partners.
The story has Mario travel to the ramshackle town of Rogueport to meet Princess Peach after news she acquired a map leading to an ancient treasure. He soon finds that Peach has been kidnapped again, and comes in conflict with the X-Nauts, a malevolent secret society. Mario's quest has him collect the seven Crystal Stars, mysterious artifacts of great power that are linked to an ancient evil sealed deep below Rogueport.
Paper Mario: The Thousand-Year Door greatly expands on the battle system, with new features such as more fleshed-out partners who now have their own health pool, and the ability to negate all damage inflicted by enemy attacks through Superguarding. An audience now watches the battles — spectators may mess with the fights in ways that help or hinder the player. On the overworld, Mario now has the ability to fold into various paper forms, allowing him to explore deeper and solve puzzles. The game also has intermissions between each Chapter, in which the player assumes the role of Peach, as well as of Bowser, both of whom have their own stories that complement the main plot.
A follow-up titled Super Paper Mario was released for the Wii in 2007. Paper Mario: The Thousand-Year Door is the only game in the series to share the same battle system as the original Paper Mario, as Super Paper Mario is a platformer with RPG elements and subsequent installments (starting with 2012's Paper Mario: Sticker Star) retooled many aspects of the series.
A remake of the same name is set to be released on the Nintendo Switch on May 23, 2024.
Plot
Prologue: A Rogue's Welcome


The adventure begins when Princess Peach goes on a cruise to Rogueport where she meets a hooded woman, and buys a box which contains a map. She sends this to Mario, along with a letter asking him to help her search for the map's treasure. Soon after that, unbeknownst to Mario and the player, she is kidnapped by Sir Grodus. Mario receives the letter with the map and decides to help her, and thus boards a ship to Rogueport.
Shortly after Mario reaches Rogueport, he finds Lord Crump attempting to interrogate Goombella about the Crystal Stars. Mario intervenes and Lord Crump tries to defeat him. After defeating the X-Naut general and escaping from the X-Nauts, Goombella introduces herself, and Mario explains his quest to her. As Goombella is also searching for the map's treasure, she decides to join Mario. Then, Goombella suggests to go to Professor Frankly's house, to consult him and show him the map. At the professor's house, Frankly explains that the map is related to the legend of the treasure of the Thousand-Year Door, and that, to obtain the treasure, one must first open the door with the seven Crystal Stars. Said objects can be found by holding the Magical Map before the Thousand-Year Door, which is located in the town's sewers. So, Mario holds the map before the Thousand-Year Door, revealing the location of the first Crystal Star.
Names in other languages
| Language | Name | Meaning |
|---|---|---|
| Japanese | プロローグ ゴロツキタウンへようこそ! Purorōgu: Gorotsuki Taun e Yōkoso! |
Prologue: Welcome to Rogueport! |
| French | Prologue: Bienvenue à Port-Lacanaïe! |
Prologue: Welcome to Rogueport |
| German | Prolog: Willkomen in Rohlingen |
Prologue: Welcome to Rogueport |
| Italian | Prologo: Benvenuti a Fannullopoli |
Prologue: Welcome to Rogueport |
| Spanish | Prólogo: Bienvenidos a Villa Viciosa |
Prologue: Welcome to Rogueport |
Chapter 1: Castle and Dragon


Mario and Goombella show the updated map to Professor Frankly, who reveals that the first Crystal Star is in Petal Meadows. To reach this place, they must find a pipe in Rogueport Sewers. After finding it, Mario and Goombella arrive in Petal Meadows, where they see Hooktail and her castle. The duo stops at a nearby village called Petalburg and discover from the mayor that the dragon Hooktail has been terrorizing the village. The mayor tells them that Hooktail guards a Crystal Star in her castle, and that to access it, they must obtain the two stone keys in Shhwonk Fortress, an ancient stone fort past Petalburg. After finding them, Mario and Goombella march to Hooktail's castle, with Koops in tow (who wants to defeat Hooktail to avenge his dead father and become stronger). After navigating through the castle's traps with the help of Koops, they encounter the dragon and defeat her, allowing Koops's father to get out of the dragon's gut and present Mario with the Diamond Star.
Somewhere else, it is revealed that Princess Peach was abducted by the X-Nauts. When an X-Naut tells Sir Grodus someone got the first Crystal Star, Peach accidentally blurts out Mario's name. Grodus hears this and orders the Shadow Sirens to steal the map in Mario's possession. Peach then meets TEC-XX, the X-Naut base's computer, who develops an interest in Peach's concept of love, and asks for her help in understanding it. Peach agrees; in exchange, TEC lets her send e-mails to Mario.
Afterward, the scene focuses on Bowser's Castle, where Kammy Koopa tells Bowser about Mario's quest to find the Crystal Stars and Peach's abduction, things that motivate Bowser to hunt for the Crystal Stars and kidnap Peach back. Bowser, with his Koopa Clown Car, and Kammy then head for Rogueport. He goes through a grassfield level based on Super Mario Bros.
Back in Petalburg, after Koops promises to return as a stronger Koopa like his dad, the group receives an e-mail from Peach, who informs them that she has been kidnapped. Mario and company head back to the Thousand-Year Door to reveal the location of the next Crystal Star.
Storyline text
Mario and friends finally got a Crystal Star in the castle after defeating Hooktail. Koops even reunited with his long-lost father, whom he thought was dead. Yet they were unable to learn anything about the whereabouts of the princess. Where could Princess Peach be? Yes... Mario's adventure has only just begun.
Names in other languages
| Language | Name | Meaning |
|---|---|---|
| Japanese | ステージ1 マリオとお城とドラゴンと Sutēji 1: Mario to Oshiro to Doragon to |
Stage 1: Mario, the castle and the dragon |
| French | Chapitre 1: Mario + château + dragon |
Chapter 1: Mario + castle + dragon |
| German | Kapitel 1: Lohgards Drachenburg |
Chapter 1: Hooktail's Dragon Castle |
| Italian | Scena I: Mario, il castello e la dragonessa |
Scene 1: Mario, the castle and the dragon |
| Spanish | Acto 1: El bueno, el feo y el malo |
Act 1: The Good, The Ugly and The Bad |
Chapter 2: The Great Boggly Tree


The second Crystal Star is revealed to be in the Great Tree, home of small creatures known as Punies, deep inside Boggly Woods. When searching for the pipe leading to Boggly Woods in Rogueport Sewers, Mario and his partners encounter Punio, who tells them that the X-Nauts have invaded the Great Tree, capturing most of the Punies and that the Jabbies, the Punies' enemies, have allied with the X-Nauts and are trying to kick the Punies out of the Great Tree. Mario and company decide to help out the Punies, and therefore Punio leads the group to the Boggly Woods. After getting there, Mario and company encounter the Shadow Sirens with a necklace that Vivian found, who do not recognize him due to having lost a sketch of him, which Beldam accuses Vivian of losing. The group continues and arrives at the Great Tree. However, they realize that the tree is locked. Punio suggests they find Madame Flurrie, who can help them find the Tree's secret entrance. Despite this, upon reaching her home, Flurrie reveals she has lost her necklace and does not want anyone to see her without it. Thus, Mario and friends return to the Shadow Sirens and defeat them, this way retrieving the necklace. After returning it to Flurrie, she joins them in their quest. The group finds the secret entrance with her help and manages to enter the Tree; after freeing the locked Punies with the aid of a special orb and after solving the Great Tree's puzzles and defeating the Jabbies, they reveal the second Crystal Star at the bottom of the Tree. There, Lord Crump snatches it, and activates a time bomb to blow up the Tree. Upon following him to the entrance, he stops the bomb and uses Magnus von Grapple to fight the heroes, but he is defeated by the group. As a result, the X-Nauts evacuate the Tree and Mario and company obtain the Emerald Star.
At the X-Naut headquarters, the X-Nauts notify Sir Grodus that Mario has taken the Emerald Star, and has also defeated Lord Crump and the Shadow Sirens. He asks them about the other Crystal Stars, but they have no luck in finding them. Grodus believes that Mario must have the map. Meanwhile, TEC-XX calls for the Princess, and, hearing her desire to dance at the Mushroom Ball, asks her to dance with him, using a hologram of Peach herself, and having to press the buttons on the screen. TEC then lets Peach e-mail Mario.
Meanwhile, Bowser heads for Petalburg, since Kammy tells him that Peach was seen there. After crossing Petal Meadows, he arrives in the town, scaring the main Koopa Troopa, and upon spotting what he thinks is Peach, he tries talking to her, but she is revealed to be merely a poster owned by a local Koopa Troopa.
As Mario and his team move on, they receive another e-mail from Peach, who tells them that the X-Nauts are also searching for the Crystal Stars. Mario and his team reveal the location of the next Crystal Star, and they visit Professor Frankly for details.
Storyline text
And so, after pummeling Lord Crump, Mario obtained the second Crystal Star... With the X-Nauts gone, peace once again prevailed throughout the Great Tree. The Boggly Woods echoed with the Puni songs of joy. But... this may not be the last our hero hears from the vile X-Nauts. They will surely continue to stand in Mario's way and try to put a stop to his efforts...
Names in other languages
| Language | Name | Meaning |
|---|---|---|
| Japanese | ステージ2 ふしぎの森の大きな木 Sutēji 2: Fushigi no Mori no Ōkina Ki |
Stage 2: The Big Tree of the Mysterious Forest |
| French | Chapitre 2: Un grand arbre |
Chapter 2: A great tree |
| German | Kapitel 2: Der Baum der Bubus |
Chapter 2: The Tree of the Punies |
| Italian | Scena II: La Grande Quercia del Bosco Misterioso |
Scene 2: The Great Oak of the Mysterious Forest |
| Spanish | Acto 2: El bosque animado |
Act 2: The Animated Forest |
Chapter 3: Of Glitz and Glory

The third Crystal Star appears in a large arena on a floating town. To reach Glitzville, Mario and the gang must visit Don Pianta. He offers them the ticket they need after doing him a favor. Once Mario and his team arrive in Glitzville, they enter the Glitz Pit, a popular place in which fighters brawl, and spot the Crystal Star on the Champ's Belt, held by Rawk Hawk, the current champion. They sign up in the Pit, battle through the ranks, and eventually gain a newborn Yoshi as a partner after obtaining his egg from Mr. Hoggle. Soon, a mysterious figure known only as "X" starts sending cryptic e-mails to Mario. The e-mails lead Mario and his partners to discover that the Star on the belt is a fake, and that the real Crystal Star is being used by Grubba, the promoter of the Glitz Pit, who has been using it to drain fighters of their energy to keep himself young and powerful. Mario and company expose his wrongdoings and chase him into the arena, where he transforms into Macho Grubba in order to eliminate Mario and his friends. Nonetheless, the group manages to defeat him. After the battle, Jolene, Grubba's assistant, appears and reveals herself as the mysterious X, explains her story, reunites with her brother Prince Mush, and gives Mario the Gold Star.
At the X-Naut base, Sir Grodus berates the Shadow Sirens for failing to defeat Mario. Beldam assures him that the sisters will take care of Mario with their new weapon. TEC-XX asks Peach to go ask Grodus a question relating to his plans. The Princess, while annoyed, soon goes undercover in an X-Naut disguise (despite the X-Nauts being roughly half Peach's size, she somehow still fits in the outfit) and learns that Grodus is plotting to use the Crystal Stars to take over the world, but he refuses to say why he's keeping Peach locked up, and finding something strange about her voice while disguised. TEC allows her to send this message to Mario.
Meanwhile, Bowser and Kammy are searching for one of the Crystal Stars in the Great Tree, where they discover that Mario already obtained it. Kammy Koopa gets into an argument with the Puni Elder, which leads to Bowser saying to himself "You're BOTH too old! Har!" or "It's Hag vs. Hag! Awesome!" Bowser is angered that Mario is one step ahead of him again.
After saying goodbye to everyone at Glitzville, with Rawk Hawk promising to not cheat anymore, King K. thanking Mario for saving him, and Jolene taking over as the new Glitz Pit manager, Mario and company receive Peach's message; they promptly reveal the fourth Crystal Star's location.
Storyline text
Glitzville's seamy underside was a dark, dangerous place seething with conspiracy... With the help of the lovely Ms. Jolene, Mario revealed Grubba's true identity... And acquired the third Crystal Star by defeating the monstrous Macho Grubba. Grubba had used the power of the Crystal Star to run his power-draining machine... What other hidden powers might these strange and mystical items possess?
Names in other languages
| Language | Name | Meaning |
|---|---|---|
| Japanese | ステージ3 もえよ!チャンピオン! Sutēji 3: Moeyo! Chanpion! |
Stage 3: Get fired up! Champion! |
| French | Chapitre 3: Vas-y champion! |
Chapter 3: Go champion! |
| German | Kapitel 3: Kampf der Champions |
Chapter 3: Clash of the Champions |
| Italian | Scena III: Forza, campione! |
Scene 3: Come on, champion! |
| Spanish | Acto 3: El rey de los luchadores |
Act 3: The King of Fighters |
Chapter 4: For Pigs the Bell Tolls


Professor Frankly tells the group that the Crystal Star is located in Creepy Steeple, near Twilight Town. When Mario and company arrive in Twilight Town, they discover that the village is under a curse cast by a monster who lives in the steeple. Using a new power, the group reaches the steeple, and battles the monster. During the battle, the monster uses an ability to steal Mario's name and body, while Mario is transformed into a shadowy version of himself. Mario's partners claim the Crystal Star and leave with whom they think is Mario. All the while, the Shadow Sirens are in Twilight Town, planning on defeating Mario and his partners with their new weapon: the Superbombomb. In spite of this, Beldam seems to have lost it, prompting her to blame Vivian and to force her to search for it. The real Mario returns to Twilight Town, and helps Vivian with her problem. Out of gratitude, she joins Mario's party. They eventually discover from the monster's parrot that the monster's name is Doopliss. After telling Doopliss his name, he is weakened and flees to Creepy Steeple. Mario and Vivian chase him there and they fight once more. Mario and his new partner defeat Doopliss, allowing Mario to regain his name and body and obtain the Ruby Star.
At the X-Naut base, an X-Naut PhD tells Sir Grodus that he's done a lot of research on the Thousand-Year Door, whose sealing power is weakening. This delights Grodus, since this means his plan will succeed, and he will soon create a new, perfect world. TEC-XX requests the Princess to participate in a sort of "quiz show" with him, which soon gets creepier with the answers that Peach somehow knows. By doing this, she discovers what the "treasure" of the Thousand-Year Door really is: the soul of an ancient demon. The Princess, although concerned if it was a good idea for TEC to tell her these things, then relays this information to Mario.
In the meantime, Bowser continues his quest for the Crystal Stars by flying to Glitzville in his Koopa Clown Car, although Kammy Koopa was attempting to buy blimp tickets. It malfunctions halfway there, though, and he must travel underwater in order to return to Rogueport. After he gets there and meets up with Kammy, who has traveled to Glitzville, finding the fights amazing, and the hot Dogs delicious. After burning her offerings, and angry enough from what he went through while swimming, Bowser orders her to continue her research on Peach and the Crystal Stars.
Back in Twilight Town, Mario and his friends receive the message from Peach. They reveal the whereabouts of the next Crystal Star and visit Professor Frankly for details.
The English name for Chapter 4, as well as its Japanese, Spanish, Italian, and French translations, are referencing the Ernest Hemingway novel, For Whom the Bell Tolls. The Japanese name is also possibly a reference to the Japan-exclusive game Kaeru no Tame ni Kane wa Naru co-developed by Intelligent Systems, which involves a bell capable of transforming frogs into people.
Storyline text
(fake) Mario defeated the scourge of Creepy Steeple and found the fourth Crystal Star. The people of Twilight Town have surely recovered from their awful curse by now. At this rate, Mario's quest to collect all seven Crystal Stars will be done in no time! With his back to Creepy Steeple, Mario sets out toward his bright future...
(real) Mario defeated the rogue who had stolen his name and appearance. Now Mario has four Crystal Stars. That leaves a mere three more to find! And THAT means his quest to collect all of the Crystal Stars is more than half over! Now Mario heads off toward his next adventure with his new friend, Vivian... ...But what about Beldam and Marilyn? And what became of the doppelganger, Doopliss?
Names in other languages
| Language | Name | Meaning |
|---|---|---|
| Japanese | ステージ4 ブタのためにカネはなる Sutēji 4: Buta no Tame ni Kane wa Naru |
Stage 4: For Pigs the Bell Tolls; parody on For Whom the Bell Tolls and Kaeru no Tame ni Kane wa Naru |
| French | Chapitre 4: La cloche à cochons |
Chapter 4: The pig bell |
| German | Kapitel 4: Die Glocke der Spukabtei |
Chapter 4: The bell of the Spook Abbey |
| Italian | Scena IV: Per chi suona la campana |
Scene 4: For whom the bell tolls |
| Spanish | Acto 4: ¿Por quién dobla la campana? |
Act 4: For Whom Does the Bell Toll? |
Chapter 5: The Key to Pirates

The fifth Crystal Star is located deep within a pirate lair on the southern island of Keelhaul Key. To reach the island, Mario enlists the help of Flavio and Admiral Bobbery. They sail to the island with some Toads, Pa-Patch, and Lord Crump in disguise (known as "Four-Eyes"). On their way there, Mario and company are attacked by Cortez's Embers, which shipwreck them on Keelhaul Key. Later on, some of the crew members are attacked by more Embers, and Bobbery sacrifices himself to save them. Bobbery says he is close to death, and after giving him his last request, they find out that he just fell asleep. As soon as Mario wakes him, he joins Mario's party. With the aid of Bobbery, and Flavio's Skull Gem, Mario and company enter Pirate's Grotto. After solving some puzzles, and gaining another ability from a black chest, they finally enter Cortez's ship. Following a battle, Cortez gives Mario his Sapphire Star. Subsequently, Lord Crump abandons his disguise and tells Mario that he will attack him with his ship's cannons until he hands over the Crystal Star. With the help of Cortez's ship and Flavio's Skull Gem, they defeat the invading X-Nauts, along with their leader.
Back at the X-Naut base, Sir Grodus is ashamed of Lord Crump for failing him again, and orders him to stand by until then. Summoning another X-Naut, he orders him to tell the Shadow Sirens (without Vivian) to attack Mario again, without failing. TEC-XX wishes to gain access to a disk in Sir Grodus's room, since he can't access the data of computers that aren't linked his network, and requests Peach to help him. When she gets into a lab, TEC gives her instructions to make a potion. After Peach turns invisible, she has no choice but to take off her clothes, so she can sneak in the base unnoticed. After entering Grodus's room, she secures the disk for TEC, and thus he promises to analyze the data. Peach then gets dressed and turns visible again with the green potion, then sends yet another e-mail to Mario, informing him of this development.
Meanwhile, in Twilight Town, Bowser, who is creeped out by the place, and Kammy Koopa run into Lord Crump, who is looking for the Superbombomb like Vivian was earlier. The three get into an argument, which escalates to an armed confrontation between the Koopa Troop and the X-Nauts. Bowser inadvertently ends up igniting the bomb after Lord Crump throws it at him, knocking out both armies.
Back at Keelhaul Key, Cortez ferries Mario and his teammates to Rogueport. Mario gets the e-mail from Peach, telling them about what TEC is analyzing. Mario and his team then reveal the next Crystal Star's location, and visit Professor Frankly for information.
Storyline text
Cortez, scourge of the seas... Mario soundly defeated this fearful spirit and claimed the Crystal Star. Perhaps the peaceful citizens of the world no longer need fear Cortez and his fell ship... The only problem remaining is how Mario will escape this isolated island... And could there be another problem still, hiding beneath our hero's nose?
Names in other languages
| Language | Name | Meaning |
|---|---|---|
| Japanese | ステージ5 トロピコアイランドの大海賊 Sutēji 5: Toropiko Airando no Dai Kaizoku |
Stage 5: The Great Pirate of the Keelhaul Key |
| French | Chapitre 5: Pirate de Tropatroce |
Chapter 5: Pirate of Keelhaul Key |
| German | Kapitel 5: Der Schatz des Piraten |
Chapter 5: The pirate's treasure |
| Italian | Scena V: Il grande pirata dell'Isola Tropico |
Scene 5: The Great Pirate of Keelhaul Key |
| Spanish | Acto 5: La isla del tesoro |
Act 5: Treasure Island |
Chapter 6: 3 Days of Excess

The sixth Crystal Star is in Poshley Sanctum, located in the ritzy town of Poshley Heights. The only way to get there is by riding on the famous Excess Express. After doing Don Pianta another favor, after which he retires from his position and gives it to Frankie, he gives Mario a train ticket. During the first day on the Excess Express, Mario and his team witness several mysterious events, including thefts of items and messages threatening to blow up the train. On their second day of travel, Pennington, a penguin detective, helps Mario and his friends solve the crimes, and together, they manage to capture a fake Zip Toad who was really Doopliss in disguise, and the one who attempted to halt the train by causing an explosion with some stolen items. At sundown, when the train stops at Riverside Station for refuel, Doopliss escapes capture. Mario and company find that the drawbridge has been lifted, preventing the Excess Express from continuing its route. The gang enters Riverside Station and flips the switch to bring the drawbridge back down. Also, they discover that a group of Smorgs had lifted the bridge. On the third and final day of the journey, a stowaway Smorg monster attacks the train, kidnapping all of its passengers. Mario and his friends defeat the creature, rescuing the passengers in the process, and finally reach Poshley Heights. They venture into Poshley Sanctum, a museum that happens to belong to Pennington. The Shadow Sirens, who happen to be already inside, snatch what appears to be the Garnet Star and flee. However, Pennington reveals that what they stole was a fake, and lets Mario find where the real Crystal Star is. After some exploring, Mario and company manage to find the real Garnet Star.

Back at the X-Naut base, the X-Nauts tell Grodus that Mario now possesses six of the seven Crystal Stars, and he is furious that his crew were fooled by the fake Crystal Star. They also tell him of TEC's betrayal. Just then, TEC makes the information he gained from Grodus's data disk known to the Princess, and prepares to help Peach escape. Before he is able to, and while Peach tries to send another e-mail to Mario, Grodus enters with two X-Nauts and orders them to initiate a data-wipe procedure of TEC's memory. TEC tells Peach "I love you" just before he is shut down.
Meanwhile, Bowser is searching for another Crystal Star, and upon clearing an underground course that resembles the Bowser's Castle levels, he reaches Rawk Hawk's workout room, where he stumbles across the Champ's Belt. Rawk Hawk performs a slide attack on Bowser, who quickly squishes him. He quickly learns that it does not bear a real Crystal Star, just a glass fake, just like Mario and his partners did in Chapter 3. Rawk Hawk informs Bowser that Gonzales (Mario) has it.
Mario and his team return to Rogueport and receive an e-mail from Peach, telling them about her being held on the moon, and what the X-Nauts plan to do with her, but the last and most grim part of the message is cut off due to TEC being shut down. Back in Rogueport, Mario and company reveal the next Crystal Star's location and visit Professor Frankly for details.
Chapter 6 appears to allude to Murder on the Orient Express, which also involves several peculiar passengers on a train where a crime takes place.
Storyline text
Mario found the sixth Crystal Star, hidden craftily in the Poshley Heights sanctum. Now only one Crystal Star remains... But our hero still does not know where Princess Peach is being held. Where could the last Crystal Star be? And where is Peach being held? Hoping this Crystal Star might yield answers, Mario and friends return to Pennington.
Names in other languages
| Language | Name | Meaning |
|---|---|---|
| Japanese | ステージ6 リッチリッチエクスプレス3日間 Sutēji 6: Ritchi Ritchi Ekusupuresu Mikka-kan |
Stage 6: The Excess Express 3 days |
| French | Chapitre 6: Dans le Crésus Express! |
Chapter 6: On the Excess Express! |
| German | Kapitel 6: Reise im Glimmer-Liner |
Chapter 6: Travel in the Excess Express |
| Italian | Scena VI: Tre giorni sul Fasto-Express |
Scene 6: Three days on the Excess Express |
| Spanish | Acto 6: Misterio en el Ricachón Exprés |
Act 6: Mystery in the Excess Express |
Chapter 7: Mario Shoots the Moon

The last Crystal Star appears to be on the moon. To reach it, Mario and his companions travel to Fahr Outpost to find a cannon to shoot them there. After searching for Goldbob and General White, whose blessings are needed to operate the firearm, Mario and company enter the cannon and are shot to the moon. Once there, the group discovers the X-Naut Fortress. After arriving at its deepest part, they face Lord Crump, who brags about his latest creation — Magnus von Grapple 2.0, and tries once again to defeat Mario and company. Even so, he is thwarted, and the Crystal Star in his possession is claimed by them.
At the same time, Bowser is looking for another Crystal Star in the Poshley Sanctum. A Paragoomba flies in and reports to Bowser that Mario has collected every Crystal Star and is heading for the Thousand-Year Door, which contains a great treasure. Bowser announces that he will steal this treasure and trounce Mario.
As Mario and his allies prepare to leave the fortress, they discover that all of the doors have been locked, except for one. In this room, the heroes find TEC, who is running on backup power. He recognizes Mario and tells him to rescue the Princess, who has been taken to the Palace of Shadow, a place that lies beyond the Thousand-Year Door. He then activates an emergency transporter, which Mario and company employ, right before the fortress explodes, along with TEC. The group is transported to a room in Rogueport Sewers. After exiting the room, Doopliss disguised as Professor Frankly meets them and urges them to open the Thousand-Year Door, lying that Grodus went through it with Peach.
Storyline text
The last Crystal Star had been hidden in the X-Naut hideout on the moon... But by the time Mario recovered it, Peach had already been taken away... Where could Peach be now? And what of the elusive Grodus? Perhaps he holds the key to the remaining puzzle... Mario finally has all seven Crystal Stars... Where will they lead him next?
Names in other languages
| Language | Name | Meaning |
|---|---|---|
| Japanese | ステージ7 はるかなる月を目ざして Sutēji 7: Harukanaru Tsuki o Mezashite |
Stage 7: Aiming at the Distant Moon |
| French | Chapitre 7: Voyage sur la Lune |
Chapter 7: Journey to the Moon |
| German | Kapitel 7: Der Weg zum Mond |
Chapter 7: The Way to the Moon |
| Italian | Scena VII: Viaggio sulla Luna |
Scene 7: Journey to the Moon |
| Spanish | Acto 7: Objetivo: la Luna |
Act 7: Target: the Moon |
Chapter 8: The Thousand-Year Door

After Mario has obtained all seven Crystal Stars, the time has come to open the Thousand-Year Door and enter the Palace of Shadow to rescue Princess Peach from Sir Grodus.
Mario and his friends open the Thousand-Year Door with the seven Crystal Stars, allowing them to enter the Palace of Shadow. The palace itself is full of enemies, puzzles, and traps. Eventually, Mario and company battle and beat a dragon named Gloomtail, Hooktail's older brother, this way making him relinquish the key to access the Riddle Tower. Upon solving the Tower's puzzles, a secret passage — which leads deeper into the Palace — is opened. Mario and his party continue down that path, but not before defeating the Shadow Sirens, who try to get rid of them. Finally, Mario and company enter the throne room of the Palace, where they confront Sir Grodus, whom they engage in a long and difficult battle. They are able to best him, yet Grodus reveals a captive Peach, whom he uses as a hostage to freely attack Mario and company. Suddenly, Bowser and Kammy drop in unexpectedly and land on top of Grodus. The duo seizes the opportunity to fight Mario, but are foiled in the end. Nevertheless, Grodus uses the distraction of the battle to bring Princess Peach into the deepest part of the Palace. There, he opens a sealed coffin and frees the Shadow Queen, the ancient demon of legend. Beldam appears all of a sudden and announces that she was the one who orchestrated the plot to free her mistress. The Shadow Queen refuses to be controlled by Grodus, and fries him with a lightning bolt, apparently killing him, leaving only his head. The Queen proceeds to possess Princess Peach, using her as a vessel to sustain her life. The world is then covered in darkness. Mario and his allies challenge the Queen, but she eventually decides to fight in her real form, in which she is invincible. She proves too much for the group to handle, until the Crystal Stars abruptly react to the evil of the Queen and fly throughout the world, each returning to where they were found, giving the people of the world a chance to cheer on Mario and his party. Their hope breaks through the Queen's invulnerability, and this also lets Peach give the heroes the last of her power. Strengthened, the heroes seal the Shadow Queen forever, saving the world.

Goombella later sends Mario a message, explaining what everyone has done: she now works with Professor Frankly, while Koops plans on becoming the mayor of Petalburg. Flurrie has returned to the stage and enacts "Paper Mario" as her comeback smash, and Doopliss plays the role of Mario. The Yoshi fights in the Glitz Pit as the "Great Gonzales Jr.", whereas Vivian has forgiven her sisters and lives in Twilight Town. Admiral Bobbery sails the seas with Cortez, and Ms. Mowz still runs her Lovely Howz of Badges. Lord Crump, Grodus and the X-Nauts survived and are spending their time, without causing trouble, in Poshley Heights. Somehow, TEC survived as well, and hopes to see the Princess again one day. The game ends when the Princess visits the Mario Bros. with another treasure map, and requests Mario's help in finding it.
Names in other languages
| Language | Name | Meaning |
|---|---|---|
| Japanese | ステージ8 スターストーンと伝説の宝 Sutēji 8: Sutā Sutōn to Densetsu no Takara |
Stage 8: The Crystal Stars and the Legendary Treasure |
| French | Chapitre 8: Le trésor légendaire |
Chapter 8: The legendary treasure |
| German | Kapitel 8: Die Legende vom Schatz |
Chapter 8: The treasure's legend |
| Italian | Scena VIII: Le Gemme Stella e il Tesoro Leggendario |
Scene 8: The Crystals Stars and the Legendary Treasure |
| Spanish | Acto 8: El destino en sus manos |
Act 8: The fate in their hands |
Gameplay

Paper Mario: The Thousand-Year Door brings over all the core mechanics of the Nintendo 64 original, with the absence of the Spin Dash being the most notable exception in the overworld. All other moves return, as well as the party member system, and once again partners can be used outside of battle to overcome obstacles and reach items from a distance. Several partners have the same abilities to ones seen in Paper Mario, like Koops being the counterpart of Kooper.
An element introduced in Paper Mario: The Thousand-Year Door is the capability to explore backgrounds, which are accessible to Mario through certain pipes. These sections are entirely 2D, working as short side-scrolling platforming sections. Several places which only appear in the background can be visited this way, some of which include Hooktail Castle, the Great Tree, the X-Naut Fortress, and Merlee's house in the Rogueport Sewers. This feature was carried over to the next game in the series, Super Paper Mario. Certain abilities are disabled here, however: Mario's partners cannot be used in the background, Mario cannot move to a different screen/area, and he also cannot walk past any buildings.
While the game features turn-based battles like Paper Mario, these went through the most noticeable changes in gameplay. Unlike the original, where partners had a simple fine/injured status system, this game gives partners their own Heart Points. As such, partners can fall in battle, and items such as the Mushroom can be used on them as well. Battles also take place on a stage, which incorporates the audience and scenery hazard elements to them. More information is available in the battle system section.
Controls
|
Overworld
|
Menu
Battle
|
Peach intermissions
Bowser intermissions
|
Mario's stats
| Stat | Initial value | Min. value | Max. value | Description | ||
|---|---|---|---|---|---|---|
| Level | 1 | 99 | Indicates Mario's progress, increased by 1 every time he collects 100 Star Points. | |||
| Star rank | Rising star | Superstar | Determines the maximum attendance of the audience.
| |||
| HP | 10 | 5 | 200* | Mario's health. Can be increased by 5 when Mario levels up, and with HP Plus badges. | ||
| FP | 5 | 200* | Mario's reserve for moves. Can be increased by 5 when Mario levels up, and with FP Plus badges. | |||
| BP | 3 | 99* | Mario's capacity to equip Badges. Can be increased by 3 when Mario levels up. | |||
| Star Power | 0 | 8 | Mario's capacity to perform special moves, increased by 1 everytime he collects a Crystal Star. | |||
| Star Points | 0 | 99 | Points obtained by winning battles that level Mario up if he collects 100 of them. | |||
| Coins | 100 | 0 | 999 | Used to buy items, badges and services. | ||
| Star Pieces | 0 | 100 | Collectibles that can be traded for badges with Dazzle. | |||
| Shine Sprites | 0 | 42 | Collectibles that can be traded for partner level-ups with Merlon. | |||
| Play time | 00:00 | 99:59 | Amount of time spent on the save file. | |||
* - Maximum HP, FP and BP are not mutually achievable.
Boots and hammer
Mario begins the game equipped with his basic Boots and Hammer, which grant no special abilities in the overworld, and deal the least amount of damage in battle (1 point for a normal attack, and 2 points with a successful action command). The player will find upgraded versions of both as they progress, which are mandatory as they allow access to important areas.
| Image | Equipment | Location found | Additional abilities |
|---|---|---|---|
| Boots | Equipped from the start |
| |
| Super Boots | The Great Tree (Chapter 2) |
| |
| Ultra Boots | Riverside Station (Chapter 6) |
| |
| Hammer | Equipped from the start |
| |
| Super Hammer | Glitzville (Chapter 3) |
| |
| Ultra Hammer | Rogueport (Ultra Boots required) |
|
Paper abilities
Like the boots and hammer upgrades, the player encounters black chests throughout the story, whose beings trapped inside give Mario special abilities to use in the overworld upon release. All of these abilities are based on the paper element of the game's graphics.
| Icon | Paper ability | Location received | Ability gained |
|---|---|---|---|
| Plane Mode | Rogueport Sewers (Prologue) | Allows Mario to fold himself into a paper airplane while standing on marked platforms called plane panels, granting him the ability to fly over large gaps. | |
| Paper Mode | Hooktail Castle (Chapter 1) | Allows Mario to turn sideways. Due to being paper-thin, he is able to squeeze through certain narrow passages. | |
| Tube Mode | Twilight Town (Chapter 4) | Allows Mario to roll up into a short tube, this way being able to fit in low passageways. | |
| Boat Mode | Pirate's Grotto (Chapter 5) | Allows Mario can turn into a paper boat while standing on wooden docks called boat panels, granting him the ability to cross bodies of water. |
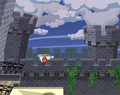
Plane Mode
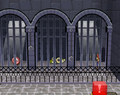
Paper Mode
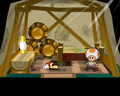
Tube Mode
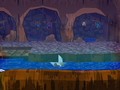
Boat Mode


Objects
This article is under construction. Therefore, please excuse its informal appearance while it is being worked on. We hope to have it completed as soon as possible.
|
Assistance objects
|
Obstacles
| ||||||||||||||||||||||||||||||||||||||||||||||||||||||||||||
Intermissions
After each Chapter is completed, two intermission scenes precede the beginning of the next. The player can save their progress before and after each intermission.
Princess Peach intermissions

The first intermission after each chapter allows the player to control Princess Peach, similarly to the intermissions from Paper Mario. These intermissions follow Peach as she is held captive in the X-Naut Fortress, as well as her interactions with the fortress's main computer, TEC-XX, who had a malfunction upon discovering her, causing him to fall in love with her. The intermissions also provide more context to the X-Nauts, their motive for kidnapping Peach, and their greater overall plans. At the end of each intermission, Peach sends a message to Mario's Mailbox SP with TEC-XX's assistance.
Bowser intermissions

The Peach intermission is followed by a Bowser intermission, a new addition to Paper Mario: The Thousand-Year Door. These intermissions serve as comic relief to contrast the more serious nature of the Peach sequences. Each intermission follows Bowser and Kammy Koopa; having discovered that Mario is collecting the Crystal Stars and Princess Peach has been kidnapped, Bowser sets off to find the Crystal Stars first and kidnap Peach himself. However, he usually visits the places Mario has been to one chapter before, and his search for Peach and the Crystal Stars in each location he visits ends to no avail.
The Bowser intermissions at the end of Chapter 2, Chapter 4, and Chapter 6 include a side-scrolling platformer level in the style of Super Mario Bros. The levels are called World 1-X, World 2-X, and World 3-X, in reference to the world numbering of Super Mario Bros., with the X being replaced by the number of attempts Bowser has used for the level. Bowser has unlimited lives during each level. Each level is themed after a basic environment from Super Mario Bros. and plays an arrangement of music from that game. Each level also has a time limit of 180 seconds, which kills Bowser if time runs out. If only 30 seconds remain, the "Hurry up!" jingle from Super Mario Bros. plays and the music speeds up. Bowser can also earn points and collect coins in these levels; however, these elements have no effect on gameplay. Each coin Bowser collects is worth 500 points, with the coin count being retained after dying. If the coin count reaches 99, it simply reverts to 0 upon collecting the next coin, without any special effect.
In these levels, Bowser can press ![]() to jump, and can perform a Ground Pound by pressing
to jump, and can perform a Ground Pound by pressing ![]() again in mid-air. He also has the ability to breathe fire by holding
again in mid-air. He also has the ability to breathe fire by holding ![]() , which can defeat enemies and destroy blocks, although he cannot breathe fire in mid-air. The only item that appears in these levels is Meat, which allows Bowser to radically increase his size and take an extra hit from hazards, similar to the effects of a Super Mushroom. However, touching lava or falling into a bottomless pit immediately kills Bowser. Bowser has four possible sizes:
, which can defeat enemies and destroy blocks, although he cannot breathe fire in mid-air. The only item that appears in these levels is Meat, which allows Bowser to radically increase his size and take an extra hit from hazards, similar to the effects of a Super Mushroom. However, touching lava or falling into a bottomless pit immediately kills Bowser. Bowser has four possible sizes:
- An extremely small size, which Bowser reverts to after taking a hit while at his default size.
- A medium size, the default size at which Bowser starts each level.
- A large size, which Bowser grows to after using a piece of Meat from his default size. At this size, Bowser flattens enemies if he stomps on them.
- A gigantic size, which Bowser grows to after using a piece of Meat from his large size. At this size, Bowser starts flashing yellow and becomes invincible similarly to Mega Mario, allowing him to crush everything in his way, including enemies, blocks, and Warp Pipes.
Enemies react to Bowser in different ways: while X-Nauts charge at Bowser, Goombas are scared by him and run away when he approaches them. The end of each level features a flagpole; reaching it completes the level and briefly displays the word "FINISH". There is also a small castle next to the flagpole, as another reference to Super Mario Bros. If Bowser is at an extremely small or medium size, he descends the flagpole and enters the castle; however, if he is large or gigantic, he destroys the flagpole and simply stands next to the castle.
Bowser says a short line when beginning each new attempt of a level.[2] Below is each line in order:
| Bowser's starting lines | ||||
|---|---|---|---|---|
| ||||
After 30 attempts, Bowser will always say "Gotta do it!" when beginning each subsequent attempt.
Party members
On his adventure, Mario, just like the past game, uses partners. They possess diverse abilities, useful both in and out of battle. Merlon can upgrade a partner by giving him 3 Shine Sprites. Every partner knows two moves at the time of joining the party, learns the third after being upgraded to Super Rank, and masters the final move upon attaining Ultra Rank. Initially, each partner may only be upgraded once, but if Mario finds the Up Arrow in Hooktail's Castle and shows it to Merlon, the wizard will remember that he has an Ultra Stone, subsequently allowing the player to upgrade a partner for a second time.
In the following table, attributes attained by leveling up to Super Rank are indicated by ![]() . Attributes attained by leveling up to Ultra Rank are indicated by
. Attributes attained by leveling up to Ultra Rank are indicated by ![]()
![]() .
.
| Name | Joins in | Summary | HP | |||||||||
|---|---|---|---|---|---|---|---|---|---|---|---|---|
Goombella |
Rogueport (Prologue) |
A sassy Goomba who studies at the University of Goom. She is the first character to join Mario (shortly after he defeats Lord Crump), since she, too, is looking for the legendary treasure. She has the same ability to uncover an enemy's stats as Goombario does. | 10 20 30 | |||||||||
| ||||||||||||
 Koops |
Petalburg (Chapter 1) |
A timid Koopa Troopa who lives in Petalburg. To prove to Petalburg that he is not a coward, and to avenge the death of his father, Koopley, he joins Mario's team. He has the same ability Kooper has outside of battle: using his shell toss move to activate switches, grab items and attack enemies, but with a slight upgrade — he can hold his shell in place and then launch it back in the opposite direction. Koops has a Defense Power of 1. | 10 15 25 | |||||||||
| ||||||||||||
Madame Flurrie |
Boggly Woods (Chapter 2) |
A slightly pompous wind spirit and an actress on hiatus that Mario meets in Boggly Woods. Out of battle, she can blow wind at enemies to make them dizzy and stun them, and also to strip fake walls away, revealing secret passages. She joins Mario only after he returns her her lost Necklace, which Vivian innocently picked up. | 15 25 35 | |||||||||
| ||||||||||||
 Yoshi |
Glitzville (Chapter 3) |
This belligerent, spunky Yoshi baby hatches from an egg rescued by Mario and friends. The player can press |
10 20 30 | |||||||||
| ||||||||||||
Vivian |
Twilight Town (Chapter 4) |
The youngest member of the Shadow Sirens. At first, she works for Sir Grodus, but eventually joins Mario's party to help him get his name, body, and teammates back, because Mario is kinder to her than her sisters. Since he is prevented from telling her who he is as a result of having his identity stolen, she does not realize he is her enemy until their final confrontation with the body thief. She retreats from battle upon learning this, but quickly returns after deciding that Mario has earned her loyalty. She can pull Mario into the shadows with her Veil technique, which is for all practical purposes identical to Lady Bow's Outta Sight move from Paper Mario. | 15 20 30 | |||||||||
| ||||||||||||
Admiral Bobbery |
Keelhaul Key (Chapter 5) |
A retired Bob-omb admiral who at first refuses to help Mario reach Keelhaul Key, but changes his mind when Mario delivers his late wife's letter to him. After Mario saves him from Cortez's underlings and gives him Chuckola Cola, he joins Mario's team. He possesses the same ability Bombette has outside of battle: with his bomb attack, he can destroy cracked walls, activate switches and attack enemies. However, he can be tossed upwards to walk on elevated ledges, and Mario can hold |
20 30 40 | |||||||||
| ||||||||||||
 Ms. Mowz |
Rogueport (optional) |
A flirty Squeek cat burglar and badge hunter and the manager of the Lovely Howz of Badges. Mario and his teammates cross paths with her at Hooktail Castle, the Great Tree, and the Glitz Pit storeroom. She is an optional partner who joins Mario if he chooses to solve her trouble at the Trouble Center in Rogueport. To help her, Mario has to get the Attack FX B badge in Hooktail's lair and give it to Ms. Mowz.
She can also seek out hidden items and badges, and penetrate enemies' defenses like Watt from the first Paper Mario does, although the specifics are considerably different. She is the first partner in the Paper Mario series who does not have to join Mario's party in order for him to complete his quest. |
15 20 25 | |||||||||
| ||||||||||||
Crystal Stars
The Crystal Stars are the principal collectibles in the game. Retrieving one marks the end of a chapter, gifts Mario one additional unit in his Star Power gauge and teaches him a special move.
| Crystal Star | Location | Guarded by | Power & SP needed | Description |
|---|---|---|---|---|
| Magical Map
|
Rogueport | Mysterious merchant (obtained by Peach) |
Sweet Treat 1 SP |
Replenishes up to 7 HP for both party members and 8 FP, and cures all status ailments (except Immobilized and Down). |
| Diamond Star
|
Hooktail Castle | Hooktail | Earth Tremor 2 SP |
Creates an earthquake that damages enemies, piercing defense and ignoring evasion. If at least one gauge of the Action Command is completed, the tremor damages all grounded and low-hovering enemies. If done perfectly (all gauges completed), deals 6 HP of damage to all foes. |
| Emerald Star
|
The Great Tree | Punies (original keepers) Magnus von Grapple (boss) |
Clock Out 2 SP |
If successful, immobilizes all enemies for a few turns. |
| Gold Star
|
Glitz Pit | Macho Grubba | Power Lift 3 SP |
Boosts Mario and his partner's Attack and Defense Power for a few turns. |
| Ruby Star
|
Creepy Steeple | Doopliss | Art Attack 4 SP |
The amount of damage dealt depends on how many times the player circles around the enemies using the |
| Sapphire Star
|
Pirate's Grotto | Cortez | Sweet Feast 5 SP |
Much like Sweet Treat, the player can replenish up to 24 HP and 24 FP for each party member, as well as cure all status ailments (except Immobilized and Down). |
| Garnet Star
|
Poshley Sanctum | Pennington (original keeper) Smorg (boss) |
Showstopper 2 SP |
If successful, instantly defeats all enemies. Does not work on enemies with more than 12 HP, mini-bosses, and bosses. |
| Crystal Star
|
X-Naut Fortress | Magnus von Grapple 2.0 | Supernova 6 SP |
Does up to 15 HP of damage to all enemies. The damage increases by 3 each time the player fills one gauge. This special move pierces Defense Power and ignores enemies' invisibility. |
Battle system
Paper Mario: The Thousand-Year Door features a turn-based battle system. A normal battle is triggered when Mario touches an enemy in the overworld. Mario's party goes first every turn, being allowed two consecutive actions — one by Mario and one by the active partner. The order can be switched with ![]() ; this also causes the first one to be in front, and thus more likely to be the target of the enemies later in the turn. Mario or his partner can perform an extra First Strike if they trigger the battle by attacking the enemy; conversely, the enemy can also attack Mario first and trigger the inverse situation.
; this also causes the first one to be in front, and thus more likely to be the target of the enemies later in the turn. Mario or his partner can perform an extra First Strike if they trigger the battle by attacking the enemy; conversely, the enemy can also attack Mario first and trigger the inverse situation.

The player is given the following actions to choose from:
- Attack: The character's available moves. For Mario, this action is split into Jump and Hammer options.
- Items: Mario or his partner can use an item from Mario's inventory.
- Special: Exclusive to Mario, the selection of special moves, which use Star Power.
- Tactics: An assortment of non-offensive actions.
- Swap partner: Changes the active party member. While this action normally costs one turn, the Quick Change badge allows the player to switch freely.
- Appeal: The character poses for the audience to recover a greater amount of Star Power
- Defend: Increases the character's defense for the remainder of the turn.
- Run away: If successful, lets Mario flee from battle. It cannot be used in most boss battles.
- Charge: Increases the character's attack power for the next turn. It is only available when the player has equipped the Charge badge for Mario, or Charge P for partners.
Battles take place on a stage. Sometimes the impact of an attack causes props to fall (damaging all characters on stage and possibly making them dizzy), while devices such as fire nozzles and falling objects are triggered at random times. The audience helps Mario gain Star Power and may throw him useful items or pelt Mario and his partners with garbage (which they can prevent by pressing ![]() to attack the audience member). Lastly, some bosses even exploit the audience for their own benefit (for example, Hooktail will eventually eat some of the audience members to regain 10 HP, which causes all the other spectators to flee, therefore making it impossible to gain any Star Power).
to attack the audience member). Lastly, some bosses even exploit the audience for their own benefit (for example, Hooktail will eventually eat some of the audience members to regain 10 HP, which causes all the other spectators to flee, therefore making it impossible to gain any Star Power).
Attacking enemies
While Mario and his partners are battling enemies, their attacks will deal extra damage and receive Star Power from an excited audience if the Action Command displayed onscreen is correctly performed. Stylish moves are extra Action Commands that, if executed, thrill the crowd even more, thus yielding even more Star Power: one must press ![]() at the right moment during a move. However, the game will never tell the player about Stylish moves, or when should one perform them, unless Eddy the Mask is talked to and the Timing Tutor badge is equipped.
at the right moment during a move. However, the game will never tell the player about Stylish moves, or when should one perform them, unless Eddy the Mask is talked to and the Timing Tutor badge is equipped.
Guarding

To perform the Guard Action Command, one must press ![]() or
or ![]() when Mario's opponent is about to strike him. Guarding reduces the damage he takes from enemy attacks and allows the player to resist status effects. The player must time it right, though.
when Mario's opponent is about to strike him. Guarding reduces the damage he takes from enemy attacks and allows the player to resist status effects. The player must time it right, though.
Guard: To perform a Guard move, the player must press ![]() to block enemy attacks, reducing the damage they deal by 1 HP, and also protecting Mario from negative status effects. The player has 8 frames (roughly 2/15 of a second) to Guard.
to block enemy attacks, reducing the damage they deal by 1 HP, and also protecting Mario from negative status effects. The player has 8 frames (roughly 2/15 of a second) to Guard.
Superguard: To perform a Superguard move, the player must press ![]() to block enemy attacks, negating the attack completely and sometimes damaging the attacker — generally a Superguard deals 1 HP of damage to a foe who employs a contact attack and none to foes who attack from a distance, but it does deflect Pokeys' ranged attacks back at them. The player only has 3 frames (or 1/20 of a second) to Superguard, making it more difficult to time than a regular Guard.
to block enemy attacks, negating the attack completely and sometimes damaging the attacker — generally a Superguard deals 1 HP of damage to a foe who employs a contact attack and none to foes who attack from a distance, but it does deflect Pokeys' ranged attacks back at them. The player only has 3 frames (or 1/20 of a second) to Superguard, making it more difficult to time than a regular Guard.
Status effects
Status effects are effects that alter a character's stats or behavior in battle. Since they can only occur within battles, they are automatically removed or healed once Mario and partners win a fight.
Below is a list of status effects and what inflicts them. Please note that, unless stated otherwise, positive status changes are always targeted at the user or someone in their party, while negative status changes are targeted at the opposing party. Since stage effects are triggered randomly, they can affect any participants in the battle. If a boss is fought more than once or has multiple forms, the battle in which they can inflict the status effect is specified in parentheses.
| Name | Effect | Inflicters |
|---|---|---|
Allergic |
Becomes unaffected by status effects, both positive and negative. |
|
Burn |
Loses 1 HP each turn. Is removed by a randomly-occurring stage effect involving falling water, and by the Frozen status ailment. Fire foes are immune to this ailment. |
|
Confused |
The victim has an approximately 50% chance each turn to ignore the AI or the player's orders and do something random and unexpected, including attacking allies. |
|
DEF-Up |
Raises Defense Power. |
|
Dizzy |
The victim's attacks have a 50% chance of missing their target. |
|
Dodgy |
The affected character has a 50% chance to dodge incoming attacks. |
|
Electrified |
The affected character will deal 1 HP of damage to attackers who make contact, and will often interrupt their attack — assuming the attackers are not electrified as well. |
|
Fast |
Allows the affected character to perform two actions each turn. |
|
Frozen |
The affected character is unable to do anything, and will take 1 HP of damage when the status expires. This ailment is negated if the Burn status is inflicted. Ice foes are immune to this ailment. |
|
Huge |
Attack Power is raised by 2. |
|
Immobilized |
The affected character is unable to do anything. |
|
Invisible |
The affected character cannot be attacked at all. |
|
Payback |
Attackers who make contact with the affected character will take half the damage dealt. |
|
Poison |
Loses 1 HP each turn. |
|
POW-Up |
Attack Power is raised. |
|
Sleep |
The victim is unable to do anything, but there is a chance that they will wake up prematurely if attacked. |
|
Slow |
The victim can only perform an action every two turns. The Fast status negates Slow. |
|
Soft |
Lowers Defense Power by 3. |
|
Tiny |
Lowers Attack Power by 2. |
|
Leveling up
Star Points
Every time Mario wins a battle, he earns Star Points. The amount he earns from each enemy or boss depends on his current level compared to the enemies he earns them from; as his level goes up, he earns less Star Points from them. If Mario's level is just under, matches or exceeds the enemy's, or reaches the maximum level, 99, he does not earn any Star Points from them at all. When Mario's Star Point meter reaches 100, the player can choose whether to upgrade Mario's Heart Points, Flower Points, or Badge Points. Upgrading HP or FP increases the upgraded stat by 5, and choosing BP raises Mario's BP by 3. Level 99 is the highest Mario can be at. Each stat has its own maximum value, which it cannot be upgraded beyond. For HP and FP, this value is 200, but for BP, this value is 99; however, it is impossible for the player to have all three stats simultaneously be at their maximum value at any one time, since the lack of level ups impedes at least one of the stats from being at its maximum.
Shine Sprites
Much like Paper Mario, there are items found in the overworld of Paper Mario: The Thousand-Year Door that, when collected, allow Mario to upgrade his partners to learn new moves and increase their HP. In this game, Shine Sprites fulfill this purpose. The price of upgrading a partner is always three Shine Sprites. There are 42 Shine Sprites altogether in the game.
The Audience
- Main article: Audience

The Audience determines how much Star Power Mario recovers. It consists of various enemies and allies, and sits and cheers as the group attacks. If Mario or his allies use the Appeal action or a Stylish move, they recover more Star Power. The audience is even exploited by various bosses: Hooktail, Cortez, and the Shadow Queen consume audience members to restore their HP, whereas Magnus von Grapple 2.0 uses spectators as ammo by launching them at Mario and his partners.
The Audience occasionally takes active participation in the battles; some spectators will attempt to toss Mario helpful items or pelt him with garbage, others will get on stage and cause a prop to fall or make combatants invisible, while others may incapacitate fellow audience members, making Star Power recovery more complicated.
Bingo!
- Main article: Bingo!
An icon appears next to Mario's Star Power Gauge whenever the player successfully uses the Action Command of an attack. If the player has two matching icons and if the player executes an additional Action Command, Mario can take the Bingo wheel for a spin.
Items
Items are objects that, if used, help Mario and his partners on their journey. They can restore their stats (HP and FP), boost stats (attack and defense) and cause certain status changes in-battle. Many can be used on enemies to negatively affect their status, and also to cause damage. Mario can hold up to 10 items in his inventory, but he can store a maximum of 31 items at any Item Shop and withdraw them at any time he wishes to. The amount of items Mario can hold is doubled as soon as he collects the Strange Sack.
Non-boss enemies can hold items in battle, which they will use, usually as soon as they get a turn.
|
HP-restoring items
FP-restoring items
|
HP and FP-restoring items
Other status-altering items Enemy-targetting items |
Miscellaneous |
Zess T. recipes
- Main article: List of Zess T. recipes
Zess T. is a Toad chef who lives in the westernmost house in Rogueport Plaza. Mario accidentally breaks her contact lens when he approaches the entrance of Rogueport's west side, and in retaliation, she blocks the entrance until he makes it up to her. After Chapter 1, Mario can buy her a new one, and upon receiving it, she frees the way and goes home, where Mario can always ask her to cook him something with one ingredient. If her Trouble Center trouble is completed (available after finishing Chapter 4), she is able to cook with two ingredients at once.
Important Things
Important Things are irreplaceable items that cannot be sold or used in battle, and are in majority mandatory for story progression. These items occupy their own section in Mario's inventory.
|
Prologue
Chapter 1
Chapter 2
Chapter 3
Chapter 4
Chapter 5
Chapter 6
|
Chapter 7
Chapter 8
Side quests
Items used by other characters
|
Badges
- Main article: List of badges in Paper Mario: The Thousand-Year Door
Badges are objects that Mario and his partners can equip, and therefore benefit from, throughout the course of the game. They can be purchased at the Lovely Howz of Badges or from Charlieton, traded for Star Pieces through Dazzle, won at the Pianta Parlor, or found in one of the places Mario and company visit. The ? Blocks containing badges in the field are red in color, unlike normal ? Blocks, which are yellow and contain coins or items.
When leveling up, Mario can gain Badge Points (BP), which allow him to equip badges he has already found. Some of the badges add new Jump or Hammer moves to Mario's commands during battle, among other abilities.
Badges can also affect Mario and his partners outside of battles. Certain badges can increase the amount of coins, flowers, hearts, or items that enemies drop after they are defeated. Foes might also carry badges in battle, which only Ms. Mowz can steal right away, though there is a likelihood that they might leave them behind once they are beaten.
Two special badges, the W Emblem and the L Emblem, can change Mario's clothing. With the W Emblem, Mario gets Wario's clothing, with the L Emblem, it results in Luigi's, and with both Emblems combined, he wears Waluigi's clothes.
If multiple copies of the same jump or hammer-based badge are worn at once, the FP requirement increases exponentially, whereas the Attack Power increases linearly.
Enemies and obstacles
Bestiary (Tattle Log)
- Main article: Paper Mario: The Thousand-Year Door bestiary
| Image | Name | HP | Attack | Defense | Location |
|---|---|---|---|---|---|
| Goomba | 2 | 1 | 0 | Rogueport Sewers Petal Meadows Glitz Pit Pit of 100 Trials | |
| Paragoomba | 2 | 1 | 0 | Rogueport Sewers Petal Meadows Hooktail Castle | |
| Spiky Goomba | 2 | 2 | 0 | ||
| Spinia | 3 | 1 | 0 | Rogueport Sewers Glitz Pit Pit of 100 Trials | |
| Koopa Troopa | 4 | 2 | 1 | Petal Meadows Hooktail Castle Rogueport Sewers | |
| Bald Cleft | 2 | 1 | 2 | Petal Meadows | |
| Bald Cleft | 2 | 1 | 4 | Petal Meadows Glitz Pit | |
| Cleft | 2 | 2 | 2 | Petal Meadows Boggly Woods Pit of 100 Trials | |
| Fuzzy | 3 | 1 | 0 | Shhwonk Fortress Glitz Pit Pit of 100 Trials | |
| Paratroopa | 4 | 2 | 1 | Hooktail Castle Rogueport Sewers | |
| Dull Bones | 1 | 2 | 1 | Hooktail Castle Glitz Pit Palace of Shadow Pit of 100 Trials | |
| Spania | 3 | 1 | 0 | Rogueport Sewers Glitz Pit Pit of 100 Trials | |
| Pale Piranha | 4 | 2 | 0 | Boggly Woods The Great Tree Glitz Pit | |
| Dark Puff | 3 | 2 | 0 | Boggly Woods Glitz Pit Pit of 100 Trials | |
| X-Naut | 4 | 3 | 0 | The Great Tree X-Naut Fortress | |
| Yux | 3 | 2 | 0 | ||
| Mini-Yux | 1 | 0 | 0 | ||
| Pider | 5 | 2 | 0 | The Great Tree Glitz Pit Pit of 100 Trials | |
| KP Koopa | 4 | 2 | 1 | Glitz Pit | |
| KP Paratroopa | 4 | 2 | 1 | ||
| Pokey | 4 | 3 | 0 | Glitz Pit Pit of 100 Trials | |
| Spiny | 3 | 3 | 3 | ||
| Lakitu | 5 | 2 | 0 | ||
| Bandit | 5 | 2 | 0 | ||
| Bandit | 8 | 3 | 0 | ||
| H. Bald Cleft | 3 | 2 | 2 | Glitz Pit | |
| Bob-omb | 4 | 2 | 1 | Glitz Pit Pit of 100 Trials | |
| Swooper | 6 | 3 | 0 | Glitz Pit Creepy Steeple | |
| R. S. Buzzy | 5 | 3 | 4 | Glitz Pit | |
| Shady Koopa | 8 | 3 | 1 | Glitz Pit Pit of 100 Trials | |
| S. Paratroopa | 8 | 3 | 1 | Glitz Pit | |
| Green Fuzzy | 5 | 3 | 0 | Glitz Pit Keelhaul Key | |
| Flower Fuzzy | 6 | 3 | 0 | Glitz Pit Keelhaul Key Pit of 100 Trials | |
 |
R. Magikoopa | 7 | 4 | 0 | Glitz Pit |
 |
W. Magikoopa | 7 | 4 | 0 | |
| G. Magikoopa | 7 | 4 | 0 | ||
| Hammer Bro | 7 | 4 | 1 | Glitz Pit Rogueport Sewers | |
| Boomerang Bro | 7 | 2 | 1 | Glitz Pit | |
| Hammer Bro | 7 | 3 | 1 | ||
| Dark Craw | 20 | 6 | 0 | Glitz Pit Pit of 100 Trials | |
| Red Chomp | 6 | 5 | 3 | ||
| D. Koopatrol | 25 | 5 | 2 | ||
| Hyper Goomba | 7 | 1 | 0 | Twilight Trail | |
| Hyper Paragoomba | 8 | 2 | 0 | ||
| Crazee Dayzee | 7 | 2 | 0 | ||
| H. S. Goomba | 8 | 3 | 0 | ||
| Amazy Dayzee | 20 | 20 | 1 | Twilight Trail Pit of 100 Trials | |
| Hyper Cleft | 4 | 3 | 3 | ||
| Buzzy Beetle | 5 | 3 | 4 | Creepy Steeple | |
| Spike Top | 5 | 3 | 4 | ||
| Boo | 7 | 3 | 0 | ||
| Ember | 8 | 3 | 0 | Keelhaul Key Pirate's Grotto | |
| Putrid Piranha | 8 | 3 | 0 | Keelhaul Key | |
| Lava Bubble | 6 | 4 | 0 | Pirate's Grotto Pit of 100 Trials | |
| Bullet Bill | 2 | 4 | 1 | Pirate's Grotto | |
| Bill Blaster | 5 | 0 | 2 | ||
 |
Bulky Bob-omb | 6 | 2 | 1 | Pirate's Grotto Pit of 100 Trials |
| Parabuzzy | 5 | 3 | 4 | ||
| Magikoopa | 7 | 4 | 0 | Rogueport Sewers | |
| Koopatrol | 6 | 4 | 2 | ||
| Spunia | 12 | 7 | 2 | Rogueport Sewers Pit of 100 Trials | |
| Dark Puff | 7 | 4 | 0 | Riverside Station | |
| Poison Pokey | 8 | 4 | 0 | Riverside Station Pit of 100 Trials | |
| S. Parabuzzy | 5 | 3 | 4 | ||
| Dark Boo | 8 | 5 | 0 | Poshley Sanctum Pit of 100 Trials | |
| Ice Puff | 9 | 4 | 0 | Fahr Outpost Pit of 100 Trials | |
| Putrid Piranha | 10 | 5 | 0 | ||
| Hyper Cleft | 6 | 5 | 5 | The Moon Pit of 100 Trials | |
| Z-Yux | 7 | 4 | 0 | The Moon X-Naut Fortress | |
| Mini-Z-Yux | 2 | 0 | 0 | ||
| Elite X-Naut | 10 | 5 | 1 | X-Naut Fortress | |
| X-Yux | 10 | 3 | 0 | ||
| Mini-X-Yux | 1 | 0 | 0 | ||
| X-Naut PhD | 9 | 4 | 0 | ||
| Swoopula | 9 | 4 | 0 | Palace of Shadow Pit of 100 Trials | |
| Dry Bones | 8 | 5 | 2 | ||
| Bombshell Bill | 3 | 6 | 2 | Palace of Shadow | |
| B. Bill Blaster | 10 | 0 | 4 | ||
| Phantom Ember | 10 | 5 | 0 | Palace of Shadow Pit of 100 Trials | |
| Dark Bones | 20 | 5 | 2 | Palace of Shadow | |
| Chain-Chomp | 7 | 6 | 5 | Palace of Shadow Pit of 100 Trials | |
 |
Dark Wizzerd | 10 | 5 | 2 | |
| Gloomba | 7 | 3 | 0 | Pit of 100 Trials | |
| Paragloomba | 7 | 3 | 0 | ||
| Spiky Gloomba | 7 | 4 | 0 | ||
| Dark Koopa | 8 | 4 | 2 | ||
| D. Paratroopa | 8 | 4 | 2 | ||
| Badge Bandit | 12 | 5 | 0 | ||
| Dark Lakitu | 13 | 5 | 0 | ||
| S. Blue Spiny | 6 | 6 | 4 | ||
 |
Wizzerd | 10 | 6 | 3 | |
| Piranha Plant | 15 | 9 | 0 | ||
| Dark Bristle | 8 | 8 | 4 | ||
| Arantula | 16 | 7 | 0 | ||
 |
Elite Wizzerd | 12 | 8 | 5 | |
| Swampire | 20 | 6 | 0 | ||
| Poison Puff | 15 | 8 | 0 | ||
| Bob-ulk | 10 | 4 | 2 |
Enemy formations
In Mario's adventure in Paper Mario: The Thousand-Year Door, he encounters enemies on the field. When he engages battle with them, there are often other enemies that accompany the one that Mario encountered on the field.
Bosses
Bold signifies chapter bosses.
| Chapter | Image | Name | HP | Attack | Defense | Location |
|---|---|---|---|---|---|---|
| Prologue A Rogue's Welcome |
 |
Lord Crump (1) | 5 | 1 | 0 | Rogueport |
 |
Gus (optional) | 20 | 3 | 0 | ||
 |
Blooper | 12 | 1 | 0 | Rogueport Sewers | |
| Chapter 1 Castle and Dragon |
Gold Fuzzy Fuzzy Horde |
10 | 1 | 0 | Shhwonk Fortress | |
| 20 | 1 (per attack) | 0 | ||||
  |
Red Bones Four Dull Bones |
5 | 3 | 1 | Hooktail Castle | |
| 1 (each) | 2 (each) | 1 (each) | ||||
| Hooktail | 20 | 5 | 1 | |||
| Chapter 2 The Great Boggly Tree |
 |
Vivian Marilyn (1) Beldam (1) |
10 | 1 | 0 | Boggly Woods |
| 12 | 2 | 0 | ||||
| 9 | 1 | 0 | ||||
 |
Magnus von Grapple | 30 | 2 | 1 | The Great Tree | |
| Chapter 3 Of Glitz and Glory |
  |
Armored Harriers | 6 (each) | 4 (each) | ??? (each) | Glitz Pit |
| Bowser (1) | 30 | 3 | 1 | |||
 |
Rawk Hawk | 40 | 4 | 0 | ||
 |
Macho Grubba | 60 | 4 | 0 | ||
| Chapter 4 For Pigs the Bell Tolls |
 |
Atomic Boo (optional) | 40 | 4 | 0 | Creepy Steeple |
 |
Doopliss (1) | 40 | 4 | 0 | ||
 |
Doopliss (2) | 40 | 4 | 0 | ||
| Chapter 5 The Key to Pirates |
Three Embers | 8 (each) | 3 (each) | 0 (each) | Keelhaul Key | |
 |
Cortez | 20 x 3 | 4 | 1 | Pirate's Grotto | |
|
Lord Crump (2) X-Nauts |
30 | 3 | 0 | X-Ship | |
| 6 (stack) 10 (horde) |
3 (stack) 5 (horde) |
0 (both) | ||||
| Chapter 6 Three Days of Excess |
 |
Smorg | 50 | 5 | 1 | Excess Express |
| Chapter 7 Mario Shoots the Moon |
 |
Two Elite X-Nauts | 10 (each) | 5 (each) | 1 (each) | X-Naut Fortress |
 |
Magnus von Grapple 2.0 | 70 | 6 | 2 | ||
| Chapter 8 The Thousand-Year Door |
  |
Dark Bones Four Dry Bones |
20 | 5 | 2 | Palace of Shadow |
| 8 (each) | 5 (each) | 2 (each) | ||||
 |
Gloomtail | 80 | 8 | 2 | ||
|
Doopliss (3) Marilyn (2) Beldam (2) |
40 | 6 | 0 | ||
| 40 | 7 | 0 | ||||
| 30 | 5 | 0 | ||||
 |
Sir Grodus Grodus X |
50 | 7 | 1 | ||
| 3 (each) | 4 (each) | 0 (each) | ||||
| Bowser (2) Kammy Koopa |
70 | 7 | 2 | |||
| 50 | 5 | 0 | ||||
  |
Shadow Queen | 150 | 7 | 1 | ||
| Pit of 100 Trials |  |
Bonetail (optional) | 200 | 8 | 2 | Pit of 100 Trials |
Environmental hazards
| Image | Hazard | Description |
|---|---|---|

|
Pit | Falling into a pit causes Mario to lose 1 HP; this is only possible in background sections in Rogueport Sewers and Boggly Woods. During Bowser's platform levels, it immediately defeats Bowser, forcing him to start over. |

|
Electric tile | Part of a puzzle in X-Naut Fortress, where stepping on the wrong tiles cause Mario to lose 1 HP. |

|
Fire Bar | Spinning flames found in the Palace of Shadow that will force Mario back to the start if touched. They also appear in Bowser's third platforming level, where it can be destroyed by his fire breath. |

|
Lava | Only appears in Bowser's level 3-X, functioning the same as a pit. |
| Spike Trap | Two kinds of spike traps are encountered: retractable ones that cause Mario to lose 1 HP upon touching them, and stationary ones that block the way and cannot be touched at all since they are on raised platforms. | |
| Spiked ceiling | Part of a puzzle in Hooktail Castle, a ceiling covered in spikes which will lower gradually. If Mario doesn't escape in time, it will cause a Game Over. | |
| Water | Mario must use his Boat Mode transformation to traverse bodies of water. If he falls in water in any other instance, he is attacked by Nibbles, losing 1 HP. | |

|
Wave | Seen in Pirate's Grotto, they swallow Boat Mario and force him to restart the section. |
World
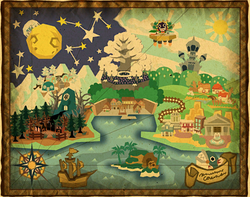
The events of Paper Mario: The Thousand-Year Door take place primarily in Rogueport and its surrounding areas. Rogueport is the hub location, and where the titular Thousand-Year Door is found.
Notable characters
Optional helpful characters
| Character | Found in/ Availability |
Service |
|---|---|---|
 Charlieton |
Rogueport Plaza | Sells Mario a rotating set of items and badges, many of them rare or exclusive to him. His listing is updated every time Mario returns to Rogueport. |
Chet Rippo |
Rogueport Sewers (Bobbery needed) |
Raises one of Mario's stats (HP, FP or BP) while decreasing another, for 39 coins. He can do the same with partner ranks. |
Dazzle |
Rogueport Sewers (from the start) |
Trades Star Pieces for badges. |
 Grifty |
Rogueport east side (Yoshi needed) |
Tells Mario Rogueport's detailed backstory. |
Lucky |
Rogueport west side (after Chapter 1) |
Invites Mario to participate in the Happy Lucky Lottery. |
 Lumpy |
Rogueport dock area | Asks Mario to invest coins in his oil search endeavor. If Mario accepts the offer, Lumpy will return later in the game to hand him his share. |
 Merlee |
Rogueport Sewers (Paper Mode needed) |
Casts a spell on Mario that grants him random lucky events (e.g. increased attack power, more SP) in a number of random battles. Mario can pay her 5, 20 or 50 coins; the higher the price, the more times the events occur. |
 Merluvlee |
Rogueport Sewers (from the start) |
Tells Mario the location of Star Pieces, Shine Sprites, or where to go to progress the story, for different amounts of coins. |
 Merlon |
Rogueport east side (from the start) |
Upgrades a partner's rank for three Shine Sprites. Can upgrade each partner a second time after Mario retrieves the Up Arrow. |
Whacka |
Keelhaul Key | A one-of-a-kind creature that drops a Whacka Bump when struck. After eight hits, it is permanently gone. |
 Wonky |
Herb T.'s place (after Chapter 1) |
Gives Mario hints for five coins. |
 Zess T. |
Rogueport Plaza (after Chapter 1) |
Cooks a recipe with an item given by Mario. After receiving the Cookbook, she can cook with two ingredients. |
Major characters


These are friendly characters that play a part in the story of each chapter or are otherwise recurring and unique, but are not fought at any point.
|
Prologue Chapter 1 Chapter 2 |
Chapter 3 Chapter 4 |
Chapter 5 Chapter 6 |
Chapter 7 Other recurring characters |
Hidden block locations

In Paper Mario: The Thousand-Year Door, Mario can discover hidden ? Blocks throughout the game. Ms. Mowz's overworld sniffing ability is helpful in determining where they are. There are 15 invisible ? Blocks in total.
Selling prices

In Paper Mario: The Thousand-Year Door, Mario can sell items from his inventory to shopkeepers in the item shops in the game. Most items can be sold to the shopkeepers for a set price at every shop, however, some items sell at a higher price depending on the location of the shop and the item itself. Mario can make a profit if he purchases an item at a low price from one store, and sells it to another that buys it from him at a higher price. One Trouble Center trouble exploits this fact.
Side activities
Star Pieces

During the adventure, Mario and co. can collect Star Pieces by finding them in hidden spots, underneath chambers which he can use the Spin Jump to reveal, and earning them from other characters. Ms. Mowz is useful in finding the overworld Star Pieces. Mario can then trade them with Dazzle for Badges. There are 100 Star Pieces in the game.
Trouble Center
- Main article: Trouble Center

In Rogueport, there is a Trouble Center which offers the citizens' troubles for Mario to solve. An anonymous quest comes from Ms. Mowz and requires Mario to find a badge she is looking for but can not find. After this quest is completed, she joins Mario's team.
The Pit of 100 Trials

The Pit of 100 Trials is an optional challenge. Before or after saving the world, Mario can take on the enemies found in the 100-basement floor area known as the Pit of 100 Trials. The enemies located on levels 51-99 are especially strong. Upon reaching floor 100, Mario discovers Bonetail, the long-lost relative of Hooktail and Gloomtail. After defeating Bonetail, Mario receives the Return Postage badge.
Similarities to Paper Mario
There are many similarities between the original Paper Mario and Paper Mario: The Thousand-Year Door, including these elements:
- Both games have an opening introduction before the title screen.
- The opening is identical to that of the previous game, right down to Parakarry delivering a letter from Princess Peach.
- The first partner of both games is a Goomba that gives Mario information about enemies, characters, and locations. They both have Headbonk, Tattle, and Multibonk as attacks.
- The second partner of both games is a Koopa Troopa. Both are obtained during Chapter 1, able to be shot out to hit switches and grab distant items, and use Shell Toss and Power Shell in battle.
- Both games have partners obtained in Chapter 3 that have first and last attacks that deal multiple low-powered hits: Lady Bow with her attacks, and Yoshi Kid with his Ground Pound and Stampede attacks.
- The fourth partner of each game allows the player to travel across gaps: Parakarry and Yoshi, respectively.
- Both games have a Bob-omb partner who is able to destroy cracked surfaces: Bombette and Bobbery, respectively.
- The fifth partner of both games allows Mario to become invisible to enemies: Bow and Vivian, respectively.
- Both games have a partner who is able to uncover hidden items, and whose basic attack pierces through Defense Power: Watt and Ms. Mowz, respectively.
- Both games have a partner who has betrayed an enemy to join Mario's party: Lakilester and Vivian, respectively.
- Both games have a partner who lets Mario ride them to move faster: Lakilester and Yoshi, respectively.
- Both games have some way to let Mario traverse through water: the partner Sushie and Boat Mode, respectively. Additionally, both abilities are obtained during Chapter 5 and can only be used to that end when a specific panel is stepped on.
- The main plot point of both games is to find seven star-shaped entities, each granting Mario special abilities.
- Both games have an upgrade system for Mario's Jump and Hammer attacks.
- In both games the player is able to play as Peach between Chapters. The player is required to dress Peach up as an enemy to learn secrets at one point. However, in Paper Mario: The Thousand-Year Door, Bowser's side-quest is separated from Peach's, as he is not the one who kidnapped her.
- As with the first Paper Mario game, a main antagonist encounters Peach disguised as a minion, and remarks on how she smells "too nice".
- Mario and Peach contact each other using friendly characters in both games. Twink helps her in Paper Mario, while TEC-XX does so in The Thousand-Year Door. In the end, both Twink and TEC develop feelings for Peach.
- Mario must solve a mystery in both games. A penguin is Mario's fellow detective in both.
- At one point in the games, Mario falls for a ploy created by the boss of a Chapter, which leads him to be confined in a cage alongside several other prisoners. The trap is a ? Block in Paper Mario, and a fake Puni pedestal in The Thousand-Year Door.
- Chapter 1 in both games features a fortress as the location of the boss, with both being located in peaceful, green plains. Additionally, both bosses terrorize the denizens of the local town (Koopa Village and Petalburg, which are both largely inhabited by Koopa Troopas). Both towns feature a distinctive, elderly Koopa Troopa (Koopa Koot and Kroop).
- The partner acquired in Chapter 2 in both games requires Mario to bring them an item.
- An oversized Clubba is the boss of Chapter 3 in both games, and both have a secret that involves making themselves powerful. Both are sought after by persistent female characters interested in finding lost persons (Lady Bow and Jolene). Furthermore, both Clubba characters have positioned security units to guard certain areas (Sentinels and Glitz Pit Security).
- In both games, at one point, Mario has to chase the Chapter 3 bosses (Tubba's Heart and Grubba).
- Chapter 4 in both games involves Mario accessing the storage room of a certain shop to make progress. It also involves widespread (and comical) mischief in a town; in Paper Mario, it is the Shy Guy frenzy that takes place in Toad Town, while in Paper Mario: The Thousand-Year Door, the denizens of Twilight Town are being turned into pigs at the toll of Creepy Steeple's bell.
- Moustafa and Flavio both give the player stones needed to reach an ancient, and rumored to be haunted, place. Also, both of the ghostly bosses (Tutankoopa and Cortez) try to intimidate Mario by uttering threats as he progresses through the level.
- Buying a Dried Shroom and another certain item along with it is a secret password in both games that must be entered in order to reach Moustafa and Don Pianta.
- Chapter 5 takes place on a tropical island with coconuts in both games, and both involve embarking on an expedition with one non-party character interested in treasure (Kolorado and Flavio). Also, in both games, this is when Mario's oldest partner joins him, and they both have to be rescued from being stuck in a tree before they do so (Sushie and Bobbery).
- The Chapter 5 bosses, Lava Piranha and Cortez, resemble each other, as Cortez's spine in his first form and Lava Piranha's stem are in the exact same position, and both of them have multiple forms. They are also accompanied by multiple entities, each with their own mechanics, attacks, and HP.
- In both games, Princess Peach must make something. Also, in both games, if she makes a mistake during the process of making it, it comes out wrong (making a cake for Gourmet Guy and making the invisibility potion, respectively).
- After the battle against Cortez is over, one of the Toad sailors tells everyone that he feels a "slight wind" coming from the cracked wall, just as Misstar does in the first game. The Bob-omb partner of both games is needed to blow the wall up. Also, the most frequently fought boss of both games (Jr. Troopa and Crump, respectively) shows up after Chapter 5 is completed.
- Chapter 6 takes place in a beautiful area and has a boss that can deal a high amount of damage when charged up: 12 for Huff N. Puff, 10 for Smorg. Also, both are blob-shaped and made up of a smaller species. Moreover, Ruff Puffs appear in the sixth Chapter of both games.
- Chapter 7 features a snowy region.
- Chapter 8 includes a fight against Bowser before the final battle, and Kammy Koopa is fought in both games.
- Both games contain puzzles in some places that are solved identically or similarly.
- The Riddle Tower shares many puzzles with the Crystal Palace, including blowing up cracked spots and walking through seemingly solid walls.
- The Palace of Shadow has puzzles and traps from Bowser's Castle, including an area wherein Mario only makes progress by following a pattern (though this is actually taken from the final castle level in Super Mario Bros.).
- Both dungeons in the final Chapters have rooms with stairs where Mario has to defeat B. Bill Blasters to reach the next room.
- The main villain of both games (those who kidnap Peach) has to be chased through a long stairway in the eighth Chapter.
- Mario's final battle is divided into multiple parts. At one point, each boss is invincible and Peach plays an integral role in negating that invincibility.
- Peach conveniently gets taken away in both games, right before Mario and company reach the hideaways of the games' main antagonists.
- In both games, there is a room where Mario can turn into 8-bit Mario, complete with Super Mario Bros. level 1-1 music playing.
- Both games have Merlon standing outside his house, waiting for Mario and his partners to show up, where he tells them about a dream that he had, and tells them to let him know if they find out the meaning of it. Afterward, an item that Merlon stored at the top of his house is retrieved by him.
- Both games feature a cooking system, and elderly, female Toad chefs, whose backstories involve deceased husbands and cakes.
- Both games have a spike-filled room where Bow's Outta Sight or Vivian's Veil must be used, and the position of the paths across the spikes are identical.
- Both games feature a boss who poses a threat by eating people (Tubba Blubba and Hooktail), and both of these have a secret weakness.
- Both games include a test during the Chapter 5 interlude that Princess Peach has to take, and that holds information that helps Mario in the future.
- Both games end with a parade led by Luigi (though in Paper Mario: The Thousand-Year Door, it is not a traditional parade, and is mainly a line of all of the characters' silhouettes, used as a way to show everyone).
- Both games' endings feature a scene in which Mario, after returning home from his travels, is shown hanging around with Luigi, having just told his brother the story of his adventure.
Quotes
- Main article: List of Paper Mario: The Thousand-Year Door quotes
- "Omigosh! Is… Isn't that a treasure map?! You HAVE to tell me where you got that!" - Goombella
- "And with that...pow! I'm gone!" - Lord Crump
- "Mmmmmmwee hee hee hee! I have no quarrel with you...but I simply can't allow you to hunt for the Crystal Stars." - Beldam
- "And then I, Grodus, will build a new world! A perfect, ideal world... Yes. A world made by me, about me, and for me! GAAACK ACK ACK ACK ACK!" - Sir Grodus
- "I'm... I'm sorry Sis. This Mario is the only person who's ever been kind to me..." - Vivian
Regional differences
It has been requested that more images be uploaded for this section. Remove this notice only after the additional image(s) have been added. Reason: Images showcasing some of the differences
Title theme
| File info |
| File info |
- The title theme was edited in international versions to flow smoother and make the drumroll more subtle than the Japanese version.
Technical changes
- There is no health warning screen when starting up the game in the Japanese version.
- There is no delay for when the player can press start on the title screen in the Japanese version.
- Holding
 when the player does not have the Ultra Boots prevents Mario from moving in the Japanese version.
- Similarly, holding
 when the player does not have the Super Hammer prevents Mario from moving in the Japanese version.
- Similarly, holding
- On the Level Up screen, the cursor is set to FP by default in the Japanese version, while in the international versions, the player has to manually move the cursor to either HP or BP.
- In the Japanese version, Mario and his partners are fully healed at the end of Chapter 1, but at the end of all the other chapters, they do not get healed at all. In the international versions, Mario and his partners are fully healed at the end of each chapter except Chapter 8.[3]
- The international versions have more Stylish moves than the Japanese version. For example, there is no second Stylish after a normal jump in the Japanese version.
- Many of the items at the Pianta Parlor have different positioning in the menu in the Japanese version.
- The backtrace screen has some additional functionality in the international versions. In the international versions, the entire screen is used and also scrolls, while in the Japanese version only a part of the screen is used and it does not scroll.
- The Japanese version is missing the number of obtained badges/recipes and total badges/recipes on the Badges and Recipes screen.
- In the Pit of 100 Trials, when a player defeats an enemy, the pipes show up faster in the Japanese version.
- Koopook is moved to a different position (further to the left) in Hooktail Castle during his trouble in the Japanese version.
- Every enemy's stats stayed the same between all versions. However, the American version mistakenly claims that the Red Spike Top has 5 defense instead of 4, and that Rawk Hawk has 3 attack and 1 defense rather than 4 and 0, respectively. These mistakes were corrected in the European version.
- The English script mistakenly says the Zess Frappe and Icicle Pop restore 20 and 10 HP when they restore 20 and 15 FP in all versions, respectively.
- During pre-Chapter 5, Swindell the Bandit is moved to the far side of East Rogueport near the barrels. In the international versions, there is one less barrel, and Swindell's position is slightly altered.
- Giving Lumpy 200 coins early in the game leaves Mario with 500 coins later in the Japanese version and 600 coins later in international versions.
- All Fuzzies have horrible vision in the Japanese version, as they often do not even notice Mario when he goes by them. In the international versions, the Fuzzies have better vision and thus notice Mario more quickly. In addition, the Fuzzies move slower in the international versions.
- There is no slowdown when moving up slopes on rooftops with Yoshi in the Japanese version.
- At the end of Bowser's levels, fireworks are fired in the Japanese version but not in the international versions.
- In the original Japanese script and every other translation of the game, the final RDM email features an additional "hidden" section if the player scroll downs for an extended period of time. This portion was removed from the English translation, despite retaining the statement hinting at its existence.
- In the Japanese version, some item combinations that are given to Zess T. give different recipe results.
| Item Combination | Japan | International |
|---|---|---|
| Poison Shroom + Turtley Leaf | Mistake | Shroom Broth |
| Mushroom + Keel Mango | Mistake | Zess Dinner |
| [Mushroom/Life Shroom] + Peachy Peach | Mistake | Zess Dinner |
| Ultra Shroom + Peachy Peach | Zess Dinner | Zess Special |
| [Dried Shroom/Mushroom/Super Shroom/Life Shroom] + Fresh Pasta | Zess Dinner | Zess Special |
| Ultra Shroom + Fresh Pasta | Zess Special | Zess Deluxe |
| Poison Shroom + Point Swap | Ultra Shroom | Mushroom |
| Slow Shroom + Jammin' Jelly | Maple Super | Jelly Super |
| Mushroom + [Turtley Leaf/Golden Leaf] | Life Shroom | Shroom Fry |
| Super Shroom + [Turtley Leaf/Golden Leaf] | Life Shroom | Shroom Roast |
| [Life Shroom/Ultra Shroom] + [Turtley Leaf/Golden Leaf] | Life Shroom | Shroom Steak |
| Thunder Bolt + Thunder Rage | Trial Stew | Mistake |
- In the Japanese version, some items sell for different prices (in coins).
| Item Name | Shop It's Sold At | Japan | International |
|---|---|---|---|
| Couple's Cake | All shops | 30 | 10 |
| Gradual Syrup | Toad Bros. Bazaar | 7 | 8 |
| Healthy Salad | All Shops | 10 | 5 |
| Koopasta | All shops | 25 | 60 |
| Meteor Meal | All shops | 20 | 40 |
| Shroom Broth | All shops | 33 | 20 |
| Shroom Crepe | All shops | 50 | 100 |
| Spicy Soup | All shops except Northwinds Mart | 10 | 5 |
| Zess Dinner | All shops except Souvenir Shop | 10 | 7 |
| Zess Dynamite | All shops except Deepdown Depot | 30 | 20 |
| Zess Tea | All shops | 10 | 6 |
Area changes
Several areas had some changes made between the Japanese and international versions.
Prologue
- The X-Nauts who jump on Mario in the Prologue move faster in the Japanese version.
- In the Japanese version, the moving platforms in the Rogueport Underground (the one in the first area and the two in the room with the pipe to Petal Meadows) do not move as far to the left and right as the ones in the international versions.
Chapter 1
- Question #2 of the Thwomp quiz in Shhwonk's Fortress asks for the price of a Mushroom and a Fire Flower in the Japanese, French, German, Italian, and Spanish versions, as opposed to the price of a Mr. Softener and a Fire Flower in the English version. However, in the US Paper Mario: The Thousand-Year Door demo included in the Nintendo GameCube's Demo Disc Version 18, this question asked for the price of a Mushroom and a Fire Flower like in the other versions.
Chapter 2
- In the Japanese version, the right Pale Piranha on the screen where the Shadow Sirens are fought in Boggly Woods acts differently from the one in the international versions.
- In the Japanese version, when unlocking the blue cage door in the Great Tree, the game checks for and removes the Strange Sack from Mario's inventory if he has it (which permanently prevents it from being obtained again as there is only one in the game). This does not happen in the international versions. Also in the Japanese version, after unlocking the blue cage door, there are several frames where Mario is able to move around freely.
- In the Japanese version, Punio's textbox when he thinks about how to reveal the secret entrance does not pause.
- In the room where the player has to hammer the switches to gain access to the Super Boots room, in the Japanese version the 4 statues all have Punis on them before hitting the switches, but in the international versions the 4 statues have the following (left to right) on them before hitting the switches: Puni, Star, Moon, Sun.
Chapter 3
- In the Glitz Pit, all fights (excluding ones that start with special cutscenes, such as The Goomba Bros. and The Armored Harriers) start about 2 seconds faster in the Japanese version when compared to the international versions.
- In the Japanese version, when returning to Rogueport from Glitzville, the entire cutscene is about 7 seconds longer than in the international versions.
- During Peach's section right after Chapter 3, when leaving the dressing room to return to TEC after talking to Grodus, the player can move while the door is opening in the Japanese version.
Chapter 5
- In the Japanese version, Mario can get the Keel Mango from the trees at Keelhaul Key at any time. In the international versions, the chapter must be completed first. This was most likely changed to ensure that Flavio ends up getting the Coconut rather than the Keel Mango as both items are tropical food and giving Flavio any food item that is not a Coconut results in him asking for something more tropical.
- One Flower Fuzzy on the screen with the blue pipe in Keelhaul Key was removed in the international versions.
- The Flower Fuzzy on the screen with the two Putrid Piranhas continues to move around if it falls down in the Japanese version, while it stays still in the international versions.
- In Pirate's Grotto, the chest behind the waterfall contains a Damage Dodge P in the Japanese version. In the international versions, this is a Defend Plus P.
- In the black chest room in Pirate's Grotto, when Mario defeats the Embers, the key randomly falls to the left or right in the Japanese version. In the international versions, it simply falls straight down.
Chapter 6
- On Day 3 of the Excess Express, Mario gets an email in the dining car in the Japanese version. In the international versions, Mario gets this email to the right of his room.
- When the Smorgs appear when talking to the Engineer, they do not cover the right part of the window in the Japanese version.
- In the outside room at Riverside Station with the Poison Pokeys and Ruff Puffs, there is a block that can be jumped on to hit a hidden block that contains a Thunder Rage. In the Japanese version, this block is a breakable block, and breaking it causes it to stay broken until the player leaves Riverside Station. The international versions made this block unbreakable.
Chapter 7
- X-Naut Fortress's third puzzle room has a safe path two squares long in the Japanese version and three squares long in the international version, thus slightly reducing its difficulty.
- On the moon, on the screen with the pipe, blowing up the rock containing the pipe causes a small cutscene to play in the Japanese version. This cutscene does not occur in the international versions.
Chapter 8
The changes made consist of the fight against the Shadow Queen:
- In the Japanese version, none of the Shadow Queen's attacks can be superguarded against.
- During the first phase of the Shadow Queen fight, she changes to her true form after dealing at least 39 damage to her in the Japanese version. In the international versions, this happens after dealing at least 61 damage.
Aesthetic changes
- Some items were redesigned in international versions:
- Super Luigi 5 is red instead of orange.
- The katakana on the Wrestling Mag are replaced with scribbles.
- The Power Rush badge has a different letter for every language.
- Vintage Red was renamed Chuckola Cola and recolored purple to resemble soda instead of wine.
- The Boos Peeka and Lahla wear bunny ears in the Japanese version, but cat ears in international versions to avoid resembling a bunny suit.
- TEC-XX's camera "eye" is blue instead of red in international versions to tone down similarities to the HAL 9000.
- Larson's Toad chalk outline and bloodstains in his house were removed from international versions to remove violent undertones.
- In the English and German scripts, Vivian is referred to with feminine pronouns and has no mention of being a male-to-female gender dysphoric.
- The Shadow Queen is slightly more formal and condescending in the English script.
- Before the battle against Shadow Queen, if Mario chooses to be her servant, after her spell has casted on Mario, Mario's sprite changes to the same as Doopliss's appearance when impersonating as him in the Japanese version, notably for the evil-looking appearance, and the effects from L Emblem and W Emblem are also removed (like how Doopliss's fake copy of Mario cannot change colors either). However, in the international version, Mario keeps the same angry pose before the spell, and his appearance and color remain unchanged.
- A few cutscenes involving flashing lights were edited down in the international versions, probably to reduce the chance of players getting epileptic seizures:
- The flashing lights during the first Shadow Queen cutscene were reduced.
- The flashing lights during the cutscene in the room that makes the Emerald Star appear were reduced.
- However, the animation for Showstopper, which despite being arguably worse than the two stated above, was not edited.
- PAL versions have additional differences from all NTSC versions. Only NTSC versions can be played in progressive scan mode, and only PAL versions can be played in 50Hz mode, using the same method to activate each. The American and Japanese versions have their languages locked to English and Japanese, respectively, while the PAL version can additionally be played in Spanish, French, Italian and German depending on the GameCube settings. Also, in NTSC versions, Mario has two different talking animations, one involving him raising his hand and one involving him moving his mouth, and each one is used in different scenarios. Only the "mouth moving" one is used in the PAL version, however, to avoid resemblance to the Nazi salute.[citation needed]
Pre-release and unused content
Reveal trailer
This game was initially titled Paper Mario 2 and featured a far different logo, one reminiscent of the original Paper Mario's logo.
Part of the original trailer shows an extra ledge above the pipe in the room directly east of the Thousand-Year Door, with an HP Plus badge on it. It could be accessed via a moving platform which had a wall over it halfway, which appeared to be passable with help from Vivian. Also, Beldam and Doopliss were originally going to be fought somewhere in Riverside Station. The trailer also showed that Item Shops would be labeled with Mushrooms, much as in Super Paper Mario, rather than the Fire Flowers seen in the final game. Red Bones was initially named "Red Koopa Skeleton." In the same trailer, one can see that "Tornado Jump" was initially called "Hurrican Jump".[sic] The status element Slow had a different icon, a snail instead of a sad purple face.

The game's original logo before the final version of the game.
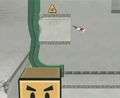
An early location of the HP Plus Badge.
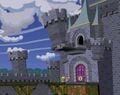
Hooktail Castle Notice how the final game, the door is just open from the start.
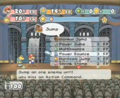
A battle in Hooktail's Castle. Notice Hurricane is spelled wrong.


Glitches
- Main article: List of Paper Mario: The Thousand-Year Door glitches

Koops splashing on dry land
At any location where Mario can fall into the river and the player can talk to an NPC, the player should stand near the river and use Koops's ability, holding ![]() so he remains in place. Without letting go of the button, the player should walk away so that Koops is offscreen, and talk to a character in the same area. When the player is done, Koops respawns next to Mario. There is a splash animation even on dry land.
so he remains in place. Without letting go of the button, the player should walk away so that Koops is offscreen, and talk to a character in the same area. When the player is done, Koops respawns next to Mario. There is a splash animation even on dry land.
Staff
- Main article: List of Paper Mario: The Thousand-Year Door staff
Intelligent Systems developed the game with Nintendo publishing it. The music is credited to Yoshito Hirano and Yuka Tsujiyoko.
Reception
Overall, Paper Mario: The Thousand-Year Door received very positive reviews from critics, who praised its enjoyable story, characters, and humor, in addition to its battling system, multiple side-quests, and soundtrack.
| Reviews | |||
|---|---|---|---|
| Release | Reviewer, Publication | Score | Comment |
| Nintendo GameCube | Peer Schneider, IGN |
9.1/10 | With Mario & Luigi: Superstar Saga finished and stashed away, I was ready for another opportunity to venture into Mario's RPG realm. While there's plenty of room for better presentation (Paper Mario Revolution, anyone), this game is an absolute blast to play. Get past the slow-moving first chapter and some clunky NPC path finding routines in chapter 2 and you'll be hooked. The story is funny, the gameplay varied, and the world so charming, you'll want to explore every last corner of it. Add to that plenty of playable characters and sidekicks, some great cameos, a memorable score loaded with classic melodies, and a quest that runs a good 30 hours long, and you've got another winning offshoot in the mighty Mario franchise. Paper Mario: The Thousand-Year Door improves on its predecessor in every way and takes the cake as the best Mario RPG yet. Highly recommended. |
| Nintendo GameCube | Jeremy Parish, 1UP |
8.5/10 | Paper Mario 2 is clearly a game for fans, created by people with genuine affection for the Mario legacy...it's a testament to the diversity of the medium that in a season marked by realistic, violent and often grim video games like GTA, Halo 2 and Def Jam: FFNY, a game like Paper Mario can be so willfully charming, harmless and child-friendly in appearance and still make for a compelling, sophisticated experience. It's a must-have for Mario nuts, and is worth a look for everyone else. With its simple, brilliant graphics, impressive sound design and laid-back but addictive gameplay, Paper Mario 2 is an excellent sequel -- and a great game in its own right. |
| Nintendo GameCube | Tom Bramwell, Eurogamer |
9/10 | Of course, you've long since realised how this was going to end. But we're trying. We're trying to put ourselves in the minds of people who would treat this game with prejudice and toss it back in our laps and say "No thanks", or just turn up on the comments thread and tell us it's crap, but quite honestly you would have to actually hate Mario, or Nintendo, in order for this not to entertain you. Whether you think you like role-playing games or not. Fair enough, if Mario has stolen your girlfriend, keyed your car, broken the lead in your pencil and signed you up to the Britannia Music Club, we don't expect you to buy this. But the only things we can say against it are specialised nit-pickings. We were honestly going to mention this one occasion when we had to redo something relatively straightforward five times due to our own cackhandedness. That's about as bad as it got for us. Otherwise our only feelings of concern stemmed from our fear that we might not get far enough in quick enough time to be able to tell you with any authority whether Paper Mario: The Thousand-Year Door is every bit as good as Intelligent Systems could make it. Well, we did, so we can. And it is. |
| Nintendo GameCube | Miguel Lopez, Gamespy |
4/5 | If I had to fault Paper Mario: The Thousand-Year Door on something, it would be its reliance on backtracking. You have to do a frightful amount of it in most of the scenarios. At best, doing so allows you to access spots in previous areas that you perhaps weren't able to before. At worst? You'll have to perform some tricky platforming one time more than you feel you should. But in the end, this is what the games that inform its design are like, so I guess we have to take the good with the bad. And when it comes to Paper Mario: The Thousand-Year Door, it's mostly all good. If you have a history of playing 2D side-scrollers, this game will make you remember just why you loved them. And if you have a soul, then this game will make it feel all warm and fuzzy. |
| Aggregators | |||
| Compiler | Platform / Score | ||
| Metacritic | 87 | ||
| GameRankings | 88.05% | ||
Gallery
- For this subject's image gallery, see Gallery:Paper Mario: The Thousand-Year Door.


Media
- For a complete list of media for this subject, see List of Paper Mario: The Thousand-Year Door media.
| File info 0:15 |
| File info 0:30 |
| File info 0:30 |
References to other games

- Donkey Kong: One of the badges is named "Jumpman", referencing to how Mario was alternatively named in this game. An audience member in the Glitz Pit also calls out Jumpman when Mario reaches Rawk Hawk a second time. In addition, although not in the game itself, the Official Nintendo Power Player's Guide alluded to Mario's encounters with the titular ape from the game where they mentioned that the X-Nauts thought they could dissuade Mario with various platforms at high places, but they had not heard of his exploits against "a certain ape."
- Super Mario Bros.: At the X-Naut Fortress in the Changing Room, Mario and company can change into an 8-bit sprite of themselves, along with the Super Mario Bros. music playing in the background. Hamma also mentioned that his grandfather was at World 7-1. Bowser's gameplay is also a direct parody of this game. In the Japanese and French versions of the game, the video-game obsessed Toad from Petalburg refers to Super Mario Bros as his favorite game for the Famicom and Nintendo Entertainment System, respectively, also urging Mario to play it in the latter version. Bowser's level segments also play very similarly to how they did in Super Mario Bros., including the Overworld and Underwater themes that play.
- Famicom Disk System boot up: During the Peach transition scene for Chapter 5, when Peach is invisible and retrieves a disc from Grodus's office, the computer screen displays a scene of Mario and Luigi fighting over a light switch, referring to the boot up screen for the Famicom Disk System if the player did not input a disk beforehand.
- Super Mario Bros. 3: The Grass Land theme is arranged as part of the music that plays during the opening cutscene. Whenever Jolene (while under the alias of "X") sent Mario an e-mail, the Ice Land map screen theme would play. The music that plays when Mario is riding the blimp is a cover of the athletic theme from this game. This game also included Boomerang Bros., Fire Bros., and Boos, which originated from this game. Also, the "king saved" music can be heard in Luigi's story telling theme. Also like Super Mario Bros. 3, the game's story is implied to be a stage play (although it is more direct than in the former game, as it was only stated by Shigeru Miyamoto in the former case). In addition, Peach after each chapter ends up sending (e-)mail to Mario with advice for the next level, with her final mail upon completing all objectives being intercepted by the main villain, similar to in Super Mario Bros. 3. Bowser's theme song contains a cover of the castle theme.
- Super Mario World: Whenever Peach sends Mario an e-mail, the title screen theme would play. Whenever Mario gets an e-mail from other people, part of the epilogue theme (from when a Koopaling castle is beaten) plays. When Mario wins a battle, the "level clear" sound plays.
- Super Mario World 2: Yoshi's Island: Blue Bandits appear as NPCs. Atomic Boo closley resembles Bigger Boo from this game.
- Super Mario 64: In the first Princess Peach interlude, Peach is singing the Inside the Castle Walls theme from this game when she is in the shower.
- Paper Mario: Parakarry makes a brief cameo at the beginning of the game, and delivers a letter to Mario from Peach, just like the previous game. Lady Bow also makes a cameo appearance, and makes a direct reference to Boo's Mansion, as well as the adventure they had. There is also a random Toad at the Excess Express (after Chapter 6 is completed) that asks Mario a quiz question, ("What did Bowser steal in the first Paper Mario?"), and the answer is, "Star Rod". The video game-obsessed Toad kid from Petalburg also mentions that he has been playing the game, describing Bow as the "cutest Boo of ALL TIME!!!" Jr. Troopa also appears in the background in the picture that Zip Toad attached to his e-mail. Gulpits are also given a reference when Grubba exclaims, "GREAT-GALLOPIN' GULPITS!". A Ratooey at Rogueport Harbor who went on a quest for oil in Dry Dry Desert can tell Mario about this adventures at the end of the game. Every part is a chapter of Paper Mario game. In the email he sends to Mario after finding him, Koopook says he is now hiding in Crystal Palace in the Japanese version; however, this last reference is lost in the English translation, as Crystal Palace is instead translated as "Goomstar Temple". Kolorado was a student of Professor Frankly, and the former's deceased father appears as a crumpled Dull Bones in Hooktail's Castle, which Koops confuses for his own father. One of the houses in Poshley Heights has a model of the K64.
- Mario Kart: During Luigi's story about Circuit Break Island, he tells Mario he had to sign up for a Kart race, and mentions he had driven karts before, giving reference to the Mario Kart series.
- Luigi's Mansion: A crow in Twilight Town says he will set up an estate pay site named Luigi's Mansion, and his crow friend says that "he's heard that name somewhere before", referencing this game.
- Super Smash Bros. Melee: In the Spanish version of the game, Rawk Hawk's victory gloat after beating The Koopinator specifically referenced Super Smash Bros. Melee (in all other versions, he simply says they are better off playing video games without naming one in particular).
- Super Mario Sunshine: Toadsworth, Piantas, and Shine Sprites appear in the game to upgrade Mario's partners. The parrot in Creepy Steeple randomly says the infamous translation of "Shine get!".
- Mario & Luigi: Superstar Saga: Chuckola Cola is an item in this game, referring to the game it has been appeared first. The "Super-Guarding" ability was likely inspired by the ability to counter enemies' attacks in Superstar Saga. Mario gaining field abilities to use in battle (Spin Jump, Spring Jump, Super/Ultra (spin) hammer) as special FP consuming attacks were also likely inspired by field abilities in Superstar Saga being used in battle as Bros. Attacks. One of Bowser's options during his conversation with Pennington during the Chapter 7 interlude is The Shadow Thief, a reference to Popple. The difference of the naming methods between the English and Japanese titles are similar to this game, as the English titles of both games have a subtitle under the series names (Mario & Luigi and Paper Mario respectively), while the Japanese titles simply have the term "RPG" under the series names.
References in later games

- Super Paper Mario: This game is alluded to by a video game-obsessed Toad in Petalburg. At the end of the game, he states that he has been playing "the new Paper Mario game" called Super Paper Mario, which was released in 2007 for the Wii, and that it will be pleasing to fans of Luigi, which hints that the game was already in production and/or planning stages at the time Paper Mario: The Thousand-Year Door was in development. All seven partners from Paper Mario: The Thousand-Year Door make cameo appearances as Catch Cards that are won by completing the Duel of 100 at Sammer's Kingdom. Francis also has plush toys of the Yoshi (in all colors), Vivian, Bobbery, and Pennington, along with a poster of Petuni. In Francis' list of things to buy, Rawk Hawk was given a reference when he stated that he wants a DVD called, "Harder than Bedrawk: The Rawk Hawk Story". Francis also stated that he wants a Ms. Mowz doll with "real-smooching action", an Excess Express train set, and a Magnus Von Grapple action figure. Francis also happens to watch "Starship X-Naut" and "The Grodus Chronicles". Also, Fracktail and Wracktail, themselves are homages to Hooktail and Bonetail. Additonally, there is also a Sammer Guy who calls himself "Laughing X-Naut" and another who calls himself "The Thousand Year Roar". Lastly, Slim's ability to make Mario, Peach, Bowser, or Luigi thin is a reference to the second curse in Paper Mario: The Thousand-Year Door.
- Super Smash Bros. Brawl: Goombella, Mini-Yoshi, Vivian, and Rawk Hawk appear as Stickers. Goombella also has her own trophy. Also, the words, "CRUMP" and "RAWK" appear in the random name selection, which are possible references to Lord Crump and Rawk Hawk.
- Paper Mario: Sticker Star: In the level Shy Guy Jungle, there is a pile of garbage with many letters. One letter is written by Goombella and it states: "Observations on the Ancient Civilization of the Chomp Ruins."
- Super Smash Bros. for Nintendo 3DS: The S.S. Flavion appears as a variation of a Paper Mario stage in this game. A Big Blooper based on the boss also appears in the stage variation's background. An arrangement of the Rogueport theme is also part of the stage's main song.
- Super Mario 3D World: The Fuzzy Horde, which debuted in this game, returns in several levels.
- Mario & Luigi: Paper Jam: Paper Mario's Airplane and Paper Modes return. During Trio Grab, Paper Mario turns into a tube, similar to Tube Mode. He can also turn into a paper drill during Trio Drill, which is similar in concept to the paper abilities from this game. When Paper Mario meets the Mario Bros., he performs a Spring Jump. Paper Mario borrows his blocking and KO'd animations from this game. The trio gains Star Points by performing Action Commands correctly, which is similar to how Paper Mario and his partners had to appeal to the audience by doing the same thing, and by also being stylish. The stage where Mario, Luigi and Paper Mario stand when they level up is similar to the stage from this game's battles, down to the yellow stripes on the curtains.
- Paper Mario: Color Splash: Peach summons Mario over to the current destination due to a discovery she made (although in this case Peach personally has Mario come along). Peach also ended up abducted shortly after bringing Mario along (although in that case, Mario does witness Peach's abduction). She also sends mail giving some hints about the main villain's plan and the next destination that Mario should head towards in the form of Holo-Peaches, and her last mail has Peach's message being cut off by the main antagonist (Black Bowser) just as Peach was about to give key details about his villainous plan. In addition, a character gets possessed by a grave evil (in this case, Bowser via Black Paint, while in Paper Mario: The Thousand-Year Door, it was Peach who was possessed by the Shadow Queen). Also, the Big Paint Stars serve a similar function to the Crystal Stars.
- Paper Mario: The Origami King: Peach's design from The Thousand-Year Door appears as a photo. Additionally, when Mario and Bob-omb interact with the steering wheel on the Princess Peach, the latter mentions that he dreams of being an admiral someday, in reference to Admiral Bobbery.
Names in other languages
| Language | Name | Meaning |
|---|---|---|
| Japanese | ペーパーマリオRPG Pēpā Mario Āru Pī Jī |
Paper Mario RPG This naming method is similar to Super Mario RPG and the Japanese name of Mario & Luigi: Superstar Saga. |
| Chinese (traditional) | 紙片瑪利歐RPG[4] Zhǐpiàn Mǎlì'ōu RPG |
Paper Mario RPG |
| French | Paper Mario: La Porte Millénaire |
Paper Mario: The Millennium Door |
| German | Paper Mario: Die Legende vom Äonentor |
Paper Mario: The Legend of the Aeon Gate |
| Italian | Paper Mario: Il Portale Millenario |
Paper Mario: The Millennium Portal |
| Korean | 페이퍼 마리오 1000년의 문 Peipeo Mario 1000(Cheon)nyeon-ui Mun |
Paper Mario The Thousand-Year Door |
| Spanish (NOE) | Paper Mario: La Puerta Milenaria |
Paper Mario: The Millennium Door |
External links
References
- ^ Release dates from TMK, retrieved 7-22-2008
- ^ Dialogue Tree - Paper Mario: The Thousand-Year Door
- ^ Paper Mario RTA Wiki
- ^ Official Chinese website for the Super Mario Bros. 35th Anniversary. Retrieved October 23, 2020.
| Nintendo GameCube games | |
|---|---|
| Super Mario franchise | Luigi's Mansion (2001) • Super Mario Sunshine (2002) • Mario Party 4 (2002) • Mario Golf: Toadstool Tour (2003) • Mario Kart: Double Dash!! (2003) • Mario Party 5 (2003) • Paper Mario: The Thousand-Year Door (2004) • Mario Power Tennis (2004) • Mario Party 6 (2004) • Dance Dance Revolution: Mario Mix (2005) • Mario Superstar Baseball (2005) • Mario Party 7 (2005) • Super Mario Strikers (2005) |
| Donkey Kong franchise | Donkey Konga (2003) • Donkey Konga 2 (2004) • Donkey Kong Jungle Beat (2004) • Donkey Konga 3 JP (2005) |
| Wario franchise | Wario World (2003) • WarioWare, Inc.: Mega Party Game$! (2003) |
| Other | Super Mario 128 (2000, demo) • Super Smash Bros. Melee (2001) • Nintendo Puzzle Collection (2003) • NBA Street V3 (2005) • SSX on Tour (Nintendo Village) (2005) • Donkey Kong Racing (cancelled) • Diddy Kong Racing Adventure (cancelled) |