Galaxy: Difference between revisions
Waluigi Time (talk | contribs) (Undo revision 2845415 by 208.189.221.83 (talk)) Tag: Undo |
m (Text replacement - "<br/>" to "<br>") |
||
| (30 intermediate revisions by 12 users not shown) | |||
| Line 5: | Line 5: | ||
|width=250 | |width=250 | ||
|image1=GoldLeafCosmic.png | |image1=GoldLeafCosmic.png | ||
|image2=Marioflytogalaxy. | |image2=Marioflytogalaxy.png | ||
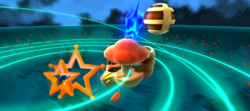
|caption1=[[Mario]] | |caption1=[[Mario]] about to fly to the [[Gold Leaf Galaxy]] with the use of a [[Launch Star]] | ||
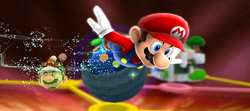
|footer=[[Mario]] flying to the [[Cosmic Cove Galaxy]] in ''[[Super Mario Galaxy 2]]'' | |footer=[[Mario]] flying to the [[Cosmic Cove Galaxy]] in ''[[Super Mario Galaxy 2]]'' | ||
}} | }} | ||
{{quote2|Now, go and explore the universe! There are lots and lots of galaxies for [[Mario|you]] to discover!|[[ | {{quote2|Now, go and explore the universe! There are lots and lots of galaxies for [[Mario|you]] to discover!|[[Luma]]|[[Super Mario Galaxy]]}} | ||
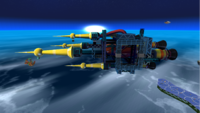
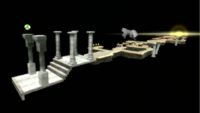
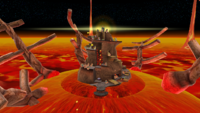
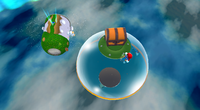
A '''galaxy''' is a system consisting of gases, stars, planets, and [[Prankster Comet|comet]]s. [[Mario]] or [[Luigi]] visits many galaxies in their adventures through ''[[Super Mario Galaxy]]'' and ''[[Super Mario Galaxy 2]]''. There is a total of 91 different galaxies between the two games: 42 in ''Super Mario Galaxy'' and 49 in ''Super Mario Galaxy 2''. | A '''galaxy''' is a system consisting of gases, stars, planets, and [[Prankster Comet|comet]]s. [[Mario]] or [[Luigi]] visits many galaxies in their adventures through ''[[Super Mario Galaxy]]'' and ''[[Super Mario Galaxy 2]]''. There is a total of 91 different galaxies between the two games: 42 in ''Super Mario Galaxy'' and 49 in ''Super Mario Galaxy 2''. | ||
The galaxies in ''Super Mario Galaxy'' are notably much smaller than real [[wikipedia:galaxy|galaxies]], often being composed of nothing more than a few small planetoids, most of which come in many different shapes and sizes. However, in ''Super Mario Galaxy 2'', a galaxy proportionate to a real galaxy appears in the background of [[World 4 (Super Mario Galaxy 2)|World 4]], while in [[World 5 (Super Mario Galaxy 2)|World 5]], there is a galaxy {{wp|supercluster}}. Smaller galaxies in the games are more comparable to systems such as the [[Wikipedia: Solar System|Solar System]]. There are solar systems that can be seen to make up other galaxies that determine whether it is a large or small one. | |||
In ''Super Mario Galaxy'', there is clearly a size difference between galaxies. | In ''Super Mario Galaxy'', there is clearly a size difference between galaxies. The fifteen major galaxies contain six (seven in [[Battlerock Galaxy]] and [[Dusty Dune Galaxy]]) [[Power Star]]s, while the twenty-seven minor galaxies possess only one (two in the [[Buoy Base Galaxy]] and the [[Gateway Galaxy]]). The "major" galaxies with six to seven Power Stars are usually much larger than the "minor" galaxies with one Power Star, which may contain only one or two planetoids; there are fifteen of these "major" galaxies and twenty-seven "minor" ones. In ''Super Mario Galaxy 2'', however, this difference is not as prevalent, as each galaxy contains either two or three regular Power Stars; respectively, there are twenty-five and twenty-four of each. | ||
In ''Super Mario Galaxy'', most galaxies are observed from six different [[dome]]s onboard the [[Comet Observatory]]. These domes show the player up to five galaxies and give them the option to fly to those galaxies in order to search for Power Stars. Just outside of each dome is a [[Hungry Luma]], which transforms into an additional galaxy after the player feeds it a certain number of [[Star Bit]]s. The remaining galaxies in the game are accessed via other areas on or around the Comet Observatory, including the [[Planet of Trials]] and the [[Gate (Super Mario Galaxy)|Gate]]. In ''Super Mario Galaxy 2'', galaxies are grouped into seven different [[World]]s, each of which contains a total of seven galaxies. One Hungry Luma is encountered in each World, which transforms into a new galaxy when called to [[Starship Mario]] and fed the required number of Star Bits. | In ''Super Mario Galaxy'', most galaxies are observed from six different [[dome]]s onboard the [[Comet Observatory]]. These domes show the player up to five galaxies and give them the option to fly to those galaxies in order to search for Power Stars. Just outside of each dome is a [[Hungry Luma]], which transforms into an additional galaxy after the player feeds it a certain number of [[Star Bit]]s. The remaining galaxies in the game are accessed via other areas on or around the Comet Observatory, including the [[Planet of Trials]] and the [[Gate (Super Mario Galaxy)|Gate]]. In ''Super Mario Galaxy 2'', galaxies are grouped into seven different [[World]]s, each of which contains a total of seven galaxies. One Hungry Luma is encountered in each World, which transforms into a new galaxy when called to [[Starship Mario]] and fed the required number of Star Bits. | ||
| Line 21: | Line 21: | ||
Many galaxies in both games contain [[black hole]]s, which Mario and Luigi run the risk of getting sucked into if they fall off the edge of some planets or areas. | Many galaxies in both games contain [[black hole]]s, which Mario and Luigi run the risk of getting sucked into if they fall off the edge of some planets or areas. | ||
==List of galaxies== | |||
===''[[Super Mario Galaxy]]''=== | ===''[[Super Mario Galaxy]]''=== | ||
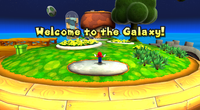
[[File:GEGMarioStart.png|thumb|200px|Mario arriving at the Good Egg Galaxy.]] | [[File:GEGMarioStart.png|thumb|200px|Mario arriving at the Good Egg Galaxy.]] | ||
Asterisk (*) denotes galaxies unlocked by feeding Hungry Lumas. | Asterisk (*) denotes galaxies unlocked by feeding Hungry Lumas. | ||
{| class="wikitable" style="text-align:center;" | {| class="wikitable" style="text-align:center;" | ||
!colspan="6"| [[Gate (Super Mario Galaxy)|Gate]] | !colspan="6"|[[File:SMG Asset Model Dome (Gate).png|50px]]<br>[[Gate (Super Mario Galaxy)|Gate]] | ||
|- | |- | ||
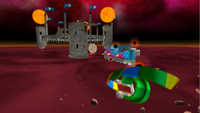
|colspan="3"|[[Gateway Galaxy]] | |colspan="3"|[[File:SMG Screenshot Gateway Galaxy (Grand Star Rescue).png|200px]]<br>[[Gateway Galaxy]] | ||
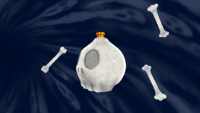
|colspan="3"|[[Boo's Boneyard Galaxy]]* | |colspan="3"|[[File:SMG Screenshot Boo's Boneyard Galaxy (Racing the Spooky Speedster).png|200px]]<br>[[Boo's Boneyard Galaxy]]* | ||
|- | |- | ||
!colspan="6"| [[Terrace (Super Mario Galaxy)|Terrace]] | !colspan="6"|[[File:SMG Terrace Dome Model.png|50px]]<br>[[Terrace (Super Mario Galaxy)|Terrace]] | ||
|- | |- | ||
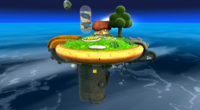
|colspan="2"| [[Good Egg Galaxy]] | |colspan="2"|[[File:Good Egg Galaxy Starting Planet.png|200px]]<br>[[Good Egg Galaxy]] | ||
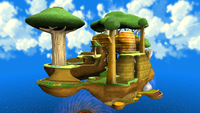
|colspan="2"| [[Honeyhive Galaxy]] | |colspan="2"|[[File:SMG Honeyhive Starting Planet.png|200px]]<br>[[Honeyhive Galaxy]] | ||
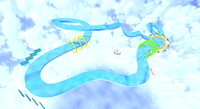
|colspan="2"| [[Loopdeeloop Galaxy]] | |colspan="2"|[[File:SMG Loopdeeloop Overview.png|200px]]<br>[[Loopdeeloop Galaxy]] | ||
|- | |- | ||
|colspan="2"| [[Flipswitch Galaxy]] | |colspan="2"|[[File:SMG Flipswitch Galaxy Mission.png|200px]]<br>[[Flipswitch Galaxy]] | ||
|colspan="2"| [[Sweet Sweet Galaxy]]* | |colspan="2"|[[File:SMG Screenshot Sweet Sweet Galaxy (Rocky Road).png|200px]]<br>[[Sweet Sweet Galaxy]]* | ||
|colspan="2"| [[Bowser Jr.'s Robot Reactor]] | |colspan="2"|[[File:SMG Screenshot Bowser Jr.'s Robot Reactor (Megaleg's Moon).png|200px]]<br>[[Bowser Jr.'s Robot Reactor]] | ||
|- | |- | ||
!colspan="6"| [[Fountain]] | !colspan="6"|[[File:SMG Fountain Dome Model.png|50px]]<br>[[Fountain]] | ||
|- | |- | ||
|colspan="2"| [[Space Junk Galaxy]] | |colspan="2"|[[File:SMG Screenshot Space Junk Galaxy (Pull Star Path).png|200px]]<br>[[Space Junk Galaxy]] | ||
|colspan="2"| [[Battlerock Galaxy]] | |colspan="2"|[[File:SMG Battlerock Overview.png|200px]]<br>[[Battlerock Galaxy]] | ||
|colspan="2"| [[Rolling Green Galaxy]] | |colspan="2"|[[File:SMG Rolling Green End Overview.png|200px]]<br>[[Rolling Green Galaxy]] | ||
|- | |- | ||
|colspan="2"| [[Hurry-Scurry Galaxy]] | |colspan="2"|[[File:SMG Screenshot Hurry-Scurry Galaxy (Shrinking Satellite).png|200px]]<br>[[Hurry-Scurry Galaxy]] | ||
|colspan="2"| [[Sling Pod Galaxy]]* | |colspan="2"|[[File:SMG Screenshot Sling Pod Galaxy (A Sticky Situation).png|200px]]<br>[[Sling Pod Galaxy]]* | ||
|colspan="2"| [[Bowser's Star Reactor]] | |colspan="2"|[[File:SMG Screenshot Bowser's Star Reactor (The Fiery Stronghold).png|200px]]<br>[[Bowser's Star Reactor]] | ||
|- | |- | ||
!colspan="6"| [[Kitchen (Super Mario Galaxy)|Kitchen]] | !colspan="6"|[[File:SMG Kitchen Dome Model.png|50px]]<br>[[Kitchen (Super Mario Galaxy)|Kitchen]] | ||
|- | |- | ||
|colspan="2"| [[Beach Bowl Galaxy]] | |colspan="2"|[[File:SMG Beach Bowl Galaxy Heavenly Beach Planet.png|200px]]<br>[[Beach Bowl Galaxy]] | ||
|colspan="2"| [[Ghostly Galaxy]] | |colspan="2"|[[File:SMG Screenshot Ghostly Galaxy (Beware of Bouldergeist).png|200px]]<br>[[Ghostly Galaxy]] | ||
|colspan="2"| [[Bubble Breeze Galaxy]] | |colspan="2"|[[File:SMG Bubble Breeze Aerial 1.png|200px]]<br>[[Bubble Breeze Galaxy]] | ||
|- | |- | ||
|colspan="2"| [[Buoy Base Galaxy]] | |colspan="2"|[[File:SMG Screenshot Buoy Base Galaxy (The Floating Fortress).png|200px]]<br>[[Buoy Base Galaxy]] | ||
|colspan="2"| [[Drip Drop Galaxy]]* | |colspan="2"|[[File:SMG Screenshot Drip Drop Galaxy (Giant Eel Outbreak).png|200px]]<br>[[Drip Drop Galaxy]]* | ||
|colspan="2"| [[Bowser Jr.'s Airship Armada]] | |colspan="2"|[[File:SMG Screenshot Bowser Jr.'s Airship Armada (Sinking the Airships).png|200px]]<br>[[Bowser Jr.'s Airship Armada]] | ||
|- | |- | ||
!colspan="6"| [[Bedroom (Super Mario Galaxy)|Bedroom]] | !colspan="6"|[[File:SMG Bedroom Dome Model.png|50px]]<br>[[Bedroom (Super Mario Galaxy)|Bedroom]] | ||
|- | |- | ||
|colspan="2"| [[Gusty Garden Galaxy]] | |colspan="2"|[[File:SMG Screenshot Gusty Garden Galaxy (Bunnies in the Wind).png|200px]]<br>[[Gusty Garden Galaxy]] | ||
|colspan="2"| [[Freezeflame Galaxy]] | |colspan="2"|[[File:SMG Screenshot Freezeflame Galaxy (The Frozen Peak of Baron Brrr).png|200px]]<br>[[Freezeflame Galaxy]] | ||
|colspan="2"| [[Dusty Dune Galaxy]] | |colspan="2"|[[File:SMG Screenshot Dusty Dune Galaxy (Soaring on the Desert Winds).png|200px]]<br>[[Dusty Dune Galaxy]] | ||
|- | |- | ||
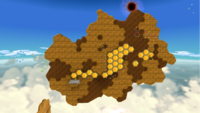
|colspan="2"| [[Honeyclimb Galaxy]] | |colspan="2"|[[File:SMG Screenshot Honeyclimb Galaxy (Scaling the Sticky Wall).png|200px]]<br>[[Honeyclimb Galaxy]] | ||
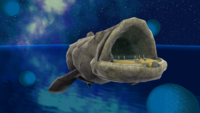
|colspan="2"| [[Bigmouth Galaxy]]* | |colspan="2"|[[File:SMG Screenshot Bigmouth Galaxy (Bigmouth's Gold Bait).png|200px]]<br>[[Bigmouth Galaxy]]* | ||
|colspan="2"| [[Bowser's Dark Matter Plant]] | |colspan="2"|[[File:SMG Screenshot Bowser's Dark Matter Plant (Darkness on the Horizon).png|200px]]<br>[[Bowser's Dark Matter Plant]] | ||
|- | |- | ||
!colspan="6"| [[Engine Room]] | !colspan="6"|[[File:SMG Engine Room Dome Model.png|50px]]<br>[[Engine Room]] | ||
|- | |- | ||
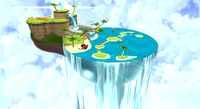
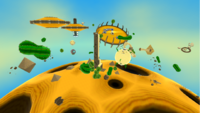
|colspan="2"| [[Gold Leaf Galaxy]] | |colspan="2"|[[File:SMG Screenshot Gold Leaf Galaxy (Star Bunnies on the Hunt).png|200px]]<br>[[Gold Leaf Galaxy]] | ||
|colspan="2"| [[Sea Slide Galaxy]] | |colspan="2"|[[File:SMG Screenshot Sea Slide Galaxy (The Silver Stars of Sea Slide).png|200px]]<br>[[Sea Slide Galaxy]] | ||
|colspan="2"| [[Toy Time Galaxy]] | |colspan="2"|[[File:SMG Screenshot Toy Time Galaxy (Mario Meets Mario).png|200px]]<br>[[Toy Time Galaxy]] | ||
|- | |- | ||
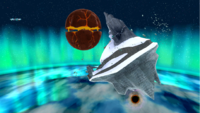
|colspan="2"| [[Bonefin Galaxy]] | |colspan="2"|[[File:SMG Kingfin Planet Overview.png|200px]]<br>[[Bonefin Galaxy]] | ||
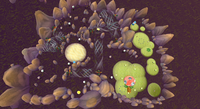
|colspan="2"| [[Sand Spiral Galaxy]]* | |colspan="2"|[[File:SMG Screenshot Sand Spiral Galaxy (Choosing a Favorite Snack).png|200px]]<br>[[Sand Spiral Galaxy]]* | ||
|colspan="2"| [[Bowser Jr.'s Lava Reactor]] | |colspan="2"|[[File:SMG Screenshot Bowser Jr.'s Lava Reactor (King Kaliente's Spicy Return).png|200px]]<br>[[Bowser Jr.'s Lava Reactor]] | ||
|- | |- | ||
!colspan="6"| [[Garden (Super Mario Galaxy)|Garden]] | !colspan="6"|[[File:SMG Garden Dome Model.png|50px]]<br>[[Garden (Super Mario Galaxy)|Garden]] | ||
|- | |- | ||
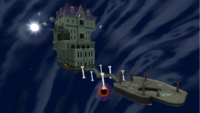
|colspan="2"| [[Deep Dark Galaxy]] | |colspan="2"|[[File:SMG Screenshot Deep Dark Galaxy (The Underground Ghost Ship).png|200px]]<br>[[Deep Dark Galaxy]] | ||
|colspan="2"| [[Dreadnought Galaxy]] | |colspan="2"|[[File:SMG Screenshot Dreadnought Galaxy (Revenge of the Topman Tribe).png|200px]]<br>[[Dreadnought Galaxy]] | ||
|colspan="2"| [[ | |colspan="2"|[[File:SMG Screenshot Matter Splatter Galaxy (Watch Your Step).png|200px]]<br>[[Matter Splatter Galaxy]] | ||
|- | |- | ||
|colspan="3"| [[ | |colspan="3"|[[File:SMG Screenshot Melty Molten Galaxy (The Sinking Lava Spire).png|200px]]<br>[[Melty Molten Galaxy]] | ||
|colspan="3"| [[Snow Cap Galaxy]]* | |colspan="3"|[[File:SMG Snow Cap Starting Planet.png|200px]]<br>[[Snow Cap Galaxy]]* | ||
|- | |- | ||
!colspan="6"| [[Planet of Trials]] | !colspan="6"|[[File:Planet of Trials.png|100px]]<br>[[Planet of Trials]] | ||
|- | |- | ||
|colspan="3"| [[Rolling Gizmo Galaxy]] | |colspan="3"|[[File:Gizmos Gears and Gadgets.png|200px]]<br>[[Rolling Gizmo Galaxy]] | ||
|colspan="3"| [[Bubble Blast Galaxy]] | |colspan="3"|[[File:Bubble Blast Galaxy.png|200px]]<br>[[Bubble Blast Galaxy]] | ||
|- | |- | ||
|colspan="3"| [[Loopdeeswoop Galaxy]] | |colspan="3"|[[File:Loopdeeswoop Galaxy.png|200px]]<br>[[Loopdeeswoop Galaxy]] | ||
|colspan="3"| [[Grand Finale Galaxy]] | |colspan="3"|[[File:GrandFinaleGalaxy-SMG.png|200px]]<br>[[Grand Finale Galaxy]] | ||
|- | |- | ||
!colspan="6"| Center of the Universe | !colspan="6"|[[File:SMG Center of the Universe.png|100px]]<br>Center of the Universe | ||
|- | |- | ||
|colspan="6"| [[Bowser's Galaxy Reactor]] | |colspan="6"|[[File:Bowser Galaxy Reactor Galaxy Reactor.png|200px]]<br>[[Bowser's Galaxy Reactor]] | ||
|} | |} | ||
| Line 106: | Line 107: | ||
Asterisk (*) denotes galaxies unlocked by feeding Hungry Lumas. | Asterisk (*) denotes galaxies unlocked by feeding Hungry Lumas. | ||
{| class="wikitable" style="text-align:center;" | {| class="wikitable" style="text-align:center;" | ||
!colspan="6"| [[World 1 (Super Mario Galaxy 2)|World 1]] | !colspan="6"|[[File:SMG2 Map W1.png|100px]]<br>[[World 1 (Super Mario Galaxy 2)|World 1]] | ||
|- | |- | ||
|colspan="2"| [[Sky Station Galaxy]] | |colspan="2"|[[File:SMG2 Sky Station Complete.png|200px]]<br>[[Sky Station Galaxy]] | ||
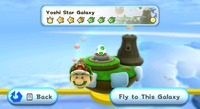
|colspan="2"| [[Yoshi Star Galaxy]] | |colspan="2"|[[File:SMG2 Map Yoshi Star.png|200px]]<br>[[Yoshi Star Galaxy]] | ||
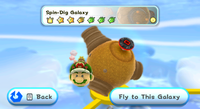
|colspan="2"| [[Spin-Dig Galaxy]] | |colspan="2"|[[File:SpinDigGalaxy.png|200px]]<br>[[Spin-Dig Galaxy]] | ||
|- | |- | ||
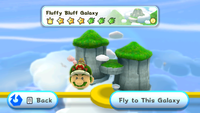
|colspan="2"| [[Fluffy Bluff Galaxy]] | |colspan="2"|[[File:Fluffy Bluff Galaxy.png|200px]]<br>[[Fluffy Bluff Galaxy]] | ||
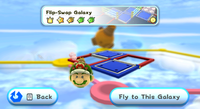
|colspan="2"| [[Flip-Swap Galaxy]]* | |colspan="2"|[[File:FlipSwapGalaxy.png|200px]]<br>[[Flip-Swap Galaxy]]* | ||
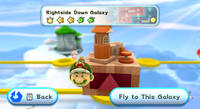
|colspan="2"| [[Rightside Down Galaxy]] | |colspan="2"|[[File:Rightside Down Galaxy.png|200px]]<br>[[Rightside Down Galaxy]] | ||
|- | |- | ||
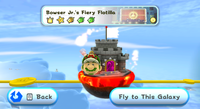
|colspan="6"| [[Bowser Jr.'s Fiery Flotilla]] | |colspan="6"|[[File:Bowser Jrs Fiery Flotilla.png|200px]]<br>[[Bowser Jr.'s Fiery Flotilla]] | ||
|- | |- | ||
!colspan="6"| [[World 2 (Super Mario Galaxy 2)|World 2]] | !colspan="6"|[[File:SMG2 Grand World Map.png|100px]]<br>[[World 2 (Super Mario Galaxy 2)|World 2]] | ||
|- | |- | ||
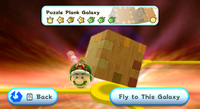
|colspan="2"| [[Puzzle Plank Galaxy]] | |colspan="2"|[[File:Puzzle Plank Galaxy.png|200px]]<br>[[Puzzle Plank Galaxy]] | ||
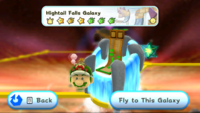
|colspan="2"| [[Hightail Falls Galaxy]] | |colspan="2"|[[File:Hightail Falls Galaxy.png|200px]]<br>[[Hightail Falls Galaxy]] | ||
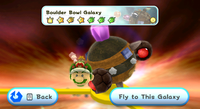
|colspan="2"| [[Boulder Bowl Galaxy]] | |colspan="2"|[[File:Boulder Bowl Galaxy.png|200px]]<br>[[Boulder Bowl Galaxy]] | ||
|- | |- | ||
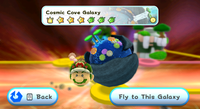
|colspan="2"| [[Cosmic Cove Galaxy]] | |colspan="2"|[[File:Cosmic Cove Galaxy.png|200px]]<br>[[Cosmic Cove Galaxy]] | ||
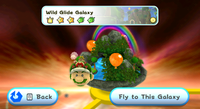
|colspan="2"| [[Wild Glide Galaxy]] | |colspan="2"|[[File:Wild Glide Galaxy.png|200px]]<br>[[Wild Glide Galaxy]] | ||
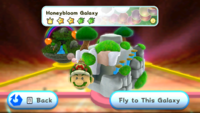
|colspan="2"| [[Honeybloom Galaxy]]* | |colspan="2"|[[File:Honeybloom.png|200px]]<br>[[Honeybloom Galaxy]]* | ||
|- | |- | ||
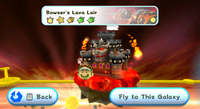
|colspan="6"| [[Bowser's Lava Lair]] | |colspan="6"|[[File:Bowser's Lava Lair.png|200px]]<br>[[Bowser's Lava Lair]] | ||
|- | |- | ||
!colspan="6"| [[World 3 (Super Mario Galaxy 2)|World 3]] | !colspan="6"|[[File:SMG2 Map W3.png|100px]]<br>[[World 3 (Super Mario Galaxy 2)|World 3]] | ||
|- | |- | ||
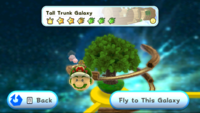
|colspan="2"| [[Tall Trunk Galaxy]] | |colspan="2"|[[File:TallTrunkGalaxy.png|200px]]<br>[[Tall Trunk Galaxy]] | ||
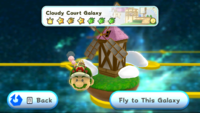
|colspan="2"| [[Cloudy Court Galaxy]] | |colspan="2"|[[File:Cloudy Court Galaxy.png|200px]]<br>[[Cloudy Court Galaxy]] | ||
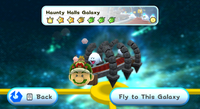
|colspan="2"| [[Haunty Halls Galaxy]] | |colspan="2"|[[File:Haunty Halls Galaxy.png|200px]]<br>[[Haunty Halls Galaxy]] | ||
|- | |- | ||
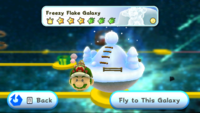
|colspan="2"| [[Freezy Flake Galaxy]] | |colspan="2"|[[File:Freezy Flake Galaxy.png|200px]]<br>[[Freezy Flake Galaxy]] | ||
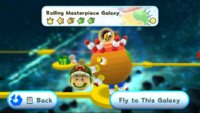
|colspan="2"| [[Rolling Masterpiece Galaxy]] | |colspan="2"|[[File:Rolling Masterpiece Galaxy.png|200px]]<br>[[Rolling Masterpiece Galaxy]] | ||
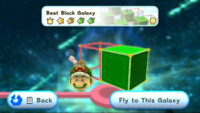
|colspan="2"| [[Beat Block Galaxy]]* | |colspan="2"|[[File:Beat Block Galaxy.png|200px]]<br>[[Beat Block Galaxy]]* | ||
|- | |- | ||
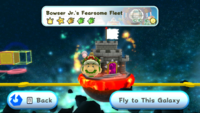
|colspan="6"| [[Bowser Jr.'s Fearsome Fleet]] | |colspan="6"|[[File:Bowser Jrs Fearsome Fleet.png|200px]]<br>[[Bowser Jr.'s Fearsome Fleet]] | ||
|- | |- | ||
!colspan="6"| [[World 4 (Super Mario Galaxy 2)|World 4]] | !colspan="6"|[[File:SMG2 Map W4.png|100px]]<br>[[World 4 (Super Mario Galaxy 2)|World 4]] | ||
|- | |- | ||
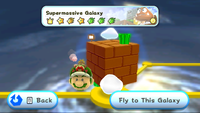
|colspan="2"| [[Supermassive Galaxy]] | |colspan="2"|[[File:Supermassive Galaxy.png|200px]]<br>[[Supermassive Galaxy]] | ||
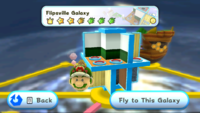
|colspan="2"| [[Flipsville Galaxy]] | |colspan="2"|[[File:Flipsville Galaxy.png|200px]]<br>[[Flipsville Galaxy]] | ||
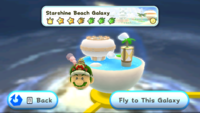
|colspan="2"| [[Starshine Beach Galaxy]] | |colspan="2"|[[File:Starshine Beach Galaxy.png|200px]]<br>[[Starshine Beach Galaxy]] | ||
|- | |- | ||
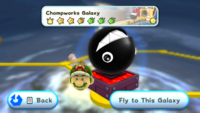
|colspan="2"| [[Chompworks Galaxy]] | |colspan="2"|[[File:Chompworks Galaxy.png|200px]]<br>[[Chompworks Galaxy]] | ||
|colspan="2"| [[Sweet Mystery Galaxy]]* | |colspan="2"|[[File:Sweet Mystery Galaxy.png|200px]]<br>[[Sweet Mystery Galaxy]]* | ||
|colspan="2"| [[Honeyhop Galaxy]] | |colspan="2"|[[File:Honeyhop Galaxy.png|200px]]<br>[[Honeyhop Galaxy]] | ||
|- | |- | ||
|colspan="6"| [[Bowser's Gravity Gauntlet]] | |colspan="6"|[[File:Bowser's Gravity Gauntlet.png|200px]]<br>[[Bowser's Gravity Gauntlet]] | ||
|- | |- | ||
!colspan="6"| [[World 5 (Super Mario Galaxy 2)|World 5]] | !colspan="6"|[[File:SMG2 Map W5.png|100px]]<br>[[World 5 (Super Mario Galaxy 2)|World 5]] | ||
|- | |- | ||
|colspan="2"| [[Space Storm Galaxy]] | |colspan="2"|[[File:Space Storm Galaxy.png|200px]]<br>[[Space Storm Galaxy]] | ||
|colspan="2"| [[Slipsand Galaxy]] | |colspan="2"|[[File:Slipsand Galaxy.png|200px]]<br>[[Slipsand Galaxy]] | ||
|colspan="2"| [[Shiverburn Galaxy]] | |colspan="2"|[[File:Shiverburn Galaxy.png|200px]]<br>[[Shiverburn Galaxy]] | ||
|- | |- | ||
|colspan="2"| [[Boo Moon Galaxy]] | |colspan="2"|[[File:boomoongalaxy.png|200px]]<br>[[Boo Moon Galaxy]] | ||
|colspan="2"| [[Upside Dizzy Galaxy]] | |colspan="2"|[[File:Upside Dizzy Galaxy.png|200px]]<br>[[Upside Dizzy Galaxy]] | ||
|colspan="2"| [[Fleet Glide Galaxy]]* | |colspan="2"|[[File:Fleet Glide Galaxy.png|200px]]<br>[[Fleet Glide Galaxy]]* | ||
|- | |- | ||
|colspan="6"| [[Bowser Jr.'s Boom Bunker]] | |colspan="6"|[[File:Bowser Jrs Boom Bunker.png|200px]]<br>[[Bowser Jr.'s Boom Bunker]] | ||
|- | |- | ||
!colspan="6"| [[World 6 (Super Mario Galaxy 2)|World 6]] | !colspan="6"|[[File:SMG2 Map W6.png|100px]]<br>[[World 6 (Super Mario Galaxy 2)|World 6]] | ||
|- | |- | ||
|colspan="2"| [[Melty Monster Galaxy]] | |colspan="2"|[[File:Melty Monster Galaxy.png|200px]]<br>[[Melty Monster Galaxy]] | ||
|colspan="2"| [[Clockwork Ruins Galaxy]] | |colspan="2"|[[File:Clockwork Ruins Galaxy.png|200px]]<br>[[Clockwork Ruins Galaxy]] | ||
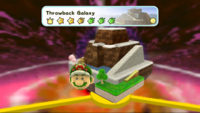
|colspan="2"| [[Throwback Galaxy]] | |colspan="2"|[[File:Throwback Galaxy.png|200px]]<br>[[Throwback Galaxy]] | ||
|- | |- | ||
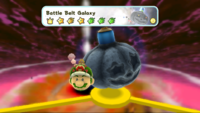
|colspan="2"| [[Battle Belt Galaxy]] | |colspan="2"|[[File:Battle Belt Galaxy.png|200px]]<br>[[Battle Belt Galaxy]] | ||
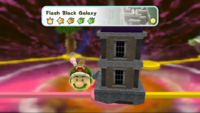
|colspan="2"| [[Flash Black Galaxy]]* | |colspan="2"|[[File:Flash Black Galaxy.png|200px]]<br>[[Flash Black Galaxy]]* | ||
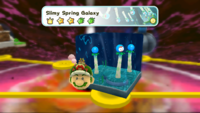
|colspan="2"| [[Slimy Spring Galaxy]] | |colspan="2"|[[File:Slimy Spring Galaxy.png|200px]]<br>[[Slimy Spring Galaxy]] | ||
|- | |- | ||
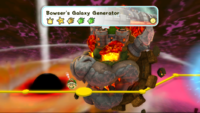
|colspan="6"| [[Bowser's Galaxy Generator]] | |colspan="6"|[[File:Bowser's Galaxy Generator.png|200px]]<br>[[Bowser's Galaxy Generator]] | ||
|- | |- | ||
!colspan="6"| [[World S]] | !colspan="6"|[[File:SMG2 Map WS.png|100px]]<br>[[World S]] | ||
|- | |- | ||
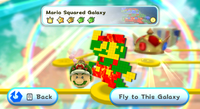
|colspan="2"| [[Mario Squared Galaxy]] | |colspan="2"|[[File:Mario Squared Galaxy.png|200px]]<br>[[Mario Squared Galaxy]] | ||
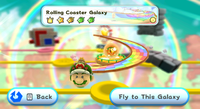
|colspan="2"| [[Rolling Coaster Galaxy]] | |colspan="2"|[[File:Rolling Coaster Galaxy.png|200px]]<br>[[Rolling Coaster Galaxy]] | ||
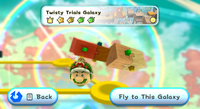
|colspan="2"| [[Twisty Trials Galaxy]] | |colspan="2"|[[File:Twisty Trials Galaxy.png|200px]]<br>[[Twisty Trials Galaxy]] | ||
|- | |- | ||
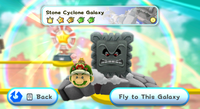
|colspan="2"| [[Stone Cyclone Galaxy]] | |colspan="2"|[[File:Stone Cyclone Galaxy.png|200px]]<br>[[Stone Cyclone Galaxy]] | ||
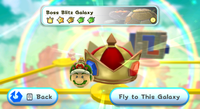
|colspan="2"| [[Boss Blitz Galaxy]] | |colspan="2"|[[File:Boss Blitz Galaxy.png|200px]]<br>[[Boss Blitz Galaxy]] | ||
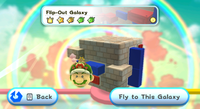
|colspan="2"| [[Flip-Out Galaxy]]* | |colspan="2"|[[File:FlipOutGalaxy.png|200px]]<br>[[Flip-Out Galaxy]]* | ||
|- | |- | ||
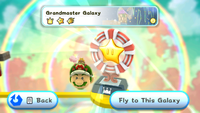
|colspan="6"| [[Grandmaster Galaxy]] | |colspan="6"|[[File:Grandmaster Galaxy.png|200px]]<br>[[Grandmaster Galaxy]] | ||
|} | |} | ||
== | ==Names in other languages== | ||
{{foreign names | {{foreign names | ||
|Jap=銀河<br>''Ginga''<br>ギャラクシー<br>''Gyarakushī'' | |Jap=銀河<br>''Ginga''<br>ギャラクシー<br>''Gyarakushī'' | ||
|Spa=Galaxia | |Spa=Galaxia | ||
|SpaM=Galaxy | |SpaM=Galaxy | ||
| | |Fre=Galaxie | ||
| | |FreM=Galaxy | ||
|Dut=Melkweg | |Dut=Melkweg | ||
|DutM=Galaxy (lit., Milky Way) | |DutM=Galaxy (lit., Milky Way) | ||
|Ger=Milchstraße<br | |Ger=Milchstraße<br>Galaxie | ||
|GerM=Galaxy (lit., Milky Way)<br | |GerM=Galaxy (lit., Milky Way)<br>Galaxy | ||
|Ita=Galassia | |Ita=Galassia | ||
|ItaM=Galaxy | |ItaM=Galaxy | ||
| Line 212: | Line 213: | ||
|KorR=Eunha | |KorR=Eunha | ||
|KorM=Galaxy (lit., Milky Way) | |KorM=Galaxy (lit., Milky Way) | ||
| | |ChiS=星系 | ||
| | |ChiSR=Xīngxì | ||
| | |ChiSM=Galaxy | ||
|ChiT=銀河 | |||
|ChiTR=Yínhé | |||
|ChiTM=Galaxy | |||
|Rom=Galaxie | |Rom=Galaxie | ||
|RomM=Galaxy | |RomM=Galaxy | ||
| Line 221: | Line 225: | ||
==Trivia== | ==Trivia== | ||
*In both ''[[Super Mario Galaxy]]'' and ''[[Super Mario Galaxy 2]]'', galaxies are commonly represented by three-dimensional revolving icons which consist of either one planet found in the galaxy or multiple planets in the galaxy. In ''Super Mario Galaxy'', only 29 of the 42 total galaxies in the game have revolving icons, as the other thirteen remaining galaxies are accessed outside of one of the six main domes. In ''Super Mario Galaxy 2'' however, every galaxy in the game has an icon. In addition, every galaxy icon in ''Super Mario Galaxy 2'' is surrounded by a faint blue circular force field, possibly the atmosphere of the galaxy. | *In both ''[[Super Mario Galaxy]]'' and ''[[Super Mario Galaxy 2]]'', galaxies are commonly represented by three-dimensional revolving icons which consist of either one planet found in the galaxy or multiple planets in the galaxy. In ''Super Mario Galaxy'', only 29 of the 42 total galaxies in the game have revolving icons, as the other thirteen remaining galaxies are accessed outside of one of the six main domes. In ''Super Mario Galaxy 2'' however, every galaxy in the game has an icon. In addition, every galaxy icon in ''Super Mario Galaxy 2'' is surrounded by a faint blue circular force field, possibly the atmosphere of the galaxy. | ||
*In ''[[Super Mario Galaxy]]'', every object found on almost all of the revolving galaxy icons in the game remains stationary. In ''[[Super Mario Galaxy 2]]'', however, almost every galaxy icon in the game has something moving on it | *In ''[[Super Mario Galaxy]]'', every object found on almost all of the revolving galaxy icons in the game remains stationary. In ''[[Super Mario Galaxy 2]]'', however, almost every galaxy icon in the game has something moving on it. | ||
*In ''[[Mario Kart 8]]'' and ''[[Mario Kart 8 Deluxe]]'', there is a sponsor named after | *In ''[[Mario Kart 8]]'' and ''[[Mario Kart 8 Deluxe]]'', there is a sponsor named after galaxies known as [[List of sponsors debuting in Mario Kart 8 and Mario Kart 8 Deluxe#Galaxy Air|Galaxy Air]]. | ||
{{SMG}} | {{SMG}} | ||
{{SMG2}} | {{SMG2}} | ||
{{ | {{SMG missions}} | ||
{{ | {{SMG2 missions}} | ||
[[it:Galassia]] | [[it:Galassia]] | ||
[[Category:Cosmic | [[Category:Cosmic areas]] | ||
[[Category:Galaxies|*]] | [[Category:Galaxies|*]] | ||
[[Category:Super Mario Galaxy]] | [[Category:Super Mario Galaxy]] | ||
[[Category:Super Mario Galaxy 2]] | [[Category:Super Mario Galaxy 2]] | ||
Latest revision as of 12:22, April 1, 2024
- This article is about galaxies in general. For the Wii games, see Super Mario Galaxy and Super Mario Galaxy 2.
- “Now, go and explore the universe! There are lots and lots of galaxies for you to discover!”
- —Luma, Super Mario Galaxy
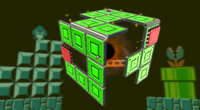
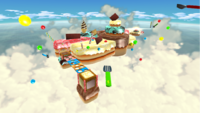
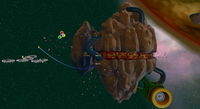
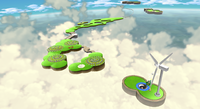
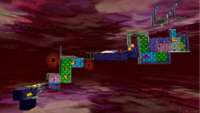
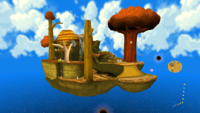
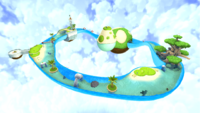
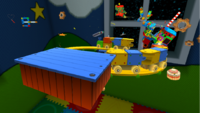
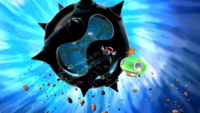
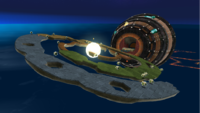
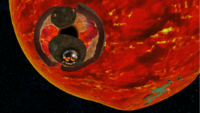
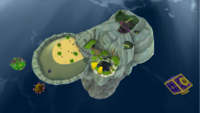
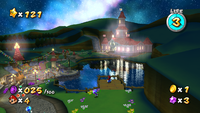
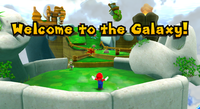
A galaxy is a system consisting of gases, stars, planets, and comets. Mario or Luigi visits many galaxies in their adventures through Super Mario Galaxy and Super Mario Galaxy 2. There is a total of 91 different galaxies between the two games: 42 in Super Mario Galaxy and 49 in Super Mario Galaxy 2.
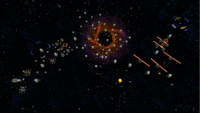
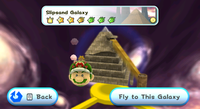
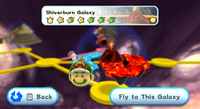
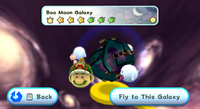
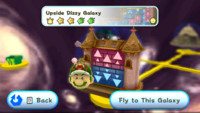
The galaxies in Super Mario Galaxy are notably much smaller than real galaxies, often being composed of nothing more than a few small planetoids, most of which come in many different shapes and sizes. However, in Super Mario Galaxy 2, a galaxy proportionate to a real galaxy appears in the background of World 4, while in World 5, there is a galaxy supercluster. Smaller galaxies in the games are more comparable to systems such as the Solar System. There are solar systems that can be seen to make up other galaxies that determine whether it is a large or small one.
In Super Mario Galaxy, there is clearly a size difference between galaxies. The fifteen major galaxies contain six (seven in Battlerock Galaxy and Dusty Dune Galaxy) Power Stars, while the twenty-seven minor galaxies possess only one (two in the Buoy Base Galaxy and the Gateway Galaxy). The "major" galaxies with six to seven Power Stars are usually much larger than the "minor" galaxies with one Power Star, which may contain only one or two planetoids; there are fifteen of these "major" galaxies and twenty-seven "minor" ones. In Super Mario Galaxy 2, however, this difference is not as prevalent, as each galaxy contains either two or three regular Power Stars; respectively, there are twenty-five and twenty-four of each.
In Super Mario Galaxy, most galaxies are observed from six different domes onboard the Comet Observatory. These domes show the player up to five galaxies and give them the option to fly to those galaxies in order to search for Power Stars. Just outside of each dome is a Hungry Luma, which transforms into an additional galaxy after the player feeds it a certain number of Star Bits. The remaining galaxies in the game are accessed via other areas on or around the Comet Observatory, including the Planet of Trials and the Gate. In Super Mario Galaxy 2, galaxies are grouped into seven different Worlds, each of which contains a total of seven galaxies. One Hungry Luma is encountered in each World, which transforms into a new galaxy when called to Starship Mario and fed the required number of Star Bits.
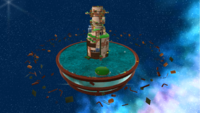
Many galaxies in both games contain black holes, which Mario and Luigi run the risk of getting sucked into if they fall off the edge of some planets or areas.
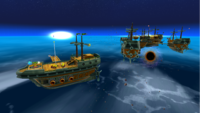
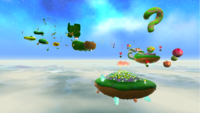
List of galaxies[edit]
Super Mario Galaxy[edit]
Asterisk (*) denotes galaxies unlocked by feeding Hungry Lumas.
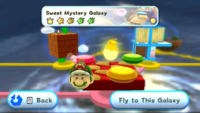
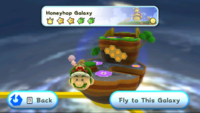
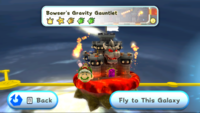
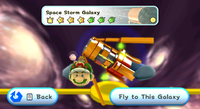
Super Mario Galaxy 2[edit]
Asterisk (*) denotes galaxies unlocked by feeding Hungry Lumas.
Names in other languages[edit]
| Language | Name | Meaning |
|---|---|---|
| Japanese | 銀河 Ginga ギャラクシー Gyarakushī |
- |
| Chinese (simplified) | 星系 Xīngxì |
Galaxy |
| Chinese (traditional) | 銀河 Yínhé |
Galaxy |
| Dutch | Melkweg |
Galaxy (lit., Milky Way) |
| French | Galaxie |
Galaxy |
| German | Milchstraße Galaxie |
Galaxy (lit., Milky Way) Galaxy |
| Italian | Galassia |
Galaxy |
| Korean | 은하 Eunha |
Galaxy (lit., Milky Way) |
| Portuguese | Galáxia |
Galaxy |
| Romanian | Galaxie |
Galaxy |
| Russian | Галактика Galaktika |
Galaxy |
| Spanish | Galaxia |
Galaxy |
Trivia[edit]
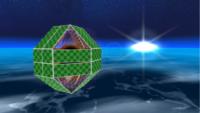
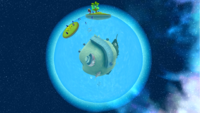
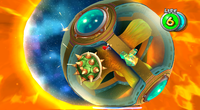
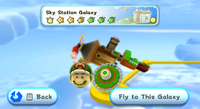
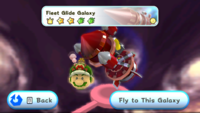
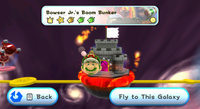
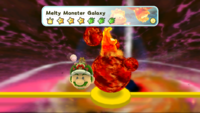
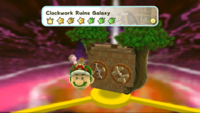
- In both Super Mario Galaxy and Super Mario Galaxy 2, galaxies are commonly represented by three-dimensional revolving icons which consist of either one planet found in the galaxy or multiple planets in the galaxy. In Super Mario Galaxy, only 29 of the 42 total galaxies in the game have revolving icons, as the other thirteen remaining galaxies are accessed outside of one of the six main domes. In Super Mario Galaxy 2 however, every galaxy in the game has an icon. In addition, every galaxy icon in Super Mario Galaxy 2 is surrounded by a faint blue circular force field, possibly the atmosphere of the galaxy.
- In Super Mario Galaxy, every object found on almost all of the revolving galaxy icons in the game remains stationary. In Super Mario Galaxy 2, however, almost every galaxy icon in the game has something moving on it.
- In Mario Kart 8 and Mario Kart 8 Deluxe, there is a sponsor named after galaxies known as Galaxy Air.
