
Super Mario World 2: Yoshi's Island: Difference between revisions
m (Text replacement - "<references/> {{" to "<references/> {{") |
No edit summary |
||
| (300 intermediate revisions by 72 users not shown) | |||
| Line 1: | Line 1: | ||
{{italic title}} | {{italic title}} | ||
{{FA}} | {{FA}} | ||
{{redirect|YI|the | {{redirect|YI|the Game Boy Advance version|[[Yoshi's Island: Super Mario Advance 3]]}} | ||
{{ | {{redirect|SMW2|the game known as "Super Mario Wii 2" in South Korea|[[Super Mario Galaxy 2]]}} | ||
|image=[[File:SMW2.jpg| | {{game infobox | ||
|image=[[File:SMW2.jpg|260px]] | |||
|developer=[[Nintendo Entertainment Analysis and Development|Nintendo EAD]] | |developer=[[Nintendo Entertainment Analysis and Development|Nintendo EAD]] | ||
|publisher=[[Nintendo]] | |publisher=[[Nintendo]] | ||
| | |release='''Super Nintendo Entertainment System:'''<br>{{release|Japan|August 5, 1995|USA|October 4, 1995|Europe|October 5, 1995|Australia|December 1995<ref>''Nintendo Magazine System'' (AU) Issue #33, page 26.</ref>}} '''Super NES Classic Edition:'''<br>{{release|USA|September 29, 2017|Europe|September 29, 2017|Australia|September 30, 2017|Japan|October 5, 2017}} '''Super Nintendo Entertainment System - Nintendo Switch Online:'''<br>{{release|USA|September 5, 2019<ref>Nintendo (September 4, 2019). [https://youtu.be/8TVE44feo_I?t=1386 Nintendo Direct 9.4.2019]. ''YouTube''. Retrieved September 4, 2019.</ref>|Japan|September 6, 2019<ref>Nintendo (September 4, 2019). [https://youtu.be/IjZbFWW23d0?t=3568 Nintendo Direct 2019.9.5]. ''YouTube''. Retrieved September 4, 2019.</ref>|Europe|September 6, 2019<ref>[https://twitter.com/NintendoEurope/status/1169375812610592769 Tweet by Nintendo of Europe (Super Nintendo Entertainment System - Nintendo Switch Online release date)]. ''Twitter''. Retrieved September 4, 2019.</ref>|Australia|September 6, 2019<ref>[https://twitter.com/NintendoAUNZ/status/1169378280031436800 Tweet by Nintendo AU NZ (Super Nintendo Entertainment System - Nintendo Switch Online release date)]. ''Twitter''. Retrieved September 4, 2019.</ref>|HK|September 6, 2019|South Korea|September 6, 2019}} | ||
|languages={{languages|en_us=y|fr_fr=y|de=y|jp=y}} | |||
|genre=[[Genre#Platform|Platform]] | |genre=[[Genre#Platform|Platform]] | ||
|modes=Single-player<br>Multiplayer [[Mini Battle]]s | |modes=Single-player<br>Multiplayer [[Mini Battle]]s | ||
|ratings={{ratings|esrb=K-A|acb=G}} | |ratings={{ratings|esrb=K-A|acb=G}} | ||
|platforms=Super Famicom / [[Super Nintendo Entertainment System]], [[Classics#Super NES Classic Edition|Super NES Classic Edition / Super Famicom Mini]], [[Super Nintendo Entertainment System - Nintendo Switch Online]] | |platforms=Super Famicom / [[Super Nintendo Entertainment System]], [[Classics#Super NES Classic Edition|Super NES Classic Edition / Super Famicom Mini]], [[Super Nintendo Entertainment System - Nintendo Switch Online]] | ||
|media={{media|snes=1|snesclassic=1| | |media={{media|snes=1|snesclassic=1|switchdl=1}} | ||
|input={{input|snes=1|snesclassic=1|joy-con=1| | |input={{input|snes=1|snesclassic=1|joy-con=1|switchpro=1|switchsnes=1}} | ||
}} | }} | ||
'''''Super Mario World 2: Yoshi's Island''''' ( | '''''Super Mario World 2: Yoshi's Island''''' (frequently referred to simply as '''''Yoshi's Island''''') is a 2D [[Genre#Platform|platform]] game for the [[Super Nintendo Entertainment System]], developed by [[Nintendo Entertainment Analysis and Development|Nintendo EAD]]. The game is the prequel to ''[[Super Mario World]]'' and it stars [[Yoshi]] and the [[Yoshi (species)|Yoshi clan]] who, while carrying [[baby Mario]], travel across [[Yoshi's Island (location)|Yoshi's Island]] to rescue [[baby Luigi]] from [[baby Bowser]] and his [[Magikoopa]] minion/caretaker, [[Kamek]]. Instead of relying on jumping and a power-up system for combat as in the traditional ''Super Mario'' platformers, Yoshis use their tongue and eggs to overcome obstacles, as well as the introduction of many other different mechanics. The game is notable for introducing a time-based health system rather than hit points, an anomaly to what many platform games typically did in this game's time period. Rather than relying on powerful pre-rendered graphics just like its contemporary ''[[Donkey Kong Country]]'', ''Super Mario World 2: Yoshi's Island'' employs a very distinct, stylized arts and crafts style to stand on its own. The game makes use of the Super FX2 graphics chip (one of only four commercially-released SNES games to do so), which allows for larger, more detailed sprites and more advanced effects that emulate 3D space. | ||
Although ''Super Mario World 2: Yoshi's Island'' was not as financially successful as its predecessor, the game's highly positive reception and unique style has spawned a new series of | Although ''Super Mario World 2: Yoshi's Island'' was not as financially successful as its predecessor, the game's highly positive reception and unique style has spawned [[Yoshi's Island (series)|a new series]] of platform games from the ''[[Yoshi (franchise)|Yoshi]]'' franchise, although it is the fourth entry overall. The game has received various adaptations into manga, such as receiving volumes dedicated to it in the ''[[Super Mario-kun]]'' and [[Super Mario (Kodansha manga)|Kodansha's ''Super Mario'' manga series]] and extensive [[List of merchandise|merchandising]]. This is the only ''Yoshi's Island'' game to be released on a home console. The game has received a [[Reissue#Remakes|remake]] on the [[Game Boy Advance]], ''[[Yoshi's Island: Super Mario Advance 3]]'', which was released on [[Virtual Console#Nintendo 3DS|Virtual Console]] for the [[Nintendo 3DS]] (with owners applicable for the [[Virtual Console#Nintendo 3DS Ambassador Program|Nintendo 3DS Ambassador Program]] being able to download the game for free) and [[Wii U]]. The original SNES version of ''Super Mario World 2: Yoshi's Island'' is included on the [[Classics#Super NES Classic Edition|SNES Classic Edition]], and although it was never announced for release on Virtual Console on any other system, it is one of the 20 launch titles for [[Super Nintendo Entertainment System - Nintendo Switch Online]] on the [[Nintendo Switch]]. A sequel, ''[[Yoshi's Island DS]]'', was released in 2006 for the [[Nintendo DS]]. In 2014, the [[Nintendo 3DS]] game ''[[Yoshi's New Island]]'' continues the story told from the first game. | ||
==Story== | ==Story== | ||
[[File:Babymarioandyoshi.png|thumb | [[File:Babymarioandyoshi.png|thumb|100px|[[Yoshi]] carrying [[baby Mario]].]] | ||
[[File:KamekMagicBlast.jpg|thumb | [[File:KamekMagicBlast.jpg|thumb|100px|[[Kamek]], one of the main antagonists, and kidnapper of Baby Luigi.]] | ||
'''From the first cinematic of ''Super Mario World 2: Yoshi's Island'':''' | '''From the first cinematic of ''Super Mario World 2: Yoshi's Island'':''' | ||
<blockquote> | <blockquote> | ||
| Line 27: | Line 29: | ||
Kamek: '''''"THE BABIES ARE MINE!"'''''<br> | Kamek: '''''"THE BABIES ARE MINE!"'''''<br> | ||
Narrator: <i>'''WOW!!!''' Snatching only one baby, the creature vanishes into the darkness from whence it came. The second baby falls undetected towards the open sea... '''OH NO...'''<br> | Narrator: <i>'''WOW!!!''' Snatching only one baby, the creature vanishes into the darkness from whence it came. The second baby falls undetected towards the open sea... '''OH NO...'''<br> | ||
Meanwhile, here is [[Yoshi's Island ( | Meanwhile, here is [[Yoshi's Island (location)|Yoshi's Island]], home to all [[Yoshi (species)|Yoshies]]. It's a lovely day, and [[Yoshi]] is taking a walk. '''HUH?!?''' Suddenly, a baby drops in onto his back. The baby seems to be fine. This is very fortunate! Wha-? Something else fell with the baby... Let's take a peek... It looks like a map. Maybe the stork was using it? But Yoshi can't figure it out. Yoshi decides to talk to his friends.</i><br> | ||
Kamek: '''AAAAAAAAAAKK!!!'''<br> | Kamek: '''AAAAAAAAAAKK!!!'''<br> | ||
Narrator: <i>[[Kamek]], the evil [[Magikoopa]], and kidnapper of the baby, quickly dispatches | Narrator: <i>[[Kamek]], the evil [[Magikoopa]], and kidnapper of the baby, quickly dispatches [[Kamek's Toadies|his toadies]], when he discovers that he missed the other baby!<br> | ||
Yoshi heads leisurely back to the other Yoshies, unaware of the danger at hand. Kamek's forces are actively searching the island. Will these two children ever reach their parents safely?</i> | Yoshi heads leisurely back to the other Yoshies, unaware of the danger at hand. Kamek's forces are actively searching the island. Will these two children ever reach their parents safely?</i> | ||
</blockquote> | </blockquote> | ||
| Line 52: | Line 54: | ||
</blockquote> | </blockquote> | ||
The story of ''Super Mario World 2: Yoshi's Island'' takes place while Mario and Luigi are in their infancy, referred to as | The story of ''Super Mario World 2: Yoshi's Island'' takes place while Mario and Luigi are in their infancy, referred to as baby Mario and baby Luigi respectively. A stork was about to deliver the newborn twins baby Mario and baby Luigi to their parents, but is ambushed by Kamek on the way there. While Kamek was successful at capturing baby Luigi and the stork and imprisons them at Bowser's Castle, baby Mario plummets into the sea, only to find himself on a Yoshi's back on an island. The Yoshis then discover that baby Mario also has a map with him, which reveals the location of Bowser's Castle. Kamek has then figured out that he has missed baby Mario and then has dispatched his Toadies to kidnap baby Mario. While the Yoshis discuss what to do with baby Mario, baby Mario then notifies the Yoshis which direction to go due to a powerful twin link, where the Yoshis then employ a relay system to transport baby Mario across the island. After overcoming obstacles and fighting bosses that Kamek has enlarged in various forts and castles in the island, the Yoshis finally manage to defeat Kamek and baby Bowser and rescue baby Luigi and the stork, allowing the stork to safely deliver the babies to their parents. | ||
==Gameplay== | ==Gameplay== | ||
[[File:Yisland3.png|thumb|left|Yoshi aiming his egg at one of the enemies.]] | [[File:Yisland3.png|thumb|left|Yoshi aiming his egg at one of the enemies.]] | ||
Like the | Like the early titles of the [[Super Mario (series)|''Super Mario'' series]], ''Super Mario World 2: Yoshi's Island'' is a two-dimensional, side-scrolling platform game. In addition to the typical run and [[jump]] controls, the Yoshis can also ingest enemies and manipulate objects using their tongue. After ingesting an enemy, the Yoshi can either eject or swallow them, although if Yoshi keeps an enemy in his mouth long enough, he will eventually swallow it (with the exception of enemies he can only ingest and spit out, and not fully swallow). Swallowing most enemies allows the Yoshi to lay a [[Yoshi's Egg|Yoshi Egg]], which it can carry up to six of; eating another enemy results in the egg at the front of the line to be discarded. While Yoshi has some eggs, the player can aim with a constantly moving target reticle and throw them to damage enemies, activate objects, ricochet them off solid surfaces, and skim them across water. This reticle can be locked into one position while aiming, and while Yoshis are aiming their eggs, they can still move around and jump. While most eggs come in green, some are yellow and red, and they release coins and stars when shattered respectively. While a Yoshi throws an egg, the egg changes color depending on how much it has bounced off walls. Green eggs can bounce up to three times, yellow eggs bounce only twice, and red eggs bounce only once. Power-ups also exist in the form of [[morph bubble|metamorphosis bubble]]s, which allow Yoshi to transform into various forms, and the [[Super Star]], which lets baby Mario turn into [[Superstar Mario|Powerful Mario]]. In addition to these moves, Yoshis can use [[Flutter Jump|Hovering Jump]]s multiple times in the air to increase the distance they travel. The first Hovering Jumps can increase the height of the jump, but subsequent Hovering Jumps mostly serve to prolong the duration of the fall. Yoshis can [[Ground Pound|Pound The Ground]] to smash stakes and defeat certain types of enemies. Camera controls include looking up to see upper areas of the level and ducking to force the camera down. | ||
[[File:Yisland1.png|thumb|Yoshi about to free | [[File:Yisland1.png|thumb|Yoshi about to free baby Mario from his bubble imprisonment.]] | ||
''Super Mario World 2: Yoshi's Island'' introduces the concept of time-based health, a mechanic that is reused in future ''Yoshi's Island'' games. When the Yoshi comes into contact with an enemy, | ''Super Mario World 2: Yoshi's Island'' introduces the concept of time-based health, a mechanic that is reused in future ''Yoshi's Island'' games. When the Yoshi comes into contact with an enemy, baby Mario becomes separated from Yoshi, encased in a bubble and floating around in the air. While baby Mario is in this state, a [[Countdown Timer]] appears, counting down in seconds until it reaches zero, in which time Yoshi must recover baby Mario or Kamek's [[Toady|Toadies]] take baby Mario, and the player loses a life. The Timer starts at ten seconds at the beginning of each level, and can be increased to a maximum of thirty by collecting [[Star (Yoshi's Island series)|Star]]s, using [[10-Point Star|10 Point Star]]s and [[20-Point Star|20 Point Star]]s, and entering [[Checkpoint Ring|Middle Ring]]s. If the Timer falls below ten, it increases back up to ten slowly after recovering baby Mario. Entering a Middle Ring also marks the point where the Yoshi can continue from if it loses a life. Other ways Yoshis can lose lives are if they touch spikes or thorns, if they fall off a cliff, if they touch lava, if they get eaten by a Lunge Fish, or if they get crushed by moving platforms. In these cases, Yoshi's death is shown onscreen, either by spinning and collapsing or flying offscreen. If the player runs out of lives, they receive a [[Game Over]]. | ||
There are six worlds in this game, and each world has nine levels total. The objective of each level is to reach the [[ | There are six worlds in this game, and each world has nine levels total. The objective of each level is to reach the [[Goal Ring]] roulette. There are ten spots on the roulette, and five of the spots can be made winning spots by collecting the five [[Smiley Flower|Special Flower]]s in each level. Landing on one of the flower points allows the player to play a [[Bonus Challenge]]. These Bonus Challenge allow Yoshis to either gain lives or [[Special Item (Yoshi's Island series)|Special Item]]s for use in levels. Two levels in each world are forts and castles, and the goal in those levels is to reach and defeat the eponymous boss that resides in those establishments rather than reach a Goal Ring. Most bosses are regular enemies that are enlarged by Kamek prior to the fight, with a few exceptions. | ||
Scattered throughout each level are three types of collectibles: thirty | Scattered throughout each level are three types of collectibles: thirty Stars, twenty [[Red Coin|red coin]]s, and five Special Flowers. At the end of each level, the player's score is tallied with a maximum of 100 points, with flowers worth ten points each and red coins and Stars one point each. Attaining a perfect one hundred points in all eight levels in a [[world]] unlocks a [[Bonus Challenge]] and an "extra" ("special" in Japanese) level on the level selection map. The extra levels are designed to be more difficult than any other level in the game, and each one has its own unique gimmick. However, the player can always choose to exit an extra level by pausing the game and pressing {{button|snes|select}}; in other levels, this can be done only if the level in question has already been cleared. | ||
If the player succeeds in attaining a perfect one hundred points in the extra level of a world, a | If the player succeeds in attaining a perfect one hundred points in the extra level of a world, a Star is added to the top of the title screen the next time the player turns on the game, for a maximum of six Stars. | ||
{{br}} | {{br}} | ||
===Controls=== | ===Controls=== | ||
[[File:Yisland4.png|thumb|200px|The option mode for the control settings.]] | [[File:Yisland4.png|thumb|200px|The option mode for the control settings.]] | ||
There are two controller configurations: Patient and Hasty. By default, Patient is selected. The control setup can be swapped at any time on the world map by scrolling over to the button with the Super Nintendo controller next to the "Score" option and selecting it; additionally, at some points, there are [[Message Block]]s that allow the player to swap control configurations. The only difference between the "Hasty" and "Patient" settings is that with "Patient" the player must press {{button|snes|A}} to target and press it again to throw an egg, while with "Hasty" the player must hold {{button|snes|A}} to target and release it to toss an egg. | There are two controller configurations: Patient and Hasty. By default, Patient is selected. The control setup can be swapped at any time on the world map by scrolling over to the button with the Super Nintendo controller next to the "Score" option and selecting it; additionally, at some points, there are [[Message Block]]s that allow the player to swap control configurations. The only difference between the "Hasty" and "Patient" settings is that with "Patient" the player must press {{button|snes|A}} to target and press it again to throw an egg, while with "Hasty" the player must hold {{button|snes|A}} to target and release it to toss an egg. | ||
{|class="wikitable"style="text-align:center" | |||
{| class="wikitable" style="text-align:center" | |||
!Action | !Action | ||
!Patient | !Patient | ||
| Line 78: | Line 78: | ||
|- | |- | ||
|Move | |Move | ||
| colspan="2" |{{button|snes|Pad}} | |colspan="2"|{{button|snes|Pad}} | ||
|- | |- | ||
|Jump | |Jump | ||
| colspan="2" |{{button|snes|B}} (hold to | |colspan="2"|{{button|snes|B}} (hold to Hovering Jump) | ||
|- | |- | ||
|Ground | |Pound The Ground | ||
| colspan="2" |{{button|snes|B}} + {{button|snes|Pad}} (down) | |colspan="2"|{{button|snes|B}} + {{button|snes|Pad}} (down) | ||
|- | |- | ||
|Eat, spit out | |Eat, spit out | ||
| colspan="2" |{{button|snes|Y}} (press to eat, press again to spit out) | |colspan="2"|{{button|snes|Y}} (press to eat, press again to spit out) | ||
|- | |- | ||
|Duck, swallow | |Duck, swallow | ||
| colspan="2" |{{button|snes|Pad}} (down) | |colspan="2"|{{button|snes|Pad}} (down) | ||
|- | |- | ||
|Aim/throw egg | |Aim/throw egg | ||
| Line 97: | Line 97: | ||
|- | |- | ||
|Lock target reticule | |Lock target reticule | ||
| colspan="2" |{{button|snes|R}} / {{button|snes|L}} (while aiming) | |colspan="2"|{{button|snes|R}} / {{button|snes|L}} (while aiming) | ||
|- | |- | ||
|Look up | |Look up | ||
| colspan="2" |{{button|snes|Pad}} (up; hold to pan camera up) | |colspan="2"|{{button|snes|Pad}} (up; hold to pan camera up) | ||
|- | |- | ||
|Pause menu | |Pause menu | ||
| colspan="2" |{{button|snes|start}} | |colspan="2"|{{button|snes|start}} | ||
|- | |- | ||
|Level options | |Level options | ||
| colspan="2" |{{button|snes|select}} | |colspan="2"|{{button|snes|select}} | ||
|} | |} | ||
==Worlds and | ==Worlds and levels== | ||
{| | {{multiple image | ||
! | |align= | ||
|direction=vertical | |||
|width=256 | |||
|footer=Yoshi's Island | |||
|image1=Yoshi's Island.gif | |||
|caption1=Day | |||
|image2=SMW2 World map 2.gif | |||
|caption2=Night | |||
}} | |||
The setting of the game takes place on [[Yoshi's Island (location)|Yoshi's Island]], which is the first world setting of ''Super Mario World''. The island portrayed in ''Super Mario World 2: Yoshi's Island'', however, is much larger in scale and comes with a larger variety of biomes and characters endemic to the island as players progress through the game. The game contains six worlds with eight regular levels each, retaining the eight level per world structure first normalized by ''[[Super Mario Bros. 3]]'', having a consistent amount of levels per world, and every fourth and eighth level of the world features a boss fight against an enemy enlarged by Kamek. All worlds have particular themed biomes, such as [[World 1 (Super Mario World 2: Yoshi's Island)|World 1]] having a grasslands while [[World 6 (Super Mario World 2: Yoshi's Island)|World 6]] has a stronger theme around caverns and lava as the player closer approaches [[King Bowser's Castle]]; this theming of levels has been carried in further entries of the ''Yoshi's Island'' series. Unlike ''Super Mario World'', ''Super Mario World 2: Yoshi's Island'' does not employ use of a world map and relies on a level select screen, which is represented by color-coded folders containing icons that preview the levels, and these levels are named after their features than rather than using generic numbered identifies, such as the third level of World 3 being called [[Nep-Enut's Domain]] rather simply being called World 3-3. One notable aspect of the level icons is that all Yoshis in their previews are Green Yoshis, despite Green Yoshis being used only in the first levels of each world, the Extra levels and King Bowser's Castle. While most levels have players moving on their own accord, a few levels are autoscrollers, with the first one being encountered in [[Hop! Hop! Donut Lifts]] in World 1. | |||
Every world contains an unlockable level known as an Extra levels, which are unlocked when players get a 100 score in all levels of the worlds. These levels feature a gimmick and are shorter and more difficult than other levels of the game, often do not contain [[Checkpoint Ring|Middle Ring]]s and they are optional to complete in regards of general progression of the game. These levels do not feature unique icons that display a preview of the level and are instead represented by a star with a number and identifier. In addition, when players first play the game, they play through a level called [[Welcome To Yoshi's Island]], which serves as a short tutorial guiding players basic controls of the game. Once completed, it cannot be replayed, effectively making it an [[Unrevisitable area|unrevisitable area]]. | |||
Due to the light arts and crafts aesthetic of the game and usage of the Super FX2 graphics chip, levels and their backdrops are rendered reminiscent of drawings rather than the more organic approach that ''Super Mario World'' has done, and their backdrops are dynamically rendered with a more complex palette. For example, the primary backdrop for [[Watch Out Below!]] from World 1 uses a soft palette and hills having an emulated colored pencils aesthetic, clouds and hills contain visible shading streaks to communicate their shadows, environment features such as waterfalls and crystals in cave levels such as [[The Cave Of Chomp Rock]] and [[The Cave Of The Mystery Maze]] are animated, [[Goonie Rides!]] renders a shimmering ocean with a large flock of the [[Goonie]] species and variants flying in the background, while the general aesthetic of World 6 primarily uses warm color palettes to communicate players that the world is lava-themed and the final world of the game. | |||
{|class="wikitable" align="center"style="text-align:center;background:whitesmoke"width=99% | |||
!style="background:forestgreen;color:white"width=75%|<big>Levels</big> | |||
|-bgcolor=limegreen | |||
![[File:SMW2 New Game icon.png]] [[World 0]] [[File:SMW2 New Game icon.png]] | |||
|-style="background:#ECFFEC" | |||
|[[File:SMW2 Yoshi's House.png]] | |||
|- | |- | ||
! | | | ||
{| class="wikitable"style="text-align:center"width=99% align=center | |||
!style="background:limegreen" width=5%|Icon | |||
!style="background:limegreen" width=5%|# | |||
!style="background:limegreen" width=35%|Level | |||
!style="background:limegreen" width=30%|Type of level | |||
|-bgcolor=#AFFFAA | |||
|[[File:SMW2 New Game icon.png]] | |||
|0 | |||
|[[Welcome To Yoshi's Island]] | |||
|Plains | |||
|} | |||
|-bgcolor="limegreen" | |||
![[File:SMW2 - World 1 (icon).png]] [[World 1 (Super Mario World 2: Yoshi's Island)|World 1]] [[File:SMW2 - World 1 (icon).png]] | |||
|-bgcolor=#ECFFEC | |||
|[[File:World 1 Map SMW2YI.png]] | |||
|- | |- | ||
| | | | ||
{| class="wikitable sortable"style="text-align:center"width=99% align=center | |||
!style="background:limegreen" width=5% class=unsortable|Icon | |||
! | !data-sort-type="number" style="background:limegreen" width=5%|# | ||
! | !data-sort-type="alphabetical" style="background:limegreen" width=35%|Level | ||
! | !style="background:limegreen" width=30%|Type of level | ||
|- | |-bgcolor=#AFFFAA | ||
|[[File:Icon SMW2-YI - Make Eggs, Throw Eggs.png|link=Make Eggs, Throw Eggs]] | |||
|{{sort|1|1-1}} | |||
|[[Make Eggs, Throw Eggs]] | |||
|Plains | |||
|-bgcolor=#ECFFEC | |||
|[[File:Icon SMW2-YI - Watch Out Below!.png|link=Watch Out Below!]] | |||
|{{sort|2|1-2}} | |||
|[[Watch Out Below!]] | |||
|Plains | |||
|-bgcolor=#AFFFAA | |||
|[[File:Icon SMW2-YI - The Cave Of Chomp Rock.png|link=The Cave Of Chomp Rock]] | |||
|{{sort|3|1-3}} | |||
|{{sort|Cave Of Chomp Rock, The|[[The Cave Of Chomp Rock]]}} | |||
|Cavern | |||
|-bgcolor=#ECFFEC | |||
|[[File:Icon SMW2-YI - Burt The Bashful's Fort.png|link=Burt The Bashful's Fort]] | |||
|{{sort|4|1-4}} | |||
|[[Burt The Bashful's Fort]] | |||
|Fortress | |||
|-bgcolor=#AFFFAA | |||
|[[File:Icon SMW2-YI - Hop! Hop! Donut Lifts.png|link=Hop! Hop! Donut Lifts]] | |||
|{{sort|5|1-5}} | |||
|[[Hop! Hop! Donut Lifts]] | |||
|Sky | |||
|-bgcolor=#ECFFEC | |||
|[[File:Icon SMW2-YI - Shy-Guys On Stilts.png|link=Shy-Guys On Stilts]] | |||
|{{sort|6|1-6}} | |||
|[[Shy-Guys On Stilts]] | |||
|Plains/Cavern | |||
|-bgcolor=#AFFFAA | |||
|[[File:Icon SMW2-YI - Touch Fuzzy, Get Dizzy.png|link=Touch Fuzzy, Get Dizzy]] | |||
|{{sort|7|1-7}} | |||
|[[Touch Fuzzy, Get Dizzy]] | |||
|Forest | |||
|-bgcolor=#ECFFEC | |||
|[[File:Icon SMW2-YI - Salvo The Slime's Castle.png|link=Salvo The Slime's Castle]] | |||
|{{sort|8|1-8}} | |||
|[[Salvo The Slime's Castle]] | |||
|Castle | |||
|-bgcolor=#AFFFAA | |||
|[[File:Icon SMW2-YI - Poochy Ain't Stupid.png|link=Poochy Ain't Stupid]] | |||
|{{sort|9|Extra 1}} | |||
|[[Poochy Ain't Stupid]] | |||
|Lava Cavern | |||
|-bgcolor=#ECFFEC | |||
|[[File:SMW2-FlipCardsIcon.png|link=Flip Cards]] | |||
|{{sort|10|Bonus 1}} | |||
|[[Flip Cards]] | |||
|Bonus Challenge | |||
|} | |||
|-bgcolor=limegreen | |||
![[File:SMW2 - World 2 (icon).png]] [[World 2 (Super Mario World 2: Yoshi's Island)|World 2]] [[File:SMW2 - World 2 (icon).png]] | |||
|- | |- | ||
| | |bgcolor=#ECFFEC|[[File:World 2 Map SMW2YI.png]] | ||
|- | |- | ||
! | | | ||
{| class="wikitable sortable"style="text-align:center"width=99% align=center | |||
!style="background:limegreen" width=5% class=unsortable|Icon | |||
!data-sort-type="number" style="background:limegreen" width=5%|# | |||
!data-sort-type="alphabetical" style="background:limegreen" width=35%|Level | |||
!style="background:limegreen" width=30%|Type of level | |||
|-bgcolor=#AFFFAA | |||
|[[File:Icon SMW2-YI - Visit Koopa And Para-Koopa.png|link=Visit Koopa And Para-Koopa]] | |||
|{{sort|1|2-1}} | |||
|[[Visit Koopa And Para-Koopa]] | |||
|Sky | |||
|-bgcolor=#ECFFEC | |||
|[[File:Icon SMW2-YI - The Baseball Boys.png|link=The Baseball Boys]] | |||
|{{sort|2|2-2}} | |||
|{{sort|Baseball Boys, The|[[The Baseball Boys]]}} | |||
|Plains | |||
|-bgcolor=#AFFFAA | |||
|[[File:Icon SMW2-YI - What's Gusty Taste Like.png|link=What's Gusty Taste Like?]] | |||
|{{sort|3|2-3}} | |||
|[[What's Gusty Taste Like?]] | |||
|Forest/Cavern | |||
|-bgcolor=#ECFFEC | |||
|[[File:Icon SMW2-YI - Bigger Boo's Fort.png|link=Bigger Boo's Fort]] | |||
|{{sort|4|2-4}} | |||
|[[Bigger Boo's Fort]] | |||
|Fortress | |||
|-bgcolor=#AFFFAA | |||
|[[File:Icon SMW2-YI - Watch Out For Lakitu.png|link=Watch Out For Lakitu]] | |||
|{{sort|5|2-5}} | |||
|[[Watch Out For Lakitu]] | |||
|Plains/Sky | |||
|-bgcolor=#ECFFEC | |||
|[[File:Icon SMW2-YI - The Cave Of The Mystery Maze.png|link=The Cave Of The Mystery Maze]] | |||
|{{sort|6|2-6}} | |||
|{{sort|Cave Of The Mystery Maze, The|[[The Cave Of The Mystery Maze]]}} | |||
|Forest/Cavern | |||
|-bgcolor=#AFFFAA | |||
|[[File:Icon SMW2-YI - Lakitu's Wall.png|link=Lakitu's Wall]] | |||
|{{sort|7|2-7}} | |||
|[[Lakitu's Wall]] | |||
|Plains | |||
|- | |- | ||
|[[File:Icon SMW2-YI - The Potted Ghost's Castle.png|link=The Potted Ghost's Castle]] | |||
|- | |{{sort|8|2-8}} | ||
|{{sort|Potted Ghost's Castle, The|[[The Potted Ghost's Castle]]}} | |||
|Castle | |||
! | |-bgcolor=#AFFFAA | ||
! | |[[File:Icon SMW2-YI - Hit That Switch!!.png|link=Hit That Switch!!]] | ||
| | |{{sort|9|Extra 2}} | ||
|[[Hit That Switch!!]] | |||
|Sky | |||
|- | |- | ||
|[[File:SMW2-ScratchandMatchIcon.png|link=Scratch and Match (minigame)]] | |||
|{{sort|10|Bonus 2}} | |||
|[[Scratch and Match (minigame)|Scratch and Match]] | |||
|Bonus Challenge | |||
|} | |||
|-bgcolor=limegreen | |||
![[File:SMW2 - World 3 (icon).png]] [[World 3 (Super Mario World 2: Yoshi's Island)|World 3]] [[File:SMW2 - World 3 (icon).png]] | |||
|-bgcolor=#ECFFEC | |||
|[[File:World 3 Map SMW2YI.png]] | |||
|- | |- | ||
| align=center style="background:# | | | ||
{| class="wikitable sortable"style="text-align:center"width=99% align=center | |||
!style="background:limegreen" width=5% class=unsortable|Icon | |||
!data-sort-type="number" style="background:limegreen" width=5%|# | |||
!data-sort-type="alphabetical" style="background:limegreen" width=35%|Level | |||
!style="background:limegreen" width=30%|Type of level | |||
|-bgcolor=#AFFFAA | |||
|[[File:Icon SMW2-YI - Welcome To Monkey World!.png|link=Welcome To Monkey World!]] | |||
|{{sort|1|3-1}} | |||
|[[Welcome To Monkey World!]] | |||
|Forest | |||
|-bgcolor=#ECFFEC | |||
|[[File:Icon SMW2-YI - Jungle Rhythm....png|link=Jungle Rhythm...]] | |||
|{{sort|2|3-2}} | |||
|[[Jungle Rhythm...]] | |||
|Forest | |||
|-bgcolor=#AFFFAA | |||
|[[File:Icon SMW2-YI - Nep-Enut's Domain.png|link=Nep-Enut's Domain]] | |||
|{{sort|3|3-3}} | |||
|[[Nep-Enut's Domain]] | |||
|Plains/Forest | |||
|-#ECFFEC | |||
|[[File:Icon SMW2-YI - Prince Froggy's Fort.png|link=Prince Froggy's Fort]] | |||
|{{sort|4|3-4}} | |||
|[[Prince Froggy's Fort]] | |||
|Fortress/Sewer | |||
|-bgcolor=#AFFFAA | |||
|[[File:Icon SMW2-YI - Jammin' Through The Trees.png|link=Jammin' Through The Trees]] | |||
|{{sort|5|3-5}} | |||
|[[Jammin' Through The Trees]] | |||
|Forest/Sky | |||
|-bgcolor=#ECFFEC | |||
|[[File:Icon SMW2-YI - The Cave Of Harry Hedgehog.png|link=The Cave Of Harry Hedgehog]] | |||
|{{sort|6|3-6}} | |||
|{{sort|Cave Of Harry Hedgehog, The|[[The Cave Of Harry Hedgehog]]}} | |||
|Forest/Cave | |||
|-bgcolor=#AFFFAA | |||
|[[File:Icon SMW2-YI - Monkeys' Favorite Lake.png|link=Monkeys' Favorite Lake]] | |||
|{{sort|7|3-7}} | |||
|[[Monkeys' Favorite Lake]] | |||
|Lake/Forest | |||
|-bgcolor=#ECFFEC | |||
|[[File:Icon SMW2-YI - Naval Piranha's Castle.png|link=Naval Piranha's Castle]] | |||
|{{sort|8|3-8}} | |||
|[[Naval Piranha's Castle]] | |||
|Castle/Sewer | |||
|-bgcolor=#AFFFAA | |||
|[[File:Icon SMW2-YI - More Monkey Madness.png|link=More Monkey Madness]] | |||
|{{sort|9|Extra 3}} | |||
|[[More Monkey Madness]] | |||
|Forest/Sky | |||
|-bgcolor=#ECFFEC | |||
|[[File:SMW2-DrawingLotsIcon.png|link=Drawing Lots]] | |||
|{{sort|10|Bonus 3}} | |||
|[[Drawing Lots]] | |||
|Bonus Challenge | |||
|} | |||
|-bgcolor=limegreen | |||
![[File:SMW2 - World 4 (icon).png]] [[World 4 (Super Mario World 2: Yoshi's Island)|World 4]] [[File:SMW2 - World 4 (icon).png]] | |||
|-bgcolor=#ECFFEC | |||
|[[File:World 4 Map SMW2YI.png]] | |||
|- | |- | ||
| align=center style="background:#AFFFAA | | | ||
{| class="wikitable sortable"style="text-align:center"width=99% align=center | |||
!style="background:limegreen" width=5% class=unsortable|Icon | |||
!data-sort-type="number" style="background:limegreen" width=5%|# | |||
!data-sort-type="alphabetical" style="background:limegreen" width=35%|Level | |||
!style="background:limegreen" width=30%|Type of level | |||
|-bgcolor=#AFFFAA | |||
|[[File:Icon SMW2-YI - GO! GO! MARIO!!.png|link=GO! GO! MARIO!!]] | |||
|{{sort|1|4-1}} | |||
|[[GO! GO! MARIO!!]] | |||
|Plains/Valley | |||
|-bgcolor=#ECFFEC | |||
|[[File:Icon SMW2-YI - The Cave Of The Lakitus.png|link=The Cave Of The Lakitus]] | |||
|{{sort|2|4-2}} | |||
|{{sort|Cave Of The Lakitus, Cave|[[The Cave Of The Lakitus]]}} | |||
|Valley/Cavern | |||
|-bgcolor=#AFFFAA | |||
|[[File:Icon SMW2-YI - Don't Look Back!.png|link=Don't Look Back!]] | |||
|{{sort|3|4-3}} | |||
|[[Don't Look Back!]] | |||
|Athletic | |||
|-bgcolor=#ECFFEC | |||
|[[File:Icon SMW2-YI - Marching Milde's Fort.png|link=Marching Milde's Fort]] | |||
|{{sort|4|4-4}} | |||
|[[Marching Milde's Fort]] | |||
|Fortress | |||
|-bgcolor=#AFFFAA | |||
|[[File:Icon SMW2-YI - Chomp Rock Zone.png|link=Chomp Rock Zone]] | |||
|{{sort|5|4-5}} | |||
|[[Chomp Rock Zone]] | |||
|Plains/Valley | |||
|-bgcolor=#ECFFEC | |||
|[[File:Icon SMW2-YI - Lake Shore Paradise.png|link=Lake Shore Paradise]] | |||
|{{sort|6|4-6}} | |||
|[[Lake Shore Paradise]] | |||
|Lake/Forest/Valley/Cavern | |||
|-bgcolor=#AFFFAA | |||
|[[File:Icon SMW2-YI - Ride Like The Wind.png|link=Ride Like The Wind]] | |||
|{{sort|7|4-7}} | |||
|[[Ride Like The Wind]] | |||
|Sky | |||
|-bgcolor=#ECFFEC | |||
|[[File:Icon SMW2-YI - Hookbill The Koopa's Castle.png|link=Hookbill The Koopa's Castle]] | |||
|{{sort|8|4-8}} | |||
|[[Hookbill The Koopa's Castle]] | |||
|Castle | |||
|-bgcolor=#AFFFAA | |||
|[[File:Icon SMW2-YI - The Impossible Maze.png|link=The Impossible? Maze]] | |||
|{{sort|9|Extra 4}} | |||
|{{sort|Impossible? Maze, The|[[The Impossible? Maze]]}} | |||
|Cavern/Sewer | |||
|-bgcolor=#ECFFEC | |||
|[[File:SMW2-MatchCardsIcon.png|link=Match Cards]] | |||
|{{sort|10|Bonus 4}} | |||
|[[Match Cards]] | |||
|Bonus Challenge | |||
|} | |||
|-bgcolor=limegreen | |||
![[File:SMW2 - World 5 (icon).png]] [[World 5 (Super Mario World 2: Yoshi's Island)|World 5]] [[File:SMW2 - World 5 (icon).png]] | |||
|-bgcolor=#ECFFEC | |||
|[[File:World 5 Map SMW2YI.png]] | |||
|- | |- | ||
| align=center style="background:#ECFFEC | | | ||
{| class="wikitable sortable"style="text-align:center"width=99% align=center | |||
!style="background:limegreen" width=5% class=unsortable|Icon | |||
!data-sort-type="number" style="background:limegreen" width=5%|# | |||
!data-sort-type="alphabetical" style="background:limegreen" width=35%|Level | |||
!style="background:limegreen" width=30%|Type of level | |||
|-bgcolor=#AFFFAA | |||
|[[File:Icon SMW2-YI - BLIZZARD!!!.png|link=BLIZZARD!!!]] | |||
|{{sort|1|5-1}} | |||
|[[BLIZZARD!!!]] | |||
|Snow/Plains | |||
|-bgcolor=#ECFFEC | |||
|[[File:Icon SMW2-YI - Ride The Ski Lifts.png|link=Ride The Ski Lifts]] | |||
|{{sort|2|5-2}} | |||
|[[Ride The Ski Lifts]] | |||
|Plains/Snow | |||
|-bgcolor=#AFFFAA | |||
|[[File:Icon SMW2-YI - Danger - Icy Conditions Ahead.png|link=Danger - Icy Conditions Ahead]] | |||
|{{sort|3|5-3}} | |||
|[[Danger - Icy Conditions Ahead]] | |||
|Forest/Plains/Lake/Snow | |||
|-bgcolor=#ECFFEC | |||
|[[File:Icon SMW2-YI - Sluggy The Unshaven's Fort.png|link=Sluggy The Unshaven's Fort]] | |||
|{{sort|4|5-4}} | |||
|[[Sluggy The Unshaven's Fort]] | |||
|Fortress | |||
|-bgcolor=#AFFFAA | |||
|[[File:Icon SMW2-YI - Goonie Rides!.png|link=Goonie Rides!]] | |||
|{{sort|5|5-5}} | |||
|[[Goonie Rides!]] | |||
|Sky | |||
|-bgcolor=#ECFFEC | |||
|[[File:Icon SMW2-YI - Welcome To Cloud World.png|link=Welcome To Cloud World]] | |||
|{{sort|6|5-6}} | |||
|[[Welcome To Cloud World]] | |||
|Sky | |||
|-bgcolor=#AFFFAA | |||
|[[File:Icon SMW2-YI - Shifting Platforms Ahead.png|link=Shifting Platforms Ahead]] | |||
|{{sort|7|5-7}} | |||
|[[Shifting Platforms Ahead]] | |||
|Sky | |||
|-bgcolor=#ECFFEC | |||
|[[File:Icon SMW2-YI - Raphael The Raven's Castle.png|link=Raphael The Raven's Castle]] | |||
|{{sort|8|5-8}} | |||
|[[Raphael The Raven's Castle]] | |||
|Castle | |||
|-bgcolor=#AFFFAA | |||
|[[File:Icon SMW2-YI - Kamek's Revenge.png|link=Kamek's Revenge]] | |||
|{{sort|9|Extra 5}} | |||
|[[Kamek's Revenge]] | |||
|Snow/Sky | |||
|-bgcolor=#ECFFEC | |||
|[[File:SMW2-RouletteIcon.png|link=Roulette]] | |||
|{{sort|10|Bonus 5}} | |||
|[[Roulette]] | |||
|Bonus Challenge | |||
|} | |||
|-bgcolor=limegreen | |||
![[File:SMW2 - World 6 (icon).png]] [[World 6 (Super Mario World 2: Yoshi's Island)|World 6]] [[File:SMW2 - World 6 (icon).png]] | |||
|-bgcolor=#ECFFEC | |||
|[[File:World 6 Map SMW2YI.png]] | |||
|- | |- | ||
| align=center style="background: | | | ||
|- | {| class="wikitable sortable"style="text-align:center"width=99% align=center | ||
| | !style="background:limegreen" width=5% class=unsortable|Icon | ||
!data-sort-type="number" style="background:limegreen" width=5%|# | |||
!data-sort-type="alphabetical" style="background:limegreen" width=35%|Level | |||
!style="background:limegreen" width=30%|Type of level | |||
|-bgcolor=#AFFFAA | |||
|- | |[[File:Icon SMW2-YI - Scary Skeleton Goonies!.png|link=Scary Skeleton Goonies!]] | ||
| | |{{sort|1|6-1}} | ||
|- | |[[Scary Skeleton Goonies!]] | ||
|Lava/Cavern | |||
|- | |-bgcolor=#ECFFEC | ||
| | |[[File:Icon SMW2-YI - The Cave Of The Bandits.png|link=The Cave Of The Bandits]] | ||
|- | |{{sort|2|6-2}} | ||
|{{sort|Cave Of The Bandits, The|[[The Cave Of The Bandits]]}} | |||
! | |Lava/Cavern | ||
|-bgcolor=#AFFFAA | |||
|[[File:Icon SMW2-YI - Beware The Spinning Logs.png|link=Beware The Spinning Logs]] | |||
| | |{{sort|3|6-3}} | ||
| | |[[Beware The Spinning Logs]] | ||
| | |Lava/Sky | ||
| | |-bgcolor=#ECFFEC | ||
| | |[[File:Icon SMW2-YI - Tap-Tap The Red Nose's Fort.png|link=Tap-Tap The Red Nose's Fort]] | ||
| | |{{sort|4|6-4}} | ||
| | |[[Tap-Tap The Red Nose's Fort]] | ||
|Fortress | |||
|-bgcolor=#AFFFAA | |||
|[[File:Icon SMW2-YI - The Very Loooooong Cave.png|link=The Very Loooooong Cave]] | |||
|{{sort|5|6-5}} | |||
|{{sort|Very Loooooong Cave, The|[[The Very Loooooong Cave]]}} | |||
|Lava/Cavern | |||
|-bgcolor=#ECFFEC | |||
|[[File:Icon SMW2-YI - The Deep, Underground Maze.png|link=The Deep, Underground Maze]] | |||
|{{sort|6|6-6}} | |||
|{{sort|Deep Underground Maze, The|[[The Deep, Underground Maze]]}} | |||
|Cavern | |||
|-bgcolor=#AFFFAA | |||
|[[File:Icon SMW2-YI - KEEP MOVING!!!!.png|link=KEEP MOVING!!!!]] | |||
|{{sort|7|6-7}} | |||
|[[KEEP MOVING!!!!]] | |||
|Hill/Castle | |||
|-bgcolor=#ECFFEC | |||
|[[File:Icon SMW2-YI - King Bowser's Castle.png|link=King Bowser's Castle (Super Mario World 2: Yoshi's Island)]] | |||
|{{sort|8|6-8}} | |||
|[[King Bowser's Castle (Super Mario World 2: Yoshi's Island)|King Bowser's Castle]] | |||
|Castle | |||
|-bgcolor=#AFFFAA | |||
|[[File:Icon SMW2-YI - Ultimate Castle Challenge.png|link=Ultimate Castle Challenge]] | |||
|{{sort|9|Extra 6}} | |||
|[[Ultimate Castle Challenge|Castles - Masterpiece Set]] | |||
|Castle/Fortress | |||
|-bgcolor=#ECFFEC | |||
|[[File:SMW2-SlotMachineIcon.png|link=Slot Machine (Yoshi's Island series)]] | |||
|{{sort|10|Bonus 6}} | |||
|[[Slot Machine (Yoshi's Island series)|Slot Machine]] | |||
|Bonus Challenge | |||
|} | |||
|} | |} | ||
==Characters== | ==Characters== | ||
===Playable characters=== | ===Playable characters=== | ||
The Yoshi species are the primary playable characters of the game and this appearance is their first starring appearance in a platformer title. All Yoshis play identically to each other, and ''Super Mario World 2: Yoshi's Island'' introduces even more color variations to the Yoshi species: in addition to the Green, Red, Blue and Yellow Yoshis that are present in ''Super Mario World'', Pink, Light Blue, Purple, and Brown Yoshis are introduced. While Pink, Light Blue, and Purple Yoshis become mainstay colors in future installments of the overall ''Super Mario'' franchise, Brown Yoshis remain exclusive to this title, being replaced by Orange Yoshis. The Yoshis in this game retain their long tongues and their abilities to eat most objects from ''Super Mario World'', though the game introduces [[Flutter Jump|Hovering Jump]]s, turning enemies and objects into eggs that can be used as projectiles, and [[Ground Pound|pounding the ground]]. | |||
The Yoshi colors are specific to the levels they are played on. | |||
{{content appearances|wikitable=y| | |||
|image1=[[File:GreenYoshi-SMW2YI.png]] | |||
|name1=[[Yoshi|Green Yoshi]] | |||
|description1=The Green Yoshi is playable in the most levels of all Yoshis, with a total of eighteen, as it is always playable in the tutorial level, the first level of each world, extra levels, Mini Battles, and [[King Bowser's Castle (Super Mario World 2: Yoshi's Island)|King Bowser's Castle]]. It also fights the fewest bosses of all Yoshis, with a total of two (including [[Mega Baby Bowser|Big Baby Bowser]]). | |||
|firstlevel1=[[Welcome To Yoshi's Island]] | |||
|lastlevel1=[[Ultimate Castle Challenge|Castles - Masterpiece Set]] | |||
|image2=[[File:PinkYoshi-SMW2YI.png]] | |||
|name2=[[Yoshi (species)|Pink Yoshi]] | |||
|description2=The Pink Yoshi is always playable in the second level of each world.{{footnote|main|a}} | |||
|firstlevel2=[[Watch Out Below!]] | |||
|lastlevel2=[[The Cave Of The Bandits]] | |||
|image3=[[File:LightBlueYoshi-SMW2YI.png]] | |||
|name3=[[Yoshi (species)|Light Blue Yoshi]] | |||
|description3=The Light Blue Yoshi is always playable in the third level of each world. | |||
|firstlevel3=[[The Cave Of Chomp Rock]] | |||
|lastlevel3=[[Beware The Spinning Logs]] | |||
|image4=[[File:YellowYoshi-SMW2YI.png]] | |||
|name4=[[Yoshi (species)|Yellow Yoshi]] | |||
|description4=The Yellow Yoshi is always playable in [[Fortress|fort]]s, the fourth level of each world, and always fight against bosses here. | |||
|firstlevel4=[[Burt The Bashful's Fort]] | |||
|lastlevel4=[[Tap-Tap The Red Nose's Fort]] | |||
|image5=[[File:PurpleYoshi-SMW2YI.png]] | |||
|name5=[[Yoshi (species)|Purple Yoshi]] | |||
|description5=The Purple Yoshi is always playable in the fifth level of each world. | |||
|firstlevel5=[[Hop! Hop! Donut Lifts]] | |||
|lastlevel5=[[The Very Loooooong Cave]] | |||
|image6=[[File:BrownYoshi-SMW2YI.png]] | |||
|name6=[[Yoshi (species)|Brown Yoshi]] | |||
|description6=The Brown Yoshi is always playable in the sixth level of each world. | |||
|firstlevel6=[[Shy-Guys On Stilts]] | |||
|lastlevel6=[[The Deep, Underground Maze]] | |||
|image7=[[File:RedYoshi-SMW2YI.png]] | |||
|name7=[[Yoshi (species)|Red Yoshi]] | |||
|description7=The Red Yoshi is always playable in the seventh level of each world.{{footnote|main|a}} | |||
|firstlevel7=[[Touch Fuzzy, Get Dizzy]] | |||
|lastlevel7=[[KEEP MOVING!!!!]] | |||
|image8=[[File:BlueYoshi-SMW2YI.png]] | |||
|name8=[[Yoshi (species)|Blue Yoshi]] | |||
|description8=The Blue Yoshi is playable in the fewest levels of all Yoshis, with a total of five, as it is playable in [[castle]]s, the eighth level of each world, with the exception of World 6, where the Green Yoshi takes the role instead. | |||
|firstlevel8=[[Salvo The Slime's Castle]] | |||
|lastlevel8=[[Raphael The Raven's Castle]] | |||
}} | |||
{{footnote|note|a|The Yoshis' positions on the map screen are swapped, with the Pink Yoshi at the seventh level and the Red Yoshi at the second. This was corrected in the Game Boy Advance version.}} | |||
===Supporting characters=== | ===Supporting characters=== | ||
While ''Yoshi'' games prior feature adult [[Mario]] in a starring role while Yoshi accrues a more passive role, such as ''[[Yoshi (game)|Yoshi]]'', ''[[Yoshi's Cookie]]'', and ''[[Yoshi's Safari]]'', ''Super Mario World 2: Yoshi's Island'' and further entries in the ''Yoshi's Island'' series flips the roles in which the Yoshis are the primary, controllable stars while Mario, as baby Mario, rides on Yoshis and acts as their timed health meter should they get hurt by enemies or objects. Baby Mario is directly controllable only under the effects of the Super Star as [[Powerful Mario|Superstar Mario]] where he dons a yellow cape and becomes invincible. [[Luigi]] makes his debut in the overall ''Yoshi'' franchise as baby Luigi, though his role mirrors [[Princess Peach]] of the ''Super Mario'' franchise in that he is kidnapped and the overall goal of the game is to rescue him from [[Kamek]] and [[baby Bowser]]'s clutches. | |||
| | |||
Two supporting characters are introduced in ''Super Mario World 2: Yoshi's Island'' and make recurring appearances throughout the ''Yoshi'' franchise. The [[stork]], designed after the {{wp|white stork}} representing an animal of folklore known to deliver babies to parents, gets ambushed and kidnapped alongside baby Luigi at the start of the game. The latter character [[Poochy]] is a dog-like creature that follows Yoshi around and Yoshi can ride on who can run on dangerous terrain such as lava and spikes. | |||
{{content description|wikitable=y| | |||
| | |image1=[[File:SMW2YIBabyMarioSprite.png]] | ||
| | |name1=[[Baby Mario]] | ||
| | |description1=Mario as an infant. The Yoshis have to transport him and take care of him throughout the game. Players can control him when he obtains a [[Super Star]]. | ||
| | |image2=[[File:BabyLuigi - SMW2YI.png]] | ||
| | |name2=[[Baby Luigi]] | ||
|description2=Luigi as an infant. He is kidnapped by [[Kamek]] and, similar to [[Princess Peach]] of the ''[[Super Mario (franchise)|Super Mario]]'' franchise, he needs to be rescued. | |||
| | |image3=[[File:Hung Stork.png]] | ||
| | |name3=[[Stork]] | ||
| | |description3=The bird that delivers baby Mario and baby Luigi to their parents. The stork is captured by Kamek, alongside baby Luigi. | ||
|image4=[[File:SMW2 Poochy.png]] | |||
| | }} | ||
|The bird that delivers | |||
| | ====Helpers==== | ||
Six helpful, generic characters assist Yoshis should they meet them. They are all harmless characters and help Yoshis either navigate through the course or provide Yoshis with ammunition such as [[Melon Bug]]s and [[Huffin Puffin]]s. | |||
{{Content appearances|wikitable=y| | |||
|image1=[[File:Melon Bug.png]] [[File:SMW2 Melon Bug roll.png]] | |||
| | |name1=[[Melon Bug]] | ||
| | |description1=Pill bug-like creatures that can roll up into balls and be used as projectiles which can defeat a wide variety of enemies, including [[Tap-Tap]]s. | ||
| | |firstlevel1=[[Touch Fuzzy, Get Dizzy]] | ||
|Pill bug-like creatures that can roll up into balls and be used as projectiles which can defeat a wide variety of enemies, including [[Tap-Tap]]s. | |lastlevel1=[[Chomp Rock Zone]] | ||
| | |image2=[[File:SMW2 Roger Lift.png]] | ||
| | |name2=[[Liquid lift]] | ||
| | |description2=A water spirit that lifts Yoshi to higher places by moving fluidly in a looping motion. | ||
| | |firstlevel2=[[Salvo The Slime's Castle]] | ||
|- | |lastlevel2=[[Salvo The Slime's Castle]] | ||
| | |image3=[[File:SMW2 Poochy.png]] | ||
| | |name3=[[Poochy]] | ||
| | |description3=A dog that can run across dangerous terrain. He travels in the same direction a Yoshi faces, and he follows a Yoshi. | ||
| | |firstlevel3=[[Poochy Ain't Stupid]] | ||
|lastlevel3=[[Jungle Rhythm...]] | |||
| | |image4=[[File:HuffinPuffinSpriteYI.png]] | ||
| | |name4=[[Huffin Puffin]] | ||
|description4=A fat chicken based on a duck that wanders around with chicks following. The chicks can be used as replacements for eggs. | |||
|firstlevel4=[[Nep-Enut's Domain]] | |||
| | |lastlevel4=[[Welcome To Cloud World]] | ||
| | |image5=[[File:Muddy Buddy.png]] | ||
|} | |name5=[[Muddy Buddy]] | ||
|description5=A creature out of mud that covers a Yoshi's feet, allowing Yoshis to safely traverse over spikes. | |||
|firstlevel5=[[Sluggy The Unshaven's Fort]] | |||
|lastlevel5=[[Sluggy The Unshaven's Fort]] | |||
|image6=[[File:SupportGhost.png]] | |||
|name6=[[Blarggwich|Support Ghost]] | |||
|description6=A monochrome [[Blargg]] with a [[Lift|Flatbed Ferry]] atop its head that takes Yoshi through treacherous terrain. | |||
|firstlevel6=[[Sluggy The Unshaven's Fort]] | |||
|lastlevel6=[[Sluggy The Unshaven's Fort]] | |||
}} | |||
===Enemies=== | ===Enemies=== | ||
{{content appearances|wikitable=y| | |||
|image1=[[File:SMW2-AquaLakitu.png]] | |||
|name1=[[Aqua Lakitu]] | |||
|description1=A Lakitu that hides underwater and throws [[Spiny Egg]]s at a Yoshi. Yoshis can defeat them when they come up from the water to attack. | |||
|firstlevel1=[[Naval Piranha's Castle]] | |||
|lastlevel1=[[Naval Piranha's Castle]] | |||
|image2=[[File:Bandit-SMW2.png]] [[File:SMW2 Bandit hide.png]] | |||
|name2=[[Bandit]] | |||
|description2=Thieves that attempt to steal baby Mario from Yoshi. It takes six eggs, three jumps or Pound the Ground to defeat them. They appear in [[Mini Battle]]s as the opponent a Yoshi faces. | |||
|firstlevel2=[[Salvo The Slime's Castle]] | |||
|lastlevel2=[[King Bowser's Castle (Super Mario World 2: Yoshi's Island)|King Bowser's Castle]] | |||
|image3=[[File:BarneyBubble SMW2.png]] | |||
|name3=[[Barney Bubble]] | |||
|description3=Circular, purple enemies that quickly run back forth. Eggs or jumping on them can defeat them, though they cannot be eaten. When stomped on, they produce bubbles that a Yoshi can use. | |||
|firstlevel3=[[Monkeys' Favorite Lake]] | |||
|lastlevel3=[[Monkeys' Favorite Lake]] | |||
|image4=[[File:SMW2 Baron von Zeppelin R.png]] [[File:SMW2 Baron von Zeppelin Y.png]] [[File:BaronVonZepplin.png]] [[File:SMW2 Baron von Zeppelin M.png]] | |||
|name4=[[Item Balloon|Baron von Zeppelin]] | |||
|description4=A balloon that carries either helpful objects or harmful objects. They drop their item they are holding when a Yoshi approaches from underneath, or, in the case of helpful items only, when a Yoshi touches them or hits them with an egg. | |||
|firstlevel4=[[Make Eggs, Throw Eggs]] | |||
|lastlevel4=[[King Bowser's Castle (Super Mario World 2: Yoshi's Island)|King Bowser's Castle]] | |||
|image5=[[File:SMW2-BeachKoopaRed.png]] [[File:SMW2YI - Beach Koopa.png]] | |||
|name5=[[Unshelled Koopa Troopa|Beach Koopa]] | |||
|description5=A shell-less Koopa Troopa. They can be defeated by eating them, throwing eggs on them, or stomping them. If they find a shell, they wear it. | |||
|firstlevel5=[[Visit Koopa And Para-Koopa]]<br>(red)<br>[[GO! GO! MARIO!!]]<br>(green) | |||
|lastlevel5=[[Hookbill The Koopa's Castle | |||
===Bosses=== | ===Bosses=== | ||
[[File:RaphaelTheRavensCastle2.png|thumb|200px|Yoshi fighting the boss of World 5, Raphael the Raven.]] | [[File:RaphaelTheRavensCastle2.png|thumb|200px|Yoshi fighting the boss of World 5, Raphael the Raven.]] | ||
Each world features a midway fort and an end-world castle (the | Each world features a midway fort (the fourth level) and an end-world castle (the eighth level) with a mid-boss and a big boss respectively. Every boss is just an enlarged version of a basic enemy that [[Kamek]] super-sizes with his magic. The only exception is [[Froggy]], who remains at his normal size while Yoshi and baby Mario are shrunk; he then eats them and the battle is located in his stomach. | ||
{{br}} | |||
====Mid-bosses==== | |||
{{content description|wikitable=y| | |||
|image1=[[File:SMW2 Burt the Bashful.png]] | |||
|name1=[[Burt the Bashful]] | |||
|description1=Burt the Bashful is the mid-boss of [[World 1 (Super Mario World 2: Yoshi's Island)|World 1]], fought at the end of [[Burt The Bashful's Fort]]. He is an enlarged Burt that Yellow Yoshi must defeat by throwing eggs at him. Burt attacks Yellow Yoshi by bouncing around. Whenever Burt is hurt, his pants lower; he is defeated when his pants are gone entirely. It takes six hits to defeat him. | |||
|image2=[[File:BiggerBoo'sFort.png]] | |||
|name2=[[Bigger Boo]] | |||
| | |description2=Bigger Boo is the mid-boss of [[World 2 (Super Mario World 2: Yoshi's Island)|World 2]], fought at the end of [[Bigger Boo's Fort]]. He is an enlarged Big Boo that chases around Yellow Yoshi when Yellow Yoshi is turned away. When Yellow Yoshi looks at Bigger Boo, he turns invisible and therefore, cannot be hit. To defeat Bigger Boo, Yellow Yoshi must ricochet eggs off walls so that it hits him while he is following Yellow Yoshi as Yellow Yoshi looks away. Every time Bigger Boo is hit, he grows in size; hitting him five times defeats him. | ||
|image3=[[File:SMW2 Prince Froggy inside.png]] | |||
| | |name3=[[Froggy]] | ||
| | |description3=Froggy is the mid-boss of [[World 3 (Super Mario World 2: Yoshi's Island)|World 3]], fought at the end of [[Prince Froggy's Fort]]. He is a normal Frog Pirate that eats Yellow Yoshi when he is shrunk by Kamek. The battle takes place in Froggy's stomach, where Yellow Yoshi needs to hit the uvula at the top of the stomach with eggs. The main hazards in this battle are the gastric acid and the Shy-Guys (appearing [[Mega Guy|big]] to Yoshi) Froggy eats. | ||
|image4=[[File:SMW2YI - Marching Milde.png]] | |||
|name4=[[Marching Milde]] | |||
| | |description4=Marching Milde is the mid-boss of [[World 4 (Super Mario World 2: Yoshi's Island)|World 4]], fought at the end of [[Marching Milde's Fort]]. She is a large Milde who attacks by walking left and right, where she hurts Yellow Yoshi from the sides. To attack her, Yellow Yoshi needs to Pound The Ground below her from above, which causes her to split to two extra large [[Puchipuchi L]]. Yellow Yoshi needs to Pound The Ground on them again to turn them into common sized Puchipuchi L, and then again to turn them into regular Mildes. Once all Mildes are defeated, the boss battle is won. | ||
|image5=[[File:SMW2YI - Sluggy the Unshaven.png]] | |||
| | |name5=[[Sluggy the Unshaven]] | ||
| | |description5=Sluggy the Unshaven is the mid-boss of [[World 5 (Super Mario World 2: Yoshi's Island)|World 5]], fought at the end of [[Sluggy The Unshaven's Fort]]. He is an enlarged Sluggy whose weak point is a heart that Yellow Yoshi needs to attack in order to damage him. To reach his heart, Yellow Yoshi needs to throw eggs at his gelatinous skin, which exposes the heart with every hit. Sluggy does not damage Yellow Yoshi, but he can push Yellow Yoshi over a pit if he advances far enough. | ||
|image6=[[File:SMW2YI - Tap-Tap the Red Nose.png]] | |||
|name6=[[Tap-Tap the Red Nose]] | |||
| | |description6=Tap-Tap the Red Nose is the mid-boss of [[World 6 (Super Mario World 2: Yoshi's Island)|World 6]], fought at the end of [[Tap-Tap The Red Nose's Fort]]. He is an invincible boss that attacks Yellow Yoshi by jumping onto the Yoshi. To defeat the boss, Yellow Yoshi needs to destroy the blocks on the floor to create a gap that leads to the lava and then push Tap-Tap the Red Nose into the lava by throwing eggs at him. | ||
}} | |||
| | |||
| | ====Big bosses==== | ||
{{content description|wikitable=y| | |||
|image1=[[File:SMW2YI - Salvo the Slime.png]] | |||
| | |name1=[[Salvo the Slime]] | ||
|description1=Salvo the Slime is the big boss of [[World 1 (Super Mario World 2: Yoshi's Island)|World 1]], fought at the end of [[Salvo The Slime's Castle]]. He is an enlarged Slime where Blue Yoshi must defeat him by throwing eggs at him. Whenever Salvo takes a hit, he reduces in size and releases Lemon Drops. Salvo additionally attacks by bouncing around, and the smaller he gets, the faster he moves around. He attempts to attack Yoshi by pushing him to the edge of the room, with lava as the obstacle. | |||
| | |image2=[[File:SMW2YI - Roger the Potted Ghost.png]] | ||
|name2=[[Roger the Potted Ghost]] | |||
|description2=Roger the Potted Ghost is the big boss of [[World 2 (Super Mario World 2: Yoshi's Island)|World 2]], fought at the end of [[The Potted Ghost's Castle]]. He is a large ghost growing from a pot that is a stationary target. In order to defeat Roger, Blue Yoshi needs to push the pot he is stationed at off a cliff, where other Shy-Guys resist Blue Yoshi's efforts from the other side. Roger can also lunge and shoot fire at Blue Yoshi. | |||
|image3=[[File:SMW2 Naval.png]] | |||
|name3=[[Naval Piranha]] | |||
|description3=Naval Piranha is the big boss of [[World 3 (Super Mario World 2: Yoshi's Island)|World 3]], fought at the end of [[Naval Piranha's Castle]]. It is an enlarged Wild Piranha that attacks Blue Yoshi with [[Nipper Spore]]s and its two buds. Its weakness is the bandaged bump where Blue Yoshi can throw eggs at. Blue Yoshi can also defeat Naval Piranha in one hit before it even enlarges by throwing an egg at it before Blue Yoshi approaches the area. | |||
| | |image4=[[File:Hookbill-SMW2.png]] | ||
| | |name4=[[Hookbill the Koopa]] | ||
|description4=Hookbill the Koopa is the big boss of [[World 4 (Super Mario World 2: Yoshi's Island)|World 4]], fought at the end of [[Hookbill The Koopa's Castle]]. He is an enlarged Koopa Troopa who attacks by lunging towards Blue Yoshi. Blue Yoshi needs to toss several eggs at Hookbill's head or arms to topple him over, where Blue Yoshi needs to Pound The Ground on his belly to damage him. After Hookbill has been damaged, he retreats into his shell and pounds the ground repeatedly. Once this attack is finished, he resumes his normal attack pattern. | |||
|image5=[[File:SMW2YI - Raphael the Raven.png]] | |||
|name5=[[Raphael the Raven]] | |||
| | |description5=Raphael the Raven is the big boss of [[World 5 (Super Mario World 2: Yoshi's Island)|World 5]], fought at the end of [[Raphael The Raven's Castle]]. He is an enlarged Raven where the battle takes place on the moon. Blue Yoshi needs to pound on stakes on the opposite side as Raphael in order to damage him. Raphael attacks by chasing Blue Yoshi, as well as Pounding The Ground to create shockwaves that circle the moon. Every time Raphael is hit, he obtains a faster attack pattern; three hits defeats him. | ||
| | |image6=[[File:SnesBabyBowser.PNG]] | ||
|name6=[[Baby Bowser]] | |||
|description6=Baby Bowser is the big boss of [[World 6 (Super Mario World 2: Yoshi's Island)|World 6]], fought at the end of [[King Bowser's Castle (Super Mario World 2: Yoshi's Island)|King Bowser's Castle]]. He is one of the antagonists of the game and has two phases. The first phase involves baby Bowser in his normal form, where he tries to Pound The Ground on the Green Yoshi to ride on him. Green Yoshi can attack baby Bowser by Pounding The Ground, using the shockwaves as an attack. | |||
|image7=[[File:SMW2 Big Baby Bowser far.png]] [[File:SMW2 Baby Bowser 2.png]] | |||
|name7=[[Mega Baby Bowser|Big Baby Bowser]] | |||
|description7=In the [[World 6 (Super Mario World 2: Yoshi's Island)|World 6]] castle [[King Bowser's Castle (Super Mario World 2: Yoshi's Island)|King Bowser's Castle]], when Green Yoshi delivers three hits to Baby Bowser, Kamek enlarges baby Bowser, starting the second phase of the fight. In order to attack Big Baby Bowser, who approaches from the background, Green Yoshi needs to obtain Giant Eggs from Baron von Zeppelins that occasionally fly in. Big Baby Bowser attacks by sending flying rocks, breathing fireballs at Green Yoshi, and charging into Green Yoshi. He is defeated when Green Yoshi hits him seven times. If Big Baby Bowser gets too close, he destroys the platform Green Yoshi is standing on, defeating Green Yoshi. | |||
| | }} | ||
| | |||
| | |||
| | |||
| | |||
| | |||
| | |||
| | |||
| | |||
| | |||
| | |||
| | |||
| | |||
| | |||
| | |||
| | |||
| | |||
| | |||
| | |||
==Transformations== | ==Transformations== | ||
===Metamorphosis bubble=== | ===Metamorphosis bubble=== | ||
Entering a [[morph bubble|metamorphosis bubble]] causes Yoshi to be transformed into one of several different types of vehicles, each with their own unique capabilities. While in this state, Yoshi is allowed to move around as the vehicle without | Entering a [[morph bubble|metamorphosis bubble]] causes Yoshi to be transformed into one of several different types of vehicles, each with their own unique capabilities. While in this state, Yoshi is allowed to move around as the vehicle without baby Mario for a limited time before being pulled back to the metamorphosis bubble and being turned back to normal. If the player is able to hit a [[Yoshi Block]] while transformed, the transformation is automatically reversed at that location. | ||
{{content appearances|wikitable=y| | |||
{| | |image1=[[File:SMW2 Helicopter Yoshi pink.png]] | ||
| | |name1=[[Helicopter Yoshi|Helicopter]] | ||
|description1=Allows a Yoshi to fly around for a brief time. | |||
|firstlevel1=[[Watch Out Below!]] | |||
|lastlevel1=[[King Bowser's Castle (Super Mario World 2: Yoshi's Island)|King Bowser's Castle]] | |||
| | |image2=[[File:SMW2 Mole Tank brown.png]] | ||
|name2=[[Mole Tank]] | |||
| | |description2=Allows a Yoshi to tunnel through sections of dirt. | ||
|Allows a Yoshi to fly around for a brief time. | |firstlevel2=[[Shy-Guys On Stilts]] | ||
| | |lastlevel2=[[The Impossible? Maze]] | ||
| | |image3=[[File:SMW2 Train Yoshi purple.png]] | ||
| | |name3=[[Train (form)|Train]] | ||
|Allows a Yoshi to tunnel through sections of dirt. | |description3=Allows a Yoshi to move along tracks seen in the background. | ||
| | |firstlevel3=[[Watch Out For Lakitu]] | ||
|lastlevel3=[[Raphael The Raven's Castle]] | |||
| | |image4=[[File:SMW2YI - Car -Red.png]] | ||
| | |name4=[[Car Yoshi|Vehicle]] | ||
|description4=Allows a Yoshi to move quickly across land. The Yoshi can increase the height of its suspension, allowing it to avoid enemies and reach higher areas. | |||
|firstlevel4=[[Lakitu's Wall]] | |||
| | |lastlevel4=[[Lakitu's Wall]] | ||
|Allows a Yoshi to move along tracks seen in the background. | |image5=[[File:SMW2YI - Submarine -LightBlue.png]] | ||
| | |name5=[[Submarine Yoshi|Submarine]] | ||
| | |description5=Allows a Yoshi to move around underwater and fire torpedoes. | ||
| | |firstlevel5=[[Nep-Enut's Domain]] | ||
|Allows a Yoshi to move quickly across land. The Yoshi can increase the height of its suspension, allowing it to avoid enemies and reach higher areas. | |lastlevel5=[[Monkeys' Favorite Lake]] | ||
|} | }} | ||
===Other transformations=== | ===Other transformations=== | ||
{| | {{content appearances|wikitable=y| | ||
|image1=[[File:SMW2YI - Superstar Mario.png]] | |||
|name1=[[Superstar Mario|Powerful Mario]] | |||
|description1=Collecting a [[Super Star]] causes baby Mario to be temporarily transformed into [[Superstar Mario|Powerful Mario]]. While in this state, baby Mario can run around without needing to ride Yoshi, completely invincible. Powerful Mario is also capable of running on walls, ceilings, and spikes, and can glide with his cape. | |||
|firstlevel1=[[Visit Koopa And Para-Koopa]] | |||
| | |lastlevel1=[[KEEP MOVING!!!!]] | ||
| | |image2=[[File:SMW2 Ski Yoshi light blue.png]] | ||
| | |name2=[[Ski Yoshi]] | ||
|Collecting a [[Super Star]] causes | |description2=Attained upon entering a house in certain snow levels, this causes a Yoshi to don ski equipment to traverse across hills and ramps. The Yoshi stays in this form until the level is completed or he fails. If a Ski Yoshi hits an obstacle or fails the ramp jump, the Yoshi rolls over and becomes a snowball. While in this form, the Yoshi is invincible, but the player can control the Yoshi nor jump. | ||
|- | |firstlevel2=[[Danger - Icy Conditions Ahead]] | ||
| | |lastlevel2=[[Kamek's Revenge]] | ||
| | }} | ||
|Attained upon entering a house in certain snow levels, this causes a Yoshi to don ski equipment to traverse across hills and ramps. The Yoshi stays in this form until the level is completed or he fails. | |||
|} | |||
{{br}} | {{br}} | ||
==Items | ==Items== | ||
{| | {{content description|wikitable=y| | ||
| | |image1=[[File:SMW2-1UP.png]] [[File:SMW2 1-Up cloud.png]] | ||
|name1=[[Extra life|1-Up]] | |||
|description1=Provide an extra life if collected; usually carried by [[Fly Guy]]s, [[bubble]]s, and [[Winged Cloud]]s. | |||
|image2=[[File:SMW2YI Boss Key.png]] | |||
| | |name2=[[Key|Big Key]] | ||
|description2=Huge keys held by each world boss, these lead to the next world. | |||
| | |image3=[[File:SMW2YI - Watermelon blue.png]] | ||
| | |name3=[[Ice watermelon|Blue watermelon]] | ||
| | |description3=Watermelons that give Yoshis the ability to breathe frost, allowing them to freeze enemies. | ||
|image4=[[File:SMW2YI - Coin.png]] [[File:SMW2 Coin alt.png]] | |||
| | |name4=[[Coin]] | ||
| | |description4=Currency that, when 100 are collected, grants Yoshi an extra life. | ||
| | |image5=[[File:SMW2YI Flashing Egg.gif]] | ||
|name5=[[Flashing Egg]] | |||
| | |description5=Eggs that release a red coin when a Yoshi strikes an enemy with it. | ||
| | |image6=[[File:SMW2 Giant Yoshi Egg.png]] [[File:SMW2 Giant Egg red.png]] | ||
| | |name6=[[Giant Egg]] | ||
|description6=Giant Yoshi Eggs that can defeat all on-screen enemies merely from the shock-wave they give off when thrown. | |||
| | |image7=[[File:SMW2 Green Shell.png]] | ||
| | |name7=[[Green Shell]] | ||
| | |description7=Shells that can be carried by Yoshi. Despite this, Yoshi cannot swallow them due to them being hard and inedible and they still can hurt Yoshi when they are sliding on the ground. | ||
|image8=[[File:SMW2 Hidden Coin.png]] | |||
| | |name8=[[Hidden Coin]] | ||
| | |description8=Coins that cannot be collected unless they are made to appear with a [[! Switch|Switch]]. | ||
|image9=[[File:SMW2 Key.png]] | |||
| | |name9=[[Key]] | ||
| | |description9=Keys that can be collected and carried like Yoshi Eggs, taking up one space of the player's maximum number of eggs. | ||
| | |image10=[[File:SMW2 Red Coin.png]] | ||
| | |name10=[[Red Coin|Red coin]] | ||
|description10=Coins that are hidden behind regular gold coins. There are 20 of them in each level and grabbing one adds one point to Yoshi's score tally at the end of the level. | |||
| | |image11=[[File:SMW2 Red Egg.png]] | ||
| | |name11=[[Red Egg]] | ||
| | |description11=A red Yoshi Egg that causes two Stars to appear when it hits an enemy or other destroyable object (such as a Winged Cloud). | ||
|image12=[[File:SMW2 Red Shell.png]] | |||
| | |name12=[[Red Shell]] | ||
| | |description12=A Red Koopa Shell that can be used by spitting it out. Despite this, it cannot be used for making eggs and can still hurt Yoshi when they are sliding on the ground. | ||
|image13=[[File:SMW2YI - Watermelon red.png]] | |||
|name13=[[Fire watermelon|Red watermelon]] | |||
| | |description13=Watermelons that give Yoshis to breathe fire, allowing them to burn enemies and melt Ice Blocks. | ||
| | |image14=[[File:SMW2 Special Flower unbloomed.png]] [[File:Smiley Flower SMW2YI sprite.png]] | ||
| | |name14=[[Smiley Flower|Special Flower]] | ||
|description14=Special Flowers that serve as collectibles. Netting all five flowers earns Yoshi an extra life and fifty points toward the completion score. Getting all the flowers in each level is also necessary for Yoshi to get a perfect score. Collecting at least one flower is also necessary to access a Bonus Challenge via the Goal Ring, and the chance of playing a Bonus Challenge is increased by collecting more. | |||
| | |image15=[[File:Sprite Star Yoshis Island.png]] | ||
| | |name15=[[Star (Yoshi's Island series)|Star]] | ||
|description15=Stars that add one more second to Yoshi's [[Countdown Timer]]. | |||
|image16=[[File:Super Star.PNG]] | |||
| | |name16=[[Super Star]] | ||
| | |description16=Turns [[Baby Mario]] into [[Superstar Mario|Powerful Mario]]. | ||
| | |image17=[[File:SMW2YI - Watermelon.png]] [[File:SMW2YI - Watermelon bite.png]] [[File:SMW2 Watermelon seed.png]] | ||
|name17=[[Watermelon]] | |||
| | |description17=Fruit that gives Yoshis the ability to shoot seeds. Watermelons with bite marks come with only a third of the seeds. | ||
| | |image18=[[File:SMW2 Yellow Egg.png]] | ||
| | |name18=[[Yellow Egg]] | ||
|description18=Yoshi Eggs that can be acquired if Yoshi throws a green egg that recoils once from the wall. | |||
| | |image19=[[File:SMW2YI - Yoshi Egg.png]] | ||
| | |name19=[[Yoshi's Egg|Yoshi Egg]] | ||
| | |description19=Eggs that can be used as projectiles and can be obtained from eating enemies or hitting an Egg Block. Only six eggs can be carried at one time. | ||
}} | |||
| | |||
| | ==Objects== | ||
| | {{content description|wikitable=y| | ||
|image1=[[File:SMW2 ! Block.png]] | |||
| | |name1=[[! Block]] | ||
| | |description1=Dotted Line Blocks that turn into these blocks after a Yoshi activates a ! Switch. | ||
|image2=[[File:SMW2 Air pump.png]] | |||
| | |name2=Air pump<ref>Miller, Kent, and Terry Munson. ''Super Mario World 2: Yoshi's Island'' Player's Guide. Page 81.</ref> | ||
|description2=Inflates a [[Red balloon (object)|red balloon]] when jumped on repeatedly. | |||
|image3=[[File:SMW2YI Switch Block green.png]] [[File:SMW2YI Switch Block red.png]] | |||
|name3=[[Arrow block]] | |||
|description3=Blocks that cause spotted platforms to rotate when hit. | |||
| | |image4=[[File:SMW2 Arrow Cloud red.png]] [[File:SMW2 Arrow Cloud Yellow.png]] [[File:SMW2 Arrow Cloud Green.png]] [[File:SMW2 Arrow Cloud Purple.png]] | ||
| | |name4=[[Arrow Cloud]] | ||
|description4=Clouds that sends eggs flying in the direction the arrow is pointing. | |||
|image5=[[File:SMW2 Arrow Sign board.png]] [[File:SMW2 Arrow Sign float.png]] | |||
| | |name5=[[Arrow Sign]] | ||
| | |description5=Points to areas of interest or the path through the level. | ||
| | |image6=[[File:SMW2 Balloon battle red.png]] [[File:SMW2 Balloon battle magenta.png]] | ||
|name6=[[Balloon (Mini Battle)]] | |||
| | |description6=Inflatable balls that appear in two [[Mini Battle]]s focused on them popping. | ||
| | |image7=[[File:Balloon-1.png]] [[File:SMW2 Balloon yellow.png]] [[File:SMW2 Balloon green.png]] [[File:SMW2 Balloon magenta.png]] | ||
| | |name7=[[Balloon (platform)]] | ||
| | |description7=Rising platforms a Yoshi can ride on, for a limited period of time. Riding on them stops them from rising. If a Yoshi rides on them too long, the balloons disappear. | ||
| | |image8=[[File:SMW2 Sunflower seed.png]] [[File:SMW2 Beanstalk.png]] | ||
| | |name8=[[Beanstalk]] | ||
| | |description8=Plants that are spawned from large seeds dropped by hit Winged Clouds. The beanstalk then grows into a tall, ladder-like platform, where Yoshis can use the leaves to traverse to upper elevations. | ||
|image9=[[File:SMW2 Bobbing rock.png]] | |||
| | |name9=Bobbing rock | ||
| | |description9=Small platforms that float in water. Standing on them tips Yoshi into the water. | ||
|image10=[[File:SMW2 Bomb green.png]] [[File:SMW2 Bomb magenta.png]] | |||
|name10=[[Bomb]] | |||
| | |description10=Small explosives used by many enemies. | ||
| | |image11=[[File:SMW2 Breakable block green.png]] [[File:SMW2 Breakable block yellow.png]] [[File:SMW2 Breakable block red.png]] | ||
| | |name11=[[Breakable block]] | ||
|description11=Large colored bricks that, when hit, go from red to yellow to green before being destroyed. | |||
| | |image12=[[File:SMW2 Brick lift.png]] | ||
| | |name12=Brick lift | ||
| | |description12=Stone slabs that appear in different sizes in isometric sections, moving up and down. | ||
|image13=[[File:SMW2 Bubble.png]] | |||
| | |name13=[[Bubble]] | ||
| | |description13=Bubbles that can carry various items, such as 1-Ups, though most bubbles take form as [[morph bubble|metamorphosis bubble]]s. When a Yoshi is damaged by an enemy, baby Mario gets encased in a bubble. | ||
| | |image14=[[File:Bucket2.PNG]] | ||
|name14=[[Bucket (Yoshi's Island series)|Bucket]] | |||
| | |description14=Buckets that turn upside down and drop [[coin]]s or occasionally enemies when hit by an egg. In some levels, these buckets can be used as platforms to traverse water or lava. | ||
| | |image15=[[File:SMW2 Cannon.png]] | ||
|name15=[[Cannon]] | |||
|description15=Cannons fire coins in the [[Gather Coins]] Mini Battle. | |||
|image16=[[File:SMW2YI Gray Chomp Rock.png]] [[File:SMW2YI Brown Chomp Rock.png]] | |||
|name16=[[Chomp Rock]] | |||
|description16=Rocks that can be pushed, which defeats any enemy in its path. Yoshis can also stand on top of them as platforms and can roll them by walking on the preferred direction. Gray Chomp Rocks revert to their original position if a Yoshi leaves the screen and brown variations do not. | |||
|image17=[[File:SMW2 Chomp sign.png]] | |||
| | |name17=Chomp sign | ||
| | |description17=Marks the territory of [[Incoming Chomp]]s. | ||
| | |image18=[[File:SMW2 Coin Block.png]] | ||
|name18=[[Coin Block]] | |||
|description18=Blocks that provide endless coins and stars to [[Superstar Mario|Powerful Mario]]. | |||
|image19=[[File:SMW2 Cork.png]] | |||
|name19=[[Cork]] | |||
|description19=A special lock that plugs a pipe. | |||
| | |image20=[[File:SMW2 Countdown Platform TCOTMM 1.png]] [[File:SMW2 Countdown Platform TCOTMM 2.png]] [[File:SMW2 Countdown Platform TCOTMM 3.png]]<br>[[File:SMW2 Number Platform.png]] [[File:SMW2 Countdown Platform DLB 2.png]] [[File:SMW2 Countdown Platform DLB 3.png]]<br>[[File:SMW2 Countdown Platform KM 1.png]] [[File:SMW2 Countdown Platform KM 2.png]] [[File:SMW2 Countdown Platform KM 3.png]] [[File:SMW2 Countdown Platform KM 4.png]] | ||
| | |name20=[[Countdown Platform]] | ||
|description20=A balance that has a number labeled on it, with the number shown decreasing by one every time something moves on it. When the number decreases to zero, the entire platform vanishes into dust. The highest number they can be is four. | |||
| | |image21=[[File:SMW2 Rock Block brown.png]] [[File:SMW2 Rock Block tan.png]] [[File:SMW2 Rock Block maroon.png]]<br>[[File:SMW2 Rock Block gray.png]] [[File:SMW2 Rock Block gray smooth.png]] [[File:SMW2 Rock Block.png]] [[File:SMW2 Rock Block blue smooth.png]] | ||
| | |name21=[[Rock Block|Cracked block]] | ||
|description21=A large block made of a durable type of rock that can only be destroyed with Yoshi Eggs. | |||
| | |image22=[[File:YoshisIslandCrate.png]] | ||
|name22=[[Crate]] | |||
|description22=Objects that can be broken by Pounding The Ground below them. They release coins, Stars or keys. They occasionally appear from Baron von Zeppelin, where a Yoshi can knock down the crate by throwing an egg at the object. | |||
| | |image23=[[File:SMW2 Donut Block.png]] [[File:SMW2 Donut Lift giant.png]] | ||
| | |name23=[[Donut Block|Donut Lift]] | ||
| | |description23=Unstable platforms that collapse when a Yoshi stays too long on one block. | ||
|image24=[[File:SMW2 Door.png]] | |||
|name24=[[Warp Door|Door]] | |||
|description24=Take Yoshi to other rooms. | |||
|image25=[[File:SMW2 Dotted Line Block.png]] | |||
| | |name25=[[Dotted-Line Block|Dotted Line Block]] | ||
| | |description25=Invisible platforms that indicate where a ! Block will spawn if a ! Switch is hit. | ||
| | |image26=[[File:SMW2 Egg Blocks.png]] [[File:SMW2 Egg Block yellow.png]] [[File:SMW2 Egg Block red.png]] [[File:SMW2 Egg Block flashing.gif]] | ||
|name26=[[Egg Block]] | |||
| | |description26=Blocks that, when struck from below, produce Yoshi Eggs. They stop making eggs when a Yoshi has the maximum amount. Non-green ones simply turn into eggs of the same color. | ||
|image27=[[File:Egg-Plant SMW2.png]] | |||
| | |name27=[[Egg Plant]] | ||
|description27=Plants that produce eggs. They stop emitting eggs when a Yoshi has the maximum amount. They emit eggs at a faster rate when a Yoshi Pounds The Ground below them. | |||
| | |image28=[[File:SMW2 Expansion Block.png]] [[File:SMW2 Expansion Block big.png]] | ||
| | |name28=[[Expansion Block]] | ||
| | |description28=A block that resembles a pink Egg Block. When struck from below, it grows, allowing a Yoshi to reach higher platforms. After a set amount of time, it reverts to its original size. | ||
|image29=[[File:SMW2 Door boss.png]] [[File:SMW2 Door Bowser.png]] | |||
| | |name29=Exit door<ref>Miller, Kent, and Terry Munson. ''Super Mario World 2: Yoshi's Island'' Player's Guide. Page 34.</ref> | ||
|description29=Take Yoshi to the boss of the respective [[fortress|fort]] or [[castle]]. | |||
| | |image30=[[File:SMW2 Falling Rock.png]] | ||
| | |name30=[[Cascading Stone|Falling stone block]] | ||
| | |description30=Platforms that fall when a Yoshi stands on them. When they are about to fall, they start shaking. These platforms can also crush a Yoshi, instantly defeating it. | ||
| | |image31=[[File:Flatbed Ferry.png]] [[File:SMW2 Flatbed Ferry yellow.png]] [[File:SMW2 Flatbed Ferry red.png]]<br>[[File:SMW2 Flatbed Ferry magenta.png]] [[File:SMW2 Flatbed Ferry pink.png]] [[File:SMW2 Flatbed Ferry cyan.png]] | ||
| | |name31=[[Lift|Flatbed Ferry]] | ||
|description31=Platforms attached to a dotted line that travel across it until the end, indicated by a large red sphere. These fall when the dotted lines do not have a large red sphere at the end of it. There are different varieties of Flatbed Ferry, and their color indicates their speed. Green Flatbed Ferries are the slowest, yellow ones run at a medium speed, and red ones are the fastest Flatbed Ferries. | |||
|image32=[[File:SMW2 Flip bridge.png]] | |||
| | |name32=Flip bridge | ||
|description32=Bridges that rotate along the center towards the screen. | |||
|image33=[[File:SMW2 Flipper.png]] | |||
| | |name33=[[Flipper]] | ||
|description33=Bars that, once passed through, prevent access to the area before. | |||
| | |image34=[[File:SMW2 Goal Roulette.png]] | ||
|name34=[[Goal Ring]] | |||
| | |description34=Roulettes that are found at the end of every level, except for castles and fortresses, and act as the goal point. | ||
|image35=[[File:SMW2 Hard Block gray.png]] [[File:SMW2 Hard Block brown.png]] [[File:SMW2 Hard Block blue.png]] [[File:SMW2 Hard Block toy.png]] | |||
| | |name35=[[Hard Block]] | ||
|description35=Blocks that Yoshi cannot destroy. | |||
| | |image36=[[File:SMW2-YI - Ice Block.png]] | ||
| | |name36=[[Ice Block]] | ||
| | |description36=Blocks that serve as slippery obstacles and cannot be picked up. Despite this, they can be melted by Yoshi's fire breath. Some Ice Blocks can hide items as well. | ||
|image37=[[File:SMW2 Lakitu's Cloud.png]] | |||
| | |name37=[[Lakitu's cloud]] | ||
| | |description37=Clouds that enable Yoshis to reach places that they could normally not get to. | ||
|image38=[[File:SMW2 Door locked.png]] | |||
|name38=[[Key Door|Locked Door]] | |||
| | |description38=Doors that require a [[key]] to open. | ||
| | |image39=[[File:SMW2 Wobbling log small.png]] [[File:SMW2 Wobbling log vertical.png]] | ||
| | |name39=[[Makeshift surfboard]] | ||
|description39=Small platforms that float in lava. Ones on their sides act as makeshift boats, while ones on-end simply bob in place. | |||
|image40=[[File:SMW2 Message Block.png]] | |||
|name40=[[Message Block]] | |||
|description40=Blocks that teach the player about controls and give tips. | |||
|image41=[[File:SMW2 Middle Ring.png]] | |||
| | |name41=[[Checkpoint Ring|Middle Ring]] | ||
| | |description41=Rings of light that appear partway through most stages and serve as checkpoints. | ||
| | |image42=[[File:SMW2 Checker block blue.png]] [[File:SMW2 Checker block blue 2.png]] [[File:SMW2 Checker block pink.png]] [[File:SMW2 Checker block pink 2.png]] | ||
|name42=[[Moving block]] | |||
| | |description42=Blocks that change into small moving platforms when hit. | ||
| | |image43=[[File:SMW2 Checker Ferry.png]] | ||
|name43=Moving platform<ref>Miller, Kent, and Terry Munson. ''Super Mario World 2: Yoshi's Island'' Player's Guide. Page 14.</ref> | |||
|description43=Small platforms that carry other objects along a horizontal track in Mini Battles. | |||
| | |image44=[[File:SMW2 Paddle Wheel.png]] | ||
| | |name44=[[Paddle Platform|Paddle wheel]] | ||
|description44=A round platform that is made up of four smaller platforms connected to chains. | |||
|image45=[[File:SMW2 Track ball.png]] | |||
| | |name45=[[Pinwheel (object)|Pinwheel]] | ||
|description45=Round platforms that can be made to roll along rails if spun. | |||
| | |image46=[[File:SMW2 Post.png]] | ||
|name46=[[Stump|Post]] | |||
| | |description46=Wooden posts that come up from the ground. Yoshi must Pound The Ground on them to get rid of them. Their color and design vary by location. | ||
| | |image47=[[File:Vase SMW2.png]] | ||
| | |name47=[[Vase|Pot]] | ||
|description47=Objects that break when Yoshi pushes them off an edge. | |||
| | |image48=[[File:POWBlock SMW2.png]] | ||
| | |name48=[[POW Block]] | ||
| | |description48=A block that turns all nearby enemies turn into Stars. They can be hit three times before they disappear. | ||
|image49=[[File:SMW2 Flimsy Ferry.png]] | |||
|name49=[[Red-and-yellow bridge]] | |||
|description49=Weak platforms that fall apart if Yoshi Pounds The Ground below them. | |||
|image50=[[File:SMW2 Red Balloon.png]] | |||
|name50=[[Red balloon (object)|Red balloon]] | |||
| | |description50=A large red balloon that Yoshi can ride for a limited time before it deflates. | ||
|image51=[[File:SMW2 Wobble Rock.png]] | |||
|name51=[[Wobble Rock|Rolling rock]] | |||
|description51=Tilting stone buttes that fall if stood on too long. | |||
|image52=[[File:SMW2 Door sealed.png]] | |||
|name52=[[Warp Door|Sealed Door]] | |||
|description52=Doors that have been boarded up and can no longer be entered after a certain point. | |||
|image53=[[File:SMW2 Shack.png]] | |||
|name53=Shack | |||
|description53=Most shacks are locked and contain Mini Battles. Unlocked ones give Yoshi [[ski]]s. | |||
|image54=[[File:SMW2 Ski Lift.png]] | |||
|name54=[[Chairlift|Ski Lift]] | |||
|description54=Moving seats suspended from rails on the snowy mountains. | |||
|image55=[[File:Snowball.PNG]] [[File:SMW2 Snowball biggest.png]] | |||
|name55=[[Snowball]] | |||
|description55=A snowball that becomes larger the more Yoshi pushes it in snow. It can also defeat enemies and can be used as a platform for Yoshi. | |||
|image56=[[File:SMW2 Breakable rock yellow.png]] | |||
|name56=[[Soft rock]]<ref>Miller, Kent, and Terry Munson. ''Super Mario World 2: Yoshi's Island'' Player's Guide. Page 10.</ref> | |||
|description56=Weak rocky walls that can be quickly chipped through with nearly any manner of attack. Breakable rock comes in various colors and textures. | |||
|image57=[[File:SMW2 Door carousel.png]] | |||
|name57=Spinning doors<ref>Miller, Kent, and Terry Munson. ''Super Mario World 2: Yoshi's Island'' Player's Guide. Page 116.</ref> | |||
|description57=A rapidly spinning quartet of doors; Yoshi can pick the one he will go through by hitting it with an egg, causing it to fall and the rest to disappear. | |||
|image58=[[File:SMW2 Spinning Log.png]] | |||
|name58=[[Spinning Log]] | |||
|description58=Orange logs that stay still for a while and then start spinning wildly, which can either help or hinder Yoshi. | |||
|image59=[[File:Arrow Lift.png]] [[File:SMW2 Spinning wheel blue.png]] [[File:SMW2 Arrow wheel special.png]] | |||
|name59=[[Arrow wheel|Spinning wheel]] | |||
|description59=Circular lifts that travel in the direction it is pointing when a Yoshi stands on it. They stop spinning when a Yoshi stands on it, and they continue when a Yoshi jumps off of it. A Yoshi can also eat these and spit them out to another area. If a Yoshi falls off to an area where the Yoshi cannot reach the spinning wheel, it respawns in the location it started at. There are two main types of spinning wheels: the blue spinning wheels disappear if a Yoshi jumps off one and does not ride it again for a while, while the tan ones stay there until Yoshi leaves the room or goes at a far enough distance away from the tan spinning wheel. A rare double-arrowed type only moves up and down or left and right, rotating when hit by an egg. | |||
|image60=[[File:SMW2 Spiked Ferry green.png]] [[File:SMW2 Spiked Ferry red.png]] | |||
|name60=[[Rough platform|Spotted platform]] | |||
|description60=Flatbed Ferries with spikes covering one side. | |||
|image61=[[File:Springball.PNG]] [[File:SMW2 Spring ball big.png]] | |||
|name61=[[Spring Ball|Spring ball]] | |||
|description61=Balls that Yoshi can jump on top of, then jump again to be propelled high into the air with a boosted jump. Yoshi can jump even further up if he times the jump right when the he contacts the spring ball. There are also larger variations, which propel Yoshi even higher. | |||
|image62=[[File:SMW2 Squishy block 2.png]] [[File:SMW2 Squishy Block.png]] | |||
|name62=[[Squishy block]] | |||
|description62=Jelly-like blocks that move when pushed. When they hit a wall, they squish against the wall, growing taller and thinner. When performing a Pound The Ground on them, the inverse happens. They can be used to safely cross over spikes. | |||
|image63=[[File:SMW2 Step.png]] | |||
|name63=Step | |||
|description63=Tiny [[Semisolid Platform]]s that appear in chains as bridges or stairs, often summoned by ? Clouds. | |||
|image64=[[File:SMW2 Sway bridge.png]] | |||
|name64=Sway bridge | |||
|description64=A bridge that wildly rocks along its center towards the screen. | |||
|image65=[[File:SMW2YI ! Switch.png]] | |||
|name65=[[! Switch|Switch]] | |||
|description65=Switches that cause [[Dotted-Line Block|Dotted Line Block]]s to transform into [[! Block]]s. | |||
|image66=[[File:SMW2 Seesaw.png]] [[File:SMW2 Wobbling log.png]] | |||
|name66=[[Seesaw|Teeter-totter]] | |||
|description66=Long platforms that rotate from Yoshi's weight. Log-based ones fall if tilted far enough. | |||
|image67=[[File:SMW2 Track.png]] | |||
|name67=[[Track]] | |||
|description67=Rails that various types of platforms travel along. | |||
|image68=[[File:SMW2 Tulip.png]] | |||
|name68=[[Tulip]] | |||
|description68=Giant floating red flowers that spit out eight Stars when an egg, shell, or a spit-up enemy enters them. | |||
|image69=[[File:SMW2 Bolt Lift.png]] | |||
|name69=[[Bolt Lift|Tumbler]] | |||
|description69=Huge industrial nuts that spin when stood upon. | |||
|image70=[[File:SMW2 Rotating board.png]] | |||
|name70=Twirling tier<ref>Miller, Kent, and Terry Munson. ''Super Mario World 2: Yoshi's Island'' Player's Guide. Page 124.</ref> | |||
|description70=Spinning platforms that can move Yoshi and whose functional length changes depending on how big they look at the time. | |||
|image71=[[File:SMW2 Warp Pipe.png]] | |||
|name71=[[Warp Pipe]] | |||
|description71=Pipes that lead to other places. They can sometimes spawn enemies, usually as a source for Yoshi Eggs. | |||
|image72=[[File:SMW2 Watermelon jar.png]] | |||
|name72=Watermelon jar | |||
|description72=Small pots that appear in the [[Watermelon Seed Spitting Contest]] to dispense watermelons. | |||
|image73=[[File:SMW2 Winged Cloud.png]] [[File:SMW2 Wingless Cloud.png]] | |||
|name73=[[Winged Cloud]] | |||
|description73=Clouds that trigger events when a Yoshi Egg is thrown at them. | |||
|image74=[[File:SMW2 Wooden Ferry.png]] | |||
|name74=Wooden Ferry{{ref needed}} | |||
|description74=Completely inert brown Flatbed Ferries of varying length that act as floating [[Semisolid Platform]]s. | |||
|image75=[[File:SMW2 Yoshi Block.png]] [[File:SMW2 Yoshi Block pink.png]] [[File:SMW2 Yoshi Block light-blue.png]] [[File:SMW2 Yoshi Block yellow.png]]<br>[[File:SMW2 Yoshi Block purple.png]] [[File:SMW2 Yoshi Block brown.png]] [[File:SMW2 Yoshi Block red.png]] [[File:SMW2 Yoshi Block blue.png]] | |||
|name75=[[Yoshi Block]] | |||
|description75=Blocks that transform Yoshi back to normal after he has been transformed into a vehicle. | |||
}} | |||
===Obstacles=== | |||
{{content appearances|wikitable=y| | |||
|image1=[[File:SMW2 Ball 'N' Chain.png]] [[File:SMW2 Ball 'N' Chain double.png]] | |||
|name1=[[Spinner|Ball 'N' Chain]] | |||
|description1=Giant, slow-moving flails that are usually powered by groups of [[Boo Guy]]s. | |||
|firstlevel1=[[Burt The Bashful's Fort]]<br>(single)<br>[[Burt The Bashful's Fort]]<br>(double) | |||
|lastlevel1=[[King Bowser's Castle (Super Mario World 2: Yoshi's Island)|King Bowser's Castle]]<br>(single)<br>[[King Bowser's Castle (Super Mario World 2: Yoshi's Island)|King Bowser's Castle]]<br>(double) | |||
|image2=[[File:Shy Guy mace.png]] | |||
|name2=[[Ball and chain (windup)|Ball and chain]] | |||
|description2=A large mace that is operated by a Boo Guy. Timed jumps must be used to pass. | |||
|firstlevel2=[[Hookbill The Koopa's Castle]] | |||
|lastlevel2=[[King Bowser's Castle (Super Mario World 2: Yoshi's Island)|King Bowser's Castle]] | |||
|image3=[[File:SMW2 Boulder.png]] | |||
|name3=[[Boulder]] | |||
|description3=Huge chunks of rock summoned to drop and destroy terrain by Big Baby Bowser. | |||
|firstlevel3=[[King Bowser's Castle (Super Mario World 2: Yoshi's Island)|King Bowser's Castle]] | |||
|lastlevel3=[[King Bowser's Castle (Super Mario World 2: Yoshi's Island)|King Bowser's Castle]] | |||
|image4=[[File:SMW2 Cannonball.png]] | |||
|name4=[[Cannonball]] | |||
|description4=Projectiles fired by [[Kaboomba]]s. | |||
|firstlevel4=[[The Cave Of The Mystery Maze]] | |||
|lastlevel4=[[Raphael The Raven's Castle]] | |||
|image5=[[File:Makiage Dosun.png]] | |||
|name5=[[Spiked weight|Chain Gate]] | |||
|description5=Spiky logs on chain operated by a crank marked with a question mark. Yoshis can lift the log by hitting the crank with eggs. However, after a set amount of time, the log comes back down. | |||
|firstlevel5=[[The Potted Ghost's Castle]] | |||
|lastlevel5=[[The Potted Ghost's Castle]] | |||
|image6=[[File:SMW2 Rushing water.png]] | |||
|name6=[[Current]] | |||
|description6=Streams found in sewers that push Yoshi and anything else caught in them around. | |||
|firstlevel6=[[The Impossible? Maze]] | |||
|lastlevel6=[[The Impossible? Maze]] | |||
|image7=[[File:SMW2 Drawbridge.png]] | |||
|name7=Drawbridge | |||
|description7=Heavy wooden doors that open to crush Yoshi. | |||
|firstlevel7=[[Burt The Bashful's Fort]] | |||
|lastlevel7=[[Burt The Bashful's Fort]] | |||
|image8=[[File:SMW2YI - Fire Bar.png]] [[File:SMW2 Fire-Bar double.png]] | |||
|name8=[[Fire Bar|Fire-Bar]] | |||
|description8=A line of balls of fire that rotate around a central pivot point, swinging in three dimensions. | |||
|firstlevel8=[[Bigger Boo's Fort]]<br>(single)<br>[[Bigger Boo's Fort]]<br>(double) | |||
|lastlevel8=[[Tap-Tap The Red Nose's Fort]]<br>(single)<br>[[Tap-Tap The Red Nose's Fort]]<br>(double) | |||
|image9=[[File:SMW2 Fireball Roger.png]] [[File:SMW2 Fireball Bowser.png]] | |||
|name9=[[Fireball (obstacle)|Fireball]] | |||
|description9=Hazards spat out by certain bosses. | |||
|firstlevel9=[[The Potted Ghost's Castle]] | |||
|lastlevel9=[[King Bowser's Castle (Super Mario World 2: Yoshi's Island)|King Bowser's Castle]] | |||
|image10=[[File:SMW2 Icicle.png]] [[File:SMW2 Icicle long.png]] [[File:SMW2 Icicle longer.png]] | |||
|name10=[[Icicle]] | |||
|description10=Icicles that fall from the ceiling when an egg is thrown at them. | |||
|firstlevel10=[[BLIZZARD!!!]]<br>(short)<br>[[BLIZZARD!!!]]<br>(medium)<br>[[BLIZZARD!!!]]<br>(long) | |||
|lastlevel10=[[The Very Loooooong Cave]]<br>(long)<br>[[The Very Loooooong Cave]]<br>(medium)<br>[[The Very Loooooong Cave]]<br>(short) | |||
|image11=[[File:SMW2 PoochyTraps.png]] | |||
|name11=[[Lava]] | |||
|description11=Molten rock that causes Yoshi to lose a life upon contact. | |||
|firstlevel11=[[Burt The Bashful's Fort]] | |||
|lastlevel11=[[King Bowser's Castle (Super Mario World 2: Yoshi's Island)|King Bowser's Castle]] | |||
|image12=[[File:SMW2 Mud.png]] | |||
|name12=[[Mud]] | |||
|description12=Soft soil that acts as a slick surface in swamps. | |||
|firstlevel12=[[Welcome To Monkey World!]] | |||
|lastlevel12=[[More Monkey Madness]] | |||
|image13=[[File:SMW2 Shockwave.png]] | |||
|name13=Shockwave | |||
|description13=Rapidly moving bursts of energy created by Raphael the Raven to travel around the moon. | |||
|firstlevel13=[[Raphael The Raven's Castle]] | |||
|lastlevel13=[[Raphael The Raven's Castle]] | |||
|image14=[[File:SMW2 Spike Trap.png]] | |||
|name14=[[Spike Trap|Spike]] | |||
|description14=Obstacles that cause Yoshi to lose a life instantly upon touching them. | |||
|firstlevel14=[[Salvo The Slime's Castle]] | |||
|lastlevel14=[[Ultimate Castle Challenge|Castles - Masterpiece Set]] | |||
|image15=[[File:SMW2 Spiny Egg 1.png]] [[File:SMW2 Spiny Egg 2.png]] | |||
|name15=[[Spiny Egg]] | |||
|description15=Explosive projectiles tossed by the Lakitu family. | |||
|firstlevel15=[[Watch Out For Lakitu]] | |||
|lastlevel15=[[Welcome To Cloud World]] | |||
|image16=[[File:SMW2 Acid.png]] | |||
|name16=Stomache acid<ref>Miller, Kent, and Terry Munson. ''Super Mario World 2: Yoshi's Island'' Player's Guide. Page 61.</ref> | |||
|description16=Caustic drops found in Froggy's stomach. | |||
|firstlevel16=[[Prince Froggy's Fort]] | |||
|lastlevel16=[[Prince Froggy's Fort]] | |||
|image17=[[File:SMW2 Thorn.png]] | |||
|name17=[[Thorn]] | |||
|description17=Spiky obstacles that act similar to Spikes and will cause Yoshi to die instantly. | |||
|firstlevel17=[[The Potted Ghost's Castle]] | |||
|lastlevel17=[[Ultimate Castle Challenge|Castles - Masterpiece Set]] | |||
|image18=[[File:SMW2 Turtle Cannon green.png]] [[File:SMW2 Turtle Cannon yellow.png]] | |||
|name18=[[Bill Blaster|Turtle Cannon]] | |||
|description18=Cannons that puff up and fire [[Bullet Bill]]s of their color. | |||
|firstlevel18=[[Poochy Ain't Stupid]]<br>(green)<br>[[Raphael The Raven's Castle]]<br>(yellow) | |||
|lastlevel18=[[Raphael The Raven's Castle]]<br>(yellow)<br>[[Raphael The Raven's Castle]]<br>(green) | |||
}} | |||
==Minigames== | ==Minigames== | ||
===Bonus Challenge=== | ===Bonus Challenge=== | ||
[[Bonus Challenge]]s are initiated when the | [[Bonus Challenge]]s are initiated when the Goal Ring stops on a flower at the end of the level. Yoshis can increase the chances of playing a Bonus Challenge by collecting Special Flowers on the level. During a Bonus Challenge, the player players one of several minigames. Upon winning the minigame, the player can receive lives or [[Special Item (Yoshi's Island series)|Special Item]]s. A specific Bonus Challenge is unlocked when the player collects 800 points in a world, and that specific Bonus Challenge can be played any time. | ||
There are six Bonus Challenges in total. | There are six Bonus Challenges in total. | ||
{| | {{content description|wikitable=y| | ||
|image1=[[File:SMW2 - Flip Cards.png]] | |||
|name1=[[Flip Cards]] | |||
|description1=Players flip over panels to earn Special Items and lives, but lose their rewards if Kamek is flipped over. | |||
|image2=[[File:ScratchandMatch.png]] | |||
|name2=[[Scratch and Match (minigame)|Scratch and Match]] | |||
|description2=Players scratch cards with baby Mario icons to earn lives. | |||
| | |image3=[[File:DrawlingLots.png]] | ||
|Players | |name3=[[Drawing Lots]] | ||
| | |description3=Players can earn Special Items by selecting a panel that does not contain a Kamek card. | ||
|image4=[[File:MatchCards.png]] | |||
| | |name4=[[Match Cards]] | ||
|Players | |description4=Players need to memorize pairs of panels and flip over the correct pairing to receive Special Items or lives. | ||
| | |image5=[[File:Roulette.png]] | ||
|name5=[[Roulette]] | |||
| | |description5=Players bet lives on a roulette, which randomly spins to generate an equation that increases or decreases lives depending on what was stopped on. | ||
|Players can earn Special Items by selecting a panel that does not contain a Kamek card. | |image6=[[File:SlotMachine.png]] | ||
| | |name6=[[Slot Machine (Yoshi's Island series)|Slot Machine]] | ||
|description6=Players stop a slot machine, which generates lives depending on the combo stopped on. | |||
| | }} | ||
|Players need to memorize pairs of panels and flip over the correct pairing to receive Special Items or lives. | |||
| | |||
| | |||
|Players bet lives on a roulette, which randomly spins to generate an equation that increases or decreases lives depending on what was stopped on. | |||
| | |||
| | |||
|Players stop a slot machine, which generates lives depending on the combo stopped on. | |||
===Mini Battles=== | ===Mini Battles=== | ||
| Line 1,229: | Line 1,740: | ||
There are four Mini Battles in total. | There are four Mini Battles in total. | ||
{{content appearances|wikitable=y| | |||
{| | |image1=[[File:SMW2-ThrowingBalloons4Icon.png]] [[File:SMW2-ThrowingBalloons6Icon.png]] [[File:SMW2-ThrowingBalloonsIcon.png]] | ||
| | |name1=[[Throwing Balloons]] | ||
|description1=Players need to toss a water balloon back and forth against a Bandit, using the button commands displayed on a screen. The player must either press four or six buttons depending on the variation of the game. | |||
|firstlevel1=[[The Cave Of Chomp Rock]] | |||
|lastlevel1=[[KEEP MOVING!!!!]] | |||
|image2=[[File:SMW2-GatherCoinsIcon.png]] | |||
|name2=[[Gather Coins]] | |||
| | |description2=Players need to collect the most coins shot out by a cannon before the time limit expires. | ||
|Players need to toss a water balloon back and forth against a Bandit, using the button commands displayed on a screen. The player must either press four or six buttons depending on the variation of the game. | |firstlevel2=[[Touch Fuzzy, Get Dizzy]] | ||
| | |lastlevel2=[[Ride Like The Wind]] | ||
| | |image3=[[File:SMW2-PoppingBalloonsIcon.png]] | ||
| | |name3=[[Popping Balloons]] | ||
|Players need to pop a balloon with a Special Item in it. | |description3=Players need to pop a balloon with a Special Item in it. | ||
|- | |firstlevel3=[[Visit Koopa And Para-Koopa]] | ||
| | |lastlevel3=[[Scary Skeleton Goonies!]] | ||
| | |image4=[[File:SMW2-SeedSpitIcon.png]] | ||
|Players need to spit watermelon seed projectiles at an opponent. | |name4=[[Watermelon Seed Spitting Contest]] | ||
| | |description4=Players need to spit watermelon seed projectiles at an opponent. | ||
|firstlevel4=[[The Cave Of The Mystery Maze]] | |||
| | |lastlevel4=[[The Cave Of The Mystery Maze]] | ||
}} | |||
===Special Items=== | ===Special Items=== | ||
By winning Bonus Challenges and Mini Battles, the player's prizes can be one of several [[Special Item (Yoshi's Island series)|Special Item]]s. These items can be used at any time during a level (except during boss battles) by going to the pause menu and selecting one of them with {{button|SNES|A}}. Up to 22 of these items can be carried at a time. | By winning Bonus Challenges and Mini Battles, the player's prizes can be one of several [[Special Item (Yoshi's Island series)|Special Item]]s. These items can be used at any time during a level (except during boss battles) by going to the pause menu and selecting one of them with {{button|SNES|A}}. Up to 22 of these items can be carried at a time. | ||
{{content description|wikitable=y| | |||
|image1=[[File:SMW2YI 10-Point Star.png]] | |||
|name1=[[10-Point Star|10 Point Star]] | |||
|description1=Increases the amount of time in the Countdown Timer by ten seconds. | |||
|image2=[[File:20PointStar.png]] | |||
|name2=[[20-Point Star|20 Point Star]] | |||
|description2=Increases the amount of time in the Countdown Timer by twenty seconds. | |||
|image3=[[File:Anytime Egg.png]] | |||
|name3=[[Anytime Egg]] | |||
|description3=Refills Yoshi Egg count up to six. | |||
|image4=[[File:Anywhere POW.png]] | |||
|name4=[[Anywhere POW]] | |||
|description4=Creates a shockwave that turns all on-screen enemies into [[Star (Yoshi's Island series)|Star]]s. | |||
|image5=[[File:Winged cloud maker.png]] | |||
|name5=[[Winged Cloud Maker]] | |||
|description5=Transforms all on-screen enemies into Winged Clouds. | |||
|image6=[[File:Magnifying Glass SMW2YI sprite.png]] | |||
|name6=[[Magnifying Glass (Super Mario World 2: Yoshi's Island)|Magnifying Glass]] | |||
|description6=Reveals red coins and hidden Winged Clouds to the player. | |||
|image7=[[File:SMW2-GreenWatermelonIcon.png]] | |||
|name7=[[Watermelon (Yoshi's Island series)|Super Green Watermelon]] | |||
|description7=Gives Yoshi a green watermelon, allowing him to shoot seeds. | |||
|image8=[[File:SMW2-RedWatermelonIcon.png]] | |||
|name8=[[Fire watermelon|Super Red Watermelon]] | |||
|description8=Gives Yoshi a red watermelon, allowing him to spit fire. | |||
|image9=[[File:SMW2-BlueWatermelonIcon.png]] | |||
|name9=[[Ice watermelon|Super Blue Watermelon]] | |||
|description9=Gives Yoshi a blue watermelon, allowing him to breathe frost. | |||
}} | |||
==Soundtrack== | |||
| | {{main|Super Mario: Yossy Island Original Sound Version}} | ||
A soundtrack CD was released in Japan on November 25, 1995, titled ''Super Mario: Yossy Island Original Sound Version''. The disc contains 26 music cues from the game's soundtrack, as composed by [[Koji Kondo]]. | |||
The instrumentation for this game's music was sampled from the {{wp|Akai S1000}} synthesizer; {{wp|E-mu Systems}}' {{wp|E-mu Proteus|Proteus}} synthesizers; the {{wp|Korg 01/W}}; Optical Media International's Universe of Sounds Vol. 2; {{wp|Roland Corporation|Roland}}'s L-CD1 synthesizer, {{wp|Roland Sound Canvas|Sound Canvas SC-88}} module, and {{wp|Roland R-8|R-8}} drum machine; and the {{wp|Yamaha Corporation|Yamaha}} TG77 and TG100. The Roland Sound Canvas, in particular, would go on to become one of the longest-used sources of instrumentation in ''Super Mario'' franchise music, with samples from both the SC-88 and the later {{wp|Roland SC-8850|SC-8850}} model being used in numerous games during the next four gaming generations. Some of the game's sound effects are samples of stock sound effects: the jungle ambience heard on the title screen and baby Mario's cry are taken from {{wp|Sound Ideas}}' General Series 6000 library, while Yoshi's tongue sound and the noises made by Piranha Plants come from Rarefaction's ''A Poke in the Ear with a Sharp Stick''.<ref>https://docs.google.com/spreadsheets/d/1JJBlHHDc65fhZmKUGLrDTLCm6rfUU83-kbuD8Y0zU0o/edit?pli=1#gid=717751203</ref> | |||
{{ | |||
==Promotion== | ==Promotion== | ||
===Culver City event=== | ===Culver City event=== | ||
[[File:CulverCityYoshisIsland.jpg|thumb|150px|Flyer promoting the Culver City event.]] | [[File:CulverCityYoshisIsland.jpg|thumb|150px|Flyer promoting the Culver City event.]] | ||
An event was held in front of a Toys "R" Us in Culver City, California on October 5, 1995 at 3:00 PM to promote the North American release of ''Super Mario World 2: Yoshi's Island''. At the event, there was a trailer and a large model [[Yoshi's Egg|Yoshi | An event was held in front of a Toys "R" Us in {{wp|Culver City, California}} on October 5, 1995 at 3:00 PM to promote the North American release of ''Super Mario World 2: Yoshi's Island''. At the event, there was a trailer and a large model [[Yoshi's Egg|Yoshi Egg]] surrounded by hay. The trailer held a banner with the words "Play It Loud" and stock art of ''Super Mario World 2: Yoshi's Island''. The Yoshi Egg held a banner with the word "Nintendo". The event centered around "hatching" the Yoshi Egg. After the hosts interacted with the idle audience, children were lined up and given small, green hammers which they used to break open a designated area at the bottom of the egg. The Yoshi Egg, when breached, yielded stringed paper and a large model of the game cartridge. Group photos were then taken of children with the cartridge. | ||
The organizers of the event also pledged to donate five hundred dollars to local schools on the condition that the principals of these schools sit on top of the Yoshi | The organizers of the event also pledged to donate five hundred dollars to local schools on the condition that the principals of these schools sit on top of the Yoshi Egg for fifteen minutes. A person in a one-piece Mario and Yoshi costume also was seated on top of the Yoshi Egg. Participants could go on and off the egg by means of a forklift. | ||
A raffle was then held with one winner receiving | A raffle was then held with one winner receiving an SNES which included a copy of ''Super Mario World 2: Yoshi's Island''. Other winners may have won t-shirts. Discount coupons were also distributed. | ||
===Material=== | ===Material=== | ||
| Line 1,323: | Line 1,821: | ||
}} | }} | ||
''Super Mario World 2: Yoshi's Island'' was the cover feature of Volume 77 of ''[[Nintendo Power]]''. ''Nintendo Power'' also distributed eight promotional cards of some of the game's bosses part of their collectible ''Super Power Club'' series of cards which began in October 1992 with Volume 44 of ''Nintendo Power''. The front of each card has an in-game image of the character and the reverse had a brief description of the character. The cards include: | ''Super Mario World 2: Yoshi's Island'' was the cover feature of Volume 77 of ''[[Nintendo Power]]''. ''Nintendo Power'' also distributed eight promotional cards of some of the game's bosses part of their collectible ''Super Power Club'' series of cards which began in October 1992 with Volume 44 of ''Nintendo Power''. The front of each card has an in-game image of the character and the reverse had a brief description of the character. The cards include: | ||
*[[Raphael the Raven]] | *[[Raphael the Raven]] | ||
*[[Roger the Potted Ghost]] (titled "The Potted Ghost") | *[[Roger the Potted Ghost]] (titled "The Potted Ghost") | ||
| Line 1,336: | Line 1,833: | ||
===Videos=== | ===Videos=== | ||
[[File:A Magical Tour of Yoshi's Island VHS.jpg|thumb|The ''A Magical Tour of Yoshi's Island'' VHS.]] | [[File:A Magical Tour of Yoshi's Island VHS.jpg|thumb|The ''A Magical Tour of Yoshi's Island'' VHS.]] | ||
Nintendo of America distributed ''Super Mario World 2: Yoshi's Island: A Magical Tour of Yoshi's Island'', a six minute-long promotional VHS. The video featured Ken Lobb and the same person who narrated the ''[[Donkey Kong Country#Trivia|Donkey Kong Country: Exposed]]'' promotional VHS | Nintendo of America distributed ''Super Mario World 2: Yoshi's Island: A Magical Tour of Yoshi's Island'', a six minute-long promotional VHS. The video featured Ken Lobb and the same person who narrated the ''[[Donkey Kong Country#Trivia|Donkey Kong Country: Exposed]]'' promotional VHS. | ||
Another promotional video, titled 'The Invasion of Nintendo', was included with a copy of ''Nintendo Power'' | Another promotional video, titled ''The Invasion of Nintendo'', was included with a copy of ''Nintendo Power'' and featured ''Super Mario World 2: Yoshi's Island'' alongside some other Nintendo games. Ken Lobb made another appearance. | ||
There exists another untitled promotional video that was likely shown on monitors in video game stores. It is about fifty seconds long and consists of clips of the game along with some narration.<ref> | There exists another untitled promotional video that was likely shown on monitors in video game stores. It is about fifty seconds long and consists of clips of the game along with some narration.<ref>https://www.youtube.com/watch?v=WKzA-SCjnG4</ref> | ||
{{br}} | {{br}} | ||
==Adaptations== | ==Adaptations== | ||
Volume 14 of ''[[Super Mario- | Volume 14 of ''[[Super Mario-kun]]'' mostly focuses on the events of ''Super Mario World 2: Yoshi's Island'', with the arc concluding in volume 15. The ''Super Mario-kun'' version of the story features Mario and Luigi traveling back in time to stop adult Bowser and Kamek alongside Yoshi and baby Mario. | ||
A standalone manga, titled "''Super Mario: | A standalone manga, titled "''Super Mario: Yossy Island''" from the [[Super Mario (Kodansha manga)|Kodansha ''Super Mario'' manga series]], was also released. The series, spanning three volumes, was written by Kazuki Motoyama, who had previously written a manga based on the game [[Yoshi (game)|''Yoshi'']], and published by Kodansha Limited. The first two volumes are based on the stories from the game, while the third volume has original stories that use the game's characters and themes. | ||
''Super Mario World 2: Yoshi's Island'' was also adapted as part of the ''[[4-koma Gag Battle]]'' series, also titled "''Super Mario: | ''Super Mario World 2: Yoshi's Island'' was also adapted as part of the ''[[4-koma Gag Battle]]'' series, also titled "''Super Mario: Yossy Island''". | ||
An issue from the Game Picture Book series of the [[Super Mario Ehon]] series, ''Super Mario Game Picture Book 4: Hang in There, Yoshi'' (「スーパーマリオゲームえほん 4 がんばれヨッシー」, ''Super Mario Game Ehon 4 Ganbare Yoshi''), is loosely based off the story of ''Super Mario World 2: Yoshi's Island''. | |||
<gallery> | <gallery> | ||
SuperMarioYoshiIslandVolume1.jpg|Volume 1 of ''Super Mario: Yossy Island'' by Kazuki Motoyama. | |||
Yoshi's Island Book 1 - Comic.jpg|Page from Volume 1. | |||
SuperMarioYoshiIslandVolume1Reverse.jpg|Reverse of volume 1 of ''Super Mario: Yossy Island''. | |||
SuperMarioYoshiIslandVolume2.jpg|Volume 2 of ''Super Mario: Yossy Island'' by Kazuki Motoyama. | |||
Yoshi's Island Book 2 - Comic.jpg|Page from Volume 2. | |||
SuperMarioYoshiIslandVolume2Reverse.jpg|Reverse of volume 2 of ''Super Mario: Yossy Island''. | |||
SuperMarioYoshiIslandVolume3.jpg|Volume 3 of ''Super Mario: Yossy Island'' by Kazuki Motoyama. | |||
SuperMarioYoshiIslandVolume3Reverse.jpg|Reverse of Volume 3 of ''Super Mario: Yossy Island''. | |||
Yoshi's Island Book 3 - Comic.jpg|Page from Volume 3. | |||
Baby Mario Baby Luigi Yoshi - KC Mario manga.png|Another panel from Volume 3. | |||
Yoshi's Island Book Ukikis.jpg|[[Yoshi]] using a [[fire watermelon|red watermelon]] against [[Ukiki|Grinder]]s. | |||
Yoshi's Island Book Zeus Guy.jpg|A [[Zeus Guy]] training [[baby Mario]] against a [[Pokey (projectile)|Needlenose]], a [[Cactus Jack]], and some [[Milde]]s. | |||
SMGPB4 Cover.png|''[[Super Mario Game Picture Book 4]]: Hang in There, Yoshi'' | |||
SMGPB4 Flower Maze.jpg|''Super Mario Game Picture Book 4: Hang in There, Yoshi'' | |||
SMGPB4 Yoshi Catching Baby Mario.jpg|''Super Mario Game Picture Book 4: Hang in There, Yoshi'' | |||
SMGPB4 Back Cover.png|The reverse of ''Super Mario Game Picture Book 4: Hang in There, Yoshi'' | |||
Mario Kun 14.jpg|''[[Super Mario-kun]]'' volume 14. | |||
Yoshi's Island Book Egg Plant.jpg|[[Baby Mario]] approaching an [[Egg Plant|Egg-Plant]]. | |||
Kunissue15.jpg|''Super Mario-kun'' volume 15. The [[Helicopter Yoshi|Helicopter]] is on the cover along with Powerful Mario (baby Mario). | |||
Super Mario Yoshi Island Gag Battle.jpg|''Super Mario: Yossy Island'' manga, part of the ''4-Koma Gag Battle'' series. | |||
4 Koma Gag Battle Yoshi's Island part 2.jpg|Part 2 of the ''4-Koma Gag Battle'' series. | |||
Yoshi's Island parents.jpg|[[Baby Mario]] and [[baby Luigi]]'s parents | |||
Yoshi's Island Club Nintendo Ghosts.jpg|The ''Super Mario World 2: Yoshi's Island'' comic from ''[[Club Nintendo (magazine)|Club Nintendo]]'' magazine | |||
Kodansha Yoshi's Island Enemies.jpg | |||
</gallery> | </gallery> | ||
==Staff== | ==Staff== | ||
{{main|List of Super Mario World 2: Yoshi's Island staff}} | {{main|List of Super Mario World 2: Yoshi's Island staff}} | ||
[[Takashi Tezuka]] | ''Super Mario World 2: Yoshi's Island'' was directed by video game designers [[Takashi Tezuka]], [[Shigefumi Hino]], and [[Hideki Konno]] and programmer Toshihiko Nakago; the four had worked on previous titles in the ''Super Mario'' series, with all except Hino being directors for ''[[Super Mario World]]''. Konno had earlier worked as a map and level designer in the previous ''Super Mario'' games and served as map director for ''Super Mario World''. This is the first ''Super Mario''-related project to involve [[Yasuhisa Yamamura]], who has most notably worked on the dungeon design in the ''[[zeldawiki:The Legend of Zelda (Series)|The Legend of Zelda]]'' series. The C.G. design the game employs is credited to [[Yoshiaki Koizumi]], who previously worked on ''[[Super Mario Kart]]'' as the illustrator. The soundtrack was composed by [[Koji Kondo]], well known for creating the ''Super Mario'' franchise's iconic tunes. [[Shigeru Miyamoto]] had heavy involvement with the game's development and served as the game's producer, while Nintendo's then-president, [[Hiroshi Yamauchi]], was the executive producer. | ||
==Development== | ==Development== | ||
In an interview with game journalist Steven Kent, Shigeru Miyamoto stated that he wanted to make a game starring Yoshi as far back as ''[[Super Mario World]]''{{'}}s development<ref name="History"></ref> | In an interview with game journalist Steven Kent, Shigeru Miyamoto stated that he wanted to make a game starring Yoshi as far back as ''[[Super Mario World]]''{{'}}s development.<ref name="History"></ref> Miyamoto disliked previous ''Yoshi'' games (specifically mentioning ''[[Yoshi's Cookie]]'', ''[[Yoshi (game)|Yoshi's Egg]]'', and ''[[Yoshi's Safari]]'', the latter being mistranslated as "''Yoshi's World Hunters''" in the interview) and wanted to make one more authentic to the Yoshi character.<ref name="History"></ref> | ||
An early version of the game was demoed to [[Nintendo]]'s marketing department, who rejected it due to the visuals "lacking punch" in comparison to ''[[Donkey Kong Country]]''{{'}}s pre-rendered 3D graphics<ref name="History">''The Ultimate History of Video Games: The Story Behind the Craze that Touched our Lives and Changed the World'', p. 518.</ref> | An early version of the game was demoed to [[Nintendo]]'s marketing department, who rejected it due to the visuals "lacking punch" in comparison to ''[[Donkey Kong Country]]''{{'}}s pre-rendered 3D graphics.<ref name="History">''The Ultimate History of Video Games: The Story Behind the Craze that Touched our Lives and Changed the World'', p. 518.</ref> In response, [[Shigeru Miyamoto]] developed a more stylized and "cartoony" art direction for the game, which was accepted. Some of the pre-rendered sprites used in the opening of the game are leftovers from the original graphical pitch. | ||
According to | According to Hisashi Nogami, the hand-drawn style was created by literally drawing the characters by hand on paper, scanning them and then carefully copying them to make the sprites "a pixel at a time".<ref>[https://kotaku.com/how-yoshi-s-island-got-its-beautiful-hand-drawn-look-1826849563 Kotaku, "How Yoshi’s Island Got Its Beautiful, Hand-Drawn Look"], 2018-06-15</ref> | ||
''Super Mario World 2: Yoshi's Island'' was one of three completed games to use the Super FX2 graphics chip, which allowed for larger sprites and more advanced effects such as sprite scaling and rotation (advertised as "Morphmation" technology), basic polygonal rendering, and advanced parallax scrolling. | ''Super Mario World 2: Yoshi's Island'' was one of three completed games to use the Super FX2 graphics chip, which allowed for larger sprites and more advanced effects such as sprite scaling and rotation (advertised as "Morphmation" technology), basic polygonal rendering, and advanced parallax scrolling. | ||
| Line 1,389: | Line 1,891: | ||
==Reception== | ==Reception== | ||
===Critical reception=== | ===Critical reception=== | ||
''Super Mario World 2: Yoshi's Island'' | ''Super Mario World 2: Yoshi's Island'' was critically acclaimed upon release, with most reviews praising the level design, the platforming mechanics, the personality, the graphics, the soundtrack, and the creativity of the game. The game remains critically lauded, garnering a 96.00% on GameRankings based on 5 reviews.<ref>[http://www.gamerankings.com/snes/588740-super-mario-world-2-yoshis-island/index.html GameRankings score]. ''GameRankings''. Retrieved March 1, 2018.</ref> The most common criticisms surrounding the game come from baby Mario's crying when he is trapped in a bubble after Yoshi takes a hit from the enemy, often being cited as "annoying". IGN retrospectively said in its article "Is There a Bad Mario Game?", "The game earned instant acclaim and rightfully so for its brilliant stage design and platforming mechanics. Yoshi's Island doesn't beat you over the head with trial and error to teach you how to play, but it also does not hold your hand with a numbingly dull tutorial."<ref>(February 13, 2009) [http://www.ign.com/articles/2009/02/13/is-there-a-bad-mario-game?page=2 "Is There a Bad Mario Game?"] ''IGN''. Retrieved March 1, 2018.</ref> Kaes Delgrego of Nintendo Life has referred to the game as "Perhaps the greatest platformer of all time" in his review, giving the game a score of a 10/10.<ref>Delgrego, Kaes. (July 22, 2009). [http://www.nintendolife.com/reviews/2009/07/super_mario_world_2_yoshis_island_retro Review: Super Mario World 2: Yoshi's Island] ''Nintendo Life''. Retrieved March 1, 2018.</ref> Delgrego called the time-based health mechanic "innovative" for its time and described it as influention on later titles, comparing it to ''Halo''{{'}}s time-based life mechanic. While he admitted that the game itself isn't revolutionary, Delgrego praised the creativity of its puzzles and pastel-style graphics. Delgrego's only criticisms focused on the easy boss fights and baby Mario's crying when Yoshi takes damage from an enemy. Reece Warrender of Cubed3 gave the game a 9/10,<ref>Warrender, Reece. (March 31, 2006) [http://www.cubed3.com/review/412/1/super-mario-world-2-yoshis-island-snes.html Super Mario World 2: Yoshi's Island (Super Nintendo) Review] ''Cubed3''. Retrieved March 1, 2018.</ref> praising the game's new and interesting mechanics, such as swallowing an enemy to create a projectile of it, as well as having simple and enjoyable mechanics that players of any age can enjoy. Warrender praised the quality of the game's graphics and sound while criticizing the easy difficulty and the short length, citing that the game can be completed in five hours despite the replay value of the points system. | ||
{|class="wikitable | Retrospective reviewers often rank ''Super Mario World 2: Yoshi's Island'' as one of the greatest video games in the medium's history. Among others, the game was placed 18th in the 100th issue of [[Nintendo Power]]'s "100 best Nintendo games of all time" in 1997. It also placed 185th in the 200th Issue of [http://www.gameinformer.com/ Game Informer's] "Top 200 Games of All Times", the lowest ranked ''Super Mario'' franchise game. Tony Mott listed the game in the 2013 revision of his reference book ''1001 Video Games You Must Play Before You Die'', making it one of 26 SNES games to be featured, while IGN included ''Super Mario World 2: Yoshi's Island'' in the 2003, 2005, 2007, 2015, 2018, 2019, and 2021 lists of the top 100 video games of all time. | ||
!colspan="4" style="font-size:120%; text-align: center; background-color:silver"|Reviews | |||
{| class="wikitable reviews" | |||
!colspan="4"style="font-size:120%; text-align: center; background-color:silver"|Reviews | |||
|-style="background-color:#E6E6E6;" | |-style="background-color:#E6E6E6;" | ||
|Release | |Release | ||
| Line 1,402: | Line 1,906: | ||
|Kaes Delgrego, [http://www.nintendolife.com/reviews/2009/07/super_mario_world_2_yoshis_island_retro Nintendo Life] | |Kaes Delgrego, [http://www.nintendolife.com/reviews/2009/07/super_mario_world_2_yoshis_island_retro Nintendo Life] | ||
|10/10 | |10/10 | ||
|align="left"|'' | |align="left"|"''Yoshi's Island isn't just a great platformer: it's a reminder of why this silly little hobby of ours is so wonderful. Sure, the game contains no political satire, no poetic justice, no character development. But if what Miyamoto and Tezuka crafted isn't a work of art, then the definition of "art" needs to be amended.''" | ||
|- | |- | ||
|SNES | |SNES | ||
|[https://archive.org/stream/nextgen-issue-014/Next_Generation_Issue_014_February_1996#page/n177/mode/1up NEXT Generation Issue #14 February 1996] | |[https://archive.org/stream/nextgen-issue-014/Next_Generation_Issue_014_February_1996#page/n177/mode/1up NEXT Generation Issue #14 February 1996] | ||
|5/5 | |5/5 | ||
|align="left"|'' | |align="left"|"''You'll find yourself baffled at the task of completing this gargantuan game, but you'll definitely enjoy trying.''" | ||
|- | |- | ||
|SNES | |SNES | ||
|Reece Warrender, [http://www.cubed3.com/review/412/1/super-mario-world-2-yoshis-island-snes.html Cubed3] | |Reece Warrender, [http://www.cubed3.com/review/412/1/super-mario-world-2-yoshis-island-snes.html Cubed3] | ||
|9/10 | |9/10 | ||
|align="left"|'' | |align="left"|"''Super Mario World was possibly the most popular game to be released on the SNES console. Following a large change of direction in the sequel you will find yourself controlling different Yoshi's in an attempted to protect a baby Mario. The game sounds unappealing, but after giving the game a fair chance you will experience a platformer like no other.''" | ||
|- | |- | ||
|SNES | |SNES | ||
|Rob Hamilton,<br>[http://www.honestgamers.com/9570/super-nintendo/super-mario-world-2-yoshis-island/review.html Honest Gamers] | |Rob Hamilton,<br>[http://www.honestgamers.com/9570/super-nintendo/super-mario-world-2-yoshis-island/review.html Honest Gamers] | ||
|10/10 | |10/10 | ||
|align="left"|'' | |align="left"|"''Yoshi's Island may not be perfect, but it provides pure gaming bliss, taking the tried-and-true Super Mario Brothers style of play and adding its own personalized touch. Just stay away from those Fuzzies. The withdrawal is pure agony!''" | ||
|- | |- | ||
!colspan="4" style="background-color:silver; font-size:120%; text-align: center;"|Aggregators | !colspan="4"style="background-color:silver; font-size:120%; text-align: center;"|Aggregators | ||
|-style="background-color:#E6E6E6;" | |-style="background-color:#E6E6E6;" | ||
|colspan=2|Compiler | |colspan=2|Compiler | ||
| Line 1,445: | Line 1,949: | ||
|footer=Animated graphics of the unused metamorphosis bubble transformations. | |footer=Animated graphics of the unused metamorphosis bubble transformations. | ||
}} | }} | ||
According to Shigeru Miyamoto, the marketing department at Nintendo wanted him to use pre-rendered 3D sprites like in ''[[Donkey Kong Country]]'' for the game, rather than stylized 2D sprites. Additionally, found in the game's data are several sprites that go unused, such as several ''[[Super Mario All-Stars]]'' sprites and three unused Yoshi forms. There are also three unused Mini Battles that can be seen in the game's code. | According to Shigeru Miyamoto, the marketing department at Nintendo wanted him to use pre-rendered 3D sprites like in ''[[Donkey Kong Country]]'' for the game, rather than stylized 2D sprites. Additionally, found in the game's data are several sprites that go unused, such as several ''[[Super Mario All-Stars]]'' sprites and three unused Yoshi forms. There are also three unused Mini Battles that can be seen in the game's code. | ||
The game was originally intended to feature the prefix '''''Super Mario Bros. 5''''', which was shortened to ''Super Mario'' in the final Japanese release. A similar concept would be carried over to the international edition, which uses the prefix ''Super Mario World 2''; the original ''Super Mario World'' was previously subtitled ''Super Mario Bros. 4'' on the Japanese release.<ref>Brian (July 24, 2020). [https://nintendoeverything.com/nintendo-leaks-continue-with-massive-release-of-game-protoypes-source-code-and-more Nintendo leaks continue with massive release of game protoypes, source code, and more]. Nintendo Everything. Retrieved September 16, 2021.</ref> It has sometimes been nicknamed '''''Super Mario Bros 5: Yoshi's Island''''' (or '''''Super Mario Bros 5''''' for short).<ref>''Nintendo Magazine System'' (Australia) issue 30, pages 10 and 11.</ref> | |||
==Glitches== | ==Glitches== | ||
{{main|List of Super Mario World 2: Yoshi's Island glitches}} | {{main|List of Super Mario World 2: Yoshi's Island glitches}} | ||
===Constantly full mouth=== | ===Constantly full mouth=== | ||
By jumping through a Middle Ring and spitting out an enemy at the same time, Yoshi constantly appears to have a full mouth, despite still being able to stick his tongue out and not being able to spit anything out.<ref name="SOAG"></ref> | By jumping through a Middle Ring and spitting out an enemy at the same time, Yoshi constantly appears to have a full mouth, despite still being able to stick his tongue out and not being able to spit anything out.<ref name="SOAG"></ref> | ||
===Giant Egg anywhere=== | |||
By going into any level with a [[Fat Guy]] and carrying a [[Giant Egg]] to the end of a level, the player must go to the edge of the screen past the exit and throw the egg up, then use Yoshi's tongue to push it slightly into the edge of the screen. By finishing the level like this, the next Yoshi will collect the egg as it appears to take baby Mario, allowing the player to take a Giant Egg into any level in the game.<ref name="SOAG">[https://www.youtube.com/watch?v=kLn2FqOhvFQ Super Mario World 2: Yoshi's Island Glitches (SNES) - Son Of A Glitch - Episode 37]. A + Start (January 30, 2015). Retrieved February 15, 2015.</ref> | |||
==Remakes and ports== | ==Remakes and ports== | ||
| Line 1,460: | Line 1,965: | ||
===''Yoshi's Island: Super Mario Advance 3''=== | ===''Yoshi's Island: Super Mario Advance 3''=== | ||
{{main|Yoshi's Island: Super Mario Advance 3}} | {{main|Yoshi's Island: Super Mario Advance 3}} | ||
''Super Mario World 2: Yoshi's Island'' was later ported to the handheld [[Game Boy Advance]] as part of the [[Super Mario Advance (series)|''Super Mario Advance'' series]], a series of updated remakes of classic ''Mario'' games | ''Super Mario World 2: Yoshi's Island'' was later ported to the handheld [[Game Boy Advance]] as part of the [[Super Mario Advance (series)|''Super Mario Advance'' series]], a series of updated remakes of classic ''Super Mario'' games, as ''[[Yoshi's Island: Super Mario Advance 3]]''. The third entry in the series, it boasted new levels and slightly altered some of the original game's graphics and dialogue, as well as making various other minor changes. This version of the game is the only version available through the Virtual Console on future consoles, rather than the original version. | ||
===SNES Classic Edition=== | ===SNES Classic Edition=== | ||
''Super Mario World 2: Yoshi's Island'' is one of the 21 titles included on the [[Super Nintendo Entertainment System#Super NES Classic Edition|Super NES Classic Edition]]. | ''Super Mario World 2: Yoshi's Island'' is one of the 21 titles included on the [[Super Nintendo Entertainment System#Super NES Classic Edition|Super NES Classic Edition]]. This was the SNES version’s first release since the original run. | ||
===Super Nintendo Entertainment System - Nintendo Switch Online=== | ===Super Nintendo Entertainment System - Nintendo Switch Online=== | ||
| Line 1,470: | Line 1,975: | ||
==Version differences== | ==Version differences== | ||
{{see also|tcrf:Super Mario World 2: Yoshi's Island/Version Differences}} | {{see also|tcrf:Super Mario World 2: Yoshi's Island/Version Differences}} | ||
Later versions of the Japanese release pluralize the collectables in the score screen and alter the number of dots that connect each term to its respective counter. The line in the Red Coin counter is increased by one dot, while the line in the total score counter is decreased to account for the pluralization of "Total Point." | |||
In the Japanese release of the game, | ===Regional differences=== | ||
*This is the first ''Super Mario'' game with French and German localizations, and the only SNES ''Super Mario'' game to have these. (''[[Super Mario RPG: Legend of the Seven Stars|Super Mario RPG]]'', the lone SNES ''Super Mario'' game released later, was not localized for PAL regions, therefore no such translations were written.) Accordingly, the PAL release gives the player the option to select a language at the start of the game. | |||
*The title screen in the Japanese version of the game is rendered in katakana. International versions replace this with a new logo written in English. | |||
*The European release omits the ® symbol from the ''Super Mario World 2'' prefix on the title logo. | |||
*In the map selection screen, the thumbnail tiles for the extra levels in the Japanese versions of the game are a red and orange background. They are also called "Special" stages. | |||
*In the Japanese release, the thumbnails for extra and bonus stages consist of stylized katakana logos; the extra stages all read スペシャル ("Special") and are suffixed by the world number, while the bonus stages each list the name of their respective bonus game. In international releases, the extra stage thumbnails depict a numbered star with "EXTRA" written below, while the bonus stage thumbnails depict a numbered Special Flower with "BONUS" written below. | |||
*The score thumbnail in international versions of the game has a completely different sprite than Japanese versions of the game, depicting a pencil drawing a line rather than a pencil writing "100" on an index card. The SNES controller in the North American version of the game also has its buttons changed to purple, though the control options menu retains the multicolor buttons seen on the Super Famicom and European SNES. | |||
*The thumbnail for the [[Popping Balloons]] Mini Battle is slightly tweaked in international versions of the game, rounding the balloon down at the edges of the thumbnail and increasing the size of Yoshi's hands. | |||
*The thumbnail for World 4-6: [[Lake Shore Paradise]] has a slightly altered Flopsy Fish in international versions of the game, featuring larger and more angular pectoral fins. | |||
*In the European version, as well as US Revision 1.1, the font is much thicker than in the Japanese version, though graphics such as controller buttons were left the same. This thicker font was later used in all versions of ''Yoshi's Island : Super Mario Advance 3''. | |||
{{multiple image | {{multiple image | ||
|align=center | |align=center | ||
| Line 1,483: | Line 1,997: | ||
}} | }} | ||
*International versions of the game remove onomatopoeia words from the chalkboard tutorial graphics and the Popping Balloons Mini Battle. Additionally, the symbol that appears when popping the correct balloon in the latter is changed from the kanji 当 ("win") surrounded by stars to a star pattern made of stars. | |||
* | *In World 6-★: [[Ultimate Castle Challenge|Castles - Masterpiece Set]], the pathed-moving platforms in the Japanese version of the game spelled out "YOSSY", Yoshi's alternate romanized Japanese name. International versions change this to "YOSHI". | ||
*In World 6-★: [[Ultimate Castle Challenge|Castles - Masterpiece Set]], the pathed-moving platforms in the Japanese version of the game spelled out "YOSSY", Yoshi's alternate romanized Japanese name. International versions | |||
==References to other games== | ==References to other games== | ||
*''[[Super Mario Bros.]]'': | *''[[Mario Bros. (game)|Mario Bros.]]'': [[POW Block]]s can be hit thrice before they disappear, like in this game. | ||
*''[[Super Mario Bros. 2]]'': Shy | *''[[Super Mario Bros.]]'': The end of the credits features a rearranged version of this game's "end of level" fanfare. [[Fire Bar]]s return, albeit depicted as swinging three-dimensionally. | ||
*''[[Super Mario Bros. 3]]'': Yoshi's | *''[[Super Mario Bros. 2]]'': [[Shy-Guy]]s and [[Snifit]]s reappear; these enemies also serve as the basis for many of the new enemies in ''Super Mario World 2: Yoshi's Island''. The sub areas attached to enemy-generating [[Warp Pipe]]s resemble those within [[Jar]]s. POW Blocks retain their color scheme from this game. | ||
*''[[Super Mario World]]'': The American and European versions of the game are sold as a | *''[[Super Mario Bros. 3]]'': [[Chain Chomp]]s, [[Donut Block]]s, and [[Nipper Plant]]s return. [[Spike]]s return as [[Spike#Super Mario World 2: Yoshi's Island / Yoshi's Island: Super Mario Advance 3|Mace Penguins]]. | ||
*''[[Super Mario World]]'': The American and European versions of the game are sold as a prequel to ''Super Mario World''. Also, some of Yoshi's sound effects are recycled. [[Expansion Block]]s utilize an unused sound effect from this game when they expand. [[Big Boo]]s, [[Beach Koopa]]s, and [[Fishin' Lakitu]]s return. [[Flying Wiggler]]s are based on [[Wiggler]]s. A single [[Magikoopa]] returns as [[Kamek]], whose name is derived from the name for the Magikoopa species in Japanese:「カメック」(Kamekku). [[Gargantua Blargg]]s and [[Blargg (small)|Red Blargg]]s are named after [[Blargg]]s. [[Cheep Cheep#Super Mario World 2: Yoshi's Island / Yoshi's Island: Super Mario Advance 3|Piscatory Petes]] resemble the [[Cheep Cheep]] design of ''Super Mario World'', along with the [[Blurp]]s of the same game. [[Superstar Mario|Powerful Mario]] wears [[Caped Mario]]'s cape. [[Dotted-Line Block]]s temporarily transform into [[! Block]]s upon hitting a [[! Switch#Yoshi franchise|Switch]], like how they could be transformed by the [[! Switch#Super Mario World / Super Mario World: Super Mario Advance 2|big switch]]es of this game. [[Lakitu's cloud]] can be ridden, like in this game. | |||
*''[[Yoshi's Cookie]]'': Yoshi's sprite is based on his sprite from the SNES version of the game, which was also the basis for his sprite in ''[[Super Mario All-Stars]]''. | |||
==References in later games== | ==References in later games== | ||
*''[[Super Mario RPG: Legend of the Seven Stars]]'': The Magikoopa fought in [[Bowser's Castle|Bowser's Keep]] has a [[ | [[File:The Beach Cannons Secret.png|thumb|The background shares a similar artstyle]] | ||
*''[[Super Mario RPG: Legend of the Seven Stars]]'': The Magikoopa fought in [[Bowser's Castle|Bowser's Keep]] has a [[Thought Peek|thought]] that strongly implies it is Kamek; while he is clearly familiar with Bowser in the English translation, the Japanese version of the line indicates that he recognizes Mario as the baby. | |||
*''[[Super Mario 64]]'': A part of the "Powerful Infant" theme is reused for the "Powerful Mario" theme in this game. | *''[[Super Mario 64]]'': A part of the "Powerful Infant" theme is reused for the "Powerful Mario" theme in this game. | ||
*''[[Tetris Attack]]'': The game is a reskin of ''[[Tetris Attack#Panel de Pon|Panel de Pon]]'' featuring many of the same creatures as ''Super Mario World 2: Yoshi's Island''. The main theme is also rearranged as the title screen music and is also incorporated into the end credits melody in the [[Game Boy]] port. | *''[[Tetris Attack]]'': The game is a reskin of ''[[Tetris Attack#Panel de Pon|Panel de Pon]]'' featuring many of the same creatures as ''Super Mario World 2: Yoshi's Island''. The main theme is also rearranged as the title screen music and is also incorporated into the end credits melody in the [[Game Boy]] port. | ||
| Line 1,508: | Line 2,016: | ||
*''[[Mario Kart 64]]'': Yoshi's sound effects were reused in this game. | *''[[Mario Kart 64]]'': Yoshi's sound effects were reused in this game. | ||
*''[[Super Smash Bros.]]'': Yoshi's moves and attacks were taken from this game. | *''[[Super Smash Bros.]]'': Yoshi's moves and attacks were taken from this game. | ||
*''[[Paper Mario]]'': [[Raphael the Raven]] returns, and [[Lava Piranha]] has a similar appearance to Naval Piranha. Additionally, one of [[Parakarry]]'s attacks is similar to the Targeting system. | *''[[Paper Mario]]'': [[Raphael the Raven]] returns, and [[Lava Piranha]] has a similar appearance to Naval Piranha. The music for [[Yoshi's Village]] is a variation on the title screen music. Additionally, one of [[Parakarry]]'s attacks is similar to the Targeting system. | ||
*''[[Mario Party 2]]'': For the minigame [[Tile Driver]], the Koopa Troopa | *''[[Mario Party 2]]'': For the minigame [[Tile Driver]], the Goomba and Koopa Troopa patterns are modified versions of their respective artwork from this game. | ||
*''[[Super Mario Sunshine]]'': The background of | *''[[Super Mario Sunshine]]'': The background of [[The Beach Cannon's Secret]]'s secret course uses the same art style as ''Super Mario World 2: Yoshi's Island''. | ||
*''[[Nintendo Puzzle Collection]]'': In ''[[Yoshi's Cookie|Yoshi no Cookie]]'', the Action Mode stage backgrounds are based on ''Super Mario World 2: Yoshi's Island''. Additionally, the normal end credits melody of the new ''Panel de Pon'' | *''[[Mario Party 4]]'': Four [[Salvo the Slime]]s are featured as obstacles in [[Slime Time (minigame)|Slime Time]]. | ||
*''[[Mario Kart: Double Dash!!]]'': The course, [[Baby Park]], takes heavy inspiration from this game, with the track banner and locations employing a similar art style. Baby Mario and Baby Luigi's karts, the [[Goo-Goo Buggy]] and the [[Rattle Buggy]] have the | *''[[Nintendo Puzzle Collection]]'': In ''[[Yoshi's Cookie|Yoshi no Cookie]]'', the Action Mode stage backgrounds are based on ''Super Mario World 2: Yoshi's Island''. Additionally, the normal end credits melody of the new ''Panel de Pon'' is arranged from the Game Boy port of ''Tetris Attack'', which in turn contains the main theme. | ||
*''[[Mario & Luigi: Superstar Saga]]'': A cover of [[Superstar Mario]]'s theme is played during the [[Star 'Stache Smash]] minigame in this game. This cover | *''[[Mario Party-e]]'': Yoshi and [[Shy Guy]]'s sprite from [[Fast Feed Yoshi!]] are taken from this game. | ||
*''[[Mario Kart: Double Dash!!]]'': The course, [[Baby Park]], takes heavy inspiration from this game, with the track banner and locations employing a similar art style. Baby Mario and Baby Luigi's karts, the [[Goo-Goo Buggy]] and the [[Rattle Buggy]] have the Special Flower engraved on them. | |||
*''[[Mario & Luigi: Superstar Saga]]'': A cover of [[Superstar Mario]]'s theme is played during the [[Star 'Stache Smash]] minigame in this game. This cover has been removed from [[Mario & Luigi: Superstar Saga + Bowser's Minions|the remake]]. | |||
*''[[Mario Party Advance]]'': Naval Piranha returns, alongside Goonies and other species. | *''[[Mario Party Advance]]'': Naval Piranha returns, alongside Goonies and other species. | ||
*''[[Super Princess Peach]]'': The game's sprite work is reminiscent to those used in ''Yoshi's Island'', especially with Koopa Paratroopas having long wings. Additionally, the game uses enemies that originated from this game such as Kaboombas and Fangs. | *''[[Super Princess Peach]]'': The game's sprite work is reminiscent to those used in ''Super Mario World 2: Yoshi's Island'', especially with Koopa Paratroopas having long wings. Additionally, the game uses enemies that originated from this game such as Kaboombas and Fangs. | ||
*''[[Mario & Luigi: Partners in Time]]'': The events of this are mentioned by Kamek. | *''[[Mario & Luigi: Partners in Time]]'': The events of this are mentioned by Kamek. An arrangement of this game's alternate title music is used for [[Yoshi's Island (location)|Yoshi's Island]] in this game. | ||
*''[[Yoshi Touch & Go]]'': This game is a retelling of ''Super Mario World 2: Yoshi's Island''{{'}}s events. | *''[[Yoshi Touch & Go]]'': This game is a retelling of ''Super Mario World 2: Yoshi's Island''{{'}}s events. | ||
*''[[Yoshi's Island DS]]'': | *''[[Yoshi's Island DS]]'': This game is the sequel and also takes place on the same titular island, and most of the enemy sprites are from this game, albeit with updated shading. Its events are mentioned at the start of the game. | ||
*''[[Super Mario 64 DS]]'' / ''[[New Super Mario Bros.]]'': The "Powerful Mario" theme from ''Super Mario 64'' returns. A slightly altered version with different instruments can also be heard in certain minigames such as [[Balloon Racing]] and [[Bounce and Trounce]]. | *''[[Super Mario 64 DS]]'' / ''[[New Super Mario Bros.]]'': The "Powerful Mario" theme from ''Super Mario 64'' returns. A slightly altered version with different instruments can also be heard in certain minigames such as [[Balloon Racing]] and [[Bounce and Trounce]]. | ||
*''[[Mario Kart Arcade GP 2]]'': The tracks [[Yoshi Park 1]] and [[Yoshi Park 2]] have amusement park rides that take heavy inspiration from this game. | *''[[Mario Kart Arcade GP 2]]'': The tracks [[Yoshi Park 1]] and [[Yoshi Park 2]] have amusement park rides that take heavy inspiration from this game. | ||
*''[[Itadaki Street DS]]'': This game features the map of Yoshi's Island. | *''[[Itadaki Street DS]]'': This game features the map of Yoshi's Island. | ||
*''[[Super Mario Galaxy]]'': An orchestral | *''[[Super Mario Galaxy]]'': An orchestral arrangement of Superstar Mario's theme is used as the theme of [[Rainbow Mario]] in this game. | ||
*''[[Super Smash Bros. Brawl]]'': The [[Yoshi's Island (Super Smash Bros. Brawl)|Yoshi's Island]] stage is inspired from this game. Some tracks of the game's soundtrack are covered in this game, including the Ground Theme and the Athletic Theme. | *''[[Super Smash Bros. Brawl]]'': The [[Yoshi's Island (Super Smash Bros. Brawl)|Yoshi's Island]] stage is inspired from this game. Some tracks of the game's soundtrack are covered in this game, including the Ground Theme and the Athletic Theme. | ||
*''[[New Super Mario Bros. Wii]]'': | *''[[New Super Mario Bros. Wii]]'': [[Kamek]] reappears and uses his magic to power up the [[Koopalings]]. Fake walls reappear. Kamek turns Bowser into a giant for the final battle. | ||
*''[[Yoshi's New Island]]'': | *''[[New Super Mario Bros. U]]'': Kamek again uses magic to enhance boss fights and turn Bowser into a giant. | ||
*''[[Yoshi's New Island]]'': This game continues the story told from ''Super Mario World 2: Yoshi's Island''. | |||
*''[[Super Mario Maker]]'': The [[Baby Mario]] Costume uses modified sprites from this game. | *''[[Super Mario Maker]]'': The [[Baby Mario]] Costume uses modified sprites from this game. | ||
*''[[Mini Mario & Friends: amiibo Challenge]]'': The soundtrack of [[Egg Launch Land]] is a complete arrangement of "Flower Garden", which plays in [[Make Eggs, Throw Eggs]] and other levels. | *''[[Mini Mario & Friends: amiibo Challenge]]'': The soundtrack of [[Egg Launch Land]] is a complete arrangement of "Flower Garden", which plays in [[Make Eggs, Throw Eggs]] and other levels. | ||
| Line 1,532: | Line 2,043: | ||
*''[[WarioWare Gold]]'': This game contains [[Yoshi's Island (microgame)|a microgame]] based on ''Super Mario World 2: Yoshi's Island'', where Yoshi must save Baby Mario from a bubble. | *''[[WarioWare Gold]]'': This game contains [[Yoshi's Island (microgame)|a microgame]] based on ''Super Mario World 2: Yoshi's Island'', where Yoshi must save Baby Mario from a bubble. | ||
*''[[Super Smash Bros. Ultimate]]'': Slugger & Green Glove appear as a spirit, using artwork from ''Super Mario World 2: Yoshi's Island''. Bowser's Final Smash in this game is based on Baby Bowser's second boss battle. | *''[[Super Smash Bros. Ultimate]]'': Slugger & Green Glove appear as a spirit, using artwork from ''Super Mario World 2: Yoshi's Island''. Bowser's Final Smash in this game is based on Baby Bowser's second boss battle. | ||
*''[[Mario Kart 8 Deluxe]]'': The [[Yoshi's Island (race course)|Yoshi's Island]] course in the ''[[Mario Kart 8 Deluxe – Booster Course Pass|Booster Course Pass]]'' is based on the game, with numerous obstacles being based on its enemies and sections based on the island layout and world themes as seen in the 3D overview on the title screen. The music is an arrangement of the athletic theme. Starting a race plays the Game Start theme, and finishing a race plays an arrangement of the Goal & Score theme. Kamek's speaking sound effect is used for his horn. | |||
*''[[Mario Kart Tour]]'': Yoshi's Island returns as a race course in this game. The [[Smiley Flower Glider]]'s art and animation are derived from the Smiley Flower from this game. | |||
*''[[Super Mario Bros. Wonder]]'': The 1-Up jingle sounds similar to the one from ''Yoshi's Island''. Melon Piranha Plants spit seeds similar to Yoshi and [[Ukiki]]s with a [[watermelon]], and Yoshis can spit seeds by eating them as well. The Yoshis' animations like running and falling are also similar. | |||
*''[[WarioWare: Move It!]]'': A [[Super Mario World 2: Yoshi's Island (microgame)|microgame]] based on ''Yoshi's Island'' appears in this game, in which Yoshi needs to run away from a [[Big Chain Chomp|Chomp Shark]]. | |||
==Media== | ==Media== | ||
{{main-media}} | {{main-media}} | ||
{{media table | {{media table | ||
| | |file1=SMW2YI Story Music Box.oga | ||
|title1=''Super Mario World 2: Yoshi's Island'' | |||
| | |||
|description1=Music Box theme | |description1=Music Box theme | ||
|length1= | |length1=0:29 | ||
| | |file2=SMW2 W1-1.ogv | ||
|title2=''Super Mario World 2: Yoshi's Island'' | |||
| | |description2=Speedrun of [[Make Eggs, Throw Eggs]]. | ||
|description2=Speedrun of | |||
|length2=0:49 | |length2=0:49 | ||
}} | }} | ||
| Line 1,551: | Line 2,064: | ||
{{main-gallery}} | {{main-gallery}} | ||
<gallery> | <gallery> | ||
Yoshi Aims An Egg.png|Yoshi aiming an [[Yoshi's Egg|egg]] at a | Yoshi Aims An Egg.png|Yoshi aiming an [[Yoshi's Egg|egg]] at a Special Flower | ||
BubblyFreak.png|[[Baby Mario]] trapped in a bubble | BubblyFreak.png|[[Baby Mario]] trapped in a bubble | ||
Helicopter SMW2 art.jpg|[[Helicopter]] | Helicopter SMW2 art.jpg|[[Helicopter Yoshi|Helicopter]] | ||
SMW2 YI Zeus Guy.png|[[Zeus Guy]] | SMW2 YI Zeus Guy.png|[[Zeus Guy]] | ||
SMW2 Yoshis Island Toadies.png| | SMW2 Yoshis Island Toadies.png|[[Kamek's Toadies]] | ||
</gallery> | </gallery> | ||
| Line 1,562: | Line 2,075: | ||
|Jap=スーパーマリオ ヨッシーアイランド | |Jap=スーパーマリオ ヨッシーアイランド | ||
|JapR=Sūpā Mario: Yosshī Airando | |JapR=Sūpā Mario: Yosshī Airando | ||
|JapM=Super Mario: Yoshi | |JapM=Super Mario: Yossy Island<ref>Mandelin, Clyde (June 8, 2017). [https://legendsoflocalization.com/qa-why-is-yoshi-sometimes-called-yossy/ Why Yoshi Is Sometimes Called Yossy in Japan]. ''Legends of Localization''. Retrieved December 28, 2021.</ref> | ||
| | |ChiS=超级马力欧 耀西岛 (Super Nintendo Entertainment System - Nintendo Switch Online)<ref>From the game description of ''Super Nintendo Entertainment System - Nintendo Switch Online''</ref> | ||
| | |ChiSR=Chāojí Mǎlì'ōu Yàoxī Dǎo | ||
| | |ChiSM=Super Mario: Yoshi Island | ||
}} | }} | ||
==References== | |||
<references/> | |||
==External links== | ==External links== | ||
{{NIWA|SmashWiki | {{NIWA|SmashWiki=Mario (universe)#Super Mario World 2: Yoshi's Island|StrategyWiki=Yoshi's Island: Super Mario World 2}} | ||
*[https://web.archive.org/web/20001018042117/http://www.nintendo.com/snes/smw2/index.html | *[https://www.nintendo.co.jp/n02/shvc/yi/ Japanese website] | ||
*[https://web.archive.org/web/20001018042117/http://www.nintendo.com/snes/smw2/index.html North American website] | |||
*[https://www.nintendo.co.jp/clvs/manuals/ja/pdf/CLV-P-VADJJ.pdf Super Mario: Yoshi's Island Japanese Super Famicom Manual] | |||
*[https://www.nintendo.co.jp/clvs/manuals/common/pdf/CLV-P-SADJE.pdf Super Mario World 2: Yoshi's Island North American SNES manual] | |||
{{YI}} | {{YI}} | ||
{{ | {{Yoshi games}} | ||
{{ | {{Super Mario games}} | ||
{{SNES}} | {{SNES}} | ||
[[Category:Super Mario World 2: Yoshi's Island|*]] | [[Category:Super Mario World 2: Yoshi's Island|*]] | ||
[[Category:Games]] | [[Category:Games]] | ||
[[Category:Super Nintendo Entertainment System | [[Category:Super Nintendo Entertainment System games]] | ||
[[Category:Platforming | [[Category:Platforming games]] | ||
[[Category:1995 games]] | [[Category:1995 games]] | ||
[[de:Super Mario World 2: Yoshi's Island]] | [[de:Super Mario World 2: Yoshi's Island]] | ||
[[it:Super Mario World 2: Yoshi's Island]] | [[it:Super Mario World 2: Yoshi's Island]] | ||
Latest revision as of 00:08, May 8, 2024
- "YI" redirects here. For the Game Boy Advance version, see Yoshi's Island: Super Mario Advance 3.
- "SMW2" redirects here. For the game known as "Super Mario Wii 2" in South Korea, see Super Mario Galaxy 2.
| Super Mario World 2: Yoshi's Island | |||||
|---|---|---|---|---|---|
 For alternate box art, see the game's gallery. | |||||
| Developer | Nintendo EAD | ||||
| Publisher | Nintendo | ||||
| Platform(s) | Super Famicom / Super Nintendo Entertainment System, Super NES Classic Edition / Super Famicom Mini, Super Nintendo Entertainment System - Nintendo Switch Online | ||||
| Release date | Super Nintendo Entertainment System: Super NES Classic Edition: Super Nintendo Entertainment System - Nintendo Switch Online: | ||||
| Language(s) | Deutsch English (United States) Français (France) 日本語 | ||||
| Genre | Platform | ||||
| Rating(s) |
| ||||
| Mode(s) | Single-player Multiplayer Mini Battles | ||||
| Media | Super NES: Nintendo Switch: Super NES Classic Edition:
Built-in
| ||||
| Input | Super NES: Nintendo Switch: Super NES Classic Edition:
| ||||
Super Mario World 2: Yoshi's Island (frequently referred to simply as Yoshi's Island) is a 2D platform game for the Super Nintendo Entertainment System, developed by Nintendo EAD. The game is the prequel to Super Mario World and it stars Yoshi and the Yoshi clan who, while carrying baby Mario, travel across Yoshi's Island to rescue baby Luigi from baby Bowser and his Magikoopa minion/caretaker, Kamek. Instead of relying on jumping and a power-up system for combat as in the traditional Super Mario platformers, Yoshis use their tongue and eggs to overcome obstacles, as well as the introduction of many other different mechanics. The game is notable for introducing a time-based health system rather than hit points, an anomaly to what many platform games typically did in this game's time period. Rather than relying on powerful pre-rendered graphics just like its contemporary Donkey Kong Country, Super Mario World 2: Yoshi's Island employs a very distinct, stylized arts and crafts style to stand on its own. The game makes use of the Super FX2 graphics chip (one of only four commercially-released SNES games to do so), which allows for larger, more detailed sprites and more advanced effects that emulate 3D space.
Although Super Mario World 2: Yoshi's Island was not as financially successful as its predecessor, the game's highly positive reception and unique style has spawned a new series of platform games from the Yoshi franchise, although it is the fourth entry overall. The game has received various adaptations into manga, such as receiving volumes dedicated to it in the Super Mario-kun and Kodansha's Super Mario manga series and extensive merchandising. This is the only Yoshi's Island game to be released on a home console. The game has received a remake on the Game Boy Advance, Yoshi's Island: Super Mario Advance 3, which was released on Virtual Console for the Nintendo 3DS (with owners applicable for the Nintendo 3DS Ambassador Program being able to download the game for free) and Wii U. The original SNES version of Super Mario World 2: Yoshi's Island is included on the SNES Classic Edition, and although it was never announced for release on Virtual Console on any other system, it is one of the 20 launch titles for Super Nintendo Entertainment System - Nintendo Switch Online on the Nintendo Switch. A sequel, Yoshi's Island DS, was released in 2006 for the Nintendo DS. In 2014, the Nintendo 3DS game Yoshi's New Island continues the story told from the first game.
StoryEdit


From the first cinematic of Super Mario World 2: Yoshi's Island:
Narrator: A long, long time ago... This is a story about baby Mario and Yoshi. A stork hurries across the dusky, pre-dawn sky. In his bill, he supports a pair of twins. Suddenly, a shadow appears in a gap between the clouds and races towards the stork with blinding speed.
Kamek: "SCRREEEECH!!!"
Kamek: "THE BABIES ARE MINE!"
Narrator: WOW!!! Snatching only one baby, the creature vanishes into the darkness from whence it came. The second baby falls undetected towards the open sea... OH NO...
Meanwhile, here is Yoshi's Island, home to all Yoshies. It's a lovely day, and Yoshi is taking a walk. HUH?!? Suddenly, a baby drops in onto his back. The baby seems to be fine. This is very fortunate! Wha-? Something else fell with the baby... Let's take a peek... It looks like a map. Maybe the stork was using it? But Yoshi can't figure it out. Yoshi decides to talk to his friends.
Kamek: AAAAAAAAAAKK!!!
Narrator: Kamek, the evil Magikoopa, and kidnapper of the baby, quickly dispatches his toadies, when he discovers that he missed the other baby!
Yoshi heads leisurely back to the other Yoshies, unaware of the danger at hand. Kamek's forces are actively searching the island. Will these two children ever reach their parents safely?
From the second cinematic of Super Mario World 2: Yoshi's Island:
Narrator: This paradise is Yoshi's Island, where all the Yoshies live. They are all in an uproar over the baby that fell from the sky. Wait! The baby seems to know where he wants to go... The bond between the twins informs each of them where the other one is. The Yoshies decide to carry the baby to his destination via a relay system. Now begins a new adventure for the Yoshies and baby Mario.
From the instruction booklet:
This story happened a long time ago...this is a story about a baby and Yoshi...
A stork hurries across the dusky, pre-dawn sky. In his bill, he supports a pair of twins, who are to be delivered to their parents as soon as possible.
Suddenly, something appears between the clouds and races towards the stork with blinding speed!
"SSCCRREEEEECH!!!", it screams. "These babies are mine!"
Snatching only one baby, the creature vanishes into the darkness from whence it came.
Oh no! The second baby falls undetected towards the open sea...
The kidnapper is Kamek, an evil Magikoopa from the Koopa Kingdom. Having divined last night that twin babies born this morning will bring disaster to the Koopa family, he arranged for an early morning ambush. Returning to his castle, Kamek realizes that he missed the other baby. He orders his toadies.
"Go forth and find that other baby! Don't let his parents get him back! Ever!!"
Meanwhile, the second baby does not fall into the sea after all...it lands safely on Yoshi's back! And right after him drops a map!!
This paradise is Yoshi's Island. And on this island lives lots of different Yoshies. These Yoshies are naturally laid back and relaxed, but this a calamity and everyone is in a state of panic. As the Yoshies frantically yell over each other, the baby insistently points at something.
Yes! The baby can sense the other baby's location. All the Yoshies quickly agree to help carry the baby to its destination by using a relay system not unlike the old pony express.
The Green Yoshi draws first honors.
The story of Super Mario World 2: Yoshi's Island takes place while Mario and Luigi are in their infancy, referred to as baby Mario and baby Luigi respectively. A stork was about to deliver the newborn twins baby Mario and baby Luigi to their parents, but is ambushed by Kamek on the way there. While Kamek was successful at capturing baby Luigi and the stork and imprisons them at Bowser's Castle, baby Mario plummets into the sea, only to find himself on a Yoshi's back on an island. The Yoshis then discover that baby Mario also has a map with him, which reveals the location of Bowser's Castle. Kamek has then figured out that he has missed baby Mario and then has dispatched his Toadies to kidnap baby Mario. While the Yoshis discuss what to do with baby Mario, baby Mario then notifies the Yoshis which direction to go due to a powerful twin link, where the Yoshis then employ a relay system to transport baby Mario across the island. After overcoming obstacles and fighting bosses that Kamek has enlarged in various forts and castles in the island, the Yoshis finally manage to defeat Kamek and baby Bowser and rescue baby Luigi and the stork, allowing the stork to safely deliver the babies to their parents.
GameplayEdit

Like the early titles of the Super Mario series, Super Mario World 2: Yoshi's Island is a two-dimensional, side-scrolling platform game. In addition to the typical run and jump controls, the Yoshis can also ingest enemies and manipulate objects using their tongue. After ingesting an enemy, the Yoshi can either eject or swallow them, although if Yoshi keeps an enemy in his mouth long enough, he will eventually swallow it (with the exception of enemies he can only ingest and spit out, and not fully swallow). Swallowing most enemies allows the Yoshi to lay a Yoshi Egg, which it can carry up to six of; eating another enemy results in the egg at the front of the line to be discarded. While Yoshi has some eggs, the player can aim with a constantly moving target reticle and throw them to damage enemies, activate objects, ricochet them off solid surfaces, and skim them across water. This reticle can be locked into one position while aiming, and while Yoshis are aiming their eggs, they can still move around and jump. While most eggs come in green, some are yellow and red, and they release coins and stars when shattered respectively. While a Yoshi throws an egg, the egg changes color depending on how much it has bounced off walls. Green eggs can bounce up to three times, yellow eggs bounce only twice, and red eggs bounce only once. Power-ups also exist in the form of metamorphosis bubbles, which allow Yoshi to transform into various forms, and the Super Star, which lets baby Mario turn into Powerful Mario. In addition to these moves, Yoshis can use Hovering Jumps multiple times in the air to increase the distance they travel. The first Hovering Jumps can increase the height of the jump, but subsequent Hovering Jumps mostly serve to prolong the duration of the fall. Yoshis can Pound The Ground to smash stakes and defeat certain types of enemies. Camera controls include looking up to see upper areas of the level and ducking to force the camera down.

Super Mario World 2: Yoshi's Island introduces the concept of time-based health, a mechanic that is reused in future Yoshi's Island games. When the Yoshi comes into contact with an enemy, baby Mario becomes separated from Yoshi, encased in a bubble and floating around in the air. While baby Mario is in this state, a Countdown Timer appears, counting down in seconds until it reaches zero, in which time Yoshi must recover baby Mario or Kamek's Toadies take baby Mario, and the player loses a life. The Timer starts at ten seconds at the beginning of each level, and can be increased to a maximum of thirty by collecting Stars, using 10 Point Stars and 20 Point Stars, and entering Middle Rings. If the Timer falls below ten, it increases back up to ten slowly after recovering baby Mario. Entering a Middle Ring also marks the point where the Yoshi can continue from if it loses a life. Other ways Yoshis can lose lives are if they touch spikes or thorns, if they fall off a cliff, if they touch lava, if they get eaten by a Lunge Fish, or if they get crushed by moving platforms. In these cases, Yoshi's death is shown onscreen, either by spinning and collapsing or flying offscreen. If the player runs out of lives, they receive a Game Over.
There are six worlds in this game, and each world has nine levels total. The objective of each level is to reach the Goal Ring roulette. There are ten spots on the roulette, and five of the spots can be made winning spots by collecting the five Special Flowers in each level. Landing on one of the flower points allows the player to play a Bonus Challenge. These Bonus Challenge allow Yoshis to either gain lives or Special Items for use in levels. Two levels in each world are forts and castles, and the goal in those levels is to reach and defeat the eponymous boss that resides in those establishments rather than reach a Goal Ring. Most bosses are regular enemies that are enlarged by Kamek prior to the fight, with a few exceptions.
Scattered throughout each level are three types of collectibles: thirty Stars, twenty red coins, and five Special Flowers. At the end of each level, the player's score is tallied with a maximum of 100 points, with flowers worth ten points each and red coins and Stars one point each. Attaining a perfect one hundred points in all eight levels in a world unlocks a Bonus Challenge and an "extra" ("special" in Japanese) level on the level selection map. The extra levels are designed to be more difficult than any other level in the game, and each one has its own unique gimmick. However, the player can always choose to exit an extra level by pausing the game and pressing ![]() ; in other levels, this can be done only if the level in question has already been cleared.
; in other levels, this can be done only if the level in question has already been cleared.
If the player succeeds in attaining a perfect one hundred points in the extra level of a world, a Star is added to the top of the title screen the next time the player turns on the game, for a maximum of six Stars.
ControlsEdit

There are two controller configurations: Patient and Hasty. By default, Patient is selected. The control setup can be swapped at any time on the world map by scrolling over to the button with the Super Nintendo controller next to the "Score" option and selecting it; additionally, at some points, there are Message Blocks that allow the player to swap control configurations. The only difference between the "Hasty" and "Patient" settings is that with "Patient" the player must press ![]() to target and press it again to throw an egg, while with "Hasty" the player must hold
to target and press it again to throw an egg, while with "Hasty" the player must hold ![]() to target and release it to toss an egg.
to target and release it to toss an egg.
| Action | Patient | Hasty |
|---|---|---|
| Move | ||
| Jump | ||
| Pound The Ground | ||
| Eat, spit out | ||
| Duck, swallow | ||
| Aim/throw egg | ||
| Lock target reticule | ||
| Look up | ||
| Pause menu | ||
| Level options | ||
Worlds and levelsEdit


The setting of the game takes place on Yoshi's Island, which is the first world setting of Super Mario World. The island portrayed in Super Mario World 2: Yoshi's Island, however, is much larger in scale and comes with a larger variety of biomes and characters endemic to the island as players progress through the game. The game contains six worlds with eight regular levels each, retaining the eight level per world structure first normalized by Super Mario Bros. 3, having a consistent amount of levels per world, and every fourth and eighth level of the world features a boss fight against an enemy enlarged by Kamek. All worlds have particular themed biomes, such as World 1 having a grasslands while World 6 has a stronger theme around caverns and lava as the player closer approaches King Bowser's Castle; this theming of levels has been carried in further entries of the Yoshi's Island series. Unlike Super Mario World, Super Mario World 2: Yoshi's Island does not employ use of a world map and relies on a level select screen, which is represented by color-coded folders containing icons that preview the levels, and these levels are named after their features than rather than using generic numbered identifies, such as the third level of World 3 being called Nep-Enut's Domain rather simply being called World 3-3. One notable aspect of the level icons is that all Yoshis in their previews are Green Yoshis, despite Green Yoshis being used only in the first levels of each world, the Extra levels and King Bowser's Castle. While most levels have players moving on their own accord, a few levels are autoscrollers, with the first one being encountered in Hop! Hop! Donut Lifts in World 1.
Every world contains an unlockable level known as an Extra levels, which are unlocked when players get a 100 score in all levels of the worlds. These levels feature a gimmick and are shorter and more difficult than other levels of the game, often do not contain Middle Rings and they are optional to complete in regards of general progression of the game. These levels do not feature unique icons that display a preview of the level and are instead represented by a star with a number and identifier. In addition, when players first play the game, they play through a level called Welcome To Yoshi's Island, which serves as a short tutorial guiding players basic controls of the game. Once completed, it cannot be replayed, effectively making it an unrevisitable area.
Due to the light arts and crafts aesthetic of the game and usage of the Super FX2 graphics chip, levels and their backdrops are rendered reminiscent of drawings rather than the more organic approach that Super Mario World has done, and their backdrops are dynamically rendered with a more complex palette. For example, the primary backdrop for Watch Out Below! from World 1 uses a soft palette and hills having an emulated colored pencils aesthetic, clouds and hills contain visible shading streaks to communicate their shadows, environment features such as waterfalls and crystals in cave levels such as The Cave Of Chomp Rock and The Cave Of The Mystery Maze are animated, Goonie Rides! renders a shimmering ocean with a large flock of the Goonie species and variants flying in the background, while the general aesthetic of World 6 primarily uses warm color palettes to communicate players that the world is lava-themed and the final world of the game.


CharactersEdit
Playable charactersEdit
The Yoshi species are the primary playable characters of the game and this appearance is their first starring appearance in a platformer title. All Yoshis play identically to each other, and Super Mario World 2: Yoshi's Island introduces even more color variations to the Yoshi species: in addition to the Green, Red, Blue and Yellow Yoshis that are present in Super Mario World, Pink, Light Blue, Purple, and Brown Yoshis are introduced. While Pink, Light Blue, and Purple Yoshis become mainstay colors in future installments of the overall Super Mario franchise, Brown Yoshis remain exclusive to this title, being replaced by Orange Yoshis. The Yoshis in this game retain their long tongues and their abilities to eat most objects from Super Mario World, though the game introduces Hovering Jumps, turning enemies and objects into eggs that can be used as projectiles, and pounding the ground.
The Yoshi colors are specific to the levels they are played on.
| Image | Name | Description | First level | Last level
|
|---|---|---|---|---|
| Green Yoshi | The Green Yoshi is playable in the most levels of all Yoshis, with a total of eighteen, as it is always playable in the tutorial level, the first level of each world, extra levels, Mini Battles, and King Bowser's Castle. It also fights the fewest bosses of all Yoshis, with a total of two (including Big Baby Bowser). | Welcome To Yoshi's Island | Castles - Masterpiece Set | |
| Pink Yoshi | The Pink Yoshi is always playable in the second level of each world.a | Watch Out Below! | The Cave Of The Bandits | |
| Light Blue Yoshi | The Light Blue Yoshi is always playable in the third level of each world. | The Cave Of Chomp Rock | Beware The Spinning Logs | |
| Yellow Yoshi | The Yellow Yoshi is always playable in forts, the fourth level of each world, and always fight against bosses here. | Burt The Bashful's Fort | Tap-Tap The Red Nose's Fort | |
| Purple Yoshi | The Purple Yoshi is always playable in the fifth level of each world. | Hop! Hop! Donut Lifts | The Very Loooooong Cave | |
| Brown Yoshi | The Brown Yoshi is always playable in the sixth level of each world. | Shy-Guys On Stilts | The Deep, Underground Maze | |
| Red Yoshi | The Red Yoshi is always playable in the seventh level of each world.a | Touch Fuzzy, Get Dizzy | KEEP MOVING!!!! | |
| Blue Yoshi | The Blue Yoshi is playable in the fewest levels of all Yoshis, with a total of five, as it is playable in castles, the eighth level of each world, with the exception of World 6, where the Green Yoshi takes the role instead. | Salvo The Slime's Castle | Raphael The Raven's Castle |
a - The Yoshis' positions on the map screen are swapped, with the Pink Yoshi at the seventh level and the Red Yoshi at the second. This was corrected in the Game Boy Advance version.
Supporting charactersEdit
While Yoshi games prior feature adult Mario in a starring role while Yoshi accrues a more passive role, such as Yoshi, Yoshi's Cookie, and Yoshi's Safari, Super Mario World 2: Yoshi's Island and further entries in the Yoshi's Island series flips the roles in which the Yoshis are the primary, controllable stars while Mario, as baby Mario, rides on Yoshis and acts as their timed health meter should they get hurt by enemies or objects. Baby Mario is directly controllable only under the effects of the Super Star as Superstar Mario where he dons a yellow cape and becomes invincible. Luigi makes his debut in the overall Yoshi franchise as baby Luigi, though his role mirrors Princess Peach of the Super Mario franchise in that he is kidnapped and the overall goal of the game is to rescue him from Kamek and baby Bowser's clutches.
Two supporting characters are introduced in Super Mario World 2: Yoshi's Island and make recurring appearances throughout the Yoshi franchise. The stork, designed after the white stork representing an animal of folklore known to deliver babies to parents, gets ambushed and kidnapped alongside baby Luigi at the start of the game. The latter character Poochy is a dog-like creature that follows Yoshi around and Yoshi can ride on who can run on dangerous terrain such as lava and spikes.
| Image | Name | Description
|
|---|---|---|
| Baby Mario | Mario as an infant. The Yoshis have to transport him and take care of him throughout the game. Players can control him when he obtains a Super Star. | |
| Baby Luigi | Luigi as an infant. He is kidnapped by Kamek and, similar to Princess Peach of the Super Mario franchise, he needs to be rescued. | |
| Stork | The bird that delivers baby Mario and baby Luigi to their parents. The stork is captured by Kamek, alongside baby Luigi. |
HelpersEdit
Six helpful, generic characters assist Yoshis should they meet them. They are all harmless characters and help Yoshis either navigate through the course or provide Yoshis with ammunition such as Melon Bugs and Huffin Puffins.
| Image | Name | Description | First level | Last level
|
|---|---|---|---|---|
| Melon Bug | Pill bug-like creatures that can roll up into balls and be used as projectiles which can defeat a wide variety of enemies, including Tap-Taps. | Touch Fuzzy, Get Dizzy | Chomp Rock Zone | |
 |
Liquid lift | A water spirit that lifts Yoshi to higher places by moving fluidly in a looping motion. | Salvo The Slime's Castle | Salvo The Slime's Castle |
| Poochy | A dog that can run across dangerous terrain. He travels in the same direction a Yoshi faces, and he follows a Yoshi. | Poochy Ain't Stupid | Jungle Rhythm... | |
| Huffin Puffin | A fat chicken based on a duck that wanders around with chicks following. The chicks can be used as replacements for eggs. | Nep-Enut's Domain | Welcome To Cloud World | |
| Muddy Buddy | A creature out of mud that covers a Yoshi's feet, allowing Yoshis to safely traverse over spikes. | Sluggy The Unshaven's Fort | Sluggy The Unshaven's Fort | |
 |
Support Ghost | A monochrome Blargg with a Flatbed Ferry atop its head that takes Yoshi through treacherous terrain. | Sluggy The Unshaven's Fort | Sluggy The Unshaven's Fort |
EnemiesEdit
| Image | Name | Description | First level | Last level
|
|---|---|---|---|---|
| Aqua Lakitu | A Lakitu that hides underwater and throws Spiny Eggs at a Yoshi. Yoshis can defeat them when they come up from the water to attack. | Naval Piranha's Castle | Naval Piranha's Castle | |
| Bandit | Thieves that attempt to steal baby Mario from Yoshi. It takes six eggs, three jumps or Pound the Ground to defeat them. They appear in Mini Battles as the opponent a Yoshi faces. | Salvo The Slime's Castle | King Bowser's Castle | |
| Barney Bubble | Circular, purple enemies that quickly run back forth. Eggs or jumping on them can defeat them, though they cannot be eaten. When stomped on, they produce bubbles that a Yoshi can use. | Monkeys' Favorite Lake | Monkeys' Favorite Lake | |
| Baron von Zeppelin | A balloon that carries either helpful objects or harmful objects. They drop their item they are holding when a Yoshi approaches from underneath, or, in the case of helpful items only, when a Yoshi touches them or hits them with an egg. | Make Eggs, Throw Eggs | King Bowser's Castle | |
| Beach Koopa | A shell-less Koopa Troopa. They can be defeated by eating them, throwing eggs on them, or stomping them. If they find a shell, they wear it. | Visit Koopa And Para-Koopa (red) GO! GO! MARIO!! (green) |
Hookbill The Koopa's Castle (green) Beware The Spinning Logs (red) | |
| Big Boo | A larger version of the Boo. They act in the same fashion as them: they stop moving when looked at and follow a Yoshi when a Yoshi turns away from them. They can be defeated only by looking away from them and bouncing an egg off a wall to hit them. Sometimes, a trail of Boos follows them. | Bigger Boo's Fort | Tap-Tap The Red Nose's Fort | |
| Big Shy Guy | Normal-sized and -acting Shy-Guys encountered by a tiny Yoshi during the battle against Froggy. | Prince Froggy's Fort (red) Prince Froggy's Fort (green) |
Prince Froggy's Fort (red) Prince Froggy's Fort (green) | |
| Blow Hard | Cactus enemies that shoot Needlenoses at a Yoshi, indicated by a flashing crosshair. Throwing eggs at them or Pounding The Ground nearby temporarily stuns them. They can be defeated only with a blue watermelon or red watermelon. | The Baseball Boys | KEEP MOVING!!!! | |
| Boo Balloon | Balloons in the shape of Boos that wander around an area, attempting to attack a Yoshi. Hitting them with an egg inflates them; three hits defeats them. | Bigger Boo's Fort | Don't Look Back! | |
| Boo Blah | Adhesive ghosts that stick to the floor or ceiling and jump up periodically. Stepping on them stuns them temporarily; they can be defeated with an Anywhere POW or a Winged Cloud Maker. | Bigger Boo's Fort | Bigger Boo's Fort | |
| Boo Buddy | Ghost enemies that stop moving when looked at and follow a Yoshi when facing away. They can be defeated only by looking away from them and bouncing an egg off a wall to hit them. | Bigger Boo's Fort | Tap-Tap The Red Nose's Fort | |
| Boo Guy | A ghost Shy-Guy that floats and meanders around. | Bigger Boo's Fort | The Deep, Underground Maze | |
| Boo Man Bluff | A blindfolded Boo that uses sound cues such as the gathering of coins to attack a Yoshi. | Bigger Boo's Fort | Bigger Boo's Fort | |
| Bouncing Bullet Bill | Bullet Bills that fired from a yellow Turtle Cannon and can bounce off any surface they touch. | Raphael The Raven's Castle | Raphael The Raven's Castle | |
| Bowling Goonie | A Hefty Goonie that is spat out and rolls about. They can be defeated by Pounding The Ground. | Goonie Rides! | Raphael The Raven's Castle | |
| Bubble Dayzee | Purple Crazee Dayzees that can blow bubbles. | Watch Out For Lakitu | Goonie Rides! | |
| Bullet Bill | Bullet-like enemies that are emitted from a Turtle Cannon and travel in a straight line. | Poochy Ain't Stupid | Raphael The Raven's Castle | |
| Bumpty | Penguin-like foes that can bump a Yoshi around. They cannot be eaten. | BLIZZARD!!! | Kamek's Revenge | |
| Burt | Rotund, circular enemies that attack in pairs by jumping on top of each other. When one is defeated, the other Burt jumps more quickly. They can be defeated with an egg or by Pounding The Ground. | Burt The Bashful's Fort | The Potted Ghost's Castle | |
| Cactus Jack | Stationary foes that can be moved only when shot by an egg. If they come in contact with anything while rolling, they explode. | Watch Out For Lakitu | The Cave Of The Mystery Maze | |
   |
Caged Ghost | Ghosts that appear from drainage grates. Hitting them with eggs shrinks them until they disappear momentarily, before regrowing to their large size. | Naval Piranha's Castle | Castles - Masterpiece Set |
| Chain Chomp | Confined, dog-like enemies that lunge at a Yoshi within their range of attack. They can be defeated by using an Anywhere POW or a Winged Cloud Maker. | Sluggy The Unshaven's Fort | Sluggy The Unshaven's Fort | |
| Clawdaddy | Crabs covered in foam that uses its claws to attack a Yoshi. Three eggs or Pounding The Ground can defeat them. | Nep-Enut's Domain | Lake Shore Paradise | |
| Cloud Drop | Enemies that move back and forth in the air. | Watch Out Below! | KEEP MOVING!!!! | |
| Coin Bandit | Bandits that carry a red coin on their heads. They run away if they see a Yoshi, but if a Yoshi collects a coin, they behave as normal Bandits: they attempt to take baby Mario away. It takes six eggs or three jumps to defeat them. Likewise, Pounding The Ground can also defeat them. | Marching Milde's Fort | The Cave Of The Bandits | |
| Crazee Dayzee | Very common enemies that behave as Shy-Guys; they wander around. Unlike Shy-Guys, they can survive if spat out, unless they collide with another enemy or object. | Make Eggs, Throw Eggs (yellow) Make Eggs, Throw Eggs (white) |
Goonie Rides! (yellow) Goonie Rides! (white) | |
| Dancing Spear Guy | Spear Guys that appear in groups and dance around. They can be defeated with eggs or eating them. | Jungle Rhythm... | Castles - Masterpiece Set | |
| Dangling Ghost | Ghosts that swing back and forth while dangling from a ceiling. They can be temporarily retracted if an egg is shot at them. | Sluggy The Unshaven's Fort | Castles - Masterpiece Set | |
| Dizzy Dandy | Enemies that resemble Special Flowers, but with an angry face. When Yoshi approaches them, they collapse and roll towards Yoshi's direction. | The Potted Ghost's Castle | BLIZZARD!!! | |
| Dr. Freezegood | Stationary snowmen that appear on ski lifts and push Yoshi around. They can be defeated by jumping on them. | Ride The Ski Lifts | Danger - Icy Conditions Ahead | |
| Eggo-Dil | Flower-like enemies that can expel their petals in a straight direction. Yoshi can eat the petals or perform a Pound The Ground on the Eggo-Dil to make it lose its petals. Only use of a Chomp Rock can defeat them. | Touch Fuzzy, Get Dizzy | Chomp Rock Zone | |
| Fang | Flying bat enemies that can swoop down and fly around to attack Yoshi. | Shy-Guys On Stilts | King Bowser's Castle | |
| Fat Guy | Fat, slow-moving Shy-Guys that produce Giant Eggs when Yoshi eat them. | Lakitu's Wall (red) Lakitu's Wall (green) |
Lakitu's Wall (red) Lakitu's Wall (green) | |
| Fishing Lakitu | Lakitus that attempt to steal baby Mario off Yoshi's back with their fishing hooks. | Hookbill The Koopa's Castle | Hookbill The Koopa's Castle | |
| Flamer Guy | Shy-Guys caught on fire that can give a Yoshi the ability to shoot fire when eaten. | Scary Skeleton Goonies! | King Bowser's Castle | |
| Flightless Goonie | Goonies that lack wings. They walk quickly back and forth. | What's Gusty Taste Like? | Kamek's Revenge | |
| Flightless Skeleton Goonie | Skeletal Flightless Goonies that walk quickly back and forth. | Scary Skeleton Goonies! | The Very Loooooong Cave | |
| Flopsy Fish | Fish that appear in water and can jump out. Eating them does not produce eggs. | Nep-Enut's Domain | Danger - Icy Conditions Ahead | |
| Fly Guy | Flying Shy-Guys that can carry various items such as red coins and 1-Ups. After a certain time has passed, the Fly Guys that carry helpful items fly away. | Make Eggs, Throw Eggs | King Bowser's Castle | |
| Flying Wiggler | Flying enemies that get enraged and go after a Yoshi if an egg is thrown at them or stepped on. They can be defeated by either getting eaten or by performing a Pound the Ground on them. | GO! GO! MARIO!! | GO! GO! MARIO!! | |
| Frog Pirate | Frogs that can launch their long tongues and grab baby Mario off a Yoshi's back. Jumping on them stuns them temporarily, but they can get defeated by eating them or throwing eggs at them. | Nep-Enut's Domain | Prince Froggy's Fort | |
| Fuzzy | Puffy enemies that drift along. If a Yoshi touches one or eats one, dizzy, disorienting effects occur, which wear off after a period of time. Eggs can defeat them. | Touch Fuzzy, Get Dizzy | Beware The Spinning Logs | |
 |
Gargantua Blargg | Tall and large enemies that appear out of lava and block a Yoshi's path, also giving a chase to a Yoshi. Shooting an egg at it temporarily causes it to retreat into lava. | Burt The Bashful's Fort | Burt The Bashful's Fort |
| Georgette Jelly | Slow-moving enemies that cannot be eaten. Jumping on them splatters them on walls, which eventually causes them to reform. | Sluggy The Unshaven's Fort | Sluggy The Unshaven's Fort | |
| Goomba | Small, weak enemies that walk back and forth. When jumped on, they are flattened, but can still move around and hurt a Yoshi. They can be defeated by throwing an egg at them, Pounding The Ground below them, or eating them. | GO! GO! MARIO!! | GO! GO! MARIO!! | |
| Goonie | Bird enemies that fly around and can be ridden on. Some of them carry bombs and Shy-Guys. Spitting them out turns them into Flightless Goonies. | Danger - Icy Conditions Ahead | Kamek's Revenge | |
| Green Glove | An enemy that can catch eggs and throw them back at Yoshi. | The Baseball Boys | Castles - Masterpiece Set | |
| Green Toady | Toadies that appear alone, which slowly chase Yoshi. When Yoshi comes in contact with them, they steal baby Mario. | Scary Skeleton Goonies! | The Deep, Underground Maze | |
| Grim Leecher | Enemies that latch onto Yoshi, kicking baby Mario off and reversing the game's controls. | The Impossible? Maze | The Impossible? Maze | |
| Grinder | Monkeys that appear in jungle levels, where they can be seen jumping around and climbing vines. Some Grinders carry green watermelons and spit the seeds at a Yoshi. They can snatch baby Mario and run away with him. | Welcome To Monkey World! (normal) Welcome To Monkey World! (spitting) Welcome To Monkey World! (swinging) |
Monkeys' Favorite Lake (swinging) More Monkey Madness (normal) More Monkey Madness (spitting) | |
| Grunt | Enemies that wear spiked helmets. If hit by an egg, they lose their helmets, causing them to frantically run around. | Marching Milde's Fort | Castles - Masterpiece Set | |
| Gusty | Fast, aerial enemies that appear offscreen and move in a straight line. | What's Gusty Taste Like? | King Bowser's Castle | |
| Harry Hedgehog | Fast-moving, blue hedgehogs that puff up in a spiny, defensive position if a Yoshi approaches them. They cannot be eaten when in the defensive position. | The Cave Of Harry Hedgehog | The Cave Of Harry Hedgehog | |
| Hefty Goonie | Large Goonies that bounce about rather than flying. They turn into Bowling Goonies if spat out or hit by an egg. | Goonie Rides! | Goonie Rides! | |
| Hootie the Blue Fish | Propelled Wild Piranhas that patrol along a set path, often in pairs. Throwing an egg at them temporarily stuns them. A red watermelon, blue watermelon, or Anywhere POW can defeat them. | Naval Piranha's Castle | Naval Piranha's Castle | |
| Hopping Tap-Tap | Gray Tap-Taps that bounce in place rather than walking. | Lakitu's Wall | KEEP MOVING!!!! | |
| Hot Lips | Submerged enemies that periodically spits lava, which defeats a Yoshi when touched. They can be temporarily stunned with an egg, though Anywhere POWs can defeat them. | Marching Milde's Fort | Hookbill The Koopa's Castle | |
 |
Incoming Chomp | Chain Chomps that appear in the background and jump nearby to where a Yoshi is, smashing any ground below them. | Watch Out Below! | Scary Skeleton Goonies! |
 |
Itsunomanika Heihō | A green Shy-Guy that hinds behind foreground objects. If a Yoshi runs through the hiding spot, a Bandit will appear and run off with Baby Mario, leaving the Itsunomanika Heihō in his place. | Watch Out For Lakitu | GO! GO! MARIO!! |
| Jean de Fillet | Fish that jump out of lava and water to attack a Yoshi. Eggs can defeat them. | The Impossible? Maze | Tap-Tap The Red Nose's Fort | |
| Kaboomba | Cannon foes that shoot cannonballs, which explode after a few seconds. A Yoshi can ride on them by jumping on them. Eggs or Pounding The Ground can defeat them. | The Cave Of The Mystery Maze | Raphael The Raven's Castle | |
| Kamek | One of the primary antagonists of the game that appears as an enemy in a few levels. He continuously flies around, swoops down, and attacks a Yoshi. | Kamek's Revenge | King Bowser's Castle | |
| Kamek's Toadies | A quartet of small Magikoopas that work for Kamek. They kidnap baby Mario when the Timer runs out. | King Bowser's Castle | King Bowser's Castle | |
| Koopa Troopa | Turtle enemies that have hard shells preventing them from being ingested and turned into eggs. Despite this, Yoshis can spit out their shells. When jumped on, they fly out of their shells and become Beach Koopas. | Visit Koopa And Para-Koopa (red) GO! GO! MARIO!! (green) |
Hookbill The Koopa's Castle (green) Beware The Spinning Logs (red) | |
| Lakitu | Cloud riding turtle enemies that chase their opponents in the same manner that they did in Super Mario World, except they use cursors to throw Spiny Eggs; if a Yoshi touches one of these cursors, then the Lakitu throws an egg towards the Yoshi's spot. | Watch Out For Lakitu | Welcome To Cloud World | |
| Lantern Ghost | Lantern-carrying specters that appear in dark areas and behave similarly to Shy-Guys. | The Cave Of Chomp Rock (green) The Cave Of Chomp Rock (orange) The Cave Of Chomp Rock (gray) Shy-Guys On Stilts (biege) |
The Cave Of The Mystery Maze (green) The Cave Of The Lakitus (orange) BLIZZARD!!! (gray) BLIZZARD!!! (biege) | |
| Lava Bubble | Fireballs that jump up and down out of lava. If a Yoshi eats one, it can spit fire. | Burt The Bashful's Fort | The Very Loooooong Cave | |
| Lava Drop | Floating balls of lava that patrol either left and right or up and down. They can be defeated by passing through a Middle Ring or a Winged Cloud Maker. | Don't Look Back! | KEEP MOVING!!!! | |
| Lemon Drop | Goopy, yellow gumdrops that are detached from Salvo the Slime when he is hit. They also appear as enemies in Prince Froggy's Fort. | Salvo The Slime's Castle | Prince Froggy's Fort | |
| Little Mouser | Mice enemies that attempt to steal a Yoshi Egg and run away with it. | The Baseball Boys (blue) KEEP MOVING!!!! (black) |
Tap-Tap The Red Nose's Fort (blue) KEEP MOVING!!!! (black) | |
| Little Skull Mouser | A Little Mouser that jumps. Unlike Little Mousers, it does not steal eggs. If hit by an egg or a jump, or if a Yoshi Punds The Ground, the skull helmet crumbles and turns the enemy into a Little Mouser. | The Baseball Boys | The Cave Of The Bandits | |
| Loch Nestor | Passive enemies that appear only when a Yoshi has transformed into a submarine. When Yoshi hits them with a torpedo, they give chase. It is defeated when hit three times by a torpedo. | Nep-Enut's Domain | Monkeys' Favorite Lake | |
| Lunge Fish | Large lungfish that hide in the water, waiting for a Yoshi to approach. When a Yoshi gets close enough, they lunge out of the water, attempting to eat the Yoshi. If they are successful, the Yoshi instantly loses a life. They can be momentarily stunned if an egg is thrown at them. | Monkeys' Favorite Lake | Monkeys' Favorite Lake | |
| Mace Guy | Shy-Guys that swing flails. If a Yoshi eats the Shy-Guy, the Mace Guy loses its mace. | Sluggy The Unshaven's Fort | Castles - Masterpiece Set | |
| Mace Penguin | Small enemies that can create and throw large spike balls as a projectile. | BLIZZARD!!! | BLIZZARD!!! | |
| Milde | Enemies that march around in lines. When jumped on, they pop, knocking back any enemies nearby them. | Touch Fuzzy, Get Dizzy | King Bowser's Castle | |
| Mock Up | Balloons that inflate when a Yoshi approaches them. If the Yoshi eats the balloon before it pops, a 1-Up is awarded. If the balloon pops, Yoshi gets damaged, while a Fly Guy flies away. | Shy-Guys On Stilts (green) Don't Look Back! (red) |
Don't Look Back! (green) Don't Look Back! (red) | |
| Mufti Guy | Shy-Guys that disguise themselves as flowers. When a Yoshi approaches, they stand up and walk after a Yoshi. | Hop! Hop! Donut Lifts (magenta) The Cave Of The Mystery Maze (red) The Cave Of The Mystery Maze (green) Goonie Rides! (yellow) |
Hop! Hop! Donut Lifts (magenta) The Cave Of The Mystery Maze (red) Goonie Rides! (green) Goonie Rides! (yellow) | |
| Needlenose | Spiky, ball-like enemies often appear as projectiles in enemy attacks. They can be eaten and turned into eggs. Yellow Needlenoses pop when they strike an object, while green Needlenoses bounce around. | The Baseball Boys (yellow) Welcome To Monkey World! (green) |
KEEP MOVING!!!! (yellow) KEEP MOVING!!!! (green) | |
 |
Nep-Enut | Aquatic enemies that chase a Yoshi and pop up out of the water in a similar fashion to Gargantua Blarggs. Shooting at egg at it temporarily causes it to retreat into the water. | What's Gusty Taste Like? | Nep-Enut's Domain |
| Nipper Plant | Enemies that appear after a Nipper Spore has touched the ground. | The Cave Of Chomp Rock | Naval Piranha's Castle | |
| Nipper Spore | Free-flying, dandelion-like enemies that become Nipper Plants after they touch the ground. Eating them does not produce eggs. | The Cave Of Chomp Rock | Naval Piranha's Castle | |
| Para-Koopa | Winged Koopa Troopas that fly around. They lose their wings when jumped on or eaten. | Visit Koopa And Para-Koopa (red) GO! GO! MARIO!! (green) |
Lake Shore Paradise (green) Beware The Spinning Logs (red) | |
| Piro Dangle | Balls of fire that patrol a set path. They appear only in a secret room in Burt The Bashful's Fort, where they cannot be defeated. | Burt The Bashful's Fort | Burt The Bashful's Fort | |
| Piscatory Pete | Fish enemies that are obstacles encountered by Yoshi in the submarine form. Firing a torpedo at them defeats them. | Nep-Enut's Domain (blue) Nep-Enut's Domain (yellow) |
Nep-Enut's Domain (yellow) Monkeys' Favorite Lake (blue) | |
| Pokey | Cactus enemies that bounce Needlenoses on their heads. | Watch Out For Lakitu | BLIZZARD!!! | |
| Potted Spiked Fun Guy | Spiked Fun Guys that hide in pots. Throwing eggs at them can defeat them. | Jammin' Through The Trees | KEEP MOVING!!!! | |
| Preying Mantas | Jellyfish enemies that are obstacles encountered by Yoshi in submarine form; they move up and down. Firing a torpedo at them defeats them. | Nep-Enut's Domain | Monkeys' Favorite Lake | |
 |
Puchipuchi L | Bigger versions of Mildes that split into four smaller Mildes when jumped on. Even bigger ones instead split into two big ones. | Marching Milde's Fort | Hookbill The Koopa's Castle |
| Raven | Black, bird-like enemies that are found wandering on large floating rocks. A Yoshi cannot eat them, but they can be defeated by jumping on them or throwing eggs at them. | Shifting Platforms Ahead | Raphael The Raven's Castle | |
| Raven (chick) | Small, black bird-like enemies that can climb on walls and ceilings. When eaten, they do not produce eggs. | Naval Piranha's Castle | Beware The Spinning Logs | |
| Red Blargg | Enemies that rise out of lava to hurt a Yoshi. Throwing eggs at them temporarily stuns them, but an Anywhere POW can defeat them permanently. | Burt The Bashful's Fort | Burt The Bashful's Fort | |
| Relay Heihō | Lines of Boo Guys that pass bombs between each other to drop. | The Potted Ghost's Castle | King Bowser's Castle | |
| Sanbo Flower | Egg-Plants that instead produce harmful Needlenoses until a Yoshi has the maximum number of eggs. | Lake Shore Paradise | KEEP MOVING!!!! | |
| Seedy Sally | Stationary Grinders on vines that drop Needlenoses directly below. | Welcome To Monkey World! | Monkeys' Favorite Lake | |
 |
Shark Chomp | Enormous, invincible enemies that give a Yoshi a chase until it chomps on a hard surface and breaks its teeth, defeating it. | Marching Milde's Fort | KEEP MOVING!!!! |
| Short Fuse | Stationary Grinders on vines that drop bombs directly below. | Welcome To Monkey World! | Monkeys' Favorite Lake | |
 |
Shy-Guy | Mask-wearing enemies that are the ubiquitous enemy in the game. They wander about, come in different colors, and can be defeated in any manner. Shy-Guys can spawn out of certain Warp Pipes until a Yoshi has the maximum number of eggs. | Welcome To Yoshi's Island (magenta) Welcome To Yoshi's Island (red) Make Eggs, Throw Eggs (yellow) Make Eggs, Throw Eggs (green) Lakitu's Wall (wheel) |
More Monkey Madness (wheel) King Bowser's Castle (magenta) Castles - Masterpiece Set (red) Castles - Masterpiece Set (yellow) Castles - Masterpiece Set (green) |
| Shy-Guy on Stilts | Shy-Guys on tall stilts that cannot be eaten in the front; a Yoshi must eat them from behind. If jumped on, they lose their stilts and turn into Shy-Guys. | Shy-Guys On Stilts (magenta) Shy-Guys On Stilts (green) Shy-Guys On Stilts (yellow) Shy-Guys On Stilts (red) |
Lake Shore Paradise (yellow) Lake Shore Paradise (green) King Bowser's Castle (red) King Bowser's Castle (magenta) | |
| Skeleton Goonie | Skeletal Goonies that cannot be ridden, instead turning into Flightless Skeleton Goonie if stepped on. Some of them carry bombs to drop on a Yoshi. | Danger - Icy Conditions Ahead | King Bowser's Castle | |
 |
Slime | Enemies that are disguised as large, rectangular platforms, carrying keys, until a Yoshi touches them, which transforms them. When hit by a seed or an egg, they turn smaller until they disappear. | Salvo The Slime's Castle | King Bowser's Castle |
| Slugger | Enemies holding baseball bats that deflect projectiles such as eggs, watermelon seeds, or Chomp Rocks. | The Baseball Boys | Beware The Spinning Logs | |
| Sluggy | Slug-like enemies that attack a Yoshi by dropping off a ceiling. They can be defeated by jumping on them. | Sluggy The Unshaven's Fort (yellow) Sluggy The Unshaven's Fort (pink) |
Sluggy The Unshaven's Fort (pink) Sluggy The Unshaven's Fort (yellow) | |
| Snifit | Shy-Guy-like enemies that can shoot projectiles in a straight line, and the projectile can go through walls. | Marching Milde's Fort | KEEP MOVING!!!! | |
| Solo Toady | Pink Toadies that appear to snatch baby Mario directly after he's knocked off Yoshi's back. | The Baseball Boys | The Cave Of The Bandits | |
| Spear Guy | Shy-Guys that cannot be jumped on, with their shield in the front protecting them from attacks in that range. A Yoshi can defeat them by eating them or throwing an egg at them when their back is turned. | Jungle Rhythm... | King Bowser's Castle | |
| Spiked Fun Guy | Enemies that cannot be jumped on; despite this, a Yoshi can either eat them or throw eggs at them to defeat them. | Jammin' Through The Trees | KEEP MOVING!!!! | |
| Spooky | Enemies that wear a disguise as a ghost. A Yoshi can ride on a Spooky, but cannot defeat the Spooky with a jump. If a Spooky lands on top of a Yoshi, it can steal baby Mario. When a Yoshi attacks it, its disguise is revealed as a green Shy-Guy. If baby Mario is stolen, a Bandit is revealed. | The Deep, Underground Maze | The Deep, Underground Maze | |
| Spray Fish | Fish enemies that appear out of water and spray a jet of water that pushes a Yoshi back. They can be temporarily stunned if an egg is thrown at it. | Salvo The Slime's Castle | Danger - Icy Conditions Ahead | |
| Stretch | Tall, thin Shy-Guys that cannot be defeated by jumping on them. When jumped on, they spit out an endless supply of watermelon seeds. | Nep-Enut's Domain (green) King Bowser's Castle (yellow) King Bowser's Castle (magenta) |
King Bowser's Castle (yellow) King Bowser's Castle (magenta) King Bowser's Castle (green) | |
| Tap-Tap | Spiky enemies that are impervious to most attacks, but they can be pushed around and stunned if a Yoshi licks them or throws an egg at them. Melon Bug balls, Chomp Rocks, red watermelons, and blue Watermelons can defeat them. | Touch Fuzzy, Get Dizzy (orange) Touch Fuzzy, Get Dizzy (gray) |
Scary Skeleton Goonies! (gray) The Deep, Underground Maze (orange) | |
 |
Tap-Tap the Golden | A large, golden enemy, found on the third door of King Bowser's Castle. Tap-Tap the Golden cannot be defeated and he chases Green Yoshi through a lava-filled, autoscrolling path, where Green Yoshi needs to outrun him and reach a Warp Pipe to escape. Green Yoshi can toss eggs at Tap-Tap the Golden to push him back. | King Bowser's Castle | King Bowser's Castle |
| Thunder Lakitu | Lakitus that shoot a ball of energy, setting the ground on fire. | BLIZZARD!!! | BLIZZARD!!! | |
| Train Bandit | Shy-Guys that chase after a Yoshi in its train form. | Watch Out For Lakitu | Raphael The Raven's Castle | |
| Wall Lakitu | A Lakitu that hides behind walls and throws Spiny Eggs at Yoshi. Jumping on them or throwing eggs at them can defeat them. | Watch Out For Lakitu | Raphael The Raven's Castle | |
| Whirly Fly Guy | Flashing Fly Guys that start off on the ground and slowly take off into the sky. If a Yoshi spits watermelon seeds at them, they drop coins. When hit enough times, they award extra lives to the Yoshi. | Lakitu's Wall | Sluggy The Unshaven's Fort | |
| Wild Piranha | Plant enemies that start small, but grow larger in size and chomp at a Yoshi's direction when a Yoshi approaches. Throwing eggs or using an item can defeat them. | Make Eggs, Throw Eggs | The Deep, Underground Maze | |
| Wild Ptooie Piranha | Wild Piranhas that spit Needlenoses at a Yoshi. They take three egg hits to defeat, changing colors when they are hit, from green to yellow if hit once, and from yellow to red if hit twice. | Jammin' Through The Trees | Lake Shore Paradise | |
| Woozy Guy | Shy-Guys that make flip jumps to move around. | Make Eggs, Throw Eggs (magenta) Make Eggs, Throw Eggs (red) Naval Piranha's Castle (green) Lake Shore Paradise (yellow) |
Welcome To Cloud World (red) Welcome To Cloud World (yellow) Welcome To Cloud World (magenta) Castles - Masterpiece Set (green) | |
| Zeus Guy | Enemies that attack a Yoshi by shooting balls of energy. If a Yoshi gets too close, they kick or punch that Yoshi. Jumping on them or throwing eggs at them temporarily stuns them. They can be defeated with a red watermelon, blue watermelon, or Anywhere POW. | Scary Skeleton Goonies! | The Deep, Underground Maze |
BossesEdit

Each world features a midway fort (the fourth level) and an end-world castle (the eighth level) with a mid-boss and a big boss respectively. Every boss is just an enlarged version of a basic enemy that Kamek super-sizes with his magic. The only exception is Froggy, who remains at his normal size while Yoshi and baby Mario are shrunk; he then eats them and the battle is located in his stomach.
Mid-bossesEdit
| Image | Name | Description
|
|---|---|---|
 |
Burt the Bashful | Burt the Bashful is the mid-boss of World 1, fought at the end of Burt The Bashful's Fort. He is an enlarged Burt that Yellow Yoshi must defeat by throwing eggs at him. Burt attacks Yellow Yoshi by bouncing around. Whenever Burt is hurt, his pants lower; he is defeated when his pants are gone entirely. It takes six hits to defeat him. |
 |
Bigger Boo | Bigger Boo is the mid-boss of World 2, fought at the end of Bigger Boo's Fort. He is an enlarged Big Boo that chases around Yellow Yoshi when Yellow Yoshi is turned away. When Yellow Yoshi looks at Bigger Boo, he turns invisible and therefore, cannot be hit. To defeat Bigger Boo, Yellow Yoshi must ricochet eggs off walls so that it hits him while he is following Yellow Yoshi as Yellow Yoshi looks away. Every time Bigger Boo is hit, he grows in size; hitting him five times defeats him. |
 |
Froggy | Froggy is the mid-boss of World 3, fought at the end of Prince Froggy's Fort. He is a normal Frog Pirate that eats Yellow Yoshi when he is shrunk by Kamek. The battle takes place in Froggy's stomach, where Yellow Yoshi needs to hit the uvula at the top of the stomach with eggs. The main hazards in this battle are the gastric acid and the Shy-Guys (appearing big to Yoshi) Froggy eats. |
 |
Marching Milde | Marching Milde is the mid-boss of World 4, fought at the end of Marching Milde's Fort. She is a large Milde who attacks by walking left and right, where she hurts Yellow Yoshi from the sides. To attack her, Yellow Yoshi needs to Pound The Ground below her from above, which causes her to split to two extra large Puchipuchi L. Yellow Yoshi needs to Pound The Ground on them again to turn them into common sized Puchipuchi L, and then again to turn them into regular Mildes. Once all Mildes are defeated, the boss battle is won. |
 |
Sluggy the Unshaven | Sluggy the Unshaven is the mid-boss of World 5, fought at the end of Sluggy The Unshaven's Fort. He is an enlarged Sluggy whose weak point is a heart that Yellow Yoshi needs to attack in order to damage him. To reach his heart, Yellow Yoshi needs to throw eggs at his gelatinous skin, which exposes the heart with every hit. Sluggy does not damage Yellow Yoshi, but he can push Yellow Yoshi over a pit if he advances far enough. |
 |
Tap-Tap the Red Nose | Tap-Tap the Red Nose is the mid-boss of World 6, fought at the end of Tap-Tap The Red Nose's Fort. He is an invincible boss that attacks Yellow Yoshi by jumping onto the Yoshi. To defeat the boss, Yellow Yoshi needs to destroy the blocks on the floor to create a gap that leads to the lava and then push Tap-Tap the Red Nose into the lava by throwing eggs at him. |
Big bossesEdit
| Image | Name | Description
|
|---|---|---|
 |
Salvo the Slime | Salvo the Slime is the big boss of World 1, fought at the end of Salvo The Slime's Castle. He is an enlarged Slime where Blue Yoshi must defeat him by throwing eggs at him. Whenever Salvo takes a hit, he reduces in size and releases Lemon Drops. Salvo additionally attacks by bouncing around, and the smaller he gets, the faster he moves around. He attempts to attack Yoshi by pushing him to the edge of the room, with lava as the obstacle. |
 |
Roger the Potted Ghost | Roger the Potted Ghost is the big boss of World 2, fought at the end of The Potted Ghost's Castle. He is a large ghost growing from a pot that is a stationary target. In order to defeat Roger, Blue Yoshi needs to push the pot he is stationed at off a cliff, where other Shy-Guys resist Blue Yoshi's efforts from the other side. Roger can also lunge and shoot fire at Blue Yoshi. |
 |
Naval Piranha | Naval Piranha is the big boss of World 3, fought at the end of Naval Piranha's Castle. It is an enlarged Wild Piranha that attacks Blue Yoshi with Nipper Spores and its two buds. Its weakness is the bandaged bump where Blue Yoshi can throw eggs at. Blue Yoshi can also defeat Naval Piranha in one hit before it even enlarges by throwing an egg at it before Blue Yoshi approaches the area. |
 |
Hookbill the Koopa | Hookbill the Koopa is the big boss of World 4, fought at the end of Hookbill The Koopa's Castle. He is an enlarged Koopa Troopa who attacks by lunging towards Blue Yoshi. Blue Yoshi needs to toss several eggs at Hookbill's head or arms to topple him over, where Blue Yoshi needs to Pound The Ground on his belly to damage him. After Hookbill has been damaged, he retreats into his shell and pounds the ground repeatedly. Once this attack is finished, he resumes his normal attack pattern. |
 |
Raphael the Raven | Raphael the Raven is the big boss of World 5, fought at the end of Raphael The Raven's Castle. He is an enlarged Raven where the battle takes place on the moon. Blue Yoshi needs to pound on stakes on the opposite side as Raphael in order to damage him. Raphael attacks by chasing Blue Yoshi, as well as Pounding The Ground to create shockwaves that circle the moon. Every time Raphael is hit, he obtains a faster attack pattern; three hits defeats him. |
| Baby Bowser | Baby Bowser is the big boss of World 6, fought at the end of King Bowser's Castle. He is one of the antagonists of the game and has two phases. The first phase involves baby Bowser in his normal form, where he tries to Pound The Ground on the Green Yoshi to ride on him. Green Yoshi can attack baby Bowser by Pounding The Ground, using the shockwaves as an attack. | |
  |
Big Baby Bowser | In the World 6 castle King Bowser's Castle, when Green Yoshi delivers three hits to Baby Bowser, Kamek enlarges baby Bowser, starting the second phase of the fight. In order to attack Big Baby Bowser, who approaches from the background, Green Yoshi needs to obtain Giant Eggs from Baron von Zeppelins that occasionally fly in. Big Baby Bowser attacks by sending flying rocks, breathing fireballs at Green Yoshi, and charging into Green Yoshi. He is defeated when Green Yoshi hits him seven times. If Big Baby Bowser gets too close, he destroys the platform Green Yoshi is standing on, defeating Green Yoshi. |
TransformationsEdit
Metamorphosis bubbleEdit
Entering a metamorphosis bubble causes Yoshi to be transformed into one of several different types of vehicles, each with their own unique capabilities. While in this state, Yoshi is allowed to move around as the vehicle without baby Mario for a limited time before being pulled back to the metamorphosis bubble and being turned back to normal. If the player is able to hit a Yoshi Block while transformed, the transformation is automatically reversed at that location.
| Image | Name | Description | First level | Last level
|
|---|---|---|---|---|
| Helicopter | Allows a Yoshi to fly around for a brief time. | Watch Out Below! | King Bowser's Castle | |
| Mole Tank | Allows a Yoshi to tunnel through sections of dirt. | Shy-Guys On Stilts | The Impossible? Maze | |
| Train | Allows a Yoshi to move along tracks seen in the background. | Watch Out For Lakitu | Raphael The Raven's Castle | |
| Vehicle | Allows a Yoshi to move quickly across land. The Yoshi can increase the height of its suspension, allowing it to avoid enemies and reach higher areas. | Lakitu's Wall | Lakitu's Wall | |
| Submarine | Allows a Yoshi to move around underwater and fire torpedoes. | Nep-Enut's Domain | Monkeys' Favorite Lake |
Other transformationsEdit
| Image | Name | Description | First level | Last level
|
|---|---|---|---|---|
| Powerful Mario | Collecting a Super Star causes baby Mario to be temporarily transformed into Powerful Mario. While in this state, baby Mario can run around without needing to ride Yoshi, completely invincible. Powerful Mario is also capable of running on walls, ceilings, and spikes, and can glide with his cape. | Visit Koopa And Para-Koopa | KEEP MOVING!!!! | |
| Ski Yoshi | Attained upon entering a house in certain snow levels, this causes a Yoshi to don ski equipment to traverse across hills and ramps. The Yoshi stays in this form until the level is completed or he fails. If a Ski Yoshi hits an obstacle or fails the ramp jump, the Yoshi rolls over and becomes a snowball. While in this form, the Yoshi is invincible, but the player can control the Yoshi nor jump. | Danger - Icy Conditions Ahead | Kamek's Revenge |
ItemsEdit
| Image | Name | Description
|
|---|---|---|
| 1-Up | Provide an extra life if collected; usually carried by Fly Guys, bubbles, and Winged Clouds. | |
| Big Key | Huge keys held by each world boss, these lead to the next world. | |
| Blue watermelon | Watermelons that give Yoshis the ability to breathe frost, allowing them to freeze enemies. | |
| Coin | Currency that, when 100 are collected, grants Yoshi an extra life. | |
| Flashing Egg | Eggs that release a red coin when a Yoshi strikes an enemy with it. | |
| Giant Egg | Giant Yoshi Eggs that can defeat all on-screen enemies merely from the shock-wave they give off when thrown. | |
| Green Shell | Shells that can be carried by Yoshi. Despite this, Yoshi cannot swallow them due to them being hard and inedible and they still can hurt Yoshi when they are sliding on the ground. | |
| Hidden Coin | Coins that cannot be collected unless they are made to appear with a Switch. | |
| Key | Keys that can be collected and carried like Yoshi Eggs, taking up one space of the player's maximum number of eggs. | |
| Red coin | Coins that are hidden behind regular gold coins. There are 20 of them in each level and grabbing one adds one point to Yoshi's score tally at the end of the level. | |
| Red Egg | A red Yoshi Egg that causes two Stars to appear when it hits an enemy or other destroyable object (such as a Winged Cloud). | |
| Red Shell | A Red Koopa Shell that can be used by spitting it out. Despite this, it cannot be used for making eggs and can still hurt Yoshi when they are sliding on the ground. | |
| Red watermelon | Watermelons that give Yoshis to breathe fire, allowing them to burn enemies and melt Ice Blocks. | |
| Special Flower | Special Flowers that serve as collectibles. Netting all five flowers earns Yoshi an extra life and fifty points toward the completion score. Getting all the flowers in each level is also necessary for Yoshi to get a perfect score. Collecting at least one flower is also necessary to access a Bonus Challenge via the Goal Ring, and the chance of playing a Bonus Challenge is increased by collecting more. | |
| Star | Stars that add one more second to Yoshi's Countdown Timer. | |
| Super Star | Turns Baby Mario into Powerful Mario. | |
| Watermelon | Fruit that gives Yoshis the ability to shoot seeds. Watermelons with bite marks come with only a third of the seeds. | |
| Yellow Egg | Yoshi Eggs that can be acquired if Yoshi throws a green egg that recoils once from the wall. | |
| Yoshi Egg | Eggs that can be used as projectiles and can be obtained from eating enemies or hitting an Egg Block. Only six eggs can be carried at one time. |
ObjectsEdit
| Image | Name | Description
|
|---|---|---|
| ! Block | Dotted Line Blocks that turn into these blocks after a Yoshi activates a ! Switch. | |
| Air pump[6] | Inflates a red balloon when jumped on repeatedly. | |
| Arrow block | Blocks that cause spotted platforms to rotate when hit. | |
| Arrow Cloud | Clouds that sends eggs flying in the direction the arrow is pointing. | |
| Arrow Sign | Points to areas of interest or the path through the level. | |
| Balloon (Mini Battle) | Inflatable balls that appear in two Mini Battles focused on them popping. | |
| Balloon (platform) | Rising platforms a Yoshi can ride on, for a limited period of time. Riding on them stops them from rising. If a Yoshi rides on them too long, the balloons disappear. | |
 |
Beanstalk | Plants that are spawned from large seeds dropped by hit Winged Clouds. The beanstalk then grows into a tall, ladder-like platform, where Yoshis can use the leaves to traverse to upper elevations. |
| Bobbing rock | Small platforms that float in water. Standing on them tips Yoshi into the water. | |
| Bomb | Small explosives used by many enemies. | |
| Breakable block | Large colored bricks that, when hit, go from red to yellow to green before being destroyed. | |
| Brick lift | Stone slabs that appear in different sizes in isometric sections, moving up and down. | |
| Bubble | Bubbles that can carry various items, such as 1-Ups, though most bubbles take form as metamorphosis bubbles. When a Yoshi is damaged by an enemy, baby Mario gets encased in a bubble. | |
| Bucket | Buckets that turn upside down and drop coins or occasionally enemies when hit by an egg. In some levels, these buckets can be used as platforms to traverse water or lava. | |
| Cannon | Cannons fire coins in the Gather Coins Mini Battle. | |
| Chomp Rock | Rocks that can be pushed, which defeats any enemy in its path. Yoshis can also stand on top of them as platforms and can roll them by walking on the preferred direction. Gray Chomp Rocks revert to their original position if a Yoshi leaves the screen and brown variations do not. | |
| Chomp sign | Marks the territory of Incoming Chomps. | |
| Coin Block | Blocks that provide endless coins and stars to Powerful Mario. | |
| Cork | A special lock that plugs a pipe. | |
| Countdown Platform | A balance that has a number labeled on it, with the number shown decreasing by one every time something moves on it. When the number decreases to zero, the entire platform vanishes into dust. The highest number they can be is four. | |
| Cracked block | A large block made of a durable type of rock that can only be destroyed with Yoshi Eggs. | |
| Crate | Objects that can be broken by Pounding The Ground below them. They release coins, Stars or keys. They occasionally appear from Baron von Zeppelin, where a Yoshi can knock down the crate by throwing an egg at the object. | |
| Donut Lift | Unstable platforms that collapse when a Yoshi stays too long on one block. | |
| Door | Take Yoshi to other rooms. | |
| Dotted Line Block | Invisible platforms that indicate where a ! Block will spawn if a ! Switch is hit. | |
| Egg Block | Blocks that, when struck from below, produce Yoshi Eggs. They stop making eggs when a Yoshi has the maximum amount. Non-green ones simply turn into eggs of the same color. | |
| Egg Plant | Plants that produce eggs. They stop emitting eggs when a Yoshi has the maximum amount. They emit eggs at a faster rate when a Yoshi Pounds The Ground below them. | |
| Expansion Block | A block that resembles a pink Egg Block. When struck from below, it grows, allowing a Yoshi to reach higher platforms. After a set amount of time, it reverts to its original size. | |
 |
Exit door[7] | Take Yoshi to the boss of the respective fort or castle. |
| Falling stone block | Platforms that fall when a Yoshi stands on them. When they are about to fall, they start shaking. These platforms can also crush a Yoshi, instantly defeating it. | |
| Flatbed Ferry | Platforms attached to a dotted line that travel across it until the end, indicated by a large red sphere. These fall when the dotted lines do not have a large red sphere at the end of it. There are different varieties of Flatbed Ferry, and their color indicates their speed. Green Flatbed Ferries are the slowest, yellow ones run at a medium speed, and red ones are the fastest Flatbed Ferries. | |
| Flip bridge | Bridges that rotate along the center towards the screen. | |
| Flipper | Bars that, once passed through, prevent access to the area before. | |
 |
Goal Ring | Roulettes that are found at the end of every level, except for castles and fortresses, and act as the goal point. |
| Hard Block | Blocks that Yoshi cannot destroy. | |
| Ice Block | Blocks that serve as slippery obstacles and cannot be picked up. Despite this, they can be melted by Yoshi's fire breath. Some Ice Blocks can hide items as well. | |
| Lakitu's cloud | Clouds that enable Yoshis to reach places that they could normally not get to. | |
| Locked Door | Doors that require a key to open. | |
| Makeshift surfboard | Small platforms that float in lava. Ones on their sides act as makeshift boats, while ones on-end simply bob in place. | |
| Message Block | Blocks that teach the player about controls and give tips. | |
| Middle Ring | Rings of light that appear partway through most stages and serve as checkpoints. | |
| Moving block | Blocks that change into small moving platforms when hit. | |
| Moving platform[8] | Small platforms that carry other objects along a horizontal track in Mini Battles. | |
 |
Paddle wheel | A round platform that is made up of four smaller platforms connected to chains. |
| Pinwheel | Round platforms that can be made to roll along rails if spun. | |
| Post | Wooden posts that come up from the ground. Yoshi must Pound The Ground on them to get rid of them. Their color and design vary by location. | |
| Pot | Objects that break when Yoshi pushes them off an edge. | |
| POW Block | A block that turns all nearby enemies turn into Stars. They can be hit three times before they disappear. | |
| Red-and-yellow bridge | Weak platforms that fall apart if Yoshi Pounds The Ground below them. | |
 |
Red balloon | A large red balloon that Yoshi can ride for a limited time before it deflates. |
 |
Rolling rock | Tilting stone buttes that fall if stood on too long. |
| Sealed Door | Doors that have been boarded up and can no longer be entered after a certain point. | |
| Shack | Most shacks are locked and contain Mini Battles. Unlocked ones give Yoshi skis. | |
| Ski Lift | Moving seats suspended from rails on the snowy mountains. | |
 |
Snowball | A snowball that becomes larger the more Yoshi pushes it in snow. It can also defeat enemies and can be used as a platform for Yoshi. |
| Soft rock[9] | Weak rocky walls that can be quickly chipped through with nearly any manner of attack. Breakable rock comes in various colors and textures. | |
 |
Spinning doors[10] | A rapidly spinning quartet of doors; Yoshi can pick the one he will go through by hitting it with an egg, causing it to fall and the rest to disappear. |
| Spinning Log | Orange logs that stay still for a while and then start spinning wildly, which can either help or hinder Yoshi. | |
| Spinning wheel | Circular lifts that travel in the direction it is pointing when a Yoshi stands on it. They stop spinning when a Yoshi stands on it, and they continue when a Yoshi jumps off of it. A Yoshi can also eat these and spit them out to another area. If a Yoshi falls off to an area where the Yoshi cannot reach the spinning wheel, it respawns in the location it started at. There are two main types of spinning wheels: the blue spinning wheels disappear if a Yoshi jumps off one and does not ride it again for a while, while the tan ones stay there until Yoshi leaves the room or goes at a far enough distance away from the tan spinning wheel. A rare double-arrowed type only moves up and down or left and right, rotating when hit by an egg. | |
| Spotted platform | Flatbed Ferries with spikes covering one side. | |
| Spring ball | Balls that Yoshi can jump on top of, then jump again to be propelled high into the air with a boosted jump. Yoshi can jump even further up if he times the jump right when the he contacts the spring ball. There are also larger variations, which propel Yoshi even higher. | |
| Squishy block | Jelly-like blocks that move when pushed. When they hit a wall, they squish against the wall, growing taller and thinner. When performing a Pound The Ground on them, the inverse happens. They can be used to safely cross over spikes. | |
| Step | Tiny Semisolid Platforms that appear in chains as bridges or stairs, often summoned by ? Clouds. | |
| Sway bridge | A bridge that wildly rocks along its center towards the screen. | |
| Switch | Switches that cause Dotted Line Blocks to transform into ! Blocks. | |
| Teeter-totter | Long platforms that rotate from Yoshi's weight. Log-based ones fall if tilted far enough. | |
| Track | Rails that various types of platforms travel along. | |
| Tulip | Giant floating red flowers that spit out eight Stars when an egg, shell, or a spit-up enemy enters them. | |
 |
Tumbler | Huge industrial nuts that spin when stood upon. |
| Twirling tier[11] | Spinning platforms that can move Yoshi and whose functional length changes depending on how big they look at the time. | |
| Warp Pipe | Pipes that lead to other places. They can sometimes spawn enemies, usually as a source for Yoshi Eggs. | |
| Watermelon jar | Small pots that appear in the Watermelon Seed Spitting Contest to dispense watermelons. | |
| Winged Cloud | Clouds that trigger events when a Yoshi Egg is thrown at them. | |
| Wooden Ferry[citation needed] | Completely inert brown Flatbed Ferries of varying length that act as floating Semisolid Platforms. | |
| Yoshi Block | Blocks that transform Yoshi back to normal after he has been transformed into a vehicle. |
ObstaclesEdit
| Image | Name | Description | First level | Last level
|
|---|---|---|---|---|
| Ball 'N' Chain | Giant, slow-moving flails that are usually powered by groups of Boo Guys. | Burt The Bashful's Fort (single) Burt The Bashful's Fort (double) |
King Bowser's Castle (single) King Bowser's Castle (double) | |
| Ball and chain | A large mace that is operated by a Boo Guy. Timed jumps must be used to pass. | Hookbill The Koopa's Castle | King Bowser's Castle | |
 |
Boulder | Huge chunks of rock summoned to drop and destroy terrain by Big Baby Bowser. | King Bowser's Castle | King Bowser's Castle |
| Cannonball | Projectiles fired by Kaboombas. | The Cave Of The Mystery Maze | Raphael The Raven's Castle | |
| Chain Gate | Spiky logs on chain operated by a crank marked with a question mark. Yoshis can lift the log by hitting the crank with eggs. However, after a set amount of time, the log comes back down. | The Potted Ghost's Castle | The Potted Ghost's Castle | |
 |
Current | Streams found in sewers that push Yoshi and anything else caught in them around. | The Impossible? Maze | The Impossible? Maze |
 |
Drawbridge | Heavy wooden doors that open to crush Yoshi. | Burt The Bashful's Fort | Burt The Bashful's Fort |
 |
Fire-Bar | A line of balls of fire that rotate around a central pivot point, swinging in three dimensions. | Bigger Boo's Fort (single) Bigger Boo's Fort (double) |
Tap-Tap The Red Nose's Fort (single) Tap-Tap The Red Nose's Fort (double) |
 |
Fireball | Hazards spat out by certain bosses. | The Potted Ghost's Castle | King Bowser's Castle |
| Icicle | Icicles that fall from the ceiling when an egg is thrown at them. | BLIZZARD!!! (short) BLIZZARD!!! (medium) BLIZZARD!!! (long) |
The Very Loooooong Cave (long) The Very Loooooong Cave (medium) The Very Loooooong Cave (short) | |
 |
Lava | Molten rock that causes Yoshi to lose a life upon contact. | Burt The Bashful's Fort | King Bowser's Castle |
| Mud | Soft soil that acts as a slick surface in swamps. | Welcome To Monkey World! | More Monkey Madness | |
| Shockwave | Rapidly moving bursts of energy created by Raphael the Raven to travel around the moon. | Raphael The Raven's Castle | Raphael The Raven's Castle | |
| Spike | Obstacles that cause Yoshi to lose a life instantly upon touching them. | Salvo The Slime's Castle | Castles - Masterpiece Set | |
| Spiny Egg | Explosive projectiles tossed by the Lakitu family. | Watch Out For Lakitu | Welcome To Cloud World | |
| Stomache acid[12] | Caustic drops found in Froggy's stomach. | Prince Froggy's Fort | Prince Froggy's Fort | |
| Thorn | Spiky obstacles that act similar to Spikes and will cause Yoshi to die instantly. | The Potted Ghost's Castle | Castles - Masterpiece Set | |
| Turtle Cannon | Cannons that puff up and fire Bullet Bills of their color. | Poochy Ain't Stupid (green) Raphael The Raven's Castle (yellow) |
Raphael The Raven's Castle (yellow) Raphael The Raven's Castle (green) |
MinigamesEdit
Bonus ChallengeEdit
Bonus Challenges are initiated when the Goal Ring stops on a flower at the end of the level. Yoshis can increase the chances of playing a Bonus Challenge by collecting Special Flowers on the level. During a Bonus Challenge, the player players one of several minigames. Upon winning the minigame, the player can receive lives or Special Items. A specific Bonus Challenge is unlocked when the player collects 800 points in a world, and that specific Bonus Challenge can be played any time.
There are six Bonus Challenges in total.
| Image | Name | Description
|
|---|---|---|
 |
Flip Cards | Players flip over panels to earn Special Items and lives, but lose their rewards if Kamek is flipped over. |
 |
Scratch and Match | Players scratch cards with baby Mario icons to earn lives. |
 |
Drawing Lots | Players can earn Special Items by selecting a panel that does not contain a Kamek card. |
 |
Match Cards | Players need to memorize pairs of panels and flip over the correct pairing to receive Special Items or lives. |
 |
Roulette | Players bet lives on a roulette, which randomly spins to generate an equation that increases or decreases lives depending on what was stopped on. |
 |
Slot Machine | Players stop a slot machine, which generates lives depending on the combo stopped on. |
Mini BattlesEdit
Mini Battles are minigames that can be played in various levels, when a Yoshi receives a key and enters a Bonus Game Shack. These are competitive fights against a Bandit, and besting that Bandit earns the Yoshi a reward. Mini Battles can later be played in the main level selection screen after they have been unlocked. If the players hold ![]() and press
and press ![]() ,
, ![]() ,
, ![]() ,
, ![]() , and
, and ![]() on the level selection screen, a screen pops up listing all Mini Battles, as well as a 2-player version of Throwing Balloons and Watermelon Seed Spitting Contest and a 4-button Throwing Balloons mode.
on the level selection screen, a screen pops up listing all Mini Battles, as well as a 2-player version of Throwing Balloons and Watermelon Seed Spitting Contest and a 4-button Throwing Balloons mode.
There are four Mini Battles in total.
| Image | Name | Description | First level | Last level
|
|---|---|---|---|---|
| Throwing Balloons | Players need to toss a water balloon back and forth against a Bandit, using the button commands displayed on a screen. The player must either press four or six buttons depending on the variation of the game. | The Cave Of Chomp Rock | KEEP MOVING!!!! | |
| Gather Coins | Players need to collect the most coins shot out by a cannon before the time limit expires. | Touch Fuzzy, Get Dizzy | Ride Like The Wind | |
| Popping Balloons | Players need to pop a balloon with a Special Item in it. | Visit Koopa And Para-Koopa | Scary Skeleton Goonies! | |
| Watermelon Seed Spitting Contest | Players need to spit watermelon seed projectiles at an opponent. | The Cave Of The Mystery Maze | The Cave Of The Mystery Maze |
Special ItemsEdit
By winning Bonus Challenges and Mini Battles, the player's prizes can be one of several Special Items. These items can be used at any time during a level (except during boss battles) by going to the pause menu and selecting one of them with ![]() . Up to 22 of these items can be carried at a time.
. Up to 22 of these items can be carried at a time.
| Image | Name | Description
|
|---|---|---|
| 10 Point Star | Increases the amount of time in the Countdown Timer by ten seconds. | |
| 20 Point Star | Increases the amount of time in the Countdown Timer by twenty seconds. | |
| Anytime Egg | Refills Yoshi Egg count up to six. | |
| Anywhere POW | Creates a shockwave that turns all on-screen enemies into Stars. | |
| Winged Cloud Maker | Transforms all on-screen enemies into Winged Clouds. | |
| Magnifying Glass | Reveals red coins and hidden Winged Clouds to the player. | |
| Super Green Watermelon | Gives Yoshi a green watermelon, allowing him to shoot seeds. | |
| Super Red Watermelon | Gives Yoshi a red watermelon, allowing him to spit fire. | |
| Super Blue Watermelon | Gives Yoshi a blue watermelon, allowing him to breathe frost. |
SoundtrackEdit
- Main article: Super Mario: Yossy Island Original Sound Version
A soundtrack CD was released in Japan on November 25, 1995, titled Super Mario: Yossy Island Original Sound Version. The disc contains 26 music cues from the game's soundtrack, as composed by Koji Kondo.
The instrumentation for this game's music was sampled from the Akai S1000 synthesizer; E-mu Systems' Proteus synthesizers; the Korg 01/W; Optical Media International's Universe of Sounds Vol. 2; Roland's L-CD1 synthesizer, Sound Canvas SC-88 module, and R-8 drum machine; and the Yamaha TG77 and TG100. The Roland Sound Canvas, in particular, would go on to become one of the longest-used sources of instrumentation in Super Mario franchise music, with samples from both the SC-88 and the later SC-8850 model being used in numerous games during the next four gaming generations. Some of the game's sound effects are samples of stock sound effects: the jungle ambience heard on the title screen and baby Mario's cry are taken from Sound Ideas' General Series 6000 library, while Yoshi's tongue sound and the noises made by Piranha Plants come from Rarefaction's A Poke in the Ear with a Sharp Stick.[13]
PromotionEdit
Culver City eventEdit

An event was held in front of a Toys "R" Us in Culver City, California on October 5, 1995 at 3:00 PM to promote the North American release of Super Mario World 2: Yoshi's Island. At the event, there was a trailer and a large model Yoshi Egg surrounded by hay. The trailer held a banner with the words "Play It Loud" and stock art of Super Mario World 2: Yoshi's Island. The Yoshi Egg held a banner with the word "Nintendo". The event centered around "hatching" the Yoshi Egg. After the hosts interacted with the idle audience, children were lined up and given small, green hammers which they used to break open a designated area at the bottom of the egg. The Yoshi Egg, when breached, yielded stringed paper and a large model of the game cartridge. Group photos were then taken of children with the cartridge.
The organizers of the event also pledged to donate five hundred dollars to local schools on the condition that the principals of these schools sit on top of the Yoshi Egg for fifteen minutes. A person in a one-piece Mario and Yoshi costume also was seated on top of the Yoshi Egg. Participants could go on and off the egg by means of a forklift.
A raffle was then held with one winner receiving an SNES which included a copy of Super Mario World 2: Yoshi's Island. Other winners may have won t-shirts. Discount coupons were also distributed.
MaterialEdit


Super Mario World 2: Yoshi's Island was the cover feature of Volume 77 of Nintendo Power. Nintendo Power also distributed eight promotional cards of some of the game's bosses part of their collectible Super Power Club series of cards which began in October 1992 with Volume 44 of Nintendo Power. The front of each card has an in-game image of the character and the reverse had a brief description of the character. The cards include:
- Raphael the Raven
- Roger the Potted Ghost (titled "The Potted Ghost")
- Bigger Boo
- Burt the Bashful (erroneously titled "Bashful Burt")
- Hookbill the Koopa
- Sluggy the Unshaven
- Tap-Tap the Red Nose (titled "Tap Tap the Red Nose")
- Naval Piranha
VideosEdit

Nintendo of America distributed Super Mario World 2: Yoshi's Island: A Magical Tour of Yoshi's Island, a six minute-long promotional VHS. The video featured Ken Lobb and the same person who narrated the Donkey Kong Country: Exposed promotional VHS.
Another promotional video, titled The Invasion of Nintendo, was included with a copy of Nintendo Power and featured Super Mario World 2: Yoshi's Island alongside some other Nintendo games. Ken Lobb made another appearance.
There exists another untitled promotional video that was likely shown on monitors in video game stores. It is about fifty seconds long and consists of clips of the game along with some narration.[14]
AdaptationsEdit
Volume 14 of Super Mario-kun mostly focuses on the events of Super Mario World 2: Yoshi's Island, with the arc concluding in volume 15. The Super Mario-kun version of the story features Mario and Luigi traveling back in time to stop adult Bowser and Kamek alongside Yoshi and baby Mario.
A standalone manga, titled "Super Mario: Yossy Island" from the Kodansha Super Mario manga series, was also released. The series, spanning three volumes, was written by Kazuki Motoyama, who had previously written a manga based on the game Yoshi, and published by Kodansha Limited. The first two volumes are based on the stories from the game, while the third volume has original stories that use the game's characters and themes.
Super Mario World 2: Yoshi's Island was also adapted as part of the 4-koma Gag Battle series, also titled "Super Mario: Yossy Island".
An issue from the Game Picture Book series of the Super Mario Ehon series, Super Mario Game Picture Book 4: Hang in There, Yoshi (「スーパーマリオゲームえほん 4 がんばれヨッシー」, Super Mario Game Ehon 4 Ganbare Yoshi), is loosely based off the story of Super Mario World 2: Yoshi's Island.

Volume 1 of Super Mario: Yossy Island by Kazuki Motoyama.
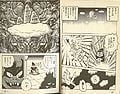
Page from Volume 1.
Reverse of volume 1 of Super Mario: Yossy Island.
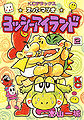
Volume 2 of Super Mario: Yossy Island by Kazuki Motoyama.
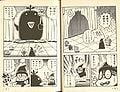
Page from Volume 2.
Reverse of volume 2 of Super Mario: Yossy Island.
Volume 3 of Super Mario: Yossy Island by Kazuki Motoyama.
Reverse of Volume 3 of Super Mario: Yossy Island.
Page from Volume 3.
Another panel from Volume 3.
Yoshi using a red watermelon against Grinders.
A Zeus Guy training baby Mario against a Needlenose, a Cactus Jack, and some Mildes.
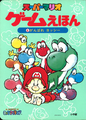
Super Mario Game Picture Book 4: Hang in There, Yoshi
Super Mario Game Picture Book 4: Hang in There, Yoshi

Super Mario Game Picture Book 4: Hang in There, Yoshi

The reverse of Super Mario Game Picture Book 4: Hang in There, Yoshi
Super Mario-kun volume 14.
Baby Mario approaching an Egg-Plant.
Super Mario-kun volume 15. The Helicopter is on the cover along with Powerful Mario (baby Mario).
Super Mario: Yossy Island manga, part of the 4-Koma Gag Battle series.
Part 2 of the 4-Koma Gag Battle series.
Baby Mario and baby Luigi's parents
The Super Mario World 2: Yoshi's Island comic from Club Nintendo magazine


StaffEdit
- Main article: List of Super Mario World 2: Yoshi's Island staff
Super Mario World 2: Yoshi's Island was directed by video game designers Takashi Tezuka, Shigefumi Hino, and Hideki Konno and programmer Toshihiko Nakago; the four had worked on previous titles in the Super Mario series, with all except Hino being directors for Super Mario World. Konno had earlier worked as a map and level designer in the previous Super Mario games and served as map director for Super Mario World. This is the first Super Mario-related project to involve Yasuhisa Yamamura, who has most notably worked on the dungeon design in the The Legend of Zelda series. The C.G. design the game employs is credited to Yoshiaki Koizumi, who previously worked on Super Mario Kart as the illustrator. The soundtrack was composed by Koji Kondo, well known for creating the Super Mario franchise's iconic tunes. Shigeru Miyamoto had heavy involvement with the game's development and served as the game's producer, while Nintendo's then-president, Hiroshi Yamauchi, was the executive producer.
DevelopmentEdit
In an interview with game journalist Steven Kent, Shigeru Miyamoto stated that he wanted to make a game starring Yoshi as far back as Super Mario World's development.[15] Miyamoto disliked previous Yoshi games (specifically mentioning Yoshi's Cookie, Yoshi's Egg, and Yoshi's Safari, the latter being mistranslated as "Yoshi's World Hunters" in the interview) and wanted to make one more authentic to the Yoshi character.[15]
An early version of the game was demoed to Nintendo's marketing department, who rejected it due to the visuals "lacking punch" in comparison to Donkey Kong Country's pre-rendered 3D graphics.[15] In response, Shigeru Miyamoto developed a more stylized and "cartoony" art direction for the game, which was accepted. Some of the pre-rendered sprites used in the opening of the game are leftovers from the original graphical pitch.
According to Hisashi Nogami, the hand-drawn style was created by literally drawing the characters by hand on paper, scanning them and then carefully copying them to make the sprites "a pixel at a time".[16]
Super Mario World 2: Yoshi's Island was one of three completed games to use the Super FX2 graphics chip, which allowed for larger sprites and more advanced effects such as sprite scaling and rotation (advertised as "Morphmation" technology), basic polygonal rendering, and advanced parallax scrolling.
ReceptionEdit
Critical receptionEdit
Super Mario World 2: Yoshi's Island was critically acclaimed upon release, with most reviews praising the level design, the platforming mechanics, the personality, the graphics, the soundtrack, and the creativity of the game. The game remains critically lauded, garnering a 96.00% on GameRankings based on 5 reviews.[17] The most common criticisms surrounding the game come from baby Mario's crying when he is trapped in a bubble after Yoshi takes a hit from the enemy, often being cited as "annoying". IGN retrospectively said in its article "Is There a Bad Mario Game?", "The game earned instant acclaim and rightfully so for its brilliant stage design and platforming mechanics. Yoshi's Island doesn't beat you over the head with trial and error to teach you how to play, but it also does not hold your hand with a numbingly dull tutorial."[18] Kaes Delgrego of Nintendo Life has referred to the game as "Perhaps the greatest platformer of all time" in his review, giving the game a score of a 10/10.[19] Delgrego called the time-based health mechanic "innovative" for its time and described it as influention on later titles, comparing it to Halo's time-based life mechanic. While he admitted that the game itself isn't revolutionary, Delgrego praised the creativity of its puzzles and pastel-style graphics. Delgrego's only criticisms focused on the easy boss fights and baby Mario's crying when Yoshi takes damage from an enemy. Reece Warrender of Cubed3 gave the game a 9/10,[20] praising the game's new and interesting mechanics, such as swallowing an enemy to create a projectile of it, as well as having simple and enjoyable mechanics that players of any age can enjoy. Warrender praised the quality of the game's graphics and sound while criticizing the easy difficulty and the short length, citing that the game can be completed in five hours despite the replay value of the points system.
Retrospective reviewers often rank Super Mario World 2: Yoshi's Island as one of the greatest video games in the medium's history. Among others, the game was placed 18th in the 100th issue of Nintendo Power's "100 best Nintendo games of all time" in 1997. It also placed 185th in the 200th Issue of Game Informer's "Top 200 Games of All Times", the lowest ranked Super Mario franchise game. Tony Mott listed the game in the 2013 revision of his reference book 1001 Video Games You Must Play Before You Die, making it one of 26 SNES games to be featured, while IGN included Super Mario World 2: Yoshi's Island in the 2003, 2005, 2007, 2015, 2018, 2019, and 2021 lists of the top 100 video games of all time.
| Reviews | |||
|---|---|---|---|
| Release | Reviewer, Publication | Score | Comment |
| SNES | Kaes Delgrego, Nintendo Life | 10/10 | "Yoshi's Island isn't just a great platformer: it's a reminder of why this silly little hobby of ours is so wonderful. Sure, the game contains no political satire, no poetic justice, no character development. But if what Miyamoto and Tezuka crafted isn't a work of art, then the definition of "art" needs to be amended." |
| SNES | NEXT Generation Issue #14 February 1996 | 5/5 | "You'll find yourself baffled at the task of completing this gargantuan game, but you'll definitely enjoy trying." |
| SNES | Reece Warrender, Cubed3 | 9/10 | "Super Mario World was possibly the most popular game to be released on the SNES console. Following a large change of direction in the sequel you will find yourself controlling different Yoshi's in an attempted to protect a baby Mario. The game sounds unappealing, but after giving the game a fair chance you will experience a platformer like no other." |
| SNES | Rob Hamilton, Honest Gamers |
10/10 | "Yoshi's Island may not be perfect, but it provides pure gaming bliss, taking the tried-and-true Super Mario Brothers style of play and adding its own personalized touch. Just stay away from those Fuzzies. The withdrawal is pure agony!" |
| Aggregators | |||
| Compiler | Platform / Score | ||
| Game Rankings | 96.00% | ||
SalesEdit
Super Mario World 2: Yoshi's Island has sold over 4 million copies, with the Edge publication stating that the game was "a radical sequel to Super Mario World whose anarchic gameworld and illustration-style visuals win it loyal fans but less dramatic total sales".[21]
Pre-release and unused contentEdit
According to Shigeru Miyamoto, the marketing department at Nintendo wanted him to use pre-rendered 3D sprites like in Donkey Kong Country for the game, rather than stylized 2D sprites. Additionally, found in the game's data are several sprites that go unused, such as several Super Mario All-Stars sprites and three unused Yoshi forms. There are also three unused Mini Battles that can be seen in the game's code.
The game was originally intended to feature the prefix Super Mario Bros. 5, which was shortened to Super Mario in the final Japanese release. A similar concept would be carried over to the international edition, which uses the prefix Super Mario World 2; the original Super Mario World was previously subtitled Super Mario Bros. 4 on the Japanese release.[22] It has sometimes been nicknamed Super Mario Bros 5: Yoshi's Island (or Super Mario Bros 5 for short).[23]
GlitchesEdit
- Main article: List of Super Mario World 2: Yoshi's Island glitches
Constantly full mouthEdit
By jumping through a Middle Ring and spitting out an enemy at the same time, Yoshi constantly appears to have a full mouth, despite still being able to stick his tongue out and not being able to spit anything out.[24]
Giant Egg anywhereEdit
By going into any level with a Fat Guy and carrying a Giant Egg to the end of a level, the player must go to the edge of the screen past the exit and throw the egg up, then use Yoshi's tongue to push it slightly into the edge of the screen. By finishing the level like this, the next Yoshi will collect the egg as it appears to take baby Mario, allowing the player to take a Giant Egg into any level in the game.[24]
Remakes and portsEdit

Yoshi's Island: Super Mario Advance 3Edit
- Main article: Yoshi's Island: Super Mario Advance 3
Super Mario World 2: Yoshi's Island was later ported to the handheld Game Boy Advance as part of the Super Mario Advance series, a series of updated remakes of classic Super Mario games, as Yoshi's Island: Super Mario Advance 3. The third entry in the series, it boasted new levels and slightly altered some of the original game's graphics and dialogue, as well as making various other minor changes. This version of the game is the only version available through the Virtual Console on future consoles, rather than the original version.
SNES Classic EditionEdit
Super Mario World 2: Yoshi's Island is one of the 21 titles included on the Super NES Classic Edition. This was the SNES version’s first release since the original run.
Super Nintendo Entertainment System - Nintendo Switch OnlineEdit
Super Mario World 2: Yoshi's Island, along with Super Mario World and Super Mario Kart, is one of the 20 launch titles for Super Nintendo Entertainment System - Nintendo Switch Online.
Version differencesEdit
Later versions of the Japanese release pluralize the collectables in the score screen and alter the number of dots that connect each term to its respective counter. The line in the Red Coin counter is increased by one dot, while the line in the total score counter is decreased to account for the pluralization of "Total Point."
Regional differencesEdit
- This is the first Super Mario game with French and German localizations, and the only SNES Super Mario game to have these. (Super Mario RPG, the lone SNES Super Mario game released later, was not localized for PAL regions, therefore no such translations were written.) Accordingly, the PAL release gives the player the option to select a language at the start of the game.
- The title screen in the Japanese version of the game is rendered in katakana. International versions replace this with a new logo written in English.
- The European release omits the ® symbol from the Super Mario World 2 prefix on the title logo.
- In the map selection screen, the thumbnail tiles for the extra levels in the Japanese versions of the game are a red and orange background. They are also called "Special" stages.
- In the Japanese release, the thumbnails for extra and bonus stages consist of stylized katakana logos; the extra stages all read スペシャル ("Special") and are suffixed by the world number, while the bonus stages each list the name of their respective bonus game. In international releases, the extra stage thumbnails depict a numbered star with "EXTRA" written below, while the bonus stage thumbnails depict a numbered Special Flower with "BONUS" written below.
- The score thumbnail in international versions of the game has a completely different sprite than Japanese versions of the game, depicting a pencil drawing a line rather than a pencil writing "100" on an index card. The SNES controller in the North American version of the game also has its buttons changed to purple, though the control options menu retains the multicolor buttons seen on the Super Famicom and European SNES.
- The thumbnail for the Popping Balloons Mini Battle is slightly tweaked in international versions of the game, rounding the balloon down at the edges of the thumbnail and increasing the size of Yoshi's hands.
- The thumbnail for World 4-6: Lake Shore Paradise has a slightly altered Flopsy Fish in international versions of the game, featuring larger and more angular pectoral fins.
- In the European version, as well as US Revision 1.1, the font is much thicker than in the Japanese version, though graphics such as controller buttons were left the same. This thicker font was later used in all versions of Yoshi's Island : Super Mario Advance 3.


- International versions of the game remove onomatopoeia words from the chalkboard tutorial graphics and the Popping Balloons Mini Battle. Additionally, the symbol that appears when popping the correct balloon in the latter is changed from the kanji 当 ("win") surrounded by stars to a star pattern made of stars.
- In World 6-★: Castles - Masterpiece Set, the pathed-moving platforms in the Japanese version of the game spelled out "YOSSY", Yoshi's alternate romanized Japanese name. International versions change this to "YOSHI".
References to other gamesEdit
- Mario Bros.: POW Blocks can be hit thrice before they disappear, like in this game.
- Super Mario Bros.: The end of the credits features a rearranged version of this game's "end of level" fanfare. Fire Bars return, albeit depicted as swinging three-dimensionally.
- Super Mario Bros. 2: Shy-Guys and Snifits reappear; these enemies also serve as the basis for many of the new enemies in Super Mario World 2: Yoshi's Island. The sub areas attached to enemy-generating Warp Pipes resemble those within Jars. POW Blocks retain their color scheme from this game.
- Super Mario Bros. 3: Chain Chomps, Donut Blocks, and Nipper Plants return. Spikes return as Mace Penguins.
- Super Mario World: The American and European versions of the game are sold as a prequel to Super Mario World. Also, some of Yoshi's sound effects are recycled. Expansion Blocks utilize an unused sound effect from this game when they expand. Big Boos, Beach Koopas, and Fishin' Lakitus return. Flying Wigglers are based on Wigglers. A single Magikoopa returns as Kamek, whose name is derived from the name for the Magikoopa species in Japanese:「カメック」(Kamekku). Gargantua Blarggs and Red Blarggs are named after Blarggs. Piscatory Petes resemble the Cheep Cheep design of Super Mario World, along with the Blurps of the same game. Powerful Mario wears Caped Mario's cape. Dotted-Line Blocks temporarily transform into ! Blocks upon hitting a Switch, like how they could be transformed by the big switches of this game. Lakitu's cloud can be ridden, like in this game.
- Yoshi's Cookie: Yoshi's sprite is based on his sprite from the SNES version of the game, which was also the basis for his sprite in Super Mario All-Stars.
References in later gamesEdit

- Super Mario RPG: Legend of the Seven Stars: The Magikoopa fought in Bowser's Keep has a thought that strongly implies it is Kamek; while he is clearly familiar with Bowser in the English translation, the Japanese version of the line indicates that he recognizes Mario as the baby.
- Super Mario 64: A part of the "Powerful Infant" theme is reused for the "Powerful Mario" theme in this game.
- Tetris Attack: The game is a reskin of Panel de Pon featuring many of the same creatures as Super Mario World 2: Yoshi's Island. The main theme is also rearranged as the title screen music and is also incorporated into the end credits melody in the Game Boy port.
- Yoshi's Story: This game was originally titled Yoshi's Island 64.
- Mario Kart 64: Yoshi's sound effects were reused in this game.
- Super Smash Bros.: Yoshi's moves and attacks were taken from this game.
- Paper Mario: Raphael the Raven returns, and Lava Piranha has a similar appearance to Naval Piranha. The music for Yoshi's Village is a variation on the title screen music. Additionally, one of Parakarry's attacks is similar to the Targeting system.
- Mario Party 2: For the minigame Tile Driver, the Goomba and Koopa Troopa patterns are modified versions of their respective artwork from this game.
- Super Mario Sunshine: The background of The Beach Cannon's Secret's secret course uses the same art style as Super Mario World 2: Yoshi's Island.
- Mario Party 4: Four Salvo the Slimes are featured as obstacles in Slime Time.
- Nintendo Puzzle Collection: In Yoshi no Cookie, the Action Mode stage backgrounds are based on Super Mario World 2: Yoshi's Island. Additionally, the normal end credits melody of the new Panel de Pon is arranged from the Game Boy port of Tetris Attack, which in turn contains the main theme.
- Mario Party-e: Yoshi and Shy Guy's sprite from Fast Feed Yoshi! are taken from this game.
- Mario Kart: Double Dash!!: The course, Baby Park, takes heavy inspiration from this game, with the track banner and locations employing a similar art style. Baby Mario and Baby Luigi's karts, the Goo-Goo Buggy and the Rattle Buggy have the Special Flower engraved on them.
- Mario & Luigi: Superstar Saga: A cover of Superstar Mario's theme is played during the Star 'Stache Smash minigame in this game. This cover has been removed from the remake.
- Mario Party Advance: Naval Piranha returns, alongside Goonies and other species.
- Super Princess Peach: The game's sprite work is reminiscent to those used in Super Mario World 2: Yoshi's Island, especially with Koopa Paratroopas having long wings. Additionally, the game uses enemies that originated from this game such as Kaboombas and Fangs.
- Mario & Luigi: Partners in Time: The events of this are mentioned by Kamek. An arrangement of this game's alternate title music is used for Yoshi's Island in this game.
- Yoshi Touch & Go: This game is a retelling of Super Mario World 2: Yoshi's Island's events.
- Yoshi's Island DS: This game is the sequel and also takes place on the same titular island, and most of the enemy sprites are from this game, albeit with updated shading. Its events are mentioned at the start of the game.
- Super Mario 64 DS / New Super Mario Bros.: The "Powerful Mario" theme from Super Mario 64 returns. A slightly altered version with different instruments can also be heard in certain minigames such as Balloon Racing and Bounce and Trounce.
- Mario Kart Arcade GP 2: The tracks Yoshi Park 1 and Yoshi Park 2 have amusement park rides that take heavy inspiration from this game.
- Itadaki Street DS: This game features the map of Yoshi's Island.
- Super Mario Galaxy: An orchestral arrangement of Superstar Mario's theme is used as the theme of Rainbow Mario in this game.
- Super Smash Bros. Brawl: The Yoshi's Island stage is inspired from this game. Some tracks of the game's soundtrack are covered in this game, including the Ground Theme and the Athletic Theme.
- New Super Mario Bros. Wii: Kamek reappears and uses his magic to power up the Koopalings. Fake walls reappear. Kamek turns Bowser into a giant for the final battle.
- New Super Mario Bros. U: Kamek again uses magic to enhance boss fights and turn Bowser into a giant.
- Yoshi's New Island: This game continues the story told from Super Mario World 2: Yoshi's Island.
- Super Mario Maker: The Baby Mario Costume uses modified sprites from this game.
- Mini Mario & Friends: amiibo Challenge: The soundtrack of Egg Launch Land is a complete arrangement of "Flower Garden", which plays in Make Eggs, Throw Eggs and other levels.
- Mario Party: Star Rush: A minigame called Dodge Fuzzy, Get Dizzy is a reference to the Touch Fuzzy, Get Dizzy level.
- Super Mario Run: When the player grabs a Super Star in Remix 10, a rearrangement of the Powerful Infant theme can be heard.
- WarioWare Gold: This game contains a microgame based on Super Mario World 2: Yoshi's Island, where Yoshi must save Baby Mario from a bubble.
- Super Smash Bros. Ultimate: Slugger & Green Glove appear as a spirit, using artwork from Super Mario World 2: Yoshi's Island. Bowser's Final Smash in this game is based on Baby Bowser's second boss battle.
- Mario Kart 8 Deluxe: The Yoshi's Island course in the Booster Course Pass is based on the game, with numerous obstacles being based on its enemies and sections based on the island layout and world themes as seen in the 3D overview on the title screen. The music is an arrangement of the athletic theme. Starting a race plays the Game Start theme, and finishing a race plays an arrangement of the Goal & Score theme. Kamek's speaking sound effect is used for his horn.
- Mario Kart Tour: Yoshi's Island returns as a race course in this game. The Smiley Flower Glider's art and animation are derived from the Smiley Flower from this game.
- Super Mario Bros. Wonder: The 1-Up jingle sounds similar to the one from Yoshi's Island. Melon Piranha Plants spit seeds similar to Yoshi and Ukikis with a watermelon, and Yoshis can spit seeds by eating them as well. The Yoshis' animations like running and falling are also similar.
- WarioWare: Move It!: A microgame based on Yoshi's Island appears in this game, in which Yoshi needs to run away from a Chomp Shark.
MediaEdit
- For a complete list of media for this subject, see List of Super Mario World 2: Yoshi's Island media.
| File info 0:29 |
| File info 0:49 |
GalleryEdit
- For this subject's image gallery, see Gallery:Super Mario World 2: Yoshi's Island.
Yoshi aiming an egg at a Special Flower

Baby Mario trapped in a bubble


Names in other languagesEdit
| Language | Name | Meaning |
|---|---|---|
| Japanese | スーパーマリオ ヨッシーアイランド Sūpā Mario: Yosshī Airando |
Super Mario: Yossy Island[25] |
| Chinese (simplified) | 超级马力欧 耀西岛 (Super Nintendo Entertainment System - Nintendo Switch Online)[26] Chāojí Mǎlì'ōu Yàoxī Dǎo |
Super Mario: Yoshi Island |
ReferencesEdit
- ^ Nintendo Magazine System (AU) Issue #33, page 26.
- ^ Nintendo (September 4, 2019). Nintendo Direct 9.4.2019. YouTube. Retrieved September 4, 2019.
- ^ Nintendo (September 4, 2019). Nintendo Direct 2019.9.5. YouTube. Retrieved September 4, 2019.
- ^ Tweet by Nintendo of Europe (Super Nintendo Entertainment System - Nintendo Switch Online release date). Twitter. Retrieved September 4, 2019.
- ^ Tweet by Nintendo AU NZ (Super Nintendo Entertainment System - Nintendo Switch Online release date). Twitter. Retrieved September 4, 2019.
- ^ Miller, Kent, and Terry Munson. Super Mario World 2: Yoshi's Island Player's Guide. Page 81.
- ^ Miller, Kent, and Terry Munson. Super Mario World 2: Yoshi's Island Player's Guide. Page 34.
- ^ Miller, Kent, and Terry Munson. Super Mario World 2: Yoshi's Island Player's Guide. Page 14.
- ^ Miller, Kent, and Terry Munson. Super Mario World 2: Yoshi's Island Player's Guide. Page 10.
- ^ Miller, Kent, and Terry Munson. Super Mario World 2: Yoshi's Island Player's Guide. Page 116.
- ^ Miller, Kent, and Terry Munson. Super Mario World 2: Yoshi's Island Player's Guide. Page 124.
- ^ Miller, Kent, and Terry Munson. Super Mario World 2: Yoshi's Island Player's Guide. Page 61.
- ^ https://docs.google.com/spreadsheets/d/1JJBlHHDc65fhZmKUGLrDTLCm6rfUU83-kbuD8Y0zU0o/edit?pli=1#gid=717751203
- ^ https://www.youtube.com/watch?v=WKzA-SCjnG4
- ^ a b c The Ultimate History of Video Games: The Story Behind the Craze that Touched our Lives and Changed the World, p. 518.
- ^ Kotaku, "How Yoshi’s Island Got Its Beautiful, Hand-Drawn Look", 2018-06-15
- ^ GameRankings score. GameRankings. Retrieved March 1, 2018.
- ^ (February 13, 2009) "Is There a Bad Mario Game?" IGN. Retrieved March 1, 2018.
- ^ Delgrego, Kaes. (July 22, 2009). Review: Super Mario World 2: Yoshi's Island Nintendo Life. Retrieved March 1, 2018.
- ^ Warrender, Reece. (March 31, 2006) Super Mario World 2: Yoshi's Island (Super Nintendo) Review Cubed3. Retrieved March 1, 2018.
- ^ Edge Staff (June 25, 2007). THE NINTENDO YEARS. Edge. Retrieved March 1, 2018.
- ^ Brian (July 24, 2020). Nintendo leaks continue with massive release of game protoypes, source code, and more. Nintendo Everything. Retrieved September 16, 2021.
- ^ Nintendo Magazine System (Australia) issue 30, pages 10 and 11.
- ^ a b Super Mario World 2: Yoshi's Island Glitches (SNES) - Son Of A Glitch - Episode 37. A + Start (January 30, 2015). Retrieved February 15, 2015.
- ^ Mandelin, Clyde (June 8, 2017). Why Yoshi Is Sometimes Called Yossy in Japan. Legends of Localization. Retrieved December 28, 2021.
- ^ From the game description of Super Nintendo Entertainment System - Nintendo Switch Online
External linksEdit
- Japanese website
- North American website
- Super Mario: Yoshi's Island Japanese Super Famicom Manual
- Super Mario World 2: Yoshi's Island North American SNES manual
| Super Mario World 2: Yoshi's Island / Yoshi's Island: Super Mario Advance 3 | |||
|---|---|---|---|
| Characters | Yoshis • Baby Mario • Baby Luigi • Baby Bowser • Kamek • Stork • Poochy • Huffin Puffin • Liquid lift • Melon Bug • Muddy Buddy • Support Ghost | ||
| Worlds | Welcome To Yoshi's Island • World 1 • World 2 • World 3 • World 4 • World 5 • World 6 | ||
| Items | Regular items | Blue watermelon • Coin • Green Shell • Green watermelon • Key • Red coin • Red Shell • Red watermelon • Special Flower • Star • Super Star • Yoshi's egg (Flashing Egg · Giant Egg · Red Egg · Yellow Egg) | |
| Special Items | 10-Point Star • 20-Point Star • Anytime Egg • Anywhere POW • Magnifying Glass • Super Blue Watermelon • Super Green Watermelon • Super Red Watermelon • Winged Cloud Maker | ||
| Objects | ! Block • Arrow block • Arrow Cloud • Balloon (Mini Battle) • Balloon (platform) • Beanstalk • Breakable block • Bubble • Bucket • Chomp Rock • Coin Block • Countdown Platform • Cracked block • Current • Donut Lift • Dotted-Line Block • Egg Block • Egg Plant • Expansion Block • Falling stone block • Flatbed Ferry • Flipper • Goal Ring • Ice Block • Icicle • Makeshift surfboard • Message Block • Middle Ring • Morph bubble • Moving block • Paddle wheel • Pinwheel • Post • Pot • POW Block • Red-and-yellow bridge • Red balloon • Rolling rock • Ski Lift • Snowball • Soft rock • Spinning Log • Spinning wheel • Spotted platform • Spring ball • Squishy block • Switch • Teeter-totter • Tulip • Tumbler • Warp Pipe • Winged Cloud • Yoshi Block | ||
| Bosses | Burt the Bashful • Salvo the Slime • Bigger Boo • Roger the Potted Ghost • Froggy • Naval Piranha • Marching Milde • Hookbill the Koopa • Sluggy the Unshaven • Raphael the Raven • Tap-Tap the Red Nose • Baby Bowser • Big Baby Bowser | ||
| Enemy classes | Edibilis Boringus • Harrassimentia Phlyoverus • Projectilia Ritebakatchia • Ucantia Defeatus • Dudim Phreykunoutonthis • Mostosti Vomitonus | ||
| Enemies | Aqua Lakitu • Bandit • Baron von Zeppelin • Barney Bubble • Beach Koopa • Big Boo • Blow Hard • Boo Balloon • Boo Blah • Boo • Boo Guy • Boo Man Bluff • Bouncing Bullet Bill • Bowling Goonie • Bubble Dayzee • Bullet Bill • Bumpty • Burt • Cactus Jack • Caged Ghost • Chain Chomp • Clawdaddy • Cloud Drop • Coin Bandit • Crazee Dayzee • Dancing Spear Guy • Dangling Ghost • Dizzy Dandy • Dr. Freezegood • Eggo-Dil • Fang • Fat Guy • Fishing Lakitu • Flamer Guy • Flightless Goonie • Flightless Skeleton Goonie • Flopsy Fish • Fly Guy • Flying Wiggler • Frog Pirate • Fuzzy • Gargantua Blargg • Georgette Jelly • Goomba • Goonie • Green Glove • Green Toady • Grim Leecher • Grinder • Grunt • Gusty • Harry Hedgehog • Hefty Goonie • Hootie the Blue Fish • Hot Lips • Incoming Chomp • Itsunomanika Heihō • Jean de Fillet • Kaboomba • Kamek • Kamek's Toadies • Koopa Troopa • Lakitu • Lantern Ghost • Lava Bubble • Lava Drop • Little Mouser • Little Skull Mouser • Loch Nestor • Lunge Fish • Mace Guy • Mace Penguin • Milde • Missile Bill* • Mock Up • Mufti Guy • Needle • Nep-Enut • Nipper Plant • Nipper Spore • Para-Koopa • Piro Dangle • Piscatory Pete • Pokey • Preying Mantas • Puchipuchi L • Raven • Raven (chick) • Red Blargg • Relay Heihō • Sanbo Flower • Shark Chomp • Shy-Guy • Shy-Guy on Stilts • Skeleton Goonie • Slime • Slime Drop • Slugger • Sluggy • Snifit • Solo Toady • Spear Guy • Spiked Fun Guy • Spooky • Spray Fish • Stretch • Tap-Tap • Tap-Tap the Golden • Thunder Lakitu • Train Bandit • Wall Lakitu • Whirly Fly Guy • Wild Piranha • Wild Ptooie Piranha • Woozy Guy • Zeus Guy | ||
| Obstacles | Ball 'N' Chain • Ball and chain • Cannonball • Fire-Bar • Lava • Spike • Spiked ball • Spiked weight • Thorn • Turtle Cannon | ||
| Mini Battles | Gather Coins • Popping Balloons • Throwing Balloons • Watermelon Seed Spitting Contest | ||
| Bonus Challenges | Flip Cards • Scratch and Match • Drawing Lots • Match Cards • Roulette • Slot Machine | ||
| Miscellaneous | Countdown Timer • Yoshi's Island | ||
| Further info | Gallery (SNES · GBA) • Glitches • Mario Bros.* • Media • Pre-release and unused content • Staff (SNES · GBA) • Super Mario: Yossy Island Original Sound Version | ||
| *Only in Yoshi's Island: Super Mario Advance 3 | |||
| Yoshi games | |||
|---|---|---|---|
| Yoshi's Island series | Super Mario World 2: Yoshi's Island (1995, SNES) • Yoshi's Island DS (2006, DS) • Yoshi's New Island (2014, 3DS) | ||
| Other | Yoshi (1991, NES) • Yoshi's Cookie (1992, NES) • Yoshi's Safari (1993, SNES) • Tetris Attack (1996, SNES) • Yoshi's Story (1997, N64) • Picross NP Vol. 2 (SFC, 1999) • Yoshi Topsy-Turvy (2004, GBA) • Yoshi Touch & Go (2005, DS) • Yoshi's Egg Toss (2006, Adobe Flash) • Yoshi's Woolly World (2015, Wii U) • Yoshi's Crafted World (2019, Switch) • Play Nintendo activities (2014–present) | ||
| Reissues | Yoshi no Cookie: Kuruppon Oven de Cookie (1994, SNES) • Yoshi's Island: Super Mario Advance 3 (2002, GBA) • Poochy & Yoshi's Woolly World (2017, 3DS) | ||
| Tech demos | Yoshi Demo (1999, GBA) • Purple Yoshi tech demo (Unknown, GBA) • Balloon Trip (2004, DS) | ||
| Crossovers | Super Smash Bros. (1999, N64) • Super Smash Bros. Melee (2001, GCN) • Super Smash Bros. Brawl (2008, Wii) • Super Smash Bros. for Nintendo 3DS (2014, 3DS) • Super Smash Bros. for Wii U (2014, Wii U) • Super Smash Bros. Ultimate (2018, Switch) | ||
| Super Mario games | |||
|---|---|---|---|
| Platformers | Super Mario series | Main | Super Mario Bros. (1985, NES) • Super Mario Bros.: The Lost Levels (1986, FDS) • Super Mario Bros. 2 (1988, NES) • Super Mario Bros. 3 (1988, NES) • Super Mario Land (1989, GB) • Super Mario World (1990, SNES) • Super Mario Land 2: 6 Golden Coins (1992, GB) • Super Mario 64 (1996, N64) • Super Mario Sunshine (2002, GCN) • New Super Mario Bros. (2006, DS) • Super Mario Galaxy (2007, Wii) • New Super Mario Bros. Wii (2009, Wii) • Super Mario Galaxy 2 (2010, Wii) • Super Mario 3D Land (2011, 3DS) • New Super Mario Bros. 2 (2012, 3DS) • New Super Mario Bros. U (2012, Wii U) • Super Mario 3D World (2013, Wii U) • Super Mario Maker (2015, Wii U) • Super Mario Run (2016, iOS/iPadOS/Android) • Super Mario Odyssey (2017, Switch) • Super Mario Maker 2 (2019, Switch) • Super Mario Bros. Wonder (2023, Switch) |
| Reissues | VS. Super Mario Bros. (1986, VS) • Super Mario Bros. (1986, G&W) • All Night Nippon: Super Mario Bros. (1986, FDS) • Super Mario Bros. (1989, NGW) • Super Mario Bros. 3 (1990, NGW) • Super Mario World (1991, NGW) • Super Mario All-Stars (1993, SNES) • Super Mario All-Stars + Super Mario World (1994, SNES) • BS Super Mario USA (1996, SNES) • BS Super Mario Collection (1997, SNES) • Super Mario Bros. Deluxe (1999, GBC) • Super Mario Advance (2001, GBA) • Super Mario World: Super Mario Advance 2 (2001, GBA) • Super Mario Advance 4: Super Mario Bros. 3 (2003, GBA) • Famicom Mini Series (2004, GBA) • Classic NES Series (2004-2005, GBA) • Super Mario 64 DS (2004, DS) • Super Mario All-Stars Limited Edition (2010, Wii) • Super Mario Maker for Nintendo 3DS (2016, 3DS) • New Super Mario Bros. U Deluxe (2019, Switch) • Super Mario 3D All-Stars (2020, Switch) • Game & Watch: Super Mario Bros. (2020, G&W) • Super Mario 3D World + Bowser's Fury (2021, Switch) | ||
| Related games | Super Mario Bros. Special (1986, computer) • Wario Land: Super Mario Land 3 (1994, GB) • Super Mario World 2: Yoshi's Island (1995, SNES) • New Super Luigi U (2013, Wii U) • Captain Toad: Treasure Tracker (2014, Wii U) • Super Mario Bros. 35 (2020, Switch) • Bowser's Fury (2021, Switch) | ||
| Canceled games | Super Mario's Wacky Worlds (CD-i) • Mario Takes America (CD-i) • VB Mario Land (VB) • Super Mario 64 2 (N64DD) | ||
| Donkey Kong series | Donkey Kong (1981, arcade) • Donkey Kong (1994, GB) | ||
| Mario vs. Donkey Kong series | Mario vs. Donkey Kong (2004, GBA) • Mario vs. Donkey Kong 2: March of the Minis (2006, DS) • Mario vs. Donkey Kong: Minis March Again! (2009, DSiWare) • Mario vs. Donkey Kong: Mini-Land Mayhem! (2010, DS) • Mario and Donkey Kong: Minis on the Move (2013, 3DS) • Mario vs. Donkey Kong: Tipping Stars (2015, 3DS/Wii U) • Mini Mario & Friends: amiibo Challenge (2016, 3DS/Wii U) | ||
| Mario Bros. series | Mario Bros. (1983, arcade) • Mario Bros. Special (1984, computer) • Punch Ball Mario Bros. (1984, computer) • Mario Clash (1995, VB) | ||
| Wrecking Crew series | VS. Wrecking Crew (1984, VS) • Wrecking Crew (1985, NES) • Wrecking Crew '98 (1998, SFC) | ||
| Other | Mario Bros. (1983, G&W) • Mario's Cement Factory (1983, G&W) • Mario & Wario (1993, SNES) • Hotel Mario (1994, CD-i) • Super Princess Peach (2005, DS) • Princess Peach: Showtime! (2024, Switch) | ||
| Reissues | Crazy Kong (1981, arcade) • Donkey Kong (1982, G&W) • Kaettekita Mario Bros. (1988, FDS) • Donkey Kong (1994, NGW) • Yoshi's Island: Super Mario Advance 3 (2002, GBA) • Donkey Kong/Donkey Kong Jr./Mario Bros. (2004, arcade) • Virtual Console (2006-2016, Wii/3DS/Wii U) • Captain Toad: Treasure Tracker (2018, Switch/3DS) • Mario vs. Donkey Kong (2024, Switch) | ||
| Tech demos | snd_test (Unknown, SNES) • Super Mario 128 (2000, GCN) • New Super Mario Bros. Mii (2011, Wii U) • Mario vs. Donkey Kong Wii U demo (2014, Wii U) | ||
| Mario Kart series | Main | Super Mario Kart (1992, SNES) • Mario Kart 64 (1996, N64) • Mario Kart: Super Circuit (2001, GBA) • Mario Kart: Double Dash!! (2003, GCN) • Mario Kart DS (2005, DS) • Mario Kart Wii (2008, Wii) • Mario Kart 7 (2011, 3DS) • Mario Kart 8 (2014, Wii U) • Mario Kart Tour (2019, iOS/iPadOS/Android) | |
| Arcade | Mario Kart Arcade GP (2005, arcade) • Mario Kart Arcade GP 2 (2007, arcade) • Mario Kart Arcade GP DX (2013, arcade) • Mario Kart Arcade GP VR (2017, arcade) | ||
| Other | Mario Kart Live: Home Circuit (2020, Switch) | ||
| Ports | Mario Kart 8 Deluxe (2017, Switch) | ||
| Tech demos | Mario Kart for Nintendo GameCube (2001, GCN) | ||
| Pitches / canceled games | VB Mario Kart (VB) • Mario Kart XXL (GBA) • Tesla Mario Kart game (Tesla vehicles) | ||
| Mario Party series | Main | Mario Party (1998, N64) • Mario Party 2 (1999, N64) • Mario Party 3 (2000, N64) • Mario Party 4 (2002, GCN) • Mario Party 5 (2003, GCN) • Mario Party 6 (2004, GCN) • Mario Party 7 (2005, GCN) • Mario Party 8 (2007, Wii) • Mario Party 9 (2012, Wii) • Mario Party 10 (2015, Wii U) • Super Mario Party (2018, Switch) • Mario Party Superstars (2021, Switch) | |
| Handheld | Mario Party Advance (2005, GBA) • Mario Party DS (2007, DS) • Mario Party: Island Tour (2013, 3DS) • Mario Party: Star Rush (2016, 3DS) • Mario Party: The Top 100 (2017, 3DS) | ||
| Arcade | Super Mario Fushigi no Korokoro Party (2004, arcade) • Super Mario Fushigi no Korokoro Party 2 (2005, arcade) • Mario Party Fushigi no Korokoro Catcher (2009, arcade) • Mario Party Kurukuru Carnival (2012, arcade) • Mario Party Fushigi no Korokoro Catcher 2 (2013, arcade) • Mario Party Challenge World (2016, arcade) | ||
| Other | Mario Party 4 (2002, Adobe Flash) • Mario Party-e (2003, GBA) | ||
| Sports games | Golf series | Golf (1984, NES) • Stroke & Match Golf (1984, VS. System) • Golf: Japan Course (1987, FDS) • Golf: U.S. Course (1987, FDS) • Golf (1989, GB) • NES Open Tournament Golf (1991, NES) • Mobile Golf (2001, GBC) | |
| Mario Golf series | NES Open Tournament Golf (1991, NES) • Mario Golf (1999, N64) • Mario Golf (1999, GBC) • Mario Golf: Toadstool Tour (2003, GCN) • Mario Golf: Advance Tour (2004, GBA) • Mario Golf: World Tour (2014, 3DS) • Mario Golf: Super Rush (2021, Switch) | ||
| Mario Tennis series | Mario's Tennis (1995, VB) • Mario Tennis (2000, N64) • Mario Tennis (2000, GBC) • Mario Power Tennis (2004, GCN) • Mario Tennis: Power Tour (2005, GBA) (Bicep Pump [Unknown, Adobe Flash] • Reflex Rally [Unknown, Adobe Flash]) • Mario Tennis Open (2012, 3DS) • Mario Tennis: Ultra Smash (2015, Wii U) • Mario Tennis Aces (2018, Switch) | ||
| Mario Baseball series | Mario Superstar Baseball (2005, GCN) • Mario Super Sluggers (2008, Wii) | ||
| Mario Strikers series | Super Mario Strikers (2005, GCN) • Mario Strikers Charged (2007, Wii) • Mario Strikers: Battle League (2022, Switch) | ||
| Famicom Grand Prix series | Famicom Grand Prix: F1 Race (1987, FDS) • Famicom Grand Prix II: 3D Hot Rally (1988, FDS) | ||
| Other | Donkey Kong Hockey (1984, G&W) • Baseball (1989, GB) • Super Mario Race (1992, GwB) • Mario Hoops 3-on-3 (2006, DS) • Mario Sports Mix (2010, Wii) • Mario Sports Superstars (2017, 3DS) • LEGO Super Mario Goal (2024, Sky Italia) | ||
| Ports | New Play Control! Mario Power Tennis (2009, Wii) | ||
| Canceled games | Super Mario American football game (GCN) • Super Mario Spikers (Wii) | ||
| Role-playing games | Paper Mario series | Paper Mario (2000, N64) • Paper Mario: The Thousand-Year Door (2004, GCN) • Super Paper Mario (2007, Wii) • Paper Mario: Sticker Star (2012, 3DS) • Paper Mario: Color Splash (2016, Wii U) • Paper Mario: The Origami King (2020, Switch) | |
| Mario & Luigi series | Mario & Luigi: Superstar Saga (2003, GBA) • Mario & Luigi: Partners in Time (2005, DS) • Mario & Luigi: Bowser's Inside Story (2009, DS) • Mario & Luigi: Dream Team (2013, 3DS) • Mario & Luigi: Paper Jam (2015, 3DS) | ||
| Other | Super Mario RPG: Legend of the Seven Stars (1996, SNES) | ||
| Remakes | Mario & Luigi: Superstar Saga + Bowser's Minions (2017, 3DS) • Mario & Luigi: Bowser's Inside Story + Bowser Jr.'s Journey (2018, 3DS) • Super Mario RPG (2023, Switch) • Paper Mario: The Thousand-Year Door (2024, Switch) | ||
| Canceled games | Super Mario RPG 2 (N64DD) • Super Paper Mario (GCN) | ||
| Dr. Mario series | Main | Dr. Mario (1990, NES/GB) • Dr. Mario 64 (2001, N64) • Dr. Mario Online Rx (2008, WiiWare) • Dr. Mario Express (2008, DSiWare) • Dr. Luigi (2013, Wii U) • Dr. Mario: Miracle Cure (2015, 3DS) • Dr. Mario World (2019, iOS/iPadOS/Android) | |
| Other | VS. Dr. Mario (1990, VS) • Dr. Mario (1993, GwB) | ||
| Remakes | Tetris & Dr. Mario (1994, SNES) • Nintendo Puzzle Collection (2003, GCN) • Dr. Mario & Puzzle League (2005, GBA) | ||
| Luigi's Mansion series | Main | Luigi's Mansion (2001, GCN) • Luigi's Mansion: Dark Moon (2013, 3DS) • Luigi's Mansion 3 (2019, Switch) | |
| Arcade | Luigi's Mansion Arcade (2015, arcade) | ||
| Remakes | Luigi's Mansion (2018, 3DS) • Luigi's Mansion 2 HD (2024, Switch) | ||
| Tech demos | Luigi's Mansion (2000, GCN) | ||
| Educational games | Mario Discovery series | Mario is Missing! (1993, MS-DOS/SNES/NES) • Mario's Time Machine (1993, MS-DOS/SNES/NES) • Mario's Early Years! Fun with Letters (1993, MS-DOS/SNES) • Mario's Early Years! Fun with Numbers (1994, MS-DOS/SNES) • Mario's Early Years! Preschool Fun (1994, MS-DOS/SNES) | |
| Mario Teaches Typing series | Mario Teaches Typing (1991, MS-DOS) • Mario Teaches Typing 2 (1996, MS-DOS) | ||
| Other | Family BASIC (1984, FC) • Super Mario Bros. & Friends: When I Grow Up (1991, MS-DOS) | ||
| Ports | Mario's Early Years! CD-ROM Collection (1995, MS-DOS) | ||
| Canceled games | Mario's Mission Earth (SNES) | ||
| Art utilities | Mario Artist series | Mario Artist: Paint Studio (1999, N64DD) • Mario Artist: Talent Studio (2000, N64DD) • Mario Artist: Communication Kit (2000, N64DD) • Mario Artist: Polygon Studio (2000, N64DD) | |
| Other | I am a teacher: Super Mario Sweater (1986, FDS) • Super Mario Bros. Print World (1991, MS-DOS) • Mario Paint (1992, SNES) • Super Mario Collection Screen Saver (1997, PC) • Mario no Photopi (1998, N64) • Mario Family (2001, GBC) | ||
| Pitches / canceled games | Mario Factory ("Game Processor RAM Cassette") • Mario Paint 3D (N64) • Mario Artist: Sound Studio (N64DD) | ||
| Miscellaneous | Picross series | Mario's Picross (1995, GB) • Mario's Super Picross (1995, SFC) • Picross 2 (1996, GB) • Picross NP Vol. 6 (2000, SFC) | |
| LCD handhelds | Mario's Bombs Away (1983, G&W) • Mario's Egg Catch (1990, SMBW) • Luigi's Hammer Toss (1990, SMBW) • Princess Toadstool's Castle Run (1990, SMBW) • Mario the Juggler (1991, G&W) | ||
| Pinball | Pinball (1984, NES) • Super Mario Bros. (1992, arcade) • Super Mario Bros. Mushroom World (1992, arcade) • Mario Pinball Land (2004, GBA) | ||
| Arcade | Mario Roulette (1991, arcade) • Piccadilly Circus: Super Mario Bros. 3 (1991, arcade) • Mario World (1991, arcade) • Terebi Denwa: Super Mario World (1992, arcade) • Super Mario World Popcorn (1992, arcade) • Pika Pika Mario (1992, arcade) • Janken Fukubiki: Super Mario World (1992, arcade) • Koopa Taiji (1993, arcade) • Būbū Mario (1993, arcade) • Mario Undōkai (1993, arcade) • Super Mario World (1993, arcade) • Super Mario Kart: Doki Doki Race (1994, arcade) • Mario Bowl (1995, arcade) • Super Mario Attack (1996, arcade) • Donkey Kong (1996, arcade) • Mario Kart 64 (1996, arcade) • Super Mario 64 (Unknown, arcade) • Super Mario Bros. 3 (Unknown, arcade) • Super Mario World (Unknown, arcade) • Guru Guru Mario (Unknown, arcade) • Swanky no Bonus Slot (Unknown, arcade) • Dokidoki Mario Chance! (2003, arcade) • Super Mario Fushigi no Janjan Land (2003, arcade) • New Super Mario Bros. Wii Coin World (2011, arcade) | ||
| Browser | Mario Net Quest (1997, Adobe Shockwave) • Mario's Memory Madness (1998, Adobe Shockwave) • Crazy Counting (1999, Adobe Shockwave) • Dinky Rinky (1999, Adobe Shockwave) • Goodness Rakes (1999, Adobe Shockwave) • Melon Mayhem (1999, Adobe Shockwave) • Nomiss (1999, Adobe Shockwave) • Wario's Whack Attack (1998, Adobe Shockwave) • The Lab (The Bookshelf • The Drafting Table • PolterCue • Ask Madame Clairvoya) (2001, Adobe Flash) • Mario Trivia (Unknown, Adobe Flash) • Mario Memory (Unknown, Adobe Flash) • Virus Attack! (Unknown, Adobe Flash) • Mini-Mario Factory Game! (2004, Adobe Flash) • Bill Bounce (2004, Adobe Flash) • Mario Party 7 Bon Voyage Quiz (2005, Adobe Flash) • Super Mario Strikers (2005, Adobe Flash) • Dr. Mario Vitamin Toss (2005, Adobe Flash) • Bowser's Lair Hockey (2005, Adobe Flash) • Heads-Up (2005, Adobe Flash) • Parasol Fall (2005, Adobe Flash) • Dribble Skillz (2006, Adobe Flash) • Superstar Shootout (2006, Adobe Flash) • Cannon Kaos (2006, Adobe Flash) • 1-Up Hunt! (2006, Adobe Flash) • Super Paper Mario Memory Match (2007, Adobe Flash) • Are You Smarter Than Mario? (2008, Adobe Flash) • Play Nintendo activities (2014–present) | ||
| DSiWare applications | Mario Calculator (2009, DSiWare) • Mario Clock (2009, DSiWare) | ||
| Other games | Alleyway (1989, GB) • Yoshi's Safari (1993, SNES) • Undake30 Same Game (1995, SFC) • Mario's Game Gallery (1995, MS-DOS) • Mario's FUNdamentals (1998, Windows) • Yakuman DS (2005, DS) | ||
| Tech demos | Mario Demo (1994, VB) • morphdemo (Unknown, N64) • Peach's Castle (2002, GCN) • Mario's Face (Unknown, DS) • DSpeak (2005, DS) • Koopa Troopa Forest (Unknown, Wii) • Mario FPS (Unknown, Wii) | ||
| Pitches / canceled games | Mario's Castle ("Project Atlantis") • Boss Game Studios' Super Mario game pitch (Unknown) • Retro Studios' Boo project (DS) • Mario Motors (DS) | ||
| Crossovers | Game & Watch Gallery series | Game & Watch Gallery (1997, GB) • Game & Watch Gallery 2 (1997, GB) • Game & Watch Gallery 3 (1999, GBC) • Game & Watch Gallery 4 (2002, GBA) | |
| Super Smash Bros. series | Super Smash Bros. (1999, N64) • Super Smash Bros. Melee (2001, GCN) • Super Smash Bros. Brawl (2008, Wii) • Super Smash Bros. for Nintendo 3DS (2014, 3DS) • Super Smash Bros. for Wii U (2014, Wii U) • Super Smash Bros. Ultimate (2018, Switch) | ||
| Itadaki Street series | Itadaki Street DS (2007, DS) • Fortune Street (2011, Wii) | ||
| Mario & Sonic series | Mario & Sonic at the Olympic Games (2007, Wii) • Mario & Sonic at the Olympic Games (2008, DS) • Mario & Sonic at the Olympic Winter Games (2009, Wii) • Mario & Sonic at the Olympic Winter Games (2009, DS) • Mario & Sonic at the London 2012 Olympic Games (2011, Wii) • Mario & Sonic at the London 2012 Olympic Games (2012, 3DS) • Mario & Sonic at the Sochi 2014 Olympic Winter Games (2013, Wii U) • Mario & Sonic at the Rio 2016 Olympic Games (2016, Wii U) • Mario & Sonic at the Rio 2016 Olympic Games (2016, 3DS) • Mario & Sonic at the Rio 2016 Olympic Games Arcade Edition (2016, arcade) • Mario & Sonic at the Olympic Games Tokyo 2020 (2019, Switch) • Mario & Sonic at the Olympic Games Tokyo 2020 - Arcade Edition (2020, arcade) | ||
| NES Remix series | Main | NES Remix (2013, Wii U) • NES Remix 2 (2014, Wii U) | |
| Reissues | NES Remix Pack (2014, Wii U) • Ultimate NES Remix (2014, 3DS) | ||
| Mario + Rabbids series | Mario + Rabbids Kingdom Battle (2017, Switch) • Mario + Rabbids Sparks of Hope (2022, Switch) | ||
| Other | Excitebike: Bun Bun Mario Battle (1997, Satellaview) • NBA Street V3 (2005, GCN) • Dance Dance Revolution: Mario Mix (2005, GCN) • SSX on Tour (2005, GCN) • Tetris DS (2006, DS) • Captain Rainbow (2008, Wii) • Art Style: PiCTOBiTS (2009, DSiWare) • Nintendo Land (2012, Wii U) • Puzzle & Dragons: Super Mario Bros. Edition (2015, 3DS) | ||
| Tech demos | Chase Mii (Unknown, Wii U) | ||
| Pitches / canceled games | Super Mario/Rabbids crossover adventure game (Wii) • DDR MARIO 2 (Wii) | ||
| Super Nintendo Entertainment System / Super Famicom games | |
|---|---|
| Super Mario franchise | Super Mario World (1990) • Mario Paint (1992) • Super Mario Kart (1992) • Mario is Missing! (1993) • Super Mario All-Stars (1993) • Yoshi's Safari (1993) • Mario & Wario (1993) • Mario's Time Machine (1993) • Mario's Early Years! Fun with Numbers (1994) • Mario's Early Years! Fun with Letters (1994) • Mario's Early Years! Preschool Fun (1994) • Tetris & Dr. Mario (1994) • Super Mario All-Stars + Super Mario World (1994) • Undake30 Same Game (1995) • Mario's Super Picross (1995) • Super Mario RPG: Legend of the Seven Stars (1996) • Wrecking Crew '98 (1998) |
| Donkey Kong franchise | Donkey Kong Country (1994) • Donkey Kong Country Competition Cartridge (1994) • Donkey Kong Country 2: Diddy's Kong Quest (1995) • Donkey Kong Country 3: Dixie Kong's Double Trouble! (1996) |
| Yoshi franchise | Yoshi's Cookie (1993) • Yoshi no Cookie: Kuruppon Oven de Cookie (1994) • Super Mario World 2: Yoshi's Island (1995) • Tetris Attack (1996) |
| Wario franchise | Mario & Wario (1993) • Wario's Woods (1994) |
| Satellaview | Wario no Mori Bakushō Version (1995) • Wario no Mori Futatabi (1995) • BS Super Mario USA (1996) • Yoshi no Panepon (1996) • Excitebike: Bun Bun Mario Battle (1997) • BS Super Mario Collection (1997-1998) • Satella-Q (1995-1999) |
| Miscellaneous | Nintendo Campus Challenge (1992) • Nintendo PowerFest '94 (1994) • Picross NP (1999-2000) |