Mario Kart Wii: Difference between revisions
Reddragon19k (talk | contribs) m (Undo revision 1134879 by Reddragon19k (talk) My bad!) |
m (→Vehicles: Better written, includes links) |
||
| (1,000 intermediate revisions by more than 100 users not shown) | |||
| Line 1: | Line 1: | ||
{{italic title}} | |||
{{FA}} | {{FA}} | ||
{{ | {{game infobox | ||
|image=[[File: | |image=[[File:Mkwii.jpg|270px]]<br>Game box art<br>[[File:MarioKartWiiNTSC.png|270px]]<br>Wii Wheel bundle box | ||
|developer=Nintendo | |developer=[[Nintendo Entertainment Analysis and Development|Nintendo EAD]] | ||
|publisher=[[Nintendo]] | |publisher=[[Nintendo]] | ||
| | |release='''Wii (original release)'''<br>{{release|Japan|April 10, 2008|Europe|April 11, 2008|Australia|April 24, 2008|USA|April 27, 2008|Mexico|April 27, 2008<ref>''Club Nintendo'' (MX) issue 198, page 76.</ref>|HK|July 12, 2008|ROC|July 12, 2008|South Korea|April 30, 2009}} '''Wii ([[Nintendo Selects]])'''<br>{{release|Europe|October 18, 2013|Australia|November 7, 2013|South Korea|August 28, 2014}} | ||
|genre=Racing | |languages={{languages|en_us=y|en_gb=y|fr_fr=y|fr_ca=y|es_es=y|es_latam=y|de=y|it=y|jp=y|kr=y}} | ||
|genre=[[Mario Kart (series)|Racing]] | |||
|modes=Single Player, Multiplayer, Online Play | |modes=Single Player, Multiplayer, Online Play | ||
|ratings={{ratings|esrb=E|pegi=3|cero=A| | |ratings={{ratings|esrb=E|pegi=3|cero=A|acb=G|usk=0|grac=all}} | ||
|platforms=[[Wii]] | |platforms=[[Wii]] | ||
|input={{input|wiimote=1|nunchuk=1|wheel=1|classic=1|wiigcn=1}} | |input={{input|wiimote=1|nunchuk=1|wheel=1|classic=1|wiigcn=1}} | ||
| | |format={{format|wii=1}} | ||
}} | }} | ||
'''''Mario Kart Wii''''' is a racing game | '''''Mario Kart Wii''''' is a multiplayer-oriented racing game from the ''[[Mario Kart (series)|Mario Kart]]'' series for the [[Wii]], developed by [[Nintendo Entertainment Analysis and Development|Nintendo EAD]]. ''Mario Kart Wii'' retains the traditional premise of the franchise, with players selecting ''[[Super Mario (franchise)|Super Mario]]'' franchise characters to use as drivers alongside themed vehicles. As with most racing games, the overarching goal is to place first among other competitors, achieved through the usage of item-based weaponry common to the series and taking the fastest routes to secure the lead. Several new key elements introduced to ''Mario Kart Wii'' include increasing the number of racers to 12 racers from 8 racers from previous entries in the series, as well as introducing a new type of vehicle to the franchise: [[bike]]s. The game takes advantage of features unique to the Wii, most notably its motion control capabilities. A [[Wii#Wii Wheel|Wii Wheel]] is included in most ''Mario Kart Wii'' packages, though the game is still compatible with other controllers such as a regular [[Wii#Wii Remote|Wii Remote]] held sideways, the Wii Remote and Nunchuk, the Nintendo GameCube controller, and the Classic Controller and Classic Controller Pro. Additional game modes are also present such as the traditional Grand Prix, Versus, Battle, and Time Trial modes. | ||
A [[Wii Wheel | |||
This game requires | This game requires 23 blocks of storage on the player's Wii system to save game data. Also, the game data cannot be copied onto another Wii. This makes it the only game in the ''Mario Kart'' series where data cannot be transferred between consoles. The game also includes its own [[Wii#Wii Channels|Wii Channel]], called the [[Wii#Mario Kart Channel|Mario Kart Channel]], which allows players to play in special tournaments and trade their racing profile with other players around the world. This channel uses 74 to 88 blocks (depending on the game's region), but unlike the game data, players can copy the channel onto their SD cards. | ||
''Mario Kart Wii'' | With over 37 million copies of the game sold, ''Mario Kart Wii'' is the second best-selling Wii game (after ''{{wp|Wii Sports}}'') and the best-selling ''Super Mario'' game for the Wii console.<ref name=sales>[http://www.nintendo.co.jp/ir/en/sales/software/wii.html IR Information : Sales Data - Top Selling Software Sales Unites - Wii Software (as of September 30, 2023)]</ref> | ||
<!--Please do not add that third party software can enable online play; unofficial material falls outside this wiki's scope.--> | |||
The game supported [[Nintendo Wi-Fi Connection]] for online multiplayer play until it was terminated by Nintendo on May 20th, 2014. | |||
==Gameplay== | ==Gameplay== | ||
[[File:Mario Kart Wii Title Screen.PNG|thumb|upright=1.1|left|The game's main title screen. If one or more profiles have gotten first place on every cup on every class, including Mirror Mode, the title screen will change from Mario and Luigi using the Wii Wheel to individual pictures of Mario, Luigi, Peach or Bowser.]] | |||
[[File:Mario Kart Wii Title Screen.PNG|thumb| | [[File:MKW WFC Countries Map.png|thumb|This map shows all the countries listed in the [[Nintendo Wi-Fi Connection]] in ''Mario Kart Wii''. Not all regions registered on the Wii system are registered in the game. Some countries that have lost their independence, such as {{wp|Aruba}}, {{wp|Sint Maarten}}, and {{wp|Curaçao}} ({{wp|Netherlands Antilles}}), as well as others that have disappeared or disintegrated, are still registered as separate regions in the Wii system or the game. In addition, {{wp|South Sudan}} and {{wp|Sudan}} are registered together as "Sudan" despite their division.<ref>[http://www.spriters-resource.com/wii/mkwii/sheet/30505/ Wii - Mario Kart Wii - Country Flags - The Spriters Resource]</ref>]] | ||
''Mario Kart Wii'' retains most of the elements from previous ''Mario Kart'' games, especially ''[[Mario Kart DS]]''. Players select a racer from a cast of ''Super Mario'' characters, who are all divided into size categories in relation to their stats, and they need to select a vehicle from the class they belong in, all with their own stats. All races start with players at a line corresponding to their proper position, where [[Lakitu (Mario Kart referee)|Lakitu]] signals the countdown time. Once the time is finished, players race three laps around a race course in an attempt to be first of the pack. Once the third lap is completed, players are ranked points depending on how well they placed in the race. While every previous ''Mario Kart'' game allowed for a maximum of eight racers on each course, up to twelve are on the course at a time in ''Mario Kart Wii''. In Grand Prix and VS mode, player characters always start out on the latter positions; once they finish the race, their position is saved as they move on to the next race. Like ''[[Mario Kart: Super Circuit]]'' and ''[[Mario Kart DS]]'', ''Mario Kart Wii'' shows a rating of how well a player performed after the trophy presentation: ★★★, ★★, ★, A, B, C, D, and E (E being the lowest ranking and ★★★ being the highest). | |||
Integral to the ''Mario Kart'' series is the usage of ''Super Mario''-themed items to use as weapons against other racers in the track, either directly benefiting the player or hurting another player's progress. Players can receive these items at random from [[Item Box]]es scattered around the track. The quality of the item received depends on the position of the racer: racers who are further down the line receive stronger items to help compensate their poorer performances. For examples, lower racers receive [[Dash Mushroom|Mushroom]]s as speed boosts, [[Star]]s for faster invincibility, etc. while higher-placed racers receive weak items such as [[Green Shell]]s and [[Banana Peel]]s. When players receive an item, they can stop the item roulette faster by pressing the corresponding item button. | |||
Several advanced techniques are retained in ''Mario Kart Wii'' from prior ''Mario Kart'' titles, although several tweaks have been made to them. Players can drift through tougher curves to maintain speed; players can perform a [[Mini-Turbo]] when players receive color-coded sparks from drifting, which depends on how long players can hold the button for drifting and the angle at which they drift. Introduced in ''Mario Kart Wii'' are two drift modes: Automatic and Manual. Automatic drifting allows players to automatically drift when turning very sharply, though players cannot perform Mini-Turbos regardless of how well they drift. Manual mode requires players hold down a button to drift, but releasing the button may release a Mini-Turbo, the strength of it depending on the color of the sparks. Players are now able to perform [[trick]]s when they driver over specific types of ramps. When drivers perform a trick and land successfully, they gain a momentary boost of speed. Tricks consist of mid-air acrobatics and are performed by shaking the [[Wii#Wii Wheel|Wii Wheel]] upward, shaking the [[Wii#Wii Remote|Wii Remote]] in the Wii Remote + Nunchuk combo, pressing the {{button|wii|Pad}} on the Classic Controller, or pressing the {{button|gcn|Pad}} on the GameCube controller. | |||
Motorbikes are introduced in this game | Motorbikes are introduced in this game, alongside having a wider variety of karts to select from. Motorbikes can perform [[wheelie]]s to increase top speed on straights, though motorbikes cannot perform the most powerful Mini-Turbo that karts can. Motorbikes also come in two classes: drift type and hang-on type. Drift type bikes drift in a similar way to karts, while hang-on type bikes commit to the turn instead. | ||
Prior to discontinuation of online services, ''Mario Kart Wii'' featured a text chat in Online Multiplayer Mode when racing or battling against Friends. Users can send pre-written phrases to other users before the series of races starts. However, there is no facility for a user to type custom messages<ref>[http://uk.wii.ign.com/articles/855/855033p1.html IGN: Update: Mario Kart Wii Text Chat Details]</ref>. | |||
''Mario Kart Wii'' | Another new change is the point system used for Grand Prix races. With twelve racers competing in each race, the point value has increased from 10/8/6/4/3/2/1/0 points for first to eighth place respectively to 15/12/10/8/7/6/5/4/3/2/1/0 points for first to twelfth place respectively. Also, 4th and 5th place are not losing positions. The following chart shows the difference of the point spreads from previous games to this installment. | ||
{|align=center class="wikitable"style="margin:auto;text-align:center;max-width:60em" | |||
|- | |||
!colspan="13"style="background:#e0e0e0"|Point Spread Comparisons (GP) | |||
|- | |||
! style="max-width:20em" | !! style="width:2.5em"| 1st !! style="width:2.5em"| 2nd !! style="width:2.5em"| 3rd !! style="width:2.5em"| 4th !! style="width:2.5em"| 5th !! style="width:2.5em"| 6th !! style="width:2.5em"| 7th !! style="width:2.5em"| 8th !! style="width:2.5em"| 9th !! style="width:2.5em"| 10th !! style="width:2.5em"| 11th !! style="width:2.5em"| 12th | |||
|- | |||
|'''''Super Mario Kart''<br>''Mario Kart 64''<br>''Mario Kart: Super Circuit'''''||style="background:#096;color:white;font-weight:bold"|9||style="background:#CF0"|6||style="background:#CF0"|3||style="background:#CF0"|1||0||0||0||0||—||—||—|| — | |||
|- | |||
|'''''Mario Kart: Double Dash!!''<br>''Mario Kart DS'''''||style="background:#096;color:white;font-weight:bold"|10||style="background:#CF0"|8||style="background:#CF0"|6||4||3||2||1||0||—||—||—||— | |||
|- | |||
|'''''Mario Kart Wii'''''||style="background:#096;color:white;font-weight:bold"|15||style="background:#CF0"|12||style="background:#CF0"|10||style="background:#CF0"|8||style="background:#CF0"|7||6||5||4||3||2||1||0 | |||
|- | |||
|colspan=13 style="text-align:justify;font-size:smaller;"|<span style="background:#096;color:white">Grove-green bg signifies victory results (great clapping, character(s) cheering), best after-race music</span><br><span style="background:#CF0">Yellow-limegreen bg signifies moderate results (mild clapping, moderate character reaction), same music in Wi-Fi as winner (different in MKDS GP)</span><br>Normal bg signifies losing results, losing music; - means not available<br>In ''Super Mario Kart'', and ''Mario Kart Super Circuit'', 5th or worse forces the player to retry the race. If the racer fares this badly four times, the Grand Prix must be started over. In ''Mario Kart 64'', 5th or worse forces the player to retry the race, but without the restrictions on how many times the player can retry a race. In ''Mario Kart: Double Dash'' and other installments after that game including this installment, the Grand Prix normally goes forth. | |||
|} | |||
===Controls=== | |||
[[File:ControllerTypes.png|thumb|upright=1.66|Controllers that can be used in ''Mario Kart Wii''.]] | |||
''Mario Kart Wii'' takes advantage of the [[Wii#Wii Remote|Wii Remote]]'s motion-sensing ability. By tilting the remote, players can steer their karts. Since the Wii Remote is designed to be inserted into the Wii Wheel for better grip, players can also play without the Wheel if they choose to. ''Mario Kart Wii'' can also be played by connecting the [[Wii#Nunchuk|Nunchuk Controller]] or the [[Classic Controller]], or using the [[Nintendo GameCube#Nintendo GameCube Controller|GameCube Controller]]. Controlling the vehicle is divided up into two sections: Basic and Advanced. | |||
====Basic controls and actions==== | |||
*'''Accelerate:''' When drivers hold down the corresponding button, the vehicle goes forward. Accelerating time depends on the type of karts: Lightweight karts have a high acceleration but low speed. Heavyweight karts tend to have a low acceleration but a high top speed. Middleweight karts tend to have an average top speed and acceleration. | |||
*'''Steer:''' Steering lets drivers move around corners. | |||
*'''Brake:''' Braking slows the vehicle to an abrupt stop. | |||
*'''Reverse:''' The driver's kart goes backwards if the driver continues holding the brake button after the vehicle comes to a stop. If a vehicle reaches maximum top speed, the vehicle will drift instead. If the player tries to accelerate while going in reverse, the vehicle will start to build momentum. When blue sparks start to appear, the player can release the brakes to get a small speed of boost. | |||
*'''Look Behind:''' Drivers can look behind their vehicles. In this way, drivers can be alert from other drivers incoming to steal their place. Drivers can also use this feature to see where they are going while backing up, or to aim a weapon at an opponent following up. This feature once appeared in ''[[Super Mario Kart]]''. | |||
*'''Drift:''' Drivers drift to keep the vehicle's speed and take corners more easily, with the benefit of getting Mini-Turbos. The feature can be set to happen automatically or when a button is held, although Mini-Turbos cannot be obtained on the former setting. | |||
====Advanced control modes==== | |||
[[File:MKW Rocket Start.png|thumb|left|upright=1.1|[[Koopa Troopa]] performing a successful Rocket Start at [[Wii Koopa Cape|Koopa Cape]]]] | |||
*'''[[Rocket Start]]:''' Drivers can perform a speed boost when a race begins. If drivers hold down the corresponding acceleration button right after the countdown timer displays the number 2, then they will receive an extra speed boost when the word "GO!" appears on the screen. However, if drivers hold down the button for too long, when the final beep is heard, their engine bursts and they get an even worse start than a regular one and take a few seconds to recover. | |||
*'''[[Mini-Turbo]]:''' When drivers [[drift]] for a reasonable amount of time varying on the vehicle used, blue sparks erupt from the vehicle's rear tires. Releasing the drift button gives them a short burst of speed. In a kart, drivers can keep drifting for longer periods to get orange sparks and a longer boost. However, orange sparks cannot be created on bikes. The amount of time the player must drift also depends on the vehicle's drifting stats. Drivers can also perform a "standing Mini-Turbo" by holding the brake/drift and acceleration buttons at the same time. This is helpful for vehicles with slow acceleration, as it will get the vehicle to top speed. A Mini-Turbo cannot be performed when drifting is set to automatic, but the standing Mini-Turbo can. | |||
*'''Jumps:''' If players jump over ramps or mushrooms, the length of the jump can be controlled by {{button|wii|padup}} (shorter jump) and {{button|wii|paddown}} (longer jump). | |||
*'''[[Trick]]s:''' Drivers can pull off a trick when they jump in order to gain a momentary Mini-Turbo. Drivers can perform a trick by flicking the Wii Remote, pressing {{button|wii|Pad}} on the Classic Controller, or pressing {{button|gcn|Pad}} on the GameCube Controller in any direction when going off a ramp or hill. They obtain a speed boost when landing. | |||
*'''[[Wheelie]]:''' Wheelies can be performed only when drivers are riding [[bike]]s. Drivers can increase their speed by lifting up the fronts of their bikes. While drivers perform a wheelie, the bike cannot be easily steered. The wheelie can be ended by braking, hopping, waiting for the wheelie to end, or simply setting the Wii Wheel or Wii Remote back down or pressing {{button|wii|Paddown}}. If drivers are bumped into while they are performing a wheelie, they lose most of their speed. If they wheelie again right as their wheelie runs out, they can get a chain wheelie. | |||
* '''[[Bullet Bill]]:''' If a driver is flying as a Bullet Bill, its route can be controlled a bit with {{button|wii|padleft}} and {{button|wii|padright}}. The range may differ for every part of a track. | |||
===Game modes=== | |||
[[File:MKW Luigi Classic Dragster screenshot.png|200px|thumb|[[Luigi]] in {{classic-link|SNES|Mario Circuit 3}}.]] | |||
*'''Grand Prix''' ''(1 player)'' In this mode, the player races against eleven other CPU players to finish in first. There are eight cups to choose from, ranging from the most to the least difficult. Drivers earn points by placing within twelve positions (see [[Mario Kart Wii#Gameplay|chart above]]). A driver with the most points at the end of the four races wins the cup. The driver will be awarded a grade for their racing performance at the end of the cup. If the character places 4th or under, the screen will say "Better Luck Next Time" as the character sits in their vehicle on a mountain far from the celebration. | |||
*'''Time Trial''' ''(1 player)'' Drivers race for the fastest time on a selected course. The fastest record is saved as a [[Ghost (Mario Kart series)|Ghost]] and can be raced against at a later time. Drivers can also race staff records, Regional Records/Champions, World Records/Champions (Wi-Fi must be used), and Friend Records (Friend must be registered and must send the Ghost for Ghost Races, and Wi-Fi also must be used.) | |||
*'''VS Race''' (''1 to 4 players, up to 12 online)'' Drivers can race with their own custom settings, but it is otherwise relatively the same as Grand Prix, other than the fact that drivers can see the other racers' character's names. The driver may choose a Solo Race, where they try to win for themselves, or Team Race, where two teams, red and blue, try to win by gathering the most points and beating the other. | |||
*'''Battle''' ''(1 to 4 players, up to 12 online)'' Drivers team up in two teams of six in a battle for the most points within a 3 minute time limit. [[Item]]s work only against the opposite team and have no effect on the team that uses them. Players can select only the Standard [[Kart]] or [[Bike]], color-coded for the team they are on. There are two ways to battle: | |||
**''Balloon Battle'': All drivers get three balloons and must use the items to hit the opponents to pop their balloons and get one point for every hit. If drivers lose all their balloons, one point is deducted and remain out for a while to be brought back to the battle with three balloons once more. If the player uses a mushroom and bumps into a player on the other team with the boost they get a point and steal a balloon. | |||
**''Coin Runners'': The goal for drivers is to obtain more coins with their team than the other. In the top right corner of the screen, the score shows, which are the coins obtained altogether for each team. If drivers hit opponents, opponents drop their [[Coin]]s. The number of [[Coin]]s dropped depends on the item that hits the player and the number of coins that the player has already gathered. | |||
*'''Ghost Race''' ''(Mario Kart Channel, 1 player)'' A ''Time Trial'' race with Ghosts made by players around the world with relatively the same skill level to the actual player. | |||
*'''Tournament''' (also known as '''Competition''') ''(Mario Kart Channel, 1 player)'' Drivers would compete in a timed competition with specific goals (see list below). This mode served as the replacement of Mission Mode from ''[[Mario Kart DS]]''. New tournaments were posted twice a month. The tournaments were discontinued after the first tournament in May 2014 was over. | |||
Grand Prix Mode initially allows only Karts in ''50cc'' and only Bikes in ''100cc''; if all the Grand Prix's are won in a single engine class, the other vehicle type will become available for it. Mirror Mode is unlocked by scoring first place on all 150cc Grand Prix. | |||
=====Other information===== | |||
*Additionally, in this game, both normal races and battles are playable online through the use of [[Nintendo Wi-Fi Connection]] (WFC). This is the second game in the series to utilize the WFC, the third to support online connectivity, and the first to allow for online battles. Races and Battles will now cater up to 12 players via Wi-Fi connection. | |||
*Just like in ''Mario Kart DS'', it is not possible to play Grand Prix with multiple players. Players can now only win cup trophies by playing alone. | |||
*In Battle Mode, the player can only play in teams. Also, the [[Spiny Shell (blue)|Spiny Shell]] makes its first appearance in Battle Mode. It chases the player of the opposite team with the most points. Also, [[Lightning]] is an item in Battle Mode. It shrinks the drivers of the opposite team and makes them lose their items, but does not take a balloon or drop coins. | |||
====Tournaments==== | |||
{{main|List of Mario Kart Wii tournaments}} | |||
[[File:MKwii-Mission.jpg|200px|thumb|left|[[Baby Mario]] collecting [[coin]]s in a tournament]] | |||
''Mario Kart Wii'' introduces a new mode for the ''Mario Kart'' series, entitled "Tournaments" (known as "Competitions" in the European version). Tournaments are somewhat similar to missions in ''[[Mario Kart DS]]''. Tournaments are played on the Mario Kart Channel, as long as the ''Mario Kart Wii'' disc is in the Wii. Tournaments require an Internet connection and WiiConnect24 to be turned on before they can be played. After a while, a tournament is retired to make room for a new one. However, the rankings of older tournaments can still be viewed on the rankings table. The tournaments began in May 2008 and continued even after all WiiConnect24 services were discontinued on June 28, 2013. The tournament service itself was later discontinued on May 20, 2014, the date on which the Nintendo WFC servers shut down. | |||
{{br|left}} | |||
The varieties of tournaments include the following: | |||
*'''VS Race''' - A standard VS race; however, race courses were somewhat altered. | |||
*'''Time Trial''' - A standard Time Trial; however, race courses were somewhat altered. | |||
*'''Numbered Gates''' - The player had to drive through ordered gates as fast as possible. | |||
*'''Coin Collecting''' - The player had to collect the coins on the stage as fast as possible. | |||
*'''Boss Battle''' - The player had to fight against a special boss. | |||
===Licenses=== | |||
[[File:MKW License.png|thumb|An example of a ''Mario Kart Wii'' license.]] | |||
Licenses replace normal save files. It is the first ''Mario Kart'' game to feature more than one save file. | |||
Each license contains each player's data, their [[Mii]], nickname, Friend Code, and a table including all categories and cups with an empty space. After a cup is won, the corresponding space is filled in with a colored square: gold for first place, silver for second, bronze for third. If at any time the Mii being used for ''Mario Kart Wii'' is deleted from the Mii Channel, the in-game Mii is also deleted. | |||
====Friend roster==== | |||
[[File:MKW Online Friend Roster.png|thumb|left|A friend roster.]] | |||
Players can add different people around the world on to their Mario Kart Wii Friend Roster. Two people need to add the Friend Codes on their licenses. A player can have up to 30 people on their Friend Roster. | |||
If two people are friends on a roster, one can open a room, which allows who is ever friends with the person to join that room. In the room, the players who joined can send messages. If a player who added the person who created the room, and another person joins and the player has not added them, they have an ability to do so. The host of the room can choose a VS Race, Team VS Race, Balloon Battle, and Coin Runners. | |||
{| border= | |||
If a player joins a race when another player is online and friends with them, the player who added the player in the race can join that race and race with the friend. | |||
{{br}} | |||
==Characters== | |||
===Drivers=== | |||
[[File:CharacterSelect-MKWii.png|thumb|350px|The character select screen, with all characters unlocked.]] | |||
''Mario Kart Wii'' features 12 starting characters, while 14 (if both [[Mii]] outfits are counted as separate characters) more can be unlocked for a total of 26 playable characters. Of those characters, [[Baby Peach]], [[Baby Daisy]], [[Rosalina]], [[Funky Kong]], [[Dry Bowser]], and Mii (in "Outfit A" and "Outfit B") are playable for the first time in the ''Mario Kart'' series, with Baby Daisy, Rosalina, and Dry Bowser making their first playable appearances overall, and Baby Daisy making her first appearance in any game. In addition, [[Dry Bones]] is playable in a home console ''Mario Kart'' installment for the first time, after previously being playable in ''[[Mario Kart DS]]''. Unlike with the past ''Mario Kart'' titles, however, the characters are categorized under a size class system, instead of the usual weight class system. | |||
The size classes are as follows: | |||
*'''Small:''' Small drivers will drive small vehicles. They usually have good acceleration, handling, and off-road stats, but low top speed and weight. | |||
*'''Medium:''' Medium drivers will drive medium-sized vehicles. Most of the karts show average weight and off-road. | |||
*'''Large:''' Large drivers will drive large vehicles. They mostly feature high top speed and weight, but low acceleration, handling, and off-road. | |||
Additionally, all the characters in the game have their own set of bonuses that boost certain stats for their vehicles. Units are out of 80, so a stat bonus of 3 would make a stat three points better than normal.<ref name=stats>[http://ark42.com/mariokart/Mario%20Kart%20Wii.png Mario Kart Wii Stat Table]</ref> Baby Peach and Large Miis have the most stat bonuses, with a total of 15 each. Bowser Jr. has the fewest stat bonuses, with a total of 6. | |||
{{br}} | |||
{|border=1 style="text-align:center; border:1px solid black; border-collapse:collapse; max-width:1586px" | |||
|- | |- | ||
! | !style="background:red;color:white"|Drivers | ||
|-style="background:#EAECF0" | |||
|style="display:inline-block; background:white" width=260px| | |||
{|border=1 cellspacing=0 cellpadding=1 margin=0 padding=0 style="border:1px solid black; border-collapse:collapse; height:100%" width=100% | |||
|- | |- | ||
! style="background:# | !style="background:#EAECF0; height:94px" align="center" colspan=4|[[File:BabyMarioMKW.png]]<br><big>'''{{text outline|{{color-link|red|Baby Mario}}}}'''</big> | ||
|- | |- | ||
!style="background:white; height:200px" align="center" colspan=4|[[File:Babymariobasic.png]] | |||
|- | |- | ||
!style="background:#EAECF0" width=50%|Emblem: | |||
|width=50%|[[File:Mario Emblem MKW.png]] | |||
|- | |- | ||
!style="background:#EAECF0"|Size: | |||
|'''{{color|dodgerblue|Small}}''' | |||
|- | |- | ||
!colspan=2 style="background:#EAECF0" height=44px|Bonuses: | |||
|- | |||
|colspan=2 height=100px|Weight '''{{color|blue|+8}}'''<br>Handling '''{{color|dodgerblue|+6}}''' | |||
|} | |} | ||
=== | |style="display:inline-block; background:white" width=260px| | ||
[[File: | {|border=1 cellspacing=0 cellpadding=1 margin=0 padding=0 style="border:1px solid black; border-collapse:collapse; height:100%" width=100% | ||
|- | |||
!style="background:#EAECF0; height:94px" align="center" colspan=4|[[File:BabyPeachMKW.png]]<br><big>'''{{text outline|{{color-link|lightpink|Baby Peach}}}}'''</big><sup><small>(new)</small></sup> | |||
|- | |||
!style="background:white; height:200px" align="center" colspan=4|[[File:Babypeachbasic.png]] | |||
|- | |||
!style="background:#EAECF0" width=50%|Emblem: | |||
|width=50%|[[File:Peach Emblem MKW.png]] | |||
|- | |||
!style="background:#EAECF0"|Size: | |||
|'''{{color|dodgerblue|Small}}''' | |||
|- | |||
!colspan=2 style="background:#EAECF0" height=44px|Bonuses: | |||
|- | |||
|colspan=2 height=100px|Speed '''{{color|darkorange|+3}}'''<br>Weight '''{{color|dodgerblue|+6}}'''<br>Acceleration '''{{color|darkorange|+3}}'''<br>Handling '''{{color|darkorange|+3}}''' | |||
|} | |||
|style="display:inline-block; background:white" width=260px| | |||
{|border=1 cellspacing=0 cellpadding=1 margin=0 padding=0 style="border:1px solid black; border-collapse:collapse; height:100%" width=100% | |||
|- | |||
!style="background:#EAECF0; height:94px" align="center" colspan=4|[[File:ToadMKW.png]]<br><big>'''{{text outline|{{color-link|blue|Toad}}|white}}'''</big> | |||
|- | |||
!style="background:white; height:200px" align="center" colspan=4|[[File:Mariokartwiitoad.jpg|258x200px]] | |||
|- | |||
!style="background:#EAECF0" width=50%|Emblem: | |||
|width=50%|[[File:Toad Emblem MKW.png]] | |||
|- | |||
!style="background:#EAECF0"|Size: | |||
|'''{{color|dodgerblue|Small}}''' | |||
|- | |||
!colspan=2 style="background:#EAECF0" height=44px|Bonuses: | |||
|- | |||
|colspan=2 height=100px|Acceleration '''{{color|dodgerblue|+6}}'''<br>Drift '''{{color|dodgerblue|+6}}''' | |||
|} | |||
|style="display:inline-block; background:white" width=260px| | |||
{|border=1 cellspacing=0 cellpadding=1 margin=0 padding=0 style="border:1px solid black; border-collapse:collapse; height:100%" width=100% | |||
|- | |||
!style="background:#EAECF0; height:94px" align="center" colspan=4|[[File:KoopaTroopa-MKWii-Icon.png]]<br><big>'''{{text outline|{{color-link|paleturquoise|Koopa Troopa}}}}'''</big> | |||
|- | |||
!style="background:white; height:200px" align="center" colspan=4|[[File:KoopaBasic.png]] | |||
|- | |||
!style="background:#EAECF0" width=50%|Emblem: | |||
|width=50%|[[File:Koopa Troopa Emblem MKW.png]] | |||
|- | |||
!style="background:#EAECF0"|Size: | |||
|'''{{color|dodgerblue|Small}}''' | |||
|- | |||
!colspan=2 style="background:#EAECF0" height=44px|Bonuses: | |||
|- | |||
|colspan=2 height=100px|Handling '''{{color|darkorange|+3}}'''<br>Mini-Turbo '''{{color|dodgerblue|+6}}''' | |||
|} | |||
|style="display:inline-block; background:white" width=260px| | |||
{|border=1 cellspacing=0 cellpadding=1 margin=0 padding=0 style="border:1px solid black; border-collapse:collapse; height:100%" width=100% | |||
|- | |||
!style="background:#EAECF0; height:94px" align="center" colspan=4|[[File:MarioMKW.png]]<br><big>'''{{text outline|{{color-link|red|Mario}}}}'''</big> | |||
|- | |||
!style="background:white; height:200px" align="center" colspan=4|[[File:MKWii Mario.jpg|258x200px]] | |||
|- | |||
!style="background:#EAECF0" width=50%|Emblem: | |||
|width=50%|[[File:Mario Emblem MKW.png]] | |||
|- | |||
!style="background:#EAECF0"|Size: | |||
|'''{{color|green|Medium}}''' | |||
|- | |||
!colspan=2 style="background:#EAECF0" height=44px|Bonuses: | |||
|- | |||
|colspan=2 height=100px|Weight '''{{color|dodgerblue|+6}}'''<br>Acceleration '''{{color|red|+2}}'''<br>Handling '''{{color|red|+2}}'''<br>Drift '''{{color|darkorange|+3}}''' | |||
|} | |||
==== | |style="display:inline-block; background:white" width=260px| | ||
{|border=1 cellspacing=0 cellpadding=1 margin=0 padding=0 style="border:1px solid black; border-collapse:collapse; height:100%" width=100% | |||
|- | |||
!style="background:#EAECF0; height:94px" align="center" colspan=4|[[File:LuigiMKW.png]]<br><big>'''{{text outline|{{color-link|green|Luigi}}|white}}'''</big> | |||
|- | |||
!style="background:white; height:200px" align="center" colspan=4|[[File:Mariokartwiiluigi.jpg|258x200px]] | |||
|- | |||
!style="background:#EAECF0" width=50%|Emblem: | |||
|width=50%|[[File:Luigi Emblem MKW.png]] | |||
|- | |||
!style="background:#EAECF0"|Size: | |||
|'''{{color|green|Medium}}''' | |||
|- | |||
!colspan=2 style="background:#EAECF0" height=44px|Bonuses: | |||
|- | |||
|colspan=2 height=100px|Speed '''{{color|red|+2}}'''<br>Weight '''{{color|dodgerblue|+6}}''' | |||
|} | |||
==== | |style="display:inline-block; background:white" width=260px| | ||
[[File: | {|border=1 cellspacing=0 cellpadding=1 margin=0 padding=0 style="border:1px solid black; border-collapse:collapse; height:100%" width=100% | ||
|- | |||
!style="background:#EAECF0; height:94px" align="center" colspan=4|[[File:PeachMKW.png]]<br><big>'''{{text outline|{{color-link|lightpink|Princess Peach|Peach}}}}'''</big> | |||
|- | |||
!style="background:white; height:200px" align="center" colspan=4|[[File:Peachbasic.png]] | |||
|- | |||
!style="background:#EAECF0" width=50%|Emblem: | |||
|width=50%|[[File:Peach Emblem MKW.png]] | |||
|- | |||
!style="background:#EAECF0"|Size: | |||
|'''{{color|green|Medium}}''' | |||
|- | |||
!colspan=2 style="background:#EAECF0" height=44px|Bonuses: | |||
|- | |||
|colspan=2 height=100px|Speed '''{{color|red|+2}}'''<br>Acceleration '''{{color|green|+5}}'''<br>Drift '''{{color|dodgerblue|+6}}''' | |||
|} | |||
=== | |style="display:inline-block; background:white" width=260px| | ||
[[File: | {|border=1 cellspacing=0 cellpadding=1 margin=0 padding=0 style="border:1px solid black; border-collapse:collapse; height:100%" width=100% | ||
|- | |||
!style="background:#EAECF0; height:94px" align="center" colspan=4|[[File:MKW Yoshi Icon.png]]<br><big>'''{{text outline|{{color-link|greenyellow|Yoshi}}}}'''</big> | |||
|- | |||
!style="background:white; height:200px" align="center" colspan=4|[[File:MKW Yoshi Standard Kart Artwork.png]] | |||
|- | |||
!style="background:#EAECF0" width=50%|Emblem: | |||
|width=50%|[[File:Yoshi Emblem MKW.png]] | |||
|- | |||
!style="background:#EAECF0"|Size: | |||
|'''{{color|green|Medium}}''' | |||
|- | |||
!colspan=2 style="background:#EAECF0" height=44px|Bonuses: | |||
|- | |||
|colspan=2 height=100px|Weight '''{{color|darkorange|+3}}'''<br>Drift '''{{color|darkorange|+3}}'''<br>Off-Road '''{{color|green|+5}}''' | |||
|} | |||
|style="display:inline-block; background:white" width=260px| | |||
{|border=1 cellspacing=0 cellpadding=1 margin=0 padding=0 style="border:1px solid black; border-collapse:collapse; height:100%" width=100% | |||
|- | |||
!style="background:#EAECF0; height:94px" align="center" colspan=4|[[File:WarioMKW.png]]<br><big>'''{{text outline|{{color-link|gold|Wario}}}}'''</big> | |||
|- | |||
!style="background:white; height:200px" align="center" colspan=4|[[File:MKW Wario Standard Kart Artwork.png]] | |||
|- | |||
!style="background:#EAECF0" width=50%|Emblem: | |||
|width=50%|[[File:Wario Emblem MKW.png]] | |||
|- | |||
!style="background:#EAECF0"|Size: | |||
|'''{{color|red|Large}}''' | |||
|- | |||
!colspan=2 style="background:#EAECF0" height=44px|Bonuses: | |||
|- | |||
|colspan=2 height=100px|Weight '''{{color|darkorange|+3}}'''<br>Off-Road '''{{color|darkorange|+3}}'''<br>Mini-Turbo '''{{color|dodgerblue|+6}}''' | |||
|} | |||
===== | |style="display:inline-block; background:white" width=260px| | ||
{|border=1 cellspacing=0 cellpadding=1 margin=0 padding=0 style="border:1px solid black; border-collapse:collapse; height:100%" width=100% | |||
|- | |||
!style="background:#EAECF0; height:94px" align="center" colspan=4|[[File:WaluigiMKW.png]]<br><big>'''{{text outline|{{color-link|midnightblue|Waluigi}}|white}}'''</big> | |||
|- | |||
!style="background:white; height:200px" align="center" colspan=4|[[File:Waluigibasic.png]] | |||
|- | |||
!style="background:#EAECF0" width=50%|Emblem: | |||
|width=50%|[[File:Waluigi Emblem MKW.png]] | |||
|- | |||
!style="background:#EAECF0"|Size: | |||
|'''{{color|red|Large}}''' | |||
|- | |||
!colspan=2 style="background:#EAECF0" height=44px|Bonuses: | |||
|- | |||
|colspan=2 height=100px|Acceleration '''{{color|dodgerblue|+6}}'''<br>Drift '''{{color|green|+5}}'''<br>Off-Road '''{{color|darkorange|+3}}''' | |||
|} | |||
==== | |style="display:inline-block; background:white" width=260px| | ||
'' | {|border=1 cellspacing=0 cellpadding=1 margin=0 padding=0 style="border:1px solid black; border-collapse:collapse; height:100%" width=100% | ||
|- | |||
!style="background:#EAECF0; height:94px" align="center" colspan=4|[[File:DonkeyKongMKW.png]]<br><big>'''{{text outline|{{color-link|saddlebrown|Donkey Kong}}|white}}'''</big> | |||
|- | |||
!style="background:white; height:200px" align="center" colspan=4|[[File:Dkbasic.png]] | |||
|- | |||
!style="background:#EAECF0" width=50%|Emblem: | |||
|width=50%|[[File:Donkey Kong Emblem MKW.png]] | |||
|- | |||
!style="background:#EAECF0"|Size: | |||
|'''{{color|red|Large}}''' | |||
|- | |||
!colspan=2 style="background:#EAECF0" height=44px|Bonuses: | |||
|- | |||
|colspan=2 height=100px|Weight '''{{color|darkorange|+3}}'''<br>Acceleration '''{{color|red|+2}}'''<br>Handling '''{{color|red|+2}}'''<br>Mini-Turbo '''{{color|darkorange|+3}}''' | |||
|} | |||
[[File: | |style="display:inline-block; background:white" width=260px| | ||
'' | {|border=1 cellspacing=0 cellpadding=1 margin=0 padding=0 style="border:1px solid black; border-collapse:collapse; height:100%" width=100% | ||
|- | |||
!style="background:#EAECF0; height:94px" align="center" colspan=4|[[File:BowserMKW.png]]<br><big>'''{{text outline|{{color-link|darkolivegreen|Bowser}}|white}}'''</big> | |||
|- | |||
!style="background:white; height:200px" align="center" colspan=4|[[File:Mariokartwiibowser.jpg|258px]] | |||
|- | |||
!style="background:#EAECF0" width=50%|Emblem: | |||
|width=50%|[[File:Bowser Emblem MKW.png]] | |||
|- | |||
!style="background:#EAECF0"|Size: | |||
|'''{{color|red|Large}}''' | |||
|- | |||
!colspan=2 style="background:#EAECF0" height=44px|Bonuses: | |||
|- | |||
|colspan=2 height=100px|Speed '''{{color|red|+2}}'''<br>Weight '''{{color|green|+5}}'''<br>Drift '''{{color|darkorange|+3}}''' | |||
|} | |||
|- | |||
!style="background:red;color:white"|Unlockable drivers | |||
|-style="background:#EAECF0" | |||
=== | |style="display:inline-block; background:white" width=260px| | ||
[[File: | {|border=1 cellspacing=0 cellpadding=1 margin=0 padding=0 style="border:1px solid black; border-collapse:collapse; height:100%" width=100% | ||
|- | |||
!style="background:#EAECF0; height:94px" align="center" colspan=4|[[File:BabyLuigiMKW.png]]<br><big>'''{{text outline|{{color-link|green|Baby Luigi}}|white}}'''</big> | |||
|- | |||
!style="background:white; height:200px" align="center" colspan=4|[[File:Babyluigi.png]] | |||
|- | |||
!style="background:#EAECF0" width=50%|Emblem: | |||
|width=50%|[[File:Luigi Emblem MKW.png]] | |||
|- | |||
!style="background:#EAECF0"|Size: | |||
|'''{{color|dodgerblue|Small}}''' | |||
|- | |||
!colspan=2 style="background:#EAECF0" height=44px|Bonuses: | |||
|- | |||
|colspan=2 height=100px|Speed '''{{color|green|+5}}'''<br>Weight '''{{color|blue|+8}}''' | |||
|- | |||
!colspan=2 style="background:#EAECF0" height=44px|To unlock: | |||
|- | |||
|colspan=2 height=44px|Unlock 8 Expert Staff Ghost Data records in Time Trials | |||
|- | |||
!colspan=2 style="background:#EAECF0"|OR: | |||
|- | |||
|colspan=2 height=44px|Play 3,150 races | |||
|- | |||
!colspan=2 style="background:#EAECF0"|OR: | |||
|- | |||
|colspan=2 height=44px|Win 100 WFC Ghost races | |||
|} | |||
|style="display:inline-block; background:white" width=260px| | |||
{|border=1 cellspacing=0 cellpadding=1 margin=0 padding=0 style="border:1px solid black; border-collapse:collapse; height:100%" width=100% | |||
|- | |||
!style="background:#EAECF0; height:94px" align="center" colspan=4|[[File:BabyDaisyMKW.png]]<br><big>'''{{text outline|{{color-link|orange|Baby Daisy}}}}'''</big><sup><small>(new)</small></sup> | |||
|- | |||
!style="background:white; height:200px" align="center" colspan=4|[[File:Babydaisykart.png]] | |||
|- | |||
!style="background:#EAECF0" width=50%|Emblem: | |||
|width=50%|[[File:Daisy Emblem MKW.png]] | |||
|- | |||
!style="background:#EAECF0"|Size: | |||
|'''{{color|dodgerblue|Small}}''' | |||
|- | |||
!colspan=2 style="background:#EAECF0" height=44px|Bonuses: | |||
|- | |||
|colspan=2 height=100px|Speed '''{{color|green|+5}}'''<br>Weight '''{{color|dodgerblue|+6}}'''<br>Mini-Turbo '''{{color|darkorange|+3}}''' | |||
|- | |||
!colspan=2 style="background:#EAECF0" height=44px|To unlock: | |||
|- | |||
|colspan=2 height=44px|Rank 1 Star or higher in all 50cc Wii Grand Prix Cups | |||
|- | |||
!colspan=2 style="background:#EAECF0"|OR: | |||
|- | |||
|colspan=2 height=44px|Play 1,950 races | |||
|- | |||
!colspan=2 style="background:#EAECF0"|OR: | |||
|- | |||
|colspan=2 height=44px|[[File:X mark.svg|x44px]] | |||
|} | |||
==== | |style="display:inline-block; background:white" width=260px| | ||
[[File: | {|border=1 cellspacing=0 cellpadding=1 margin=0 padding=0 style="border:1px solid black; border-collapse:collapse; height:100%" width=100% | ||
|- | |||
!style="background:#EAECF0; height:94px" align="center" colspan=4|[[File:ToadetteMKWIIMug.png]]<br><big>'''{{text outline|{{color-link|ivory|Toadette}}|hotpink}}'''</big> | |||
|- | |||
!style="background:white; height:200px" align="center" colspan=4|[[File:Toadettewii.png]] | |||
|- | |||
!style="background:#EAECF0" width=50%|Emblem: | |||
|width=50%|[[File:Toadette Emblem MKW.png]] | |||
|- | |||
!style="background:#EAECF0"|Size: | |||
|'''{{color|dodgerblue|Small}}''' | |||
|- | |||
!colspan=2 style="background:#EAECF0" height=44px|Bonuses: | |||
|- | |||
|colspan=2 height=100px|Speed '''{{color|darkorange|+3}}'''<br>Off-Road '''{{color|dodgerblue|+6}}''' | |||
|- | |||
!colspan=2 style="background:#EAECF0" height=44px|To unlock: | |||
|- | |||
|colspan=2 height=44px|Play Time Trials on all courses | |||
|- | |||
!colspan=2 style="background:#EAECF0"|OR: | |||
|- | |||
|colspan=2 height=44px|Play 2,550 races | |||
|- | |||
!colspan=2 style="background:#EAECF0"|OR: | |||
|- | |||
|colspan=2 height=44px|Win 1,000 WFC races | |||
|} | |||
|style="display:inline-block; background:white" width=260px| | |||
{|border=1 cellspacing=0 cellpadding=1 margin=0 padding=0 style="border:1px solid black; border-collapse:collapse; height:100%" width=100% | |||
|- | |||
!style="background:#EAECF0; height:94px" align="center" colspan=4|[[File:MK Wii Dry Bones icon.png]]<br><big>'''{{text outline|{{color-link|olive|Dry Bones}}|white}}'''</big> | |||
|- | |||
!style="background:white; height:200px" align="center" colspan=4|[[File:Drybwii.png]] | |||
|- | |||
!style="background:#EAECF0" width=50%|Emblem: | |||
|width=50%|[[File:Dry Bones Emblem MKW.png]] | |||
|- | |||
!style="background:#EAECF0"|Size: | |||
|'''{{color|dodgerblue|Small}}''' | |||
|- | |||
!colspan=2 style="background:#EAECF0" height=44px|Bonuses: | |||
|- | |||
|colspan=2 height=100px|Acceleration '''{{color|darkorange|+3}}'''<br>Drift '''{{color|darkorange|+3}}'''<br>Mini-Turbo '''{{color|dodgerblue|+6}}''' | |||
|- | |||
!colspan=2 style="background:#EAECF0" height=44px|To unlock: | |||
|- | |||
|colspan=2 height=44px|Win the 100cc Leaf Cup | |||
|- | |||
!colspan=2 style="background:#EAECF0"|OR: | |||
|- | |||
|colspan=2 height=44px|Play 1,050 races | |||
|- | |||
!colspan=2 style="background:#EAECF0"|OR: | |||
|- | |||
|colspan=2 height=44px|[[File:X mark.svg|x44px]] | |||
|} | |||
|style="display:inline-block; background:white" width=260px| | |||
{|border=1 cellspacing=0 cellpadding=1 margin=0 padding=0 style="border:1px solid black; border-collapse:collapse; height:100%" width=100% | |||
|- | |||
!style="background:#EAECF0; height:94px" align="center" colspan=4|[[File:DaisyMKW.png]]<br><big>'''{{text outline|{{color-link|orange|Princess Daisy|Daisy}}}}'''</big> | |||
|- | |||
!style="background:white; height:200px" align="center" colspan=4|[[File:DaisyMKWii.png]] | |||
|- | |||
!style="background:#EAECF0" width=50%|Emblem: | |||
|width=50%|[[File:Daisy Emblem MKW.png]] | |||
|- | |||
!style="background:#EAECF0"|Size: | |||
|'''{{color|green|Medium}}''' | |||
|- | |||
!colspan=2 style="background:#EAECF0" height=44px|Bonuses: | |||
|- | |||
|colspan=2 height=100px|Speed '''{{color|gold|+4}}'''<br>Handling '''{{color|red|+2}}'''<br>Mini-Turbo '''{{color|darkorange|+3}}''' | |||
|- | |||
!colspan=2 style="background:#EAECF0" height=44px|To unlock: | |||
|- | |||
|colspan=2 height=44px|Win the 150cc Special Cup | |||
|- | |||
!colspan=2 style="background:#EAECF0"|OR: | |||
|- | |||
|colspan=2 height=44px|Play 2,850 races | |||
|- | |||
!colspan=2 style="background:#EAECF0"|OR: | |||
|- | |||
|colspan=2 height=44px|[[File:X mark.svg|x44px]] | |||
|} | |||
== | |style="display:inline-block; background:white" width=260px| | ||
'' | {|border=1 cellspacing=0 cellpadding=1 margin=0 padding=0 style="border:1px solid black; border-collapse:collapse; height:100%" width=100% | ||
|- | |||
!style="background:#EAECF0; height:94px" align="center" colspan=4|[[File:BirdoMKW.png]]<br><big>'''{{text outline|{{color-link|blueviolet|Birdo}}|white}}'''</big> | |||
|- | |||
!style="background:white; height:200px" align="center" colspan=4|[[File:Birdomkwii.png]] | |||
|- | |||
!style="background:#EAECF0" width=50%|Emblem: | |||
|width=50%|[[File:Birdo Emblem MKW.png]] | |||
|- | |||
!style="background:#EAECF0"|Size: | |||
|'''{{color|green|Medium}}''' | |||
|- | |||
!colspan=2 style="background:#EAECF0" height=44px|Bonuses: | |||
|- | |||
|colspan=2 height=100px|Weight '''{{color|darkorange|+3}}'''<br>Off-Road '''{{color|darkorange|+3}}'''<br>Mini-Turbo '''{{color|green|+5}}''' | |||
|- | |||
!colspan=2 style="background:#EAECF0" height=44px|To unlock: | |||
|- | |||
|colspan=2 height=44px|Play Time Trials on 16 different courses | |||
|- | |||
!colspan=2 style="background:#EAECF0"|OR: | |||
|- | |||
|colspan=2 height=44px|Play 1,350 races | |||
|- | |||
!colspan=2 style="background:#EAECF0"|OR: | |||
|- | |||
|colspan=2 height=44px|Win 250 WFC races | |||
|} | |||
|style="display:inline-block; background:white" width=260px| | |||
{|border=1 cellspacing=0 cellpadding=1 margin=0 padding=0 style="border:1px solid black; border-collapse:collapse; height:100%" width=100% | |||
File: | |- | ||
!style="background:#EAECF0; height:94px" align="center" colspan=4|[[File:DiddyKongMKW.png]]<br><big>'''{{text outline|{{color-link|goldenrod|Diddy Kong}}|lemonchiffon}}'''</big> | |||
File: | |- | ||
!style="background:white; height:200px" align="center" colspan=4|[[File:MKW Diddy Kong Artwork.png]] | |||
File: | |- | ||
!style="background:#EAECF0" width=50%|Emblem: | |||
|width=50%|[[File:Diddy Kong Emblem MKW.png]] | |||
|- | |||
!style="background:#EAECF0"|Size: | |||
|'''{{color|green|Medium}}''' | |||
|- | |||
!colspan=2 style="background:#EAECF0" height=44px|Bonuses: | |||
|- | |||
|colspan=2 height=100px|Acceleration '''{{color|darkorange|+3}}'''<br>Drift '''{{color|darkorange|+3}}'''<br>Mini-Turbo '''{{color|green|+5}}''' | |||
|- | |||
!colspan=2 style="background:#EAECF0" height=44px|To unlock: | |||
|- | |||
|colspan=2 height=44px|Win the 50cc Lightning Cup | |||
File: | |- | ||
!colspan=2 style="background:#EAECF0"|OR: | |||
|- | |||
|colspan=2 height=44px|Play 450 races | |||
|- | |||
!colspan=2 style="background:#EAECF0"|OR: | |||
|- | |||
|colspan=2 height=44px|[[File:X mark.svg|x44px]] | |||
|} | |||
== | |style="display:inline-block; background:white" width=260px| | ||
[[File: | {|border=1 cellspacing=0 cellpadding=1 margin=0 padding=0 style="border:1px solid black; border-collapse:collapse; height:100%" width=100% | ||
|- | |||
!style="background:#EAECF0; height:94px" align="center" colspan=4|[[File:Bowser Jr MK Wii icon.png]]<br><big>'''{{text outline|{{color-link|yellow|Bowser Jr.}}}}'''</big> | |||
|- | |||
!style="background:white; height:200px" align="center" colspan=4|[[File:Jrwii.png]] | |||
|- | |||
!style="background:#EAECF0" width=50%|Emblem: | |||
|width=50%|[[File:Bowser Jr Emblem MKW.png]] | |||
|- | |||
!style="background:#EAECF0"|Size: | |||
|'''{{color|green|Medium}}''' | |||
|- | |||
!colspan=2 style="background:#EAECF0" height=44px|Bonuses: | |||
|- | |||
|colspan=2 height=100px|Off-Road '''{{color|darkorange|+3}}'''<br>Mini-Turbo '''{{color|darkorange|+3}}''' | |||
|- | |||
!colspan=2 style="background:#EAECF0" height=44px|To unlock: | |||
|- | |||
|colspan=2 height=44px|Rank 1 Star or higher in all 100cc Retro Grand Prix Cups | |||
|- | |||
!colspan=2 style="background:#EAECF0"|OR: | |||
|- | |||
|colspan=2 height=44px|Play 3,450 races | |||
|- | |||
!colspan=2 style="background:#EAECF0"|OR: | |||
|- | |||
|colspan=2 height=44px|[[File:X mark.svg|x44px]] | |||
|} | |||
|style="display:inline-block; background:white" width=260px| | |||
{|border=1 cellspacing=0 cellpadding=1 margin=0 padding=0 style="border:1px solid black; border-collapse:collapse; height:100%" width=100% | |||
|- | |||
!style="background:#EAECF0; height:94px" align="center" colspan=4|[[File:KingBooMKW.png]]<br><big>'''{{text outline|{{color-link|Black|King Boo}}|white}}'''</big> | |||
=== | |- | ||
!style="background:white; height:200px" align="center" colspan=4|[[File:Boowiiking.png]] | |||
|- | |||
!style="background:#EAECF0" width=50%|Emblem: | |||
|width=50%|[[File:King Boo Emblem MKW.png]] | |||
File: | |- | ||
!style="background:#EAECF0"|Size: | |||
|'''{{color|red|Large}}''' | |||
|- | |||
!colspan=2 style="background:#EAECF0" height=44px|Bonuses: | |||
|- | |||
|colspan=2 height=100px|Handling '''{{color|green|+5}}'''<br>Off-Road '''{{color|darkorange|+3}}''' | |||
|- | |||
File: | !colspan=2 style="background:#EAECF0" height=44px|To unlock: | ||
|- | |||
|colspan=2 height=44px|Win the 50cc Star Cup | |||
|- | |||
!colspan=2 style="background:#EAECF0"|OR: | |||
|- | |||
|colspan=2 height=44px|Play 750 races | |||
|- | |||
!colspan=2 style="background:#EAECF0"|OR: | |||
|- | |||
|colspan=2 height=44px|[[File:X mark.svg|x44px]] | |||
|} | |||
=== | |style="display:inline-block; background:white" width=260px| | ||
{|border=1 cellspacing=0 cellpadding=1 margin=0 padding=0 style="border:1px solid black; border-collapse:collapse; height:100%" width=100% | |||
|- | |||
File: | !style="background:#EAECF0; height:94px" align="center" colspan=4|[[File:RosalinaMKW.png]]<br><big>'''{{text outline|{{color-link|turquoise|Rosalina}}|lemonchiffon}}'''</big><sup><small>(new)</small></sup> | ||
|- | |||
!style="background:white; height:200px" align="center" colspan=4|[[File:Rosawii.png]] | |||
|- | |||
!style="background:#EAECF0" width=50%|Emblem: | |||
|width=50%|[[File:Rosalina Emblem MKW.png]] | |||
|- | |||
!style="background:#EAECF0"|Size: | |||
|'''{{color|red|Large}}''' | |||
|- | |||
!colspan=2 style="background:#EAECF0" height=44px|Bonuses: | |||
|- | |||
|colspan=2 height=100px|Speed '''{{color|darkorange|+3}}'''<br>Handling '''{{color|darkorange|+3}}'''<br>Mini-Turbo '''{{color|darkorange|+3}}''' | |||
|- | |||
!colspan=2 style="background:#EAECF0" height=44px|To unlock: | |||
|- | |||
|colspan=2 height=44px|Rank 1 Star or higher in all Mirror Cups | |||
|- | |||
!colspan=2 style="background:#EAECF0"|OR: | |||
|- | |||
|colspan=2 height=44px|Play 4,950 races | |||
|- | |||
!colspan=2 style="background:#EAECF0"|OR: | |||
|- | |||
|colspan=2 height=44px|Play 50 races with a ''[[Super Mario Galaxy]]'' save file | |||
|} | |||
|style="display:inline-block; background:white" width=260px| | |||
{|border=1 cellspacing=0 cellpadding=1 margin=0 padding=0 style="border:1px solid black; border-collapse:collapse; height:100%" width=100% | |||
|- | |||
!style="background:#EAECF0; height:94px" align="center" colspan=4|[[File:MK Wii Funky Kong icon.png]]<br><big>'''{{text outline|{{color-link|ivory|Funky Kong}}|deepskyblue}}'''</big><sup><small>(new)</small></sup> | |||
|- | |||
!style="background:white; height:200px" align="center" colspan=4|[[File:Funky Kong MKW Artwork.png]] | |||
|- | |||
!style="background:#EAECF0" width=50%|Emblem: | |||
|width=50%|[[File:Funky Kong Emblem MKW.png]] | |||
|- | |||
!style="background:#EAECF0"|Size: | |||
|'''{{color|red|Large}}''' | |||
|- | |||
!colspan=2 style="background:#EAECF0" height=44px|Bonuses: | |||
|- | |||
|colspan=2 height=100px|Speed '''{{color|gold|+4}}'''<br>Off-Road '''{{color|darkorange|+3}}''' | |||
|- | |||
!colspan=2 style="background:#EAECF0" height=44px|To unlock: | |||
|- | |||
|colspan=2 height=44px|Unlock 4 Expert Staff Ghost Data records in Time Trials | |||
|- | |||
!colspan=2 style="background:#EAECF0"|OR: | |||
|- | |||
|colspan=2 height=44px|Play 2,250 races | |||
|- | |||
!colspan=2 style="background:#EAECF0"|OR: | |||
|- | |||
|colspan=2 height=44px|Win 25 WFC Ghost races | |||
|} | |||
== | |style="display:inline-block; background:white" width=260px| | ||
{|border=1 cellpadding= | {|border=1 cellspacing=0 cellpadding=1 margin=0 padding=0 style="border:1px solid black; border-collapse:collapse; height:100%" width=100% | ||
|- | |- | ||
!colspan= | !style="background:#EAECF0; height:94px" align="center" colspan=4|[[File:MK Wii Dry Bowser.png]]<br><big>'''{{text outline|{{color-link|tan|Dry Bowser}}}}'''</big><sup><small>(new)</small></sup> | ||
|- | |- | ||
! | !style="background:white; height:200px" align="center" colspan=4|[[File:Skelebowwii.png]] | ||
| | |||
|- | |- | ||
! | !style="background:#EAECF0" width=50%|Emblem: | ||
| | |width=50%|[[File:Dry Bowser Emblem MKW.png]] | ||
|- | |- | ||
! | !style="background:#EAECF0"|Size: | ||
| | |'''{{color|red|Large}}''' | ||
|- | |- | ||
! | !colspan=2 style="background:#EAECF0" height=44px|Bonuses: | ||
| | |- | ||
|colspan=2 height=100px|Off-Road '''{{color|dodgerblue|+6}}'''<br>Mini-Turbo '''{{color|dodgerblue|+6}}''' | |||
|- | |- | ||
! | !colspan=2 style="background:#EAECF0" height=44px|To unlock: | ||
| | |||
|- | |- | ||
|colspan=2 height=44px|Rank 1 Star or higher in all 150cc Wii Grand Prix Cups | |||
|1 Star | |||
|- | |- | ||
! | !colspan=2 style="background:#EAECF0"|OR: | ||
| | |||
|- | |- | ||
|colspan=2 height=44px|Play 4,350 races | |||
| | |||
| | |||
|- | |- | ||
! | !colspan=2 style="background:#EAECF0"|OR: | ||
| | |||
|- | |- | ||
|colspan=2 height=44px|[[File:X mark.svg|x44px]] | |||
| | |||
|} | |} | ||
==== | |style="display:inline-block; background:white" width=524px| | ||
{|border=1 cellspacing=0 cellpadding=1 margin=0 padding=0 style="border:1px solid black; border-collapse:collapse; height:100%" width=100% | |||
|- | |||
!style="background:#EAECF0; height:94px" align="center" colspan=3|[[File:MKW Mii Outfit A select icon.png]]<br><big>'''{{text outline|{{color-link|white|Mii|Mii Outfit A}}|black}}'''</big><sup><small>(new)</small></sup> | |||
!style="background:#EAECF0; height:94px" align="center" colspan=3|[[File:MKW Mii Outfit B select icon.png]]<br><big>'''{{text outline|{{color-link|white|Mii|Mii Outfit B}}|black}}'''</big><sup><small>(new)</small></sup> | |||
|- | |||
!style="background:white; height:200px" align="center" colspan=6|[[File:Mii logo.svg|258px]] | |||
|- | |- | ||
!colspan= | !colspan=3 style="background:#EAECF0" width=50%|Emblem: | ||
|colspan=3 width=50%|<big>♂</big>: [[File:Male Mii Emblem MKW.png]] <big>♀</big>:[[File:Female Mii Emblem MKW.png]] | |||
|- | |- | ||
! | !colspan=3 style="background:#EAECF0"|Size: | ||
| | |colspan=3|'''Height-and-width dependent''' | ||
|- | |- | ||
! | !colspan=6 height=21px style="background:#EAECF0"|Bonuses: | ||
|Expert Staff | |- | ||
!colspan=2 width=33% height=20px style="background:#EAECF0"|Small: | |||
!colspan=2 style="background:#EAECF0"|Medium: | |||
!colspan=2 style="background:#EAECF0"|Large: | |||
|- | |||
|colspan=2 height=100px|Speed '''{{color|darkorange|+3}}'''<br>Weight '''{{color|darkorange|+3}}'''<br>Drift '''{{color|darkorange|+3}}'''<br>Mini-Turbo '''{{color|darkorange|+3}}''' | |||
|colspan=2|Speed '''{{color|darkorange|+3}}'''<br>Weight '''{{color|darkorange|+3}}'''<br>Off-Road '''{{color|darkorange|+3}}'''<br>Mini-Turbo '''{{color|darkorange|+3}}''' | |||
|colspan=2|Speed '''{{color|darkorange|+3}}'''<br>Acceleration '''{{color|darkorange|+3}}'''<br>Handling '''{{color|darkorange|+3}}'''<br>Off-Road '''{{color|darkorange|+3}}'''<br>Mini-Turbo '''{{color|darkorange|+3}}''' | |||
|- | |||
!colspan=6 height=21px style="background:#EAECF0"|To unlock: | |||
|- | |||
!colspan=3 height=20px style="background:#EAECF0"|Outfit A: | |||
!colspan=3 style="background:#EAECF0"|Outfit B: | |||
|- | |||
|colspan=3 height=44px|Win the 100cc Special Cup | |||
|colspan=3 height=44px|Unlock all 32 Expert Staff Ghost Data records in Time Trials | |||
|- | |||
!colspan=6 style="background:#EAECF0"|OR: | |||
|- | |||
|colspan=3 height=44px|Play 1,650 races | |||
|colspan=3 height=44px|Play 5,100 combined races and battles | |||
|- | |||
!colspan=6 style="background:#EAECF0"|OR: | |||
|- | |||
|colspan=3 height=44px|[[File:X mark.svg|x44px]] | |||
|colspan=3 height=44px|Win 5,000 WFC Ghost races | |||
|} | |} | ||
|} | |||
{|border=1 | ===Additional enemies, obstacles, and species=== | ||
These characters and features may either aid the player or act as obstacles and other intractable objects that impede racers if bumped into. | |||
{|border=1 style="text-align:left;border-collapse:collapse;max-width:100em;margin:auto"align=center class="wikitable" | |||
|- | |- | ||
!colspan= | !colspan="4"style="background:#e0e0e0" align=center|Characters and elements | ||
|- | |- | ||
!width= | !width="10%"align=center|Image | ||
!width="5%"align=center|Character/element | |||
!width= | !width="20%"align=center|Location | ||
!width="65%"align=center|Description | |||
!width= | |||
!width= | |||
|- | |- | ||
|align=center|[[File:AngrySunMKW.png|100px]] | |||
| - | |align=center|[[Angry Sun]] | ||
| | |align=center|{{classic-link|DS|Desert Hills}} | ||
| | |An enemy that appears as part of the scenery and spawns Fire Snakes onto the course. | ||
| | |- | ||
| | |align=center|[[File:Bob-ombCarMKW.png|100px]] | ||
| - | |align=center|[[Bob-omb Car]] | ||
| - | |align=center|[[Wii Moonview Highway|Moonview Highway]] | ||
|A car that explodes when driven into or hit by a shell. The explosion sends any driver in the vicinity flying. Any driver who runs into the latter frames of the explosion spins out. | |||
|- | |||
|align=center|[[File:BowserStatueMKW.png|100px]] | |||
|align=center|[[Bowser Statue]] | |||
|align=center|{{classic-link|N64|Bowser's Castle}} | |||
|A large statue of Bowser that burns drivers if they run into its flame. | |||
|- | |||
|align=center|[[File:BoulderMKW.png|100px]] | |||
|align=center|[[Boulder]] | |||
|align=center|{{classic-link|GCN|DK Mountain}} | |||
|A large ball of rock that rolls down the course and flips over any driver who runs into it. | |||
|- | |||
|align=center|[[File:CataquackMKW.png|100px]] | |||
|align=center|[[Cataquack]] | |||
|align=center|{{classic-link|GCN|Peach Beach}} | |||
|An enemy that flips drivers over when touched. Players can temporarily stun Cataquacks by hitting them with shells, POW Blocks, or [[Lightning]], or by driving through them while invincible. | |||
|- | |||
|align=center|[[File:ChainChompMKW.png|100px]] | |||
|align=center|[[Chain Chomp]] (chained) | |||
|align=center|[[Mario Circuit (Mario Kart Wii)|Mario Circuit]], {{classic-link|GCN|Mario Circuit}}, {{classic-link|DS|Peach Gardens}} | |||
|An enemy that knocks over drivers and causes them to lose their items by ramming into them. Some Chain Chomps are chained to stakes, while others roam freely. Chain Chomps that are chained to stakes lunge at nearby drivers. | |||
|- | |||
|align=center|[[File:ChompMKW.png|100px]] | |||
|align=center|Chain Chomp (unchained) | |||
|align=center|[[Chain Chomp Wheel]] | |||
|An enemy that appears rolling around in Chain Chomp Wheel. Driving under it smashes players, while flying into its upper regions from a ramp causes players to flip over. | |||
|- | |||
|align=center|[[File:DelfinoOakTreeMKW.png|100px]] | |||
|align=center|[[Delfino Oak Tree]] | |||
|align=center|{{classic-link|GCN|Mario Circuit}} | |||
|A stationary obstacle that stops players when driven into, serving as a wall. | |||
|- | |- | ||
|align=center|[[File:FireSnakeMKW.png|100px]] | |||
| | |align=center|[[Fire Snake]] | ||
| | |align=center|[[Wii Grumble Volcano|Grumble Volcano]], {{classic-link|DS|Desert Hills}} | ||
| | |A burning snake-like enemy that spins drivers out when touched. In Grumble Volcano, Fire Snakes jump out from pipes, while in <small>DS</small> Desert Hills, they are spawned from the Angry Sun. | ||
| - | |||
| | |||
| | |||
| - | |||
|- | |- | ||
|align=center|[[File:GoombaMKW.png|100px]] | |||
| | |align=center|[[Goomba]] | ||
| | |align=center|[[Wii Mushroom Gorge|Mushroom Gorge]], [[Mario Circuit (Mario Kart Wii)|Mario Circuit]], [[Wii Koopa Cape|Koopa Cape]], {{classic-link|GCN|Mario Circuit}} | ||
| | |A small enemy that spins drivers out when touched. If a driver defeats Goombas with a shell or while invincible, they drop [[Dash Mushroom|Mushroom]]s. They can also be defeated with Lightning, although they do not leave any Mushrooms when struck. | ||
| - | |||
| | |||
| | |||
| | |||
|- | |- | ||
|align=center|[[File:KoopaZapperMKW.png|100px]] | |||
| | |align=center|[[Koopa Zapper]] | ||
| | |align=center|[[Wii Koopa Cape|Koopa Cape]] | ||
| | |A rotating current of electricity that temporarily shrinks players when touched. Koopa Zappers are similar to the effects of Lightning or a Thunder Cloud, though the duration is shorter. | ||
| | |||
| | |||
| | |||
| | |||
|- | |- | ||
|align=center|[[File:LakituMKW.png|100px]] | |||
| | |align=center|[[Lakitu (Mario Kart referee)|Lakitu]] | ||
| | |align=center|All courses | ||
| | |The referee of ''Mario Kart Wii'' and the entire ''Mario Kart'' series. He starts races, keeps track of the laps, announces the winner of a race, and pulls drivers out if they fall off the track. | ||
| | |||
| | |||
| | |||
| | |||
|- | |- | ||
|align=center|[[File:LavaGeyserMKW.png|100px]] | |||
| | |align=center|[[Lava Geyser]] | ||
| | |align=center|[[Wii Grumble Volcano|Grumble Volcano]], [[Bowser's Castle (Mario Kart Wii)|Bowser's Castle]], {{classic-link|N64|Bowser's Castle}} | ||
| - | |A pillar of lava that emerges from either a pool of lava or a crack on the ground. In Bowser's Castle, drivers can perform [[Jump Boost|trick]]s off the hills generated by the geysers. Drivers who come in contact with Lava Geysers flip over. | ||
| | |||
| | |||
| | |||
| | |||
|- | |- | ||
|align=center|[[File:MechaBowserMKW.png|100px]] | |||
| | |align=center|[[Bowser Statue|Mecha Bowser]] | ||
| | |align=center|[[Bowser's Castle (Mario Kart Wii)|Bowser's Castle]] | ||
| | |A large Bowser-shaped machine that spits out large explosive fireballs that detonate on a blast mark in the stage. Drivers who are hit by a fireball flip over, and they are sent flying if they are caught in the explosion. | ||
| | |||
| | |||
| - | |||
|- | |- | ||
|align=center|[[File:Mecha Piranha PlantMKW.png|100px]] | |||
| | |align=center|[[Mecha Piranha Plant]] | ||
| | |align=center|{{classic-link|GCN|Waluigi Stadium}} | ||
| | |A Piranha Plant-shaped obstacle that acts as a moving wall, emerging from the pipes and stopping any driver who runs into it. | ||
| - | |||
| | |||
| | |||
| | |||
|- | |- | ||
|align=center|[[File:MiiDriversMKW.png|100px]] | |||
| | |align=center|[[Mii|Mii Drivers]] | ||
| | |align=center|[[Wii Coconut Mall|Coconut Mall]] | ||
| | |Miis from the player's system who drive cars back and forth. Driving into them flips drivers over and causes them to lose their items. | ||
| | |||
| | |||
| | |||
| | |||
|- | |- | ||
|align=center|[[File:MinecartMKW.png|100px]] | |||
| | |align=center|[[Mine Cart|Minecart]] | ||
| | |align=center|[[Wii Wario's Gold Mine|Wario's Gold Mine]] | ||
| | |A four-wheeled vehicle that travels along the rails in the mine. Drivers who hit minecarts flip over. | ||
| | |||
| | |||
| | |||
| - | |||
|- | |- | ||
|align=center|[[File:MushroomCow.png|100px]] | |||
| | |align=center|[[Moo Moo]] | ||
| | |align=center|[[Wii Moo Moo Meadows|Moo Moo Meadows]] | ||
| | |A cow that flips drivers over if it is driven into and causes them to lose their items. Moo Moos are first found on the off-road patches of the track but wander onto the road as time goes by. | ||
| | |||
| | |||
| | |||
| - | |||
|- | |- | ||
|align=center|[[File:MontyMoleMKW.png|100px]] | |||
| | |align=center|[[Monty Mole]] | ||
| | |align=center|[[Wii Moo Moo Meadows|Moo Moo Meadows]], {{classic-link|DS|Peach Gardens}} | ||
| | |An enemy that leaps out of a hole made of dirt. The holes slow drivers down, and any driver who runs into Monty Moles who leap out of these holes flips over. | ||
| - | |||
| | |||
| | |||
| | |||
|- | |- | ||
|align=center|[[File:OilSlickMKW.png|100px]] | |||
| | |align=center|[[Oil slick]] | ||
| | |align=center|{{classic-link|SNES|Mario Circuit 3}} | ||
| | |A patch of an oil spill dotted throughout the course. Drivers who go through oil slicks spin out. | ||
| - | |||
| | |||
| | |||
| | |||
|- | |- | ||
|align=center|[[File:PenguinSliderMKW.png|100px]] | |||
| | |align=center|[[Penguin|Penguin Slider]] | ||
| | |align=center|{{classic-link|N64|Sherbet Land}} | ||
| | |A small penguin that waddles and slides back and forth, causing drivers who run into it to spin out. | ||
| - | |||
| | |||
| | |||
| | |||
|- | |- | ||
|align=center|[[File:PenguinWaddlerMKW.png|100px]] | |||
| | |align=center|[[Penguin|Penguin Waddler]] | ||
| | |align=center|{{classic-link|N64|Sherbet Land}} | ||
| | |A large penguin found circling a pillar in the cave segment of Sherbet Land. Players who drive into Penguin Waddlers spin out. | ||
| | |||
| - | |||
| | |||
| | |||
|- | |- | ||
|align=center|[[File:PiranhaPlantMKW.png|100px]] | |||
| | |align=center|[[Piranha Plant]] | ||
| - | |align=center|{{classic-link|N64|Mario Raceway}}, {{classic-link|GCN|Mario Circuit}} | ||
| | |A stationary obstacle that spins drivers out when it is touched. The Piranha Plants in <small>GCN</small> Mario Circuit are stationed in Warp Pipes and take bites out of drivers who come nearby, causing them to flip over and lose their items. | ||
| - | |||
| | |||
| | |||
| | |||
|- | |- | ||
|align=center|[[File:PodobooMKW.png|100px]] | |||
| | |align=center|[[Lava Bubble|Podoboo]] | ||
| | |align=center|[[Bowser's Castle (Mario Kart Wii)|Bowser's Castle]], {{classic-link|GBA|Bowser's Castle 3|Bowser Castle 3}} | ||
| - | |A fiery ball that emerges from lava and causes drivers to spin out. | ||
| | |||
| | |||
| 3 | |||
| | |||
|- | |- | ||
|align=center|[[File:PodobooCogMKW.png|100px]] | |||
| | |align=center|[[Fire Bar#Mario Kart series|Podoboo Cog]] | ||
| | |align=center|[[Bowser's Castle (Mario Kart Wii)|Bowser's Castle]], {{classic-link|GCN|Waluigi Stadium}} | ||
| | |A solid eyed cog with three [[Fire Bar]]s circling it, which cause drivers who touch them to spin out. | ||
| - | |||
| | |||
| | |||
| | |||
|- | |- | ||
|align=center|[[File:PokeyMKW.png|100px]] | |||
| | |align=center|[[Pokey]] | ||
| | |align=center|[[Wii Dry Dry Ruins|Dry Dry Ruins]], {{classic-link|DS|Desert Hills}} | ||
| | |A spiky, cactus-like enemy that spins drivers out when touched. Drivers can temporarily destroy Pokeys with shells or Lightning, or by running into them while invincible. | ||
| | |||
| - | |||
| - | |||
|- | |- | ||
|align=center|[[File:ShyGuyGalleonMKW.png|100px]] | |||
| | |align=center|[[Shy Guy Galleon]] | ||
| | |align=center|{{classic-link|GBA|Shy Guy Beach}} | ||
| | |A pirate ship with [[Shy Guy]]s as part of the scenery that launch explosive cannonballs onto the course. | ||
| - | |||
| | |||
| | |||
| | |||
|- | |- | ||
|align=center|[[File:ShyGuySnowboarderMKW.png|100px]] | |||
| | |align=center|[[Snowboarding Shy Guy|Shy Guy Snowboarder]] | ||
| | |align=center|[[Wii DK Summit|DK Summit]] | ||
| | |A snowboarding Shy Guy that spins out drivers when it is touched. | ||
| | |||
| | |||
| | |||
| | |||
|- | |- | ||
|align=center|[[File:MKW Sidestepper Screenshot.png|100px]] | |||
| | |align=center|[[Sidestepper]] | ||
| | |align=center|{{classic-link|GBA|Shy Guy Beach}} | ||
| | |A crab that spins out drivers when it is touched. Drivers can temporarily defeat Sidesteppers with shells, POW Blocks, or Lightning, or by running into them while invincible. | ||
| | |||
| - | |||
| | |||
| | |||
|- | |- | ||
|align=center|[[File:SpikyTopmanMKW.png|100px]] | |||
| | |align=center|[[Spiky Topman]] | ||
| | |align=center|[[Galaxy Colosseum]] | ||
| | |An enemy that exclusively appears in Galaxy Colosseum as part of a tournament, where the goal is to knock the Spiky Topmen off the course with Mushroom boosts. | ||
| | |||
| | |||
| | |||
| | |||
|- | |- | ||
|align=center|[[File:SwooperMKW.png|100px]] | |||
| | |align=center|[[Swoop|Swooper]] | ||
| | |align=center|[[Wii Wario's Gold Mine|Wario's Gold Mine]], [[Wii Dry Dry Ruins|Dry Dry Ruins]] | ||
| | |A bat-like enemy that slows players down when it is driven into. | ||
| | |||
| | |||
| | |||
| | |||
|- | |- | ||
|align=center|[[File:MKW Thwomp Screenshot.png|100px]] | |||
| | |align=center|[[Thwomp]] | ||
| | |align=center|[[Bowser's Castle (Mario Kart Wii)|Bowser's Castle]], {{classic-link|GBA|Bowser's Castle 3|Bowser Castle 3}}, {{classic-link|N64|Bowser's Castle}}, [[Thwomp Desert]] | ||
| - | |This enemy smashes drivers if it is directly driven under, and it acts as a wall when simply driven into. In <small>N64</small> Bowser's Castle, some of the Thwomps slide back and forth. The Thwomp in Thwomp Desert causes the terrain to become uneven, though players can still get smashed by the Thwomp if they are under it when it crashes. | ||
| | |||
| 3 | |||
| - | |||
| | |||
|- | |- | ||
|align=center|[[File:VehicleMKW.png|100px]] | |||
| | |align=center|Vehicles: [[Car (obstacle)|cars]] and [[truck]]s | ||
| | |align=center|[[Wii Moonview Highway|Moonview Highway]] | ||
| | |Obstacles on the highway that flip players over when they are driven into and squash players that hit them from the front. Characters who are in the Mega Mushroom form can knock cars over but not trucks, while characters under the effects of invincibility from a Star or using a Bullet Bill can knock all vehicles over. | ||
| | |||
| | |||
| | |||
| | |||
|- | |- | ||
|align=center|[[File:WigglerMKW.png|100px]] | |||
| | |align=center|[[Wiggler]] | ||
| | |align=center|[[Wii Maple Treeway|Maple Treeway]] | ||
| | |A large enemy that wanders around the track and bounces around drivers that bump into it. | ||
| | |||
| | |||
| | |||
| | |||
|- | |- | ||
|align=center|[[File:VolcanicDebrisMKW.png|100px]] | |||
|align=center|[[Volcanic debris]] | |||
|align=center|[[Wii Grumble Volcano|Grumble Volcano]] | |||
|Large balls of fire that spin out any driver who comes in contact with them. | |||
|} | |} | ||
===Background characters=== | |||
These characters appear as part of the audience or do not affect the character, being part of the course scenery served for world-building purposes. | |||
*[[Big Cheep Cheep]]s | |||
*[[Birdo]]s | |||
*[[Boo]]s | |||
*[[Goomba]]s | |||
*[[Hammer Bro]]s. | |||
*[[Luma]] | |||
*[[Mii]]s | |||
*[[Monty Mole]]s | |||
*[[Pianta]]s | |||
*[[Shy Guy]]s | |||
*[[Sledge Bro]]s. | |||
*[[Toad (species)|Toads]] | |||
*[[Maw-Ray|Unagi]] | |||
==Vehicles== | ==Vehicles== | ||
There are thirty-six total vehicles in | There are thirty-six total vehicles in this game. There are 18 karts, 18 bikes, each divided into the 3 size classes, making 6 and 6 available to each character, 3 and 3 to begin (thus making half of the vehicles unlockable). As with the Standard vehicles, each kart and bike varies in color scheme depending on which character drives them. Each has 7 stats, which are shown during character selection: | ||
*'''Speed:''' How high the top speed of the vehicle is. This does not affect off-road travel. | *'''Speed:''' How high the top speed of the vehicle is. This does not affect off-road travel. Negatively correlated with acceleration. It is also the only stat where no vehicle goes below twenty. | ||
*'''Weight:''' How heavy a vehicle is. With a higher weight, the player can knock lighter characters away by ramming them. | *'''Weight:''' How heavy a vehicle is. With a higher weight, the player can knock lighter characters away by ramming them. Weight also affects the angle that a vehicle goes over a jump at, with heavier vehicles jumping at a lower angle. Finally, heavier vehicles bounce less upon landing from a jump. | ||
*'''Acceleration:''' How quickly the vehicle's top speed is achieved from a non-moving position. | *'''Acceleration:''' How quickly the vehicle's top speed is achieved from a non-moving position. Negatively correlated with speed. | ||
*'''Handling:''' How tight the vehicles can normally turn. Usually opposes the drift rating. | *'''Handling:''' How tight the vehicles can normally turn. Usually opposes the drift rating. | ||
*'''Drift:''' How tight the vehicle turns while using the drifting maneuver. Usually opposes the handling rating. | *'''Drift:''' How tight the vehicle turns while using the drifting maneuver. Usually opposes the handling rating. | ||
*'''Off-Road:''' How much speed the vehicle retains when off | *'''Off-Road:''' How much speed the vehicle retains when off the track. A low rating of this can slow the vehicle significantly. Also, vehicles with a high off-road stat slide less when driving on ice. There exist several types of off-road surfaces which vary in intensity. | ||
*'''Mini-Turbo:''' When using the manual drift option, how effective a mini-boost will be. While all vehicles can perform a blue spark mini-turbo, only karts can execute | *'''Mini-Turbo:''' When using the manual drift option, how effective a mini-boost will be. While all vehicles can perform a blue spark mini-turbo, only karts can execute an orange spark mini-turbo. Has no effect on the standing mini-turbo. | ||
The following table includes vehicles in order of class primarily. Two types of bikes are distinguished by how they turn when the player attempts to drift ([[Standard bike (vehicle class)|drift type bikes]] drift similar to a kart, while [[Sport bike (vehicle class)|hang-on type bikes]] commit to the turn). The stats are displayed with number values, with the units being out of 80,<ref name="stats"></ref> and bars representing that number out of 80. Some names differ between American English and Commonwealth English. | |||
Each kart comes in various colors depending on the character driving it. The time trial mode's record icons use a single color for each kart regardless of driver; the following table reflects those colors. | |||
'''Note''': Vehicles with an Off-Road value greater than 50 can drift on normal off-road terrain. | |||
{|border=1 style="text-align:center; border:1px solid black; border-collapse:collapse; max-width:1586px" | |||
|- | |||
!style="background:red;color:white"|Default vehicles | |||
|-style="background:#EAECF0" | |||
|style="display:inline-block; background:white" width=260px| | |||
{|border=1 cellspacing=0 cellpadding=1 margin=0 padding=0 style="border:1px solid black; border-collapse:collapse; height:100%" width=100% | |||
|- | |||
!style="background:#EAECF0; height:56px" align="center" colspan=2|<big>'''[[Standard Kart S]]'''</big> | |||
|- | |||
!style="background:white; height:260px" align="center" colspan=2|[[File:Standard Kart S (Toad) Model.png|250x250px]] | |||
|- | |||
!style="background:#EAECF0" width=35%|Type: | |||
|width=65%|'''Kart''' | |||
|- | |||
!style="background:#EAECF0" width=35%|Size: | |||
|width=65%|'''{{color|dodgerblue|Small}}''' | |||
|- | |||
!style="background:#EAECF0"|Speed: | |||
|align="center"|'''41''' | |||
{|style="background:white; border:1px solid #1e276b; border-collapse:collapse" | |||
!style="background:#white; width:84px !important" | | |||
{|style="background:#d8f800; border:1px solid #1e276b; border-collapse:collapse" | |||
!style="background:#d8f800; border:1px solid #1e276b; width:41px !important" | | |||
!style="background:#EAECF0; width:39px !important" | | |||
|} | |||
|} | |||
|- | |||
!style="background:#EAECF0"|Weight: | |||
|align="center"|'''29''' | |||
{|style="background:white; border:1px solid #1e276b; border-collapse:collapse" | |||
!style="background:#white; width:84px !important" | | |||
{|style="background:#d8f800; border:1px solid #1e276b; border-collapse:collapse" | |||
!style="background:#d8f800; border:1px solid #1e276b; width:29px !important" | | |||
!style="background:#EAECF0; width:51px !important" | | |||
|} | |||
|} | |||
|- | |||
!style="background:#EAECF0"|Acceleration: | |||
|align="center"|'''48''' | |||
{|style="background:white; border:1px solid #1e276b; border-collapse:collapse" | |||
!style="background:#white; width:84px !important" | | |||
{|style="background:#d8f800; border:1px solid #1e276b; border-collapse:collapse" | |||
!style="background:#d8f800; border:1px solid #1e276b; width:48px !important" | | |||
!style="background:#EAECF0; width:32px !important" | | |||
|} | |||
|} | |||
|- | |||
!style="background:#EAECF0"|Handling: | |||
|align="center"|'''48''' | |||
{|style="background:white; border:1px solid #1e276b; border-collapse:collapse" | |||
!style="background:#white; width:84px !important" | | |||
{|style="background:#d8f800; border:1px solid #1e276b; border-collapse:collapse" | |||
!style="background:#d8f800; border:1px solid #1e276b; width:48px !important" | | |||
!style="background:#EAECF0; width:32px !important" | | |||
|} | |||
|} | |||
|- | |||
!style="background:#EAECF0"|Drift: | |||
|align="center"|'''51''' | |||
{|style="background:white; border:1px solid #1e276b; border-collapse:collapse" | |||
!style="background:#white; width:84px !important" | | |||
{|style="background:#d8f800; border:1px solid #1e276b; border-collapse:collapse" | |||
!style="background:#d8f800; border:1px solid #1e276b; width:51px !important" | | |||
!style="background:#EAECF0; width:29px !important" | | |||
|} | |||
|} | |||
|- | |||
!style="background:#EAECF0"|Off-Road: | |||
|align="center"|'''40''' | |||
{|style="background:white; border:1px solid #1e276b; border-collapse:collapse" | |||
!style="background:#white; width:84px !important" | | |||
{|style="background:#d8f800; border:1px solid #1e276b; border-collapse:collapse" | |||
!style="background:#d8f800; border:1px solid #1e276b; width:40px !important" | | |||
!style="background:#EAECF0; width:40px !important" | | |||
|} | |||
|} | |||
|- | |||
!style="background:#EAECF0"|Mini-Turbo: | |||
|align="center"|'''45''' | |||
{|style="background:white; border:1px solid #1e276b; border-collapse:collapse" | |||
!style="background:#white; width:84px !important" | | |||
{|style="background:#d8f800; border:1px solid #1e276b; border-collapse:collapse" | |||
!style="background:#d8f800; border:1px solid #1e276b; width:45px !important" | | |||
!style="background:#EAECF0; width:35px !important" | | |||
|} | |||
|} | |||
|} | |||
|style="display:inline-block; background:white" width=260px| | |||
{|border=1 cellspacing=0 cellpadding=1 margin=0 padding=0 style="border:1px solid black; border-collapse:collapse; height:100%" width=100% | |||
|- | |||
!style="background:#EAECF0; height:56px" align="center" colspan=2|<big>'''[[Standard Bike S]]'''</big> | |||
|- | |||
!style="background:white; height:260px" align="center" colspan=2|[[File:Standard Bike S (Toad) Model.png|250x250px]] | |||
|- | |||
!style="background:#EAECF0" width=35%|Type: | |||
|width=65%|'''Bike (drift type)''' | |||
|- | |||
!style="background:#EAECF0" width=35%|Size: | |||
|width=65%|'''{{color|dodgerblue|Small}}''' | |||
|- | |||
!style="background:#EAECF0"|Speed: | |||
|align="center"|'''39''' | |||
{|style="background:white; border:1px solid #1e276b; border-collapse:collapse" | |||
!style="background:#white; width:84px !important" | | |||
{|style="background:#d8f800; border:1px solid #1e276b; border-collapse:collapse" | |||
!style="background:#d8f800; border:1px solid #1e276b; width:39px !important" | | |||
!style="background:#EAECF0; width:41px !important" | | |||
|} | |||
|} | |||
|- | |||
!style="background:#EAECF0"|Weight: | |||
|align="center"|'''21''' | |||
{|style="background:white; border:1px solid #1e276b; border-collapse:collapse" | |||
!style="background:#white; width:84px !important" | | |||
{|style="background:#d8f800; border:1px solid #1e276b; border-collapse:collapse" | |||
!style="background:#d8f800; border:1px solid #1e276b; width:21px !important" | | |||
!style="background:#EAECF0; width:59px !important" | | |||
|} | |||
|} | |||
|- | |||
!style="background:#EAECF0"|Acceleration: | |||
|align="center"|'''51''' | |||
{|style="background:white; border:1px solid #1e276b; border-collapse:collapse" | |||
!style="background:#white; width:84px !important" | | |||
{|style="background:#d8f800; border:1px solid #1e276b; border-collapse:collapse" | |||
!style="background:#d8f800; border:1px solid #1e276b; width:51px !important" | | |||
!style="background:#EAECF0; width:29px !important" | | |||
|} | |||
|} | |||
|- | |||
!style="background:#EAECF0"|Handling: | |||
|align="center"|'''51''' | |||
{|style="background:white; border:1px solid #1e276b; border-collapse:collapse" | |||
!style="background:#white; width:84px !important" | | |||
{|style="background:#d8f800; border:1px solid #1e276b; border-collapse:collapse" | |||
!style="background:#d8f800; border:1px solid #1e276b; width:51px !important" | | |||
!style="background:#EAECF0; width:29px !important" | | |||
|} | |||
|} | |||
|- | |||
!style="background:#EAECF0"|Drift: | |||
|align="center"|'''54''' | |||
{|style="background:white; border:1px solid #1e276b; border-collapse:collapse" | |||
!style="background:#white; width:84px !important" | | |||
{|style="background:#d8f800; border:1px solid #1e276b; border-collapse:collapse" | |||
!style="background:#d8f800; border:1px solid #1e276b; width:54px !important" | | |||
!style="background:#EAECF0; width:26px !important" | | |||
|} | |||
|} | |||
|- | |||
!style="background:#EAECF0"|Off-Road: | |||
|align="center"|'''43''' | |||
{|style="background:white; border:1px solid #1e276b; border-collapse:collapse" | |||
!style="background:#white; width:84px !important" | | |||
{|style="background:#d8f800; border:1px solid #1e276b; border-collapse:collapse" | |||
!style="background:#d8f800; border:1px solid #1e276b; width:43px !important" | | |||
!style="background:#EAECF0; width:37px !important" | | |||
|} | |||
|} | |||
|- | |||
!style="background:#EAECF0"|Mini-Turbo: | |||
|align="center"|'''48''' | |||
{|style="background:white; border:1px solid #1e276b; border-collapse:collapse" | |||
!style="background:#white; width:84px !important" | | |||
{|style="background:#d8f800; border:1px solid #1e276b; border-collapse:collapse" | |||
!style="background:#d8f800; border:1px solid #1e276b; width:48px !important" | | |||
!style="background:#EAECF0; width:32px !important" | | |||
|} | |||
|} | |||
|} | |||
|style="display:inline-block; background:white" width=260px| | |||
{|border=1 cellspacing=0 cellpadding=1 margin=0 padding=0 style="border:1px solid black; border-collapse:collapse; height:100%" width=100% | |||
|- | |||
!style="background:#EAECF0; height:56px" align="center" colspan=2|<big>'''[[Booster Seat]]''' [[File:Flag of USA.png|20px]]<br>'''[[Booster Seat|Baby Booster]]''' [[File:Flag of Europe.png|20px]]</big> | |||
|- | |||
!style="background:white; height:260px" align="center" colspan=2|[[File:Booster Seat (Baby Mario) Model.png|250x250px]] | |||
|- | |||
!style="background:#EAECF0" width=35%|Type: | |||
|width=65%|'''Kart''' | |||
|- | |||
!style="background:#EAECF0" width=35%|Size: | |||
|width=65%|'''{{color|dodgerblue|Small}}''' | |||
|- | |||
!style="background:#EAECF0"|Speed: | |||
|align="center"|'''27''' | |||
{|style="background:white; border:1px solid #1e276b; border-collapse:collapse" | |||
!style="background:#white; width:84px !important" | | |||
{|style="background:#d8f800; border:1px solid #1e276b; border-collapse:collapse" | |||
!style="background:#d8f800; border:1px solid #1e276b; width:27px !important" | | |||
!style="background:#EAECF0; width:53px !important" | | |||
|} | |||
|} | |||
|- | |||
!style="background:#EAECF0"|Weight: | |||
|align="center"|'''27''' | |||
{|style="background:white; border:1px solid #1e276b; border-collapse:collapse" | |||
!style="background:#white; width:84px !important" | | |||
{|style="background:#d8f800; border:1px solid #1e276b; border-collapse:collapse" | |||
!style="background:#d8f800; border:1px solid #1e276b; width:27px !important" | | |||
!style="background:#EAECF0; width:53px !important" | | |||
|} | |||
|} | |||
|- | |||
!style="background:#EAECF0"|Acceleration: | |||
|align="center"|'''56''' | |||
{|style="background:white; border:1px solid #1e276b; border-collapse:collapse" | |||
!style="background:#white; width:84px !important" | | |||
{|style="background:#d8f800; border:1px solid #1e276b; border-collapse:collapse" | |||
!style="background:#d8f800; border:1px solid #1e276b; width:56px !important" | | |||
!style="background:#EAECF0; width:24px !important" | | |||
|} | |||
|} | |||
|- | |||
!style="background:#EAECF0"|Handling: | |||
|align="center"|'''64''' | |||
{|style="background:white; border:1px solid #1e276b; border-collapse:collapse" | |||
!style="background:#white; width:84px !important" | | |||
{|style="background:#d8f800; border:1px solid #1e276b; border-collapse:collapse" | |||
!style="background:#d8f800; border:1px solid #1e276b; width:64px !important" | | |||
!style="background:#EAECF0; width:16px !important" | | |||
|} | |||
|} | |||
|- | |||
!style="background:#EAECF0"|Drift: | |||
|align="center"|'''37''' | |||
{|style="background:white; border:1px solid #1e276b; border-collapse:collapse" | |||
!style="background:#white; width:84px !important" | | |||
{|style="background:#d8f800; border:1px solid #1e276b; border-collapse:collapse" | |||
!style="background:#d8f800; border:1px solid #1e276b; width:37px !important" | | |||
!style="background:#EAECF0; width:43px !important" | | |||
|} | |||
|} | |||
|- | |||
!style="background:#EAECF0"|Off-Road: | |||
|align="center"|'''54''' | |||
{|style="background:white; border:1px solid #1e276b; border-collapse:collapse" | |||
!style="background:#white; width:84px !important" | | |||
{|style="background:#d8f800; border:1px solid #1e276b; border-collapse:collapse" | |||
!style="background:#d8f800; border:1px solid #1e276b; width:54px !important" | | |||
!style="background:#EAECF0; width:26px !important" | | |||
|} | |||
|} | |||
|- | |||
!style="background:#EAECF0"|Mini-Turbo: | |||
|align="center"|'''59''' | |||
{|style="background:white; border:1px solid #1e276b; border-collapse:collapse" | |||
!style="background:#white; width:84px !important" | | |||
{|style="background:#d8f800; border:1px solid #1e276b; border-collapse:collapse" | |||
!style="background:#d8f800; border:1px solid #1e276b; width:59px !important" | | |||
!style="background:#EAECF0; width:21px !important" | | |||
|} | |||
|} | |||
|} | |||
|style="display:inline-block; background:white" width=260px| | |||
{|border=1 cellspacing=0 cellpadding=1 margin=0 padding=0 style="border:1px solid black; border-collapse:collapse; height:100%" width=100% | |||
|- | |||
!style="background:#EAECF0; height:56px" align="center" colspan=2|<big>'''[[Bullet Bike]]'''</big> | |||
|- | |||
!style="background:white; height:260px" align="center" colspan=2|[[File:Bullet Bike (Baby Mario) Model.png|250x250px]] | |||
|- | |||
!style="background:#EAECF0" width=35%|Type: | |||
|width=65%|'''Bike (hang-on type)''' | |||
|- | |||
!style="background:#EAECF0" width=35%|Size: | |||
|width=65%|'''{{color|dodgerblue|Small}}''' | |||
|- | |||
!style="background:#EAECF0"|Speed: | |||
|align="center"|'''53''' | |||
{|style="background:white; border:1px solid #1e276b; border-collapse:collapse" | |||
!style="background:#white; width:84px !important" | | |||
{|style="background:#d8f800; border:1px solid #1e276b; border-collapse:collapse" | |||
!style="background:#d8f800; border:1px solid #1e276b; width:53px !important" | | |||
!style="background:#EAECF0; width:27px !important" | | |||
|} | |||
|} | |||
|- | |||
!style="background:#EAECF0"|Weight: | |||
|align="center"|'''24''' | |||
{|style="background:white; border:1px solid #1e276b; border-collapse:collapse" | |||
!style="background:#white; width:84px !important" | | |||
{|style="background:#d8f800; border:1px solid #1e276b; border-collapse:collapse" | |||
!style="background:#d8f800; border:1px solid #1e276b; width:24px !important" | | |||
!style="background:#EAECF0; width:56px !important" | | |||
|} | |||
|} | |||
|- | |||
!style="background:#EAECF0"|Acceleration: | |||
|align="center"|'''32''' | |||
{|style="background:white; border:1px solid #1e276b; border-collapse:collapse" | |||
!style="background:#white; width:84px !important" | | |||
{|style="background:#d8f800; border:1px solid #1e276b; border-collapse:collapse" | |||
!style="background:#d8f800; border:1px solid #1e276b; width:32px !important" | | |||
!style="background:#EAECF0; width:48px !important" | | |||
|} | |||
|} | |||
|- | |||
!style="background:#EAECF0"|Handling: | |||
|align="center"|'''35''' | |||
{|style="background:white; border:1px solid #1e276b; border-collapse:collapse" | |||
!style="background:#white; width:84px !important" | | |||
{|style="background:#d8f800; border:1px solid #1e276b; border-collapse:collapse" | |||
!style="background:#d8f800; border:1px solid #1e276b; width:35px !important" | | |||
!style="background:#EAECF0; width:45px !important" | | |||
|} | |||
|} | |||
|- | |||
!style="background:#EAECF0"|Drift: | |||
|align="center"|'''67''' | |||
{|style="background:white; border:1px solid #1e276b; border-collapse:collapse" | |||
!style="background:#white; width:84px !important" | | |||
{|style="background:#d8f800; border:1px solid #1e276b; border-collapse:collapse" | |||
!style="background:#d8f800; border:1px solid #1e276b; width:67px !important" | | |||
!style="background:#EAECF0; width:13px !important" | | |||
|} | |||
|} | |||
|- | |||
!style="background:#EAECF0"|Off-Road: | |||
|align="center"|'''29''' | |||
{|style="background:white; border:1px solid #1e276b; border-collapse:collapse" | |||
!style="background:#white; width:84px !important" | | |||
{|style="background:#d8f800; border:1px solid #1e276b; border-collapse:collapse" | |||
!style="background:#d8f800; border:1px solid #1e276b; width:29px !important" | | |||
!style="background:#EAECF0; width:51px !important" | | |||
|} | |||
|} | |||
|- | |||
!style="background:#EAECF0"|Mini-Turbo: | |||
|align="center"|'''67''' | |||
{|style="background:white; border:1px solid #1e276b; border-collapse:collapse" | |||
!style="background:#white; width:84px !important" | | |||
{|style="background:#d8f800; border:1px solid #1e276b; border-collapse:collapse" | |||
!style="background:#d8f800; border:1px solid #1e276b; width:67px !important" | | |||
!style="background:#EAECF0; width:13px !important" | | |||
|} | |||
|} | |||
|} | |||
|style="display:inline-block; background:white" width=260px| | |||
{|border=1 cellspacing=0 cellpadding=1 margin=0 padding=0 style="border:1px solid black; border-collapse:collapse; height:100%" width=100% | |||
|- | |||
!style="background:#EAECF0; height:56px" align="center" colspan=2|<big>'''[[Mini Beast]]''' [[File:Flag of USA.png|20px]]<br>'''[[Mini Beast|Concerto]]''' [[File:Flag of Europe.png|20px]]</big> | |||
|- | |||
!style="background:white; height:260px" align="center" colspan=2|[[File:Mini Beast (Baby Mario) Model.png|250x250px]] | |||
|- | |||
!style="background:#EAECF0" width=35%|Type: | |||
|width=65%|'''Kart''' | |||
|- | |||
!style="background:#EAECF0" width=35%|Size: | |||
|width=65%|'''{{color|dodgerblue|Small}}''' | |||
|- | |||
!style="background:#EAECF0"|Speed: | |||
|align="center"|'''55''' | |||
{|style="background:white; border:1px solid #1e276b; border-collapse:collapse" | |||
!style="background:#white; width:84px !important" | | |||
{|style="background:#d8f800; border:1px solid #1e276b; border-collapse:collapse" | |||
!style="background:#d8f800; border:1px solid #1e276b; width:55px !important" | | |||
!style="background:#EAECF0; width:25px !important" | | |||
|} | |||
|} | |||
|- | |||
!style="background:#EAECF0"|Weight: | |||
|align="center"|'''32''' | |||
{|style="background:white; border:1px solid #1e276b; border-collapse:collapse" | |||
!style="background:#white; width:84px !important" | | |||
{|style="background:#d8f800; border:1px solid #1e276b; border-collapse:collapse" | |||
!style="background:#d8f800; border:1px solid #1e276b; width:32px !important" | | |||
!style="background:#EAECF0; width:48px !important" | | |||
|} | |||
|} | |||
|- | |||
!style="background:#EAECF0"|Acceleration: | |||
|align="center"|'''29''' | |||
{|style="background:white; border:1px solid #1e276b; border-collapse:collapse" | |||
!style="background:#white; width:84px !important" | | |||
{|style="background:#d8f800; border:1px solid #1e276b; border-collapse:collapse" | |||
!style="background:#d8f800; border:1px solid #1e276b; width:29px !important" | | |||
!style="background:#EAECF0; width:51px !important" | | |||
|} | |||
|} | |||
|- | |||
!style="background:#EAECF0"|Handling: | |||
|align="center"|'''32''' | |||
{|style="background:white; border:1px solid #1e276b; border-collapse:collapse" | |||
!style="background:#white; width:84px !important" | | |||
{|style="background:#d8f800; border:1px solid #1e276b; border-collapse:collapse" | |||
!style="background:#d8f800; border:1px solid #1e276b; width:32px !important" | | |||
!style="background:#EAECF0; width:48px !important" | | |||
|} | |||
|} | |||
|- | |||
!style="background:#EAECF0"|Drift: | |||
|align="center"|'''64''' | |||
{|style="background:white; border:1px solid #1e276b; border-collapse:collapse" | |||
!style="background:#white; width:84px !important" | | |||
{|style="background:#d8f800; border:1px solid #1e276b; border-collapse:collapse" | |||
!style="background:#d8f800; border:1px solid #1e276b; width:64px !important" | | |||
!style="background:#EAECF0; width:16px !important" | | |||
|} | |||
|} | |||
|- | |||
!style="background:#EAECF0"|Off-Road: | |||
|align="center"|'''27''' | |||
{|style="background:white; border:1px solid #1e276b; border-collapse:collapse" | |||
!style="background:#white; width:84px !important" | | |||
{|style="background:#d8f800; border:1px solid #1e276b; border-collapse:collapse" | |||
!style="background:#d8f800; border:1px solid #1e276b; width:27px !important" | | |||
!style="background:#EAECF0; width:53px !important" | | |||
|} | |||
|} | |||
|- | |||
!style="background:#EAECF0"|Mini-Turbo: | |||
|align="center"|'''64''' | |||
{|style="background:white; border:1px solid #1e276b; border-collapse:collapse" | |||
!style="background:#white; width:84px !important" | | |||
{|style="background:#d8f800; border:1px solid #1e276b; border-collapse:collapse" | |||
!style="background:#d8f800; border:1px solid #1e276b; width:64px !important" | | |||
!style="background:#EAECF0; width:16px !important" | | |||
|} | |||
|} | |||
|} | |||
|style="display:inline-block; background:white" width=260px| | |||
{|border=1 cellspacing=0 cellpadding=1 margin=0 padding=0 style="border:1px solid black; border-collapse:collapse; height:100%" width=100% | |||
|- | |||
!style="background:#EAECF0; height:56px" align="center" colspan=2|<big>'''[[Bit Bike]]''' [[File:Flag of USA.png|20px]]<br>'''[[Bit Bike|Nanobike]]''' [[File:Flag of Europe.png|20px]]</big> | |||
|- | |||
!style="background:white; height:260px" align="center" colspan=2|[[File:Bit Bike (Baby Mario) Model.png|250x250px]] | |||
|- | |||
!style="background:#EAECF0" width=35%|Type: | |||
|width=65%|'''Bike (drift type)''' | |||
|- | |||
!style="background:#EAECF0" width=35%|Size: | |||
|width=65%|'''{{color|dodgerblue|Small}}''' | |||
|- | |||
!style="background:#EAECF0"|Speed: | |||
|align="center"|'''25''' | |||
{|style="background:white; border:1px solid #1e276b; border-collapse:collapse" | |||
!style="background:#white; width:84px !important" | | |||
{|style="background:#d8f800; border:1px solid #1e276b; border-collapse:collapse" | |||
!style="background:#d8f800; border:1px solid #1e276b; width:25px !important" | | |||
!style="background:#EAECF0; width:55px !important" | | |||
|} | |||
|} | |||
|- | |||
!style="background:#EAECF0"|Weight: | |||
|align="center"|'''18''' | |||
{|style="background:white; border:1px solid #1e276b; border-collapse:collapse" | |||
!style="background:#white; width:84px !important" | | |||
{|style="background:#d8f800; border:1px solid #1e276b; border-collapse:collapse" | |||
!style="background:#d8f800; border:1px solid #1e276b; width:18px !important" | | |||
!style="background:#EAECF0; width:62px !important" | | |||
|} | |||
|} | |||
|- | |||
!style="background:#EAECF0"|Acceleration: | |||
|align="center"|'''59''' | |||
{|style="background:white; border:1px solid #1e276b; border-collapse:collapse" | |||
!style="background:#white; width:84px !important" | | |||
{|style="background:#d8f800; border:1px solid #1e276b; border-collapse:collapse" | |||
!style="background:#d8f800; border:1px solid #1e276b; width:59px !important" | | |||
!style="background:#EAECF0; width:21px !important" | | |||
|} | |||
|} | |||
|- | |||
!style="background:#EAECF0"|Handling: | |||
|align="center"|'''67''' | |||
{|style="background:white; border:1px solid #1e276b; border-collapse:collapse" | |||
!style="background:#white; width:84px !important" | | |||
{|style="background:#d8f800; border:1px solid #1e276b; border-collapse:collapse" | |||
!style="background:#d8f800; border:1px solid #1e276b; width:67px !important" | | |||
!style="background:#EAECF0; width:13px !important" | | |||
|} | |||
|} | |||
|- | |||
!style="background:#EAECF0"|Drift: | |||
|align="center"|'''40''' | |||
{|style="background:white; border:1px solid #1e276b; border-collapse:collapse" | |||
!style="background:#white; width:84px !important" | | |||
{|style="background:#d8f800; border:1px solid #1e276b; border-collapse:collapse" | |||
!style="background:#d8f800; border:1px solid #1e276b; width:40px !important" | | |||
!style="background:#EAECF0; width:40px !important" | | |||
|} | |||
|} | |||
|- | |||
!style="background:#EAECF0"|Off-Road: | |||
|align="center"|'''56''' | |||
{|style="background:white; border:1px solid #1e276b; border-collapse:collapse" | |||
!style="background:#white; width:84px !important" | | |||
{|style="background:#d8f800; border:1px solid #1e276b; border-collapse:collapse" | |||
!style="background:#d8f800; border:1px solid #1e276b; width:56px !important" | | |||
!style="background:#EAECF0; width:24px !important" | | |||
|} | |||
|} | |||
|- | |||
!style="background:#EAECF0"|Mini-Turbo: | |||
|align="center"|'''62''' | |||
{|style="background:white; border:1px solid #1e276b; border-collapse:collapse" | |||
!style="background:#white; width:84px !important" | | |||
{|style="background:#d8f800; border:1px solid #1e276b; border-collapse:collapse" | |||
!style="background:#d8f800; border:1px solid #1e276b; width:62px !important" | | |||
!style="background:#EAECF0; width:18px !important" | | |||
|} | |||
|} | |||
|} | |||
|style="display:inline-block; background:white" width=260px| | |||
{|border=1 cellspacing=0 cellpadding=1 margin=0 padding=0 style="border:1px solid black; border-collapse:collapse; height:100%" width=100% | |||
|- | |||
!style="background:#EAECF0; height:56px" align="center" colspan=2|<big>'''[[Standard Kart M]]'''</big> | |||
|- | |||
!style="background:white; height:260px" align="center" colspan=2|[[File:Standard Kart M (Mario) Model.png|250x250px]] | |||
|- | |||
!style="background:#EAECF0" width=35%|Type: | |||
|width=65%|'''Kart''' | |||
|- | |||
!style="background:#EAECF0" width=35%|Size: | |||
|width=65%|'''{{color|green|Medium}}''' | |||
|- | |||
!style="background:#EAECF0"|Speed: | |||
|align="center"|'''46''' | |||
{|style="background:white; border:1px solid #1e276b; border-collapse:collapse" | |||
!style="background:#white; width:84px !important" | | |||
{|style="background:#d8f800; border:1px solid #1e276b; border-collapse:collapse" | |||
!style="background:#d8f800; border:1px solid #1e276b; width:46px !important" | | |||
!style="background:#EAECF0; width:34px !important" | | |||
|} | |||
|} | |||
|- | |||
!style="background:#EAECF0"|Weight: | |||
|align="center"|'''45''' | |||
{|style="background:white; border:1px solid #1e276b; border-collapse:collapse" | |||
!style="background:#white; width:84px !important" | | |||
{|style="background:#d8f800; border:1px solid #1e276b; border-collapse:collapse" | |||
!style="background:#d8f800; border:1px solid #1e276b; width:45px !important" | | |||
!style="background:#EAECF0; width:35px !important" | | |||
|} | |||
|} | |||
|- | |||
!style="background:#EAECF0"|Acceleration: | |||
|align="center"|'''40''' | |||
{|style="background:white; border:1px solid #1e276b; border-collapse:collapse" | |||
!style="background:#white; width:84px !important" | | |||
{|style="background:#d8f800; border:1px solid #1e276b; border-collapse:collapse" | |||
!style="background:#d8f800; border:1px solid #1e276b; width:40px !important" | | |||
!style="background:#EAECF0; width:40px !important" | | |||
|} | |||
|} | |||
|- | |||
!style="background:#EAECF0"|Handling: | |||
|align="center"|'''43''' | |||
{|style="background:white; border:1px solid #1e276b; border-collapse:collapse" | |||
!style="background:#white; width:84px !important" | | |||
{|style="background:#d8f800; border:1px solid #1e276b; border-collapse:collapse" | |||
!style="background:#d8f800; border:1px solid #1e276b; width:43px !important" | | |||
!style="background:#EAECF0; width:37px !important" | | |||
|} | |||
|} | |||
|- | |||
!style="background:#EAECF0"|Drift: | |||
|align="center"|'''45''' | |||
{|style="background:white; border:1px solid #1e276b; border-collapse:collapse" | |||
!style="background:#white; width:84px !important" | | |||
{|style="background:#d8f800; border:1px solid #1e276b; border-collapse:collapse" | |||
!style="background:#d8f800; border:1px solid #1e276b; width:45px !important" | | |||
!style="background:#EAECF0; width:35px !important" | | |||
|} | |||
|} | |||
|- | |||
!style="background:#EAECF0"|Off-Road: | |||
|align="center"|'''35''' | |||
{|style="background:white; border:1px solid #1e276b; border-collapse:collapse" | |||
!style="background:#white; width:84px !important" | | |||
{|style="background:#d8f800; border:1px solid #1e276b; border-collapse:collapse" | |||
!style="background:#d8f800; border:1px solid #1e276b; width:35px !important" | | |||
!style="background:#EAECF0; width:45px !important" | | |||
|} | |||
|} | |||
|- | |||
!style="background:#EAECF0"|Mini-Turbo: | |||
|align="center"|'''40''' | |||
{|style="background:white; border:1px solid #1e276b; border-collapse:collapse" | |||
!style="background:#white; width:84px !important" | | |||
{|style="background:#d8f800; border:1px solid #1e276b; border-collapse:collapse" | |||
!style="background:#d8f800; border:1px solid #1e276b; width:40px !important" | | |||
!style="background:#EAECF0; width:40px !important" | | |||
|} | |||
|} | |||
|} | |||
|style="display:inline-block; background:white" width=260px| | |||
{|border=1 cellspacing=0 cellpadding=1 margin=0 padding=0 style="border:1px solid black; border-collapse:collapse; height:100%" width=100% | |||
|- | |||
!style="background:#EAECF0; height:56px" align="center" colspan=2|<big>'''[[Standard Bike M]]'''</big> | |||
|- | |||
!style="background:white; height:260px" align="center" colspan=2|[[File:Standard Bike M (Mario) Model.png|250x250px]] | |||
|- | |||
!style="background:#EAECF0" width=35%|Type: | |||
|width=65%|'''Bike (drift type)''' | |||
|- | |||
!style="background:#EAECF0" width=35%|Size: | |||
|width=65%|'''{{color|green|Medium}}''' | |||
|- | |||
!style="background:#EAECF0"|Speed: | |||
|align="center"|'''43''' | |||
{|style="background:white; border:1px solid #1e276b; border-collapse:collapse" | |||
!style="background:#white; width:84px !important" | | |||
{|style="background:#d8f800; border:1px solid #1e276b; border-collapse:collapse" | |||
!style="background:#d8f800; border:1px solid #1e276b; width:43px !important" | | |||
!style="background:#EAECF0; width:37px !important" | | |||
|} | |||
|} | |||
|- | |||
!style="background:#EAECF0"|Weight: | |||
|align="center"|'''37''' | |||
{|style="background:white; border:1px solid #1e276b; border-collapse:collapse" | |||
!style="background:#white; width:84px !important" | | |||
{|style="background:#d8f800; border:1px solid #1e276b; border-collapse:collapse" | |||
!style="background:#d8f800; border:1px solid #1e276b; width:37px !important" | | |||
!style="background:#EAECF0; width:43px !important" | | |||
|} | |||
|} | |||
|- | |||
!style="background:#EAECF0"|Acceleration: | |||
|align="center"|'''43''' | |||
{|style="background:white; border:1px solid #1e276b; border-collapse:collapse" | |||
!style="background:#white; width:84px !important" | | |||
{|style="background:#d8f800; border:1px solid #1e276b; border-collapse:collapse" | |||
!style="background:#d8f800; border:1px solid #1e276b; width:43px !important" | | |||
!style="background:#EAECF0; width:37px !important" | | |||
|} | |||
|} | |||
|- | |||
!style="background:#EAECF0"|Handling: | |||
|align="center"|'''45''' | |||
{|style="background:white; border:1px solid #1e276b; border-collapse:collapse" | |||
!style="background:#white; width:84px !important" | | |||
{|style="background:#d8f800; border:1px solid #1e276b; border-collapse:collapse" | |||
!style="background:#d8f800; border:1px solid #1e276b; width:45px !important" | | |||
!style="background:#EAECF0; width:35px !important" | | |||
|} | |||
|} | |||
|- | |||
!style="background:#EAECF0"|Drift: | |||
|align="center"|'''48''' | |||
{|style="background:white; border:1px solid #1e276b; border-collapse:collapse" | |||
!style="background:#white; width:84px !important" | | |||
{|style="background:#d8f800; border:1px solid #1e276b; border-collapse:collapse" | |||
!style="background:#d8f800; border:1px solid #1e276b; width:48px !important" | | |||
!style="background:#EAECF0; width:32px !important" | | |||
|} | |||
|} | |||
|- | |||
!style="background:#EAECF0"|Off-Road: | |||
|align="center"|'''37''' | |||
{|style="background:white; border:1px solid #1e276b; border-collapse:collapse" | |||
!style="background:#white; width:84px !important" | | |||
{|style="background:#d8f800; border:1px solid #1e276b; border-collapse:collapse" | |||
!style="background:#d8f800; border:1px solid #1e276b; width:37px !important" | | |||
!style="background:#EAECF0; width:43px !important" | | |||
|} | |||
|} | |||
|- | |||
!style="background:#EAECF0"|Mini-Turbo: | |||
|align="center"|'''43''' | |||
{|style="background:white; border:1px solid #1e276b; border-collapse:collapse" | |||
!style="background:#white; width:84px !important" | | |||
{|style="background:#d8f800; border:1px solid #1e276b; border-collapse:collapse" | |||
!style="background:#d8f800; border:1px solid #1e276b; width:43px !important" | | |||
!style="background:#EAECF0; width:37px !important" | | |||
|} | |||
|} | |||
|} | |||
|style="display:inline-block; background:white" width=260px| | |||
{|border=1 cellspacing=0 cellpadding=1 margin=0 padding=0 style="border:1px solid black; border-collapse:collapse; height:100%" width=100% | |||
|- | |||
!style="background:#EAECF0; height:56px" align="center" colspan=2|<big>'''[[Classic Dragster]]''' [[File:Flag of USA.png|20px]]<br>'''[[Classic Dragster|Nostalgia 1]]''' [[File:Flag of Europe.png|20px]]</big> | |||
|- | |||
!style="background:white; height:260px" align="center" colspan=2|[[File:Classic Dragster (Mario) Model.png|250x250px]] | |||
|- | |||
!style="background:#EAECF0" width=35%|Type: | |||
|width=65%|'''Kart''' | |||
|- | |||
!style="background:#EAECF0" width=35%|Size: | |||
|width=65%|'''{{color|green|Medium}}''' | |||
|- | |||
!style="background:#EAECF0"|Speed: | |||
|align="center"|'''37''' | |||
{|style="background:white; border:1px solid #1e276b; border-collapse:collapse" | |||
!style="background:#white; width:84px !important" | | |||
{|style="background:#d8f800; border:1px solid #1e276b; border-collapse:collapse" | |||
!style="background:#d8f800; border:1px solid #1e276b; width:37px !important" | | |||
!style="background:#EAECF0; width:43px !important" | | |||
|} | |||
|} | |||
|- | |||
!style="background:#EAECF0"|Weight: | |||
|align="center"|'''43''' | |||
{|style="background:white; border:1px solid #1e276b; border-collapse:collapse" | |||
!style="background:#white; width:84px !important" | | |||
{|style="background:#d8f800; border:1px solid #1e276b; border-collapse:collapse" | |||
!style="background:#d8f800; border:1px solid #1e276b; width:43px !important" | | |||
!style="background:#EAECF0; width:37px !important" | | |||
|} | |||
|} | |||
|- | |||
!style="background:#EAECF0"|Acceleration: | |||
|align="center"|'''59''' | |||
{|style="background:white; border:1px solid #1e276b; border-collapse:collapse" | |||
!style="background:#white; width:84px !important" | | |||
{|style="background:#d8f800; border:1px solid #1e276b; border-collapse:collapse" | |||
!style="background:#d8f800; border:1px solid #1e276b; width:59px !important" | | |||
!style="background:#EAECF0; width:21px !important" | | |||
|} | |||
|} | |||
|- | |||
!style="background:#EAECF0"|Handling: | |||
|align="center"|'''54''' | |||
{|style="background:white; border:1px solid #1e276b; border-collapse:collapse" | |||
!style="background:#white; width:84px !important" | | |||
{|style="background:#d8f800; border:1px solid #1e276b; border-collapse:collapse" | |||
!style="background:#d8f800; border:1px solid #1e276b; width:54px !important" | | |||
!style="background:#EAECF0; width:26px !important" | | |||
|} | |||
|} | |||
|- | |||
!style="background:#EAECF0"|Drift: | |||
|align="center"|'''54''' | |||
{|style="background:white; border:1px solid #1e276b; border-collapse:collapse" | |||
!style="background:#white; width:84px !important" | | |||
{|style="background:#d8f800; border:1px solid #1e276b; border-collapse:collapse" | |||
!style="background:#d8f800; border:1px solid #1e276b; width:54px !important" | | |||
!style="background:#EAECF0; width:26px !important" | | |||
|} | |||
|} | |||
|- | |||
!style="background:#EAECF0"|Off-Road: | |||
|align="center"|'''40''' | |||
{|style="background:white; border:1px solid #1e276b; border-collapse:collapse" | |||
!style="background:#white; width:84px !important" | | |||
{|style="background:#d8f800; border:1px solid #1e276b; border-collapse:collapse" | |||
!style="background:#d8f800; border:1px solid #1e276b; width:40px !important" | | |||
!style="background:#EAECF0; width:40px !important" | | |||
|} | |||
|} | |||
|- | |||
!style="background:#EAECF0"|Mini-Turbo: | |||
|align="center"|'''51''' | |||
{|style="background:white; border:1px solid #1e276b; border-collapse:collapse" | |||
!style="background:#white; width:84px !important" | | |||
{|style="background:#d8f800; border:1px solid #1e276b; border-collapse:collapse" | |||
!style="background:#d8f800; border:1px solid #1e276b; width:51px !important" | | |||
!style="background:#EAECF0; width:29px !important" | | |||
|} | |||
|} | |||
|} | |||
|style="display:inline-block; background:white" width=260px| | |||
{|border=1 cellspacing=0 cellpadding=1 margin=0 padding=0 style="border:1px solid black; border-collapse:collapse; height:100%" width=100% | |||
|- | |||
!style="background:#EAECF0; height:56px" align="center" colspan=2|<big>'''[[Mach Bike]]'''</big> | |||
|- | |||
!style="background:white; height:260px" align="center" colspan=2|[[File:Mach Bike (Mario) Model.png|250x250px]] | |||
|- | |||
!style="background:#EAECF0" width=35%|Type: | |||
|width=65%|'''Bike (hang-on type)''' | |||
|- | |||
!style="background:#EAECF0" width=35%|Size: | |||
|width=65%|'''{{color|green|Medium}}''' | |||
|- | |||
!style="background:#EAECF0"|Speed: | |||
|align="center"|'''55''' | |||
{|style="background:white; border:1px solid #1e276b; border-collapse:collapse" | |||
!style="background:#white; width:84px !important" | | |||
{|style="background:#d8f800; border:1px solid #1e276b; border-collapse:collapse" | |||
!style="background:#d8f800; border:1px solid #1e276b; width:55px !important" | | |||
!style="background:#EAECF0; width:25px !important" | | |||
|} | |||
|} | |||
|- | |||
!style="background:#EAECF0"|Weight: | |||
|align="center"|'''37''' | |||
{|style="background:white; border:1px solid #1e276b; border-collapse:collapse" | |||
!style="background:#white; width:84px !important" | | |||
{|style="background:#d8f800; border:1px solid #1e276b; border-collapse:collapse" | |||
!style="background:#d8f800; border:1px solid #1e276b; width:37px !important" | | |||
!style="background:#EAECF0; width:43px !important" | | |||
|} | |||
|} | |||
|- | |||
!style="background:#EAECF0"|Acceleration: | |||
|align="center"|'''24''' | |||
{|style="background:white; border:1px solid #1e276b; border-collapse:collapse" | |||
!style="background:#white; width:84px !important" | | |||
{|style="background:#d8f800; border:1px solid #1e276b; border-collapse:collapse" | |||
!style="background:#d8f800; border:1px solid #1e276b; width:24px !important" | | |||
!style="background:#EAECF0; width:56px !important" | | |||
|} | |||
|} | |||
|- | |||
!style="background:#EAECF0"|Handling: | |||
|align="center"|'''32''' | |||
{|style="background:white; border:1px solid #1e276b; border-collapse:collapse" | |||
!style="background:#white; width:84px !important" | | |||
{|style="background:#d8f800; border:1px solid #1e276b; border-collapse:collapse" | |||
!style="background:#d8f800; border:1px solid #1e276b; width:32px !important" | | |||
!style="background:#EAECF0; width:48px !important" | | |||
|} | |||
|} | |||
|- | |||
!style="background:#EAECF0"|Drift: | |||
|align="center"|'''62''' | |||
{|style="background:white; border:1px solid #1e276b; border-collapse:collapse" | |||
!style="background:#white; width:84px !important" | | |||
{|style="background:#d8f800; border:1px solid #1e276b; border-collapse:collapse" | |||
!style="background:#d8f800; border:1px solid #1e276b; width:62px !important" | | |||
!style="background:#EAECF0; width:18px !important" | | |||
|} | |||
|} | |||
|- | |||
!style="background:#EAECF0"|Off-Road: | |||
|align="center"|'''27''' | |||
{|style="background:white; border:1px solid #1e276b; border-collapse:collapse" | |||
!style="background:#white; width:84px !important" | | |||
{|style="background:#d8f800; border:1px solid #1e276b; border-collapse:collapse" | |||
!style="background:#d8f800; border:1px solid #1e276b; width:27px !important" | | |||
!style="background:#EAECF0; width:53px !important" | | |||
|} | |||
|} | |||
|- | |||
!style="background:#EAECF0"|Mini-Turbo: | |||
|align="center"|'''62''' | |||
{|style="background:white; border:1px solid #1e276b; border-collapse:collapse" | |||
!style="background:#white; width:84px !important" | | |||
{|style="background:#d8f800; border:1px solid #1e276b; border-collapse:collapse" | |||
!style="background:#d8f800; border:1px solid #1e276b; width:62px !important" | | |||
!style="background:#EAECF0; width:18px !important" | | |||
|} | |||
|} | |||
|} | |||
|style="display:inline-block; background:white" width=260px| | |||
{|border=1 cellspacing=0 cellpadding=1 margin=0 padding=0 style="border:1px solid black; border-collapse:collapse; height:100%" width=100% | |||
|- | |||
!style="background:#EAECF0; height:56px" align="center" colspan=2|<big>'''[[Wild Wing]]'''</big> | |||
|- | |||
!style="background:white; height:260px" align="center" colspan=2|[[File:Wild Wing (Mario) Model.png|250x250px]] | |||
|- | |||
!style="background:#EAECF0" width=35%|Type: | |||
|width=65%|'''Kart''' | |||
|- | |||
!style="background:#EAECF0" width=35%|Size: | |||
|width=65%|'''{{color|green|Medium}}''' | |||
|- | |||
!style="background:#EAECF0"|Speed: | |||
|align="center"|'''57''' | |||
{|style="background:white; border:1px solid #1e276b; border-collapse:collapse" | |||
!style="background:#white; width:84px !important" | | |||
{|style="background:#d8f800; border:1px solid #1e276b; border-collapse:collapse" | |||
!style="background:#d8f800; border:1px solid #1e276b; width:57px !important" | | |||
!style="background:#EAECF0; width:23px !important" | | |||
|} | |||
|} | |||
|- | |||
!style="background:#EAECF0"|Weight: | |||
|align="center"|'''51''' | |||
{|style="background:white; border:1px solid #1e276b; border-collapse:collapse" | |||
!style="background:#white; width:84px !important" | | |||
{|style="background:#d8f800; border:1px solid #1e276b; border-collapse:collapse" | |||
!style="background:#d8f800; border:1px solid #1e276b; width:51px !important" | | |||
!style="background:#EAECF0; width:29px !important" | | |||
|} | |||
|} | |||
|- | |||
!style="background:#EAECF0"|Acceleration: | |||
|align="center"|'''21''' | |||
{|style="background:white; border:1px solid #1e276b; border-collapse:collapse" | |||
!style="background:#white; width:84px !important" | | |||
{|style="background:#d8f800; border:1px solid #1e276b; border-collapse:collapse" | |||
!style="background:#d8f800; border:1px solid #1e276b; width:21px !important" | | |||
!style="background:#EAECF0; width:59px !important" | | |||
|} | |||
|} | |||
|- | |||
!style="background:#EAECF0"|Handling: | |||
|align="center"|'''29''' | |||
{|style="background:white; border:1px solid #1e276b; border-collapse:collapse" | |||
!style="background:#white; width:84px !important" | | |||
{|style="background:#d8f800; border:1px solid #1e276b; border-collapse:collapse" | |||
!style="background:#d8f800; border:1px solid #1e276b; width:29px !important" | | |||
!style="background:#EAECF0; width:51px !important" | | |||
|} | |||
|} | |||
|- | |||
!style="background:#EAECF0"|Drift: | |||
|align="center"|'''59''' | |||
{|style="background:white; border:1px solid #1e276b; border-collapse:collapse" | |||
!style="background:#white; width:84px !important" | | |||
{|style="background:#d8f800; border:1px solid #1e276b; border-collapse:collapse" | |||
!style="background:#d8f800; border:1px solid #1e276b; width:59px !important" | | |||
!style="background:#EAECF0; width:21px !important" | | |||
|} | |||
|} | |||
|- | |||
!style="background:#EAECF0"|Off-Road: | |||
|align="center"|'''24''' | |||
{|style="background:white; border:1px solid #1e276b; border-collapse:collapse" | |||
!style="background:#white; width:84px !important" | | |||
{|style="background:#d8f800; border:1px solid #1e276b; border-collapse:collapse" | |||
!style="background:#d8f800; border:1px solid #1e276b; width:24px !important" | | |||
!style="background:#EAECF0; width:56px !important" | | |||
|} | |||
|} | |||
|- | |||
!style="background:#EAECF0"|Mini-Turbo: | |||
|align="center"|'''59''' | |||
{|style="background:white; border:1px solid #1e276b; border-collapse:collapse" | |||
!style="background:#white; width:84px !important" | | |||
{|style="background:#d8f800; border:1px solid #1e276b; border-collapse:collapse" | |||
!style="background:#d8f800; border:1px solid #1e276b; width:59px !important" | | |||
!style="background:#EAECF0; width:21px !important" | | |||
|} | |||
|} | |||
|} | |||
|style="display:inline-block; background:white" width=260px| | |||
{|border=1 cellspacing=0 cellpadding=1 margin=0 padding=0 style="border:1px solid black; border-collapse:collapse; height:100%" width=100% | |||
|- | |||
!style="background:#EAECF0; height:56px" align="center" colspan=2|<big>'''[[Sugarscoot]]''' [[File:Flag of USA.png|20px]]<br>'''[[Sugarscoot|Bon Bon]]''' [[File:Flag of Europe.png|20px]]</big> | |||
|- | |||
!style="background:white; height:260px" align="center" colspan=2|[[File:Sugarscoot (Peach) Model.png|250x250px]] | |||
|- | |||
!style="background:#EAECF0" width=35%|Type: | |||
|width=65%|'''Bike (drift type)''' | |||
|- | |||
!style="background:#EAECF0" width=35%|Size: | |||
|width=65%|'''{{color|green|Medium}}''' | |||
|- | |||
!style="background:#EAECF0"|Speed: | |||
|align="center"|'''32''' | |||
{|style="background:white; border:1px solid #1e276b; border-collapse:collapse" | |||
!style="background:#white; width:84px !important" | | |||
{|style="background:#d8f800; border:1px solid #1e276b; border-collapse:collapse" | |||
!style="background:#d8f800; border:1px solid #1e276b; width:32px !important" | | |||
!style="background:#EAECF0; width:48px !important" | | |||
|} | |||
|} | |||
|- | |||
!style="background:#EAECF0"|Weight: | |||
|align="center"|'''32''' | |||
{|style="background:white; border:1px solid #1e276b; border-collapse:collapse" | |||
!style="background:#white; width:84px !important" | | |||
{|style="background:#d8f800; border:1px solid #1e276b; border-collapse:collapse" | |||
!style="background:#d8f800; border:1px solid #1e276b; width:32px !important" | | |||
!style="background:#EAECF0; width:48px !important" | | |||
|} | |||
|} | |||
|- | |||
!style="background:#EAECF0"|Acceleration: | |||
|align="center"|'''54''' | |||
{|style="background:white; border:1px solid #1e276b; border-collapse:collapse" | |||
!style="background:#white; width:84px !important" | | |||
{|style="background:#d8f800; border:1px solid #1e276b; border-collapse:collapse" | |||
!style="background:#d8f800; border:1px solid #1e276b; width:54px !important" | | |||
!style="background:#EAECF0; width:26px !important" | | |||
|} | |||
|} | |||
|- | |||
!style="background:#EAECF0"|Handling: | |||
|align="center"|'''62''' | |||
{|style="background:white; border:1px solid #1e276b; border-collapse:collapse" | |||
!style="background:#white; width:84px !important" | | |||
{|style="background:#d8f800; border:1px solid #1e276b; border-collapse:collapse" | |||
!style="background:#d8f800; border:1px solid #1e276b; width:62px !important" | | |||
!style="background:#EAECF0; width:18px !important" | | |||
|} | |||
|} | |||
|- | |||
!style="background:#EAECF0"|Drift: | |||
|align="center"|'''35''' | |||
{|style="background:white; border:1px solid #1e276b; border-collapse:collapse" | |||
!style="background:#white; width:84px !important" | | |||
{|style="background:#d8f800; border:1px solid #1e276b; border-collapse:collapse" | |||
!style="background:#d8f800; border:1px solid #1e276b; width:35px !important" | | |||
!style="background:#EAECF0; width:45px !important" | | |||
|} | |||
|} | |||
|- | |||
!style="background:#EAECF0"|Off-Road: | |||
|align="center"|'''51''' | |||
{|style="background:white; border:1px solid #1e276b; border-collapse:collapse" | |||
!style="background:#white; width:84px !important" | | |||
{|style="background:#d8f800; border:1px solid #1e276b; border-collapse:collapse" | |||
!style="background:#d8f800; border:1px solid #1e276b; width:51px !important" | | |||
!style="background:#EAECF0; width:29px !important" | | |||
|} | |||
|} | |||
|- | |||
!style="background:#EAECF0"|Mini-Turbo: | |||
|align="center"|'''56''' | |||
{|style="background:white; border:1px solid #1e276b; border-collapse:collapse" | |||
!style="background:#white; width:84px !important" | | |||
{|style="background:#d8f800; border:1px solid #1e276b; border-collapse:collapse" | |||
!style="background:#d8f800; border:1px solid #1e276b; width:56px !important" | | |||
!style="background:#EAECF0; width:24px !important" | | |||
|} | |||
|} | |||
|} | |||
|style="display:inline-block; background:white" width=260px| | |||
{|border=1 cellspacing=0 cellpadding=1 margin=0 padding=0 style="border:1px solid black; border-collapse:collapse; height:100%" width=100% | |||
|- | |||
!style="background:#EAECF0; height:56px" align="center" colspan=2|<big>'''[[Standard Kart L]]'''</big> | |||
|- | |||
!style="background:white; height:260px" align="center" colspan=2|[[File:Standard Kart L (Bowser) Model.png|250x250px]] | |||
|- | |||
!style="background:#EAECF0" width=35%|Type: | |||
|width=65%|'''Kart''' | |||
|- | |||
!style="background:#EAECF0" width=35%|Size: | |||
|width=65%|'''{{color|red|Large}}''' | |||
|- | |||
!style="background:#EAECF0"|Speed: | |||
|align="center"|'''48''' | |||
{|style="background:white; border:1px solid #1e276b; border-collapse:collapse" | |||
!style="background:#white; width:84px !important" | | |||
{|style="background:#d8f800; border:1px solid #1e276b; border-collapse:collapse" | |||
!style="background:#d8f800; border:1px solid #1e276b; width:48px !important" | | |||
!style="background:#EAECF0; width:32px !important" | | |||
|} | |||
|} | |||
|- | |||
!style="background:#EAECF0"|Weight: | |||
|align="center"|'''59''' | |||
{|style="background:white; border:1px solid #1e276b; border-collapse:collapse" | |||
!style="background:#white; width:84px !important" | | |||
{|style="background:#d8f800; border:1px solid #1e276b; border-collapse:collapse" | |||
!style="background:#d8f800; border:1px solid #1e276b; width:59px !important" | | |||
!style="background:#EAECF0; width:21px !important" | | |||
|} | |||
|} | |||
|- | |||
!style="background:#EAECF0"|Acceleration: | |||
|align="center"|'''37''' | |||
{|style="background:white; border:1px solid #1e276b; border-collapse:collapse" | |||
!style="background:#white; width:84px !important" | | |||
{|style="background:#d8f800; border:1px solid #1e276b; border-collapse:collapse" | |||
!style="background:#d8f800; border:1px solid #1e276b; width:37px !important" | | |||
!style="background:#EAECF0; width:43px !important" | | |||
|} | |||
|} | |||
|- | |||
!style="background:#EAECF0"|Handling: | |||
|align="center"|'''40''' | |||
{|style="background:white; border:1px solid #1e276b; border-collapse:collapse" | |||
!style="background:#white; width:84px !important" | | |||
{|style="background:#d8f800; border:1px solid #1e276b; border-collapse:collapse" | |||
!style="background:#d8f800; border:1px solid #1e276b; width:40px !important" | | |||
!style="background:#EAECF0; width:40px !important" | | |||
|} | |||
|} | |||
|- | |||
!style="background:#EAECF0"|Drift: | |||
|align="center"|'''40''' | |||
{|style="background:white; border:1px solid #1e276b; border-collapse:collapse" | |||
!style="background:#white; width:84px !important" | | |||
{|style="background:#d8f800; border:1px solid #1e276b; border-collapse:collapse" | |||
!style="background:#d8f800; border:1px solid #1e276b; width:40px !important" | | |||
!style="background:#EAECF0; width:40px !important" | | |||
|} | |||
|} | |||
|- | |||
!style="background:#EAECF0"|Off-Road: | |||
|align="center"|'''35''' | |||
{|style="background:white; border:1px solid #1e276b; border-collapse:collapse" | |||
!style="background:#white; width:84px !important" | | |||
{|style="background:#d8f800; border:1px solid #1e276b; border-collapse:collapse" | |||
!style="background:#d8f800; border:1px solid #1e276b; width:35px !important" | | |||
!style="background:#EAECF0; width:45px !important" | | |||
|} | |||
|} | |||
|- | |||
!style="background:#EAECF0"|Mini-Turbo: | |||
|align="center"|'''35''' | |||
{|style="background:white; border:1px solid #1e276b; border-collapse:collapse" | |||
!style="background:#white; width:84px !important" | | |||
{|style="background:#d8f800; border:1px solid #1e276b; border-collapse:collapse" | |||
!style="background:#d8f800; border:1px solid #1e276b; width:35px !important" | | |||
!style="background:#EAECF0; width:45px !important" | | |||
|} | |||
|} | |||
|} | |||
|style="display:inline-block; background:white" width=260px| | |||
{|border=1 cellspacing=0 cellpadding=1 margin=0 padding=0 style="border:1px solid black; border-collapse:collapse; height:100%" width=100% | |||
|- | |||
!style="background:#EAECF0; height:56px" align="center" colspan=2|<big>'''[[Standard Bike L]]'''</big> | |||
|- | |||
!style="background:white; height:260px" align="center" colspan=2|[[File:Standard Bike L (Wario) Model.png|250x250px]] | |||
|- | |||
!style="background:#EAECF0" width=35%|Type: | |||
|width=65%|'''Bike (drift type)''' | |||
|- | |||
!style="background:#EAECF0" width=35%|Size: | |||
|width=65%|'''{{color|red|Large}}''' | |||
|- | |||
!style="background:#EAECF0"|Speed: | |||
|align="center"|'''46''' | |||
{|style="background:white; border:1px solid #1e276b; border-collapse:collapse" | |||
!style="background:#white; width:84px !important" | | |||
{|style="background:#d8f800; border:1px solid #1e276b; border-collapse:collapse" | |||
!style="background:#d8f800; border:1px solid #1e276b; width:46px !important" | | |||
!style="background:#EAECF0; width:34px !important" | | |||
|} | |||
|} | |||
|- | |||
!style="background:#EAECF0"|Weight: | |||
|align="center"|'''54''' | |||
{|style="background:white; border:1px solid #1e276b; border-collapse:collapse" | |||
!style="background:#white; width:84px !important" | | |||
{|style="background:#d8f800; border:1px solid #1e276b; border-collapse:collapse" | |||
!style="background:#d8f800; border:1px solid #1e276b; width:54px !important" | | |||
!style="background:#EAECF0; width:26px !important" | | |||
|} | |||
|} | |||
|- | |||
!style="background:#EAECF0"|Acceleration: | |||
|align="center"|'''40''' | |||
{|style="background:white; border:1px solid #1e276b; border-collapse:collapse" | |||
!style="background:#white; width:84px !important" | | |||
{|style="background:#d8f800; border:1px solid #1e276b; border-collapse:collapse" | |||
!style="background:#d8f800; border:1px solid #1e276b; width:40px !important" | | |||
!style="background:#EAECF0; width:40px !important" | | |||
|} | |||
|} | |||
|- | |||
!style="background:#EAECF0"|Handling: | |||
|align="center"|'''43''' | |||
{|style="background:white; border:1px solid #1e276b; border-collapse:collapse" | |||
!style="background:#white; width:84px !important" | | |||
{|style="background:#d8f800; border:1px solid #1e276b; border-collapse:collapse" | |||
!style="background:#d8f800; border:1px solid #1e276b; width:43px !important" | | |||
!style="background:#EAECF0; width:37px !important" | | |||
|} | |||
|} | |||
|- | |||
!style="background:#EAECF0"|Drift: | |||
|align="center"|'''43''' | |||
{|style="background:white; border:1px solid #1e276b; border-collapse:collapse" | |||
!style="background:#white; width:84px !important" | | |||
{|style="background:#d8f800; border:1px solid #1e276b; border-collapse:collapse" | |||
!style="background:#d8f800; border:1px solid #1e276b; width:43px !important" | | |||
!style="background:#EAECF0; width:37px !important" | | |||
|} | |||
|} | |||
|- | |||
!style="background:#EAECF0"|Off-Road: | |||
|align="center"|'''37''' | |||
{|style="background:white; border:1px solid #1e276b; border-collapse:collapse" | |||
!style="background:#white; width:84px !important" | | |||
{|style="background:#d8f800; border:1px solid #1e276b; border-collapse:collapse" | |||
!style="background:#d8f800; border:1px solid #1e276b; width:37px !important" | | |||
!style="background:#EAECF0; width:43px !important" | | |||
|} | |||
|} | |||
|- | |||
!style="background:#EAECF0"|Mini-Turbo: | |||
|align="center"|'''37''' | |||
{|style="background:white; border:1px solid #1e276b; border-collapse:collapse" | |||
!style="background:#white; width:84px !important" | | |||
{|style="background:#d8f800; border:1px solid #1e276b; border-collapse:collapse" | |||
!style="background:#d8f800; border:1px solid #1e276b; width:37px !important" | | |||
!style="background:#EAECF0; width:43px !important" | | |||
|} | |||
|} | |||
|} | |||
|style="display:inline-block; background:white" width=260px| | |||
{|border=1 cellspacing=0 cellpadding=1 margin=0 padding=0 style="border:1px solid black; border-collapse:collapse; height:100%" width=100% | |||
|- | |||
!style="background:#EAECF0; height:56px" align="center" colspan=2|<big>'''[[Offroader]]'''</big> | |||
|- | |||
!style="background:white; height:260px" align="center" colspan=2|[[File:Offroader (Bowser) Model.png|250x250px]] | |||
|- | |||
!style="background:#EAECF0" width=35%|Type: | |||
|width=65%|'''Kart''' | |||
|- | |||
!style="background:#EAECF0" width=35%|Size: | |||
|width=65%|'''{{color|red|Large}}''' | |||
|- | |||
!style="background:#EAECF0"|Speed: | |||
|align="center"|'''39''' | |||
{|style="background:white; border:1px solid #1e276b; border-collapse:collapse" | |||
!style="background:#white; width:84px !important" | | |||
{|style="background:#d8f800; border:1px solid #1e276b; border-collapse:collapse" | |||
!style="background:#d8f800; border:1px solid #1e276b; width:39px !important" | | |||
!style="background:#EAECF0; width:41px !important" | | |||
|} | |||
|} | |||
|- | |||
!style="background:#EAECF0"|Weight: | |||
|align="center"|'''64''' | |||
{|style="background:white; border:1px solid #1e276b; border-collapse:collapse" | |||
!style="background:#white; width:84px !important" | | |||
{|style="background:#d8f800; border:1px solid #1e276b; border-collapse:collapse" | |||
!style="background:#d8f800; border:1px solid #1e276b; width:64px !important" | | |||
!style="background:#EAECF0; width:16px !important" | | |||
|} | |||
|} | |||
|- | |||
!style="background:#EAECF0"|Acceleration: | |||
|align="center"|'''48''' | |||
{|style="background:white; border:1px solid #1e276b; border-collapse:collapse" | |||
!style="background:#white; width:84px !important" | | |||
{|style="background:#d8f800; border:1px solid #1e276b; border-collapse:collapse" | |||
!style="background:#d8f800; border:1px solid #1e276b; width:48px !important" | | |||
!style="background:#EAECF0; width:32px !important" | | |||
|} | |||
|} | |||
|- | |||
!style="background:#EAECF0"|Handling: | |||
|align="center"|'''54''' | |||
{|style="background:white; border:1px solid #1e276b; border-collapse:collapse" | |||
!style="background:#white; width:84px !important" | | |||
{|style="background:#d8f800; border:1px solid #1e276b; border-collapse:collapse" | |||
!style="background:#d8f800; border:1px solid #1e276b; width:54px !important" | | |||
!style="background:#EAECF0; width:26px !important" | | |||
|} | |||
|} | |||
|- | |||
!style="background:#EAECF0"|Drift: | |||
|align="center"|'''18''' | |||
{|style="background:white; border:1px solid #1e276b; border-collapse:collapse" | |||
!style="background:#white; width:84px !important" | | |||
{|style="background:#d8f800; border:1px solid #1e276b; border-collapse:collapse" | |||
!style="background:#d8f800; border:1px solid #1e276b; width:18px !important" | | |||
!style="background:#EAECF0; width:62px !important" | | |||
|} | |||
|} | |||
|- | |||
!style="background:#EAECF0"|Off-Road: | |||
|align="center"|'''43''' | |||
{|style="background:white; border:1px solid #1e276b; border-collapse:collapse" | |||
!style="background:#white; width:84px !important" | | |||
{|style="background:#d8f800; border:1px solid #1e276b; border-collapse:collapse" | |||
!style="background:#d8f800; border:1px solid #1e276b; width:43px !important" | | |||
!style="background:#EAECF0; width:37px !important" | | |||
|} | |||
|} | |||
|- | |||
!style="background:#EAECF0"|Mini-Turbo: | |||
|align="center"|'''45''' | |||
{|style="background:white; border:1px solid #1e276b; border-collapse:collapse" | |||
!style="background:#white; width:84px !important" | | |||
{|style="background:#d8f800; border:1px solid #1e276b; border-collapse:collapse" | |||
!style="background:#d8f800; border:1px solid #1e276b; width:45px !important" | | |||
!style="background:#EAECF0; width:35px !important" | | |||
|} | |||
|} | |||
|} | |||
|style="display:inline-block; background:white" width=260px| | |||
{|border=1 cellspacing=0 cellpadding=1 margin=0 padding=0 style="border:1px solid black; border-collapse:collapse; height:100%" width=100% | |||
|- | |||
!style="background:#EAECF0; height:56px" align="center" colspan=2|<big>'''[[Flame Runner]]''' [[File:Flag of USA.png|20px]]<br>'''[[Flame Runner|Bowser Bike]]''' [[File:Flag of Europe.png|20px]]</big> | |||
|- | |||
!style="background:white; height:260px" align="center" colspan=2|[[File:Flame Runner (Bowser) Model.png|250x250px]] | |||
|- | |||
!style="background:#EAECF0" width=35%|Type: | |||
|width=65%|'''Bike (hang-on type)''' | |||
|- | |||
!style="background:#EAECF0" width=35%|Size: | |||
|width=65%|'''{{color|red|Large}}''' | |||
|- | |||
!style="background:#EAECF0"|Speed: | |||
|align="center"|'''60''' | |||
{|style="background:white; border:1px solid #1e276b; border-collapse:collapse" | |||
!style="background:#white; width:84px !important" | | |||
{|style="background:#d8f800; border:1px solid #1e276b; border-collapse:collapse" | |||
!style="background:#d8f800; border:1px solid #1e276b; width:60px !important" | | |||
!style="background:#EAECF0; width:20px !important" | | |||
|} | |||
|} | |||
|- | |||
!style="background:#EAECF0"|Weight: | |||
|align="center"|'''54''' | |||
{|style="background:white; border:1px solid #1e276b; border-collapse:collapse" | |||
!style="background:#white; width:84px !important" | | |||
{|style="background:#d8f800; border:1px solid #1e276b; border-collapse:collapse" | |||
!style="background:#d8f800; border:1px solid #1e276b; width:54px !important" | | |||
!style="background:#EAECF0; width:26px !important" | | |||
|} | |||
|} | |||
|- | |||
!style="background:#EAECF0"|Acceleration: | |||
|align="center"|'''18''' | |||
{|style="background:white; border:1px solid #1e276b; border-collapse:collapse" | |||
!style="background:#white; width:84px !important" | | |||
{|style="background:#d8f800; border:1px solid #1e276b; border-collapse:collapse" | |||
!style="background:#d8f800; border:1px solid #1e276b; width:18px !important" | | |||
!style="background:#EAECF0; width:62px !important" | | |||
|} | |||
|} | |||
|- | |||
!style="background:#EAECF0"|Handling: | |||
|align="center"|'''24''' | |||
{|style="background:white; border:1px solid #1e276b; border-collapse:collapse" | |||
!style="background:#white; width:84px !important" | | |||
{|style="background:#d8f800; border:1px solid #1e276b; border-collapse:collapse" | |||
!style="background:#d8f800; border:1px solid #1e276b; width:24px !important" | | |||
!style="background:#EAECF0; width:56px !important" | | |||
|} | |||
|} | |||
|- | |||
!style="background:#EAECF0"|Drift: | |||
|align="center"|'''51''' | |||
{|style="background:white; border:1px solid #1e276b; border-collapse:collapse" | |||
!style="background:#white; width:84px !important" | | |||
{|style="background:#d8f800; border:1px solid #1e276b; border-collapse:collapse" | |||
!style="background:#d8f800; border:1px solid #1e276b; width:51px !important" | | |||
!style="background:#EAECF0; width:29px !important" | | |||
|} | |||
|} | |||
|- | |||
!style="background:#EAECF0"|Off-Road: | |||
|align="center"|'''21''' | |||
{|style="background:white; border:1px solid #1e276b; border-collapse:collapse" | |||
!style="background:#white; width:84px !important" | | |||
{|style="background:#d8f800; border:1px solid #1e276b; border-collapse:collapse" | |||
!style="background:#d8f800; border:1px solid #1e276b; width:21px !important" | | |||
!style="background:#EAECF0; width:59px !important" | | |||
|} | |||
|} | |||
|- | |||
!style="background:#EAECF0"|Mini-Turbo: | |||
|align="center"|'''51''' | |||
{|style="background:white; border:1px solid #1e276b; border-collapse:collapse" | |||
!style="background:#white; width:84px !important" | | |||
{|style="background:#d8f800; border:1px solid #1e276b; border-collapse:collapse" | |||
!style="background:#d8f800; border:1px solid #1e276b; width:51px !important" | | |||
!style="background:#EAECF0; width:29px !important" | | |||
|} | |||
|} | |||
|} | |||
|style="display:inline-block; background:white" width=260px| | |||
{|border=1 cellspacing=0 cellpadding=1 margin=0 padding=0 style="border:1px solid black; border-collapse:collapse; height:100%" width=100% | |||
|- | |||
!style="background:#EAECF0; height:56px" align="center" colspan=2|<big>'''[[Flame Flyer]]'''</big> | |||
|- | |||
!style="background:white; height:260px" align="center" colspan=2|[[File:Flame Flyer (Bowser) Model.png|250x250px]] | |||
|- | |||
!style="background:#EAECF0" width=35%|Type: | |||
|width=65%|'''Kart''' | |||
|- | |||
!style="background:#EAECF0" width=35%|Size: | |||
|width=65%|'''{{color|red|Large}}''' | |||
|- | |||
!style="background:#EAECF0"|Speed: | |||
|align="center"|'''62''' | |||
{|style="background:white; border:1px solid #1e276b; border-collapse:collapse" | |||
!style="background:#white; width:84px !important" | | |||
{|style="background:#d8f800; border:1px solid #1e276b; border-collapse:collapse" | |||
!style="background:#d8f800; border:1px solid #1e276b; width:62px !important" | | |||
!style="background:#EAECF0; width:18px !important" | | |||
|} | |||
|} | |||
|- | |||
!style="background:#EAECF0"|Weight: | |||
|align="center"|'''59''' | |||
{|style="background:white; border:1px solid #1e276b; border-collapse:collapse" | |||
!style="background:#white; width:84px !important" | | |||
{|style="background:#d8f800; border:1px solid #1e276b; border-collapse:collapse" | |||
!style="background:#d8f800; border:1px solid #1e276b; width:59px !important" | | |||
!style="background:#EAECF0; width:21px !important" | | |||
|} | |||
|} | |||
|- | |||
!style="background:#EAECF0"|Acceleration: | |||
|align="center"|'''16''' | |||
{|style="background:white; border:1px solid #1e276b; border-collapse:collapse" | |||
!style="background:#white; width:84px !important" | | |||
{|style="background:#d8f800; border:1px solid #1e276b; border-collapse:collapse" | |||
!style="background:#d8f800; border:1px solid #1e276b; width:16px !important" | | |||
!style="background:#EAECF0; width:64px !important" | | |||
|} | |||
|} | |||
|- | |||
!style="background:#EAECF0"|Handling: | |||
|align="center"|'''21''' | |||
{|style="background:white; border:1px solid #1e276b; border-collapse:collapse" | |||
!style="background:#white; width:84px !important" | | |||
{|style="background:#d8f800; border:1px solid #1e276b; border-collapse:collapse" | |||
!style="background:#d8f800; border:1px solid #1e276b; width:21px !important" | | |||
!style="background:#EAECF0; width:59px !important" | | |||
|} | |||
|} | |||
|- | |||
!style="background:#EAECF0"|Drift: | |||
|align="center"|'''48''' | |||
{|style="background:white; border:1px solid #1e276b; border-collapse:collapse" | |||
!style="background:#white; width:84px !important" | | |||
{|style="background:#d8f800; border:1px solid #1e276b; border-collapse:collapse" | |||
!style="background:#d8f800; border:1px solid #1e276b; width:48px !important" | | |||
!style="background:#EAECF0; width:32px !important" | | |||
|} | |||
|} | |||
|- | |||
!style="background:#EAECF0"|Off-Road: | |||
|align="center"|'''18''' | |||
{|style="background:white; border:1px solid #1e276b; border-collapse:collapse" | |||
!style="background:#white; width:84px !important" | | |||
{|style="background:#d8f800; border:1px solid #1e276b; border-collapse:collapse" | |||
!style="background:#d8f800; border:1px solid #1e276b; width:18px !important" | | |||
!style="background:#EAECF0; width:62px !important" | | |||
|} | |||
|} | |||
|- | |||
!style="background:#EAECF0"|Mini-Turbo: | |||
|align="center"|'''48''' | |||
{|style="background:white; border:1px solid #1e276b; border-collapse:collapse" | |||
!style="background:#white; width:84px !important" | | |||
{|style="background:#d8f800; border:1px solid #1e276b; border-collapse:collapse" | |||
!style="background:#d8f800; border:1px solid #1e276b; width:48px !important" | | |||
!style="background:#EAECF0; width:32px !important" | | |||
|} | |||
|} | |||
|} | |||
|style="display:inline-block; background:white" width=260px| | |||
{|border=1 cellspacing=0 cellpadding=1 margin=0 padding=0 style="border:1px solid black; border-collapse:collapse; height:100%" width=100% | |||
|- | |||
!style="background:#EAECF0; height:56px" align="center" colspan=2|<big>'''[[Wario Bike]]'''</big> | |||
|- | |||
!style="background:white; height:260px" align="center" colspan=2|[[File:Wario Bike (Wario) Model.png|250x250px]] | |||
|- | |||
!style="background:#EAECF0" width=35%|Type: | |||
|width=65%|'''Bike (drift type)''' | |||
|- | |||
!style="background:#EAECF0" width=35%|Size: | |||
|width=65%|'''{{color|red|Large}}''' | |||
|- | |||
!style="background:#EAECF0"|Speed: | |||
|align="center"|'''37''' | |||
{|style="background:white; border:1px solid #1e276b; border-collapse:collapse" | |||
!style="background:#white; width:84px !important" | | |||
{|style="background:#d8f800; border:1px solid #1e276b; border-collapse:collapse" | |||
!style="background:#d8f800; border:1px solid #1e276b; width:37px !important" | | |||
!style="background:#EAECF0; width:43px !important" | | |||
|} | |||
|} | |||
|- | |||
!style="background:#EAECF0"|Weight: | |||
|align="center"|'''59''' | |||
{|style="background:white; border:1px solid #1e276b; border-collapse:collapse" | |||
!style="background:#white; width:84px !important" | | |||
{|style="background:#d8f800; border:1px solid #1e276b; border-collapse:collapse" | |||
!style="background:#d8f800; border:1px solid #1e276b; width:59px !important" | | |||
!style="background:#EAECF0; width:21px !important" | | |||
|} | |||
|} | |||
|- | |||
!style="background:#EAECF0"|Acceleration: | |||
|align="center"|'''51''' | |||
{|style="background:white; border:1px solid #1e276b; border-collapse:collapse" | |||
!style="background:#white; width:84px !important" | | |||
{|style="background:#d8f800; border:1px solid #1e276b; border-collapse:collapse" | |||
!style="background:#d8f800; border:1px solid #1e276b; width:51px !important" | | |||
!style="background:#EAECF0; width:29px !important" | | |||
|} | |||
|} | |||
|- | |||
!style="background:#EAECF0"|Handling: | |||
|align="center"|'''56''' | |||
{|style="background:white; border:1px solid #1e276b; border-collapse:collapse" | |||
!style="background:#white; width:84px !important" | | |||
{|style="background:#d8f800; border:1px solid #1e276b; border-collapse:collapse" | |||
!style="background:#d8f800; border:1px solid #1e276b; width:56px !important" | | |||
!style="background:#EAECF0; width:24px !important" | | |||
|} | |||
|} | |||
|- | |||
!style="background:#EAECF0"|Drift: | |||
|align="center"|'''21''' | |||
{|style="background:white; border:1px solid #1e276b; border-collapse:collapse" | |||
!style="background:#white; width:84px !important" | | |||
{|style="background:#d8f800; border:1px solid #1e276b; border-collapse:collapse" | |||
!style="background:#d8f800; border:1px solid #1e276b; width:21px !important" | | |||
!style="background:#EAECF0; width:59px !important" | | |||
|} | |||
|} | |||
|- | |||
!style="background:#EAECF0"|Off-Road: | |||
|align="center"|'''45''' | |||
{|style="background:white; border:1px solid #1e276b; border-collapse:collapse" | |||
!style="background:#white; width:84px !important" | | |||
{|style="background:#d8f800; border:1px solid #1e276b; border-collapse:collapse" | |||
!style="background:#d8f800; border:1px solid #1e276b; width:45px !important" | | |||
!style="background:#EAECF0; width:35px !important" | | |||
|} | |||
|} | |||
|- | |||
!style="background:#EAECF0"|Mini-Turbo: | |||
|align="center"|'''48''' | |||
{|style="background:white; border:1px solid #1e276b; border-collapse:collapse" | |||
!style="background:#white; width:84px !important" | | |||
{|style="background:#d8f800; border:1px solid #1e276b; border-collapse:collapse" | |||
!style="background:#d8f800; border:1px solid #1e276b; width:48px !important" | | |||
!style="background:#EAECF0; width:32px !important" | | |||
|} | |||
|} | |||
|} | |||
|- | |||
!style="background:red;color:white"|Unlockable vehicles | |||
|-style="background:#EAECF0" | |||
|style="display:inline-block; background:white" width=260px| | |||
{|border=1 cellspacing=0 cellpadding=1 margin=0 padding=0 style="border:1px solid black; border-collapse:collapse; height:100%" width=100% | |||
|- | |||
!style="background:#EAECF0; height:56px" align="center" colspan=2|<big>'''[[Cheep Charger]]'''</big> | |||
|- | |||
!style="background:white; height:260px" align="center" colspan=2|[[File:Cheep Charger (Baby Mario) Model.png|250x250px]] | |||
|- | |||
!style="background:#EAECF0" width=35%|Type: | |||
|width=65%|'''Kart''' | |||
|- | |||
!style="background:#EAECF0" width=35%|Size: | |||
|width=65%|'''{{color|dodgerblue|Small}}''' | |||
|- | |||
!style="background:#EAECF0"|Speed: | |||
|align="center"|'''34''' | |||
{|style="background:white; border:1px solid #1e276b; border-collapse:collapse" | |||
!style="background:#white; width:84px !important" | | |||
{|style="background:#d8f800; border:1px solid #1e276b; border-collapse:collapse" | |||
!style="background:#d8f800; border:1px solid #1e276b; width:34px !important" | | |||
!style="background:#EAECF0; width:46px !important" | | |||
|} | |||
|} | |||
|- | |||
!style="background:#EAECF0"|Weight: | |||
|align="center"|'''24''' | |||
{|style="background:white; border:1px solid #1e276b; border-collapse:collapse" | |||
!style="background:#white; width:84px !important" | | |||
{|style="background:#d8f800; border:1px solid #1e276b; border-collapse:collapse" | |||
!style="background:#d8f800; border:1px solid #1e276b; width:24px !important" | | |||
!style="background:#EAECF0; width:56px !important" | | |||
|} | |||
|} | |||
|- | |||
!style="background:#EAECF0"|Acceleration: | |||
|align="center"|'''64''' | |||
{|style="background:white; border:1px solid #1e276b; border-collapse:collapse" | |||
!style="background:#white; width:84px !important" | | |||
{|style="background:#d8f800; border:1px solid #1e276b; border-collapse:collapse" | |||
!style="background:#d8f800; border:1px solid #1e276b; width:64px !important" | | |||
!style="background:#EAECF0; width:16px !important" | | |||
|} | |||
|} | |||
|- | |||
!style="background:#EAECF0"|Handling: | |||
|align="center"|'''56''' | |||
{|style="background:white; border:1px solid #1e276b; border-collapse:collapse" | |||
!style="background:#white; width:84px !important" | | |||
{|style="background:#d8f800; border:1px solid #1e276b; border-collapse:collapse" | |||
!style="background:#d8f800; border:1px solid #1e276b; width:56px !important" | | |||
!style="background:#EAECF0; width:24px !important" | | |||
|} | |||
|} | |||
|- | |||
!style="background:#EAECF0"|Drift: | |||
|align="center"|'''59''' | |||
{|style="background:white; border:1px solid #1e276b; border-collapse:collapse" | |||
!style="background:#white; width:84px !important" | | |||
{|style="background:#d8f800; border:1px solid #1e276b; border-collapse:collapse" | |||
!style="background:#d8f800; border:1px solid #1e276b; width:59px !important" | | |||
!style="background:#EAECF0; width:21px !important" | | |||
|} | |||
|} | |||
|- | |||
!style="background:#EAECF0"|Off-Road: | |||
|align="center"|'''45''' | |||
{|style="background:white; border:1px solid #1e276b; border-collapse:collapse" | |||
!style="background:#white; width:84px !important" | | |||
{|style="background:#d8f800; border:1px solid #1e276b; border-collapse:collapse" | |||
!style="background:#d8f800; border:1px solid #1e276b; width:45px !important" | | |||
!style="background:#EAECF0; width:35px !important" | | |||
|} | |||
|} | |||
|- | |||
!style="background:#EAECF0"|Mini-Turbo: | |||
|align="center"|'''54''' | |||
{|style="background:white; border:1px solid #1e276b; border-collapse:collapse" | |||
!style="background:#white; width:84px !important" | | |||
{|style="background:#d8f800; border:1px solid #1e276b; border-collapse:collapse" | |||
!style="background:#d8f800; border:1px solid #1e276b; width:54px !important" | | |||
!style="background:#EAECF0; width:26px !important" | | |||
|} | |||
|} | |||
|- | |||
!colspan=2 style="background:#EAECF0" height=44px|To unlock: | |||
|- | |||
|colspan=2 height=44px|Rank 1 Star in all 50cc Retro Grand Prix Cups | |||
|- | |||
!colspan=2 style="background:#EAECF0"|OR: | |||
|- | |||
|colspan=2 height=44px|Play 1,800 races | |||
|- | |||
!colspan=2 style="background:#EAECF0"|OR: | |||
|- | |||
|colspan=2 height=44px|[[File:X mark.svg|x44px]] | |||
|} | |||
|style="display:inline-block; background:white" width=260px| | |||
{|border=1 cellspacing=0 cellpadding=1 margin=0 padding=0 style="border:1px solid black; border-collapse:collapse; height:100%" width=100% | |||
|- | |||
!style="background:#EAECF0; height:56px" align="center" colspan=2|<big>'''[[Quacker]]'''</big> | |||
|- | |||
!style="background:white; height:260px" align="center" colspan=2|[[File:Quacker (Baby Mario) Model.png|250x250px]] | |||
|- | |||
!style="background:#EAECF0" width=35%|Type: | |||
|width=65%|'''Bike (hang-on type)''' | |||
|- | |||
!style="background:#EAECF0" width=35%|Size: | |||
|width=65%|'''{{color|dodgerblue|Small}}''' | |||
|- | |||
!style="background:#EAECF0"|Speed: | |||
|align="center"|'''32''' | |||
{|style="background:white; border:1px solid #1e276b; border-collapse:collapse" | |||
!style="background:#white; width:84px !important" | | |||
{|style="background:#d8f800; border:1px solid #1e276b; border-collapse:collapse" | |||
!style="background:#d8f800; border:1px solid #1e276b; width:32px !important" | | |||
!style="background:#EAECF0; width:48px !important" | | |||
|} | |||
|} | |||
|- | |||
!style="background:#EAECF0"|Weight: | |||
|align="center"|'''17''' | |||
{|style="background:white; border:1px solid #1e276b; border-collapse:collapse" | |||
!style="background:#white; width:84px !important" | | |||
{|style="background:#d8f800; border:1px solid #1e276b; border-collapse:collapse" | |||
!style="background:#d8f800; border:1px solid #1e276b; width:17px !important" | | |||
!style="background:#EAECF0; width:63px !important" | | |||
|} | |||
|} | |||
|- | |||
!style="background:#EAECF0"|Acceleration: | |||
|align="center"|'''67''' | |||
{|style="background:white; border:1px solid #1e276b; border-collapse:collapse" | |||
!style="background:#white; width:84px !important" | | |||
{|style="background:#d8f800; border:1px solid #1e276b; border-collapse:collapse" | |||
!style="background:#d8f800; border:1px solid #1e276b; width:67px !important" | | |||
!style="background:#EAECF0; width:13px !important" | | |||
|} | |||
|} | |||
|- | |||
!style="background:#EAECF0"|Handling: | |||
|align="center"|'''60''' | |||
{|style="background:white; border:1px solid #1e276b; border-collapse:collapse" | |||
!style="background:#white; width:84px !important" | | |||
{|style="background:#d8f800; border:1px solid #1e276b; border-collapse:collapse" | |||
!style="background:#d8f800; border:1px solid #1e276b; width:60px !important" | | |||
!style="background:#EAECF0; width:20px !important" | | |||
|} | |||
|} | |||
|- | |||
!style="background:#EAECF0"|Drift: | |||
|align="center"|'''62''' | |||
{|style="background:white; border:1px solid #1e276b; border-collapse:collapse" | |||
!style="background:#white; width:84px !important" | | |||
{|style="background:#d8f800; border:1px solid #1e276b; border-collapse:collapse" | |||
!style="background:#d8f800; border:1px solid #1e276b; width:62px !important" | | |||
!style="background:#EAECF0; width:18px !important" | | |||
|} | |||
|} | |||
|- | |||
!style="background:#EAECF0"|Off-Road: | |||
|align="center"|'''48''' | |||
{|style="background:white; border:1px solid #1e276b; border-collapse:collapse" | |||
!style="background:#white; width:84px !important" | | |||
{|style="background:#d8f800; border:1px solid #1e276b; border-collapse:collapse" | |||
!style="background:#d8f800; border:1px solid #1e276b; width:48px !important" | | |||
!style="background:#EAECF0; width:32px !important" | | |||
|} | |||
|} | |||
|- | |||
!style="background:#EAECF0"|Mini-Turbo: | |||
|align="center"|'''57''' | |||
{|style="background:white; border:1px solid #1e276b; border-collapse:collapse" | |||
!style="background:#white; width:84px !important" | | |||
{|style="background:#d8f800; border:1px solid #1e276b; border-collapse:collapse" | |||
!style="background:#d8f800; border:1px solid #1e276b; width:57px !important" | | |||
!style="background:#EAECF0; width:23px !important" | | |||
|} | |||
|} | |||
|- | |||
!colspan=2 style="background:#EAECF0" height=44px|To unlock: | |||
|- | |||
|colspan=2 height=44px|Win the 150cc Star Cup | |||
|- | |||
!colspan=2 style="background:#EAECF0"|OR: | |||
|- | |||
|colspan=2 height=44px|Play 2,400 races | |||
|- | |||
!colspan=2 style="background:#EAECF0"|OR: | |||
|- | |||
|colspan=2 height=44px|[[File:X mark.svg|x44px]] | |||
|} | |||
|style="display:inline-block; background:white" width=260px| | |||
{|border=1 cellspacing=0 cellpadding=1 margin=0 padding=0 style="border:1px solid black; border-collapse:collapse; height:100%" width=100% | |||
|- | |||
!style="background:#EAECF0; height:56px" align="center" colspan=2|<big>'''[[Tiny Titan]]''' [[File:Flag of USA.png|20px]]<br>'''[[Tiny Titan|Rally Romper]]''' [[File:Flag of Europe.png|20px]]</big> | |||
|- | |||
!style="background:white; height:260px" align="center" colspan=2|[[File:Tiny Titan (Baby Mario) Model.png|250x250px]] | |||
|- | |||
!style="background:#EAECF0" width=35%|Type: | |||
|width=65%|'''Kart''' | |||
|- | |||
!style="background:#EAECF0" width=35%|Size: | |||
|width=65%|'''{{color|dodgerblue|Small}}''' | |||
|- | |||
!style="background:#EAECF0"|Speed: | |||
|align="center"|'''46''' | |||
{|style="background:white; border:1px solid #1e276b; border-collapse:collapse" | |||
!style="background:#white; width:84px !important" | | |||
{|style="background:#d8f800; border:1px solid #1e276b; border-collapse:collapse" | |||
!style="background:#d8f800; border:1px solid #1e276b; width:46px !important" | | |||
!style="background:#EAECF0; width:34px !important" | | |||
|} | |||
|} | |||
|- | |||
!style="background:#EAECF0"|Weight: | |||
|align="center"|'''35''' | |||
{|style="background:white; border:1px solid #1e276b; border-collapse:collapse" | |||
!style="background:#white; width:84px !important" | | |||
{|style="background:#d8f800; border:1px solid #1e276b; border-collapse:collapse" | |||
!style="background:#d8f800; border:1px solid #1e276b; width:35px !important" | | |||
!style="background:#EAECF0; width:45px !important" | | |||
|} | |||
|} | |||
|- | |||
!style="background:#EAECF0"|Acceleration: | |||
|align="center"|'''43''' | |||
{|style="background:white; border:1px solid #1e276b; border-collapse:collapse" | |||
!style="background:#white; width:84px !important" | | |||
{|style="background:#d8f800; border:1px solid #1e276b; border-collapse:collapse" | |||
!style="background:#d8f800; border:1px solid #1e276b; width:43px !important" | | |||
!style="background:#EAECF0; width:37px !important" | | |||
|} | |||
|} | |||
|- | |||
!style="background:#EAECF0"|Handling: | |||
|align="center"|'''43''' | |||
{|style="background:white; border:1px solid #1e276b; border-collapse:collapse" | |||
!style="background:#white; width:84px !important" | | |||
{|style="background:#d8f800; border:1px solid #1e276b; border-collapse:collapse" | |||
!style="background:#d8f800; border:1px solid #1e276b; width:43px !important" | | |||
!style="background:#EAECF0; width:37px !important" | | |||
|} | |||
|} | |||
|- | |||
!style="background:#EAECF0"|Drift: | |||
|align="center"|'''29''' | |||
{|style="background:white; border:1px solid #1e276b; border-collapse:collapse" | |||
!style="background:#white; width:84px !important" | | |||
{|style="background:#d8f800; border:1px solid #1e276b; border-collapse:collapse" | |||
!style="background:#d8f800; border:1px solid #1e276b; width:29px !important" | | |||
!style="background:#EAECF0; width:51px !important" | | |||
|} | |||
|} | |||
|- | |||
!style="background:#EAECF0"|Off-Road: | |||
|align="center"|'''64''' | |||
{|style="background:white; border:1px solid #1e276b; border-collapse:collapse" | |||
!style="background:#white; width:84px !important" | | |||
{|style="background:#d8f800; border:1px solid #1e276b; border-collapse:collapse" | |||
!style="background:#d8f800; border:1px solid #1e276b; width:64px !important" | | |||
!style="background:#EAECF0; width:16px !important" | | |||
|} | |||
|} | |||
|- | |||
!style="background:#EAECF0"|Mini-Turbo: | |||
|align="center"|'''40''' | |||
{|style="background:white; border:1px solid #1e276b; border-collapse:collapse" | |||
!style="background:#white; width:84px !important" | | |||
{|style="background:#d8f800; border:1px solid #1e276b; border-collapse:collapse" | |||
!style="background:#d8f800; border:1px solid #1e276b; width:40px !important" | | |||
!style="background:#EAECF0; width:40px !important" | | |||
|} | |||
|} | |||
|- | |||
!colspan=2 style="background:#EAECF0" height=44px|To unlock: | |||
|- | |||
|colspan=2 height=44px|Unlock an Expert Staff Ghost Data record in Time Trials | |||
|- | |||
!colspan=2 style="background:#EAECF0"|OR: | |||
|- | |||
|colspan=2 height=44px|Play 1,200 races | |||
|- | |||
!colspan=2 style="background:#EAECF0"|OR: | |||
|- | |||
|colspan=2 height=44px|Win 50 WFC races | |||
|} | |||
|style="display:inline-block; background:white" width=260px| | |||
{|border=1 cellspacing=0 cellpadding=1 margin=0 padding=0 style="border:1px solid black; border-collapse:collapse; height:100%" width=100% | |||
|- | |||
!style="background:#EAECF0; height:56px" align="center" colspan=2|<big>'''[[Magikruiser]]'''</big> | |||
|- | |||
!style="background:white; height:260px" align="center" colspan=2|[[File:Magikruiser (Baby Mario) Model.png|250x250px]] | |||
|- | |||
!style="background:#EAECF0" width=35%|Type: | |||
|width=65%|'''Bike (hang-on type)''' | |||
|- | |||
!style="background:#EAECF0" width=35%|Size: | |||
|width=65%|'''{{color|dodgerblue|Small}}''' | |||
|- | |||
!style="background:#EAECF0"|Speed: | |||
|align="center"|'''43''' | |||
{|style="background:white; border:1px solid #1e276b; border-collapse:collapse" | |||
!style="background:#white; width:84px !important" | | |||
{|style="background:#d8f800; border:1px solid #1e276b; border-collapse:collapse" | |||
!style="background:#d8f800; border:1px solid #1e276b; width:43px !important" | | |||
!style="background:#EAECF0; width:37px !important" | | |||
|} | |||
|} | |||
|- | |||
!style="background:#EAECF0"|Weight: | |||
|align="center"|'''24''' | |||
{|style="background:white; border:1px solid #1e276b; border-collapse:collapse" | |||
!style="background:#white; width:84px !important" | | |||
{|style="background:#d8f800; border:1px solid #1e276b; border-collapse:collapse" | |||
!style="background:#d8f800; border:1px solid #1e276b; width:24px !important" | | |||
!style="background:#EAECF0; width:56px !important" | | |||
|} | |||
|} | |||
|- | |||
!style="background:#EAECF0"|Acceleration: | |||
|align="center"|'''45''' | |||
{|style="background:white; border:1px solid #1e276b; border-collapse:collapse" | |||
!style="background:#white; width:84px !important" | | |||
{|style="background:#d8f800; border:1px solid #1e276b; border-collapse:collapse" | |||
!style="background:#d8f800; border:1px solid #1e276b; width:45px !important" | | |||
!style="background:#EAECF0; width:35px !important" | | |||
|} | |||
|} | |||
|- | |||
!style="background:#EAECF0"|Handling: | |||
|align="center"|'''45''' | |||
{|style="background:white; border:1px solid #1e276b; border-collapse:collapse" | |||
!style="background:#white; width:84px !important" | | |||
{|style="background:#d8f800; border:1px solid #1e276b; border-collapse:collapse" | |||
!style="background:#d8f800; border:1px solid #1e276b; width:45px !important" | | |||
!style="background:#EAECF0; width:35px !important" | | |||
|} | |||
|} | |||
|- | |||
!style="background:#EAECF0"|Drift: | |||
|align="center"|'''32''' | |||
{|style="background:white; border:1px solid #1e276b; border-collapse:collapse" | |||
!style="background:#white; width:84px !important" | | |||
{|style="background:#d8f800; border:1px solid #1e276b; border-collapse:collapse" | |||
!style="background:#d8f800; border:1px solid #1e276b; width:32px !important" | | |||
!style="background:#EAECF0; width:48px !important" | | |||
|} | |||
|} | |||
|- | |||
!style="background:#EAECF0"|Off-Road: | |||
|align="center"|'''67''' | |||
{|style="background:white; border:1px solid #1e276b; border-collapse:collapse" | |||
!style="background:#white; width:84px !important" | | |||
{|style="background:#d8f800; border:1px solid #1e276b; border-collapse:collapse" | |||
!style="background:#d8f800; border:1px solid #1e276b; width:67px !important" | | |||
!style="background:#EAECF0; width:13px !important" | | |||
|} | |||
|} | |||
|- | |||
!style="background:#EAECF0"|Mini-Turbo: | |||
|align="center"|'''43''' | |||
{|style="background:white; border:1px solid #1e276b; border-collapse:collapse" | |||
!style="background:#white; width:84px !important" | | |||
{|style="background:#d8f800; border:1px solid #1e276b; border-collapse:collapse" | |||
!style="background:#d8f800; border:1px solid #1e276b; width:43px !important" | | |||
!style="background:#EAECF0; width:37px !important" | | |||
|} | |||
|} | |||
|- | |||
!colspan=2 style="background:#EAECF0" height=44px|To unlock: | |||
|- | |||
|colspan=2 height=44px|Play Time Trials on 8 different courses | |||
|- | |||
!colspan=2 style="background:#EAECF0"|OR: | |||
|- | |||
|colspan=2 height=44px|Play 900 races | |||
|- | |||
!colspan=2 style="background:#EAECF0"|OR: | |||
|- | |||
|colspan=2 height=44px|[[File:X mark.svg|x44px]] | |||
|} | |||
|style="display:inline-block; background:white" width=260px| | |||
{|border=1 cellspacing=0 cellpadding=1 margin=0 padding=0 style="border:1px solid black; border-collapse:collapse; height:100%" width=100% | |||
|- | |||
!style="background:#EAECF0; height:56px" align="center" colspan=2|<big>'''[[Blue Falcon]]'''</big> | |||
|- | |||
!style="background:white; height:260px" align="center" colspan=2|[[File:Blue Falcon (Baby Mario) Model.png|250x250px]] | |||
|- | |||
!style="background:#EAECF0" width=35%|Type: | |||
|width=65%|'''Kart''' | |||
|- | |||
!style="background:#EAECF0" width=35%|Size: | |||
|width=65%|'''{{color|dodgerblue|Small}}''' | |||
|- | |||
!style="background:#EAECF0"|Speed: | |||
|align="center"|'''60''' | |||
{|style="background:white; border:1px solid #1e276b; border-collapse:collapse" | |||
!style="background:#white; width:84px !important" | | |||
{|style="background:#d8f800; border:1px solid #1e276b; border-collapse:collapse" | |||
!style="background:#d8f800; border:1px solid #1e276b; width:60px !important" | | |||
!style="background:#EAECF0; width:20px !important" | | |||
|} | |||
|} | |||
|- | |||
!style="background:#EAECF0"|Weight: | |||
|align="center"|'''29''' | |||
{|style="background:white; border:1px solid #1e276b; border-collapse:collapse" | |||
!style="background:#white; width:84px !important" | | |||
{|style="background:#d8f800; border:1px solid #1e276b; border-collapse:collapse" | |||
!style="background:#d8f800; border:1px solid #1e276b; width:29px !important" | | |||
!style="background:#EAECF0; width:51px !important" | | |||
|} | |||
|} | |||
|- | |||
!style="background:#EAECF0"|Acceleration: | |||
|align="center"|'''35''' | |||
{|style="background:white; border:1px solid #1e276b; border-collapse:collapse" | |||
!style="background:#white; width:84px !important" | | |||
{|style="background:#d8f800; border:1px solid #1e276b; border-collapse:collapse" | |||
!style="background:#d8f800; border:1px solid #1e276b; width:35px !important" | | |||
!style="background:#EAECF0; width:45px !important" | | |||
|} | |||
|} | |||
|- | |||
!style="background:#EAECF0"|Handling: | |||
|align="center"|'''29''' | |||
{|style="background:white; border:1px solid #1e276b; border-collapse:collapse" | |||
!style="background:#white; width:84px !important" | | |||
{|style="background:#d8f800; border:1px solid #1e276b; border-collapse:collapse" | |||
!style="background:#d8f800; border:1px solid #1e276b; width:29px !important" | | |||
!style="background:#EAECF0; width:51px !important" | | |||
|} | |||
|} | |||
|- | |||
!style="background:#EAECF0"|Drift: | |||
|align="center"|'''43''' | |||
{|style="background:white; border:1px solid #1e276b; border-collapse:collapse" | |||
!style="background:#white; width:84px !important" | | |||
{|style="background:#d8f800; border:1px solid #1e276b; border-collapse:collapse" | |||
!style="background:#d8f800; border:1px solid #1e276b; width:43px !important" | | |||
!style="background:#EAECF0; width:37px !important" | | |||
|} | |||
|} | |||
|- | |||
!style="background:#EAECF0"|Off-Road: | |||
|align="center"|'''24''' | |||
{|style="background:white; border:1px solid #1e276b; border-collapse:collapse" | |||
!style="background:#white; width:84px !important" | | |||
{|style="background:#d8f800; border:1px solid #1e276b; border-collapse:collapse" | |||
!style="background:#d8f800; border:1px solid #1e276b; width:24px !important" | | |||
!style="background:#EAECF0; width:56px !important" | | |||
|} | |||
|} | |||
|- | |||
!style="background:#EAECF0"|Mini-Turbo: | |||
|align="center"|'''29''' | |||
{|style="background:white; border:1px solid #1e276b; border-collapse:collapse" | |||
!style="background:#white; width:84px !important" | | |||
{|style="background:#d8f800; border:1px solid #1e276b; border-collapse:collapse" | |||
!style="background:#d8f800; border:1px solid #1e276b; width:29px !important" | | |||
!style="background:#EAECF0; width:51px !important" | | |||
|} | |||
|} | |||
|- | |||
!colspan=2 style="background:#EAECF0" height=44px|To unlock: | |||
|- | |||
|colspan=2 height=44px|Win the Mirror Lightning Cup | |||
|- | |||
!colspan=2 style="background:#EAECF0"|OR: | |||
|- | |||
|colspan=2 height=44px|Play 4,200 races | |||
|- | |||
!colspan=2 style="background:#EAECF0"|OR: | |||
|- | |||
|colspan=2 height=44px|[[File:X mark.svg|x44px]] | |||
|} | |||
|style="display:inline-block; background:white" width=260px| | |||
{|border=1 cellspacing=0 cellpadding=1 margin=0 padding=0 style="border:1px solid black; border-collapse:collapse; height:100%" width=100% | |||
|- | |||
!style="background:#EAECF0; height:56px" align="center" colspan=2|<big>'''[[Jet Bubble]]''' [[File:Flag of USA.png|20px]]<br>'''[[Jet Bubble|Bubble Bike]]''' [[File:Flag of Europe.png|20px]]</big> | |||
|- | |||
!style="background:white; height:260px" align="center" colspan=2|[[File:Jet Bubble (Baby Mario) Model.png|250x250px]] | |||
|- | |||
!style="background:#EAECF0" width=35%|Type: | |||
|width=65%|'''Bike (hang-on type)''' | |||
|- | |||
!style="background:#EAECF0" width=35%|Size: | |||
|width=65%|'''{{color|dodgerblue|Small}}''' | |||
|- | |||
!style="background:#EAECF0"|Speed: | |||
|align="center"|'''48''' | |||
{|style="background:white; border:1px solid #1e276b; border-collapse:collapse" | |||
!style="background:#white; width:84px !important" | | |||
{|style="background:#d8f800; border:1px solid #1e276b; border-collapse:collapse" | |||
!style="background:#d8f800; border:1px solid #1e276b; width:48px !important" | | |||
!style="background:#EAECF0; width:32px !important" | | |||
|} | |||
|} | |||
|- | |||
!style="background:#EAECF0"|Weight: | |||
|align="center"|'''27''' | |||
{|style="background:white; border:1px solid #1e276b; border-collapse:collapse" | |||
!style="background:#white; width:84px !important" | | |||
{|style="background:#d8f800; border:1px solid #1e276b; border-collapse:collapse" | |||
!style="background:#d8f800; border:1px solid #1e276b; width:27px !important" | | |||
!style="background:#EAECF0; width:53px !important" | | |||
|} | |||
|} | |||
|- | |||
!style="background:#EAECF0"|Acceleration: | |||
|align="center"|'''40''' | |||
{|style="background:white; border:1px solid #1e276b; border-collapse:collapse" | |||
!style="background:#white; width:84px !important" | | |||
{|style="background:#d8f800; border:1px solid #1e276b; border-collapse:collapse" | |||
!style="background:#d8f800; border:1px solid #1e276b; width:40px !important" | | |||
!style="background:#EAECF0; width:40px !important" | | |||
|} | |||
|} | |||
|- | |||
!style="background:#EAECF0"|Handling: | |||
|align="center"|'''40''' | |||
{|style="background:white; border:1px solid #1e276b; border-collapse:collapse" | |||
!style="background:#white; width:84px !important" | | |||
{|style="background:#d8f800; border:1px solid #1e276b; border-collapse:collapse" | |||
!style="background:#d8f800; border:1px solid #1e276b; width:40px !important" | | |||
!style="background:#EAECF0; width:40px !important" | | |||
|} | |||
|} | |||
|- | |||
!style="background:#EAECF0"|Drift: | |||
|align="center"|'''45''' | |||
{|style="background:white; border:1px solid #1e276b; border-collapse:collapse" | |||
!style="background:#white; width:84px !important" | | |||
{|style="background:#d8f800; border:1px solid #1e276b; border-collapse:collapse" | |||
!style="background:#d8f800; border:1px solid #1e276b; width:45px !important" | | |||
!style="background:#EAECF0; width:35px !important" | | |||
|} | |||
|} | |||
|- | |||
!style="background:#EAECF0"|Off-Road: | |||
|align="center"|'''35''' | |||
{|style="background:white; border:1px solid #1e276b; border-collapse:collapse" | |||
!style="background:#white; width:84px !important" | | |||
{|style="background:#d8f800; border:1px solid #1e276b; border-collapse:collapse" | |||
!style="background:#d8f800; border:1px solid #1e276b; width:35px !important" | | |||
!style="background:#EAECF0; width:45px !important" | | |||
|} | |||
|} | |||
|- | |||
!style="background:#EAECF0"|Mini-Turbo: | |||
|align="center"|'''37''' | |||
{|style="background:white; border:1px solid #1e276b; border-collapse:collapse" | |||
!style="background:#white; width:84px !important" | | |||
{|style="background:#d8f800; border:1px solid #1e276b; border-collapse:collapse" | |||
!style="background:#d8f800; border:1px solid #1e276b; width:37px !important" | | |||
!style="background:#EAECF0; width:43px !important" | | |||
|} | |||
|} | |||
|- | |||
!colspan=2 style="background:#EAECF0" height=44px|To unlock: | |||
|- | |||
|colspan=2 height=44px|Win the Mirror Leaf Cup | |||
|- | |||
!colspan=2 style="background:#EAECF0"|OR: | |||
|- | |||
|colspan=2 height=44px|Play 3,900 races | |||
|- | |||
!colspan=2 style="background:#EAECF0"|OR: | |||
|- | |||
|colspan=2 height=44px|[[File:X mark.svg|x44px]] | |||
|} | |||
|style="display:inline-block; background:white" width=260px| | |||
{|border=1 cellspacing=0 cellpadding=1 margin=0 padding=0 style="border:1px solid black; border-collapse:collapse; height:100%" width=100% | |||
|- | |||
!style="background:#EAECF0; height:56px" align="center" colspan=2|<big>'''[[Super Blooper (kart)|Super Blooper]]''' [[File:Flag of USA.png|20px]]<br>'''[[Super Blooper (kart)|Turbo Blooper]]''' [[File:Flag of Europe.png|20px]]</big> | |||
|- | |||
!style="background:white; height:260px" align="center" colspan=2|[[File:Super Blooper (Mario) Model.png|250x250px]] | |||
|- | |||
!style="background:#EAECF0" width=35%|Type: | |||
|width=65%|'''Kart''' | |||
|- | |||
!style="background:#EAECF0" width=35%|Size: | |||
|width=65%|'''{{color|green|Medium}}''' | |||
|- | |||
!style="background:#EAECF0"|Speed: | |||
|align="center"|'''50''' | |||
{|style="background:white; border:1px solid #1e276b; border-collapse:collapse" | |||
!style="background:#white; width:84px !important" | | |||
{|style="background:#d8f800; border:1px solid #1e276b; border-collapse:collapse" | |||
!style="background:#d8f800; border:1px solid #1e276b; width:50px !important" | | |||
!style="background:#EAECF0; width:30px !important" | | |||
|} | |||
|} | |||
|- | |||
!style="background:#EAECF0"|Weight: | |||
|align="center"|'''40''' | |||
{|style="background:white; border:1px solid #1e276b; border-collapse:collapse" | |||
!style="background:#white; width:84px !important" | | |||
{|style="background:#d8f800; border:1px solid #1e276b; border-collapse:collapse" | |||
!style="background:#d8f800; border:1px solid #1e276b; width:40px !important" | | |||
!style="background:#EAECF0; width:40px !important" | | |||
|} | |||
|} | |||
|- | |||
!style="background:#EAECF0"|Acceleration: | |||
|align="center"|'''35''' | |||
{|style="background:white; border:1px solid #1e276b; border-collapse:collapse" | |||
!style="background:#white; width:84px !important" | | |||
{|style="background:#d8f800; border:1px solid #1e276b; border-collapse:collapse" | |||
!style="background:#d8f800; border:1px solid #1e276b; width:35px !important" | | |||
!style="background:#EAECF0; width:45px !important" | | |||
|} | |||
|} | |||
|- | |||
!style="background:#EAECF0"|Handling: | |||
|align="center"|'''37''' | |||
{|style="background:white; border:1px solid #1e276b; border-collapse:collapse" | |||
!style="background:#white; width:84px !important" | | |||
{|style="background:#d8f800; border:1px solid #1e276b; border-collapse:collapse" | |||
!style="background:#d8f800; border:1px solid #1e276b; width:37px !important" | | |||
!style="background:#EAECF0; width:43px !important" | | |||
|} | |||
|} | |||
|- | |||
!style="background:#EAECF0"|Drift: | |||
|align="center"|'''21''' | |||
{|style="background:white; border:1px solid #1e276b; border-collapse:collapse" | |||
!style="background:#white; width:84px !important" | | |||
{|style="background:#d8f800; border:1px solid #1e276b; border-collapse:collapse" | |||
!style="background:#d8f800; border:1px solid #1e276b; width:21px !important" | | |||
!style="background:#EAECF0; width:59px !important" | | |||
|} | |||
|} | |||
|- | |||
!style="background:#EAECF0"|Off-Road: | |||
|align="center"|'''54''' | |||
{|style="background:white; border:1px solid #1e276b; border-collapse:collapse" | |||
!style="background:#white; width:84px !important" | | |||
{|style="background:#d8f800; border:1px solid #1e276b; border-collapse:collapse" | |||
!style="background:#d8f800; border:1px solid #1e276b; width:54px !important" | | |||
!style="background:#EAECF0; width:26px !important" | | |||
|} | |||
|} | |||
|- | |||
!style="background:#EAECF0"|Mini-Turbo: | |||
|align="center"|'''35''' | |||
{|style="background:white; border:1px solid #1e276b; border-collapse:collapse" | |||
!style="background:#white; width:84px !important" | | |||
{|style="background:#d8f800; border:1px solid #1e276b; border-collapse:collapse" | |||
!style="background:#d8f800; border:1px solid #1e276b; width:35px !important" | | |||
!style="background:#EAECF0; width:45px !important" | | |||
|} | |||
|} | |||
|- | |||
!colspan=2 style="background:#EAECF0" height=44px|To unlock: | |||
|- | |||
|colspan=2 height=44px|Win the 50cc Leaf Cup | |||
|- | |||
!colspan=2 style="background:#EAECF0"|OR: | |||
|- | |||
|colspan=2 height=44px|Play 300 races | |||
|- | |||
!colspan=2 style="background:#EAECF0"|OR: | |||
|- | |||
|colspan=2 height=44px|[[File:X mark.svg|x44px]] | |||
|} | |||
{| border= | |style="display:inline-block; background:white" width=260px| | ||
{|border=1 cellspacing=0 cellpadding=1 margin=0 padding=0 style="border:1px solid black; border-collapse:collapse; height:100%" width=100% | |||
|- | |- | ||
! | !style="background:#EAECF0; height:56px" align="center" colspan=2|<big>'''[[Zip Zip]]''' [[File:Flag of USA.png|20px]]<br>'''[[Zip Zip|Rapide]]''' [[File:Flag of Europe.png|20px]]</big> | ||
|- | |- | ||
| | !style="background:white; height:260px" align="center" colspan=2|[[File:Zip Zip (Mario) Model.png|250x250px]] | ||
|- | |- | ||
|''' | !style="background:#EAECF0" width=35%|Type: | ||
|width=65%|'''Kart''' | |||
|- | |- | ||
|''' | !style="background:#EAECF0" width=35%|Size: | ||
|width=65%|'''{{color|green|Medium}}''' | |||
|- | |- | ||
|''' | !style="background:#EAECF0"|Speed: | ||
|align="center"|'''41''' | |||
{|style="background:white; border:1px solid #1e276b; border-collapse:collapse" | |||
!style="background:#white; width:84px !important" | | |||
{|style="background:#d8f800; border:1px solid #1e276b; border-collapse:collapse" | |||
!style="background:#d8f800; border:1px solid #1e276b; width:41px !important" | | |||
!style="background:#EAECF0; width:39px !important" | | |||
|} | |||
|} | |||
|- | |- | ||
|''' | !style="background:#EAECF0"|Weight: | ||
|align="center"|'''35''' | |||
{|style="background:white; border:1px solid #1e276b; border-collapse:collapse" | |||
!style="background:#white; width:84px !important" | | |||
{|style="background:#d8f800; border:1px solid #1e276b; border-collapse:collapse" | |||
!style="background:#d8f800; border:1px solid #1e276b; width:35px !important" | | |||
!style="background:#EAECF0; width:45px !important" | | |||
|} | |||
|} | |||
|- | |- | ||
|''' | !style="background:#EAECF0"|Acceleration: | ||
| | |align="center"|'''45''' | ||
! | {|style="background:white; border:1px solid #1e276b; border-collapse:collapse" | ||
!style="background:#white; width:84px !important" | | |||
{|style="background:#d8f800; border:1px solid #1e276b; border-collapse:collapse" | |||
!style="background:#d8f800; border:1px solid #1e276b; width:45px !important" | | |||
!style="background:#EAECF0; width:35px !important" | | |||
|} | |||
|} | |||
|- | |- | ||
|''' | !style="background:#EAECF0"|Handling: | ||
|align="center"|'''51''' | |||
{|style="background:white; border:1px solid #1e276b; border-collapse:collapse" | |||
!style="background:#white; width:84px !important" | | |||
{|style="background:#d8f800; border:1px solid #1e276b; border-collapse:collapse" | |||
!style="background:#d8f800; border:1px solid #1e276b; width:51px !important" | | |||
!style="background:#EAECF0; width:29px !important" | | |||
|} | |||
|} | |||
|- | |- | ||
|''' | !style="background:#EAECF0"|Drift: | ||
|align="center"|'''29''' | |||
{|style="background:white; border:1px solid #1e276b; border-collapse:collapse" | |||
!style="background:#white; width:84px !important" | | |||
{|style="background:#d8f800; border:1px solid #1e276b; border-collapse:collapse" | |||
!style="background:#d8f800; border:1px solid #1e276b; width:29px !important" | | |||
!style="background:#EAECF0; width:51px !important" | | |||
|} | |||
|} | |||
|- | |- | ||
|'''[[ | !style="background:#EAECF0"|Off-Road: | ||
|align="center"|'''62''' | |||
{|style="background:white; border:1px solid #1e276b; border-collapse:collapse" | |||
!style="background:#white; width:84px !important" | | |||
{|style="background:#d8f800; border:1px solid #1e276b; border-collapse:collapse" | |||
!style="background:#d8f800; border:1px solid #1e276b; width:62px !important" | | |||
!style="background:#EAECF0; width:18px !important" | | |||
|} | |||
|} | |||
|- | |||
!style="background:#EAECF0"|Mini-Turbo: | |||
|align="center"|'''45''' | |||
{|style="background:white; border:1px solid #1e276b; border-collapse:collapse" | |||
!style="background:#white; width:84px !important" | | |||
{|style="background:#d8f800; border:1px solid #1e276b; border-collapse:collapse" | |||
!style="background:#d8f800; border:1px solid #1e276b; width:45px !important" | | |||
!style="background:#EAECF0; width:35px !important" | | |||
|} | |||
|} | |||
|- | |||
!colspan=2 style="background:#EAECF0" height=44px|To unlock: | |||
|- | |||
|colspan=2 height=44px|Win the 100cc Lightning Cup | |||
|- | |||
!colspan=2 style="background:#EAECF0"|OR: | |||
|- | |||
|colspan=2 height=44px|Play 2,100 races | |||
|- | |||
!colspan=2 style="background:#EAECF0"|OR: | |||
|- | |||
|colspan=2 height=44px|[[File:X mark.svg|x44px]] | |||
|} | |||
|style="display:inline-block; background:white" width=260px| | |||
{|border=1 cellspacing=0 cellpadding=1 margin=0 padding=0 style="border:1px solid black; border-collapse:collapse; height:100%" width=100% | |||
|- | |||
!style="background:#EAECF0; height:56px" align="center" colspan=2|<big>'''[[Daytripper]]''' [[File:Flag of USA.png|20px]]<br>'''[[Daytripper|Royal Racer]]''' [[File:Flag of Europe.png|20px]]</big> | |||
|- | |||
!style="background:white; height:260px" align="center" colspan=2|[[File:Daytripper (Peach) Model.png|250x250px]] | |||
|- | |||
!style="background:#EAECF0" width=35%|Type: | |||
|width=65%|'''Kart''' | |||
|- | |||
!style="background:#EAECF0" width=35%|Size: | |||
|width=65%|'''{{color|green|Medium}}''' | |||
|- | |||
!style="background:#EAECF0"|Speed: | |||
|align="center"|'''34''' | |||
{|style="background:white; border:1px solid #1e276b; border-collapse:collapse" | |||
!style="background:#white; width:84px !important" | | |||
{|style="background:#d8f800; border:1px solid #1e276b; border-collapse:collapse" | |||
!style="background:#d8f800; border:1px solid #1e276b; width:34px !important" | | |||
!style="background:#EAECF0; width:46px !important" | | |||
|} | |||
|} | |||
|- | |||
!style="background:#EAECF0"|Weight: | |||
|align="center"|'''45''' | |||
{|style="background:white; border:1px solid #1e276b; border-collapse:collapse" | |||
!style="background:#white; width:84px !important" | | |||
{|style="background:#d8f800; border:1px solid #1e276b; border-collapse:collapse" | |||
!style="background:#d8f800; border:1px solid #1e276b; width:45px !important" | | |||
!style="background:#EAECF0; width:35px !important" | | |||
|} | |||
|} | |||
|- | |- | ||
|''' | !style="background:#EAECF0"|Acceleration: | ||
|align="center"|'''51''' | |||
{|style="background:white; border:1px solid #1e276b; border-collapse:collapse" | |||
!style="background:#white; width:84px !important" | | |||
{|style="background:#d8f800; border:1px solid #1e276b; border-collapse:collapse" | |||
!style="background:#d8f800; border:1px solid #1e276b; width:51px !important" | | |||
!style="background:#EAECF0; width:29px !important" | | |||
|} | |||
|} | |||
|- | |- | ||
|''' | !style="background:#EAECF0"|Handling: | ||
|align="center"|'''59''' | |||
{|style="background:white; border:1px solid #1e276b; border-collapse:collapse" | |||
!style="background:#white; width:84px !important" | | |||
{|style="background:#d8f800; border:1px solid #1e276b; border-collapse:collapse" | |||
!style="background:#d8f800; border:1px solid #1e276b; width:59px !important" | | |||
!style="background:#EAECF0; width:21px !important" | | |||
|} | |||
|} | |||
|- | |- | ||
|''' | !style="background:#EAECF0"|Drift: | ||
| | |align="center"|'''32''' | ||
! | {|style="background:white; border:1px solid #1e276b; border-collapse:collapse" | ||
!style="background:#white; width:84px !important" | | |||
{|style="background:#d8f800; border:1px solid #1e276b; border-collapse:collapse" | |||
!style="background:#d8f800; border:1px solid #1e276b; width:32px !important" | | |||
!style="background:#EAECF0; width:48px !important" | | |||
|} | |||
|} | |||
|- | |- | ||
|''' | !style="background:#EAECF0"|Off-Road: | ||
|align="center"|'''48''' | |||
{|style="background:white; border:1px solid #1e276b; border-collapse:collapse" | |||
!style="background:#white; width:84px !important" | | |||
{|style="background:#d8f800; border:1px solid #1e276b; border-collapse:collapse" | |||
!style="background:#d8f800; border:1px solid #1e276b; width:48px !important" | | |||
!style="background:#EAECF0; width:32px !important" | | |||
|} | |||
|} | |||
|- | |- | ||
|''' | !style="background:#EAECF0"|Mini-Turbo: | ||
|align="center"|'''54''' | |||
{|style="background:white; border:1px solid #1e276b; border-collapse:collapse" | |||
!style="background:#white; width:84px !important" | | |||
{|style="background:#d8f800; border:1px solid #1e276b; border-collapse:collapse" | |||
!style="background:#d8f800; border:1px solid #1e276b; width:54px !important" | | |||
!style="background:#EAECF0; width:26px !important" | | |||
|} | |||
|} | |||
|- | |- | ||
| | !colspan=2 style="background:#EAECF0" height=44px|To unlock: | ||
|- | |- | ||
| | |colspan=2 height=44px|Win the 150cc Leaf Cup | ||
|- | |- | ||
| | !colspan=2 style="background:#EAECF0"|OR: | ||
|- | |- | ||
| | |colspan=2 height=44px|Play 2,700 races | ||
|- | |- | ||
| | !colspan=2 style="background:#EAECF0"|OR: | ||
|- | |- | ||
| | |colspan=2 height=44px|[[File:X mark.svg|x44px]] | ||
|} | |||
|style="display:inline-block; background:white" width=260px| | |||
{|border=1 cellspacing=0 cellpadding=1 margin=0 padding=0 style="border:1px solid black; border-collapse:collapse; height:100%" width=100% | |||
|- | |- | ||
|'''[[ | !style="background:#EAECF0; height:56px" align="center" colspan=2|<big>'''[[Sneakster]]''' [[File:Flag of USA.png|20px]]<br>'''[[Sneakster|Nitrocycle]]''' [[File:Flag of Europe.png|20px]]</big> | ||
|- | |- | ||
| | !style="background:white; height:260px" align="center" colspan=2|[[File:Sneakster (Mario) Model.png|250x250px]] | ||
|- | |- | ||
|''' | !style="background:#EAECF0" width=35%|Type: | ||
|width=65%|'''Bike (hang-on type)''' | |||
|- | |- | ||
!style="background:#EAECF0" width=35%|Size: | |||
|width=65%|'''{{color|green|Medium}}''' | |||
|- | |- | ||
|''' | !style="background:#EAECF0"|Speed: | ||
|align="center"|'''62''' | |||
{|style="background:white; border:1px solid #1e276b; border-collapse:collapse" | |||
!style="background:#white; width:84px !important" | | |||
{|style="background:#d8f800; border:1px solid #1e276b; border-collapse:collapse" | |||
!style="background:#d8f800; border:1px solid #1e276b; width:41px !important" | | |||
!style="background:#EAECF0; width:18px !important" | | |||
|} | |||
|} | |||
|- | |- | ||
|''' | !style="background:#EAECF0"|Weight: | ||
|align="center"|'''40''' | |||
{|style="background:white; border:1px solid #1e276b; border-collapse:collapse" | |||
!style="background:#white; width:84px !important" | | |||
{|style="background:#d8f800; border:1px solid #1e276b; border-collapse:collapse" | |||
!style="background:#d8f800; border:1px solid #1e276b; width:40px !important" | | |||
!style="background:#EAECF0; width:40px !important" | | |||
|} | |||
|} | |||
|- | |- | ||
|''' | !style="background:#EAECF0"|Acceleration: | ||
|align="center"|'''29''' | |||
{|style="background:white; border:1px solid #1e276b; border-collapse:collapse" | |||
!style="background:#white; width:84px !important" | | |||
{|style="background:#d8f800; border:1px solid #1e276b; border-collapse:collapse" | |||
!style="background:#d8f800; border:1px solid #1e276b; width:29px !important" | | |||
!style="background:#EAECF0; width:51px !important" | | |||
|} | |||
|} | |||
|- | |- | ||
|''' | !style="background:#EAECF0"|Handling: | ||
|align="center"|'''27''' | |||
{|style="background:white; border:1px solid #1e276b; border-collapse:collapse" | |||
!style="background:#white; width:84px !important" | | |||
{|style="background:#d8f800; border:1px solid #1e276b; border-collapse:collapse" | |||
!style="background:#d8f800; border:1px solid #1e276b; width:27px !important" | | |||
!style="background:#EAECF0; width:53px !important" | | |||
|} | |||
|} | |||
|- | |- | ||
|''' | !style="background:#EAECF0"|Drift: | ||
|align="center"|'''40''' | |||
{|style="background:white; border:1px solid #1e276b; border-collapse:collapse" | |||
!style="background:#white; width:84px !important" | | |||
{|style="background:#d8f800; border:1px solid #1e276b; border-collapse:collapse" | |||
!style="background:#d8f800; border:1px solid #1e276b; width:40px !important" | | |||
!style="background:#EAECF0; width:40px !important" | | |||
|} | |||
|} | |||
|- | |- | ||
|''' | !style="background:#EAECF0"|Off-Road: | ||
| | |align="center"|'''24''' | ||
! | {|style="background:white; border:1px solid #1e276b; border-collapse:collapse" | ||
!style="background:#white; width:84px !important" | | |||
{|style="background:#d8f800; border:1px solid #1e276b; border-collapse:collapse" | |||
!style="background:#d8f800; border:1px solid #1e276b; width:24px !important" | | |||
!style="background:#EAECF0; width:56px !important" | | |||
|} | |||
|} | |||
|- | |- | ||
|''' | !style="background:#EAECF0"|Mini-Turbo: | ||
|align="center"|'''27''' | |||
{|style="background:white; border:1px solid #1e276b; border-collapse:collapse" | |||
!style="background:#white; width:84px !important" | | |||
{|style="background:#d8f800; border:1px solid #1e276b; border-collapse:collapse" | |||
!style="background:#d8f800; border:1px solid #1e276b; width:27px !important" | | |||
!style="background:#EAECF0; width:53px !important" | | |||
|} | |||
|} | |||
|- | |- | ||
| | !colspan=2 style="background:#EAECF0" height=44px|To unlock: | ||
|- | |- | ||
| | |colspan=2 height=44px|Rank 1 Star in all 100cc Wii Grand Prix Cups | ||
|- | |- | ||
| | !colspan=2 style="background:#EAECF0"|OR: | ||
|- | |- | ||
| | |colspan=2 height=44px|Play 3,300 races | ||
|- | |- | ||
| | !colspan=2 style="background:#EAECF0"|OR: | ||
|- | |- | ||
|colspan=2 height=44px|[[File:X mark.svg|x44px]] | |||
|} | |} | ||
=== | |style="display:inline-block; background:white" width=260px| | ||
{|border=1 cellspacing=0 cellpadding=1 margin=0 padding=0 style="border:1px solid black; border-collapse:collapse; height:100%" width=100% | |||
|- | |||
!style="background:#EAECF0; height:56px" align="center" colspan=2|<big>'''[[B Dasher Mk. 2|Sprinter]]''' [[File:Flag of USA.png|20px]]<br>'''[[B Dasher Mk. 2]]''' [[File:Flag of Europe.png|20px]]</big> | |||
|- | |||
!style="background:white; height:260px" align="center" colspan=2|[[File:Sprinter (Mario) Model.png|250x250px]] | |||
|- | |||
!style="background:#EAECF0" width=35%|Type: | |||
|width=65%|'''Kart''' | |||
|- | |||
!style="background:#EAECF0" width=35%|Size: | |||
|width=65%|'''{{color|green|Medium}}''' | |||
|- | |||
!style="background:#EAECF0"|Speed: | |||
|align="center"|'''64''' | |||
{|style="background:white; border:1px solid #1e276b; border-collapse:collapse" | |||
!style="background:#white; width:84px !important" | | |||
{|style="background:#d8f800; border:1px solid #1e276b; border-collapse:collapse" | |||
!style="background:#d8f800; border:1px solid #1e276b; width:64px !important" | | |||
!style="background:#EAECF0; width:16px !important" | | |||
|} | |||
|} | |||
|- | |||
!style="background:#EAECF0"|Weight: | |||
|align="center"|'''48''' | |||
{|style="background:white; border:1px solid #1e276b; border-collapse:collapse" | |||
!style="background:#white; width:84px !important" | | |||
{|style="background:#d8f800; border:1px solid #1e276b; border-collapse:collapse" | |||
!style="background:#d8f800; border:1px solid #1e276b; width:48px !important" | | |||
!style="background:#EAECF0; width:32px !important" | | |||
|} | |||
|} | |||
|- | |||
!style="background:#EAECF0"|Acceleration: | |||
|align="center"|'''27''' | |||
{|style="background:white; border:1px solid #1e276b; border-collapse:collapse" | |||
!style="background:#white; width:84px !important" | | |||
{|style="background:#d8f800; border:1px solid #1e276b; border-collapse:collapse" | |||
!style="background:#d8f800; border:1px solid #1e276b; width:27px !important" | | |||
!style="background:#EAECF0; width:53px !important" | | |||
|} | |||
|} | |||
|- | |||
!style="background:#EAECF0"|Handling: | |||
|align="center"|'''24''' | |||
{|style="background:white; border:1px solid #1e276b; border-collapse:collapse" | |||
!style="background:#white; width:84px !important" | | |||
{|style="background:#d8f800; border:1px solid #1e276b; border-collapse:collapse" | |||
!style="background:#d8f800; border:1px solid #1e276b; width:24px !important" | | |||
!style="background:#EAECF0; width:56px !important" | | |||
|} | |||
|} | |||
|- | |||
!style="background:#EAECF0"|Drift: | |||
|align="center"|'''37''' | |||
{|style="background:white; border:1px solid #1e276b; border-collapse:collapse" | |||
!style="background:#white; width:84px !important" | | |||
{|style="background:#d8f800; border:1px solid #1e276b; border-collapse:collapse" | |||
!style="background:#d8f800; border:1px solid #1e276b; width:37px !important" | | |||
!style="background:#EAECF0; width:43px !important" | | |||
|} | |||
|} | |||
|- | |||
!style="background:#EAECF0"|Off-Road: | |||
|align="center"|'''21''' | |||
{|style="background:white; border:1px solid #1e276b; border-collapse:collapse" | |||
!style="background:#white; width:84px !important" | | |||
{|style="background:#d8f800; border:1px solid #1e276b; border-collapse:collapse" | |||
!style="background:#d8f800; border:1px solid #1e276b; width:21px !important" | | |||
!style="background:#EAECF0; width:59px !important" | | |||
|} | |||
|} | |||
|- | |||
!style="background:#EAECF0"|Mini-Turbo: | |||
|align="center"|'''24''' | |||
{|style="background:white; border:1px solid #1e276b; border-collapse:collapse" | |||
!style="background:#white; width:84px !important" | | |||
{|style="background:#d8f800; border:1px solid #1e276b; border-collapse:collapse" | |||
!style="background:#d8f800; border:1px solid #1e276b; width:24px !important" | | |||
!style="background:#EAECF0; width:56px !important" | | |||
|} | |||
|} | |||
|- | |||
!colspan=2 style="background:#EAECF0" height=44px|To unlock: | |||
|- | |||
|colspan=2 height=44px|Unlock 24 Expert Staff Ghost Data Records in Time Trials | |||
|- | |||
!colspan=2 style="background:#EAECF0"|OR: | |||
|- | |||
|colspan=2 height=44px|Play 4,650 races | |||
|- | |||
!colspan=2 style="background:#EAECF0"|OR: | |||
|- | |||
|colspan=2 height=44px|Win 3000 WFC races | |||
|} | |||
|style="display:inline-block; background:white" width=260px| | |||
{|border=1 cellspacing=0 cellpadding=1 margin=0 padding=0 style="border:1px solid black; border-collapse:collapse; height:100%" width=100% | |||
|- | |||
!style="background:#EAECF0; height:56px" align="center" colspan=2|<big>'''[[Dolphin Dasher]]'''</big> | |||
|- | |||
!style="background:white; height:260px" align="center" colspan=2|[[File:Dolphin Dasher (Mario) Model.png|250x250px]] | |||
|- | |||
!style="background:#EAECF0" width=35%|Type: | |||
|width=65%|'''Bike (hang-on type)''' | |||
|- | |||
!style="background:#EAECF0" width=35%|Size: | |||
|width=65%|'''{{color|green|Medium}}''' | |||
|- | |||
!style="background:#EAECF0"|Speed: | |||
|align="center"|'''48''' | |||
{|style="background:white; border:1px solid #1e276b; border-collapse:collapse" | |||
!style="background:#white; width:84px !important" | | |||
{|style="background:#d8f800; border:1px solid #1e276b; border-collapse:collapse" | |||
!style="background:#d8f800; border:1px solid #1e276b; width:48px !important" | | |||
!style="background:#EAECF0; width:32px !important" | | |||
|} | |||
|} | |||
|- | |||
!style="background:#EAECF0"|Weight: | |||
|align="center"|'''43''' | |||
{|style="background:white; border:1px solid #1e276b; border-collapse:collapse" | |||
!style="background:#white; width:84px !important" | | |||
{|style="background:#d8f800; border:1px solid #1e276b; border-collapse:collapse" | |||
!style="background:#d8f800; border:1px solid #1e276b; width:43px !important" | | |||
!style="background:#EAECF0; width:37px !important" | | |||
|} | |||
|} | |||
|- | |||
!style="background:#EAECF0"|Acceleration: | |||
|align="center"|'''37''' | |||
{|style="background:white; border:1px solid #1e276b; border-collapse:collapse" | |||
!style="background:#white; width:84px !important" | | |||
{|style="background:#d8f800; border:1px solid #1e276b; border-collapse:collapse" | |||
!style="background:#d8f800; border:1px solid #1e276b; width:37px !important" | | |||
!style="background:#EAECF0; width:43px !important" | | |||
|} | |||
|} | |||
|- | |||
!style="background:#EAECF0"|Handling: | |||
|align="center"|'''40''' | |||
{|style="background:white; border:1px solid #1e276b; border-collapse:collapse" | |||
!style="background:#white; width:84px !important" | | |||
{|style="background:#d8f800; border:1px solid #1e276b; border-collapse:collapse" | |||
!style="background:#d8f800; border:1px solid #1e276b; width:40px !important" | | |||
!style="background:#EAECF0; width:40px !important" | | |||
|} | |||
|} | |||
|- | |||
!style="background:#EAECF0"|Drift: | |||
|align="center"|'''24''' | |||
{|style="background:white; border:1px solid #1e276b; border-collapse:collapse" | |||
!style="background:#white; width:84px !important" | | |||
{|style="background:#d8f800; border:1px solid #1e276b; border-collapse:collapse" | |||
!style="background:#d8f800; border:1px solid #1e276b; width:24px !important" | | |||
!style="background:#EAECF0; width:56px !important" | | |||
|} | |||
|} | |||
|- | |||
!style="background:#EAECF0"|Off-Road: | |||
|align="center"|'''56''' | |||
{|style="background:white; border:1px solid #1e276b; border-collapse:collapse" | |||
!style="background:#white; width:84px !important" | | |||
{|style="background:#d8f800; border:1px solid #1e276b; border-collapse:collapse" | |||
!style="background:#d8f800; border:1px solid #1e276b; width:56px !important" | | |||
!style="background:#EAECF0; width:24px !important" | | |||
|} | |||
|} | |||
|- | |||
!style="background:#EAECF0"|Mini-Turbo: | |||
|align="center"|'''37''' | |||
{|style="background:white; border:1px solid #1e276b; border-collapse:collapse" | |||
!style="background:#white; width:84px !important" | | |||
{|style="background:#d8f800; border:1px solid #1e276b; border-collapse:collapse" | |||
!style="background:#d8f800; border:1px solid #1e276b; width:37px !important" | | |||
!style="background:#EAECF0; width:43px !important" | | |||
|} | |||
|} | |||
|- | |||
!colspan=2 style="background:#EAECF0" height=44px|To unlock: | |||
|- | |||
|colspan=2 height=44px|Win the Mirror Star Cup | |||
|- | |||
!colspan=2 style="background:#EAECF0"|OR: | |||
|- | |||
|colspan=2 height=44px|Play 3,750 races | |||
|- | |||
!colspan=2 style="background:#EAECF0"|OR: | |||
|- | |||
|colspan=2 height=44px|[[File:X mark.svg|x44px]] | |||
|} | |||
|style="display:inline-block; background:white" width=260px| | |||
{|border=1 cellspacing=0 cellpadding=1 margin=0 padding=0 style="border:1px solid black; border-collapse:collapse; height:100%" width=100% | |||
|- | |||
!style="background:#EAECF0; height:56px" align="center" colspan=2|<big>'''[[Piranha Prowler]]'''</big> | |||
|- | |||
!style="background:white; height:260px" align="center" colspan=2|[[File:Piranha Prowler (Bowser) Model.png|250x250px]] | |||
|- | |||
!style="background:#EAECF0" width=35%|Type: | |||
|width=65%|'''Kart''' | |||
|- | |||
!style="background:#EAECF0" width=35%|Size: | |||
|width=65%|'''{{color|red|Large}}''' | |||
|- | |||
!style="background:#EAECF0"|Speed: | |||
|align="center"|'''55''' | |||
{|style="background:white; border:1px solid #1e276b; border-collapse:collapse" | |||
!style="background:#white; width:84px !important" | | |||
{|style="background:#d8f800; border:1px solid #1e276b; border-collapse:collapse" | |||
!style="background:#d8f800; border:1px solid #1e276b; width:55px !important" | | |||
!style="background:#EAECF0; width:25px !important" | | |||
|} | |||
|} | |||
|- | |||
!style="background:#EAECF0"|Weight: | |||
|align="center"|'''67''' | |||
{|style="background:white; border:1px solid #1e276b; border-collapse:collapse" | |||
!style="background:#white; width:84px !important" | | |||
{|style="background:#d8f800; border:1px solid #1e276b; border-collapse:collapse" | |||
!style="background:#d8f800; border:1px solid #1e276b; width:67px !important" | | |||
!style="background:#EAECF0; width:13px !important" | | |||
|} | |||
|} | |||
|- | |||
!style="background:#EAECF0"|Acceleration: | |||
|align="center"|'''29''' | |||
{|style="background:white; border:1px solid #1e276b; border-collapse:collapse" | |||
!style="background:#white; width:84px !important" | | |||
{|style="background:#d8f800; border:1px solid #1e276b; border-collapse:collapse" | |||
!style="background:#d8f800; border:1px solid #1e276b; width:29px !important" | | |||
!style="background:#EAECF0; width:51px !important" | | |||
|} | |||
|} | |||
|- | |||
!style="background:#EAECF0"|Handling: | |||
|align="center"|'''35''' | |||
{|style="background:white; border:1px solid #1e276b; border-collapse:collapse" | |||
!style="background:#white; width:84px !important" | | |||
{|style="background:#d8f800; border:1px solid #1e276b; border-collapse:collapse" | |||
!style="background:#d8f800; border:1px solid #1e276b; width:35px !important" | | |||
!style="background:#EAECF0; width:45px !important" | | |||
|} | |||
|} | |||
|- | |||
!style="background:#EAECF0"|Drift: | |||
|align="center"|'''35''' | |||
{|style="background:white; border:1px solid #1e276b; border-collapse:collapse" | |||
!style="background:#white; width:84px !important" | | |||
{|style="background:#d8f800; border:1px solid #1e276b; border-collapse:collapse" | |||
!style="background:#d8f800; border:1px solid #1e276b; width:35px !important" | | |||
!style="background:#EAECF0; width:45px !important" | | |||
|} | |||
|} | |||
|- | |||
!style="background:#EAECF0"|Off-Road: | |||
|align="center"|'''29''' | |||
{|style="background:white; border:1px solid #1e276b; border-collapse:collapse" | |||
!style="background:#white; width:84px !important" | | |||
{|style="background:#d8f800; border:1px solid #1e276b; border-collapse:collapse" | |||
!style="background:#d8f800; border:1px solid #1e276b; width:29px !important" | | |||
!style="background:#EAECF0; width:51px !important" | | |||
|} | |||
|} | |||
|- | |||
!style="background:#EAECF0"|Mini-Turbo: | |||
|align="center"|'''27''' | |||
{|style="background:white; border:1px solid #1e276b; border-collapse:collapse" | |||
!style="background:#white; width:84px !important" | | |||
{|style="background:#d8f800; border:1px solid #1e276b; border-collapse:collapse" | |||
!style="background:#d8f800; border:1px solid #1e276b; width:27px !important" | | |||
!style="background:#EAECF0; width:53px !important" | | |||
|} | |||
|} | |||
|- | |||
!colspan=2 style="background:#EAECF0" height=44px|To unlock: | |||
|- | |||
|colspan=2 height=44px|Win the 50cc Special Cup | |||
|- | |||
!colspan=2 style="background:#EAECF0"|OR: | |||
|- | |||
|colspan=2 height=44px|Play 600 races | |||
|- | |||
!colspan=2 style="background:#EAECF0"|OR: | |||
|- | |||
|colspan=2 height=44px|[[File:X mark.svg|x44px]] | |||
|} | |||
|style="display:inline-block; background:white" width=260px| | |||
{|border=1 cellspacing=0 cellpadding=1 margin=0 padding=0 style="border:1px solid black; border-collapse:collapse; height:100%" width=100% | |||
|- | |||
!style="background:#EAECF0; height:56px" align="center" colspan=2|<big>'''[[Shooting Star (bike)|Shooting Star]]''' [[File:Flag of USA.png|20px]]<br>'''[[Shooting Star (bike)|Twinkle Star]]''' [[File:Flag of Europe.png|20px]]</big> | |||
|- | |||
!style="background:white; height:260px" align="center" colspan=2|[[File:Shooting Star (Waluigi) Model.png|250x250px]] | |||
|- | |||
!style="background:#EAECF0" width=35%|Type: | |||
|width=65%|'''Bike (drift type)''' | |||
|- | |||
!style="background:#EAECF0" width=35%|Size: | |||
|width=65%|'''{{color|red|Large}}''' | |||
|- | |||
!style="background:#EAECF0"|Speed: | |||
|align="center"|'''50''' | |||
{|style="background:white; border:1px solid #1e276b; border-collapse:collapse" | |||
!style="background:#white; width:84px !important" | | |||
{|style="background:#d8f800; border:1px solid #1e276b; border-collapse:collapse" | |||
!style="background:#d8f800; border:1px solid #1e276b; width:50px !important" | | |||
!style="background:#EAECF0; width:30px !important" | | |||
|} | |||
|} | |||
|- | |||
!style="background:#EAECF0"|Weight: | |||
|align="center"|'''48''' | |||
{|style="background:white; border:1px solid #1e276b; border-collapse:collapse" | |||
!style="background:#white; width:84px !important" | | |||
{|style="background:#d8f800; border:1px solid #1e276b; border-collapse:collapse" | |||
!style="background:#d8f800; border:1px solid #1e276b; width:48px !important" | | |||
!style="background:#EAECF0; width:32px !important" | | |||
|} | |||
|} | |||
|- | |||
!style="background:#EAECF0"|Acceleration: | |||
|align="center"|'''29''' | |||
{|style="background:white; border:1px solid #1e276b; border-collapse:collapse" | |||
!style="background:#white; width:84px !important" | | |||
{|style="background:#d8f800; border:1px solid #1e276b; border-collapse:collapse" | |||
!style="background:#d8f800; border:1px solid #1e276b; width:29px !important" | | |||
!style="background:#EAECF0; width:51px !important" | | |||
|} | |||
|} | |||
|- | |||
!style="background:#EAECF0"|Handling: | |||
|align="center"|'''32''' | |||
{|style="background:white; border:1px solid #1e276b; border-collapse:collapse" | |||
!style="background:#white; width:84px !important" | | |||
{|style="background:#d8f800; border:1px solid #1e276b; border-collapse:collapse" | |||
!style="background:#d8f800; border:1px solid #1e276b; width:32px !important" | | |||
!style="background:#EAECF0; width:48px !important" | | |||
|} | |||
|} | |||
|- | |||
!style="background:#EAECF0"|Drift: | |||
|align="center"|'''59''' | |||
{|style="background:white; border:1px solid #1e276b; border-collapse:collapse" | |||
!style="background:#white; width:84px !important" | | |||
{|style="background:#d8f800; border:1px solid #1e276b; border-collapse:collapse" | |||
!style="background:#d8f800; border:1px solid #1e276b; width:59px !important" | | |||
!style="background:#EAECF0; width:21px !important" | | |||
|} | |||
|} | |||
|- | |||
!style="background:#EAECF0"|Off-Road: | |||
|align="center"|'''27''' | |||
{|style="background:white; border:1px solid #1e276b; border-collapse:collapse" | |||
!style="background:#white; width:84px !important" | | |||
{|style="background:#d8f800; border:1px solid #1e276b; border-collapse:collapse" | |||
!style="background:#d8f800; border:1px solid #1e276b; width:27px !important" | | |||
!style="background:#EAECF0; width:53px !important" | | |||
|} | |||
|} | |||
|- | |||
!style="background:#EAECF0"|Mini-Turbo: | |||
|align="center"|'''59''' | |||
{|style="background:white; border:1px solid #1e276b; border-collapse:collapse" | |||
!style="background:#white; width:84px !important" | | |||
{|style="background:#d8f800; border:1px solid #1e276b; border-collapse:collapse" | |||
!style="background:#d8f800; border:1px solid #1e276b; width:59px !important" | | |||
!style="background:#EAECF0; width:21px !important" | | |||
|} | |||
|} | |||
|- | |||
!colspan=2 style="background:#EAECF0" height=44px|To unlock: | |||
|- | |||
|colspan=2 height=44px|Win the 100cc Star Cup | |||
|- | |||
!colspan=2 style="background:#EAECF0"|OR: | |||
|- | |||
|colspan=2 height=44px|Play 1,500 races | |||
|- | |||
!colspan=2 style="background:#EAECF0"|OR: | |||
|- | |||
|colspan=2 height=44px|[[File:X mark.svg|x44px]] | |||
|} | |||
== | |style="display:inline-block; background:white" width=260px| | ||
[[File: | {|border=1 cellspacing=0 cellpadding=1 margin=0 padding=0 style="border:1px solid black; border-collapse:collapse; height:100%" width=100% | ||
|- | |||
!style="background:#EAECF0; height:56px" align="center" colspan=2|<big>'''[[Jetsetter]]''' [[File:Flag of USA.png|20px]]<br>'''[[Jetsetter|Aero Glider]]''' [[File:Flag of Europe.png|20px]]</big> | |||
|- | |||
!style="background:white; height:260px" align="center" colspan=2|[[File:Jetsetter (Wario) Model.png|250x250px]] | |||
|- | |||
!style="background:#EAECF0" width=35%|Type: | |||
|width=65%|'''Kart''' | |||
|- | |||
!style="background:#EAECF0" width=35%|Size: | |||
|width=65%|'''{{color|red|Large}}''' | |||
|- | |||
!style="background:#EAECF0"|Speed: | |||
|align="center"|'''69''' | |||
{|style="background:white; border:1px solid #1e276b; border-collapse:collapse" | |||
!style="background:#white; width:84px !important" | | |||
{|style="background:#d8f800; border:1px solid #1e276b; border-collapse:collapse" | |||
!style="background:#d8f800; border:1px solid #1e276b; width:69px !important" | | |||
!style="background:#EAECF0; width:11px !important" | | |||
|} | |||
|} | |||
|- | |||
!style="background:#EAECF0"|Weight: | |||
|align="center"|'''56''' | |||
{|style="background:white; border:1px solid #1e276b; border-collapse:collapse" | |||
!style="background:#white; width:84px !important" | | |||
{|style="background:#d8f800; border:1px solid #1e276b; border-collapse:collapse" | |||
!style="background:#d8f800; border:1px solid #1e276b; width:56px !important" | | |||
!style="background:#EAECF0; width:24px !important" | | |||
|} | |||
|} | |||
|- | |||
!style="background:#EAECF0"|Acceleration: | |||
|align="center"|'''21''' | |||
{|style="background:white; border:1px solid #1e276b; border-collapse:collapse" | |||
!style="background:#white; width:84px !important" | | |||
{|style="background:#d8f800; border:1px solid #1e276b; border-collapse:collapse" | |||
!style="background:#d8f800; border:1px solid #1e276b; width:21px !important" | | |||
!style="background:#EAECF0; width:59px !important" | | |||
|} | |||
|} | |||
|- | |||
!style="background:#EAECF0"|Handling: | |||
|align="center"|'''17''' | |||
{|style="background:white; border:1px solid #1e276b; border-collapse:collapse" | |||
!style="background:#white; width:84px !important" | | |||
{|style="background:#d8f800; border:1px solid #1e276b; border-collapse:collapse" | |||
!style="background:#d8f800; border:1px solid #1e276b; width:17px !important" | | |||
!style="background:#EAECF0; width:63px !important" | | |||
|} | |||
|} | |||
|- | |||
!style="background:#EAECF0"|Drift: | |||
|align="center"|'''27''' | |||
{|style="background:white; border:1px solid #1e276b; border-collapse:collapse" | |||
!style="background:#white; width:84px !important" | | |||
{|style="background:#d8f800; border:1px solid #1e276b; border-collapse:collapse" | |||
!style="background:#d8f800; border:1px solid #1e276b; width:27px !important" | | |||
!style="background:#EAECF0; width:53px !important" | | |||
|} | |||
|} | |||
|- | |||
!style="background:#EAECF0"|Off-Road: | |||
|align="center"|'''16''' | |||
{|style="background:white; border:1px solid #1e276b; border-collapse:collapse" | |||
!style="background:#white; width:84px !important" | | |||
{|style="background:#d8f800; border:1px solid #1e276b; border-collapse:collapse" | |||
!style="background:#d8f800; border:1px solid #1e276b; width:16px !important" | | |||
!style="background:#EAECF0; width:64px !important" | | |||
|} | |||
|} | |||
|- | |||
!style="background:#EAECF0"|Mini-Turbo: | |||
|align="center"|'''16''' | |||
{|style="background:white; border:1px solid #1e276b; border-collapse:collapse" | |||
!style="background:#white; width:84px !important" | | |||
{|style="background:#d8f800; border:1px solid #1e276b; border-collapse:collapse" | |||
!style="background:#d8f800; border:1px solid #1e276b; width:16px !important" | | |||
!style="background:#EAECF0; width:64px !important" | | |||
|} | |||
|} | |||
|- | |||
!colspan=2 style="background:#EAECF0" height=44px|To unlock: | |||
|- | |||
|colspan=2 height=44px|Rank 1 Star in all 150cc Retro Grand Prix Cups | |||
|- | |||
!colspan=2 style="background:#EAECF0"|OR: | |||
|- | |||
|colspan=2 height=44px|Play 4,500 races | |||
|- | |||
!colspan=2 style="background:#EAECF0"|OR: | |||
|- | |||
|colspan=2 height=44px|[[File:X mark.svg|x44px]] | |||
|} | |||
|style="display:inline-block; background:white" width=260px| | |||
{|border=1 cellspacing=0 cellpadding=1 margin=0 padding=0 style="border:1px solid black; border-collapse:collapse; height:100%" width=100% | |||
|- | |||
!style="background:#EAECF0; height:56px" align="center" colspan=2|<big>'''[[Spear]]''' [[File:Flag of USA.png|20px]]<br>'''[[Spear|Torpedo]]''' [[File:Flag of Europe.png|20px]]</big> | |||
|- | |||
!style="background:white; height:260px" align="center" colspan=2|[[File:Spear (Waluigi) Model.png|250x250px]] | |||
|- | |||
!style="background:#EAECF0" width=35%|Type: | |||
|width=65%|'''Bike (hang-on type)''' | |||
|- | |||
!style="background:#EAECF0" width=35%|Size: | |||
|width=65%|'''{{color|red|Large}}''' | |||
|- | |||
!style="background:#EAECF0"|Speed: | |||
|align="center"|'''67''' | |||
{|style="background:white; border:1px solid #1e276b; border-collapse:collapse" | |||
!style="background:#white; width:84px !important" | | |||
{|style="background:#d8f800; border:1px solid #1e276b; border-collapse:collapse" | |||
!style="background:#d8f800; border:1px solid #1e276b; width:67px !important" | | |||
!style="background:#EAECF0; width:23px !important" | | |||
|} | |||
|} | |||
|- | |||
!style="background:#EAECF0"|Weight: | |||
|align="center"|'''56''' | |||
{|style="background:white; border:1px solid #1e276b; border-collapse:collapse" | |||
!style="background:#white; width:84px !important" | | |||
{|style="background:#d8f800; border:1px solid #1e276b; border-collapse:collapse" | |||
!style="background:#d8f800; border:1px solid #1e276b; width:56px !important" | | |||
!style="background:#EAECF0; width:24px !important" | | |||
|} | |||
|} | |||
|- | |||
!style="background:#EAECF0"|Acceleration: | |||
|align="center"|'''24''' | |||
{|style="background:white; border:1px solid #1e276b; border-collapse:collapse" | |||
!style="background:#white; width:84px !important" | | |||
{|style="background:#d8f800; border:1px solid #1e276b; border-collapse:collapse" | |||
!style="background:#d8f800; border:1px solid #1e276b; width:24px !important" | | |||
!style="background:#EAECF0; width:56px !important" | | |||
|} | |||
|} | |||
|- | |||
!style="background:#EAECF0"|Handling: | |||
|align="center"|'''18''' | |||
{|style="background:white; border:1px solid #1e276b; border-collapse:collapse" | |||
!style="background:#white; width:84px !important" | | |||
{|style="background:#d8f800; border:1px solid #1e276b; border-collapse:collapse" | |||
!style="background:#d8f800; border:1px solid #1e276b; width:18px !important" | | |||
!style="background:#EAECF0; width:62px !important" | | |||
|} | |||
|} | |||
|- | |||
!style="background:#EAECF0"|Drift: | |||
|align="center"|'''29''' | |||
{|style="background:white; border:1px solid #1e276b; border-collapse:collapse" | |||
!style="background:#white; width:84px !important" | | |||
{|style="background:#d8f800; border:1px solid #1e276b; border-collapse:collapse" | |||
!style="background:#d8f800; border:1px solid #1e276b; width:29px !important" | | |||
!style="background:#EAECF0; width:51px !important" | | |||
|} | |||
|} | |||
|- | |||
!style="background:#EAECF0"|Off-Road: | |||
|align="center"|'''18''' | |||
{|style="background:white; border:1px solid #1e276b; border-collapse:collapse" | |||
!style="background:#white; width:84px !important" | | |||
{|style="background:#d8f800; border:1px solid #1e276b; border-collapse:collapse" | |||
!style="background:#d8f800; border:1px solid #1e276b; width:18px !important" | | |||
!style="background:#EAECF0; width:62px !important" | | |||
|} | |||
|} | |||
|- | |||
!style="background:#EAECF0"|Mini-Turbo: | |||
|align="center"|'''18''' | |||
{|style="background:white; border:1px solid #1e276b; border-collapse:collapse" | |||
!style="background:#white; width:84px !important" | | |||
{|style="background:#d8f800; border:1px solid #1e276b; border-collapse:collapse" | |||
!style="background:#d8f800; border:1px solid #1e276b; width:18px !important" | | |||
!style="background:#EAECF0; width:62px !important" | | |||
|} | |||
|} | |||
|- | |||
!colspan=2 style="background:#EAECF0" height=44px|To unlock: | |||
|- | |||
|colspan=2 height=44px|Unlock 12 Expert Staff Ghost Data records in Time Trials | |||
|- | |||
!colspan=2 style="background:#EAECF0"|OR: | |||
|- | |||
|colspan=2 height=44px|Play 3,600 races | |||
|- | |||
!colspan=2 style="background:#EAECF0"|OR: | |||
|- | |||
|colspan=2 height=44px|[[File:X mark.svg|x44px]] | |||
|} | |||
|style="display:inline-block; background:white" width=260px| | |||
{|border=1 cellspacing=0 cellpadding=1 margin=0 padding=0 style="border:1px solid black; border-collapse:collapse; height:100%" width=100% | |||
|- | |||
!style="background:#EAECF0; height:56px" align="center" colspan=2|<big>'''[[Honeycoupe]]''' [[File:Flag of USA.png|20px]]<br>'''[[Honeycoupe|Dragonetti]]''' [[File:Flag of Europe.png|20px]]</big> | |||
|- | |||
!style="background:white; height:260px" align="center" colspan=2|[[File:Honeycoupe (Donkey Kong) Model.png|250x250px]] | |||
|- | |||
!style="background:#EAECF0" width=35%|Type: | |||
|width=65%|'''Kart''' | |||
|- | |||
!style="background:#EAECF0" width=35%|Size: | |||
|width=65%|'''{{color|red|Large}}''' | |||
|- | |||
!style="background:#EAECF0"|Speed: | |||
|align="center"|'''53''' | |||
{|style="background:white; border:1px solid #1e276b; border-collapse:collapse" | |||
!style="background:#white; width:84px !important" | | |||
{|style="background:#d8f800; border:1px solid #1e276b; border-collapse:collapse" | |||
!style="background:#d8f800; border:1px solid #1e276b; width:50px !important" | | |||
!style="background:#EAECF0; width:27px !important" | | |||
|} | |||
|} | |||
|- | |||
!style="background:#EAECF0"|Weight: | |||
|align="center"|'''62''' | |||
{|style="background:white; border:1px solid #1e276b; border-collapse:collapse" | |||
!style="background:#white; width:84px !important" | | |||
{|style="background:#d8f800; border:1px solid #1e276b; border-collapse:collapse" | |||
!style="background:#d8f800; border:1px solid #1e276b; width:62px !important" | | |||
!style="background:#EAECF0; width:18px !important" | | |||
|} | |||
|} | |||
|- | |||
!style="background:#EAECF0"|Acceleration: | |||
|align="center"|'''27''' | |||
{|style="background:white; border:1px solid #1e276b; border-collapse:collapse" | |||
!style="background:#white; width:84px !important" | | |||
{|style="background:#d8f800; border:1px solid #1e276b; border-collapse:collapse" | |||
!style="background:#d8f800; border:1px solid #1e276b; width:27px !important" | | |||
!style="background:#EAECF0; width:53px !important" | | |||
|} | |||
|} | |||
|- | |||
!style="background:#EAECF0"|Handling: | |||
|align="center"|'''29''' | |||
{|style="background:white; border:1px solid #1e276b; border-collapse:collapse" | |||
!style="background:#white; width:84px !important" | | |||
{|style="background:#d8f800; border:1px solid #1e276b; border-collapse:collapse" | |||
!style="background:#d8f800; border:1px solid #1e276b; width:29px !important" | | |||
!style="background:#EAECF0; width:51px !important" | | |||
|} | |||
|} | |||
|- | |||
!style="background:#EAECF0"|Drift: | |||
|align="center"|'''56''' | |||
{|style="background:white; border:1px solid #1e276b; border-collapse:collapse" | |||
!style="background:#white; width:84px !important" | | |||
{|style="background:#d8f800; border:1px solid #1e276b; border-collapse:collapse" | |||
!style="background:#d8f800; border:1px solid #1e276b; width:56px !important" | | |||
!style="background:#EAECF0; width:24px !important" | | |||
|} | |||
|} | |||
|- | |||
!style="background:#EAECF0"|Off-Road: | |||
|align="center"|'''24''' | |||
{|style="background:white; border:1px solid #1e276b; border-collapse:collapse" | |||
!style="background:#white; width:84px !important" | | |||
{|style="background:#d8f800; border:1px solid #1e276b; border-collapse:collapse" | |||
!style="background:#d8f800; border:1px solid #1e276b; width:24px !important" | | |||
!style="background:#EAECF0; width:56px !important" | | |||
|} | |||
|} | |||
|- | |||
!style="background:#EAECF0"|Mini-Turbo: | |||
|align="center"|'''56''' | |||
{|style="background:white; border:1px solid #1e276b; border-collapse:collapse" | |||
!style="background:#white; width:84px !important" | | |||
{|style="background:#d8f800; border:1px solid #1e276b; border-collapse:collapse" | |||
!style="background:#d8f800; border:1px solid #1e276b; width:56px !important" | | |||
!style="background:#EAECF0; width:24px !important" | | |||
|} | |||
|} | |||
|- | |||
!colspan=2 style="background:#EAECF0" height=44px|To unlock: | |||
|- | |||
|colspan=2 height=44px|Win the 150cc Lightning Cup | |||
|- | |||
!colspan=2 style="background:#EAECF0"|OR: | |||
|- | |||
|colspan=2 height=44px|Play 3,000 races | |||
|- | |||
!colspan=2 style="background:#EAECF0"|OR: | |||
|- | |||
|colspan=2 height=44px|[[File:X mark.svg|x44px]] | |||
|} | |||
=== | |style="display:inline-block; background:white" width=260px| | ||
{|border=1 cellspacing=0 cellpadding=1 margin=0 padding=0 style="border:1px solid black; border-collapse:collapse; height:100%" width=100% | |||
|- | |||
!style="background:#EAECF0; height:56px" align="center" colspan=2|<big>'''[[Phantom (bike)|Phantom]]'''</big> | |||
|- | |||
!style="background:white; height:260px" align="center" colspan=2|[[File:Phantom (Waluigi) Model.png|250x250px]] | |||
|- | |||
!style="background:#EAECF0" width=35%|Type: | |||
|width=65%|'''Bike (drift type)''' | |||
|- | |||
!style="background:#EAECF0" width=35%|Size: | |||
|width=65%|'''{{color|red|Large}}''' | |||
|- | |||
!style="background:#EAECF0"|Speed: | |||
|align="center"|'''43''' | |||
{|style="background:white; border:1px solid #1e276b; border-collapse:collapse" | |||
!style="background:#white; width:84px !important" | | |||
{|style="background:#d8f800; border:1px solid #1e276b; border-collapse:collapse" | |||
!style="background:#d8f800; border:1px solid #1e276b; width:43px !important" | | |||
!style="background:#EAECF0; width:34px !important" | | |||
|} | |||
|} | |||
|- | |||
!style="background:#EAECF0"|Weight: | |||
|align="center"|'''51''' | |||
{|style="background:white; border:1px solid #1e276b; border-collapse:collapse" | |||
!style="background:#white; width:84px !important" | | |||
{|style="background:#d8f800; border:1px solid #1e276b; border-collapse:collapse" | |||
!style="background:#d8f800; border:1px solid #1e276b; width:51px !important" | | |||
!style="background:#EAECF0; width:29px !important" | | |||
|} | |||
|} | |||
|- | |||
!style="background:#EAECF0"|Acceleration: | |||
|align="center"|'''43''' | |||
{|style="background:white; border:1px solid #1e276b; border-collapse:collapse" | |||
!style="background:#white; width:84px !important" | | |||
{|style="background:#d8f800; border:1px solid #1e276b; border-collapse:collapse" | |||
!style="background:#d8f800; border:1px solid #1e276b; width:43px !important" | | |||
!style="background:#EAECF0; width:34px !important" | | |||
|} | |||
|} | |||
|- | |||
!style="background:#EAECF0"|Handling: | |||
|align="center"|'''48''' | |||
{|style="background:white; border:1px solid #1e276b; border-collapse:collapse" | |||
!style="background:#white; width:84px !important" | | |||
{|style="background:#d8f800; border:1px solid #1e276b; border-collapse:collapse" | |||
!style="background:#d8f800; border:1px solid #1e276b; width:48px !important" | | |||
!style="background:#EAECF0; width:32px !important" | | |||
|} | |||
|} | |||
|- | |||
!style="background:#EAECF0"|Drift: | |||
|align="center"|'''17''' | |||
{|style="background:white; border:1px solid #1e276b; border-collapse:collapse" | |||
!style="background:#white; width:84px !important" | | |||
{|style="background:#d8f800; border:1px solid #1e276b; border-collapse:collapse" | |||
!style="background:#d8f800; border:1px solid #1e276b; width:17px !important" | | |||
!style="background:#EAECF0; width:63px !important" | | |||
|} | |||
|} | |||
|- | |||
!style="background:#EAECF0"|Off-Road: | |||
|align="center"|'''56''' | |||
{|style="background:white; border:1px solid #1e276b; border-collapse:collapse" | |||
!style="background:#white; width:84px !important" | | |||
{|style="background:#d8f800; border:1px solid #1e276b; border-collapse:collapse" | |||
!style="background:#d8f800; border:1px solid #1e276b; width:56px !important" | | |||
!style="background:#EAECF0; width:24px !important" | | |||
|} | |||
|} | |||
|- | |||
!style="background:#EAECF0"|Mini-Turbo: | |||
|align="center"|'''40''' | |||
{|style="background:white; border:1px solid #1e276b; border-collapse:collapse" | |||
!style="background:#white; width:84px !important" | | |||
{|style="background:#d8f800; border:1px solid #1e276b; border-collapse:collapse" | |||
!style="background:#d8f800; border:1px solid #1e276b; width:40px !important" | | |||
!style="background:#EAECF0; width:40px !important" | | |||
|} | |||
|} | |||
|- | |||
!colspan=2 style="background:#EAECF0" height=44px|To unlock: | |||
|- | |||
|colspan=2 height=44px|Win the Mirror Special Cup | |||
|- | |||
!colspan=2 style="background:#EAECF0"|OR: | |||
|- | |||
|colspan=2 height=44px|Play 4,050 races | |||
|- | |||
!colspan=2 style="background:#EAECF0"|OR: | |||
|- | |||
|colspan=2 height=44px|[[File:X mark.svg|x44px]] | |||
|} | |||
|} | |} | ||
=== | ==Internal stats== | ||
The stats reported do not correspond to all the actual in-game stats.<ref>[https://docs.google.com/spreadsheets/d/1ED0T-w9q7_-z5lyBZAmBGBWuhLExSlYDcfZgzrdm7Wg/edit?usp=sharing A direct transcription of the content of the ''driverparam.bin'' and ''kartParam.bin'' files in the ''/Race/Common.szs'' archive of the filesystem of ''Mario Kart Wii''].</ref><ref>[https://wiki.tockdom.com/wiki/DriverParam.bin#Driver_Statistics driverParam.bin]. ''Custom Mario Kart Wiiki''. Retrieved September 5, 2023.</ref><ref>[https://wiki.tockdom.com/wiki/KartParam.bin#Vehicle_Statistics kartParam.bin]. ''Custom Mario Kart Wiiki''. Retrieved September 5, 2023.</ref> | |||
===Characters' bonuses=== | |||
There are 20 different kinds of bonuses, which increase a few statistics of the vehicles:<br> | |||
*'''Weight:''' Increases the weight of the vehicle. | |||
*'''Speed:''' Increases the top speed of the vehicle. | |||
**'''While Steering:''' Increases the top speed of the vehicle while steering, expressed as fraction of the top speed. | |||
*'''Acceleration:''' Increases the acceleration. | |||
**'''Standard Acceleration:''' Increases the first two stage-related acceleration parameters, used when starting from a standstill without mini-turbos (S1 and S2) | |||
**'''Drift Acceleration:''' Increases the last two stage-related acceleration parameters, used when the vehicle is near full speed while drifting (S3 and S4) | |||
*'''Handling:''' Increases how fast the vehicle can turn regularly (angular velocity). | |||
*'''Drift:''' Increases how fast the vehicle can turn while drifting (angular velocity). | |||
*'''Mini-Turbo:''' Increases the duration of the Mini-Turbo boost. | |||
*'''Off-Road Speed:''' Increases the top speed on each kind of off-road section. | |||
*'''Off-Road Handling:''' Increases the Handling on each kind of off-road section.<br> | |||
{|style="text-align:center; max-width:100em; margin:auto; border:2px solid"align=center class="wikitable" | |||
!colspan="11"style="border-top:2px solid black;background:#e0e0e0"|Small characters' bonuses | |||
|- | |||
!colspan="2"|Character | |||
!Baby Mario | |||
!Baby Luigi | |||
!Baby Peach | |||
!Baby Daisy | |||
!Toad | |||
!Toadette | |||
!Koopa Troopa | |||
!Dry Bones | |||
!Small Mii | |||
|- | |||
!colspan="2"|Weight | |||
|0.756 | |||
|0.756 | |||
|0.504 | |||
|0.504 | |||
|0 | |||
|0 | |||
|0 | |||
|0 | |||
|0 | |||
|- | |||
!rowspan="2"|Speed | |||
!Standard (km/h) | |||
|0 | |||
|1.06 | |||
|0.53 | |||
|1.06 | |||
|0 | |||
|0.53 | |||
|0 | |||
|0 | |||
|0.53 | |||
|- | |||
!While steering | |||
|0.000474 | |||
|0.000474 | |||
|0.000474 | |||
|0 | |||
|0.000947 | |||
|0 | |||
|0.000474 | |||
|0.000474 | |||
|0.000947 | |||
|- | |||
!rowspan="2"|Standard Acceleration | |||
!S1 | |||
|0 | |||
|0 | |||
|0.025 | |||
|0 | |||
|0.05 | |||
|0 | |||
|0 | |||
|0.025 | |||
|0 | |||
|- | |||
!S2 | |||
|0 | |||
|0 | |||
|0.035 | |||
|0 | |||
|0.07 | |||
|0 | |||
|0 | |||
|0.035 | |||
|0 | |||
|- | |||
!rowspan="2"|Drift Acceleration | |||
!S3 | |||
|0 | |||
|0 | |||
|0 | |||
|0 | |||
|0.18 | |||
|0 | |||
|0 | |||
|0.09 | |||
|0 | |||
|- | |||
!S4 | |||
|0 | |||
|0 | |||
|0 | |||
|0 | |||
|0.02 | |||
|0 | |||
|0 | |||
|0.01 | |||
|0 | |||
|- | |||
!rowspan="2"|Handling | |||
!Manual | |||
|0.00111 | |||
|0 | |||
|0.000555 | |||
|0 | |||
|0 | |||
|0 | |||
|0.000555 | |||
|0 | |||
|0.000555 | |||
|- | |||
!Auto | |||
|0.00058 | |||
|0 | |||
|0.00029 | |||
|0 | |||
|0 | |||
|0 | |||
|0.00029 | |||
|0 | |||
|0.00029 | |||
|- | |||
!rowspan="2"|Drift | |||
!Manual | |||
|0.000529 | |||
|0 | |||
|0 | |||
|0 | |||
|0 | |||
|0 | |||
|0.000265 | |||
|0 | |||
|0 | |||
|- | |||
!Auto | |||
|0.000444 | |||
|0 | |||
|0 | |||
|0 | |||
|0 | |||
|0 | |||
|0.000222 | |||
|0 | |||
|0 | |||
|- | |||
!colspan="2"|Mini-Turbo (frames) | |||
|0 | |||
|0 | |||
|0 | |||
|4 | |||
|0 | |||
|0 | |||
|8 | |||
|8 | |||
|4 | |||
|- | |||
!rowspan="4"|Off-Road Speed | |||
!Weak Off-road | |||
|0 | |||
|0 | |||
|0 | |||
|0 | |||
|0 | |||
|0.0342 | |||
|0 | |||
|0 | |||
|0 | |||
|- | |||
!Off-road | |||
|0 | |||
|0 | |||
|0 | |||
|0 | |||
|0 | |||
|0.0368 | |||
|0 | |||
|0 | |||
|0 | |||
|- | |||
!Heavy Off-road | |||
|0 | |||
|0 | |||
|0 | |||
|0 | |||
|0 | |||
|0.0226 | |||
|0 | |||
|0 | |||
|0 | |||
|- | |||
!Slippery Off-road | |||
|0 | |||
|0 | |||
|0 | |||
|0 | |||
|0 | |||
|0.01283 | |||
|0 | |||
|0 | |||
|0 | |||
|- | |||
!rowspan="4"|Off-Road Handling | |||
!Slippery Road | |||
|0 | |||
|0 | |||
|0 | |||
|0 | |||
|0 | |||
|0.00526 | |||
|0 | |||
|0 | |||
|0 | |||
|- | |||
!Weak Off-road | |||
|0 | |||
|0 | |||
|0 | |||
|0 | |||
|0 | |||
|0.00736 | |||
|0 | |||
|0 | |||
|0 | |||
|- | |||
!Off-road and Heavy Off-road | |||
|0 | |||
|0 | |||
|0 | |||
|0 | |||
|0 | |||
|0.00526 | |||
|0 | |||
|0 | |||
|0 | |||
|- | |||
!Slippery Off-road | |||
|0 | |||
|0 | |||
|0 | |||
|0 | |||
|0 | |||
|0.00526 | |||
|0 | |||
|0 | |||
|0 | |||
|- | |||
!colspan="11"style="border-top:2px solid black;background:#e0e0e0"|Medium characters' bonuses | |||
|- | |||
!colspan="2"|Character | |||
!Mario | |||
!Luigi | |||
!Peach | |||
!Daisy | |||
!Yoshi | |||
!Birdo | |||
!Diddy Kong | |||
!Bowser Jr. | |||
!Medium Mii | |||
|- | |||
!colspan="2"|Weight | |||
|0.504 | |||
|0.504 | |||
|0 | |||
|0 | |||
|0.252 | |||
|0.252 | |||
|0 | |||
|0 | |||
|0.252 | |||
|- | |||
!rowspan="2"|Speed | |||
!Standard (km/h) | |||
|0 | |||
|0.53 | |||
|0.53 | |||
|1.06 | |||
|0 | |||
|0 | |||
|0 | |||
|0 | |||
|0.53 | |||
|- | |||
!While steering | |||
|0 | |||
|0.000474 | |||
|0 | |||
|0 | |||
|0 | |||
|0.000474 | |||
|0.000474 | |||
|0.000947 | |||
|0 | |||
|- | |||
!rowspan="2"|Standard Acceleration | |||
!S1 | |||
|0.025 | |||
|0 | |||
|0.05 | |||
|0 | |||
|0 | |||
|0 | |||
|0.025 | |||
|0 | |||
|0 | |||
|- | |||
!S2 | |||
|0.035 | |||
|0 | |||
|0.07 | |||
|0 | |||
|0 | |||
|0 | |||
|0.035 | |||
|0 | |||
|0 | |||
|- | |||
!rowspan="2"|Drift Acceleration | |||
!S3 | |||
|0.09 | |||
|0 | |||
|0.18 | |||
|0 | |||
|0.09 | |||
|0 | |||
|0.09 | |||
|0 | |||
|0.09 | |||
|- | |||
!S4 | |||
|0.01 | |||
|0 | |||
|0.02 | |||
|0 | |||
|0.01 | |||
|0 | |||
|0.01 | |||
|0 | |||
|0.01 | |||
|- | |||
!rowspan="2"|Handling | |||
!Manual | |||
|0.000555 | |||
|0 | |||
|0 | |||
|0.000555 | |||
|0 | |||
|0 | |||
|0 | |||
|0 | |||
|0 | |||
|- | |||
!Auto | |||
|0.00029 | |||
|0 | |||
|0 | |||
|0.00029 | |||
|0 | |||
|0 | |||
|0 | |||
|0 | |||
|0 | |||
|- | |||
!rowspan="2"|Drift | |||
!Manual | |||
|0.000265 | |||
|0 | |||
|0 | |||
|0.000265 | |||
|0.000265 | |||
|0 | |||
|0 | |||
|0 | |||
|0.000265 | |||
|- | |||
!Auto | |||
|0.000222 | |||
|0 | |||
|0 | |||
|0.000222 | |||
|0.000222 | |||
|0 | |||
|0 | |||
|0 | |||
|0.000222 | |||
|- | |||
!colspan="2"|Mini-Turbo (frames) | |||
|0 | |||
|0 | |||
|0 | |||
|4 | |||
|0 | |||
|8 | |||
|8 | |||
|4 | |||
|4 | |||
|- | |||
!rowspan="4"|Off-Road Speed | |||
!Weak Off-road | |||
|0 | |||
|0 | |||
|0 | |||
|0 | |||
|0.0342 | |||
|0.0171 | |||
|0 | |||
|0.0171 | |||
|0 | |||
|- | |||
!Off-road | |||
|0 | |||
|0 | |||
|0 | |||
|0 | |||
|0.0368 | |||
|0.0184 | |||
|0 | |||
|0.0184 | |||
|0 | |||
|- | |||
!Heavy Off-road | |||
|0 | |||
|0 | |||
|0 | |||
|0 | |||
|0.0226 | |||
|0.0113 | |||
|0 | |||
|0.0113 | |||
|0 | |||
|- | |||
!Slippery Off-road | |||
|0 | |||
|0 | |||
|0 | |||
|0 | |||
|0.01283 | |||
|0.00641 | |||
|0 | |||
|0.00641 | |||
|0 | |||
|- | |||
!rowspan="4"|Off-Road Handling | |||
!Slippery Road | |||
|0 | |||
|0 | |||
|0 | |||
|0 | |||
|0 | |||
|0 | |||
|0 | |||
|0.00263 | |||
|0 | |||
|- | |||
!Weak Off-road | |||
|0 | |||
|0 | |||
|0 | |||
|0 | |||
|0 | |||
|0 | |||
|0 | |||
|0.00368 | |||
|0 | |||
|- | |||
!Off-road and Heavy Off-road | |||
|0 | |||
|0 | |||
|0 | |||
|0 | |||
|0 | |||
|0 | |||
|0 | |||
|0.00263 | |||
|0 | |||
|- | |||
!Slippery Off-road | |||
|0 | |||
|0 | |||
|0 | |||
|0 | |||
|0 | |||
|0 | |||
|0 | |||
|0.00211 | |||
|0 | |||
|- | |||
!colspan="11"style="border-top:2px solid black;background:#e0e0e0"|Large characters' bonuses | |||
|- | |||
!colspan="2"|Character | |||
!Wario | |||
!Waluigi | |||
!Donkey Kong | |||
!Bowser | |||
!King Boo | |||
!Rosalina | |||
!Funky Kong | |||
!Dry Bowser | |||
!Large Mii | |||
|- | |||
!colspan="2"|Weight | |||
|0.252 | |||
|0 | |||
|0.252 | |||
|0.504 | |||
|0 | |||
|0 | |||
|0 | |||
|0 | |||
|0.252 | |||
|- | |||
!rowspan="2"|Speed | |||
!Standard (km/h) | |||
|0 | |||
|0 | |||
|0 | |||
|0.53 | |||
|0 | |||
|0.53 | |||
|1.06 | |||
|0 | |||
|0.53 | |||
|- | |||
!While steering | |||
|0 | |||
|0 | |||
|0.000474 | |||
|0 | |||
|0.000474 | |||
|0.000947 | |||
|0 | |||
|0.000474 | |||
|0 | |||
|- | |||
!rowspan="2"|Standard Acceleration | |||
!S1 | |||
|0 | |||
|0.05 | |||
|0.025 | |||
|0 | |||
|0 | |||
|0 | |||
|0 | |||
|0 | |||
|0 | |||
|- | |||
!S2 | |||
|0 | |||
|0.07 | |||
|0.035 | |||
|0 | |||
|0 | |||
|0 | |||
|0 | |||
|0 | |||
|0 | |||
|- | |||
!rowspan="2"|Drift Acceleration | |||
!S3 | |||
|0 | |||
|0.18 | |||
|0 | |||
|0.09 | |||
|0 | |||
|0 | |||
|0 | |||
|0 | |||
|0 | |||
|- | |||
!S4 | |||
|0 | |||
|0.02 | |||
|0 | |||
|0.01 | |||
|0 | |||
|0 | |||
|0 | |||
|0 | |||
|0 | |||
|- | |||
!rowspan="2"|Handling | |||
!Manual | |||
|0 | |||
|0 | |||
|0.000555 | |||
|0 | |||
|0.00111 | |||
|0.000555 | |||
|0 | |||
|0 | |||
|0 | |||
|- | |||
!Auto | |||
|0 | |||
|0 | |||
|0.00029 | |||
|0 | |||
|0.00058 | |||
|0.00029 | |||
|0 | |||
|0 | |||
|0 | |||
|- | |||
!rowspan="2"|Drift | |||
!Manual | |||
|0.000265 | |||
|0 | |||
|0 | |||
|0 | |||
|0.000529 | |||
|0 | |||
|0 | |||
|0 | |||
|0 | |||
|- | |||
!Auto | |||
|0.000222 | |||
|0 | |||
|0 | |||
|0 | |||
|0.000444 | |||
|0 | |||
|0 | |||
|0 | |||
|0 | |||
|- | |||
!colspan="2"|Mini-Turbo (frames) | |||
|8 | |||
|0 | |||
|4 | |||
|0 | |||
|0 | |||
|4 | |||
|0 | |||
|8 | |||
|4 | |||
|- | |||
!rowspan="4"|Off-Road Speed | |||
!Weak Off-road | |||
|0.0171 | |||
|0.0171 | |||
|0 | |||
|0 | |||
|0.0171 | |||
|0 | |||
|0.0171 | |||
|0.0342 | |||
|0.0171 | |||
|- | |||
!Off-road | |||
|0.0184 | |||
|0.0184 | |||
|0 | |||
|0 | |||
|0.0184 | |||
|0 | |||
|0.0184 | |||
|0.0368 | |||
|0.0184 | |||
|- | |||
!Heavy Off-road | |||
|0.0113 | |||
|0.0113 | |||
|0 | |||
|0 | |||
|0.0113 | |||
|0 | |||
|0.0113 | |||
|0.0226 | |||
|0.0113 | |||
|- | |||
!Slippery Off-road | |||
|0.00641 | |||
|0.00641 | |||
|0 | |||
|0 | |||
|0.00641 | |||
|0 | |||
|0.00641 | |||
|0.01283 | |||
|0.00641 | |||
|- | |||
!rowspan="4"|Off-Road Handling | |||
!Slippery Road | |||
|0 | |||
|0.00263 | |||
|0 | |||
|0.00263 | |||
|0 | |||
|0 | |||
|0.00526 | |||
|0 | |||
|0.00263 | |||
|- | |||
!Weak Off-road | |||
|0 | |||
|0.00368 | |||
|0 | |||
|0.00368 | |||
|0 | |||
|0 | |||
|0.00736 | |||
|0 | |||
|0.00368 | |||
|- | |||
!Off-road and Heavy Off-road | |||
|0 | |||
|0.00263 | |||
|0 | |||
|0.00263 | |||
|0 | |||
|0 | |||
|0.00526 | |||
|0 | |||
|0.00263 | |||
|- | |||
!Slippery Off-road | |||
|0 | |||
|0.00211 | |||
|0 | |||
|0.00211 | |||
|0 | |||
|0 | |||
|0.00422 | |||
|0 | |||
|0.00211 | |||
|} | |||
{| width | ===Vehicles' stats=== | ||
|- | The vehicles have 31 stats. Acceleration is divided in four stages, presumably depending on the actual speed relative to the full speed. In each stage, acceleration is determined by two factors, a stage-specific '''S''' factor which is affected by the character bonus and a general '''E''' factor. These factors change while drifting, that itself can begin once the vehicle has reached 55% of its top speed. Finally, some stats change depending on the drifting method used (either '''Manual''' or '''Auto''') and depending on the fact that the vehicle is steering ('''While Steering''') or not ('''Standard''').<br> | ||
! | *'''Weight:''' The weight of the vehicle. | ||
! | *'''Speed:''' The top speed of the vehicle. | ||
! | **'''While Steering:''' The top speed of the vehicle while steering, expressed as fraction of the top speed. | ||
! | *'''Acceleration:''' How much the relative speed of the vehicle, i.e. the speed expressed as fraction of the top speed, increases over time. | ||
|- | *'''Handling:''' How fast the vehicle changes direction over time while steering (angular velocity). | ||
| | **'''Range:''' How much the vehicle swings while steering. | ||
| | *'''Drift:''' How fast the vehicle changes direction over time while drifting (angular velocity). | ||
| | **'''Range:''' How much the vehicle swings while drifting. | ||
| | *'''Mini-Turbo:''' The duration of the Mini-Turbo boost. | ||
|- | *'''Off-Road Speed:''' The relative Speed in various Off-Road sections. | ||
| | *'''Off-Road Handling:''' The relative Handling in various Off-Road sections. | ||
| | *'''Tilt:''' How much the kart tilts in various conditions.<br> | ||
| | {|style="text-align:center; max-width:100em; margin:auto; border:2px solid"align=center class="wikitable" | ||
| | |- | ||
|- | !colspan="15"style="background:#e0e0e0; text-align:center"|Small vehicles' stats | ||
| | |- | ||
| | !colspan="3"|Vehicle | ||
| | !Standard Kart S | ||
| | !Booster Seat | ||
|- | !Mini Beast | ||
| | !Cheep Charger | ||
| | !Tiny Titan | ||
| | !Blue Falcon | ||
| | !Standard Bike S | ||
!Bullet Bike | |||
!Bit Bike | |||
!Quacker | |||
!Magikruiser | |||
!Jet Bubble | |||
|- | |||
!colspan="3"|Weight | |||
|3.05 | |||
|2.84 | |||
|3.26 | |||
|2.63 | |||
|3.47 | |||
|3.05 | |||
|2.42 | |||
|2.63 | |||
|2.21 | |||
|2 | |||
|2.63 | |||
|2.84 | |||
|- | |||
!rowspan="2"|Speed | |||
!colspan="2"|Standard (km/h) | |||
|78.71 | |||
|75.53 | |||
|81.89 | |||
|77.12 | |||
|79.77 | |||
|82.95 | |||
|78.18 | |||
|81.36 | |||
|75 | |||
|76.59 | |||
|79.24 | |||
|80.3 | |||
|- | |||
!colspan="2"|While steering | |||
|0.9957 | |||
|0.9985 | |||
|0.9938 | |||
|0.9933 | |||
|0.9966 | |||
|0.9919 | |||
|0.9962 | |||
|0.9943 | |||
|0.999 | |||
|0.9938 | |||
|0.9971 | |||
|0.9947 | |||
|- | |||
!rowspan="10"|Acceleration | |||
!rowspan="5"|Not Drifting | |||
!S1 | |||
|0.728 | |||
|0.866 | |||
|0.71924 | |||
|0.4795 | |||
|0.89094 | |||
|0.254 | |||
|0.774 | |||
|0.75358 | |||
|0.912 | |||
|0.5 | |||
|0.682 | |||
|0.8566 | |||
|- | |||
!S2 | |||
|0.728 | |||
|0.866 | |||
|0.3744 | |||
|1.668 | |||
|0.5764 | |||
|0.766 | |||
|0.774 | |||
|0.4148 | |||
|0.912 | |||
|1.75 | |||
|0.682 | |||
|0.536 | |||
|- | |||
!S3 | |||
|0.5034 | |||
|0.5448 | |||
|0.4172 | |||
|0.4418 | |||
|0.5182 | |||
|0.3516 | |||
|0.5172 | |||
|0.4374 | |||
|0.5586 | |||
|0.45 | |||
|0.4896 | |||
|0.498 | |||
|- | |||
!S4 | |||
|0.07034 | |||
|0.07448 | |||
|0.05172 | |||
|0.04418 | |||
|0.06182 | |||
|0.03516 | |||
|0.07172 | |||
|0.05374 | |||
|0.07586 | |||
|0.045 | |||
|0.06896 | |||
|0.0598 | |||
|- | |||
!E | |||
|0.65 | |||
|0.65 | |||
|0.2 | |||
|0.2 | |||
|0.2 | |||
|0.2 | |||
|0.65 | |||
|0.2 | |||
|0.65 | |||
|0.2 | |||
|0.65 | |||
|0.2 | |||
|- | |||
!rowspan="5"|Drifting | |||
!S1 | |||
|0.85 | |||
|0.85 | |||
|0.8 | |||
|0.9 | |||
|0.8 | |||
|0.9 | |||
|0.85 | |||
|0.8 | |||
|0.85 | |||
|0.9 | |||
|0.85 | |||
|0.8 | |||
|- | |||
!S2 | |||
|0.95 | |||
|0.95 | |||
|0.925 | |||
|0.975 | |||
|0.925 | |||
|0.975 | |||
|0.95 | |||
|0.925 | |||
|0.95 | |||
|0.975 | |||
|0.95 | |||
|0.925 | |||
|- | |||
!S3 | |||
|1.95 | |||
|1.45 | |||
|2.45 | |||
|2.25 | |||
|1.15 | |||
|1.65 | |||
|2.05 | |||
|2.55 | |||
|1.55 | |||
|2.35 | |||
|1.25 | |||
|1.75 | |||
|- | |||
!S4 | |||
|0.13 | |||
|0.13 | |||
|0.15 | |||
|0.11 | |||
|0.15 | |||
|0.11 | |||
|0.13 | |||
|0.15 | |||
|0.13 | |||
|0.11 | |||
|0.15 | |||
|0.13 | |||
|- | |||
!E | |||
|0.965 | |||
|0.965 | |||
|0.98 | |||
|0.95 | |||
|0.98 | |||
|0.95 | |||
|0.965 | |||
|0.98 | |||
|0.965 | |||
|0.95 | |||
|0.98 | |||
|0.965 | |||
|- | |||
!rowspan="3"|Handling | |||
!colspan="2"|Manual | |||
|0.024 | |||
|0.0274 | |||
|0.0205 | |||
|0.0257 | |||
|0.0228 | |||
|0.0199 | |||
|0.0269 | |||
|0.0237 | |||
|0.0301 | |||
|0.0285 | |||
|0.0258 | |||
|0.0248 | |||
|- | |||
!colspan="2"|Auto | |||
|0.0244 | |||
|0.0267 | |||
|0.0222 | |||
|0.0256 | |||
|0.0237 | |||
|0.0219 | |||
|0.0217 | |||
|0.0205 | |||
|0.023 | |||
|0.0224 | |||
|0.0213 | |||
|0.0209 | |||
|- | |||
!colspan="2"|Range | |||
|0.88 | |||
|0.94 | |||
|0.82 | |||
|0.91 | |||
|0.86 | |||
|0.81 | |||
|0.955 | |||
|0.91 | |||
|1 | |||
|0.9775 | |||
|0.94 | |||
|0.925 | |||
|- | |||
!rowspan="3"|Drift | |||
!colspan="2"|Manual | |||
|0.0186 | |||
|0.0181 | |||
|0.0198 | |||
|0.0191 | |||
|0.0174 | |||
|0.0167 | |||
|0.0135 | |||
|0.0171 | |||
|0.013 | |||
|0.016 | |||
|0.0136 | |||
|0.0129 | |||
|- | |||
!colspan="2"|Auto | |||
|0.0209 | |||
|0.0204 | |||
|0.0222 | |||
|0.0214 | |||
|0.0196 | |||
|0.0188 | |||
|0.0146 | |||
|0.0125 | |||
|0.0142 | |||
|0.0119 | |||
|0.0107 | |||
|0.0103 | |||
|- | |||
!colspan="2"|Range | |||
|0.94 | |||
|0.92 | |||
|0.99 | |||
|0.96 | |||
|0.89 | |||
|0.86 | |||
|0.95 | |||
|1 | |||
|0.93 | |||
|0.97 | |||
|0.9 | |||
|0.88 | |||
|- | |||
!colspan="3"|Mini-Turbo (frames) | |||
|29 | |||
|36 | |||
|39 | |||
|33 | |||
|27 | |||
|22 | |||
|31 | |||
|40 | |||
|37 | |||
|35 | |||
|28 | |||
|26 | |||
|- | |||
!colspan="3"|Traction | |||
||-15 | |||
|5 | |||
||-8 | |||
||-3 | |||
|4 | |||
|10 | |||
|1 | |||
|1 | |||
|0 | |||
|3 | |||
|3 | |||
|3 | |||
|- | |||
!rowspan="4"|Off-Road Speed | |||
!colspan="2"|Weak Off-road | |||
|0.7039 | |||
|0.7894 | |||
|0.6184 | |||
|0.7381 | |||
|0.8578 | |||
|0.6013 | |||
|0.721 | |||
|0.6355 | |||
|0.8065 | |||
|0.7552 | |||
|0.8749 | |||
|0.6697 | |||
|- | |||
!colspan="2"|Off-road | |||
|0.4906 | |||
|0.5826 | |||
|0.3986 | |||
|0.5274 | |||
|0.6562 | |||
|0.3802 | |||
|0.509 | |||
|0.417 | |||
|0.601 | |||
|0.5458 | |||
|0.6746 | |||
|0.4538 | |||
|- | |||
!colspan="2"|Heavy Off-road | |||
|0.2867 | |||
|0.3432 | |||
|0.2302 | |||
|0.3093 | |||
|0.3884 | |||
|0.2189 | |||
|0.298 | |||
|0.2415 | |||
|0.3545 | |||
|0.3206 | |||
|0.3997 | |||
|0.2641 | |||
|- | |||
!colspan="2"|Slippery Off-road | |||
|0.931 | |||
|0.9588 | |||
|0.9032 | |||
|0.9421 | |||
|0.981 | |||
|0.8977 | |||
|0.9366 | |||
|0.9088 | |||
|0.9644 | |||
|0.9477 | |||
|0.9866 | |||
|0.9199 | |||
|- | |||
!rowspan="5"|Off-Road Handling | |||
!colspan="2"|Slippery Road | |||
|0.08419 | |||
|0.09997 | |||
|0.06841 | |||
|0.08945 | |||
|0.07893 | |||
|0.06315 | |||
|0.08156 | |||
|0.06578 | |||
|0.09734 | |||
|0.08682 | |||
|0.0763 | |||
|0.07104 | |||
|- | |||
!colspan="2"|Weak Off-road | |||
|0.12784 | |||
|0.14992 | |||
|0.10576 | |||
|0.1352 | |||
|0.12048 | |||
|0.0984 | |||
|0.12416 | |||
|0.10208 | |||
|0.14624 | |||
|0.13152 | |||
|0.1168 | |||
|0.10944 | |||
|- | |||
!colspan="2"|Off-road | |||
|0.08419 | |||
|0.09997 | |||
|0.06841 | |||
|0.08945 | |||
|0.07893 | |||
|0.06315 | |||
|0.08156 | |||
|0.06578 | |||
|0.09734 | |||
|0.08682 | |||
|0.0763 | |||
|0.07104 | |||
|- | |||
!colspan="2"|Heavy Off-road | |||
|0.08419 | |||
|0.09997 | |||
|0.06841 | |||
|0.08945 | |||
|0.07893 | |||
|0.06315 | |||
|0.08156 | |||
|0.06578 | |||
|0.09734 | |||
|0.08682 | |||
|0.0763 | |||
|0.07104 | |||
|- | |||
!colspan="2"|Slippery Off-road | |||
|0.05743 | |||
|0.07009 | |||
|0.04477 | |||
|0.06165 | |||
|0.05321 | |||
|0.04055 | |||
|0.05532 | |||
|0.04266 | |||
|0.06798 | |||
|0.05954 | |||
|0.0511 | |||
|0.04688 | |||
|- | |||
!colspan="3"|Tilt | |||
|0.03 | |||
|0.035 | |||
|0.02 | |||
|0.03 | |||
|0.02 | |||
|0.03 | |||
| | |||
| | |||
| | |||
| | |||
| | |||
| | |||
|- | |||
!colspan="15"style="background:#e0e0e0; text-align:center; border-top:2px solid" |Medium vehicles' stats | |||
|- | |||
!colspan="3"|Vehicle | |||
!Standard Kart M | |||
!Classic Dragster | |||
!Wild Wing | |||
!Super Blooper | |||
!Daytripper | |||
!Sprinter | |||
!Standard Bike M | |||
!Mach Bike | |||
!Sugarscoot | |||
!Zip Zip | |||
!Sneakster | |||
!Dolphin Dasher | |||
|- | |||
!colspan="3"|Weight | |||
|4.31 | |||
|4.1 | |||
|4.73 | |||
|3.89 | |||
|4.31 | |||
|4.52 | |||
|3.68 | |||
|3.68 | |||
|3.26 | |||
|3.47 | |||
|3.89 | |||
|4.1 | |||
|- | |||
!rowspan="2"|Speed | |||
!colspan="2"|Standard (km/h) | |||
|79.77 | |||
|77.65 | |||
|82.42 | |||
|80.83 | |||
|77.12 | |||
|84.01 | |||
|79.24 | |||
|81.89 | |||
|76.59 | |||
|78.71 | |||
|83.48 | |||
|80.3 | |||
|- | |||
!colspan="2"|While steering | |||
|0.9943 | |||
|0.9924 | |||
|0.9928 | |||
|0.9952 | |||
|0.9976 | |||
|0.9909 | |||
|0.9947 | |||
|0.9933 | |||
|0.9981 | |||
|0.9966 | |||
|0.9914 | |||
|0.9957 | |||
|- | |||
!rowspan="10"|Acceleration | |||
!rowspan="5"|Not Drifting | |||
!S1 | |||
|0.59 | |||
|0.4385 | |||
|0.61622 | |||
|0.254 | |||
|0.774 | |||
|0.6849 | |||
|0.636 | |||
|0.65056 | |||
|0.82 | |||
|0.92528 | |||
|0.213 | |||
|0.82226 | |||
|- | |||
!S2 | |||
|0.59 | |||
|1.504 | |||
|0.2532 | |||
|0.766 | |||
|0.774 | |||
|0.334 | |||
|0.636 | |||
|0.2936 | |||
|0.82 | |||
|0.6168 | |||
|0.602 | |||
|0.4956 | |||
|- | |||
!S3 | |||
|0.462 | |||
|0.4254 | |||
|0.3566 | |||
|0.3516 | |||
|0.5172 | |||
|0.397 | |||
|0.4758 | |||
|0.3768 | |||
|0.531 | |||
|0.5384 | |||
|0.3352 | |||
|0.4778 | |||
|- | |||
!S4 | |||
|0.0662 | |||
|0.04254 | |||
|0.04566 | |||
|0.03516 | |||
|0.07172 | |||
|0.0497 | |||
|0.06758 | |||
|0.04768 | |||
|0.0731 | |||
|0.06384 | |||
|0.03352 | |||
|0.05778 | |||
|- | |||
!E | |||
|0.65 | |||
|0.2 | |||
|0.2 | |||
|0.2 | |||
|0.65 | |||
|0.2 | |||
|0.65 | |||
|0.2 | |||
|0.65 | |||
|0.2 | |||
|0.2 | |||
|0.2 | |||
|- | |||
!rowspan="5"|Drifting | |||
!S1 | |||
|0.85 | |||
|0.9 | |||
|0.8 | |||
|0.9 | |||
|0.85 | |||
|0.8 | |||
|0.85 | |||
|0.8 | |||
|0.85 | |||
|0.8 | |||
|0.9 | |||
|0.8 | |||
|- | |||
!S2 | |||
|0.95 | |||
|0.975 | |||
|0.925 | |||
|0.975 | |||
|0.95 | |||
|0.925 | |||
|0.95 | |||
|0.925 | |||
|0.95 | |||
|0.925 | |||
|0.975 | |||
|0.925 | |||
|- | |||
!S3 | |||
|1.75 | |||
|2.05 | |||
|2.25 | |||
|0.85 | |||
|1.25 | |||
|1.45 | |||
|1.85 | |||
|2.35 | |||
|1.35 | |||
|1.15 | |||
|1.55 | |||
|0.95 | |||
|- | |||
!S4 | |||
|0.13 | |||
|0.11 | |||
|0.15 | |||
|0.15 | |||
|0.13 | |||
|0.11 | |||
|0.13 | |||
|0.15 | |||
|0.13 | |||
|0.15 | |||
|0.11 | |||
|0.15 | |||
|- | |||
!E | |||
|0.965 | |||
|0.95 | |||
|0.98 | |||
|0.98 | |||
|0.965 | |||
|0.95 | |||
|0.965 | |||
|0.98 | |||
|0.965 | |||
|0.98 | |||
|0.95 | |||
|0.98 | |||
|- | |||
!rowspan="3"|Handling | |||
!colspan="2"|Manual | |||
|0.0228 | |||
|0.0251 | |||
|0.0199 | |||
|0.0216 | |||
|0.0263 | |||
|0.0187 | |||
|0.0258 | |||
|0.0232 | |||
|0.029 | |||
|0.0269 | |||
|0.0221 | |||
|0.0248 | |||
|- | |||
!colspan="2"|Auto | |||
|0.0237 | |||
|0.0252 | |||
|0.0219 | |||
|0.023 | |||
|0.0259 | |||
|0.0211 | |||
|0.0213 | |||
|0.0203 | |||
|0.0226 | |||
|0.0217 | |||
|0.0198 | |||
|0.0209 | |||
|- | |||
!colspan="2"|Range | |||
|0.86 | |||
|0.9 | |||
|0.81 | |||
|0.84 | |||
|0.92 | |||
|0.79 | |||
|0.94 | |||
|0.9025 | |||
|0.985 | |||
|0.955 | |||
|0.8875 | |||
|0.925 | |||
|- | |||
!rowspan="3"|Drift | |||
!colspan="2"|Manual | |||
|0.0184 | |||
|0.0186 | |||
|0.0193 | |||
|0.0177 | |||
|0.0177 | |||
|0.0162 | |||
|0.0127 | |||
|0.0164 | |||
|0.0124 | |||
|0.0115 | |||
|0.0119 | |||
|0.014 | |||
|- | |||
!colspan="2"|Auto | |||
|0.0206 | |||
|0.0209 | |||
|0.0217 | |||
|0.0198 | |||
|0.0198 | |||
|0.0183 | |||
|0.014 | |||
|0.0121 | |||
|0.0138 | |||
|0.0133 | |||
|0.0097 | |||
|0.0108 | |||
|- | |||
!colspan="2"|Range | |||
|0.93 | |||
|0.94 | |||
|0.97 | |||
|0.9 | |||
|0.9 | |||
|0.84 | |||
|0.92 | |||
|0.98 | |||
|0.91 | |||
|0.88 | |||
|0.85 | |||
|0.91 | |||
|- | |||
!colspan="3"|Mini-Turbo (frames) | |||
|27 | |||
|32 | |||
|36 | |||
|24 | |||
|33 | |||
|19 | |||
|28 | |||
|37 | |||
|35 | |||
|29 | |||
|20 | |||
|26 | |||
|- | |||
!colspan="3"|Traction | |||
|3 | |||
||-5 | |||
|0 | |||
|5 | |||
||-7 | |||
|0 | |||
||-2 | |||
|3 | |||
||-9 | |||
||-4 | |||
||-11 | |||
|2 | |||
|- | |||
!rowspan="4"|Off-Road Speed | |||
!colspan="2"|Weak Off-road | |||
|0.6697 | |||
|0.7039 | |||
|0.6013 | |||
|0.7894 | |||
|0.7552 | |||
|0.5842 | |||
|0.6868 | |||
|0.6184 | |||
|0.7723 | |||
|0.8407 | |||
|0.6013 | |||
|0.8065 | |||
|- | |||
!colspan="2"|Off-road | |||
|0.4538 | |||
|0.4906 | |||
|0.3802 | |||
|0.5826 | |||
|0.5458 | |||
|0.3618 | |||
|0.4722 | |||
|0.3986 | |||
|0.5642 | |||
|0.6378 | |||
|0.3802 | |||
|0.601 | |||
|- | |||
!colspan="2"|Heavy Off-road | |||
|0.2641 | |||
|0.2867 | |||
|0.2189 | |||
|0.3432 | |||
|0.3206 | |||
|0.2076 | |||
|0.2754 | |||
|0.2302 | |||
|0.3319 | |||
|0.3771 | |||
|0.2189 | |||
|0.3545 | |||
|- | |||
!colspan="2"|Slippery Off-road | |||
|0.9199 | |||
|0.931 | |||
|0.8977 | |||
|0.9588 | |||
|0.9477 | |||
|0.8921 | |||
|0.9255 | |||
|0.9032 | |||
|0.9532 | |||
|0.9755 | |||
|0.8977 | |||
|0.9644 | |||
|- | |||
!rowspan="5"|Off-Road Handling | |||
!colspan="2"|Slippery Road | |||
|0.07893 | |||
|0.08419 | |||
|0.06578 | |||
|0.07367 | |||
|0.09471 | |||
|0.06052 | |||
|0.0763 | |||
|0.06315 | |||
|0.09208 | |||
|0.08156 | |||
|0.05789 | |||
|0.07104 | |||
|- | |||
!colspan="2"|Weak Off-road | |||
|0.12048 | |||
|0.12784 | |||
|0.10208 | |||
|0.11312 | |||
|0.14256 | |||
|0.09472 | |||
|0.1168 | |||
|0.0984 | |||
|0.13888 | |||
|0.12416 | |||
|0.09104 | |||
|0.10944 | |||
|- | |||
!colspan="2"|Off-road | |||
|0.07893 | |||
|0.08419 | |||
|0.06578 | |||
|0.07367 | |||
|0.09471 | |||
|0.06052 | |||
|0.0763 | |||
|0.06315 | |||
|0.09208 | |||
|0.08156 | |||
|0.05789 | |||
|0.07104 | |||
|- | |||
!colspan="2"|Heavy Off-road | |||
|0.07893 | |||
|0.08419 | |||
|0.06578 | |||
|0.07367 | |||
|0.09471 | |||
|0.06052 | |||
|0.0763 | |||
|0.06315 | |||
|0.09208 | |||
|0.08156 | |||
|0.05789 | |||
|0.07104 | |||
|- | |||
!colspan="2"|Slippery Off-road | |||
|0.05321 | |||
|0.05743 | |||
|0.04266 | |||
|0.04899 | |||
|0.06587 | |||
|0.03844 | |||
|0.0511 | |||
|0.04055 | |||
|0.06376 | |||
|0.05532 | |||
|0.03633 | |||
|0.04688 | |||
|- | |||
!colspan="3"|Tilt | |||
|0.03 | |||
|0.02 | |||
|0.015 | |||
|0.02 | |||
|0.035 | |||
|0.015 | |||
| | |||
| | |||
| | |||
| | |||
| | |||
| | |||
|- | |||
!colspan="15"style="background:#e0e0e0; text-align:center; border-top:2px solid"|Large vehicles' stats | |||
|- | |||
!colspan="3"|Vehicle | |||
!Standard Kart L | |||
!Offroader | |||
!Flame Flyer | |||
!Piranha Prowler | |||
!Jetsetter | |||
!Honeycoupe | |||
!Standard Bike L | |||
!Flame Runner | |||
!Wario Bike | |||
!Shooting Star | |||
!Spear | |||
!Phantom | |||
|- | |||
!colspan="3"|Weight | |||
|5.36 | |||
|5.78 | |||
|5.36 | |||
|5.99 | |||
|5.15 | |||
|5.57 | |||
|4.94 | |||
|4.94 | |||
|5.36 | |||
|4.52 | |||
|5.15 | |||
|4.73 | |||
|- | |||
!rowspan="2"|Speed | |||
!colspan="2"|Standard (km/h) | |||
|80.3 | |||
|78.18 | |||
|83.48 | |||
|81.89 | |||
|85.07 | |||
|81.36 | |||
|79.77 | |||
|82.95 | |||
|77.65 | |||
|80.83 | |||
|84.54 | |||
|79.24 | |||
|- | |||
!colspan="2"|While steering | |||
|0.9943 | |||
|0.9966 | |||
|0.9919 | |||
|0.9928 | |||
|0.99 | |||
|0.9938 | |||
|0.9947 | |||
|0.9924 | |||
|0.9971 | |||
|0.9943 | |||
|0.9905 | |||
|0.9957 | |||
|- | |||
!rowspan="10"|Acceleration | |||
!rowspan="5"|Not Drifting | |||
!S1 | |||
|0.544 | |||
|0.728 | |||
|0.54754 | |||
|0.406 | |||
|0.1515 | |||
|0.6849 | |||
|0.59 | |||
|0.58188 | |||
|0.774 | |||
|0.71924 | |||
|0.172 | |||
|0.89094 | |||
|- | |||
!S2 | |||
|0.544 | |||
|0.728 | |||
|0.1724 | |||
|0.406 | |||
|0.356 | |||
|0.334 | |||
|0.59 | |||
|0.2128 | |||
|0.774 | |||
|0.3744 | |||
|0.438 | |||
|0.5764 | |||
|- | |||
!S3 | |||
|0.4482 | |||
|0.5034 | |||
|0.3162 | |||
|0.4068 | |||
|0.3106 | |||
|0.397 | |||
|0.462 | |||
|0.3364 | |||
|0.5172 | |||
|0.4172 | |||
|0.3188 | |||
|0.5182 | |||
|- | |||
!S4 | |||
|0.06482 | |||
|0.07034 | |||
|0.04162 | |||
|0.06068 | |||
|0.03106 | |||
|0.0497 | |||
|0.0662 | |||
|0.04364 | |||
|0.07172 | |||
|0.05172 | |||
|0.03188 | |||
|0.06182 | |||
|- | |||
!E | |||
|0.65 | |||
|0.65 | |||
|0.2 | |||
|0.65 | |||
|0.2 | |||
|0.2 | |||
|0.65 | |||
|0.2 | |||
|0.65 | |||
|0.2 | |||
|0.2 | |||
|0.2 | |||
|- | |||
!rowspan="5"|Drifting | |||
!S1 | |||
|0.85 | |||
|0.85 | |||
|0.8 | |||
|0.85 | |||
|0.9 | |||
|0.8 | |||
|0.85 | |||
|0.8 | |||
|0.85 | |||
|0.8 | |||
|0.9 | |||
|0.8 | |||
|- | |||
!S2 | |||
|0.95 | |||
|0.95 | |||
|0.925 | |||
|0.95 | |||
|0.975 | |||
|0.925 | |||
|0.95 | |||
|0.925 | |||
|0.95 | |||
|0.925 | |||
|0.975 | |||
|0.925 | |||
|- | |||
!S3 | |||
|1.55 | |||
|0.75 | |||
|1.85 | |||
|1.35 | |||
|1.05 | |||
|2.15 | |||
|1.65 | |||
|1.95 | |||
|0.85 | |||
|2.25 | |||
|1.15 | |||
|0.65 | |||
|- | |||
!S4 | |||
|0.13 | |||
|0.13 | |||
|0.15 | |||
|0.13 | |||
|0.11 | |||
|0.15 | |||
|0.13 | |||
|0.15 | |||
|0.13 | |||
|0.15 | |||
|0.11 | |||
|0.15 | |||
|- | |||
!E | |||
|0.965 | |||
|0.965 | |||
|0.98 | |||
|0.965 | |||
|0.95 | |||
|0.98 | |||
|0.965 | |||
|0.98 | |||
|0.965 | |||
|0.98 | |||
|0.95 | |||
|0.98 | |||
|- | |||
!rowspan="3"|Handling | |||
!colspan="2"|Manual | |||
|0.0222 | |||
|0.0251 | |||
|0.0182 | |||
|0.0211 | |||
|0.017 | |||
|0.0199 | |||
|0.0253 | |||
|0.0216 | |||
|0.028 | |||
|0.0232 | |||
|0.0205 | |||
|0.0264 | |||
|- | |||
!colspan="2"|Auto | |||
|0.0233 | |||
|0.0252 | |||
|0.0207 | |||
|0.0226 | |||
|0.02 | |||
|0.0219 | |||
|0.0211 | |||
|0.0196 | |||
|0.0222 | |||
|0.0203 | |||
|0.0192 | |||
|0.0215 | |||
|- | |||
!colspan="2"|Range | |||
|0.85 | |||
|0.9 | |||
|0.78 | |||
|0.83 | |||
|0.76 | |||
|0.81 | |||
|0.9325 | |||
|0.88 | |||
|0.97 | |||
|0.9025 | |||
|0.865 | |||
|0.9475 | |||
|- | |||
!rowspan="3"|Drift | |||
!colspan="2"|Manual | |||
|0.0174 | |||
|0.0167 | |||
|0.0184 | |||
|0.0169 | |||
|0.0155 | |||
|0.0191 | |||
|0.0121 | |||
|0.015 | |||
|0.0112 | |||
|0.0141 | |||
|0.0108 | |||
|0.0107 | |||
|- | |||
!colspan="2"|Auto | |||
|0.0196 | |||
|0.0188 | |||
|0.0206 | |||
|0.0191 | |||
|0.0175 | |||
|0.0214 | |||
|0.0137 | |||
|0.0114 | |||
|0.0131 | |||
|0.0149 | |||
|0.0092 | |||
|0.0127 | |||
|- | |||
!colspan="2"|Range | |||
|0.89 | |||
|0.86 | |||
|0.93 | |||
|0.87 | |||
|0.81 | |||
|0.96 | |||
|0.9 | |||
|0.94 | |||
|0.87 | |||
|0.97 | |||
|0.82 | |||
|0.85 | |||
|- | |||
!colspan="3"|Mini-Turbo (frames) | |||
|24 | |||
|29 | |||
|31 | |||
|20 | |||
|15 | |||
|35 | |||
|26 | |||
|32 | |||
|31 | |||
|36 | |||
|16 | |||
|27 | |||
|- | |||
!colspan="3"|Traction | |||
||-15 | |||
|7 | |||
|0 | |||
||-13 | |||
|30 | |||
|0 | |||
|0 | |||
|0 | |||
|5 | |||
|27 | |||
|3 | |||
|2 | |||
|- | |||
!rowspan="4"|Off-Road Speed | |||
!colspan="2"|Weak Off-road | |||
|0.6697 | |||
|0.721 | |||
|0.5671 | |||
|0.6355 | |||
|0.55 | |||
|0.6013 | |||
|0.6868 | |||
|0.5842 | |||
|0.7381 | |||
|0.6184 | |||
|0.5671 | |||
|0.8065 | |||
|- | |||
!colspan="2"|Off-road | |||
|0.4538 | |||
|0.509 | |||
|0.3434 | |||
|0.417 | |||
|0.325 | |||
|0.3802 | |||
|0.4722 | |||
|0.3618 | |||
|0.5274 | |||
|0.3986 | |||
|0.3434 | |||
|0.601 | |||
|- | |||
!colspan="2"|Heavy Off-road | |||
|0.2641 | |||
|0.298 | |||
|0.1963 | |||
|0.2415 | |||
|0.185 | |||
|0.2189 | |||
|0.2754 | |||
|0.2076 | |||
|0.3093 | |||
|0.2302 | |||
|0.1963 | |||
|0.3545 | |||
|- | |||
!colspan="2"|Slippery Off-road | |||
|0.9199 | |||
|0.9366 | |||
|0.8866 | |||
|0.9088 | |||
|0.881 | |||
|0.8977 | |||
|0.9255 | |||
|0.8921 | |||
|0.9421 | |||
|0.9032 | |||
|0.8866 | |||
|0.9644 | |||
|- | |||
!rowspan="5"|Off-Road Handling | |||
!colspan="2"|Slippery Road | |||
|0.0763 | |||
|0.08945 | |||
|0.05789 | |||
|0.06578 | |||
|0.05263 | |||
|0.06578 | |||
|0.07367 | |||
|0.05526 | |||
|0.08682 | |||
|0.06315 | |||
|0.05 | |||
|0.0763 | |||
|- | |||
!colspan="2"|Weak Off-road | |||
|0.1168 | |||
|0.1352 | |||
|0.09104 | |||
|0.10208 | |||
|0.08368 | |||
|0.10208 | |||
|0.11312 | |||
|0.08736 | |||
|0.13152 | |||
|0.0984 | |||
|0.08 | |||
|0.1168 | |||
|- | |||
!colspan="2"|Off-road | |||
|0.0763 | |||
|0.08945 | |||
|0.05789 | |||
|0.06578 | |||
|0.05263 | |||
|0.06578 | |||
|0.07367 | |||
|0.05526 | |||
|0.08682 | |||
|0.06315 | |||
|0.05 | |||
|0.0763 | |||
|- | |||
!colspan="2"|Heavy Off-road | |||
|0.0763 | |||
|0.08945 | |||
|0.05789 | |||
|0.06578 | |||
|0.05263 | |||
|0.06578 | |||
|0.07367 | |||
|0.05526 | |||
|0.08682 | |||
|0.06315 | |||
|0.05 | |||
|0.0763 | |||
|- | |||
!colspan="2"|Slippery Off-road | |||
|0.0511 | |||
|0.06165 | |||
|0.03633 | |||
|0.04266 | |||
|0.03211 | |||
|0.04266 | |||
|0.04899 | |||
|0.03422 | |||
|0.05954 | |||
|0.04055 | |||
|0.03 | |||
|0.0511 | |||
|- | |||
!colspan="3"|Tilt | |||
|0.015 | |||
|0.015 | |||
|0.015 | |||
|0.01 | |||
|0.02 | |||
|0.025 | |||
| | |||
| | |||
| | |||
| | |||
| | |||
| | |||
|} | |} | ||
== | ==Courses== | ||
[[File:Wario Gold Mine MKW screenshot.png|thumb|upright=1.1|[[Wario]] races towards a steep downhill portion of [[Wii Wario's Gold Mine|Wario's Gold Mine]].]] | |||
| | Race courses are divided into various [[Cup]]s again: [[Mushroom Cup]], [[Flower Cup]], [[Star Cup]], and [[Special Cup]] for [[new course]]s and [[Shell Cup]], [[Banana Cup]], [[Leaf Cup]], and [[Lightning Cup]] for [[Classic course|returning course]]s. Notably, these are the same as in ''[[Mario Kart DS]]''. | ||
All thirty-two tracks have three laps, regardless of length and difficulty. At first, only two Wii and two Retro Cups are available, but clearing the former two in first place unlocks the Star Cup, while clearing the latter two in first place unlocks the Leaf Cup; likewise, clearing the Star and Leaf Cups in first place unlocks the Special and Lightning Cups, respectively. This process only applies for the difficulty level the player is in, so it must be repeated for all others to have the secret Cups available in each of them. | |||
This is the first game in the series to have different track names between the American and PAL versions; this applies to [[Wii DK Summit|DK Summit]]/DK's Snowboard Cross, [[Chain Chomp Wheel]]/Chain Chomp Roulette, and [[Galaxy Colosseum]]/Galaxy Arena. | |||
===Wii Grand Prix=== | |||
There are sixteen new courses in ''Mario Kart Wii''. | |||
{|style="width:700px;margin:auto;text-align:center"class="wikitable" | |||
|- | |||
![[File:Mushroom-MKWii-Icon.png|50px]]<br>[[Mushroom Cup]] | |||
![[File:MKW Flower Cup Icon.png|50px]]<br>[[Flower Cup]] | |||
![[File:MKW Star Cup Emblem.png|50px]]<br>[[Star Cup]] | |||
![[File:MKW Special Cup Emblem.png|50px]]<br>[[Special Cup]] | |||
|- | |||
|[[File:Luigi Circuit MKWii.png|150px]]<br>[[Luigi Circuit (Mario Kart Wii)|Luigi Circuit]] | |||
|[[File:MarioCircuit MKWii.png|150px]]<br>[[Mario Circuit (Mario Kart Wii)|Mario Circuit]] | |||
|[[File:Daisy circuit1.png|150px]]<br>[[Wii Daisy Circuit|Daisy Circuit]] | |||
|[[File:Dry Dry Ruins.png|150px]]<br>[[Wii Dry Dry Ruins|Dry Dry Ruins]] | |||
|- | |||
|[[File:Moo Moo Meadows MKWii.png|150px]]<br>[[Wii Moo Moo Meadows|Moo Moo Meadows]] | |||
|[[File:Coconut Mall MKWii.png|150px]]<br>[[Wii Coconut Mall|Coconut Mall]] | |||
|[[File:MKW Koopa Cape.png|150px]]<br>[[Wii Koopa Cape|Koopa Cape]] | |||
|[[File:Moonviewhighway.png|150px]]<br>[[Wii Moonview Highway|Moonview Highway]] | |||
|- | |||
|[[File:Mushroom Gorge MKWii.png|150px]]<br>[[Wii Mushroom Gorge|Mushroom Gorge]]<br><br> | |||
|[[File:DK Summit MKWii.png|150px]]<br>[[Wii DK Summit|DK Summit]] [[File:Flag of USA.png|20px]]<br>[[Wii DK Summit|DK's Snowboard Cross]] [[File:Flag of Europe.png|20px]] | |||
|[[File:MKW Maple Treeway Overlook.png|150px]]<br>[[Wii Maple Treeway|Maple Treeway]]<br><br> | |||
|[[File:BowsersCastleMKW.png|150px]]<br>[[Bowser's Castle (Mario Kart Wii)|Bowser's Castle]]<br><br> | |||
|- | |||
|[[File:Toad's Factory MKWii.png|150px]]<br>[[Toad's Factory]] | |||
|[[File:MKW Wario's Gold Mine Course Overview.png|150px]]<br>[[Wii Wario's Gold Mine|Wario's Gold Mine]] | |||
|[[File:Grumble Volcano.png|150px]]<br>[[Wii Grumble Volcano|Grumble Volcano]] | |||
|[[File:MKW Rainbow Road Overview.png|150px]]<br>[[Wii Rainbow Road|Rainbow Road]] | |||
|} | |} | ||
===='' | ===Retro Grand Prix=== | ||
These are courses that appeared in previous ''Mario Kart'' installments, much like in ''[[Mario Kart DS]]''. This includes two courses each from ''[[Super Mario Kart]]'' and ''[[Mario Kart: Super Circuit]]'', and four each from ''[[Mario Kart 64]]'', ''[[Mario Kart: Double Dash!!]]'' and ''Mario Kart DS''. These have been graphically updated and have some new details such as extra trees and ramps, new features such as jumps, pipe tricks, and even added shortcuts. These courses appear in the Shell, Banana, Leaf, and Lightning Cups. This game is tied with ''[[Mario Kart 8 Deluxe]]'' (when counting the ''[[Mario Kart 8 Deluxe – Booster Course Pass|Booster Course Pass]]'') for having the second most retro [[Mario Circuit]] courses of any ''Mario Kart'' game, with three, behind only ''[[Mario Kart Tour]]'', which has six. | |||
{|style="width:700px;margin:auto;text-align:center"class="wikitable" | |||
|- | |||
![[File:MKW Shell Cup Icon.png|50px]]<br>[[Shell Cup]] | |||
![[File:MKW Banana Cup Icon.png|50px]]<br>[[Banana Cup]] | |||
![[File:MKW Leaf Cup Emblem.png|35px]]<br>[[Leaf Cup]] | |||
![[File:MKW Lightning Cup Emblem.png|50px]]<br>[[Lightning Cup]] | |||
|- | |||
|[[File:Peach Beach MKWii.png|150px]]<br>{{classic-link|GCN|Peach Beach}} | |||
|[[File:Sherbet Land N64 MKWii.png|150px]]<br>{{classic-link|N64|Sherbet Land}} | |||
|[[File:Desert Hills.png|150px]]<br>{{classic-link|DS|Desert Hills}} | |||
|[[File:MKW SNES Mario Circuit 3 Overview.png|150px]]<br>{{classic-link|SNES|Mario Circuit 3}} | |||
|- | |||
|[[File:Yoshi Falls MKWii.png|150px]]<br>{{classic-link|DS|Yoshi Falls}} | |||
|[[File:Shy Guy Beach MKWii.png|150px]]<br>{{classic-link|GBA|Shy Guy Beach}} | |||
|[[File:MKW GBA Bowser Castle 3 Intro.png|150px]]<br>{{classic-link|GBA|Bowser's Castle 3|Bowser Castle 3}} | |||
|[[File:MKWii Peach Gardens.png|150px]]<br>{{classic-link|DS|Peach Gardens}} | |||
|- | |||
|[[File:Ghost Valley 2 MKWii.png|150px]]<br>{{classic-link|SNES|Ghost Valley 2}} | |||
|[[File:Delfino Square MKWii.png|150px]]<br>{{classic-link|DS|Delfino Square}} | |||
|[[File:D.K.'s Jungle Parkway.png|150px]]<br>{{classic-link|N64|DK's Jungle Parkway}} | |||
|[[File:DK Mountain.png|150px]]<br>{{classic-link|GCN|DK Mountain}} | |||
|- | |||
|[[File:Mario Raceway 64 MKWii.png|150px]]<br>{{classic-link|N64|Mario Raceway}} | |||
|[[File:Waluigi Stadium MKWii.png|150px]]<br>{{classic-link|GCN|Waluigi Stadium}} | |||
|[[File:MKWii GCNMario.png|150px]]<br>{{classic-link|GCN|Mario Circuit}} | |||
|[[File:N64BowserCastle-MKWii.png|150px]]<br>{{classic-link|N64|Bowser's Castle}} | |||
|} | |||
===Battle stages=== | |||
This game has the most battle courses of any ''Mario Kart'' game, with ten. Additionally, this is the first ''Mario Kart'' game with unique music for each battle course. | |||
{|style="width:400px;margin:auto;text-align:center"class="wikitable" | |||
|- | |||
![[File:MKW icon Wii Stages.png|60x60px]]<br>Wii Stages | |||
![[File:MKW icon Retro Stages.png|60x60px]]<br>Retro Stages | |||
|- | |||
|<center>[[File:Block Plaza.png|150px]]<br>[[Block Plaza]]</center> | |||
|<center>[[File:Battle Course 4 (SNES).png|150px]]<br>{{classic-link|SNES|Battle Course 4}}</center> | |||
|- | |||
|<center>[[File:Delfino Pier.png|150px]]<br>[[Delfino Pier]]</center> | |||
|<center>[[File:Battle Course 3 (GBA).png|150px]]<br>{{classic-link|GBA|Battle Course 3}}</center> | |||
|- | |||
|<center>[[File:MKW Funky Stadium Overview.png|150px]]<br>[[Funky Stadium]]</center> | |||
|<center>[[File:N64Skyscraper-MKWii.png|150px]]<br>{{classic-link|N64|Skyscraper}}</center> | |||
|- | |||
|<center>[[File:Chain Chomp Roulette.png|150px]]<br>[[Chain Chomp Wheel]] [[File:Flag of USA.png|20px]]<br>[[Chain Chomp Wheel|Chain Chomp Roulette]] [[File:Flag of Europe.png|20px]] | |||
|<center>[[File:Cookie Land.png|150px]]<br>{{classic-link|GCN|Cookie Land}}</center><br> | |||
|- | |||
|<center>[[File:Thwomp Desert.png|150px]]<br>[[Thwomp Desert]]</center> | |||
|<center>[[File:Twilight House.png|150px]]<br>{{classic-link|DS|Twilight House}}</center> | |||
|} | |||
===Other stages=== | |||
''Mario Kart Wii'' featured one course that was exclusive to certain online tournaments. | |||
{|style="width:400px;margin:auto;text-align:center"class="wikitable" | |||
|- | |||
![[List of Mario Kart Wii tournaments|Online Tournament]] | |||
|- | |||
|[[File:MKW Galaxy Colosseum View.png|150px]]<br>[[Galaxy Colosseum]] [[File:Flag of USA.png|20px]]<br>[[Galaxy Colosseum|Galaxy Arena]] [[File:Flag of Europe.png|20px]] | |||
|} | |||
==Ghosts== | ==Ghosts== | ||
In ''Mario Kart Wii'', there are '''Normal Staff''' | In ''Mario Kart Wii'', there are '''Normal Staff''' [[Ghost (Mario Kart series)|Ghosts]] and '''Expert Staff''' Ghosts. Beating the normal staff Ghosts by a certain amount of time unlocks the Expert Staff Ghosts. Unlocking Expert Staff Ghosts can help unlock certain characters and vehicles in the game. Below are two tables: the first shows the Normal Staff Ghosts, while the second shows the Expert Staff Ghosts, and also shows the character and vehicle the Ghost used. | ||
===Normal Staff Ghosts=== | ===Normal Staff Ghosts=== | ||
{| border= | {|border=1 style="text-align:center;border-collapse:collapse;max-width:100em;margin:auto"align=center class="wikitable" | ||
|- | |- | ||
! | !|Course | ||
! | !|Staff Name | ||
! | !|Time | ||
! | !|Character | ||
! | !|Vehicle | ||
! | !|Wii Wheel | ||
! | !|Drift | ||
|- | |- | ||
|[[Luigi Circuit | |[[Luigi Circuit (Mario Kart Wii)|Luigi Circuit]]||Nin★sato||01:29.670||Luigi||B Dasher Mk 2/Sprinter||Yes||Auto | ||
|- | |- | ||
|[[Moo Moo Meadows]]|| | |[[Wii Moo Moo Meadows|Moo Moo Meadows]]||Nin★YuNya||01:37.856||Baby Daisy||Baby Booster/Booster Seat||Yes||Auto | ||
|- | |- | ||
|[[Mushroom Gorge]]|| | |[[Wii Mushroom Gorge|Mushroom Gorge]]||Nin★Murak||02:16.110||Toadette||Quacker||Yes||Manual | ||
|- | |- | ||
|[[Toad's Factory]]|| | |[[Toad's Factory]]||Nin★Misa||02:22.480||Toad||Bubble Bike/Jet Bubble||Yes||Manual | ||
|- | |- | ||
|[[Mario Circuit | |[[Mario Circuit (Mario Kart Wii)|Mario Circuit]]||Nin★==Kony||01:44.777||Mario||Rapide/Zip Zip||Yes||Manual | ||
|- | |- | ||
|[[Coconut Mall]]|| | |[[Wii Coconut Mall|Coconut Mall]]||Nin★♪SiMO||02:30.764||Daisy||Bon Bon/Sugarscoot||No||Manual | ||
|- | |- | ||
|[[DK Summit]]|| | |[[Wii DK Summit|DK Summit]]||Nin★mokke||02:34.693||Donkey Kong||Standard Bike L||Yes||Manual | ||
|- | |- | ||
|[[Wario's Gold Mine]]|| | |[[Wii Wario's Gold Mine|Wario's Gold Mine]]||Nin★morimo||02:19.585||Wario||Wario Bike||Yes||Manual | ||
|- | |- | ||
|[[Daisy Circuit]]|| | |[[Wii Daisy Circuit|Daisy Circuit]]||Nin★Toki||01:56.822||Daisy||Royal Racer/Daytripper||No||Manual | ||
|- | |- | ||
|[[Koopa Cape]]|| | |[[Wii Koopa Cape|Koopa Cape]]||Nin★Rose||03:03.022||Koopa Troopa||Cheep Charger||No||Manual | ||
|- | |- | ||
|[[Maple Treeway]]|| | |[[Wii Maple Treeway|Maple Treeway]]||Nin★pico||02:58.633||Diddy Kong||Nostalgia 1/Classic Dragster||Yes||Manual | ||
|- | |- | ||
|[[Grumble Volcano]]|| | |[[Wii Grumble Volcano|Grumble Volcano]]||Nin★Gorin||02:28.237||Dry Bowser||Offroader||Yes||Manual | ||
|- | |- | ||
|[[Dry Dry Ruins]]|| | |[[Wii Dry Dry Ruins|Dry Dry Ruins]]||Nin★Kei||02:30.949||Yoshi||Nostalgia 1/Classic Dragster||Yes||Manual | ||
|- | |- | ||
|[[Moonview Highway]]|| | |[[Wii Moonview Highway|Moonview Highway]]||Nin★KOZ★||02:16.802||Peach||Standard Kart M||Yes||Manual | ||
|- | |- | ||
|[[Bowser's Castle ( | |[[Bowser's Castle (Mario Kart Wii)|Bowser's Castle]]||[[Kosuke Yabuki|Nin★YABUKI]]||03:04.836||Bowser||Piranha Prowler||No||Manual | ||
|- | |- | ||
|[[Rainbow Road | |[[Wii Rainbow Road|Rainbow Road]]||[[Hideki Konno|Nin★Konno]]||03:05.895||Rosalina||Twinkle Star/Shooting Star||No||Manual | ||
|- | |- | ||
| | |{{classic-link|GCN|Peach Beach}}||Nin★HIRO||01:34.233||Peach||Royal Racer/Daytripper||No||Manual | ||
|- | |- | ||
| | |{{classic-link|DS|Yoshi Falls}}||Nin★DoTak||01:16.461||Yoshi||Rapide/Zip Zip||No||Manual | ||
|- | |- | ||
| | |{{classic-link|SNES|Ghost Valley 2}}||Nin★YOKO||01:06.595||King Boo||Standard Kart L||Yes||Manual | ||
|- | |- | ||
| | |{{classic-link|N64|Mario Raceway}}||Nin★Ichiro||02:14.799||Baby Mario||Nanobike/Bit Bike||Yes||Manual | ||
|- | |- | ||
| | |{{classic-link|N64|Sherbet Land}}||Nin★Sakat||02:48.651||Baby Luigi||Quacker||Yes||Auto | ||
|- | |- | ||
| | |{{classic-link|GBA|Shy Guy Beach}}||Nin★Kato||01:45.568||Koopa Troopa||Cheep Charger||Yes||Manual | ||
|- | |- | ||
| | |{{classic-link|DS|Delfino Square}}||Nin★iwaco||02:41.807||Wario||Wario Bike||Yes||Manual | ||
|- | |- | ||
| | |{{classic-link|GCN|Waluigi Stadium}}||Nin★NARI★||02:32.882||Waluigi||Standard Bike L||No||Manual | ||
|- | |- | ||
| | |{{classic-link|DS|Desert Hills}}||Nin★CHIA||02:10.233||Dry Bones||Standard Bike S||No||Manual | ||
|- | |- | ||
| | |{{classic-link|GBA|Bowser's Castle 3|Bowser Castle 3}}||Nin★Fukuda||02:58.304||Dry Bowser||Standard Kart L||Yes||Manual | ||
|- | |- | ||
| | |{{classic-link|N64|DK's Jungle Parkway}}||Nin★Matt||02:58.264||Donkey Kong||Phantom||Yes||Manual | ||
|- | |- | ||
| | |{{classic-link|GCN|Mario Circuit}}||Nin★♪Miz||01:59.771||Mario||Standard Bike M||Yes||Manual | ||
|- | |- | ||
| | |{{classic-link|SNES|Mario Circuit 3}}||Nin★iwaco||01:38.880||Baby Mario||Standard Kart S||Yes||Manual | ||
|- | |- | ||
| | |{{classic-link|DS|Peach Gardens}}||Nin★Ito.y||02:34.894||Baby Peach||Magikruiser||Yes||Manual | ||
|- | |- | ||
| | |{{classic-link|GCN|DK Mountain}}||Nin★♪msk||02:57.744||Funky Kong||Wario Bike||Yes||Manual | ||
|- | |- | ||
| | |{{classic-link|N64|Bowser's Castle}}||Nin★GASK2||03:19.323||Bowser Jr.||Standard Kart M||Yes||Manual | ||
|} | |} | ||
===Expert Staff Ghosts=== | ===Expert Staff Ghosts=== | ||
{| border= | {|border=1 style="text-align:center;border-collapse:collapse;max-width:100em;margin:auto"align=center class="wikitable" | ||
|- | |||
!|Course | |||
!|Staff Name | |||
!|Unlock Time | |||
!|Time | |||
!|Character | |||
!|Vehicle | |||
!|Wii Wheel | |||
!|Drift | |||
|- | |||
|[[Luigi Circuit (Mario Kart Wii)|Luigi Circuit]]||Nin★Uta♪||01:26.394|| 01:19.419||Luigi||Mach Bike||Yes||Manual | |||
|- | |||
|[[Wii Moo Moo Meadows|Moo Moo Meadows]]||Nin★Tkym||01:34.160|| 01:25.909||Baby Daisy||Bullet Bike||No||Auto | |||
|- | |||
|[[Wii Mushroom Gorge|Mushroom Gorge]]||Nin★Miki||02:10.875|| 02:01.011||Toadette||Concerto/Mini Beast||No||Manual | |||
|- | |||
|[[Toad's Factory]]||Nin★GQO||02:17.653|| 02:05.593||Toad||Blue Falcon||No||Manual | |||
|- | |||
|[[Mario Circuit (Mario Kart Wii)|Mario Circuit]]||Nin★fuyu||01:40.528|| 01:33.702||Mario||B Dasher Mk 2/Sprinter||No||Manual | |||
|- | |||
|[[Wii Coconut Mall|Coconut Mall]]||Nin★MUGI★||02:25.620|| 02:13.333||Daisy||Wild Wing||Yes||Manual | |||
|- | |||
|[[Wii DK Summit|DK Summit]]||Nin★KOZ★||02:29.076|| 02:17.546||Donkey Kong||Flame Flyer||Yes||Manual | |||
|- | |||
|[[Wii Wario's Gold Mine|Wario's Gold Mine]]||[[Ryo Nagamatsu|Nin★♪Ryo]]||02:15.323|| 02:04.800||Wario||Flame Flyer||No||Manual | |||
|- | |||
|[[Wii Daisy Circuit|Daisy Circuit]]||Nin★Taeko||01:51.786|| 01:41.362||Daisy||Mach Bike||No||Manual | |||
|- | |||
|[[Wii Koopa Cape|Koopa Cape]]||Nin★morimo||02:56.867|| 02:41.370||Koopa Troopa||Bubble Bike/Jet Bubble||No||Manual | |||
|- | |- | ||
|[[Wii Maple Treeway|Maple Treeway]]||Nin★MUGI★||02:51.684|| 02:37.812||Diddy Kong||Nitrocycle/Sneakster||No||Manual | |||
|- | |- | ||
|[[Wii Grumble Volcano|Grumble Volcano]]||Nin★aki||02:22.856|| 02:11.852||Dry Bowser||Torpedo/Spear||No||Manual | |||
|- | |- | ||
|[[ | |[[Wii Dry Dry Ruins|Dry Dry Ruins]]||Nin★Akito||02:26.064|| 02:14.286||Yoshi||Nitrocycle/Sneakster||Yes||Manual | ||
|- | |- | ||
|[[ | |[[Wii Moonview Highway|Moonview Highway]]||Nin★Koh||02:10.509|| 02:04.163||Peach||Mach Bike||Yes||Manual | ||
|- | |- | ||
|[[ | |[[Bowser's Castle (Mario Kart Wii)|Bowser's Castle]]||Nin★Masa||02:57.382|| 02:42.098||Bowser||Bowser Bike/Flame Runner||No||Manual | ||
|- | |- | ||
|[[ | |[[Wii Rainbow Road|Rainbow Road]]||Nin★Syun1||03:00.007|| 02:44.734|| style="text-align:center;"|Rosalina||Aero Glider/Jetsetter||No||Manual | ||
|- | |- | ||
| | |{{classic-link|GCN|Peach Beach}}||Nin★Taeko||01:30.909|| 01:23.140||Peach||Dolphin Dasher||Yes||Manual | ||
|- | |- | ||
| | |{{classic-link|DS|Yoshi Falls}}||Nin★FJ||01:14.072|| 01:09.175||Yoshi||Super Blooper/Turbo Blooper||Yes||Manual | ||
|- | |- | ||
| | |{{classic-link|SNES|Ghost Valley 2}}||Nin★sira■||01:04.261|| 00:58.907||King Boo||Torpedo/Spear||No||Manual | ||
|- | |- | ||
| | |{{classic-link|N64|Mario Raceway}}||Nin★Yuuki||02:10.069|| 01:59.053||Baby Mario||Concerto/Mini Beast||No||Manual | ||
|- | |- | ||
| | |{{classic-link|N64|Sherbet Land}}||Nin★FJ||02:42.536|| 02:28.356||Baby Luigi||Blue Falcon||No||Manual | ||
|- | |- | ||
| | |{{classic-link|GBA|Shy Guy Beach}}||Nin★Matt||01:41.174|| 01:32.867||Koopa Troopa||Magikruiser||No||Manual | ||
|- | |- | ||
|[[ | |{{classic-link|DS|Delfino Square}}||[[Taro Bando|Nin★TARO]]||02:36.630|| 02:24.169||Wario||Dragonetti/Honeycoupe||No||Manual | ||
|- | |- | ||
|[[ | |{{classic-link|GCN|Waluigi Stadium}}||[[Ryo Nagamatsu|Nin★♪Ryo]]||02:26.335|| 02:12.367||Waluigi||Piranha Prowler||No||Manual | ||
|- | |- | ||
| | |{{classic-link|DS|Desert Hills}}||Nin★solami||02:02.358|| 01:52.686||Dry Bones||Rally Romper/Tiny Titan||Yes||Manual | ||
|- | |- | ||
| | |{{classic-link|GBA|Bowser's Castle 3|Bowser Castle 3}}||Nin★A24||02:53.651|| 02:39.391||Dry Bowser||Bowser Bike/Flame Runner||No||Manual | ||
|- | |- | ||
| | |{{classic-link|N64|DK's Jungle Parkway}}||Nin★Syun1||02:51.693|| 02:37.782||Donkey Kong||Flame Flyer||Yes||Manual | ||
|- | |- | ||
| | |{{classic-link|GCN|Mario Circuit}}||Nin★Dai8||01:55.907|| 01:49.939||Mario||Wild Wing||No||Manual | ||
|- | |- | ||
| | |{{classic-link|SNES|Mario Circuit 3}}||Nin★Shige||01:35.213|| 01:26.659||Baby Mario||Bullet Bike||No||Manual | ||
|- | |- | ||
| | |{{classic-link|DS|Peach Gardens}}||Nin★==Kony||02:29.793|| 02:16.777||Baby Peach||Concerto/Mini Beast||Yes||Manual | ||
|- | |- | ||
| | |{{classic-link|GCN|DK Mountain}}||Nin★Miyam||02:52.100|| 02:38.130||Funky Kong||Flame Flyer||Yes||Manual | ||
|- | |- | ||
| | |{{classic-link|N64|Bowser's Castle}}||Nin★Kentan||03:09.228|| 02:55.933||Bowser Jr.||Nitrocycle/Sneakster||Yes||Manual | ||
|} | |||
==Items== | |||
:''For the probability of obtaining each item when an Item Box is opened in the various modes, see [[Mario Kart Wii item probability distributions]].'' | |||
''Mario Kart Wii'' includes two new items, the [[Mega Mushroom]] and the [[POW Block]], and brings back the [[Thunder Cloud]] from the ''Mario Kart Arcade GP'' installments (making this game its console ''Mario Kart'' debut). All three items are absent from ''[[Mario Kart 7]]'' and ''[[Mario Kart 8]]''. Items can be earned by driving through [[Item Box|Item Boxes]] on the courses, just like in previous games. Once a player has done so, an item will be selected via the Item Roulette. Players can use items by pressing {{button|wii|padleft}}. In general, players tend to obtain a weak item such as a [[Banana]] or a [[Green Shell]] when they are in first. However, if players are in a lower place, they obtain a slightly more powerful item such as a [[Red Shell]] or [[Lightning]]. Usually, the lower the place of the player, the rarer and more powerful the item they get. [[Super Star|Star]]s, Mega Mushrooms, and [[Bullet Bill]]s are examples of powerful items as they provide speed boosts and invincibility. This is the only game in the ''Mario Kart'' series where the drivers do not vocally react to getting inked by a Blooper. | |||
{|class="wikitable" | |||
|- | |- | ||
| | !Image | ||
!Name | |||
!align="center"|Description | |||
|- | |- | ||
|[[ | |[[File:Mushroom.png|100px]] | ||
|align="center"|[[Dash Mushroom|Mushroom]] | |||
|Gives players a short speed boost that ignores terrain. | |||
|- | |- | ||
|[[ | |[[File:MKW Triple Mushrooms Artwork.png|100px]] | ||
|align="center"|[[Triple Mushrooms]] | |||
|Gives players three Mushrooms, which give separate boosts. It is the default item in Time Trial mode. | |||
|- | |- | ||
|[[ | |[[File:Golden Mushroom Artwork - Mario Kart Wii.png|100px]] | ||
|align="center"|[[Golden Dash Mushroom|Golden Mushroom]] | |||
|The driver gets an infinite number of Mushroom boosts for 7.5 seconds. | |||
|- | |- | ||
|[[ | |[[File:Mega Mushroom Artwork - Mario Kart Wii.png|100px]] | ||
|align="center"|[[Mega Mushroom]]<br>'''''New item''''' | |||
|The driver grows bigger, which allows them to squash other racers by running over them, making them lose their items and slow down for a moment. The Mega Mushroom makes the racer invincible to all attacks except those from Stars, Bullet Bills, and Bloopers. It allows the user to destroy items and course obstacles and gives the driver a speed boost. In addition, the player can go off-road without suffering any effect of slowing down. The effect lasts for 7.5 seconds but will be ended prematurely if the player is hit by Lightning. | |||
|- | |- | ||
|[[ | |[[File:MKW Fake Item Box Artwork.png|100px]] | ||
|align="center"|[[Fake Item Box]] | |||
|This item imitates an Item Box but is colored red and has an upside down question mark. At a distance, it appears a similar color to a regular item box, only revealing its true color as the player approaches. It causes opponents to flip over once hit. It cannot block item attacks, but it can be held behind the player's vehicle to block other vehicles. | |||
|- | |- | ||
|[[ | |[[File:Banana - Mario Kart Wii.png|100px]] | ||
|align="center"|[[Banana]] | |||
|When drivers run into a Banana, it causes them to slip and slow down. It can also be held behind the player's vehicle to block attacks from shells and other vehicles. | |||
|- | |- | ||
|[[ | |[[File:MKW Triple Bananas Artwork.png|100px]] | ||
|align="center"|[[Triple Bananas]] | |||
|This item gives the driver a trail of three Bananas. | |||
|- | |- | ||
|[[ | |[[File:MKW Green Shell Artwork.png|100px]] | ||
|align="center"|[[Green Shell]] | |||
|A basic green shell that can be thrown forwards and backwards. It bounces off obstacles several times before it hits an opponent or is destroyed. With each bounce, the new direction is a little corrected to increase the probability of hitting a player. | |||
|- | |- | ||
|[[ | |[[File:MKW Triple Green Shells Artwork.png|100px]] | ||
|align="center"|[[Triple Green Shells]] | |||
|Three Green Shells that surround the racer until released. These can also be thrown forward or backward. | |||
|- | |- | ||
|[[ | |[[File:MKW Red Shell Artwork.png|100px]] | ||
|align="center"|[[Red Shell]] | |||
|A fragile shell that tracks the nearest opponent when fired forward. It will break if it hits an obstacle. | |||
|- | |- | ||
|[[ | |[[File:MKW Triple Red Shells Artwork.png|100px]] | ||
|align="center"|[[Triple Red Shells]] | |||
|Three Red Shells that surround the racer until released. | |||
|- | |||
|[[File:MKW Spiny Shell Artwork.png|100px]] | |||
|align="center"|[[Spiny Shell (blue)|Spiny Shell]] | |||
|A blue shell that flies directly to the racer in first place and explodes like a Bob-omb. Only one Spiny Shell can be in play at a time, and Spiny Shells are unobtainable for the first 30 seconds of a race. | |||
|- | |||
|[[File:MKW Star Artwork.png|100px]] | |||
|align="center"|[[Super Star|Star]] | |||
|The driver obtains total invincibility for 7.5 seconds, allowing them to knock over items, course obstacles, and other players on contact. Also, the driver receives a speed boost and the power to drive off-road with no speed loss. Racers that are hit will lose all items in their possession. | |||
|- | |||
|[[File:MKDD Thunderbolt Artwork.png|100px]] | |||
|align="center"|[[Lightning]] | |||
|Lightning strikes every racer ahead of the user, causing them to spin out, drop their items, and shrink to a very small size, driving more slowly. This item takes no effect on racers with invincibility items activated. The effects wear off from lowest place to first. Any users with the Mega Mushroom in effect shrink to normal size. Only one Lightning can be in play at a time, and it has a cooldown timer both for the first 30 seconds of a race and for 30 seconds between uses. | |||
|- | |||
|[[File:MKW Thunder Cloud Artwork.png|100px]] | |||
|align="center"|[[Thunder Cloud]]<br>'''''New item in console Mario Kart''''' | |||
|A thundercloud hovers over the recipient and strikes it with lightning after 10 seconds. The user shrinks to a very small size for 10 seconds, driving more slowly. Before this happens, the user has higher speed and acceleration while not losing speed when driving off-road, and may pass the cloud to an opponent by bumping into them. The Thunder Cloud can be destroyed if the driver goes into a cannon or uses a Star or Mega Mushroom. Only one Thunder Cloud can be in play at a time. | |||
|- | |||
|[[File:Bob-omb - Mario Kart Wii.png|100px]] | |||
|align="center"|[[Bob-omb]] | |||
|Blows up a racer anywhere on the track. It has the same effect as the Spiny Shell, except that it can be lobbed or tossed backwards just like a Banana. | |||
|- | |||
|[[File:Blooper.png|100px]] | |||
|align="center"|[[Blooper]] | |||
|Squirts ink on any racer ahead of the user, partially obscuring vision. It eventually wears off, but it can be immediately removed by a speed boost from a Mushroom, boost tile, etc. The higher the player's position is, the more their vision is obscured. Only one Blooper can be in play at a time, and it has a cooldown timer both for the first 15 seconds of a race and for 15 seconds between uses. | |||
|- | |||
|[[File:Bullet Bill Artwork - Mario Kart Wii.png|100px]] | |||
|align="center"|[[Bullet Bill]] | |||
|Transforms the racer into a large Bullet Bill, which rockets down the entire track at very high speeds on autopilot. The Bullet Bill provides total invincibility and will knock over any item, any course hazard, and any player that is in the way, making them lose or drop all their items. Only one Bullet Bill can be in play at a time. | |||
|- | |||
|[[File:POW Block - Mario Kart Wii.png|100px]] | |||
|align="center"|[[POW Block]]<br>'''''New item''''' | |||
|The POW Block appears above the karts as a 2D image, warning players of its arrival, and causes any racer on the ground ahead of the user to spin out and drop their items. Players who deploy the wheelie button at the moment the POW Block hits mitigate the spinout by retaining their speed. Players can also be airborne to avoid the POW Block, as the POW Block will not affect any racer that is in the air. Only one POW Block can be in play at a time, and it has a cooldown timer both for the first 20 seconds of a race and for 20 seconds between uses. | |||
|} | |} | ||
== | ==Differences in multiplayer modes== | ||
'' | As in the previous games in the ''Mario Kart'' series, there are several small changes made to the courses in split-screen mode, most likely to preserve the frame-rate. | ||
*At the start of a race, Lakitu is next to the player driver, slightly facing the side of the track. In single player mode, he is in front of the player driver, facing the camera. This only counts for races, however, as Lakitu always starts next to the player when in a battle. | |||
*The question marks in the Item Boxes spin around with the box. They are static in single player mode. | |||
*Frame-rate slows to 30 frames per second if the screen is split 4 ways or is in Two Player Online. | |||
*The fourth screen in local three player play displays a dynamic camera that rotates between the three player drivers. | |||
*CPUs do not animate. In Battle Mode, their voices are also absent. | |||
*There are no tourists on the Sunshine cruise ship in {{classic-link|GCN|Peach Beach}}. | |||
*Boos do not animate in {{classic-link|SNES|Ghost Valley 2}}. | |||
*In {{classic-link|GCN|Waluigi Stadium}}, the metal Piranha Plants do not move their jaws, and the moving arrow signs and the Jumbotron are absent as in ''Mario Kart: Double Dash!!'' | |||
*There are no Miis in the stores in [[Wii Coconut Mall|Coconut Mall]]. | |||
*The crowd in [[Mario Circuit (Mario Kart Wii)|Mario Circuit]], [[Toad's Factory]], [[Wii Daisy Circuit|Daisy Circuit]], and {{classic-link|DS|Delfino Square}} do not animate. | |||
*No tourists are on the ship in {{classic-link|N64|DK's Jungle Parkway}}. | |||
*The Jumbotron at [[Funky Stadium]] does not show the human player; instead it shows a picture of Funky Kong's face with the words "Funky Stadium". | |||
*[[Star Bit]]s are missing in [[Wii Rainbow Road|Rainbow Road]]. | |||
==Staff== | |||
{{main|List of Mario Kart Wii staff}} | |||
Consistent with the rest of the console ''Mario Kart'' series, ''Mario Kart Wii'' is developed by [[Nintendo EAD]]. [[Shigeru Miyamoto]] is the general producer of the game, with the producer being [[Hideki Konno]], who had been consistently involved with the ''Mario Kart'' series since the first installment, except ''Mario Kart: Double Dash!!'', and the executive producer being [[Satoru Iwata]]. Yasuyuki Oyagi directed the game, having co-directed the series since ''Mario Kart 64'' barring ''[[Mario Kart: Super Circuit]]'', though ''Mario Kart Wii'' was the first installment he was the sole director of and the last installment he directed, becoming a co-producer later on. ''Mario Kart Wii'' was the debut of [[Kosuke Yabuki]] as a planner; he would later become key staff and serving a director role in later ''Mario Kart'' installments. | |||
==Reception== | |||
===Critical reception=== | |||
''Mario Kart Wii'' has received positive reviews from critics. It has an average score of 82.07% from 74 reviews in GameRankings and an average of 82 based on 73 reviews on Metacritic.<ref>[https://web.archive.org/web/20160410055802/http://www.gamerankings.com/wii/942008-mario-kart-wii/index.html GameRankings score for ''Mario Kart Wii'']. Retrieved December 11, 2013.</ref><ref>[http://www.metacritic.com/game/wii/mario-kart-wii Metacritic score for ''Mario Kart Wii''.] ''Metacritic''. Retrieved December 11, 2013.</ref> | |||
Bozon of IGN gave the game an 8.5 out of 10, praising the online play, the presentation, and the gameplay but criticizing the cheap AI in 150cc, the lack of voice chat, reliance on friend codes, and the random items. He finished off with, "Every player is going to have their own love/hate relationship with ''Mario Kart Wii'', but in the end the game does so many things right that it'd be foolish not to give credit where due. Online seriously raises the bar for Nintendo, trumping even Smash in a big, big way. The sense of community you can get even with random racers online and ghost-supported leader boards is impressive, and the fact that you can head on to Nintendo Wi-Fi Connection solo, with a friend via split-screen, or hook up with buddies across the world without worry of lag and never-ending disconnect notices makes ''Mario Kart Wii'' a pure joy to play online. It isn't the best ''Mario Kart'' in the series, but it's a must-play experience on Wii, and standard-setting offering as far as online, channel support, and connectivity are concerned. Now if you'll excuse us, we've got some online stats to obsess over."<ref>Bozon (Apr 20, 2008) [http://www.ign.com/articles/2008/04/20/mario-kart-wii-review Mario Kart Wii Review.] ''IGN''. Retrieved December 11, 2013.</ref> Sammy Barker of Nintendo Life praised the game for its polished gameplay and being well-thought and brilliant. Though he criticized the presentation, he wrote, "Poor presentation should not be an issue in this generation of gaming, particularly with the other consoles doing it so well, but, thankfully for us (as Wii owners), this game is a living, breathing example of gameplay over graphics." He gave the game 9/10 stars.<ref>Barker, Sammy (April 14, 2008) [http://www.nintendolife.com/reviews/2008/04/mario_kart_wii_wii Review: Mario Kart Wii.] ''Nintendo Life''. Retrieved December 11, 2013.</ref> Oli Welsh of Eurogamer gave the game a score of 8/10. He praised the presentation of the game, the use of the Wii Wheel, and the smooth gameplay while criticizing the Battle Mode and the single player exclusive Grand Prix mode (though this was revised after being informed by Nintendo that four sequences of races with friends is still possible). He wrote, "Ultimately, the sheer sensory pleasure of playing ''Mario Kart Wii'' - from the charming animations, to the bopping tunes, to the sugar-rush boosting, to the exquisite steering - far overcomes the few concerns we have about it. It still has to be docked a mark for the awkward structure and compromised battle modes - but it's still unreservedly recommended to anyone for whom ''Mario Kart'' is a gaming cornerstone. And really, that should be everyone."<ref>Welsh, Oli. (March 20, 2008) [http://www.eurogamer.net/articles/mario-kart-wii-review Mario Kart Wii Review.] ''Eurogamer''. Retrieved December 11, 2013.</ref> | |||
Ryan Davis of Giant Bomb criticized the game for being safe. He wrote, "''Mario Kart Wii'' is a good game stunted by its audience's apparently insatiable appetite for the exact same thing, over and over again. The addition of online play and motion controls are good, but they're also the most predictable choices possible. Personally, I'm completely tired of getting exactly what I expect." He gave the game a 3 out of 5 stars.<ref>Davis, Ryan (May 7, 2008) [http://www.giantbomb.com/reviews/mario-kart-wii-review/1900-26/ Mario Kart Wii review.] ''Giant Bomb''. Retrieved December 11, 2013.</ref> Edge gave the game 6/10, criticizing the game's compromising local, splitscreen multiplayer for online play. They ended with "Undercutting local multiplayer to benefit the online movement is a grievous error. Of all the multiplayer franchises, we struggle to think of a title in which four friends sat side by side seemed more natural. Having sacrificed racing integrity in Double Dash to side with social silliness, Nintendo has turned 180 degrees into an awkward halfway house. It’s a residence from where it has attempted to regain time-trial credentials with the loosest racing yet, and sees the company finally find its online feet by betraying one of its great pastimes. Perhaps first place in ''Mario Kart Wii'' isn’t the least enjoyable location in gaming after all."<ref>[https://web.archive.org/web/20130617170757/http://www.edge-online.com/review/mario-kart-wii-review/2/ Mario Kart Wii review.] ''Edge''. Retrieved December 11, 2013.</ref> | |||
{| class="wikitable reviews" | |||
!colspan="4"style="font-size:120%; text-align: center; background-color:silver"|Reviews | |||
|-style="background-color:#E6E6E6;" | |||
|Reviewer, Publication | |||
|Score | |||
|Comment | |||
|- | |||
|''[[Nintendo Power]]'' | |||
|9/10 | |||
|align=left|''With more features, modes and multiplayer options than ever before, fans should be revved up to get behind the wheel. [May 2008, p.86].'' | |||
|- | |||
|''Official Nintendo Magazine UK'' | |||
|9.4/10 | |||
|align=left|''A fantastic racer and the best online Nintendo game ever. [Apr 2008, p.58]'' | |||
|- | |||
|Bozon, [https://www.ign.com/articles/2008/04/20/mario-kart-wii-review IGN] | |||
|8.5/10 | |||
|align=left|''There are some things that feel completely out of whack though, such as the uncharacteristically cheap AI in 150cc, the lack of voice chat for an extremely social online game, reliance on friend codes, and "everyone's a winner" feeling you get when random items show up and completely turn the game upside down in an instant.'' | |||
|- | |||
|Bryn Williams, [http://wii.gamespy.com/wii/mario-kart-wii/870096p1.html GameSpy] | |||
|4.5/5 | |||
|align=left|''The offline and online content is extremely entertaining and the pursuit of casual and hardcore karting has never been this much fun.'' | |||
|- | |||
|Greg Leahy, [https://www.nintendoworldreport.com/review/15825/mario-kart-wii-wii Nintendo World Report] | |||
|8.5/10 | |||
|align=left|''Mario Kart Wii is ultimately much the same game as Mario Kart DS, but this is forgivable due to its drastically improved online functionality along with some welcome gameplay additions and tweaks.'' | |||
|- | |||
|Lark Anderson, [https://www.gamespot.com/reviews/mario-kart-wii-review/1900-6189936/ GameSpot] | |||
|8.5/10 | |||
|align=left|''Mario Kart Wii offers varied multiplayer and thoroughly integrated online modes that will keep you coming back for more.'' | |||
|- | |||
|Oli Welsh, [https://www.eurogamer.net/mario-kart-wii-review Eurogamer] | |||
|8/10 | |||
|align=left|''Ultimately, the sheer sensory pleasure of playing Mario Kart Wii - from the charming animations, to the bopping tunes, to the sugar-rush boosting, to the exquisite steering - far overcomes the few concerns we have about it. It still has to be docked a mark for the awkward structure and compromised multiplayer modes - but it's still unreservedly recommended to anyone for whom Mario Kart is a gaming cornerstone.'' | |||
|- | |||
|''Electronic Gaming Monthly'' | |||
|6.4/10 | |||
|align=left|''While Mario Kart Wii is predictably similar to its predecessors, something has changed with this installment. Something that makes it feel subtly unlike other Mario Karts--and not a change for the better. [June 2008, p.73]'' | |||
|- | |||
|''Edge Magazine'' | |||
|6/10 | |||
|align=left|'' Having sacrificed racing integrity in "Double Dash" to side with social silliness, Nintendo has turned 180 degrees into an awkward halfway house. [May 2008, p.86]'' | |||
|- | |||
|Chris Kohler, [https://www.wired.com/2008/05/review-mario-ka/#more Wired] | |||
|6/10 | |||
|align=left|''[Mario Kart Wii's Battle Mode] is no longer a last-man-standing contest: Matches now last three minutes each, and if your kart takes too much damage, don't worry! You'll just respawn. Even worse, all battles are now played in teams of two. So while you can still have four human players, they can't all face off against each other -- and what's the point of that?'' | |||
|- | |||
|Ryan Davis, [https://www.giantbomb.com/reviews/mario-kart-wii-review/1900-26/ Giant Bomb] | |||
|6/10 | |||
|align=left|''Personally, I’m completely tired of getting exactly what I expect.'' | |||
|- | |||
!colspan="4"style="background-color:silver; font-size:120%; text-align: center;"|Aggregators | |||
|-style="background-color:#E6E6E6;" | |||
|colspan=2|Compiler | |||
|colspan=2|Platform / Score | |||
|- | |||
|colspan=2|Metacritic | |||
|colspan=2 style="background-color:LimeGreen"|[http://www.metacritic.com/game/wii/mario-kart-wii/critic-reviews 82] | |||
|- | |||
|colspan=2|GameRankings | |||
|colspan=2|[https://web.archive.org/web/20160410055802/http://www.gamerankings.com/wii/942008-mario-kart-wii/index.html 82.07%] | |||
|} | |||
{{br}} | |||
===Awards=== | |||
''Mario Kart Wii'' won the "Favorite Video Game" award at the {{wp|2010 Kids' Choice Awards|Nickelodeon 2010 Kids' Choice Awards}}, beating out ''[[zeldawiki:The Legend of Zelda: Spirit Tracks|The Legend of Zelda: Spirit Tracks]]'', ''{{wp|Wii Fit}}'', and ''{{wp|Wii Sports Resort}}''. The game won the Best Online Multiplayer Game from IGN in 2008.<ref>[https://web.archive.org/web/20081222040859/http://bestof.ign.com/2008/wii/19.html IGN Wii: Best Online Multiplayer Game.] ''IGN''. Retrieved March 7, 2018.</ref> In the ''[[Guinness World Records]] 2010 Gamer's Edition'', ''Mario Kart Wii'' won the "Best-selling racing game" accolade.<ref>Funk, John (May 21, 2010) [http://www.escapistmagazine.com/news/view/100814-Marios-Ten-Best-Guinness-World-Records Mario's Ten Best Guinness World Records.] ''The Escapist''. Retrieved March 7, 2018.</ref> | |||
===Sales=== | |||
In the week of May 4, 2008 in Japan, ''Mario Kart Wii'' became the best-selling game for the Wii, having sold over a million copies in Japan, less than a month after its release.<ref>McWhertor, Michael. (March 8, 2008). [https://kotaku.com/388562/aint-no-stopping-mario-kart-wii-in-japan Ain't No Stopping Mario Kart Wii In Japan.] ''Kotaku''. Retrieved March 5, 2018.</ref> In the UK, ''Mario Kart Wii'' was the 8th biggest selling video game in British history and the single best-selling Nintendo game in history.<ref>[https://web.archive.org/web/20080420052652/http://kotaku.com/379767/british-sales-charts Sales Charts British Sales Charts.] ''Kotaku''. Retrieved March 5, 2018.</ref> In the United States, at the month's release, ''Mario Kart Wii'' was the second best-seller at 1.12 million copies, being beaten out by the Xbox 360 version of ''{{wp|Grand Theft Auto IV}}'', but outselling the PS3 version of ''Grand Theft Auto IV''.<ref>Sinclair, Brendan. (June 5, 2008) [https://www.gamespot.com/articles/npd-us-april-game-revs-spike-on-gtaiv/1100-6191066/ NPD: US April game revs spike on GTAIV.] ''GameSpot''. Retrieved March 5, 2018.</ref> ''Mario Kart Wii'' currently is the second best-selling game on the Wii, beaten out by ''Wii Sports'', and in turn the best-selling ''Super Mario'' game on the system; the game has sold a total of 37.38 million units as of December 31, 2020, and was originally the best-selling ''Mario Kart'' game and the best-selling racing video game of all time, before being overtaken by ''Mario Kart 8 Deluxe'' in September 30, 2021. | |||
==Promotion== | |||
{{main|List of Mario Kart Wii trading cards}} | |||
Trading cards were released to celebrate the release of ''Mario Kart Wii''. Trading card packs additionally included tattoos called [[FunTats]]. | |||
For the marketing of ''Mario Kart Wii'' in the United States only, Nintendo of America did a series of three commercials starring [[Cowboy Jed]], primarily to promote their slogan for this game: "Get Behind The Wheel!". The slogan focuses on the [[Wii#Wii Wheel|Wii Wheel]], Nintendo's targeted gameplay control, as stated earlier in this article. | |||
== | ==Pre-release and unused content== | ||
{{main| | {{main|List of Mario Kart Wii pre-release and unused content}} | ||
Unused graphics have been found depicting icons for a [[Hammer Bro]], a [[Koopa Paratroopa]], and [[Petey Piranha]], presumably being an extra character for each weight class. An outfit for the NPC Miis has also been found, which resembles a [[Toad]]. | |||
<gallery widths=64 heights=64 style="display:inline-block"> | |||
KoopaParatroopa-MKWii-Icon.png|An unused select Icon for [[Koopa Paratroopa]] as a player | |||
HammerBro-MKWii-Icon.png|An unused select Icon for [[Hammer Bro]] as a player | |||
Petey-MKWii-Icon.png|An unused select Icon for [[Petey Piranha]] as a player | |||
</gallery> | |||
<gallery style="display:inline-block"> | |||
MKWii NPC Mii Outfit.png|The unused Toad outfit | |||
</gallery> | |||
==Glitches== | ==Glitches== | ||
{{main| | {{main|List of Mario Kart Wii glitches}} | ||
'''Note:''' All names are conjectural unless otherwise specified. | |||
===Grumble Volcano lap glitch=== | |||
On the large rock to the left of the starting lien in [[Grumble Volcano]], if the player drives around it, they will complete a lap. | |||
== | ===Incorrect number of players=== | ||
{{main | Rarely, when the player finishes an online race, if the next race has 12 players, the game will say it has 13 players instead. | ||
===Miscolored Item Boxes=== | |||
[[File:MKW Blue Fake Item Box Glitch.png|thumb|The glitch in action]] | |||
To perform the glitch, the player needs to start a team race on the blue team. If the player starts a solo race, some racers' [[Fake Item Boxes]] will be blue instead of red. | |||
==Gallery== | |||
{{main-gallery}} | |||
<gallery> | |||
MKW Mario Holding Bob-omb on Wild Wing Artwork.png|[[Mario]] driving his [[Wild Wing]] with a [[Bob-omb]] | |||
MKW Yoshi Mach Bike Artwork.png|[[Yoshi]] riding his [[Mach Bike]] | |||
MKW Toad Cheep Charger Artwork.png|[[Toad]] driving his [[Cheep Charger]] | |||
MKW Waluigi Bike Artwork.png|[[Waluigi]] riding his [[Standard Bike L]] | |||
Bowser Art - Mario Kart Wii.png|[[Bowser]] driving his [[Flame Flyer]] holding a [[Spiny Shell]] | |||
Poster_MKWii.jpg|[[Luigi Circuit (Wii)|Luigi Circuit]] group picture artwork | |||
</gallery> | |||
==Music and sound== | |||
Technically, this is the first game before ''[[Mario Kart 8]]'' to feature revamped music for retro courses. In this case, the SNES and GBA tracks received revamped songs, as well as some of the battle stages. Tracks from the N64 and DS had their songs slightly enhanced in sound quality. The GCN tracks, however, remained relatively the same. This trait is also kept in ''[[Mario Kart 7]]'' as well. | |||
It is also the first and currently only game that cuts off the tracks' intros in the final lap. | |||
== | The soundtrack was created using Best Service's Advanced Orchestra and Gigapack, EastWest's Stormdrum and Quantum Leap Brass, E-MU Systems' Proteus/3, Korg Triton Le, ILIO's Synclavier Essential Percussion and World & Orchestra, Roland's D-550, Fantom X7 and Sound Canvas SC-8850, Spectrasonics' Distorted Reality and Supreme Beats, Ueberschall's House Essentials and Zero-G's Jungle Warfare.<ref>https://docs.google.com/spreadsheets/d/1JJBlHHDc65fhZmKUGLrDTLCm6rfUU83-kbuD8Y0zU0o/edit?pli=1#gid=717751203</ref> | ||
{{main|{{PAGENAME}} | ===Soundtrack=== | ||
{{main|{{PAGENAME}} Platinum Soundtrack}} | |||
An official soundtrack was released in 2011 by [[Club Nintendo (rewards program)|Club Nintendo]] as a Platinum reward featuring 43 songs from the game itself. | |||
==Media== | ===Media=== | ||
{{media | {{main-media}} | ||
{{media table | |||
| | |file1=MKW-Title.oga | ||
| | |title1=Title Screen | ||
|description1=The | |description1=The music for the Title Screen | ||
|length1= | |length1=0:30 | ||
| | |file2=MKW Mario and Luigi Circuit Theme.oga | ||
| | |title2=[[Mario Circuit (Mario Kart Wii)|Mario Circuit]] and [[Luigi Circuit (Mario Kart Wii)|Luigi Circuit]] | ||
| | |description2=The music for Mario Circuit and Luigi Circuit | ||
| | |length2=0:30 | ||
|description2=The | |file3=MKW Rainbow Road Theme.oga | ||
|length2= | |title3=[[Wii Rainbow Road |Rainbow Road]] | ||
| | |description3=The music for Rainbow Road | ||
| | |length3=0:30 | ||
| | |file4=MKW Credits Part 1.oga | ||
|title4=Credits Pt. 1 | |||
|description3=The | |description4=The theme for the first part of the credits | ||
|length3= | |length4=0:30 | ||
| | |||
| | |||
| | |||
| | |||
}} | }} | ||
== | ==References to other games== | ||
[[File:MKWii-RainbowRoad2.png|thumb|Star Bits in Rainbow Road]] | |||
| | *All past [[Mario Kart (series)|''Mario Kart'' games]]: Half of the courses are taken from those games in the Retro Grand Prix, while half of the Battle courses are taken from those games under Retro Battle Course. | ||
| | *''[[Mario Bros. (game)|Mario Bros.]]'': The [[POW Block]]'s logo appears in some of the cars in [[Wii Moonview Highway|Moonview Highway]]. It also returns as an item. | ||
| | *''[[Super Mario Bros.]]'': Various items from said game appear in the background of the Battle course [[Block Plaza]], ''Super Mario Bros.''-style. Additionally, the first seconds of the course [[Bowser's Castle (Mario Kart Wii)|Bowser's Castle]] theme resemble the music played in that game by its instruments. Also, the tune that plays in the award ceremony is a cover version of the tune that plays when [[Mario]]/[[Luigi]] beats a castle. When bumped into, a racer's vehicle makes one of several beeping noises, one of which is the first six notes of the [[Ground Theme (Super Mario Bros.)|Ground Theme]], and another is the power-up sound effect. | ||
| | *''[[Super Mario Bros. 3]]'': The license plates on some of the trucks read "SMB3", the abbreviation of ''Super Mario Bros. 3''. They also say "POW" as a reference to the item that causes earthquakes. | ||
| | *''[[Famicom Grand Prix II: 3D Hot Rally]]'': The [[Tiny Titan]] was inspired by the [[Monster (vehicle)|Monster]]. | ||
| | *''[[Super Mario Kart]]'': [[SNES Ghost Valley 2|Ghost Valley 2]] and [[SNES Mario Circuit 3|Mario Circuit 3]] return as retro courses, and [[SNES Battle Course 4|Battle Course 4]] returns as a playable battle course. Also, part of the music that plays during the Award Ceremony (if drivers win a [[Trophy]]) is the same as in the same scenario in ''Super Mario Kart'', ''Mario Kart 64'' and ''Mario Kart: Super Circuit''. | ||
| | *''[[Super Mario 64]]'': [[Maw-Ray|Unagi]] appear in the background of [[Wii Koopa Cape|Koopa Cape]] and Chain Chomp Wheel. | ||
| | *''[[Mario Kart 64]]'': [[N64 Mario Raceway|Mario Raceway]], [[N64 Sherbet Land|Sherbet Land]], [[N64 DK's Jungle Parkway|DK's Jungle Parkway]], and [[N64 Bowser's Castle|Bowser's Castle]] return as retro courses, and [[N64 Skyscraper|Skyscraper]] returns as a playable battle course. Also, the course [[Wii Moo Moo Meadows|Moo Moo Meadows]] is based on [[N64 Moo Moo Farm|Moo Moo Farm]], and [[Block Plaza]] has parts of [[Block Fort]]. Also, part of the music that plays during the Award Ceremony (if drivers win a [[Trophy]]) is the same as in the same scenario in ''Mario Kart 64'', ''Super Mario Kart'' and ''Mario Kart: Super Circuit''. | ||
| | *''[[Mario Kart: Super Circuit]]'': [[GBA Shy Guy Beach|Shy Guy Beach]] and [[GBA Bowser's Castle 3|Bowser Castle 3]] return as retro courses, and [[GBA Battle Course 3|Battle Course 3]] returns as a playable battle course. Also, the Yoshi Sphinx from the background of [[Yoshi Desert]] returns as a part of the race course Dry Dry Ruins. Part of the music that plays during the Award Ceremony (if drivers win a [[Trophy]]) is the same as in the same scenario in ''Mario Kart: Super Circuit'', ''Super Mario Kart'' and ''Mario Kart 64''. | ||
| | *''[[Super Mario Sunshine]]'': The battle stage [[Delfino Pier]] is based on [[Delfino Plaza]]. Also, the course [[Wii Coconut Mall|Coconut Mall]] is seemingly located on [[Isle Delfino]]. | ||
| | *''[[WarioWare (series)|WarioWare]]'' series: The [[Wario Bike]] appears as a selectable vehicle. | ||
*''[[Mario Kart: Double Dash!!]]'': [[GCN Peach Beach|Peach Beach]], [[GCN Waluigi Stadium|Waluigi Stadium]], [[GCN Mario Circuit|Mario Circuit]], and [[GCN DK Mountain|DK Mountain]] return as retro courses, and [[GCN Cookie Land|Cookie Land]] returns as a playable battle course, and all of these courses retain their intros as retro tracks. Also, [[Daisy Cruiser]] cameos in the background of [[Wii Daisy Circuit|Daisy Circuit]], [[Block Plaza]] has parts of [[Block City]], the course Dry Dry Ruins has the same starting point as Dry Dry Desert, and finally, the character icons and the starting race jingle for Grand Prix races was also recycled from that game for VS. and Grand Prix races in this game, along with the 3-2-1 starting countdown, but with "GO!" at the end instead of "START". Some of the animations seen for the driver selection process (excluding the new drivers introduced for this game) are ported character models from ''Mario Kart: Double Dash!!'', with only a few characters receiving noticeable changes. On the save file/driver's license screen, the Star Cup uses the same icon. | |||
* ''[[Mario Party 7]]'': [[Dry Bones]] and [[Boo]]'s artwork can be seen in [[Bowser's Castle (Mario Kart Wii)|Bowser's Castle]] on the Showtime billboard. Some of [[Birdo]]'s voice clips are reused from this game. | |||
*''[[Mario Kart DS]]'': [[DS Yoshi Falls|Yoshi Falls]], [[DS Delfino Square|Delfino Square]], [[DS Desert Hills|Desert Hills]], and [[DS Peach Gardens|Peach Gardens]] return as retro courses, and [[DS Twilight House|Twilight House]] returns as a playable battle course, and just like ''Double Dash!!'', all of the courses' intros return in this game as well. Also, the course [[Wii DK Summit|DK Summit]] has derived many elements from [[DS DK Pass|DK Pass]], and the course Dry Dry Ruins has similar music to that of Desert Hills, and finally, the countdown sound effect for starting races and battles are recycled from that game to signal the start of the race in Grand Prix, Time Trial, and VS mode. The Zipper is a bike that relates to the Shooting Star and the [[ROB-LGS]] acts like the Standard Bikes in the game. The opening portion of the theme for Rainbow Road is taken from [[Rainbow Road (Mario Kart DS)|Rainbow Road]]'s music from this game. | |||
*''[[New Super Mario Bros.]]'': Various features in the game are derived from their ''New Super Mario Bros.''-look, such as the hills and outcrops of [[Luigi Circuit (Mario Kart Wii)|Luigi Circuit]] and the [[Flower (environmental object)|flowers]] and mushrooms of Moo Moo Meadows. The [[Mega Mushroom]] is an item in the game. The mushroom platforms in [[Wii Mushroom Gorge|Mushroom Gorge]] is based on the mushroom platforms in said game, with the red ones being "bouncy", and the green ones more like solid platforms. [[Wii Grumble Volcano|Grumble Volcano]] is similar to [[World 8 (New Super Mario Bros.)|World 8]] of ''New Super Mario Bros.'' Also, Dry Bowser, who first appears in ''New Super Mario Bros.'', returns to ''Mario Kart Wii'' as his second appearance. | |||
*''[[Mario Kart Arcade GP 2]]'': Princess Peach's profile artwork is reused. | |||
*''[[Mario Strikers Charged]]'': Several voice clips are reused from this game. | |||
*''[[Mario Party 8]]'': Several voice clips are reused from this game. Daisy's artwork from this game is also reused, but with her kart added to it. | |||
*''[[Donkey Kong Barrel Blast]]'': Several of [[Donkey Kong]], [[Diddy Kong]], and [[Funky Kong]]'s voice clips are reused from this game. | |||
*''[[Super Mario Galaxy]]'': [[Wii Rainbow Road |Rainbow Road]] has several elements from said game, such as Star Bits or a section based on [[Launch Stars]], and portions of the [[Good Egg Galaxy]]'s music is heard for the course's music. [[Wii Maple Treeway|Maple Treeway]] resembles the [[Gold Leaf Galaxy]]. The battle course [[Galaxy Colosseum]] is also heavily based on ''Super Mario Galaxy''. Additionally, [[Spiky Topmen]] are the enemies in the June 2008 1st Competition. Also, Rosalina, who first appears in ''Super Mario Galaxy'', returns to ''Mario Kart Wii'' as her second appearance. | |||
==References in later games== | |||
[[File:SSB4TrophyToadQuacker.png|thumb|The Quacker trophy from ''Super Smash Bros. for Wii U'']] | |||
*''[[Mario Super Sluggers]]'': Some of Funky Kong's voice clips are reused in this game. | |||
*''[[New Super Mario Bros. Wii]]'': The character icons were reused in the Character Selection. Also, some of the voices from this game were reused as well. | |||
*''[[Mario Sports Mix]]'': In [[Toad Park]], the Standard Kart design is used from this game. | |||
*''[[Mario Kart 7]]'': This game's retro selection reuses some courses, being [[Wii Mushroom Gorge|Mushroom Gorge]], [[Wii Coconut Mall|Coconut Mall]], [[Wii Maple Treeway|Maple Treeway]] and [[Wii Koopa Cape|Koopa Cape]]. [[Jump Boost|Tricks]], which are first introduced here, are reused in this game as well as the character icons and countdown timer for starting races and battles. Some voice clips and kart engine sounds are reused. | |||
*''[[Mario Party 9]]'': Some of the characters voice clips, such as most of [[Princess Daisy|Daisy]]'s voice clips and some of [[Toad|Toad's]], return in this game. | |||
*''[[Mario Kart 8]]'' / ''[[Mario Kart 8 Deluxe]]'': Tricks, Bikes, twelve-player races, and the ability to look behind return. [[Wii Moo Moo Meadows|Moo Moo Meadows]], [[Wii Grumble Volcano|Grumble Volcano]], and [[Wii Wario's Gold Mine|Wario's Gold Mine]] return as retro courses (Wario's Gold Mine was added via DLC, but is available from the start in ''Mario Kart 8 Deluxe''). [[Wii Coconut Mall|Coconut Mall]], [[Wii Mushroom Gorge|Mushroom Gorge]], [[Wii Maple Treeway|Maple Treeway]], [[Wii DK Summit|DK Summit]], [[Wii Moonview Highway|Moonview Highway]], [[Wii Koopa Cape|Koopa Cape]], [[Wii Daisy Circuit|Daisy Circuit]], and [[Wii Rainbow Road|Rainbow Road]] return as part of the ''[[Mario Kart 8 Deluxe – Booster Course Pass|Booster Course Pass]]'' in ''Mario Kart 8 Deluxe''. The [[Bowser's Castle (Mario Kart 8)|Bowser's Castle]] in this game sees the return of a similar giant moving Bowser statue that players drive around. Peach, Daisy, and Rosalina wear their bike suits again when riding a bike or ATV. Some voice clips are reused. The [[Launch Star]] boosters from Rainbow Road also return in the remastered {{classic-link|N64|Rainbow Road}} in this game. | |||
*''[[Super Smash Bros. for Wii U]]'': [[Wii Mushroom Gorge|Mushroom Gorge]] is one of the few songs that can be heard at the stage [[Mario Circuit (Super Smash Bros. for Wii U)|Mario Circuit]]. The [[Standard Bike|Standard Bike M]], [[Daytripper]], [[Flame Runner]], [[Quacker]], and [[Offroader]] all appear as trophies. Also, some of [[Bowser Jr.]]'s voice clips are reused. The [[POW Block]] item causes the Shy Guy racers in Mario Circuit to spin out when used. | |||
*''[[Mario & Luigi: Paper Jam]]'': [[King Boo]]'s voice clips are reused during his boss fight. | |||
*''[[Super Smash Bros. Ultimate]]'': Some of Daisy's voice clips are recycled in this game. The Standard Kart, Standard Bike, and Cheep Charger appear as spirits. | |||
*''[[Mario Kart Tour]]'': [[Wii Mushroom Gorge|Mushroom Gorge]], [[Wii Coconut Mall|Coconut Mall]], [[Wii DK Summit|DK Summit]], [[Wii Daisy Circuit|Daisy Circuit]], [[Wii Koopa Cape|Koopa Cape]], [[Wii Maple Treeway|Maple Treeway]], [[Wii Dry Dry Ruins|Dry Dry Ruins]], [[Wii Moonview Highway|Moonview Highway]], and [[Wii Rainbow Road|Rainbow Road]] appear as returning courses. The [[Cheep Charger]], [[Wild Wing]], [[Super Blooper (kart)|Super Blooper]], [[B Dasher Mk. 2|Sprinter]] (using its British English name), [[Daytripper]], [[Offroader]], [[Flame Flyer]], and [[Jetsetter]] (renamed the Speeder) return as karts in this game. The jingle that plays when obtaining a level-boost ticket for a High-End kart, racer, or glider is recreated. Diddy Kong and Funky Kong's voice clips are reused in this game. | |||
*''[[Donkey Kong Country: Tropical Freeze]]'': Funky Kong's emblem from ''Mario Kart Wii'' makes a cameo appearance on some plane wreckage in the background of [[Big Top Bop]]. | |||
*''[[Paper Mario: The Origami King]]'': An arrangement of [[Wii Maple Treeway|Maple Treeway]]'s music plays in the Tranquil Pipes Teahouse at Shogun Studios. | |||
==Names in other languages== | |||
{{foreign names | |||
|Jap=マリオカートWii | |||
|JapR=Mario Kāto Wī | |||
|JapM=''Mario Kart Wii'' | |||
|Kor=마리오 카트 Wii | |Kor=마리오 카트 Wii | ||
|KorR= | |KorR=Mario Kateu Wii | ||
|KorM=Mario Kart Wii | |KorM=''Mario Kart Wii'' | ||
|ChiS=马力欧卡丁车Wii<ref>https://weibo.com/6154885380/GsVVdcTql</ref> | |||
|ChiSR=Mǎlìōu Kǎdīngchē Wii | |||
|ChiSM=''Mario Kart Wii'' | |||
|ChiT=瑪利歐賽車 Wii<ref>https://www.nintendo.com.hk/wii/wii_software.html</ref> | |||
|ChiTR=Mǎlìōu Sàichē Wii | |||
|ChiTM=''Mario Racing Wii'' | |||
}} | }} | ||
==Trivia== | ==Trivia== | ||
* | *The save data description is "''Race for first!''" in the NTSC version and "''Race for 1st place!''" in the PAL version. | ||
*In the opening cutscene, Peach can be seen racing with her hair untied. She always wears a ponytail in-game. | |||
*In | |||
==References== | ==References== | ||
<references/> | <references/> | ||
==External links== | ==External links== | ||
*[ | {{NIWA|StrategyWiki=1}} | ||
*[ | *[https://www.nintendo.co.jp/wii/rmcj/ Japanese website] | ||
*[ | *[https://www.nintendo.co.uk/Games/Wii/Mario-Kart-Wii-281848.html European website] | ||
*[https://www.nintendo.com/games/detail/O8zz_eN8oGRK9ApOgJ86zbE6zRv3pdB2 North American website] | |||
*[https://www.nintendo.com/consumer/gameslist/manuals/Wii_Mario_Kart.pdf North American manual] | |||
{{MKW}} | {{MKW}} | ||
{{ | {{Super Mario games}} | ||
{{Wii}} | {{Wii}} | ||
[[de:Mario Kart Wii]] | |||
[[ | [[it:Mario Kart Wii]] | ||
[[Category:Wii | [[Category:Mario Kart Wii|*]] | ||
[[Category:Games]] | [[Category:Games]] | ||
[[Category: | [[Category:Wii games]] | ||
[[Category:Racing | [[Category:Racing games]] | ||
[[Category:2008 games]] | [[Category:2008 games]] | ||
[[Category:2009 games]] | [[Category:2009 games]] | ||
[[Category:Games with Wi-Fi Connection]] | [[Category:Games with Nintendo Wi-Fi Connection]] | ||
[[Category:Nintendo Selects]] | |||
Latest revision as of 23:01, June 19, 2024
| Mario Kart Wii | |||||||||||||
|---|---|---|---|---|---|---|---|---|---|---|---|---|---|
 Game box art  Wii Wheel bundle box For alternate box art, see the game's gallery. | |||||||||||||
| Developer | Nintendo EAD | ||||||||||||
| Publisher | Nintendo | ||||||||||||
| Platform(s) | Wii | ||||||||||||
| Release date | Wii (original release) Wii (Nintendo Selects) | ||||||||||||
| Language(s) | English (United Kingdom) English (United States) French (France) French (Canada) German Spanish (Spain) Spanish (Latin America) Italian Japanese Korean | ||||||||||||
| Genre | Racing | ||||||||||||
| Rating(s) |
| ||||||||||||
| Mode(s) | Single Player, Multiplayer, Online Play | ||||||||||||
| Format | Wii: | ||||||||||||
| Input | Wii:
| ||||||||||||
Mario Kart Wii is a multiplayer-oriented racing game from the Mario Kart series for the Wii, developed by Nintendo EAD. Mario Kart Wii retains the traditional premise of the franchise, with players selecting Super Mario franchise characters to use as drivers alongside themed vehicles. As with most racing games, the overarching goal is to place first among other competitors, achieved through the usage of item-based weaponry common to the series and taking the fastest routes to secure the lead. Several new key elements introduced to Mario Kart Wii include increasing the number of racers to 12 racers from 8 racers from previous entries in the series, as well as introducing a new type of vehicle to the franchise: bikes. The game takes advantage of features unique to the Wii, most notably its motion control capabilities. A Wii Wheel is included in most Mario Kart Wii packages, though the game is still compatible with other controllers such as a regular Wii Remote held sideways, the Wii Remote and Nunchuk, the Nintendo GameCube controller, and the Classic Controller and Classic Controller Pro. Additional game modes are also present such as the traditional Grand Prix, Versus, Battle, and Time Trial modes.
This game requires 23 blocks of storage on the player's Wii system to save game data. Also, the game data cannot be copied onto another Wii. This makes it the only game in the Mario Kart series where data cannot be transferred between consoles. The game also includes its own Wii Channel, called the Mario Kart Channel, which allows players to play in special tournaments and trade their racing profile with other players around the world. This channel uses 74 to 88 blocks (depending on the game's region), but unlike the game data, players can copy the channel onto their SD cards.
With over 37 million copies of the game sold, Mario Kart Wii is the second best-selling Wii game (after Wii Sports) and the best-selling Super Mario game for the Wii console.[2]
The game supported Nintendo Wi-Fi Connection for online multiplayer play until it was terminated by Nintendo on May 20th, 2014.
Gameplay


Mario Kart Wii retains most of the elements from previous Mario Kart games, especially Mario Kart DS. Players select a racer from a cast of Super Mario characters, who are all divided into size categories in relation to their stats, and they need to select a vehicle from the class they belong in, all with their own stats. All races start with players at a line corresponding to their proper position, where Lakitu signals the countdown time. Once the time is finished, players race three laps around a race course in an attempt to be first of the pack. Once the third lap is completed, players are ranked points depending on how well they placed in the race. While every previous Mario Kart game allowed for a maximum of eight racers on each course, up to twelve are on the course at a time in Mario Kart Wii. In Grand Prix and VS mode, player characters always start out on the latter positions; once they finish the race, their position is saved as they move on to the next race. Like Mario Kart: Super Circuit and Mario Kart DS, Mario Kart Wii shows a rating of how well a player performed after the trophy presentation: ★★★, ★★, ★, A, B, C, D, and E (E being the lowest ranking and ★★★ being the highest).
Integral to the Mario Kart series is the usage of Super Mario-themed items to use as weapons against other racers in the track, either directly benefiting the player or hurting another player's progress. Players can receive these items at random from Item Boxes scattered around the track. The quality of the item received depends on the position of the racer: racers who are further down the line receive stronger items to help compensate their poorer performances. For examples, lower racers receive Mushrooms as speed boosts, Stars for faster invincibility, etc. while higher-placed racers receive weak items such as Green Shells and Banana Peels. When players receive an item, they can stop the item roulette faster by pressing the corresponding item button.
Several advanced techniques are retained in Mario Kart Wii from prior Mario Kart titles, although several tweaks have been made to them. Players can drift through tougher curves to maintain speed; players can perform a Mini-Turbo when players receive color-coded sparks from drifting, which depends on how long players can hold the button for drifting and the angle at which they drift. Introduced in Mario Kart Wii are two drift modes: Automatic and Manual. Automatic drifting allows players to automatically drift when turning very sharply, though players cannot perform Mini-Turbos regardless of how well they drift. Manual mode requires players hold down a button to drift, but releasing the button may release a Mini-Turbo, the strength of it depending on the color of the sparks. Players are now able to perform tricks when they driver over specific types of ramps. When drivers perform a trick and land successfully, they gain a momentary boost of speed. Tricks consist of mid-air acrobatics and are performed by shaking the Wii Wheel upward, shaking the Wii Remote in the Wii Remote + Nunchuk combo, pressing the ![]() on the Classic Controller, or pressing the
on the Classic Controller, or pressing the ![]() on the GameCube controller.
on the GameCube controller.
Motorbikes are introduced in this game, alongside having a wider variety of karts to select from. Motorbikes can perform wheelies to increase top speed on straights, though motorbikes cannot perform the most powerful Mini-Turbo that karts can. Motorbikes also come in two classes: drift type and hang-on type. Drift type bikes drift in a similar way to karts, while hang-on type bikes commit to the turn instead.
Prior to discontinuation of online services, Mario Kart Wii featured a text chat in Online Multiplayer Mode when racing or battling against Friends. Users can send pre-written phrases to other users before the series of races starts. However, there is no facility for a user to type custom messages[4].
Another new change is the point system used for Grand Prix races. With twelve racers competing in each race, the point value has increased from 10/8/6/4/3/2/1/0 points for first to eighth place respectively to 15/12/10/8/7/6/5/4/3/2/1/0 points for first to twelfth place respectively. Also, 4th and 5th place are not losing positions. The following chart shows the difference of the point spreads from previous games to this installment.
| Point Spread Comparisons (GP) | ||||||||||||
|---|---|---|---|---|---|---|---|---|---|---|---|---|
| 1st | 2nd | 3rd | 4th | 5th | 6th | 7th | 8th | 9th | 10th | 11th | 12th | |
| Super Mario Kart Mario Kart 64 Mario Kart: Super Circuit |
9 | 6 | 3 | 1 | 0 | 0 | 0 | 0 | — | — | — | — |
| Mario Kart: Double Dash!! Mario Kart DS |
10 | 8 | 6 | 4 | 3 | 2 | 1 | 0 | — | — | — | — |
| Mario Kart Wii | 15 | 12 | 10 | 8 | 7 | 6 | 5 | 4 | 3 | 2 | 1 | 0 |
| Grove-green bg signifies victory results (great clapping, character(s) cheering), best after-race music Yellow-limegreen bg signifies moderate results (mild clapping, moderate character reaction), same music in Wi-Fi as winner (different in MKDS GP) Normal bg signifies losing results, losing music; - means not available In Super Mario Kart, and Mario Kart Super Circuit, 5th or worse forces the player to retry the race. If the racer fares this badly four times, the Grand Prix must be started over. In Mario Kart 64, 5th or worse forces the player to retry the race, but without the restrictions on how many times the player can retry a race. In Mario Kart: Double Dash and other installments after that game including this installment, the Grand Prix normally goes forth. | ||||||||||||
Controls

Mario Kart Wii takes advantage of the Wii Remote's motion-sensing ability. By tilting the remote, players can steer their karts. Since the Wii Remote is designed to be inserted into the Wii Wheel for better grip, players can also play without the Wheel if they choose to. Mario Kart Wii can also be played by connecting the Nunchuk Controller or the Classic Controller, or using the GameCube Controller. Controlling the vehicle is divided up into two sections: Basic and Advanced.
Basic controls and actions
- Accelerate: When drivers hold down the corresponding button, the vehicle goes forward. Accelerating time depends on the type of karts: Lightweight karts have a high acceleration but low speed. Heavyweight karts tend to have a low acceleration but a high top speed. Middleweight karts tend to have an average top speed and acceleration.
- Steer: Steering lets drivers move around corners.
- Brake: Braking slows the vehicle to an abrupt stop.
- Reverse: The driver's kart goes backwards if the driver continues holding the brake button after the vehicle comes to a stop. If a vehicle reaches maximum top speed, the vehicle will drift instead. If the player tries to accelerate while going in reverse, the vehicle will start to build momentum. When blue sparks start to appear, the player can release the brakes to get a small speed of boost.
- Look Behind: Drivers can look behind their vehicles. In this way, drivers can be alert from other drivers incoming to steal their place. Drivers can also use this feature to see where they are going while backing up, or to aim a weapon at an opponent following up. This feature once appeared in Super Mario Kart.
- Drift: Drivers drift to keep the vehicle's speed and take corners more easily, with the benefit of getting Mini-Turbos. The feature can be set to happen automatically or when a button is held, although Mini-Turbos cannot be obtained on the former setting.
Advanced control modes

- Rocket Start: Drivers can perform a speed boost when a race begins. If drivers hold down the corresponding acceleration button right after the countdown timer displays the number 2, then they will receive an extra speed boost when the word "GO!" appears on the screen. However, if drivers hold down the button for too long, when the final beep is heard, their engine bursts and they get an even worse start than a regular one and take a few seconds to recover.
- Mini-Turbo: When drivers drift for a reasonable amount of time varying on the vehicle used, blue sparks erupt from the vehicle's rear tires. Releasing the drift button gives them a short burst of speed. In a kart, drivers can keep drifting for longer periods to get orange sparks and a longer boost. However, orange sparks cannot be created on bikes. The amount of time the player must drift also depends on the vehicle's drifting stats. Drivers can also perform a "standing Mini-Turbo" by holding the brake/drift and acceleration buttons at the same time. This is helpful for vehicles with slow acceleration, as it will get the vehicle to top speed. A Mini-Turbo cannot be performed when drifting is set to automatic, but the standing Mini-Turbo can.
- Jumps: If players jump over ramps or mushrooms, the length of the jump can be controlled by
 (shorter jump) and
  (longer jump).
 - Tricks: Drivers can pull off a trick when they jump in order to gain a momentary Mini-Turbo. Drivers can perform a trick by flicking the Wii Remote, pressing
 on the Classic Controller, or pressing
  on the GameCube Controller in any direction when going off a ramp or hill. They obtain a speed boost when landing.
 - Wheelie: Wheelies can be performed only when drivers are riding bikes. Drivers can increase their speed by lifting up the fronts of their bikes. While drivers perform a wheelie, the bike cannot be easily steered. The wheelie can be ended by braking, hopping, waiting for the wheelie to end, or simply setting the Wii Wheel or Wii Remote back down or pressing . If drivers are bumped into while they are performing a wheelie, they lose most of their speed. If they wheelie again right as their wheelie runs out, they can get a chain wheelie.
- Bullet Bill: If a driver is flying as a Bullet Bill, its route can be controlled a bit with
 and
and  . The range may differ for every part of a track.
Game modes

- Grand Prix (1 player) In this mode, the player races against eleven other CPU players to finish in first. There are eight cups to choose from, ranging from the most to the least difficult. Drivers earn points by placing within twelve positions (see chart above). A driver with the most points at the end of the four races wins the cup. The driver will be awarded a grade for their racing performance at the end of the cup. If the character places 4th or under, the screen will say "Better Luck Next Time" as the character sits in their vehicle on a mountain far from the celebration.
- Time Trial (1 player) Drivers race for the fastest time on a selected course. The fastest record is saved as a Ghost and can be raced against at a later time. Drivers can also race staff records, Regional Records/Champions, World Records/Champions (Wi-Fi must be used), and Friend Records (Friend must be registered and must send the Ghost for Ghost Races, and Wi-Fi also must be used.)
- VS Race (1 to 4 players, up to 12 online) Drivers can race with their own custom settings, but it is otherwise relatively the same as Grand Prix, other than the fact that drivers can see the other racers' character's names. The driver may choose a Solo Race, where they try to win for themselves, or Team Race, where two teams, red and blue, try to win by gathering the most points and beating the other.
- Battle (1 to 4 players, up to 12 online) Drivers team up in two teams of six in a battle for the most points within a 3 minute time limit. Items work only against the opposite team and have no effect on the team that uses them. Players can select only the Standard Kart or Bike, color-coded for the team they are on. There are two ways to battle:
- Balloon Battle: All drivers get three balloons and must use the items to hit the opponents to pop their balloons and get one point for every hit. If drivers lose all their balloons, one point is deducted and remain out for a while to be brought back to the battle with three balloons once more. If the player uses a mushroom and bumps into a player on the other team with the boost they get a point and steal a balloon.
- Coin Runners: The goal for drivers is to obtain more coins with their team than the other. In the top right corner of the screen, the score shows, which are the coins obtained altogether for each team. If drivers hit opponents, opponents drop their Coins. The number of Coins dropped depends on the item that hits the player and the number of coins that the player has already gathered.
- Ghost Race (Mario Kart Channel, 1 player) A Time Trial race with Ghosts made by players around the world with relatively the same skill level to the actual player.
- Tournament (also known as Competition) (Mario Kart Channel, 1 player) Drivers would compete in a timed competition with specific goals (see list below). This mode served as the replacement of Mission Mode from Mario Kart DS. New tournaments were posted twice a month. The tournaments were discontinued after the first tournament in May 2014 was over.
Grand Prix Mode initially allows only Karts in 50cc and only Bikes in 100cc; if all the Grand Prix's are won in a single engine class, the other vehicle type will become available for it. Mirror Mode is unlocked by scoring first place on all 150cc Grand Prix.
Other information
- Additionally, in this game, both normal races and battles are playable online through the use of Nintendo Wi-Fi Connection (WFC). This is the second game in the series to utilize the WFC, the third to support online connectivity, and the first to allow for online battles. Races and Battles will now cater up to 12 players via Wi-Fi connection.
- Just like in Mario Kart DS, it is not possible to play Grand Prix with multiple players. Players can now only win cup trophies by playing alone.
- In Battle Mode, the player can only play in teams. Also, the Spiny Shell makes its first appearance in Battle Mode. It chases the player of the opposite team with the most points. Also, Lightning is an item in Battle Mode. It shrinks the drivers of the opposite team and makes them lose their items, but does not take a balloon or drop coins.
Tournaments
- Main article: List of Mario Kart Wii tournaments

Mario Kart Wii introduces a new mode for the Mario Kart series, entitled "Tournaments" (known as "Competitions" in the European version). Tournaments are somewhat similar to missions in Mario Kart DS. Tournaments are played on the Mario Kart Channel, as long as the Mario Kart Wii disc is in the Wii. Tournaments require an Internet connection and WiiConnect24 to be turned on before they can be played. After a while, a tournament is retired to make room for a new one. However, the rankings of older tournaments can still be viewed on the rankings table. The tournaments began in May 2008 and continued even after all WiiConnect24 services were discontinued on June 28, 2013. The tournament service itself was later discontinued on May 20, 2014, the date on which the Nintendo WFC servers shut down.
The varieties of tournaments include the following:
- VS Race - A standard VS race; however, race courses were somewhat altered.
- Time Trial - A standard Time Trial; however, race courses were somewhat altered.
- Numbered Gates - The player had to drive through ordered gates as fast as possible.
- Coin Collecting - The player had to collect the coins on the stage as fast as possible.
- Boss Battle - The player had to fight against a special boss.
Licenses

Licenses replace normal save files. It is the first Mario Kart game to feature more than one save file.
Each license contains each player's data, their Mii, nickname, Friend Code, and a table including all categories and cups with an empty space. After a cup is won, the corresponding space is filled in with a colored square: gold for first place, silver for second, bronze for third. If at any time the Mii being used for Mario Kart Wii is deleted from the Mii Channel, the in-game Mii is also deleted.
Friend roster

Players can add different people around the world on to their Mario Kart Wii Friend Roster. Two people need to add the Friend Codes on their licenses. A player can have up to 30 people on their Friend Roster.
If two people are friends on a roster, one can open a room, which allows who is ever friends with the person to join that room. In the room, the players who joined can send messages. If a player who added the person who created the room, and another person joins and the player has not added them, they have an ability to do so. The host of the room can choose a VS Race, Team VS Race, Balloon Battle, and Coin Runners.
If a player joins a race when another player is online and friends with them, the player who added the player in the race can join that race and race with the friend.
Characters
Drivers

Mario Kart Wii features 12 starting characters, while 14 (if both Mii outfits are counted as separate characters) more can be unlocked for a total of 26 playable characters. Of those characters, Baby Peach, Baby Daisy, Rosalina, Funky Kong, Dry Bowser, and Mii (in "Outfit A" and "Outfit B") are playable for the first time in the Mario Kart series, with Baby Daisy, Rosalina, and Dry Bowser making their first playable appearances overall, and Baby Daisy making her first appearance in any game. In addition, Dry Bones is playable in a home console Mario Kart installment for the first time, after previously being playable in Mario Kart DS. Unlike with the past Mario Kart titles, however, the characters are categorized under a size class system, instead of the usual weight class system.
The size classes are as follows:
- Small: Small drivers will drive small vehicles. They usually have good acceleration, handling, and off-road stats, but low top speed and weight.
- Medium: Medium drivers will drive medium-sized vehicles. Most of the karts show average weight and off-road.
- Large: Large drivers will drive large vehicles. They mostly feature high top speed and weight, but low acceleration, handling, and off-road.
Additionally, all the characters in the game have their own set of bonuses that boost certain stats for their vehicles. Units are out of 80, so a stat bonus of 3 would make a stat three points better than normal.[5] Baby Peach and Large Miis have the most stat bonuses, with a total of 15 each. Bowser Jr. has the fewest stat bonuses, with a total of 6.
| Drivers | ||||||||||||||||||||||||||||||||||||||||||||||||||||||||||||||||||||||||||||||||||||||||||||||||||||||||||||||||||||||||||||||||||||||||||||||||||||||||||||||||||||||||||||||||||||||||||||||||||||||||||||||||||||||||||||||||||||||||||||||||||||||||||||||||||||||||||||||||||||||||||||||||||||||||||||||||||||||||||||||||||||||||||||||||||||||||||||||||||||||||||||||||||||||||||||||||||||||||||||||||||||||||||||||||||||||||||||||||
|---|---|---|---|---|---|---|---|---|---|---|---|---|---|---|---|---|---|---|---|---|---|---|---|---|---|---|---|---|---|---|---|---|---|---|---|---|---|---|---|---|---|---|---|---|---|---|---|---|---|---|---|---|---|---|---|---|---|---|---|---|---|---|---|---|---|---|---|---|---|---|---|---|---|---|---|---|---|---|---|---|---|---|---|---|---|---|---|---|---|---|---|---|---|---|---|---|---|---|---|---|---|---|---|---|---|---|---|---|---|---|---|---|---|---|---|---|---|---|---|---|---|---|---|---|---|---|---|---|---|---|---|---|---|---|---|---|---|---|---|---|---|---|---|---|---|---|---|---|---|---|---|---|---|---|---|---|---|---|---|---|---|---|---|---|---|---|---|---|---|---|---|---|---|---|---|---|---|---|---|---|---|---|---|---|---|---|---|---|---|---|---|---|---|---|---|---|---|---|---|---|---|---|---|---|---|---|---|---|---|---|---|---|---|---|---|---|---|---|---|---|---|---|---|---|---|---|---|---|---|---|---|---|---|---|---|---|---|---|---|---|---|---|---|---|---|---|---|---|---|---|---|---|---|---|---|---|---|---|---|---|---|---|---|---|---|---|---|---|---|---|---|---|---|---|---|---|---|---|---|---|---|---|---|---|---|---|---|---|---|---|---|---|---|---|---|---|---|---|---|---|---|---|---|---|---|---|---|---|---|---|---|---|---|---|---|---|---|---|---|---|---|---|---|---|---|---|---|---|---|---|---|---|---|---|---|---|---|---|---|---|---|---|---|---|---|---|---|---|---|---|---|---|---|---|---|---|---|---|---|---|---|---|---|---|---|---|---|---|---|---|---|---|---|---|---|---|---|---|---|---|---|---|---|---|---|---|---|---|---|---|---|---|---|---|---|---|---|---|---|---|---|---|---|---|---|---|---|---|---|---|---|---|---|---|---|---|---|---|---|---|---|---|---|---|---|---|---|---|---|---|---|---|
|
|
|
|
|
|
|
|
|
|
|
| |||||||||||||||||||||||||||||||||||||||||||||||||||||||||||||||||||||||||||||||||||||||||||||||||||||||||||||||||||||||||||||||||||||||||||||||||||||||||||||||||||||||||||||||||||||||||||||||||||||||||||||||||||||||||||||||||||||||||||||||||||||||||||||||||||||||||||||||||||||||||||||||||||||||||||||||||||||||||||||||||||||||||||||||||||||||||||||||||||||||||||||||||||||||||||||||||||||||||||||||||||||||||||||||||||||
| Unlockable drivers | ||||||||||||||||||||||||||||||||||||||||||||||||||||||||||||||||||||||||||||||||||||||||||||||||||||||||||||||||||||||||||||||||||||||||||||||||||||||||||||||||||||||||||||||||||||||||||||||||||||||||||||||||||||||||||||||||||||||||||||||||||||||||||||||||||||||||||||||||||||||||||||||||||||||||||||||||||||||||||||||||||||||||||||||||||||||||||||||||||||||||||||||||||||||||||||||||||||||||||||||||||||||||||||||||||||||||||||||||
|
|
|
|
|
|
|
|
|
|
|
|
| ||||||||||||||||||||||||||||||||||||||||||||||||||||||||||||||||||||||||||||||||||||||||||||||||||||||||||||||||||||||||||||||||||||||||||||||||||||||||||||||||||||||||||||||||||||||||||||||||||||||||||||||||||||||||||||||||||||||||||||||||||||||||||||||||||||||||||||||||||||||||||||||||||||||||||||||||||||||||||||||||||||||||||||||||||||||||||||||||||||||||||||||||||||||||||||||||||||||||||||||||||||||||||||||||||||


Additional enemies, obstacles, and species
These characters and features may either aid the player or act as obstacles and other intractable objects that impede racers if bumped into.
| Characters and elements | |||
|---|---|---|---|
| Image | Character/element | Location | Description |

|
Angry Sun | DS Desert Hills | An enemy that appears as part of the scenery and spawns Fire Snakes onto the course. |

|
Bob-omb Car | Moonview Highway | A car that explodes when driven into or hit by a shell. The explosion sends any driver in the vicinity flying. Any driver who runs into the latter frames of the explosion spins out. |

|
Bowser Statue | N64 Bowser's Castle | A large statue of Bowser that burns drivers if they run into its flame. |

|
Boulder | GCN DK Mountain | A large ball of rock that rolls down the course and flips over any driver who runs into it. |

|
Cataquack | GCN Peach Beach | An enemy that flips drivers over when touched. Players can temporarily stun Cataquacks by hitting them with shells, POW Blocks, or Lightning, or by driving through them while invincible. |

|
Chain Chomp (chained) | Mario Circuit, GCN Mario Circuit, DS Peach Gardens | An enemy that knocks over drivers and causes them to lose their items by ramming into them. Some Chain Chomps are chained to stakes, while others roam freely. Chain Chomps that are chained to stakes lunge at nearby drivers. |

|
Chain Chomp (unchained) | Chain Chomp Wheel | An enemy that appears rolling around in Chain Chomp Wheel. Driving under it smashes players, while flying into its upper regions from a ramp causes players to flip over. |

|
Delfino Oak Tree | GCN Mario Circuit | A stationary obstacle that stops players when driven into, serving as a wall. |

|
Fire Snake | Grumble Volcano, DS Desert Hills | A burning snake-like enemy that spins drivers out when touched. In Grumble Volcano, Fire Snakes jump out from pipes, while in DS Desert Hills, they are spawned from the Angry Sun. |

|
Goomba | Mushroom Gorge, Mario Circuit, Koopa Cape, GCN Mario Circuit | A small enemy that spins drivers out when touched. If a driver defeats Goombas with a shell or while invincible, they drop Mushrooms. They can also be defeated with Lightning, although they do not leave any Mushrooms when struck. |

|
Koopa Zapper | Koopa Cape | A rotating current of electricity that temporarily shrinks players when touched. Koopa Zappers are similar to the effects of Lightning or a Thunder Cloud, though the duration is shorter. |

|
Lakitu | All courses | The referee of Mario Kart Wii and the entire Mario Kart series. He starts races, keeps track of the laps, announces the winner of a race, and pulls drivers out if they fall off the track. |

|
Lava Geyser | Grumble Volcano, Bowser's Castle, N64 Bowser's Castle | A pillar of lava that emerges from either a pool of lava or a crack on the ground. In Bowser's Castle, drivers can perform tricks off the hills generated by the geysers. Drivers who come in contact with Lava Geysers flip over. |

|
Mecha Bowser | Bowser's Castle | A large Bowser-shaped machine that spits out large explosive fireballs that detonate on a blast mark in the stage. Drivers who are hit by a fireball flip over, and they are sent flying if they are caught in the explosion. |

|
Mecha Piranha Plant | GCN Waluigi Stadium | A Piranha Plant-shaped obstacle that acts as a moving wall, emerging from the pipes and stopping any driver who runs into it. |
| Mii Drivers | Coconut Mall | Miis from the player's system who drive cars back and forth. Driving into them flips drivers over and causes them to lose their items. | |

|
Minecart | Wario's Gold Mine | A four-wheeled vehicle that travels along the rails in the mine. Drivers who hit minecarts flip over. |

|
Moo Moo | Moo Moo Meadows | A cow that flips drivers over if it is driven into and causes them to lose their items. Moo Moos are first found on the off-road patches of the track but wander onto the road as time goes by. |

|
Monty Mole | Moo Moo Meadows, DS Peach Gardens | An enemy that leaps out of a hole made of dirt. The holes slow drivers down, and any driver who runs into Monty Moles who leap out of these holes flips over. |

|
Oil slick | SNES Mario Circuit 3 | A patch of an oil spill dotted throughout the course. Drivers who go through oil slicks spin out. |

|
Penguin Slider | N64 Sherbet Land | A small penguin that waddles and slides back and forth, causing drivers who run into it to spin out. |

|
Penguin Waddler | N64 Sherbet Land | A large penguin found circling a pillar in the cave segment of Sherbet Land. Players who drive into Penguin Waddlers spin out. |

|
Piranha Plant | N64 Mario Raceway, GCN Mario Circuit | A stationary obstacle that spins drivers out when it is touched. The Piranha Plants in GCN Mario Circuit are stationed in Warp Pipes and take bites out of drivers who come nearby, causing them to flip over and lose their items. |

|
Podoboo | Bowser's Castle, GBA Bowser Castle 3 | A fiery ball that emerges from lava and causes drivers to spin out. |

|
Podoboo Cog | Bowser's Castle, GCN Waluigi Stadium | A solid eyed cog with three Fire Bars circling it, which cause drivers who touch them to spin out. |

|
Pokey | Dry Dry Ruins, DS Desert Hills | A spiky, cactus-like enemy that spins drivers out when touched. Drivers can temporarily destroy Pokeys with shells or Lightning, or by running into them while invincible. |

|
Shy Guy Galleon | GBA Shy Guy Beach | A pirate ship with Shy Guys as part of the scenery that launch explosive cannonballs onto the course. |

|
Shy Guy Snowboarder | DK Summit | A snowboarding Shy Guy that spins out drivers when it is touched. |

|
Sidestepper | GBA Shy Guy Beach | A crab that spins out drivers when it is touched. Drivers can temporarily defeat Sidesteppers with shells, POW Blocks, or Lightning, or by running into them while invincible. |

|
Spiky Topman | Galaxy Colosseum | An enemy that exclusively appears in Galaxy Colosseum as part of a tournament, where the goal is to knock the Spiky Topmen off the course with Mushroom boosts. |

|
Swooper | Wario's Gold Mine, Dry Dry Ruins | A bat-like enemy that slows players down when it is driven into. |

|
Thwomp | Bowser's Castle, GBA Bowser Castle 3, N64 Bowser's Castle, Thwomp Desert | This enemy smashes drivers if it is directly driven under, and it acts as a wall when simply driven into. In N64 Bowser's Castle, some of the Thwomps slide back and forth. The Thwomp in Thwomp Desert causes the terrain to become uneven, though players can still get smashed by the Thwomp if they are under it when it crashes. |
| Vehicles: cars and trucks | Moonview Highway | Obstacles on the highway that flip players over when they are driven into and squash players that hit them from the front. Characters who are in the Mega Mushroom form can knock cars over but not trucks, while characters under the effects of invincibility from a Star or using a Bullet Bill can knock all vehicles over. | |

|
Wiggler | Maple Treeway | A large enemy that wanders around the track and bounces around drivers that bump into it. |

|
Volcanic debris | Grumble Volcano | Large balls of fire that spin out any driver who comes in contact with them. |
Background characters
These characters appear as part of the audience or do not affect the character, being part of the course scenery served for world-building purposes.
- Big Cheep Cheeps
- Birdos
- Boos
- Goombas
- Hammer Bros.
- Luma
- Miis
- Monty Moles
- Piantas
- Shy Guys
- Sledge Bros.
- Toads
- Unagi
Vehicles
There are thirty-six total vehicles in this game. There are 18 karts, 18 bikes, each divided into the 3 size classes, making 6 and 6 available to each character, 3 and 3 to begin (thus making half of the vehicles unlockable). As with the Standard vehicles, each kart and bike varies in color scheme depending on which character drives them. Each has 7 stats, which are shown during character selection:
- Speed: How high the top speed of the vehicle is. This does not affect off-road travel. Negatively correlated with acceleration. It is also the only stat where no vehicle goes below twenty.
- Weight: How heavy a vehicle is. With a higher weight, the player can knock lighter characters away by ramming them. Weight also affects the angle that a vehicle goes over a jump at, with heavier vehicles jumping at a lower angle. Finally, heavier vehicles bounce less upon landing from a jump.
- Acceleration: How quickly the vehicle's top speed is achieved from a non-moving position. Negatively correlated with speed.
- Handling: How tight the vehicles can normally turn. Usually opposes the drift rating.
- Drift: How tight the vehicle turns while using the drifting maneuver. Usually opposes the handling rating.
- Off-Road: How much speed the vehicle retains when off the track. A low rating of this can slow the vehicle significantly. Also, vehicles with a high off-road stat slide less when driving on ice. There exist several types of off-road surfaces which vary in intensity.
- Mini-Turbo: When using the manual drift option, how effective a mini-boost will be. While all vehicles can perform a blue spark mini-turbo, only karts can execute an orange spark mini-turbo. Has no effect on the standing mini-turbo.
The following table includes vehicles in order of class primarily. Two types of bikes are distinguished by how they turn when the player attempts to drift (drift type bikes drift similar to a kart, while hang-on type bikes commit to the turn). The stats are displayed with number values, with the units being out of 80,[5] and bars representing that number out of 80. Some names differ between American English and Commonwealth English.
Each kart comes in various colors depending on the character driving it. The time trial mode's record icons use a single color for each kart regardless of driver; the following table reflects those colors.
Note: Vehicles with an Off-Road value greater than 50 can drift on normal off-road terrain.
| Default vehicles | |||||||||||||||||||||||||||||||||||||||||||||||||||||||||||||||||||||||||||||||||||||||||||||||||||||||||||||||||||||||||||||||||||||||||||||||||||||||||||||||||||||||||||||||||||||||||||||||||||||||||||||||||||||||||||||||||||||||||||||||||||||||||||||||||||||||||||||||||||||||||||||||||||||||||||||||||||||||||||||||||||||||||||||||||||||||||||||||||||||||||||||||||||||||||||||||||||||||||||||||||||||||||||||||||||||||||||||||||||||||||||||||||||||||||||||||||||||||||||||||||||||||||||||||||||||||||||||||||||||||||||||||||||||||||||||||||||||||||||||||||||||||||||||||||||||||||||||||||||||||||||||||||||||||||||||||||||||||||||||||||||||||||||||||||||||||||||||||||||||||||||||||||||||||||||||||||||||||||||||||||||||||||||||||||||||||||||||||||||||||||||||||||||||||||||||||||||||||||||||||||||||||||||||||||||||||||||||||||||||||||||||||||||||||||||||||||||||||||||||||||||||||||||||||||||||||||||||||||||||||||||||||||||||||||||||||||||||||||||||||||||||||||||||||||||||||||||||||||||||||
|---|---|---|---|---|---|---|---|---|---|---|---|---|---|---|---|---|---|---|---|---|---|---|---|---|---|---|---|---|---|---|---|---|---|---|---|---|---|---|---|---|---|---|---|---|---|---|---|---|---|---|---|---|---|---|---|---|---|---|---|---|---|---|---|---|---|---|---|---|---|---|---|---|---|---|---|---|---|---|---|---|---|---|---|---|---|---|---|---|---|---|---|---|---|---|---|---|---|---|---|---|---|---|---|---|---|---|---|---|---|---|---|---|---|---|---|---|---|---|---|---|---|---|---|---|---|---|---|---|---|---|---|---|---|---|---|---|---|---|---|---|---|---|---|---|---|---|---|---|---|---|---|---|---|---|---|---|---|---|---|---|---|---|---|---|---|---|---|---|---|---|---|---|---|---|---|---|---|---|---|---|---|---|---|---|---|---|---|---|---|---|---|---|---|---|---|---|---|---|---|---|---|---|---|---|---|---|---|---|---|---|---|---|---|---|---|---|---|---|---|---|---|---|---|---|---|---|---|---|---|---|---|---|---|---|---|---|---|---|---|---|---|---|---|---|---|---|---|---|---|---|---|---|---|---|---|---|---|---|---|---|---|---|---|---|---|---|---|---|---|---|---|---|---|---|---|---|---|---|---|---|---|---|---|---|---|---|---|---|---|---|---|---|---|---|---|---|---|---|---|---|---|---|---|---|---|---|---|---|---|---|---|---|---|---|---|---|---|---|---|---|---|---|---|---|---|---|---|---|---|---|---|---|---|---|---|---|---|---|---|---|---|---|---|---|---|---|---|---|---|---|---|---|---|---|---|---|---|---|---|---|---|---|---|---|---|---|---|---|---|---|---|---|---|---|---|---|---|---|---|---|---|---|---|---|---|---|---|---|---|---|---|---|---|---|---|---|---|---|---|---|---|---|---|---|---|---|---|---|---|---|---|---|---|---|---|---|---|---|---|---|---|---|---|---|---|---|---|---|---|---|---|---|---|---|---|---|---|---|---|---|---|---|---|---|---|---|---|---|---|---|---|---|---|---|---|---|---|---|---|---|---|---|---|---|---|---|---|---|---|---|---|---|---|---|---|---|---|---|---|---|---|---|---|---|---|---|---|---|---|---|---|---|---|---|---|---|---|---|---|---|---|---|---|---|---|---|---|---|---|---|---|---|---|---|---|---|---|---|---|---|---|---|---|---|---|---|---|---|---|---|---|---|---|---|---|---|---|---|---|---|---|---|---|---|---|---|---|---|---|---|---|---|---|---|---|---|---|---|---|---|---|---|---|---|---|---|---|---|---|---|---|---|---|---|---|---|---|---|---|---|---|---|---|---|---|---|---|---|---|---|---|---|---|---|---|---|---|---|---|---|---|---|---|---|---|---|---|---|---|---|---|---|---|---|---|---|---|---|---|---|---|---|---|---|---|---|---|---|---|---|---|---|---|---|---|---|---|---|---|---|---|---|---|---|---|---|---|---|---|---|---|---|---|---|---|---|---|---|---|---|---|---|---|---|---|---|---|---|---|---|---|---|---|---|---|---|---|---|---|---|---|---|---|---|---|---|---|---|---|---|---|---|---|---|---|---|---|---|---|---|---|---|---|---|---|---|---|---|---|---|---|---|---|---|---|---|---|---|---|---|---|---|---|---|---|---|---|---|---|---|---|---|---|---|---|---|---|---|---|---|---|---|---|---|---|---|---|---|---|---|---|---|---|---|---|---|---|---|---|---|---|---|---|---|---|---|---|---|---|---|---|---|---|---|---|---|---|---|---|---|---|---|---|---|---|---|---|---|---|---|---|---|---|---|---|---|---|---|---|---|---|---|---|---|---|---|---|---|---|---|---|---|---|---|---|---|---|---|---|---|---|---|---|---|---|---|---|---|---|---|---|---|---|---|---|---|---|---|---|---|---|---|---|---|---|---|---|---|---|---|---|---|---|---|---|---|---|---|---|---|---|---|---|---|---|---|---|---|---|---|---|---|---|---|---|---|---|---|---|---|---|---|---|---|---|---|---|---|---|---|---|---|---|---|---|---|---|---|---|---|---|---|---|---|---|---|---|---|---|---|---|---|---|---|---|---|---|---|---|---|---|---|---|---|---|---|---|---|---|---|---|---|---|---|---|---|---|---|---|---|---|---|---|---|---|---|---|---|---|---|---|---|---|---|---|---|---|---|---|---|---|---|---|---|---|---|---|---|---|---|---|---|---|---|---|---|---|---|---|---|---|---|---|---|---|---|---|---|---|---|---|---|---|---|---|---|---|---|---|
|
|
|
|
|
|
|
|
|
|
|
|
|
|
|
|
|
| ||||||||||||||||||||||||||||||||||||||||||||||||||||||||||||||||||||||||||||||||||||||||||||||||||||||||||||||||||||||||||||||||||||||||||||||||||||||||||||||||||||||||||||||||||||||||||||||||||||||||||||||||||||||||||||||||||||||||||||||||||||||||||||||||||||||||||||||||||||||||||||||||||||||||||||||||||||||||||||||||||||||||||||||||||||||||||||||||||||||||||||||||||||||||||||||||||||||||||||||||||||||||||||||||||||||||||||||||||||||||||||||||||||||||||||||||||||||||||||||||||||||||||||||||||||||||||||||||||||||||||||||||||||||||||||||||||||||||||||||||||||||||||||||||||||||||||||||||||||||||||||||||||||||||||||||||||||||||||||||||||||||||||||||||||||||||||||||||||||||||||||||||||||||||||||||||||||||||||||||||||||||||||||||||||||||||||||||||||||||||||||||||||||||||||||||||||||||||||||||||||||||||||||||||||||||||||||||||||||||||||||||||||||||||||||||||||||||||||||||||||||||||||||||||||||||||||||||||||||||||||||||||||||||||||||||||||||||||||||||||||||||||||||||||||||||
| Unlockable vehicles | |||||||||||||||||||||||||||||||||||||||||||||||||||||||||||||||||||||||||||||||||||||||||||||||||||||||||||||||||||||||||||||||||||||||||||||||||||||||||||||||||||||||||||||||||||||||||||||||||||||||||||||||||||||||||||||||||||||||||||||||||||||||||||||||||||||||||||||||||||||||||||||||||||||||||||||||||||||||||||||||||||||||||||||||||||||||||||||||||||||||||||||||||||||||||||||||||||||||||||||||||||||||||||||||||||||||||||||||||||||||||||||||||||||||||||||||||||||||||||||||||||||||||||||||||||||||||||||||||||||||||||||||||||||||||||||||||||||||||||||||||||||||||||||||||||||||||||||||||||||||||||||||||||||||||||||||||||||||||||||||||||||||||||||||||||||||||||||||||||||||||||||||||||||||||||||||||||||||||||||||||||||||||||||||||||||||||||||||||||||||||||||||||||||||||||||||||||||||||||||||||||||||||||||||||||||||||||||||||||||||||||||||||||||||||||||||||||||||||||||||||||||||||||||||||||||||||||||||||||||||||||||||||||||||||||||||||||||||||||||||||||||||||||||||||||||||||||||||||||||||
|
|
|
|
|
|
|
|
|
|
|
|
|
|
|
|
|
| ||||||||||||||||||||||||||||||||||||||||||||||||||||||||||||||||||||||||||||||||||||||||||||||||||||||||||||||||||||||||||||||||||||||||||||||||||||||||||||||||||||||||||||||||||||||||||||||||||||||||||||||||||||||||||||||||||||||||||||||||||||||||||||||||||||||||||||||||||||||||||||||||||||||||||||||||||||||||||||||||||||||||||||||||||||||||||||||||||||||||||||||||||||||||||||||||||||||||||||||||||||||||||||||||||||||||||||||||||||||||||||||||||||||||||||||||||||||||||||||||||||||||||||||||||||||||||||||||||||||||||||||||||||||||||||||||||||||||||||||||||||||||||||||||||||||||||||||||||||||||||||||||||||||||||||||||||||||||||||||||||||||||||||||||||||||||||||||||||||||||||||||||||||||||||||||||||||||||||||||||||||||||||||||||||||||||||||||||||||||||||||||||||||||||||||||||||||||||||||||||||||||||||||||||||||||||||||||||||||||||||||||||||||||||||||||||||||||||||||||||||||||||||||||||||||||||||||||||||||||||||||||||||||||||||||||||||||||||||||||||||||||||||||||||||||||
_Model.png)
_Model.png)
_Model.png)
_Model.png)
_Model.png)
_Model.png)
_Model.png)
_Model.png)
_Model.png)
_Model.png)
_Model.png)
_Model.png)
_Model.png)
_Model.png)
_Model.png)
_Model.png)
_Model.png)
_Model.png)
_Model.png)
_Model.png)
_Model.png)
_Model.png)
_Model.png)
_Model.png)
_Model.png)
_Model.png)
_Model.png)
_Model.png)
_Model.png)
_Model.png)
_Model.png)
_Model.png)
_Model.png)
_Model.png)
_Model.png)
_Model.png)
Internal stats
The stats reported do not correspond to all the actual in-game stats.[6][7][8]
Characters' bonuses
There are 20 different kinds of bonuses, which increase a few statistics of the vehicles:
- Weight: Increases the weight of the vehicle.
- Speed: Increases the top speed of the vehicle.
- While Steering: Increases the top speed of the vehicle while steering, expressed as fraction of the top speed.
- Acceleration: Increases the acceleration.
- Standard Acceleration: Increases the first two stage-related acceleration parameters, used when starting from a standstill without mini-turbos (S1 and S2)
- Drift Acceleration: Increases the last two stage-related acceleration parameters, used when the vehicle is near full speed while drifting (S3 and S4)
- Handling: Increases how fast the vehicle can turn regularly (angular velocity).
- Drift: Increases how fast the vehicle can turn while drifting (angular velocity).
- Mini-Turbo: Increases the duration of the Mini-Turbo boost.
- Off-Road Speed: Increases the top speed on each kind of off-road section.
- Off-Road Handling: Increases the Handling on each kind of off-road section.
| Small characters' bonuses | ||||||||||
|---|---|---|---|---|---|---|---|---|---|---|
| Character | Baby Mario | Baby Luigi | Baby Peach | Baby Daisy | Toad | Toadette | Koopa Troopa | Dry Bones | Small Mii | |
| Weight | 0.756 | 0.756 | 0.504 | 0.504 | 0 | 0 | 0 | 0 | 0 | |
| Speed | Standard (km/h) | 0 | 1.06 | 0.53 | 1.06 | 0 | 0.53 | 0 | 0 | 0.53 |
| While steering | 0.000474 | 0.000474 | 0.000474 | 0 | 0.000947 | 0 | 0.000474 | 0.000474 | 0.000947 | |
| Standard Acceleration | S1 | 0 | 0 | 0.025 | 0 | 0.05 | 0 | 0 | 0.025 | 0 |
| S2 | 0 | 0 | 0.035 | 0 | 0.07 | 0 | 0 | 0.035 | 0 | |
| Drift Acceleration | S3 | 0 | 0 | 0 | 0 | 0.18 | 0 | 0 | 0.09 | 0 |
| S4 | 0 | 0 | 0 | 0 | 0.02 | 0 | 0 | 0.01 | 0 | |
| Handling | Manual | 0.00111 | 0 | 0.000555 | 0 | 0 | 0 | 0.000555 | 0 | 0.000555 |
| Auto | 0.00058 | 0 | 0.00029 | 0 | 0 | 0 | 0.00029 | 0 | 0.00029 | |
| Drift | Manual | 0.000529 | 0 | 0 | 0 | 0 | 0 | 0.000265 | 0 | 0 |
| Auto | 0.000444 | 0 | 0 | 0 | 0 | 0 | 0.000222 | 0 | 0 | |
| Mini-Turbo (frames) | 0 | 0 | 0 | 4 | 0 | 0 | 8 | 8 | 4 | |
| Off-Road Speed | Weak Off-road | 0 | 0 | 0 | 0 | 0 | 0.0342 | 0 | 0 | 0 |
| Off-road | 0 | 0 | 0 | 0 | 0 | 0.0368 | 0 | 0 | 0 | |
| Heavy Off-road | 0 | 0 | 0 | 0 | 0 | 0.0226 | 0 | 0 | 0 | |
| Slippery Off-road | 0 | 0 | 0 | 0 | 0 | 0.01283 | 0 | 0 | 0 | |
| Off-Road Handling | Slippery Road | 0 | 0 | 0 | 0 | 0 | 0.00526 | 0 | 0 | 0 |
| Weak Off-road | 0 | 0 | 0 | 0 | 0 | 0.00736 | 0 | 0 | 0 | |
| Off-road and Heavy Off-road | 0 | 0 | 0 | 0 | 0 | 0.00526 | 0 | 0 | 0 | |
| Slippery Off-road | 0 | 0 | 0 | 0 | 0 | 0.00526 | 0 | 0 | 0 | |
| Medium characters' bonuses | ||||||||||
| Character | Mario | Luigi | Peach | Daisy | Yoshi | Birdo | Diddy Kong | Bowser Jr. | Medium Mii | |
| Weight | 0.504 | 0.504 | 0 | 0 | 0.252 | 0.252 | 0 | 0 | 0.252 | |
| Speed | Standard (km/h) | 0 | 0.53 | 0.53 | 1.06 | 0 | 0 | 0 | 0 | 0.53 |
| While steering | 0 | 0.000474 | 0 | 0 | 0 | 0.000474 | 0.000474 | 0.000947 | 0 | |
| Standard Acceleration | S1 | 0.025 | 0 | 0.05 | 0 | 0 | 0 | 0.025 | 0 | 0 |
| S2 | 0.035 | 0 | 0.07 | 0 | 0 | 0 | 0.035 | 0 | 0 | |
| Drift Acceleration | S3 | 0.09 | 0 | 0.18 | 0 | 0.09 | 0 | 0.09 | 0 | 0.09 |
| S4 | 0.01 | 0 | 0.02 | 0 | 0.01 | 0 | 0.01 | 0 | 0.01 | |
| Handling | Manual | 0.000555 | 0 | 0 | 0.000555 | 0 | 0 | 0 | 0 | 0 |
| Auto | 0.00029 | 0 | 0 | 0.00029 | 0 | 0 | 0 | 0 | 0 | |
| Drift | Manual | 0.000265 | 0 | 0 | 0.000265 | 0.000265 | 0 | 0 | 0 | 0.000265 |
| Auto | 0.000222 | 0 | 0 | 0.000222 | 0.000222 | 0 | 0 | 0 | 0.000222 | |
| Mini-Turbo (frames) | 0 | 0 | 0 | 4 | 0 | 8 | 8 | 4 | 4 | |
| Off-Road Speed | Weak Off-road | 0 | 0 | 0 | 0 | 0.0342 | 0.0171 | 0 | 0.0171 | 0 |
| Off-road | 0 | 0 | 0 | 0 | 0.0368 | 0.0184 | 0 | 0.0184 | 0 | |
| Heavy Off-road | 0 | 0 | 0 | 0 | 0.0226 | 0.0113 | 0 | 0.0113 | 0 | |
| Slippery Off-road | 0 | 0 | 0 | 0 | 0.01283 | 0.00641 | 0 | 0.00641 | 0 | |
| Off-Road Handling | Slippery Road | 0 | 0 | 0 | 0 | 0 | 0 | 0 | 0.00263 | 0 |
| Weak Off-road | 0 | 0 | 0 | 0 | 0 | 0 | 0 | 0.00368 | 0 | |
| Off-road and Heavy Off-road | 0 | 0 | 0 | 0 | 0 | 0 | 0 | 0.00263 | 0 | |
| Slippery Off-road | 0 | 0 | 0 | 0 | 0 | 0 | 0 | 0.00211 | 0 | |
| Large characters' bonuses | ||||||||||
| Character | Wario | Waluigi | Donkey Kong | Bowser | King Boo | Rosalina | Funky Kong | Dry Bowser | Large Mii | |
| Weight | 0.252 | 0 | 0.252 | 0.504 | 0 | 0 | 0 | 0 | 0.252 | |
| Speed | Standard (km/h) | 0 | 0 | 0 | 0.53 | 0 | 0.53 | 1.06 | 0 | 0.53 |
| While steering | 0 | 0 | 0.000474 | 0 | 0.000474 | 0.000947 | 0 | 0.000474 | 0 | |
| Standard Acceleration | S1 | 0 | 0.05 | 0.025 | 0 | 0 | 0 | 0 | 0 | 0 |
| S2 | 0 | 0.07 | 0.035 | 0 | 0 | 0 | 0 | 0 | 0 | |
| Drift Acceleration | S3 | 0 | 0.18 | 0 | 0.09 | 0 | 0 | 0 | 0 | 0 |
| S4 | 0 | 0.02 | 0 | 0.01 | 0 | 0 | 0 | 0 | 0 | |
| Handling | Manual | 0 | 0 | 0.000555 | 0 | 0.00111 | 0.000555 | 0 | 0 | 0 |
| Auto | 0 | 0 | 0.00029 | 0 | 0.00058 | 0.00029 | 0 | 0 | 0 | |
| Drift | Manual | 0.000265 | 0 | 0 | 0 | 0.000529 | 0 | 0 | 0 | 0 |
| Auto | 0.000222 | 0 | 0 | 0 | 0.000444 | 0 | 0 | 0 | 0 | |
| Mini-Turbo (frames) | 8 | 0 | 4 | 0 | 0 | 4 | 0 | 8 | 4 | |
| Off-Road Speed | Weak Off-road | 0.0171 | 0.0171 | 0 | 0 | 0.0171 | 0 | 0.0171 | 0.0342 | 0.0171 |
| Off-road | 0.0184 | 0.0184 | 0 | 0 | 0.0184 | 0 | 0.0184 | 0.0368 | 0.0184 | |
| Heavy Off-road | 0.0113 | 0.0113 | 0 | 0 | 0.0113 | 0 | 0.0113 | 0.0226 | 0.0113 | |
| Slippery Off-road | 0.00641 | 0.00641 | 0 | 0 | 0.00641 | 0 | 0.00641 | 0.01283 | 0.00641 | |
| Off-Road Handling | Slippery Road | 0 | 0.00263 | 0 | 0.00263 | 0 | 0 | 0.00526 | 0 | 0.00263 |
| Weak Off-road | 0 | 0.00368 | 0 | 0.00368 | 0 | 0 | 0.00736 | 0 | 0.00368 | |
| Off-road and Heavy Off-road | 0 | 0.00263 | 0 | 0.00263 | 0 | 0 | 0.00526 | 0 | 0.00263 | |
| Slippery Off-road | 0 | 0.00211 | 0 | 0.00211 | 0 | 0 | 0.00422 | 0 | 0.00211 | |
Vehicles' stats
The vehicles have 31 stats. Acceleration is divided in four stages, presumably depending on the actual speed relative to the full speed. In each stage, acceleration is determined by two factors, a stage-specific S factor which is affected by the character bonus and a general E factor. These factors change while drifting, that itself can begin once the vehicle has reached 55% of its top speed. Finally, some stats change depending on the drifting method used (either Manual or Auto) and depending on the fact that the vehicle is steering (While Steering) or not (Standard).
- Weight: The weight of the vehicle.
- Speed: The top speed of the vehicle.
- While Steering: The top speed of the vehicle while steering, expressed as fraction of the top speed.
- Acceleration: How much the relative speed of the vehicle, i.e. the speed expressed as fraction of the top speed, increases over time.
- Handling: How fast the vehicle changes direction over time while steering (angular velocity).
- Range: How much the vehicle swings while steering.
- Drift: How fast the vehicle changes direction over time while drifting (angular velocity).
- Range: How much the vehicle swings while drifting.
- Mini-Turbo: The duration of the Mini-Turbo boost.
- Off-Road Speed: The relative Speed in various Off-Road sections.
- Off-Road Handling: The relative Handling in various Off-Road sections.
- Tilt: How much the kart tilts in various conditions.
| Small vehicles' stats | ||||||||||||||
|---|---|---|---|---|---|---|---|---|---|---|---|---|---|---|
| Vehicle | Standard Kart S | Booster Seat | Mini Beast | Cheep Charger | Tiny Titan | Blue Falcon | Standard Bike S | Bullet Bike | Bit Bike | Quacker | Magikruiser | Jet Bubble | ||
| Weight | 3.05 | 2.84 | 3.26 | 2.63 | 3.47 | 3.05 | 2.42 | 2.63 | 2.21 | 2 | 2.63 | 2.84 | ||
| Speed | Standard (km/h) | 78.71 | 75.53 | 81.89 | 77.12 | 79.77 | 82.95 | 78.18 | 81.36 | 75 | 76.59 | 79.24 | 80.3 | |
| While steering | 0.9957 | 0.9985 | 0.9938 | 0.9933 | 0.9966 | 0.9919 | 0.9962 | 0.9943 | 0.999 | 0.9938 | 0.9971 | 0.9947 | ||
| Acceleration | Not Drifting | S1 | 0.728 | 0.866 | 0.71924 | 0.4795 | 0.89094 | 0.254 | 0.774 | 0.75358 | 0.912 | 0.5 | 0.682 | 0.8566 |
| S2 | 0.728 | 0.866 | 0.3744 | 1.668 | 0.5764 | 0.766 | 0.774 | 0.4148 | 0.912 | 1.75 | 0.682 | 0.536 | ||
| S3 | 0.5034 | 0.5448 | 0.4172 | 0.4418 | 0.5182 | 0.3516 | 0.5172 | 0.4374 | 0.5586 | 0.45 | 0.4896 | 0.498 | ||
| S4 | 0.07034 | 0.07448 | 0.05172 | 0.04418 | 0.06182 | 0.03516 | 0.07172 | 0.05374 | 0.07586 | 0.045 | 0.06896 | 0.0598 | ||
| E | 0.65 | 0.65 | 0.2 | 0.2 | 0.2 | 0.2 | 0.65 | 0.2 | 0.65 | 0.2 | 0.65 | 0.2 | ||
| Drifting | S1 | 0.85 | 0.85 | 0.8 | 0.9 | 0.8 | 0.9 | 0.85 | 0.8 | 0.85 | 0.9 | 0.85 | 0.8 | |
| S2 | 0.95 | 0.95 | 0.925 | 0.975 | 0.925 | 0.975 | 0.95 | 0.925 | 0.95 | 0.975 | 0.95 | 0.925 | ||
| S3 | 1.95 | 1.45 | 2.45 | 2.25 | 1.15 | 1.65 | 2.05 | 2.55 | 1.55 | 2.35 | 1.25 | 1.75 | ||
| S4 | 0.13 | 0.13 | 0.15 | 0.11 | 0.15 | 0.11 | 0.13 | 0.15 | 0.13 | 0.11 | 0.15 | 0.13 | ||
| E | 0.965 | 0.965 | 0.98 | 0.95 | 0.98 | 0.95 | 0.965 | 0.98 | 0.965 | 0.95 | 0.98 | 0.965 | ||
| Handling | Manual | 0.024 | 0.0274 | 0.0205 | 0.0257 | 0.0228 | 0.0199 | 0.0269 | 0.0237 | 0.0301 | 0.0285 | 0.0258 | 0.0248 | |
| Auto | 0.0244 | 0.0267 | 0.0222 | 0.0256 | 0.0237 | 0.0219 | 0.0217 | 0.0205 | 0.023 | 0.0224 | 0.0213 | 0.0209 | ||
| Range | 0.88 | 0.94 | 0.82 | 0.91 | 0.86 | 0.81 | 0.955 | 0.91 | 1 | 0.9775 | 0.94 | 0.925 | ||
| Drift | Manual | 0.0186 | 0.0181 | 0.0198 | 0.0191 | 0.0174 | 0.0167 | 0.0135 | 0.0171 | 0.013 | 0.016 | 0.0136 | 0.0129 | |
| Auto | 0.0209 | 0.0204 | 0.0222 | 0.0214 | 0.0196 | 0.0188 | 0.0146 | 0.0125 | 0.0142 | 0.0119 | 0.0107 | 0.0103 | ||
| Range | 0.94 | 0.92 | 0.99 | 0.96 | 0.89 | 0.86 | 0.95 | 1 | 0.93 | 0.97 | 0.9 | 0.88 | ||
| Mini-Turbo (frames) | 29 | 36 | 39 | 33 | 27 | 22 | 31 | 40 | 37 | 35 | 28 | 26 | ||
| Traction | -15 | 5 | -8 | -3 | 4 | 10 | 1 | 1 | 0 | 3 | 3 | 3 | ||
| Off-Road Speed | Weak Off-road | 0.7039 | 0.7894 | 0.6184 | 0.7381 | 0.8578 | 0.6013 | 0.721 | 0.6355 | 0.8065 | 0.7552 | 0.8749 | 0.6697 | |
| Off-road | 0.4906 | 0.5826 | 0.3986 | 0.5274 | 0.6562 | 0.3802 | 0.509 | 0.417 | 0.601 | 0.5458 | 0.6746 | 0.4538 | ||
| Heavy Off-road | 0.2867 | 0.3432 | 0.2302 | 0.3093 | 0.3884 | 0.2189 | 0.298 | 0.2415 | 0.3545 | 0.3206 | 0.3997 | 0.2641 | ||
| Slippery Off-road | 0.931 | 0.9588 | 0.9032 | 0.9421 | 0.981 | 0.8977 | 0.9366 | 0.9088 | 0.9644 | 0.9477 | 0.9866 | 0.9199 | ||
| Off-Road Handling | Slippery Road | 0.08419 | 0.09997 | 0.06841 | 0.08945 | 0.07893 | 0.06315 | 0.08156 | 0.06578 | 0.09734 | 0.08682 | 0.0763 | 0.07104 | |
| Weak Off-road | 0.12784 | 0.14992 | 0.10576 | 0.1352 | 0.12048 | 0.0984 | 0.12416 | 0.10208 | 0.14624 | 0.13152 | 0.1168 | 0.10944 | ||
| Off-road | 0.08419 | 0.09997 | 0.06841 | 0.08945 | 0.07893 | 0.06315 | 0.08156 | 0.06578 | 0.09734 | 0.08682 | 0.0763 | 0.07104 | ||
| Heavy Off-road | 0.08419 | 0.09997 | 0.06841 | 0.08945 | 0.07893 | 0.06315 | 0.08156 | 0.06578 | 0.09734 | 0.08682 | 0.0763 | 0.07104 | ||
| Slippery Off-road | 0.05743 | 0.07009 | 0.04477 | 0.06165 | 0.05321 | 0.04055 | 0.05532 | 0.04266 | 0.06798 | 0.05954 | 0.0511 | 0.04688 | ||
| Tilt | 0.03 | 0.035 | 0.02 | 0.03 | 0.02 | 0.03 | ||||||||
| Medium vehicles' stats | ||||||||||||||
| Vehicle | Standard Kart M | Classic Dragster | Wild Wing | Super Blooper | Daytripper | Sprinter | Standard Bike M | Mach Bike | Sugarscoot | Zip Zip | Sneakster | Dolphin Dasher | ||
| Weight | 4.31 | 4.1 | 4.73 | 3.89 | 4.31 | 4.52 | 3.68 | 3.68 | 3.26 | 3.47 | 3.89 | 4.1 | ||
| Speed | Standard (km/h) | 79.77 | 77.65 | 82.42 | 80.83 | 77.12 | 84.01 | 79.24 | 81.89 | 76.59 | 78.71 | 83.48 | 80.3 | |
| While steering | 0.9943 | 0.9924 | 0.9928 | 0.9952 | 0.9976 | 0.9909 | 0.9947 | 0.9933 | 0.9981 | 0.9966 | 0.9914 | 0.9957 | ||
| Acceleration | Not Drifting | S1 | 0.59 | 0.4385 | 0.61622 | 0.254 | 0.774 | 0.6849 | 0.636 | 0.65056 | 0.82 | 0.92528 | 0.213 | 0.82226 |
| S2 | 0.59 | 1.504 | 0.2532 | 0.766 | 0.774 | 0.334 | 0.636 | 0.2936 | 0.82 | 0.6168 | 0.602 | 0.4956 | ||
| S3 | 0.462 | 0.4254 | 0.3566 | 0.3516 | 0.5172 | 0.397 | 0.4758 | 0.3768 | 0.531 | 0.5384 | 0.3352 | 0.4778 | ||
| S4 | 0.0662 | 0.04254 | 0.04566 | 0.03516 | 0.07172 | 0.0497 | 0.06758 | 0.04768 | 0.0731 | 0.06384 | 0.03352 | 0.05778 | ||
| E | 0.65 | 0.2 | 0.2 | 0.2 | 0.65 | 0.2 | 0.65 | 0.2 | 0.65 | 0.2 | 0.2 | 0.2 | ||
| Drifting | S1 | 0.85 | 0.9 | 0.8 | 0.9 | 0.85 | 0.8 | 0.85 | 0.8 | 0.85 | 0.8 | 0.9 | 0.8 | |
| S2 | 0.95 | 0.975 | 0.925 | 0.975 | 0.95 | 0.925 | 0.95 | 0.925 | 0.95 | 0.925 | 0.975 | 0.925 | ||
| S3 | 1.75 | 2.05 | 2.25 | 0.85 | 1.25 | 1.45 | 1.85 | 2.35 | 1.35 | 1.15 | 1.55 | 0.95 | ||
| S4 | 0.13 | 0.11 | 0.15 | 0.15 | 0.13 | 0.11 | 0.13 | 0.15 | 0.13 | 0.15 | 0.11 | 0.15 | ||
| E | 0.965 | 0.95 | 0.98 | 0.98 | 0.965 | 0.95 | 0.965 | 0.98 | 0.965 | 0.98 | 0.95 | 0.98 | ||
| Handling | Manual | 0.0228 | 0.0251 | 0.0199 | 0.0216 | 0.0263 | 0.0187 | 0.0258 | 0.0232 | 0.029 | 0.0269 | 0.0221 | 0.0248 | |
| Auto | 0.0237 | 0.0252 | 0.0219 | 0.023 | 0.0259 | 0.0211 | 0.0213 | 0.0203 | 0.0226 | 0.0217 | 0.0198 | 0.0209 | ||
| Range | 0.86 | 0.9 | 0.81 | 0.84 | 0.92 | 0.79 | 0.94 | 0.9025 | 0.985 | 0.955 | 0.8875 | 0.925 | ||
| Drift | Manual | 0.0184 | 0.0186 | 0.0193 | 0.0177 | 0.0177 | 0.0162 | 0.0127 | 0.0164 | 0.0124 | 0.0115 | 0.0119 | 0.014 | |
| Auto | 0.0206 | 0.0209 | 0.0217 | 0.0198 | 0.0198 | 0.0183 | 0.014 | 0.0121 | 0.0138 | 0.0133 | 0.0097 | 0.0108 | ||
| Range | 0.93 | 0.94 | 0.97 | 0.9 | 0.9 | 0.84 | 0.92 | 0.98 | 0.91 | 0.88 | 0.85 | 0.91 | ||
| Mini-Turbo (frames) | 27 | 32 | 36 | 24 | 33 | 19 | 28 | 37 | 35 | 29 | 20 | 26 | ||
| Traction | 3 | -5 | 0 | 5 | -7 | 0 | -2 | 3 | -9 | -4 | -11 | 2 | ||
| Off-Road Speed | Weak Off-road | 0.6697 | 0.7039 | 0.6013 | 0.7894 | 0.7552 | 0.5842 | 0.6868 | 0.6184 | 0.7723 | 0.8407 | 0.6013 | 0.8065 | |
| Off-road | 0.4538 | 0.4906 | 0.3802 | 0.5826 | 0.5458 | 0.3618 | 0.4722 | 0.3986 | 0.5642 | 0.6378 | 0.3802 | 0.601 | ||
| Heavy Off-road | 0.2641 | 0.2867 | 0.2189 | 0.3432 | 0.3206 | 0.2076 | 0.2754 | 0.2302 | 0.3319 | 0.3771 | 0.2189 | 0.3545 | ||
| Slippery Off-road | 0.9199 | 0.931 | 0.8977 | 0.9588 | 0.9477 | 0.8921 | 0.9255 | 0.9032 | 0.9532 | 0.9755 | 0.8977 | 0.9644 | ||
| Off-Road Handling | Slippery Road | 0.07893 | 0.08419 | 0.06578 | 0.07367 | 0.09471 | 0.06052 | 0.0763 | 0.06315 | 0.09208 | 0.08156 | 0.05789 | 0.07104 | |
| Weak Off-road | 0.12048 | 0.12784 | 0.10208 | 0.11312 | 0.14256 | 0.09472 | 0.1168 | 0.0984 | 0.13888 | 0.12416 | 0.09104 | 0.10944 | ||
| Off-road | 0.07893 | 0.08419 | 0.06578 | 0.07367 | 0.09471 | 0.06052 | 0.0763 | 0.06315 | 0.09208 | 0.08156 | 0.05789 | 0.07104 | ||
| Heavy Off-road | 0.07893 | 0.08419 | 0.06578 | 0.07367 | 0.09471 | 0.06052 | 0.0763 | 0.06315 | 0.09208 | 0.08156 | 0.05789 | 0.07104 | ||
| Slippery Off-road | 0.05321 | 0.05743 | 0.04266 | 0.04899 | 0.06587 | 0.03844 | 0.0511 | 0.04055 | 0.06376 | 0.05532 | 0.03633 | 0.04688 | ||
| Tilt | 0.03 | 0.02 | 0.015 | 0.02 | 0.035 | 0.015 | ||||||||
| Large vehicles' stats | ||||||||||||||
| Vehicle | Standard Kart L | Offroader | Flame Flyer | Piranha Prowler | Jetsetter | Honeycoupe | Standard Bike L | Flame Runner | Wario Bike | Shooting Star | Spear | Phantom | ||
| Weight | 5.36 | 5.78 | 5.36 | 5.99 | 5.15 | 5.57 | 4.94 | 4.94 | 5.36 | 4.52 | 5.15 | 4.73 | ||
| Speed | Standard (km/h) | 80.3 | 78.18 | 83.48 | 81.89 | 85.07 | 81.36 | 79.77 | 82.95 | 77.65 | 80.83 | 84.54 | 79.24 | |
| While steering | 0.9943 | 0.9966 | 0.9919 | 0.9928 | 0.99 | 0.9938 | 0.9947 | 0.9924 | 0.9971 | 0.9943 | 0.9905 | 0.9957 | ||
| Acceleration | Not Drifting | S1 | 0.544 | 0.728 | 0.54754 | 0.406 | 0.1515 | 0.6849 | 0.59 | 0.58188 | 0.774 | 0.71924 | 0.172 | 0.89094 |
| S2 | 0.544 | 0.728 | 0.1724 | 0.406 | 0.356 | 0.334 | 0.59 | 0.2128 | 0.774 | 0.3744 | 0.438 | 0.5764 | ||
| S3 | 0.4482 | 0.5034 | 0.3162 | 0.4068 | 0.3106 | 0.397 | 0.462 | 0.3364 | 0.5172 | 0.4172 | 0.3188 | 0.5182 | ||
| S4 | 0.06482 | 0.07034 | 0.04162 | 0.06068 | 0.03106 | 0.0497 | 0.0662 | 0.04364 | 0.07172 | 0.05172 | 0.03188 | 0.06182 | ||
| E | 0.65 | 0.65 | 0.2 | 0.65 | 0.2 | 0.2 | 0.65 | 0.2 | 0.65 | 0.2 | 0.2 | 0.2 | ||
| Drifting | S1 | 0.85 | 0.85 | 0.8 | 0.85 | 0.9 | 0.8 | 0.85 | 0.8 | 0.85 | 0.8 | 0.9 | 0.8 | |
| S2 | 0.95 | 0.95 | 0.925 | 0.95 | 0.975 | 0.925 | 0.95 | 0.925 | 0.95 | 0.925 | 0.975 | 0.925 | ||
| S3 | 1.55 | 0.75 | 1.85 | 1.35 | 1.05 | 2.15 | 1.65 | 1.95 | 0.85 | 2.25 | 1.15 | 0.65 | ||
| S4 | 0.13 | 0.13 | 0.15 | 0.13 | 0.11 | 0.15 | 0.13 | 0.15 | 0.13 | 0.15 | 0.11 | 0.15 | ||
| E | 0.965 | 0.965 | 0.98 | 0.965 | 0.95 | 0.98 | 0.965 | 0.98 | 0.965 | 0.98 | 0.95 | 0.98 | ||
| Handling | Manual | 0.0222 | 0.0251 | 0.0182 | 0.0211 | 0.017 | 0.0199 | 0.0253 | 0.0216 | 0.028 | 0.0232 | 0.0205 | 0.0264 | |
| Auto | 0.0233 | 0.0252 | 0.0207 | 0.0226 | 0.02 | 0.0219 | 0.0211 | 0.0196 | 0.0222 | 0.0203 | 0.0192 | 0.0215 | ||
| Range | 0.85 | 0.9 | 0.78 | 0.83 | 0.76 | 0.81 | 0.9325 | 0.88 | 0.97 | 0.9025 | 0.865 | 0.9475 | ||
| Drift | Manual | 0.0174 | 0.0167 | 0.0184 | 0.0169 | 0.0155 | 0.0191 | 0.0121 | 0.015 | 0.0112 | 0.0141 | 0.0108 | 0.0107 | |
| Auto | 0.0196 | 0.0188 | 0.0206 | 0.0191 | 0.0175 | 0.0214 | 0.0137 | 0.0114 | 0.0131 | 0.0149 | 0.0092 | 0.0127 | ||
| Range | 0.89 | 0.86 | 0.93 | 0.87 | 0.81 | 0.96 | 0.9 | 0.94 | 0.87 | 0.97 | 0.82 | 0.85 | ||
| Mini-Turbo (frames) | 24 | 29 | 31 | 20 | 15 | 35 | 26 | 32 | 31 | 36 | 16 | 27 | ||
| Traction | -15 | 7 | 0 | -13 | 30 | 0 | 0 | 0 | 5 | 27 | 3 | 2 | ||
| Off-Road Speed | Weak Off-road | 0.6697 | 0.721 | 0.5671 | 0.6355 | 0.55 | 0.6013 | 0.6868 | 0.5842 | 0.7381 | 0.6184 | 0.5671 | 0.8065 | |
| Off-road | 0.4538 | 0.509 | 0.3434 | 0.417 | 0.325 | 0.3802 | 0.4722 | 0.3618 | 0.5274 | 0.3986 | 0.3434 | 0.601 | ||
| Heavy Off-road | 0.2641 | 0.298 | 0.1963 | 0.2415 | 0.185 | 0.2189 | 0.2754 | 0.2076 | 0.3093 | 0.2302 | 0.1963 | 0.3545 | ||
| Slippery Off-road | 0.9199 | 0.9366 | 0.8866 | 0.9088 | 0.881 | 0.8977 | 0.9255 | 0.8921 | 0.9421 | 0.9032 | 0.8866 | 0.9644 | ||
| Off-Road Handling | Slippery Road | 0.0763 | 0.08945 | 0.05789 | 0.06578 | 0.05263 | 0.06578 | 0.07367 | 0.05526 | 0.08682 | 0.06315 | 0.05 | 0.0763 | |
| Weak Off-road | 0.1168 | 0.1352 | 0.09104 | 0.10208 | 0.08368 | 0.10208 | 0.11312 | 0.08736 | 0.13152 | 0.0984 | 0.08 | 0.1168 | ||
| Off-road | 0.0763 | 0.08945 | 0.05789 | 0.06578 | 0.05263 | 0.06578 | 0.07367 | 0.05526 | 0.08682 | 0.06315 | 0.05 | 0.0763 | ||
| Heavy Off-road | 0.0763 | 0.08945 | 0.05789 | 0.06578 | 0.05263 | 0.06578 | 0.07367 | 0.05526 | 0.08682 | 0.06315 | 0.05 | 0.0763 | ||
| Slippery Off-road | 0.0511 | 0.06165 | 0.03633 | 0.04266 | 0.03211 | 0.04266 | 0.04899 | 0.03422 | 0.05954 | 0.04055 | 0.03 | 0.0511 | ||
| Tilt | 0.015 | 0.015 | 0.015 | 0.01 | 0.02 | 0.025 | ||||||||
Courses

Race courses are divided into various Cups again: Mushroom Cup, Flower Cup, Star Cup, and Special Cup for new courses and Shell Cup, Banana Cup, Leaf Cup, and Lightning Cup for returning courses. Notably, these are the same as in Mario Kart DS.
All thirty-two tracks have three laps, regardless of length and difficulty. At first, only two Wii and two Retro Cups are available, but clearing the former two in first place unlocks the Star Cup, while clearing the latter two in first place unlocks the Leaf Cup; likewise, clearing the Star and Leaf Cups in first place unlocks the Special and Lightning Cups, respectively. This process only applies for the difficulty level the player is in, so it must be repeated for all others to have the secret Cups available in each of them.
This is the first game in the series to have different track names between the American and PAL versions; this applies to DK Summit/DK's Snowboard Cross, Chain Chomp Wheel/Chain Chomp Roulette, and Galaxy Colosseum/Galaxy Arena.
Wii Grand Prix
There are sixteen new courses in Mario Kart Wii.


Retro Grand Prix
These are courses that appeared in previous Mario Kart installments, much like in Mario Kart DS. This includes two courses each from Super Mario Kart and Mario Kart: Super Circuit, and four each from Mario Kart 64, Mario Kart: Double Dash!! and Mario Kart DS. These have been graphically updated and have some new details such as extra trees and ramps, new features such as jumps, pipe tricks, and even added shortcuts. These courses appear in the Shell, Banana, Leaf, and Lightning Cups. This game is tied with Mario Kart 8 Deluxe (when counting the Booster Course Pass) for having the second most retro Mario Circuit courses of any Mario Kart game, with three, behind only Mario Kart Tour, which has six.


Battle stages
This game has the most battle courses of any Mario Kart game, with ten. Additionally, this is the first Mario Kart game with unique music for each battle course.

.png)

.png)


Other stages
Mario Kart Wii featured one course that was exclusive to certain online tournaments.
| Online Tournament |
|---|
 Galaxy Colosseum Galaxy Arena |
Ghosts
In Mario Kart Wii, there are Normal Staff Ghosts and Expert Staff Ghosts. Beating the normal staff Ghosts by a certain amount of time unlocks the Expert Staff Ghosts. Unlocking Expert Staff Ghosts can help unlock certain characters and vehicles in the game. Below are two tables: the first shows the Normal Staff Ghosts, while the second shows the Expert Staff Ghosts, and also shows the character and vehicle the Ghost used.
Normal Staff Ghosts
| Course | Staff Name | Time | Character | Vehicle | Wii Wheel | Drift |
|---|---|---|---|---|---|---|
| Luigi Circuit | Nin★sato | 01:29.670 | Luigi | B Dasher Mk 2/Sprinter | Yes | Auto |
| Moo Moo Meadows | Nin★YuNya | 01:37.856 | Baby Daisy | Baby Booster/Booster Seat | Yes | Auto |
| Mushroom Gorge | Nin★Murak | 02:16.110 | Toadette | Quacker | Yes | Manual |
| Toad's Factory | Nin★Misa | 02:22.480 | Toad | Bubble Bike/Jet Bubble | Yes | Manual |
| Mario Circuit | Nin★==Kony | 01:44.777 | Mario | Rapide/Zip Zip | Yes | Manual |
| Coconut Mall | Nin★♪SiMO | 02:30.764 | Daisy | Bon Bon/Sugarscoot | No | Manual |
| DK Summit | Nin★mokke | 02:34.693 | Donkey Kong | Standard Bike L | Yes | Manual |
| Wario's Gold Mine | Nin★morimo | 02:19.585 | Wario | Wario Bike | Yes | Manual |
| Daisy Circuit | Nin★Toki | 01:56.822 | Daisy | Royal Racer/Daytripper | No | Manual |
| Koopa Cape | Nin★Rose | 03:03.022 | Koopa Troopa | Cheep Charger | No | Manual |
| Maple Treeway | Nin★pico | 02:58.633 | Diddy Kong | Nostalgia 1/Classic Dragster | Yes | Manual |
| Grumble Volcano | Nin★Gorin | 02:28.237 | Dry Bowser | Offroader | Yes | Manual |
| Dry Dry Ruins | Nin★Kei | 02:30.949 | Yoshi | Nostalgia 1/Classic Dragster | Yes | Manual |
| Moonview Highway | Nin★KOZ★ | 02:16.802 | Peach | Standard Kart M | Yes | Manual |
| Bowser's Castle | Nin★YABUKI | 03:04.836 | Bowser | Piranha Prowler | No | Manual |
| Rainbow Road | Nin★Konno | 03:05.895 | Rosalina | Twinkle Star/Shooting Star | No | Manual |
| GCN Peach Beach | Nin★HIRO | 01:34.233 | Peach | Royal Racer/Daytripper | No | Manual |
| DS Yoshi Falls | Nin★DoTak | 01:16.461 | Yoshi | Rapide/Zip Zip | No | Manual |
| SNES Ghost Valley 2 | Nin★YOKO | 01:06.595 | King Boo | Standard Kart L | Yes | Manual |
| N64 Mario Raceway | Nin★Ichiro | 02:14.799 | Baby Mario | Nanobike/Bit Bike | Yes | Manual |
| N64 Sherbet Land | Nin★Sakat | 02:48.651 | Baby Luigi | Quacker | Yes | Auto |
| GBA Shy Guy Beach | Nin★Kato | 01:45.568 | Koopa Troopa | Cheep Charger | Yes | Manual |
| DS Delfino Square | Nin★iwaco | 02:41.807 | Wario | Wario Bike | Yes | Manual |
| GCN Waluigi Stadium | Nin★NARI★ | 02:32.882 | Waluigi | Standard Bike L | No | Manual |
| DS Desert Hills | Nin★CHIA | 02:10.233 | Dry Bones | Standard Bike S | No | Manual |
| GBA Bowser Castle 3 | Nin★Fukuda | 02:58.304 | Dry Bowser | Standard Kart L | Yes | Manual |
| N64 DK's Jungle Parkway | Nin★Matt | 02:58.264 | Donkey Kong | Phantom | Yes | Manual |
| GCN Mario Circuit | Nin★♪Miz | 01:59.771 | Mario | Standard Bike M | Yes | Manual |
| SNES Mario Circuit 3 | Nin★iwaco | 01:38.880 | Baby Mario | Standard Kart S | Yes | Manual |
| DS Peach Gardens | Nin★Ito.y | 02:34.894 | Baby Peach | Magikruiser | Yes | Manual |
| GCN DK Mountain | Nin★♪msk | 02:57.744 | Funky Kong | Wario Bike | Yes | Manual |
| N64 Bowser's Castle | Nin★GASK2 | 03:19.323 | Bowser Jr. | Standard Kart M | Yes | Manual |
Expert Staff Ghosts
| Course | Staff Name | Unlock Time | Time | Character | Vehicle | Wii Wheel | Drift |
|---|---|---|---|---|---|---|---|
| Luigi Circuit | Nin★Uta♪ | 01:26.394 | 01:19.419 | Luigi | Mach Bike | Yes | Manual |
| Moo Moo Meadows | Nin★Tkym | 01:34.160 | 01:25.909 | Baby Daisy | Bullet Bike | No | Auto |
| Mushroom Gorge | Nin★Miki | 02:10.875 | 02:01.011 | Toadette | Concerto/Mini Beast | No | Manual |
| Toad's Factory | Nin★GQO | 02:17.653 | 02:05.593 | Toad | Blue Falcon | No | Manual |
| Mario Circuit | Nin★fuyu | 01:40.528 | 01:33.702 | Mario | B Dasher Mk 2/Sprinter | No | Manual |
| Coconut Mall | Nin★MUGI★ | 02:25.620 | 02:13.333 | Daisy | Wild Wing | Yes | Manual |
| DK Summit | Nin★KOZ★ | 02:29.076 | 02:17.546 | Donkey Kong | Flame Flyer | Yes | Manual |
| Wario's Gold Mine | Nin★♪Ryo | 02:15.323 | 02:04.800 | Wario | Flame Flyer | No | Manual |
| Daisy Circuit | Nin★Taeko | 01:51.786 | 01:41.362 | Daisy | Mach Bike | No | Manual |
| Koopa Cape | Nin★morimo | 02:56.867 | 02:41.370 | Koopa Troopa | Bubble Bike/Jet Bubble | No | Manual |
| Maple Treeway | Nin★MUGI★ | 02:51.684 | 02:37.812 | Diddy Kong | Nitrocycle/Sneakster | No | Manual |
| Grumble Volcano | Nin★aki | 02:22.856 | 02:11.852 | Dry Bowser | Torpedo/Spear | No | Manual |
| Dry Dry Ruins | Nin★Akito | 02:26.064 | 02:14.286 | Yoshi | Nitrocycle/Sneakster | Yes | Manual |
| Moonview Highway | Nin★Koh | 02:10.509 | 02:04.163 | Peach | Mach Bike | Yes | Manual |
| Bowser's Castle | Nin★Masa | 02:57.382 | 02:42.098 | Bowser | Bowser Bike/Flame Runner | No | Manual |
| Rainbow Road | Nin★Syun1 | 03:00.007 | 02:44.734 | Rosalina | Aero Glider/Jetsetter | No | Manual |
| GCN Peach Beach | Nin★Taeko | 01:30.909 | 01:23.140 | Peach | Dolphin Dasher | Yes | Manual |
| DS Yoshi Falls | Nin★FJ | 01:14.072 | 01:09.175 | Yoshi | Super Blooper/Turbo Blooper | Yes | Manual |
| SNES Ghost Valley 2 | Nin★sira■ | 01:04.261 | 00:58.907 | King Boo | Torpedo/Spear | No | Manual |
| N64 Mario Raceway | Nin★Yuuki | 02:10.069 | 01:59.053 | Baby Mario | Concerto/Mini Beast | No | Manual |
| N64 Sherbet Land | Nin★FJ | 02:42.536 | 02:28.356 | Baby Luigi | Blue Falcon | No | Manual |
| GBA Shy Guy Beach | Nin★Matt | 01:41.174 | 01:32.867 | Koopa Troopa | Magikruiser | No | Manual |
| DS Delfino Square | Nin★TARO | 02:36.630 | 02:24.169 | Wario | Dragonetti/Honeycoupe | No | Manual |
| GCN Waluigi Stadium | Nin★♪Ryo | 02:26.335 | 02:12.367 | Waluigi | Piranha Prowler | No | Manual |
| DS Desert Hills | Nin★solami | 02:02.358 | 01:52.686 | Dry Bones | Rally Romper/Tiny Titan | Yes | Manual |
| GBA Bowser Castle 3 | Nin★A24 | 02:53.651 | 02:39.391 | Dry Bowser | Bowser Bike/Flame Runner | No | Manual |
| N64 DK's Jungle Parkway | Nin★Syun1 | 02:51.693 | 02:37.782 | Donkey Kong | Flame Flyer | Yes | Manual |
| GCN Mario Circuit | Nin★Dai8 | 01:55.907 | 01:49.939 | Mario | Wild Wing | No | Manual |
| SNES Mario Circuit 3 | Nin★Shige | 01:35.213 | 01:26.659 | Baby Mario | Bullet Bike | No | Manual |
| DS Peach Gardens | Nin★==Kony | 02:29.793 | 02:16.777 | Baby Peach | Concerto/Mini Beast | Yes | Manual |
| GCN DK Mountain | Nin★Miyam | 02:52.100 | 02:38.130 | Funky Kong | Flame Flyer | Yes | Manual |
| N64 Bowser's Castle | Nin★Kentan | 03:09.228 | 02:55.933 | Bowser Jr. | Nitrocycle/Sneakster | Yes | Manual |
Items
- For the probability of obtaining each item when an Item Box is opened in the various modes, see Mario Kart Wii item probability distributions.
Mario Kart Wii includes two new items, the Mega Mushroom and the POW Block, and brings back the Thunder Cloud from the Mario Kart Arcade GP installments (making this game its console Mario Kart debut). All three items are absent from Mario Kart 7 and Mario Kart 8. Items can be earned by driving through Item Boxes on the courses, just like in previous games. Once a player has done so, an item will be selected via the Item Roulette. Players can use items by pressing ![]() . In general, players tend to obtain a weak item such as a Banana or a Green Shell when they are in first. However, if players are in a lower place, they obtain a slightly more powerful item such as a Red Shell or Lightning. Usually, the lower the place of the player, the rarer and more powerful the item they get. Stars, Mega Mushrooms, and Bullet Bills are examples of powerful items as they provide speed boosts and invincibility. This is the only game in the Mario Kart series where the drivers do not vocally react to getting inked by a Blooper.
. In general, players tend to obtain a weak item such as a Banana or a Green Shell when they are in first. However, if players are in a lower place, they obtain a slightly more powerful item such as a Red Shell or Lightning. Usually, the lower the place of the player, the rarer and more powerful the item they get. Stars, Mega Mushrooms, and Bullet Bills are examples of powerful items as they provide speed boosts and invincibility. This is the only game in the Mario Kart series where the drivers do not vocally react to getting inked by a Blooper.
| Image | Name | Description |
|---|---|---|

|
Mushroom | Gives players a short speed boost that ignores terrain. |

|
Triple Mushrooms | Gives players three Mushrooms, which give separate boosts. It is the default item in Time Trial mode. |

|
Golden Mushroom | The driver gets an infinite number of Mushroom boosts for 7.5 seconds. |

|
Mega Mushroom New item |
The driver grows bigger, which allows them to squash other racers by running over them, making them lose their items and slow down for a moment. The Mega Mushroom makes the racer invincible to all attacks except those from Stars, Bullet Bills, and Bloopers. It allows the user to destroy items and course obstacles and gives the driver a speed boost. In addition, the player can go off-road without suffering any effect of slowing down. The effect lasts for 7.5 seconds but will be ended prematurely if the player is hit by Lightning. |

|
Fake Item Box | This item imitates an Item Box but is colored red and has an upside down question mark. At a distance, it appears a similar color to a regular item box, only revealing its true color as the player approaches. It causes opponents to flip over once hit. It cannot block item attacks, but it can be held behind the player's vehicle to block other vehicles. |

|
Banana | When drivers run into a Banana, it causes them to slip and slow down. It can also be held behind the player's vehicle to block attacks from shells and other vehicles. |

|
Triple Bananas | This item gives the driver a trail of three Bananas. |

|
Green Shell | A basic green shell that can be thrown forwards and backwards. It bounces off obstacles several times before it hits an opponent or is destroyed. With each bounce, the new direction is a little corrected to increase the probability of hitting a player. |

|
Triple Green Shells | Three Green Shells that surround the racer until released. These can also be thrown forward or backward. |

|
Red Shell | A fragile shell that tracks the nearest opponent when fired forward. It will break if it hits an obstacle. |

|
Triple Red Shells | Three Red Shells that surround the racer until released. |

|
Spiny Shell | A blue shell that flies directly to the racer in first place and explodes like a Bob-omb. Only one Spiny Shell can be in play at a time, and Spiny Shells are unobtainable for the first 30 seconds of a race. |

|
Star | The driver obtains total invincibility for 7.5 seconds, allowing them to knock over items, course obstacles, and other players on contact. Also, the driver receives a speed boost and the power to drive off-road with no speed loss. Racers that are hit will lose all items in their possession. |

|
Lightning | Lightning strikes every racer ahead of the user, causing them to spin out, drop their items, and shrink to a very small size, driving more slowly. This item takes no effect on racers with invincibility items activated. The effects wear off from lowest place to first. Any users with the Mega Mushroom in effect shrink to normal size. Only one Lightning can be in play at a time, and it has a cooldown timer both for the first 30 seconds of a race and for 30 seconds between uses. |

|
Thunder Cloud New item in console Mario Kart |
A thundercloud hovers over the recipient and strikes it with lightning after 10 seconds. The user shrinks to a very small size for 10 seconds, driving more slowly. Before this happens, the user has higher speed and acceleration while not losing speed when driving off-road, and may pass the cloud to an opponent by bumping into them. The Thunder Cloud can be destroyed if the driver goes into a cannon or uses a Star or Mega Mushroom. Only one Thunder Cloud can be in play at a time. |

|
Bob-omb | Blows up a racer anywhere on the track. It has the same effect as the Spiny Shell, except that it can be lobbed or tossed backwards just like a Banana. |

|
Blooper | Squirts ink on any racer ahead of the user, partially obscuring vision. It eventually wears off, but it can be immediately removed by a speed boost from a Mushroom, boost tile, etc. The higher the player's position is, the more their vision is obscured. Only one Blooper can be in play at a time, and it has a cooldown timer both for the first 15 seconds of a race and for 15 seconds between uses. |

|
Bullet Bill | Transforms the racer into a large Bullet Bill, which rockets down the entire track at very high speeds on autopilot. The Bullet Bill provides total invincibility and will knock over any item, any course hazard, and any player that is in the way, making them lose or drop all their items. Only one Bullet Bill can be in play at a time. |

|
POW Block New item |
The POW Block appears above the karts as a 2D image, warning players of its arrival, and causes any racer on the ground ahead of the user to spin out and drop their items. Players who deploy the wheelie button at the moment the POW Block hits mitigate the spinout by retaining their speed. Players can also be airborne to avoid the POW Block, as the POW Block will not affect any racer that is in the air. Only one POW Block can be in play at a time, and it has a cooldown timer both for the first 20 seconds of a race and for 20 seconds between uses. |
Differences in multiplayer modes
As in the previous games in the Mario Kart series, there are several small changes made to the courses in split-screen mode, most likely to preserve the frame-rate.
- At the start of a race, Lakitu is next to the player driver, slightly facing the side of the track. In single player mode, he is in front of the player driver, facing the camera. This only counts for races, however, as Lakitu always starts next to the player when in a battle.
- The question marks in the Item Boxes spin around with the box. They are static in single player mode.
- Frame-rate slows to 30 frames per second if the screen is split 4 ways or is in Two Player Online.
- The fourth screen in local three player play displays a dynamic camera that rotates between the three player drivers.
- CPUs do not animate. In Battle Mode, their voices are also absent.
- There are no tourists on the Sunshine cruise ship in GCN Peach Beach.
- Boos do not animate in SNES Ghost Valley 2.
- In GCN Waluigi Stadium, the metal Piranha Plants do not move their jaws, and the moving arrow signs and the Jumbotron are absent as in Mario Kart: Double Dash!!
- There are no Miis in the stores in Coconut Mall.
- The crowd in Mario Circuit, Toad's Factory, Daisy Circuit, and DS Delfino Square do not animate.
- No tourists are on the ship in N64 DK's Jungle Parkway.
- The Jumbotron at Funky Stadium does not show the human player; instead it shows a picture of Funky Kong's face with the words "Funky Stadium".
- Star Bits are missing in Rainbow Road.
Staff
- Main article: List of Mario Kart Wii staff
Consistent with the rest of the console Mario Kart series, Mario Kart Wii is developed by Nintendo EAD. Shigeru Miyamoto is the general producer of the game, with the producer being Hideki Konno, who had been consistently involved with the Mario Kart series since the first installment, except Mario Kart: Double Dash!!, and the executive producer being Satoru Iwata. Yasuyuki Oyagi directed the game, having co-directed the series since Mario Kart 64 barring Mario Kart: Super Circuit, though Mario Kart Wii was the first installment he was the sole director of and the last installment he directed, becoming a co-producer later on. Mario Kart Wii was the debut of Kosuke Yabuki as a planner; he would later become key staff and serving a director role in later Mario Kart installments.
Reception
Critical reception
Mario Kart Wii has received positive reviews from critics. It has an average score of 82.07% from 74 reviews in GameRankings and an average of 82 based on 73 reviews on Metacritic.[9][10]
Bozon of IGN gave the game an 8.5 out of 10, praising the online play, the presentation, and the gameplay but criticizing the cheap AI in 150cc, the lack of voice chat, reliance on friend codes, and the random items. He finished off with, "Every player is going to have their own love/hate relationship with Mario Kart Wii, but in the end the game does so many things right that it'd be foolish not to give credit where due. Online seriously raises the bar for Nintendo, trumping even Smash in a big, big way. The sense of community you can get even with random racers online and ghost-supported leader boards is impressive, and the fact that you can head on to Nintendo Wi-Fi Connection solo, with a friend via split-screen, or hook up with buddies across the world without worry of lag and never-ending disconnect notices makes Mario Kart Wii a pure joy to play online. It isn't the best Mario Kart in the series, but it's a must-play experience on Wii, and standard-setting offering as far as online, channel support, and connectivity are concerned. Now if you'll excuse us, we've got some online stats to obsess over."[11] Sammy Barker of Nintendo Life praised the game for its polished gameplay and being well-thought and brilliant. Though he criticized the presentation, he wrote, "Poor presentation should not be an issue in this generation of gaming, particularly with the other consoles doing it so well, but, thankfully for us (as Wii owners), this game is a living, breathing example of gameplay over graphics." He gave the game 9/10 stars.[12] Oli Welsh of Eurogamer gave the game a score of 8/10. He praised the presentation of the game, the use of the Wii Wheel, and the smooth gameplay while criticizing the Battle Mode and the single player exclusive Grand Prix mode (though this was revised after being informed by Nintendo that four sequences of races with friends is still possible). He wrote, "Ultimately, the sheer sensory pleasure of playing Mario Kart Wii - from the charming animations, to the bopping tunes, to the sugar-rush boosting, to the exquisite steering - far overcomes the few concerns we have about it. It still has to be docked a mark for the awkward structure and compromised battle modes - but it's still unreservedly recommended to anyone for whom Mario Kart is a gaming cornerstone. And really, that should be everyone."[13]
Ryan Davis of Giant Bomb criticized the game for being safe. He wrote, "Mario Kart Wii is a good game stunted by its audience's apparently insatiable appetite for the exact same thing, over and over again. The addition of online play and motion controls are good, but they're also the most predictable choices possible. Personally, I'm completely tired of getting exactly what I expect." He gave the game a 3 out of 5 stars.[14] Edge gave the game 6/10, criticizing the game's compromising local, splitscreen multiplayer for online play. They ended with "Undercutting local multiplayer to benefit the online movement is a grievous error. Of all the multiplayer franchises, we struggle to think of a title in which four friends sat side by side seemed more natural. Having sacrificed racing integrity in Double Dash to side with social silliness, Nintendo has turned 180 degrees into an awkward halfway house. It’s a residence from where it has attempted to regain time-trial credentials with the loosest racing yet, and sees the company finally find its online feet by betraying one of its great pastimes. Perhaps first place in Mario Kart Wii isn’t the least enjoyable location in gaming after all."[15]
| Reviews | |||
|---|---|---|---|
| Reviewer, Publication | Score | Comment | |
| Nintendo Power | 9/10 | With more features, modes and multiplayer options than ever before, fans should be revved up to get behind the wheel. [May 2008, p.86]. | |
| Official Nintendo Magazine UK | 9.4/10 | A fantastic racer and the best online Nintendo game ever. [Apr 2008, p.58] | |
| Bozon, IGN | 8.5/10 | There are some things that feel completely out of whack though, such as the uncharacteristically cheap AI in 150cc, the lack of voice chat for an extremely social online game, reliance on friend codes, and "everyone's a winner" feeling you get when random items show up and completely turn the game upside down in an instant. | |
| Bryn Williams, GameSpy | 4.5/5 | The offline and online content is extremely entertaining and the pursuit of casual and hardcore karting has never been this much fun. | |
| Greg Leahy, Nintendo World Report | 8.5/10 | Mario Kart Wii is ultimately much the same game as Mario Kart DS, but this is forgivable due to its drastically improved online functionality along with some welcome gameplay additions and tweaks. | |
| Lark Anderson, GameSpot | 8.5/10 | Mario Kart Wii offers varied multiplayer and thoroughly integrated online modes that will keep you coming back for more. | |
| Oli Welsh, Eurogamer | 8/10 | Ultimately, the sheer sensory pleasure of playing Mario Kart Wii - from the charming animations, to the bopping tunes, to the sugar-rush boosting, to the exquisite steering - far overcomes the few concerns we have about it. It still has to be docked a mark for the awkward structure and compromised multiplayer modes - but it's still unreservedly recommended to anyone for whom Mario Kart is a gaming cornerstone. | |
| Electronic Gaming Monthly | 6.4/10 | While Mario Kart Wii is predictably similar to its predecessors, something has changed with this installment. Something that makes it feel subtly unlike other Mario Karts--and not a change for the better. [June 2008, p.73] | |
| Edge Magazine | 6/10 | Having sacrificed racing integrity in "Double Dash" to side with social silliness, Nintendo has turned 180 degrees into an awkward halfway house. [May 2008, p.86] | |
| Chris Kohler, Wired | 6/10 | [Mario Kart Wii's Battle Mode] is no longer a last-man-standing contest: Matches now last three minutes each, and if your kart takes too much damage, don't worry! You'll just respawn. Even worse, all battles are now played in teams of two. So while you can still have four human players, they can't all face off against each other -- and what's the point of that? | |
| Ryan Davis, Giant Bomb | 6/10 | Personally, I’m completely tired of getting exactly what I expect. | |
| Aggregators | |||
| Compiler | Platform / Score | ||
| Metacritic | 82 | ||
| GameRankings | 82.07% | ||
Awards
Mario Kart Wii won the "Favorite Video Game" award at the Nickelodeon 2010 Kids' Choice Awards, beating out The Legend of Zelda: Spirit Tracks, Wii Fit, and Wii Sports Resort. The game won the Best Online Multiplayer Game from IGN in 2008.[16] In the Guinness World Records 2010 Gamer's Edition, Mario Kart Wii won the "Best-selling racing game" accolade.[17]
Sales
In the week of May 4, 2008 in Japan, Mario Kart Wii became the best-selling game for the Wii, having sold over a million copies in Japan, less than a month after its release.[18] In the UK, Mario Kart Wii was the 8th biggest selling video game in British history and the single best-selling Nintendo game in history.[19] In the United States, at the month's release, Mario Kart Wii was the second best-seller at 1.12 million copies, being beaten out by the Xbox 360 version of Grand Theft Auto IV, but outselling the PS3 version of Grand Theft Auto IV.[20] Mario Kart Wii currently is the second best-selling game on the Wii, beaten out by Wii Sports, and in turn the best-selling Super Mario game on the system; the game has sold a total of 37.38 million units as of December 31, 2020, and was originally the best-selling Mario Kart game and the best-selling racing video game of all time, before being overtaken by Mario Kart 8 Deluxe in September 30, 2021.
Promotion
- Main article: List of Mario Kart Wii trading cards
Trading cards were released to celebrate the release of Mario Kart Wii. Trading card packs additionally included tattoos called FunTats.
For the marketing of Mario Kart Wii in the United States only, Nintendo of America did a series of three commercials starring Cowboy Jed, primarily to promote their slogan for this game: "Get Behind The Wheel!". The slogan focuses on the Wii Wheel, Nintendo's targeted gameplay control, as stated earlier in this article.
Pre-release and unused content
- Main article: List of Mario Kart Wii pre-release and unused content
Unused graphics have been found depicting icons for a Hammer Bro, a Koopa Paratroopa, and Petey Piranha, presumably being an extra character for each weight class. An outfit for the NPC Miis has also been found, which resembles a Toad.

An unused select Icon for Koopa Paratroopa as a player

An unused select Icon for Hammer Bro as a player

An unused select Icon for Petey Piranha as a player

The unused Toad outfit

Glitches
- Main article: List of Mario Kart Wii glitches
Note: All names are conjectural unless otherwise specified.
Grumble Volcano lap glitch
On the large rock to the left of the starting lien in Grumble Volcano, if the player drives around it, they will complete a lap.
Incorrect number of players
Rarely, when the player finishes an online race, if the next race has 12 players, the game will say it has 13 players instead.
Miscolored Item Boxes

To perform the glitch, the player needs to start a team race on the blue team. If the player starts a solo race, some racers' Fake Item Boxes will be blue instead of red.
Gallery
- For this subject's image gallery, see Gallery:Mario Kart Wii.
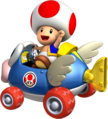
Toad driving his Cheep Charger
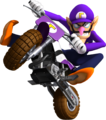
Waluigi riding his Standard Bike L
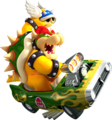
Bowser driving his Flame Flyer holding a Spiny Shell
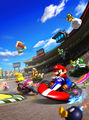
Luigi Circuit group picture artwork


Music and sound
Technically, this is the first game before Mario Kart 8 to feature revamped music for retro courses. In this case, the SNES and GBA tracks received revamped songs, as well as some of the battle stages. Tracks from the N64 and DS had their songs slightly enhanced in sound quality. The GCN tracks, however, remained relatively the same. This trait is also kept in Mario Kart 7 as well. It is also the first and currently only game that cuts off the tracks' intros in the final lap.
The soundtrack was created using Best Service's Advanced Orchestra and Gigapack, EastWest's Stormdrum and Quantum Leap Brass, E-MU Systems' Proteus/3, Korg Triton Le, ILIO's Synclavier Essential Percussion and World & Orchestra, Roland's D-550, Fantom X7 and Sound Canvas SC-8850, Spectrasonics' Distorted Reality and Supreme Beats, Ueberschall's House Essentials and Zero-G's Jungle Warfare.[21]
Soundtrack
- Main article: Mario Kart Wii Platinum Soundtrack
An official soundtrack was released in 2011 by Club Nintendo as a Platinum reward featuring 43 songs from the game itself.
Media
- For a complete list of media for this subject, see List of Mario Kart Wii media.
| File info 0:30 |
| File info 0:30 |
| File info 0:30 |
| File info 0:30 |
References to other games

- All past Mario Kart games: Half of the courses are taken from those games in the Retro Grand Prix, while half of the Battle courses are taken from those games under Retro Battle Course.
- Mario Bros.: The POW Block's logo appears in some of the cars in Moonview Highway. It also returns as an item.
- Super Mario Bros.: Various items from said game appear in the background of the Battle course Block Plaza, Super Mario Bros.-style. Additionally, the first seconds of the course Bowser's Castle theme resemble the music played in that game by its instruments. Also, the tune that plays in the award ceremony is a cover version of the tune that plays when Mario/Luigi beats a castle. When bumped into, a racer's vehicle makes one of several beeping noises, one of which is the first six notes of the Ground Theme, and another is the power-up sound effect.
- Super Mario Bros. 3: The license plates on some of the trucks read "SMB3", the abbreviation of Super Mario Bros. 3. They also say "POW" as a reference to the item that causes earthquakes.
- Famicom Grand Prix II: 3D Hot Rally: The Tiny Titan was inspired by the Monster.
- Super Mario Kart: Ghost Valley 2 and Mario Circuit 3 return as retro courses, and Battle Course 4 returns as a playable battle course. Also, part of the music that plays during the Award Ceremony (if drivers win a Trophy) is the same as in the same scenario in Super Mario Kart, Mario Kart 64 and Mario Kart: Super Circuit.
- Super Mario 64: Unagi appear in the background of Koopa Cape and Chain Chomp Wheel.
- Mario Kart 64: Mario Raceway, Sherbet Land, DK's Jungle Parkway, and Bowser's Castle return as retro courses, and Skyscraper returns as a playable battle course. Also, the course Moo Moo Meadows is based on Moo Moo Farm, and Block Plaza has parts of Block Fort. Also, part of the music that plays during the Award Ceremony (if drivers win a Trophy) is the same as in the same scenario in Mario Kart 64, Super Mario Kart and Mario Kart: Super Circuit.
- Mario Kart: Super Circuit: Shy Guy Beach and Bowser Castle 3 return as retro courses, and Battle Course 3 returns as a playable battle course. Also, the Yoshi Sphinx from the background of Yoshi Desert returns as a part of the race course Dry Dry Ruins. Part of the music that plays during the Award Ceremony (if drivers win a Trophy) is the same as in the same scenario in Mario Kart: Super Circuit, Super Mario Kart and Mario Kart 64.
- Super Mario Sunshine: The battle stage Delfino Pier is based on Delfino Plaza. Also, the course Coconut Mall is seemingly located on Isle Delfino.
- WarioWare series: The Wario Bike appears as a selectable vehicle.
- Mario Kart: Double Dash!!: Peach Beach, Waluigi Stadium, Mario Circuit, and DK Mountain return as retro courses, and Cookie Land returns as a playable battle course, and all of these courses retain their intros as retro tracks. Also, Daisy Cruiser cameos in the background of Daisy Circuit, Block Plaza has parts of Block City, the course Dry Dry Ruins has the same starting point as Dry Dry Desert, and finally, the character icons and the starting race jingle for Grand Prix races was also recycled from that game for VS. and Grand Prix races in this game, along with the 3-2-1 starting countdown, but with "GO!" at the end instead of "START". Some of the animations seen for the driver selection process (excluding the new drivers introduced for this game) are ported character models from Mario Kart: Double Dash!!, with only a few characters receiving noticeable changes. On the save file/driver's license screen, the Star Cup uses the same icon.
- Mario Party 7: Dry Bones and Boo's artwork can be seen in Bowser's Castle on the Showtime billboard. Some of Birdo's voice clips are reused from this game.
- Mario Kart DS: Yoshi Falls, Delfino Square, Desert Hills, and Peach Gardens return as retro courses, and Twilight House returns as a playable battle course, and just like Double Dash!!, all of the courses' intros return in this game as well. Also, the course DK Summit has derived many elements from DK Pass, and the course Dry Dry Ruins has similar music to that of Desert Hills, and finally, the countdown sound effect for starting races and battles are recycled from that game to signal the start of the race in Grand Prix, Time Trial, and VS mode. The Zipper is a bike that relates to the Shooting Star and the ROB-LGS acts like the Standard Bikes in the game. The opening portion of the theme for Rainbow Road is taken from Rainbow Road's music from this game.
- New Super Mario Bros.: Various features in the game are derived from their New Super Mario Bros.-look, such as the hills and outcrops of Luigi Circuit and the flowers and mushrooms of Moo Moo Meadows. The Mega Mushroom is an item in the game. The mushroom platforms in Mushroom Gorge is based on the mushroom platforms in said game, with the red ones being "bouncy", and the green ones more like solid platforms. Grumble Volcano is similar to World 8 of New Super Mario Bros. Also, Dry Bowser, who first appears in New Super Mario Bros., returns to Mario Kart Wii as his second appearance.
- Mario Kart Arcade GP 2: Princess Peach's profile artwork is reused.
- Mario Strikers Charged: Several voice clips are reused from this game.
- Mario Party 8: Several voice clips are reused from this game. Daisy's artwork from this game is also reused, but with her kart added to it.
- Donkey Kong Barrel Blast: Several of Donkey Kong, Diddy Kong, and Funky Kong's voice clips are reused from this game.
- Super Mario Galaxy: Rainbow Road has several elements from said game, such as Star Bits or a section based on Launch Stars, and portions of the Good Egg Galaxy's music is heard for the course's music. Maple Treeway resembles the Gold Leaf Galaxy. The battle course Galaxy Colosseum is also heavily based on Super Mario Galaxy. Additionally, Spiky Topmen are the enemies in the June 2008 1st Competition. Also, Rosalina, who first appears in Super Mario Galaxy, returns to Mario Kart Wii as her second appearance.
References in later games

- Mario Super Sluggers: Some of Funky Kong's voice clips are reused in this game.
- New Super Mario Bros. Wii: The character icons were reused in the Character Selection. Also, some of the voices from this game were reused as well.
- Mario Sports Mix: In Toad Park, the Standard Kart design is used from this game.
- Mario Kart 7: This game's retro selection reuses some courses, being Mushroom Gorge, Coconut Mall, Maple Treeway and Koopa Cape. Tricks, which are first introduced here, are reused in this game as well as the character icons and countdown timer for starting races and battles. Some voice clips and kart engine sounds are reused.
- Mario Party 9: Some of the characters voice clips, such as most of Daisy's voice clips and some of Toad's, return in this game.
- Mario Kart 8 / Mario Kart 8 Deluxe: Tricks, Bikes, twelve-player races, and the ability to look behind return. Moo Moo Meadows, Grumble Volcano, and Wario's Gold Mine return as retro courses (Wario's Gold Mine was added via DLC, but is available from the start in Mario Kart 8 Deluxe). Coconut Mall, Mushroom Gorge, Maple Treeway, DK Summit, Moonview Highway, Koopa Cape, Daisy Circuit, and Rainbow Road return as part of the Booster Course Pass in Mario Kart 8 Deluxe. The Bowser's Castle in this game sees the return of a similar giant moving Bowser statue that players drive around. Peach, Daisy, and Rosalina wear their bike suits again when riding a bike or ATV. Some voice clips are reused. The Launch Star boosters from Rainbow Road also return in the remastered N64 Rainbow Road in this game.
- Super Smash Bros. for Wii U: Mushroom Gorge is one of the few songs that can be heard at the stage Mario Circuit. The Standard Bike M, Daytripper, Flame Runner, Quacker, and Offroader all appear as trophies. Also, some of Bowser Jr.'s voice clips are reused. The POW Block item causes the Shy Guy racers in Mario Circuit to spin out when used.
- Mario & Luigi: Paper Jam: King Boo's voice clips are reused during his boss fight.
- Super Smash Bros. Ultimate: Some of Daisy's voice clips are recycled in this game. The Standard Kart, Standard Bike, and Cheep Charger appear as spirits.
- Mario Kart Tour: Mushroom Gorge, Coconut Mall, DK Summit, Daisy Circuit, Koopa Cape, Maple Treeway, Dry Dry Ruins, Moonview Highway, and Rainbow Road appear as returning courses. The Cheep Charger, Wild Wing, Super Blooper, Sprinter (using its British English name), Daytripper, Offroader, Flame Flyer, and Jetsetter (renamed the Speeder) return as karts in this game. The jingle that plays when obtaining a level-boost ticket for a High-End kart, racer, or glider is recreated. Diddy Kong and Funky Kong's voice clips are reused in this game.
- Donkey Kong Country: Tropical Freeze: Funky Kong's emblem from Mario Kart Wii makes a cameo appearance on some plane wreckage in the background of Big Top Bop.
- Paper Mario: The Origami King: An arrangement of Maple Treeway's music plays in the Tranquil Pipes Teahouse at Shogun Studios.
Names in other languages
| Language | Name | Meaning |
|---|---|---|
| Japanese | マリオカートWii Mario Kāto Wī |
Mario Kart Wii |
| Chinese (simplified) | 马力欧卡丁车Wii[22] Mǎlìōu Kǎdīngchē Wii |
Mario Kart Wii |
| Chinese (traditional) | 瑪利歐賽車 Wii[23] Mǎlìōu Sàichē Wii |
Mario Racing Wii |
| Korean | 마리오 카트 Wii Mario Kateu Wii |
Mario Kart Wii |
Trivia
- The save data description is "Race for first!" in the NTSC version and "Race for 1st place!" in the PAL version.
- In the opening cutscene, Peach can be seen racing with her hair untied. She always wears a ponytail in-game.
References
- ^ Club Nintendo (MX) issue 198, page 76.
- ^ IR Information : Sales Data - Top Selling Software Sales Unites - Wii Software (as of September 30, 2023)
- ^ Wii - Mario Kart Wii - Country Flags - The Spriters Resource
- ^ IGN: Update: Mario Kart Wii Text Chat Details
- ^ a b Mario Kart Wii Stat Table
- ^ A direct transcription of the content of the driverparam.bin and kartParam.bin files in the /Race/Common.szs archive of the filesystem of Mario Kart Wii.
- ^ driverParam.bin. Custom Mario Kart Wiiki. Retrieved September 5, 2023.
- ^ kartParam.bin. Custom Mario Kart Wiiki. Retrieved September 5, 2023.
- ^ GameRankings score for Mario Kart Wii. Retrieved December 11, 2013.
- ^ Metacritic score for Mario Kart Wii. Metacritic. Retrieved December 11, 2013.
- ^ Bozon (Apr 20, 2008) Mario Kart Wii Review. IGN. Retrieved December 11, 2013.
- ^ Barker, Sammy (April 14, 2008) Review: Mario Kart Wii. Nintendo Life. Retrieved December 11, 2013.
- ^ Welsh, Oli. (March 20, 2008) Mario Kart Wii Review. Eurogamer. Retrieved December 11, 2013.
- ^ Davis, Ryan (May 7, 2008) Mario Kart Wii review. Giant Bomb. Retrieved December 11, 2013.
- ^ Mario Kart Wii review. Edge. Retrieved December 11, 2013.
- ^ IGN Wii: Best Online Multiplayer Game. IGN. Retrieved March 7, 2018.
- ^ Funk, John (May 21, 2010) Mario's Ten Best Guinness World Records. The Escapist. Retrieved March 7, 2018.
- ^ McWhertor, Michael. (March 8, 2008). Ain't No Stopping Mario Kart Wii In Japan. Kotaku. Retrieved March 5, 2018.
- ^ Sales Charts British Sales Charts. Kotaku. Retrieved March 5, 2018.
- ^ Sinclair, Brendan. (June 5, 2008) NPD: US April game revs spike on GTAIV. GameSpot. Retrieved March 5, 2018.
- ^ https://docs.google.com/spreadsheets/d/1JJBlHHDc65fhZmKUGLrDTLCm6rfUU83-kbuD8Y0zU0o/edit?pli=1#gid=717751203
- ^ https://weibo.com/6154885380/GsVVdcTql
- ^ https://www.nintendo.com.hk/wii/wii_software.html