Wario Land: Super Mario Land 3: Difference between revisions
LinkTheLefty (talk | contribs) mNo edit summary |
No edit summary Tag: Mobile edit |
||
| (41 intermediate revisions by 15 users not shown) | |||
| Line 1: | Line 1: | ||
{{italic title}} | {{italic title}} | ||
{{ | {{about|the game|the microgame|[[Wario Land (WarioWare: Smooth Moves)]]}} | ||
{{media missing}} | |||
{{game infobox | |||
|title=Wario Land: Super Mario Land 3 | |||
|image=[[File:WarioLandBoxArt.jpg|250px]] | |image=[[File:WarioLandBoxArt.jpg|250px]] | ||
|developer=[[Nintendo Research & Development 1|Nintendo R&D 1]] | |developer=[[Nintendo Research & Development 1|Nintendo R&D 1]] | ||
|publisher=[[Nintendo]] | |publisher=[[Nintendo]] | ||
| | |release='''Game Boy:'''<br>{{release|Japan|January 21, 1994|USA|February 1994<ref>''Super Smash Bros. Brawl'' {{iw|smashwiki|Chronicle}}</ref>|Europe|May 13, 1994}} '''Virtual Console (3DS):'''<br>{{release|Japan|December 14, 2011|Europe|February 16, 2012|Australia|February 16, 2012|USA|July 26, 2012|South Korea|May 18, 2016}} | ||
|genre=2D [[Genre#Platform| | |languages={{languages|en_us=y|jp=y}} | ||
|modes=Single | |genre=2D [[Genre#Platform games|platformer]] | ||
|modes=Single player | |||
|ratings='''Original release:'''{{ratings|esrb=E|pegi=3|acb=G|cero=A|usk=0}} '''VC release:'''{{ratings|acb=PG}} | |ratings='''Original release:'''{{ratings|esrb=E|pegi=3|acb=G|cero=A|usk=0}} '''VC release:'''{{ratings|acb=PG}} | ||
|platforms=[[Game Boy]], [[Virtual Console]] ([[Nintendo 3DS]]) | |platforms=[[Game Boy]], [[Virtual Console]] ([[Nintendo 3DS]]) | ||
| Line 12: | Line 16: | ||
|input={{input|gb=1|3ds=1}} | |input={{input|gb=1|3ds=1}} | ||
}} | }} | ||
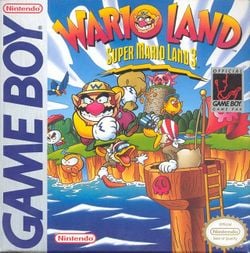
'''''Wario Land: Super Mario Land 3''''' is a [[List of games|game]] released for the [[Game Boy]] in 1994 and rereleased for the [[Nintendo 3DS]]'s [[Virtual Console#Nintendo 3DS|Virtual Console]] in 2011. It is a direct sequel to ''[[Super Mario Land 2: 6 Golden Coins]]'', being set apart from that game and its predecessor, ''[[Super Mario Land]]'', in that it does not star [[Mario]] but instead his rival, [[Wario]]. Despite the gameplay being similar to the ''Super Mario'' series, this is the first installment in the ''[[Wario Land (series)|Wario Land]]'' series. Mario makes a cameo at the end of this game by retrieving the stolen statue of [[Princess Peach|Princess Toadstool]] from Captain Syrup. | |||
'''''Wario Land: Super Mario Land 3''''' is a [[List of games|game]] released for the [[Game Boy]] in 1994 and rereleased for the [[Nintendo 3DS]]'s [[Virtual Console#Nintendo 3DS|Virtual Console]] in 2011. It is set apart from | |||
==Plot== | ==Plot== | ||
Desiring to replace or restore the [[Mario's castle|castle]] he lost to [[Mario|his rival]] in ''[[Super Mario Land 2: 6 Golden Coins]]'', Wario sets out to steal a golden statue of [[Princess Peach|Princess Toadstool]] from the [[Black Sugar Gang|Brown Sugar Pirates]] and [[Captain Syrup]], which he then intends to ransom for the money to buy his own castle. Along the way, he collects or steals any other [[coin]]s and [[treasure (Wario franchise)|treasure]]s he finds or knocks out of enemies. The game is spent by navigating a number of levels to reclaim his lost treasures, and has a significant level of re-playability due to the branched path that many of the levels take. In the end, Captain Syrup (revealed to be female, which was hidden in the instruction manual) is defeated while Wario ultimately gets anything from a birdhouse to an actual planet or moon for himself based on the amount of treasure collected as compensation for failing to steal the statue (due to Mario retrieving it by airlifting it). | Desiring to replace or restore the [[Mario's castle|castle]] he lost to [[Mario|his rival]] in ''[[Super Mario Land 2: 6 Golden Coins]]'', Wario sets out to steal a golden statue of [[Princess Peach|Princess Toadstool]] from the [[Black Sugar Gang|Brown Sugar Pirates]] and [[Captain Syrup]], which he then intends to ransom for the money to buy his own castle. Along the way, he collects or steals any other [[coin]]s and [[treasure (Wario franchise)|treasure]]s he finds or knocks out of enemies. The game is spent by navigating a number of levels to reclaim his lost treasures, and has a significant level of re-playability due to the branched path that many of the levels take. In the end, Captain Syrup (revealed to be female, which was hidden in the instruction manual) is defeated while Wario ultimately gets anything from a birdhouse to an actual planet or moon for himself based on the amount of treasure collected as compensation for failing to steal the statue (due to Mario retrieving it by airlifting it). | ||
===Endings=== | ===Endings=== | ||
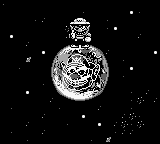
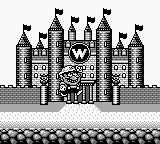
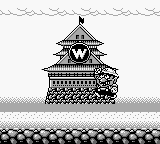
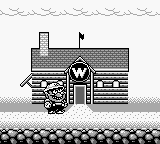
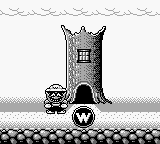
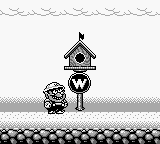
''Wario Land: Super Mario Land 3'' introduces a new mechanic where the ending is determined by the amount of coins that Wario has collected in the game. The more coins and treasures he collects, the better his new home will be. If Wario does not complete the game with the best ending, the player will be urged to " | ''Wario Land: Super Mario Land 3'' introduces a new mechanic where the ending is determined by the amount of coins that Wario has collected in the game. The more coins and treasures he collects, the better his new home will be. If Wario does not complete the game with the best ending, the player will be urged to "Please retry!" after the credits, and any levels with missing treasures will be marked flashing on the map. | ||
{| | |||
{{content description|wikitable=y|sortable=y| | |||
|image1=[[File:WL1 Shot - Ending6 Planet.png]] | |||
| | |name1=Planetoid | ||
|description1='''6 Money Bags''' (requirements: 99,999 total coins, all 15 treasures and 40 courses cleared) | |||
|'''6 Money Bags''' | |image2=[[File:WL1 Shot - Ending5 Castle.png]] | ||
|name2=[[Wario Castle|Castle]] | |||
| | |description2='''5 Money Bags''' (requirements: 90,008 - 99,999 total coins) | ||
|image3=[[File:WL1 Shot - Ending4 Pagoda.png]] | |||
|'''5 Money Bags''' | |name3=Pagoda | ||
|description3='''4 Money Bags''' (requirements: 70,008 - 90,007 total coins) | |||
| | |image4=[[File:WL1 Shot - Ending3 Log Cabin.png]] | ||
|name4=Log cabin | |||
|'''4 Money Bags''' | |description4='''3 Money Bags''' (requirements: 40,008 - 70,007 total coins) | ||
|image5=[[File:WL1 Shot - Ending2 Tree Stump.png]] | |||
| | |name5=Tree trunk | ||
|description5='''2 Money Bags''' (requirements: 10,072 - 40,007 total coins) | |||
|'''3 Money Bags''' | |image6=[[File:WL1 Shot - Ending1 Birdhouse.png]] | ||
|name6=Birdhouse | |||
| | |description6='''1 Money Bag''' (requirements: 300 - 10,071 total coins) | ||
}} | |||
|'''2 Money Bags''' | |||
| | |||
| '''1 Money Bag''' | |||
{{br|left}} | {{br|left}} | ||
| Line 59: | Line 56: | ||
===Transformations=== | ===Transformations=== | ||
One of the main features in ''Wario Land: Super Mario Land 3'' is the various transformations that Wario can go through by collecting a [[Power Up Pot]]. These special powers can at times help Wario overcome obstacles and defeat tough enemies; however, if Wario takes damage when in any of the first three transformations, he will transform into Small Wario, who dies instantly upon taking damage. | One of the main features in ''Wario Land: Super Mario Land 3'' is the various transformations that Wario can go through by collecting a [[Power Up Pot]]. These special powers can at times help Wario overcome obstacles and defeat tough enemies; however, if Wario takes damage when in any of the first three transformations, he will transform into Small Wario, who dies instantly upon taking damage. | ||
{| | {{content description|wikitable=y|sortable=y| | ||
|image1=[[File:WLSML3BullWarioSprite.png]] | |||
| | |name1=[[Bull Wario]] | ||
| | |description1=Wario can transform into Bull Wario by obtaining a [[Viking helmet|Bull Pot]] or a [[garlic bottle|Garlic Pot]] (in normal form). In this form, Wario can destroy his enemies and blocks much easier. Wario can also create a shock wave by crashing into the ground with his weight, and stick to the ceiling. | ||
|image2=[[File:WLSML3DragonWarioSprite.png]] | |||
| | |name2=[[Dragon Wario (Wario Land series)|Dragon Wario]] | ||
| | |description2=Wario transforms into Dragon Wario by obtaining a [[Dragon Pot]]. Upon obtaining the power-up, he wears a dragon-like helmet on his head, which allows him to momentarily spew fire from it. The fire works underwater as well, though instead of fire, the helmet shoots arrow-like projectiles. Unlike other forms, Wario cannot perform a Body Slam when wearing the hat. | ||
|image3=[[File:WLSML3JetWarioSprite.png]] | |||
| | |name3=[[Jet Wario]] | ||
| | |description3=By obtaining a [[Jet Pot]], Wario wears a plane-like helmet on his head, which allows him to glide for a while. He gradually descends until touching the ground, in which he can start walking again. Wario also walks more quickly and jumps higher with this item. | ||
|image4=[[File:WLSML3TinyWarioSprite.png]] | |||
| | |name4=[[Tiny Wario|Small Wario]] | ||
|} | |description4=Wario transforms into Small Wario if damaged. He is then not able to Body Slam, and taking more damage results in loss of a life (similar to [[Small Mario]]). Small Wario can transform back into regular Wario by finding a Garlic Pot or by completing a level. He can transform directly to Bull, Dragon, or Jet Wario by finding the applicable pot. | ||
|image5=[[File:WLSML3BombWario.png]] | |||
|name5=[[Bomb Mario|Bomb Wario]] | |||
|description5=Bomb Wario exclusively appears in the file-select screen and is only accessible by entering the [[CLEAR|CLEAR pipe]]. However, Bomb Wario can change back to Hunter Wario by entering it again. | |||
}} | |||
==Worlds== | ==Worlds== | ||
[[File:WarioLandOverworld.png|thumb | [[File:WarioLandOverworld.png|thumb|An overview of the Island]] | ||
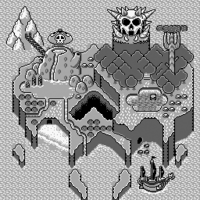
''Wario Land: Super Mario Land 3'' takes place in [[Kitchen Island]]. The following worlds are as follows: | |||
{{content description|wikitable=y|sortable=y| | |||
|image1=[[File:RiceBeach.png]] | |||
|name1=[[Rice Beach]] | |||
|description1=The starting point of Wario's adventure to take the rumored [[Princess Peach|Princess Toadstool]] statue away from Kitchen Island. Despite being a beach-themed world, the world's fourth and fifth courses take place in the caverns at the back of the beach. A secret exit can also be found in its third course. The [[Spiked Koopa]] serves as the world's boss. When Wario defeats said boss, the tide comes in and floods the world's first and third courses with water, allowing him to reach various areas that he is unable to reach. | |||
#[[Course No.01]] | |||
#[[Course No.02]] | |||
#[[Course No.03]] | |||
#[[Course No.04]] | |||
#[[Course No.05]] | |||
#[[Course No.06]] | |||
|image2=[[File:MtTeapot.png]] | |||
|name2=[[Mt. Teapot]] | |||
|description2=A massive mountain shaped like a teakettle, filled with hot springs and some [[lava]] areas. With a total of seven courses, it is the largest world in the game. Asparagus Lake sits at the base of the mountain. (the world's fourth course being replaced by a boss course after Wario activates a special trigger at the end of its sixth course). A secret exit in the world's second course leads to Sherbet Land. The [[Minotaur]] serves as the world's boss. | |||
#[[Course No.07]] | |||
#[[Course No.08]] | |||
#[[Course No.09]] | |||
#[[Course No.10]] | |||
#[[Course No.11]] | |||
#[[Course No.12]] | |||
#[[Course No.13]] | |||
|image3=[[File:Sherbert Land.png]] | |||
|name3=[[Sherbet Land (world)|Sherbet Land]] | |||
|description3=An enormous iceberg that serves as an optional area, accessible by finding the secret exit in the second course of Mt. Teapot. Secret exits can be found in the world's second and third courses respectively. The [[Penguin (boss)|Penguin]] serves as the world's boss and can be bypassed entirely by leaving through the door in the boss room (contributing to the "optional" theme of the area). | |||
#[[Course No.14]] | |||
#[[Course No.15]] | |||
#[[Course No.16]] | |||
#[[Course No.17]] | |||
#[[Course No.18]] | |||
#[[Course No.19]] | |||
|image4=[[File:Stove Canyon.png]] | |||
|name4=[[Stove Canyon]] | |||
|description4=A deep, lava-filled canyon near the center of the island. The courses within contain fire-based hazards. A secret exit can be found in the fourth course. The [[Devil's Head]] serves as the world's boss. | |||
#[[Course No.20]] | |||
#[[Course No.21]] | |||
#[[Course No.22]] | |||
#[[Course No.23]] | |||
#[[Course No.24]] | |||
#[[Course No.25]] | |||
|image5=[[File:SSTeaCupWL.png]] | |||
|name5=[[SS Tea Cup]] | |||
|description5=The [[Black Sugar Gang|Brown Sugar Pirates]]' frigate. Not only does this world consist of courses set on the pirate ship itself, it also consists of courses set in caverns, beaches, oceans, and jungles surrounding it. [[Bobo]] serves as the world's boss. | |||
#[[Course No.26]] | |||
#[[Course No.27]] | |||
#[[Course No.28]] | |||
#[[Course No.29]] | |||
#[[Course No.30]] | |||
|image6=[[File:Parsley woods.png]] | |||
|name6=[[Parsley Woods]] | |||
|description6=A deciduous forest filled with trees similar to that of the [[Forest of Illusion]] in ''[[Super Mario World]]''. In addition to forest-themed courses, two courses take place on moving shipment trains, while two other forest-themed courses involve climbing fork-shaped trees. Fork Tree stands prominently in the middle of the forest. Originally, Wario is trapped in this world until beating its second course, which drains the lake (as well as all of the water in its first course) in the area and opens up an exit to the rest of Kitchen Island. The [[ghost (Wario Land: Super Mario Land 3)|ghost]] serves as the world's boss. | |||
#[[Course No.31]] | |||
#[[Course No.32]] | |||
#[[Course No.33]] | |||
#[[Course No.34]] | |||
#[[Course No.35]] | |||
#[[Course No.36]] | |||
|image7=[[File:SML3 Syrup Castle.png]] | |||
|name7=[[Syrup Castle]] | |||
|description7=A gigantic, stony, and imposing tower at the corner of the island, with a skull-shaped castle at the top. On his way up the tower, Wario destroys it bit-by-bit, revealing that its foundation is actually the giant golden Princess Toadstool statue. It has the fewest courses of all worlds, with a total of four. The boss is [[Captain Syrup]], who summons the [[Genie (Wario Land: Super Mario Land 3)|Genie]] to fight Wario. This world must be cleared to beat the game. | |||
#[[Course No.37]] | |||
#[[Course No.38]] | |||
#[[Course No.39]] | |||
#[[Course No.40]] | |||
}} | |||
{{br}} | {{br}} | ||
==Enemies== | ==Enemies== | ||
{| | {{content appearances|wikitable=y|sortable=y| | ||
|image1=[[File:Batshuruken.png]] | |||
|name1=[[Batto Shuruken]] | |||
|description1=A hawk-like statue resembling a [[Mask Gate]], which shoots Kōmori Missiles. | |||
|firstlevel1=[[Course No.37]] | |||
| | |lastlevel1=[[Course No.40]] | ||
| | |image2=[[File:Shyfly.png]] | ||
| | |name2=[[Bee Fly]] | ||
|A hawk-like statue resembling a [[Mask Gate]], which shoots Kōmori Missiles. | |description2=A bashful insect that flees from Wario whenever he gets too close. | ||
| | |firstlevel2=[[Course No.26]] | ||
|lastlevel2=[[Course No.27]] | |||
| | |image3=[[File:Boulder.png]] | ||
|A bashful insect that flees from Wario whenever he gets too close. | |name3=[[Big]] | ||
| | |description3=A large round fruit that falls from above and rolls towards the player. | ||
|firstlevel3=[[Course No.26]] | |||
| | |lastlevel3=[[Course No.26]] | ||
|A large round fruit that falls from above and rolls towards the player. | |image4=[[File:Fireballwl.png]] | ||
| | |name4=[[Bō]] | ||
|description4=Fiery objects that emerge from lava like [[Lava Bubble|Podoboo]]s do. | |||
| | |firstlevel4=[[Course No.21]] | ||
|Fiery objects that emerge from lava like [[Lava Bubble]]s do. | |lastlevel4=[[Course No.25]] | ||
| | |image5=[[File:Bucket head wl.png]] | ||
| | |name5=[[Bucket Head]] | ||
| | |description5=An ill-tempered snowman that spits out icy flakes at Wario, in an attempt to hurt him. | ||
|An ill-tempered snowman that spits out icy flakes at Wario, in an attempt to hurt him. | |firstlevel5=[[Course No.14]] | ||
| | |lastlevel5=[[Course No.19]] | ||
| | |image6=[[File:Dolan dak.png]] | ||
| | |name6=[[Chicken Duck]] | ||
|A non-aggressive creature that, when an enemy is thrown at it, will fly away while dropping large coins. | |description6=A non-aggressive creature that, when an enemy is thrown at it, will fly away while dropping large coins. | ||
| | |firstlevel6=[[Course No.12]] | ||
|lastlevel6=[[Course No.38]] | |||
| | |image7=[[File:Deedee.png]] | ||
|A sailor-costumed duck that hurls boomerangs at Wario. | |name7=[[D.D.]] | ||
| | |description7=A sailor-costumed duck that hurls boomerangs at Wario. | ||
|firstlevel7=[[Course No.02]] | |||
| | |lastlevel7=[[Course No.39]] | ||
|A bat enemy which swoops towards Wario in an attempt to damage him with its pointy tail. | |image8=[[File:Debidebi.png]] | ||
| | |name8=[[Demon Bat]] | ||
|description8=A bat enemy which swoops towards Wario in an attempt to damage him with its pointy tail. | |||
| | |firstlevel8=[[Course No.04]] | ||
|A spiky enemy that clings to the ceiling and falls when Wario gets below. It is only dangerous when falling. | |lastlevel8=[[Course No.23]] | ||
| | |image9=[[File:Dropper.png]] | ||
|name9=[[Dropper]] | |||
| | |description9=A spiky enemy that clings to the ceiling and falls when Wario gets below. It is only dangerous when falling. | ||
|Although not considered an enemy, it can carry Wario across large chasms. | |firstlevel9=[[Course No.02]] | ||
| | |lastlevel9=[[Course No.38]] | ||
|image10=[[File:Floater.png]] | |||
| | |name10=[[Floater]] | ||
|A thug animal that hurls knives at the player. | |description10=Although not considered an enemy, it can carry Wario across large chasms. | ||
| | |firstlevel10=[[Course No.11]] | ||
|lastlevel10=[[Course No.17]] | |||
| | |image11=[[File:Gaugau.png]] | ||
|A seal enemy that carries a harpoon while swimming underwater. | |name11=[[Gaugau]] | ||
| | |description11=A thug animal that hurls knives at the player. | ||
|firstlevel11=[[Course No.03]] | |||
| | |lastlevel11=[[Course No.38]] | ||
| | |image12=[[File:Goboten.png]] | ||
|name12=[[Goboten]] | |||
|description12=A seal enemy that carries a harpoon while swimming underwater. | |||
| | |firstlevel12=[[Course No.17]] | ||
|A | |lastlevel12=[[Course No.28]] | ||
| | |image13=[[File:Guragura.png]] | ||
| | |name13=[[Guragura]] | ||
| | |description13=A mole that spins a flail. | ||
| | |firstlevel13=[[Course No.01]] | ||
| | |lastlevel13=[[Course No.40]] | ||
| | |image14=[[File:Harisu.png]] | ||
| | |name14=[[Harisu]] | ||
| | |description14=A hedgehog enemy with retracting quills. | ||
| | |firstlevel14=[[Course No.15]] | ||
|lastlevel14=[[Course No.19]] | |||
| | |image15=[[File:Helmut.png]] | ||
| | |name15=[[Helmut]] | ||
|description15=An underwater jellyfish with a spiny head. It is vulnerable from the bottom. | |||
|firstlevel15=[[Course No.02]] | |||
| | |lastlevel15=[[Course No.27]] | ||
|image16=[[File:Konotako.png]] | |||
| | |name16=[[Konotako]] | ||
|description16=A flying bomb that sticks to Wario and detonates after a few moments. | |||
| | |firstlevel16=[[Course No.09]] | ||
| | |lastlevel16=[[Course No.13]] | ||
|image17=[[File:Botsufire.png]] | |||
|name17=[[Kōmori Missile]] | |||
| | |description17=An incandescent projectile, in an appearance similar to those of [[Lava Bubble|Podoboo]]s, shot by a Batto Shuruken. | ||
| | |firstlevel17=[[Course No.37]] | ||
| | |lastlevel17=[[Course No.40]] | ||
| | |image18=[[File:Maizo.png]] | ||
| | |name18=[[Maizō]] | ||
|A | |description18=A money-obsessed crustacean who will flee if forced from under the sand. | ||
| | |firstlevel18=[[Course No.06]] | ||
|lastlevel18=[[Course No.06]] | |||
| | |image19=[[File:MuncherWL.png]] | ||
| | |name19=[[Muncher]] | ||
|description19=Invulnerable carnivorous plants that stick to the ground and wait for some prey. | |||
|firstlevel19=[[Course No.01]] | |||
| | |lastlevel19=[[Course No.27]] | ||
| | |image20=[[File:Paidan.png]] | ||
| | |name20=[[Paidan]] | ||
|description20=An arachnid that clambers ropes and ladders, similar to [[Hoopster]]s. | |||
| | |firstlevel20=[[Course No.30]] | ||
| | |lastlevel20=[[Course No.30]] | ||
| | |image21=[[File:Pecan.png]] | ||
|name21=[[Pecan]] | |||
| | |description21=A swimming pirate pelican that spits [[mine]]s which explode after a short time. | ||
| | |firstlevel21=[[Course No.08]] | ||
| | |lastlevel21=[[Course No.19]] | ||
|image22=[[File:Penkoon.png]] | |||
| | |name22=[[Penkoon]] | ||
| | |description22=A robust pirate that rolls small dangerous boulders at the player, resembling both a penguin and a raccoon. | ||
|firstlevel22=[[Course No.05]] | |||
|lastlevel22=[[Course No.39]] | |||
| | |image23=[[File:Pikkarikun.png]] | ||
|A | |name23=[[Pikkarikun]] | ||
| | |description23=A thundercloud entity whose only attack method is dropping electric bolts. | ||
| | |firstlevel23=[[Course No.17]] | ||
| | |lastlevel23=[[Course No.36]] | ||
|A | |image24=[[File:Pinwheel.png]] | ||
| | |name24=[[Pinwheel (Wario Land: Super Mario Land 3)|Pinwheel]] | ||
|description24=A seahorse that curls and spins whenever Wario touches it. It possesses an array of sharp blades, found on its back. | |||
| | |firstlevel24=[[Course No.07]] | ||
|A | |lastlevel24=[[Course No.34]] | ||
|image25=[[File:RagingMuncherWL.png]] | |||
| | |name25=[[Piranha Plant]] | ||
| | |description25=Much like Munchers, they are rooted in the ground and continuously crunch thin air. They can instantly defeat Wario upon contact. | ||
| | |firstlevel25=[[Course No.26]] | ||
|lastlevel25=[[Course No.37]] | |||
|image26=[[File:WLPirategoom.png]] | |||
| | |name26=[[Pirate Goom]] | ||
| | |description26=A spear-holding enemy. Unlike the Wanderin' Goom, it might harm the player using his weapon. | ||
| | |firstlevel26=[[Course No.01]] | ||
|lastlevel26=[[Course No.40]] | |||
| | |image27=[[File:Pouncer.png]] | ||
|A | |name27=[[Pouncer]] | ||
| | |description27=A stone creature whose behavior and appearance are similar to a [[Thwomp]], as it usually plummets from up above and attempts to squish the protagonist, as well as other wandering beings, although they also travel along preset paths. | ||
| | |firstlevel27=[[Course No.02]] | ||
| | |lastlevel27=[[Course No.18]] | ||
|A | |image28=[[File:Pillars.png]] | ||
|name28=[[Skewer]] | |||
|description28=Perilous underwater threats for Wario; some are vertical and spiky, some are horizontal and not prickly. | |||
|firstlevel28=[[Course No.19]] | |||
| | |lastlevel28=[[Course No.19]] | ||
| | |image29=[[File:Chikuri.png]] | ||
|name29=[[Sparky (Wario Land: Super Mario Land 3)|Sparky]] | |||
| | |description29=A spiked ball that travels along walls. | ||
| | |firstlevel29=[[Course No.05]] | ||
| | |lastlevel29=[[Course No.05]] | ||
|image30=[[File:Spiked ball.png]] | |||
| | |name30=[[Spike Ball|Spiked ball]] | ||
| | |description30=Large prickly balls that plummet from the thickets of [[Parsley Woods]]. | ||
|firstlevel30=[[Course No.31]] | |||
|lastlevel30=[[Course No.37]] | |||
| | |image31=[[File:Togemaru.png]] | ||
|A | |name31=[[Togemaru]] | ||
|description31=A bouncing spiked creature with a soft underbelly. | |||
| | |firstlevel31=[[Course No.02]] | ||
|lastlevel31=[[Course No.11]] | |||
|image32=[[File:Ukiwani.png]] | |||
|name32=[[Ukiwani]] | |||
|description32=A disinterested-looking crocodilian that floats at the surface of water. It leaps and munches Wario whenever he gets above it. | |||
|firstlevel32=[[Course No.26]] | |||
|lastlevel32=[[Course No.29]] | |||
|image33=[[File:WLGoom.png]] | |||
|name33=[[Wanderin' Goom]] | |||
|description33=A tiny and meek enemy that wanders around and do not harm Wario. | |||
|firstlevel33=[[Course No.01]] | |||
|lastlevel33=[[Course No.38]] | |||
|image34=[[File:Watch.png]] | |||
|name34=[[Watch]] | |||
|description34=A rash bird that swoops down to Wario. | |||
|firstlevel34=[[Course No.07]] | |||
|lastlevel34=[[Course No.39]] | |||
|image35=[[File:White puff.png]] | |||
|name35=[[White puff]] | |||
|description35=A puffy creature that inflates itself whenever Wario makes contact with it. | |||
|firstlevel35=[[Course No.02]] | |||
|lastlevel35=[[Course No.02]] | |||
|image36=[[File:WL sentry knight.png]] | |||
|name36=[[Knight]] | |||
|description36=A knight waterfowl who guards the door to the final room. | |||
|firstlevel36=[[Course No.40]] | |||
|lastlevel36=[[Course No.40]] | |||
|image37=[[File:Yadora.png]] | |||
|name37=[[Yadorā]] | |||
|description37=A hermit crab that possesses a prickly shell. It points one of its claws in the direction it walks. | |||
|firstlevel37=[[Course No.03]] | |||
|lastlevel37=[[Course No.19]] | |||
|image38=[[File:Ghostgoom.png]] | |||
|name38=[[Yarikuri Obake]] | |||
|description38=The ghost variety of Pirate Gooms. | |||
|firstlevel38=[[Course No.12]] | |||
|lastlevel38=[[Course No.36]] | |||
}} | |||
==Bosses== | ==Bosses== | ||
Each world has a boss that Wario must defeat at the end. Here is a listing of the bosses in order, and which world they correspond to. Wario will not be able to fight bosses again once they are beaten. | Each world has a boss that Wario must defeat at the end. Here is a listing of the bosses in order, and which world they correspond to. Wario will not be able to fight bosses again once they are beaten; however, the only exception (other than the [[Genie (Wario Land: Super Mario Land 3)|Genie]]) is the [[Penguin (boss)|Penguin]]. | ||
{| | {{content description|wikitable=y|sortable=y| | ||
| | |image1=[[File:SpikedkoopaWL.png]] | ||
|name1=[[Spiked Koopa]] | |||
|description1=The Spiked Koopa is a [[Hammer Bro]]-like enemy protected by spiky armor, serving as the boss in [[Rice Beach]]. In his fight with Wario, he employs a three-pronged attack of striking from land, air, and underground. His shell makes him invulnerable to ground pounds and fire. However, he can be rammed into, exposing his soft belly. After three hits to his vulnerable underside, he is defeated. | |||
|image2=[[File:Beefnewl.png]] | |||
|name2=[[Minotaur]] | |||
|description2=The Minotaur serves as the boss in [[Mt. Teapot]] is immune to head stomps and ground pounds, due to his horns and thick hide. He attempts to destroy Wario by picking him up and throwing him into the lava below their battleground. To defeat him, Wario has to throw him into the lava instead. | |||
|image3=[[File:Penguinwl.png]] | |||
|[[Spiked Koopa]] | |name3=[[Penguin (boss)|Penguin]] | ||
| | |description3=The Penguin is a large and bulky foe that wields two vicious spiked boxing gloves, which he uses to punch Wario, and serves as the boss in [[Sherbet Land (world)|Sherbet Land]]. He is immune to ground pounds and fire, but Wario can hurt him by hitting his head. He then dons a spiked helmet, but Wario can simply knock it off with a slam and then attack the penguin. | ||
|image4=[[File:BigHeadwl.png]] | |||
| | |name4=[[Devil's Head]] | ||
|description4=The Devil's Head is a giant floating head who serves as the boss in [[Stove Canyon]], whose fighting style revolves around breaking blocks with his tongue, trying to get Wario to fall into a chasm, and spitting rocks. The Devil's Head is immune to fire, coins, and ground pounds, but the rubble from his attacks that are left behind must be picked up by Wario and thrown at him to defeat him. | |||
|[[Minotaur]] | |image5=[[File:BoboWL1.png]] | ||
|[[Mt. Teapot]] | |name5=[[Bobo]] | ||
|description5=Bobo is a giant bird that serves as the boss in [[SS Tea Cup]] and sends out two [[Watch]]es to attack Wario. He must jump on top of a Watch and toss it at Bobo three times before Bobo is defeated. Alternatively, Bobo can also be harmed by Dragon Wario's fire attack. | |||
| | |image6=[[File:Giantghostwl.png]] | ||
|name6=[[Ghost (Wario Land: Super Mario Land 3)|Ghost]] | |||
|[[Penguin (boss)|Penguin]] | |description6=The ghost is the boss in [[Parsley Woods]]. He can paralyze Wario by touching him, and is immune to head stomps, coins, and fire. The ghost also turns invisible and drops coins that transform into [[Yarikuri Obake]] to attack Wario. Wario can defeat the ghost by tossing his Yarikuri Obake minions at him. | ||
| | |image7=[[File:Denpuwl.png]] | ||
|name7=[[Genie (Wario Land: Super Mario Land 3)|Genie]] | |||
| | |description7=The Genie is a neutral character who serves as the boss in [[Syrup Castle]]. He produces fireballs that chase Wario around. However, Wario can toss the Genie's magic lamp so that it lands upright, producing a small cloud. Wario can ride this cloud and leap from it to pounce on the Genie's head. The cloud then turns into a miniature version of the Genie that blasts lightning bolts, but the mini-Genie is easily destroyed. After enough hits on the head, the Genie is defeated. | ||
}} | |||
|[[Devil's Head]] | |||
| | |||
| | |||
|[[Bobo]] | |||
|[[SS Tea Cup]] | |||
| | |||
|[[Ghost (Wario Land: Super Mario Land 3)|Ghost]] | |||
|[[Parsley Woods]] | |||
| | |||
|[[Genie (Wario Land: Super Mario Land 3)|Genie]] | |||
|[[Syrup Castle]] | |||
==Reception== | ==Reception== | ||
Although it did not sell as well as its ''Super Mario Land'' predecessors, the game received mostly favorable reviews. The game placed 71st in the 100th issue of [[Nintendo Power]]'s "100 best Nintendo games of all time" in 1997.<ref>http://www.gamekult.com/communaute/forum/voirmessage.html?foid=13000909</ref> | Although it did not sell as well as its ''Super Mario Land'' predecessors, the game received mostly favorable reviews. The game placed 71st in the 100th issue of [[Nintendo Power]]'s "100 best Nintendo games of all time" in 1997.<ref>http://www.gamekult.com/communaute/forum/voirmessage.html?foid=13000909</ref> | ||
{|class="wikitable | {|class="wikitable reviews" | ||
!colspan="4" style="font-size:120%; text-align: center; background-color:silver"|Reviews | !colspan="4"style="font-size:120%; text-align: center; background-color:silver"|Reviews | ||
|-style="background-color:#E6E6E6" | |-style="background-color:#E6E6E6" | ||
|Release | |Release | ||
| Line 309: | Line 382: | ||
|align="left"|"''The fact is, Wario Land never works completely. It is a very easy game that hasn't quite found its direction, and yet it packs the tiny Game Boy screen with as much personality as anything else Nintendo had put out. Wario was simply born to be a star, and he doesn't have to bring any wanna-be in blue overalls with him anymore. Wario Land marked the end of original handheld Mario games until 2006's [[New Super Mario Bros.]] and as long as Wario was there, I could hardly miss him.''" | |align="left"|"''The fact is, Wario Land never works completely. It is a very easy game that hasn't quite found its direction, and yet it packs the tiny Game Boy screen with as much personality as anything else Nintendo had put out. Wario was simply born to be a star, and he doesn't have to bring any wanna-be in blue overalls with him anymore. Wario Land marked the end of original handheld Mario games until 2006's [[New Super Mario Bros.]] and as long as Wario was there, I could hardly miss him.''" | ||
|- | |- | ||
!colspan="4" style="background-color:silver; font-size:120%; text-align: center;"|Aggregators | !colspan="4"style="background-color:silver; font-size:120%; text-align: center;"|Aggregators | ||
|-style="background-color:#E6E6E6" | |-style="background-color:#E6E6E6" | ||
|colspan=2|Compiler | |colspan=2|Compiler | ||
| Line 323: | Line 396: | ||
==References to earlier games== | ==References to earlier games== | ||
*[[Mario (franchise)|''Mario'' franchise]] - [[Spiked Koopa|The game's first boss]] is considered a variety of [[Hammer Bro]]ther. A statue of Princess Toadstool serves as the game's {{wp|MacGuffin}}, and Mario himself makes an appearance during the ending. The way blocks and forms work, which would be dropped in the ''Wario Land'' games after ''[[Virtual Boy Wario Land]]'', is taken from the ''Mario'' franchise as well. | *[[Super Mario (franchise)|''Super Mario'' franchise]] - [[Spiked Koopa|The game's first boss]] is considered a variety of [[Hammer Bro]]ther. A statue of Princess Toadstool serves as the game's {{wp|MacGuffin}}, and Mario himself makes an appearance during the ending. The way blocks and forms work, which would be dropped in the ''Wario Land'' games after ''[[Virtual Boy Wario Land]]'', is taken from the ''Super Mario'' franchise as well. | ||
*''[[Super Mario Land 2: 6 Golden Coins]]'' - [[ | *''[[Super Mario Land 2: 6 Golden Coins]]'' - The game is a direct sequel to this title. [[Bee Fly|Bee Flies]] from this game's [[Tree Zone]] make an appearance on the [[SS Tea Cup]], one of the few aspects from the original ''Super Mario Land'' duology to carry over into ''Wario Land''. | ||
*''[[metroidwiki:Metroid II: The Return of Samus|Metroid II: The Return of Samus]]'': The sound effects used during the final battle when landing blows on the Genie (and other bosses) were reused from the stunned and pained roar sound effects from all forms of Metroids during battles against them in that game. The pausing sound effect also comes from this game. | *''[[metroidwiki:Metroid II: The Return of Samus|Metroid II: The Return of Samus]]'': The sound effects used during the final battle when landing blows on the Genie (and other bosses) were reused from the stunned and pained roar sound effects from all forms of Metroids during battles against them in that game. The pausing sound effect also comes from this game. | ||
| Line 334: | Line 407: | ||
*''[[WarioWare: Smooth Moves]]'': A [[microgame]] called [[Wario Land (WarioWare: Smooth Moves)|Wario Land]] is one of [[9-Volt]] and [[18-Volt]]'s microgames. | *''[[WarioWare: Smooth Moves]]'': A [[microgame]] called [[Wario Land (WarioWare: Smooth Moves)|Wario Land]] is one of [[9-Volt]] and [[18-Volt]]'s microgames. | ||
*''[[Super Smash Bros. Brawl]]'': [[Masahiro Sakurai]] stated on the website that the ''WarioWare'' section of All-Star mode was put to match the time Wario was the main character in ''Wario Land: Super Mario Land 3''. Also, one of Wario's alternate costumes is based on his in-game sprite. | *''[[Super Smash Bros. Brawl]]'': [[Masahiro Sakurai]] stated on the website that the ''WarioWare'' section of All-Star mode was put to match the time Wario was the main character in ''Wario Land: Super Mario Land 3''. Also, one of Wario's alternate costumes is based on his in-game sprite. | ||
*''[[Super Mario 3D Land]]'': When in their Small forms, Mario and Luigi lose their caps, similarly to Wario's Small form, though they wear a hat if the player collects the maximum number of lives (1,110 lives), and Super Mario/Luigi lose the cap instead. | |||
*''[[Mario Kart 7]]'': Part of the music that plays on [[3DS Wario Shipyard|Wario Shipyard]] is an arrangement of the music of the first stage of [[Rice Beach]], and a painting of [[Bull Wario]] can be seen on a billboard. | *''[[Mario Kart 7]]'': Part of the music that plays on [[3DS Wario Shipyard|Wario Shipyard]] is an arrangement of the music of the first stage of [[Rice Beach]], and a painting of [[Bull Wario]] can be seen on a billboard. | ||
*''[[Mario Party 10]]'': Wario's hard hat is seen in the background of his own personalized [[amiibo]]-exclusive [[Wario Board|board]]. | *''[[Mario Party 10]]'': Wario's hard hat is seen in the background of his own personalized [[amiibo]]-exclusive [[Wario Board|board]]. | ||
| Line 339: | Line 413: | ||
==Glitches== | ==Glitches== | ||
{{main|List of Wario Land: Super Mario Land 3 glitches}} | |||
'''NOTE''': This glitch is only possible in the Game Boy version of the game. It was fixed in the 3DS Virtual Console version. | |||
''' | |||
It is possible to skip certain levels or even worlds if there is a possible path to the right and an open path in a different direction. This can be done by pressing {{button|Padright}} and a different direction simultaneously on the D-Pad. | It is possible to skip certain levels or even worlds if there is a possible path to the right and an open path in a different direction. This can be done by pressing {{button|Padright}} and a different direction simultaneously on the D-Pad. | ||
For example, [[Course No.01]] starts with a path downward at all times (which takes Wario to the overworld) and a possible path to the right (which takes Wario to [[Course No.02]]). If the player presses {{button|Paddown}} and {{button|Padright}} simultaneously, Wario can walk to Course No.02 even if he | For example, [[Course No.01]] starts with a path downward at all times (which takes Wario to the overworld) and a possible path to the right (which takes Wario to [[Course No.02]]). If the player presses {{button|Paddown}} and {{button|Padright}} simultaneously, Wario can walk to Course No.02 even if he has not completed Course No.01. | ||
The reason why this occurs is that when the game first checks if Wario can possibly move in a certain direction (even if the direction is not unlocked yet), it checks button presses in the order {{button|Padleft}}, {{button|Padup}}, {{button|Paddown}}, and {{button|Padright}}. After this, to determine which direction Wario should move, the game checks which button is pressed a second time, this time in this order: {{button|Padright}}, {{button|Padleft}}, {{button|Padup}}, {{button|Paddown}} <ref name="levelskip">[ | The reason why this occurs is that when the game first checks if Wario can possibly move in a certain direction (even if the direction is not unlocked yet), it checks button presses in the order {{button|Padleft}}, {{button|Padup}}, {{button|Paddown}}, and {{button|Padright}}. After this, to determine which direction Wario should move, the game checks which button is pressed a second time, this time in this order: {{button|Padright}}, {{button|Padleft}}, {{button|Padup}}, {{button|Paddown}} <ref name="levelskip">[https://tasvideos.org/4507S.html McHazard's GB ''Wario Land: Super Mario Land 3'' "game end glitch" in 01:31.15]</ref> This discrepancy makes the glitch possible. | ||
In the 3DS's Virtual Console version, the button checking is consistent, by always checking in this order: {{button|Padright}}, {{button|Padleft}}, {{button|Padup}}, {{button|Paddown}}. This consistency fixes the glitch and makes it impossible to perform on the 3DS. | In the 3DS's Virtual Console version, the button checking is consistent, by always checking in this order: {{button|Padright}}, {{button|Padleft}}, {{button|Padup}}, {{button|Paddown}}. This consistency fixes the glitch and makes it impossible to perform on the 3DS. | ||
==Staff== | ==Staff== | ||
| Line 403: | Line 436: | ||
WL-Gaugau.png|[[Gaugau]] | WL-Gaugau.png|[[Gaugau]] | ||
</gallery> | </gallery> | ||
==Names in other languages== | ==Names in other languages== | ||
| Line 419: | Line 449: | ||
==Trivia== | ==Trivia== | ||
*The game was tentatively titled ''Super Mario Land 3: Kairiki Wario'' (スーパーマリオランド3 怪力ワリオ), ''kairiki'' meaning "super-strong". The name was used on a Japanese promotional flyer from 1993. The logo depicted on the flyer differs drastically from any of the ''Wario Land'' logos.<ref>[http://blogs.yahoo.co.jp/gamesmasa/60117836.html Promotional flyer for ''Super Mario Land 3: Kairiki Wario'', from a collection of Japanese video game promotional flyers on Yahoo Japan Blog.]</ref> | *The game was tentatively titled ''Super Mario Land 3: Kairiki Wario'' (スーパーマリオランド3 怪力ワリオ), ''kairiki'' meaning "super-strong". The name was used on a Japanese promotional flyer from 1993. The logo depicted on the flyer differs drastically from any of the ''Wario Land'' logos.<ref>[https://web.archive.org/web/20140925223654/http://blogs.yahoo.co.jp/gamesmasa/60117836.html Promotional flyer for ''Super Mario Land 3: Kairiki Wario'', from a collection of Japanese video game promotional flyers on Yahoo Japan Blog.]</ref> | ||
*Despite being released in 1994, the game instead carries a 1993 copyright in the ROM itself and on the back of the American box, implying that the game was originally planned for release late that year and then pushed back. | *Despite being released in 1994, the game instead carries a 1993 copyright in the ROM itself and on the back of the American box, implying that the game was originally planned for release late that year and then pushed back. | ||
*This game borrows some sound effects used in ''[[metroidwiki:Metroid II: Return of Samus|Metroid II: Return of Samus]]'', another Game Boy game developed by [[Nintendo Research & Development 1|Nintendo R&D1]]. One example is when a boss is hit; the noise is the same one made when a Metroid gets hit. Other borrowed sound effects are when the player pauses the game and the sound of triggering | *This game borrows some sound effects used in ''[[metroidwiki:Metroid II: Return of Samus|Metroid II: Return of Samus]]'', another Game Boy game developed by [[Nintendo Research & Development 1|Nintendo R&D1]]. One example is when a boss is hit; the noise is the same one made when a Metroid gets hit. Other borrowed sound effects are when the player pauses the game and the sound of triggering [[mine]]s, which is the same as Samus going into Morph Ball. | ||
*The manual states that the Select button is "Not used." However, the player can use a Debug Cheat<ref>Campbell, Stuart. ''Game Boy Game Secrets, 1999 Edition'' Prima's Official Strategy Guide. Page 95.</ref> by pressing that button sixteen times on the pause screen. Holding down the {{button|gb|A}} and {{button|gb|B}} button simultaneously will allow them to alter the numbers on the status bar as well as power up Wario. | *The manual states that the Select button is "Not used." However, the player can use a Debug Cheat<ref>Campbell, Stuart. ''Game Boy Game Secrets, 1999 Edition'' Prima's Official Strategy Guide. Page 95.</ref> by pressing that button sixteen times on the pause screen. Holding down the {{button|gb|A}} and {{button|gb|B}} button simultaneously will allow them to alter the numbers on the status bar as well as power up Wario. | ||
*The Japanese title refers to the game as being the third installment in the ''Super Mario Land'' series; however, the name was reversed in the Western versions, as this is rather the first game in the ''Wario Land'' series. | *The Japanese title refers to the game as being the third installment in the ''Super Mario Land'' series; however, the name was reversed in the Western versions, as this is rather the first game in the ''Wario Land'' series. | ||
| Line 430: | Line 460: | ||
==External links== | ==External links== | ||
{{NIWA|StrategyWiki=1}} | {{NIWA|StrategyWiki=1}} | ||
*[ | *[https://www.nintendo.co.jp/n02/dmg/wja/index.html Official Japanese Website] | ||
{{WL}} | {{WL}} | ||
{{ | {{Wario games}} | ||
{{Super Mario games}} | |||
{{GB}} | {{GB}} | ||
{{ | {{Virtual Console}} | ||
[[Category:Wario Land: Super Mario Land 3|*]] | [[Category:Wario Land: Super Mario Land 3|*]] | ||
[[Category:Games]] | [[Category:Games]] | ||
Latest revision as of 23:35, May 20, 2024
- This article is about the game. For the microgame, see Wario Land (WarioWare: Smooth Moves).
| It has been requested that at least one audio and/or video file related to this article be uploaded. Please upload all related music, sound effects, voice clips, or any videos for this article. See the help page for information on how to get started. |
| Wario Land: Super Mario Land 3 | |||||||||||||
|---|---|---|---|---|---|---|---|---|---|---|---|---|---|
 For alternate box art, see the game's gallery. | |||||||||||||
| Developer | Nintendo R&D 1 | ||||||||||||
| Publisher | Nintendo | ||||||||||||
| Platform(s) | Game Boy, Virtual Console (Nintendo 3DS) | ||||||||||||
| Release date | Game Boy: Virtual Console (3DS): | ||||||||||||
| Language(s) | English (United States) 日本語 | ||||||||||||
| Genre | 2D platformer | ||||||||||||
| Rating(s) | Original release:
| ||||||||||||
| Mode(s) | Single player | ||||||||||||
| Media | Game Boy:
Nintendo 3DS: | ||||||||||||
| Input | Game Boy:
Nintendo 3DS:
| ||||||||||||
Wario Land: Super Mario Land 3 is a game released for the Game Boy in 1994 and rereleased for the Nintendo 3DS's Virtual Console in 2011. It is a direct sequel to Super Mario Land 2: 6 Golden Coins, being set apart from that game and its predecessor, Super Mario Land, in that it does not star Mario but instead his rival, Wario. Despite the gameplay being similar to the Super Mario series, this is the first installment in the Wario Land series. Mario makes a cameo at the end of this game by retrieving the stolen statue of Princess Toadstool from Captain Syrup.
Plot[edit]
Desiring to replace or restore the castle he lost to his rival in Super Mario Land 2: 6 Golden Coins, Wario sets out to steal a golden statue of Princess Toadstool from the Brown Sugar Pirates and Captain Syrup, which he then intends to ransom for the money to buy his own castle. Along the way, he collects or steals any other coins and treasures he finds or knocks out of enemies. The game is spent by navigating a number of levels to reclaim his lost treasures, and has a significant level of re-playability due to the branched path that many of the levels take. In the end, Captain Syrup (revealed to be female, which was hidden in the instruction manual) is defeated while Wario ultimately gets anything from a birdhouse to an actual planet or moon for himself based on the amount of treasure collected as compensation for failing to steal the statue (due to Mario retrieving it by airlifting it).
Endings[edit]
Wario Land: Super Mario Land 3 introduces a new mechanic where the ending is determined by the amount of coins that Wario has collected in the game. The more coins and treasures he collects, the better his new home will be. If Wario does not complete the game with the best ending, the player will be urged to "Please retry!" after the credits, and any levels with missing treasures will be marked flashing on the map.
| Image | Name | Description
|
|---|---|---|
 |
Planetoid | 6 Money Bags (requirements: 99,999 total coins, all 15 treasures and 40 courses cleared) |
 |
Castle | 5 Money Bags (requirements: 90,008 - 99,999 total coins) |
 |
Pagoda | 4 Money Bags (requirements: 70,008 - 90,007 total coins) |
 |
Log cabin | 3 Money Bags (requirements: 40,008 - 70,007 total coins) |
 |
Tree trunk | 2 Money Bags (requirements: 10,072 - 40,007 total coins) |
 |
Birdhouse | 1 Money Bag (requirements: 300 - 10,071 total coins) |
Gameplay[edit]
Wario Land: Super Mario Land 3 is a 2D platforming game. It is divided into seven worlds, which each are divided into multiple courses. In most courses Wario has to trade in ten of his coins for one big 10 Gold Coin to open the door to the next course. Once the player completes a course, the next course will become available, and so on. The game also allows players to revisit levels that have already been completed.
It has several mechanics that are similar to the Super Mario games such as the transformation system. Wario can also touch enemies as long as they do not have any hazards equipped, so he can stun or defeat them by performing a Body Slam, ground pound, touching soft-spots, or tossing at others.
Transformations[edit]
One of the main features in Wario Land: Super Mario Land 3 is the various transformations that Wario can go through by collecting a Power Up Pot. These special powers can at times help Wario overcome obstacles and defeat tough enemies; however, if Wario takes damage when in any of the first three transformations, he will transform into Small Wario, who dies instantly upon taking damage.
| Image | Name | Description
|
|---|---|---|
| Bull Wario | Wario can transform into Bull Wario by obtaining a Bull Pot or a Garlic Pot (in normal form). In this form, Wario can destroy his enemies and blocks much easier. Wario can also create a shock wave by crashing into the ground with his weight, and stick to the ceiling. | |
| Dragon Wario | Wario transforms into Dragon Wario by obtaining a Dragon Pot. Upon obtaining the power-up, he wears a dragon-like helmet on his head, which allows him to momentarily spew fire from it. The fire works underwater as well, though instead of fire, the helmet shoots arrow-like projectiles. Unlike other forms, Wario cannot perform a Body Slam when wearing the hat. | |
| Jet Wario | By obtaining a Jet Pot, Wario wears a plane-like helmet on his head, which allows him to glide for a while. He gradually descends until touching the ground, in which he can start walking again. Wario also walks more quickly and jumps higher with this item. | |
| Small Wario | Wario transforms into Small Wario if damaged. He is then not able to Body Slam, and taking more damage results in loss of a life (similar to Small Mario). Small Wario can transform back into regular Wario by finding a Garlic Pot or by completing a level. He can transform directly to Bull, Dragon, or Jet Wario by finding the applicable pot. | |
| Bomb Wario | Bomb Wario exclusively appears in the file-select screen and is only accessible by entering the CLEAR pipe. However, Bomb Wario can change back to Hunter Wario by entering it again. |
Worlds[edit]
Wario Land: Super Mario Land 3 takes place in Kitchen Island. The following worlds are as follows:
| Image | Name | Description
|
|---|---|---|
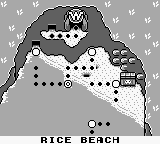 |
Rice Beach | The starting point of Wario's adventure to take the rumored Princess Toadstool statue away from Kitchen Island. Despite being a beach-themed world, the world's fourth and fifth courses take place in the caverns at the back of the beach. A secret exit can also be found in its third course. The Spiked Koopa serves as the world's boss. When Wario defeats said boss, the tide comes in and floods the world's first and third courses with water, allowing him to reach various areas that he is unable to reach. |
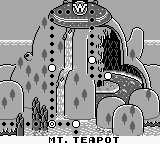 |
Mt. Teapot | A massive mountain shaped like a teakettle, filled with hot springs and some lava areas. With a total of seven courses, it is the largest world in the game. Asparagus Lake sits at the base of the mountain. (the world's fourth course being replaced by a boss course after Wario activates a special trigger at the end of its sixth course). A secret exit in the world's second course leads to Sherbet Land. The Minotaur serves as the world's boss. |
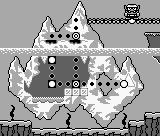 |
Sherbet Land | An enormous iceberg that serves as an optional area, accessible by finding the secret exit in the second course of Mt. Teapot. Secret exits can be found in the world's second and third courses respectively. The Penguin serves as the world's boss and can be bypassed entirely by leaving through the door in the boss room (contributing to the "optional" theme of the area). |
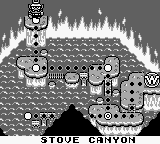 |
Stove Canyon | A deep, lava-filled canyon near the center of the island. The courses within contain fire-based hazards. A secret exit can be found in the fourth course. The Devil's Head serves as the world's boss. |
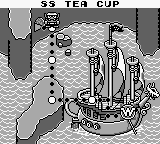 |
SS Tea Cup | The Brown Sugar Pirates' frigate. Not only does this world consist of courses set on the pirate ship itself, it also consists of courses set in caverns, beaches, oceans, and jungles surrounding it. Bobo serves as the world's boss. |
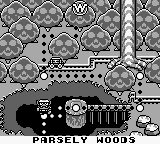 |
Parsley Woods | A deciduous forest filled with trees similar to that of the Forest of Illusion in Super Mario World. In addition to forest-themed courses, two courses take place on moving shipment trains, while two other forest-themed courses involve climbing fork-shaped trees. Fork Tree stands prominently in the middle of the forest. Originally, Wario is trapped in this world until beating its second course, which drains the lake (as well as all of the water in its first course) in the area and opens up an exit to the rest of Kitchen Island. The ghost serves as the world's boss. |
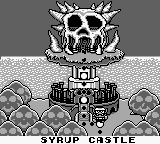 |
Syrup Castle | A gigantic, stony, and imposing tower at the corner of the island, with a skull-shaped castle at the top. On his way up the tower, Wario destroys it bit-by-bit, revealing that its foundation is actually the giant golden Princess Toadstool statue. It has the fewest courses of all worlds, with a total of four. The boss is Captain Syrup, who summons the Genie to fight Wario. This world must be cleared to beat the game. |
Enemies[edit]
| Image | Name | Description | First level | Last level
|
|---|---|---|---|---|
| Batto Shuruken | A hawk-like statue resembling a Mask Gate, which shoots Kōmori Missiles. | Course No.37 | Course No.40 | |
| Bee Fly | A bashful insect that flees from Wario whenever he gets too close. | Course No.26 | Course No.27 | |
| Big | A large round fruit that falls from above and rolls towards the player. | Course No.26 | Course No.26 | |
| Bō | Fiery objects that emerge from lava like Podoboos do. | Course No.21 | Course No.25 | |
| Bucket Head | An ill-tempered snowman that spits out icy flakes at Wario, in an attempt to hurt him. | Course No.14 | Course No.19 | |
| Chicken Duck | A non-aggressive creature that, when an enemy is thrown at it, will fly away while dropping large coins. | Course No.12 | Course No.38 | |
| D.D. | A sailor-costumed duck that hurls boomerangs at Wario. | Course No.02 | Course No.39 | |
| Demon Bat | A bat enemy which swoops towards Wario in an attempt to damage him with its pointy tail. | Course No.04 | Course No.23 | |
| Dropper | A spiky enemy that clings to the ceiling and falls when Wario gets below. It is only dangerous when falling. | Course No.02 | Course No.38 | |
| Floater | Although not considered an enemy, it can carry Wario across large chasms. | Course No.11 | Course No.17 | |
| Gaugau | A thug animal that hurls knives at the player. | Course No.03 | Course No.38 | |
| Goboten | A seal enemy that carries a harpoon while swimming underwater. | Course No.17 | Course No.28 | |
| Guragura | A mole that spins a flail. | Course No.01 | Course No.40 | |
| Harisu | A hedgehog enemy with retracting quills. | Course No.15 | Course No.19 | |
| Helmut | An underwater jellyfish with a spiny head. It is vulnerable from the bottom. | Course No.02 | Course No.27 | |
| Konotako | A flying bomb that sticks to Wario and detonates after a few moments. | Course No.09 | Course No.13 | |
| Kōmori Missile | An incandescent projectile, in an appearance similar to those of Podoboos, shot by a Batto Shuruken. | Course No.37 | Course No.40 | |
| Maizō | A money-obsessed crustacean who will flee if forced from under the sand. | Course No.06 | Course No.06 | |
| Muncher | Invulnerable carnivorous plants that stick to the ground and wait for some prey. | Course No.01 | Course No.27 | |
| Paidan | An arachnid that clambers ropes and ladders, similar to Hoopsters. | Course No.30 | Course No.30 | |
| Pecan | A swimming pirate pelican that spits mines which explode after a short time. | Course No.08 | Course No.19 | |
| Penkoon | A robust pirate that rolls small dangerous boulders at the player, resembling both a penguin and a raccoon. | Course No.05 | Course No.39 | |
| Pikkarikun | A thundercloud entity whose only attack method is dropping electric bolts. | Course No.17 | Course No.36 | |
| Pinwheel | A seahorse that curls and spins whenever Wario touches it. It possesses an array of sharp blades, found on its back. | Course No.07 | Course No.34 | |
| Piranha Plant | Much like Munchers, they are rooted in the ground and continuously crunch thin air. They can instantly defeat Wario upon contact. | Course No.26 | Course No.37 | |
| Pirate Goom | A spear-holding enemy. Unlike the Wanderin' Goom, it might harm the player using his weapon. | Course No.01 | Course No.40 | |
| Pouncer | A stone creature whose behavior and appearance are similar to a Thwomp, as it usually plummets from up above and attempts to squish the protagonist, as well as other wandering beings, although they also travel along preset paths. | Course No.02 | Course No.18 | |
| Skewer | Perilous underwater threats for Wario; some are vertical and spiky, some are horizontal and not prickly. | Course No.19 | Course No.19 | |
| Sparky | A spiked ball that travels along walls. | Course No.05 | Course No.05 | |
| Spiked ball | Large prickly balls that plummet from the thickets of Parsley Woods. | Course No.31 | Course No.37 | |
| Togemaru | A bouncing spiked creature with a soft underbelly. | Course No.02 | Course No.11 | |
| Ukiwani | A disinterested-looking crocodilian that floats at the surface of water. It leaps and munches Wario whenever he gets above it. | Course No.26 | Course No.29 | |
| Wanderin' Goom | A tiny and meek enemy that wanders around and do not harm Wario. | Course No.01 | Course No.38 | |
| Watch | A rash bird that swoops down to Wario. | Course No.07 | Course No.39 | |
| White puff | A puffy creature that inflates itself whenever Wario makes contact with it. | Course No.02 | Course No.02 | |
| Knight | A knight waterfowl who guards the door to the final room. | Course No.40 | Course No.40 | |
| Yadorā | A hermit crab that possesses a prickly shell. It points one of its claws in the direction it walks. | Course No.03 | Course No.19 | |
| Yarikuri Obake | The ghost variety of Pirate Gooms. | Course No.12 | Course No.36 |
Bosses[edit]
Each world has a boss that Wario must defeat at the end. Here is a listing of the bosses in order, and which world they correspond to. Wario will not be able to fight bosses again once they are beaten; however, the only exception (other than the Genie) is the Penguin.
| Image | Name | Description
|
|---|---|---|
| Spiked Koopa | The Spiked Koopa is a Hammer Bro-like enemy protected by spiky armor, serving as the boss in Rice Beach. In his fight with Wario, he employs a three-pronged attack of striking from land, air, and underground. His shell makes him invulnerable to ground pounds and fire. However, he can be rammed into, exposing his soft belly. After three hits to his vulnerable underside, he is defeated. | |
| Minotaur | The Minotaur serves as the boss in Mt. Teapot is immune to head stomps and ground pounds, due to his horns and thick hide. He attempts to destroy Wario by picking him up and throwing him into the lava below their battleground. To defeat him, Wario has to throw him into the lava instead. | |
| Penguin | The Penguin is a large and bulky foe that wields two vicious spiked boxing gloves, which he uses to punch Wario, and serves as the boss in Sherbet Land. He is immune to ground pounds and fire, but Wario can hurt him by hitting his head. He then dons a spiked helmet, but Wario can simply knock it off with a slam and then attack the penguin. | |
 |
Devil's Head | The Devil's Head is a giant floating head who serves as the boss in Stove Canyon, whose fighting style revolves around breaking blocks with his tongue, trying to get Wario to fall into a chasm, and spitting rocks. The Devil's Head is immune to fire, coins, and ground pounds, but the rubble from his attacks that are left behind must be picked up by Wario and thrown at him to defeat him. |
 |
Bobo | Bobo is a giant bird that serves as the boss in SS Tea Cup and sends out two Watches to attack Wario. He must jump on top of a Watch and toss it at Bobo three times before Bobo is defeated. Alternatively, Bobo can also be harmed by Dragon Wario's fire attack. |
| Ghost | The ghost is the boss in Parsley Woods. He can paralyze Wario by touching him, and is immune to head stomps, coins, and fire. The ghost also turns invisible and drops coins that transform into Yarikuri Obake to attack Wario. Wario can defeat the ghost by tossing his Yarikuri Obake minions at him. | |
 |
Genie | The Genie is a neutral character who serves as the boss in Syrup Castle. He produces fireballs that chase Wario around. However, Wario can toss the Genie's magic lamp so that it lands upright, producing a small cloud. Wario can ride this cloud and leap from it to pounce on the Genie's head. The cloud then turns into a miniature version of the Genie that blasts lightning bolts, but the mini-Genie is easily destroyed. After enough hits on the head, the Genie is defeated. |
Reception[edit]
Although it did not sell as well as its Super Mario Land predecessors, the game received mostly favorable reviews. The game placed 71st in the 100th issue of Nintendo Power's "100 best Nintendo games of all time" in 1997.[2]
| Reviews | |||
|---|---|---|---|
| Release | Reviewer, Publication | Score | Comment |
| Nintendo 3DS | Corbie Dillard, Nintendo Life | 9/10 | "It would be quite easy to make a case for either Super Mario Land 2: 6 Golden Coins or Wario Land as the original Game Boy system's best platforming experience, but given how different the two titles are it almost seems unfair to compare them directly. With Wario Land, Nintendo completely reinvented its portable platformer and gave its greedy new character his own game, instead of merely plopping him down into the middle of another standard Super Mario Land presentation. A wealth of new gameplay features combined with a unique visual and musical style make this title stand on its own, and at £3.60 on the Virtual Console it gives old and new fans of the previous Super Mario Land releases a fresh spin on the series. If you want to experience some of the best platforming the Game Boy system has to offer, you needn't look any further than this release." |
| Nintendo 3DS | Travis Fahs, IGN | 7.9/10 | "The fact is, Wario Land never works completely. It is a very easy game that hasn't quite found its direction, and yet it packs the tiny Game Boy screen with as much personality as anything else Nintendo had put out. Wario was simply born to be a star, and he doesn't have to bring any wanna-be in blue overalls with him anymore. Wario Land marked the end of original handheld Mario games until 2006's New Super Mario Bros. and as long as Wario was there, I could hardly miss him." |
| Aggregators | |||
| Compiler | Platform / Score | ||
| GameRankings | 83.11% | ||
Sequels[edit]
The game spawned five sequels, Virtual Boy Wario Land, Wario Land II, Wario Land 3, Wario Land 4, and Wario Land: Shake It!. The Wario franchise also received Wario World and Wario: Master of Disguise which were similar games. A spin-off series was also made, the popular WarioWare series of games.
References to earlier games[edit]
- Super Mario franchise - The game's first boss is considered a variety of Hammer Brother. A statue of Princess Toadstool serves as the game's MacGuffin, and Mario himself makes an appearance during the ending. The way blocks and forms work, which would be dropped in the Wario Land games after Virtual Boy Wario Land, is taken from the Super Mario franchise as well.
- Super Mario Land 2: 6 Golden Coins - The game is a direct sequel to this title. Bee Flies from this game's Tree Zone make an appearance on the SS Tea Cup, one of the few aspects from the original Super Mario Land duology to carry over into Wario Land.
- Metroid II: The Return of Samus: The sound effects used during the final battle when landing blows on the Genie (and other bosses) were reused from the stunned and pained roar sound effects from all forms of Metroids during battles against them in that game. The pausing sound effect also comes from this game.
References in later games[edit]
- Mario Party 2: Wario's helmet is reused for his Mystery Land costume in this game.
- Luigi's Mansion: The game's various endings regarding what mansion Luigi has depending on how the player completed the game is similar to in this game.
- WarioWare, Inc.: Mega Microgame$!: The microgame Grow Wario Grow features the Tiny Wario and regular Wario sprites.
- Wario World: Just like with this game, the player's castle in the ending varies by how they completed the game.
- WarioWare: Smooth Moves: A microgame called Wario Land is one of 9-Volt and 18-Volt's microgames.
- Super Smash Bros. Brawl: Masahiro Sakurai stated on the website that the WarioWare section of All-Star mode was put to match the time Wario was the main character in Wario Land: Super Mario Land 3. Also, one of Wario's alternate costumes is based on his in-game sprite.
- Super Mario 3D Land: When in their Small forms, Mario and Luigi lose their caps, similarly to Wario's Small form, though they wear a hat if the player collects the maximum number of lives (1,110 lives), and Super Mario/Luigi lose the cap instead.
- Mario Kart 7: Part of the music that plays on Wario Shipyard is an arrangement of the music of the first stage of Rice Beach, and a painting of Bull Wario can be seen on a billboard.
- Mario Party 10: Wario's hard hat is seen in the background of his own personalized amiibo-exclusive board.
- Super Mario Maker: When transforming into Wario's Costume Mario costume after collecting a Mystery Mushroom, the transformation sound effect after collecting a Power Up Pot can be heard. The "lose a life" theme and the tune heard at the minigame selection screen after clearing a course also play after falling into a pit or lava and clearing a level as Wario, respectively.
Glitches[edit]
- Main article: List of Wario Land: Super Mario Land 3 glitches
NOTE: This glitch is only possible in the Game Boy version of the game. It was fixed in the 3DS Virtual Console version.
It is possible to skip certain levels or even worlds if there is a possible path to the right and an open path in a different direction. This can be done by pressing and a different direction simultaneously on the D-Pad.
For example, Course No.01 starts with a path downward at all times (which takes Wario to the overworld) and a possible path to the right (which takes Wario to Course No.02). If the player presses and
simultaneously, Wario can walk to Course No.02 even if he has not completed Course No.01.
The reason why this occurs is that when the game first checks if Wario can possibly move in a certain direction (even if the direction is not unlocked yet), it checks button presses in the order ,
,
, and
. After this, to determine which direction Wario should move, the game checks which button is pressed a second time, this time in this order:
,
,
,
[3] This discrepancy makes the glitch possible.
In the 3DS's Virtual Console version, the button checking is consistent, by always checking in this order: ,
,
,
. This consistency fixes the glitch and makes it impossible to perform on the 3DS.
Staff[edit]
- Main article: List of Wario Land: Super Mario Land 3 staff
Gallery[edit]
- For this subject's image gallery, see Gallery:Wario Land: Super Mario Land 3.
Names in other languages[edit]
| Language | Name | Meaning |
|---|---|---|
| Japanese | スーパーマリオランド3 ワリオランド Sūpā Mario Rando 3: Wario Rando |
Super Mario Land 3: Wario Land |
| Chinese (simplified) | 玛利欧世界第三集[5] |
Super Mario Land 3 |
| Chinese (traditional) | 孖寶兄弟世界第三集[4] |
Twin Brother World 3 |
Trivia[edit]
- The game was tentatively titled Super Mario Land 3: Kairiki Wario (スーパーマリオランド3 怪力ワリオ), kairiki meaning "super-strong". The name was used on a Japanese promotional flyer from 1993. The logo depicted on the flyer differs drastically from any of the Wario Land logos.[6]
- Despite being released in 1994, the game instead carries a 1993 copyright in the ROM itself and on the back of the American box, implying that the game was originally planned for release late that year and then pushed back.
- This game borrows some sound effects used in Metroid II: Return of Samus, another Game Boy game developed by Nintendo R&D1. One example is when a boss is hit; the noise is the same one made when a Metroid gets hit. Other borrowed sound effects are when the player pauses the game and the sound of triggering mines, which is the same as Samus going into Morph Ball.
- The manual states that the Select button is "Not used." However, the player can use a Debug Cheat[7] by pressing that button sixteen times on the pause screen. Holding down the
and
button simultaneously will allow them to alter the numbers on the status bar as well as power up Wario.
- The Japanese title refers to the game as being the third installment in the Super Mario Land series; however, the name was reversed in the Western versions, as this is rather the first game in the Wario Land series.
References[edit]
- ^ Super Smash Bros. Brawl Chronicle
- ^ http://www.gamekult.com/communaute/forum/voirmessage.html?foid=13000909
- ^ McHazard's GB Wario Land: Super Mario Land 3 "game end glitch" in 01:31.15
- ^ https://www.mariowiki.com/File:Wario_Land_Chinese_boxart_front(only_half).jpg
- ^ https://www.mariowiki.com/File:Wario_Land_Chinese_boxart_back(only_half).jpg
- ^ Promotional flyer for Super Mario Land 3: Kairiki Wario, from a collection of Japanese video game promotional flyers on Yahoo Japan Blog.
- ^ Campbell, Stuart. Game Boy Game Secrets, 1999 Edition Prima's Official Strategy Guide. Page 95.
External links[edit]
| Wario Land: Super Mario Land 3 | |||
|---|---|---|---|
| Characters | Wario • Brown Sugar Pirates • Mario | ||
| Bosses | Spiked Koopa • Minotaur • Penguin • Devil's Head • Bobo • Ghost • Captain Syrup • Genie | ||
| Worlds | Rice Beach • Mt. Teapot • Sherbet Land • Stove Canyon • SS Tea Cup • Parsley Woods • Syrup Castle | ||
| Power-ups | Bull Pot • Dragon Pot • Garlic Pot • Jet Pot • Star | ||
| Collectibles | ? Block • 1 Gold Coin • 10 Gold Coin • 100 Coin • 3-Up Heart • Heart • Key • Treasure | ||
| Enemies and obstacles | Batto Shuruken • Bee Fly • Big • Bō • Bucket Head • Chicken Duck • D.D. • Demon Bat • Dropper • Floater • Gaugau • Goboten • Guragura • Harisu • Helmut • Knight • Konotako • Kōmori Missile • Lance • Maizō • Mine • Muncher • Paidan • Pecan • Penkoon • Pikkarikun • Pinwheel • Piranha Plant • Pirate Goom • Pouncer • Skewer • Sparky • Spiked ball • Togemaru • Ukiwani • Wanderin' Goom • Watch • White puff • Yadorā • Yarikuri Obake | ||
| Miscellaneous | Gallery • Glitches • Media • Pre-release and unused content • Staff | ||
| Game Boy games | |
|---|---|
| Super Mario franchise | Alleyway (1989) • Baseball (1989) • Super Mario Land (1989) • Golf (1989) • Dr. Mario (1990) • Super Mario Land 2: 6 Golden Coins (1992) • Donkey Kong (1994) • Mario's Picross (1995) • Picross 2 (1996) |
| Donkey Kong franchise | Donkey Kong (1994) • Donkey Kong Land (1995) • Donkey Kong Land 2 (1996) • Donkey Kong Land III (1997) |
| Yoshi franchise | Yoshi (1991) • Yoshi's Cookie (1992) • Tetris Attack (1996) |
| Wario franchise | Wario Land: Super Mario Land 3 (1994) • Wario Blast: Featuring Bomberman! (1994) • Wario Land II (1998) |
| Miscellaneous | Tetris (1989) • The Legend of Zelda: Link's Awakening (1993) • Game & Watch Gallery (1997) • Game & Watch Gallery 2 (1997) |
