Wario Land 3
| It has been requested that at least one audio and/or video file related to this article be uploaded. Please upload music, sound effects, voice clips, or any videos for this article. See the help page for help getting started. |
- This article is about the game for the Game Boy Color. For the microgame from WarioWare Gold of the same name, see Wario Land 3 (microgame). For the poll of the same name, see Wario Land 3 (poll).
| Wario Land 3 | |||||||||
|---|---|---|---|---|---|---|---|---|---|
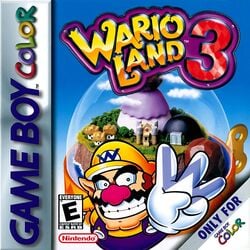 North American box art For alternate box art, see the related gallery. | |||||||||
| Developer | Nintendo R&D1 | ||||||||
| Publisher | Nintendo | ||||||||
| Platforms | Game Boy Color, LodgeNet, Virtual Console (Nintendo 3DS), Game Boy - Nintendo Classics | ||||||||
| Release dates | Game Boy Color: Virtual Console (3DS): Game Boy - Nintendo Classics: | ||||||||
| Languages | English Japanese | ||||||||
| Genre | 2D Platformer | ||||||||
| Ratings |
| ||||||||
| Mode | Single-player | ||||||||
| Format | Nintendo Switch: Game Boy Color:
Nintendo 3DS: | ||||||||
| Input | Nintendo Switch: Game Boy Color:
Nintendo 3DS:
| ||||||||
| Serial code | CGB-AW8A | ||||||||
Wario Land 3 is a video game for the Game Boy Color released in 2000, and the fourth installment in the Wario Land series. It was rereleased for the 3DS's Virtual Console in Japan on May 2, 2012, in Europe and Australia on December 6, 2012, and in the Americas on August 29, 2013; and later rereleased for the Nintendo Switch's Game Boy - Nintendo Classics service as one of its launch titles on February 8, 2023. To escape the world inside a music box, Wario must collect the five music boxes, with the help of treasures found along the way that include power-ups and ones that open up the world.
Story[edit]
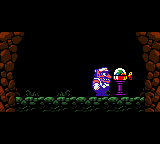
One day, Wario is flying with his plane over the woods until it runs out of fuel and crashes. Stranded, Wario then stumbles upon a mysterious cave, where inside he discovers a strange music box containing a small world inside sitting on a pedestal. When he goes to take a closer look, he is suddenly magically sucked into the music box. He then wakes up inside a dark temple and meets a hidden figure, who informs Wario that he is a god who once protected the world inside the music box, until an evil being sealed away his magical powers within five music boxes scattered across said world. The figure promises that if Wario can gather the boxes and free it, it will send Wario back outside and allow him keep any treasure he finds along the way. With his mind on the money and the fact he can return to his own world, Wario agrees to this proposal and departs on his quest in search of the music boxes and the many treasures of this mysterious land. During which, several monsters attempt to impede his progress, but were unsuccessful in stopping the treasure hunter.
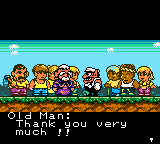
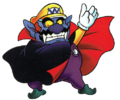
After collecting all the music boxes, Wario returns to the temple. Once there, the music boxes play a melody together, and the song frees the hidden figure. However, the figure turns out to be an evil clown-like demon, who announced his plan to rule over the world inside the music box as well as the outer world. It then attempts to destroy Wario since he outlived his usefulness, but Wario is able to defeat it. After the demon was vanquished, all the monsters that attacked Wario before are turned back into humans. An elder explains that their world was peaceful until the demon invaded, so they managed to seal away its power within the five music boxes, but not before they were turned into monsters. He then states that they only tried to stop Wario from releasing the demon and letting it continue its conquest, but never thought that he would destroy it and free them from its curse. He thanks Wario for what he unintentionally did for them and transports him back to his world along with the treasure that he had collected, as promised before by the hidden figure.
Gameplay[edit]
The base mechanics in Wario Land 3 are very similar to that of its predecessor, Wario Land II. If Wario touches an enemy, he is simply stunned or transformed in one of his many transformations, known as reactions in the Wario Land series (one exception is in the final boss fight, where Wario can be "killed" and get a Game Over). Wario can crouch and walk using the direction pads, use a Dash Attack by pressing the button and jump using the
button.
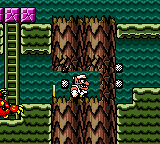
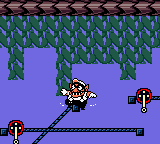
The game has a more open structure than its predecessors. Wario starts the game with most of his powers from Wario Land II missing or toned down. To progress, the player has to collect treasures which grant him new abilities, open new levels or cause changes in the existing levels that allow one to reach previously inaccessible areas. The world map is divided into levels, which the player can enter and leave as they please. Should the player not know where to go, they can go to the The Temple, which indicates where to go next. By holding in the overworld, the player can check the path that Wario can travel on the overworld, and if Wario moves to a different part of the map, he can press the same direction on the
, he moves faster to the destination.
Each level contains a total of four color-coded treasure chests, and as such, the player may need to visit a level multiple times at different point of the game in order to obtain all treasures. To collect a treasure, the player must first find the chest's key. Most treasure chests require completing a puzzle to be collected, and some are guarded by a boss. Not all treasures are necessary to complete the game.
This Wario Land installment features a day and night system; after clearing a level, day turns in night or night turns in day. This system affects some levels, and some treasures can only be accessed at a specific time of the day.
Wario's reactions[edit]
The game includes reactions returning from Wario Land II, in addition to some new ones.
| Image | Name | Description |
|---|---|---|
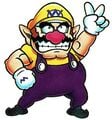
| Wario | Wario's normal form with no reaction. He starts out the game powerless, but as he progresses into the game, he can collect power-ups that will allow him to perform the Smash Attack, swim and dive into the water, strengthen his signature Attack, lift light and heavy enemies, etc. This is the only form of Wario that can enter doors and open treasure chests, as well as grab an owl or a zipline handle. | |
| Ball | When jumped on by Shoot, Wario becomes a ball. If touched, he will be used to score a point, which will revert him to normal if he is still in the soccer game. He can slowly move left or right while bouncing and can also be grabbed and thrown by the tortoise goalkeeper to revert to normal. Likewise, Wario can inflict the same effect on Shoot. | |
| Ball o' String Wario | When touched by a Silky while it is spitting string, Wario will roll back and forth across a course, bouncing off walls, until he eventually unravels back into Wario. This can be used to break Itodama Blocks. | |
| Bouncy Wario | After getting hit on the head by a Hammer-bot, Wario keeps bouncing and can jump to new heights. While on the ground, pressing | |
| Bubble Wario | Wario is trapped inside a bubble, allowing him to keep floating upward until he hits something. While inside the bubble, Wario has the ability to resist currents in the water. | |
| Crazy Wario | Wario becomes a hard-to-control, where he uncontrollably moves back and forth. Unlike Wario Land II, Crazy Wario cannot exhale a poisonous gas to defeat enemies and does not change color. Water or getting hurt will revert Wario to a normal state. | |
| Electric Wario | After Wario is hit by a zap of electricity, he is propelled backwards and cannot move for about a second. Any enemies touching him will be immediately defeated. | |
| Fat Wario | Wario after swallowing an Appleby's apple or a Doughnuteer's donut. With Wario's extra weight, he can easily break through breakable blocks even when Wario has not obtained any Smash Attack-related powerups, and also break doughnut blocks. As a side-effect, Wario is slow and cannot jump as high as normal, but if any enemy runs into him (or if he runs into them) they will instantly be defeated. After moving for a while or going into water, Wario will lose weight and return to normal. | |
| Flat Wario | When Wario is flattened by an Omodon or a Count Richtertoffen, he can glide smoothly in the air to reach farther places in the air and slip through tiny cracks in walls. Even without the High Jump Boots, Wario can hold | |
| Hot Wario | After Wario is burned, he starts running around with his pants on fire and will slowly burn more intently until he is reduced to cinders. Wario can break through Bonfire Blocks when he's completely enveloped in flames. If Wario makes contact with water or the fire subsides, he will return to normal. | |
| Ice Skatin' Wario | Wario is frozen solid and sent skimming backwards, until he hits a wall. Although a usual inconvenience, he can slide past spikes and defeat most enemies on his path. | |
| Invisible Wario | Wario is invisible, so he can pass through seeing-eye doors. However, aside from an occasional glimpse, the player cannot see Wario, either, making this a very difficult transformation to use. Unlike all other Wario Forms, he can still walk through doorways. When Wario goes through pipes, he reverts to normal. The invisibility also goes away after Wario takes on a different reaction. | |
| Puffy Wario | When hit by a stinger from an enemy, Wario's head is filled with air. Wario will float upwards until he hits something. | |
| Snowman Wario | When Wario is covered in falling snow, he becomes a snowman. If Snowman Wario rolls down a slope, he can break Snowman Blocks, though some can only be broken if the snowball is big enough. Wario can defeat every enemy in this form. | |
| Vampire Wario and Bat-Wario | When getting touched by Kobatto, Wario transforms into a vampire and can defeat every enemy he touches. Plus, by pressing the | |
| Zombie Wario | Wario is impervious to all enemy damage, can defeat almost all enemies on touch, and fall through thin floors, although he is incredibly slow. Unlike Wario Land II, he is able to jump, though he cannot jump very high. Water or light will return him to normal Wario. |
Power-ups[edit]
The nine power-ups that can be found during gameplay are as follows:
- Lead Overalls: By pressing the
button in midair, Wario can perform a Smash Attack. He can destroy little enemies, damaged blocks and stun big enemies with these overalls. (Stunned enemies can be defeated when attacking them again)
- Swimming Flippers: Allows Wario to swim underwater. By tapping the
button, he swims faster. However, he cannot swim against currents.
- Head Smash Helmet: Allows Wario to destroy not only damaged blocks, but also solid blocks by bumping into them from below.
- Grab Glove: Allows Wario to lift small enemies when walking towards them while they are toppled, or small objects. He can throw them forward by pressing the
button, or upward when holding
after throwing. Charged throws can be done by holding the
button and then releasing it, causing enemies/objects to be thrown further and may be destroyed if thrown near a solid surface. Enemy Blocks can be broken by throwing an enemy or object against them.
- Super Smash: Allows Wario to break solid blocks with his Dash Attacks or when rolling. Damaged blocks can be broken without being stopped and large enemies can be defeated immediately.
- Super Jump Slam Overalls: Similar to the Super Smash, it allows Wario's Smash Attack to break solid blocks, break through damaged blocks unstopped, and defeat large enemies immediately. Additionally, using it on the ground causes the ground to shake, toppling small enemies and certain big enemies.
- High Jump Boots: Pressing
while jumping allows Wario to jump higher. Enemies can also be used to perform high jumps when holding
while bouncing onto them, and holding
while doing so allows Wario to bounce higher.
- Prince Frog's Glove: Allows Wario to swim against strong currents while tapping the
button.
- Super Grab Gloves: Allows Wario to lift big enemies as well as normal ones. His speed is reduced while carrying big enemies and they cannot be throw as far as smaller enemies.
After acquiring each treasure required for a power-up, a short tutorial will be played to demonstrate the new abilities that Wario just acquired. The first demonstration must be played in full and cannot be skipped. They can be viewed again if the player pauses the game while playing one of the levels and selecting the Action Help option, allowing one of the tutorials to be played (though they are now skippable), provided that they are not currently Vampire Wario, holding a zipline handle, or holding onto an owl, as in those three cases, they have unique Action Help demonstrations associated with them.
Golf Minigame[edit]
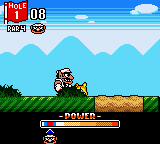
In some levels, Wario will find a block with the word "Mini Game Clear" and an arrow pointing up written on it. Wario can get this block to lift and subsequently opening the way by playing a minigame of golf, which can be accessed by entering a door with a drawing of a Para-Goom at its top within the level. Several levels have one room to play the Golf minigame, while The Vast Plain has two: one underground and one in the sky, though it is only required to clear one of them to lift both blocks. To play the minigame, Wario must have enough money in his possession, where it is 10 coins at first, 30 coins later, and finally maxing at 50 coins per entry. The goal for this Golf minigame is to knock Para-Goom into the hole, which is achieved by using Wario's Dash Attack on a Para-Goom to knock it away towards the hole. If it falls into lava or water, another Para-Goom will fall on the closest spot of the lava/water, so that Wario will be able to continue. In order to hit the Para-Goom, the player must press the button to move the blue arrow in the power meter displayed at the bottom of the screen, then press it again to stop it. Then, a red arrow will appear; it must stop on the red or the blue space inside the meter, which affects the bounce of the Para-Goom; should Wario hit outside that range, he will stumble, but the shot will still count despite missing. The player can also use the direction pads (left and right) to get a further view of the hole and also where the Para-Goom will end up if hit with the maximum power. The game is completed if Wario scores par or below, but if Wario did not sink the Para-Goom within the number of shots indicated by the par, the game is over and requires playing again to lift the block.
The following levels contain Golf minigame rooms. The treasures listed require clearing them to procure, and some are required to clear to get all the Musical Coins (marked with asterisks):
- Out of the Woods: Red Chest
- The Vast Plain* (2): Red Chest, Green Chest
- Sea Turtle Rocks: Red Chest
- Desert Ruins: Green Chest
- The Volcano's Base: Green Chest
- The West Crater*: Blue Chest
- The Grasslands: Red Chest
- The Big Bridge: Green Chest
- The Steep Canyon*: Blue Chest
- Above the Clouds: Green Chest
- The Colossal Hole*: Red Chest
In the northern side of the music box world, there is an uncolored building which can be visited by going from north to west (and vice versa). After getting all seven crayons, the building will be fully colored and Wario can play Golf there by visiting it. There are four courses in the building, where three are available from the start and the fourth one only available after getting all of the Musical Coins in all levels. Every course has five holes each, for a total par of 20 each. Each time Wario initiates a course, he must pay 50 coins. Unlike the Golf minigame rooms in the individual levels, Wario can hit as many shots as is required per hole even if he scores above par, though he will be disappointed if that happens. After five holes are completed, the Best Score is recorded if it is achieved.
List of levels[edit]
Items and objects[edit]
| Image | Name | Description |
|---|---|---|
| Musical Coin | Each of them is worth 10 coins. If Wario collects all 8 in one go in each level, a part of a drawing of a golf course is colored. If the whole drawing is colored, a new course is unlocked in the Golf minigame found in the overworld. | |
| Normal coin | Normal coins Wario can find in levels, occasionally found after breaking blocks. They are used to pay to play the Golf minigames. | |
| Colored coins | Each colored coin is worth 10 normal coins. The color denotes what Key the player is close to. | |
| Keys | The keys appear in specific locations in every level. Each key is needed to open the treasure chest of the same color. In Time Attack, the objective is to collect all four keys and then exit through any goal door. | |

|
Treasure Chests | The treasure chests that appear in every level. After Wario obtains a key, the treasure chest of the same color can be opened. Once opened, it is replaced with a goal door when the level is revisited. |
| Barrel | With the Grab Glove power-up, these can be thrown at Enemy Blocks, but they are fragile so will break after dropping on a surface. | |
| Stove | Stoves can be used as platforms. They can be shoved around by using a Dash Attack on their sides. | |
| Switch | When bumped from below, will toggle between on or off. They change the state of certain objects found within the levels. | |
| Blocks (damaged) | Blocks that can be broken through most forms of attacks. | |
| Blocks (solid) | Blocks that can be broken only after Wario has the necessary power-ups, or if Fat Wario drops on them. | |
| Bonfire Blocks | Bonfire Blocks break after Hot Wario touches them when he is on fire. | |
| Doughnut blocks | Doughnut blocks can only be broken by Fat Wario after he drops on them. | |
| Enemy Blocks | Breaks after an enemy or object is thrown at it. | |
| Flame block | Disappears after all nearby torches are lit with fire. | |
| Itodama Block | Breaks after Ball o' String Wario collides on it. | |
| Snowman Block | Breaks after Snowman Wario as a snowball collides through it. Lighter ones break more easily, while darker ones break only after the snowball is at its biggest. |
Enemies[edit]
| Image | Name | Description |
|---|---|---|
| Akamajakushi | A jumping creature found in water and occasionally lava. If it bumps into Wario headfirst, he will roll backwards until he hits a wall or lands in water. | |
| Appleby | A mole lizard-like enemy that throws apples from holes in walls, turning Wario into Fat Wario if he eats the apple. | |
| Beam Robota | A blue robot who attacks with beams stored inside their chests. The beams go through walls. | |
| Bird | A flying enemy. The blue birds will stun Wario, while the orange ones turn him into Crazy Wario. | |
| Brrr Bear | A blue polar bear who spits ice at Wario and turns him into Ice Skatin' Wario. | |
| Count Richtertoffen | A rotund creature who attacks by jumping up to either shake the ground or squash Wario to turn him into Flat Wario. | |
| Denki | A spark of electricity that drops from a hanging lamp. They travel towards where Wario is once they hit the ground, triggering Electric Wario if touched. | |
| Doughnuteer | A small creature holding a fork with doughnuts. If Wario eats one, he will become Fat Wario. | |
| Electric Lamp | A hanging lamp that drops denki. | |
| Fire Robota | A red robot attacking with a fire torch stored in its chest. | |
| Flame | A massive flame within a torch, sometimes dropping smaller flames. Touching either causes Wario to become Flaming Wario. | |
| Futamogu | A red creature with a platform on its head found in holes; Smash-Attacking from above bumps it down. | |
| Hammer-bot | A big blue robot riding on treads that uses its hammers to turn Wario into Bouncy Wario. | |
| Haridama | An invincible enemy only appearing in Bank of the Wild River; when touched, Wario will become puffy. | |
| Hebarii | A slime that attaches itself to the ceilings. It attacks by shooting glowing projectiles. Shaking the ground or hitting a switch knocks down the enemy. | |
| Kobatto | Bat enemies that turn Wario into Vampire Wario. | |
| Kuri | A chestnut enemy found in the battle against Wolfenboss. | |
| Kushimushi | Bug enemies with rake-shaped mandibles, always found on vines and trees. Its front stuns Wario. | |
| Mad Scienstein | A scientist who attacks by using his potions, triggering Invisible Wario if he is hit by one. | |
| Mizu no te | An invincible enemy only appearing in The Steep Canyon that tries to make Wario fall into fast currents. | |
| Mizuuo | A fish that occasionally spits out drops of water that stun Wario. | |
| Mr. Moon | An invincible enemy who attacks with electric beams and turns Wario into Electric Wario. It only appears at nighttime. | |
| Nobiiru | An enemy with retracting spikes that extends from the wall every few seconds. | |
| Octohōn | An underwater enemy that is initially small. When it grows bigger, it attacks by tackling Wario, causing him to be knocked off into the direction that he was pushed until he hits a wall. | |
| Omodon | A Thwomp-like enemy, carried by an Omodonmeka to flatten Wario if he is underneath it. | |
| Omodonmeka | A flying enemy. The blue versions of them grab Wario, and the green and red ones try to smash him with an Omodon. | |
| Para-Goom | A yellow enemy who attacks using its spiky parasol. | |
| Pneumo | A floating jellyfish that attacks by turning its mouth into a needle, which on contact turns Wario into Puffy Wario. | |
| Prince Froggy | A big frog that sits in place, blocking Wario's path. It can be defeated by using Hot Wario, Vampire Wario, or Ice Skatin' Wario. In The Peaceful Village, one appears red instead of gray, and will only move if using a Smash Attack near it but not on top of it. | |
| Robo-Mouse | A rodent robot that pursues Wario and breaks through fragile walls with its claws. If it catches Wario, it will throw him out of the room he is inside of. | |
| Seeing-eye door | A gate with an eye that blocks all it sees from passing. Wario must become invisible to pass them. | |
| Sensor | Horizontal or vertical double-layered laser traps found in the depths of Sea Turtle Rocks. | |
| Silky | A green worm that projects a special string from its mouth. If Wario is hit, he will turn into a Ball o' String Wario. | |
| Snake | An invincible enemy living in vases that attacks by spitting fire. | |
| Spark | A small floating glowing ball that often appears in climbing or flying sections. | |
| Spear-bot | A green robot that attacks with a spear stored inside its chest. | |
| Spearhead | A blue blob with a spear as its nose and weapon. | |
| Sun | An invincible enemy who attacks with fire balls and turns Wario into Hot Wario. It only appears at daytime. | |
| Suna kara te | An invincible enemy only appearing at daytime in Desert Ruins that tries to make Wario fall into moving sand. | |
| Teruteru | A ghost-like enemy who shrouds Wario's head to makes the screen dark. After bumping into a wall, it will fall off and patrol the area where it fell it off. | |
| Spike | A clump of spikes that harms Wario if he touches it. | |
| Togēba | A flat blue spiny slime that is completely invulnerable to all attacks, but floats up if the ground shakes. | |
| Togeuo | A black fish that attacks with its needles. | |
| Webber | A spider enemy who can shoot electric projectiles. Their backs can be used as platforms. | |
| Zombie | An undead enemy who throws its head at Wario that turns him into a zombie. |
Bosses[edit]
Even though Wario cannot be defeated in most boss battles, each of them has a way to eject Wario from the area to force a restart through needing to reenter the area to battle them again. Once the boss battle initiates, pressing Start will cause a buzzing sound to be played, meaning that the boss battle cannot be paused. The pause functionality will only be resumed after the boss is defeated or Wario exits the area with the boss, meaning that being ejected from the arena won't reenable the pausing as long as Wario is still within the same area.
Treasures[edit]
There are 100 treasures in total Wario can collect, many of which alter the music box world and open new areas to Wario's exploration. However, not all of the treasures are needed to complete the game, as only 48 specific ones are necessary, which excludes any found in three levels: Above the Clouds, Forest of Fear, and The Warped Void. Of the required treasures, they include power-ups, music boxes, and ones guarded by bosses. Only both Out of the Woods and The Stagnant Swamp contain treasures where all four in those levels are required to beat the game. The locations for the required treasures will be suggested by a hidden figure if Wario visits the temple before obtaining the bare minimum.
Required treasures to beat the game are marked with an asterisk.
| Image | Name | Location | Purpose |
|---|---|---|---|
| Yellow Music Box* | The Grasslands (Gray Chest) | The five magical artifacts needed to complete the game. Together they can break the seal on a hidden figure, unlocking the final battle in The Temple, but the first four each has a unique purpose.
| |
| Blue Music Box* | A Town in Chaos (Red Chest) | ||
| Green Music Box* | Sea Turtle Rocks (Gray Chest) | ||
| Red Music Box* | The Stagnant Swamp (Green Chest) | ||
| Gold Music Box* | Out of the Woods (Blue Chest) | ||
| Prince Frog's Glove* | Out of the Woods (Green Chest) | Allows Wario to swim faster, so he can traverse currents. Wario can use this new ability to access new paths in Bank of the Wild River, The Steep Canyon, and Beneath the Waves. | |
| Swimming Flippers* | Tower of Revival (Gray Chest) | Makes Wario able to swim and dive in water. Wario can use this new ability to access new paths in The Pool of Rain and The Big Bridge. | |
| High Jump Boots* | The Colossal Hole (Green Chest) | Boosts Wario's jumping abilities, letting him jump higher and giving him the ability to use enemies as stepping stones. Wario can use this new ability to access new paths in The Grasslands, The Stagnant Swamp, and Cave of Flames. | |
| Super Grab Gloves* | The East Crater (Gray Chest) | Boosts Wario's strength, allowing him to lift heavy enemies. Wario can use this new ability to access new paths in A Town in Chaos, Castle of Illusions, and (if the Mystery Handle was collected) Forest of Fear. | |
| Super Smash* | Tower of Revival (Red Chest) | Upgrades Wario's Dash Attack, so he can smash through non-cracked blocks. Also allows him to break non-cracked blocks with his head and access new paths in Bank of the Wild River and The Colossal Hole, and opens the path to Sea Turtle Rocks. | |
| Grab Glove* | The Steep Canyon (Gray Chest) | Allows Wario to lift small objects and enemies. Wario can use this new ability to access new paths in The Tidal Coast, The Frigid Sea, and The Big Bridge. | |
| Lead Overalls* | The Volcano's Base (Gray Chest) | Gives Wario the ability to perform a Smash Attack that can break cracked blocks and defeat enemies. Wario can use this ability to access new paths in Out of the Woods and The Vast Plain. | |
| Super Jump Slam Overalls* | Castle of Illusions (Gray Chest) | Powers up Wario's Smash Attack, allowing him to break non-cracked blocks and stun enemies. Wario can use this upgraded ability to access new paths in Sea Turtle Rocks, The West Crater, Desert Ruins, and The Peaceful Village. | |
| Head Smash Helmet* | The Frigid Sea (Gray Chest) | Allows Wario to break both types of blocks with his head by jumping beneath them. Wario can use this ability to access new paths in A Town in Chaos and Desert Ruins. | |
| Lantern* | The Big Bridge (Blue Chest) | When brought together, Castle of Illusions will appear on the east side. | |
| Magical Flame* | The Frigid Sea (Green Chest) | ||
| Torch | Castle of Illusions (Red Chest) | Opens the path to Forest of Fear and connects the east sector with the north sector of the world. | |
| First Gear for Machine* | The Pool of Rain (Gray Chest) | When placed into the elevator on the east side, the path to The Grasslands will open. | |
| Second Gear for Machine* | A Town in Chaos (Gray Chest) | ||
| Warp Compact | Forest of Fear (Gray Chest) | Makes The Warped Void appear on the east side. | |
| Jar* | Out of the Woods (Red Chest) | Summons a rain storm and opens the path to The Pool of Rain and A Town in Chaos. | |
| Treasure Map* | Tower of Revival (Green Chest) | Reveals a secret path through the mountains and opens the path to The East Crater | |
| Blue Book* | The Peaceful Village (Red Chest) | When brought together with the Magic Wand, the water on the east side will freeze and open the path to The Frigid Sea. | |
| Sky Key | Tower of Revival (Blue Chest) | Unlocks the door leading to the tower's top and opens the path to Above the Clouds. | |
| Yellow Book* | The Tidal Coast (Gray Chest) | When brought together, these items create a lightning storm and open the path to The Steep Canyon. | |
| Trident* | Bank of the Wild River (Gray Chest) | ||
| Axe* | Out of the Woods (Gray Chest) | Cuts the big tree on the north side down and opens the path to The Peaceful Village and The Vast Plain | |
| Magic Wand* | The Grasslands (Green Chest) | When brought together with the Blue Book, the water on the east side will freeze and open the path to The Frigid Sea. | |
| Skull Ring (blue)* | The Pool of Rain (Red Chest) | When brought together, Tower of Revival will rise from the ground on the south side. | |
| Skull Ring (red)* | The Vast Plain (Green Chest) | ||
| Blue Tablet* | The Peaceful Village (Gray Chest) | These items unlock the gate at the hill on the north side and open the path to Desert Ruins. | |
| Green Tablet* | The Vast Plain (Gray Chest) | ||
| Ornamental Fan* | The Pool of Rain (Green Chest) | Blows away the mist at the south side and opens the path to The Stagnant Swamp. | |
| Top Half of Scroll* | Desert Ruins (Gray and Red Chests) | When brought together, these items calm the storm on the west side and open the path to The Volcano's Base. | |
| Bottom Half of Scroll* | |||
| Tusk (blue)* | The Volcano's Base (Blue Chest) | When brought together, these items cause the volcano to erupt and open the path to The West Crater and The Colossal Hole. | |
| Tusk (red)* | The Steep Canyon (Red Chest) | ||
| Green Flower* | The Stagnant Swamp (Red Chest) | ||
| Blue Chemical | The Steep Canyon (Blue Chest) | When brought together, these items move the heavy blocks in The Vast Plain and Beneath the Waves out of the way. | |
| Red Chemical | Beneath the Waves (Green Chest) | ||
| Air-Pump | The Colossal Hole (Red Chest) | Makes the blocks of ice rise in Bank of the Wild River and The Pool of Rain. | |
| Sapling of Growth | A Town in Chaos (Blue Chest) | Causes the little octopi in The Tidal Coast and Beneath the Waves to grow in size. | |
| Night Vision Scope | The East Crater (Green Chest) | Illuminates a certain room in Sea Turtle Rocks. | |
| Electric Fan Propeller | The Tidal Coast (Green Chest) | Produces currents of air in A Town in Chaos. | |
| Rust Spray | Castle of Illusions (Blue Chest) | Causes the iron walls in The West Crater, The Steep Canyon, and Cave of Flames to rust, making them destructible. | |
| Statue* | Bank of the Wild River (Green Chest) | Produces patches of wire in Tower of Revival and The Tidal Coast, which Wario can use to climb on. | |
| Explosive Plunger Box* | Beneath the Waves (Gray Chest) | Causes bombs in The Stagnant Swamp, Cave of Flames, and The Colossal Hole to explode, opening new paths. | |
| Scissors | Cave of Flames (Blue Chest) | Cuts the balloon in Above the Clouds loose, opening a new path. | |
| Castle Brick | The West Crater (Green Chest) | Opens a new path in Castle of Illusions. | |
| Warp Removal Apparatus | Forest of Fear (Green Chest) | Makes the dimensional rifts in The Warped Void disappear, opening new paths. | |
| Key Card (red) | Forest of Fear (Red and Blue Chests) | When brought together, a trapped Para-Goom in The Warped Void will be released, opening a new path. | |
| Key Card (blue) | |||
| Jackhammer | Above the Clouds (Green Chest) | Releases a stream of hot air in The East Crater. | |
| Pick-Axe | Above the Clouds (Blue Chest) | Opens a new area in The East Crater. | |
| Rocket | Bank of the Wild River (Blue Chest) | This treasure serves no purpose. | |
| Pocket Pet | The Big Bridge (Green Chest) | This treasure serves no purpose. (It is a reference to the Pokémon Pikachu device that was released shortly before Wario Land 3.) | |
| Mystery Handle | The Warped Void (Gray Chest) | Raises a Warp Pipe from the ground in Forest of Fear, opening a new path. | |
| Demon's Blood | The Warped Void (Green Chest) | When obtained, zombies will emerge in a specific area of Forest of Fear, opening a new path. | |
| Gold Magic* | Castle of Illusions (Green Chest) | Causes the tree in Out of the Woods to open, creating a new path. | |
| Fighter Mannequin | The Grasslands (Blue Chest) | This treasure serves no purpose. | |
| Truck Wheel | The Grasslands (Red Chest) | Makes the carts in The Volcano's Base operational, opening a new path. | |
| Flute* | The Stagnant Swamp (Gray Chest) | Summons snakes in The Peaceful Village, The Grasslands, and The Volcano's Base. | |
| Foot of Stone* | The Tidal Coast (Red Chest) | Creates an earthquake that opens a new paths in The Volcano's Base and The Steep Canyon, and drains the water of The Stagnant Swamp. | |
| Golden Right Eye | Sea Turtle Rocks (Red Chest) | Opens the golden snake door in Tower of Revival. | |
| Golden Left Eye | A Town in Chaos (Green Chest) | ||
| Right Glass Eye* | The West Crater (Gray Chest) | Opens the blue snake door in Tower of Revival. | |
| Left Glass Eye* | The Colossal Hole (Gray Chest) | ||
| Scepter* | Cave of Flames (Gray Chest) | Purifies the murky water in The Big Bridge, The Frigid Sea, and Sea Turtle Rocks, opening new paths. | |
| Top Half of Sun Medallion* | Sea Turtle Rocks (Green Chest) | When brought together, the eternal night on the east side of the world will end, making it possible to access the levels there during the daytime. New paths are opened in The Colossal Hole, The Frigid Sea, and Castle of Illusions. | |
| Bottom Half of Sun Medallion* | Desert Ruins (Blue Chest) | ||
| Eye of the Storm* | The Stagnant Swamp (Blue Chest) | Causes leaves to fall down in Out of the Woods, opening a new path. | |
| Pouch* | Cave of Flames (Green Chest) | ||
| Magic Seeds* | The Big Bridge (Gray Chest) | Causes stalks to grow in The Vast Plain, The Pool of Rain, and The Grasslands, opening new paths. | |
| Full Moon Gong | Sea Turtle Rocks (Blue Chest) | Summons the moon in Above the Clouds, opening a new path. | |
| Telephone | The Steep Canyon (Green Chest) | This treasure serves no purpose. | |
| Crown | The Volcano's Base (Green Chest) | This treasure serves no purpose. | |
| Day or Night Spell | The Peaceful Village (Blue Chest) | Gives Wario the ability to switch between daytime and nighttime on the map. | |
| Red Gem | The Vast Plain (Blue Chest) | This treasure serves no purpose. | |
| Green Gem | The Tidal Coast (Blue Chest) | This treasure serves no purpose. | |
| Blue Gem | The Volcano's Base (Red Chest) | This treasure serves no purpose. | |
| Clubs Crest | Beneath the Waves (Blue Chest) | This treasure serves no purpose. | |
| Spades Crest | The West Crater (Blue Chest) | This treasure serves no purpose. | |
| Heart Crest | The Warped Void (Blue Chest) | This treasure serves no purpose. | |
| Diamonds Crest | The East Crater (Red Chest) | This treasure serves no purpose. | |
| Earthen Figure | The East Crater (Blue Chest) | This treasure serves no purpose. | |
| Saber | The West Crater (Red Chest) | This treasure serves no purpose. | |
| Goblet | The Peaceful Village (Green Chest) | This treasure serves no purpose. | |
| Teapot | The Frigid Sea (Red Chest) | This treasure serves no purpose. | |
| Magnifying Glass | Bank of the Wild River (Red Chest) | Allows Wario to check which treasures he has already collected, without having to enter the level first. | |
| UFO | The Frigid Sea (Blue Chest) | This treasure serves no purpose. | |
| Minicar | Cave of Flames (Red Chest) | This treasure serves no purpose. | |
| Locomotive | The Colossal Hole (Blue Chest) | This treasure serves no purpose. | |
| Fire Drencher | Above the Clouds (Red Chest) | Extinguishes the flames in The West Crater and The East Crater, opening new paths. | |
| Crayon (red) | Beneath the Waves (Red Chest) | A set of seven treasures shaped like crayons. Whenever Wario finds one of the crayons, the object will travel to the hill that separates the north side from the west side, where it will then color a specific aspect of the hill. What gets colored in is determined by the crayon's color:
Once the entire landscape is colored, the golf challenge minigame will be unlocked and can be accessed at any time Wario travels from the north side to the west side and vice versa. | |
| Crayon (brown) | The Warped Void (Red Chest) | ||
| Crayon (yellow) | The Pool of Rain (Blue Chest) | ||
| Crayon (green) | Above the Clouds (Gray Chest) | ||
| Crayon (cyan) | The Big Bridge (Red Chest) | ||
| Crayon (blue) | The Vast Plain (Red Chest) | ||
| Crayon (pink) | Desert Ruins (Green Chest) |
Time Attack[edit]
Once Wario has opened all 100 treasure chests and beaten the final boss, Time Attack mode is activated and overrides Start Game as the main way to play the game.
The following message will be displayed from now on when starting the game:
Time Attack
- Compete for time taken to get all 4 keys and clear the course.
- Press
on the Map Screen to see the list of best times.
Thus, Wario has to try to collect all the four keys the fastest way possible and enter an exit doorway in this mode. The best time is saved for each level, though saving when playing a level is not possible. If Wario breaks his personal record, he will joyfully lift his thumb. Otherwise, he will react as if he entered an exit without opening a chest in the normal mode. On the other hand, it is still possible to collect Musical Coins to unlock the extra course for the Golf Minigame even if not every key is collected.
The save option in the pause interface is not available in Time Attack mode.
Staff[edit]
- Main article: List of Wario Land 3 staff
Glitches[edit]
Ice Skatin' glitch[edit]
To perform this glitch, Wario must travel to the Cave of Flames and enter the eastern pipe, in search of the green key and treasure chest. He must then proceed to the area obscured by Bonfire Blocks, after first destroying them with the Hot Wario form. On the bridge, he should be careful to avoid the Akamajakushi that will leap out of the fire, as well as the Brrr Bear coming towards him. Wario has to jump on the Brrr Bear's head and give it a few pushes to the left. There should be a short distance between the Brrr Bear and an Akamajakushi's starting position. As it regains balance, Wario must let himself become frozen, but upon colliding with a leaping Akamajakushi, he will be sent rolling back to the previous area, preempting his transformation into Ice Skatin' Wario.
Though he may seem back to normal, Wario still acts as if he were in his Ice Skatin' Wario form. Thus, he can walk straight into enemies and knock them out. He also does not respond to the effects of flames, Mad Scienstein's potions, or even the Brrr Bear's ice breath. This glitch can be undone by walking into a Seeing-eye door, entering a pipe, or exiting the level via Save Menu. The player will have no choice but to undo it anyway, since the rest of the level cannot be finished when stuck in the Ice Skatin' Wario reaction.
Rolling glitch[edit]
When crouching at the foot of a hill, Wario may get stuck in a tight spot while sliding before he starts rolling. The rolling glitch can be performed at The Stagnant Swamp and The Colossal Hole.
In this case, one will be able to walk as normal, but the game still treats Wario as if he is just rolling. Thus, he can break regular blocks and defeat enemies just by walking through them. Though there is a slight difference, as this state he will even stay if he walks on a hill, enters doors, crouches, climbs up a ladder, performs a normal attack or a Dash Attack.
It will end if Wario gets attacked by an enemy, enters a pipe or if he hits a wall with a regular attack. In the last case, the animation will occur that can normally be seen when rolling Wario smashes at a wall.
Swamp water glitch[edit]
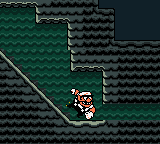
This glitch can be performed at The Stagnant Swamp. To do so, Wario must be floating in the muddy water and touching either edge of the pool. When is pressed at the correct time, Wario will briefly dive under the water and the camera will move up. This can be repeated until the camera reaches the top of the level and Wario can be seen floating in the air. Wario will still act like he is at the bottom of the swamp, and will appear to swim in invisible water, walk on invisible platforms, and enter an invisible door or pipe.
The swamp water glitch ends when Wario uses a zip line, jumps through the top of the screen, or uses the aforementioned door or pipe.
Reception[edit]
| Reviews | |||
|---|---|---|---|
| Release | Reviewer, Publication | Score | Comment |
| Game Boy Color | Frank Provo, GameSpot | 9.8/10 | "As far as platformers go, Wario Land 3 is a game that fires on all cylinders. Massive replay value rounds out perfect gameplay, a battery save keeps your progress, and a plethora of cutscenes further serves to delight one's senses past the point of pleasure. Additionally, a variety of plot twists and gotchas helps to make the story one of the more engrossing in recent memory, with an end boss that simply has to be seen to be believed. In many ways, it's as if Nintendo set out to make Wario 3 into a 2D RPG. Whatever the intent, Wario 3 raises the bar that all other platformer titles must meet in terms of fun, eye-candy, and replay value." |
| Nintendo 3DS | Marcel van Duyn, Nintendo Life | 9/10 | "Like Wario Land II before it, Wario Land 3 is essentially more of a puzzle game than an action game. The concept has been refined even more, with a ton of stages and different paths, making it easily the biggest Wario Land in terms of scope. If you enjoyed the previous adventure then this generously expanded outing is likely to please you even more." |
| Aggregators | |||
| Compiler | Platform / Score | ||
| GameRankings | 90.00% | ||
Gallery[edit]
- For this subject's image gallery, see Gallery:Wario Land 3.
Multimedia[edit]
| File info |
| File info |
| File info |
| File info |
| File info |
| File info |
| File info |
| File info |
| File info |
| File info |
References to other games[edit]
- The High Jump Boots are from this game.
References in later games[edit]
- The Wario Court, Waluigi Court and Wario & Waluigi Court's music is a cover of the Out of the Woods music.
- The game's character roster is almost entirely made up of characters originating from Wario Land 3.
- Wario's theme is a cover of the Out of the Woods music.
- The music box can be seen on a shelf during Wario's storyline.
- When a computer-controlled Wario builds a tent on the board, he mentions Rudy the Clown.
Names in other languages[edit]
| Language | Name | Meaning | Note(s) | Ref. |
|---|---|---|---|---|
| Japanese | ワリオランド3 不思議なオルゴ~ル Wario Rando 3: Fushigi na Orugōru |
Wario Land 3: The Mysterious Music Box | [1] | |
| Chinese (Simplified) | 瓦力欧乐园3 不思議なオルゴール Wǎlì'ōu Lèyuán 3: Fushigi na Orugōru |
Wario Wonderland 3: The Mysterious Music Box[a] | [6] | |
| Chinese (Traditional) | 瓦利歐樂園3 不思議なオルゴール Wǎlì'ōu Lèyuán 3: Fushigi na Orugōru |
Wario Wonderland 3: The Mysterious Music Box[a] | [6] |
External links[edit]
References[edit]
- ^ a b ワリオランド3 不思議なオルゴ~ル. Nintendo Co., Ltd. (Japanese). Retrieved September 25, 2009.
- ^ Nintendo lança novos jogos no Brasil. Novo Milênio (Brazilian Portuguese). Retrieved January 19, 2025.
- ^ American box art
- ^ American website
- ^ Australian box art
- ^ a b Game Boy - Nintendo Classics
| Game Boy Color games | |
|---|---|
| Super Mario franchise | Super Mario Bros. Deluxe (1999) • Mario Golf (1999) • Mario Tennis (2000) • Mobile Golf (2001) • Mario Family (2001) |
| Donkey Kong franchise | Donkey Kong GB: Dinky Kong & Dixie Kong (2000) • Donkey Kong Country (2000) |
| Wario franchise | Wario Land II* (1998) • Wario Land 3 (2000) |
| Other | Game Boy Color Promotional Demo (1998) • Game & Watch Gallery 2* (1998) • The Legend of Zelda: Link's Awakening DX* (1998) • Game & Watch Gallery 3* (1999) |
