The Warped Void

The Warped Void is the fifth level on the eastern side of the music box world in Wario Land 3. It is unlocked after Wario acquires the Warp Compact in the Forest of Fear's Gray Chest, which creates a portal in the overworld that makes this level accessible. In fact, all of Forest of Fear's treasures open up new paths in this level.
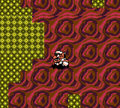
The Warped Void is a maze which has many warps that take Wario to different parts of the level. Aesthetically, this level is similar to the Time Attack stage from Wario Land II. The background contains different colors in different parts of the level that are based on the keys and chests that are related to the areas.
This level is not required to be visited to complete the game, alongside Above the Clouds and Forest of Fear.
Treasures[edit]
Gray Chest: Mystery Handle[edit]

The Mystery Handle[1] is found in the Gray Chest. It is available as soon as the level is unlocked.
To get the Gray Key, Wario must first enter the door to the right, and then in the second area, enter the door to the right. In the third area, there is a green Omodonmeka at the top. Wario must go left and cross the platforms while avoiding the circle portals, because touching them returns Wario back to where he started from. After going up the ladder, Wario must cross the Omodonmeka without being squashed, and then jump across the gap to enter the door past the Spearheads. In this door, Wario returns to the second room in a new location, where he can access a barrel. Using the barrel, it must be thrown at the Enemy Blocks housing the Gray Key to break them, so that Wario can collect it.
From the Gray Key, Wario can enter the door to the right, and then enter the circle portal to return to the start, after which he returns back to where he started, where he can access the Gray Chest from there.
The Mystery Handle raises a pipe from the ground in the Forest of Fear by twisting it like a valve, allowing the pipe next to the Gray Chest to be entered.
Red Chest: Crayon (brown)[edit]
The brown Crayon in the Red Chest requires the Remote Control found in the Forest of Fear's Green Chest, which is used to remove the circle portals in the level so that the parts of the level blocked by them become accessible.
First, Wario must make his way to the area with the green Omodonmeka, first by going to the door to the right, and then going to the door to the right in the second area. After that, Wario must go all the way left, which is possible after the circle portals are gone. On the left, there is a warp at the floor, which brings Wario to a freefall area with a red background. Should Wario touch one of the warps in the area, he will be brought back to the previous area; he can re-enter the freefall area from there. The Red Key is alongside the left path in the fork.
From the Red Key, Wario must go to the right at the fork to reach the Red Chest.
The brown Crayon flies to the tower on the northern side of the world. The crayon is used to color one part of the area that is initially monochrome. The brown crayon colors the forest's ground and the tree trunks. After the area is colored by seven different crayons, the Golf minigame there can be played.
Green Chest: Demon's Blood[edit]

The Demon's Blood in the Green Chest requires the Remote Control found in the Forest of Fear's Green Chest, which is used to remove the circle portals in the level so that the parts of the level blocked by them become accessible.
To access the area with the green background, Wario must first go all the way left from the beginning and enter the door. In the new area, Wario must go up the ladder and then grab the barrel while jumping as Count Richtertoffen slams the ground, as otherwise Wario will drop the barrel. He must bring the barrel to the left to throw up and left to break the Enemy Blocks. After breaking enough blocks for Wario to pass, Wario must go down the ladder and then drop into the warp on the way down the ladder. This warps Wario to a different location in the level, where he must carry the barrel to the right while avoiding the Count Richtertoffen's ground shakes by jumping, in order to throw it up and right to break the Enemy Blocks. After that, he must enter the door to the left to return to the original location in the same area, and then make his way up, left, up, then right to reach the Green Key.
After obtaining the Green Key, Wario must go to the left and then up the platforms, where another warp is. Wario must drop into the warp, where he will be in another area with green background falling. Wario must go to the left past the spikes and then land on the thin platform, where the Green Chest is to the right.
The Demon's Blood summons zombies in the Forest of Fear after the blood drips on the ground in the graveyard.
Blue Chest: Heart Crest[edit]

The Heart Crest in the Blue Chest requires both the red and blue Key Cards in the Forest of Fear's Red Chest and Blue Chest respectively, opening up a gate containing a Para-Goom so that it is free.
To get to where the Para-Goom is, Wario must first go to the door to the right in the first area, and then go to the door to the right in the second area, go up and right in the third area to go to the door to return to the second area, and then go left past the barrel to the door to the left to go back to the first area. From there, Wario can jump across the gap to reach the Para-Goom. Using the Para-Goom, Wario must throw it at the Enemy Blocks to break it, and then enter the door. In this room, he enters an area with a blue background. First, Wario must break the first set of blocks to go inside the door to the left, and in the second room, take the apple from Appleby to trigger Fat Wario to break the doughnut block to the left. He must then enter the door after returning to normal to go to the third area, and then enter the door below to return to the first room. In the first room, Wario must go all the way left past the second group of blocks to enter the door, returning to the second area. In this part, he must use the Omodon from the red Omodonmeka to trigger Flat Wario so that he floats through the narrow gap to the right, return back to normal by using the blue Omodonmeka, and then enter the door to a compartment in the third area. The Blue Key is to the left within this compartment.
From the Blue Key, Wario must enter the door, which returns him to the first area. He must then enter one of the doors to the left to reach the second area, after which he must go into the door at the bottom to the third area. In this area, Wario must jump to the right on the collapsible platforms, and then jump to the right platform as the third platform falls to cross the wall. The Blue Chest is all the way to the right from there.
The Heart Crest does not affect the world in any way.
Musical Coins[edit]
| Location | Description |
|---|---|

|
First, Wario must go to the room to the right from the beginning, and then go to the room to right in this room. After that, he must make his way up and to the right to trigger Flat Wario from the Omodon, and then drop down and to the left to reach a warp on the floor to reach a freefall room with the red background. While Flat Wario drops within this room, he must go left after floating back or forth five times to reach the Musical Coin. |

|
From the previous Musical Coin, Wario must touch the warp to return the previous room to use the water to return back to normal. After that, he must go back to the freefall room with the red background. Once there, Wario must take the right side until he collects the Musical Coin. |

|
In the room where a green Omodonmeka is, Wario must climb the ladder and then go right while avoiding being squished by the Omodon to go into the door. After entering, Wario must take the barrel to the left, drop down below, and then throw it at the Enemy Blocks to free the Hammer-bot. Using the Hammer-bot, Wario must throw it at the Enemy Blocks that cover the Musical Coin to be able to collect it. |

|
From the previous Musical Coin, Wario must bring the Hammer-bot all the wayto the right, and then use it to trigger Bouncy Wario. After that, Wario must step on the thin platform, and then boost his jump to reach the Musical Coin. |

|
From the previous Musical Coin, Wario must bring the Hammer-bot to the left to trigger Bouncy Wario, and then jump up to the thin platforms around the left side, where there is a door. After entering the door, Wario is back to another part of the beginning area. From where he ended up, Wario must go left to where a Para-Goom is, and then throw it at the Enemy Blocks. After that, he must enter the door. Within this door, Wario must break the group of damaged blocks directly to the left in a way that allows him to reach the thin platform above to reach the Musical Coin. Alternatively, Wario can break the group of four-block-wide damaged blocks in a way that allows him to access both this coin and the next one. |

|
From the thin platform, Wario must jump back down, and then go to the leftmost group of damaged blocks to break them in a way that allows him to reach the Musical Coin. Alternatively, Wario can break the four-block-wide group of damaged blocks in a way that allows him to access both this coin and the previous one. |

|
From the room where the two previous Musical Coins are found in, Wario must enter the rightmost door, and then jump across the platforms past the Brrr Bears in order to reach the Musical Coin all the way to the left. |

|
From the previous Musical Coin, Wario must jump down to the floor below to enter the door all the way to the left. In this room, he must drop on the warp, grab the barrel in the new location to break the Enemy Blocks to the right, enter the door, and then climb the ladders and platforms all the way up to reach a warp. Within the freefall area with the green background, Wario must go right, pass the spikes, and then go left to reach the Musical Coin. |


Enemies[edit]
- Brrr Bear (6)
- Para-Goom (1)
- Hammer-bot (1)
- Omodonmeka (4, 2 carrying Omodon)
- Omodon (2)
- Spearhead (2)
- Count Richtertoffen (2)
- Appleby (1)
Reaction abilities in this level[edit]
- Fat Wario (via Appleby)
- Flat Wario (via Omodon or Count Richtertoffen)
- Ice Skatin' Wario (via Brrr Bear)
Gallery[edit]
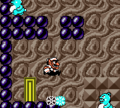
Wario with the released Para-Goom.
Wario in the Blue Chest room.
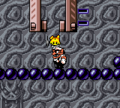
Wario near a door.
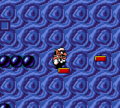
Wario near a warp platform.
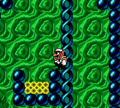
Wario falling in the Red Chest room.


Names in other languages[edit]
| Language | Name | Meaning | Note(s) | Ref. |
|---|---|---|---|---|
| Japanese | ゆがんだ空間 Yuganda Kūkan |
The Warped Space (note that the connotation of「歪んだ」yuganda, "warped", is very negative) | [?] |
References[edit]
- ^ "Go left and touch the treasure chest to receive the Mystery Handle and complete the level." – Official American Wario Land 3 website (Internet Archive)