Tour London Loop: Difference between revisions
No edit summary |
|||
| (276 intermediate revisions by 78 users not shown) | |||
| Line 1: | Line 1: | ||
{{ | {{classic title}} | ||
{{race course infobox | |||
|title=London Loop | |title=London Loop | ||
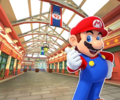
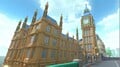
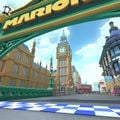
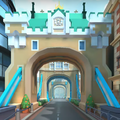
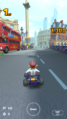
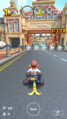
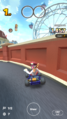
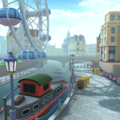
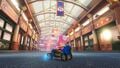
|image=[[File:MKT | |image=[[File:MKT London View.jpg|300px]]<br>View of [[Big Ben]] and the [[Finish line (object)|starting line]] | ||
| | |appears_in=''[[Mario Kart Tour]]'' ([[List of games by date#2019|2019]] <small>(1)</small>, 2020 <small>(2)</small>, 2021 <small>(3)</small>)<br> ''[[Mario Kart 8 Deluxe]]'' (''[[Mario Kart 8 Deluxe – Booster Course Pass|Booster Course Pass]]'', Wave 3) (2022) | ||
|tours=[[London Tour]]<br>[[1st Anniversary Tour]] | |based_on=[[London]] and {{wp|City of Westminster|Westminster}}, [[United Kingdom|England]] | ||
| | |online_play=Available ([[Nintendo Switch|Switch]]) | ||
|map=[[File:MKT Map LondonLoop.png|140px]] | |cups=[[Rock Cup]] | ||
|tours='''London Loop:'''<br>[[London Tour]]<br>[[1st Anniversary Tour]]<br>[[2nd Anniversary Tour]]<br>[[Spring Tour]]<br>'''London Loop 2:'''<br>[[Baby Rosalina Tour]]<br>[[2nd Anniversary Tour]]<br>[[Metropolitan Tour]]<br>[[Spring Tour]]<br>'''London Loop 3:'''<br>[[Halloween Tour (2021)]]<br>[[Metropolitan Tour]]<br>[[Anniversary Tour (2023)]] | |||
|ghost={{ghost|8DX <small>150cc</small>|Nin★Frank|2:20.500|[[File:MK8 Mario Icon.png|32px|link=Mario]][[File:CometBodyMK8.png|32px|link=Comet]][[File:SlimTiresMK8.png|32px|link=Slim (tire)|Slim]][[File:SuperGliderMK8.png|32px|link=Super Glider]]}}{{ghost|8DX <small>200cc</small>|Nin★Alice|1:38.896|[[File:MK8 Red Yoshi Icon.png|32px|link=Yoshi (Species)]][[File:SportsCoupeMK8.png|32px|link=Sports Coupe]][[File:StandardTiresMK8.png|32px|link=Standard (tire)|Standard]][[File:SuperGliderMK8.png|32px|link=Super Glider]]}} | |||
|sample=''Mario Kart Tour''<br>[[File:MKT London Loop Theme.oga]]<br>''Mario Kart 8 Deluxe''<br>[[File:Switch Tour LondonLoop BCP.oga]]<br>''Mario Kart 8 Deluxe'' (frontrunning)<br>[[File:Switch Tour LondonLoop Frontrunning BCP.oga]] | |||
|map=''Mario Kart Tour''<br><small>London Loop<br>[[File:MKT Map LondonLoop.png|140x140px]]<br>London Loop 2<br>[[File:MKT Map LondonLoop2.png|140x140px]]<br>London Loop 3<br>[[File:MKT Map LondonLoop3.png|140x140px]]</small><br>''Mario Kart 8 Deluxe''<br>[[File:MK8DX Tour London Loop Map.png|140px]] | |||
}} | }} | ||
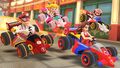
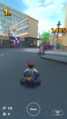
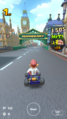
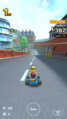
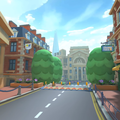
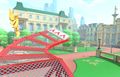
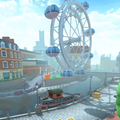
'''London Loop''' is a race course in ''[[Mario Kart Tour]]''. It is set in [[London]], [[United Kingdom|England]], and makes its debut in the city’s namesake tour, the [[London Tour]]. London Loop has three routes, named London Loop, '''London Loop 2''', and '''London Loop 3''', each with its own R, T, and R/T variants. The second route made its debut in the [[Baby Rosalina Tour]], due to [[Baby Rosalina]]'s detective outfit, which is a reference to {{wp|Sherlock Holmes}}, a fictional resident of London, while the third route debuted in the [[Halloween Tour (2021)|2021 Halloween Tour]]. The course features various landmarks from the cities of London and {{wp|City of Westminster|Westminster}}, with the first route focusing on the main metropolitan areas, the second route focusing on the outskirts, and the third route focusing on the {{wp|River Thames}}. The first and second routes have the racers go around London clockwise; however, the third route has them go around counterclockwise instead. | |||
The music for this course bears similarities to that of [[3DS Rock Rock Mountain|Rock Rock Mountain]], as well as being a reference to 1960s [[wikipedia:British Invasion|British rock music]]. | |||
London Loop appears in the ''[[Mario Kart 8 Deluxe – Booster Course Pass]]'' as the first course of the [[Rock Cup]]. | |||
London Loop | ==''Mario Kart Tour''== | ||
{{multiframe | |||
|align=right | |||
|1=<div style=background:#999999>[[File:MKT FullMap LondonLoop.png|120px]][[File:MKT FullMap LondonLoop2.png|120px]]</div><div style=background:#999999>[[File:MKT FullMap LondonLoop3.png|120px]]</div> | |||
|2=The city course's routes in relation to each other. | |||
}} | |||
===London Loop=== | |||
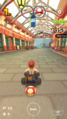
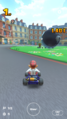
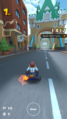
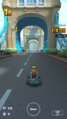
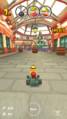
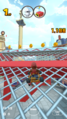
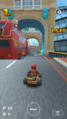
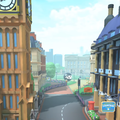
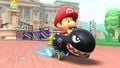
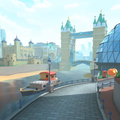
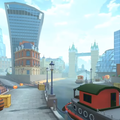
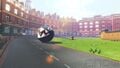
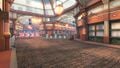
The course begins to the right of [[Big Ben]], followed by a gradual right next to a double-decker bus. The road then weaves its way around {{wp|Nelson's Column}}, then makes another gradual right through {{wp|Charing Cross}} and a part of {{wp|Trafalgar Square}} before making a sharp left at {{wp|St Paul's Cathedral}}. The player then reaches {{wp|Leadenhall Market}}, which they exit after making a single slight right. After another sharp right with a [[Chain Chomp]] in a green space in front of the [[Tower of London]], the player crosses [[Tower Bridge]], then takes another sharp right past {{wp|City Hall, London (Southwark)|City Hall}} and {{wp|The Shard}} with the {{wp|London Eye}} in the background. After a left sigmoid curve, the player returns to the finish line. This specific route was the only European city course route that was not brought back in the [[Metropolitan Tour]]. | |||
The course also appears as '''London Loop R''' (reversed), '''London Loop T''' (with ramps), and '''London Loop R/T''' (reversed with ramps). In the T and R/T variants, there are several stationary [[Bus|double-decker buses]] on the track. | |||
====Appearances==== | |||
For this course's tour appearances, see [[List of London Loop tour appearances in Mario Kart Tour#London Loop|List of London Loop tour appearances in ''Mario Kart Tour'' § London Loop]]. | |||
====Top-tier and middle-tier items==== | |||
{{MKT favored table|new|London Loop}} | |||
====Bonus challenges==== | |||
<div class="contentbox mw-collapsible mw-collapsed> | |||
{{MKT bonus challenge table|Ring Race|London Loop}} | |||
{{MKT bonus challenge table|Glider Challenge|London Loop}} | |||
{{MKT bonus challenge table|Do Jump Boosts|London Loop}} | |||
{{MKT bonus challenge table|Vs. Mega|London Loop|char=Bowser}} | |||
{{MKT bonus challenge table|Smash Small Dry Bones|London Loop}} | |||
</div> | |||
===London Loop 2=== | |||
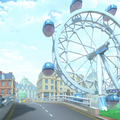
The course begins to the right of the [[Big Ben]] on {{wp|Westminster Bridge}}. Players take a slight right to enter {{wp|St James's Park}} in front of {{wp|Buckingham Palace}}. Two [[Chain Chomp]]s are located in the green space, one in the very center and one outside the palace. Racers drive down a long street shortly afterwards, driving past the {{wp|British Museum}}, eventually leading to a ramp with {{wp|The Shard}} visible in the far background. Racers take a right to {{wp|Trafalgar Square}} before eventually driving across {{wp|Waterloo Bridge}}, passing the {{wp|London Eye}}. A U-bend to the right is taken, which leads racers back on to Westminster Bridge before arriving at the finish line. | |||
The course also appears as '''London Loop 2R''' (reversed), '''London Loop 2T''' (with ramps), and '''London Loop 2R/T''' (reversed with ramps). In all three variants, there are several stationary [[Bus|double-decker buses]] on the track. In the R/T variant, both Chain Chomps are gone; racers skip the James's Park section entirely before reaching a [[Glide Ramp|glide ramp]] and then finishing the lap on [[Kanaami Road]] above the starting line. | |||
====Appearances==== | |||
For this course's tour appearances, see [[List of London Loop tour appearances in Mario Kart Tour#London Loop 2|List of London Loop tour appearances in ''Mario Kart Tour'' § London Loop 2]]. | |||
====Top-tier and middle-tier items==== | |||
{{MKT favored table|new|London Loop 2}} | |||
====Bonus challenges==== | |||
<div class="contentbox mw-collapsible mw-collapsed> | |||
{{MKT bonus challenge table|Ring Race|London Loop 2}} | |||
{{MKT bonus challenge table|Steer Clear of Obstacles|London Loop 2}} | |||
{{MKT bonus challenge table|Vs. Mega|London Loop 2|char=Hammer Bro|lc=y}} | |||
{{MKT bonus challenge table|Combo Attack|London Loop 2T}} | |||
</div> | |||
===London Loop 3=== | |||
The course starts on the {{wp|Westminster Bridge}}, though it faces away from [[Big Ben]], the opposite direction of London Loop and London Loop 2. Racers take a left turn and travel past the {{wp|London Eye}} before taking a right by the {{wp|River Thames}}, passing {{wp|20 Fenchurch Street|The Walkie-Talkie}} and the {{wp|City Hall, London (Southwark)|City Hall}}. Two boats can be seen floating on the river. Shortly after, the racers must take a U-bend to the left to cross [[Tower Bridge]], which has a [[Glide Ramp|glide ramp]] that is only usable on lap 2. A wide bend to the left around the green space of the [[Tower of London]] follows, with a [[Chain Chomp]] in the center. Players then drive back to The Walkie-Talkie before taking a right to access a path besides the River Thames. After driving below a bridge, the player takes one last left to reach the finish line, passing Big Ben. | |||
The course also appears as '''London Loop 3R''' (reversed), '''London Loop 3T''' (with ramps), and '''London Loop 3R/T''' (reversed with ramps). In all three variants, there is a glide ramp between the green space and the Tower Bridge, which now instead has a dash panel ramp. In the T variant, the Chain Chomp in the green space is gone. In the R/T variant, racers briefly drive over the River Thames via [[Kanaami Road]] and use an additional glide ramp when returning to the track. | |||
====Appearances==== | |||
For this course's tour appearances, see [[List of London Loop tour appearances in Mario Kart Tour#London Loop 3|List of London Loop tour appearances in ''Mario Kart Tour'' § London Loop 3]]. | |||
====Top-tier and middle-tier items==== | |||
{{MKT favored table|new|London Loop 3}} | |||
====Bonus challenges==== | |||
<div class="contentbox mw-collapsible mw-collapsed> | |||
{{MKT bonus challenge table|Combo Attack|London Loop 3T}} | |||
{{MKT bonus challenge table|Break Item Boxes|London Loop 3}} | |||
</div> | |||
==''Mario Kart 8 Deluxe''== | |||
[[File:MK8-Course-Tour LondonLoop.jpg|thumb|250px|London Loop in ''Mario Kart 8 Deluxe'']] | |||
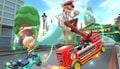
London Loop returns in ''[[Mario Kart 8 Deluxe]]'' as part of the third wave of the ''[[Mario Kart 8 Deluxe – Booster Course Pass|Booster Course Pass]]''. It is the first course of the [[Rock Cup]]. The course has received significant visual upgrades, and is now set in cloudy weather. The {{wp|London Eye}} now moves, unlike in ''Mario Kart Tour''. The various barrels and crates on the course have been removed. The minimap is rotated 90 degrees clockwise and features multiple paths that are unused in ''Mario Kart Tour'', such as one to the right of Leadenhall Market and one going beneath the Admiralty Arch. This makes London Loop the second ''Mario Kart Tour'' city course to include roads that were unused at the time of their appearance in the Booster Course Pass, after [[Tour Sydney Sprint|Sydney Sprint]] and alongside [[Tour Berlin Byways|Berlin Byways]]. Like Berlin Byways, the previously unused roads in this course were never used in ''Tour'' prior to new content for it concluding. | |||
The first lap is based on the first London Loop route. Racers begin on {{wp|Westminster Bridge}}, facing Big Ben. An [[arrow field]] immediately directs them to turn right and drive through {{wp|Charing Cross}}. Unlike in ''Mario Kart Tour'', racers can perform tricks off of the center of the roundabout. They can also drive the long way around the roundabout, though there is no benefit to doing so. Either way, players then drive around the front of {{wp|St Paul's Cathedral}} and come to {{wp|Leadenhall Market}}. They can still drive through it, but there is now also the option to drive on a straighter path to its right, which is unused in ''Tour''. From there, they drive through a right curve past a [[Chain Chomp]] chained outside the [[Tower of London]], across [[Tower Bridge]], and back to the starting line taking the route past {{wp|The Shard}}. | |||
The second lap is based on London Loop 2. As such, racers go straight ahead and enter {{wp|St James's Park}}. There is another Chain Chomp there, and an additional one chained near the left side of the gate. After leaving the park, an arrow field directs racers left through a long road, with exits with a ramp pointed toward the front door of the Bush House. Players then drive across {{wp|Waterloo Bridge}} before taking two right turns to reach the starting line again. | |||
The third and final lap is a combination of London Loop 2 again and London Loop 3R. Players once again drive through St James's Park. However, the Chain Chomp has broken loose and is now roaming around, occasionally crossing onto the road. The Chain Chomp outside the park's gate has also freed itself and gone through the {{wp|Admiralty Arch}} to circle the Charing Cross. Racers, too, drive under the Admiralty Arch and go straight through Charing Cross towards the {{wp|River Thames}} (where an unchained Chain Chomp is swimming, of no consequence to the player). Players drive along the Thames and under the Waterloo Bridge before taking the right turn near the Tower of London again, whose Chain Chomp has also broken loose. They drive over the Tower Bridge again (although there is no [[Glide Ramp]] like there is in ''Mario Kart Tour''), turn right to drive on the other side of the Thames, and then head for the finish line to end the race. | |||
In the first lap, the second path of Leadenhall Market is blocked off with red arrows, implying the player would drive there in a later lap. However, the player never visits that area in the race again, so the route, like in ''Mario Kart Tour'', remains unused, making it the only route in the Booster Course Pass with this distinction. (Note that the route only leads into a void.) | |||
During the beginning of this course's music, a second guitar plays a few notes, panned to the left; this guitar is absent in all subsequent loops of the song.<ref>YoshiMr. (December 9, 2022). [https://youtu.be/WZaNsUFBqUA How a Single Guitar (may have) Set a Mario Kart Milestone (I think)]. ''YouTube''. Retrieved December 9, 2022.</ref> | |||
Unlike some other courses using arrow fields in the Booster Course Pass, London Loop can be driven in reverse from the beginning without [[Lakitu]] picking up the player. However, this loads the third lap layout with the unchained Chain Chomps, meaning that if the player turns back around and resumes following the course normally, the Chain Chomps will rechain themselves, only to be unchained again once Lap 3 is triggered properly. | |||
London Loop is one of three ''Mario Kart Tour'' courses in the third wave overall, alongside {{classic|Tour|Berlin Byways}} and [[Merry Mountain]]. | |||
{{br}} | |||
==Profiles== | |||
===''Mario Kart 8 Deluxe''=== | |||
*'''Official Nintendo social media accounts:''' ''Take a tour of London Loop, coming in Wave 3 of the Mario Kart 8 Deluxe – Booster Course Pass. Every lap is a new route through the city, each with its own sights to see: the London Eye, Tower Bridge and more!''<ref>NintendoEurope (November 22, 2022). [https://twitter.com/NintendoEurope/status/1595009199221743617 ''Twitter'']. Retrieved November 29, 2022. ([https://web.archive.org/web/20221208201732/https://twitter.com/NintendoEurope/status/1595009199221743617 Archived] December 8, 2022, 20:17:32 UTC via Wayback Machine.)</ref><ref>MarioKartUK (November 22, 2022). [https://www.facebook.com/watch/?v=1662637324132349 ''Facebook'']. Retrieved December 8, 2022.</ref> | |||
*'''Nintendo Switch News app (US)''': | |||
**''This course first appeared in the Mario Kart™ Tour game.'' | |||
**''As you can guess from the name, it's modelled after the city of London in jolly ol' England. If you look around, you can see familiar buildings lining the course.'' | |||
**''The course will change depending on the lap and there are also different routes you can take. Explore around and choose wisely!'' | |||
*'''Nintendo Switch News app (UK)''': '''''Find a roundabout route to victory in London Loop!'''<br>We'd like to present to you a course released as part of the third wave, which is available now: London Loop.<br>Race through the streets of London and enjoy the mix of historic and modern architecture this charming city course, which debuted in the smart device game Mario Kart Tour, has to offer! How many landmarks can you spot? Thankfully you'll have plenty of opportunities to see the sights from different angles, as one of the highlights of the course is the fact that the route you'll take changes from lap to lap. If you're keen-eyed enough, you might even find some special paths to the top of the podium!'' | |||
*'''''Nintendo Magazine 2023 Summer''''': ''A city course inspired by London, U.K. Besides the famous palace and bridge, you can also see the characteristic double-decker bus.''<ref>[https://www.nintendo.co.jp/software/feature/magazine_2023summer/index_en.html?page=22 Nintendo Magazine 2023 Summer (Digital English edition)]. nintendo.co.jp. Retrieved July 15, 2023. ([https://web.archive.org/web/20230715104855/https://www.nintendo.co.jp/software/feature/magazine_2023summer/index_en.html?page=22&device=pc Archived] July 15, 2023, 10:48:55 UTC via Wayback Machine.)</ref> | |||
==Sponsors== | |||
*[[List of sponsors debuting in Mario Kart 8 and Mario Kart 8 Deluxe#Boomerang Bros. International Airlines|Boomerang Bros. International Airlines]] (posters) | |||
*[[List of sponsors debuting in Mario Kart 8 and Mario Kart 8 Deluxe#Chain Chomp Racing Chains|Chain Chomp Racing Chains]] (signs) | |||
*[[List of sponsors debuting in Mario Kart Wii#Coconut Cafe|Coconut Café]] (signs) | |||
*[[List of sponsors debuting in Mario Kart Wii#Fountain Cafe|Fountain Café]] (signs) | |||
*[[List of sponsors debuting in Mario Kart 8 and Mario Kart 8 Deluxe#Galaxy Air|Galaxy Air]] (signs) | |||
*[[Mario Kart TV]] (vans) (''Mario Kart 8 Deluxe'' only) | |||
*[[List of sponsors debuting in Mario Kart 8 and Mario Kart 8 Deluxe#Mario Work Gear|Mario Work Gear]] (buses) | |||
*[[List of sponsors debuting in Mario Kart 8 and Mario Kart 8 Deluxe#Mushroom Piston|Mushroom Piston]] (signs) | |||
*[[List of sponsors debuting in Mario Kart 8 and Mario Kart 8 Deluxe#Peach & Daisy Royal Patisserie|Peach & Daisy Royal Patisserie]] (buses) | |||
*[[List of sponsors debuting in Mario Kart 8 and Mario Kart 8 Deluxe#Princess Orange|Princess Orange]] (posters) | |||
*[[List of sponsors debuting in Mario Kart Tour#Princess Peach Jewels|Princess Peach Jewels]] (signs) | |||
*[[List of sponsors debuting in Mario Kart Tour#Race|Race]] (flags) | |||
*[[List of sponsors debuting in Mario Kart Tour#Racer's|Racer's]] (posters) | |||
*[[List of sponsors debuting in Mario Kart 8 and Mario Kart 8 Deluxe#Roy Smooth Sounds|Roy Smooth Sounds]] (posters) | |||
*[[List of sponsors debuting in Mario Kart: Double Dash!!#Sunshine Parts|Sunshine Parts]] (signs) | |||
*[[List of sponsors debuting in Mario Kart Tour#Toad Shopping Plaza|Toad Shopping Plaza]] (posters) | |||
*[[List of sponsors debuting in Mario Kart Wii#Tropical Bakery|Tropical Bakery]] (signs) | |||
==Gallery== | ==Gallery== | ||
=== | ===''Mario Kart Tour''=== | ||
<gallery> | <gallery> | ||
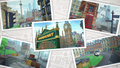
London Pictures.png|Pictures of the various London Loop courses | |||
London Pictures 2.png|Pictures of the various London Loop courses | |||
</gallery> | </gallery> | ||
=== | ====London Loop==== | ||
==== | =====Course icons===== | ||
<gallery> | <gallery> | ||
MKT London View.jpg|View of Big Ben | MKT Icon LondonLoop WaluigiBusDriver.png|The course icon of London Loop | ||
MKT Icon LondonLoopR Mario.png|The course icon of the R variant | |||
MKT Icon LondonLoopT ToadTourist.png|The course icon of the T variant | |||
MKT Icon LondonLoopRT DaisyHolidayCheer.png|The course icon of the R/T variant | |||
</gallery> | |||
=====Screenshots===== | |||
<gallery> | |||
MKT LondonLoop Starting Line.png|View of the finish line | |||
MKT London Loop Big Ben & Palace.jpg|View of {{wp|Big Ben}} & the {{wp|Palace of Westminster}} | |||
MKT London Loop Finish Line.jpg|View of the finish line | MKT London Loop Finish Line.jpg|View of the finish line | ||
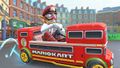
MKT London Loop Bus.jpg|View of a bus | MKT London Loop Bus.jpg|View of a bus | ||
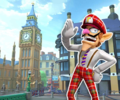
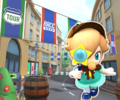
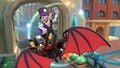
MKT Daisy Holiday Cheer London.jpg|Daisy (Holiday Cheer) tricking | MKT London Loop View.png|View of {{wp|Leadenhall Market}} | ||
MKT Daisy Holiday Cheer Ribbon Rider.jpg|Daisy (Holiday Cheer) in the [[ | MKT London Loop View 2.png|View of the interior of Leadenhall Market | ||
MKT Lakitu London Loop.jpg|Lakitu drifting | MKT London Loop View 3.png|View of {{wp|Trafalgar Square}} | ||
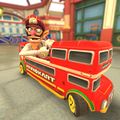
MKT Waluigi Bus Driver.jpg|Waluigi (Bus Driver) drifting | MKT London Loop View 4.png|View of [[Tower Bridge]] | ||
MKT Waluigi Bus Driver Double-Decker.jpg|Waluigi (Bus Driver) in the | MKT Daisy Holiday Cheer London.jpg|[[Princess Daisy|Daisy (Holiday Cheer)]] tricking in the [[Ribbon Rider]] | ||
MKT Peachette Swift Jack.jpg|Peachette in the [[Swift Jack]] | MKT Daisy Holiday Cheer Ribbon Rider.jpg|Daisy (Holiday Cheer) in the Ribbon Rider with [[Shy Guy]] and [[Yoshi]] behind | ||
MKT Lakitu London Loop.jpg|[[Lakitu]] and other racers drifting | |||
MKT Waluigi Bus Driver.jpg|[[Waluigi|Waluigi (Bus Driver)]] drifting in the [[Double-Decker]] | |||
MKT Waluigi Bus Driver Double-Decker.jpg|Waluigi (Bus Driver) in the Double-Decker | |||
MKT Peachette Swift Jack.jpg|[[Peachette]] in the [[Swift Jack]] | |||
MKT London Tour Thank You.jpg|"Thank you" message for the London Tour | MKT London Tour Thank You.jpg|"Thank you" message for the London Tour | ||
MKT Sports Coupe.jpg|[[Mario]] drifting in the [[Sports Coupe]] | |||
MKT 1st Anniversary Tour End.jpg|Mario (Musician), [[Princess Peach|Peach (Vacation)]], [[Baby Rosalina|Baby Rosalina (Detective)]], Waluigi (Bus Driver), and [[Shy Guy|Shy Guy (Pastry Chef)]] tricking on the course | |||
MKT City Racer Pipe 1 Drivers.jpg|Waluigi (Bus Driver), Pauline, Baby Peach (Cherub), and Mario (Racing) driving in London Loop T | |||
London View.png|View of the finish line area | |||
MKT London Loop Nelson's Column.png| | MKT London Loop Nelson's Column.png|Waluigi (Bus Driver) approaching {{wp|Nelson's Column}} at the start of a race in London Loop | ||
MKT London Loop bus station.png|On a curve after passing Nelson's Column | MKT London Loop bus station.png|On a curve after passing Nelson's Column | ||
MKT London Loop St Paul's Cathedral.png|In front of {{wp|St Paul's Cathedral}} | MKT London Loop St Paul's Cathedral.png|In front of {{wp|St Paul's Cathedral}} | ||
| Line 195: | Line 172: | ||
MKT London Loop Leadenhall Market.png|Inside Leadenhall Market | MKT London Loop Leadenhall Market.png|Inside Leadenhall Market | ||
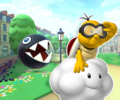
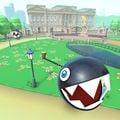
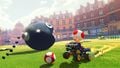
MKT London Loop Chain Chomp.png|Around the park with the [[Chain Chomp]] | MKT London Loop Chain Chomp.png|Around the park with the [[Chain Chomp]] | ||
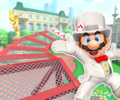
MKT London Loop Tower Bridge.png|Preparing to cross | MKT London Loop Tower Bridge.png|Preparing to cross [[Tower Bridge]] | ||
MKT London Loop London Eye.png|At the curve from where the {{wp|London Eye}} can be seen | MKT London Loop London Eye.png|At the curve from where the {{wp|London Eye}} can be seen | ||
MKT London Loop last curve.png|On the last curve before the [[Finish Line (object)|finish line]] | MKT London Loop last curve.png|On the last curve before the [[Finish Line (object)|finish line]] | ||
MKT London Loop Big Ben.png|Approaching the finish line with [[Big Ben]] in sight | MKT London Loop Big Ben.png|Approaching the finish line with [[Big Ben]] in sight | ||
MKT London Loop R crates.png| | MKT London Loop R crates.png|Lakitu on London Loop R, in a section with [[crate]]s | ||
MKT London Loop R Tower Bridge.png|Entering Tower Bridge | MKT London Loop R Tower Bridge.png|Entering Tower Bridge | ||
MKT London Loop R Leadenhall Market.png|Inside Leadenhall Market | MKT London Loop R Leadenhall Market.png|Inside Leadenhall Market | ||
| Line 207: | Line 184: | ||
MKT London Loop RT.png|[[Princess Peach|Peach]] on London Loop R/T | MKT London Loop RT.png|[[Princess Peach|Peach]] on London Loop R/T | ||
MKT London Loop RT bus.png|Driving on a bus | MKT London Loop RT bus.png|Driving on a bus | ||
MKT London Loop Ring Race.png|[[Shy Guy]] | MKT London Loop Ring Race.png|Shy Guy in London Loop's [[Ring Race]] bonus challenge | ||
</gallery> | |||
====London Loop 2==== | |||
=====Course icons===== | |||
<gallery> | |||
MKT Icon LondonLoop2 BabyRosalinaDetective.png|The course icon | |||
MKT Icon LondonLoop2R Lakitu.png|The course icon of the R variant | |||
MKT Icon LondonLoop2T MarioTuxedo.png|The course icon of the T variant | |||
MKT Icon LondonLoop2RT Rosalina.png|The course icon of the R/T variant | |||
</gallery> | |||
=====Screenshots===== | |||
<gallery> | |||
MKT London Loop 2 Scene.jpg|View of [[Chain Chomp]]s on a park in front of the {{wp|Buckingham Palace}} | |||
MKT London Loop 2 View.png|View of the {{wp|Bush House}} | |||
MKT London Loop 2 View 2.png|View of the {{wp|London Eye}} | |||
MKT London Loop 2 View 3.png|View of Big Ben | |||
MKT London Loop 2T Scene.jpg|View of London Loop 2T | |||
MKT Rosalina and Waluigi Bus Driver.jpg|[[Rosalina]] and [[Waluigi|Waluigi (Bus Driver)]] tricking near the finish line | |||
MKT Bullet Blaster.jpg|[[Baby Mario]] drifting in the [[Bullet Blaster]] | |||
MKT Peach Camera.jpg|[[Princess Peach|Peach]] cheering in the [[Royale]] | |||
MKT Baby Rosalina Tour Thanks.png|"Thank you" message for the end of the Baby Rosalina Tour | |||
MKT Paris & London Pipe.jpg|[[Baby Rosalina|Baby Rosalina (Detective)]], Peach (Vacation), [[Shy Guy|Shy Guy (Pastry Chef)]], [[Mario|Mario (Chef)]], and Waluigi (Bus Driver) tricking on the course | |||
</gallery> | |||
====London Loop 3==== | |||
=====Course icons===== | |||
<gallery> | |||
MKT Icon LondonLoop3 FireRosalina.png|The course icon | |||
MKT Icon LondonLoop3R DixieKong.png|The course icon of the R variant | |||
MKT Icon LondonLoop3T WaluigiVampire.png|The course icon of the T variant | |||
MKT Icon LondonLoop3RT RosalinaHalloween.png|The course icon of the R/T variant | |||
</gallery> | |||
=====Screenshots===== | |||
<gallery> | |||
MKT London Loop 3 View.png|View of the road by the {{wp|River Thames}} | |||
MKT London Loop 3 View 2.png|View of the Thames and the {{wp|Tower of London}} | |||
MKT London Loop 3 View 3.png|View of {{wp|20 Fenchurch Street|the Walkie-Talkie}} | |||
MKT London Loop 3 View 4.png|View of the {{wp|London Eye}} | |||
MKT Waluigi Vampire.jpg|[[Waluigi|Waluigi (Vampire)]] gliding on the course | |||
London Loop 3 Gliding.jpg|[[Rosalina|Rosalina (Halloween)]] gliding on the course with the [[Poison Apple Kart]] and the [[Wicked Wings]] | |||
</gallery> | |||
===''Mario Kart 8 Deluxe''=== | |||
<gallery> | |||
MK8D Tour London Loop Course Icon.png|The course icon | |||
MK8DLondonLoop1.jpg|View of a double-decker bus and the {{wp|London Eye}} | |||
MK8DLondonLoop2.jpg|[[Toad]], [[Toadette]], and [[Peach]] racing near Big Ben | |||
MK8DLondonLoop3.jpg|Various racers by the River Thames | |||
MK8DLondonLoop4.jpg|Toad driving past a [[Chain Chomp]] | |||
MK8DLondonLoop5.jpg|Toadette driving through Leadenhall Market | |||
MK8DLondonLoop6.jpg|View of Big Ben and the starting line | |||
MK8DLondonLoop7.jpg|View of a Chain Chomp | |||
MK8DLondonLoop8.jpg|View of Leadenhall Market | |||
</gallery> | </gallery> | ||
==Names in other languages== | ==Names in other languages== | ||
{{foreign names | {{foreign names | ||
|Jap=ロンドン アベニュー | |||
|Jap=ロンドン | |||
|JapR=Rondon Abenyū | |JapR=Rondon Abenyū | ||
|JapM=London Avenue | |JapM=London Avenue | ||
| | |ChiS=伦敦环线 | ||
| | |ChiSR=Lúndūn Huánxiàn | ||
|ChiSM=London Loop | |||
|ChiT=倫敦環線 | |||
|ChiTR=Lúndūn Huánxiàn | |||
|ChiTM=London Loop | |||
|Dut=Londen-Ronde | |||
|DutM=London Tour | |||
|Fre=Détour à Londres | |||
|FreM=London Detour | |||
|Ger=London-Tour | |Ger=London-Tour | ||
|GerM=London Tour | |GerM=London Tour | ||
|Ita=Giro di Londra | |||
|ItaM=London Loop/Tour | |||
|Kor=런던 루프 | |||
|KorR=Leondeon Lupeu | |||
|KorM=London Loop | |||
|PorA=Arrancada em Londres | |||
|PorAM=London Sprint | |||
|PorE=Ronda por Londres | |||
|PorEM=London Round | |||
|Rus=Лондонское турне | |||
|RusR=Londonskoye turne | |||
|RusM=London Tournée | |||
|Spa=Ronda por Londres | |Spa=Ronda por Londres | ||
|SpaM= | |SpaM=Round around London | ||
}} | }} | ||
==Trivia== | ==Trivia== | ||
* | *In the course icons and promotional pictures posted on social media by Nintendo for ''Mario Kart Tour'', [[Big Ben]] is depicted with extra details, such as windows and spires. These details are absent in both ''Mario Kart Tour''{{'}}s gameplay and ''Mario Kart 8 Deluxe''. | ||
*This course shares its name with a walk located in Outer London, the {{wp|London Outer Orbital Path}} (also known as the London LOOP). | |||
*This course is one of two ''Tour'' city courses whose postcard promotional art does not depict a character in a corresponding alternate costume. The other course is [[Madrid Drive]]. | |||
==References== | |||
<references/> | |||
{{MK race courses}} | |||
{{MKT}} | {{MKT}} | ||
{{ | {{MK8}} | ||
[[Category:Mario Kart Tour | [[Category:Cities]] | ||
[[Category:Classic courses]] | |||
[[Category:Mario Kart 8 Deluxe – Booster Course Pass race courses]] | |||
[[Category:Mario Kart Tour race courses]] | |||
[[it:Giro di Londra]] | [[it:Giro di Londra]] | ||
Revision as of 22:32, May 18, 2024
| London Loop | |||||||||||
|---|---|---|---|---|---|---|---|---|---|---|---|
| File:MKT London View.jpg View of Big Ben and the starting line | |||||||||||
| Information | |||||||||||
| Appears in | Mario Kart Tour (2019 (1), 2020 (2), 2021 (3)) Mario Kart 8 Deluxe (Booster Course Pass, Wave 3) (2022) | ||||||||||
| Cup(s) | Rock Cup | ||||||||||
| Tour(s) | |||||||||||
| Based on | London and Westminster, England | ||||||||||
| Online play | Available (Switch) | ||||||||||
| |||||||||||
| |||||||||||
| |||||||||||


London Loop is a race course in Mario Kart Tour. It is set in London, England, and makes its debut in the city’s namesake tour, the London Tour. London Loop has three routes, named London Loop, London Loop 2, and London Loop 3, each with its own R, T, and R/T variants. The second route made its debut in the Baby Rosalina Tour, due to Baby Rosalina's detective outfit, which is a reference to Sherlock Holmes, a fictional resident of London, while the third route debuted in the 2021 Halloween Tour. The course features various landmarks from the cities of London and Westminster, with the first route focusing on the main metropolitan areas, the second route focusing on the outskirts, and the third route focusing on the River Thames. The first and second routes have the racers go around London clockwise; however, the third route has them go around counterclockwise instead.
The music for this course bears similarities to that of Rock Rock Mountain, as well as being a reference to 1960s British rock music.
London Loop appears in the Mario Kart 8 Deluxe – Booster Course Pass as the first course of the Rock Cup.
Mario Kart Tour


London Loop
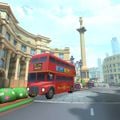
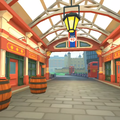
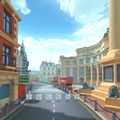
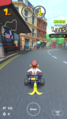
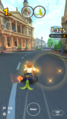
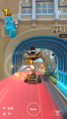
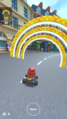
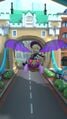
The course begins to the right of Big Ben, followed by a gradual right next to a double-decker bus. The road then weaves its way around Nelson's Column, then makes another gradual right through Charing Cross and a part of Trafalgar Square before making a sharp left at St Paul's Cathedral. The player then reaches Leadenhall Market, which they exit after making a single slight right. After another sharp right with a Chain Chomp in a green space in front of the Tower of London, the player crosses Tower Bridge, then takes another sharp right past City Hall and The Shard with the London Eye in the background. After a left sigmoid curve, the player returns to the finish line. This specific route was the only European city course route that was not brought back in the Metropolitan Tour.
The course also appears as London Loop R (reversed), London Loop T (with ramps), and London Loop R/T (reversed with ramps). In the T and R/T variants, there are several stationary double-decker buses on the track.
Appearances
For this course's tour appearances, see List of London Loop tour appearances in Mario Kart Tour § London Loop.
Top-tier and middle-tier items
Select "show" to reveal the drivers, karts, and gliders for which London Loop and its variants are always favored or favorite courses. For instances in which additional drivers, karts, and gliders temporarily had this course and its variants as favored or favorite courses, see List of London Loop tour appearances in Mario Kart Tour.
| Course | Three-item drivers | Bonus points ×2 karts | Combo bonus ×3 gliders | Two-item drivers | Bonus points ×1.5 karts | Combo bonus ×2 gliders |
|---|---|---|---|---|---|---|
Normal variant |
||||||
R variant |
||||||
T variant |
||||||
R/T variant |
||||||
| * indicates a favored course upgraded to a favorite course after reaching level 3. ** indicates a favored course upgraded to a favorite course after reaching level 6. *** indicates a favored course upgraded to a favorite course after reaching level 8 for High-End items. | ||||||
Bonus challenges
| Ring Race | |||||||
|---|---|---|---|---|---|---|---|
| Icon | Course variant | Chosen driver |
Chosen kart |
Chosen glider |
Grand Star scores | Tour appearances | Cup |

|
Regular | Shy Guy |
Pipe Frame |
Super Glider |
|
London Tour | Toad Cup |
|
2nd Anniversary Tour | Baby Luigi Cup | |||||
| Glider Challenge | |||||||
|---|---|---|---|---|---|---|---|
| Icon | Course variant | Chosen driver |
Chosen kart |
Chosen glider |
Grand Star distances | Tour appearances | Cup |

|
Regular | Luigi |
Pipe Frame |
Super Glider |
|
London Tour | Shy Guy Cup |
| 1st Anniversary Tour | Peach Cup | ||||||
| Do Jump Boosts | |||||||
|---|---|---|---|---|---|---|---|
| Icon | Course variant | Chosen driver |
Chosen kart |
Chosen glider |
Grand Star scores | Tour appearances | Cup |

|
Regular | Ludwig |
Pipe Frame |
Super Glider |
|
London Tour | Ludwig Cup |
| Vs. Mega Bowser | |||||||
|---|---|---|---|---|---|---|---|
| Icon | Course variant | Mega opponent information | Tour appearances | Cup | |||
| Driver | Kart | Glider | Items used | ||||

|
Regular | Bowser |
Pipe Buggy |
Super Glider |
Green Shells[1] Bowser's Shells[1] |
London Tour | Bowser Cup |
| Spring Tour | Larry Cup | ||||||
| Smash Small Dry Bones | |||||||
|---|---|---|---|---|---|---|---|
| Icon | Course variant | Chosen driver |
Chosen kart |
Chosen glider |
Grand Star scores | Tour appearances | Cup |

|
Regular | Peach |
Pipe Frame |
Super Glider |
|
1st Anniversary Tour | Daisy Cup |
| Spring Tour | Cat Peach Cup | ||||||
London Loop 2
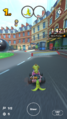
The course begins to the right of the Big Ben on Westminster Bridge. Players take a slight right to enter St James's Park in front of Buckingham Palace. Two Chain Chomps are located in the green space, one in the very center and one outside the palace. Racers drive down a long street shortly afterwards, driving past the British Museum, eventually leading to a ramp with The Shard visible in the far background. Racers take a right to Trafalgar Square before eventually driving across Waterloo Bridge, passing the London Eye. A U-bend to the right is taken, which leads racers back on to Westminster Bridge before arriving at the finish line.
The course also appears as London Loop 2R (reversed), London Loop 2T (with ramps), and London Loop 2R/T (reversed with ramps). In all three variants, there are several stationary double-decker buses on the track. In the R/T variant, both Chain Chomps are gone; racers skip the James's Park section entirely before reaching a glide ramp and then finishing the lap on Kanaami Road above the starting line.
Appearances
For this course's tour appearances, see List of London Loop tour appearances in Mario Kart Tour § London Loop 2.
Top-tier and middle-tier items
Select "show" to reveal the drivers, karts, and gliders for which London Loop 2 and its variants are always favored or favorite courses. For instances in which additional drivers, karts, and gliders temporarily had this course and its variants as favored or favorite courses, see List of London Loop 2 tour appearances in Mario Kart Tour.
| Course | Three-item drivers | Bonus points ×2 karts | Combo bonus ×3 gliders | Two-item drivers | Bonus points ×1.5 karts | Combo bonus ×2 gliders |
|---|---|---|---|---|---|---|
Normal variant |
||||||
R variant |
||||||
T variant |
||||||
R/T variant |
||||||
| * indicates a favored course upgraded to a favorite course after reaching level 3. ** indicates a favored course upgraded to a favorite course after reaching level 6. *** indicates a favored course upgraded to a favorite course after reaching level 8 for High-End items. | ||||||
Bonus challenges
| Ring Race | |||||||
|---|---|---|---|---|---|---|---|
| Icon | Course variant | Chosen driver |
Chosen kart |
Chosen glider |
Grand Star scores | Tour appearances | Cup |

|
Regular | Baby Rosalina |
Pipe Frame |
Super Glider |
|
Baby Rosalina Tour | Baby Rosalina Cup |
| Steer Clear of Obstacles | |||||||
|---|---|---|---|---|---|---|---|
| Icon | Course variant | Chosen driver |
Chosen kart |
Chosen glider |
Obstacles | Tour appearances | Cup |

|
Regular | Koopa Troopa |
Pipe Frame |
Super Glider |
Barrel Bomb  Chain Chomp (chained) |
Baby Rosalina Tour | Koopa Troopa Cup |
| 2nd Anniversary Tour | Ludwig Cup | ||||||
| Spring Tour | Wendy Cup | ||||||
| vs. Mega Hammer Bro | |||||||
|---|---|---|---|---|---|---|---|
| Icon | Course variant | Mega opponent information | Tour appearances | Cup | |||
| Driver | Kart | Glider | Items used | ||||

|
Regular | Hammer Bro |
Koopa Dasher |
TBD | Mushrooms[2] 150cc and higher only Hammers |
Baby Rosalina Tour | Rosalina Cup |
| Metropolitan Tour | Wario Cup | ||||||
| Combo Attack | |||||||
|---|---|---|---|---|---|---|---|
| Icon | Course variant | Chosen driver |
Chosen kart |
Chosen glider |
Highest combo counts | Tour appearances | Cup |

|
T | Waluigi |
Pipe Frame |
Super Glider |
|
Spring Tour | Dry Bones Cup |
London Loop 3
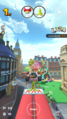
The course starts on the Westminster Bridge, though it faces away from Big Ben, the opposite direction of London Loop and London Loop 2. Racers take a left turn and travel past the London Eye before taking a right by the River Thames, passing The Walkie-Talkie and the City Hall. Two boats can be seen floating on the river. Shortly after, the racers must take a U-bend to the left to cross Tower Bridge, which has a glide ramp that is only usable on lap 2. A wide bend to the left around the green space of the Tower of London follows, with a Chain Chomp in the center. Players then drive back to The Walkie-Talkie before taking a right to access a path besides the River Thames. After driving below a bridge, the player takes one last left to reach the finish line, passing Big Ben.
The course also appears as London Loop 3R (reversed), London Loop 3T (with ramps), and London Loop 3R/T (reversed with ramps). In all three variants, there is a glide ramp between the green space and the Tower Bridge, which now instead has a dash panel ramp. In the T variant, the Chain Chomp in the green space is gone. In the R/T variant, racers briefly drive over the River Thames via Kanaami Road and use an additional glide ramp when returning to the track.
Appearances
For this course's tour appearances, see List of London Loop tour appearances in Mario Kart Tour § London Loop 3.
Top-tier and middle-tier items
Select "show" to reveal the drivers, karts, and gliders for which London Loop 3 and its variants are always favored or favorite courses. For instances in which additional drivers, karts, and gliders temporarily had this course and its variants as favored or favorite courses, see List of London Loop 3 tour appearances in Mario Kart Tour.
| Course | Three-item drivers | Bonus points ×2 karts | Combo bonus ×3 gliders | Two-item drivers | Bonus points ×1.5 karts | Combo bonus ×2 gliders |
|---|---|---|---|---|---|---|
Normal variant |
||||||
R variant |
||||||
T variant |
||||||
R/T variant |
||||||
| * indicates a favored course upgraded to a favorite course after reaching level 3. ** indicates a favored course upgraded to a favorite course after reaching level 6. *** indicates a favored course upgraded to a favorite course after reaching level 8 for High-End items. | ||||||
Bonus challenges
| Combo Attack | |||||||
|---|---|---|---|---|---|---|---|
| Icon | Course variant | Chosen driver |
Chosen kart |
Chosen glider |
Highest combo counts | Tour appearances | Cup |

|
T | Waluigi |
Pipe Frame |
Super Glider |
|
Metropolitan Tour | Peach Cup |
| Break Item Boxes | |||||||||
|---|---|---|---|---|---|---|---|---|---|
| Icon | Course variant | Chosen driver |
Chosen kart |
Chosen glider |
Item Box type found |
Number of item slots | Grand Star scores | Tour appearances | Cup |

|
Regular | Luigi |
Pipe Frame |
Super Glider |
Mega Mushroom Coin Super Horn |
2 |
|
Halloween Tour (2021) | Toadette Cup |
| 1 |
|
Anniversary Tour (2023) | Boomerang Bro Cup | ||||||
Mario Kart 8 Deluxe

London Loop returns in Mario Kart 8 Deluxe as part of the third wave of the Booster Course Pass. It is the first course of the Rock Cup. The course has received significant visual upgrades, and is now set in cloudy weather. The London Eye now moves, unlike in Mario Kart Tour. The various barrels and crates on the course have been removed. The minimap is rotated 90 degrees clockwise and features multiple paths that are unused in Mario Kart Tour, such as one to the right of Leadenhall Market and one going beneath the Admiralty Arch. This makes London Loop the second Mario Kart Tour city course to include roads that were unused at the time of their appearance in the Booster Course Pass, after Sydney Sprint and alongside Berlin Byways. Like Berlin Byways, the previously unused roads in this course were never used in Tour prior to new content for it concluding.
The first lap is based on the first London Loop route. Racers begin on Westminster Bridge, facing Big Ben. An arrow field immediately directs them to turn right and drive through Charing Cross. Unlike in Mario Kart Tour, racers can perform tricks off of the center of the roundabout. They can also drive the long way around the roundabout, though there is no benefit to doing so. Either way, players then drive around the front of St Paul's Cathedral and come to Leadenhall Market. They can still drive through it, but there is now also the option to drive on a straighter path to its right, which is unused in Tour. From there, they drive through a right curve past a Chain Chomp chained outside the Tower of London, across Tower Bridge, and back to the starting line taking the route past The Shard.
The second lap is based on London Loop 2. As such, racers go straight ahead and enter St James's Park. There is another Chain Chomp there, and an additional one chained near the left side of the gate. After leaving the park, an arrow field directs racers left through a long road, with exits with a ramp pointed toward the front door of the Bush House. Players then drive across Waterloo Bridge before taking two right turns to reach the starting line again.
The third and final lap is a combination of London Loop 2 again and London Loop 3R. Players once again drive through St James's Park. However, the Chain Chomp has broken loose and is now roaming around, occasionally crossing onto the road. The Chain Chomp outside the park's gate has also freed itself and gone through the Admiralty Arch to circle the Charing Cross. Racers, too, drive under the Admiralty Arch and go straight through Charing Cross towards the River Thames (where an unchained Chain Chomp is swimming, of no consequence to the player). Players drive along the Thames and under the Waterloo Bridge before taking the right turn near the Tower of London again, whose Chain Chomp has also broken loose. They drive over the Tower Bridge again (although there is no Glide Ramp like there is in Mario Kart Tour), turn right to drive on the other side of the Thames, and then head for the finish line to end the race.
In the first lap, the second path of Leadenhall Market is blocked off with red arrows, implying the player would drive there in a later lap. However, the player never visits that area in the race again, so the route, like in Mario Kart Tour, remains unused, making it the only route in the Booster Course Pass with this distinction. (Note that the route only leads into a void.)
During the beginning of this course's music, a second guitar plays a few notes, panned to the left; this guitar is absent in all subsequent loops of the song.[3]
Unlike some other courses using arrow fields in the Booster Course Pass, London Loop can be driven in reverse from the beginning without Lakitu picking up the player. However, this loads the third lap layout with the unchained Chain Chomps, meaning that if the player turns back around and resumes following the course normally, the Chain Chomps will rechain themselves, only to be unchained again once Lap 3 is triggered properly.
London Loop is one of three Mario Kart Tour courses in the third wave overall, alongside Tour Berlin Byways and Merry Mountain.
Profiles
Mario Kart 8 Deluxe
- Official Nintendo social media accounts: Take a tour of London Loop, coming in Wave 3 of the Mario Kart 8 Deluxe – Booster Course Pass. Every lap is a new route through the city, each with its own sights to see: the London Eye, Tower Bridge and more![4][5]
- Nintendo Switch News app (US):
- This course first appeared in the Mario Kart™ Tour game.
- As you can guess from the name, it's modelled after the city of London in jolly ol' England. If you look around, you can see familiar buildings lining the course.
- The course will change depending on the lap and there are also different routes you can take. Explore around and choose wisely!
- Nintendo Switch News app (UK): Find a roundabout route to victory in London Loop!
We'd like to present to you a course released as part of the third wave, which is available now: London Loop.
Race through the streets of London and enjoy the mix of historic and modern architecture this charming city course, which debuted in the smart device game Mario Kart Tour, has to offer! How many landmarks can you spot? Thankfully you'll have plenty of opportunities to see the sights from different angles, as one of the highlights of the course is the fact that the route you'll take changes from lap to lap. If you're keen-eyed enough, you might even find some special paths to the top of the podium! - Nintendo Magazine 2023 Summer: A city course inspired by London, U.K. Besides the famous palace and bridge, you can also see the characteristic double-decker bus.[6]
Sponsors
- Boomerang Bros. International Airlines (posters)
- Chain Chomp Racing Chains (signs)
- Coconut Café (signs)
- Fountain Café (signs)
- Galaxy Air (signs)
- Mario Kart TV (vans) (Mario Kart 8 Deluxe only)
- Mario Work Gear (buses)
- Mushroom Piston (signs)
- Peach & Daisy Royal Patisserie (buses)
- Princess Orange (posters)
- Princess Peach Jewels (signs)
- Race (flags)
- Racer's (posters)
- Roy Smooth Sounds (posters)
- Sunshine Parts (signs)
- Toad Shopping Plaza (posters)
- Tropical Bakery (signs)
Gallery
Mario Kart Tour
Pictures of the various London Loop courses
Pictures of the various London Loop courses


London Loop
Course icons
The course icon of London Loop
The course icon of the R variant
The course icon of the T variant
The course icon of the R/T variant
Screenshots
View of the finish line
View of Big Ben & the Palace of Westminster
View of the finish line
View of a bus

View of Leadenhall Market
View of the interior of Leadenhall Market
View of Trafalgar Square
View of Tower Bridge
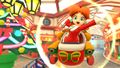
Daisy (Holiday Cheer) tricking in the Ribbon Rider
Lakitu and other racers drifting
Waluigi (Bus Driver) drifting in the Double-Decker
Waluigi (Bus Driver) in the Double-Decker
Peachette in the Swift Jack

"Thank you" message for the London Tour
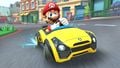
Mario drifting in the Sports Coupe
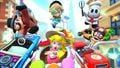
Mario (Musician), Peach (Vacation), Baby Rosalina (Detective), Waluigi (Bus Driver), and Shy Guy (Pastry Chef) tricking on the course
Waluigi (Bus Driver), Pauline, Baby Peach (Cherub), and Mario (Racing) driving in London Loop T

View of the finish line area
Waluigi (Bus Driver) approaching Nelson's Column at the start of a race in London Loop
On a curve after passing Nelson's Column
In front of St Paul's Cathedral
Approaching a row of Item Boxes at the entrance in Leadenhall Market
Inside Leadenhall Market
Around the park with the Chain Chomp
Preparing to cross Tower Bridge
At the curve from where the London Eye can be seen
On the last curve before the finish line
Approaching the finish line with Big Ben in sight
Lakitu on London Loop R, in a section with crates
Entering Tower Bridge
Inside Leadenhall Market
Diddy Kong on London Loop T, driving on a large ramp near Nelson's Column
Driving past some buses on Tower Bridge in the first lap of a race
Driving on top of the same buses in the second lap, when the bridge is turned into a ramp
Peach on London Loop R/T
Driving on a bus
Shy Guy in London Loop's Ring Race bonus challenge


London Loop 2
Course icons
The course icon
The course icon of the R variant
The course icon of the T variant
The course icon of the R/T variant
Screenshots
View of Chain Chomps on a park in front of the Buckingham Palace
View of the Bush House
View of the London Eye
View of Big Ben
View of London Loop 2T
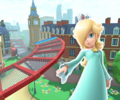
Rosalina and Waluigi (Bus Driver) tricking near the finish line
Baby Mario drifting in the Bullet Blaster

"Thank you" message for the end of the Baby Rosalina Tour
Baby Rosalina (Detective), Peach (Vacation), Shy Guy (Pastry Chef), Mario (Chef), and Waluigi (Bus Driver) tricking on the course


London Loop 3
Course icons
The course icon
The course icon of the R variant
The course icon of the T variant
The course icon of the R/T variant
Screenshots
View of the road by the River Thames
View of the Thames and the Tower of London
View of the Walkie-Talkie
View of the London Eye
Waluigi (Vampire) gliding on the course
Rosalina (Halloween) gliding on the course with the Poison Apple Kart and the Wicked Wings


Mario Kart 8 Deluxe

The course icon

View of a double-decker bus and the London Eye
Various racers by the River Thames
Toad driving past a Chain Chomp
Toadette driving through Leadenhall Market

View of Big Ben and the starting line
View of a Chain Chomp
View of Leadenhall Market


Names in other languages
| Language | Name | Meaning | Notes |
|---|---|---|---|
| Japanese | ロンドン アベニュー[?] Rondon Abenyū |
London Avenue | |
| Chinese (simplified) | 伦敦环线[?] Lúndūn Huánxiàn |
London Loop | |
| Chinese (traditional) | 倫敦環線[?] Lúndūn Huánxiàn |
London Loop | |
| Dutch | Londen-Ronde[?] | London Tour | |
| French | Détour à Londres[?] | London Detour | |
| German | London-Tour[?] | London Tour | |
| Italian | Giro di Londra[?] | London Loop/Tour | |
| Korean | 런던 루프[?] Leondeon Lupeu |
London Loop | |
| Portuguese (NOA) | Arrancada em Londres[?] | London Sprint | |
| Portuguese (NOE) | Ronda por Londres[?] | London Round | |
| Russian | Лондонское турне[?] Londonskoye turne |
London Tournée | |
| Spanish | Ronda por Londres[?] | Round around London |
Trivia
- In the course icons and promotional pictures posted on social media by Nintendo for Mario Kart Tour, Big Ben is depicted with extra details, such as windows and spires. These details are absent in both Mario Kart Tour's gameplay and Mario Kart 8 Deluxe.
- This course shares its name with a walk located in Outer London, the London Outer Orbital Path (also known as the London LOOP).
- This course is one of two Tour city courses whose postcard promotional art does not depict a character in a corresponding alternate costume. The other course is Madrid Drive.
References
- ^ a b TheMadWeazel (December 10, 2019). London Tour “Bowser Cup” - Mario Kart Tour. YouTube. Retrieved December 21, 2020.
- ^ Amb3r Barw1ck (March 25, 2020). Baby Rosalina (Detective) beats Mega Hammer Bro (Last Baby Rosalina Tour Video). YouTube. Retrieved December 21, 2020.
- ^ YoshiMr. (December 9, 2022). How a Single Guitar (may have) Set a Mario Kart Milestone (I think). YouTube. Retrieved December 9, 2022.
- ^ NintendoEurope (November 22, 2022). Twitter. Retrieved November 29, 2022. (Archived December 8, 2022, 20:17:32 UTC via Wayback Machine.)
- ^ MarioKartUK (November 22, 2022). Facebook. Retrieved December 8, 2022.
- ^ Nintendo Magazine 2023 Summer (Digital English edition). nintendo.co.jp. Retrieved July 15, 2023. (Archived July 15, 2023, 10:48:55 UTC via Wayback Machine.)