Mario Kart Arcade GP 2: Difference between revisions
m (Text replacement - ":Crossover Games" to ":Crossover games") |
mNo edit summary |
||
| (41 intermediate revisions by 22 users not shown) | |||
| Line 1: | Line 1: | ||
{{italic title}} | {{italic title}} | ||
{{infobox | {{game infobox | ||
|image=[[File: | |image=[[File:MKAG2.svg|270px]] | ||
|developer=[[Bandai Namco Entertainment|Bandai Namco | |developer=[[Bandai Namco Entertainment|Bandai Namco Amusement]] | ||
|publisher=Bandai Namco | |publisher=Bandai Namco Amusement<ref>[https://game.watch.impress.co.jp/docs/20070216/aou_bn.htm "「AOU2007 アミューズメント・エキスポ」ブースレポート ~バンダイナムコゲームス編~"]</ref> | ||
| | |release={{release|Japan|March 14, 2007|Australia|July 10, 2007|Europe|July 10, 2007<ref>https://www.imdb.com/title/tt3410220/releaseinfo?ref_=tt_ql_dt_2</ref>|USA|March 12, 2008}} | ||
|genre=[[Genre#Racing|Racing]] | |genre=[[Genre#Racing|Racing]] | ||
|modes=Single-player, Multiplayer (VS), Time Trial | |modes=Single-player, Multiplayer (VS), Time Trial | ||
|cabinet=Sit down | |cabinet=Sit down | ||
| | |arcade_system=[[Triforce]] | ||
|monitor=29" CRT | |monitor=29" CRT | ||
|input={{input|arcade=2}} | |input={{input|arcade=2}} | ||
}} | }} | ||
'''''Mario Kart Arcade GP 2''''' is the second game in the [[Mario Kart (series)|''Mario Kart Arcade GP'' series]] and the | '''''Mario Kart Arcade GP 2''''' is the second game in the [[Mario Kart (series)|''Mario Kart Arcade GP'' series]] and the seventh in the ''Mario Kart'' series overall. It is a follow-up to ''[[Mario Kart Arcade GP]]'', and was later followed by ''[[Mario Kart Arcade GP DX]]''. The game has custom karts for characters, similar to ''[[Mario Kart: Double Dash!!]]'' and ''[[Mario Kart DS]]''. It contains virtually all the content of the original, but greatly expands it with the addition of several new courses, items and racers. Like the predecessor, ''Pac-Man'' characters appear as playable in this game. The game also introduces [[Mametchi]] as a playable character. In-game, it appears to be broadcast live and has color-commentary of the player by a narrator, whose language depends on the region of the game. | ||
==How To Play== | ==How To Play== | ||
First, players can adjust their seat within the time limit by moving a lever near their feet and sliding to any position on the arcade machine. After that happens, players can choose a character to play as. Then, players can take a picture of themselves within the time limit; if the player does not take the picture, a countdown starts to force the player to take it. On some instances, the camera cannot be used. The picture of the current character is instead used. | First, players can adjust their seat within the time limit by moving a lever near their feet and sliding to any position on the arcade machine. After that happens, players can choose a character to play as. Then, players can take a picture of themselves using the camera lens within the time limit; if the player does not take the picture, a countdown starts to force the player to take it. On some instances, the camera cannot be used. The picture of the current character is instead used. | ||
When the race starts, the players' object is to finish in 1st place. If they get a lower place, they must retry to unlock the course by giving the game certain money or some tokens. If players get 1st place, they can continue if they pay the game another token or dollar(s). If not, the game is over. | When the race starts, the players' object is to finish in 1st place. If they get a lower place, they must retry to unlock the course by giving the game certain money or some tokens. If players get 1st place, they can continue if they pay the game another token or dollar(s). If not, the game is over. | ||
| Line 51: | Line 49: | ||
==Modes== | ==Modes== | ||
===Grand Prix=== | ===Grand Prix=== | ||
In Grand Prix, the player races against five computer drivers for winning the trophies in every race. The goal of each race is to finish in first place within the time limit. There are three engine levels available: 50cc, 100cc, and 150cc, and as with the previous ''Mario Kart'' installments, is linear with the difficulty | In Grand Prix, the player races against five computer drivers for winning the trophies in every race. The goal of each race is to finish in first place within the time limit (if the player is in first place and then times out rather than finishing, the round will not count as completed). There are three engine levels available: 50cc, 100cc, and 150cc, and as with the previous ''Mario Kart'' installments, is linear with the difficulty - 50cc being the slowest (Easy), 100cc being the standard (Normal) and 150cc being the fastest (Master). There are 4 difficulty levels, and each one has two stages. Each cup has 2 tracks, separated into 4 rounds. The first 2 rounds are the tracks in normal conditions, and the last 2 rounds the same tracks in different conditions (e.g. DK Jungle changes to rain). After having completed each round, the player receives a challenge, similar to the [[Mario Kart DS#Mission Mode|Mission Mode]] that appears in ''[[Mario Kart DS]]''. Unlike [[Mario Kart Arcade GP|the previous game]], clearing the challenge is not necessary to complete a cup. Also, when the player is using a Mario Card, the player receives [[Mario Coin]]s depending on their performance, up to a maximum of 15. Extra mode makes a return, only under the name of Special Cup (Reverse mode). In initial gameplay, a player can select the next round only after winning the first round. When the players completes all 4 rounds, they can play a "challenge game" stage. | ||
===Time | ===Time Attack=== | ||
In Time | In Time Attack mode, the user tries to get the fastest time on the tracks. To select Time Attack, the player must hold VS Cancel while selecting a class (50cc is not available in Time Attack). The player starts with 3 Mushrooms in Time Attack, and the number of coins on track is reduced to ten during 150cc Time Attack (compared to 25 in 100cc Time Attack). | ||
A difference in the HUD between this game and [[Mario Kart Arcade GP|the first game]] is that the remaining time is moved to the top-right and the total time is made larger and moved all the way to the top-left. There is no commentary during Time Attack games. | |||
===VS=== | ===VS=== | ||
After the players insert coins, the machine starts a search for VS races. If players are found, the game starts a VS Match. Like the previous game, up to four players can play together. In VS, the players first select an engine class, select a character, takes a picture (if necessary), then votes for a course. After, each player will be given 3 random items. Unlike the previous game, in multiplayer mode players in the minimap are given colors depending on their player number: | After the players insert coins, the machine starts a search for VS races. If players are found, the game starts a VS Match. Like the previous game, up to four players can play together. In VS, the players first select an engine class, select a character, takes a picture (if necessary), then votes for a course. After, each player will be given 3 random items. Unlike the previous game, in multiplayer mode players in the minimap are given colors depending on their player number: Player 1 is red; Player 2 is orange; Player 3 is green; Player 4 is blue; and CPUs are dark blue. If fewer than four players gather for a race then CPU drivers are added to make up four racers. | ||
During the race, the bottom-left screen displays the player number (unlike the first game, which did not do so), and there is no speedometer in the bottom-right, just showing the coin count (just like the first game did). Also, the commentator says the player number before the character's name except for CPU-controlled karts. | |||
If | When the race is over, players can choose if they want to continue with the same opponents or not. If two or more players decide to continue, the selection process restarts from the very beginning (players select a class first unlike in single player where the class and mode is not re-selected). If only one player decides to continue, it will change to a Grand Prix/Time Attack game for that player (this time only where the player selects the class and mode, before character select). | ||
==Mario Coins and Coins== | ==Mario Coins and Coins== | ||
[[File:MKAGP2 MarioCoin.jpg|thumb| The Mario Coin in ''Mario Kart Arcade GP 2'']] | [[File:MKAGP2 MarioCoin.jpg|thumb|The Mario Coin in ''Mario Kart Arcade GP 2'']] | ||
[[Mario Coin]]s are coins that the player can pick up in ''Mario Kart Arcade GP 2''. If the player gains enough Mario Coins and regular [[Coin]]s, they can unlock prizes to save on their Mario Card (e.g. new karts, special items). | [[Mario Coin]]s are coins that the player can pick up in ''Mario Kart Arcade GP 2''. If the player gains enough Mario Coins and regular [[Coin]]s, they can unlock prizes to save on their Mario Card (e.g. new karts, special items). Upon collecting 4000 Mario Coins, players will unlock the ability to change to a first-person perspective akin to that of ''[[Mario Kart 7]]''. This is done by pressing the VS Cancel button during a race. | ||
{{br}} | {{br}} | ||
==Item Boxes== | ==Item Boxes== | ||
[[File:ToadItemBoxes.png|150px|thumb|left|The new, multi-colored, hexagonal item boxes.]] | [[File:ToadItemBoxes.png|150px|thumb|left|The new, multi-colored, hexagonal item boxes.]] | ||
''Mario Kart Arcade GP 2'' | ''Mario Kart Arcade GP 2'' does not feature the normal cube item boxes seen in previous games; it comes with multi-colored, hexagonal item boxes. They have a white question mark while [[Fake Item Box|Jack-in-the-boxes]] (fake Item Boxes) have a white, upside-down question mark. When taken, they instantly regenerate, unlike the other ''Mario Kart'' games, in which they take a while. | ||
===Basic Items=== | ===Basic Items=== | ||
| Line 132: | Line 108: | ||
*[[Fake Item Box|Jack-in-the-box]] | *[[Fake Item Box|Jack-in-the-box]] | ||
*[[Jump Seal]] | *[[Jump Seal]] | ||
*[[ | *[[Mask]] | ||
*[[Meat]] | *[[Meat]] | ||
*[[Monster's Hammer]] | *[[Monster's Hammer]] | ||
*[[Monster Pill]] | |||
*[[Mouse Cracker]] | *[[Mouse Cracker]] | ||
*[[Mustache Pen]] | *[[Mustache Pen]] | ||
| Line 143: | Line 120: | ||
*[[Pump]] | *[[Pump]] | ||
*[[Quack Hammer]] | *[[Quack Hammer]] | ||
| | |||
*[[Rabbit Ear]] | *[[Rabbit Ear]] | ||
*[[Rain Cloud]] | *[[Rain Cloud]] | ||
*[[Reflect Shield]] | *[[Reflect Shield]] | ||
| Line 160: | Line 137: | ||
*[[Thunder Stick]] | *[[Thunder Stick]] | ||
*[[Time Bomb (item)|Time Bomb]] | *[[Time Bomb (item)|Time Bomb]] | ||
*[[ | *[[Tornado]] | ||
*[[Tox-Banana Shot]] | *[[Tox-Banana Shot]] | ||
*[[Wheel Virus]] | *[[Wheel Virus]] | ||
| Line 166: | Line 143: | ||
==Characters== | ==Characters== | ||
[[File:MKAGP2CharSelect.png|thumb|The character select screen]] | [[File:MKAGP2CharSelect.png|thumb|300px|The character select screen]] | ||
All playable characters from ''Mario Kart Arcade GP'' return along with two new characters, [[Waluigi]] and a {{wp|Tamagotchi}} named [[Mametchi]]. They all have two karts available: a standard go-kart and a personal kart that increases speed, but reduces acceleration. | All playable characters from ''Mario Kart Arcade GP'' return along with two new characters, [[Waluigi]] and a {{wp|Tamagotchi}} named [[Mametchi]]. They all have two karts available: a standard go-kart and a personal kart that increases speed, but reduces acceleration. | ||
| Line 176: | Line 153: | ||
!Standard Kart | !Standard Kart | ||
|- | |- | ||
| align="center" |[[File:IconMarioMKAGP2.png|link=Mario|120px]] | |align="center"|[[File:IconMarioMKAGP2.png|link=Mario|120px]][[File:NameMarioMKAGP2.png|link=Mario|120px]] | ||
|[[File:KartSpecMarioMKAGP2.png|289px]] | |[[File:KartSpecMarioMKAGP2.png|289px]] | ||
|[[File:KartStandMarioMKAGP2.png|289px]] | |[[File:KartStandMarioMKAGP2.png|289px]] | ||
|- | |- | ||
| align="center" |[[File:IconLuigiMKAGP2.png|link=Luigi|120px]] | |align="center"|[[File:IconLuigiMKAGP2.png|link=Luigi|120px]][[File:NameLuigiMKAGP2.png|link=Luigi|120px]] | ||
|[[File:KartSpecLuigiMKAGP2.png|289px]] | |[[File:KartSpecLuigiMKAGP2.png|289px]] | ||
|[[File:KartStandLuigiMKAGP2.png|289px]] | |[[File:KartStandLuigiMKAGP2.png|289px]] | ||
|- | |- | ||
| align="center" |[[File:IconPacManMKAGP2.png|link=Pac-Man|120px]] | |align="center"|[[File:IconPacManMKAGP2.png|link=Pac-Man|120px]][[File:NamePacManMKAGP2.png|link=Pac-Man|120px]] | ||
|[[File:KartSpecPacManMKAGP2.png|289px]] | |[[File:KartSpecPacManMKAGP2.png|289px]] | ||
|[[File:KartStandPacManMKAGP2.png|289px]] | |[[File:KartStandPacManMKAGP2.png|289px]] | ||
|- | |- | ||
| align="center" |[[File:IconWaluigiMKAGP2.png|link=Waluigi|120px]] | |align="center"|[[File:IconWaluigiMKAGP2.png|link=Waluigi|120px]][[File:NameWaluigiMKAGP2.png|link=Waluigi|120px]] | ||
|[[File:KartSpecWaluigiMKAGP2.png|289px]] | |[[File:KartSpecWaluigiMKAGP2.png|289px]] | ||
|[[File:KartStandWaluigiMKAGP2.png|289px]] | |[[File:KartStandWaluigiMKAGP2.png|289px]] | ||
| Line 201: | Line 178: | ||
!Standard Kart | !Standard Kart | ||
|- | |- | ||
| align="center" |[[File:IconPeachMKAGP2.png|link=Princess Peach|center|120px]] | |align="center"|[[File:IconPeachMKAGP2.png|link=Princess Peach|center|120px]][[File:NamePeachMKAGP2.png|link=Princess Peach|120px]] | ||
|[[File:KartSpecPeachMKAGP2.png|289px]] | |[[File:KartSpecPeachMKAGP2.png|289px]] | ||
|[[File:KartStandPeachMKAGP2.png|289px]] | |[[File:KartStandPeachMKAGP2.png|289px]] | ||
|- | |- | ||
| align="center" |[[File:IconYoshiMKAGP2.png|link=Yoshi|center|120px]] | |align="center"|[[File:IconYoshiMKAGP2.png|link=Yoshi|center|120px]][[File:NameYoshiMKAGP2.png|link=Yoshi|120px]] | ||
|[[File:KartSpecYoshiMKAGP2.png|289px]] | |[[File:KartSpecYoshiMKAGP2.png|289px]] | ||
|[[File:KartStandYoshiMKAGP2.png|289px]] | |[[File:KartStandYoshiMKAGP2.png|289px]] | ||
|- | |- | ||
| align="center" |[[File:IconBlinkyMKAGP2.png|link=Blinky|center|120px]] | |align="center"|[[File:IconBlinkyMKAGP2.png|link=Blinky|center|120px]][[File:NameBlinkyMKAGP2.png|link=Blinky|120px]] | ||
|[[File:KartSpecBlinkyMKAGP2.png|289px]] | |[[File:KartSpecBlinkyMKAGP2.png|289px]] | ||
|[[File:KartStandBlinkyMKAGP2.png|289px]] | |[[File:KartStandBlinkyMKAGP2.png|289px]] | ||
| Line 222: | Line 199: | ||
!Standard Kart | !Standard Kart | ||
|- | |- | ||
| align="center" |[[File:IconMametchiMKAGP2.png|link=Mametchi|center|120px]] | |align="center"|[[File:IconMametchiMKAGP2.png|link=Mametchi|center|120px]][[File:NameMametchiMKAGP2.png|link=Mametchi|120px]] | ||
|[[File:KartSpecMametchiMKAGP2.png|289px]] | |[[File:KartSpecMametchiMKAGP2.png|289px]] | ||
|[[File:KartStandMametchiMKAGP2.png|289px]] | |[[File:KartStandMametchiMKAGP2.png|289px]] | ||
|- | |- | ||
| align="center" |[[File:IconMrsPacManMKAGP2.png|link=Ms. Pac-Man|center|120px]] | |align="center"|[[File:IconMrsPacManMKAGP2.png|link=Ms. Pac-Man|center|120px]][[File:NameMsPacManMKAGP2.png|link=Ms. Pac-Man|120px]] | ||
|[[File:KartSpecMsPacManMKAGP2.png|289px]] | |[[File:KartSpecMsPacManMKAGP2.png|289px]] | ||
|[[File:KartStandMsPacManMKAGP2.png|289px]] | |[[File:KartStandMsPacManMKAGP2.png|289px]] | ||
|- | |- | ||
| align="center" |[[File:IconToadMKAGP2.png|link=Toad|center|120px]] | |align="center"|[[File:IconToadMKAGP2.png|link=Toad|center|120px]][[File:NameToadMKAGP2.png|link=Toad|120px]] | ||
|[[File:KartSpecToadMKAGP2.png|289px]] | |[[File:KartSpecToadMKAGP2.png|289px]] | ||
|[[File:KartStandToadMKAGP2.png|289px]] | |[[File:KartStandToadMKAGP2.png|289px]] | ||
| Line 243: | Line 220: | ||
!Standard Kart | !Standard Kart | ||
|- | |- | ||
| align="center" |[[File:IconWarioMKAGP2.png|link=Wario|center|120px]] | |align="center"|[[File:IconWarioMKAGP2.png|link=Wario|center|120px]][[File:NameWarioMKAGP2.png|link=Wario|120px]] | ||
|[[File:KartSpecWarioMKAGP2.png|289px]] | |[[File:KartSpecWarioMKAGP2.png|289px]] | ||
|[[File:KartStandWarioMKAGP2.png|289px]] | |[[File:KartStandWarioMKAGP2.png|289px]] | ||
|- | |- | ||
| align="center" |[[File:IconDonkeyKongMKAGP2.png|link=Donkey Kong|center|120px]] | |align="center"|[[File:IconDonkeyKongMKAGP2.png|link=Donkey Kong|center|120px]][[File:NameDonkeyKongMKAGP2.png|link=Donkey Kong|120px]] | ||
|[[File:KartSpecDonkeyKongMKAGP2.png|289px]] | |[[File:KartSpecDonkeyKongMKAGP2.png|289px]] | ||
|[[File:KartStandDonkeyKongMKAGP2.png|289px]] | |[[File:KartStandDonkeyKongMKAGP2.png|289px]] | ||
|- | |- | ||
| align="center" |[[File:IconBowserMKAGP2.png|link=Bowser|center|120px]] | |align="center"|[[File:IconBowserMKAGP2.png|link=Bowser|center|120px]][[File:NameBowserMKAGP2.png|link=Bowser|120px]] | ||
|[[File:KartSpecBowserMKAGP2.png|289px]] | |[[File:KartSpecBowserMKAGP2.png|289px]] | ||
|[[File:KartStandBowserMKAGP2.png|289px]] | |[[File:KartStandBowserMKAGP2.png|289px]] | ||
| Line 258: | Line 235: | ||
*Additionally, the Rainbow Cup challenge game features players trying to reach the finish line before a nonplayable [[Robo Mario]]. | *Additionally, the Rainbow Cup challenge game features players trying to reach the finish line before a nonplayable [[Robo Mario]]. | ||
===Cameo | ===Cameo appearances=== | ||
Although these characters are not playable in ''Mario Kart Arcade GP 2'', they all make small cameos somewhere in the game, either from a sponsor or seen in a course. | Although these characters are not playable in ''Mario Kart Arcade GP 2'', they all make small cameos somewhere in the game, either from a sponsor or seen in a course. | ||
{|class="wikitable" width=50% | |||
{|width=50% | |||
!Character | !Character | ||
!Location | !Location | ||
| Line 269: | Line 244: | ||
|[[Baby Luigi]] | |[[Baby Luigi]] | ||
|[[Yoshi Park 1]]<br>[[Yoshi Park 2]]<br>[[Mario Highway]]<br>[[Mario Beach]]<br>[[DK Jungle (Mario Kart Arcade GP)|DK Jungle]]<br>[[Bananan Ruins]] | |[[Yoshi Park 1]]<br>[[Yoshi Park 2]]<br>[[Mario Highway]]<br>[[Mario Beach]]<br>[[DK Jungle (Mario Kart Arcade GP)|DK Jungle]]<br>[[Bananan Ruins]] | ||
|align="center" |[[File:BMBLSwingRide.png|200px]] | |align="center"|[[File:BMBLSwingRide.png|200px]] | ||
|- | |- | ||
|[[Baby Mario]] | |[[Baby Mario]] | ||
|[[Yoshi Park 1]]<br>[[Yoshi Park 2]]<br>[[Mario Highway]]<br>[[Mario Beach]]<br>[[DK Jungle (Mario Kart Arcade GP)|DK Jungle]]<br>[[Bananan Ruins]] | |[[Yoshi Park 1]]<br>[[Yoshi Park 2]]<br>[[Mario Highway]]<br>[[Mario Beach]]<br>[[DK Jungle (Mario Kart Arcade GP)|DK Jungle]]<br>[[Bananan Ruins]] | ||
|align="center" |[[File:BMBLSwingRide.png|200px]] | |align="center"|[[File:BMBLSwingRide.png|200px]] | ||
|- | |- | ||
|[[Birdo]] | |[[Birdo]] | ||
|Results screen | |Results screen | ||
|align="center" |[[File:Daisymkarccameo.png|200px]] | |align="center"|[[File:Daisymkarccameo.png|200px]] | ||
|- | |- | ||
|[[Bowser Jr.]] | |[[Bowser Jr.]] | ||
|[[Mario Highway]]<br>[[Mario Beach]]<br>[[Diamond City (race course)|Diamond City]]<br>[[Snow Panic]]<br>[[Bowser's Castle (Mario Kart Arcade GP)|Bowser's Castle]]<br>[[Castle Wall]]<br>Results | |[[Mario Highway]]<br>[[Mario Beach]]<br>[[Diamond City (race course)|Diamond City]]<br>[[Snow Panic]]<br>[[Bowser's Castle (Mario Kart Arcade GP)|Bowser's Castle]]<br>[[Castle Wall]]<br>Results screen | ||
|align="center" |[[File:BowserCastleBowserJrMKAGP2.png|200px]] | |align="center"|[[File:BowserCastleBowserJrMKAGP2.png|200px]] | ||
|- | |- | ||
|[[Princess Daisy]] | |[[Princess Daisy]] | ||
|Results | |Results screen | ||
|align="center" |[[File:Daisymkarccameo.png|200px]] | |align="center"|[[File:Daisymkarccameo.png|200px]] | ||
|- | |- | ||
|[[Diddy Kong]] | |[[Diddy Kong]] | ||
|[[DK Jungle (Mario Kart Arcade GP)|DK Jungle]]<br>[[Bananan Ruins]]<br>Results | |[[DK Jungle (Mario Kart Arcade GP)|DK Jungle]]<br>[[Bananan Ruins]]<br>Results screen | ||
|align="center" |[[File:DKJungleBeginEnd.png|200px]] | |align="center"|[[File:DKJungleBeginEnd.png|200px]] | ||
|- | |- | ||
|[[Dry Bones]] | |[[Dry Bones]] | ||
|[[Bowser's Castle (Mario Kart Arcade GP)|Bowser's Castle]]<br>[[Castle Wall]] | |[[Bowser's Castle (Mario Kart Arcade GP)|Bowser's Castle]]<br>[[Castle Wall]] | ||
|align="center" |[[File:DryBonesMKAGP2.png|200px]] | |align="center"|[[File:DryBonesMKAGP2.png|200px]] | ||
|- | |- | ||
|[[Hammer Bro]] | |[[Hammer Bro]] | ||
|[[Bowser's Castle (Mario Kart Arcade GP)|Bowser's Castle]]<br>[[Castle Wall]] | |[[Bowser's Castle (Mario Kart Arcade GP)|Bowser's Castle]]<br>[[Castle Wall]] | ||
|align="center" |[[File:CastleWallStretch.png|200px]] | |align="center"|[[File:CastleWallStretch.png|200px]] | ||
|- | |- | ||
|[[wikipedia:Jr. Pac-Man|Jr. Pac-Man]] | |[[wikipedia:Jr. Pac-Man|Jr. Pac-Man]] | ||
|[[Yoshi Park 1]]<br>[[Yoshi Park 2]]<br>[[Pac Mountain]]<br>[[Pac Labyrinth]] | |[[Yoshi Park 1]]<br>[[Yoshi Park 2]]<br>[[Pac Mountain]]<br>[[Pac Labyrinth]] | ||
|align="center" |[[File:PacMountainEntranceofTunnel.png|200px]] | |align="center"|[[File:PacMountainEntranceofTunnel.png|200px]] | ||
|- | |- | ||
|[[Kamek]] | |[[Kamek]] | ||
|[[Bowser's Castle (Mario Kart Arcade GP)|Bowser's Castle]]<br>[[Castle Wall]] | |[[Bowser's Castle (Mario Kart Arcade GP)|Bowser's Castle]]<br>[[Castle Wall]] | ||
|align="center" |[[File:DryBonesMKAGP2.png|200px]] | |align="center"|[[File:DryBonesMKAGP2.png|200px]] | ||
|- | |- | ||
|[[Koopa Troopa|Koopa]] | |[[Koopa Troopa|Koopa]] | ||
|[[Bowser's Castle (Mario Kart Arcade GP)|Bowser's Castle]]<br>[[Castle Wall]]<br>[[Yoshi Park 1]]<br>[[Yoshi Park 2]]<br>[[Stadium Arena]]<br>[[Waluigi Stadium (Mario Kart Arcade GP 2)|Waluigi Stadium]] | |[[Bowser's Castle (Mario Kart Arcade GP)|Bowser's Castle]]<br>[[Castle Wall]]<br>[[Yoshi Park 1]]<br>[[Yoshi Park 2]]<br>[[Stadium Arena]]<br>[[Waluigi Stadium (Mario Kart Arcade GP 2)|Waluigi Stadium]]<br>Results screen | ||
|align="center" |[[File:CastleWallKoopas.png|200px]] | |align="center"|[[File:CastleWallKoopas.png|200px]] | ||
|- | |- | ||
|[[King Boo]] | |[[King Boo]] | ||
|[[Yoshi Park 2]] | |[[Yoshi Park 2]] | ||
|align="center" |[[File:KingBooYoshiPark2.png|200px]] | |align="center"|[[File:KingBooYoshiPark2.png|200px]] | ||
|- | |- | ||
|[[Mechakoopa]] | |[[Mechakoopa]] | ||
|[[Bowser's Castle (Mario Kart Arcade GP)|Bowser's Castle]] | |[[Bowser's Castle (Mario Kart Arcade GP)|Bowser's Castle]] | ||
|align="center" |[[File:MechaKoopaMKAGP2.png|200px]] | |align="center"|[[File:MechaKoopaMKAGP2.png|200px]] | ||
|- | |- | ||
|[[Nipper Plant]] | |[[Nipper Plant]] | ||
|[[Bananan Ruins]]<br>[[Castle Wall]] | |[[Bananan Ruins]]<br>[[Castle Wall]] | ||
|align="center" |[[File:CastleWallDirt.png|200px]] | |align="center"|[[File:CastleWallDirt.png|200px]] | ||
|- | |- | ||
|[[Noki]] | |[[Noki]] | ||
|[[Stadium Arena]]<br>[[Waluigi Stadium (Mario Kart Arcade GP 2)|Waluigi Stadium]] | |[[Stadium Arena]]<br>[[Waluigi Stadium (Mario Kart Arcade GP 2)|Waluigi Stadium]]<br>Results screen | ||
|align="center" |[[File:Waluigi StadiumMKAGP 2.PNG|200px]] | |align="center"|[[File:Waluigi StadiumMKAGP 2.PNG|200px]] | ||
|- | |- | ||
|[[Koopa Paratroopa|Paratroopa]] | |[[Koopa Paratroopa|Paratroopa]] | ||
|[[Bowser's Castle (Mario Kart Arcade GP)|Bowser's Castle]]<br>[[Castle Wall]]<br>[[Yoshi Park 1]]<br>[[Yoshi Park 2]]<br>[[Stadium Arena]]<br>[[Waluigi Stadium (Mario Kart Arcade GP 2)|Waluigi Stadium]] | |[[Bowser's Castle (Mario Kart Arcade GP)|Bowser's Castle]]<br>[[Castle Wall]]<br>[[Yoshi Park 1]]<br>[[Yoshi Park 2]]<br>[[Stadium Arena]]<br>[[Waluigi Stadium (Mario Kart Arcade GP 2)|Waluigi Stadium]] | ||
|align="center" |[[File:CastleWallKoopas.png|200px]] | |align="center"|[[File:CastleWallKoopas.png|200px]] | ||
|- | |- | ||
|[[Pianta]] | |[[Pianta]] | ||
|[[Stadium Arena]]<br>[[Waluigi Stadium (Mario Kart Arcade GP 2)|Waluigi Stadium]]<br>Results screen | |[[Stadium Arena]]<br>[[Waluigi Stadium (Mario Kart Arcade GP 2)|Waluigi Stadium]]<br>Results screen | ||
|align="center" |[[File:Daisymkarccameo.png|200px]] | |align="center"|[[File:Daisymkarccameo.png|200px]] | ||
|- | |- | ||
|[[Professor Elvin Gadd]] | |[[Professor Elvin Gadd]] | ||
|[[Diamond City (race course)|Diamond City]]<br>[[Snow Panic]] | |[[Diamond City (race course)|Diamond City]]<br>[[Snow Panic]] | ||
|align="center" |[[File:EgadCity DiamondVillage MKAGP2.png|200px]] | |align="center"|[[File:EgadCity DiamondVillage MKAGP2.png|200px]] | ||
|- | |- | ||
|[[Toadette]] | |[[Toadette]] | ||
|[[Yoshi Park 1]]<br>[[Yoshi Park 2]] | |[[Yoshi Park 1]]<br>[[Yoshi Park 2]] | ||
|align="center" |[[File:YoshiPark2ToadToadette.png|200px]] | |align="center"|[[File:YoshiPark2ToadToadette.png|200px]] | ||
|- | |- | ||
|[[Toadsworth]] | |[[Toadsworth]] | ||
|[[Yoshi Park 2]]<br>[[DK Jungle (Mario Kart Arcade GP)|DK Jungle]]<br>Results screen | |[[Yoshi Park 2]]<br>[[DK Jungle (Mario Kart Arcade GP)|DK Jungle]]<br>Results screen | ||
|align="center" |[[File:YoshiPark2RotatingRoom.png|200px]] | |align="center"|[[File:YoshiPark2RotatingRoom.png|200px]] | ||
|} | |} | ||
| Line 355: | Line 330: | ||
==Internet Rankings== | ==Internet Rankings== | ||
''Mario Kart Arcade GP 2'', along with ''[[Mario Kart Arcade GP]]'', featured Internet Rankings. It was run by Bandai Namco Entertainment Japan, and a Mario Card was required. These were located at: | ''Mario Kart Arcade GP 2'', along with ''[[Mario Kart Arcade GP]]'', featured Internet Rankings. It was run by Bandai Namco Entertainment Japan, and a Mario Card was required. These were located at: | ||
*[https://www.bandainamcogames.co.jp/aa/english/mariokart2/ranking/ Rankings (English)] | |||
*[https://www.bandainamcogames.co.jp/english/aa/regist/ More information] | |||
==Courses== | |||
''Mario Kart Arcade GP 2'' brings back all courses from the original ''Mario Kart Arcade GP'' and adds four new courses into two cups. There are eight cups in total, each one with two tracks and a challenge in the final. The cups are organized into 4 rounds, the first 2 rounds are the tracks in normal conditions, and the last 2 rounds the same tracks in different conditions, like rain in DK Jungle. | |||
After finishing all four races from each stage, a Challenge Game comes up, in which the player is not required to complete for winning the cup. Each of them requires the player to drive to a goal under a certain amount of time while under a certain condition, such as driving backwards through a road of banana peels. | |||
Winning all cups, the player unlocks advanced courses, the [[Mirror Mode]]. | |||
===Easy=== | ===Easy=== | ||
{| | |||
|- | {|class="wikitable" border=1 cellspacing=0 cellpadding=5 margin=0 padding=0 style="border:1px solid black; border-collapse:collapse; height:100%; text-align:center;" | ||
![[Yoshi Cup]] | |- | ||
!colspan=5|[[File:MKAGP 2 Yoshi Cup Icon.png|link=Yoshi Cup]]<br><big>'''[[Yoshi Cup]]'''</big> | |||
|- | |- | ||
|[[File: | |width="20%"|[[File:MKAGP 2 Yoshi Park 1 Logo.png|200px|link=Yoshi Park 1]] | ||
|[[File: | |width="20%"|[[File:MKAGP 2 Yoshi Park 2 Logo.png|200px|link=Yoshi Park 2]] | ||
| | |width="20%"|[[File:MKAGP 2 Yoshi Park 1 Logo.png|200px|link=Yoshi Park 1]] | ||
|[[File: | |width="20%"|[[File:MKAGP 2 Yoshi Park 2 Logo.png|200px|link=Yoshi Park 2]] | ||
|[[File:MarioBeach.png| | |width="20%"| | ||
|- | |||
|[[File:MKAGP 2 Yoshi Park 1 Icon 2.png|200px]]<br>[[Yoshi Park 1]] | |||
|[[File:YoshiPark2.png|200px]]<br>[[Yoshi Park 2]] | |||
|[[File:YoshiPark.png|200px]]<br>[[Yoshi Park 1]] | |||
|[[File:YoshiPark2.png|200px]]<br>[[Yoshi Park 2]] | |||
|[[File:MKAGP 2 Coin Collector.png|200px]]<br>Coin Collector | |||
|- | |||
|colspan=5|[[File:MKAGP 2 Mario Cup Icon.png|link=Mario Cup]]<br><big>'''[[Mario Cup]]'''</big> | |||
|- | |||
|width="20%"|[[File:MKAGP 2 Mario Highway Logo.png|200px|link=Mario Highway]] | |||
|width="20%"|[[File:MKAGP 2 Mario Beach Logo.png|200px|link=Mario Beach]] | |||
|width="20%"|[[File:MKAGP 2 Mario Highway Logo.png|200px|link=Mario Highway]] | |||
|width="20%"|[[File:MKAGP 2 Mario Beach Logo.png|200px|link=Mario Beach]] | |||
|width="20%"| | |||
|- | |||
|[[File:MarioHighway.png|200px]]<br>[[Mario Highway]] | |||
|[[File:MarioBeach.png|200px]]<br>[[Mario Beach]] | |||
|[[File:MKAGP 2 Mario Highway Icon 2.png|200px]]<br>[[Mario Highway]] | |||
|[[File:MKAGP 2 Mario Beach Icon 2.png|200px]]<br>[[Mario Beach]] | |||
|[[File:MKAGP 2 Move Giant Watermelon!.png|200px]]<br>Move Giant Watermelon! | |||
|} | |} | ||
===Normal=== | ===Normal=== | ||
{| | |||
|- | {|class="wikitable" border=1 cellspacing=0 cellpadding=5 margin=0 padding=0 style="border:1px solid black; border-collapse:collapse; height:100%; text-align:center;" | ||
![[Waluigi Cup]] | |- | ||
!colspan=5|[[File:MKAGP 2 Waluigi Cup Icon.png|link=Waluigi Cup]]<br><big>'''[[Waluigi Cup]]'''</big> | |||
|- | |||
| | |width="20%"|[[File:MKAGP 2 Arena Stadium Logo.png|200px|link=Stadium Arena]] | ||
|[[File: | |width="20%"|[[File:MKAGP 2 Waluigi Stadium Logo.png|200px|link=Waluigi Stadium (Mario Kart Arcade GP 2)]] | ||
|[[File: | |width="20%"|[[File:MKAGP 2 Arena Stadium Logo.png|200px|link=Stadium Arena]] | ||
|[[File: | |width="20%"|[[File:MKAGP 2 Waluigi Stadium Logo.png|200px|link=Waluigi Stadium (Mario Kart Arcade GP 2)]] | ||
| | |width="20%"| | ||
|[[File: | |- | ||
|[[File: | |[[File:StadiumAreanIcon.png|200px]]<br>[[Stadium Arena]] | ||
|[[File: | |[[File:WaluigiStadiumIconMKAGP2.png|200px]]<br>[[Waluigi Stadium (Mario Kart Arcade GP 2)|Waluigi Stadium]] | ||
|[[File:MKAGP 2 Stadium Arena Icon 2.png|200px]]<br>[[Stadium Arena]] | |||
|[[File:MKAGP 2 Waluigi Stadium Icon 2.png|200px]]<br>[[Waluigi Stadium (Mario Kart Arcade GP 2)|Waluigi Stadium]] | |||
|[[File:MKAGP 2 Bird Kart Contest!.png|200px]]<br>Bird Kart Contest! | |||
|- | |||
!colspan=5|[[File:MKAGP 2 DK Cup Icon.png|link=DK Cup]]<br><big>'''[[DK Cup]]'''</big> | |||
|- | |||
|width="20%"|[[File:MKAGP 2 DK Jungle Logo.png|200px|link=DK Jungle]] | |||
|width="20%"|[[File:MKAGP 2 DK Bananan Ruins Logo.png|200px|link=Bananan Ruins]] | |||
|width="20%"|[[File:MKAGP 2 DK Jungle Logo.png|200px|link=DK Jungle]] | |||
|width="20%"|[[File:MKAGP 2 DK Bananan Ruins Logo.png|200px|link=Bananan Ruins]] | |||
|width="20%"| | |||
|- | |||
|[[File:DKJungleMKAGP.png|200px]]<br>[[DK Jungle]] | |||
|[[File:BanananRuins.png|200px]]<br>[[Bananan Ruins]] | |||
|[[File:MKAGP 2 DK Jungle 2.png|200px]]<br>[[DK Jungle]] | |||
|[[File:MKAGP 2 Bananan Ruins 2.png|200px]]<br>[[Bananan Ruins]] | |||
|[[File:MKAGP 2 Koopa Panic!.png|200px]]<br>Koopa Panic! | |||
|- | |||
!colspan=5|[[File:MKAGP 2 Wario Cup Icon.png|link=Wario Cup]]<br><big>'''[[Wario Cup]]'''</big> | |||
|- | |||
|width="20%"|[[File:MKAGP 2 Diamond City Logo.png|200px|link=Diamond City (race course)]] | |||
|width="20%"|[[File:MKAGP 2 Snow Panic Logo.png|200px|link=Snow Panic]] | |||
|width="20%"|[[File:MKAGP 2 Diamond City Logo.png|200px|link=Diamond City (race course)]] | |||
|width="20%"|[[File:MKAGP 2 Snow Panic Logo.png|200px|link=Snow Panic]] | |||
|width="20%"| | |||
|- | |||
|[[File:DiamondCity.png|200px]]<br>[[Diamond City (race course)|Diamond City]] | |||
|[[File:SnowPanic.png|200px]]<br>[[Snow Panic]] | |||
|[[File:MKAGP 2 Diamond City 2.png|200px]]<br>[[Diamond City (race course)|Diamond City]] | |||
|[[File:MKAGP 2 Snow Panic 2.png|200px]]<br>[[Snow Panic]] | |||
|[[File:MKAGP 2 Backward Race.png|200px]]<br>Backward Race | |||
|} | |} | ||
===Master=== | ===Master=== | ||
{| | |||
|- | {|class="wikitable" border=1 cellspacing=0 cellpadding=5 margin=0 padding=0 style="border:1px solid black; border-collapse:collapse; height:100%; text-align:center;" | ||
![[Pac-Man Cup]] | |- | ||
!colspan=5|[[File:MKAGP 2 PAC Cup Icon.png|link=Pac-Man Cup]]<br><big>'''[[Pac-Man Cup]]'''</big> | |||
|- | |||
| | |width="20%"|[[File:MKAGP 2 Pac Mountain Logo.png|200px|link=Pac Mountain]] | ||
|[[File: | |width="20%"|[[File:MKAGP 2 Pac Labyrinth Logo.png|200px|link=Pac Labyrinth]] | ||
|[[File: | |width="20%"|[[File:MKAGP 2 Pac Mountain Logo.png|200px|link=Pac Mountain]] | ||
|[[File: | |width="20%"|[[File:MKAGP 2 Pac Labyrinth Logo.png|200px|link=Pac Labyrinth]] | ||
| | |width="20%"| | ||
|[[File: | |- | ||
|[[File:CastleWallIcon.png| | |[[File:PacMountainIcon.png|200px]]<br>[[Pac Mountain]] | ||
|[[File: | |[[File:PacLabyrinthIcon.png|200px]]<br>[[Pac Labyrinth]] | ||
|[[File:MKAGP 2 Pac Mountain 2.png|200px]]<br>[[Pac Mountain]] | |||
|[[File:MKAGP 2 Pac Labyrinth 2.png|200px]]<br>[[Pac Labyrinth]] | |||
|[[File:MKAGP 2 PAC Challenge!.png|200px]]<br>PAC Challenge! | |||
|- | |||
!colspan=5|[[File:MKAGP 2 Bowser Cup Icon.png|link=Bowser Cup]]<br><big>'''[[Bowser Cup]]'''</big> | |||
|- | |||
|width="20%"|[[File:MKAGP 2 Bowser Castle Logo.png|200px|link=Bowser's Castle]] | |||
|width="20%"|[[File:MKAGP 2 Castle Wall Logo.png|200px|link=Castle Wall]] | |||
|width="20%"|[[File:MKAGP 2 Bowser Castle Logo.png|200px|link=Bowser's Castle]] | |||
|width="20%"|[[File:MKAGP 2 Castle Wall Logo.png|200px|link=Castle Wall]] | |||
|width="20%"| | |||
|- | |||
|[[File:IconBowserCastleMKAGP2.png|200px]]<br>[[Bowser's Castle]] | |||
|[[File:CastleWallIcon.png|200px]]<br>[[Castle Wall]] | |||
|[[File:MKAGP 2 Bowser Castle 2.png|200px]]<br>[[Bowser's Castle]] | |||
|[[File:MKAGP 2 Castle Wall 2.png|200px]]<br>[[Castle Wall]] | |||
|[[File:MKAGP 2 Final Battle with Bowser!.png|200px]]<br>Final Battle with Bowser! | |||
|- | |||
|- | |||
!colspan=5|[[File:MKAGP 2 Rainbow Cup Icon.png|link=Rainbow Cup]]<br><big>'''[[Rainbow Cup]]'''</big> | |||
|- | |||
|width="20%"|[[File:MKAGP 2 Rainbow Coaster Logo.png|200px|link=Rainbow Coaster]] | |||
|width="20%"|[[File:MKAGP 2 Rainbow Downhill Logo.png|200px|link=Rainbow Downhill]] | |||
|width="20%"|[[File:MKAGP 2 Rainbow Coaster Logo.png|200px|link=Rainbow Coaster]] | |||
|width="20%"|[[File:MKAGP 2 Rainbow Downhill Logo.png|200px|link=Rainbow Downhill]] | |||
|width="20%"| | |||
|- | |||
|[[File:RainbowCoasterIcon.png|200px]]<br>[[Rainbow Coaster]] | |||
|[[File:RainbowDownhillIcon.png|200px]]<br>[[Rainbow Downhill]] | |||
|[[File:MKAGP 2 Rainbow Coaster 2.png|200px]]<br>[[Rainbow Coaster]] | |||
|[[File:MKAGP 2 Rainbow Downhill 2.png|200px]]<br>[[Rainbow Downhill]] | |||
|[[File:MKAGP 2 1 vs 1 Battle with Robo Mario!.png|200px]]<br>1 vs 1 Battle with Robo Mario! | |||
|} | |} | ||
==Staff== | ==Staff== | ||
| Line 427: | Line 473: | ||
==Gallery== | ==Gallery== | ||
{{main-gallery}} | {{main-gallery}} | ||
<gallery> | |||
Pac man.jpg|[[Pac-Man]] | |||
MKAGP2 Lakitu.png|[[Lakitu (Mario Kart referee)|Lakitu]] | |||
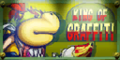
KingofGraffitiMKAGP2.png|[[Bowser Jr.]]'s sponsor | |||
ToadetteArcadeGP2.png|[[Toadette]] | |||
</gallery> | |||
==Media== | ==Media== | ||
{{more media|section=yes}} | {{more media|section=yes|At least two more music samples}} | ||
{{media table | {{media table | ||
|file1=MKAGP2 YoshiPark.oga | |file1=MKAGP2 YoshiPark.oga | ||
|title1=[[Yoshi Park 1]] and [[Yoshi Park 2]] | |title1=[[Yoshi Park 1]] and [[Yoshi Park 2]] | ||
}} | }} | ||
==References to other games== | |||
*''[[Super Mario Bros.]]'': The menu theme includes a remix of the overworld theme from this game. Also, when losing a race, an arrangement of the death jingle plays. | |||
*''[[Super Mario World 2: Yoshi's Island]]'': [[Yoshi Park 1]]'s theme is heavily based on this game. | |||
*''[[Wario Land 4]]'': The [[Wario Car]] is one of Wario's karts. | |||
*''[[Luigi's Mansion]]'': [[Yoshi Park 2]] features a ''Luigi's Mansion''-based attraction, complete with the generic ghosts from said game and King Boo. | |||
*''[[WarioWare (series)|WarioWare]]'' series: The central location of the series, [[Diamond City]], appears as a racetrack. | |||
*''[[Mario Kart: Double Dash!!]]'': Some sound and voice effects have been borrowed from this game, such as the start signal sound effect. | |||
*''[[Mario Kart Arcade GP]]'': All the assets from the original game are re-used with slight enhancements. | |||
*''[[Mario Kart DS]]'': The [[Egg Rider]] resembles the [[Egg 1]], Mario's Special Kart resembles the [[B Dasher]], and the [[Mash Run]] resembles the [[Mushmellow]]. | |||
==References in later games== | |||
*''[[Mario Kart Tour]]'': The Mario [[Event token|team token]]s resemble the [[Mario Coin]]s. | |||
==Names in other languages== | ==Names in other languages== | ||
{{foreign names | {{foreign names | ||
|Jap= | |Jap=マリオカート アーケードグランプリ 2 | ||
|JapR=Mario Kāto Ākēdo Guranpuri Tsū | |JapR=Mario Kāto Ākēdo Guranpuri Tsū | ||
|JapM= | |JapM=Mario Kart Arcade Grand Prix 2 | ||
}} | }} | ||
==Trivia== | ==Trivia== | ||
*This | *This is the last installment of the ''Mario Kart'' series to use the series' original logo font in the game's title. | ||
==References== | ==References== | ||
| Line 449: | Line 514: | ||
==External links== | ==External links== | ||
{{NIWA|StrategyWiki=1}} | {{NIWA|NWiki=1|StrategyWiki=1}} | ||
*[ | *[https://bandainamco-am.co.jp/am/vg/mariokart2/special/ Japanese website] | ||
*[ | *[https://bandainamcoent.co.jp/am/english/aa/mariokart2/ English website] | ||
*[https://youtu.be/r_K_u6FElgM Grand Prix video showcasing all 32 cup rounds] | *[https://youtu.be/r_K_u6FElgM Grand Prix video showcasing all 32 cup rounds] | ||
{{MKAGP2}} | {{MKAGP2}} | ||
{{ | {{Super Mario games}} | ||
{{Arcade}} | {{Arcade}} | ||
[[Category:Mario Kart Arcade GP 2|*]] | [[Category:Mario Kart Arcade GP 2|*]] | ||
Revision as of 18:38, April 21, 2024
| Mario Kart Arcade GP 2 | |
|---|---|
 For alternate box art, see the game's gallery. | |
| Developer | Bandai Namco Amusement |
| Publisher | Bandai Namco Amusement[1] |
| Release date | |
| Genre | Racing |
| Mode(s) | Single-player, Multiplayer (VS), Time Trial |
| Cabinet | Sit down |
| Arcade system | Triforce |
| Monitor | 29" CRT |
| Input | Arcade: Joystick
|
Mario Kart Arcade GP 2 is the second game in the Mario Kart Arcade GP series and the seventh in the Mario Kart series overall. It is a follow-up to Mario Kart Arcade GP, and was later followed by Mario Kart Arcade GP DX. The game has custom karts for characters, similar to Mario Kart: Double Dash!! and Mario Kart DS. It contains virtually all the content of the original, but greatly expands it with the addition of several new courses, items and racers. Like the predecessor, Pac-Man characters appear as playable in this game. The game also introduces Mametchi as a playable character. In-game, it appears to be broadcast live and has color-commentary of the player by a narrator, whose language depends on the region of the game.
How To Play
First, players can adjust their seat within the time limit by moving a lever near their feet and sliding to any position on the arcade machine. After that happens, players can choose a character to play as. Then, players can take a picture of themselves using the camera lens within the time limit; if the player does not take the picture, a countdown starts to force the player to take it. On some instances, the camera cannot be used. The picture of the current character is instead used.
When the race starts, the players' object is to finish in 1st place. If they get a lower place, they must retry to unlock the course by giving the game certain money or some tokens. If players get 1st place, they can continue if they pay the game another token or dollar(s). If not, the game is over.
Controls
- Accelerate - Accelerator pedal
- Brake - Brake pedal
- Item - ITEM button on center of steering wheel.
- VS Cancel - VS CANCEL button right of the steering wheel
- Mario Card holder - Mario Card slot on the bottom right of the screen
- Money holder - Money slot under Mario Card slot
Techniques
Rocket Start

The player can get a rocket start when the accelerator is pressed right when "1" is displayed. If successful, the kart gets a small speed boost when the race starts. The method of performing the rocket start closely resembles the one from Mario Kart: Double Dash!!
Jumping and Drifting
Jumping is performed if the brake pedal is pressed quickly and drifting occurs if the brake pedal is tapped twice.
Mario Card

A Mario Card is the data card (or save file) that appears was copied from Mario Kart Arcade GP and appears in Mario Kart Arcade GP 2. It appears in all sorts of different colors and designs.
Features
- The player's chosen nickname
- The player's amount of coins
- The player's rank
- The player's item (e.g. 70 SP Item Get!, 64)
- The player's amount of VS wins (if any)
- The card's password for the Internet Rankings
- The player's completed GP cups and class
Modes
Grand Prix
In Grand Prix, the player races against five computer drivers for winning the trophies in every race. The goal of each race is to finish in first place within the time limit (if the player is in first place and then times out rather than finishing, the round will not count as completed). There are three engine levels available: 50cc, 100cc, and 150cc, and as with the previous Mario Kart installments, is linear with the difficulty - 50cc being the slowest (Easy), 100cc being the standard (Normal) and 150cc being the fastest (Master). There are 4 difficulty levels, and each one has two stages. Each cup has 2 tracks, separated into 4 rounds. The first 2 rounds are the tracks in normal conditions, and the last 2 rounds the same tracks in different conditions (e.g. DK Jungle changes to rain). After having completed each round, the player receives a challenge, similar to the Mission Mode that appears in Mario Kart DS. Unlike the previous game, clearing the challenge is not necessary to complete a cup. Also, when the player is using a Mario Card, the player receives Mario Coins depending on their performance, up to a maximum of 15. Extra mode makes a return, only under the name of Special Cup (Reverse mode). In initial gameplay, a player can select the next round only after winning the first round. When the players completes all 4 rounds, they can play a "challenge game" stage.
Time Attack
In Time Attack mode, the user tries to get the fastest time on the tracks. To select Time Attack, the player must hold VS Cancel while selecting a class (50cc is not available in Time Attack). The player starts with 3 Mushrooms in Time Attack, and the number of coins on track is reduced to ten during 150cc Time Attack (compared to 25 in 100cc Time Attack).
A difference in the HUD between this game and the first game is that the remaining time is moved to the top-right and the total time is made larger and moved all the way to the top-left. There is no commentary during Time Attack games.
VS
After the players insert coins, the machine starts a search for VS races. If players are found, the game starts a VS Match. Like the previous game, up to four players can play together. In VS, the players first select an engine class, select a character, takes a picture (if necessary), then votes for a course. After, each player will be given 3 random items. Unlike the previous game, in multiplayer mode players in the minimap are given colors depending on their player number: Player 1 is red; Player 2 is orange; Player 3 is green; Player 4 is blue; and CPUs are dark blue. If fewer than four players gather for a race then CPU drivers are added to make up four racers.
During the race, the bottom-left screen displays the player number (unlike the first game, which did not do so), and there is no speedometer in the bottom-right, just showing the coin count (just like the first game did). Also, the commentator says the player number before the character's name except for CPU-controlled karts.
When the race is over, players can choose if they want to continue with the same opponents or not. If two or more players decide to continue, the selection process restarts from the very beginning (players select a class first unlike in single player where the class and mode is not re-selected). If only one player decides to continue, it will change to a Grand Prix/Time Attack game for that player (this time only where the player selects the class and mode, before character select).
Mario Coins and Coins

Mario Coins are coins that the player can pick up in Mario Kart Arcade GP 2. If the player gains enough Mario Coins and regular Coins, they can unlock prizes to save on their Mario Card (e.g. new karts, special items). Upon collecting 4000 Mario Coins, players will unlock the ability to change to a first-person perspective akin to that of Mario Kart 7. This is done by pressing the VS Cancel button during a race.
Item Boxes

Mario Kart Arcade GP 2 does not feature the normal cube item boxes seen in previous games; it comes with multi-colored, hexagonal item boxes. They have a white question mark while Jack-in-the-boxes (fake Item Boxes) have a white, upside-down question mark. When taken, they instantly regenerate, unlike the other Mario Kart games, in which they take a while.
Basic Items

Unlike in the typical Mario Kart games, items are grouped into these categories: locking-on, passing the item, dropping backward, and shooting forward. Locking-on item involves a moving cursor that stops if it goes over an opponent. If the cursor is locked-in for enough time, the cursor flashes red and the thrown item locks into the player, similar to a Red Shell. Passing items require the item to be thrown, much as a locking-on item. Afflicted players need to collide with other players to evade the hindering effects. Items that drop backward and items that shoot forward act similarly to items in the traditional Mario Kart games.
Unlike in most Mario Kart games, these items can be thrown in only one direction. Also unlike most Mario Kart games, only certain items appear during a race. Three of them are shown before the race starts. Most of these items have a temporary after-effect that can hinder the affected driver.
Characters

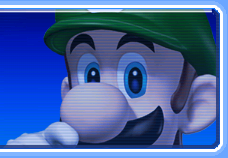
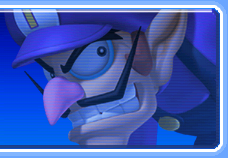
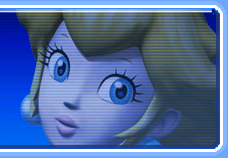
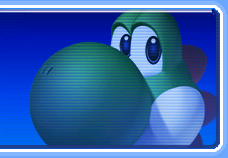
All playable characters from Mario Kart Arcade GP return along with two new characters, Waluigi and a Tamagotchi named Mametchi. They all have two karts available: a standard go-kart and a personal kart that increases speed, but reduces acceleration.
Balanced
| Character | Special Kart | Standard Kart |
|---|---|---|
 |

|

|
 |

|

|
 |

|

|
 |

|

|
Strong Acceleration
| Character | Special Kart | Standard Kart |
|---|---|---|
 |

|

|
 |

|

|
 |

|

|
Easy Control
| Character | Special Kart | Standard Kart |
|---|---|---|
 |

|

|

|

| |
 |

|

|
High Speed
| Character | Special Kart | Standard Kart |
|---|---|---|
 |

|

|
 |

|

|
 |

|

|
- Additionally, the Rainbow Cup challenge game features players trying to reach the finish line before a nonplayable Robo Mario.
Cameo appearances
Although these characters are not playable in Mario Kart Arcade GP 2, they all make small cameos somewhere in the game, either from a sponsor or seen in a course.


Faces

Mario Kart Arcade GP 2 features 'faces'. These are the borders around the players face when the player gets their photo taken. Players can also get special, character specific faces if they choose to play as that character. If no picture is taken, then the default face shows the character's mugshot.
Internet Rankings
Mario Kart Arcade GP 2, along with Mario Kart Arcade GP, featured Internet Rankings. It was run by Bandai Namco Entertainment Japan, and a Mario Card was required. These were located at:
Courses
Mario Kart Arcade GP 2 brings back all courses from the original Mario Kart Arcade GP and adds four new courses into two cups. There are eight cups in total, each one with two tracks and a challenge in the final. The cups are organized into 4 rounds, the first 2 rounds are the tracks in normal conditions, and the last 2 rounds the same tracks in different conditions, like rain in DK Jungle.
After finishing all four races from each stage, a Challenge Game comes up, in which the player is not required to complete for winning the cup. Each of them requires the player to drive to a goal under a certain amount of time while under a certain condition, such as driving backwards through a road of banana peels.
Winning all cups, the player unlocks advanced courses, the Mirror Mode.
Easy
Yoshi Cup | ||||
|---|---|---|---|---|
Yoshi Park 1 |
 Yoshi Park 2 |
 Yoshi Park 1 |
Yoshi Park 2 |
 Coin Collector |
Mario Cup | ||||
 Mario Highway |
 Mario Beach |
Mario Highway |
Mario Beach |
 Move Giant Watermelon! |
Normal
Waluigi Cup | ||||
|---|---|---|---|---|
 Stadium Arena |
 Waluigi Stadium |
Stadium Arena |
Waluigi Stadium |
 Bird Kart Contest! |
DK Cup | ||||
 DK Jungle |
 Bananan Ruins |
 DK Jungle |
 Bananan Ruins |
 Koopa Panic! |
Wario Cup | ||||
 Diamond City |
 Snow Panic |
 Diamond City |
 Snow Panic |
 Backward Race |
Master
Pac-Man Cup | ||||
|---|---|---|---|---|
 Pac Mountain |
 Pac Labyrinth |
 Pac Mountain |
 Pac Labyrinth |
 PAC Challenge! |
Bowser Cup | ||||
 Bowser's Castle |
 Castle Wall |
 Bowser's Castle |
 Castle Wall |
 Final Battle with Bowser! |
Rainbow Cup | ||||
 Rainbow Coaster |
 Rainbow Downhill |
 Rainbow Coaster |
 Rainbow Downhill |
 1 vs 1 Battle with Robo Mario! |
Staff
- Main article: List of Mario Kart Arcade GP 2 staff
Gallery
- For this subject's image gallery, see Gallery:Mario Kart Arcade GP 2.
Bowser Jr.'s sponsor


Media
References to other games
- Super Mario Bros.: The menu theme includes a remix of the overworld theme from this game. Also, when losing a race, an arrangement of the death jingle plays.
- Super Mario World 2: Yoshi's Island: Yoshi Park 1's theme is heavily based on this game.
- Wario Land 4: The Wario Car is one of Wario's karts.
- Luigi's Mansion: Yoshi Park 2 features a Luigi's Mansion-based attraction, complete with the generic ghosts from said game and King Boo.
- WarioWare series: The central location of the series, Diamond City, appears as a racetrack.
- Mario Kart: Double Dash!!: Some sound and voice effects have been borrowed from this game, such as the start signal sound effect.
- Mario Kart Arcade GP: All the assets from the original game are re-used with slight enhancements.
- Mario Kart DS: The Egg Rider resembles the Egg 1, Mario's Special Kart resembles the B Dasher, and the Mash Run resembles the Mushmellow.
References in later games
- Mario Kart Tour: The Mario team tokens resemble the Mario Coins.
Names in other languages
| Language | Name | Meaning | Notes |
|---|---|---|---|
| Japanese | マリオカート アーケードグランプリ 2[?] Mario Kāto Ākēdo Guranpuri Tsū |
Mario Kart Arcade Grand Prix 2 |
Trivia
- This is the last installment of the Mario Kart series to use the series' original logo font in the game's title.