Bowser's Kingdom: Difference between revisions
m (→Regional coins) |
|||
| (39 intermediate revisions by 17 users not shown) | |||
| Line 14: | Line 14: | ||
}} | }} | ||
'''Bowser's Kingdom''' is the thirteenth kingdom visited in ''[[Super Mario Odyssey]]''. It is the home of [[Bowser]] and the greater location of '''[[Bowser's Castle]]'''. Unlike most games, which feature a Western-European design for his castle, | '''Bowser's Kingdom''' is the thirteenth kingdom visited in ''[[Super Mario Odyssey]]''. It is the home of [[Bowser]] and the greater location of '''[[Bowser's Castle]]'''. Unlike most games, which feature a Western-European design for his castle, Bowser has constructed a new castle for his wedding with [[Princess Peach]]<ref>''[[The Art of Super Mario Odyssey]]'', page 263.</ref>, resulting in a lush, flowering traditional [[Japan|Japanese]] castle, with a concentric series of walls and baileys, a traditional garden and tea house, and a central keep. Instead of the usual [[lava]], its moats are filled with [[Poison (obstacle)|poison]]. | ||
At the end of the kingdom, Mario and Cappy must defeat [[RoboBrood]], a giant robot piloted by the [[Broodals]]. After defeating the Broodals, Mario and Cappy visit the [[Moon Kingdom]] to chase after Bowser and | At the end of the kingdom, Mario and Cappy must defeat [[RoboBrood]], a giant robot piloted by the [[Broodals]]. After defeating the Broodals, Mario and Cappy visit the [[Moon Kingdom]] to chase after Bowser and Princess Peach. | ||
==Brochure details== | ==Brochure details== | ||
[[File:SMO Bowser Brochure A.png|thumb|left|150px|''Mallets big enough to climb on.'']] | [[File:SMO Bowser Brochure A.png|thumb|left|150px|''Mallets big enough to climb on.'']] | ||
<big>Terrifying Gatekeepers</big> | |||
''Don't run afoul of the Stairface Ogres that guard this kingdom. When they spot an intruder, they bring their huge mallets down, no questions asked. On the other hand, you have to admire their tenacity and work ethic. The scars on their faces show they don't give up easily.'' | ''Don't run afoul of the Stairface Ogres that guard this kingdom. When they spot an intruder, they bring their huge mallets down, no questions asked. On the other hand, you have to admire their tenacity and work ethic. The scars on their faces show they don't give up easily.'' | ||
[[File:SMO Bowser Brochure B.png|thumb|200px|''Architecture as lovely as the scenery.'']] | [[File:SMO Bowser Brochure B.png|thumb|200px|''Architecture as lovely as the scenery.'']] | ||
<big>Beautiful Tile Work</big> | |||
''This kingdom's architecture is unique. Roofs are made of heavy, layered tiles that will not budge even if walked upon. They also create a uniformity in the overall design, enhancing the beauty of the palace.'' | ''This kingdom's architecture is unique. Roofs are made of heavy, layered tiles that will not budge even if walked upon. They also create a uniformity in the overall design, enhancing the beauty of the palace.'' | ||
| Line 30: | Line 33: | ||
[[File:SMO Bowser Brochure D.png|thumb|left|150px|''Statues or not, they're certainly imposing.'']] | [[File:SMO Bowser Brochure D.png|thumb|left|150px|''Statues or not, they're certainly imposing.'']] | ||
<big>Statues Guard the Court</big> | |||
''The palace tower highlights the inner citadel, and the gate leading to it is guarded by fearsome statues.'' | ''The palace tower highlights the inner citadel, and the gate leading to it is guarded by fearsome statues.'' | ||
''The statues are fashioned after gods of wind and thunder, the perfect motif for a sky palace, and since they are modeled on Bowser, the ruler of this kingdom, they serve as a warning to foes here and abroad.'' | ''The statues are fashioned after gods of wind and thunder, the perfect motif for a sky palace, and since they are modeled on Bowser, the ruler of this kingdom, they serve as a warning to foes here and abroad.'' | ||
[[File:SMO Bowser Brochure E.png|thumb|150px|''Beware rolling ordinance.'']] | [[File:SMO Bowser Brochure E.png|thumb|150px|''Beware rolling ordinance.'']] | ||
<big>Impressive Fortifications</big> | |||
''Surrounding the inner citadel are the second and third courts. The second court is especially fortified, with many cannons to repel invaders. Cannonballs often roll along the ground, and many tourists fall trying to evade them. Legends speak of invaders [[Pokio|repelling the cannonballs with spears]], but no mere mortal could hope to do this, so try not to get too close!'' | ''Surrounding the inner citadel are the second and third courts. The second court is especially fortified, with many cannons to repel invaders. Cannonballs often roll along the ground, and many tourists fall trying to evade them. Legends speak of invaders [[Pokio|repelling the cannonballs with spears]], but no mere mortal could hope to do this, so try not to get too close!'' | ||
[[File:SMO Bowser Brochure F.png|thumb|left|150px|''These statues, called [[jizo]], stand in a row.'']] | [[File:SMO Bowser Brochure F.png|thumb|left|150px|''These statues, called [[jizo]], stand in a row.'']] | ||
<big>An Oasis of Calm</big> | |||
''This elegant garden is a balm for the brutality of this kingdom and will help you forget all the hardships you faced to reach it. You can even buy souvenirs, so be sure you stop by!'' | ''This elegant garden is a balm for the brutality of this kingdom and will help you forget all the hardships you faced to reach it. You can even buy souvenirs, so be sure you stop by!'' | ||
{{br}} | {{br}} | ||
[[File:SMO Bowser Brochure C.png|thumb|left|50px]] | [[File:SMO Bowser Brochure C.png|thumb|left|50px]] | ||
<big>The Hole Thing</big> | |||
''All along the walls, these holes were meant to allow defenders to shoot at invaders, but nowadays you're more likely to find a demon or a snake coming out than an arrow.'' | ''All along the walls, these holes were meant to allow defenders to shoot at invaders, but nowadays you're more likely to find a demon or a snake coming out than an arrow.'' | ||
{{br}} | {{br}} | ||
[[File:SMO Bowser Brochure G.png|thumb|350px]] | [[File:SMO Bowser Brochure G.png|thumb|350px]] | ||
<big>Three Keys to the Kingdom</big> | |||
# ''Dart past the silent and lethal Stairface Ogres.'' | # ''Dart past the silent and lethal Stairface Ogres.'' | ||
# ''Avoid being distracted by the ominous (yet brightly glowing) clouds.'' | # ''Avoid being distracted by the ominous (yet brightly glowing) clouds.'' | ||
| Line 55: | Line 63: | ||
{{br}} | {{br}} | ||
<big>Map</big> | |||
[[File:SMO Bowser Brochure Map.png|thumb|left|200px]] | [[File:SMO Bowser Brochure Map.png|thumb|left|200px]] | ||
{{br}} | {{br}} | ||
==Checkpoint Flag locations== | ==Checkpoint Flag locations== | ||
===Odyssey=== | ===Odyssey=== | ||
[[File:SMO Bowser's | [[File:SMO Bowser's Kingdom Odyssey.jpg|thumb]] | ||
{{main|Odyssey}} | {{main|Odyssey}} | ||
The Odyssey lands in the southwestern corner of the kingdom. [[Hint Toad]] and [[Uncle amiibo]] are nearby. Mario can throw [[Cappy]] onto one of the Bowser heads on the fence behind the Odyssey to spawn a Power Moon. After completing this kingdom's story objectives, [[Banktoad]] will appear near the front gate along with a [[Warp Pipe]] that leads to the left of the Beneath the Keep checkpoint. | The Odyssey lands in the southwestern corner of the kingdom. [[Hint Toad]] and [[Uncle amiibo]] are nearby. Mario can throw [[Cappy]] onto one of the Bowser heads on the fence behind the Odyssey to spawn a Power Moon. After completing this kingdom's story objectives, [[Banktoad]] will appear near the front gate along with a [[Warp Pipe]] that leads to the left of the Beneath the Keep checkpoint. | ||
===Third Courtyard (Front)=== | ===Third Courtyard (Front)=== | ||
[[File:SMO | [[File:SMO Third Courtyard flag.jpg|thumb]] | ||
At the start of the area are two torches, a [[Checkpoint Flag]], and two [[Pokio]]s. Further to the right is an area with some crates, two [[Spiny|Spinies]], and three [[? Block]]s. The middle ? Block contains a [[Heart (item)|Heart]]. If [[Mario]] [[capture]]s a Pokio, he can fling himself to the upper level, where there is another Spiny, some crates, and a [[spark pylon]] which leads to [[Third Courtyard (Rear)]]. A wall with another Spiny and some [[regional coin]]s on it can also be found up here; if Mario falls off the right side of this wall, he finds a hidden platform with a Pokio and [[Power Moon]] #5, "[[List of Power Moons in Bowser's Kingdom#Behind the Big Wall|Behind the Big Wall]]". | At the start of the area are two torches, a [[Checkpoint Flag]], and two [[Pokio]]s. Further to the right is an area with some crates, two [[Spiny|Spinies]], and three [[? Block]]s. The middle ? Block contains a [[Heart (item)|Heart]]. If [[Mario]] [[capture]]s a Pokio, he can fling himself to the upper level, where there is another Spiny, some crates, and a [[spark pylon]] which leads to [[Third Courtyard (Rear)]]. A wall with another Spiny and some [[regional coin]]s on it can also be found up here; if Mario falls off the right side of this wall, he finds a hidden platform with a Pokio and [[Power Moon]] #5, "[[List of Power Moons in Bowser's Kingdom#Behind the Big Wall|Behind the Big Wall]]". | ||
| Line 77: | Line 84: | ||
|SpaE=Tercer patio (parte frontal) | |SpaE=Tercer patio (parte frontal) | ||
|SpaEM=Third Courtyard (Front Part) | |SpaEM=Third Courtyard (Front Part) | ||
|Ger= Außenhof - Vorderseite | |||
|GerM= Outer Courtyard Front | |||
}} | }} | ||
| Line 92: | Line 101: | ||
|SpaE=Tercer patio (parte trasera) | |SpaE=Tercer patio (parte trasera) | ||
|SpaEM=Third Courtyard (Back Part) | |SpaEM=Third Courtyard (Back Part) | ||
|Ger= Außenhof - Rückseite | |||
|GerM= Outer Courtyard Back | |||
}} | }} | ||
===Second Courtyard=== | ===Second Courtyard=== | ||
[[File:SMO Second Courtyard flag.jpg|thumb]] | |||
The spark pylon at the end of Third Courtyard (Rear) leads here. This area is armed with cannons that fire rolling [[bomb]]s, which can be used to destroy metal crates by using Cappy to alter their trajectory. The second story mission, [[Smart Bombing]], takes place here, in which Mario must collect five Moon Shards to spawn a Power Moon. | The spark pylon at the end of Third Courtyard (Rear) leads here. This area is armed with cannons that fire rolling [[bomb]]s, which can be used to destroy metal crates by using Cappy to alter their trajectory. The second story mission, [[Smart Bombing]], takes place here, in which Mario must collect five Moon Shards to spawn a Power Moon. | ||
| Line 104: | Line 116: | ||
|SpaE=Segundo Patio | |SpaE=Segundo Patio | ||
|SpaEM=Second Courtyard | |SpaEM=Second Courtyard | ||
|Ger= Mittelhof | |||
|GerM= Middle Yard | |||
}} | }} | ||
===Souvenir Shop=== | ===Souvenir Shop=== | ||
[[File:Crazy Cap Bowsers Kingdom.jpg|thumb]] | [[File:Crazy Cap Bowsers Kingdom.jpg|thumb]] | ||
[[File:SMO Souvenir Shop flag.jpg|thumb]] | |||
This island is in between the Second Courtyard and Main Courtyard Entrance, and it consists of a [[Crazy Cap]] surrounded by a small garden. Behind the shop is a small sitting area. A [[New Donker]] stands next to a locked door in the back of the shoppe, granting Mario access to a secret area if he is wearing the Samurai Helmet and Samurai Armor. | This island is in between the Second Courtyard and Main Courtyard Entrance, and it consists of a [[Crazy Cap]] surrounded by a small garden. Behind the shop is a small sitting area. A [[New Donker]] stands next to a locked door in the back of the shoppe, granting Mario access to a secret area if he is wearing the Samurai Helmet and Samurai Armor. | ||
| Line 119: | Line 134: | ||
|SpaE=Tienda de recuerdos | |SpaE=Tienda de recuerdos | ||
|SpaEM=Souvenir Shop | |SpaEM=Souvenir Shop | ||
|Ger= Souvenir-Shop | |||
|GerM= Souvenir Shop | |||
}} | }} | ||
===Main Courtyard Entrance=== | ===Main Courtyard Entrance=== | ||
[[File:SMO Bowser Brochure D.png|thumb]] | [[File:SMO Bowser Brochure D.png|thumb]] | ||
[[File:SMO Main Courtyard Entrance flag.jpg|thumb]] | |||
[[Hariet]] and [[Topper]] are fought in this area. The [[Checkpoint Flag]] is on the bridge in the middle. A [[Jizo]] statue is installed behind the building on the right. Mario may capture the statue and hop around a bit to find glowing spots have appeared in the ground. Moving the Jizo over these spots often reveals [[coin]]s, [[Heart (item)|heart]]s, and possibly a [[Life-Up Heart]]. There is a painting behind the building on the left leading to either the [[Snow Kingdom]] or [[Seaside Kingdom]] depending on the order in which they were visited. Three regional coins may also be found atop this building. There are two large, round platforms on either side of the large, golden [[Bowser Statue]]s. Mario must fight Topper on the platform on the right and Hariet on the platform on the left. Defeating both of them reveals a [[Power Moon]] between the platforms Mario must collect to complete the mission and open up a bridge to the Main Courtyard. | [[Hariet]] and [[Topper]] are fought in this area. The [[Checkpoint Flag]] is on the bridge in the middle. A [[Jizo]] statue is installed behind the building on the right. Mario may capture the statue and hop around a bit to find glowing spots have appeared in the ground. Moving the Jizo over these spots often reveals [[coin]]s, [[Heart (item)|heart]]s, and possibly a [[Life-Up Heart]]. There is a painting behind the building on the left leading to either the [[Snow Kingdom]] or [[Seaside Kingdom]] depending on the order in which they were visited. Three regional coins may also be found atop this building. There are two large, round platforms on either side of the large, golden [[Bowser Statue]]s. Mario must fight Topper on the platform on the right and Hariet on the platform on the left. Defeating both of them reveals a [[Power Moon]] between the platforms Mario must collect to complete the mission and open up a bridge to the Main Courtyard. | ||
| Line 131: | Line 149: | ||
|Jap=クッパ城 本丸前 | |Jap=クッパ城 本丸前 | ||
|JapR=Kuppa Jō Honmaru Mae | |JapR=Kuppa Jō Honmaru Mae | ||
|JapM=Bowser's Castle Ward | |JapM=Bowser's Castle In Front of the Main Ward | ||
|SpaE=Entrada al patio principal | |SpaE=Entrada al patio principal | ||
|SpaEM=Main Courtyard Entrance | |SpaEM=Main Courtyard Entrance | ||
|Ger= Haupthof - Eingang | |||
|GerM= Main Courtyard Entrance | |||
}} | }} | ||
===Main Courtyard=== | ===Main Courtyard=== | ||
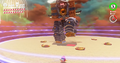
[[File:SMO | [[File:SMO Main Courtyard flag.jpg|thumb]] | ||
This Checkpoint Flag is right beyond the door that opens after fighting Hariet and Topper. The kingdom's Moon Rock and [[Hint Art]] are found here. Up ahead is a bridge leading to the main part of the castle, where Mario must capture Pokios and scale walls while dodging bombs. | This Checkpoint Flag is right beyond the door that opens after fighting Hariet and Topper. The kingdom's Moon Rock and [[Hint Art]] are found here. Up ahead is a bridge leading to the main part of the castle, where Mario must capture Pokios and scale walls while dodging bombs. | ||
| Line 145: | Line 165: | ||
|JapR=Kuppa Jō Honmaru Iruguchi | |JapR=Kuppa Jō Honmaru Iruguchi | ||
|JapM=Bowser's Castle Ward Entrance | |JapM=Bowser's Castle Ward Entrance | ||
|SpaE=Patio principal | |||
|SpaEM=Main Courtyard | |||
|Ger= Haupthof | |||
|GerM= Main Courtyard | |||
}} | }} | ||
===Outer Wall=== | ===Outer Wall=== | ||
[[File:SMO Bowser's Moon 14.png|thumb|left]] | [[File:SMO Bowser's Moon 14.png|thumb|left]] | ||
[[File:SMO Outer Wall flag.jpg|thumb]] | |||
This Checkpoint Flag is found right after getting past the bombs in the Main Courtyard. Up ahead is a Stairface Ogre guarding a tall wall with rotating circles that Mario must scale with a captured Pokio. Nearby metal crates, one of which contains a Power Moon, can be broken by having the Stairface Ogre crush them. | This Checkpoint Flag is found right after getting past the bombs in the Main Courtyard. Up ahead is a Stairface Ogre guarding a tall wall with rotating circles that Mario must scale with a captured Pokio. Nearby metal crates, one of which contains a Power Moon, can be broken by having the Stairface Ogre crush them. | ||
====Names in other languages==== | |||
{{foreign names | |||
|Jap=クッパ城 壱の壁 | |||
|JapR=Kuppa Jō Ichi no Kabe | |||
|JapM=Bowser's Castle Outer Wall | |||
|SpaE=Muro exterior del Castillo de Bowser | |||
|SpaEM=Outer Wall of Bowser's Castle | |||
|Ger= Äußere Mauer | |||
|GerM= Outer Wall | |||
}} | |||
===Inner Wall=== | ===Inner Wall=== | ||
[[File:SMO Inner Wall flag.jpg|thumb]] | |||
This Checkpoint Flag is at the top of the Outer Wall. Up ahead is another Pokio wall, this one featuring horizontally sliding rectangular panels and columns of spikes Mario must avoid. | This Checkpoint Flag is at the top of the Outer Wall. Up ahead is another Pokio wall, this one featuring horizontally sliding rectangular panels and columns of spikes Mario must avoid. | ||
====Names in other languages==== | |||
{{foreign names | |||
|Jap=クッパ城 弐の壁 | |||
|JapR=Kuppa Jō Ni no Kabe | |||
|JapM=Bowser's Castle Inner Wall | |||
|SpaE=Muro interior del Castillo de Bowser | |||
|SpaEM=Inner Wall of Bowser's Castle | |||
|Ger= Innere Mauer | |||
|GerM= Inner Wall | |||
}} | |||
===Beneath the Keep=== | ===Beneath the Keep=== | ||
[[File:SMO Bowser's Moon 11.png|thumb]] | [[File:SMO Bowser's Moon 11.png|thumb]] | ||
[[File:SMO Beneath the Keep flag.jpg|thumb]] | |||
At the top of the Inner Wall, Mario will find a Checkpoint Flag on a bridge over a pool of poison. [[Talkatoo]] is found here, as is the leader of the [[Roving Racers]] later on. Up ahead is a spark pylon that takes Mario to the roof of a [[wikipedia:Tenshu|Tenshu]] with a massive golden model of Bowser's head within it. This is where Mario encounters Bowser and initiates the battle with [[RoboBrood]] over the arena. | At the top of the Inner Wall, Mario will find a Checkpoint Flag on a bridge over a pool of poison. [[Talkatoo]] is found here, as is the leader of the [[Roving Racers]] later on. Up ahead is a spark pylon that takes Mario to the roof of a [[wikipedia:Tenshu|Tenshu]] with a massive golden model of Bowser's head within it. This is where Mario encounters Bowser and initiates the battle with [[RoboBrood]] over the arena. | ||
| Line 167: | Line 215: | ||
|JapM=Bowser's Castle Beneath the Keep | |JapM=Bowser's Castle Beneath the Keep | ||
|SpaE=Bajo el torreón del Castillo de Bowser | |SpaE=Bajo el torreón del Castillo de Bowser | ||
|SpaEM=Beneath the Keep of Bowser's Castle | |SpaEM=Beneath the Keep of Bowser's Castle | ||
|Ger= Am Fuße des Turms | |||
|GerM= At The Foot Of The Tower | |||
}} | }} | ||
===Showdown Arena=== | ===Showdown Arena=== | ||
[[File:SMO Bowser's Moon 42.png|thumb]] | [[File:SMO Bowser's Moon 42.png|thumb]] | ||
[[File:SMO Showdown Arena flag.jpg|thumb]] | |||
A circular arena where RoboBrood is fought. After defeating RoboBrood, there is a Warp Pipe leading to a bonus area and a [[Scarecrow (object)|scarecrow]] that spawns a tower of rotating platforms leading to a Power Moon. Another Power Moon can be found buried under the ground. | A circular arena where RoboBrood is fought. After defeating RoboBrood, there is a Warp Pipe leading to a bonus area and a [[Scarecrow (object)|scarecrow]] that spawns a tower of rotating platforms leading to a Power Moon. Another Power Moon can be found buried under the ground. | ||
====Names in other languages==== | |||
{{foreign names | |||
|Jap=クッパ城 決戦場 | |||
|JapR=Kuppa Jō Kensenjō | |||
|JapM=Bowser's Castle Showdown Arena | |||
|SpaE=Plaza de combate | |||
|SpaEM=Combat Square | |||
|Ger= Arena der Entscheidung | |||
|GerM= Arnena Of Decision | |||
}} | |||
===Island in the Sky=== | ===Island in the Sky=== | ||
| Line 190: | Line 252: | ||
|SpaE=Isla en el cielo | |SpaE=Isla en el cielo | ||
|SpaEM=Island in the Sky | |SpaEM=Island in the Sky | ||
|Ger= Insel im Himmel | |||
|GerM= Island In The Sky | |||
}} | }} | ||
| Line 287: | Line 351: | ||
'''Starting Area / Odyssey - 4 coins''' | '''Starting Area / Odyssey - 4 coins''' | ||
*'''4 coins:''' | *'''4 coins:''' Above the entrance door. | ||
'''Third Courtyard (Front) - 4 coins''' | '''Third Courtyard (Front) - 4 coins''' | ||
*'''4 coins:''' In plain sight at the end of a roof. | *'''4 coins:''' In plain sight at the end of a roof. | ||
''' | '''Third Courtyard (Rear) - 8 coins''' | ||
*'''4 coins:''' | *'''4 coins:''' Behind a wall near the exit spark pylon, accessible via Pokio. | ||
*'''4 coins:''' On top of the easternmost wall. | |||
*''' | |||
''' | '''Second Courtyard - 23 coins''' | ||
*''' | *'''3 coins:''' On a ledge east of the checkpoint flag. | ||
*''' | *'''3 coins:''' In a nook near some Spinies. | ||
*'''3 coins:''' | *'''3 coins:''' Beyond the easternmost roof. | ||
*'''3 coins:''' On a plaster wall below the tall building, accessible via Pokio. | |||
*'''4 coins:''' Behind the northeast wall of the courtyard, accessible via Pokio. | |||
*'''4 coins:''' On top of the tall building. | |||
*'''3 coins:''' On the northwest roof. | |||
'''Souvenir Shop - 3 coins''' | |||
*'''3 coins:''' On the roof of the Crazy Cap shop. | *'''3 coins:''' On the roof of the Crazy Cap shop. | ||
| Line 310: | Line 376: | ||
'''Main Courtyard - 12 coins''' | '''Main Courtyard - 12 coins''' | ||
*'''3 coins:''' | *'''3 coins:''' Above the main gates on the roof. | ||
*'''3 coins:''' | *'''3 coins:''' To the right of the gate facing the entrance. | ||
*'''3 coins:''' | *'''3 coins:''' To the left of the gate facing the main keep. | ||
*'''3 coins:''' | *'''3 coins:''' In the left pool. | ||
'''Outer Wall - 10 coins''' | '''Outer Wall - 10 coins''' | ||
*'''3 coins:''' Near the checkpoint flag, obtained by capturing a Pokio and dropping down. | *'''3 coins:''' Near the checkpoint flag, obtained by capturing a Pokio and dropping down. | ||
*'''4 coins:''' | *'''4 coins:''' On the rightmost wall circle. | ||
*'''3 coins:''' | *'''3 coins:''' In the middle of the leftmost wall circle. | ||
'''Inner Wall - 6 coins''' | '''Inner Wall - 6 coins''' | ||
| Line 325: | Line 391: | ||
'''Beneath the Keep - 24 coins''' | '''Beneath the Keep - 24 coins''' | ||
*'''3 coins:''' On the | *'''3 coins:''' Above the On Top of the Spinning Tower room door, accessible via jumping off the Dashing Above the Clouds beanstalk. | ||
*'''3 coins:''' On the | *'''3 coins:''' On the other side of the poison pool from the last coins, on a platform. | ||
*'''3 coins:''' | *'''3 coins:''' Above the poison pool located below the Bowser's Kingdom Treasure Vault area. | ||
*'''3 coins:''' On the | *'''3 coins:''' On the wall during the ascent to Bowser's Castle Treasure Vault, accessible via Pokio. | ||
*'''3 coins:''' Under the bridge, obtained by capturing the Lakitu on the right side. | *'''3 coins:''' Under the bridge, obtained by capturing the Lakitu on the right side. | ||
*'''3 coins:''' | *'''3 coins:''' Above the gate in front of the spark pylon, accessible via a slingshot in the northwest corner (requires Lakitu). | ||
*'''3 coins:''' | *'''3 coins:''' On the keep roof, on the left side. | ||
*'''3 coins:''' | *'''3 coins:''' On a lantern after taking the spark pylon to the keep roof and dropping down onto the Bowser statue. | ||
'''Showdown Arena - 3 coins''' | '''Showdown Arena - 3 coins''' | ||
| Line 340: | Line 406: | ||
{|class="wikitable"style="text-align:center" | {|class="wikitable"style="text-align:center" | ||
|- | |- | ||
! | !Item | ||
!Description | !Description | ||
!Price | !Price | ||
!Note | !Note | ||
|- | |- | ||
|[[File:SMO Samurai Helmet.png|100px]] | |[[File:SMO Samurai Helmet.png|100px]]<br>Samurai Helmet | ||
|{{anchor|Samurai Helmet}}''The samurai wore helmets that were functional AND fancy.'' | |{{anchor|Samurai Helmet}}''The samurai wore helmets that were functional AND fancy.'' | ||
|[[File:SMO_Art_-_Regional_Coin_(Bowser's).svg|20px]] 5 | |[[File:SMO_Art_-_Regional_Coin_(Bowser's).svg|20px]] 5 | ||
|Required for "Scene of Crossing the Poison Swamp" and "Taking Notes: In the Folding Screen" | |Required for "Scene of Crossing the Poison Swamp" and "Taking Notes: In the Folding Screen" | ||
|- | |- | ||
|[[File:SMO Samurai Armor.png|100px]] | |[[File:SMO Samurai Armor.png|100px]]<br>Samurai Armor | ||
|{{anchor|Samurai Armor}}''The samurai basically walked around wearing works of art.'' | |{{anchor|Samurai Armor}}''The samurai basically walked around wearing works of art.'' | ||
|[[File:SMO_Art_-_Regional_Coin_(Bowser's).svg|20px]] 10 | |[[File:SMO_Art_-_Regional_Coin_(Bowser's).svg|20px]] 10 | ||
|Required for "Scene of Crossing the Poison Swamp" and "Taking Notes: In the Folding Screen" | |Required for "Scene of Crossing the Poison Swamp" and "Taking Notes: In the Folding Screen" | ||
|- | |- | ||
|[[File:SMO Happi Headband.png|100px]] | |[[File:SMO Happi Headband.png|100px]]<br>Happi Headband | ||
|{{anchor|Happi Headband}}''This coiled headband is perfect when you want to cover just a BIT of your head.'' | |{{anchor|Happi Headband}}''This coiled headband is perfect when you want to cover just a BIT of your head.'' | ||
|[[File:SMO_Art_-_Regional_Coin_(Bowser's).svg|20px]] 20 | |[[File:SMO_Art_-_Regional_Coin_(Bowser's).svg|20px]] 20 | ||
|N/A | |N/A | ||
|- | |- | ||
|[[File:SMO Happi Outfit.png|100px]] | |[[File:SMO Happi Outfit.png|100px]]<br>Happi Outfit | ||
|{{anchor|Happi Outfit}}''Traditional clothing designed to be easy to move around in at a festival.'' | |{{anchor|Happi Outfit}}''Traditional clothing designed to be easy to move around in at a festival.'' | ||
|[[File:SMO_Art_-_Regional_Coin_(Bowser's).svg|20px]] 25 | |[[File:SMO_Art_-_Regional_Coin_(Bowser's).svg|20px]] 25 | ||
|N/A | |N/A | ||
|- | |- | ||
|[[File:SMO Paper Lantern Souvenir.png|100px]] | |[[File:SMO Paper Lantern Souvenir.png|100px]]<br>Paper Lantern | ||
|{{anchor|Paper Lantern}}''These lanterns are found in Bowser's Castle. In the old days, people used to walk around with them like flashlights!'' | |{{anchor|Paper Lantern}}''These lanterns are found in Bowser's Castle. In the old days, people used to walk around with them like flashlights!'' | ||
|[[File:SMO Art - Regional Coin (Bowser's).svg|20px]] 5 | |[[File:SMO Art - Regional Coin (Bowser's).svg|20px]] 5 | ||
|N/A | |N/A | ||
|- | |- | ||
|[[File:SMO Jizo Statue Souvenir.png|100px]] | |[[File:SMO Jizo Statue Souvenir.png|100px]]<br>Jizo Statue | ||
|{{anchor|Jizo Statue}}''Found placed all over, these guardian deities watch over travelers in silent protection.'' | |{{anchor|Jizo Statue}}''Found placed all over, these guardian deities watch over travelers in silent protection.'' | ||
|[[File:SMO Art - Regional Coin (Bowser's).svg|20px]] 25 | |[[File:SMO Art - Regional Coin (Bowser's).svg|20px]] 25 | ||
|N/A | |N/A | ||
|- | |- | ||
|[[File:SMO Bowser's Kingdom Sticker Souvenir.png|100px]] | |[[File:SMO Bowser's Kingdom Sticker Souvenir.png|100px]]<br>Bowser's Kingdom Sticker | ||
|{{anchor|Bowser's Kingdom Sticker}}''A sticker inspired by Bowser's Castle.'' | |{{anchor|Bowser's Kingdom Sticker}}''A sticker inspired by Bowser's Castle.'' | ||
|[[File:SMO Art - Regional Coin (Bowser's).svg|20px]] 5 | |[[File:SMO Art - Regional Coin (Bowser's).svg|20px]] 5 | ||
|N/A | |N/A | ||
|- | |- | ||
|[[File:SMO Power Moon Red.png|100px]] | |[[File:SMO Power Moon Red.png|100px]]<br>Bowser's Kingdom Power Moon | ||
|''A Power Moon that was recovered from Bowser's kingdom.'' | |''A Power Moon that was recovered from Bowser's kingdom.'' | ||
|[[File:SMO_coin.png|20px]] 100 | |[[File:SMO_coin.png|20px]] 100 | ||
| Line 423: | Line 480: | ||
|Spa=Reino de Bowser | |Spa=Reino de Bowser | ||
|SpaM=Bowser's Kingdom | |SpaM=Bowser's Kingdom | ||
| | |Fre=Pays de Bowser | ||
| | |FreM=Bowser's Country | ||
|Ger=Bowsers Land | |Ger=Bowsers Land | ||
|GerM = Bowser's Country | |GerM = Bowser's Country | ||
| Line 448: | Line 505: | ||
|Spa=Castillo de Bowser | |Spa=Castillo de Bowser | ||
|SpaM=Bowser's Castle | |SpaM=Bowser's Castle | ||
| | |Fre=Château de Bowser | ||
| | |FreM=Bowser's Castle | ||
|Ger=Bowsers Festung | |Ger=Bowsers Festung | ||
|GerM=Bowser's Fortress | |GerM=Bowser's Fortress | ||
| Line 467: | Line 524: | ||
==Trivia== | ==Trivia== | ||
*Many ornaments strewn throughout the kingdom, such as the [[wikipedia:Nobori|nobori]] and the [[wikipedia:Traditional lighting equipment of Japan#Chōchin|chōchin]], contain the kanji | *Many ornaments strewn throughout the kingdom, such as the [[wikipedia:Nobori|nobori]] and the [[wikipedia:Traditional lighting equipment of Japan#Chōchin|chōchin]], contain the kanji {{hover|寿|ことぶき}} (''kotobuki''), which means "long life". Some chōchin additionally contain the compound {{hover|空覇|そらは}} (can also be read as ''kuppa'', Bowser's Japanese name), literally meaning "celestial supremacy". Put together, the kanji translates as "Long live King Bowser!" | ||
*The kingdom's industry (hanafuda cards) may be a reference to Nintendo's origins as a card company. | *The kingdom's industry (hanafuda cards) may be a reference to Nintendo's origins as a card company. | ||
*The Bowser statues seen during the boss battles against Topper and Hariet are based on the Japanese gods ''{{wp| | *The Bowser statues seen during the boss battles against Topper and Hariet are based on the Japanese gods ''{{wp|Fūjin}}'', the god of winds, and ''{{wp|Raijin}}'', the god of thunder, respectively. | ||
*While capturing a [[spark pylon]] in this kingdom, the sound it makes to the music is replaced by {{wp|Koto (instrument)|koto}} samples to reflect its Japanese theme. Additionally, if specific music is played in the [[List of Super Mario Odyssey media|Music List]], the sound will slow down. | *While capturing a [[spark pylon]] in this kingdom, the sound it makes to the music is replaced by {{wp|Koto (instrument)|koto}} samples to reflect its Japanese theme. Additionally, if specific music is played in the [[List of Super Mario Odyssey media|Music List]], the sound will slow down. | ||
==References== | |||
<references/> | |||
{{SMO}} | {{SMO}} | ||
{{SMO kingdoms}} | {{SMO kingdoms}} | ||
[[Category:Bowser's castles]] | [[Category:Bowser's castles]] | ||
[[Category: | [[Category:Temples]] | ||
[[Category:Super Mario Odyssey kingdoms]] | [[Category:Super Mario Odyssey kingdoms]] | ||
[[it:Regno di Bowser]] | [[it:Regno di Bowser]] | ||
Latest revision as of 21:14, March 30, 2024
- This article is about Bowser's Kingdom in Super Mario Odyssey. For the final world in Super Mario World 2: Yoshi's Island also referred to as "Koopa Kingdom", see World 6 (Super Mario World 2: Yoshi's Island).
| Bowser's Kingdom | |||
|---|---|---|---|
| Well-Defended Castle Floating Among Glowing Clouds | |||

| |||
| Bowser's Castle | |||
| The castle that walled off the sky. | |||
| Population | Middling | ||
| Size | Sprawling | ||
| Locals | Stairface Ogres | ||
| Currency | Oblong | ||
| Industry | Hanafuda cards | ||
| Temperature | Average 79°F (26°C) | ||
| First appearance | Super Mario Odyssey (2017) | ||
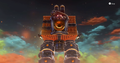
Bowser's Kingdom is the thirteenth kingdom visited in Super Mario Odyssey. It is the home of Bowser and the greater location of Bowser's Castle. Unlike most games, which feature a Western-European design for his castle, Bowser has constructed a new castle for his wedding with Princess Peach[1], resulting in a lush, flowering traditional Japanese castle, with a concentric series of walls and baileys, a traditional garden and tea house, and a central keep. Instead of the usual lava, its moats are filled with poison.
At the end of the kingdom, Mario and Cappy must defeat RoboBrood, a giant robot piloted by the Broodals. After defeating the Broodals, Mario and Cappy visit the Moon Kingdom to chase after Bowser and Princess Peach.
Brochure details[edit]

Terrifying Gatekeepers
Don't run afoul of the Stairface Ogres that guard this kingdom. When they spot an intruder, they bring their huge mallets down, no questions asked. On the other hand, you have to admire their tenacity and work ethic. The scars on their faces show they don't give up easily.

Beautiful Tile Work
This kingdom's architecture is unique. Roofs are made of heavy, layered tiles that will not budge even if walked upon. They also create a uniformity in the overall design, enhancing the beauty of the palace.
Though you can move along the roofs, this palace rests quite high in the sky, and if you fall off, you will most definitely die. It's not the surest footing either, so be careful.

Statues Guard the Court
The palace tower highlights the inner citadel, and the gate leading to it is guarded by fearsome statues.
The statues are fashioned after gods of wind and thunder, the perfect motif for a sky palace, and since they are modeled on Bowser, the ruler of this kingdom, they serve as a warning to foes here and abroad.

Impressive Fortifications
Surrounding the inner citadel are the second and third courts. The second court is especially fortified, with many cannons to repel invaders. Cannonballs often roll along the ground, and many tourists fall trying to evade them. Legends speak of invaders repelling the cannonballs with spears, but no mere mortal could hope to do this, so try not to get too close!

An Oasis of Calm
This elegant garden is a balm for the brutality of this kingdom and will help you forget all the hardships you faced to reach it. You can even buy souvenirs, so be sure you stop by!

The Hole Thing
All along the walls, these holes were meant to allow defenders to shoot at invaders, but nowadays you're more likely to find a demon or a snake coming out than an arrow.

Three Keys to the Kingdom
- Dart past the silent and lethal Stairface Ogres.
- Avoid being distracted by the ominous (yet brightly glowing) clouds.
- Survive the various traps designed to end your trip early.
Map

Checkpoint Flag locations[edit]
Odyssey[edit]

- Main article: Odyssey
The Odyssey lands in the southwestern corner of the kingdom. Hint Toad and Uncle amiibo are nearby. Mario can throw Cappy onto one of the Bowser heads on the fence behind the Odyssey to spawn a Power Moon. After completing this kingdom's story objectives, Banktoad will appear near the front gate along with a Warp Pipe that leads to the left of the Beneath the Keep checkpoint.
Third Courtyard (Front)[edit]

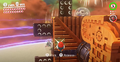
At the start of the area are two torches, a Checkpoint Flag, and two Pokios. Further to the right is an area with some crates, two Spinies, and three ? Blocks. The middle ? Block contains a Heart. If Mario captures a Pokio, he can fling himself to the upper level, where there is another Spiny, some crates, and a spark pylon which leads to Third Courtyard (Rear). A wall with another Spiny and some regional coins on it can also be found up here; if Mario falls off the right side of this wall, he finds a hidden platform with a Pokio and Power Moon #5, "Behind the Big Wall".
Names in other languages[edit]
| Language | Name | Meaning |
|---|---|---|
| Japanese | クッパ城 三の丸 手前 Kuppa Jō San no Maru Temae |
Bowser's Castle Third Ward Front |
| German | Außenhof - Vorderseite |
Outer Courtyard Front |
| Spanish (NOE) | Tercer patio (parte frontal) |
Third Courtyard (Front Part) |
Third Courtyard (Rear)[edit]

This area is reached after leaving Third Courtyard (Front) via a spark pylon. After some stairs, Mario reaches an enclosed area with two Spinies, three ? Blocks, and a rainbow treble clef on the left. The middle ? Block is a Coin Block. Above the middle ? Block is a Hidden Block containing a Heart. If Mario touches the treble clef, Notes appear in the pen. Collecting all of them before time runs out makes Power Moon #18, "Taking Notes: Between Spinies", appear in place of the treble clef. To the right of the pen are three coin rings over a pit. After that is a Stairface Ogre. Once Mario defeats it, Power Moon #1, "Infiltrate Bowser's Castle!" appears from behind. After collecting this Power Moon, the doors ahead open and stairs rise, taking Mario to an area with crates and a spark pylon which takes him to the Second Courtyard. In the crate section, Mario is able to get up onto the roof, where he can find some regional coins, as well as a Pokio on the side. Mario can capture the Pokio and poke the hole in the middle of the wall to reveal Power Moon #21, "Poking Your Nose in the Plaster Wall".
After opening the kingdom's Moon Rock, a second rainbow treble clef appears over the roof, on the side of the courtyard. Mario can touch this treble clef for notes to appear on the wall, which he must use a Pokio to collect. After collecting all of the notes in the given time, Power Moon #54, "Taking Notes: On the Wall", appears for Mario to collect.
Names in other languages[edit]
| Language | Name | Meaning |
|---|---|---|
| Japanese | クッパ城 三の丸 奥 Kuppa Jō San no Maru Oku |
Bowser's Castle Third Ward Interior |
| German | Außenhof - Rückseite |
Outer Courtyard Back |
| Spanish (NOE) | Tercer patio (parte trasera) |
Third Courtyard (Back Part) |
Second Courtyard[edit]

The spark pylon at the end of Third Courtyard (Rear) leads here. This area is armed with cannons that fire rolling bombs, which can be used to destroy metal crates by using Cappy to alter their trajectory. The second story mission, Smart Bombing, takes place here, in which Mario must collect five Moon Shards to spawn a Power Moon.
Names in other languages[edit]
| Language | Name | Meaning |
|---|---|---|
| Japanese | クッパ城 二の丸 Kuppa Jō Ni no Maru |
Bowser's Castle Second Ward |
| German | Mittelhof |
Middle Yard |
| Spanish (NOE) | Segundo Patio |
Second Courtyard |
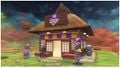
Souvenir Shop[edit]


This island is in between the Second Courtyard and Main Courtyard Entrance, and it consists of a Crazy Cap surrounded by a small garden. Behind the shop is a small sitting area. A New Donker stands next to a locked door in the back of the shoppe, granting Mario access to a secret area if he is wearing the Samurai Helmet and Samurai Armor.
There are two Jizo statues on the side of the shoppe. Mario may capture one and put it in place with the others in the garden to reveal a Power Moon. He may also break through a cracked stone slab nearby to find a hidden area with a missing Jizo. Once again, getting the Jizo into the correct position reveals a Power Moon. There is then a Warp Pipe taking Mario back to the surface. In the post-game, Princess Peach and Tiara visit this area.
Names in other languages[edit]
| Language | Name | Meaning |
|---|---|---|
| Japanese | 門前の土産物店 Monzen no Miyagemonoten |
Souvenir Shop Before the Gate |
| German | Souvenir-Shop |
Souvenir Shop |
| Spanish (NOE) | Tienda de recuerdos |
Souvenir Shop |
Main Courtyard Entrance[edit]

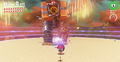
Hariet and Topper are fought in this area. The Checkpoint Flag is on the bridge in the middle. A Jizo statue is installed behind the building on the right. Mario may capture the statue and hop around a bit to find glowing spots have appeared in the ground. Moving the Jizo over these spots often reveals coins, hearts, and possibly a Life-Up Heart. There is a painting behind the building on the left leading to either the Snow Kingdom or Seaside Kingdom depending on the order in which they were visited. Three regional coins may also be found atop this building. There are two large, round platforms on either side of the large, golden Bowser Statues. Mario must fight Topper on the platform on the right and Hariet on the platform on the left. Defeating both of them reveals a Power Moon between the platforms Mario must collect to complete the mission and open up a bridge to the Main Courtyard.
After this kingdom's Moon Rock has been cracked open, a few additional Power Moons become available in this area. Mario may return to where Topper was fought to find Yoofoe, which must be defeated to earn a Power Moon. A lock also appears near the spark pylon here, in front of the flags floating nearby. Mario may grab on and use them as flagpoles to reach a key he must collect to unlock this Power Moon. The final Power Moon involves collecting all of the notes that appear over the platform on which Hariet was previously fought. Collecting them all in the limited time awards Mario this Power Moon.
Names in other languages[edit]
| Language | Name | Meaning |
|---|---|---|
| Japanese | クッパ城 本丸前 Kuppa Jō Honmaru Mae |
Bowser's Castle In Front of the Main Ward |
| German | Haupthof - Eingang |
Main Courtyard Entrance |
| Spanish (NOE) | Entrada al patio principal |
Main Courtyard Entrance |
Main Courtyard[edit]

This Checkpoint Flag is right beyond the door that opens after fighting Hariet and Topper. The kingdom's Moon Rock and Hint Art are found here. Up ahead is a bridge leading to the main part of the castle, where Mario must capture Pokios and scale walls while dodging bombs.
Names in other languages[edit]
| Language | Name | Meaning |
|---|---|---|
| Japanese | クッパ城 本丸入口 Kuppa Jō Honmaru Iruguchi |
Bowser's Castle Ward Entrance |
| German | Haupthof |
Main Courtyard |
| Spanish (NOE) | Patio principal |
Main Courtyard |
Outer Wall[edit]


This Checkpoint Flag is found right after getting past the bombs in the Main Courtyard. Up ahead is a Stairface Ogre guarding a tall wall with rotating circles that Mario must scale with a captured Pokio. Nearby metal crates, one of which contains a Power Moon, can be broken by having the Stairface Ogre crush them.
Names in other languages[edit]
| Language | Name | Meaning |
|---|---|---|
| Japanese | クッパ城 壱の壁 Kuppa Jō Ichi no Kabe |
Bowser's Castle Outer Wall |
| German | Äußere Mauer |
Outer Wall |
| Spanish (NOE) | Muro exterior del Castillo de Bowser |
Outer Wall of Bowser's Castle |
Inner Wall[edit]

This Checkpoint Flag is at the top of the Outer Wall. Up ahead is another Pokio wall, this one featuring horizontally sliding rectangular panels and columns of spikes Mario must avoid.
Names in other languages[edit]
| Language | Name | Meaning |
|---|---|---|
| Japanese | クッパ城 弐の壁 Kuppa Jō Ni no Kabe |
Bowser's Castle Inner Wall |
| German | Innere Mauer |
Inner Wall |
| Spanish (NOE) | Muro interior del Castillo de Bowser |
Inner Wall of Bowser's Castle |
Beneath the Keep[edit]


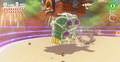
At the top of the Inner Wall, Mario will find a Checkpoint Flag on a bridge over a pool of poison. Talkatoo is found here, as is the leader of the Roving Racers later on. Up ahead is a spark pylon that takes Mario to the roof of a Tenshu with a massive golden model of Bowser's head within it. This is where Mario encounters Bowser and initiates the battle with RoboBrood over the arena.
Though most of the area surrounding the Checkpoint Flag is surrounded by poison, there are a few additional Power Moons as well as regional coins Mario can pick up. One of the buildings near the keep has a frame with Japanese writing. Mario must throw Cappy at it to knock it down, making the Power Moon appear. Another building in this area has a scarecrow initiating a timer challenge over the poison. Lakitu can also be found in this area, and may be used to "fish" in the poison moat. Reeling in the largest fish reveals Poochy, and subsequently, a Power Moon.
Names in other languages[edit]
| Language | Name | Meaning |
|---|---|---|
| Japanese | クッパ城 天守下 Kuppa Jō Tenshushita |
Bowser's Castle Beneath the Keep |
| German | Am Fuße des Turms |
At The Foot Of The Tower |
| Spanish (NOE) | Bajo el torreón del Castillo de Bowser |
Beneath the Keep of Bowser's Castle |
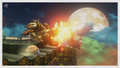
Showdown Arena[edit]


A circular arena where RoboBrood is fought. After defeating RoboBrood, there is a Warp Pipe leading to a bonus area and a scarecrow that spawns a tower of rotating platforms leading to a Power Moon. Another Power Moon can be found buried under the ground.
Names in other languages[edit]
| Language | Name | Meaning |
|---|---|---|
| Japanese | クッパ城 決戦場 Kuppa Jō Kensenjō |
Bowser's Castle Showdown Arena |
| German | Arena der Entscheidung |
Arnena Of Decision |
| Spanish (NOE) | Plaza de combate |
Combat Square |
Island in the Sky[edit]

The Island in the Sky can be accessed using a painting found in Cascade Kingdom. Located on the island is the Secret Path to Bowser's Castle! Power Moon.
Names in other languages[edit]
| Language | Name | Meaning |
|---|---|---|
| Japanese | 空に浮かぶ小島 Sora ni Ukabu Kojima |
Islet Floating in the Sky |
| Chinese | 飘浮在空中的小岛 (Simplified) Piāofú zài kōngzhōng de xiǎodǎo 飄在空中的小島 (Traditional) Piāo zài kōngzhōng de xiǎodǎo |
Islet Floating in the Sky |
| German | Insel im Himmel |
Island In The Sky |
| Russian | Платформа в небе Platforma v nebe |
Platform in the Sky |
| Spanish (NOE) | Isla en el cielo |
Island in the Sky |
Bonus areas[edit]
| Bonus area | Accessed via | Location | Description |
|---|---|---|---|
 Bowser's Castle Treasure Vault |
Open doorway | Below the left side of the large poison pool surrounding the "Beneath the Keep" Checkpoint Flag | A small, golden room with many coin piles and a treasure chest containing a Power Moon. The doorway leading to this room is reached by scaling the wall with spinning, wooden, circular panels as a Pokio. The coins do not reappear if Mario revisits the room after he has already collected them.
There is a total of 255 coins in the room, referencing a common hard limit in video games using 8-bit storage (and as such, the amount of coins the player could carry before glitching the game in Super Mario 64, among others). |
 The Folding Screen |
Locked door guarded by a New Donker | Behind the Crazy Cap shop | An 8-bit area set inside a folding screen in a small room. Mario can only access this area if he is wearing his samurai set. |
 The Spinning Tower |
Closed doorway | Below the left side of the large poison pool surrounding the "Beneath the Keep" Checkpoint Flag | A tower-like area with segments that spin at intervals, where Mario must capture a Pokio and use it to scale the tower's walls to reach the Power Moon at the top. Below the tower is a key Mario can use to make a second Power Moon appear. Mario must defeat the nearby Stairface Ogre to open the gate leading to this area. |
 Jizo Area |
Warp Pipe | At the Showdown Arena after RoboBrood has been defeated | An area where Mario must capture several Jizo statues and place them on several P Switches to activate bridges, walls and elevators, creating a path to a Power Moon. Many retracting spikes appear as hazards, which Mario is immune to as a Jizo statue. |
 Sky Slope Area |
Beanstalk | On the eaves just below the gate to the Spinning Tower | A sky area where Mario must collect as many Rocket Flowers to traverse a long slope to the other side. Unlike the other sky areas, the camera is positioned behind Mario by default rather than from the side. The seed that grows the beanstalk leading to this area can be found on the same eaves. |
 Hexagon Tower |
Moon Pipe | On the isolated building northwest of the Main Courtyard | A transparent hexagonal tower-like area featuring boulders that drop down like inside a pachinko machine, where Mario must capture a Parabones and use it to fly to the bottom of the tower to collect Moon Shards and a key required to obtain Power Moons, while avoiding the boulders on the way down and back. |
 The Wooden Tower |
Moon Pipe | On the isolated building southeast of the Main Courtyard | A platforming area composed of a wooden, frame-like structure with rotating pillars where Mario must capture a Pokio and use it to scale said structure while avoiding Spinies and several other Pokios. |
Enemies[edit]
Enemies marked with an asterisk (*) are only found in bonus areas.

8-bit Koopa Troopas*

Hariet (boss)
RoboBrood (boss)


Objectives[edit]
- Infiltrate Bowser's Castle!: The goal is to defeat the Stairface Ogre at the rear of the Third Courtyard.
- Smart Bombing: The goal is to collect the Moon Shards at the rear of the Second Courtyard.
- Big Broodal Battle: The goal is to defeat Topper and Hariet at the entrance to the Main Courtyard.
- Showdown at Bowser's Castle: The goal is to defeat RoboBrood at the keep of Bowser's Castle.
Paintings[edit]


There are two paintings in this kingdom. One is located at the left building near the Main Courtyard Entrance's Checkpoint Flag, at the left side of the wall. It takes the player either to the Snow Kingdom Clifftop at the Snow Kingdom or the Diving Platform at the Seaside Kingdom, and it can be accessed after completing the main game.
The other painting is located at the Island in the Sky, which can only be reached from a painting in the Cascade Kingdom.
Power Moons[edit]
- Main article: List of Power Moons in Bowser's Kingdom
There are a total of 64 Power Moons (61 regular Power Moons and 1 Multi Moon) in this kingdom. During the player's first visit to this kingdom, they can collect 37 Power Moons and the Multi Moon. After the player defeats Bowser in the Moon Kingdom, 7 more Power Moons become available to collect, including one from the kingdom's Hint Art and one from using a painting found in the Cascade Kingdom. The Moon Rock will also be available to destroy, causing 17 additional Power Moons to be accessible.
In order to progress to the Moon Kingdom, the player must collect at least 8 Power Moons.
Regional coins[edit]

- Main article: List of regional coins in Bowser's Kingdom
There are a total of 100 regional coins that can be found in Bowser's Kingdom, which take the form of kobans with Bowser's insignia on them.
Starting Area / Odyssey - 4 coins
- 4 coins: Above the entrance door.
Third Courtyard (Front) - 4 coins
- 4 coins: In plain sight at the end of a roof.
Third Courtyard (Rear) - 8 coins
- 4 coins: Behind a wall near the exit spark pylon, accessible via Pokio.
- 4 coins: On top of the easternmost wall.
Second Courtyard - 23 coins
- 3 coins: On a ledge east of the checkpoint flag.
- 3 coins: In a nook near some Spinies.
- 3 coins: Beyond the easternmost roof.
- 3 coins: On a plaster wall below the tall building, accessible via Pokio.
- 4 coins: Behind the northeast wall of the courtyard, accessible via Pokio.
- 4 coins: On top of the tall building.
- 3 coins: On the northwest roof.
Souvenir Shop - 3 coins
- 3 coins: On the roof of the Crazy Cap shop.
Main Courtyard Entrance - 3 coins
- 3 coins: On the roof on the right.
Main Courtyard - 12 coins
- 3 coins: Above the main gates on the roof.
- 3 coins: To the right of the gate facing the entrance.
- 3 coins: To the left of the gate facing the main keep.
- 3 coins: In the left pool.
Outer Wall - 10 coins
- 3 coins: Near the checkpoint flag, obtained by capturing a Pokio and dropping down.
- 4 coins: On the rightmost wall circle.
- 3 coins: In the middle of the leftmost wall circle.
Inner Wall - 6 coins
- 3 coins: On a ledge below the checkpoint flag.
- 3 coins: On the left side of the moving walls.
Beneath the Keep - 24 coins
- 3 coins: Above the On Top of the Spinning Tower room door, accessible via jumping off the Dashing Above the Clouds beanstalk.
- 3 coins: On the other side of the poison pool from the last coins, on a platform.
- 3 coins: Above the poison pool located below the Bowser's Kingdom Treasure Vault area.
- 3 coins: On the wall during the ascent to Bowser's Castle Treasure Vault, accessible via Pokio.
- 3 coins: Under the bridge, obtained by capturing the Lakitu on the right side.
- 3 coins: Above the gate in front of the spark pylon, accessible via a slingshot in the northwest corner (requires Lakitu).
- 3 coins: On the keep roof, on the left side.
- 3 coins: On a lantern after taking the spark pylon to the keep roof and dropping down onto the Bowser statue.
Showdown Arena - 3 coins
- 3 coins: In plain sight, up the flag.
Crazy Cap items[edit]
| Item | Description | Price | Note |
|---|---|---|---|
 Samurai Helmet |
The samurai wore helmets that were functional AND fancy. | Required for "Scene of Crossing the Poison Swamp" and "Taking Notes: In the Folding Screen" | |
 Samurai Armor |
The samurai basically walked around wearing works of art. | Required for "Scene of Crossing the Poison Swamp" and "Taking Notes: In the Folding Screen" | |
 Happi Headband |
This coiled headband is perfect when you want to cover just a BIT of your head. | N/A | |
 Happi Outfit |
Traditional clothing designed to be easy to move around in at a festival. | N/A | |
 Paper Lantern |
These lanterns are found in Bowser's Castle. In the old days, people used to walk around with them like flashlights! | N/A | |
 Jizo Statue |
Found placed all over, these guardian deities watch over travelers in silent protection. | N/A | |
 Bowser's Kingdom Sticker |
A sticker inspired by Bowser's Castle. | N/A | |
 Bowser's Kingdom Power Moon |
A Power Moon that was recovered from Bowser's kingdom. | N/A |
Gallery[edit]
Bowser's Kingdom sticker
Oblong-shaped coin

Oblong-shaped currency icon


.svg)
A Jizo and captured Jizo standing next to each other
The outside of Showdown Arena
Unused Hint Art
The Crazy Cap Souvenir Shop
The RoboBrood appears
Mario fights the RoboBrood
Mario fights the RoboBrood
Mario fights the RoboBrood
Mario fights the RoboBrood


Names in other languages[edit]
Bowser's Kingdom[edit]
| Language | Name | Meaning |
|---|---|---|
| Japanese | クッパの国 Kuppa no kuni |
Bowser's Country |
| Chinese | 酷霸王之国 (Simplified) Kùbàwáng zhī Guó 庫巴國 (Traditional) Kùbā Guó |
Bowser's Country Bowser Kingdom |
| Dutch | Bowsers rijk |
Bowser's Realm |
| French | Pays de Bowser |
Bowser's Country |
| German | Bowsers Land |
Bowser's Country |
| Italian | Regno di Bowser |
Bowser's Kingdom |
| Korean | 쿠파 왕국 Kupa Wangguk |
Bowser Kingdom |
| Russian | Царство Боузера Tsarstvo Bouzera |
Bowser's Kingdom |
| Spanish | Reino de Bowser |
Bowser's Kingdom |
Bowser's Castle[edit]
| Language | Name | Meaning |
|---|---|---|
| Japanese | クッパ城 Kuppa-jō |
Bowser Castle |
| Chinese | 酷霸王城堡 (Simplified) Kùbàwáng Chéngbǎo 庫巴城堡 (Traditional) Kùbā Chéngbǎo |
Bowser Castle |
| Dutch | Bowsers kasteel |
Bowser's Castle |
| French | Château de Bowser |
Bowser's Castle |
| German | Bowsers Festung |
Bowser's Fortress |
| Italian | Castello di Bowser |
Bowser's Castle |
| Korean | 쿠파 성 Kupa Seong |
Bowser Castle |
| Russian | Замок Боузера Zamok Bouzera |
Bowser's Castle |
| Spanish | Castillo de Bowser |
Bowser's Castle |
Trivia[edit]
- Many ornaments strewn throughout the kingdom, such as the nobori and the chōchin, contain the kanji 寿 (kotobuki), which means "long life". Some chōchin additionally contain the compound 空覇 (can also be read as kuppa, Bowser's Japanese name), literally meaning "celestial supremacy". Put together, the kanji translates as "Long live King Bowser!"
- The kingdom's industry (hanafuda cards) may be a reference to Nintendo's origins as a card company.
- The Bowser statues seen during the boss battles against Topper and Hariet are based on the Japanese gods Fūjin, the god of winds, and Raijin, the god of thunder, respectively.
- While capturing a spark pylon in this kingdom, the sound it makes to the music is replaced by koto samples to reflect its Japanese theme. Additionally, if specific music is played in the Music List, the sound will slow down.
References[edit]
- ^ The Art of Super Mario Odyssey, page 263.