List of hidden blocks in Paper Mario: Difference between revisions
| Line 15: | Line 15: | ||
|[[File:Hidden Block Alert PMTOK icon.png|48px]] | |[[File:Hidden Block Alert PMTOK icon.png|48px]] | ||
|[[File:Mushroom PMTOK icon.png|64px]]<br>[[Mushroom]] | |[[File:Mushroom PMTOK icon.png|64px]]<br>[[Mushroom]] | ||
| | |Description PLACEHOLDER | ||
|[[File:PMHiddenBlock1.png|250px]] | |[[File:PMHiddenBlock1.png|250px]] | ||
|- | |- | ||
| | | | ||
|[[File:Coinbag MarioParty.png|48px]]<br>Coin Bag<br>PLACEHOLDER | |[[File:Coinbag MarioParty.png|48px]]<br>Coin Bag<br>PLACEHOLDER | ||
| | |Description PLACEHOLDER | ||
|[[File:PMHiddenBlock2.png|250px]] | |[[File:PMHiddenBlock2.png|250px]] | ||
|- | |- | ||
| | | | ||
|[[File:Coinbag MarioParty.png|48px]]<br>Coin Bag<br>PLACEHOLDER | |[[File:Coinbag MarioParty.png|48px]]<br>Coin Bag<br>PLACEHOLDER | ||
| | |Description PLACEHOLDER | ||
|[[File:PMHiddenBlock3.png|250px]] | |[[File:PMHiddenBlock3.png|250px]] | ||
|- | |- | ||
| | | | ||
|[[File:Coinbag MarioParty.png|48px]]<br>Coin Bag<br>PLACEHOLDER | |[[File:Coinbag MarioParty.png|48px]]<br>Coin Bag<br>PLACEHOLDER | ||
| | |Description PLACEHOLDER | ||
|[[File:PMHiddenBlock4.png|250px]] | |[[File:PMHiddenBlock4.png|250px]] | ||
|- | |- | ||
| | | | ||
|[[File:Coinbag MarioParty.png|48px]]<br>Coin Bag<br>PLACEHOLDER | |[[File:Coinbag MarioParty.png|48px]]<br>Coin Bag<br>PLACEHOLDER | ||
| | |Description PLACEHOLDER | ||
|[[File:PMHiddenBlock5.png|250px]] | |[[File:PMHiddenBlock5.png|250px]] | ||
|- | |- | ||
| | | | ||
|[[File:Coinbag MarioParty.png|48px]]<br>Coin Bag<br>PLACEHOLDER | |[[File:Coinbag MarioParty.png|48px]]<br>Coin Bag<br>PLACEHOLDER | ||
| | |Description PLACEHOLDER | ||
|[[File:PMHiddenBlock6.png|250px]] | |[[File:PMHiddenBlock6.png|250px]] | ||
|- | |- | ||
| | | | ||
|[[File:Fire Flower PMTOK icon.png|48px]]<br>[[Fire Flower]] | |[[File:Fire Flower PMTOK icon.png|48px]]<br>[[Fire Flower]] | ||
| | |Description PLACEHOLDER | ||
|[[File:PMHiddenBlock7.png|250px]] | |[[File:PMHiddenBlock7.png|250px]] | ||
|- | |- | ||
| | | | ||
|[[File:PMTOK Giant Coin.png|48px]]<br>[[100 Coin]] | |[[File:PMTOK Giant Coin.png|48px]]<br>[[100 Coin]] | ||
| | |Description PLACEHOLDER | ||
|[[File:PMHiddenBlock9.png|250px]] | |[[File:PMHiddenBlock9.png|250px]] | ||
|- | |- | ||
| | | | ||
|Small [[Confetti Bag]] | |Small [[Confetti Bag]] | ||
| | |Description PLACEHOLDER | ||
|[[File:PMHiddenBlock8.png|250px]] | |[[File:PMHiddenBlock8.png|250px]] | ||
|- | |- | ||
| | | | ||
|[[File:Coinbag MarioParty.png|48px]]<br>Coin Bag<br>PLACEHOLDER | |[[File:Coinbag MarioParty.png|48px]]<br>Coin Bag<br>PLACEHOLDER | ||
| | |Description PLACEHOLDER | ||
|[[File:PMHiddenBlock10.png|250px]] | |[[File:PMHiddenBlock10.png|250px]] | ||
|- | |- | ||
| Line 68: | Line 68: | ||
| | | | ||
|[[File:PaperMario Items VoltShroom.png]]<br>[[Volt Shroom]] | |[[File:PaperMario Items VoltShroom.png]]<br>[[Volt Shroom]] | ||
| | |Description PLACEHOLDER | ||
|[[File:PMHiddenBlock11.png|250px]] | |[[File:PMHiddenBlock11.png|250px]] | ||
|- | |- | ||
| | | | ||
|[[File:PaperMario Items LifeShroom.png]]<br>[[Life Shroom]] | |[[File:PaperMario Items LifeShroom.png]]<br>[[Life Shroom]] | ||
| | |Description PLACEHOLDER | ||
|[[File:PMHiddenBlock12.png|250px]] | |[[File:PMHiddenBlock12.png|250px]] | ||
|- | |- | ||
| | | | ||
|1 Coin each | |1 Coin each | ||
| | |Description PLACEHOLDER | ||
|[[File:PMHiddenBlock13.png|250px]] | |[[File:PMHiddenBlock13.png|250px]] | ||
|- | |- | ||
| | | | ||
|[[File:PaperMario Items StoneCap.png]]<br>[[Stone Cap]] | |[[File:PaperMario Items StoneCap.png]]<br>[[Stone Cap]] | ||
| | |Description PLACEHOLDER | ||
|[[File:PMHiddenBlock14.png|250px]] | |[[File:PMHiddenBlock14.png|250px]] | ||
|- | |- | ||
| | | | ||
|[[File:PaperMario Items MapleSyrup.png]]<br>[[Maple Syrup]] | |[[File:PaperMario Items MapleSyrup.png]]<br>[[Maple Syrup]] | ||
| | |Description PLACEHOLDER | ||
|[[File:PMHiddenBlock15.png|250px]] | |[[File:PMHiddenBlock15.png|250px]] | ||
|- | |- | ||
| | | | ||
|[[File:PaperMario Items Mystery.png]]<br>[[Mystery Box (item)|Mystery?]] | |[[File:PaperMario Items Mystery.png]]<br>[[Mystery Box (item)|Mystery?]] | ||
| | |Description PLACEHOLDER | ||
|[[File:PMHiddenBlock16.png|250px]] | |[[File:PMHiddenBlock16.png|250px]] | ||
|- | |- | ||
| | | | ||
|[[File:PaperMario Items FrightJar.png]]<br>[[Fright Mask|Fright Jar]] | |[[File:PaperMario Items FrightJar.png]]<br>[[Fright Mask|Fright Jar]] | ||
| | |Description PLACEHOLDER | ||
|[[File:PMHiddenBlock17.png|250px]] | |[[File:PMHiddenBlock17.png|250px]] | ||
|- | |- | ||
| | | | ||
|[[File:PaperMario Items SuperSoda.png]]<br>[[Super Soda]] | |[[File:PaperMario Items SuperSoda.png]]<br>[[Super Soda]] | ||
| | |Description PLACEHOLDER | ||
|[[File:PMHiddenBlock18.png|250px]] | |[[File:PMHiddenBlock18.png|250px]] | ||
|- | |- | ||
| | | | ||
|[[File:PaperMario Items DizzyDial.png]]<br>[[Dizzy Dial]] | |[[File:PaperMario Items DizzyDial.png]]<br>[[Dizzy Dial]] | ||
| | |Description PLACEHOLDER | ||
|[[File:PMHiddenBlock19.png|250px]] | |[[File:PMHiddenBlock19.png|250px]] | ||
|- | |- | ||
| | | | ||
|[[File:PaperMario Items ThunderRage.png]]<br>[[Thunder Rage]] | |[[File:PaperMario Items ThunderRage.png]]<br>[[Thunder Rage]] | ||
| | |Description PLACEHOLDER | ||
|[[File:PMHiddenBlock20.png|250px]] | |[[File:PMHiddenBlock20.png|250px]] | ||
|- | |- | ||
| | | | ||
|[[File:PaperMario Items FireFlower.png]]<br>[[Fire Flower]] | |[[File:PaperMario Items FireFlower.png]]<br>[[Fire Flower]] | ||
| | |Description PLACEHOLDER | ||
|[[File:PMHiddenBlock21.png|250px]] | |[[File:PMHiddenBlock21.png|250px]] | ||
|- | |- | ||
| | | | ||
|[[File:PaperMario Items SuperShroom.png]]<br>[[Super Mushroom|Super Shroom]] | |[[File:PaperMario Items SuperShroom.png]]<br>[[Super Mushroom|Super Shroom]] | ||
| | |Description PLACEHOLDER | ||
|[[File:PMHiddenBlock22.png|250px]] | |[[File:PMHiddenBlock22.png|250px]] | ||
|- | |- | ||
| | | | ||
|[[File:PaperMario Items VoltShroom.png]]<br>[[Volt Shroom]] | |[[File:PaperMario Items VoltShroom.png]]<br>[[Volt Shroom]] | ||
| | |Description PLACEHOLDER | ||
|[[File:PMHiddenBlock23.png|250px]] | |[[File:PMHiddenBlock23.png|250px]] | ||
|- | |- | ||
| | | | ||
|[[File:Deep Focus Badge.png]]<br>[[Deep Focus]] Badge | |[[File:Deep Focus Badge.png]]<br>[[Deep Focus]] Badge | ||
| | |Description PLACEHOLDER | ||
|[[File:PMHiddenBlock24.png|250px]] | |[[File:PMHiddenBlock24.png|250px]] | ||
|- | |- | ||
| | | | ||
|[[File:PaperMario Items SnowmanDoll.png]]<br>[[Snowman Doll]] | |[[File:PaperMario Items SnowmanDoll.png]]<br>[[Snowman Doll]] | ||
| | |Description PLACEHOLDER | ||
|[[File:PMHiddenBlock25.png|250px]] | |[[File:PMHiddenBlock25.png|250px]] | ||
|- | |- | ||
| | | | ||
|1 Coin | |1 Coin | ||
| | |Description PLACEHOLDER | ||
|[[File:PMHiddenBlock26.png|250px]] | |[[File:PMHiddenBlock26.png|250px]] | ||
|- | |- | ||
| | | | ||
|[[File:PaperMario Items RepelGel.png]]<br>[[Repel Gel]] | |[[File:PaperMario Items RepelGel.png]]<br>[[Repel Gel]] | ||
| | |Description PLACEHOLDER | ||
|[[File:PMHiddenBlock27.png|250px]] | |[[File:PMHiddenBlock27.png|250px]] | ||
|- | |- | ||
| | | | ||
|[[File:PaperMario Items Mystery.png]]<br>[[Mystery Box (item)|Mystery?]] | |[[File:PaperMario Items Mystery.png]]<br>[[Mystery Box (item)|Mystery?]] | ||
| | |Description PLACEHOLDER | ||
|[[File:PMHiddenBlock28.png|250px]] | |[[File:PMHiddenBlock28.png|250px]] | ||
|- | |- | ||
| | | | ||
|[[File:PaperMario Items ThunderRage.png]]<br>[[Thunder Rage]] | |[[File:PaperMario Items ThunderRage.png]]<br>[[Thunder Rage]] | ||
| | |Description PLACEHOLDER | ||
|[[File:PMHiddenBlock29.png|250px]] | |[[File:PMHiddenBlock29.png|250px]] | ||
|- | |- | ||
| | | | ||
|[[File:PaperMario Items StoneCap.png]]<br>[[Stone Cap]] | |[[File:PaperMario Items StoneCap.png]]<br>[[Stone Cap]] | ||
| | |Description PLACEHOLDER | ||
|[[File:PMHiddenBlock30.png|250px]] | |[[File:PMHiddenBlock30.png|250px]] | ||
|- | |- | ||
| | | | ||
|[[File:PaperMario Items VoltShroom.png]]<br>[[Volt Shroom]] | |[[File:PaperMario Items VoltShroom.png]]<br>[[Volt Shroom]] | ||
| | |Description PLACEHOLDER | ||
|[[File:PMHiddenBlock31.png|250px]] | |[[File:PMHiddenBlock31.png|250px]] | ||
|- | |- | ||
| | | | ||
|[[File:PaperMario Items LifeShroom.png]]<br>[[Life Shroom]] | |[[File:PaperMario Items LifeShroom.png]]<br>[[Life Shroom]] | ||
| | |Description PLACEHOLDER | ||
|[[File:PMHiddenBlock32.png|250px]] | |[[File:PMHiddenBlock32.png|250px]] | ||
|- | |- | ||
| | | | ||
|[[File:PaperMario Items MapleSyrup.png]]<br>[[Maple Syrup]] | |[[File:PaperMario Items MapleSyrup.png]]<br>[[Maple Syrup]] | ||
| | |Description PLACEHOLDER | ||
|[[File:PMHiddenBlock33.png|250px]] | |[[File:PMHiddenBlock33.png|250px]] | ||
|- | |- | ||
| | | | ||
|1 Coin | |1 Coin | ||
| | |Description PLACEHOLDER | ||
|[[File:PMHiddenBlock34.png|250px]] | |[[File:PMHiddenBlock34.png|250px]] | ||
|- | |- | ||
| | | | ||
|[[File:PaperMario Items ShootingStar.png]]<br>[[Shooting Star (item)|Shooting Star]] | |[[File:PaperMario Items ShootingStar.png]]<br>[[Shooting Star (item)|Shooting Star]] | ||
| | |Description PLACEHOLDER | ||
|[[File:PMHiddenBlock35.png|250px]] | |[[File:PMHiddenBlock35.png|250px]] | ||
|- | |- | ||
| | | | ||
|[[File:PaperMario Items ThunderRage.png]]<br>[[Thunder Rage]] | |[[File:PaperMario Items ThunderRage.png]]<br>[[Thunder Rage]] | ||
| | |Description PLACEHOLDER | ||
|[[File:PMHiddenBlock36.png|250px]] | |[[File:PMHiddenBlock36.png|250px]] | ||
|} | |} | ||
Revision as of 13:32, October 18, 2022
In Paper Mario, Mario can discover Hidden Blocks throughout the Mushroom Kingdom. Like regular ? Blocks, these invisible blocks contain coins, items, and even badges. Mario can reveal them by using Watt's field ability by pressing ![]() ; however, Mario can still uncover them himself without her, even before she joins his party. All Hidden Blocks are revealed by jumping at them -- there are no Hidden Blocks on the ground that must be hit with the Hammer. Some Hidden Blocks are too high for Mario to hit with an ordinary jump and thus require the use of the Tornado Jump from the Ultra Boots to reveal them (such as four mandatory ones in Toad Town Tunnels leading to Shiver City). Hidden Blocks will never be found in areas with NPCs; as such, they will not be found in shops or houses. If Mario reveals a block containing an item or badge, then leaves and returns to the area without collecting the contents, the block will become invisible again until he does so. Some invisible blocks are used as stepping stones to reach new places or other items. There are 47 Hidden Blocks in the game. This page lists the location of each Hidden Block, the contents, and how to get to them.
; however, Mario can still uncover them himself without her, even before she joins his party. All Hidden Blocks are revealed by jumping at them -- there are no Hidden Blocks on the ground that must be hit with the Hammer. Some Hidden Blocks are too high for Mario to hit with an ordinary jump and thus require the use of the Tornado Jump from the Ultra Boots to reveal them (such as four mandatory ones in Toad Town Tunnels leading to Shiver City). Hidden Blocks will never be found in areas with NPCs; as such, they will not be found in shops or houses. If Mario reveals a block containing an item or badge, then leaves and returns to the area without collecting the contents, the block will become invisible again until he does so. Some invisible blocks are used as stepping stones to reach new places or other items. There are 47 Hidden Blocks in the game. This page lists the location of each Hidden Block, the contents, and how to get to them.
? Block locations
| Hidden | Item | Description | Image |
|---|---|---|---|
| #202122 | 10 blocks | |||
Mushroom |
Description PLACEHOLDER | 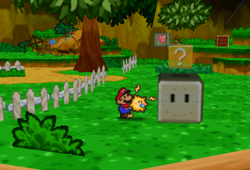
| |
Coin Bag PLACEHOLDER |
Description PLACEHOLDER | 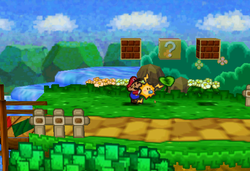
| |
Coin Bag PLACEHOLDER |
Description PLACEHOLDER | 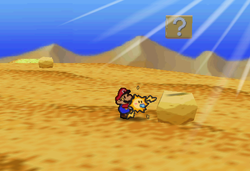
| |
Coin Bag PLACEHOLDER |
Description PLACEHOLDER | 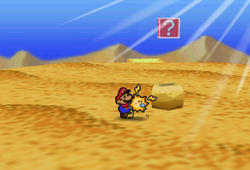
| |
Coin Bag PLACEHOLDER |
Description PLACEHOLDER | 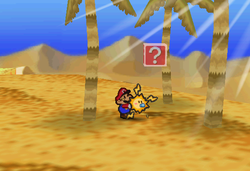
| |
Coin Bag PLACEHOLDER |
Description PLACEHOLDER | 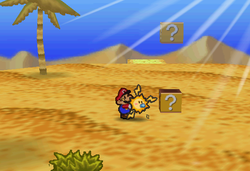
| |
Fire Flower |
Description PLACEHOLDER | 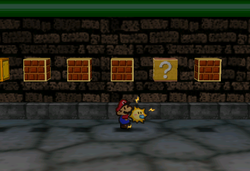
| |
100 Coin |
Description PLACEHOLDER | 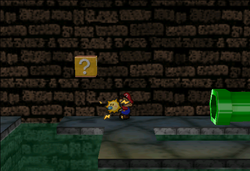
| |
| Small Confetti Bag | Description PLACEHOLDER | 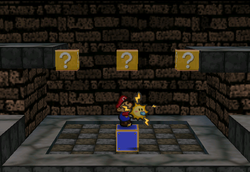
| |
Coin Bag PLACEHOLDER |
Description PLACEHOLDER | 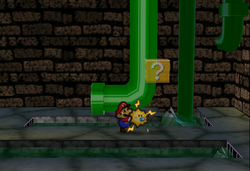
| |
| #202122 | 9 blocks | |||
Volt Shroom |
Description PLACEHOLDER | 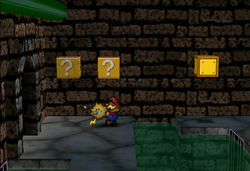
| |
Life Shroom |
Description PLACEHOLDER | 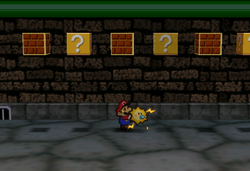
| |
| 1 Coin each | Description PLACEHOLDER | 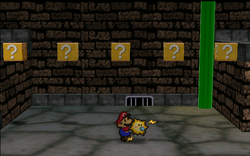
| |
Stone Cap |
Description PLACEHOLDER | 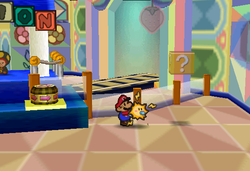
| |
Maple Syrup |
Description PLACEHOLDER | 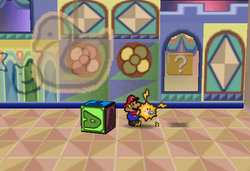
| |
Mystery? |
Description PLACEHOLDER | 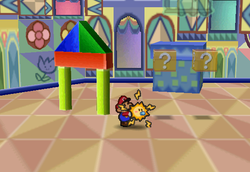
| |
Fright Jar |
Description PLACEHOLDER | 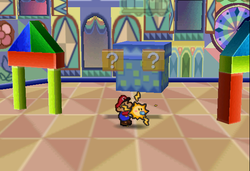
| |
Super Soda |
Description PLACEHOLDER | 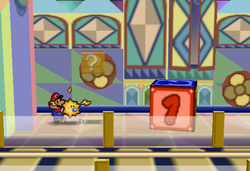
| |
Dizzy Dial |
Description PLACEHOLDER | 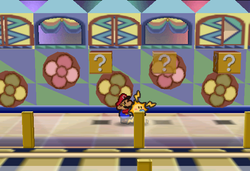
| |
Thunder Rage |
Description PLACEHOLDER | 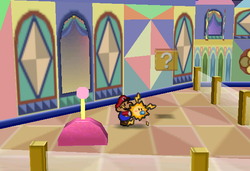
| |
Fire Flower |
Description PLACEHOLDER | 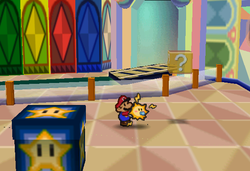
| |
Super Shroom |
Description PLACEHOLDER | 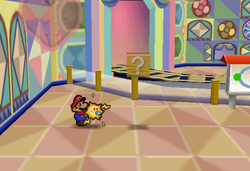
| |
Volt Shroom |
Description PLACEHOLDER | 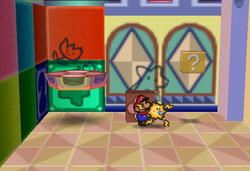
| |
Deep Focus Badge |
Description PLACEHOLDER | 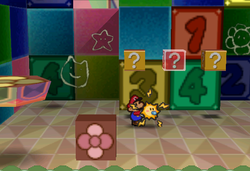
| |
Snowman Doll |
Description PLACEHOLDER | 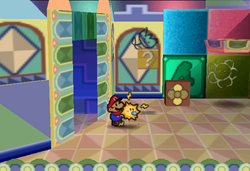
| |
| 1 Coin | Description PLACEHOLDER | 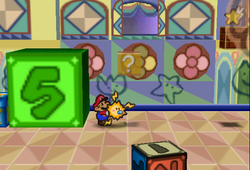
| |
Repel Gel |
Description PLACEHOLDER | 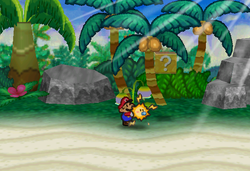
| |
Mystery? |
Description PLACEHOLDER | 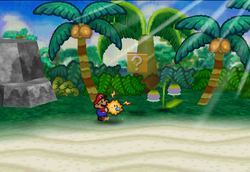
| |
Thunder Rage |
Description PLACEHOLDER | 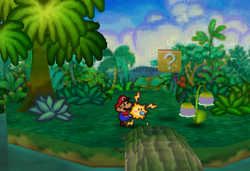
| |
Stone Cap |
Description PLACEHOLDER | 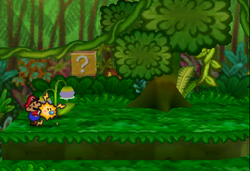
| |
Volt Shroom |
Description PLACEHOLDER | 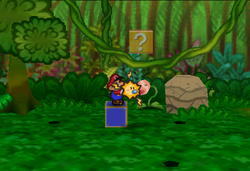
| |
Life Shroom |
Description PLACEHOLDER | 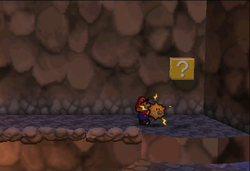
| |
Maple Syrup |
Description PLACEHOLDER | 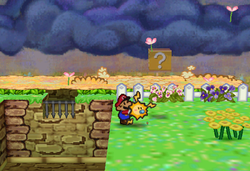
| |
| 1 Coin | Description PLACEHOLDER | 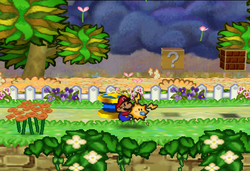
| |
Shooting Star |
Description PLACEHOLDER | 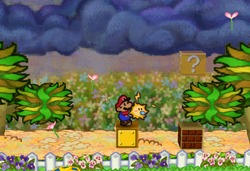
| |
Thunder Rage |
Description PLACEHOLDER | 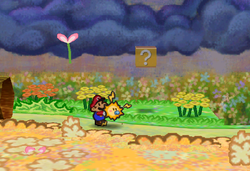
| |
Hidden Block count
This chart shows the number of Hidden Blocks for each location, with the total amount at the bottom. Locations are listed in the order the player can visit them.
| Location | Count |
|---|---|
| Goomba Village | 1 |
| Pleasant Path | 1 |
| Toad Town Tunnels | 12 |
| Dry Dry Desert | 4 |
| Shy Guy's Toy Box | 13 |
| Lavalava Island | 2 |
| Jade Jungle | 3 |
| Mt. Lavalava | 1 |
| Flower Fields | 4 |
| Shiver Snowfield | 1 |
| Shiver Mountain | 1 |
| Crystal Palace | 1 |
| Bowser's Castle | 2 |
| Princess Peach's Castle | 1 |
| Total | 47 |
Trivia
- Unlike Surprise Boxes in Super Mario RPG: Legend of the Seven Stars and invisible ? Blocks in Mario & Luigi: Superstar Saga which have to be hit twice to collect their items (first time to even reveal them), Hidden Blocks in Paper Mario immediately drop their items as soon as they're hit and revealed.
- In Gusty Gulch, there is a ? Block containing a single Coin inside a small house with no door one screen east of the Windy Mill. Close inspection through the cracks on the top of the house reveals the ? Block is not invisible.
