Famicom Grand Prix: F1 Race: Difference between revisions
m (Text replacement - "(\|[\n ]*)released([\n ]*=)" to "$1release$2") |
m (Reverted edits by Conradd (talk) to last revision by SuperLuigiDude) Tag: Rollback |
||
| (77 intermediate revisions by 15 users not shown) | |||
| Line 12: | Line 12: | ||
|input={{input|nes=1}} | |input={{input|nes=1}} | ||
|}} | |}} | ||
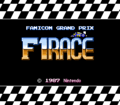
'''''Famicom Grand Prix: F1 Race''''' | '''''Famicom Grand Prix: F1 Race''''' is a Japan-exclusive racing game released for the [[Family Computer Disk System]] on October 30, 1987. It is a racing game starring [[Mario]] in Formula One cars, as a successor to the generic 1984 racing game ''{{wp|F1 Race}}''. A tournament was held for this game from October 30 to December 15, 1987. The top 100 players of each of the four difficulty levels received a trophy with their name and rank along with a poster that had the names of all 400 trophy holders. They, along with thousands of runners-up and raffle winners, received a [[Super Mario Bros. (Game & Watch)|''Super Mario Bros.'' Game & Watch]] sealed in a case shaped like Diskun, the mascot of the Disk System who appeared on all Disk System game covers. They also received mock driver's licenses.<ref>[https://www.youtube.com/watch?v=LkgCL38Xzj4&t=0s Video of the prizes]</ref> A sequel was released months later, known as ''[[Famicom Grand Prix II: 3D Hot Rally]]''; it was very different from this game and also the subject of a tournament. | ||
In the game, players can choose to play alone or with other cars. Cars have a certain amount of | This game, along with its sequel, was possibly an ancestor to the ''[[Mario Kart (series)|Mario Kart]]'' series, most likely due to the fact that it features Mario and possesses similar 2D racing mechanics, which was later carried on to ''[[Super Mario Kart]]''. In the game, Mario is the player's driver, wearing the same color as the vehicle he drives; his likeness is also used for his pit crew, with all but the crew chief also wearing the car's color. | ||
==Gameplay== | |||
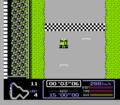
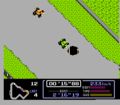
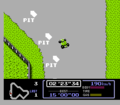
[[File:F1 Race gameplay screenshot.png|thumb|left|Gameplay of the game]] | |||
In the game, players can choose to play alone or with other cars. Cars have a certain amount of body quality, tire quality, and fuel; body decreases whenever the player crashes into a wall or another car, as well as whenever they drive off of the road, tire decreases with time and decreases faster while off-road, and fuel decrease with time spent accelerating. Running out of body or fuel is an immediate disqualification, but have no effect before being fully depleted beyond warning chimes. As tire depletes, however, the car's treads wear out and make turning have gradually less friction, with the traction becoming completely slippery and erratic when the meter is fully empty. Cars with a higher rating in any of those categories take longer to deplete, and higher ratings of tire start out with much better traction as well than lower ones. The player can go to a pit-stop to regenerate the body, tire, and fuel; the pit stop can take a moment to complete, but rapidly pressing {{button|NES|A}} and {{button|NES|B}} repeatedly during it speeds the process up, which can be crucial in not losing one's placement by a large margin. | |||
Steering is done with the {{button|NES|pad}} left and {{button|NES|pad}} right buttons. Due to the camera angle, this means careful attention must be paid to the direction the car is going when preparing to steer. When starting a race, {{button|NES|A}} revs the car in low gear, while {{button|NES|B}} brings it up to high gear, as a predecessor to the [[Rocket Start]]; from here, {{button|NES|B}} is used for acceleration. The same process can also be done during the race if the player has slowed down; skipping straight to high gear causes it to sputter slowly. Additionally, certain cars are capable of turbo, which allows them to continue accelerating beyond their typical top speed by pressing {{button|NES|B}} and {{button|NES|pad}} up at the same time. {{button|NES|B}} and {{button|NES|A}} at the same time, meanwhile, allow the driver to brake. As with most games, pausing is done by pressing {{button|NES|start}}; when on the pause screen, the player can retire by pressing {{button|NES|select}}. | |||
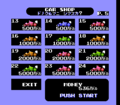
[[File:FGPI Shop screenshot 1.png|thumb|The shop]] | |||
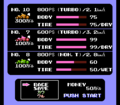
Winning the Grand Prix rewards players with money (measured in millions of dollars), which can be used to buy more expensive cars. There are a total of 24 different cars, each having a different level of power, body, tire, and fuel capacity, though they also cost varying amounts. The player's garage can hold up to three cars at a time, so to buy a fourth, one must first be sold. The player cars come in red, yellow, green, and blue, while opponent cars additionally come in different colors (which due to palette limitations, are rendered through combinations of the four main colors rapidly flashing between each other to blend them together, with the fastest one flashing between all four). | |||
There are a total of ten circuits spread across four race levels (analogous to [[cup]]s) with four circuits each - as such, some circuits appear in multiple race levels. The primary difference between the race levels is the speed at which the opponents can drive and how low the player can rank before being disqualified, both of which become more challenging on higher levels. The majority of the circuits are classified as Dry, meaning traction is good on them, but a small amount are instead Wet, where traction is poor. Usually, other cars, walls, and off-road areas are the only obstacles, but occasionally [[oil slick]]s appear on the road as well from retired competitors. | |||
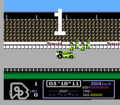
In every level, the player starts in the back of the starting grid. In each further race, their position is instead determined by their standing in the level, so if they are in first place, they will start at the front. To continue to the next race in any given level, the player must finish within 9th place in the first two levels or within 6th place in the second two levels. Finishing within the top six always earns a cash reward; knocking apart lesser cars, meanwhile, results in a fine. If the player does not finish within the required placement, that vehicle is retired. If all the player's vehicles are retired, it results in a [[Game Over]]. | |||
In Time Trial mode, the player can record and beat times on six unique circuits, as well as use them to practice the game's mechanics. A car is provided for these, and the player can choose whether or not it is turbo-capable, as well as the course and number of laps. The specific car can be chosen by pressing {{button|NES|pad}} down, {{button|NES|A}}, and {{button|NES|B}} all at once on a controller in port 2 to bring up a list and then using {{button|NES|pad}} and {{button|NES|select}} to choose, though the car's turbo settings must match the menu's. Multiple players can play on this mode via taking turns. | |||
If the player crashes into a wall, rather than coming to a full stop, they bounce off it at an angle depending on their current position; as such, crashing into it head-on will result in an instant 180° turn. When going under a bridge, the player is unable to turn, so if they are angled to the side when they enter the tunnel, they will likely end up hitting the wall. Hitting other racers causes the player to spin out, though the non-player racers will be unaffected unless they are an unnamed competitor that has been hit twice, retiring them and leaving an oil slick. Additionally, non-player characters can touch each other and even occupy the same space without any effect. Oil slicks cause the player to spin out even more times than hitting another racer, though non-player characters can also drive through them without any effect. | |||
==Cars== | |||
The shop always carries twelve cars across four tiers; higher tiers are unlocked by completing race levels and replace the respective lower tier in the shop's availability. The player starts with $50 million. The car's color corresponds to the type of tires: blue ones are 50/Dry, Yellow ones are 75/Dry, Red ones are 99/Dry, and green ones are varying amounts of Wet. The car's shape corresponds to fuel economy and turbo: smooth, domed-shaped cars lack turbo but a fuel efficiency of over 3km/l, bump-backed domed-shaped cars have no turbo but a fuel efficiency between 2km/l and 3km/l, the sole angular car with a large upper wing has no turbo and a fuel efficiency of under 1km/l, and angular cars with a small upper wing are capable of using turbo with varying amounts of fuel efficiency. | |||
===Default=== | |||
{|border=1 style="text-align:center; display:inline-block" | |||
|- | |||
!colspan=3 style="background:crimson;color:white;width:332px"|Group 1 - $10M | |||
|- | |||
|width=33%| | |||
{|border=1 cellspacing=0 cellpadding=4 margin=0 padding=0 style="border:1px solid black; border-collapse:collapse; height:100%" width=100% | |||
|- | |||
|colspan=2 style="background:#EAECF0"|'''No. 1''' | |||
|- | |||
|colspan=2 style="background:black"|[[File:FGPI Blue shop 1.png]] | |||
|- | |||
!style="background:#EAECF0"|Power: | |||
|'''500PS''' | |||
|- | |||
!style="background:#EAECF0"|Turbo: | |||
|'''No''' | |||
|- | |||
!style="background:#EAECF0"|Fuel: | |||
|'''3.5km/l''' | |||
|- | |||
!style="background:#EAECF0"|Body: | |||
|'''99''' | |||
|- | |||
!style="background:#EAECF0"|Tire: | |||
|'''50/Dry''' | |||
|} | |||
|width=33%| | |||
{|border=1 cellspacing=0 cellpadding=4 margin=0 padding=0 style="border:1px solid black; border-collapse:collapse; height:100%" width=100% | |||
|- | |||
|colspan=2 style="background:#EAECF0"|'''No. 2''' | |||
|- | |||
|colspan=2 style="background:black"|[[File:FGPI Yellow shop 1.png]] | |||
|- | |||
!style="background:#EAECF0"|Power: | |||
|'''500PS''' | |||
|- | |||
!style="background:#EAECF0"|Turbo: | |||
|'''No''' | |||
|- | |||
!style="background:#EAECF0"|Fuel: | |||
|'''3.5km/l''' | |||
|- | |||
!style="background:#EAECF0"|Body: | |||
|'''75''' | |||
|- | |||
!style="background:#EAECF0"|Tire: | |||
|'''75/Dry''' | |||
|} | |||
|width=33%| | |||
{|border=1 cellspacing=0 cellpadding=4 margin=0 padding=0 style="border:1px solid black; border-collapse:collapse; height:100%" width=100% | |||
|- | |||
|colspan=2 style="background:#EAECF0"|'''No. 3''' | |||
|- | |||
|colspan=2 style="background:black"|[[File:FGPI Blue shop 2.png]] | |||
|- | |||
!style="background:#EAECF0"|Power: | |||
|'''600PS''' | |||
|- | |||
!style="background:#EAECF0"|Turbo: | |||
|'''Yes''' | |||
|- | |||
!style="background:#EAECF0"|Fuel: | |||
|'''3.2km/l''' | |||
|- | |||
!style="background:#EAECF0"|Body: | |||
|'''60''' | |||
|- | |||
!style="background:#EAECF0"|Tire: | |||
|'''50/Dry''' | |||
|} | |||
|} | |||
{|border=1 style="text-align:center; display:inline-block" | |||
|- | |||
!colspan=3 style="background:crimson;color:white;width:332px"|Group 2 - $30M | |||
|- | |||
| | |||
{|border=1 cellspacing=0 cellpadding=4 margin=0 padding=0 style="border:1px solid black; border-collapse:collapse; height:100%" width=100% | |||
|- | |||
|colspan=2 style="background:#EAECF0"|'''No. 4''' | |||
|- | |||
|colspan=2 style="background:black"|[[File:FGPI Blue shop 2.png]] | |||
|- | |||
!style="background:#EAECF0"|Power: | |||
|'''600PS''' | |||
|- | |||
!style="background:#EAECF0"|Turbo: | |||
|'''Yes''' | |||
|- | |||
!style="background:#EAECF0"|Fuel: | |||
|'''3.2km/l''' | |||
|- | |||
!style="background:#EAECF0"|Body: | |||
|'''99''' | |||
|- | |||
!style="background:#EAECF0"|Tire: | |||
|'''50/Dry''' | |||
|} | |||
| | |||
{|border=1 cellspacing=0 cellpadding=4 margin=0 padding=0 style="border:1px solid black; border-collapse:collapse; height:100%" width=100% | |||
|- | |||
|colspan=2 style="background:#EAECF0"|'''No. 5''' | |||
|- | |||
|colspan=2 style="background:black"|[[File:FGPI Yellow shop 2.png]] | |||
|- | |||
!style="background:#EAECF0"|Power: | |||
|'''600PS''' | |||
|- | |||
!style="background:#EAECF0"|Turbo: | |||
|'''Yes''' | |||
|- | |||
!style="background:#EAECF0"|Fuel: | |||
|'''3.2km/l''' | |||
|- | |||
!style="background:#EAECF0"|Body: | |||
|'''75''' | |||
|- | |||
!style="background:#EAECF0"|Tire: | |||
|'''75/Dry''' | |||
|} | |||
| | |||
{|border=1 cellspacing=0 cellpadding=4 margin=0 padding=0 style="border:1px solid black; border-collapse:collapse; height:100%" width=100% | |||
|- | |||
|colspan=2 style="background:#EAECF0"|'''No. 6''' | |||
|- | |||
|colspan=2 style="background:black"|[[File:FGPI Blue shop 3.png]] | |||
|- | |||
!style="background:#EAECF0"|Power: | |||
|'''800PS''' | |||
|- | |||
!style="background:#EAECF0"|Turbo: | |||
|'''No''' | |||
|- | |||
!style="background:#EAECF0"|Fuel: | |||
|'''2.8km/l''' | |||
|- | |||
!style="background:#EAECF0"|Body: | |||
|'''60''' | |||
|- | |||
!style="background:#EAECF0"|Tire: | |||
|'''50/Dry''' | |||
|} | |||
|} | |||
{|border=1 style="text-align:center; display:inline-block" | |||
|- | |||
!colspan=3 style="background:crimson;color:white;width:332px"|Group 3 - $100M | |||
|- | |||
| | |||
{|border=1 cellspacing=0 cellpadding=4 margin=0 padding=0 style="border:1px solid black; border-collapse:collapse; height:100%" width=100% | |||
|- | |||
|colspan=2 style="background:#EAECF0"|'''No. 7''' | |||
|- | |||
|colspan=2 style="background:black"|[[File:FGPI Red shop 2.png]] | |||
|- | |||
!style="background:#EAECF0"|Power: | |||
|'''600PS''' | |||
|- | |||
!style="background:#EAECF0"|Turbo: | |||
|'''Yes''' | |||
|- | |||
!style="background:#EAECF0"|Fuel: | |||
|'''3.2km/l''' | |||
|- | |||
!style="background:#EAECF0"|Body: | |||
|'''99''' | |||
|- | |||
!style="background:#EAECF0"|Tire: | |||
|'''99/Dry''' | |||
|} | |||
| | |||
{|border=1 cellspacing=0 cellpadding=4 margin=0 padding=0 style="border:1px solid black; border-collapse:collapse; height:100%" width=100% | |||
|- | |||
|colspan=2 style="background:#EAECF0"|'''No. 8''' | |||
|- | |||
|colspan=2 style="background:black"|[[File:FGPI Green shop 3.png]] | |||
|- | |||
!style="background:#EAECF0"|Power: | |||
|'''800PS''' | |||
|- | |||
!style="background:#EAECF0"|Turbo: | |||
|'''No''' | |||
|- | |||
!style="background:#EAECF0"|Fuel: | |||
|'''2.8km/l''' | |||
|- | |||
!style="background:#EAECF0"|Body: | |||
|'''60''' | |||
|- | |||
!style="background:#EAECF0"|Tire: | |||
|'''50/Wet''' | |||
|} | |||
| | |||
{|border=1 cellspacing=0 cellpadding=4 margin=0 padding=0 style="border:1px solid black; border-collapse:collapse; height:100%" width=100% | |||
|- | |||
|colspan=2 style="background:#EAECF0"|'''No. 9''' | |||
|- | |||
|colspan=2 style="background:black"|[[File:FGPI Blue shop 2.png]] | |||
|- | |||
!style="background:#EAECF0"|Power: | |||
|'''800PS''' | |||
|- | |||
!style="background:#EAECF0"|Turbo: | |||
|'''Yes''' | |||
|- | |||
!style="background:#EAECF0"|Fuel: | |||
|'''2.1km/l''' | |||
|- | |||
!style="background:#EAECF0"|Body: | |||
|'''50''' | |||
|- | |||
!style="background:#EAECF0"|Tire: | |||
|'''50/Dry''' | |||
|} | |||
|} | |||
{|border=1 style="text-align:center; display:inline-block" | |||
|- | |||
!colspan=3 style="background:crimson;color:white;width:332px"|Group 4 - $300M | |||
|- | |||
| | |||
{|border=1 cellspacing=0 cellpadding=4 margin=0 padding=0 style="border:1px solid black; border-collapse:collapse; height:100%" width=100% | |||
|- | |||
|colspan=2 style="background:#EAECF0"|'''No. 10''' | |||
|- | |||
|colspan=2 style="background:black"|[[File:FGPI Yellow shop 2.png]] | |||
|- | |||
!style="background:#EAECF0"|Power: | |||
|'''800PS''' | |||
|- | |||
!style="background:#EAECF0"|Turbo: | |||
|'''Yes''' | |||
|- | |||
!style="background:#EAECF0"|Fuel: | |||
|'''2.1km/l''' | |||
|- | |||
!style="background:#EAECF0"|Body: | |||
|'''75''' | |||
|- | |||
!style="background:#EAECF0"|Tire: | |||
|'''75/Dry''' | |||
|} | |||
| | |||
{|border=1 cellspacing=0 cellpadding=4 margin=0 padding=0 style="border:1px solid black; border-collapse:collapse; height:100%" width=100% | |||
|- | |||
|colspan=2 style="background:#EAECF0"|'''No. 11''' | |||
|- | |||
|colspan=2 style="background:black"|[[File:FGPI Green shop 2.png]] | |||
|- | |||
!style="background:#EAECF0"|Power: | |||
|'''800PS''' | |||
|- | |||
!style="background:#EAECF0"|Turbo: | |||
|'''Yes''' | |||
|- | |||
!style="background:#EAECF0"|Fuel: | |||
|'''2.1km/l''' | |||
|- | |||
!style="background:#EAECF0"|Body: | |||
|'''60''' | |||
|- | |||
!style="background:#EAECF0"|Tire: | |||
|'''75/Wet''' | |||
|} | |||
| | |||
{|border=1 cellspacing=0 cellpadding=4 margin=0 padding=0 style="border:1px solid black; border-collapse:collapse; height:100%" width=100% | |||
|- | |||
|colspan=2 style="background:#EAECF0"|'''No. 12''' | |||
|- | |||
|colspan=2 style="background:black"|[[File:FGPI Red shop 3.png]] | |||
|- | |||
!style="background:#EAECF0"|Power: | |||
|'''800PS''' | |||
|- | |||
!style="background:#EAECF0"|Turbo: | |||
|'''No''' | |||
|- | |||
!style="background:#EAECF0"|Fuel: | |||
|'''2.8km/l''' | |||
|- | |||
!style="background:#EAECF0"|Body: | |||
|'''60''' | |||
|- | |||
!style="background:#EAECF0"|Tire: | |||
|'''99/Dry''' | |||
|} | |||
|} | |||
===Unlockable=== | |||
{|border=1 style="text-align:center; display:inline-block" | |||
|- | |||
!colspan=3 style="background:crimson;color:white;width:332px"|Group 5 - $500M | |||
|- | |||
!colspan=3|Complete race level 1<br><small>Replaces group 1</small> | |||
|- | |||
|width=33%| | |||
{|border=1 cellspacing=0 cellpadding=4 margin=0 padding=0 style="border:1px solid black; border-collapse:collapse; height:100%" width=100% | |||
|- | |||
|colspan=2 style="background:#EAECF0"|'''No. 13''' | |||
|- | |||
|colspan=2 style="background:black"|[[File:FGPI Red shop 2.png]] | |||
|- | |||
!style="background:#EAECF0"|Power: | |||
|'''800PS''' | |||
|- | |||
!style="background:#EAECF0"|Turbo: | |||
|'''Yes''' | |||
|- | |||
!style="background:#EAECF0"|Fuel: | |||
|'''2.1km/l''' | |||
|- | |||
!style="background:#EAECF0"|Body: | |||
|'''99''' | |||
|- | |||
!style="background:#EAECF0"|Tire: | |||
|'''99/Dry''' | |||
|} | |||
|width=33%| | |||
{|border=1 cellspacing=0 cellpadding=4 margin=0 padding=0 style="border:1px solid black; border-collapse:collapse; height:100%" width=100% | |||
|- | |||
|colspan=2 style="background:#EAECF0"|'''No. 14''' | |||
|- | |||
|colspan=2 style="background:black"|[[File:FGPI Blue shop 3.png]] | |||
|- | |||
!style="background:#EAECF0"|Power: | |||
|'''1000PS''' | |||
|- | |||
!style="background:#EAECF0"|Turbo: | |||
|'''No''' | |||
|- | |||
!style="background:#EAECF0"|Fuel: | |||
|'''2.3km/l''' | |||
|- | |||
!style="background:#EAECF0"|Body: | |||
|'''50''' | |||
|- | |||
!style="background:#EAECF0"|Tire: | |||
|'''50/Dry''' | |||
|} | |||
|width=33%| | |||
{|border=1 cellspacing=0 cellpadding=4 margin=0 padding=0 style="border:1px solid black; border-collapse:collapse; height:100%" width=100% | |||
|- | |||
|colspan=2 style="background:#EAECF0"|'''No. 15''' | |||
|- | |||
|colspan=2 style="background:black"|[[File:FGPI Red shop 3.png]] | |||
|- | |||
!style="background:#EAECF0"|Power: | |||
|'''1000PS''' | |||
|- | |||
!style="background:#EAECF0"|Turbo: | |||
|'''No''' | |||
|- | |||
!style="background:#EAECF0"|Fuel: | |||
|'''2.3km/l''' | |||
|- | |||
!style="background:#EAECF0"|Body: | |||
|'''35''' | |||
|- | |||
!style="background:#EAECF0"|Tire: | |||
|'''99/Dry''' | |||
|} | |||
|} | |||
{|border=1 style="text-align:center; display:inline-block" | |||
|- | |||
!colspan=3 style="background:crimson;color:white;width:332px"|Group 6 - $1000M | |||
|- | |||
!colspan=3|Complete race level 2<br><small>Replaces group 2</small> | |||
|- | |||
| | |||
{|border=1 cellspacing=0 cellpadding=4 margin=0 padding=0 style="border:1px solid black; border-collapse:collapse; height:100%" width=100% | |||
|- | |||
|colspan=2 style="background:#EAECF0"|'''No. 16''' | |||
|- | |||
|colspan=2 style="background:black"|[[File:FGPI Yellow shop 3.png]] | |||
|- | |||
!style="background:#EAECF0"|Power: | |||
|'''1000PS''' | |||
|- | |||
!style="background:#EAECF0"|Turbo: | |||
|'''No''' | |||
|- | |||
!style="background:#EAECF0"|Fuel: | |||
|'''2.3km/l''' | |||
|- | |||
!style="background:#EAECF0"|Body: | |||
|'''75''' | |||
|- | |||
!style="background:#EAECF0"|Tire: | |||
|'''75/Dry''' | |||
|} | |||
| | |||
{|border=1 cellspacing=0 cellpadding=4 margin=0 padding=0 style="border:1px solid black; border-collapse:collapse; height:100%" width=100% | |||
|- | |||
|colspan=2 style="background:#EAECF0"|'''No. 17''' | |||
|- | |||
|colspan=2 style="background:black"|[[File:FGPI Green shop 3.png]] | |||
|- | |||
!style="background:#EAECF0"|Power: | |||
|'''1000PS''' | |||
|- | |||
!style="background:#EAECF0"|Turbo: | |||
|'''No''' | |||
|- | |||
!style="background:#EAECF0"|Fuel: | |||
|'''2.3km/l''' | |||
|- | |||
!style="background:#EAECF0"|Body: | |||
|'''60''' | |||
|- | |||
!style="background:#EAECF0"|Tire: | |||
|'''75/Wet''' | |||
|} | |||
| | |||
{|border=1 cellspacing=0 cellpadding=4 margin=0 padding=0 style="border:1px solid black; border-collapse:collapse; height:100%" width=100% | |||
|- | |||
|colspan=2 style="background:#EAECF0"|'''No. 18''' | |||
|- | |||
|colspan=2 style="background:black"|[[File:FGPI Yellow shop 2.png]] | |||
|- | |||
!style="background:#EAECF0"|Power: | |||
|'''1200PS''' | |||
|- | |||
!style="background:#EAECF0"|Turbo: | |||
|'''Yes''' | |||
|- | |||
!style="background:#EAECF0"|Fuel: | |||
|'''1.5km/l''' | |||
|- | |||
!style="background:#EAECF0"|Body: | |||
|'''35''' | |||
|- | |||
!style="background:#EAECF0"|Tire: | |||
|'''75/Dry''' | |||
|} | |||
|} | |||
{|border=1 style="text-align:center; display:inline-block" | |||
|- | |||
!colspan=3 style="background:crimson;color:white;width:332px"|Group 7 - $2000M | |||
|- | |||
!colspan=3|Complete race level 3<br><small>Replaces group 3</small> | |||
|- | |||
| | |||
{|border=1 cellspacing=0 cellpadding=4 margin=0 padding=0 style="border:1px solid black; border-collapse:collapse; height:100%" width=100% | |||
|- | |||
|colspan=2 style="background:#EAECF0"|'''No. 19''' | |||
|- | |||
|colspan=2 style="background:black"|[[File:FGPI Yellow shop 2.png]] | |||
|- | |||
!style="background:#EAECF0"|Power: | |||
|'''1200PS''' | |||
|- | |||
!style="background:#EAECF0"|Turbo: | |||
|'''Yes''' | |||
|- | |||
!style="background:#EAECF0"|Fuel: | |||
|'''1.5km/l''' | |||
|- | |||
!style="background:#EAECF0"|Body: | |||
|'''60''' | |||
|- | |||
!style="background:#EAECF0"|Tire: | |||
|'''75/Dry''' | |||
|} | |||
| | |||
{|border=1 cellspacing=0 cellpadding=4 margin=0 padding=0 style="border:1px solid black; border-collapse:collapse; height:100%" width=100% | |||
|- | |||
|colspan=2 style="background:#EAECF0"|'''No. 20''' | |||
|- | |||
|colspan=2 style="background:black"|[[File:FGPI Red shop 3.png]] | |||
|- | |||
!style="background:#EAECF0"|Power: | |||
|'''1000PS''' | |||
|- | |||
!style="background:#EAECF0"|Turbo: | |||
|'''No''' | |||
|- | |||
!style="background:#EAECF0"|Fuel: | |||
|'''2.3km/l''' | |||
|- | |||
!style="background:#EAECF0"|Body: | |||
|'''75''' | |||
|- | |||
!style="background:#EAECF0"|Tire: | |||
|'''99/Dry''' | |||
|} | |||
| | |||
{|border=1 cellspacing=0 cellpadding=4 margin=0 padding=0 style="border:1px solid black; border-collapse:collapse; height:100%" width=100% | |||
|- | |||
|colspan=2 style="background:#EAECF0"|'''No. 21''' | |||
|- | |||
|colspan=2 style="background:black"|[[File:FGPI Green shop 2.png]] | |||
|- | |||
!style="background:#EAECF0"|Power: | |||
|'''1200PS''' | |||
|- | |||
!style="background:#EAECF0"|Turbo: | |||
|'''Yes''' | |||
|- | |||
!style="background:#EAECF0"|Fuel: | |||
|'''1.5km/l''' | |||
|- | |||
!style="background:#EAECF0"|Body: | |||
|'''50''' | |||
|- | |||
!style="background:#EAECF0"|Tire: | |||
|'''75/Wet''' | |||
|} | |||
|} | |||
{|border=1 style="text-align:center; display:inline-block" | |||
|- | |||
!colspan=3 style="background:crimson;color:white;width:332px"|Group 8 - $5000M | |||
|- | |||
!colspan=3|Complete race level 4<br><small>Replaces group 4</small> | |||
|- | |||
| | |||
{|border=1 cellspacing=0 cellpadding=4 margin=0 padding=0 style="border:1px solid black; border-collapse:collapse; height:100%" width=100% | |||
|- | |||
|colspan=2 style="background:#EAECF0"|'''No. 22''' | |||
|- | |||
|colspan=2 style="background:black"|[[File:FGPI Green shop 2.png]] | |||
|- | |||
!style="background:#EAECF0"|Power: | |||
|'''1200PS''' | |||
|- | |||
!style="background:#EAECF0"|Turbo: | |||
|'''Yes''' | |||
|- | |||
!style="background:#EAECF0"|Fuel: | |||
|'''1.5km/l''' | |||
|- | |||
!style="background:#EAECF0"|Body: | |||
|'''60''' | |||
|- | |||
!style="background:#EAECF0"|Tire: | |||
|'''99/Wet''' | |||
|} | |||
| | |||
{|border=1 cellspacing=0 cellpadding=4 margin=0 padding=0 style="border:1px solid black; border-collapse:collapse; height:100%" width=100% | |||
|- | |||
|colspan=2 style="background:#EAECF0"|'''No. 23''' | |||
|- | |||
|colspan=2 style="background:black"|[[File:FGPI Red shop 2.png]] | |||
|- | |||
!style="background:#EAECF0"|Power: | |||
|'''1200PS''' | |||
|- | |||
!style="background:#EAECF0"|Turbo: | |||
|'''Yes''' | |||
|- | |||
!style="background:#EAECF0"|Fuel: | |||
|'''1.5km/l''' | |||
|- | |||
!style="background:#EAECF0"|Body: | |||
|'''75''' | |||
|- | |||
!style="background:#EAECF0"|Tire: | |||
|'''99/Dry''' | |||
|} | |||
| | |||
{|border=1 cellspacing=0 cellpadding=4 margin=0 padding=0 style="border:1px solid black; border-collapse:collapse; height:100%" width=100% | |||
|- | |||
|colspan=2 style="background:#EAECF0"|'''No. 24''' | |||
|- | |||
|colspan=2 style="background:black"|[[File:FGPI Red shop 4.png]] | |||
|- | |||
!style="background:#EAECF0"|Power: | |||
|'''1500PS''' | |||
|- | |||
!style="background:#EAECF0"|Turbo: | |||
|'''No''' | |||
|- | |||
!style="background:#EAECF0"|Fuel: | |||
|'''1.3km/l''' | |||
|- | |||
!style="background:#EAECF0"|Body: | |||
|'''35''' | |||
|- | |||
!style="background:#EAECF0"|Tire: | |||
|'''99/Dry''' | |||
|} | |||
|} | |||
==Opponents== | |||
There are six scripted opponents who drive consistent vehicles and usually stay in the same placement of the race. Each is from a different country in Europe or the Americas. | |||
{|border=1 style="text-align:center; display:inline-block" | |||
|- | |||
!colspan=2 style="background:#EAECF0"|<big>1: {{text outline|{{color-link|Michel Rumble|hotpink}}}}</big> | |||
|- | |||
|colspan=2|[[File:F1Racer1.png|300x250px]] | |||
|- | |||
!rowspan=2 width=40% style="background:#EAECF0"|Nationality | |||
!style="background:gray"|[[File:Flag of France.png|x20px]] | |||
|- | |||
|France | |||
|- | |||
!rowspan=2 width=50% style="background:#EAECF0"|Color | |||
!style="background:gray"|[[File:FGPI Rainbow drive.gif]] | |||
|- | |||
|{{text outline|{{color|Pink|hotpink}}}} | |||
|} | |||
{|border=1 style="text-align:center; display:inline-block" | |||
|- | |||
!colspan=2 style="background:#EAECF0"|<big>2: {{text outline|{{color-link|Antonio Zico|greenyellow}}}}</big> | |||
|- | |||
|colspan=2|[[File:F1Racer2.png|300x250px]] | |||
|- | |||
!rowspan=2 width=40% style="background:#EAECF0"|Nationality | |||
!style="background:gray"|[[File:Flag of Brazil.png|x20px]] | |||
|- | |||
|Brazil | |||
|- | |||
!rowspan=2 width=50% style="background:#EAECF0"|Color | |||
!style="background:gray"|[[File:FGPI Banana drive.gif]] | |||
|- | |||
|{{text outline|{{color|Yellow-green|greenyellow}}}} | |||
|} | |||
{|border=1 style="text-align:center; display:inline-block" | |||
|- | |||
!colspan=2 style="background:#EAECF0"|<big>3: {{text outline|{{color-link|George Turbo|mediumorchid}}}}</big> | |||
|- | |||
|colspan=2|[[File:F1Racer3.png|300x250px]] | |||
|- | |||
!rowspan=2 width=40% style="background:#EAECF0"|Nationality | |||
!style="background:gray"|[[File:Flag of England.png|x20px]] | |||
|- | |||
|England | |||
|- | |||
!rowspan=2 width=50% style="background:#EAECF0"|Color | |||
!style="background:gray"|[[File:FGPI Purple drive.gif]] | |||
|- | |||
|{{text outline|{{color|Purple|mediumorchid}}}} | |||
|} | |||
{|border=1 style="text-align:center; display:inline-block" | |||
|- | |||
!colspan=2 style="background:#EAECF0"|<big>4: {{text outline|{{color-link|Bronco Maccini|crimson}}}}</big> | |||
|- | |||
|colspan=2|[[File:F1Racer4.png|300x250px]] | |||
|- | |||
!rowspan=2 width=40% style="background:#EAECF0"|Nationality | |||
!style="background:gray"|[[File:Flag of Italy.png|x20px]] | |||
|- | |||
|Italy | |||
|- | |||
!rowspan=2 width=50% style="background:#EAECF0"|Color | |||
!style="background:gray"|[[File:FGPI Red drive.gif]] | |||
|- | |||
|{{text outline|{{color|Red|crimson}}}} | |||
|} | |||
{|border=1 style="text-align:center; display:inline-block" | |||
|- | |||
!colspan=2 style="background:#EAECF0"|<big>5: {{text outline|{{color-link|Howard Axel|royalblue}}}}</big> | |||
|- | |||
|colspan=2|[[File:F1Racer5.png|300x250px]] | |||
|- | |||
!rowspan=2 width=40% style="background:#EAECF0"|Nationality | |||
!style="background:gray"|[[File:Flag of USA.png|x20px]] | |||
|- | |||
|United States | |||
|- | |||
!rowspan=2 width=50% style="background:#EAECF0"|Color | |||
!style="background:gray"|[[File:FGPI Blue drive.gif]] | |||
|- | |||
|{{text outline|{{color|Blue|royalblue}}}} | |||
|} | |||
{|border=1 style="text-align:center; display:inline-block" | |||
|- | |||
!colspan=2 style="background:#EAECF0"|<big>6: {{text outline|{{color-link|Panther Pedalf|lightgreen}}}}</big> | |||
|- | |||
|colspan=2|[[File:F1Racer6.png|300x250px]] | |||
|- | |||
!rowspan=2 width=40% style="background:#EAECF0"|Nationality | |||
!style="background:gray"|[[File:Flag of Germany.png|x20px]] | |||
|- | |||
|West Germany | |||
|- | |||
!rowspan=2 width=50% style="background:#EAECF0"|Color | |||
!style="background:gray"|[[File:FGPI Green drive.gif]] | |||
|- | |||
|{{text outline|{{color|Green|lightgreen}}}} | |||
|} | |||
Additionally, several racers of lesser importance appear in orange cars; they affect the player's own placement, but do not appear on the minimap. Most drive very slowly, and will often be lapped within the second lap. When they are caught up to from a lap ahead, they are colored teal; lapping them again changes them back to orange, and so on. If a lesser car is collided with twice, it retires and leaves an [[oil slick]] in its wake. | |||
==Race levels== | |||
===Grand prix race=== | |||
{|border=1 style="text-align:center; display:inline-block" | |||
|- | |||
!colspan=4 style="background:crimson;color:white"|Level 1 | |||
|- | |||
|width=25%| | |||
{|border=1 cellspacing=0 cellpadding=4 margin=0 padding=0 style="border:1px solid black; border-collapse:collapse; height:100%" width=100% | |||
|- | |||
|Level.1-1 | |||
|- | |||
|[[File:FGPI Preview Circuit-1.png]] | |||
|- | |||
|[[Circuit-1]] | |||
|- | |||
|[[File:FGPI icon Dry.png]] Dry | |||
|} | |||
|width=25%| | |||
{|border=1 cellspacing=0 cellpadding=4 margin=0 padding=0 style="border:1px solid black; border-collapse:collapse; height:100%" width=100% | |||
|- | |||
|Level.1-2 | |||
|- | |||
|[[File:FGPI Preview Circuit-2.png]] | |||
|- | |||
|[[Circuit-2]] | |||
|- | |||
|[[File:FGPI icon Dry.png]] Dry | |||
|} | |||
|width=25%| | |||
{|border=1 cellspacing=0 cellpadding=4 margin=0 padding=0 style="border:1px solid black; border-collapse:collapse; height:100%" width=100% | |||
|- | |||
|Level.1-3 | |||
|- | |||
|[[File:FGPI Preview Circuit-3.png]] | |||
|- | |||
|[[Circuit-3]] | |||
|- | |||
|[[File:FGPI icon Dry.png]] Dry | |||
|} | |||
|width=25%| | |||
{|border=1 cellspacing=0 cellpadding=4 margin=0 padding=0 style="border:1px solid black; border-collapse:collapse; height:100%" width=100% | |||
|- | |||
|Level.1-4 | |||
|- | |||
|[[File:FGPI Preview Circuit-4.png]] | |||
|- | |||
|[[Circuit-4]] | |||
|- | |||
|[[File:FGPI icon Dry.png]] Dry | |||
|} | |||
|} | |||
{|border=1 style="text-align:center; display:inline-block" | |||
!colspan=4 style="background:crimson;color:white"|Level 2 | |||
|- | |||
| | |||
{|border=1 cellspacing=0 cellpadding=4 margin=0 padding=0 style="border:1px solid black; border-collapse:collapse; height:100%" width=100% | |||
|- | |||
|Level.2-1 | |||
|- | |||
|[[File:FGPI Preview Circuit-3.png]] | |||
|- | |||
|Circuit-3 | |||
|- | |||
|[[File:FGPI icon Dry.png]] Dry | |||
|} | |||
| | |||
{|border=1 cellspacing=0 cellpadding=4 margin=0 padding=0 style="border:1px solid black; border-collapse:collapse; height:100%" width=100% | |||
|- | |||
|Level.2-2 | |||
|- | |||
|[[File:FGPI Preview Circuit-4.png]] | |||
|- | |||
|Circuit-4 | |||
|- | |||
|[[File:FGPI icon Dry.png]] Dry | |||
|} | |||
| | |||
{|border=1 cellspacing=0 cellpadding=4 margin=0 padding=0 style="border:1px solid black; border-collapse:collapse; height:100%" width=100% | |||
|- | |||
|Level.2-3 | |||
|- | |||
|[[File:FGPI Preview Circuit-5.png]] | |||
|- | |||
|[[Circuit-5]] | |||
|- | |||
|[[File:FGPI icon Dry.png]] Dry | |||
|} | |||
| | |||
{|border=1 cellspacing=0 cellpadding=4 margin=0 padding=0 style="border:1px solid black; border-collapse:collapse; height:100%" width=100% | |||
|- | |||
|Level.2-4 | |||
|- | |||
|[[File:FGPI Preview Circuit-6.png]] | |||
|- | |||
|[[Circuit-6]] | |||
|- | |||
|[[File:FGPI icon Dry.png]] Dry | |||
|} | |||
|} | |||
{|border=1 style="text-align:center; display:inline-block" | |||
!colspan=4 style="background:crimson;color:white"|Level 3 | |||
|- | |||
| | |||
{|border=1 cellspacing=0 cellpadding=4 margin=0 padding=0 style="border:1px solid black; border-collapse:collapse; height:100%" width=100% | |||
|- | |||
|Level.3-1 | |||
|- | |||
|[[File:FGPI Preview Circuit-5.png]] | |||
|- | |||
|Circuit-5 | |||
|- | |||
|[[File:FGPI icon Dry.png]] Dry | |||
|} | |||
| | |||
{|border=1 cellspacing=0 cellpadding=4 margin=0 padding=0 style="border:1px solid black; border-collapse:collapse; height:100%" width=100% | |||
|- | |||
|Level.3-2 | |||
|- | |||
|[[File:FGPI Preview Circuit-6.png]] | |||
|- | |||
|Circuit-6 | |||
|- | |||
|[[File:FGPI icon Dry.png]] Dry | |||
|} | |||
| | |||
{|border=1 cellspacing=0 cellpadding=4 margin=0 padding=0 style="border:1px solid black; border-collapse:collapse; height:100%" width=100% | |||
|- | |||
|Level.3-3 | |||
|- | |||
|[[File:FGPI Preview Circuit-7.png]] | |||
|- | |||
|[[Circuit-7]] | |||
|- | |||
|[[File:FGPI icon Dry.png]] Dry | |||
|} | |||
| | |||
{|border=1 cellspacing=0 cellpadding=4 margin=0 padding=0 style="border:1px solid black; border-collapse:collapse; height:100%" width=100% | |||
|- | |||
|Level.3-4 | |||
|- | |||
|[[File:FGPI Preview Circuit-8.png]] | |||
|- | |||
|[[Circuit-8]] | |||
|- | |||
|[[File:FGPI icon Wet.png]] Wet | |||
|} | |||
|} | |||
{|border=1 style="text-align:center; display:inline-block" | |||
!colspan=4 style="background:crimson;color:white"|Level 4 | |||
|- | |||
| | |||
{|border=1 cellspacing=0 cellpadding=4 margin=0 padding=0 style="border:1px solid black; border-collapse:collapse; height:100%" width=100% | |||
|- | |||
|Level.4-1 | |||
|- | |||
|[[File:FGPI Preview Circuit-7.png]] | |||
|- | |||
|Circuit-7 | |||
|- | |||
|[[File:FGPI icon Dry.png]] Dry | |||
|} | |||
| | |||
{|border=1 cellspacing=0 cellpadding=4 margin=0 padding=0 style="border:1px solid black; border-collapse:collapse; height:100%" width=100% | |||
|- | |||
|Level.4-2 | |||
|- | |||
|[[File:FGPI Preview Circuit-8.png]] | |||
|- | |||
|Circuit-8 | |||
|- | |||
|[[File:FGPI icon Wet.png]] Wet | |||
|} | |||
| | |||
{|border=1 cellspacing=0 cellpadding=4 margin=0 padding=0 style="border:1px solid black; border-collapse:collapse; height:100%" width=100% | |||
|- | |||
|Level.4-3 | |||
|- | |||
|[[File:FGPI Preview Circuit-9.png]] | |||
|- | |||
|[[Circuit-9]] | |||
|- | |||
|[[File:FGPI icon Dry.png]] Dry | |||
|} | |||
| | |||
{|border=1 cellspacing=0 cellpadding=4 margin=0 padding=0 style="border:1px solid black; border-collapse:collapse; height:100%" width=100% | |||
|- | |||
|Level.4-4 | |||
|- | |||
|[[File:FGPI Preview Circuit-10.png]] | |||
|- | |||
|[[Circuit-10]] | |||
|- | |||
|[[File:FGPI icon Wet.png]] Wet | |||
|} | |||
|} | |||
===Time trial race=== | |||
{|border=1 style="text-align:center; display:inline-block" | |||
|- | |||
|[[File:FGPI Preview No. 1 circuit.png]] | |||
|- | |||
|[[Circuit No-1]] | |||
|} | |||
{|border=1 style="text-align:center; display:inline-block" | |||
|- | |||
|[[File:FGPI Preview No. 2 circuit.png]] | |||
|- | |||
|[[Circuit No-2]] | |||
|} | |||
{|border=1 style="text-align:center; display:inline-block" | |||
|- | |||
|[[File:FGPI Preview No. 3 circuit.png]] | |||
|- | |||
|[[Circuit No-3]] | |||
|} | |||
{|border=1 style="text-align:center; display:inline-block" | |||
|- | |||
|[[File:FGPI Preview No. 4 circuit.png]] | |||
|- | |||
|[[Circuit No-4]] | |||
|} | |||
{|border=1 style="text-align:center; display:inline-block" | |||
|- | |||
|[[File:FGPI Preview No. 5 circuit.png]] | |||
|- | |||
|[[Circuit No-5]] | |||
|} | |||
{|border=1 style="text-align:center; display:inline-block" | |||
|- | |||
|[[File:FGPI Preview No. 6 circuit.png]] | |||
|- | |||
|[[Circuit No-6]] | |||
|} | |||
==Gallery== | ==Gallery== | ||
===Logos=== | ===Logos=== | ||
| Line 27: | Line 1,021: | ||
===Artwork=== | ===Artwork=== | ||
====Mario==== | |||
<gallery> | <gallery> | ||
F1race mariocover.png|Mario artwork from the cover | F1race mariocover.png|Mario artwork from the cover | ||
| Line 32: | Line 1,027: | ||
f1race mario2.png|Mario with a victory lei and trophy | f1race mario2.png|Mario with a victory lei and trophy | ||
f1race mario3.png|Mario holding his helmet | f1race mario3.png|Mario holding his helmet | ||
F1_race_mario_holds.png|Mario holding his helmet and a tire | |||
f1race mario4.png|Mario with a checkerboard flag | f1race mario4.png|Mario with a checkerboard flag | ||
f1race mario5.png|Mario with a checkerboard flag | f1race mario5.png|Mario with a checkerboard flag | ||
f1race mario6.png|Mario artwork in a round icon | f1race mario6.png|Mario artwork in a round icon | ||
</gallery> | |||
====Miscellaneous==== | |||
<gallery> | |||
F1GP1.jpg | |||
F1GP2.jpg | |||
F1GP3.jpg | |||
</gallery> | |||
===Sprites=== | |||
;Track | |||
<gallery widths="48px" heights="23px" class="graybg" style="display:inline-block"> | |||
FGPI Red spin.gif|Red car | |||
FGPI Red crash.png|Red car | |||
FGPI Yellow spin.gif|Yellow car | |||
FGPI Yellow drive.gif|Yellow car | |||
FGPI Yellow crash.png|Yellow car | |||
FGPI Green spin.gif|Green car | |||
FGPI Green crash.png|Green car | |||
FGPI Blue spin.gif|Blue car | |||
FGPI Blue crash.png|Blue car | |||
FGPI Orange drive.gif|Minor opponent car | |||
FGPI Teal drive.gif|Minor opponent car | |||
FGPI Oil slick.png|[[Oil slick]] | |||
FGPI Orange oil.gif|Oil slick | |||
FGPI Banana oil.gif|Oil slick | |||
FGPI Green oil.png|Oil slick | |||
FGPI Teal oil.gif|Oil slick | |||
FGPI Blue oil.png|Oil slick | |||
FGPI Purple oil.gif|Oil slick | |||
FGPI Rainbow oil.gif|Oil slick | |||
</gallery> | |||
;Map icons | |||
<gallery widths="48px" heights="6px" class="graybg" style="display:inline-block"> | |||
FGPI Player map.png|[[Mario]] | |||
FGPI Rainbow map.gif|[[Michel Rumble]] | |||
FGPI Banana map.gif|[[Antonio Zico]] | |||
FGPI Purple map.gif|[[George Turbo]] | |||
FGPI Red map.png|[[Bronco Maccini]] | |||
FGPI Blue map.png|[[Howard Axel]] | |||
FGPI Green map.png|[[Panther Pedalf]] | |||
</gallery> | |||
;Pit/finish | |||
<gallery widths="40px" heights="16px" class="graybg" style="display:inline-block"> | |||
FGPI Red pit.png|Red car | |||
FGPI Yellow pit.png|Yellow car | |||
FGPI Green pit.png|Green car | |||
FGPI Blue pit.png|Blue car | |||
</gallery> | |||
<gallery widths="90px" heights="45px" class="graybg" style="display:inline-block"> | |||
FGPI Red pit stop.gif|Red crew | |||
FGPI Yellow pit stop.gif|Yellow crew | |||
FGPI Green pit stop.gif|Green crew | |||
FGPI Blue pit stop.gif|Blue crew | |||
</gallery> | |||
<gallery widths="72px" heights="46px" class="graybg" style="display:inline-block"> | |||
FGPI Red level complete.gif|Red crew | |||
FGPI Yellow level complete.gif|Yellow crew | |||
FGPI Green level complete.gif|Green crew | |||
FGPI Blue level complete.gif|Blue crew | |||
</gallery> | |||
<gallery widths="71px" heights="36px" class="graybg" style="display:inline-block"> | |||
FGPI Flagman.gif|Referee | |||
</gallery> | |||
<gallery widths="32px" heights="16px" class="graybg" style="display:inline-block"> | |||
FGPI Audience.gif|Audience | |||
</gallery> | |||
;Menu | |||
<gallery widths="47" heights="12px" class="blackbg" style="display:inline-block"> | |||
FGPI Menu car start.gif|Car | |||
FGPI Menu car select.gif|Car | |||
FGPI Menu car selected.gif|Car | |||
</gallery> | |||
<gallery widths="24" heights="20px" class="blackbg" style="display:inline-block"> | |||
FGPI Red select.png|Red selector | |||
FGPI Yellow select.png|Yellow selector | |||
FGPI Green select.png|Green selector | |||
FGPI Blue select.png|Blue selector | |||
</gallery> | |||
<gallery widths="118" heights="29px" class="blackbg" style="display:inline-block"> | |||
FGPI Red win.gif|Red team | |||
FGPI Yellow win.gif|Yellow team | |||
FGPI Green win.gif|Green team | |||
FGPI Blue win.gif|Blue team | |||
FGPI Red lose.gif|Red team | |||
FGPI Yellow lose.gif|Yellow team | |||
FGPI Green lose.gif|Green team | |||
FGPI Blue lose.gif|Blue team | |||
</gallery> | |||
<gallery widths="48" heights="29px" class="blackbg" style="display:inline-block"> | |||
FGPI Red win multi.gif|Red team | |||
FGPI Yellow win multi.gif|Yellow team | |||
FGPI Green win multi.gif|Green team | |||
FGPI Blue win multi.gif|Blue team | |||
FGPI Red lose multi.gif|Red team | |||
FGPI Yellow lose multi.gif|Yellow team | |||
FGPI Green lose multi.gif|Green team | |||
FGPI Blue lose multi.gif|Blue team | |||
</gallery> | </gallery> | ||
| Line 40: | Line 1,144: | ||
<gallery> | <gallery> | ||
F1 Race Title screen.png|Title screen | F1 Race Title screen.png|Title screen | ||
FGPI Shop screenshot 2.png|Another iteration of the shop | |||
FGPI Garage screenshot.png|The garage | |||
FGPI Starting line screenshot.png|A starting line | |||
FGPI Acceleration screenshot.png|A car accelerating | |||
FGPI Cornering screenshot.png|A car cornering | |||
FGPI Braking screenshot.png|A car braking | |||
FGPI Oil slick screenshot.png|An oil slick | |||
FGPI Pit turn screenshot.png|A car preparing for a pit stop | |||
FGPI GP win race level.png|Winning a race level in 1st | |||
</gallery> | </gallery> | ||
== | ===Maps=== | ||
{{ | <gallery> | ||
FGP1 Circuit No-3 full.png|[[Circuit No-3]] | |||
FGP1 Circuit No-6 full.png|[[Circuit No-6]] | |||
</gallery> | |||
===Miscellaneous=== | |||
<gallery> | |||
FDS F1 Race.png|Disk | |||
</gallery> | |||
==Names in other languages== | |||
{{Foreign names | |||
|Jap=ファミコングランプリ F1レース | |||
|JapR=Famikon Guran Puri: F1 Rēsu | |||
|JapM=Famicom Grand Prix: F1 Race | |||
}} | |||
==External links== | |||
*[https://www.nintendo.com/jp/famicom/software/fmc-fg/index.html Official site] | |||
==References== | ==References== | ||
{{NIWA|StrategyWiki=Famicom Grand Prix F1 Race}} | |||
<references/> | <references/> | ||
{{ | {{FGP}} | ||
{{Super Mario games}} | |||
{{NES}} | {{NES}} | ||
[[Category:Famicom Grand Prix: F1 Race|*]] | |||
[[Category:Japan-only games]] | [[Category:Japan-only games]] | ||
[[Category:Nintendo Entertainment System games]] | [[Category:Nintendo Entertainment System games]] | ||
Latest revision as of 02:56, March 13, 2024
| Famicom Grand Prix: F1 Race | |
|---|---|

| |
| Developer | Nintendo EAD HAL Laboratory |
| Publisher | Nintendo |
| Platform(s) | Family Computer Disk System |
| Release date | |
| Genre | Racing |
| Media | FDS:
Floppy disk
|
| Input | NES:
|
Famicom Grand Prix: F1 Race is a Japan-exclusive racing game released for the Family Computer Disk System on October 30, 1987. It is a racing game starring Mario in Formula One cars, as a successor to the generic 1984 racing game F1 Race. A tournament was held for this game from October 30 to December 15, 1987. The top 100 players of each of the four difficulty levels received a trophy with their name and rank along with a poster that had the names of all 400 trophy holders. They, along with thousands of runners-up and raffle winners, received a Super Mario Bros. Game & Watch sealed in a case shaped like Diskun, the mascot of the Disk System who appeared on all Disk System game covers. They also received mock driver's licenses.[1] A sequel was released months later, known as Famicom Grand Prix II: 3D Hot Rally; it was very different from this game and also the subject of a tournament.
This game, along with its sequel, was possibly an ancestor to the Mario Kart series, most likely due to the fact that it features Mario and possesses similar 2D racing mechanics, which was later carried on to Super Mario Kart. In the game, Mario is the player's driver, wearing the same color as the vehicle he drives; his likeness is also used for his pit crew, with all but the crew chief also wearing the car's color.
Gameplay[edit]

In the game, players can choose to play alone or with other cars. Cars have a certain amount of body quality, tire quality, and fuel; body decreases whenever the player crashes into a wall or another car, as well as whenever they drive off of the road, tire decreases with time and decreases faster while off-road, and fuel decrease with time spent accelerating. Running out of body or fuel is an immediate disqualification, but have no effect before being fully depleted beyond warning chimes. As tire depletes, however, the car's treads wear out and make turning have gradually less friction, with the traction becoming completely slippery and erratic when the meter is fully empty. Cars with a higher rating in any of those categories take longer to deplete, and higher ratings of tire start out with much better traction as well than lower ones. The player can go to a pit-stop to regenerate the body, tire, and fuel; the pit stop can take a moment to complete, but rapidly pressing ![]() and
and ![]() repeatedly during it speeds the process up, which can be crucial in not losing one's placement by a large margin.
repeatedly during it speeds the process up, which can be crucial in not losing one's placement by a large margin.
Steering is done with the ![]() left and
left and ![]() right buttons. Due to the camera angle, this means careful attention must be paid to the direction the car is going when preparing to steer. When starting a race,
right buttons. Due to the camera angle, this means careful attention must be paid to the direction the car is going when preparing to steer. When starting a race, ![]() revs the car in low gear, while
revs the car in low gear, while ![]() brings it up to high gear, as a predecessor to the Rocket Start; from here,
brings it up to high gear, as a predecessor to the Rocket Start; from here, ![]() is used for acceleration. The same process can also be done during the race if the player has slowed down; skipping straight to high gear causes it to sputter slowly. Additionally, certain cars are capable of turbo, which allows them to continue accelerating beyond their typical top speed by pressing
is used for acceleration. The same process can also be done during the race if the player has slowed down; skipping straight to high gear causes it to sputter slowly. Additionally, certain cars are capable of turbo, which allows them to continue accelerating beyond their typical top speed by pressing ![]() and
and ![]() up at the same time.
up at the same time. ![]() and
and ![]() at the same time, meanwhile, allow the driver to brake. As with most games, pausing is done by pressing
at the same time, meanwhile, allow the driver to brake. As with most games, pausing is done by pressing ![]() ; when on the pause screen, the player can retire by pressing
; when on the pause screen, the player can retire by pressing ![]() .
.

Winning the Grand Prix rewards players with money (measured in millions of dollars), which can be used to buy more expensive cars. There are a total of 24 different cars, each having a different level of power, body, tire, and fuel capacity, though they also cost varying amounts. The player's garage can hold up to three cars at a time, so to buy a fourth, one must first be sold. The player cars come in red, yellow, green, and blue, while opponent cars additionally come in different colors (which due to palette limitations, are rendered through combinations of the four main colors rapidly flashing between each other to blend them together, with the fastest one flashing between all four).
There are a total of ten circuits spread across four race levels (analogous to cups) with four circuits each - as such, some circuits appear in multiple race levels. The primary difference between the race levels is the speed at which the opponents can drive and how low the player can rank before being disqualified, both of which become more challenging on higher levels. The majority of the circuits are classified as Dry, meaning traction is good on them, but a small amount are instead Wet, where traction is poor. Usually, other cars, walls, and off-road areas are the only obstacles, but occasionally oil slicks appear on the road as well from retired competitors.
In every level, the player starts in the back of the starting grid. In each further race, their position is instead determined by their standing in the level, so if they are in first place, they will start at the front. To continue to the next race in any given level, the player must finish within 9th place in the first two levels or within 6th place in the second two levels. Finishing within the top six always earns a cash reward; knocking apart lesser cars, meanwhile, results in a fine. If the player does not finish within the required placement, that vehicle is retired. If all the player's vehicles are retired, it results in a Game Over.
In Time Trial mode, the player can record and beat times on six unique circuits, as well as use them to practice the game's mechanics. A car is provided for these, and the player can choose whether or not it is turbo-capable, as well as the course and number of laps. The specific car can be chosen by pressing ![]() down,
down, ![]() , and
, and ![]() all at once on a controller in port 2 to bring up a list and then using
all at once on a controller in port 2 to bring up a list and then using ![]() and
and ![]() to choose, though the car's turbo settings must match the menu's. Multiple players can play on this mode via taking turns.
to choose, though the car's turbo settings must match the menu's. Multiple players can play on this mode via taking turns.
If the player crashes into a wall, rather than coming to a full stop, they bounce off it at an angle depending on their current position; as such, crashing into it head-on will result in an instant 180° turn. When going under a bridge, the player is unable to turn, so if they are angled to the side when they enter the tunnel, they will likely end up hitting the wall. Hitting other racers causes the player to spin out, though the non-player racers will be unaffected unless they are an unnamed competitor that has been hit twice, retiring them and leaving an oil slick. Additionally, non-player characters can touch each other and even occupy the same space without any effect. Oil slicks cause the player to spin out even more times than hitting another racer, though non-player characters can also drive through them without any effect.
Cars[edit]
The shop always carries twelve cars across four tiers; higher tiers are unlocked by completing race levels and replace the respective lower tier in the shop's availability. The player starts with $50 million. The car's color corresponds to the type of tires: blue ones are 50/Dry, Yellow ones are 75/Dry, Red ones are 99/Dry, and green ones are varying amounts of Wet. The car's shape corresponds to fuel economy and turbo: smooth, domed-shaped cars lack turbo but a fuel efficiency of over 3km/l, bump-backed domed-shaped cars have no turbo but a fuel efficiency between 2km/l and 3km/l, the sole angular car with a large upper wing has no turbo and a fuel efficiency of under 1km/l, and angular cars with a small upper wing are capable of using turbo with varying amounts of fuel efficiency.
Default[edit]
| Group 1 - $10M | ||||||||||||||||||||||||||||||||||||||||||||
|---|---|---|---|---|---|---|---|---|---|---|---|---|---|---|---|---|---|---|---|---|---|---|---|---|---|---|---|---|---|---|---|---|---|---|---|---|---|---|---|---|---|---|---|---|
|
|
| ||||||||||||||||||||||||||||||||||||||||||
| Group 2 - $30M | ||||||||||||||||||||||||||||||||||||||||||||
|---|---|---|---|---|---|---|---|---|---|---|---|---|---|---|---|---|---|---|---|---|---|---|---|---|---|---|---|---|---|---|---|---|---|---|---|---|---|---|---|---|---|---|---|---|
|
|
| ||||||||||||||||||||||||||||||||||||||||||
| Group 3 - $100M | ||||||||||||||||||||||||||||||||||||||||||||
|---|---|---|---|---|---|---|---|---|---|---|---|---|---|---|---|---|---|---|---|---|---|---|---|---|---|---|---|---|---|---|---|---|---|---|---|---|---|---|---|---|---|---|---|---|
|
|
| ||||||||||||||||||||||||||||||||||||||||||
| Group 4 - $300M | ||||||||||||||||||||||||||||||||||||||||||||
|---|---|---|---|---|---|---|---|---|---|---|---|---|---|---|---|---|---|---|---|---|---|---|---|---|---|---|---|---|---|---|---|---|---|---|---|---|---|---|---|---|---|---|---|---|
|
|
| ||||||||||||||||||||||||||||||||||||||||||
Unlockable[edit]
| Group 5 - $500M | ||||||||||||||||||||||||||||||||||||||||||||
|---|---|---|---|---|---|---|---|---|---|---|---|---|---|---|---|---|---|---|---|---|---|---|---|---|---|---|---|---|---|---|---|---|---|---|---|---|---|---|---|---|---|---|---|---|
| Complete race level 1 Replaces group 1 | ||||||||||||||||||||||||||||||||||||||||||||
|
|
| ||||||||||||||||||||||||||||||||||||||||||
| Group 6 - $1000M | ||||||||||||||||||||||||||||||||||||||||||||
|---|---|---|---|---|---|---|---|---|---|---|---|---|---|---|---|---|---|---|---|---|---|---|---|---|---|---|---|---|---|---|---|---|---|---|---|---|---|---|---|---|---|---|---|---|
| Complete race level 2 Replaces group 2 | ||||||||||||||||||||||||||||||||||||||||||||
|
|
| ||||||||||||||||||||||||||||||||||||||||||
| Group 7 - $2000M | ||||||||||||||||||||||||||||||||||||||||||||
|---|---|---|---|---|---|---|---|---|---|---|---|---|---|---|---|---|---|---|---|---|---|---|---|---|---|---|---|---|---|---|---|---|---|---|---|---|---|---|---|---|---|---|---|---|
| Complete race level 3 Replaces group 3 | ||||||||||||||||||||||||||||||||||||||||||||
|
|
| ||||||||||||||||||||||||||||||||||||||||||
| Group 8 - $5000M | ||||||||||||||||||||||||||||||||||||||||||||
|---|---|---|---|---|---|---|---|---|---|---|---|---|---|---|---|---|---|---|---|---|---|---|---|---|---|---|---|---|---|---|---|---|---|---|---|---|---|---|---|---|---|---|---|---|
| Complete race level 4 Replaces group 4 | ||||||||||||||||||||||||||||||||||||||||||||
|
|
| ||||||||||||||||||||||||||||||||||||||||||
Opponents[edit]
There are six scripted opponents who drive consistent vehicles and usually stay in the same placement of the race. Each is from a different country in Europe or the Americas.
| 1: | |
|---|---|

| |
| Nationality | |
| France | |
| Color | |
Pink
| |
| 2: | |
|---|---|

| |
| Nationality | |
| Brazil | |
| Color | |
Yellow-green
| |
| 3: | |
|---|---|

| |
| Nationality | |
| England | |
| Color | |
Purple
| |
| 4: | |
|---|---|

| |
| Nationality | |
| Italy | |
| Color | |
Red
| |
| 5: | |
|---|---|

| |
| Nationality | |
| United States | |
| Color | |
Blue
| |
| 6: | |
|---|---|

| |
| Nationality | |
| West Germany | |
| Color | |
Green
| |
Additionally, several racers of lesser importance appear in orange cars; they affect the player's own placement, but do not appear on the minimap. Most drive very slowly, and will often be lapped within the second lap. When they are caught up to from a lap ahead, they are colored teal; lapping them again changes them back to orange, and so on. If a lesser car is collided with twice, it retires and leaves an oil slick in its wake.
Race levels[edit]
Grand prix race[edit]
| Level 1 | |||||||||||||||||||
|---|---|---|---|---|---|---|---|---|---|---|---|---|---|---|---|---|---|---|---|
|
|
|
| ||||||||||||||||
| Level 2 | |||||||||||||||||||
|---|---|---|---|---|---|---|---|---|---|---|---|---|---|---|---|---|---|---|---|
|
|
|
| ||||||||||||||||
| Level 3 | |||||||||||||||||||
|---|---|---|---|---|---|---|---|---|---|---|---|---|---|---|---|---|---|---|---|
|
|
|
| ||||||||||||||||
| Level 4 | |||||||||||||||||||
|---|---|---|---|---|---|---|---|---|---|---|---|---|---|---|---|---|---|---|---|
|
|
|
| ||||||||||||||||
Time trial race[edit]
| Circuit No-1 |
| Circuit No-2 |
| Circuit No-3 |
| Circuit No-4 |
| Circuit No-5 |
| Circuit No-6 |
Gallery[edit]
Logos[edit]

English logo
Japanese logo
Alternate logo
Logo with subtitle
Artwork[edit]
Mario[edit]
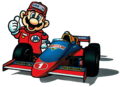
Mario artwork from the cover
Mario with a checkerboard flag

Mario with a victory lei and trophy
Mario holding his helmet
Mario holding his helmet and a tire
Mario with a checkerboard flag

Mario with a checkerboard flag
Mario artwork in a round icon


Miscellaneous[edit]


Sprites[edit]
- Track

Red car

Red car

Yellow car

Yellow car

Yellow car

Green car

Green car

Blue car

Blue car

Minor opponent car

Minor opponent car

Oil slick

Oil slick

Oil slick

Oil slick

Oil slick

Oil slick

Oil slick
- Map icons
- Pit/finish

Red car

Yellow car

Green car

Blue car

Red crew

Yellow crew

Green crew

Blue crew

Red crew

Yellow crew

Green crew

Blue crew

Referee

Audience
- Menu

Car

Car

Car

Red selector

Yellow selector

Green selector

Blue selector

Red team

Yellow team

Green team

Blue team

Red team

Yellow team

Green team

Blue team

Red team

Yellow team

Green team

Blue team

Red team

Yellow team

Green team

Blue team
Screenshots[edit]
Title screen
Another iteration of the shop
The garage
A starting line
A car accelerating
A car cornering
A car braking
An oil slick
A car preparing for a pit stop
Winning a race level in 1st


Maps[edit]


Miscellaneous[edit]
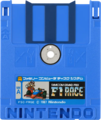
Disk

Names in other languages[edit]
| Language | Name | Meaning |
|---|---|---|
| Japanese | ファミコングランプリ F1レース Famikon Guran Puri: F1 Rēsu |
Famicom Grand Prix: F1 Race |
External links[edit]
References[edit]
| Famicom Grand Prix: F1 Race | ||
|---|---|---|
| Characters | Playable | Mario |
| Opponent | Antonio Zico • Bronco Maccini • George Turbo • Howard Axel • Michel Rumble • Panther Pedalf | |
| Courses | Race levels | Circuit-1 • Circuit-2 • Circuit-3 • Circuit-4 • Circuit-5 • Circuit-6 • Circuit-7 • Circuit-8 • Circuit-9 • Circuit-10 |
| Time trial | Circuit No-1 • Circuit No-2 • Circuit No-3 • Circuit No-4 • Circuit No-5 • Circuit No-6 | |
| Miscellaneous | Cars • Oil slick | |