Capture: Difference between revisions
m (Explained in the controls) |
PikaPhantom (talk | contribs) (→Trivia) Tag: Mobile edit |
||
| (67 intermediate revisions by 38 users not shown) | |||
| Line 1: | Line 1: | ||
[[File:SMO-Capture | [[File:SMO Art - Goomba Capture.png|thumb|200px|Artwork of Mario capturing a Goomba]] | ||
'''Capture''' is a unique ability that [[Mario]] gains in ''[[Super Mario Odyssey]]''. His newfound | '''Capture''' is a unique ability that [[Mario]] gains in ''[[Super Mario Odyssey]]''. His newfound [[Bonneter]] friend, [[Cappy]], grants him this power when Mario first visits the [[Cap Kingdom]]. The name itself is a wordplay based on "[[cap]]." When Cappy is [[Cap Throw|thrown]] at certain enemies, creatures, or objects, such as [[Goomba]]s, Mario is able to take control of said enemy, creature, or object. This allows Mario to use new abilities, many of which he has never previously had, and collect [[Power Moon]]s that would normally be out of his reach. When Mario captures something, that thing will gain his hat and mustache, as well as blue pupils or his irises (if it has eyes). Mario can also "de-capture" his host at will (by pressing {{button|switch|zl}}/{{button|switch|zr}}), stunning it for a while. However, if an enemy or other being wears a hat or similar headgear on its head, Mario can capture it only after knocking the hat by [[jump]]ing onto it or throwing Cappy. | ||
{{br}} | When Mario throws Cappy at an enemy or object and captures it, the hat is shown to be [[Mario Cap|Mario's cap]] and does not correspond to any [[Crazy Cap|hats]] Mario wears. | ||
{{br|toc=1}} | |||
==Capture list== | ==Capture list== | ||
{| class="wikitable" | {|class="wikitable" | ||
|- | |- | ||
!# | !# | ||
| Line 13: | Line 14: | ||
|- | |- | ||
!01 | !01 | ||
|style="text-align:center;"|[[File:SMO Frog Capture.png| | |style="text-align:center;"|[[File:SMO Frog Capture.png|100x100px]]<br>[[Frog]] | ||
|Mario can capture a frog to jump extremely high and reach high platforms and places that he could otherwise not reach. | |Mario can capture a frog to jump extremely high and reach high platforms and places that he could otherwise not reach. | ||
|{{button| | |{{button|switch|leftstick}} + {{button|switch|Y}} Dash <br> {{button|switch|B}} Jump <br> ''Shake the {{button|switch|joy-con}} Joy-Con/{{button|switch|pro}} Pro Controller to High Jump.'' | ||
|- | |- | ||
!02 | !02 | ||
|style="text-align:center;"|[[File:SMO Spark pylon Capture.png| | |style="text-align:center;"|[[File:SMO Spark pylon Capture.png|100x100px]]<br>[[Spark pylon]] | ||
|Mario can capture spark pylons in order to become electricity and zip across power lines. He can also "de-capture" the pylons at any point, allowing him to drop onto objects below him and reach some otherwise unreachable areas. If there are collectible objects like [[Coin]]s or a [[Power Moon]] close to a power line, Mario can leave the power line to collect them; this is done by pressing the {{button| | |Mario can capture spark pylons in order to become electricity and zip across power lines. He can also "de-capture" the pylons at any point, allowing him to drop onto objects below him and reach some otherwise unreachable areas. If there are collectible objects like [[Coin]]s or a [[Power Moon]] close to a power line, Mario can leave the power line to collect them; this is done by pressing the {{button|switch|y}} button or shaking the controller at the right time. | ||
|{{button| | |{{button|switch|leftstick}} Move <br> ''You can also shake the {{button|switch|joy-con}} Joy-Con/{{button|switch|pro}} Pro Controller to move.'' | ||
|- | |- | ||
!03 | !03 | ||
|style="text-align:center;"|[[File:SMO Paragoomba Capture.png| | |style="text-align:center;"|[[File:SMO Paragoomba Capture.png|100x100px]]<br>[[Paragoomba]] | ||
|Mario can capture a Paragoomba and use it to fly over bottomless pits of fog. | |Mario can capture a Paragoomba and use it to fly over bottomless pits of fog. | ||
|{{button| | |{{button|switch|B}} Fly <br> ''Shake the {{button|switch|joy-con}} Joy-Con/{{button|switch|pro}} Pro Controller to fly faster.'' | ||
|- | |- | ||
!04 | !04 | ||
|style="text-align:center;"|[[File:SMO Chain Chomp Capture.png| | |style="text-align:center;"|[[File:SMO Chain Chomp Capture.png|100x100px]]<br>[[Chain Chomp]] | ||
|Mario can capture a Chain Chomp and pull back on its chain in order to have it fly off in the opposite direction. This allows him to destroy rocks and other obstacles that Mario could otherwise not destroy himself. | |Mario can capture a Chain Chomp and pull back on its chain in order to have it fly off in the opposite direction. This allows him to destroy rocks and other obstacles that Mario could otherwise not destroy himself. | ||
|Pull {{button| | |Pull {{button|switch|leftstick}} to Wind Up <br> Release {{button|switch|leftstick}} to Send Flying | ||
|- | |- | ||
!05 | !05 | ||
|style="text-align:center;"|[[File:SMO Big Chain Chomp Capture.png| | |style="text-align:center;"|[[File:SMO Big Chain Chomp Capture.png|100x100px]]<br>[[Big Chain Chomp]] | ||
|The Big Chain Chomps behave the same as the Chain Chomps; however, they have a longer chain, allowing them to fly further than their smaller counterparts. | |The Big Chain Chomps behave the same as the Chain Chomps; however, they have a longer chain, allowing them to fly further than their smaller counterparts. | ||
|Pull {{button| | |Pull {{button|switch|leftstick}} to Wind Up <br> Release {{button|switch|leftstick}} to Send Flying | ||
|- | |- | ||
!06 | !06 | ||
|style="text-align:center;"|[[File:SMO Broode's Chain Chomp Capture.png| | |style="text-align:center;"|[[File:SMO Broode's Chain Chomp Capture.png|100x100px]]<br>[[Madame Broode|Broode's Chain Chomp]] | ||
|Mario can capture Madame Broode's Chain Chomp during his encounter with her. It behaves the same as the Big Chain Chomp, and it is used to defeat Madame Broode. | |Mario can capture Madame Broode's Chain Chomp during his encounter with her. It behaves the same as the Big Chain Chomp, and it is used to defeat Madame Broode. | ||
|Pull {{button| | |Pull {{button|switch|leftstick}} to Wind Up <br> Release {{button|switch|leftstick}} to Send Flying | ||
|- | |- | ||
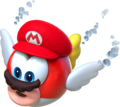
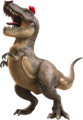
!07 | !07 | ||
|style="text-align:center;"|[[File:SMO T-Rex Capture.png| | |style="text-align:center;"|[[File:SMO T-Rex Capture.png|100x100px]]<br>[[T-Rex]] | ||
|Mario can capture a T-Rex in order to destroy stone rocks and enemies. However, Mario can only stay as a T-Rex for a short time, as it is too big for Cappy to hold on to for a long time. | |Mario can capture a T-Rex in order to destroy stone rocks and enemies. However, Mario can only stay as a T-Rex for a short time, as it is too big for Cappy to hold on to for a long time. | ||
|{{button| | |{{button|switch|leftstick}} + {{button|switch|Y}} Dash <br> {{button|switch|B}} Attack <br> ''You can also shake the {{button|switch|joy-con}} Joy-Con/{{button|switch|pro}} Pro Controller to attack.'' | ||
|- | |- | ||
!08 | !08 | ||
|style="text-align:center;"|[[File:SMO Binoculars Capture.png| | |style="text-align:center;"|[[File:SMO Binoculars Capture.png|100x100px]]<br>[[Binoculars]] | ||
|Mario can capture a pair of binoculars and use them to look around the area and examine his surroundings. This is vital for collecting Power Moons from zooming into floating taxis or Sphynx. | |Mario can capture a pair of binoculars and use them to look around the area and examine his surroundings. This is vital for collecting Power Moons from zooming into floating taxis or Sphynx. | ||
|{{button| | |{{button|switch|rightstick}} Look Around <br> {{button|switch|Y}} Zoom <br> ''You can also look around with the {{button|switch|joy-con-r}} Joy-Con (R)/{{button|switch|pro}} Pro Controller. <br> {{button|switch|R}} Reset'' | ||
|- | |- | ||
!09 | !09 | ||
|style="text-align:center;"|[[File:SMO Bullet Bill Capture.png| | |style="text-align:center;"|[[File:SMO Bullet Bill Capture.png|100x100px]]<br>[[Bullet Bill]] | ||
|Mario can capture a Bullet Bill and use it to fly around and destroy stone blocks or other objects that he could otherwise not destroy. After a short time, however, the Bullet Bill will explode, releasing Mario and dropping him off where ever it exploded. | |Mario can capture a Bullet Bill and use it to fly around and destroy stone blocks or other objects that he could otherwise not destroy. After a short time, however, the Bullet Bill will explode, releasing Mario and dropping him off where ever it exploded. | ||
|Hold {{button| | |Hold {{button|switch|Y}} to Accelerate <br> ''Shake the {{button|switch|joy-con}} Joy-Con/{{button|switch|pro}} Pro Controller to accelerate more.'' | ||
|- | |- | ||
!10 | !10 | ||
|style="text-align:center;"|[[File:SMO Moe-Eye Capture.png| | |style="text-align:center;"|[[File:SMO Moe-Eye Capture.png|100x100px]]<br>[[Moe-Eye]] | ||
|Mario can capture Moe-Eyes in order to put on their shades, which allows him to see invisible platforms, Coins, and blocks that he could otherwise not see. Wearing the shades causes the Moe-Eyes to move slower than they do without their shades. | |Mario can capture Moe-Eyes in order to put on their shades, which allows him to see invisible platforms, Coins, and blocks that he could otherwise not see. Wearing the shades causes the Moe-Eyes to move slower than they do without their shades. | ||
|{{button| | |{{button|switch|Y}} Put On / Take Off Shades | ||
|- | |- | ||
!11 | !11 | ||
|style="text-align:center;"|[[File:SMO Cactus Capture.png| | |style="text-align:center;"|[[File:SMO Cactus Capture.png|100x100px]]<br>[[Cactus]] | ||
|Mario can capture a cactus (in the [[Sand Kingdom]]) in order to move it out of the way of a glowing spot on the ground, which hides a [[Power Moon]]. | |Mario can capture a cactus (in the [[Sand Kingdom]]) in order to move it out of the way of a glowing spot on the ground, which hides a [[Power Moon]]. | ||
|{{button| | |{{button|switch|leftstick}} Move | ||
|- | |- | ||
!12 | !12 | ||
|style="text-align:center;"|[[File:SMO Goomba Capture.png| | |style="text-align:center;"|[[File:SMO Goomba Capture.png|100x100px]]<br>[[Goomba]] | ||
|Mario can capture Goombas in order to stack them into Goomba Towers, which allows him to reach high spots that he could otherwise not reach. As a Goomba, Mario can also interact with [[Goombette]], who will award Mario with a Power Moon as a sign of affection. If Mario approaches the female Goomba in his normal form, it will instead disappear in fear. Goombas' feet are also able to walk across icy surfaces without slipping around. | |Mario can capture Goombas in order to stack them into Goomba Towers, which allows him to reach high spots that he could otherwise not reach. As a Goomba, Mario can also interact with [[Goombette]], who will award Mario with a Power Moon as a sign of affection. If Mario approaches the female Goomba in his normal form, it will instead disappear in fear. Goombas' feet are also able to walk across icy surfaces without slipping around. | ||
|{{button| | |{{button|switch|leftstick}} + {{button|switch|Y}} Dash <br> {{button|switch|B}} Jump <br> ''Shake the {{button|switch|joy-con}} Joy-Con/{{button|switch|pro}} Pro Controller to High Jump.'' | ||
|- | |- | ||
!13 | !13 | ||
|style="text-align:center;"|[[File:SMO Knucklotec's Fist Capture.png| | |style="text-align:center;"|[[File:SMO Knucklotec's Fist Capture.png|100x100px]]<br>[[Knucklotec|Knucklotec's Fist]] | ||
|During the battle against Knucklotec in the Sand Kingdom (and during the rematch in the Mushroom Kingdom), Mario can capture Knucklotec's Fist, which he can use to punch the foe in order to damage him. Similar to Bullet Bills, Knucklotec's Fist can only be captured for a short amount of time. | |During the battle against Knucklotec in the Sand Kingdom (and during the rematch in the Mushroom Kingdom), Mario can capture Knucklotec's Fist, which he can use to punch the foe in order to damage him. Similar to Bullet Bills, Knucklotec's Fist can only be captured for a short amount of time. | ||
|Hold {{button| | |Hold {{button|switch|Y}} to Accelerate <br> ''Shake the {{button|switch|joy-con}} Joy-Con/{{button|switch|pro}} Pro Controller to accelerate more.'' | ||
|- | |- | ||
!14 | !14 | ||
|style="text-align:center;"|[[File:SMO Mini Rocket Capture.png| | |style="text-align:center;"|[[File:SMO Mini Rocket Capture.png|100x100px]]<br>[[Mini Rocket]] | ||
|Mario can capture a Mini Rocket in order to blast off into the sky, where he can find a platforming challenge that awards a Power Moon when completed. He can also capture the Mini Rocket in the sky area in order to return to the main level he came from. | |Mario can capture a Mini Rocket in order to blast off into the sky, where he can find a platforming challenge that awards a Power Moon when completed. He can also capture the Mini Rocket in the sky area in order to return to the main level he came from. | ||
|Hold {{button| | |Hold {{button|switch|B}} to Launch | ||
|- | |- | ||
!15 | !15 | ||
|style="text-align:center;"|[[File:SMO Glydon Capture.png| | |style="text-align:center;"|[[File:SMO Glydon Capture.png|100x100px]]<br>[[Glydon]] | ||
|Mario can capture Glydon in order to glide across the Kingdoms and reach high areas that are too far for Mario to reach otherwise. | |Mario can capture Glydon in order to glide across the Kingdoms and reach high areas that are too far for Mario to reach otherwise. | ||
|Hold {{button| | |Hold {{button|switch|B}} to Glide | ||
|- | |- | ||
!16 | !16 | ||
|style="text-align:center;"|[[File:SMO Lakitu Capture.png| | |style="text-align:center;"|[[File:SMO Lakitu Capture.png|100x100px]]<br>[[Lakitu]] | ||
|Mario can capture Lakitu and use him to fish for Cheep Cheeps and Big Cheep Cheeps, the latter of which awards Mario with a Power Moon. | |Mario can capture Lakitu and use him to fish for Cheep Cheeps and Big Cheep Cheeps, the latter of which awards Mario with a Power Moon. | ||
|{{button| | |{{button|switch|Y}} Lower / Raise Line | ||
|- | |- | ||
!17 | !17 | ||
|style="text-align:center;"|[[File:SMO Zipper Capture.png| | |style="text-align:center;"|[[File:SMO Zipper Capture.png|100x100px]]<br>[[Zipper (Super Mario Odyssey)|Zipper]] | ||
|Mario can capture zippers in order to un-zip sections of the level and reveal hidden passages to Coins and Power Moons. | |Mario can capture zippers in order to un-zip sections of the level and reveal hidden passages to Coins and Power Moons. | ||
|{{button| | |{{button|switch|leftstick}} Move | ||
|- | |- | ||
!18 | !18 | ||
|style="text-align:center;"|[[File:SMO Cheep Cheep Capture.png| | |style="text-align:center;"|[[File:SMO Cheep Cheep Capture.png|100x100px]]<br>[[Cheep Cheep]] | ||
|Mario can capture a Cheep Cheep in order to swim faster and better while in the water. If the Cheep Cheep leaves the water, it will bounce around until it re-enters water. As a Cheep Cheep, Mario will not need to come to the water's surface for air. | |Mario can capture a Cheep Cheep in order to swim faster and better while in the water. If the Cheep Cheep leaves the water, it will bounce around until it re-enters water. As a Cheep Cheep, Mario will not need to come to the water's surface for air. | ||
|{{button| | |{{button|switch|Y}} Dive <br> {{button|switch|B}} Surface <br> ''Shake the {{button|switch|joy-con}} Joy-Con/{{button|switch|pro}} Pro Controller to attack.'' | ||
|- | |- | ||
!19 | !19 | ||
|style="text-align:center;"|[[File:SMO Puzzle Part (Lake Kingdom) Capture.png| | |style="text-align:center;"|[[File:SMO Puzzle Part (Lake Kingdom) Capture.png|100x100px]]<br>[[Puzzle Part|Puzzle Part (Lake Kingdom)]] | ||
|Mario can capture a large stone rock in the [[Lake Kingdom]] in order to solve a puzzle for a [[Lochlady]], who will award Mario with a Power Moon once the puzzle is solved. | |Mario can capture a large stone rock in the [[Lake Kingdom]] in order to solve a puzzle for a [[Lochlady]], who will award Mario with a Power Moon once the puzzle is solved. | ||
|{{button| | |{{button|switch|leftstick}} Move | ||
|- | |- | ||
!20 | !20 | ||
|style="text-align:center;"|[[File:SMO Piranha Plant Capture.png| | |style="text-align:center;"|[[File:SMO Piranha Plant Capture.png|100x100px]]<br>[[Poison Piranha Plant]] | ||
|To capture a Poison Piranha Plant, Mario must first kick a rock into its mouth, which will then allow Cappy to land on top of the Plant's head (rather than the Piranha Plant eating Cappy). As a Poison Piranha Plant, Mario can spit balls of poison at other enemies or at the ground. | |To capture a Poison Piranha Plant, Mario must first kick a rock into its mouth, which will then allow Cappy to land on top of the Plant's head (rather than the Piranha Plant eating Cappy). As a Poison Piranha Plant, Mario can spit balls of poison at other enemies or at the ground. | ||
|{{button| | |{{button|switch|Y}} Spit <br> ''Shake the {{button|switch|joy-con}} Joy-Con/{{button|switch|pro}} Pro Controller to spit farther and faster.'' | ||
|- | |- | ||
!21 | !21 | ||
|style="text-align:center;"|[[File:SMO Uproot Capture.png| | |style="text-align:center;"|[[File:SMO Uproot Capture.png|100x100px]]<br>[[Uproot]] | ||
|Mario can capture Uproots in order to stretch their legs and reach high places that he could otherwise not reach. Mario can also use the Uproot to break otherwise unreachable [[Rock Block]]s located high off the ground. | |Mario can capture Uproots in order to stretch their legs and reach high places that he could otherwise not reach. Mario can also use the Uproot to break otherwise unreachable [[Rock Block]]s located high off the ground. | ||
|Hold {{button| | |Hold {{button|switch|B}} to Stretch <br> ''Shake the {{button|switch|joy-con}} Joy-Con/{{button|switch|pro}} Pro Controller to stretch farther.'' | ||
|- | |- | ||
!22 | !22 | ||
|style="text-align:center;"|[[File:SMO Fire Bro Capture.png| | |style="text-align:center;"|[[File:SMO Fire Bro Capture.png|100x100px]]<br>[[Fire Bro]] | ||
|Mario can capture a Fire Bro to fire fireballs at enemies and objects, which will award Mario with Coins and, rarely, Power Moons. | |Mario can capture a Fire Bro to fire fireballs at enemies and objects, which will award Mario with Coins and, rarely, Power Moons. | ||
|{{button| | |{{button|switch|Y}} Throw <br> {{button|switch|B}} Jump <br> ''Shake the {{button|switch|joy-con}} Joy-Con/{{button|switch|pro}} Pro Controller to throw faster.'' | ||
|- | |- | ||
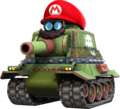
!23 | !23 | ||
|style="text-align:center;"|[[File:SMO Sherm Capture.png| | |style="text-align:center;"|[[File:SMO Sherm Capture.png|100x100px]]<br>[[Sherm]] | ||
|Mario can capture tank-like enemies called Sherms and use them to fire cannonballs at enemies and mounds of dirt, which can open up the path to new areas. | |Mario can capture tank-like enemies called Sherms and use them to fire cannonballs at enemies and mounds of dirt, which can open up the path to new areas. | ||
|{{button| | |{{button|switch|rightstick}} Aim <br> {{button|switch|Y}} Shoot <br> ''You can also aim with the {{button|switch|joy-con-r}} Joy-Con (R)/{{button|switch|pro}} Pro Controller.'' | ||
|- | |- | ||
!24 | !24 | ||
|style="text-align:center;"|[[File:SMO Coin Coffer Capture.png| | |style="text-align:center;"|[[File:SMO Coin Coffer Capture.png|100x100px]]<br>[[Coin Coffer]] | ||
|Mario can capture a Coin Coffer and use it to fire his Coins at enemies and objects. Mario will also gain 30 free coins for capturing a Coin Coffer. | |Mario can capture a Coin Coffer and use it to fire his Coins at enemies and objects. Mario will also gain 30 free coins for capturing a Coin Coffer. | ||
|{{button| | |{{button|switch|Y}} Shoot <br> {{button|switch|B}} Jump <br> ''Shake the {{button|switch|joy-con}} Joy-Con/{{button|switch|pro}} Pro Controller to scatter coins.'' | ||
|- | |- | ||
!25 | !25 | ||
|style="text-align:center;"|[[File:SMO Tree Capture.png| | |style="text-align:center;"|[[File:SMO Tree Capture.png|100x100px]]<br>[[Tree]] | ||
|Mario can capture a tree (in the [[Wooded Kingdom]]) in order to move it out of the way of a glowing spot on the ground, which hides a Power Moon. | |Mario can capture a tree (in the [[Wooded Kingdom]]) in order to move it out of the way of a glowing spot on the ground, which hides a Power Moon. | ||
|{{button| | |{{button|switch|leftstick}} Move | ||
|- | |- | ||
!26 | !26 | ||
|style="text-align:center;"|[[File:SMO Boulder Capture.png| | |style="text-align:center;"|[[File:SMO Boulder Capture.png|100x100px]]<br>[[Boulder]] | ||
|Mario can capture a rock (in the Wooded Kingdom) in order to move it out of the way of an alcove on the adjacent tree, which hides some [[regional coin]]s. | |Mario can capture a rock (in the Wooded Kingdom) in order to move it out of the way of an alcove on the adjacent tree, which hides some [[regional coin]]s. | ||
|{{button| | |{{button|switch|leftstick}} Move | ||
|- | |- | ||
!27 | !27 | ||
|style="text-align:center;"|[[File:SMO Picture Match Part (Goomba) Capture.png| | |style="text-align:center;"|[[File:SMO Picture Match Part (Goomba) Capture.png|100x100px]]<br>[[Picture Match|Picture Match Part (Goomba)]] | ||
|Mario can capture a piece of a Goomba picture during the Picture Match mini-game in the [[Cloud Kingdom]]. | |Mario can capture a piece of a Goomba picture during the Picture Match mini-game in the [[Cloud Kingdom]]. | ||
|{{button| | |{{button|switch|Y}} Rotate Left <br> {{button|switch|B}} Rotate Right <br> {{button|switch|ZL}} Place | ||
|- | |- | ||
!28 | !28 | ||
|style="text-align:center;"|[[File:SMO Tropical Wiggler Capture.png| | |style="text-align:center;"|[[File:SMO Tropical Wiggler Capture.png|100x100px]]<br>[[Tropical Wiggler]] | ||
|Mario can capture Tropical Wigglers and use them to stretch out and reach small platforms and alcoves that he could otherwise not reach. | |Mario can capture Tropical Wigglers and use them to stretch out and reach small platforms and alcoves that he could otherwise not reach. | ||
|{{button| | |{{button|switch|leftstick}} + {{button|switch|Y}} Stretch <br> ''Shake the {{button|switch|joy-con}} Joy-Con/{{button|switch|pro}} Pro Controller to stretch faster.'' | ||
|- | |- | ||
!29 | !29 | ||
|style="text-align:center;"|[[File:SMO Pole Capture.png| | |style="text-align:center;"|[[File:SMO Pole Capture.png|100x100px]]<br>[[Pole (bollard)|Pole]] | ||
|Mario can capture Poles (in the [[Metro Kingdom]]) to fling himself large distances and reach high or far areas. | |Mario can capture Poles (in the [[Metro Kingdom]]) to fling himself large distances and reach high or far areas. | ||
|{{button| | |{{button|switch|leftstick}} Flick <br> ''Shake the {{button|switch|joy-con}} Joy-Con/{{button|switch|pro}} Pro Controller to flick farther.'' | ||
|- | |- | ||
!30 | !30 | ||
|style="text-align:center;"|[[File:SMO Manhole Capture.png| | |style="text-align:center;"|[[File:SMO Manhole Capture.png|100x100px]]<br>[[Manhole]] | ||
|Mario can capture the smaller manhole cover (in the Metro Kingdom) to move it out of the way and access a secret area containing two Power Moons and the bigger manhole cover (in the Metro Kingdom) to move it out of the way and access the Underground Power Plant. | |Mario can capture the smaller manhole cover (in the Metro Kingdom) to move it out of the way and access a secret area containing two Power Moons and the bigger manhole cover (in the Metro Kingdom) to move it out of the way and access the Underground Power Plant. | ||
|{{button| | |{{button|switch|leftstick}} Move | ||
|- | |- | ||
!31 | !31 | ||
|style="text-align:center;"|[[File:SMO Taxi Capture.png| | |style="text-align:center;"|[[File:SMO Taxi Capture.png|100x100px]]<br>[[Taxi]] | ||
|Mario can capture a taxi (in the Metro Kingdom), which will take him to a secret night-time area in the Kingdom filled with Sherms and Moon Shards, which Mario must collect to receive a Power Moon. | |Mario can capture a taxi (in the Metro Kingdom), which will take him to a secret night-time area in the Kingdom filled with Sherms and Moon Shards, which Mario must collect to receive a Power Moon. | ||
|{{button| | |{{button|switch|leftstick}} Move | ||
|- | |- | ||
!32 | !32 | ||
|style="text-align:center;"|[[File:SMO RC Car Capture.png| | |style="text-align:center;"|[[File:SMO RC Car Capture.png|100x100px]]<br>[[RC Car]] | ||
|Mario can capture a [[New Donker]] (in the Metro Kingdom) to control a small RC Car and drive it into a small cage holding a Power Moon. | |Mario can capture a [[New Donker]] (in the Metro Kingdom) to control a small RC Car and drive it into a small cage holding a Power Moon. | ||
|{{button| | |{{button|switch|leftstick}} Accelerate <br> {{button|switch|rightstick}} Steer | ||
|- | |- | ||
!33 | !33 | ||
|style="text-align:center;"|[[File:SMO Ty-foo Capture.png| | |style="text-align:center;"|[[File:SMO Ty-foo Capture.png|100x100px]]<br>[[Ty-foo]] | ||
|Mario can capture Ty-foos and use them to blow away enemies or blocks, which can open access to secret areas. | |Mario can capture Ty-foos and use them to blow away enemies or blocks, which can open access to secret areas. | ||
|Hold {{button| | |Hold {{button|switch|Y}} to Exhale <br> ''Shake the {{button|switch|joy-con}} Joy-Con/{{button|switch|pro}} Pro Controller to blow harder.'' | ||
|- | |- | ||
!34 | !34 | ||
|style="text-align:center;"|[[File:SMO Shiverian Racer Capture.png| | |style="text-align:center;"|[[File:SMO Shiverian Racer Capture.png|100x100px]]<br>[[Shiverian|Shiverian Racer]] | ||
|Mario can capture a Shiverian Racer in order to participate in the Bound Bowl Grand Prix (in the Snow Kingdom). | |Mario can capture a Shiverian Racer in order to participate in the Bound Bowl Grand Prix (in the Snow Kingdom). | ||
|{{button| | |{{button|switch|B}} Bound <br> ''You can also shake the {{button|switch|joy-con}} Joy-Con/{{button|switch|pro}} Pro Controller to bound.'' | ||
|- | |- | ||
!35 | !35 | ||
|style="text-align:center;"|[[File:SMO Cheep Cheep (Snow Kingdom) Capture.png| | |style="text-align:center;"|[[File:SMO Cheep Cheep (Snow Kingdom) Capture.png|100x100px]]<br>[[Cheep Cheep#Super Mario Odyssey|Cheep Cheep (Snow Kingdom)]] | ||
|Mario can capture purple Cheep Cheeps (in the Snow Kingdom), which behave exactly the same as the regular Cheep Cheeps, with the addition of not being hurt from freezing. | |Mario can capture purple Cheep Cheeps (in the Snow Kingdom), which behave exactly the same as the regular Cheep Cheeps, with the addition of not being hurt from freezing. | ||
|{{button| | |{{button|switch|Y}} Dive <br> {{button|switch|B}} Surface <br> ''Shake the {{button|switch|joy-con}} Joy-Con/{{button|switch|pro}} Pro Controller to attack.'' | ||
|- | |- | ||
!36 | !36 | ||
|style="text-align:center;"|[[File:SMO Gushen Capture.png| | |style="text-align:center;"|[[File:SMO Gushen Capture.png|100x100px]]<br>[[Gushen]] | ||
|Mario can capture Gushens and use them to spray jets of water, which can be used to reach high ledges where Power Moons can be found. | |Mario can capture Gushens and use them to spray jets of water, which can be used to reach high ledges where Power Moons can be found. | ||
|Hold {{button| | |Hold {{button|switch|Y}} to Jet Forward <br> Hold {{button|switch|B}} to Jet Upward <br> ''Shake the {{button|switch|joy-con}} Joy-Con/{{button|switch|pro}} Pro Controller to spray in all directions.'' | ||
|- | |- | ||
!37 | !37 | ||
|style="text-align:center;"|[[File:SMO Lava Bubble Capture.png| | |style="text-align:center;"|[[File:SMO Lava Bubble Capture.png|100x100px]]<br>[[Lava Bubble]] | ||
|Mario can capture Lava Bubbles and use them to swim around lava and reach otherwise unreachable areas across the lava sea. | |Mario can capture Lava Bubbles and use them to swim around lava and reach otherwise unreachable areas across the lava sea. | ||
|{{button| | |{{button|switch|leftstick}} + {{button|switch|Y}} Dash <br> {{button|switch|B}} Jump <br> ''Shake the {{button|switch|joy-con}} Joy-Con/{{button|switch|pro}} Pro Controller to dash faster.'' | ||
|- | |- | ||
!38 | !38 | ||
|style="text-align:center;"|[[File:SMO Volbonan Capture.png| | |style="text-align:center;"|[[File:SMO Volbonan Capture.png|100x100px]]<br>[[Volbonan]] | ||
|Mario can capture Volbonans and use them to fling to high places that he could otherwise not reach. | |Mario can capture Volbonans and use them to fling to high places that he could otherwise not reach. | ||
|{{button| | |{{button|switch|leftstick}} Flick <br> ''Shake the {{button|switch|joy-con}} Joy-Con/{{button|switch|pro}} Pro Controller to flick farther.'' | ||
|- | |- | ||
!39 | !39 | ||
|style="text-align:center;"|[[File:SMO Hammer Bro Capture.png| | |style="text-align:center;"|[[File:SMO Hammer Bro Capture.png|100x100px]]<br>[[Hammer Bro]] | ||
|Mario can capture a Hammer Bro and use them to throw hammers (or frying pans in the [[Luncheon Kingdom]]), which can break mounds of dirt (mounds of cheese rocks in the Luncheon Kingdom) and reveal hidden objects underneath. | |Mario can capture a Hammer Bro and use them to throw hammers (or frying pans in the [[Luncheon Kingdom]]), which can break mounds of dirt (mounds of cheese rocks in the Luncheon Kingdom) and reveal hidden objects underneath. | ||
|{{button| | |{{button|switch|Y}} Throw <br> {{button|switch|B}} Jump <br> ''Shake the {{button|switch|joy-con}} Joy-Con/{{button|switch|pro}} Pro Controller to throw farther.'' | ||
|- | |- | ||
!40 | !40 | ||
|style="text-align:center;"|[[File:SMO Meat Capture.png| | |style="text-align:center;"|[[File:SMO Meat Capture.png|100x100px]]<br>[[Meat (object)|Meat]] | ||
|Mario can capture a large slab of meat (in the Luncheon Kingdom) and use it to lure [[Cookatiel]] to pick it up and drop it in the large pot atop Mount Volbono, where a Multi Moon awaits. | |Mario can capture a large slab of meat (in the Luncheon Kingdom) and use it to lure [[Cookatiel]] to pick it up and drop it in the large pot atop Mount Volbono, where a Multi Moon awaits. It cannot be captured again after defeating Cookatiel on the same save file. | ||
|{{button| | |{{button|switch|b}} Twitch | ||
|- | |- | ||
!41 | !41 | ||
|style="text-align:center;"|[[File:SMO Piranha Plant Capture.png| | |style="text-align:center;"|[[File:SMO Piranha Plant Capture.png|100x100px]]<br>[[Fire Piranha Plant]] | ||
|Mario can capture a Fire Piranha Plant and use it to spit fireballs at enemies or unlit torches, which can award the player with a Power Moon. | |Mario can capture a Fire Piranha Plant and use it to spit fireballs at enemies or unlit torches, which can award the player with a Power Moon. | ||
|{{button| | |{{button|switch|Y}} Spit <br> ''Shake the {{button|switch|joy-con}} Joy-Con/{{button|switch|pro}} Pro Controller to spit farther and faster.'' | ||
|- | |- | ||
!42 | !42 | ||
|style="text-align:center;"|[[File:SMO Pokio Capture.png| | |style="text-align:center;"|[[File:SMO Pokio Capture.png|100x100px]]<br>[[Pokio]] | ||
|Mario can capture a Pokio and use it to poke into a non-metal wall and fling himself upwards to reach higher areas that he could otherwise not reach. | |Mario can capture a Pokio and use it to poke into a non-metal wall and fling himself upwards to reach higher areas that he could otherwise not reach. | ||
|{{button| | |{{button|switch|Y}} Poke <br> {{button|switch|B}} Jump | ||
|- | |- | ||
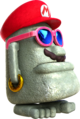
!43 | !43 | ||
|style="text-align:center;"|[[File:SMO Jizo Capture.png| | |style="text-align:center;"|[[File:SMO Jizo Capture.png|100x100px]]<br>[[Jizo]] | ||
|Mario can capture a Jizo statue and use it to line up with other Jizo statue rows, earn coins or Hearts from glowing spots on the ground, break cracked blocks, and weigh down certain [[P Switch]]es. | |Mario can capture a Jizo statue and use it to line up with other Jizo statue rows, earn coins or Hearts from glowing spots on the ground, break cracked blocks, and weigh down certain [[P Switch]]es. | ||
|{{button| | |{{button|switch|leftstick}} + {{button|switch|Y}} Dash | ||
|- | |- | ||
!44 | !44 | ||
|style="text-align:center;"|[[File:SMO Bowser statue Capture.png| | |style="text-align:center;"|[[File:SMO Bowser statue Capture.png|100x100px]]<br>[[Bowser Statue|Bowser statue]] | ||
|Mario can capture a Bowser statue (in the [[Moon Kingdom]]) in order to move it out of the way of a small ditch containing a Power Moon. | |Mario can capture a Bowser statue (in the [[Moon Kingdom]]) in order to move it out of the way of a small ditch containing a Power Moon. | ||
|{{button| | |{{button|switch|leftstick}} Move | ||
|- | |- | ||
!45 | !45 | ||
|style="text-align:center;"|[[File:SMO Parabones Capture.png| | |style="text-align:center;"|[[File:SMO Parabones Capture.png|100x100px]]<br>[[Parabones]] | ||
|Mario can capture a Parabones and use it to fly across large pits of lava and reach distant platforms that he could otherwise not reach. | |Mario can capture a Parabones and use it to fly across large pits of lava and reach distant platforms that he could otherwise not reach. | ||
|{{button| | |{{button|switch|B}} Fly <br> ''Shake the {{button|switch|joy-con}} Joy-Con/{{button|switch|pro}} Pro Controller to fly faster.'' | ||
|- | |- | ||
!46 | !46 | ||
|style="text-align:center;"|[[File:SMO Banzai Bill Capture.png| | |style="text-align:center;"|[[File:SMO Banzai Bill Capture.png|100x100px]]<br>[[Banzai Bill]] | ||
|Mario can capture a Banzai Bill, which will make him temporarily invincible (until the Banzai Bill hits a solid wall or blows itself up), allowing Mario to cross large areas of lava or destroy large blocks of stone. | |Mario can capture a Banzai Bill, which will make him temporarily invincible (until the Banzai Bill hits a solid wall or blows itself up), allowing Mario to cross large areas of lava or destroy large blocks of stone. | ||
|Hold {{button| | |Hold {{button|switch|Y}} to Accelerate <br> ''Shake the {{button|switch|joy-con}} Joy-Con/{{button|switch|pro}} Pro Controller to accelerate more.'' | ||
|- | |- | ||
!47 | !47 | ||
|style="text-align:center;"|[[File:SMO Chargin' Chuck Capture.png| | |style="text-align:center;"|[[File:SMO Chargin' Chuck Capture.png|100x100px]]<br>[[Chargin' Chuck]] | ||
|Mario can capture a Chargin' Chuck and use it to charge through boulders or other tough obstacles in the way. | |Mario can capture a Chargin' Chuck and use it to charge through boulders or other tough obstacles in the way. | ||
|Hold {{button| | |Hold {{button|switch|Y}} to Charge Up <br> Release {{button|switch|Y}} to Tackle | ||
|- | |- | ||
!48 | !48 | ||
|style="text-align:center;"|[[File:SMO Bowser Capture.png| | |style="text-align:center;"|[[File:SMO Bowser Capture.png|100x100px]]<br>[[Bowser]] | ||
|Mario can capture Bowser (during the story events of the [[Moon Kingdom]]) and use him to destroy large blocks of stone. He is the only capture that cannot be de-captured when used. | |Mario can capture an unconscious Bowser (during the story events of the [[Moon Kingdom]]) and use him to destroy large blocks of stone. He is the only capture that cannot be de-captured when used. | ||
|{{button| | |{{button|switch|Y}} Attack <br> {{button|switch|B}} Jump <br> ''Shake the {{button|switch|joy-con}} Joy-Con/{{button|switch|pro}} Pro Controller to breathe fire.'' | ||
|- | |- | ||
!49 | !49 | ||
|style="text-align:center;"|[[File:SMO Letter Capture.png| | |style="text-align:center;"|[[File:SMO Letter Capture.png|100x100px]]<br>[[Letter (Super Mario Odyssey)|Letter]] | ||
|Mario can capture the letters M, A, R, I and O (in the Metro Kingdom) and use them to spell out the word "Mario", which will reward him with a Power Moon. | |Mario can capture the letters M, A, R, I and O (in the Metro Kingdom) and use them to spell out the word "Mario", which will reward him with a Power Moon. | ||
|{{button| | |{{button|switch|leftstick}} + {{button|switch|Y}} Dash <br> ''Shake the {{button|switch|joy-con}} Joy-Con/{{button|switch|pro}} Pro Controller to dash faster.'' | ||
|- | |- | ||
!50 | !50 | ||
|style="text-align:center;"|[[File:SMO Puzzle Part (Metro Kingdom) Capture.png| | |style="text-align:center;"|[[File:SMO Puzzle Part (Metro Kingdom) Capture.png|100x100px]]<br>[[Puzzle Part|Puzzle Part (Metro Kingdom)]] | ||
|Mario can capture an uncharged block in the New Donk City Power Plant in order to place it on top of a socket, which will power it up and reward the player with a Power Moon. | |Mario can capture an uncharged block in the New Donk City Power Plant in order to place it on top of a socket, which will power it up and reward the player with a Power Moon. | ||
|{{button| | |{{button|switch|leftstick}} Move | ||
|- | |- | ||
!51 | !51 | ||
|style="text-align:center;"|[[File:SMO Picture Match Part (Mario) Capture.png| | |style="text-align:center;"|[[File:SMO Picture Match Part (Mario) Capture.png|100x100px]]<br>[[Picture Match|Picture Match Part (Mario)]] | ||
|Mario can capture a piece of a Mario picture during the Picture Match mini-game in the Mushroom Kingdom. | |Mario can capture a piece of a Mario picture during the Picture Match mini-game in the Mushroom Kingdom. | ||
|{{button| | |{{button|switch|Y}} Rotate Left <br> {{button|switch|B}} Rotate Right <br> {{button|switch|ZL}} Place | ||
|- | |- | ||
!52 | !52 | ||
|style="text-align:center;"|[[File:SMO Yoshi Capture.png| | |style="text-align:center;"|[[File:SMO Yoshi Capture.png|100x100px]]<br>[[Yoshi]] | ||
|Mario can capture Yoshi and use him to eat several berries scattered across the area where he is found. Eating 10 of these berries rewards Mario with a Power Moon. | |Mario can capture Yoshi and use him to eat several berries scattered across the area where he is found. Eating 10 of these berries rewards Mario with a Power Moon. | ||
|{{button| | |{{button|switch|Y}} Extend Tongue <br> Hold {{button|switch|B}} to Flutter Jump <br> ''You can also shake the {{button|switch|joy-con}} Joy-Con/{{button|switch|pro}} Pro Controller to extend tongue.'' | ||
|} | |} | ||
| Line 278: | Line 279: | ||
SMO Art - Goomba Capture.png|Mario capturing a Goomba | SMO Art - Goomba Capture.png|Mario capturing a Goomba | ||
SMO-MarioCapturingGoomba.png | SMO-MarioCapturingGoomba.png | ||
SMO Art - E3 Char5.png|Captured [[Goomba]] | SMO Art - E3 Char5.png|Captured [[Goomba]] | ||
SMO Art - E3 Char6.png|Captured [[Chain Chomp]] | SMO Art - E3 Char6.png|Captured [[Chain Chomp]] | ||
SMO Art - E3 Char7.png|Captured [[Bullet Bill]] | SMO Art - E3 Char7.png|Captured [[Bullet Bill]] | ||
SMO Art - E3 Char8.png|Captured [[Hammer Bro]] | SMO Art - E3 Char8.png|Captured [[Hammer Bro]] | ||
Kinopio-kun Hammer Bro painting.jpg|Captured Hammer Bro drawn by [[Kinopio-kun]] | |||
SMO Art - E3 Char9.png|Captured [[Lava Bubble]] | SMO Art - E3 Char9.png|Captured [[Lava Bubble]] | ||
SMO Art - E3 Char10.png|Captured [[Cheep Cheep]] | SMO Art - E3 Char10.png|Captured [[Cheep Cheep]] | ||
| Line 291: | Line 290: | ||
SMO Art - E3 Char1.png|Captured [[Uproot]] | SMO Art - E3 Char1.png|Captured [[Uproot]] | ||
SMO Art - E3 Char2.png|Captured [[T-Rex]] | SMO Art - E3 Char2.png|Captured [[T-Rex]] | ||
Super Mario-Kun 55.jpg|Captured [[Yoshi]] and [[Bowser]] from ''[[Super Mario-Kun]]'' | |||
Yukio Sawada 2018 New Year Card Illustration.jpg|Captured [[Poochy]] from a 2018 New Year greeting card drawn by [[Yukio Sawada]] | |||
Kinopio-kun Cappy.jpg|Captured Kinopio-kun from Nintendo's official [[LINE]] account | |||
SMB 35th Anniversary Lineup TVCM.jpg|Various captured transformations from a Japanese commercial promoting the [[Super Mario Bros. 35th Anniversary|''Super Mario Bros.'' 35th Anniversary]] | |||
</gallery> | </gallery> | ||
==Names in other languages== | ==Names in other languages== | ||
{{foreign names | {{foreign names | ||
|Jap=キャプチャー | |||
|JapR=Kyapuchā | |||
|JapM=Capture | |||
|Spa=Capturar | |Spa=Capturar | ||
|SpaM=Capture | |SpaM=Capture | ||
|Kor= | |Kor=캡처 | ||
|KorR= | |KorR=Capcheo | ||
|KorM=Capture | |KorM=Capture | ||
|Rus=Зашляпивание | |Rus=Зашляпивание | ||
| Line 308: | Line 314: | ||
|ChiR=Fùshēn | |ChiR=Fùshēn | ||
|ChiM=Possess | |ChiM=Possess | ||
|Fre=Chapimorphose | |||
|FreM=Portmanteau of "chapeau" (hat) and "métamorphose" (metamorphosis) | |||
|Ita=Cap-tura | |||
|ItaM=Cap-ture | |||
}} | }} | ||
==Trivia== | ==Trivia== | ||
*According to ''[[The Art of Super Mario Odyssey]]'', not only was Bowser going to have access to the | [[File:Peach Bowser Concept TAoSMO.jpg|thumb|[[Bowser]] after capturing [[Princess Peach|Peach]] as shown in one of the pages of ''[[The Art of Super Mario Odyssey]]'']] | ||
{{multiframe| | |||
*In the E3 2017 trailer for ''Super Mario Odyssey'', Mario's pole capture was shown to have Mario's mustache.<ref>https://www.youtube.com/watch?v=wGQHQc_3ycE</ref> This is not the case in the final game. | [[File:SMO Art - E3 Char5.png|100px]] | ||
* | [[File:SMM 30th Goomba.png|100px]] | ||
|align=left | |||
|size=210 | |||
|A captured Goomba compared with a Goomba under the effects of a [[Big Mushroom]]}} | |||
{{multiframe| | |||
[[File:SMO 8bit Mario Bowser.png|100px]] | |||
[[File:SMM-SMB-Bowser-Kidnapping-Princess-Peach.png|100px]] | |||
|align=left | |||
|size=210 | |||
|Bowser's captured sprite and his [[Big Mario]] sprite}} | |||
*According to ''[[The Art of Super Mario Odyssey]]'', not only was Bowser going to have access to the capture abilities, but he would have used it to take over Princess Peach's body, with her gaining an appearance that bears a much closer resemblance to Bowser when captured by him than most captured beings in the final game do to Mario.<ref>http://www.nintendolife.com/news/2018/09/super_mario_odyssey_art_book_reveals_official_bowsette_concept_existed_long_before_the_fan-made_one</ref> There is also a picture of Mario capturing Princess Peach, which implies that she was originally intended to be a capturable character.<ref>https://m.youtube.com/watch?v=Mpkvf-nvdSU</ref> | |||
*In the E3 2017 trailer for ''Super Mario Odyssey'', Mario's pole capture was shown to have Mario's mustache.<ref>https://www.youtube.com/watch?v=wGQHQc_3ycE</ref> This is not the case in the final game. However, the pole's in-game model retains the mustache despite not using it, which can be seen via [[glitch]]es.<ref>https://www.youtube.com/watch?v=Tv7opM3zrbI&t=82s</ref> | |||
*Many of the enemies captured by Mario resemble their [[Big Mario]] sprites in ''[[Super Mario Maker]]''. The only differences between Bowser's appearance in the 8-bit section of the final boss sequence and his [[Big Mushroom]] form are the lack of cap and a different mustache. | |||
{{br|left}} | |||
==References== | ==References== | ||
<references/> | <references/> | ||
{{Mario forms}} | |||
{{SMO}} | {{SMO}} | ||
[[Category:Moves]] | [[Category:Moves]] | ||
Latest revision as of 20:20, April 2, 2024

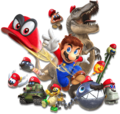
Capture is a unique ability that Mario gains in Super Mario Odyssey. His newfound Bonneter friend, Cappy, grants him this power when Mario first visits the Cap Kingdom. The name itself is a wordplay based on "cap." When Cappy is thrown at certain enemies, creatures, or objects, such as Goombas, Mario is able to take control of said enemy, creature, or object. This allows Mario to use new abilities, many of which he has never previously had, and collect Power Moons that would normally be out of his reach. When Mario captures something, that thing will gain his hat and mustache, as well as blue pupils or his irises (if it has eyes). Mario can also "de-capture" his host at will (by pressing ![]() /
/![]() ), stunning it for a while. However, if an enemy or other being wears a hat or similar headgear on its head, Mario can capture it only after knocking the hat by jumping onto it or throwing Cappy.
), stunning it for a while. However, if an enemy or other being wears a hat or similar headgear on its head, Mario can capture it only after knocking the hat by jumping onto it or throwing Cappy.
When Mario throws Cappy at an enemy or object and captures it, the hat is shown to be Mario's cap and does not correspond to any hats Mario wears.
Capture list[edit]
| # | Capture | Description | Controls |
|---|---|---|---|
| 01 |  Frog |
Mario can capture a frog to jump extremely high and reach high platforms and places that he could otherwise not reach. | Shake the |
| 02 |  Spark pylon |
Mario can capture spark pylons in order to become electricity and zip across power lines. He can also "de-capture" the pylons at any point, allowing him to drop onto objects below him and reach some otherwise unreachable areas. If there are collectible objects like Coins or a Power Moon close to a power line, Mario can leave the power line to collect them; this is done by pressing the |
You can also shake the |
| 03 |  Paragoomba |
Mario can capture a Paragoomba and use it to fly over bottomless pits of fog. | Shake the |
| 04 |  Chain Chomp |
Mario can capture a Chain Chomp and pull back on its chain in order to have it fly off in the opposite direction. This allows him to destroy rocks and other obstacles that Mario could otherwise not destroy himself. | Pull Release |
| 05 |  Big Chain Chomp |
The Big Chain Chomps behave the same as the Chain Chomps; however, they have a longer chain, allowing them to fly further than their smaller counterparts. | Pull Release |
| 06 |  Broode's Chain Chomp |
Mario can capture Madame Broode's Chain Chomp during his encounter with her. It behaves the same as the Big Chain Chomp, and it is used to defeat Madame Broode. | Pull Release |
| 07 |  T-Rex |
Mario can capture a T-Rex in order to destroy stone rocks and enemies. However, Mario can only stay as a T-Rex for a short time, as it is too big for Cappy to hold on to for a long time. | You can also shake the |
| 08 |  Binoculars |
Mario can capture a pair of binoculars and use them to look around the area and examine his surroundings. This is vital for collecting Power Moons from zooming into floating taxis or Sphynx. | You can also look around with the |
| 09 |  Bullet Bill |
Mario can capture a Bullet Bill and use it to fly around and destroy stone blocks or other objects that he could otherwise not destroy. After a short time, however, the Bullet Bill will explode, releasing Mario and dropping him off where ever it exploded. | Hold Shake the |
| 10 |  Moe-Eye |
Mario can capture Moe-Eyes in order to put on their shades, which allows him to see invisible platforms, Coins, and blocks that he could otherwise not see. Wearing the shades causes the Moe-Eyes to move slower than they do without their shades. | |
| 11 |  Cactus |
Mario can capture a cactus (in the Sand Kingdom) in order to move it out of the way of a glowing spot on the ground, which hides a Power Moon. | |
| 12 |  Goomba |
Mario can capture Goombas in order to stack them into Goomba Towers, which allows him to reach high spots that he could otherwise not reach. As a Goomba, Mario can also interact with Goombette, who will award Mario with a Power Moon as a sign of affection. If Mario approaches the female Goomba in his normal form, it will instead disappear in fear. Goombas' feet are also able to walk across icy surfaces without slipping around. | Shake the |
| 13 |  Knucklotec's Fist |
During the battle against Knucklotec in the Sand Kingdom (and during the rematch in the Mushroom Kingdom), Mario can capture Knucklotec's Fist, which he can use to punch the foe in order to damage him. Similar to Bullet Bills, Knucklotec's Fist can only be captured for a short amount of time. | Hold Shake the |
| 14 |  Mini Rocket |
Mario can capture a Mini Rocket in order to blast off into the sky, where he can find a platforming challenge that awards a Power Moon when completed. He can also capture the Mini Rocket in the sky area in order to return to the main level he came from. | Hold |
| 15 |  Glydon |
Mario can capture Glydon in order to glide across the Kingdoms and reach high areas that are too far for Mario to reach otherwise. | Hold |
| 16 |  Lakitu |
Mario can capture Lakitu and use him to fish for Cheep Cheeps and Big Cheep Cheeps, the latter of which awards Mario with a Power Moon. | |
| 17 |  Zipper |
Mario can capture zippers in order to un-zip sections of the level and reveal hidden passages to Coins and Power Moons. | |
| 18 |  Cheep Cheep |
Mario can capture a Cheep Cheep in order to swim faster and better while in the water. If the Cheep Cheep leaves the water, it will bounce around until it re-enters water. As a Cheep Cheep, Mario will not need to come to the water's surface for air. | Shake the |
| 19 | _Capture.png) Puzzle Part (Lake Kingdom) |
Mario can capture a large stone rock in the Lake Kingdom in order to solve a puzzle for a Lochlady, who will award Mario with a Power Moon once the puzzle is solved. | |
| 20 |  Poison Piranha Plant |
To capture a Poison Piranha Plant, Mario must first kick a rock into its mouth, which will then allow Cappy to land on top of the Plant's head (rather than the Piranha Plant eating Cappy). As a Poison Piranha Plant, Mario can spit balls of poison at other enemies or at the ground. | Shake the |
| 21 |  Uproot |
Mario can capture Uproots in order to stretch their legs and reach high places that he could otherwise not reach. Mario can also use the Uproot to break otherwise unreachable Rock Blocks located high off the ground. | Hold Shake the |
| 22 |  Fire Bro |
Mario can capture a Fire Bro to fire fireballs at enemies and objects, which will award Mario with Coins and, rarely, Power Moons. | Shake the |
| 23 |  Sherm |
Mario can capture tank-like enemies called Sherms and use them to fire cannonballs at enemies and mounds of dirt, which can open up the path to new areas. | You can also aim with the |
| 24 |  Coin Coffer |
Mario can capture a Coin Coffer and use it to fire his Coins at enemies and objects. Mario will also gain 30 free coins for capturing a Coin Coffer. | Shake the |
| 25 |  Tree |
Mario can capture a tree (in the Wooded Kingdom) in order to move it out of the way of a glowing spot on the ground, which hides a Power Moon. | |
| 26 |  Boulder |
Mario can capture a rock (in the Wooded Kingdom) in order to move it out of the way of an alcove on the adjacent tree, which hides some regional coins. | |
| 27 | _Capture.png) Picture Match Part (Goomba) |
Mario can capture a piece of a Goomba picture during the Picture Match mini-game in the Cloud Kingdom. | |
| 28 |  Tropical Wiggler |
Mario can capture Tropical Wigglers and use them to stretch out and reach small platforms and alcoves that he could otherwise not reach. | Shake the |
| 29 |  Pole |
Mario can capture Poles (in the Metro Kingdom) to fling himself large distances and reach high or far areas. | Shake the |
| 30 |  Manhole |
Mario can capture the smaller manhole cover (in the Metro Kingdom) to move it out of the way and access a secret area containing two Power Moons and the bigger manhole cover (in the Metro Kingdom) to move it out of the way and access the Underground Power Plant. | |
| 31 |  Taxi |
Mario can capture a taxi (in the Metro Kingdom), which will take him to a secret night-time area in the Kingdom filled with Sherms and Moon Shards, which Mario must collect to receive a Power Moon. | |
| 32 |  RC Car |
Mario can capture a New Donker (in the Metro Kingdom) to control a small RC Car and drive it into a small cage holding a Power Moon. | |
| 33 |  Ty-foo |
Mario can capture Ty-foos and use them to blow away enemies or blocks, which can open access to secret areas. | Hold Shake the |
| 34 |  Shiverian Racer |
Mario can capture a Shiverian Racer in order to participate in the Bound Bowl Grand Prix (in the Snow Kingdom). | You can also shake the |
| 35 | _Capture.png) Cheep Cheep (Snow Kingdom) |
Mario can capture purple Cheep Cheeps (in the Snow Kingdom), which behave exactly the same as the regular Cheep Cheeps, with the addition of not being hurt from freezing. | Shake the |
| 36 |  Gushen |
Mario can capture Gushens and use them to spray jets of water, which can be used to reach high ledges where Power Moons can be found. | Hold Hold Shake the |
| 37 |  Lava Bubble |
Mario can capture Lava Bubbles and use them to swim around lava and reach otherwise unreachable areas across the lava sea. | Shake the |
| 38 | Volbonan |
Mario can capture Volbonans and use them to fling to high places that he could otherwise not reach. | Shake the |
| 39 |  Hammer Bro |
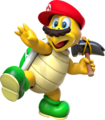
Mario can capture a Hammer Bro and use them to throw hammers (or frying pans in the Luncheon Kingdom), which can break mounds of dirt (mounds of cheese rocks in the Luncheon Kingdom) and reveal hidden objects underneath. | Shake the |
| 40 |  Meat |
Mario can capture a large slab of meat (in the Luncheon Kingdom) and use it to lure Cookatiel to pick it up and drop it in the large pot atop Mount Volbono, where a Multi Moon awaits. It cannot be captured again after defeating Cookatiel on the same save file. | |
| 41 | Fire Piranha Plant |
Mario can capture a Fire Piranha Plant and use it to spit fireballs at enemies or unlit torches, which can award the player with a Power Moon. | Shake the |
| 42 |  Pokio |
Mario can capture a Pokio and use it to poke into a non-metal wall and fling himself upwards to reach higher areas that he could otherwise not reach. | |
| 43 |  Jizo |
Mario can capture a Jizo statue and use it to line up with other Jizo statue rows, earn coins or Hearts from glowing spots on the ground, break cracked blocks, and weigh down certain P Switches. | |
| 44 |  Bowser statue |
Mario can capture a Bowser statue (in the Moon Kingdom) in order to move it out of the way of a small ditch containing a Power Moon. | |
| 45 |  Parabones |
Mario can capture a Parabones and use it to fly across large pits of lava and reach distant platforms that he could otherwise not reach. | Shake the |
| 46 |  Banzai Bill |
Mario can capture a Banzai Bill, which will make him temporarily invincible (until the Banzai Bill hits a solid wall or blows itself up), allowing Mario to cross large areas of lava or destroy large blocks of stone. | Hold Shake the |
| 47 |  Chargin' Chuck |
Mario can capture a Chargin' Chuck and use it to charge through boulders or other tough obstacles in the way. | Hold Release |
| 48 |  Bowser |
Mario can capture an unconscious Bowser (during the story events of the Moon Kingdom) and use him to destroy large blocks of stone. He is the only capture that cannot be de-captured when used. | Shake the |
| 49 | Letter |
Mario can capture the letters M, A, R, I and O (in the Metro Kingdom) and use them to spell out the word "Mario", which will reward him with a Power Moon. | Shake the |
| 50 | _Capture.png) Puzzle Part (Metro Kingdom) |
Mario can capture an uncharged block in the New Donk City Power Plant in order to place it on top of a socket, which will power it up and reward the player with a Power Moon. | |
| 51 | _Capture.png) Picture Match Part (Mario) |
Mario can capture a piece of a Mario picture during the Picture Match mini-game in the Mushroom Kingdom. | |
| 52 | Yoshi |
Mario can capture Yoshi and use him to eat several berries scattered across the area where he is found. Eating 10 of these berries rewards Mario with a Power Moon. | Hold You can also shake the |
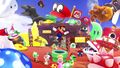
Gallery[edit]
Mario, Cappy and captured transformations.

Mario capturing a Goomba

Captured Goomba

Captured Chain Chomp

Captured Bullet Bill
Captured Hammer Bro
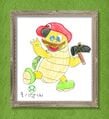
Captured Hammer Bro drawn by Kinopio-kun

Captured Lava Bubble
Captured Cheep Cheep
Captured Sherm
Captured Moe-Eye

Captured Uproot
Captured T-Rex
Captured Yoshi and Bowser from Super Mario-Kun
Captured Poochy from a 2018 New Year greeting card drawn by Yukio Sawada

Captured Kinopio-kun from Nintendo's official LINE account
Various captured transformations from a Japanese commercial promoting the Super Mario Bros. 35th Anniversary


Names in other languages[edit]
| Language | Name | Meaning |
|---|---|---|
| Japanese | キャプチャー Kyapuchā |
Capture |
| Chinese | 附身 Fùshēn |
Possess |
| French | Chapimorphose |
Portmanteau of "chapeau" (hat) and "métamorphose" (metamorphosis) |
| German | Capern |
From "Kapern" (capture) |
| Italian | Cap-tura |
Cap-ture |
| Korean | 캡처 Capcheo |
Capture |
| Russian | Зашляпивание Zashlyapivanie |
Verb derived from шляпа (hat). |
| Spanish | Capturar |
Capture |
Trivia[edit]


- According to The Art of Super Mario Odyssey, not only was Bowser going to have access to the capture abilities, but he would have used it to take over Princess Peach's body, with her gaining an appearance that bears a much closer resemblance to Bowser when captured by him than most captured beings in the final game do to Mario.[1] There is also a picture of Mario capturing Princess Peach, which implies that she was originally intended to be a capturable character.[2]
- In the E3 2017 trailer for Super Mario Odyssey, Mario's pole capture was shown to have Mario's mustache.[3] This is not the case in the final game. However, the pole's in-game model retains the mustache despite not using it, which can be seen via glitches.[4]
- Many of the enemies captured by Mario resemble their Big Mario sprites in Super Mario Maker. The only differences between Bowser's appearance in the 8-bit section of the final boss sequence and his Big Mushroom form are the lack of cap and a different mustache.