List of Super Mario 64 glitches: Difference between revisions
LinkTheLefty (talk | contribs) mNo edit summary |
(→Japanese music cut-out*: replace link with internet archive) |
||
| (266 intermediate revisions by 51 users not shown) | |||
| Line 1: | Line 1: | ||
{{italic title|List of ''Super Mario 64'' glitches}} | {{italic title|List of ''Super Mario 64'' glitches}} | ||
This is a list of glitches in | This is a list of glitches in ''[[Super Mario 64]]''. For glitches found exclusively in [[Super Mario 64 DS|the remake]], see [[List of Super Mario 64 DS glitches|List of ''Super Mario 64 DS'' glitches]]. Unless otherwise noted, all names are conjectural. Glitches marked with an asterisk (*) are fixed in the Shindō, PAL, North American, [[iQue Player]], and [[Virtual Console]] releases. | ||
__TOC__ | |||
==Audio== | |||
===Big Boo's Haunt music cut-out=== | |||
In [[Big Boo's Haunt]], the player should choose any mission other than [[Go on a Ghost Hunt]], then defeat [[Big Boo]] in the Merry-Go-Round but ignore the Star. Instead the player needs to leave, collect a [[Vanish Cap]] and acquire 100 coins. After the Vanish Cap expires, the player should collect the 100-Coin Star. Now the background music does not play, though sound effects can still be heard, including ambient noises outside the mansion. Should the player wear the Vanish Cap again, the music restarts after the cap wears off. | |||
== | ===Infinite cap music glitch=== | ||
'''NOTE''': This glitch does not work in the Japanese version. | |||
After selecting the [[Footrace with Koopa the Quick|second mission]] in [[Bob-omb Battlefield]], the player should talk to [[Koopa the Quick]] while wearing the [[Wing Cap]]. While racing him up the mountain, the player must use a small alcove to [[warp]] higher up the mountain; the Wing Cap will seemingly disappear, after which the player should reach the flag at the summit and wait for Koopa the Quick to arrive. After talking to Koopa the Quick, the Wing Cap background music plays endlessly. Alternatively, the player can talk to [[King Bob-omb]] while wearing the Wing Cap, and then quickly warp using the alcove near the summit, achieving the same effect.<ref>[https://www.youtube.com/watch?v=M0QhDJ_SCDs YouTube video of Infinite cap music glitch]{{dead link}}</ref> | |||
[[ | |||
[[ | |||
To end the glitch, the player can collect another Wing Cap and let it expire. | |||
=== | ===Japanese music cut-out*=== | ||
In [[ | In both [[Bowser in the Sky]]<ref>[https://www.youtube.com/watch?v=A7pSWGRD9Rk YouTube video of Japanese BitS Audio glitch]</ref> and [[Shifting Sand Land]]'s pyramid,<ref>[https://web.archive.org/web/20201029023312/https://www.youtube.com/watch?v=b7BPNgxAZYQ&gl=US&hl=en Super mario 64 - SSL Secrets glitch (Japanese version only)]</ref> it is possible for the music to cut-out due to multiple glitches exclusive to the Japanese version of the game. While this glitch is in effect, any attempt to leave the course freezes the game. For Bowser in the Sky, just entering the stage the wrong way can cut-out the music. For the pyramid, collecting the fifth [[secret]] in an odd way sometimes cuts out the music. | ||
=== | ===Koopa Shell music glitch=== | ||
[[ | If the player holds {{button|N64|Z}} to crouch right as [[Mario]] touches a [[Koopa Shell]], the music in the level will replay from the beginning as Mario dismounts immediately. Despite this, the shell remains and the glitch can be repeated.<ref>[https://www.youtube.com/watch?v=zoUmwFR987U YouTube video of Koopa Shell music glitch]</ref> | ||
=== | ===Koopa the Quick warp music glitch*=== | ||
In Bob-omb Battlefield, if Mario travels through a warp after starting a race with Koopa the Quick, the "[[Slider]]" music is replaced with the "[[Super Mario 64 Main Theme]]". This glitch was fixed after the original Japanese release. | |||
=== | ===Loud Ukkiki glitch=== | ||
[[ | In [[Tall, Tall Mountain]], even if Mario is very far away from [[Ukiki|Ukkiki]], the monkey can be heard as if they were right next to him. | ||
[[ | |||
=== | ===Yahoo paused sound pitch glitch=== | ||
If the game is paused just after Mario performs a Long Jump or Triple Jump, his voice can shift lower or higher in pitch than normal. | |||
{{br}} | |||
=== | ==Camera== | ||
===Below Mario in Bob-omb Battlefield glitch=== | |||
[[File:SM64 Camera underneath Mario in BOB.png|thumb|The camera glitch in Bob-omb Battlefield]] | |||
While using the [[Lakitu Bros.|Lakitu]] camera mode, If the player performs [[Wall Kick]]s to jump from the foot of the white slope over the seesaw platform, the camera focuses Mario from below the floor. | |||
{{br}} | |||
=== | ===In the walls of Dire, Dire Docks glitch=== | ||
[[ | In the beginning area of [[Dire, Dire Docks]], if the player swims into the wall above the tunnel leading to [[Board Bowser's Sub|Bowser's Submarine]], the camera moves out of bounds. Moving away from the wall returns the camera to a normal position.<ref>[https://twitter.com/ChikoritaL/status/1368416504211857415 Intriguing camera glitch found in Dire, Dire Docks]</ref> | ||
=== | ===Invisible cannon glitch=== | ||
[[ | After entering a [[cannon]], if the player attempts to launch Mario as early as possible, the game gets confused. The viewfinder does not show up and the camera pans out of the cannon as if Mario was standing in that spot, revealing that both the cannon and Mario are invisible. The camera can be controlled and rotated around normally. This glitch ends when the cannon is fired.<ref>[https://www.youtube.com/watch?v=48Slecuy_kA YouTube video of cannon camera glitch]</ref> | ||
=== | ===Star/death camera glitch=== | ||
When Mario collects a Star or dies and the platform he stands on moves away, he will warp to the next surface below him, which is often the death barrier. This extreme change in height is too much for the camera to track, resulting in Mario being far below the camera. The spinning platform around the volcano in [[Lethal Lava Land]], [[Donut Block]]s, and being pushed off a [[Magic Carpet]] in [[Rainbow Ride]] are common places to accomplish this glitch. | |||
=== | ===Stuck behind door glitch=== | ||
[[File:SM64 Cameraglitch.png|thumb|100px|The camera glitch]] | |||
When Mario enters a door in the [[Peach's Castle|castle]] and then goes back through it quickly, the camera may briefly get stuck behind the door. This does not work on the doors in the main lobby. | |||
{{br}} | |||
== | ===Wing Cap camera glitch=== | ||
If Mario lands on a slope on the same frame that he starts flying with the [[Wing Cap]], the camera continues using the mode intended for flight. This can be achieved by [[Triple Jump]]ing onto the fence past the first bridge in Bob-omb Battlefield, with precise timing. The camera follows Mario closely, and tries to stay behind him at a low angle. The {{button|N64|C}} buttons only move the camera temporarily.<ref>[https://www.youtube.com/watch?v=4pqQQxL6W8s YouTube video of Wing Cap Camera glitch]</ref> | |||
[[ | |||
The camera returns to intended behavior if: | |||
*Mario receives knockback, is thrown, gets squished, or gets set on fire | |||
*Mario initiates flight normally, rides a [[Koopa Shell]], or leaves the course | |||
*Mario enters water, a cannon, or a [[tornado]] | |||
=== | ==Freezes== | ||
===Attacking an uninitialized Monty Mole freeze=== | |||
Before popping out of holes to attack Mario, [[Monty Mole]]s start out invisible and in predetermined locations. Only when Mario is within 1500 units of a hole will the Monty Moles be repositioned and behave as normally seen. Reaching a Monty mole in this uninitialized position and attacking it freezes the game. | |||
*In [[Tall, Tall Mountain]], the player can use a 100-Coin [[Star]] to reach the uninitialized Monty Mole at the bottom of a pit, and attack it before Mario is ejected from the course.<ref>Uninitialized Monty Mole in Tall, Tall Mountain [https://www.youtube.com/watch?v=aafLNwyR5kk]</ref> | |||
*In [[Hazy Maze Cave]], the player must take a route that involves Backwards Long Jumping through the mesh wall in front of the [[Navigating the Toxic Maze]] Star. After clipping through the wall, the player must go down the elevator, enter the maze, and take the first right turn to get to the plateau with a [[Blue Coin Block]]. The uninitialized Monty Mole sits in the poison gas in front of said plateau.<ref>Uninitialized Monty Mole in Hazy Maze Cave [https://www.youtube.com/watch?v=FdDj4HT_4bg]</ref> | |||
=== | ===Big Boo's Haunt freeze=== | ||
There is a corner of [[Big Boo's Haunt]] that crashes the game when Mario touches it. This corner can be accessed by entering the rightmost door on the first floor. | |||
After positioning Mario on the thin ledge located to the left of a bright window, the player should jump and move Mario {{button|n64|Stickdown}} slightly away from the ledge until he begins to fall. Now moving {{button|n64|Stickup}} towards the wall and pressing {{button|n64|B}} to kick for some extra momentum, Mario should touch the wall and the game will freeze.<ref>[https://www.youtube.com/watch?v=YjXxkwR6MxU YouTube video of BBH Crash]</ref> | |||
=== | ===Dead Mario softlock=== | ||
[[File:Zombie Freeze.gif|thumb|120px|Mario dies as a Star is released]] | |||
In [[Bob-omb Battlefield]], the player should use the [[Wing Cap]] to fly Mario above the floating island such that falling would result in Mario's death. If Mario [[Ground Pound]]s the yellow [[! Block]], upon landing he will die as the Star is released. At this point Mario cannot move, exit the course, or complete his death animation. Similarly, if Mario dies and collects a coin to summon the 100-Coin Star at the same time, the game will softlock.<ref name="YouTube video of Several Death glitches">[https://youtu.be/1qiMOcT9DNU SM64 Star Death Softlock Testing]</ref> | |||
{{br}} | {{br}} | ||
'''NOTE''': Using the "Zombie Mario" glitch removes the need for precise positioning and timing. | |||
===Double Star softlock=== | |||
If Mario collects a 100-Coin Star as he opens a Star block, this second Star may be released as Mario lands. Similar to the Dead Mario softlock, the overlapping animations of a Star dance and a Star being released confuse the game, resulting in a softlock.<ref>[https://www.youtube.com/watch?v=IrSyQqTfNOI YouTube video of double star freeze]</ref> | |||
=== | ===Freeze while entering Vanish Cap Under the Moat=== | ||
When entering [[The Secret Under the Moat|Vanish Cap Under the Moat]], if the player tries to move the camera around in [[Lakitu Bros.|Lakitu]] Mode while the screen is black, the game may freeze. | |||
'''NOTE''': This glitch only applies to the North American version. | |||
=== | ===Hanging Mario freeze=== | ||
If Mario is pushed backwards off a hangable ceiling before completing the grabbing animation, the game freezes. This can be accomplished using a [[#Bob-omb Glitches|bloated Bob-omb]] to push Mario backwards, or a [[crate]] placed in a way that can push Mario off.<ref name="simultaneous">[https://www.youtube.com/watch?v=ixgL7FYF22w YouTube video of simultaneous event glitches]</ref> | |||
=== | ===Long-distance Monty Mole defeat freeze=== | ||
When a Monty Mole is defeated from too far away, the game cannot choose the next hole for the Monty Mole to appear from, as every hole is too far from Mario. This unexpected result causes the game to freeze. The player can defeat a Monty Mole from a sufficiently long distance by throwing a [[Bob-omb]].<ref>[https://www.youtube.com/watch?v=DERow1hFa-0 YouTube video of Monty Mole Freeze in TTM]</ref> | |||
= | According to Tyler Kehne,<ref>[https://www.youtube.com/watch?v=P4AQ9AmWa9s A better video of the Monty Mole freeze, the cause of the glitch was discovered 7 years later]</ref> | ||
<blockquote>''When a mole is KO'd, the game runs a function to determine which hole the mole should go to next. The function cycles through all the holes to see which ones are eligible candidates, and then selects one of those at random. But if none of the holes are eligible, the function returns null. Throwing the Bob-omb at the mole allows the mole to be KO'd at a distance, something the programmers hadn't accounted for. Thus, Mario is too far away from all the holes for any of them to be eligible, and so null is returned, causing the game crash. TL;DR Long range mole KO's crash the game.''</blockquote> | |||
=== | ===Monty Mole rocks filling memory=== | ||
Due to a developer oversight, the rocks thrown by Monty Moles do not disappear if thrown off the cliff of Tall, Tall Mountain. Once approximately 200 rocks accumulate, there is no more space available to load new objects, freezing the game. This is similar to how the game handles the teleportation clones of Mario's cap. | |||
As stated by Scott B. (alias pannenkoek2012) on YouTube,<ref>[https://www.youtube.com/watch?v=KPzVVAYKoqE]</ref> | |||
<blockquote>''... the game will eventually crash due to a continuously accumulating supply of pebbles. Pebbles deactivate when they are more than 4000 units away from Mario. Hence, a deactivated pebble won't hit the ground and unload, but instead just remain invisible and unmoving in midair. So by having Monty Moles continually throw pebbles off the edge, the pebbles will keep loading into object slots but never unload. Since the game only has 240 object slots, eventually all the slots become occupied and the game crashes.''</blockquote> | |||
'''NOTE''': This glitch may not work on the Virtual Console release. | |||
=== | ==Graphics== | ||
===Boo glitch=== | |||
[[File:SM64 Booback.png|thumb|100px|The [[Boo]] facing away from Mario]] | |||
[[File:SM64 Booback2.png|thumb|100px|The same Boo outside the castle walls]] | |||
After collecting at least 12 [[Power Star]]s a large [[Boo]] appears in the hallway leading to the courtyard. The player should enter the [[Whomp's Fortress]] painting room and move to the far left side, then leave and head to the hallway. The Boo should be facing backwards, and the player must chase it out of the room. | |||
{{br}} | |||
Now the player must enter the basement and immediately return to the Boo, who is now facing forward. Performing the previous actions again will cause the Boo to seemingly disappear. However, the player either enters the door to the courtyard or manipulates the camera to see beyond the wall, the Boo can be seen floating behind the door. | |||
=== | ===Bubba death glitch=== | ||
If Mario is using a [[Koopa Shell]] to surf on the water and gets eaten by a [[Cheep Chomp|Bubba]], the shell stays suspended in the air.{{ref needed}} | |||
=== | ===Doors and a cloud in empty space glitch=== | ||
{{multiple image | |||
|align=right | |||
|direction=vertical | |||
|image1=HiddenDoor.png | |||
|width1=100 | |||
|caption1=The first hidden door | |||
|image2=HiddenDoor 2.png | |||
|width2=100 | |||
|caption2=Another hidden door | |||
}} | |||
[[File:SM64 Out of Bounds Star Doors.png|thumb|100px|Two floating Star doors]] | |||
Certain doors in [[Peach's Castle]] are visible from other rooms when the camera shows the space beyond the walls. This can be achieved by standing near a wall and using the first-person camera mode {{Button|N64|CUp}} to look through it. The doors appear to be in empty space because the rest of a room is not rendered while Mario is in another area. | |||
*If Mario looks around in first-person view while standing on the left edge of the platform with the [[Big Star Door|70 Star Door]], a door from the lower level is visible. | |||
*When using first-person view from the outside wall of the spiral staircase to the second floor, the 50 and 70 Star Doors are visible. | |||
*Another door can be seen when standing in the left edge next to the Whomp's Fortress painting. | |||
[[File:SM64 Hidden Cloud.png|thumb|100px|The hidden cloud]] | |||
Likewise, the reflection of [[Lakitu Bros.|Lakitu's]] cloud in the second-floor mirror room is always rendered. In several places, like the corners next to the room's door and the stairway to the second floor, Mario can enter first-person view to look through a wall and see the cloud. | |||
{{br}} | |||
=== | ===Fly Guy size manipulation glitch=== | ||
If the | If Mario runs back and forth underneath the [[Fly Guy]] in [[Tall, Tall Mountain]], it begins to shrink. This is a side effect of the Fly Guy changing size to signal that it is preparing to shoot a fireball. The Fly Guy's size affects the starting height of a [[Spin Jump]] off of it. | ||
If the glitch is repeated, the value for the Fly Guy's size eventually becomes negative, causing it to render upside-down and inside-out. Mario cannot interact with the Fly Guy while it has a negative size.<ref>[https://www.youtube.com/watch?v=kHd8TSf2tds YouTube video of Shrinking Fly Guy glitch]</ref> Repeating the glitch for long enough will cause one of the base positions of the Fly Guy's model to exceed float values that properly convert into a 32-bit signed integer, resulting in a game crash.<ref>Pannenkoek2012 (April 26, 2023). [https://youtube.com/shorts/h3UvdEF98DY?si=IfgPRLbst58pFWqQ Crashing SM64 by Shrinking a Fly Guy]. ''YouTube''. Retrieved January 2, 2024.</ref> | |||
The | ===Frozen head glitch*=== | ||
[[File:SM64 Frozen Head.png|thumb|upright=0.85|The glitch in action]] | |||
After defeating [[Bowser]] in the [[Bowser in the Dark World|Dark World]] or [[Bowser in the Fire Sea|Fire Sea]], he drops a key. In the Japanese version, if the player runs to where the key will land, presses {{button|n64|cup}} and looks somewhere, Mario keeps looking that way during the key collection cutscene.<ref>[https://www.youtube.com/watch?v=ve07BT9ADrg YouTube video of frozen head]</ref> | |||
{{br}} | |||
===Ground Pound turn-around glitch=== | |||
When Mario ground pounds out of a Side [[Somersault]], he turns around instantly in midair. | |||
=== | ===Instant Tower of the Wing Cap transition glitch=== | ||
[[File:SM64_EnterLightGlitch.gif|thumb|120px|Mario performing the glitch]] | |||
When the [[Tower of the Wing Cap]] is unlocked, Mario has to stand right next to the sun carpet in the castle's main hall and look {{button|N64|cup}} at the sun on the ceiling. Then, he has to leave the first-person view mode, quickly step onto the carpet, and press {{button|N64|cup}} again. Mario enters the Tower of the Wing Cap instantly while the camera is still zooming in, instead of framing the ceiling as intended. | |||
{{br}} | |||
===Invisible Bowser glitch=== | |||
=== | |||
{{multiple image | {{multiple image | ||
|align=right | |align=right | ||
|direction= | |direction=vertical | ||
| | |image1=SM64 Invisible Bowser.png | ||
| | |width1=100 | ||
| | |caption1=Mario grabbing invisible Bowser's tail | ||
|image2= | |image2=SM64 Invisible Bowser 2.png | ||
|width2= | |width2=100 | ||
|caption2=Bowser is defeated while invisible | |||
}} | }} | ||
This glitch only | Bowser can teleport when battled in the Fire Sea, during which he becomes invisible. If Mario grabs Bowser while he teleports, Bowser stays invisible until he teleports again or is thrown off of the platform. The invisible Bowser cannot hurt Mario on contact, but is still able to attack as usual.<ref name="Bowser glitches">[https://www.youtube.com/watch?v=7CYJRRP5fhY YouTube video of several Bowser glitches]</ref> | ||
{{br}} | |||
===Mr. I hovering around Mario glitch=== | |||
This glitch occurs in [[Lethal Lava Land]] only. The player has to get the Koopa Shell from the [[! Block]] and set the camera to fixed mode, so that a [[Mr. I]] can be seen until Mario moves. Then, he has to defeat the Mr. I by circling around it, but due to it being offscreen now, its death animation cannot play. The defeated Mr. I's eyeball then hovers around Mario for a short amount of time and move in various ways.<ref>[https://www.youtube.com/watch?v=JGP6vFHMHxE YouTube video of Mr. I glitch]</ref> | |||
===Pitch conservation glitch=== | |||
When Mario is in a diving animation (normal diving, swimming, or flying), his angle is preserved in memory. This value is supposed to be reset between animations, but due to an oversight, sometimes it does not. For instance, if Mario exits the water while he was facing upwards and then performs a dive, the dive will start with the previous extreme angle as opposed to a normal dive. Despite this dramatic difference, the physics of the move are unchanged.<ref>[https://youtu.be/TQt8MCsniQI YouTube video on pitch and yaw velocity conservation, by UncommentatedPannen]</ref> | |||
If an extreme angle is preserved and Mario starts flying, he will immediately face the preserved angle which will influence his trajectory. Several actions reset the conserved angle, including grabbing a ledge, shooting from a [[cannon]], changing areas, and jumping while facing a slope. | |||
===Power Meter glitch=== | |||
When Mario dies in a course, the [[Health Meter|Power Meter]] is typically set to one wedge for the cutscene where he is ejected from the course and the meter refills. However, when Mario is ejected from [[Hazy Maze Cave]], [[Rainbow Ride]], Bowser in the Dark World, or [[Bowser in the Sky]], there is a delay before the meter is set to one wedge, so when Mario returns to the castle the amount of wedges in the Power Meter briefly carries over from death.{{ref needed}} | |||
==Physics== | ==Physics== | ||
===1-Up Mushroom | '''NOTE''': These glitches result from how Mario and/or other characters and objects interact with the world. | ||
[[File:SM64 Chasing1Up.gif|thumb | ===1-Up Mushroom circling Mario glitch=== | ||
[[File:SM64 Chasing1Up.gif|thumb|100px|The [[1-Up Mushroom]] chasing [[Mario]]]] | |||
Mario can avoid a homing [[1-Up Mushroom]] indefinitely by crouching. Despite its ability to move vertically, the mushroom instead attempts to reach Mario laterally, flying in circles above his head. This oversight was not fixed in the [[Super Mario 64 DS|Nintendo DS remake]]. | |||
{{br}} | |||
=== | ===Baby Penguin stuck in chimney glitch=== | ||
[[File:Floating Baby Benguin glitch.PNG|thumb|[[Tuxie]] inside the chimney]] | |||
In [[Cool, Cool Mountain]], the player should pick up a [[Baby Penguin]] and bring it to the cabin at the summit. By letting go of the Penguin above the chimney, any attempt to reclaim the baby will result in Mario entering the slide area with the [[Big Penguin]]. Reloading the main area by either talking a bridge warp or exiting the cabin at the base of the slide will reset the baby Penguin's position. | |||
{{br}} | |||
===Black room of death=== | |||
A '''black room of death''' ('''BRoD''' for short) refers to the spaces behind doors in the [[Peach's Castle]], which are only meant for Mario to walk into during the animation where he opens the door. Nonetheless, certain exploits allow Mario to reach these spaces. Once inside these spaces, attempting to open the door will put Mario in the corresponding BRoD at the other side. Depending on the collision around the "rooms" in each loaded area, he may or may not be able to escape. | |||
{|class="wikitable"style="width:75%;margin:0 auto;cellpadding:5;" | |||
!Location | |||
!Description | |||
|- | |||
|Castle entrance||One BRoD pair is accessible by [[#Clip through walls|falling through the castle roof]].<br>Mario can escape by jumping through the wall above the front doors inside the castle. | |||
|- | |||
|Lobby||Another BRoD can be accessed by performing the [[#Clip through wallssecond ledge clip]].<br>This room can be exited with backwards long jumps. | |||
|- | |||
|Basement||The third BRoD pair is accessible with a MIPS clip through the basement door.<br>This room can be exited by performing backwards long jumps. | |||
|- | |||
|Basement||Similarly, clipping through the moat door with MIPS grants access to the fourth BRoD pair. | |||
|- | |||
|Courtyard||The fifth BRoD pair can be accessed if the player performs backwards long jumps to clip inside. | |||
|} | |||
<gallery> | <gallery> | ||
SM64 BRoD1.png|Mario outside the castle <br> (BRoD #1) | SM64 BRoD1.png|Mario outside the castle <br> (BRoD #1) | ||
| Line 183: | Line 210: | ||
SM64 BRoD4.png|Mario over the basement door (BRoD #3) | SM64 BRoD4.png|Mario over the basement door (BRoD #3) | ||
SM64 BRoD5.png|The other side <br> | SM64 BRoD5.png|The other side <br> | ||
SM64 BRoD6.png|Near the moat | SM64 BRoD6.png|Near the moat<br> (BRoD #4)¹ | ||
SM64 BRoD7.png|The other side | SM64 BRoD7.png|The other side | ||
SM64 BRoD8.png|Mario over the Courtyard door <br> (BRoD #5)¹ | SM64 BRoD8.png|Mario over the Courtyard door <br> (BRoD #5)¹ | ||
SM64 BRoD9.png|The other side (It is escapable from this side through the corners next to the door) | SM64 BRoD9.png|The other side (It is escapable from this side through the corners next to the door) | ||
</gallery> | </gallery> | ||
¹This BRoD is inescapable. | |||
=== | ===Climb slippery slopes=== | ||
This | [[File:Climb Slippery Slopes 1.gif|thumb|100px|Mario scales a slope]] | ||
While facing a slippery slope, the player must rhythmically switch between moving {{button|n64|STICKup}} towards the slope and holding the control stick {{button|N64|STICK}} neutral. This process allows Mario to climb the slope. Similarly, this can be accomplished in the remake by moving {{button|ds|Pad}} in the given direction without pressing {{button|ds|Y}} down. | |||
{{br}} | |||
'''NOTE''': This trick does not work on all slippery slopes. Additionally, the slope shown was changed to a wall in ''[[Super Mario 64 DS]]''. | |||
[[File:Climb Slippery Slopes 2.gif|thumb|130px|Mario kicks up a slope]] | |||
Alternatively, if the player runs {{button|n64|STICKup}} up a slippery slope and kicks {{button|n64|B}} whenever Mario begins to slow down, he will scale the slope. This works in many areas, including the slope next to the basement door, the slope of the Toxic Maze in [[Hazy Maze Cave]], [[Bowser]]'s steep stair slopes, and the white slope in [[Bob-omb Battlefield]]. | |||
{{br}} | |||
===Clip through walls=== | |||
There are various tricks the player can perform to clip Mario through walls depending on the situation: | |||
<br><br> | |||
{|style="width:85%;cellpadding:4;" | |||
!width="20%"|Ground Pound<br>clipping : | |||
|When initiating a ground pound, the game keeps Mario in place for a moment before sending him downwards.<br>This moment can be exploited to clip through moving platforms including: | |||
|- | |||
| | |||
| | |||
*A [[Whomp]] or [[Whomp King]] as it falls (a ground pound is not needed but makes the clip consistent). This is reportedly not a glitch,<ref>''Official UK Nintendo Magazine'' Issue #56 (May 1997), page 42. "'''''SLAB BEAST TRICK''' In Course Two’s Chip Off Whomp’s Block section (found behind Door One on the right-hand side of the castle), there’s a cheat which looks like a development mistake! However, the Big N assures us it isn't... Go to the mid-section of the castle where you‘ll find two giant Slab Beasts. The normal way to beat these creatures is to perform a butt-bash on their backs, an act of bravery which will award Mario with three coins. However, instead of avoiding the Slab Beast as it falls towards the ground, jump directly into the centre of the it’s{{sic}} face and Mario will appear unharmed on the other side! This makes collecting coins from Slab Beasts easier, but it take es a lot of skill to pull off. You may want to stock up on lives before trying it.''"</ref> despite being removed in ''[[Super Mario 64 DS]]''. | |||
*A revolving checkerboard elevator. | |||
*An elevator that is not very thick. | |||
*An elevator that moves fast downwards. | |||
*An elevator that moves extremely fast upwards.<ref>[https://www.youtube.com/watch?v=7ZwwAemsbYQ YouTube video of Whomp ground pound clip]</ref> | |||
|} | |||
<br> | |||
{|style="width:85%;cellpadding:4;" | |||
|- | |||
!width="20%"|Ledge clipping : | |||
|There are certain walls in the game that Mario can clip into by grabbing onto specific parts of a ledge. These include: | |||
|- | |||
|[[File:SM64 TtR.png|thumb|center|120px|A ledge clip]] | |||
| | |||
*In the castle upstairs spiral staircase, running to the pole on the left wall, and then jumping twice makes Mario go through the room and onto the stairs. | |||
*On the basement stairs, if the player aims a double jump correctly to the right side, Mario grabs a ledge and pulls himself up, and he stands in another [[#Black Room of Death|Black Room of Death]]. | |||
*By standing under and jumping at the part of the first bridge of [[Bob-omb Battlefield]] that is closest to the start of the level, Mario clips through the bridge. | |||
|} | |||
<br> | |||
{|class="mw-collapsible mw-collapsed"style="width:85%;cellpadding:4;" | |||
|- | |||
!width="20%"|Miscellaneous<br>wall clipping : | |||
|Some walls can be clipped through without much resistance. As such, the following examples do not require Backwards Long Jumps or similar techniques: | |||
|- | |||
| | |||
| | |||
*In [[Whomp's Fortress]], above and to the right of the cannon (between the flagpole and the "wrong" breakable wall), there is a spot where Mario can clip through the wall. | |||
*In [[Cool, Cool Mountain]], right next to the most distant red coin at the bottom, if Mario climbs the slope from the direction that leads toward the cabin, there is a point at top where Mario can clip through the mountain. | |||
*In [[Whomp's Fortress]], if Mario long jumps to the right of the second [[Piranha Plant]] in a way that causes Mario to slam into the fence and the ground in the right direction, Mario passes through the wall. | |||
*At the start of [[Tall, Tall Mountain]], by long jumping into the mountain (at the spot where it is jutting out slightly).<ref>[https://www.youtube.com/watch?v=W5aVrZEN_d4 YouTube video of TTM Wall Clip near start]</ref> | |||
*In Tall, Tall Mountain, by jumping into the ledge located just below the platform with an [[Ukiki|Ukkiki]] that steals Mario's Cap.<ref>[https://www.youtube.com/watch?v=R4OkJJvxWyE YouTube video of TTM Wall Clip near Ukkiki]</ref> | |||
*At the top of Tall, Tall Mountain, by running up into the waterfall where the fence meets it. | |||
*At the start of [[Cool, Cool Mountain]], where two slopes meet (near the broken bridge with the warp).<ref>[https://www.youtube.com/watch?v=_ESvqzpfi0s YouTube video of CCM wall clipping glitch]</ref> | |||
*In Whomp's Fortress, if Mario uses the cannon and aims at a fence, he passes directly through it. | |||
*In [[Snowman's Land]], at the igloo, by standing at the wall directly opposite the entrance and pressing the {{button|n64|A}} button then the {{button|n64|B}} button (Mario kicks against the wall). Mario can enter the igloo in this manner. | |||
*In [[Bob-omb Battlefield]], by pushing into the spot where the wall and the gate touch on the left side while it is closed. | |||
*In Bob-omb Battlefield, by pushing into the spot where the wall and the gate touch on the right side while it is open. | |||
*In [[Jolly Roger Bay]], above the entrance to the cave, by a rock. The wall can be clipped through if the player is swimming with full speed and pressing {{button|n64|B}} at the correct time. This lets the player clip through the wall into the cave.<ref>[https://www.youtube.com/watch?v=vh-ZqFT7cGY YouTube video of Jolly Roger Bay wall clip]</ref> | |||
*After collecting all 120 Power Stars and being outside the castle, the player can use the [[cannon]] near the castle's moat to shoot Mario up on top of the castle's roof, where he must locate the [[Wing Cap]]. Mario must use it to fly back to the cannon and then shoot himself back out of it again, this time aiming towards the flagpole at the top of the castle's tower. If done correctly, the targeting reticle of the cannon should be able to go no higher when aimed upwards. Once launched, the player has to steer Mario towards the second rooftop area on the side of the tower with the window. Mario must run into the middle part of the wall here, and then jump when he hits the wall (while simultaneously holding the control stick forward). This may take a while, but Mario should eventually go through the wall of the tower and end up behind the castle's front doors in a black room of death. There is a glitch similar to this one in the [[Super Mario 64 DS|DS remake]]. | |||
*When using a speed exploit to gain an immense amount of speed, Mario can clip through most walls. This exploit works thanks to how collision checks are processed. | |||
{{hover|With one exception|Mario's position is not divided into quarter frames while he swims.}}, the game splits up each frame of movement into four "quarter frames"; for each quarter frame, the game checks for collisions by determining Mario's next position based on his velocity and seeing if it overlaps with anything. Notably the game does adjust for how fast Mario is going, so an exceptionally large speed will have large gaps between each position that is checked. These walls are typically not very wide, so with high enough speed Mario's position will never be inside the wall on a given quarter frame, effectively bypassing the wall.<ref name="CollisionOverview 1"/> | |||
|} | |||
<br> | |||
==== | ===Clip with objects=== | ||
[[ | The following glitches involve Mario being pushed through solid geometry using either the push from an object or the backward force from throwing objects. | ||
=====Bob-omb clip===== | |||
Mario can be pushed through walls by jumping between the wall and a Bob-omb as it chases him.<ref name="Several glitches using Bob-ombs"/> Alternatively if Mario holds a [[#Bob-omb Glitches|bloated Bob-omb]] with his back to a wall or steep floor, throwing the Bob-omb can push Mario through. This can be used to [[#Clip Behind Chain Chomp's Gate|clip ''Behind Chain Chomp's Gate'']] and collect the Star without freeing the Chain Chomp. | |||
==== | =====Chuckya clip===== | ||
When Mario is held by a Chuckya, the Chuckya will ignore any collision it may swing Mario into. By luring a Chuckya to a wall and then having it grab Mario, it can throw Mario through walls or even out of bounds. Alternatively, if Mario has his back against a wall and throws the Chuckya, the action will push Mario through the wall. | |||
=====Crate clip===== | |||
[[File:sM64 WFswim.png|thumb|120px|Mario clips into [[Whomp's Fortress]]]] | |||
After placing a [[crate]] next to a wall, the player should ground pound between the box and the wall. This will cause Mario to clip through the wall. Alternatively, if Mario has his back against a wall and throws the crate, they will briefly interact which will push Mario through the wall.<ref>[https://www.youtube.com/watch?v=kIpw46fUj24 YouTube video of Crate Clip method two]</ref> | |||
{{br}} | |||
==== | =====Penguin clips===== | ||
In [[Cool, Cool Mountain]], both the [[Mother Penguin]] and the [[Baby Penguin]]s can be used to clip through walls: | |||
By grabbing Tuxie after reuniting with her mother, she can be lured to stand next to the cabin at the foot of the mountain. Mario can then clip into the cabin by jumping in between the wall and the Mother Penguin.<ref>[https://www.youtube.com/watch?v=6D8Fx4B2-28 YouTube video of large Penguin Wall Glitch]</ref> Alternatively, Tuxie can be used to clip through the floor by guiding the Penguin to the peak of the mountain and jumping just past her. This glitch can be used to avoid collecting the coins above the chimney of the cabin.<ref>[https://www.youtube.com/watch?v=VPMiF4RMGzM YouTube video of small Penguin Wall Clip]</ref> | |||
=== | ===Coin through the platform glitch=== | ||
Beneath the gray platform in [[Shifting Sand Land]], Mario should run toward a [[Goomba]] and defeat it with either a dive, break dance, or slide kick. This should launch the Goomba away, and its coins may fly upwards and through the ceiling. | |||
=== | ===Death outside the boundaries glitch=== | ||
[[File:SM64 | [[File:SM64 Killeredge.png|thumb|120px|Mario dying without his cap]] | ||
The boundaries that surround each course and the castle, referred to as '''out of bounds''', are designed to never let Mario through, and are more effective than typical walls; anywhere that no floor exists below a space is out of bounds. However, certain interactions do not account for this restriction, allowing Mario to breach the boundary. As a failsafe, the game will always unceremoniously deplete Mario's [[Power Meter]] the instant his position is out of bounds. | |||
{{br}} | |||
'''NOTE''': The death barrier is defined using a floor, so the large pits below certain levels are not out of bounds. | |||
The | |||
One method involves Mario lifting himself from a ledge. If Mario reaches the rightside corner of the castle roof, he can hang from the ledge right against an invisible boundary. The player can pull Mario back up onto the roof, where Mario will climb up past the intended boundaries and lose a [[Extra Life|life]]. For unusual reasons, he also loses his cap.<ref name="YouTube video of Several Death glitches"></ref> | |||
Alternatively the player can be pushed or placed out of bounds by Bob-ombs and Chuckyas respectively, or clip through using a [[crate]]. For example, if a player grabs a crate in [[Bob-omb Battlefield]], Mario can crouch {{button|N64|Z}} to place the box partially inside a slope at an edge of the level. Then by then performing a ground pound between the crate and the hill, Mario will temporarily clip under the slope despite the space being out of bounds. This is caused by the game using a stale reference for the ground that Mario was last in contact with, mistakenly assuming that the space Mario clips into is valid. However after being moved, the game updates this floor reference and Mario is killed from being out of bounds. | |||
=== | ===Death transfer glitch=== | ||
When Mario loses all his health and leaves the area through certain means, his dying animation can occur in the new area by exploiting instances where his health is preserved between areas. This transfer of health results in the game attributing the death to a different cause than whatever action brought Mario's health down. These glitches can be performed in the [[Super Mario 64 DS|DS remake]]. | |||
==== | ====Burn into drowning==== | ||
[[File:SM64 Burn n' Drown glitch.gif|thumb|120px|Mario drowning after burning to death]] | |||
By leaving [[The Secret Under the Moat|Vanish Cap Under the Moat]] with no health remaining, Mario can drown in the castle moat immediately after spawning there. One strategy is to let a Keronpa Ball burn Mario while at two remaining wedges of health, then running off the ledge. Mario will be warped to the moat with no health, thus he drowns and loses a life. | |||
{{br}} | |||
==== | ====Burn into Lethal Lava Land==== | ||
The player can deplete the Power Meter in the basement by burning Mario on the torches. If Mario is burned by a torch and enters the [[Lethal Lava Land]] painting such that he has no wedges of health, then upon landing in the course he will die.<ref>[https://www.youtube.com/watch?v=dTzQEI2ArYc YouTube video of Lethal Lava Land death]</ref> | |||
=== | ====Death exit==== | ||
[[File:Death teleporting.png|thumb|Mario landing with no health]] | |||
The player can deplete Mario's health to two wedges and enter the [[Tower of the Wing Cap]]. When the Wing Cap begins to wear out, they should aim to land on the edge of the central platform so Mario slides off while taking fall damage. Once Mario lands back in the castle lobby, he dies. | |||
{{br}} | |||
A more universal method involves taking small fall damage. While in a course, the player must take die from fall damage while not moving {{button|N64|Stick}} the control stick. As the health depletes, there is a brief moment when the player can pause the game and exit the course before the death animation plays. | |||
=== | ====Drown Twice==== | ||
After completing the mission [[Board Bowser's Sub]], a large opening leading from the second area of [[Dire, Dire Docks]] to the lake outside of Peach's Castle will become accessible. If Mario drowns while drifting into this opening, he will drown a second time at the other side.<ref>https://youtu.be/tdVNm47P8GQ</ref> | |||
=== | ====Snufit into drowning==== | ||
While Mario's health is low in the [[Behind the Waterfall|Cavern of the Metal Cap]], the player must obtain a [[Metal Cap]] and have a [[Snifit (Super Mario 64)|Snufit]] chase Mario. When Long Jumping to the box Mario can be hit by the Snufit, causing him to fall into the waterfall and return to the castle moat. Mario will die as soon as he hits the lake. | |||
===Elevator escape glitch=== | |||
In [[Hazy Maze Cave]], it is possible to clip the moving arrow platform out of the red coin room by running it into a wall, then quickly alternating between the arrow facing towards the wall and an arrow facing perpendicularly. If done enough times, the platform will enter the wall and will move out of bounds.<ref>https://www.youtube.com/watch?v=E79jvV41R60</ref> | |||
=== | ===Floating Bob-omb glitch=== | ||
[[File: | [[File:Bomb-omb on air.png|thumb|120px|The Bob-omb suspended in air]] | ||
In [[Big Bob-omb on the Summit|Mission 1]] of [[Bob-omb Battlefield]], there is a Bob-omb operating the water cannon along the mountain path. If Mario picks up this Bob-omb and ground pounds {{button|n64|Z}} then the Bob-omb will be suspended in mid-air, as the programmers modified this particular Bob-omb's behavior to keep it in place.<ref>[https://www.youtube.com/watch?v=N4JRo19Yp74&t=247s Video]</ref> | |||
{{br}} | |||
=== | ===Gentle squish glitch=== | ||
[[Mario]] | [[File:sM64 Crush0dmg.png|thumb|A healthy, squished Mario]] | ||
Inside the pyramid of [[Shifting Sand Land]], if Mario is positioned at the edge of where the [[Spindel]] rolls, it will start to flatten Mario. However, being crushed will only do damage if Mario is squished a sufficient amount, so he will not lose any health. While gently squished the player cannot move until the Spindel rolls off of Mario. This effect can also be seen if Mario stands beneath elevator lifts in various levels. | |||
{{br}} | |||
=== | ===Grinding glitch=== | ||
If Mario is positioned at the edge of ground such that he is facing slightly away from the ledge, falling off and immediately attempting to move back towards the ledge can make Mario rapidly switch between falling and standing. In this state the camera will shake, and if the player presses {{button|n64|a}} Mario performs a [[Double Jump (consecutive)|Double Jump]]. | |||
This glitch is labeled '''grinding glitch''' by analogy to a {{wp|Grind (skateboarding)|type of skateboarding trick}}. | |||
=== | ===Ice cap loss glitch=== | ||
[[ | In [[Snowman's Land]], Mario will lose his cap when blown off the icy bridge by the [[Snowman's Big Head]]. If the player is unfortunate, the cap may be sent towards the ice box into the section with a Star inside. This Star will prevent Mario from retrieving his hat from above. If the game saves at this point, Mario will remain capless unless the player abuses speed exploits to clip through the side of the ice box. | ||
=== | ===Invisible walls glitch=== | ||
[[File:SM64 InvisibleWall.gif|thumb|Mario hitting the side of a staircase step]] | |||
==== | Due to how the game handles the positions of surfaces, Mario can collide with a wall, ceiling, or out-of-bounds area in places where this behavior is not intended.<ref>[//youtu.be/f1kbABTyeo8?t=313 Section of a YouTube video on wall, floor, and ceiling collision (part 2), by UncommentatedPannen]</ref> Despite these collisions being attributed to "invisible walls" the actual culprit is most often an exposed ceiling.<ref name="CollisionOverview 1">[//youtu.be/UnU7DJXiMAQ?t=1828 Section of a YouTube video on wall, floor, and ceiling collision (part 1), by UncommentatedPannen]</ref> | ||
{|class="wikitable mw-collapsible mw-collapsed" | |||
|+style="text-align:left"|{{nowrap|A list of examples has been attached.}} | |||
|- | |||
!Example!!Cause | |||
|- | |||
|The invisible boundaries that surround every area.||Out of bounds | |||
|- | |||
|In the first room of the castle on the top right side where the fence bends<ref>[https://www.youtube.com/watch?v=NhPiVVI2AiE YouTube video of the invisible wall inside the castle]{{dead link}}</ref>||Needs new reference to confirm | |||
|- | |||
|On the right side of the first stairs in [[Bob-omb Battlefield]].<ref name=BOBinvisiblewall>[https://www.youtube.com/watch?v=f6Mda7yDVn8 YouTube video of two invisible walls in Bob-omb Battlefield]</ref>||Exposed ceiling | |||
|- | |||
|In Bob-omb Battlefield, on top of the fence over the tunnel where there is a rectangular opening.<ref name=BOBinvisiblewall/>||Exposed ceiling | |||
|- | |||
|In Bob-omb Battlefield above and in the red arrow sign directly after the bridge and to the left of the tunnel.<ref>[https://www.youtube.com/watch?v=-BG2M_XUVfQ YouTube video of Bob-omb Battlefield sign invisible wall]{{dead link}}</ref> || Needs new reference to confirm | |||
|- | |||
|Near the rotating log in [[Tall, Tall Mountain]].||Unconfirmed | |||
|- | |||
|In the entrance of [[Bowser in the Dark World]], very small spot on the stairs. ||Exposed ceiling | |||
|- | |||
|In Bowser in the Dark World, above one of the corners of the fence on the curving path.<ref>[https://www.youtube.com/watch?v=1CIBitdcmCY YouTube video of a invisible wall in Bowser in the Dark World]{{dead link}}</ref>||Needs new reference to confirm | |||
|- | |||
|In [[Snowman's Land]] at a right angle to the edge of the snow triangle creating machine's path. Mario dies if he touches this wall.<ref>[https://www.youtube.com/watch?v=LZ52K89zrqM YouTube video of Snowman's Land Invisible wall death]{{dead link}}</ref>||Needs new reference to confirm | |||
|- | |||
|Inside the volcano of [[Lethal Lava Land]], in the middle of the downward flowing lava.||Unconfirmed | |||
|- | |||
|In [[Dire, Dire Docks]] where the sign is in the second area and the temporary boxes spawn.<ref>[https://www.youtube.com/watch?v=J6WslJkLw7k YouTube video of Dire, Dire Docks invisible wall]{{dead link}}</ref>||Needs new reference to confirm | |||
|- | |||
|Above the overhang at the beach in [[Tiny-Huge Island]].<ref>[https://www.youtube.com/watch?v=5a5GU589Mas YouTube video of the invisible wall in Tiny-Huge Island]</ref>||Exposed ceiling | |||
|- | |||
|At the sides of the swinging pendulums in [[Tick Tock Clock]].<ref name=TTCglitches/>||Exposed ceilings | |||
|} | |||
=== | ===Overextended see-saw glitch=== | ||
'''NOTE''': The following trick does not apply to the rotating platforms in [[Big Boo's Haunt]]. | |||
See-saw platforms will rotate based on the side Mario is standing on. Typically they will not rotate more than 90° as Mario will begin to slide off. However, this restriction can be bypassed if the player performs the first method of [[#Climb slippery slopes|climbing slippery slopes,]] allowing Mario to continue tilting the platform. If the platform is rotated more than 260° from its resting position, it resets as soon as Mario stops standing on it.<ref>[https://www.youtube.com/watch?v=4ZnrKNHiRto YouTube video of Seesaw Glitch Part One]</ref> | |||
Due to these types of platforms being offset from the pivoting axis, the whole platform will eventually be on the opposite side of Mario relative to the axis, making 270° the absolute limit.<ref>[https://www.youtube.com/watch?v=5PERrt2171s YouTube video of Seesaw Glitch Part Two]</ref> | |||
[[ | |||
=== | ===Segmented Pokey glitch=== | ||
Pokeys are normally made of four connected segments and a head. If Mario knocks a segment off it will disappear and the head will drop down, but after some time all segments will regrow. If a Pokey travels into the stone structure in [[Shifting Sand Land]], the Pokey can split into two pieces. Now the head does not move downward when Mario destroys segments. | |||
=== | ===Slide in place glitch=== | ||
Within courses there are certain locations where Mario can get stuck in a sliding or diving position. For many spots this prevents the player from escaping once stuck; the option to exit the course through the pause menu is not available in this situation. | |||
{|class="wikitable mw-collapsible mw-collapsed" | |||
|+style="text-align:left"|{{nowrap|A list of examples has been attached.}} | |||
|- | |||
!Area!!Description | |||
|- | |||
|Castle lobby||In the first room of the castle at the edge of the ceiling (where it is angled downward and inward).<ref>[https://www.youtube.com/watch?v=cyMMJHPwbWU YouTube video of Stuck in ceiling glitch]</ref><ref>[https://www.youtube.com/watch?v=OhX-q8MQ3ro YouTube video of stuck in ceiling glitch variant]{{dead link}}</ref> | |||
|- | |||
|[[Bob-omb Battlefield]]||Mario can get stuck in the corner of most hills.<ref>[https://www.youtube.com/watch?v=h8pEMackSuc YouTube video of Bob-omb Battlefield stuck glitch]</ref> | |||
|- | |||
|[[Whomp's Fortress]]||Between the wall and the left breakable wall.<ref>[https://www.youtube.com/watch?v=CsyEGZ2J2FY YouTube video of Whomp's Fortress stuck glitch]</ref> | |||
|- | |||
|[[Shifting Sand Land]]||Near [[Klepto]] and between two inward and downward facing planes.<ref>[https://www.youtube.com/watch?v=VQwaWqz7grY YouTube video of Shifting Sand Land Stuck glitch]</ref> | |||
|- | |||
|[[Hazy Maze Cave]]||Between the abandoned mine wire door and the land in front of the [[! Switch#Super Mario 64 / Super Mario 64 DS|Purple Switch]]. Requires precision placement.<ref name="stuck">[https://www.youtube.com/watch?v=KG74FANhpLI YouTube video of several Stuck spots]{{dead link}}</ref> | |||
|- | |||
|Hazy Maze Cave||At the bottomless pit where balls fall.<ref>[https://www.youtube.com/watch?v=dIN0wLg-7xw YouTube video of Hazy Maze Cave stuck glitch]</ref> | |||
|- | |||
|[[Bowser in the Fire Sea]]||Between the pole and the side of the suspending hexagon facing toward the start (requiring knockback). While climbing the pole, the player needs to press {{button|n64|A}} followed by {{button|n64|B}}. <ref name="stuck"/> | |||
|- | |||
|[[Bowser in the Fire Sea]]||By diving towards the corner at where the green funnel and the last platform touch.<ref>[https://www.youtube.com/watch?v=mFDzlUID2E8 YouTube video of Bowser in the Fire Sea Stuck glitch]</ref> | |||
|- | |||
|[[Tall, Tall Mountain]]||Behind the log and on the waterfall.<ref>[https://www.youtube.com/watch?v=djTuqK2VtYo YouTube video of waterfall stuck sliding spot]</ref> | |||
|- | |||
|[[Snowman's Land]]||At the top of the giant Snowman head, when Mario is slowly walking towards the high sloped glaucous-colored wall.<ref>[https://www.youtube.com/watch?v=oPSRfgw3980 YouTube video of Snowman's Land Stuck glitch]</ref> | |||
|- | |||
|[[Rainbow Ride]]||On the back slope of the big house roof. This one does not work on the original Japanese version.<ref>[https://www.youtube.com/watch?v=a__Zw3xVrfs YouTube video of Rainbow Ride stuck spot]</ref> | |||
|- | |||
|[[Bowser in the Sky]]||At the vertical slope, with perfect movement, it is possible to get stuck in the corner of the slope.<ref name="stuck"/> | |||
|} | |||
=== | ===Slide on dangerous surfaces glitch=== | ||
[[File:Lava Sidekick.gif|thumb|120px|Mario bounces safely on [[lava]]]] | |||
If Mario slides off a slope while sitting or performs a slide kick, the initial bounce will allow him to skim the surface of [[quicksand]], [[lava]], and [[freezing water]] without harm. | |||
===== | ===Speed exploits=== | ||
All of these glitches involve Mario being able to increase in velocity without limit, due to the lack of a speed cap on certain actions such as moving backwards and wall jumping. Mario can conserve this momentum into [[Wing Cap]] flight, abuse this speed to pass through walls, and traverse between [[#Parallel Universe|parallel universes]]. | |||
====Backwards long jump==== | |||
[[File:SM64 Less Than 70 Stars Game Beat.png|thumb|Mario beating the game with less than 70 Stars]] | |||
A long jump typically sends Mario forwards. However, if the player then holds the control stick {{button|N64|StickDown}} back relative to Mario and continues to perform long jumps, Mario will begin moving backwards. If this is performed on a staircase, steep slope, riding up an elevator, or with some surface that holds Mario in place, he will land much sooner than on flat ground. | |||
{{br}} | |||
[[File:SM64 Notendless.png|thumb|Mario on top of the endless stairs with 16 Stars]] | |||
[[File: | When landing, the player can rapidly tap the {{button|n64|A}} button, causing Mario to zoom backwards at very high speeds.<ref>[https://www.youtube.com/watch?v=gHvXUeisefw YouTube video showing how to Backwards Long Jump]</ref> This is most famously used to reach the top of the [[endless stairs]] in the Peach's Castle.<ref>[https://www.youtube.com/watch?v=qEBxIH08Fpo YouTube video of Backwards Long Jump]</ref> Normally when running up this staircase, the game repeatedly warps Mario back down to a lower section of the stairs to prevent access to [[Bowser in the Sky]] until 70 Stars are collected. However when the backwards long jump is repeated in quick succession, Mario can reach enough speed to bypass the trigger that creates the illusion of the endless stairs. This same principle allows Mario to breach walls. | ||
{{br}} | |||
This glitch is fixed in the ''Super Mario 64: Shindō Pak Taiō Version'' re-release, as well as subsequent releases based on this version (namely the iQue Player release and the version in ''[[Super Mario 3D All-Stars]]''), as a limit is added to the speed Mario can achieve when he travels backwards. The glitch is also fixed in ''[[Super Mario 64 DS]]'', in which attempting to perform it causes the camera to move behind Mario and makes him turn around. The glitch is not fixed in the [[Virtual Console]] or [[Nintendo 64 - Nintendo Switch Online]] releases. | |||
This glitch is acknowledged in the "''Super Mario 64'' Question Mark Block" [[LEGO Super Mario|LEGO ''Super Mario'']] set, as the "Perform the perfect jump" mission consists of the player replicating the glitch to obtain a [[Power Star]].<ref>Ashnflash (September 29, 2021). [https://www.youtube.com/watch?v=nZq0UOrrQlo LEGO Super Mario 64 ? Block - All 10 Stars]. ''YouTube''. Retrieved March 16, 2023.</ref> | |||
=== | ====Speed wall kicking==== | ||
When Mario | When Mario contacts a wall in the air, there is a moment where he can perform a Wall Kick. Normally this will set his speed to a fixed amount, however if the player presses {{button|N64|A}} the instant Mario contacts the wall, he will push away from the wall before the game can limit his speed. Done consecutively this can be abused to accumulate forward speed, although the process is slower and more precise than performing than abusing Backwards Long Jumps.<ref>bobmario's video: https://www.youtube.com/watch?v=Vlh0CA_aBwQ</ref> | ||
=== | ====Speed walking==== | ||
When standing on a slope and the edge of water, the backwards momentum Mario receives can build up. This can be abused to reach massive backwards speed if there is something to hold Mario in place during the process. Among these spots are: | |||
*In the castle grounds next to the waterfall where the water and the wall touch on the left side.<ref>Plush's video: https://www.youtube.com/watch?v=ljsnQqVuPCY YouTube video of Castle Grounds Speed Sliding Spot</ref> | |||
This | *In [[Whomp's Fortress]] the corner next to the cannon and the brick wall in the pool of water.<ref>Tomatobird8's video: https://www.youtube.com/watch?v=T0ZTAm4ogMQ YouTube video of WF Speed Sliding Spot{{dead link}}</ref> | ||
====Speed wind==== | |||
In places including [[Tiny-Huge Island]] and [[Tall, Tall Mountain]], when Mario is pushed upwards into a slope by [[wind]], his speed steadily builds up.<ref>[https://tasvideos.org/GameResources/N64/SuperMario64.html TASVideos - description and video about the HS Wind Glitch]</ref> | |||
===Stuck Skeeter glitch=== | |||
If the water level in [[Wet-Dry World]] is lowered when a [[Skeeter]] is in between two platforms, it will be unable to escape, constantly banging into the sides of each wall.<ref>[https://www.youtube.com/watch?v=7xLPNiWQBbg Video of a Skeeter getting stuck in Wet-Dry World]</ref> | |||
===Stuck to lava glitches=== | |||
It is possible for Mario to become stuck under objects while falling into [[lava]], preventing him from bouncing away. Getting burnt by lava does not give Mario temporary invulnerability unlike running into an enemy, so in these situations he rapidly screams and dies near-instantly. | |||
'''NOTE''': If the player runs through a [[Spinning Heart]] before burning Mario, he can stay in contact with the lava for longer. | |||
====Platform crush glitch==== | |||
[[File:SM64 Brutal Death.gif|thumb|120px|Mario is crushed on [[lava]]]] | |||
In [[Bowser in the Fire Sea|the Fire Sea]], there is a section with the two platforms shifting across the lava. The player should jump into the lava when the platform is moving towards [[Mario]] so he moves to be under the base of the platform. If timed correctly, the platform crushes Mario while he is standing on lava, causing massive damage. Alternatively, if Mario landed very close to the platform, Mario is instead [[#Gentle squish|gently squished.]] | |||
{{br}} | {{br}} | ||
=== | |||
[[File: | ====Rolling log in Lethal Lava Land glitch==== | ||
[[File:SM64 Logstuck.png|thumb|100px|The Crushing Log glitch in action]] | |||
The player must grab a [[Green Shell]] in [[Lethal Lava Land]], and head to the log near the caged area. After jumping onto the log to make it move, they should charge at the log as it rolls towards Mario. Upon contact, Mario loses the Green Shell and the log crushes him while he is repeatedly burnt by the lava, causing a near-instant death. | |||
{{br}} | {{br}} | ||
====Tilting lava platforms glitch==== | |||
[[File:SM64 Stucklava.png|thumb|100px|Mario stuck burning on lava]] | |||
In either Lethal Lava Land or Bowser in the Fire Sea, the player should dive underneath one of the tilting pyramid platforms that float above the lava. If positioned correctly, Mario will be stuck to the bottom of the platform due to the ceiling, and so he rapidly gets burned and his [[Health Meter]] drains almost immediately. | |||
{{br}} | |||
=== | ===Unreachable 100-Coin Star glitch=== | ||
[[File:UngetableStar.png|thumb|Unreachable Star]] | |||
Once Mario collects the 100th coin in a course, the 100-Coin Star will spawn a set distance above the player with no exceptions. If the 100 coins milestone is achieved close to a ceiling, the Star will be placed inside the ceiling where Mario cannot collect it. This oversight is commonly seen by collecting a Red Coin atop a bookshelf in [[Big Boo's Haunt]] and the highest Red Coin in [[Dire, Dire Docks]], though it is possible to collect a coin from a defeated enemy and achieve the same result. | |||
{{br}} | |||
=== | ===Wing cap momentum memory glitch=== | ||
When Mario touches the ground after a Wing Cap the game does not reset the variables affecting the direction Mario was turning towards. This means that if the player holds {{button|n64|Stickright}} or {{button|n64|Stickleft}} on the Control stick just before Mario touches the ground and then performs a [[Triple Jump]] to fly again, Mario suddenly jerks towards said direction. | |||
{{br}} | |||
==Scripting== | |||
{{more images|section=y|Illustrate all applicable glitches in this section (GIFs may be needed here)}} | |||
'''NOTE''': These glitches abuse interactions that cause objects or displayed information to perform unintended behaviors. | |||
===Beached Bubba glitch=== | |||
Although [[Cheep Chomp|Bubba]] cannot be defeated by conventional means, there is a way to beach the hungry fish. In [[Tiny-Huge Island]], Mario should lure the Bubba to the rocky edge of the shoreline. If Bubba lunges out of the water and lands on the rocky surface, it will begin drifting across the island while facing downwards. Bubba will stop at walls and will still attempt to chomp at Mario in this state, albeit without being able to chase him. If Bubba falls off of the level, the fish can be seen resting on the death barrier.<ref>[https://www.youtube.com/watch?v=rYnB8ty_4ZM YouTube video of Beached Bubba glitch]</ref> | |||
=== | ===Bowser momentum glitch=== | ||
== | {{multiframe | ||
|align=right | |||
|1=[[File:MomentumGlitch1.png|200px]][[File:MomentumGlitch2.png|200px]] | |||
|2=<center>Bowser is sent flying off the stage in the [[Bowser in the Dark World|Dark World]] and [[Bowser in the Fire Sea|Fire Sea]]</center> | |||
}} | |||
During any Bowser battle, the player must first grab Bowser's tail and throw him off the edge. When Bowser jumps back, intercept him before he lands, grabbing his tail again, and throw him into a bomb. Rather than being blasted back onto the platform, Bowser will be sent flying off the edge of the stage.<ref name="Bowser glitches"/> | |||
Because Bowser fell off during the hit, he will eventually jump back to the center of the stage and the battle will progress as if he was never injured. | |||
=== | ===Broken big crate glitch=== | ||
[[ | If the player attempts to destroy a [[! Switch#Super Mario 64 / Super Mario 64 DS|Purple Switch]] [[crate]] as it disappears, it will instead break as the Purple Switch is pressed again.<ref name="simultaneous"/> | ||
=== | ===Broken bookshelf glitch=== | ||
[[ | During the mission "[[Secret of the Haunted Books]]" of [[Big Boo's Haunt]], it is intended that Mario approach a bookcase and hit three of the books in a particular sequence, opening a path to the Star. | ||
Once a book is hit, it will stay inserted unless the player does not apply the correct sequence or he exits the room. Due to an oversight however, Mario's progress in the sequence is remembered. This means that Mario can hit two of the books in the correct order, leave the room, and come back to hit the third book, which should play a jingle. If Mario now hits another book before the bookshelf opens up the game will be confused, as Mario has now both inputted the correct and incorrect code. The bookshelf will not move yet the books will not pop out to let the player try again.<ref>[https://www.youtube.com/watch?v=b-yDD1OhLPk YouTube video of Broken Bookshelf]{{dead link}}</ref> | |||
=== | ===Cap duplication glitch=== | ||
While Mario's cap is resting on the ground, if the player uses a [[warp]] and returns, a duplicate cap will be created in the same spot the original cap fell. This can be performed repeatedly to create a new cap on every warp, and a duplicated cap will adopt Mario's facing angle from the moment it was created.<ref>[https://youtu.be/PLgmj3qIJPA Hat Factory Glitch]</ref> | |||
=== | ===Cap in hand glitch=== | ||
[[File: | [[File:SM64 Capinhand.png|100px|thumb|Mario holding his cap]] | ||
[[ | If the player strikes a [[Cap Block]] and lets it respawn to hit it again, two caps will briefly be collectable. If Mario picks up the first cap before it disappears and the second cap lands on him before he finishes, Mario will hold the special cap in his hands while still gaining the new attributes. | ||
Alternatively the player can perform the glitch to have multiple hats in the same spot. Attempting to pick up the hats will cause Mario to put them on one at a time. When Mario picks up the second, the cap on his head will disappear and Mario will keep holding the second cap in his hand rather than placing it on his head. | |||
There are several aspects that are affected by performing this trick: | |||
*In this state Mario's hat cannot be stolen or blown off his head, though damage is still increased due to Mario not wearing the cap. | |||
*Talking to a [[Bob-omb Buddy]] will cause Mario to correctly put on the cap. | |||
*If the player used Klepto, then reentering Shifting Sand Land will show the hat still in his talons. | |||
*Objects Mario picks up will no longer be rendered in his hands, allowing him to throw objects [[#Held Object's Last Position|remotely]]. | |||
*Saving and reloading the game, Mario will be without his cap.<ref>[https://www.youtube.com/watch?v=XPL0tilRmtg A side effect to "Cap in Hand"]{{dead link}}</ref> | |||
=== | ===Cloning glitch=== | ||
[[File:SM64 Cloning.png|thumb|Mario holding a [[Goomba]] clone]] | |||
[[File:Mario and haze.PNG|thumb|left|Mario holding nothing in his hand]] | |||
[[File:Mario holding coin.PNG|thumb|left|Mario holding a [[coin]] clone]] | |||
{{NIWA|Ukikipedia=Cloning|title=Cloning}} | |||
Mario and held objects are intended to have a doubly linked relationship: Mario's data structure references the held object's slot in memory, and the held object stays loaded but hidden (the graphic in Mario's hands is not the actual object) until he drops it. However, if an object unloads in the time it takes to process that Mario has grabbed it, Mario will hold a reference to the now-vacant slot that it occupied. This can be done in various ways, including grabbing a [[crate]] as it unloads or breaks, or a [[Bob-omb]] as it explodes.<ref>[https://www.youtube.com/watch?v=9xE2otZ-9os YouTube video of Cloning]</ref> Another object can then load into the empty slot while unaware that Mario is holding it, and regardless of whether it was programmed to be held. | |||
The player can strategically load and unload objects to manipulate which vacant slot index is held, and what object takes that slot. Because the newly loaded object appears to be rendered both in the world and in Mario's hands, this glitch is commonly referred to as cloning. Nearly any object can be cloned, but it must load in after Mario performs the setup, so he cannot, for instance, clone himself. | |||
Once dropped, clones of normally unholdable objects do not process scripting events properly. For example, many coins are spawned in sets, where a [[Spawning Point|spawner object]] tracks which coins in the set have been collected. If one of these coins is cloned, it cannot pass an event to its spawner to flag itself as collected. Upon reloading the spawner, that coin respawns and can be collected a second time. Another consequence of the broken event processing is that Mario can only interact with such clones once. Clones of enemies that were not intended to be held can collide with Mario once before becoming largely unresponsive. Cloned platforms do not collide with Mario. | |||
Clones also cannot unload unless Mario passes through a loading zone or exits the stage, so repeated cloning can fill up all 240 memory slots that the game allocates for objects. This causes the game to enter an infinite loop that is functionally equivalent to a crash. | |||
=== | ===Coin counter rollover=== | ||
If Mario collects more than 255 coins in a course, it will save a number less than or equal to 255 as the coin count record. For example, collecting a Star while the coin count is at 999 will record a coin count of 231 coins. The reason this happens is that the record's coin counter only saves the first byte of the level's coin data (which is stored in two bytes). The coin counter effectively rolls over while saving. If Mario collected 256 coins (or a number multiple of it, such as 512, and 768) in a level, it would be stored as 0.<ref>[https://www.youtube.com/watch?v=dokE1J5wlhE A YouTube video explaining the glitch, by pannenkoek2012]</ref> | |||
'''NOTE''': The maximum number of coins that can be collected while in a level is 999; collecting more does not affect the coin counter, [[#Negative lives*|except on the original Japanese release.]] | |||
===Delayed dialogue glitch=== | |||
Certain text boxes will automatically open when Mario is standing in proximity to [[Koopa the Quick]], the [[Big Penguin]], et al. These textboxes can be delayed to initiate the conversation from further away than intended. By performing a Triple Jump with one of the jumps being in the range of the speaker, the game will not begin the conversation until Mario lands for a long enough moment. If Mario wears a [[Wing Cap]] he can fly an arbitrary distance from the speaker, which can be exploited to [[#Beat Koopa the Quick in zero seconds|beat Koopa the Quick in zero seconds.]] | |||
===Disappearing Fly Guy glitch=== | |||
In [[Snowman's Land]], if Mario stands near a specific tree then a [[Fly Guy]] will fly towards the freezing water and will mysteriously die. It is believed that the freezing water physically extends beyond what is seen.<ref>[https://www.youtube.com/watch?v=4BM3tmGYzpY YouTube video of Fly Guy Death Glitch]{{dead link}}</ref> | |||
===Drowning Goomba glitch=== | |||
At the foot of [[Tall, Tall Mountain]] there is a trio of Goombas. The one closest to the water often gets stuck on unstable ground in the river. While in the water it will be fine, however if the Goomba touches the ground beneath the water it will die. | |||
===Enemy-specific exploits=== | |||
{|width=100% cellspacing=0 border=1 cellpadding=3 style="border-collapse:collapse;background:#f5f5f5" | |||
|-style="background:#ff0000;color:white;" | |||
!width=13%|Enemy | |||
!Exploits | |||
|- | |||
|align=center style="background:#FFFFFF"id="Bob-omb Glitches"|[[File:Bomb-omb SM64.png|x100px]]<br>[[Bob-omb]] | |||
| | |||
;Bloated Bob-ombs | |||
[[File:Larger Bomb-omb.png|thumb|Mario holds a large Bob-omb]] | |||
If the player grabs a Bob-omb while it prepares to explode, the Bob-omb will stay bloated and the explosion is canceled. This can be achieved by tossing one and catching it just as it hits the ground.<ref>[https://www.youtube.com/watch?v=uXp7C1gU7T4 YouTube video of "Hold Larger Bob-omb"]</ref> The later the Bob-omb is grabbed, the larger it will be; very bloated Bob-ombs will constantly intersect with Mario, providing constant backwards momentum until detonation. | |||
---- | |||
;Bob-omb through the bars | |||
In [[Bob-omb Battlefield]], the player should open the gate beneath the rocky arch. Now if Mario grabs a Bob-omb with a dive and bonks against the edge of the bars, the Bob-omb will jitter back and forth for a while before eventually popping out of the bars.<ref name="Several glitches using Bob-ombs">[https://www.youtube.com/watch?v=fpiTPtZ4Fxg YouTube video of several glitches using Bob-ombs]</ref> | |||
---- | |||
;Missing Bob-ombs | |||
Mario should grab any Bob-omb on [[Tall, Tall Mountain]] and stand at a ledge. By dropping or throwing the Bob-omb off, it will not respawn unless Mario exits the level. Sometimes the Bob-ombs will wander off the mountainside automatically, with the same result. | |||
|- | |||
|align=center style="background:#FFFFFF"id="Bully Glitches"|[[File:SM64 Asset Model Bully.png|x100px]]<br>[[File:SM64 Asset Model Chill Bully.png|x100px]]<br>[[Bully]] | |||
| | |||
;Bully blocker | |||
If a Bully rams Mario into the corner of two walls, it may repeatedly strike Mario where escaping requires jumping away during an unreasonably small window of time.<ref>[https://www.youtube.com/watch?v=weJl6_d-NXg&t=1m30s YouTube video of the Bully Blocker glitch]{{dead link}}</ref> This issue was addressed in the [[Super Mario 64 DS|DS remake]]; if a Bully rams into Mario it now pauses between strikes. | |||
---- | |||
;Chill Bully off the platform | |||
In [[Snowman's Land]], it is possible to push the [[Chill Bully]] off of the ice platform without it landing in freezing water using a [[Koopa Shell]]. This Bully will sink into the ground in various places, particularly when interacting with slopes, stepping onto low-elevation ground, or going too far from the platform. Once the Chill Bully sinks, it releases a Star as expected.<ref>[https://www.youtube.com/watch?v=KWuDc2qJuNw YouTube video of Ice Bully glitch]</ref> | |||
---- | |||
;Unfinished Bully boiling | |||
If Mario collides with a Bully as it boils in lava, its death will be interrupted and the Bully will stay partially submerged. Additionally, the Bully will awkwardly cling to Mario if he is riding a [[Koopa Shell]]. This also applies to the Chill Bully drowning in freezing water, though it still disappears and releases a Star.<ref>[https://www.youtube.com/watch?v=oKqdPIexM88 YouTube video of Unboiled Bully glitch]</ref> | |||
|- | |||
|align=center style="background:#FFFFFF"id="Chuckya Glitches"|[[File:Chuckya SM64.png|x100px]]<br>[[Chuckya]] | |||
| | |||
;Chuckya drop | |||
Normally Chuckya is unable to willingly move off an edge. However, a Chuckya can become airborne while traveling down a steep enough slope, and being in the air removes this restriction. This can be abused in [[Bowser in the Sky]] after Mario performs a specific set of actions to manipulate the Chuckya from below until it reaches a nearby slope, allowing the Chuckya to fall down to Mario.<ref>[https://www.youtube.com/watch?v=opnLYxrVWMc YouTube video explaining the Chuckya Drop by Pannenkoek2012]</ref> | |||
---- | |||
;Grabbed by dead Chuckya | |||
A thrown Chuckya will explode on impact. If it manages to grab Mario right when this happens, Mario will be stuck in midair and the player is softlocked. Similarly, if Chuckya is dropped into a bottomless pit and Mario gets grabbed during the fall, Chuckya despawns and Mario flails in place. | |||
---- | |||
;Grabbed while holding a clone | |||
If Mario holds a Chuckya [[#Cloning|clone]] and gets grabbed by the real Chuckya, Mario will be forced to drop the clone. This causes the real Chuckya to be thrown and explode on the ground, leaving Mario flailing in the air. This can also be achieved with a [[#Heave-Ho Glitches|Heave-Ho.]] | |||
---- | |||
;Invisible Mario | |||
After performing the [[#Heavy objects become light|Portable Chuckya]] glitch to position [[Chuckya]] underwater, Mario should get grabbed. Normally Mario would be unable to move until being thrown, however the water takes priority and he is able to swim around while being invisible. If Mario now grabs Chuckya, he stays invisible while a copy of him holding Chuckya remains in the water. | |||
The game tracks Mario using two different positions: his <u>struct</u> position which is controlled by the player and used for calculations, and his <u>object</u> position which is where Mario is seen. When grabbed by a Chuckya, Mario's struct detaches from the Mario seen in Chuckya's grasp. Grabbing Chuckya interrupts the process, so Mario remains invisible.<ref>[https://youtu.be/thuY_6Zr8Qg?t=1676 Seeing the Unseen (Held Mario) by UncommentatedPannen]</ref> | |||
'''NOTE''': Jumping on a slope near the Chuckya ends the glitch and turn Mario visible again. Attempting to go out of bounds will reposition Mario at his object position and end the glitch. | |||
|- | |||
|align=center style="background:#FFFFFF"id="Heave-Ho Glitches"|[[File:SM64 Asset Model Heave-Ho.png|x100px]]<br>[[Heave-Ho]] | |||
| | |||
;Heave-Ho's disappearing act | |||
If the player uses a [[#Cloning|cloned]] [[Crystal Tap]] to set the water level so that it is at the exact same level as one of the surfaces with a Heave-Ho, the water level will repeatedly rise above said surface due to its natural oscillation. Thus the Heave-Ho repeatedly appears and disappears in tandem with the water. | |||
---- | |||
If Mario holds a | ;Heave-Ho out of bounds | ||
In [[Wet-Dry World]] if Mario clips behind the pushable block intended to be pushed into the wall, which can be achieved by [[#Chuckya clip|clipping with Chuckya]], the block can instead push the block out of the wall. By luring the Heave-Ho into the hole and squeezing it against the wall with the block, the player can push the Heave-Ho out of bounds, where it will fall to the death barrier and then respawn on the surface of water. | |||
---- | |||
;Heave-Ho's Skeeter impersonation | |||
Typically Heave-Hos disappear when water submerges their platform and reappear once the water is gone. However, if Mario is near a respawning Heave-Ho while the water level drops, the Heave-Ho sticks to the water's surface and sinks through the floor. The Heave-Ho will be driving on the surface of water, comparable to [[Skeeter]]s. Raising the water level above the platform will correct the glitch.<ref>[https://www.youtube.com/watch?v=sEUQ16_Un28 YouTube video of Heave-Ho glitches by Pannenkoek2012]</ref> | |||
---- | |||
;Heaved while holding a clone | |||
If Mario holds a Heave-Ho [[#Cloning|clone]] and gets grabbed by the real Heave-Ho, Mario will be forced to drop the clone. The real Heave-Ho is then dropped, leaving Mario flailing on the ground in a softlock. This can also be achieved with a [[#Chuckya Glitches|Chuckya]]. | |||
|- | |||
|align=center style="background:#FFFFFF"id="Scuttle Bug Glitches"|[[File:SM64 Asset Model Scuttlebug.png|x75px]]<br>[[Scuttlebug|Scuttle Bug]] | |||
| | |||
;Scuttle Bug raising | |||
It is possible to raise a Scuttle Bug arbitrarily high, even into vertical [[#Parallel Universe|Parallel Universes]]. This abuses two properties: | |||
*A room and its contents are only active when Mario is inside or is standing next to its door. | |||
*Inactive enemies will process that Mario is near and initiate its behavior, but can only act once they become active again. | |||
First the player should transport a Scuttle Bug to a new position, where its activation radius can be entered from a adjacent room. When the player exits the room this Scuttle Bug will be deactivated. In this state, a Scuttle Bug will turn to face towards its home location unless Mario is close enough, in which case it will turns towards Mario and attempt to lunge. By standing close enough to the door so that the room becomes active, the Scuttle Bug can now continue its attack. If Mario moves away to deactivate the room while the Scuttle Bug is at the peak of its jump, it ends up suspended in midair and the lunge is cut short. This process can be repeated despite the Scuttle Bug being off the ground. | |||
---- | |||
;Scuttle Bug transportation | |||
Each Scuttle Bug has a home location to patrol around, and if Mario gets close then the Scuttle Bug will try to attack him. However unlike most enemies, the Scuttle Bug's home location can be changed, as every time a Scuttle Bug hits Mario the game sets a new home at that position. By strategically luring a Scuttle Bug away from its home and letting it lunge into Mario repeatedly, Mario can effectively transport the bug. Note that Scuttle bugs are unable to leave their native rooms, instead getting stuck in the door. | |||
|} | |||
{{br}} | |||
=== | ===Falling Chain Chomp glitch=== | ||
In [[Bob-omb Battlefield]], if Mario frees the [[Chain Chomp]] from its post right as it lunges, its momentum will influence the Chain Chomp's trajectory and it may go over the fence as it hops around. This offset will cause the sequence to look very strange, as the Chain Chomp hits the wall at the bottom when attempting to break the cage that holds the Star.<ref>[https://www.youtube.com/watch?v=3_uj615Ez0Q YouTube video of Chain Chomp Falling Down Glitch]</ref> | |||
=== | ===Floor property inheritance glitch=== | ||
When Mario is standing on the edge of a surface with another floor below him, the game may incorrectly apply the properties of that lower floor to where Mario stands. For instance, Mario can sink into a [[Tox Box]] because of the quicksand directly below,<ref>[https://www.youtube.com/watch?v=eYDrvNMsjuY YouTube video of Death in Midair Tox Box glitch]</ref> or slide back as if the floor is steep.<ref>[https://youtu.be/5b_U9xQlDnc YouTube Video explaining floor property inheritance]</ref> | |||
=== | ===Frozen environment glitch=== | ||
[[ | These glitches cause the game to maintain a surreal state where most objects either are unloaded or do not update when interacted with. | ||
{|class="mw-collapsible mw-collapsed"style="width:85%;cellpadding:4;spacing: 1;" | |||
|+style="text-align:left;"|'''{{nowrap|A list of object properties has been attached: }}''' | |||
|- | |||
| | |||
*[[Crate]]s and [[Crazed Crate]]s are invisible but are still fully functional. The impact will yield no coins, but the boxes can be reused. | |||
*Moving objects like the rotating log at [[Tall, Tall Mountain]] are still visible, however they are no longer solid. | |||
*The [[Bob-omb Buddy]] has no animation and will not rotate towards Mario. Initiating a conversation will softlock the game. | |||
*[[Goomba]]s, like [[#Cloning|clones]], can only be interacted with once. In addition, these Goombas have no animation and appear to be floating. | |||
*[[Fly Guy]] can be interacted with only once and stays in place, and does not disappear or produce coins after it is killed. | |||
*[[Chuckya]] is invisible but can still be interacted with. When thrown it will yield no coins. | |||
*Mario will interact with [[Bob-omb]]s exactly like the [[Chuckya]]. It will not explode nor move. | |||
*Not a single [[Monty Mole]] appears, and the holes they emerge from are missing. | |||
*[[Red Coin]]s are appear to stop spinning. When collected they neither disappear nor show the number of them collected. | |||
*[[1-Up Mushroom]]s are visible but cannot be collected. | |||
*[[Power Star]]s can be collected to exit the course, but they do not rotate. | |||
|} | |||
A [[List of New Super Mario Bros. glitches#Frozen Ghost House|similar glitch]] is possible in ''[[New Super Mario Bros.]]'' | |||
====Mario's magic monkey*==== | |||
At the section of [[Tall, Tall Mountain]] with a log, the player should dive at [[Ukiki|Ukkiki]] such that Mario lands in the water, swimming with Ukkiki in his hands. Note that Ukkiki has not spoken at this point, since the game waits for Mario to be standing on the ground. Sliding off of the geometry in the water and bouncing on the ground will allow the player to Ground Pound {{button|n64|Z}} which drops the monkey without ever conversing. Mario is now in the surreal world of frozen time and unloaded objects.<ref>https://m.youtube.com/watch?v=MpYxcpx84ts</ref> Once Mario retrieves Ukkiki and properly begins the conversation, the world will resume; coins released from various events will spawn, and enemies return to intended behavior.<ref>[https://www.youtube.com/watch?v=L7NiVDGn2d0 YouTube video of Tool-assisted superplay including performing the Freezing Surroundings glitch]</ref> | |||
In releases beyond the original Japanese version, Ukkiki's conversation will begin as soon as Mario is touching the ground for even a moment, making the last step of the setup impossible. Additionally, it is not possible to drop Ukkiki in midair, as pressing the {{button|n64|Z}} button now does nothing in this situation. | |||
====Time-freezing Cap Switch glitch*==== | |||
When Mario has just stomped on a [[Cap Switch]], the game goes into a frozen state until the text box is closed. Similarly to the [[#Delayed dialogue|delayed dialogue exploit,]] if Mario jumps or slides off right when pressing the switch, the game will wait until Mario is next standing on the ground to initiate the text box. In this moment, Stars do not disappear when collected. The glitch ends when the text box appears or Mario exits the course.<ref>[https://www.youtube.com/watch?v=8vORMMFwuu8 YouTube video of Japanese cap frozen time glitch]</ref> | |||
===Hands-free holding glitch=== | |||
Normally Mario's movement is restricted while holding an object. However, this can be circumvented with the following interactions: | |||
#Grabbing an object with a dive and landing on a downward slope | |||
#Holding an object and being pushed off a ledge | |||
#Holding an object and soft bonking against a ceiling (e.g. the bottom edges of [[! Block]]s) | |||
In this state the object is being held but Mario isn't occupied with physically holding it, hence the term "hands free". However, While Mario has his hands free, the game tries very hard to drop the object at this point; various actions cancel the glitch ranging from most ground movement and actions against walls, to interacting with poles, cannons, sources of damage, wind, shells or the owl, to being tosses, carried or blown away. Thus, Mario must be kept occupied constantly. | |||
Despite the instability of this state, Mario can still punch, kick, jump, hang from ceilings, and fly without dropping the item. The player can turn Mario by butt-sliding down slopes or using rotating platforms. Regrabbing the object can be achieved by diving, entering water, trying to pick up something else, initiating a conversation, or a summoning a Star.<ref>[https://www.youtube.com/watch?v=x4DJCa_3hgU YouTube video of Hands Free Holding glitch]</ref> | |||
===Hands-free teleport glitch=== | |||
<!--create table where the left column is comprised of images of the relevant objects, and the right explains the effect of this glitch--> | |||
While Mario's carrying an object with his [[#Hands free holding|hands free,]] the player should use a [[warp]]. Once on the other side, there are various effects<ref>[https://www.youtube.com/watch?v=qqmYYIQRSuI YouTube video of Hands Free Teleport glitch]</ref> depending on what object was taken through: | |||
'''NOTE''': [[#Cloning|Clones]] will vanish upon warping, and the source of the clone will be unaffected. | |||
{|width=100% cellspacing=0 border=1 cellpadding=3 style="border-collapse:collapse;background:#f5f5f5" | |||
|-style="background:#ff0000;color:white;" | |||
!width=13%|Object | |||
!width=37%|Warp Result | |||
!width=13%|Object | |||
!width=37%|Warp Result | |||
|- | |||
|align=center style="background:#FFFFFF"|[[File:Mario climbing on a Block SM64 artwork.jpg|x100px]]<br>[[Crate]] | |||
|The crate disappears on the other side, and will never respawn even after 30 seconds of inactivity. This is because the game still thinks the crate is being held, so the timer allowing it to despawn is still deactivated. | |||
|align=center style="background:#FFFFFF"|[[File:STROOP- Crazy Box.png|x100px]]<br>[[Crazed Crate]] | |||
|The Crazed Crate will be stuck to Mario's position in both an invisible and intangible state, essentially disappearing. | |||
|- | |||
|align=center style="background:#FFFFFF"|[[File:SM64 Asset Model Penguin (Adult).png|x100px]]<br>[[Baby Penguin]] | |||
|The Penguin will disappear on the other side, however the [[Mother Penguin]] will respond as if Mario is still carrying one. Despite this, Mario is unable to put down the Penguin, so bringing [[Tuxie]] in this manner will not grant Mario a Star. | |||
|align=center style="background:#FFFFFF"|[[File:Ukiki 64.png|x100px]]<br>[[Ukiki|Ukkiki]] | |||
|The monkey will disappear on the other side, however at the summit of [[Tall, Tall Mountain]], Ukkiki will ask Mario to be freed. Regardless of which option is chosen, Mario is unable to put down the monkey, and this text can be triggered repeatedly. | |||
|- | |||
|align=center style="background:#FFFFFF"|[[File:Chuckya SM64.png|x100px]]<br>[[Chuckya]] | |||
|The Chuckya will be sent back to where it was initially grabbed both invisible and intangible. Since it was never defeated it can be respawned by crossing through a loading zone. | |||
|align=center style="background:#FFFFFF"|[[File:BigBob-ombSM64.png|x100px]]<br>[[King Bob-omb]] | |||
|King Bob-omb will be sent back to where he was initially grabbed, however he will be both invisible and intangible. | |||
|- | |||
|align=center style="background:#FFFFFF"|[[File:Bomb-omb SM64.png|x100px]]<br>[[Bob-omb]] | |||
|colspan=3 | The Bob-omb disappears on the other side, and will stick to the front of Mario if he approaches the warp but remains invisible. Bob-ombs are kept tangible while held in order to produce smoke, so diving or grabbing will put the Bob-omb back in Mario's hands. It will also destroy other Bob-bombs on contact and push [[Goomba]]s around. If the Bob-omb was [[#Bob-omb glitches|bloated]] when warping, Mario will be constantly pushed backwards. | |||
'''NOTE''': Kicking the Bob-omb before or after the glitch will cause the previous interactions to no longer occur. | |||
|} | |||
{{br}} | |||
=== | ===Heavy object carry glitch=== | ||
[[ | There are certain enemies such as [[Chuckya]]s and [[King Bob-omb]] which are very heavy, thus Mario will lean back, cannot jump, and walks slowly while he carries them. However, if the heavy enemy and Mario stand positioned close to a ledge, the player can punch {{button|N64|B}} such that Mario falls off the ledge immediately. Because Mario is airborne he can perform a dive {{button|N64|B}} and grab the heavy enemy. Normally a dive cannot be used to grab heavy objects, however canceling the punch and quickly diving tricks the game since Mario satisfied the punching check and was in a grabbing state. Because dives are not meant to be used in this way, Mario defaults to holding the object as normal.<ref>[https://youtu.be/oZ12n5mdAJA Make Heavy Objects Lightweight via edge Tutorial by UncommentatedPannen]</ref> | ||
Alternatively in [[Wet-Dry World]], Mario should throw a Chuckya off a ledge and then get caught by it in midair before it touches the ground. This will safely transport it to a lower elevation, and the player can now raise the water level using a [[Crystal Tap]] to submerge the Chuckya. If Mario grabs the Chuckya while underwater, he will be able to carry it as if it were a normal object., allowing him to jump high and run at normal speed.<ref>https://youtu.be/Ea6d9oaHOBA?t=22</ref> | |||
=== | ===Held object's last position glitch=== | ||
[[File:SM64 HOLP Manipulation Example.png|thumb|An example of HOLP manipulation: The [[Bob-omb]] was thrown remotely by Mario with a cap in his hand]] | |||
The held object's last position, often abbreviated to "''HOLP''", is a location the game tracks when Mario holds most objects. What Mario holds is simply a visual copy of the original object, so once Mario releases this copy from his grasp, the original object is set to a particular location relative to the HOLP and inherits Mario's orientation; if an object is dropped by Mario it is placed at the height of Mario's feet and at the lateral position of the HOLP with no velocity, and if Mario throws an object it will move to the HOLP while inheriting his speed. | |||
{{br}} | |||
The HOLP is a global value used between all courses and save files, and defaults to (0,0,0) before being used. When needed, the game will update this value to match the location of Mario's hands, however it will only update when the game needs to render an object in Mario's hands. As such the HOLP will not update when: Mario is not holding anything, Mario is invisible from knockback, Mario is not within view of the camera, or the object being held is not visible in the first place. Exploits such as the cap in hand glitch can be used to hold an object without updating the HOLP, allowing the player to remotely throw an object from wherever Mario last properly released an object. The only way to reset the HOLP is if the player resets or turns off the system.<ref>[https://www.youtube.com/watch?v=seQ-IL-eNqk YouTube video of Object Displacement glitch ]</ref> | |||
=== | ===Infinite Coins glitches=== | ||
Through various exploits it is possible to obtain an endless number of coins. However, the coin counter is limited to 999 coins maximum.<ref>[https://www.youtube.com/watch?v=RHl7YOu35hc YouTube video from Pannenkoek2012 about infinite coin glitches]</ref> | |||
====Bowser's fire glitch==== | |||
While battling Bowser, the fire he spews at Mario has a chance to drop coins. Through patience the player can collect these coins as these appear without limit. | |||
=== | ====Cloning==== | ||
By cloning coins or their [[Spawning Point]]s in courses with loading zones it is possible to obtain an infinite amount of coins; in courses without loading zones, the amount of coins which can be collected by cloning is limited by the amount of available object slots. | |||
====Disappearing crate glitch==== | |||
In levels with platforms such as [[Block (Super Mario 64)|Block]]s, pushable blocks or [[Blue Coin Block]]s, Mario should place a [[crate]] atop one of these objects. If the player walks away, the platform used becomes intangible and the crate falls until the two overlap. Right as the crate would despawn from inactivity, Mario must return to make the platform tangible again, breaking the crate and releasing its three coins. The game does not realize the crate was broken, so it will simply respawn and the process can be repeated. | |||
====Money Bags duplication glitch==== | |||
In [[Snowman's Land]] there are two [[Moneybags|Money Bags]] which disguise themselves as coins until Mario approaches them. If the player reapproaches a Money Bags just as it transforms back into a coin, it will duplicate into two Money Bags, one that transforms into a coin and another that hops away. This process can be repeated to collect an unlimited amount of coins.<ref>[https://www.youtube.com/watch?v=eJnEh4Cjs0M YouTube video of Money Bags Duplication glitch]</ref> | |||
====Piranha Flower death glitch==== | |||
In the small version of [[Tiny-Huge Island]] there is an area with 5 [[Big Fire Piranha|Piranha Flower]]s, which normally go limp and drop coins when defeated. While a Piranha Flower is shrinking back into the ground however, the player should attack it at the last moment possible. The Piranha Flower will play a death sound as it sprouts back up, and defeating it now will drop 2 coins as it vanishes. The game is tricked into thinking the Piranha Flower has not yet been defeated, so if Mario uses the [[Shrinker Pipe]] and returns, the plant will respawn and the process can be repeated to obtain more coins.<ref>[https://www.youtube.com/watch?v=OalrzUMc-oQ YouTube video of Infinite Coins from Plant glitch]</ref> | |||
=== | ===Instant movement glitches=== | ||
====Downward teleports==== | |||
* | Some events and interactions expect Mario to stay grounded, and if he somehow becomes airborne the game will send Mario to the next available floor as a failsafe: | ||
*Swimming into a ceiling such as the underside of the ship in [[Jolly Roger Bay]], the game will move Mario out by sending him down until he no longer overlaps with said ceiling.<ref>[https://www.youtube.com/watch?v=ch2Bbw0LnHY YouTube video of JRB Ship Downward Teleport]{{dead link}}</ref> | |||
*Jumping above a swinging pendulum while its ceilings are exposed.<ref name=TTCglitches>[https://www.youtube.com/watch?v=Ebp-D7e6Sd4 YouTube video of several glitches in TTC Japanese version]</ref> | |||
*Grabbing the tail of Bowser while it hangs off the edge of the arena will send Mario instantly to the death barrier below.<ref>[https://www.youtube.com/watch?v=7CYJRRP5fhY YouTube video of Bowser glitches]</ref> | |||
*Being crushed while the platform Mario stands on moves out from under him. | |||
* | *Being electrocuted by an [[Amp]] while performing a [[Ground Pound]]. | ||
*Mario collects a Star while the platform he stands on moves out from under him.<ref>[https://www.youtube.com/watch?v=pdXyDLsemz8 YouTube video explaining Instant Descent]</ref> | |||
[[File:sM64 100 Coins Glitch 2.png|thumb|left|160px|Mario's default victory dance underwater]] | |||
In [[Dire, Dire Docks]], the player should collect the 100th coin such that the 100-Coin Star overlaps with the path of the poles near the submarine. When collecting this star will hanging from a pole, Mario will suddenly drop to the bottom of the lake and celebrate as if he were standing on land. | |||
[[File:StuckAir.png|thumb|120px|Mario appears buried in midair]] | |||
On [[Cool, Cool Mountain]], if the player heads to the top of the wooden lift and performs a [[Long Jump]] towards the [[Bob-omb Buddy]]'s island, landing at the very edge of the island will cause [[Mario]] to warp down. He appears to be stuck in snow yet also in the air, but he actually rests on the death barrier. Once Mario frees himself, he loses a life and is ejected from the painting. | |||
<br> | |||
==== | ====Upward teleports==== | ||
Some events and interactions expect Mario to be at a specific height, and if he isn't the game will simply send Mario up this expected position: | |||
*Beginning to swim will set Mario to the water's surface, even if he wasn't at that height when entering the water. | |||
*Collecting a Star next to a ledge will briefly make Mario grab it before snapping him onto the floor above. | |||
*Jumping into the edge of a ceiling directly below a hanging grate, the game will incorrectly assume Mario grabbed the grate and warp him up. This effect can be seen inside the mountain of [[Tiny-Huge Island]] by jumping into the ceiling above the exit, and in [[Bowser in the Fire Sea|the Fire Sea]] by jumping into the edge of the pole base.<ref>[https://www.youtube.com/watch?v=xT71wYq3vGI YouTube video of BITFS]</ref> | |||
=== | ===Koopa Shell glitch=== | ||
Normally riding a [[Koopa Shell]] into water will cause Mario to simply surf across the surface. However, a glitch can be performed in the large version of [[Tiny-Huge Island]] which circumvents this restriction. | |||
After reaching the beach, Mario should knock the [[Koopa Troopa]] away such that it slides towards the water when trying to retrieve its shell. When the Koopa is slightly submerged, the player can knock it away again and land such that Mario mounts the shell and enters the water at the same time. At this point Mario will be swimming with the shell inside him, propelling him forwards indefinitely. Mario's range of moves are no longer bound by the typical restrictions of a Koopa Shell; instead a different set of interactions will end the ride on top of what would break a shell: | |||
*Attempting to walk, use a cannon, or get lifted by wind | |||
*Receiving knockback, being burned, getting grabbed, or twirling | |||
When attempting the glitch with a shell [[#Cloning|clone,]] Mario will not be propelled nor have a shell attached to him. Instead only the music will change and the shell clone can be reused. If Mario goes through a warp, the music will stop playing and the shell will be forever intangible.<ref>[https://www.youtube.com/watch?v=2xH7CN-ixzg YouTube video of Precipitate Plastron glitch]</ref> | |||
=== | ===Misplaced Coins oversights=== | ||
This | Various coins throughout the available courses are misplaced such that they float inside the ground and/or despawn instantly: | ||
*In [[Snowman's Land]], there is a single coin that was placed inside the mountain, just below the wooden slope. This coin can be collected if Mario clips into the mountain. | |||
*The [[#Mystery Goomba|Mystery Goomba]] of [[Bowser in the Sky]] cannot be defeated due to being spawned on the death barrier and promptly unloaded, making the coin it holds impossible to collect. | |||
*In the small version of [[Tiny-Huge Island]], there are two slopes in front of the [[Metal ball|iron ball]] spawner, where a line of three coins lay: the first coin sits at the beginning of the slope, the second coin is slightly inside the ground but sticks out enough to be collected when running over the slope, and the third coin floating completely inside the island. This third coin can be collected if the player clips into the island, then jumps out of the water towards the coin.<ref>[https://www.youtube.com/watch?v=1iwAbEXgpic YouTube video about the impossible coin]</ref> | |||
*In the large version of Tiny-Huge Island where iron balls roll, there is a line of four coins spawned by one [[Spawning Point]]. This particular spawning point is meant to create 5 coins that are set down to the nearest floor. The fifth coin is spawned halfway inside the ground due to the spawner being located beneath the slope, activating a failsafe which immediately unloads the coin. This makes the fifth coin impossible to collect. | |||
'''NOTE''': The reason for both of Tiny-Huge Island's misplaced coins is believed to be a change of the level geometry during development to make the iron balls roll away from the fenced area, without adjusting the positions of the coins and coin spawner to compensate.<ref>[https://www.youtube.com/watch?v=iPILIf7ru48 YouTube video about the impossible coin on THI's big island]</ref> | |||
=== | ===Mystery Goomba oversight=== | ||
This [[Goomba]] is a misplaced Goomba found in [[Bowser in the Sky]]. After climbing up the long Pole, Mario reaches a platform with a Goomba [[Spawning Point]] on it. Despite all Goomba spawning points spawning three Goombas, only two of them can be seen at this location. The reason for the missing Goomba is the spawner's placement, which causes the third Goomba to spawn off the platform, above a bottomless pit. Because Goombas always spawn at the closest available floor directly below them, this Goomba does not spawn in the air next to the platform; rather the Goomba spawns all the way down on the death barrier, where it gets deactivated only one frame later due to Mario being too far away. As such it can only be seen in that one moment.<ref>[https://www.youtube.com/watch?v=rEBMaAoKRvw The Mystery Goomba, YouTube video by Pannenkoek]</ref> | |||
Although it can be cloned, the Goomba cannot be properly defeated due to it being so far away from its spawning point - both the spawning point and the Goombas it spawns have their own activation radius, and Mario needs to be within both the Goomba's and the spawner's radius to activate the Goomba and be able to interact with it - because its own activation radius and the spawner's activation radius can never overlap.<ref>[https://www.youtube.com/watch?v=pdXyDLsemz8 YouTube video, explaining why the Goomba cannot be killed, by Pannenkoek2012]</ref> | |||
=== | ===Negative lives glitch*=== | ||
[[File:SM64 BitDW M25.png|thumb|[[Mario]] with "M25" lives]] | |||
'''NOTE''': This glitch only works in the Japanese version. | |||
When Mario reaches a total of 1,000 coins in a given course, his extra life total will change to "{{hover|M25|negative 25}}" due to a developer mistake. The intended process was to set the coin total back to 999 coins if the player ever exceeded this limit. On the original Japanese release however, the game will instead set Mario's total lives to 999 when he has exceeds the coin limit. Since the life counter is only 8 bits, this overflows and reads as -25 (the display shows '''M25''', with M representing a minus sign). Upon reaching -128 lives, the total underflows and then is set down to 100.<ref>[https://www.youtube.com/watch?v=Hcs2k2tq2vQu YouTube video of "Negative Lives"]</ref> The releases that followed corrected this issue. | |||
==== | ===Parallel Universes=== | ||
{{NIWA|Ukikipedia=Parallel Universe|title=Parallel Universe}} | |||
Parallel Universes (PUs for short) are phantom copies of a course's collision model that occur at regular intervals out of bounds. | |||
The game stores object positions as {{wp|Float (computing)|floating point numbers}}. Within the collision checks for floors and ceilings in the level geometry, it {{wp|Type conversion|casts}} the position values to signed 16-bit integers. This data type can only store values from −32768 to 32767, so the type conversion will {{wpInteger overflow|truncate}} larger float values into this range. Therefore, an object far out of bounds might detect collision where there is none, if the game finds collision at the truncated converted position. In practice, there seem to be invisible copies of the collision model that tile the coordinate space every 2<sup>16</sup> units.<ref>[https://tasvideos.org/GameResources/N64/SuperMario64.html TASVideos - explanation of Parallel Universes]</ref> This glitch does not apply to walls or objects with colliders, which both use floating point arithmetic. Some objects are exceptions, such as loading zones, namely paintings in the castle, or [[Crazed Crate]]s. It also does not apply to water, or copy the stage's visual model. | |||
The direction of a parallel universe influences how collision checks work, leading to different properties. Lateral PUs have floors and ceilings. Upward vertical PUs are filled with ceiling hitboxes. Downward vertical PUs have floor collisions that snap Mario back up to the lateral grid (a glitch called an overflow jump). | |||
Mario can reach a parallel universe if he has enough speed to clip through out of bounds. Because the game checks Mario's position in four increments per frame, Mario needs enough speed to travel between four parallel universes at a time. Thus, it is most convenient to sync up with PUs|Parallel Universes}} that are a multiple of four away in each direction. Other PUs are accessible through diagonal movement, or if a movement increment is canceled, which occurs when it would place Mario inside a ceiling or out of bounds. | |||
Attempting to bring the camera into a parallel universe will freeze the game on console, so it must be set to fixed mode first; this crash does not occur in emulator releases. Mario can bring held objects into parallel universes, or spawn certain objects there. Spawning a [[Power Star]] like a 100-Coin Star in a parallel universe softlocks the game.<ref>[https://www.youtube.com/watch?v=wC1PV9CYC4Y YouTube video showing the softlock from spawning a star in a PU]</ref> | |||
Larger floating point numbers are spaced more coarsely; the existence of Parallel Universes allows for glitches where this affects kinematics. When far enough from the origin, float-valued coordinates become so coarsely spread that it is difficult for objects to cross between them and change position. Some Parallel Universes are completely inaccessible because no floating point coordinate lies within them. | |||
=== | ===Permanently crushed glitch=== | ||
If Mario collects a Star while he is being crushed by an object, Mario will remain squished. In this state movement speed and jump height are decreased, and Mario will not die from slow quicksand. Additionally, pressing {{button|n64|B}} or {{button|n64|Z}} will do nothing.<ref>[https://www.youtube.com/watch?v=6jJKs3-U9KA YouTube video of Permanently Crushed glitch]</ref> | |||
=== | ===Spawning displacement glitch*=== | ||
In the original Japanese release, if Mario is standing on a moving platform (e.g. the falling blocks in [[Whomp's Fortress]]<ref>[https://www.youtube.com/watch?v=VX0WYWNvZlQ YouTube video of Pass Though the Ground glitch]</ref> or the rotating platform in [[Wet-Dry World]]) and suddenly loses contact, the platform will still influence Mario by shifting him once before he falls as normal. By dying or leaving a course through various means, this can be applied to Mario the moment he returns to the castle. Specifically, Mario will shift relative to the platform's position in the course he left, which is often far from where Mario is spawned in the castle. Due to this, rotational displacement is often larger than translational displacement.<ref>[https://www.youtube.com/watch?v=XL8TCplAaWc YouTube video from Pannenkoek2012 about Spawning Displacement]</ref> | |||
If the platform Mario stands on is replaced in memory by another object in the castle, or if the shift in position would place Mario out of bounds, the displacement does not occur. If Mario exits a course standing on an object that is replaced by a moving platform in the next area, Mario will be displaced by the new platform. | |||
'''NOTE''': Spawning displacement will affect the demos that play after getting a game over. This will desync the intended behavior of the demo. | |||
===Star dance in sky glitch=== | |||
[[File:SM64 100cglitch.png|thumb|Mario's victory dance on air]] | |||
There are several courses with large pits below the ground: [[Tiny-Huge Island]], [[Tick Tock Clock]], [[Whomp's Fortress]], [[Rainbow Ride]], [[Cool, Cool Mountain]], [[Tall, Tall Mountain]] and [[Hazy Maze Cave]]. If Mario collects a Star above on of these pits, he will land on the death barrier below and perform his victory dance. Once Mario is done however, the level kicks him out as intended. It is easiest to perform this trick using a 100-Coin Star, as the position of the Star is based where Mario collects his 100th coin. | |||
{{br}} | |||
=== | ===Suicidal Bowser glitch=== | ||
[[ | In any [[Bowser]] arena, Mario should lure or throw Bowser to the platform's edge. Then, Mario should be positioned on the same ledge far from Bowser so that he jumps towards Mario and narrowly misses the platform during his descent. As Bowser's fall was not a result of being thrown, he will not jump back to the platform, leaving Mario alone in the arena.<ref>[https://www.youtube.com/watch?v=S3xfYIu5ryg&feature=related YouTube video of "Suicidal Bowser"]</ref> | ||
=== | ===Water level manipulation glitch=== | ||
[[ | In courses with water, the surface naturally fluctuates slightly up and down from the median value. If the Mario moves through a loading zone in either [[Wet-Dry World]] or [[Dire, Dire Docks]], the game will set the current water level as the median value, even if it is slightly higher or lower. By repeating this process, the water can be can either be drained or fully flood the course with patience. Done to its extreme, the player can set the water level such that it reaches the upper or lower bounds in its height, allowing it to oscillate between fully submerging the levels and draining them.<ref>[https://www.youtube.com/watch?v=2NtxoAgNY80 YouTube video of Water Level Manipulation]</ref> | ||
=== | ===Falling Yoshi glitch=== | ||
Once Mario has collected 120 Stars, Yoshi can be found atop the flat section of the castle roof walking between four different spots: | |||
#Near the [[Cap Block]] | |||
#Near the central spire | |||
#Near the back-right corner of the castle roof | |||
#In the center of these three points | |||
Starting from ''position 1'': if Yoshi turns counterclockwise walking to ''position 3'', and then turns clockwise walking back towards ''position 1'', there is a chance that Yoshi will step onto the slanted part of the roof. This offset interrupts Yoshi's path, causing him to pass the aforementioned spots and continue walking forwards. If Yoshi falls off the roof and Mario is away from his normal location, he will respawn. If the player tries talking to Yoshi on a slanted section, Yoshi may be unable to properly jump to the waterfall, resulting in a softlock. Similarly, if Yoshi is spoken to while he is steps off the roof, he will be blocked by the castle wall, unable to reach the waterfall.<ref>[https://www.youtube.com/watch?v=3UDDdbXaGx0 YouTube video of Yoshi Falls Off the Roof Glitch]</ref> | |||
=== | ===Zero second finish glitch=== | ||
[[File: | [[File:Koopazeroglitch.png|thumb|Mario on the goal flag in zero seconds]] | ||
In [[Bob-omb Battlefield]], the player should don a [[Wing Cap]] and triple jump right in front of [[Koopa the Quick]], then land inside the nearby [[cannon]]. At this point Mario can fly up to the summit and reach the goal flag, using another cannon to gain more height as necessary. Koopa the Quick will offer to race Mario once he lands, and by accepting Mario will immediately win the race, with the timer at zero seconds. | |||
{{br}} | |||
Similarly in [[Tiny-Huge Island]], the player should defeat the Koopa so that a [[Green Shell]] rests on the beach. Then the player should triple jump right in front of Koopa the Quick, aiming to land on the shell. After riding to the goal flag and dismounting, Mario can immediately win the race. | |||
Despite the race starting, Koopa the Quick never begins running to the goal flag, so the [[Power Star]] cannot be obtained in this way. Instead an invisible and silent Koopa the Quick remains at the start.<ref>Pannenkoek2012 (July 27, 2013). [https://youtu.be/iuL46B5Uzec SM64 - Koopa the Quick Turns Invisible Glitch]. ''YouTube''. Retrieved October 22, 2023.</ref> | |||
[[ | |||
===Zombie Mario glitch=== | |||
[[File:SM64 Zombiedoor.png|thumb|120px|[[Mario]] entering a door with his [[Health Meter]] fully depleted]] | |||
When Mario's [[Power Meter]] is fully depleted, the game is supposed to initiate a death animation based on the current situation. For example, dying in water will show Mario drowning, and death by knockback will show Mario fail to stand back up. Most of these animations have a delay before they play out, which can be abused to postpone the death sequence. | |||
{{br}} | |||
For instance: If Mario takes small fall damage in front of a door, he is able to enter the door despite his condition and promptly loses a life at the other side. | |||
[[File:SM64 Zombiemarioglitch.png|thumb|[[Wing Mario]] flying with no sections of health remaining]] | |||
To stay dead for arbitrarily long, the player should abuse [[cannon]]s; the developers did not add a condition for Mario dying inside a cannon, so he is able to operate one without any health. By either taking knockback from a [[Bob-omb]] explosion<ref name="Several glitches using Bob-ombs"></ref> | |||
or taking fall damage at the edge of the cannon's opening such that Mario falls into it, he can enter a cannon while his Power Meter depletes. Wearing a [[Wing Cap]] allows for controlled flight while dead, though collecting any coins at this point will not restore Mario's health. Once Mario lands he will properly lose a life. This can be achieved in places such as [[Shifting Sand Land]]<ref>[https://www.youtube.com/watch?v=3K6OLQDiDtg YouTube video of Zombie Mario glitch]</ref> | |||
and the [[Castle Grounds]].<ref>[https://www.youtube.com/watch?v=r8wd08VCzbE YouTube video of the second way to perform the Zombie Mario glitch]</ref> | |||
{| | |||
|'''NOTES''': | |||
:*Attempting to grab a tree or pole with no health causes Mario to let go instantly. | |||
:*This issue was resolved in the [[Super Mario 64 DS|DS remake]] by allowing a given character to die while inside a cannon. | |||
|} | |||
{{br}} | |||
==Sequence breaks== | |||
'''NOTE''': These glitches allow Mario to access areas through unintended methods. | |||
===Cannonless wall blast glitch=== | |||
In [[Whomp's Fortress]], if Mario touches an exact spot on the wall which can be blasted away, he will do a ledge grab animation and collect the [[Star]] in the process. With the following setup this glitch can be achieved consistently: | |||
First the player should grab the wall so that Mario is between the log bridge and a [[Piranha Plant]], with his left hand touching the bridge. After climbing up, the player must backflip onto the bridge, turn the camera {{button|N64|CLeft}} left twice, and punch {{button|N64|B}} once. Then, the player has to walk {{button|N64|stickdown}} down, so that Mario walks to the bridge's ledge and grabs it. After pressing {{button|N64|CRight}} then {{button|N64|CLeft}} to reset the camera orientation, the player should climb up and immediately move {{button|N64|stickdown}} down again, so that Mario runs in an arc off the bridge, hitting the wall and collecting the Star.<ref>[https://www.youtube.com/watch?v=xoRHPj1eghA YouTube video of the Cannonless setup]</ref> | |||
=== | ===Climb the castle without 120 Stars glitch=== | ||
[[File:Climb The Castle.gif|thumb|130px|Mario jumping to the castle roof]] | |||
From the right side of [[Peach's Castle]], the player should perform a triple jump onto the grassy slope, moving slightly {{button|N64|stickleft}} to the left during the second jump. If done correctly, Mario will begin sliding and the player can quickly jump to grab the castle roof. | |||
{{br}} | |||
=== | ===Clip Behind Chain Chomp's Gate=== | ||
[[File:SM64_Behindgate.png|thumb|Mario behind the gate]] | |||
Using a [[#Bob-omb Glitches|bloated Bob-omb]] in [[Bob-omb Battlefield]], it is possible to get [[Behind Chain Chomp's Gate]] without freeing the [[Chain Chomp]]. After preparing the Bob-omb and navigating to the gated Star with the backwards momentum, the player should position Mario with his back against the gate. When throwing the Bob-omb from this position, Mario will clip through and can collect the Star. | |||
=== | ===Complete the game with 0 Stars glitch=== | ||
After starting a new file, the player should enter the castle and go to the stairs leading to the basement. A ledge near the ceiling can be grabbed to pull Mario into a space in the walls. There, multiple backwards long jumps can be performed to build up speed. Once Mario has enough speed, he can redirect his momentum first towards the castle's entrance door, then up the stairs in the main hall, and finally through the [[Big Star Door|8 Star Door]] to reach Bowser in the Dark World. After defeating Bowser and receiving the first key, the player must head to the basement. | |||
'''NOTE''': Alternatively the moat door skip can be used instead to access the basement without beating Bowser in the Dark World. | |||
Next the player should position Mario on a small set of stairs and face away from the 30 Star Door. Performing multiple Backwards Long Jumps here, Mario can clip through said door and past the entrance to [[Dire, Dire Docks]] with good positioning. After Bowser has been beaten in [[Bowser in the Fire Sea|the Fire Sea,]] the player must enter Dire, Dire Docks and pause to exit the course, as otherwise there is no way out of the room. Now that Mario has access to the second floor of the castle, Backwards Long Jumps can be performed to breach both the 50 Star Door and the endless staircase.<ref>https://www.youtube.com/watch?v=lk1w3hcQT7g</ref> | |||
=== | ===Lakitu skip=== | ||
[[File:Lakitu glitch.png|thumb|[[Lakitu Bros.|Lakitu]] without his cloud]] | |||
Before crossing the bridge to enter Peach's Castle for the first time, [[Lakitu Bros.|Lakitu]] will stop Mario and begin an introduction. If the player performs a [[Long Jump]] on the edge of the bridge, the trigger can be skipped and Lakitu remains resting in front of the castle's entrance door, without his cloud. Lakitu will be gone when returning to the [[Castle Grounds]]. | |||
{{br}} | |||
=== | ===Mario Through the Jet Stream without Metal Cap glitch=== | ||
In the [[Through the Jet Stream (Dire, Dire Docks)|Through the Jet Stream]] missions for [[Jolly Roger Bay]] or [[Through the Jet Stream (Dire, Dire Docks)|Dire, Dire Docks]], Mario should swim to a jet stream. While the force pushing Mario back is strong, it is possible to swim against the current. The player must repeatedly and rapidly press {{button|n64|A}} while swimming into the jet stream, and eventually Mario will reach the Star without a [[Metal Cap]].<ref>[https://www.youtube.com/watch?v=sLkPk5TzZls YouTube video of "Mario Through the Jet Stream without Metal Cap"]</ref> | |||
=== | ===MIPS clips=== | ||
[[File:SM64 MIPS clip.png|thumb|Mario inside the door after a successful clip and grabbing MIPS]] | |||
After grabbing [[MIPS]] for the first time, he can be grabbed again and carried around. When setting MIPS down, Mario moves forward a bit which can be exploited. | |||
{{br}} | |||
If the player walks into the corner of a door while holding MIPS and lets go, Mario can be pushed inside of the door. By crawling {{button|N64|Z}} and turning around, MIPS can be grabbed while staying inside the door, and Mario can simply clip out the other side. Performing this trick on the wooden door in the basement and the 30 Star Door, Mario will gain access to Dire, Dire Docks and Bowser in the Fire Sea with less than 30 Stars.<ref>[https://www.youtube.com/watch?v=tnlTs7iJedE YouTube video of "MIPS Glitch"]</ref> Mario can also use this glitch to enter to two different black rooms of death. | |||
If | |||
=== | ===Moat door skip=== | ||
It is possible to enter the door inside the castle's moat while it is still flooded, though the full setup is too precise to be reliably performed in real time. | |||
With 10 Stars or more, Mario can enter [[The Secret Under the Moat|Vanish Cap Under the Moat]] by speed flying with the [[Wing Cap]] found atop the castle.<ref>[https://www.youtube.com/watch?v=v5o_9XKmAfE YouTube video of Moat Door Skip (original video) by ''Sonicpacker'']</ref> With less Stars however, Mario can instead perform backwards long jumps starting from near the pond to jump down through the grate and enter the course. | |||
[[ | |||
Once inside, the player should stand on a wooden lift and build up immense speed by performing many Backwards Long Jumps against the wall until Mario drops off the elevator into the abyss. This places Mario in the moat water, which conserves the built-up speed. Now by sliding {{button|N64|Z}} on a slope outside the castle and navigating through [[#Parallel Universe|parallel universes]]<ref>[https://www.youtube.com/watch?v=JYgjmOwvTF0 Visualization of the PU movement by ''Pannenkoek2012'']</ref> with precise angles, it is possible to redirect Mario so he is right next to the moat door but not swimming.<ref>[https://pastebin.com/uH5GhHbp Description of the Moat Door Skip and its technical background]</ref> | |||
'''NOTE''': This grants access to the basement without needing to defeat [[Bowser in the Dark World]].<ref>[https://www.youtube.com/watch?v=iUt840BUOYA YouTube video of TAS Speedrun using the Moat Door Skip]</ref> | |||
[[ | |||
=== | ===Pillarless through the top of the pyramid glitch=== | ||
Using a bloated [[Bob-omb]], it is possible to enter the pyramid in [[Shifting Sand Land]] through the top without standing on the four pillars first. Grabbing the Bob-omb close to the level entrance at its largest possible size before it explodes gives Mario significant backwards momentum. From here the player should navigate up the sand dunes and dive while sliding to initiate the hands-free holding glitch. | |||
The sections of [[quicksand]] can be avoided with Ground Pounds so that Mario stays in the air for longer while being pushed. After passing over the fence and landing on the pyramid, the player has to rapidly press {{button|N64|A}} to scale the slope until Mario is around the same height as the Star [[Shining Atop the Pyramid]]. Performing another Ground Pound will clip Mario into the pyramid, entering it from above. | |||
<ref>[https://www.youtube.com/watch?v=2Lt-yARCNdQ YouTube video of the "Pillarless" glitch]</ref> | |||
=== | ===Underground lake shortcuts=== | ||
The cavern where [[Dorrie]] swims in Hazy Maze Cave can be reached without riding the elevator located after the rolling rocks area. | |||
====Elevator clip==== | |||
Between the rolling rocks section and the [[Red Coins]] area is an elevator. After stepping onto the elevator, the player should jump off and position Mario so he hugs the wall the elevator is connected to, then shimmy {{button|N64|stickright}} to the right. When the elevator descends, Mario gets pushed through the floor towards the island with the [[Swimming Beast in the Cavern]] Star. | |||
====Elevator room jump==== | |||
Again in the elevator room leading to the Red Coins, the player can go over the walls by performing several Wall Kicks at the top. Starting with a Side Somersault or a Triple Jump can make the process easier, but eventually Mario will reach the underground lake from above. | |||
====Triple Jump off the block==== | |||
First the player must reach the red mesh platform above the rolling rock pit, where a yellow [[! Block]] can be found. Performing a [[Triple Jump]] with the third jump landing on the ! Block gives Mario enough height to pass over the cave walls, where he can fall into the underground lake. | |||
== | ==Cartridge tilting glitches== | ||
{{damage|2}} | |||
Tilting a cartridge can interrupt part of the flow of data between the cartridge and the console, causing glitches that may not be possible with a stable connection. Cartridge tilting glitches are only possible on Nintendo 64 releases of ''Super Mario 64'', as [[Nintendo DS]] and [[Nintendo Switch]] Game Cards cannot be tilted. | |||
Effects of cartridge tilting on this game may include parts of Mario's body disappearing or rotating unusually, corrupted music and sound effects,<ref>[https://www.youtube.com/watch?v=XS11HnEB9T0 YouTube video of Cartridge-Tilting Mario 1]{{dead link}}</ref> corrupted textures, clipping through collision, blurry graphics, and freezing or crashing the game upon certain interactions.{{ref needed}} | |||
{{multiple image | |||
|align=right | |||
|direction=horizontal | |||
|footer=Mario lying sideways, on the ground (top) and during Wing Cap flight (bottom) | |||
|image1=SM64 Lying on the Floor Glitch 1.png | |||
|width1=150 | |||
= | |image2=SM64 Lying on the Floor Glitch 2.png | ||
There | |width2=150 | ||
}} | |||
There is a glitch to make Mario lie sideways without disconnecting the cartridge, which is a common graphical result of cartridge tilting. In the American and European versions of the game, the player must go to the roof of [[Peach's Castle]], get the Wing Cap, and go to the left of Princess Peach's image. Mario suddenly lies on the roof and briefly disappears after jumping. The glitch lasts until the console is turned off.{{ref needed}} | |||
{{br}} | |||
==References== | ==References== | ||
<references/> | <references/> | ||
{{Glitches}} | {{Glitches}} | ||
{{SM64}} | |||
[[Category:Glitches|Super Mario 64]] | [[Category:Glitches|Super Mario 64]] | ||
[[Category:Super Mario 64|*]] | [[Category:Super Mario 64|*]] | ||
Latest revision as of 13:44, April 21, 2024
This is a list of glitches in Super Mario 64. For glitches found exclusively in the remake, see List of Super Mario 64 DS glitches. Unless otherwise noted, all names are conjectural. Glitches marked with an asterisk (*) are fixed in the Shindō, PAL, North American, iQue Player, and Virtual Console releases.
Audio
Big Boo's Haunt music cut-out
In Big Boo's Haunt, the player should choose any mission other than Go on a Ghost Hunt, then defeat Big Boo in the Merry-Go-Round but ignore the Star. Instead the player needs to leave, collect a Vanish Cap and acquire 100 coins. After the Vanish Cap expires, the player should collect the 100-Coin Star. Now the background music does not play, though sound effects can still be heard, including ambient noises outside the mansion. Should the player wear the Vanish Cap again, the music restarts after the cap wears off.
Infinite cap music glitch
NOTE: This glitch does not work in the Japanese version.
After selecting the second mission in Bob-omb Battlefield, the player should talk to Koopa the Quick while wearing the Wing Cap. While racing him up the mountain, the player must use a small alcove to warp higher up the mountain; the Wing Cap will seemingly disappear, after which the player should reach the flag at the summit and wait for Koopa the Quick to arrive. After talking to Koopa the Quick, the Wing Cap background music plays endlessly. Alternatively, the player can talk to King Bob-omb while wearing the Wing Cap, and then quickly warp using the alcove near the summit, achieving the same effect.[1]
To end the glitch, the player can collect another Wing Cap and let it expire.
Japanese music cut-out*
In both Bowser in the Sky[2] and Shifting Sand Land's pyramid,[3] it is possible for the music to cut-out due to multiple glitches exclusive to the Japanese version of the game. While this glitch is in effect, any attempt to leave the course freezes the game. For Bowser in the Sky, just entering the stage the wrong way can cut-out the music. For the pyramid, collecting the fifth secret in an odd way sometimes cuts out the music.
Koopa Shell music glitch
If the player holds ![]() to crouch right as Mario touches a Koopa Shell, the music in the level will replay from the beginning as Mario dismounts immediately. Despite this, the shell remains and the glitch can be repeated.[4]
to crouch right as Mario touches a Koopa Shell, the music in the level will replay from the beginning as Mario dismounts immediately. Despite this, the shell remains and the glitch can be repeated.[4]
Koopa the Quick warp music glitch*
In Bob-omb Battlefield, if Mario travels through a warp after starting a race with Koopa the Quick, the "Slider" music is replaced with the "Super Mario 64 Main Theme". This glitch was fixed after the original Japanese release.
Loud Ukkiki glitch
In Tall, Tall Mountain, even if Mario is very far away from Ukkiki, the monkey can be heard as if they were right next to him.
Yahoo paused sound pitch glitch
If the game is paused just after Mario performs a Long Jump or Triple Jump, his voice can shift lower or higher in pitch than normal.
Camera
Below Mario in Bob-omb Battlefield glitch

While using the Lakitu camera mode, If the player performs Wall Kicks to jump from the foot of the white slope over the seesaw platform, the camera focuses Mario from below the floor.
In the walls of Dire, Dire Docks glitch
In the beginning area of Dire, Dire Docks, if the player swims into the wall above the tunnel leading to Bowser's Submarine, the camera moves out of bounds. Moving away from the wall returns the camera to a normal position.[5]
Invisible cannon glitch
After entering a cannon, if the player attempts to launch Mario as early as possible, the game gets confused. The viewfinder does not show up and the camera pans out of the cannon as if Mario was standing in that spot, revealing that both the cannon and Mario are invisible. The camera can be controlled and rotated around normally. This glitch ends when the cannon is fired.[6]
Star/death camera glitch
When Mario collects a Star or dies and the platform he stands on moves away, he will warp to the next surface below him, which is often the death barrier. This extreme change in height is too much for the camera to track, resulting in Mario being far below the camera. The spinning platform around the volcano in Lethal Lava Land, Donut Blocks, and being pushed off a Magic Carpet in Rainbow Ride are common places to accomplish this glitch.
Stuck behind door glitch

When Mario enters a door in the castle and then goes back through it quickly, the camera may briefly get stuck behind the door. This does not work on the doors in the main lobby.
Wing Cap camera glitch
If Mario lands on a slope on the same frame that he starts flying with the Wing Cap, the camera continues using the mode intended for flight. This can be achieved by Triple Jumping onto the fence past the first bridge in Bob-omb Battlefield, with precise timing. The camera follows Mario closely, and tries to stay behind him at a low angle. The ![]() buttons only move the camera temporarily.[7]
buttons only move the camera temporarily.[7]
The camera returns to intended behavior if:
- Mario receives knockback, is thrown, gets squished, or gets set on fire
- Mario initiates flight normally, rides a Koopa Shell, or leaves the course
- Mario enters water, a cannon, or a tornado
Freezes
Attacking an uninitialized Monty Mole freeze
Before popping out of holes to attack Mario, Monty Moles start out invisible and in predetermined locations. Only when Mario is within 1500 units of a hole will the Monty Moles be repositioned and behave as normally seen. Reaching a Monty mole in this uninitialized position and attacking it freezes the game.
- In Tall, Tall Mountain, the player can use a 100-Coin Star to reach the uninitialized Monty Mole at the bottom of a pit, and attack it before Mario is ejected from the course.[8]
- In Hazy Maze Cave, the player must take a route that involves Backwards Long Jumping through the mesh wall in front of the Navigating the Toxic Maze Star. After clipping through the wall, the player must go down the elevator, enter the maze, and take the first right turn to get to the plateau with a Blue Coin Block. The uninitialized Monty Mole sits in the poison gas in front of said plateau.[9]
Big Boo's Haunt freeze
There is a corner of Big Boo's Haunt that crashes the game when Mario touches it. This corner can be accessed by entering the rightmost door on the first floor.
After positioning Mario on the thin ledge located to the left of a bright window, the player should jump and move Mario ![]() slightly away from the ledge until he begins to fall. Now moving
slightly away from the ledge until he begins to fall. Now moving ![]() towards the wall and pressing
towards the wall and pressing ![]() to kick for some extra momentum, Mario should touch the wall and the game will freeze.[10]
to kick for some extra momentum, Mario should touch the wall and the game will freeze.[10]
Dead Mario softlock

In Bob-omb Battlefield, the player should use the Wing Cap to fly Mario above the floating island such that falling would result in Mario's death. If Mario Ground Pounds the yellow ! Block, upon landing he will die as the Star is released. At this point Mario cannot move, exit the course, or complete his death animation. Similarly, if Mario dies and collects a coin to summon the 100-Coin Star at the same time, the game will softlock.[11]
NOTE: Using the "Zombie Mario" glitch removes the need for precise positioning and timing.
Double Star softlock
If Mario collects a 100-Coin Star as he opens a Star block, this second Star may be released as Mario lands. Similar to the Dead Mario softlock, the overlapping animations of a Star dance and a Star being released confuse the game, resulting in a softlock.[12]
Freeze while entering Vanish Cap Under the Moat
When entering Vanish Cap Under the Moat, if the player tries to move the camera around in Lakitu Mode while the screen is black, the game may freeze.
NOTE: This glitch only applies to the North American version.
Hanging Mario freeze
If Mario is pushed backwards off a hangable ceiling before completing the grabbing animation, the game freezes. This can be accomplished using a bloated Bob-omb to push Mario backwards, or a crate placed in a way that can push Mario off.[13]
Long-distance Monty Mole defeat freeze
When a Monty Mole is defeated from too far away, the game cannot choose the next hole for the Monty Mole to appear from, as every hole is too far from Mario. This unexpected result causes the game to freeze. The player can defeat a Monty Mole from a sufficiently long distance by throwing a Bob-omb.[14]
According to Tyler Kehne,[15]
When a mole is KO'd, the game runs a function to determine which hole the mole should go to next. The function cycles through all the holes to see which ones are eligible candidates, and then selects one of those at random. But if none of the holes are eligible, the function returns null. Throwing the Bob-omb at the mole allows the mole to be KO'd at a distance, something the programmers hadn't accounted for. Thus, Mario is too far away from all the holes for any of them to be eligible, and so null is returned, causing the game crash. TL;DR Long range mole KO's crash the game.
Monty Mole rocks filling memory
Due to a developer oversight, the rocks thrown by Monty Moles do not disappear if thrown off the cliff of Tall, Tall Mountain. Once approximately 200 rocks accumulate, there is no more space available to load new objects, freezing the game. This is similar to how the game handles the teleportation clones of Mario's cap.
As stated by Scott B. (alias pannenkoek2012) on YouTube,[16]
... the game will eventually crash due to a continuously accumulating supply of pebbles. Pebbles deactivate when they are more than 4000 units away from Mario. Hence, a deactivated pebble won't hit the ground and unload, but instead just remain invisible and unmoving in midair. So by having Monty Moles continually throw pebbles off the edge, the pebbles will keep loading into object slots but never unload. Since the game only has 240 object slots, eventually all the slots become occupied and the game crashes.
NOTE: This glitch may not work on the Virtual Console release.
Graphics
Boo glitch


After collecting at least 12 Power Stars a large Boo appears in the hallway leading to the courtyard. The player should enter the Whomp's Fortress painting room and move to the far left side, then leave and head to the hallway. The Boo should be facing backwards, and the player must chase it out of the room.
Now the player must enter the basement and immediately return to the Boo, who is now facing forward. Performing the previous actions again will cause the Boo to seemingly disappear. However, the player either enters the door to the courtyard or manipulates the camera to see beyond the wall, the Boo can be seen floating behind the door.
Bubba death glitch
If Mario is using a Koopa Shell to surf on the water and gets eaten by a Bubba, the shell stays suspended in the air.[citation needed]
Doors and a cloud in empty space glitch


Certain doors in Peach's Castle are visible from other rooms when the camera shows the space beyond the walls. This can be achieved by standing near a wall and using the first-person camera mode ![]() to look through it. The doors appear to be in empty space because the rest of a room is not rendered while Mario is in another area.
to look through it. The doors appear to be in empty space because the rest of a room is not rendered while Mario is in another area.
- If Mario looks around in first-person view while standing on the left edge of the platform with the 70 Star Door, a door from the lower level is visible.
- When using first-person view from the outside wall of the spiral staircase to the second floor, the 50 and 70 Star Doors are visible.
- Another door can be seen when standing in the left edge next to the Whomp's Fortress painting.

Likewise, the reflection of Lakitu's cloud in the second-floor mirror room is always rendered. In several places, like the corners next to the room's door and the stairway to the second floor, Mario can enter first-person view to look through a wall and see the cloud.
Fly Guy size manipulation glitch
If Mario runs back and forth underneath the Fly Guy in Tall, Tall Mountain, it begins to shrink. This is a side effect of the Fly Guy changing size to signal that it is preparing to shoot a fireball. The Fly Guy's size affects the starting height of a Spin Jump off of it.
If the glitch is repeated, the value for the Fly Guy's size eventually becomes negative, causing it to render upside-down and inside-out. Mario cannot interact with the Fly Guy while it has a negative size.[17] Repeating the glitch for long enough will cause one of the base positions of the Fly Guy's model to exceed float values that properly convert into a 32-bit signed integer, resulting in a game crash.[18]
Frozen head glitch*

After defeating Bowser in the Dark World or Fire Sea, he drops a key. In the Japanese version, if the player runs to where the key will land, presses ![]() and looks somewhere, Mario keeps looking that way during the key collection cutscene.[19]
and looks somewhere, Mario keeps looking that way during the key collection cutscene.[19]
Ground Pound turn-around glitch
When Mario ground pounds out of a Side Somersault, he turns around instantly in midair.
Instant Tower of the Wing Cap transition glitch

When the Tower of the Wing Cap is unlocked, Mario has to stand right next to the sun carpet in the castle's main hall and look ![]() at the sun on the ceiling. Then, he has to leave the first-person view mode, quickly step onto the carpet, and press
at the sun on the ceiling. Then, he has to leave the first-person view mode, quickly step onto the carpet, and press ![]() again. Mario enters the Tower of the Wing Cap instantly while the camera is still zooming in, instead of framing the ceiling as intended.
again. Mario enters the Tower of the Wing Cap instantly while the camera is still zooming in, instead of framing the ceiling as intended.
Invisible Bowser glitch


Bowser can teleport when battled in the Fire Sea, during which he becomes invisible. If Mario grabs Bowser while he teleports, Bowser stays invisible until he teleports again or is thrown off of the platform. The invisible Bowser cannot hurt Mario on contact, but is still able to attack as usual.[20]
Mr. I hovering around Mario glitch
This glitch occurs in Lethal Lava Land only. The player has to get the Koopa Shell from the ! Block and set the camera to fixed mode, so that a Mr. I can be seen until Mario moves. Then, he has to defeat the Mr. I by circling around it, but due to it being offscreen now, its death animation cannot play. The defeated Mr. I's eyeball then hovers around Mario for a short amount of time and move in various ways.[21]
Pitch conservation glitch
When Mario is in a diving animation (normal diving, swimming, or flying), his angle is preserved in memory. This value is supposed to be reset between animations, but due to an oversight, sometimes it does not. For instance, if Mario exits the water while he was facing upwards and then performs a dive, the dive will start with the previous extreme angle as opposed to a normal dive. Despite this dramatic difference, the physics of the move are unchanged.[22]
If an extreme angle is preserved and Mario starts flying, he will immediately face the preserved angle which will influence his trajectory. Several actions reset the conserved angle, including grabbing a ledge, shooting from a cannon, changing areas, and jumping while facing a slope.
Power Meter glitch
When Mario dies in a course, the Power Meter is typically set to one wedge for the cutscene where he is ejected from the course and the meter refills. However, when Mario is ejected from Hazy Maze Cave, Rainbow Ride, Bowser in the Dark World, or Bowser in the Sky, there is a delay before the meter is set to one wedge, so when Mario returns to the castle the amount of wedges in the Power Meter briefly carries over from death.[citation needed]
Physics
NOTE: These glitches result from how Mario and/or other characters and objects interact with the world.
1-Up Mushroom circling Mario glitch

Mario can avoid a homing 1-Up Mushroom indefinitely by crouching. Despite its ability to move vertically, the mushroom instead attempts to reach Mario laterally, flying in circles above his head. This oversight was not fixed in the Nintendo DS remake.
Baby Penguin stuck in chimney glitch

In Cool, Cool Mountain, the player should pick up a Baby Penguin and bring it to the cabin at the summit. By letting go of the Penguin above the chimney, any attempt to reclaim the baby will result in Mario entering the slide area with the Big Penguin. Reloading the main area by either talking a bridge warp or exiting the cabin at the base of the slide will reset the baby Penguin's position.
Black room of death
A black room of death (BRoD for short) refers to the spaces behind doors in the Peach's Castle, which are only meant for Mario to walk into during the animation where he opens the door. Nonetheless, certain exploits allow Mario to reach these spaces. Once inside these spaces, attempting to open the door will put Mario in the corresponding BRoD at the other side. Depending on the collision around the "rooms" in each loaded area, he may or may not be able to escape.
| Location | Description |
|---|---|
| Castle entrance | One BRoD pair is accessible by falling through the castle roof. Mario can escape by jumping through the wall above the front doors inside the castle. |
| Lobby | Another BRoD can be accessed by performing the #Clip through wallssecond ledge clip. This room can be exited with backwards long jumps. |
| Basement | The third BRoD pair is accessible with a MIPS clip through the basement door. This room can be exited by performing backwards long jumps. |
| Basement | Similarly, clipping through the moat door with MIPS grants access to the fourth BRoD pair. |
| Courtyard | The fifth BRoD pair can be accessed if the player performs backwards long jumps to clip inside. |

Mario outside the castle
(BRoD #1)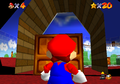
The other side
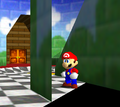
Mario under the stairs
(BRoD #2)
Mario over the basement door (BRoD #3)
The other side

Near the moat
(BRoD #4)¹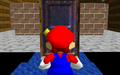
The other side
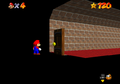
Mario over the Courtyard door
(BRoD #5)¹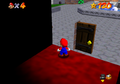
The other side (It is escapable from this side through the corners next to the door)


¹This BRoD is inescapable.
Climb slippery slopes

While facing a slippery slope, the player must rhythmically switch between moving ![]() towards the slope and holding the control stick
towards the slope and holding the control stick ![]() neutral. This process allows Mario to climb the slope. Similarly, this can be accomplished in the remake by moving
neutral. This process allows Mario to climb the slope. Similarly, this can be accomplished in the remake by moving ![]() in the given direction without pressing
in the given direction without pressing ![]() down.
down.
NOTE: This trick does not work on all slippery slopes. Additionally, the slope shown was changed to a wall in Super Mario 64 DS.

Alternatively, if the player runs ![]() up a slippery slope and kicks
up a slippery slope and kicks ![]() whenever Mario begins to slow down, he will scale the slope. This works in many areas, including the slope next to the basement door, the slope of the Toxic Maze in Hazy Maze Cave, Bowser's steep stair slopes, and the white slope in Bob-omb Battlefield.
whenever Mario begins to slow down, he will scale the slope. This works in many areas, including the slope next to the basement door, the slope of the Toxic Maze in Hazy Maze Cave, Bowser's steep stair slopes, and the white slope in Bob-omb Battlefield.
Clip through walls
There are various tricks the player can perform to clip Mario through walls depending on the situation:
| Ground Pound clipping : |
When initiating a ground pound, the game keeps Mario in place for a moment before sending him downwards. This moment can be exploited to clip through moving platforms including: |
|---|---|
|
| Ledge clipping : | There are certain walls in the game that Mario can clip into by grabbing onto specific parts of a ledge. These include: |
|---|---|
|

| Miscellaneous wall clipping : |
Some walls can be clipped through without much resistance. As such, the following examples do not require Backwards Long Jumps or similar techniques: |
|---|---|
With one exception, the game splits up each frame of movement into four "quarter frames"; for each quarter frame, the game checks for collisions by determining Mario's next position based on his velocity and seeing if it overlaps with anything. Notably the game does adjust for how fast Mario is going, so an exceptionally large speed will have large gaps between each position that is checked. These walls are typically not very wide, so with high enough speed Mario's position will never be inside the wall on a given quarter frame, effectively bypassing the wall.[29] |
Clip with objects
The following glitches involve Mario being pushed through solid geometry using either the push from an object or the backward force from throwing objects.
Bob-omb clip
Mario can be pushed through walls by jumping between the wall and a Bob-omb as it chases him.[30] Alternatively if Mario holds a bloated Bob-omb with his back to a wall or steep floor, throwing the Bob-omb can push Mario through. This can be used to clip Behind Chain Chomp's Gate and collect the Star without freeing the Chain Chomp.
Chuckya clip
When Mario is held by a Chuckya, the Chuckya will ignore any collision it may swing Mario into. By luring a Chuckya to a wall and then having it grab Mario, it can throw Mario through walls or even out of bounds. Alternatively, if Mario has his back against a wall and throws the Chuckya, the action will push Mario through the wall.
Crate clip

After placing a crate next to a wall, the player should ground pound between the box and the wall. This will cause Mario to clip through the wall. Alternatively, if Mario has his back against a wall and throws the crate, they will briefly interact which will push Mario through the wall.[31]
Penguin clips
In Cool, Cool Mountain, both the Mother Penguin and the Baby Penguins can be used to clip through walls:
By grabbing Tuxie after reuniting with her mother, she can be lured to stand next to the cabin at the foot of the mountain. Mario can then clip into the cabin by jumping in between the wall and the Mother Penguin.[32] Alternatively, Tuxie can be used to clip through the floor by guiding the Penguin to the peak of the mountain and jumping just past her. This glitch can be used to avoid collecting the coins above the chimney of the cabin.[33]
Coin through the platform glitch
Beneath the gray platform in Shifting Sand Land, Mario should run toward a Goomba and defeat it with either a dive, break dance, or slide kick. This should launch the Goomba away, and its coins may fly upwards and through the ceiling.
Death outside the boundaries glitch

The boundaries that surround each course and the castle, referred to as out of bounds, are designed to never let Mario through, and are more effective than typical walls; anywhere that no floor exists below a space is out of bounds. However, certain interactions do not account for this restriction, allowing Mario to breach the boundary. As a failsafe, the game will always unceremoniously deplete Mario's Power Meter the instant his position is out of bounds.
NOTE: The death barrier is defined using a floor, so the large pits below certain levels are not out of bounds.
One method involves Mario lifting himself from a ledge. If Mario reaches the rightside corner of the castle roof, he can hang from the ledge right against an invisible boundary. The player can pull Mario back up onto the roof, where Mario will climb up past the intended boundaries and lose a life. For unusual reasons, he also loses his cap.[11]
Alternatively the player can be pushed or placed out of bounds by Bob-ombs and Chuckyas respectively, or clip through using a crate. For example, if a player grabs a crate in Bob-omb Battlefield, Mario can crouch ![]() to place the box partially inside a slope at an edge of the level. Then by then performing a ground pound between the crate and the hill, Mario will temporarily clip under the slope despite the space being out of bounds. This is caused by the game using a stale reference for the ground that Mario was last in contact with, mistakenly assuming that the space Mario clips into is valid. However after being moved, the game updates this floor reference and Mario is killed from being out of bounds.
to place the box partially inside a slope at an edge of the level. Then by then performing a ground pound between the crate and the hill, Mario will temporarily clip under the slope despite the space being out of bounds. This is caused by the game using a stale reference for the ground that Mario was last in contact with, mistakenly assuming that the space Mario clips into is valid. However after being moved, the game updates this floor reference and Mario is killed from being out of bounds.
Death transfer glitch
When Mario loses all his health and leaves the area through certain means, his dying animation can occur in the new area by exploiting instances where his health is preserved between areas. This transfer of health results in the game attributing the death to a different cause than whatever action brought Mario's health down. These glitches can be performed in the DS remake.
Burn into drowning

By leaving Vanish Cap Under the Moat with no health remaining, Mario can drown in the castle moat immediately after spawning there. One strategy is to let a Keronpa Ball burn Mario while at two remaining wedges of health, then running off the ledge. Mario will be warped to the moat with no health, thus he drowns and loses a life.
Burn into Lethal Lava Land
The player can deplete the Power Meter in the basement by burning Mario on the torches. If Mario is burned by a torch and enters the Lethal Lava Land painting such that he has no wedges of health, then upon landing in the course he will die.[34]
Death exit

The player can deplete Mario's health to two wedges and enter the Tower of the Wing Cap. When the Wing Cap begins to wear out, they should aim to land on the edge of the central platform so Mario slides off while taking fall damage. Once Mario lands back in the castle lobby, he dies.
A more universal method involves taking small fall damage. While in a course, the player must take die from fall damage while not moving ![]() the control stick. As the health depletes, there is a brief moment when the player can pause the game and exit the course before the death animation plays.
the control stick. As the health depletes, there is a brief moment when the player can pause the game and exit the course before the death animation plays.
Drown Twice
After completing the mission Board Bowser's Sub, a large opening leading from the second area of Dire, Dire Docks to the lake outside of Peach's Castle will become accessible. If Mario drowns while drifting into this opening, he will drown a second time at the other side.[35]
Snufit into drowning
While Mario's health is low in the Cavern of the Metal Cap, the player must obtain a Metal Cap and have a Snufit chase Mario. When Long Jumping to the box Mario can be hit by the Snufit, causing him to fall into the waterfall and return to the castle moat. Mario will die as soon as he hits the lake.
Elevator escape glitch
In Hazy Maze Cave, it is possible to clip the moving arrow platform out of the red coin room by running it into a wall, then quickly alternating between the arrow facing towards the wall and an arrow facing perpendicularly. If done enough times, the platform will enter the wall and will move out of bounds.[36]
Floating Bob-omb glitch

In Mission 1 of Bob-omb Battlefield, there is a Bob-omb operating the water cannon along the mountain path. If Mario picks up this Bob-omb and ground pounds ![]() then the Bob-omb will be suspended in mid-air, as the programmers modified this particular Bob-omb's behavior to keep it in place.[37]
then the Bob-omb will be suspended in mid-air, as the programmers modified this particular Bob-omb's behavior to keep it in place.[37]
Gentle squish glitch

Inside the pyramid of Shifting Sand Land, if Mario is positioned at the edge of where the Spindel rolls, it will start to flatten Mario. However, being crushed will only do damage if Mario is squished a sufficient amount, so he will not lose any health. While gently squished the player cannot move until the Spindel rolls off of Mario. This effect can also be seen if Mario stands beneath elevator lifts in various levels.
Grinding glitch
If Mario is positioned at the edge of ground such that he is facing slightly away from the ledge, falling off and immediately attempting to move back towards the ledge can make Mario rapidly switch between falling and standing. In this state the camera will shake, and if the player presses ![]() Mario performs a Double Jump.
Mario performs a Double Jump.
This glitch is labeled grinding glitch by analogy to a type of skateboarding trick.
Ice cap loss glitch
In Snowman's Land, Mario will lose his cap when blown off the icy bridge by the Snowman's Big Head. If the player is unfortunate, the cap may be sent towards the ice box into the section with a Star inside. This Star will prevent Mario from retrieving his hat from above. If the game saves at this point, Mario will remain capless unless the player abuses speed exploits to clip through the side of the ice box.
Invisible walls glitch

Due to how the game handles the positions of surfaces, Mario can collide with a wall, ceiling, or out-of-bounds area in places where this behavior is not intended.[38] Despite these collisions being attributed to "invisible walls" the actual culprit is most often an exposed ceiling.[29]
| Example | Cause |
|---|---|
| The invisible boundaries that surround every area. | Out of bounds |
| In the first room of the castle on the top right side where the fence bends[39] | Needs new reference to confirm |
| On the right side of the first stairs in Bob-omb Battlefield.[40] | Exposed ceiling |
| In Bob-omb Battlefield, on top of the fence over the tunnel where there is a rectangular opening.[40] | Exposed ceiling |
| In Bob-omb Battlefield above and in the red arrow sign directly after the bridge and to the left of the tunnel.[41] | Needs new reference to confirm |
| Near the rotating log in Tall, Tall Mountain. | Unconfirmed |
| In the entrance of Bowser in the Dark World, very small spot on the stairs. | Exposed ceiling |
| In Bowser in the Dark World, above one of the corners of the fence on the curving path.[42] | Needs new reference to confirm |
| In Snowman's Land at a right angle to the edge of the snow triangle creating machine's path. Mario dies if he touches this wall.[43] | Needs new reference to confirm |
| Inside the volcano of Lethal Lava Land, in the middle of the downward flowing lava. | Unconfirmed |
| In Dire, Dire Docks where the sign is in the second area and the temporary boxes spawn.[44] | Needs new reference to confirm |
| Above the overhang at the beach in Tiny-Huge Island.[45] | Exposed ceiling |
| At the sides of the swinging pendulums in Tick Tock Clock.[46] | Exposed ceilings |
Overextended see-saw glitch
NOTE: The following trick does not apply to the rotating platforms in Big Boo's Haunt.
See-saw platforms will rotate based on the side Mario is standing on. Typically they will not rotate more than 90° as Mario will begin to slide off. However, this restriction can be bypassed if the player performs the first method of climbing slippery slopes, allowing Mario to continue tilting the platform. If the platform is rotated more than 260° from its resting position, it resets as soon as Mario stops standing on it.[47] Due to these types of platforms being offset from the pivoting axis, the whole platform will eventually be on the opposite side of Mario relative to the axis, making 270° the absolute limit.[48]
Segmented Pokey glitch
Pokeys are normally made of four connected segments and a head. If Mario knocks a segment off it will disappear and the head will drop down, but after some time all segments will regrow. If a Pokey travels into the stone structure in Shifting Sand Land, the Pokey can split into two pieces. Now the head does not move downward when Mario destroys segments.
Slide in place glitch
Within courses there are certain locations where Mario can get stuck in a sliding or diving position. For many spots this prevents the player from escaping once stuck; the option to exit the course through the pause menu is not available in this situation.
| Area | Description |
|---|---|
| Castle lobby | In the first room of the castle at the edge of the ceiling (where it is angled downward and inward).[49][50] |
| Bob-omb Battlefield | Mario can get stuck in the corner of most hills.[51] |
| Whomp's Fortress | Between the wall and the left breakable wall.[52] |
| Shifting Sand Land | Near Klepto and between two inward and downward facing planes.[53] |
| Hazy Maze Cave | Between the abandoned mine wire door and the land in front of the Purple Switch. Requires precision placement.[54] |
| Hazy Maze Cave | At the bottomless pit where balls fall.[55] |
| Bowser in the Fire Sea | Between the pole and the side of the suspending hexagon facing toward the start (requiring knockback). While climbing the pole, the player needs to press |
| Bowser in the Fire Sea | By diving towards the corner at where the green funnel and the last platform touch.[56] |
| Tall, Tall Mountain | Behind the log and on the waterfall.[57] |
| Snowman's Land | At the top of the giant Snowman head, when Mario is slowly walking towards the high sloped glaucous-colored wall.[58] |
| Rainbow Ride | On the back slope of the big house roof. This one does not work on the original Japanese version.[59] |
| Bowser in the Sky | At the vertical slope, with perfect movement, it is possible to get stuck in the corner of the slope.[54] |
Slide on dangerous surfaces glitch

If Mario slides off a slope while sitting or performs a slide kick, the initial bounce will allow him to skim the surface of quicksand, lava, and freezing water without harm.
Speed exploits
All of these glitches involve Mario being able to increase in velocity without limit, due to the lack of a speed cap on certain actions such as moving backwards and wall jumping. Mario can conserve this momentum into Wing Cap flight, abuse this speed to pass through walls, and traverse between parallel universes.
Backwards long jump

A long jump typically sends Mario forwards. However, if the player then holds the control stick ![]() back relative to Mario and continues to perform long jumps, Mario will begin moving backwards. If this is performed on a staircase, steep slope, riding up an elevator, or with some surface that holds Mario in place, he will land much sooner than on flat ground.
back relative to Mario and continues to perform long jumps, Mario will begin moving backwards. If this is performed on a staircase, steep slope, riding up an elevator, or with some surface that holds Mario in place, he will land much sooner than on flat ground.

When landing, the player can rapidly tap the ![]() button, causing Mario to zoom backwards at very high speeds.[60] This is most famously used to reach the top of the endless stairs in the Peach's Castle.[61] Normally when running up this staircase, the game repeatedly warps Mario back down to a lower section of the stairs to prevent access to Bowser in the Sky until 70 Stars are collected. However when the backwards long jump is repeated in quick succession, Mario can reach enough speed to bypass the trigger that creates the illusion of the endless stairs. This same principle allows Mario to breach walls.
button, causing Mario to zoom backwards at very high speeds.[60] This is most famously used to reach the top of the endless stairs in the Peach's Castle.[61] Normally when running up this staircase, the game repeatedly warps Mario back down to a lower section of the stairs to prevent access to Bowser in the Sky until 70 Stars are collected. However when the backwards long jump is repeated in quick succession, Mario can reach enough speed to bypass the trigger that creates the illusion of the endless stairs. This same principle allows Mario to breach walls.
This glitch is fixed in the Super Mario 64: Shindō Pak Taiō Version re-release, as well as subsequent releases based on this version (namely the iQue Player release and the version in Super Mario 3D All-Stars), as a limit is added to the speed Mario can achieve when he travels backwards. The glitch is also fixed in Super Mario 64 DS, in which attempting to perform it causes the camera to move behind Mario and makes him turn around. The glitch is not fixed in the Virtual Console or Nintendo 64 - Nintendo Switch Online releases.
This glitch is acknowledged in the "Super Mario 64 Question Mark Block" LEGO Super Mario set, as the "Perform the perfect jump" mission consists of the player replicating the glitch to obtain a Power Star.[62]
Speed wall kicking
When Mario contacts a wall in the air, there is a moment where he can perform a Wall Kick. Normally this will set his speed to a fixed amount, however if the player presses ![]() the instant Mario contacts the wall, he will push away from the wall before the game can limit his speed. Done consecutively this can be abused to accumulate forward speed, although the process is slower and more precise than performing than abusing Backwards Long Jumps.[63]
the instant Mario contacts the wall, he will push away from the wall before the game can limit his speed. Done consecutively this can be abused to accumulate forward speed, although the process is slower and more precise than performing than abusing Backwards Long Jumps.[63]
Speed walking
When standing on a slope and the edge of water, the backwards momentum Mario receives can build up. This can be abused to reach massive backwards speed if there is something to hold Mario in place during the process. Among these spots are:
- In the castle grounds next to the waterfall where the water and the wall touch on the left side.[64]
- In Whomp's Fortress the corner next to the cannon and the brick wall in the pool of water.[65]
Speed wind
In places including Tiny-Huge Island and Tall, Tall Mountain, when Mario is pushed upwards into a slope by wind, his speed steadily builds up.[66]
Stuck Skeeter glitch
If the water level in Wet-Dry World is lowered when a Skeeter is in between two platforms, it will be unable to escape, constantly banging into the sides of each wall.[67]
Stuck to lava glitches
It is possible for Mario to become stuck under objects while falling into lava, preventing him from bouncing away. Getting burnt by lava does not give Mario temporary invulnerability unlike running into an enemy, so in these situations he rapidly screams and dies near-instantly.
NOTE: If the player runs through a Spinning Heart before burning Mario, he can stay in contact with the lava for longer.
Platform crush glitch

In the Fire Sea, there is a section with the two platforms shifting across the lava. The player should jump into the lava when the platform is moving towards Mario so he moves to be under the base of the platform. If timed correctly, the platform crushes Mario while he is standing on lava, causing massive damage. Alternatively, if Mario landed very close to the platform, Mario is instead gently squished.
Rolling log in Lethal Lava Land glitch

The player must grab a Green Shell in Lethal Lava Land, and head to the log near the caged area. After jumping onto the log to make it move, they should charge at the log as it rolls towards Mario. Upon contact, Mario loses the Green Shell and the log crushes him while he is repeatedly burnt by the lava, causing a near-instant death.
Tilting lava platforms glitch

In either Lethal Lava Land or Bowser in the Fire Sea, the player should dive underneath one of the tilting pyramid platforms that float above the lava. If positioned correctly, Mario will be stuck to the bottom of the platform due to the ceiling, and so he rapidly gets burned and his Health Meter drains almost immediately.
Unreachable 100-Coin Star glitch

Once Mario collects the 100th coin in a course, the 100-Coin Star will spawn a set distance above the player with no exceptions. If the 100 coins milestone is achieved close to a ceiling, the Star will be placed inside the ceiling where Mario cannot collect it. This oversight is commonly seen by collecting a Red Coin atop a bookshelf in Big Boo's Haunt and the highest Red Coin in Dire, Dire Docks, though it is possible to collect a coin from a defeated enemy and achieve the same result.
Wing cap momentum memory glitch
When Mario touches the ground after a Wing Cap the game does not reset the variables affecting the direction Mario was turning towards. This means that if the player holds ![]() or
or ![]() on the Control stick just before Mario touches the ground and then performs a Triple Jump to fly again, Mario suddenly jerks towards said direction.
on the Control stick just before Mario touches the ground and then performs a Triple Jump to fly again, Mario suddenly jerks towards said direction.
Scripting
It has been requested that more images be uploaded for this section. Remove this notice only after the additional image(s) have been added. Reason: Illustrate all applicable glitches in this section (GIFs may be needed here)
NOTE: These glitches abuse interactions that cause objects or displayed information to perform unintended behaviors.
Beached Bubba glitch
Although Bubba cannot be defeated by conventional means, there is a way to beach the hungry fish. In Tiny-Huge Island, Mario should lure the Bubba to the rocky edge of the shoreline. If Bubba lunges out of the water and lands on the rocky surface, it will begin drifting across the island while facing downwards. Bubba will stop at walls and will still attempt to chomp at Mario in this state, albeit without being able to chase him. If Bubba falls off of the level, the fish can be seen resting on the death barrier.[68]
Bowser momentum glitch


During any Bowser battle, the player must first grab Bowser's tail and throw him off the edge. When Bowser jumps back, intercept him before he lands, grabbing his tail again, and throw him into a bomb. Rather than being blasted back onto the platform, Bowser will be sent flying off the edge of the stage.[20]
Because Bowser fell off during the hit, he will eventually jump back to the center of the stage and the battle will progress as if he was never injured.
Broken big crate glitch
If the player attempts to destroy a Purple Switch crate as it disappears, it will instead break as the Purple Switch is pressed again.[13]
Broken bookshelf glitch
During the mission "Secret of the Haunted Books" of Big Boo's Haunt, it is intended that Mario approach a bookcase and hit three of the books in a particular sequence, opening a path to the Star.
Once a book is hit, it will stay inserted unless the player does not apply the correct sequence or he exits the room. Due to an oversight however, Mario's progress in the sequence is remembered. This means that Mario can hit two of the books in the correct order, leave the room, and come back to hit the third book, which should play a jingle. If Mario now hits another book before the bookshelf opens up the game will be confused, as Mario has now both inputted the correct and incorrect code. The bookshelf will not move yet the books will not pop out to let the player try again.[69]
Cap duplication glitch
While Mario's cap is resting on the ground, if the player uses a warp and returns, a duplicate cap will be created in the same spot the original cap fell. This can be performed repeatedly to create a new cap on every warp, and a duplicated cap will adopt Mario's facing angle from the moment it was created.[70]
Cap in hand glitch

If the player strikes a Cap Block and lets it respawn to hit it again, two caps will briefly be collectable. If Mario picks up the first cap before it disappears and the second cap lands on him before he finishes, Mario will hold the special cap in his hands while still gaining the new attributes.
Alternatively the player can perform the glitch to have multiple hats in the same spot. Attempting to pick up the hats will cause Mario to put them on one at a time. When Mario picks up the second, the cap on his head will disappear and Mario will keep holding the second cap in his hand rather than placing it on his head.
There are several aspects that are affected by performing this trick:
- In this state Mario's hat cannot be stolen or blown off his head, though damage is still increased due to Mario not wearing the cap.
- Talking to a Bob-omb Buddy will cause Mario to correctly put on the cap.
- If the player used Klepto, then reentering Shifting Sand Land will show the hat still in his talons.
- Objects Mario picks up will no longer be rendered in his hands, allowing him to throw objects remotely.
- Saving and reloading the game, Mario will be without his cap.[71]
Cloning glitch


Mario and held objects are intended to have a doubly linked relationship: Mario's data structure references the held object's slot in memory, and the held object stays loaded but hidden (the graphic in Mario's hands is not the actual object) until he drops it. However, if an object unloads in the time it takes to process that Mario has grabbed it, Mario will hold a reference to the now-vacant slot that it occupied. This can be done in various ways, including grabbing a crate as it unloads or breaks, or a Bob-omb as it explodes.[72] Another object can then load into the empty slot while unaware that Mario is holding it, and regardless of whether it was programmed to be held.
The player can strategically load and unload objects to manipulate which vacant slot index is held, and what object takes that slot. Because the newly loaded object appears to be rendered both in the world and in Mario's hands, this glitch is commonly referred to as cloning. Nearly any object can be cloned, but it must load in after Mario performs the setup, so he cannot, for instance, clone himself.
Once dropped, clones of normally unholdable objects do not process scripting events properly. For example, many coins are spawned in sets, where a spawner object tracks which coins in the set have been collected. If one of these coins is cloned, it cannot pass an event to its spawner to flag itself as collected. Upon reloading the spawner, that coin respawns and can be collected a second time. Another consequence of the broken event processing is that Mario can only interact with such clones once. Clones of enemies that were not intended to be held can collide with Mario once before becoming largely unresponsive. Cloned platforms do not collide with Mario.
Clones also cannot unload unless Mario passes through a loading zone or exits the stage, so repeated cloning can fill up all 240 memory slots that the game allocates for objects. This causes the game to enter an infinite loop that is functionally equivalent to a crash.
Coin counter rollover
If Mario collects more than 255 coins in a course, it will save a number less than or equal to 255 as the coin count record. For example, collecting a Star while the coin count is at 999 will record a coin count of 231 coins. The reason this happens is that the record's coin counter only saves the first byte of the level's coin data (which is stored in two bytes). The coin counter effectively rolls over while saving. If Mario collected 256 coins (or a number multiple of it, such as 512, and 768) in a level, it would be stored as 0.[73]
NOTE: The maximum number of coins that can be collected while in a level is 999; collecting more does not affect the coin counter, except on the original Japanese release.
Delayed dialogue glitch
Certain text boxes will automatically open when Mario is standing in proximity to Koopa the Quick, the Big Penguin, et al. These textboxes can be delayed to initiate the conversation from further away than intended. By performing a Triple Jump with one of the jumps being in the range of the speaker, the game will not begin the conversation until Mario lands for a long enough moment. If Mario wears a Wing Cap he can fly an arbitrary distance from the speaker, which can be exploited to beat Koopa the Quick in zero seconds.
Disappearing Fly Guy glitch
In Snowman's Land, if Mario stands near a specific tree then a Fly Guy will fly towards the freezing water and will mysteriously die. It is believed that the freezing water physically extends beyond what is seen.[74]
Drowning Goomba glitch
At the foot of Tall, Tall Mountain there is a trio of Goombas. The one closest to the water often gets stuck on unstable ground in the river. While in the water it will be fine, however if the Goomba touches the ground beneath the water it will die.
Enemy-specific exploits
| Enemy | Exploits |
|---|---|
 Bob-omb |
If the player grabs a Bob-omb while it prepares to explode, the Bob-omb will stay bloated and the explosion is canceled. This can be achieved by tossing one and catching it just as it hits the ground.[75] The later the Bob-omb is grabbed, the larger it will be; very bloated Bob-ombs will constantly intersect with Mario, providing constant backwards momentum until detonation.
In Bob-omb Battlefield, the player should open the gate beneath the rocky arch. Now if Mario grabs a Bob-omb with a dive and bonks against the edge of the bars, the Bob-omb will jitter back and forth for a while before eventually popping out of the bars.[30]
Mario should grab any Bob-omb on Tall, Tall Mountain and stand at a ledge. By dropping or throwing the Bob-omb off, it will not respawn unless Mario exits the level. Sometimes the Bob-ombs will wander off the mountainside automatically, with the same result. |
  Bully |
If a Bully rams Mario into the corner of two walls, it may repeatedly strike Mario where escaping requires jumping away during an unreasonably small window of time.[76] This issue was addressed in the DS remake; if a Bully rams into Mario it now pauses between strikes.
In Snowman's Land, it is possible to push the Chill Bully off of the ice platform without it landing in freezing water using a Koopa Shell. This Bully will sink into the ground in various places, particularly when interacting with slopes, stepping onto low-elevation ground, or going too far from the platform. Once the Chill Bully sinks, it releases a Star as expected.[77]
If Mario collides with a Bully as it boils in lava, its death will be interrupted and the Bully will stay partially submerged. Additionally, the Bully will awkwardly cling to Mario if he is riding a Koopa Shell. This also applies to the Chill Bully drowning in freezing water, though it still disappears and releases a Star.[78] |
 Chuckya |
Normally Chuckya is unable to willingly move off an edge. However, a Chuckya can become airborne while traveling down a steep enough slope, and being in the air removes this restriction. This can be abused in Bowser in the Sky after Mario performs a specific set of actions to manipulate the Chuckya from below until it reaches a nearby slope, allowing the Chuckya to fall down to Mario.[79]
A thrown Chuckya will explode on impact. If it manages to grab Mario right when this happens, Mario will be stuck in midair and the player is softlocked. Similarly, if Chuckya is dropped into a bottomless pit and Mario gets grabbed during the fall, Chuckya despawns and Mario flails in place.
If Mario holds a Chuckya clone and gets grabbed by the real Chuckya, Mario will be forced to drop the clone. This causes the real Chuckya to be thrown and explode on the ground, leaving Mario flailing in the air. This can also be achieved with a Heave-Ho.
After performing the Portable Chuckya glitch to position Chuckya underwater, Mario should get grabbed. Normally Mario would be unable to move until being thrown, however the water takes priority and he is able to swim around while being invisible. If Mario now grabs Chuckya, he stays invisible while a copy of him holding Chuckya remains in the water. The game tracks Mario using two different positions: his struct position which is controlled by the player and used for calculations, and his object position which is where Mario is seen. When grabbed by a Chuckya, Mario's struct detaches from the Mario seen in Chuckya's grasp. Grabbing Chuckya interrupts the process, so Mario remains invisible.[80] NOTE: Jumping on a slope near the Chuckya ends the glitch and turn Mario visible again. Attempting to go out of bounds will reposition Mario at his object position and end the glitch. |
 Heave-Ho |
If the player uses a cloned Crystal Tap to set the water level so that it is at the exact same level as one of the surfaces with a Heave-Ho, the water level will repeatedly rise above said surface due to its natural oscillation. Thus the Heave-Ho repeatedly appears and disappears in tandem with the water.
In Wet-Dry World if Mario clips behind the pushable block intended to be pushed into the wall, which can be achieved by clipping with Chuckya, the block can instead push the block out of the wall. By luring the Heave-Ho into the hole and squeezing it against the wall with the block, the player can push the Heave-Ho out of bounds, where it will fall to the death barrier and then respawn on the surface of water.
Typically Heave-Hos disappear when water submerges their platform and reappear once the water is gone. However, if Mario is near a respawning Heave-Ho while the water level drops, the Heave-Ho sticks to the water's surface and sinks through the floor. The Heave-Ho will be driving on the surface of water, comparable to Skeeters. Raising the water level above the platform will correct the glitch.[81]
If Mario holds a Heave-Ho clone and gets grabbed by the real Heave-Ho, Mario will be forced to drop the clone. The real Heave-Ho is then dropped, leaving Mario flailing on the ground in a softlock. This can also be achieved with a Chuckya. |
 Scuttle Bug |
It is possible to raise a Scuttle Bug arbitrarily high, even into vertical Parallel Universes. This abuses two properties:
First the player should transport a Scuttle Bug to a new position, where its activation radius can be entered from a adjacent room. When the player exits the room this Scuttle Bug will be deactivated. In this state, a Scuttle Bug will turn to face towards its home location unless Mario is close enough, in which case it will turns towards Mario and attempt to lunge. By standing close enough to the door so that the room becomes active, the Scuttle Bug can now continue its attack. If Mario moves away to deactivate the room while the Scuttle Bug is at the peak of its jump, it ends up suspended in midair and the lunge is cut short. This process can be repeated despite the Scuttle Bug being off the ground.
Each Scuttle Bug has a home location to patrol around, and if Mario gets close then the Scuttle Bug will try to attack him. However unlike most enemies, the Scuttle Bug's home location can be changed, as every time a Scuttle Bug hits Mario the game sets a new home at that position. By strategically luring a Scuttle Bug away from its home and letting it lunge into Mario repeatedly, Mario can effectively transport the bug. Note that Scuttle bugs are unable to leave their native rooms, instead getting stuck in the door. |

Falling Chain Chomp glitch
In Bob-omb Battlefield, if Mario frees the Chain Chomp from its post right as it lunges, its momentum will influence the Chain Chomp's trajectory and it may go over the fence as it hops around. This offset will cause the sequence to look very strange, as the Chain Chomp hits the wall at the bottom when attempting to break the cage that holds the Star.[82]
Floor property inheritance glitch
When Mario is standing on the edge of a surface with another floor below him, the game may incorrectly apply the properties of that lower floor to where Mario stands. For instance, Mario can sink into a Tox Box because of the quicksand directly below,[83] or slide back as if the floor is steep.[84]
Frozen environment glitch
These glitches cause the game to maintain a surreal state where most objects either are unloaded or do not update when interacted with.
|
A similar glitch is possible in New Super Mario Bros.
Mario's magic monkey*
At the section of Tall, Tall Mountain with a log, the player should dive at Ukkiki such that Mario lands in the water, swimming with Ukkiki in his hands. Note that Ukkiki has not spoken at this point, since the game waits for Mario to be standing on the ground. Sliding off of the geometry in the water and bouncing on the ground will allow the player to Ground Pound ![]() which drops the monkey without ever conversing. Mario is now in the surreal world of frozen time and unloaded objects.[85] Once Mario retrieves Ukkiki and properly begins the conversation, the world will resume; coins released from various events will spawn, and enemies return to intended behavior.[86]
which drops the monkey without ever conversing. Mario is now in the surreal world of frozen time and unloaded objects.[85] Once Mario retrieves Ukkiki and properly begins the conversation, the world will resume; coins released from various events will spawn, and enemies return to intended behavior.[86]
In releases beyond the original Japanese version, Ukkiki's conversation will begin as soon as Mario is touching the ground for even a moment, making the last step of the setup impossible. Additionally, it is not possible to drop Ukkiki in midair, as pressing the ![]() button now does nothing in this situation.
button now does nothing in this situation.
Time-freezing Cap Switch glitch*
When Mario has just stomped on a Cap Switch, the game goes into a frozen state until the text box is closed. Similarly to the delayed dialogue exploit, if Mario jumps or slides off right when pressing the switch, the game will wait until Mario is next standing on the ground to initiate the text box. In this moment, Stars do not disappear when collected. The glitch ends when the text box appears or Mario exits the course.[87]
Hands-free holding glitch
Normally Mario's movement is restricted while holding an object. However, this can be circumvented with the following interactions:
- Grabbing an object with a dive and landing on a downward slope
- Holding an object and being pushed off a ledge
- Holding an object and soft bonking against a ceiling (e.g. the bottom edges of ! Blocks)
In this state the object is being held but Mario isn't occupied with physically holding it, hence the term "hands free". However, While Mario has his hands free, the game tries very hard to drop the object at this point; various actions cancel the glitch ranging from most ground movement and actions against walls, to interacting with poles, cannons, sources of damage, wind, shells or the owl, to being tosses, carried or blown away. Thus, Mario must be kept occupied constantly.
Despite the instability of this state, Mario can still punch, kick, jump, hang from ceilings, and fly without dropping the item. The player can turn Mario by butt-sliding down slopes or using rotating platforms. Regrabbing the object can be achieved by diving, entering water, trying to pick up something else, initiating a conversation, or a summoning a Star.[88]
Hands-free teleport glitch
While Mario's carrying an object with his hands free, the player should use a warp. Once on the other side, there are various effects[89] depending on what object was taken through:
NOTE: Clones will vanish upon warping, and the source of the clone will be unaffected.
| Object | Warp Result | Object | Warp Result |
|---|---|---|---|
 Crate |
The crate disappears on the other side, and will never respawn even after 30 seconds of inactivity. This is because the game still thinks the crate is being held, so the timer allowing it to despawn is still deactivated. |  Crazed Crate |
The Crazed Crate will be stuck to Mario's position in both an invisible and intangible state, essentially disappearing. |
.png) Baby Penguin |
The Penguin will disappear on the other side, however the Mother Penguin will respond as if Mario is still carrying one. Despite this, Mario is unable to put down the Penguin, so bringing Tuxie in this manner will not grant Mario a Star. |  Ukkiki |
The monkey will disappear on the other side, however at the summit of Tall, Tall Mountain, Ukkiki will ask Mario to be freed. Regardless of which option is chosen, Mario is unable to put down the monkey, and this text can be triggered repeatedly. |
Chuckya |
The Chuckya will be sent back to where it was initially grabbed both invisible and intangible. Since it was never defeated it can be respawned by crossing through a loading zone. |  King Bob-omb |
King Bob-omb will be sent back to where he was initially grabbed, however he will be both invisible and intangible. |
Bob-omb |
The Bob-omb disappears on the other side, and will stick to the front of Mario if he approaches the warp but remains invisible. Bob-ombs are kept tangible while held in order to produce smoke, so diving or grabbing will put the Bob-omb back in Mario's hands. It will also destroy other Bob-bombs on contact and push Goombas around. If the Bob-omb was bloated when warping, Mario will be constantly pushed backwards.
NOTE: Kicking the Bob-omb before or after the glitch will cause the previous interactions to no longer occur. | ||
Heavy object carry glitch
There are certain enemies such as Chuckyas and King Bob-omb which are very heavy, thus Mario will lean back, cannot jump, and walks slowly while he carries them. However, if the heavy enemy and Mario stand positioned close to a ledge, the player can punch ![]() such that Mario falls off the ledge immediately. Because Mario is airborne he can perform a dive
such that Mario falls off the ledge immediately. Because Mario is airborne he can perform a dive ![]() and grab the heavy enemy. Normally a dive cannot be used to grab heavy objects, however canceling the punch and quickly diving tricks the game since Mario satisfied the punching check and was in a grabbing state. Because dives are not meant to be used in this way, Mario defaults to holding the object as normal.[90]
and grab the heavy enemy. Normally a dive cannot be used to grab heavy objects, however canceling the punch and quickly diving tricks the game since Mario satisfied the punching check and was in a grabbing state. Because dives are not meant to be used in this way, Mario defaults to holding the object as normal.[90]
Alternatively in Wet-Dry World, Mario should throw a Chuckya off a ledge and then get caught by it in midair before it touches the ground. This will safely transport it to a lower elevation, and the player can now raise the water level using a Crystal Tap to submerge the Chuckya. If Mario grabs the Chuckya while underwater, he will be able to carry it as if it were a normal object., allowing him to jump high and run at normal speed.[91]
Held object's last position glitch

The held object's last position, often abbreviated to "HOLP", is a location the game tracks when Mario holds most objects. What Mario holds is simply a visual copy of the original object, so once Mario releases this copy from his grasp, the original object is set to a particular location relative to the HOLP and inherits Mario's orientation; if an object is dropped by Mario it is placed at the height of Mario's feet and at the lateral position of the HOLP with no velocity, and if Mario throws an object it will move to the HOLP while inheriting his speed.
The HOLP is a global value used between all courses and save files, and defaults to (0,0,0) before being used. When needed, the game will update this value to match the location of Mario's hands, however it will only update when the game needs to render an object in Mario's hands. As such the HOLP will not update when: Mario is not holding anything, Mario is invisible from knockback, Mario is not within view of the camera, or the object being held is not visible in the first place. Exploits such as the cap in hand glitch can be used to hold an object without updating the HOLP, allowing the player to remotely throw an object from wherever Mario last properly released an object. The only way to reset the HOLP is if the player resets or turns off the system.[92]
Infinite Coins glitches
Through various exploits it is possible to obtain an endless number of coins. However, the coin counter is limited to 999 coins maximum.[93]
Bowser's fire glitch
While battling Bowser, the fire he spews at Mario has a chance to drop coins. Through patience the player can collect these coins as these appear without limit.
Cloning
By cloning coins or their Spawning Points in courses with loading zones it is possible to obtain an infinite amount of coins; in courses without loading zones, the amount of coins which can be collected by cloning is limited by the amount of available object slots.
Disappearing crate glitch
In levels with platforms such as Blocks, pushable blocks or Blue Coin Blocks, Mario should place a crate atop one of these objects. If the player walks away, the platform used becomes intangible and the crate falls until the two overlap. Right as the crate would despawn from inactivity, Mario must return to make the platform tangible again, breaking the crate and releasing its three coins. The game does not realize the crate was broken, so it will simply respawn and the process can be repeated.
Money Bags duplication glitch
In Snowman's Land there are two Money Bags which disguise themselves as coins until Mario approaches them. If the player reapproaches a Money Bags just as it transforms back into a coin, it will duplicate into two Money Bags, one that transforms into a coin and another that hops away. This process can be repeated to collect an unlimited amount of coins.[94]
Piranha Flower death glitch
In the small version of Tiny-Huge Island there is an area with 5 Piranha Flowers, which normally go limp and drop coins when defeated. While a Piranha Flower is shrinking back into the ground however, the player should attack it at the last moment possible. The Piranha Flower will play a death sound as it sprouts back up, and defeating it now will drop 2 coins as it vanishes. The game is tricked into thinking the Piranha Flower has not yet been defeated, so if Mario uses the Shrinker Pipe and returns, the plant will respawn and the process can be repeated to obtain more coins.[95]
Instant movement glitches
Downward teleports
Some events and interactions expect Mario to stay grounded, and if he somehow becomes airborne the game will send Mario to the next available floor as a failsafe:
- Swimming into a ceiling such as the underside of the ship in Jolly Roger Bay, the game will move Mario out by sending him down until he no longer overlaps with said ceiling.[96]
- Jumping above a swinging pendulum while its ceilings are exposed.[46]
- Grabbing the tail of Bowser while it hangs off the edge of the arena will send Mario instantly to the death barrier below.[97]
- Being crushed while the platform Mario stands on moves out from under him.
- Being electrocuted by an Amp while performing a Ground Pound.
- Mario collects a Star while the platform he stands on moves out from under him.[98]

In Dire, Dire Docks, the player should collect the 100th coin such that the 100-Coin Star overlaps with the path of the poles near the submarine. When collecting this star will hanging from a pole, Mario will suddenly drop to the bottom of the lake and celebrate as if he were standing on land.

On Cool, Cool Mountain, if the player heads to the top of the wooden lift and performs a Long Jump towards the Bob-omb Buddy's island, landing at the very edge of the island will cause Mario to warp down. He appears to be stuck in snow yet also in the air, but he actually rests on the death barrier. Once Mario frees himself, he loses a life and is ejected from the painting.
Upward teleports
Some events and interactions expect Mario to be at a specific height, and if he isn't the game will simply send Mario up this expected position:
- Beginning to swim will set Mario to the water's surface, even if he wasn't at that height when entering the water.
- Collecting a Star next to a ledge will briefly make Mario grab it before snapping him onto the floor above.
- Jumping into the edge of a ceiling directly below a hanging grate, the game will incorrectly assume Mario grabbed the grate and warp him up. This effect can be seen inside the mountain of Tiny-Huge Island by jumping into the ceiling above the exit, and in the Fire Sea by jumping into the edge of the pole base.[99]
Koopa Shell glitch
Normally riding a Koopa Shell into water will cause Mario to simply surf across the surface. However, a glitch can be performed in the large version of Tiny-Huge Island which circumvents this restriction.
After reaching the beach, Mario should knock the Koopa Troopa away such that it slides towards the water when trying to retrieve its shell. When the Koopa is slightly submerged, the player can knock it away again and land such that Mario mounts the shell and enters the water at the same time. At this point Mario will be swimming with the shell inside him, propelling him forwards indefinitely. Mario's range of moves are no longer bound by the typical restrictions of a Koopa Shell; instead a different set of interactions will end the ride on top of what would break a shell:
- Attempting to walk, use a cannon, or get lifted by wind
- Receiving knockback, being burned, getting grabbed, or twirling
When attempting the glitch with a shell clone, Mario will not be propelled nor have a shell attached to him. Instead only the music will change and the shell clone can be reused. If Mario goes through a warp, the music will stop playing and the shell will be forever intangible.[100]
Misplaced Coins oversights
Various coins throughout the available courses are misplaced such that they float inside the ground and/or despawn instantly:
- In Snowman's Land, there is a single coin that was placed inside the mountain, just below the wooden slope. This coin can be collected if Mario clips into the mountain.
- The Mystery Goomba of Bowser in the Sky cannot be defeated due to being spawned on the death barrier and promptly unloaded, making the coin it holds impossible to collect.
- In the small version of Tiny-Huge Island, there are two slopes in front of the iron ball spawner, where a line of three coins lay: the first coin sits at the beginning of the slope, the second coin is slightly inside the ground but sticks out enough to be collected when running over the slope, and the third coin floating completely inside the island. This third coin can be collected if the player clips into the island, then jumps out of the water towards the coin.[101]
- In the large version of Tiny-Huge Island where iron balls roll, there is a line of four coins spawned by one Spawning Point. This particular spawning point is meant to create 5 coins that are set down to the nearest floor. The fifth coin is spawned halfway inside the ground due to the spawner being located beneath the slope, activating a failsafe which immediately unloads the coin. This makes the fifth coin impossible to collect.
NOTE: The reason for both of Tiny-Huge Island's misplaced coins is believed to be a change of the level geometry during development to make the iron balls roll away from the fenced area, without adjusting the positions of the coins and coin spawner to compensate.[102]
Mystery Goomba oversight
This Goomba is a misplaced Goomba found in Bowser in the Sky. After climbing up the long Pole, Mario reaches a platform with a Goomba Spawning Point on it. Despite all Goomba spawning points spawning three Goombas, only two of them can be seen at this location. The reason for the missing Goomba is the spawner's placement, which causes the third Goomba to spawn off the platform, above a bottomless pit. Because Goombas always spawn at the closest available floor directly below them, this Goomba does not spawn in the air next to the platform; rather the Goomba spawns all the way down on the death barrier, where it gets deactivated only one frame later due to Mario being too far away. As such it can only be seen in that one moment.[103]
Although it can be cloned, the Goomba cannot be properly defeated due to it being so far away from its spawning point - both the spawning point and the Goombas it spawns have their own activation radius, and Mario needs to be within both the Goomba's and the spawner's radius to activate the Goomba and be able to interact with it - because its own activation radius and the spawner's activation radius can never overlap.[104]
Negative lives glitch*

NOTE: This glitch only works in the Japanese version.
When Mario reaches a total of 1,000 coins in a given course, his extra life total will change to "M25" due to a developer mistake. The intended process was to set the coin total back to 999 coins if the player ever exceeded this limit. On the original Japanese release however, the game will instead set Mario's total lives to 999 when he has exceeds the coin limit. Since the life counter is only 8 bits, this overflows and reads as -25 (the display shows M25, with M representing a minus sign). Upon reaching -128 lives, the total underflows and then is set down to 100.[105] The releases that followed corrected this issue.
Parallel Universes
Parallel Universes (PUs for short) are phantom copies of a course's collision model that occur at regular intervals out of bounds.
The game stores object positions as floating point numbers. Within the collision checks for floors and ceilings in the level geometry, it casts the position values to signed 16-bit integers. This data type can only store values from −32768 to 32767, so the type conversion will Template:WpInteger overflow larger float values into this range. Therefore, an object far out of bounds might detect collision where there is none, if the game finds collision at the truncated converted position. In practice, there seem to be invisible copies of the collision model that tile the coordinate space every 216 units.[106] This glitch does not apply to walls or objects with colliders, which both use floating point arithmetic. Some objects are exceptions, such as loading zones, namely paintings in the castle, or Crazed Crates. It also does not apply to water, or copy the stage's visual model.
The direction of a parallel universe influences how collision checks work, leading to different properties. Lateral PUs have floors and ceilings. Upward vertical PUs are filled with ceiling hitboxes. Downward vertical PUs have floor collisions that snap Mario back up to the lateral grid (a glitch called an overflow jump).
Mario can reach a parallel universe if he has enough speed to clip through out of bounds. Because the game checks Mario's position in four increments per frame, Mario needs enough speed to travel between four parallel universes at a time. Thus, it is most convenient to sync up with PUs|Parallel Universes}} that are a multiple of four away in each direction. Other PUs are accessible through diagonal movement, or if a movement increment is canceled, which occurs when it would place Mario inside a ceiling or out of bounds.
Attempting to bring the camera into a parallel universe will freeze the game on console, so it must be set to fixed mode first; this crash does not occur in emulator releases. Mario can bring held objects into parallel universes, or spawn certain objects there. Spawning a Power Star like a 100-Coin Star in a parallel universe softlocks the game.[107]
Larger floating point numbers are spaced more coarsely; the existence of Parallel Universes allows for glitches where this affects kinematics. When far enough from the origin, float-valued coordinates become so coarsely spread that it is difficult for objects to cross between them and change position. Some Parallel Universes are completely inaccessible because no floating point coordinate lies within them.
Permanently crushed glitch
If Mario collects a Star while he is being crushed by an object, Mario will remain squished. In this state movement speed and jump height are decreased, and Mario will not die from slow quicksand. Additionally, pressing ![]() or
or ![]() will do nothing.[108]
will do nothing.[108]
Spawning displacement glitch*
In the original Japanese release, if Mario is standing on a moving platform (e.g. the falling blocks in Whomp's Fortress[109] or the rotating platform in Wet-Dry World) and suddenly loses contact, the platform will still influence Mario by shifting him once before he falls as normal. By dying or leaving a course through various means, this can be applied to Mario the moment he returns to the castle. Specifically, Mario will shift relative to the platform's position in the course he left, which is often far from where Mario is spawned in the castle. Due to this, rotational displacement is often larger than translational displacement.[110]
If the platform Mario stands on is replaced in memory by another object in the castle, or if the shift in position would place Mario out of bounds, the displacement does not occur. If Mario exits a course standing on an object that is replaced by a moving platform in the next area, Mario will be displaced by the new platform.
NOTE: Spawning displacement will affect the demos that play after getting a game over. This will desync the intended behavior of the demo.
Star dance in sky glitch

There are several courses with large pits below the ground: Tiny-Huge Island, Tick Tock Clock, Whomp's Fortress, Rainbow Ride, Cool, Cool Mountain, Tall, Tall Mountain and Hazy Maze Cave. If Mario collects a Star above on of these pits, he will land on the death barrier below and perform his victory dance. Once Mario is done however, the level kicks him out as intended. It is easiest to perform this trick using a 100-Coin Star, as the position of the Star is based where Mario collects his 100th coin.
Suicidal Bowser glitch
In any Bowser arena, Mario should lure or throw Bowser to the platform's edge. Then, Mario should be positioned on the same ledge far from Bowser so that he jumps towards Mario and narrowly misses the platform during his descent. As Bowser's fall was not a result of being thrown, he will not jump back to the platform, leaving Mario alone in the arena.[111]
Water level manipulation glitch
In courses with water, the surface naturally fluctuates slightly up and down from the median value. If the Mario moves through a loading zone in either Wet-Dry World or Dire, Dire Docks, the game will set the current water level as the median value, even if it is slightly higher or lower. By repeating this process, the water can be can either be drained or fully flood the course with patience. Done to its extreme, the player can set the water level such that it reaches the upper or lower bounds in its height, allowing it to oscillate between fully submerging the levels and draining them.[112]
Falling Yoshi glitch
Once Mario has collected 120 Stars, Yoshi can be found atop the flat section of the castle roof walking between four different spots:
- Near the Cap Block
- Near the central spire
- Near the back-right corner of the castle roof
- In the center of these three points
Starting from position 1: if Yoshi turns counterclockwise walking to position 3, and then turns clockwise walking back towards position 1, there is a chance that Yoshi will step onto the slanted part of the roof. This offset interrupts Yoshi's path, causing him to pass the aforementioned spots and continue walking forwards. If Yoshi falls off the roof and Mario is away from his normal location, he will respawn. If the player tries talking to Yoshi on a slanted section, Yoshi may be unable to properly jump to the waterfall, resulting in a softlock. Similarly, if Yoshi is spoken to while he is steps off the roof, he will be blocked by the castle wall, unable to reach the waterfall.[113]
Zero second finish glitch

In Bob-omb Battlefield, the player should don a Wing Cap and triple jump right in front of Koopa the Quick, then land inside the nearby cannon. At this point Mario can fly up to the summit and reach the goal flag, using another cannon to gain more height as necessary. Koopa the Quick will offer to race Mario once he lands, and by accepting Mario will immediately win the race, with the timer at zero seconds.
Similarly in Tiny-Huge Island, the player should defeat the Koopa so that a Green Shell rests on the beach. Then the player should triple jump right in front of Koopa the Quick, aiming to land on the shell. After riding to the goal flag and dismounting, Mario can immediately win the race.
Despite the race starting, Koopa the Quick never begins running to the goal flag, so the Power Star cannot be obtained in this way. Instead an invisible and silent Koopa the Quick remains at the start.[114]
Zombie Mario glitch

When Mario's Power Meter is fully depleted, the game is supposed to initiate a death animation based on the current situation. For example, dying in water will show Mario drowning, and death by knockback will show Mario fail to stand back up. Most of these animations have a delay before they play out, which can be abused to postpone the death sequence.
For instance: If Mario takes small fall damage in front of a door, he is able to enter the door despite his condition and promptly loses a life at the other side.

To stay dead for arbitrarily long, the player should abuse cannons; the developers did not add a condition for Mario dying inside a cannon, so he is able to operate one without any health. By either taking knockback from a Bob-omb explosion[30] or taking fall damage at the edge of the cannon's opening such that Mario falls into it, he can enter a cannon while his Power Meter depletes. Wearing a Wing Cap allows for controlled flight while dead, though collecting any coins at this point will not restore Mario's health. Once Mario lands he will properly lose a life. This can be achieved in places such as Shifting Sand Land[115] and the Castle Grounds.[116]
NOTES:
|
Sequence breaks
NOTE: These glitches allow Mario to access areas through unintended methods.
Cannonless wall blast glitch
In Whomp's Fortress, if Mario touches an exact spot on the wall which can be blasted away, he will do a ledge grab animation and collect the Star in the process. With the following setup this glitch can be achieved consistently:
First the player should grab the wall so that Mario is between the log bridge and a Piranha Plant, with his left hand touching the bridge. After climbing up, the player must backflip onto the bridge, turn the camera ![]() left twice, and punch
left twice, and punch ![]() once. Then, the player has to walk
once. Then, the player has to walk ![]() down, so that Mario walks to the bridge's ledge and grabs it. After pressing
down, so that Mario walks to the bridge's ledge and grabs it. After pressing ![]() then
then ![]() to reset the camera orientation, the player should climb up and immediately move
to reset the camera orientation, the player should climb up and immediately move ![]() down again, so that Mario runs in an arc off the bridge, hitting the wall and collecting the Star.[117]
down again, so that Mario runs in an arc off the bridge, hitting the wall and collecting the Star.[117]
Climb the castle without 120 Stars glitch

From the right side of Peach's Castle, the player should perform a triple jump onto the grassy slope, moving slightly ![]() to the left during the second jump. If done correctly, Mario will begin sliding and the player can quickly jump to grab the castle roof.
to the left during the second jump. If done correctly, Mario will begin sliding and the player can quickly jump to grab the castle roof.
Clip Behind Chain Chomp's Gate

Using a bloated Bob-omb in Bob-omb Battlefield, it is possible to get Behind Chain Chomp's Gate without freeing the Chain Chomp. After preparing the Bob-omb and navigating to the gated Star with the backwards momentum, the player should position Mario with his back against the gate. When throwing the Bob-omb from this position, Mario will clip through and can collect the Star.
Complete the game with 0 Stars glitch
After starting a new file, the player should enter the castle and go to the stairs leading to the basement. A ledge near the ceiling can be grabbed to pull Mario into a space in the walls. There, multiple backwards long jumps can be performed to build up speed. Once Mario has enough speed, he can redirect his momentum first towards the castle's entrance door, then up the stairs in the main hall, and finally through the 8 Star Door to reach Bowser in the Dark World. After defeating Bowser and receiving the first key, the player must head to the basement.
NOTE: Alternatively the moat door skip can be used instead to access the basement without beating Bowser in the Dark World.
Next the player should position Mario on a small set of stairs and face away from the 30 Star Door. Performing multiple Backwards Long Jumps here, Mario can clip through said door and past the entrance to Dire, Dire Docks with good positioning. After Bowser has been beaten in the Fire Sea, the player must enter Dire, Dire Docks and pause to exit the course, as otherwise there is no way out of the room. Now that Mario has access to the second floor of the castle, Backwards Long Jumps can be performed to breach both the 50 Star Door and the endless staircase.[118]
Lakitu skip

Before crossing the bridge to enter Peach's Castle for the first time, Lakitu will stop Mario and begin an introduction. If the player performs a Long Jump on the edge of the bridge, the trigger can be skipped and Lakitu remains resting in front of the castle's entrance door, without his cloud. Lakitu will be gone when returning to the Castle Grounds.
Mario Through the Jet Stream without Metal Cap glitch
In the Through the Jet Stream missions for Jolly Roger Bay or Dire, Dire Docks, Mario should swim to a jet stream. While the force pushing Mario back is strong, it is possible to swim against the current. The player must repeatedly and rapidly press ![]() while swimming into the jet stream, and eventually Mario will reach the Star without a Metal Cap.[119]
while swimming into the jet stream, and eventually Mario will reach the Star without a Metal Cap.[119]
MIPS clips

After grabbing MIPS for the first time, he can be grabbed again and carried around. When setting MIPS down, Mario moves forward a bit which can be exploited.
If the player walks into the corner of a door while holding MIPS and lets go, Mario can be pushed inside of the door. By crawling ![]() and turning around, MIPS can be grabbed while staying inside the door, and Mario can simply clip out the other side. Performing this trick on the wooden door in the basement and the 30 Star Door, Mario will gain access to Dire, Dire Docks and Bowser in the Fire Sea with less than 30 Stars.[120] Mario can also use this glitch to enter to two different black rooms of death.
and turning around, MIPS can be grabbed while staying inside the door, and Mario can simply clip out the other side. Performing this trick on the wooden door in the basement and the 30 Star Door, Mario will gain access to Dire, Dire Docks and Bowser in the Fire Sea with less than 30 Stars.[120] Mario can also use this glitch to enter to two different black rooms of death.
Moat door skip
It is possible to enter the door inside the castle's moat while it is still flooded, though the full setup is too precise to be reliably performed in real time.
With 10 Stars or more, Mario can enter Vanish Cap Under the Moat by speed flying with the Wing Cap found atop the castle.[121] With less Stars however, Mario can instead perform backwards long jumps starting from near the pond to jump down through the grate and enter the course.
Once inside, the player should stand on a wooden lift and build up immense speed by performing many Backwards Long Jumps against the wall until Mario drops off the elevator into the abyss. This places Mario in the moat water, which conserves the built-up speed. Now by sliding ![]() on a slope outside the castle and navigating through parallel universes[122] with precise angles, it is possible to redirect Mario so he is right next to the moat door but not swimming.[123]
on a slope outside the castle and navigating through parallel universes[122] with precise angles, it is possible to redirect Mario so he is right next to the moat door but not swimming.[123]
NOTE: This grants access to the basement without needing to defeat Bowser in the Dark World.[124]
Pillarless through the top of the pyramid glitch
Using a bloated Bob-omb, it is possible to enter the pyramid in Shifting Sand Land through the top without standing on the four pillars first. Grabbing the Bob-omb close to the level entrance at its largest possible size before it explodes gives Mario significant backwards momentum. From here the player should navigate up the sand dunes and dive while sliding to initiate the hands-free holding glitch.
The sections of quicksand can be avoided with Ground Pounds so that Mario stays in the air for longer while being pushed. After passing over the fence and landing on the pyramid, the player has to rapidly press ![]() to scale the slope until Mario is around the same height as the Star Shining Atop the Pyramid. Performing another Ground Pound will clip Mario into the pyramid, entering it from above.
[125]
to scale the slope until Mario is around the same height as the Star Shining Atop the Pyramid. Performing another Ground Pound will clip Mario into the pyramid, entering it from above.
[125]
Underground lake shortcuts
The cavern where Dorrie swims in Hazy Maze Cave can be reached without riding the elevator located after the rolling rocks area.
Elevator clip
Between the rolling rocks section and the Red Coins area is an elevator. After stepping onto the elevator, the player should jump off and position Mario so he hugs the wall the elevator is connected to, then shimmy ![]() to the right. When the elevator descends, Mario gets pushed through the floor towards the island with the Swimming Beast in the Cavern Star.
to the right. When the elevator descends, Mario gets pushed through the floor towards the island with the Swimming Beast in the Cavern Star.
Elevator room jump
Again in the elevator room leading to the Red Coins, the player can go over the walls by performing several Wall Kicks at the top. Starting with a Side Somersault or a Triple Jump can make the process easier, but eventually Mario will reach the underground lake from above.
Triple Jump off the block
First the player must reach the red mesh platform above the rolling rock pit, where a yellow ! Block can be found. Performing a Triple Jump with the third jump landing on the ! Block gives Mario enough height to pass over the cave walls, where he can fall into the underground lake.
Cartridge tilting glitches
Warning! Performing these actions may corrupt your game's save file.
Tilting a cartridge can interrupt part of the flow of data between the cartridge and the console, causing glitches that may not be possible with a stable connection. Cartridge tilting glitches are only possible on Nintendo 64 releases of Super Mario 64, as Nintendo DS and Nintendo Switch Game Cards cannot be tilted.
Effects of cartridge tilting on this game may include parts of Mario's body disappearing or rotating unusually, corrupted music and sound effects,[126] corrupted textures, clipping through collision, blurry graphics, and freezing or crashing the game upon certain interactions.[citation needed]


There is a glitch to make Mario lie sideways without disconnecting the cartridge, which is a common graphical result of cartridge tilting. In the American and European versions of the game, the player must go to the roof of Peach's Castle, get the Wing Cap, and go to the left of Princess Peach's image. Mario suddenly lies on the roof and briefly disappears after jumping. The glitch lasts until the console is turned off.[citation needed]
References
- ^ YouTube video of Infinite cap music glitch[dead link]
- ^ YouTube video of Japanese BitS Audio glitch
- ^ Super mario 64 - SSL Secrets glitch (Japanese version only)
- ^ YouTube video of Koopa Shell music glitch
- ^ Intriguing camera glitch found in Dire, Dire Docks
- ^ YouTube video of cannon camera glitch
- ^ YouTube video of Wing Cap Camera glitch
- ^ Uninitialized Monty Mole in Tall, Tall Mountain [1]
- ^ Uninitialized Monty Mole in Hazy Maze Cave [2]
- ^ YouTube video of BBH Crash
- ^ a b SM64 Star Death Softlock Testing
- ^ YouTube video of double star freeze
- ^ a b YouTube video of simultaneous event glitches
- ^ YouTube video of Monty Mole Freeze in TTM
- ^ A better video of the Monty Mole freeze, the cause of the glitch was discovered 7 years later
- ^ [3]
- ^ YouTube video of Shrinking Fly Guy glitch
- ^ Pannenkoek2012 (April 26, 2023). Crashing SM64 by Shrinking a Fly Guy. YouTube. Retrieved January 2, 2024.
- ^ YouTube video of frozen head
- ^ a b YouTube video of several Bowser glitches
- ^ YouTube video of Mr. I glitch
- ^ YouTube video on pitch and yaw velocity conservation, by UncommentatedPannen
- ^ Official UK Nintendo Magazine Issue #56 (May 1997), page 42. "SLAB BEAST TRICK In Course Two’s Chip Off Whomp’s Block section (found behind Door One on the right-hand side of the castle), there’s a cheat which looks like a development mistake! However, the Big N assures us it isn't... Go to the mid-section of the castle where you‘ll find two giant Slab Beasts. The normal way to beat these creatures is to perform a butt-bash on their backs, an act of bravery which will award Mario with three coins. However, instead of avoiding the Slab Beast as it falls towards the ground, jump directly into the centre of the it’s[sic] face and Mario will appear unharmed on the other side! This makes collecting coins from Slab Beasts easier, but it take es a lot of skill to pull off. You may want to stock up on lives before trying it."
- ^ YouTube video of Whomp ground pound clip
- ^ YouTube video of TTM Wall Clip near start
- ^ YouTube video of TTM Wall Clip near Ukkiki
- ^ YouTube video of CCM wall clipping glitch
- ^ YouTube video of Jolly Roger Bay wall clip
- ^ a b Section of a YouTube video on wall, floor, and ceiling collision (part 1), by UncommentatedPannen
- ^ a b c YouTube video of several glitches using Bob-ombs
- ^ YouTube video of Crate Clip method two
- ^ YouTube video of large Penguin Wall Glitch
- ^ YouTube video of small Penguin Wall Clip
- ^ YouTube video of Lethal Lava Land death
- ^ https://youtu.be/tdVNm47P8GQ
- ^ https://www.youtube.com/watch?v=E79jvV41R60
- ^ Video
- ^ Section of a YouTube video on wall, floor, and ceiling collision (part 2), by UncommentatedPannen
- ^ YouTube video of the invisible wall inside the castle[dead link]
- ^ a b YouTube video of two invisible walls in Bob-omb Battlefield
- ^ YouTube video of Bob-omb Battlefield sign invisible wall[dead link]
- ^ YouTube video of a invisible wall in Bowser in the Dark World[dead link]
- ^ YouTube video of Snowman's Land Invisible wall death[dead link]
- ^ YouTube video of Dire, Dire Docks invisible wall[dead link]
- ^ YouTube video of the invisible wall in Tiny-Huge Island
- ^ a b YouTube video of several glitches in TTC Japanese version
- ^ YouTube video of Seesaw Glitch Part One
- ^ YouTube video of Seesaw Glitch Part Two
- ^ YouTube video of Stuck in ceiling glitch
- ^ YouTube video of stuck in ceiling glitch variant[dead link]
- ^ YouTube video of Bob-omb Battlefield stuck glitch
- ^ YouTube video of Whomp's Fortress stuck glitch
- ^ YouTube video of Shifting Sand Land Stuck glitch
- ^ a b c YouTube video of several Stuck spots[dead link]
- ^ YouTube video of Hazy Maze Cave stuck glitch
- ^ YouTube video of Bowser in the Fire Sea Stuck glitch
- ^ YouTube video of waterfall stuck sliding spot
- ^ YouTube video of Snowman's Land Stuck glitch
- ^ YouTube video of Rainbow Ride stuck spot
- ^ YouTube video showing how to Backwards Long Jump
- ^ YouTube video of Backwards Long Jump
- ^ Ashnflash (September 29, 2021). LEGO Super Mario 64 ? Block - All 10 Stars. YouTube. Retrieved March 16, 2023.
- ^ bobmario's video: https://www.youtube.com/watch?v=Vlh0CA_aBwQ
- ^ Plush's video: https://www.youtube.com/watch?v=ljsnQqVuPCY YouTube video of Castle Grounds Speed Sliding Spot
- ^ Tomatobird8's video: https://www.youtube.com/watch?v=T0ZTAm4ogMQ YouTube video of WF Speed Sliding Spot[dead link]
- ^ TASVideos - description and video about the HS Wind Glitch
- ^ Video of a Skeeter getting stuck in Wet-Dry World
- ^ YouTube video of Beached Bubba glitch
- ^ YouTube video of Broken Bookshelf[dead link]
- ^ Hat Factory Glitch
- ^ A side effect to "Cap in Hand"[dead link]
- ^ YouTube video of Cloning
- ^ A YouTube video explaining the glitch, by pannenkoek2012
- ^ YouTube video of Fly Guy Death Glitch[dead link]
- ^ YouTube video of "Hold Larger Bob-omb"
- ^ YouTube video of the Bully Blocker glitch[dead link]
- ^ YouTube video of Ice Bully glitch
- ^ YouTube video of Unboiled Bully glitch
- ^ YouTube video explaining the Chuckya Drop by Pannenkoek2012
- ^ Seeing the Unseen (Held Mario) by UncommentatedPannen
- ^ YouTube video of Heave-Ho glitches by Pannenkoek2012
- ^ YouTube video of Chain Chomp Falling Down Glitch
- ^ YouTube video of Death in Midair Tox Box glitch
- ^ YouTube Video explaining floor property inheritance
- ^ https://m.youtube.com/watch?v=MpYxcpx84ts
- ^ YouTube video of Tool-assisted superplay including performing the Freezing Surroundings glitch
- ^ YouTube video of Japanese cap frozen time glitch
- ^ YouTube video of Hands Free Holding glitch
- ^ YouTube video of Hands Free Teleport glitch
- ^ Make Heavy Objects Lightweight via edge Tutorial by UncommentatedPannen
- ^ https://youtu.be/Ea6d9oaHOBA?t=22
- ^ YouTube video of Object Displacement glitch
- ^ YouTube video from Pannenkoek2012 about infinite coin glitches
- ^ YouTube video of Money Bags Duplication glitch
- ^ YouTube video of Infinite Coins from Plant glitch
- ^ YouTube video of JRB Ship Downward Teleport[dead link]
- ^ YouTube video of Bowser glitches
- ^ YouTube video explaining Instant Descent
- ^ YouTube video of BITFS
- ^ YouTube video of Precipitate Plastron glitch
- ^ YouTube video about the impossible coin
- ^ YouTube video about the impossible coin on THI's big island
- ^ The Mystery Goomba, YouTube video by Pannenkoek
- ^ YouTube video, explaining why the Goomba cannot be killed, by Pannenkoek2012
- ^ YouTube video of "Negative Lives"
- ^ TASVideos - explanation of Parallel Universes
- ^ YouTube video showing the softlock from spawning a star in a PU
- ^ YouTube video of Permanently Crushed glitch
- ^ YouTube video of Pass Though the Ground glitch
- ^ YouTube video from Pannenkoek2012 about Spawning Displacement
- ^ YouTube video of "Suicidal Bowser"
- ^ YouTube video of Water Level Manipulation
- ^ YouTube video of Yoshi Falls Off the Roof Glitch
- ^ Pannenkoek2012 (July 27, 2013). SM64 - Koopa the Quick Turns Invisible Glitch. YouTube. Retrieved October 22, 2023.
- ^ YouTube video of Zombie Mario glitch
- ^ YouTube video of the second way to perform the Zombie Mario glitch
- ^ YouTube video of the Cannonless setup
- ^ https://www.youtube.com/watch?v=lk1w3hcQT7g
- ^ YouTube video of "Mario Through the Jet Stream without Metal Cap"
- ^ YouTube video of "MIPS Glitch"
- ^ YouTube video of Moat Door Skip (original video) by Sonicpacker
- ^ Visualization of the PU movement by Pannenkoek2012
- ^ Description of the Moat Door Skip and its technical background
- ^ YouTube video of TAS Speedrun using the Moat Door Skip
- ^ YouTube video of the "Pillarless" glitch
- ^ YouTube video of Cartridge-Tilting Mario 1[dead link]