List of maps in Super Paper Mario: Difference between revisions
From the Super Mario Wiki, the Mario encyclopedia
Jump to navigationJump to search
Time Turner (talk | contribs) mNo edit summary |
(I forgot to edit this again.) Tag: Mobile edit |
||
| (28 intermediate revisions by 17 users not shown) | |||
| Line 1: | Line 1: | ||
{{italic title|List of maps in ''Super Paper Mario''}} | {{italic title|List of maps in ''Super Paper Mario''}} | ||
The following is a list of all 48 collectible | In ''[[Super Paper Mario]]'', the player can purchase maps from [[Flamm]]. These maps will lead Mario and the heroes to hidden treasures throughout the game. All maps are purchased with [[coin]]s. Once the heroes find the area with the hidden treasure, they must use the [[Pixl]] [[Fleep]], move him over the treasure spot on the screen and press {{button|wii|1}} to flip and find the treasure. Many of the treasures are [[Catch Card]]s, and sometimes a character's Catch Card can even be found using a map before the character appears in the game, such as [[King Sammer]], [[Welderberg]], and [[Brobot L-type]]. The player is unable to reveal the treasure without purchasing the respective map. | ||
{| align="center" cellpadding= | |||
The following is a list of all 48 collectible maps and their description as seen directly in the game. | |||
{| class="wikitable sortable" align="center" cellpadding=7 cellspacing=2 style="font-family: verdana, sans-serif; padding: 6px; background-color: #f7f8ff; border:1px solid #8888aa; color:black" width=95% | |||
|-13 | |-13 | ||
|- bgcolor=#99B1FF | |- bgcolor=#99B1FF | ||
| width=3% | '''#''' || width=25% | '''Image''' || width=20% | '''Location''' || width=5% | '''Cost''' || width=17% | '''Treasure''' || width=30% |'''Description''' | | width=3% | '''#''' || class="unsortable" width=25% | '''Image''' || width=20% | '''Location''' || width=5% | '''Cost''' || width=17% | '''Treasure''' || width=30% |'''Description''' || width=20% | '''Available after''' | ||
|- | |- | ||
|1 | |1 | ||
|[[File:SPM Map 1.png|250px]] | |[[File:SPM Map 1.png|250px]] | ||
|Flipside | |Flipside 3rd Floor | ||
|20 | |20 | ||
|[[Gold Bar]] | |[[Gold Bar]] | ||
|This map shows a familiar spot. | |This map shows a familiar spot. | ||
|[[Land of the Cragnons|Chapter 5]] | |||
|- | |- | ||
|2 | |2 | ||
|[[File:SPM Map 2.png|250px]] | |[[File:SPM Map 2.png|250px]] | ||
| | |[[Mirror Hall]] | ||
|60 | |60 | ||
|[[Welderberg]] [[Catch Card]] | |[[Welderberg]] [[Catch Card]] | ||
|The map shows colorful objects in a row. | |The map shows colorful objects in a row. | ||
|Chapter 5 | |||
|- | |- | ||
|3 | |3 | ||
|[[File:SPM Map 3.png|250px]] | |[[File:SPM Map 3.png|250px]] | ||
|Flipside | |Flipside B1 | ||
|30 | |30 | ||
|[[Ultra Shroom Shake]] | |[[Ultra Shroom Shake]] | ||
|The map shows an underground area. | |The map shows an underground area. | ||
|Chapter 5 | |||
|- | |- | ||
|4 | |4 | ||
|[[File:SPM Map 4.png|250px]] | |[[File:SPM Map 4.png|250px]] | ||
| | |[[Flipside Arcade]] | ||
|110 | |110 | ||
|[[King Sammer]] Catch Card | |[[King Sammer]] Catch Card | ||
|The map shows a door with an unusual design. | |The map shows a door with an unusual design. | ||
|[[Sammer's Kingdom|Chapter 6]] | |||
|- | |- | ||
|5 | |5 | ||
|[[File:SPM Map 5.png|250px]] | |[[File:SPM Map 5.png|250px]] | ||
|Flopside | |Flopside 3rd Floor | ||
|80 | |80 | ||
|[[O'Chunks]] Catch Card | |[[O'Chunks]] Catch Card | ||
|The map shows something solid black. | |The map shows something solid black. | ||
|[[Castle Bleck|Chapter 8]] | |||
|- | |- | ||
|6 | |6 | ||
|[[File:SPM Map 6.png|250px]] | |[[File:SPM Map 6.png|250px]] | ||
|Chapter 1-1 | |[[Lineland Road|Chapter 1-1]] | ||
|20 | |20 | ||
|[[Bestovius]] Catch Card | |[[Bestovius]] Catch Card | ||
|The map shows a house. | |The map shows a house. | ||
|Chapter 5 | |||
|- | |- | ||
|7 | |7 | ||
|[[File:SPM Map 7.png|250px]] | |[[File:SPM Map 7.png|250px]] | ||
|Chapter 1-2 | |[[Mount Lineland|Chapter 1-2]] | ||
|50 | |50 | ||
|[[Golden Leaf]] | |[[Golden Leaf]] | ||
|The map shows a vertically climbing set of hills. | |The map shows a vertically climbing set of hills. | ||
|Chapter 6 | |||
|- | |- | ||
|8 | |8 | ||
|[[File:SPM Map 8.png|250px]] | |[[File:SPM Map 8.png|250px]] | ||
|Chapter 1-2 ([[Green | |Chapter 1-2 ([[Green]]'s House) | ||
|70 | |70 | ||
|[[Brobot L- | |[[Brobot L-type]] Catch Card | ||
|The map shows a room decked out in pretty colors. | |The map shows a room decked out in pretty colors. | ||
|[[The Underwhere|Chapter 7]] | |||
|- | |- | ||
|9 | |9 | ||
|[[File:SPM Map 9.png|250px]] | |[[File:SPM Map 9.png|250px]] | ||
|Chapter 1-3 | |[[Yold Desert|Chapter 1-3]] | ||
|40 | |40 | ||
|Gold Bar x3 | |Gold Bar x3 | ||
|The map shows a rock somewhere. | |The map shows a rock somewhere. | ||
|Chapter 5 | |||
|- | |- | ||
|10 | |10 | ||
| Line 75: | Line 86: | ||
|[[Fracktail]] Catch Card | |[[Fracktail]] Catch Card | ||
|The map shows a desert somewhere. | |The map shows a desert somewhere. | ||
|Chapter 5 | |||
|- | |- | ||
|11 | |11 | ||
|[[File:SPM Map 11.png|250px]] | |[[File:SPM Map 11.png|250px]] | ||
|Chapter 1-4 | |[[Yold Ruins|Chapter 1-4]] | ||
|70 | |70 | ||
|[[Merlumina]] Catch Card | |[[Merlumina]] Catch Card | ||
|The map shows a mysterious locale. | |The map shows a mysterious locale. | ||
|Chapter 5 | |||
|- | |- | ||
|12 | |12 | ||
|[[File:SPM Map 12.png|250px]] | |[[File:SPM Map 12.png|250px]] | ||
|Chapter 2-1 | |[[Gloam Valley|Chapter 2-1]] | ||
|20 | |20 | ||
|[[Shooting Star (item)|Shooting Star]] | |[[Shooting Star (item)|Shooting Star]] | ||
|The map shows a suspicious building. | |The map shows a suspicious building. | ||
|Chapter 5 | |||
|- | |- | ||
|13 | |13 | ||
|[[File:SPM Map 13.png|250px]] | |[[File:SPM Map 13.png|250px]] | ||
|Chapter 2-2 | |[[Merlee's Mansion|Chapter 2-2]] | ||
|50 | |50 | ||
|[[Catch Card SP]] | |[[Catch Card SP]] | ||
|The map shows a building somewhere. | |The map shows a building somewhere. | ||
|Chapter 5 | |||
|- | |- | ||
|14 | |14 | ||
| Line 103: | Line 118: | ||
|[[Gnip]] Catch Card | |[[Gnip]] Catch Card | ||
|The map shows the inside of a building. | |The map shows the inside of a building. | ||
|Chapter 5 | |||
|- | |- | ||
|15 | |15 | ||
| Line 110: | Line 126: | ||
|[[Mimi]] Card | |[[Mimi]] Card | ||
|The map shows a place where you exchange money. | |The map shows a place where you exchange money. | ||
|Chapter 8 | |||
|- | |- | ||
|16 | |16 | ||
|[[File:SPM Map 16.png|250px]] | |[[File:SPM Map 16.png|250px]] | ||
|Chapter 2-4 | |[[Merlee's Basement|Chapter 2-4]] | ||
|30 | |30 | ||
|Gold Bar x3 | |Gold Bar x3 | ||
|The map shows a staircase. | |The map shows a staircase. | ||
|Chapter 5 | |||
|- | |- | ||
|17 | |17 | ||
| Line 124: | Line 142: | ||
|[[Dried Mushroom]] | |[[Dried Mushroom]] | ||
|The map shows a fragrant locale. | |The map shows a fragrant locale. | ||
|Chapter 5 | |||
|- | |- | ||
|18 | |18 | ||
|[[File:SPM Map 18.png|250px]] | |[[File:SPM Map 18.png|250px]] | ||
|Chapter 3-1 | |[[The Bitlands|Chapter 3-1]] | ||
|10 | |10 | ||
|[[Back Cursya]] Catch Card | |[[Back Cursya]] Catch Card | ||
|The map shows a place decked out in three colors. | |The map shows a place decked out in three colors. | ||
|Chapter 5 | |||
|- | |- | ||
|19 | |19 | ||
| Line 138: | Line 158: | ||
|Ultra Shroom Shake | |Ultra Shroom Shake | ||
|The map shows a spot filled with memories. | |The map shows a spot filled with memories. | ||
|Chapter 5 | |||
|- | |- | ||
|20 | |20 | ||
|[[File:SPM Map 20.png|250px]] | |[[File:SPM Map 20.png|250px]] | ||
|Chapter 3-2 | |[[The Tile Pool|Chapter 3-2]] | ||
|80 | |80 | ||
|[[Big Blooper]] Catch Card | |[[Big Blooper (Super Paper Mario)|Big Blooper]] Catch Card | ||
|The map shows a hidden treasure underwater. | |The map shows a hidden treasure underwater. | ||
|Chapter 5 | |||
|- | |- | ||
|21 | |21 | ||
| Line 152: | Line 174: | ||
|[[Power Plus (Super Paper Mario)|Power Plus]] | |[[Power Plus (Super Paper Mario)|Power Plus]] | ||
|The map shows a place where treasure abounds. | |The map shows a place where treasure abounds. | ||
|Chapter 8 | |||
|- | |- | ||
|22 | |22 | ||
|[[File:SPM Map 22.png|250px]] | |[[File:SPM Map 22.png|250px]] | ||
|Chapter 3-3 | |[[The Dotwood Tree|Chapter 3-3]] | ||
|130 | |130 | ||
|[[Dimentio]] Catch Card | |[[Dimentio]] Catch Card | ||
|The map shows a section of a big tree. | |The map shows a section of a big tree. | ||
|Chapter 8 | |||
|- | |- | ||
|23 | |23 | ||
|[[File:SPM Map 23.png|250px]] | |[[File:SPM Map 23.png|250px]] | ||
|Chapter 3-4 | |[[Fort Francis|Chapter 3-4]] | ||
|230 | |230 | ||
|[[Tiptron]] Catch Card | |[[Tiptron]] Catch Card | ||
|The map shows a large room that's been oddly decorated. | |The map shows a large room that's been oddly decorated. | ||
|Chapter 8 | |||
|- | |- | ||
|24 | |24 | ||
| Line 173: | Line 198: | ||
|[[Francis]] Catch Card | |[[Francis]] Catch Card | ||
|The map shows a place that may have too much treasure. | |The map shows a place that may have too much treasure. | ||
|Chapter 5 | |||
|- | |- | ||
|25 | |25 | ||
|[[File:SPM Map 25.png|250px]] | |[[File:SPM Map 25.png|250px]] | ||
|Chapter 4-2 | |[[Planet Blobule|Chapter 4-2]] | ||
|30 | |30 | ||
|[[Squirps]] Catch Card | |[[Squirps]] Catch Card | ||
|The map shows a smelly spot in an unexpected place. | |The map shows a smelly spot in an unexpected place. | ||
|Chapter 5 | |||
|- | |- | ||
|26 | |26 | ||
| Line 187: | Line 214: | ||
|[[Hooligon]] Catch Card | |[[Hooligon]] Catch Card | ||
|The map shows the location of a person's hidden treasure. | |The map shows the location of a person's hidden treasure. | ||
|Chapter 7 | |||
|- | |- | ||
|27 | |27 | ||
|[[File:SPM Map 27.png|250px]] | |[[File:SPM Map 27.png|250px]] | ||
|Chapter 4-3 | |[[Outer Limits|Chapter 4-3]] | ||
|80 | |80 | ||
|[[Mr. L]] Catch Card | |[[Mr. L]] Catch Card | ||
|The map shows a shop somewhere. | |The map shows a shop somewhere. | ||
|Chapter 5 | |||
|- | |- | ||
|28 | |28 | ||
|[[File:SPM Map 28.png|250px]] | |[[File:SPM Map 28.png|250px]] | ||
|Chapter 4-4 | |[[Whoa Zone|Chapter 4-4]] | ||
|90 | |90 | ||
|[[Brobot]] Catch Card | |[[Brobot]] Catch Card | ||
|The map shows a treasure in a forbidden place. | |The map shows a treasure in a forbidden place. | ||
|Chapter 5 | |||
|- | |- | ||
|29 | |29 | ||
| Line 206: | Line 236: | ||
|Chapter 4-4 | |Chapter 4-4 | ||
|80 | |80 | ||
|[[HP Plus]] | |[[HP Plus (Super Paper Mario)|HP Plus]] | ||
|The map shows a love transmitter to the future. | |The map shows a love transmitter to the future. | ||
|Chapter 6 | |||
|- | |- | ||
|30 | |30 | ||
|[[File:SPM Map 30.png|250px]] | |[[File:SPM Map 30.png|250px]] | ||
|Chapter 5-1 | |[[Downtown of Crag|Chapter 5-1]] | ||
|120 | |120 | ||
|[[Muth]] Catch Card | |[[Muth]] Catch Card | ||
|CRAGLEY HO! The map shows a treasure on a rock tower. | |CRAGLEY HO! The map shows a treasure on a rock tower. | ||
|Chapter 7 | |||
|- | |- | ||
|31 | |31 | ||
| Line 222: | Line 254: | ||
|[[Flint Cragley]] Catch Card | |[[Flint Cragley]] Catch Card | ||
|The map shows a hard to find spot. | |The map shows a hard to find spot. | ||
|Chapter 5 | |||
|- | |- | ||
|32 | |32 | ||
|[[File:SPM Map 32.png|250px]] | |[[File:SPM Map 32.png|250px]] | ||
|Chapter 5-2 | |[[Gap of Crag|Chapter 5-2]] | ||
|20 | |20 | ||
|[[Fire Burst]] | |[[Fire Burst]] | ||
|The map shows a large volcano. | |The map shows a large volcano. | ||
|Chapter 7 | |||
|- | |- | ||
|33 | |33 | ||
| Line 236: | Line 270: | ||
|Ultra Shroom Shake | |Ultra Shroom Shake | ||
|The map shows a treasure-filled place in a volcano. | |The map shows a treasure-filled place in a volcano. | ||
|Chapter 5 | |||
|- | |- | ||
|34 | |34 | ||
|[[File:SPM Map 34.png|250px]] | |[[File:SPM Map 34.png|250px]] | ||
|Chapter 5-3 | |[[Floro Caverns|Chapter 5-3]] | ||
|70 | |70 | ||
|Shooting Star | |Shooting Star | ||
|The map shows the inside of a cave. | |The map shows the inside of a cave. | ||
|Chapter 5 | |||
|- | |- | ||
|35 | |35 | ||
| Line 250: | Line 286: | ||
|[[Hornfels]] & [[Monzo]] Catch Card | |[[Hornfels]] & [[Monzo]] Catch Card | ||
|The map shows tracks like those used by a small train. | |The map shows tracks like those used by a small train. | ||
|Chapter 5 | |||
|- | |- | ||
|36 | |36 | ||
| Line 257: | Line 294: | ||
|[[Poison Mushroom]] | |[[Poison Mushroom]] | ||
|The map shows a pipe and a door in a cave somewhere. | |The map shows a pipe and a door in a cave somewhere. | ||
|Chapter 6 | |||
|- | |- | ||
|37 | |37 | ||
| Line 264: | Line 302: | ||
|[[King Croacus IV|King Croacus]] Catch Card | |[[King Croacus IV|King Croacus]] Catch Card | ||
|The map shows a treasure among treasures, so to speak. | |The map shows a treasure among treasures, so to speak. | ||
|Chapter 6 | |||
|- | |- | ||
|38 | |38 | ||
|[[File:SPM Map 38.png|250px]] | |[[File:SPM Map 38.png|250px]] | ||
|Chapter 7-1 | |[[The Underwhere|Chapter 7-1]] | ||
|70 | |70 | ||
|[[Jaydes]] Catch Card | |[[Jaydes]] Catch Card | ||
|The map shows something that defies gravity. | |The map shows something that defies gravity. | ||
|Chapter 8 | |||
|- | |- | ||
|39 | |39 | ||
| Line 278: | Line 318: | ||
|[[Underhand]] Catch Card | |[[Underhand]] Catch Card | ||
|The map shows a river flowing with the tears of evildoers. | |The map shows a river flowing with the tears of evildoers. | ||
|Chapter 8 | |||
|- | |- | ||
|40 | |40 | ||
|[[File:SPM Map 40.png|250px]] | |[[File:SPM Map 40.png|250px]] | ||
|Chapter 7-2 | |[[Underwhere Road|Chapter 7-2]] | ||
|80 | |80 | ||
|[[Trial Stew]] | |[[Trial Stew]] | ||
|The map shows a treasure in an unopened box. | |The map shows a treasure in an unopened box. | ||
|Chapter 7 | |||
|- | |- | ||
|41 | |41 | ||
| Line 292: | Line 334: | ||
|[[Underchomp]] Catch Card | |[[Underchomp]] Catch Card | ||
|The map shows a place between sky and earth. | |The map shows a place between sky and earth. | ||
|Chapter 8 | |||
|- | |- | ||
|42 | |42 | ||
|[[File:SPM Map 42.png|250px]] | |[[File:SPM Map 42.png|250px]] | ||
|Chapter 7-3 | |[[Overthere Stair|Chapter 7-3]] | ||
|150 | |150 | ||
|Gold Bar x3 | |Gold Bar x3 | ||
|The map shows an oddly colored tree. | |The map shows an oddly colored tree. | ||
|Chapter 7 | |||
|- | |- | ||
|43 | |43 | ||
|[[File:SPM Map 43.png|250px]] | |[[File:SPM Map 43.png|250px]] | ||
|Chapter 7-4 | |[[The Overthere|Chapter 7-4]] | ||
|90 | |90 | ||
|[[Grambi]] Catch Card | |[[Grambi]] Catch Card | ||
|The map shows several similar objects in a row. | |The map shows several similar objects in a row. | ||
|Chapter 8 | |||
|- | |- | ||
|44 | |44 | ||
| Line 313: | Line 358: | ||
|[[Luvbi]] Catch Card | |[[Luvbi]] Catch Card | ||
|The map shows a white platform in a blue sky. | |The map shows a white platform in a blue sky. | ||
|Chapter 8 | |||
|- | |- | ||
|45 | |45 | ||
| Line 320: | Line 366: | ||
|[[Bonechill]] Catch Card | |[[Bonechill]] Catch Card | ||
|The map shows a white staircase. | |The map shows a white staircase. | ||
|Chapter 8 | |||
|- | |- | ||
|46 | |46 | ||
|[[File:SPM Map 46.png|250px]] | |[[File:SPM Map 46.png|250px]] | ||
|Chapter 8-1 | |[[Castle Bleck Entry|Chapter 8-1]] | ||
|160 | |160 | ||
|[[Nastasia]] Catch Card | |[[Nastasia]] Catch Card | ||
|The map shows light that dispels the darkness. | |The map shows light that dispels the darkness. | ||
|Chapter 8 | |||
|- | |- | ||
|47 | |47 | ||
|[[File:SPM Map 47.png|250px]] | |[[File:SPM Map 47.png|250px]] | ||
|Chapter 8-3 | |[[Castle Bleck Interior|Chapter 8-3]] | ||
|200 | |200 | ||
|[[Super Dimentio]] Catch Card | |[[Super Dimentio]] Catch Card | ||
|The map shows devices floating in the darkness. | |The map shows devices floating in the darkness. | ||
|Chapter 8 | |||
|- | |- | ||
|48 | |48 | ||
|[[File:SPM Map 48.png|250px]] | |[[File:SPM Map 48.png|250px]] | ||
|Chapter 8-4 | |[[Castle Bleck Inner Sanctum|Chapter 8-4]] | ||
|90 | |90 | ||
|[[Count Bleck]] Catch Card | |[[Count Bleck]] Catch Card | ||
|Where is this place? There are so many black walls... | |Where is this place? There are so many black walls... | ||
|Chapter 8 | |||
|- | |- | ||
|} | |} | ||
{{SPM}} | {{SPM}} | ||
[[Category:Lists|Maps]] | [[Category:Lists|Maps]] | ||
[[Category:Collectibles]] | [[Category:Collectibles]] | ||
[[Category:Super Paper Mario]] | [[Category:Super Paper Mario items|*]] | ||
[[de:Landkarte]] | |||
Latest revision as of 15:21, March 15, 2024
In Super Paper Mario, the player can purchase maps from Flamm. These maps will lead Mario and the heroes to hidden treasures throughout the game. All maps are purchased with coins. Once the heroes find the area with the hidden treasure, they must use the Pixl Fleep, move him over the treasure spot on the screen and press ![]() to flip and find the treasure. Many of the treasures are Catch Cards, and sometimes a character's Catch Card can even be found using a map before the character appears in the game, such as King Sammer, Welderberg, and Brobot L-type. The player is unable to reveal the treasure without purchasing the respective map.
to flip and find the treasure. Many of the treasures are Catch Cards, and sometimes a character's Catch Card can even be found using a map before the character appears in the game, such as King Sammer, Welderberg, and Brobot L-type. The player is unable to reveal the treasure without purchasing the respective map.
The following is a list of all 48 collectible maps and their description as seen directly in the game.
| # | Image | Location | Cost | Treasure | Description | Available after |
| 1 | 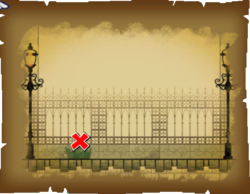
|
Flipside 3rd Floor | 20 | Gold Bar | This map shows a familiar spot. | Chapter 5 |
| 2 | 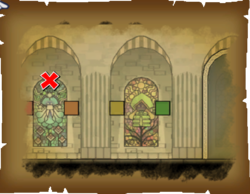
|
Mirror Hall | 60 | Welderberg Catch Card | The map shows colorful objects in a row. | Chapter 5 |
| 3 | 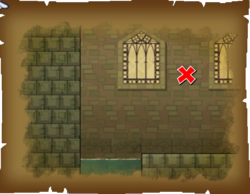
|
Flipside B1 | 30 | Ultra Shroom Shake | The map shows an underground area. | Chapter 5 |
| 4 | 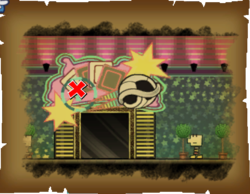
|
Flipside Arcade | 110 | King Sammer Catch Card | The map shows a door with an unusual design. | Chapter 6 |
| 5 | 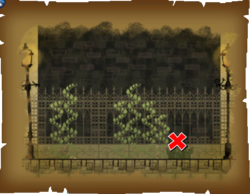
|
Flopside 3rd Floor | 80 | O'Chunks Catch Card | The map shows something solid black. | Chapter 8 |
| 6 | 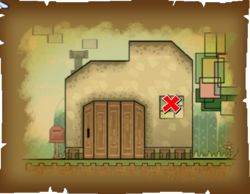
|
Chapter 1-1 | 20 | Bestovius Catch Card | The map shows a house. | Chapter 5 |
| 7 | 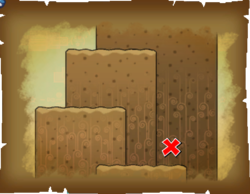
|
Chapter 1-2 | 50 | Golden Leaf | The map shows a vertically climbing set of hills. | Chapter 6 |
| 8 | 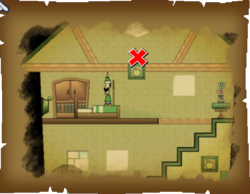
|
Chapter 1-2 (Green's House) | 70 | Brobot L-type Catch Card | The map shows a room decked out in pretty colors. | Chapter 7 |
| 9 | 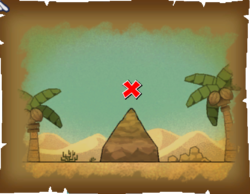
|
Chapter 1-3 | 40 | Gold Bar x3 | The map shows a rock somewhere. | Chapter 5 |
| 10 | 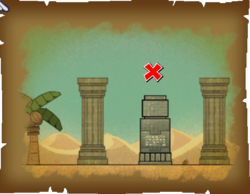
|
Chapter 1-3 | 40 | Fracktail Catch Card | The map shows a desert somewhere. | Chapter 5 |
| 11 | 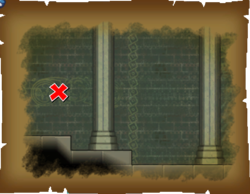
|
Chapter 1-4 | 70 | Merlumina Catch Card | The map shows a mysterious locale. | Chapter 5 |
| 12 | 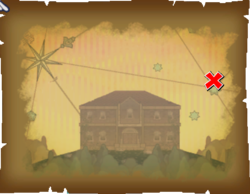
|
Chapter 2-1 | 20 | Shooting Star | The map shows a suspicious building. | Chapter 5 |
| 13 | 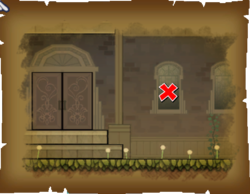
|
Chapter 2-2 | 50 | Catch Card SP | The map shows a building somewhere. | Chapter 5 |
| 14 | 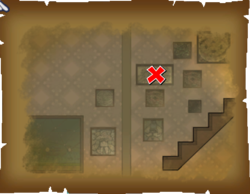
|
Chapter 2-2 | 50 | Gnip Catch Card | The map shows the inside of a building. | Chapter 5 |
| 15 | 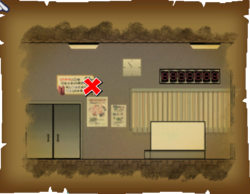
|
Chapter 2-3 | 100 | Mimi Card | The map shows a place where you exchange money. | Chapter 8 |
| 16 | 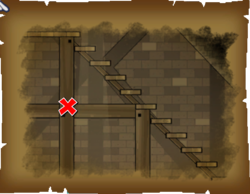
|
Chapter 2-4 | 30 | Gold Bar x3 | The map shows a staircase. | Chapter 5 |
| 17 | 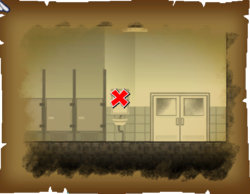
|
Chapter 2-4 | 50 | Dried Mushroom | The map shows a fragrant locale. | Chapter 5 |
| 18 | 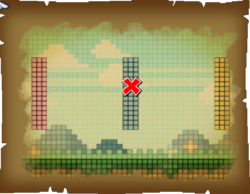
|
Chapter 3-1 | 10 | Back Cursya Catch Card | The map shows a place decked out in three colors. | Chapter 5 |
| 19 | 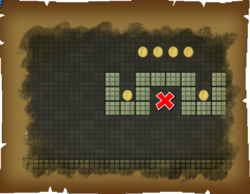
|
Chapter 3-1 | 90 | Ultra Shroom Shake | The map shows a spot filled with memories. | Chapter 5 |
| 20 | 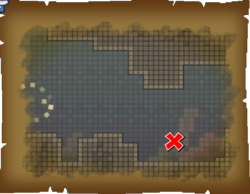
|
Chapter 3-2 | 80 | Big Blooper Catch Card | The map shows a hidden treasure underwater. | Chapter 5 |
| 21 | 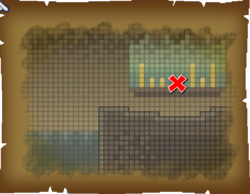
|
Chapter 3-2 | 180 | Power Plus | The map shows a place where treasure abounds. | Chapter 8 |
| 22 | 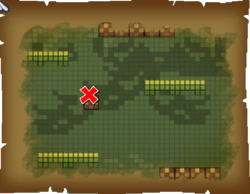
|
Chapter 3-3 | 130 | Dimentio Catch Card | The map shows a section of a big tree. | Chapter 8 |
| 23 | 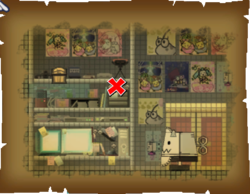
|
Chapter 3-4 | 230 | Tiptron Catch Card | The map shows a large room that's been oddly decorated. | Chapter 8 |
| 24 | 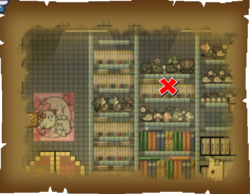
|
Chapter 3-4 | 40 | Francis Catch Card | The map shows a place that may have too much treasure. | Chapter 5 |
| 25 | 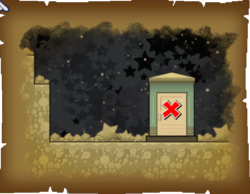
|
Chapter 4-2 | 30 | Squirps Catch Card | The map shows a smelly spot in an unexpected place. | Chapter 5 |
| 26 | 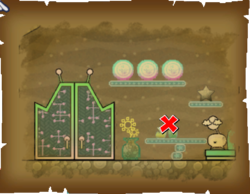
|
Chapter 4-2 | 70 | Hooligon Catch Card | The map shows the location of a person's hidden treasure. | Chapter 7 |
| 27 | 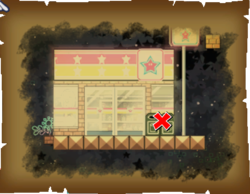
|
Chapter 4-3 | 80 | Mr. L Catch Card | The map shows a shop somewhere. | Chapter 5 |
| 28 | 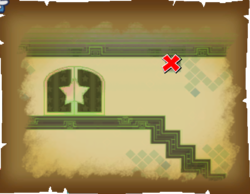
|
Chapter 4-4 | 90 | Brobot Catch Card | The map shows a treasure in a forbidden place. | Chapter 5 |
| 29 | 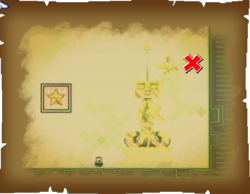
|
Chapter 4-4 | 80 | HP Plus | The map shows a love transmitter to the future. | Chapter 6 |
| 30 | 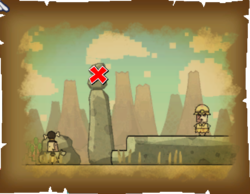
|
Chapter 5-1 | 120 | Muth Catch Card | CRAGLEY HO! The map shows a treasure on a rock tower. | Chapter 7 |
| 31 | 
|
Chapter 5-1 | 10 | Flint Cragley Catch Card | The map shows a hard to find spot. | Chapter 5 |
| 32 | 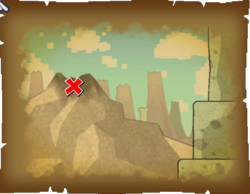
|
Chapter 5-2 | 20 | Fire Burst | The map shows a large volcano. | Chapter 7 |
| 33 | 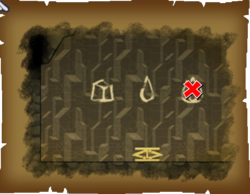
|
Chapter 5-2 | 110 | Ultra Shroom Shake | The map shows a treasure-filled place in a volcano. | Chapter 5 |
| 34 | 
|
Chapter 5-3 | 70 | Shooting Star | The map shows the inside of a cave. | Chapter 5 |
| 35 | 
|
Chapter 5-3 | 60 | Hornfels & Monzo Catch Card | The map shows tracks like those used by a small train. | Chapter 5 |
| 36 | 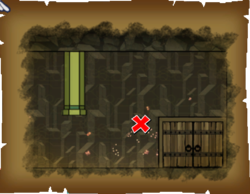
|
Chapter 5-4 | 140 | Poison Mushroom | The map shows a pipe and a door in a cave somewhere. | Chapter 6 |
| 37 | 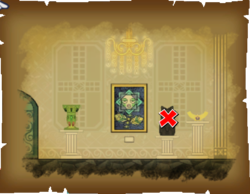
|
Chapter 5-4 | 60 | King Croacus Catch Card | The map shows a treasure among treasures, so to speak. | Chapter 6 |
| 38 | 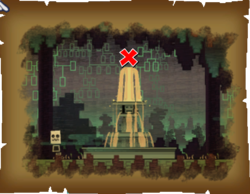
|
Chapter 7-1 | 70 | Jaydes Catch Card | The map shows something that defies gravity. | Chapter 8 |
| 39 | 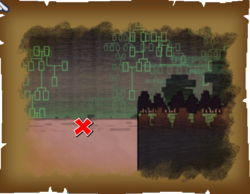
|
Chapter 7-1 | 80 | Underhand Catch Card | The map shows a river flowing with the tears of evildoers. | Chapter 8 |
| 40 | 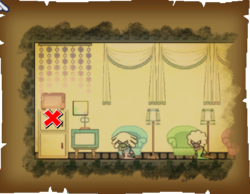
|
Chapter 7-2 | 80 | Trial Stew | The map shows a treasure in an unopened box. | Chapter 7 |
| 41 | 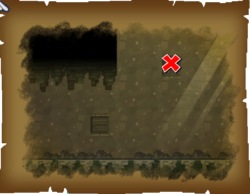
|
Chapter 7-2 | 70 | Underchomp Catch Card | The map shows a place between sky and earth. | Chapter 8 |
| 42 | 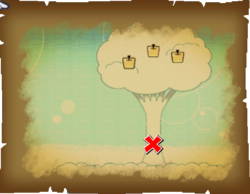
|
Chapter 7-3 | 150 | Gold Bar x3 | The map shows an oddly colored tree. | Chapter 7 |
| 43 | 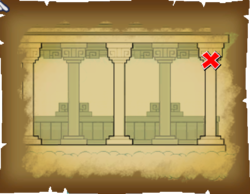
|
Chapter 7-4 | 90 | Grambi Catch Card | The map shows several similar objects in a row. | Chapter 8 |
| 44 | 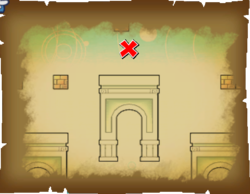
|
Chapter 7-4 | 100 | Luvbi Catch Card | The map shows a white platform in a blue sky. | Chapter 8 |
| 45 | 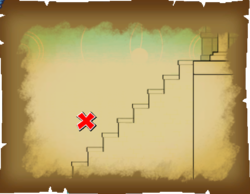
|
Chapter 7-4 | 190 | Bonechill Catch Card | The map shows a white staircase. | Chapter 8 |
| 46 | 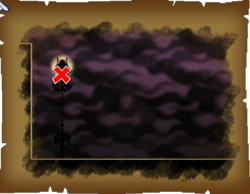
|
Chapter 8-1 | 160 | Nastasia Catch Card | The map shows light that dispels the darkness. | Chapter 8 |
| 47 | 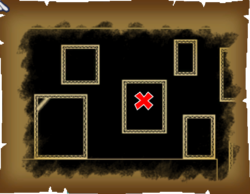
|
Chapter 8-3 | 200 | Super Dimentio Catch Card | The map shows devices floating in the darkness. | Chapter 8 |
| 48 | 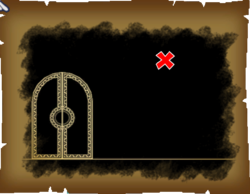
|
Chapter 8-4 | 90 | Count Bleck Catch Card | Where is this place? There are so many black walls... | Chapter 8 |