Flipside Pit of 100 Trials: Difference between revisions
No edit summary |
SnailofKale (talk | contribs) m (changed "Super Jump" to "super jump" since apparently that's game accurate) |
||
| (98 intermediate revisions by 59 users not shown) | |||
| Line 1: | Line 1: | ||
{{ | {{quote2|DANGER! Do not enter! -Flipside City Hall-|Signpost|[[Super Paper Mario]]}} | ||
[[ | [[File:SPMpit100.PNG|300px|thumb|The Flipside Pit of 100 Trials in ''Super Paper Mario'']] | ||
The '''Flipside Pit of 100 Trials''' is a one hundred-room labyrinth in ''[[Super Paper Mario]]'', similar to the [[Pit of 100 Trials (Paper Mario: The Thousand-Year Door)|Pit of 100 Trials]] seen in ''[[Paper Mario: The Thousand-Year Door]]''. However, in this game, there are two pits – one in [[Flipside]] and one in [[Flopside]], the latter of which is called the [[Flopside Pit of 100 Trials]]. The switch that opens the Flipside Pit is located above the entrance, which is sealed by blocks. After gaining [[Boomer (Super Paper Mario)|Boomer]], one can go to the lowest level on the outskirts of Flipside. After looking around with [[Tippi]], the player can reveal a route to a bunch of blocks. They can then have [[Mario]] flip on the blocks and a secret passage will appear, which will lead to the ledge with the blue block to open the way to the Pit. (The location is also hinted at by [[Garson]].) Alternatively, [[Luigi]] can simply hit the switch by doing a [[Super jump (Super Paper Mario)|super jump]]. | |||
In the Pit, a random enemy in each room holds a [[Pit Key]] to a locked door that proceeds to the next room. The player is given five minutes in every room to find and defeat the enemy holding the key and unlock and enter the locked door. If the player runs out of time, they will receive an instant [[Game Over]]. In every tenth room is a [[Catch Card]] of a [[Pixl]], a pipe leading out of the pit, and the door to the next room of the pit. At the 100th room, though, the boss [[Wracktail]] is found and the pit cannot be escaped until he is defeated. After Wracktail is destroyed, the player obtains the Pixl [[Dashell]]. The pipe leading out of the pit will not appear until the player has Dashell. | |||
In the | Both pits have artwork on the walls depicting a Pure Heart and where it is found, which changes every 25 rooms. In the Flipside pit, Rooms 1-25 show the first Pure Heart paired with Flipside and Flopside, and [[Fracktail]] is shown with the orange Pure Heart in Rooms 26-50. Rooms 51-75 have [[Merlee's Mansion]], with the corresponding Pure Heart. Rooms 76-99 show [[Fort Francis]] with the Pure Heart inside. Room 100 seems to be designed to simulate the area in which Fracktail is fought, with the music from the [[Yold Desert]] and a circular patterned floor which can be seen to act like sand when Wracktail rises from the ground. | ||
The walls of the pit are covered with faint images of doors, which each represent the possible location of any door in the pit. This is accurate for the visual LCD style (similar to the ''Game & Watch'' series) of the pit, as many devices with this type of screen rely on faint background shapes being filled to appear as images. The rooms in the Pit switch around every time the Pit is entered. This indicates there may be more than 100 rooms in the Pit, although the player only needs to go through 100 rooms to reach Wracktail. | |||
==Rooms and Enemies== | |||
The enemies start off fairly easy, gradually getting stronger as the player progresses. The list below details the enemies in the Pit and where they appear. | |||
===Rooms 1-9=== | |||
*[[Squiglet]] (Rooms 1, 3 and 8) | |||
*[[Goomba]] (Rooms 2 and 5) | |||
*[[Squig]] (Rooms 3, 7 and 8) | |||
*[[Sproing-Oing]] (Rooms 4 and 7) | |||
*[[Gloomba]] (Rooms 5 and 9) | |||
*[[Cherbil]] (Room 6) | |||
*[[Poison Cherbil]] (Room 9) | |||
===Rooms 11-19=== | |||
*[[Koopa Paratroopa]] (Room 11) | |||
*[[Koopa Troopa]] (Rooms 11, 14, 16 and 19) | |||
*[[Paragoomba]] (Room 12) | |||
*[[Spiked Goomba]] (Room 12) | |||
*[[Shlurp]] (Rooms 13 and 15) | |||
*[[Bald Cleft]] (Room 13) | |||
*[[Goomba|Flip Goomba]] (Room 14) | |||
*[[Boomboxer]] (Room 15) | |||
*[[Tileoid G]] (Room 16) | |||
*[[Koopa Troopa|Flip Koopa Troopa]] (Room 17) | |||
*[[Buzzy Beetle]] (Room 18) | |||
*[[Squig]] (Room 18) | |||
*[[Koopatrol]] (Room 19) | |||
*[[Squiglet]] (Room 19) | |||
== | ===Rooms 21-29=== | ||
*[[Spiny]] (Room 21) | |||
*[[Boo]] (Room 22) | |||
*[[Gloomba]] (Room 22) | |||
*[[Fuzzy]] (Room 23) | |||
*[[Cherbil]] (Room 23) | |||
*[[Boing-Oing]] (Room 24) | |||
*[[Sproing-Oing]] (Room 24) | |||
*[[Chain Chomp]] (Room 25) | |||
*[[Crazee Dayzee]] (Room 26) | |||
*[[Paragoomba]] (Room 26) | |||
*[[Squiglet]] (Room 27) | |||
*[[Hammer Bro]] (Room 28) | |||
*[[Koopa Troopa]] (Room 28) | |||
*[[Rawbus]] (Room 29) | |||
=== | ===Rooms 31-39=== | ||
*[[Tileoid B]] (Room 31) | |||
*[[Tileoid G]] (Rooms 31 and 39) | |||
*[[Longator]] (Room 32) | |||
*[[Growmeba]] (Room 33) | |||
*[[Cursya]] (Room 33) | |||
*[[Squig]] (Rooms 33, 35 and 37) | |||
*[[Stone Buzzy]] (Room 34) | |||
*[[Bald Cleft]] (Room 34) | |||
*[[Choppa]] (Room 35) | |||
*[[Ninjoe]] (Room 36) | |||
*[[Spike Top]] (Room 37) | |||
*[[Buzzy Beetle]] (Room 37) | |||
*[[Magikoopa]] (Room 38) | |||
*[[Spiked Goomba]] (Room 38) | |||
*[[Fire Bro]] (Room 39) | |||
* [[Squiglet]] ( | ===Rooms 41-49=== | ||
* [[ | *[[Clubba]] (Room 41 and 48) | ||
* [[Squig]] ( | *[[Squiglet]] (Room 41) | ||
* [[ | *[[Pokey]] (Room 42) | ||
* [[ | *[[Gloomba]] (Room 42) | ||
* [[Cherbil]] (Room | *[[Koopa Striker]] (Room 43) | ||
* [[Poison Cherbil]] (Room | *[[Squog]] (Room 44 and 49) | ||
*[[Squig]] (Room 44) | |||
*[[Cursya]] (Room 44) | |||
*[[Tileoid R]] (Room 45) | |||
*[[Tileoid B]] (Room 45) | |||
*[[Koopa Paratroopa|Flip Paratroopa]] (Room 46) | |||
*[[Goomba|Flip Goomba]] (Room 46) | |||
*[[Ice Cherbil]] (Room 47) | |||
*[[Poison Cherbil]] (Room 47) | |||
*[[Cherbil]] (Room 47) | |||
*[[Magikoopa]] (Room 48) | |||
=== | ===Rooms 51-59=== | ||
*[[Spiny|Flip Spiny]] (Room 51) | |||
*[[Spiny]] (Room 51) | |||
*[[Buzzy Beetle]] (Room 51) | |||
*[[Pigarithm]] (Room 52) | |||
*[[Spania]] (Room 53) | |||
*[[Tileoid B]] (Room 53) | |||
*[[Dry Bones]] (Room 54) | |||
*[[Clubba]] (Room 54) | |||
*[[Hooligon]] (Room 55) | |||
*[[Dark Boo]] (Room 56) | |||
*[[Tech Cursya]] (Room 56) | |||
*[[Zoing-Oing]] (Room 57) | |||
*[[Ice Cherbil]] (Room 57) | |||
*[[Amazy Dayzee]] (Room 58) | |||
*[[Crazee Dayzee]] (Room 58) | |||
*[[Yellow Magiblot]] (Room 59) | |||
*[[Squig]] (Room 59) | |||
* [[ | ===Rooms 61-69=== | ||
* [[ | *[[Beepboxer]] (Room 61) | ||
* [[ | *[[Heavy Cursya]] (Room 61) | ||
* [[ | *[[Cursya]] (Room 61) | ||
* [[ | *[[Dull Bones]] (Room 62) | ||
* [[ | *[[Dark Boo]] (Room 62) | ||
* [[ | *[[Boomerang Bro]] (Room 63) | ||
* [[ | *[[Clubba]] (Room 63) | ||
* [[Tileoid | *[[Tileoid Y]] (Room 64) | ||
* [[ | *[[Tileoid R]] (Room 64) | ||
* [[ | *[[Blomeba]] (Room 65) | ||
* [[ | *[[Growmeba]] (Room 65) | ||
* [[ | *[[Skellobit]] (Room 66) | ||
* [[ | *[[Ninjoe]] (Room 66) | ||
*[[Longadile]] (Room 67) | |||
*[[Longator]] (Room 67) | |||
*[[Hammer Bro|Flip Hammer Bro]] (Room 68) | |||
*[[Squog]] (Room 68) | |||
*[[Squoinker]] (Room 68) | |||
*[[Soopa Striker]] (Room 69) | |||
=== | ===Rooms 71-79=== | ||
*[[Cleft#Super Paper Mario|Moon Cleft]] (Room 71) | |||
*[[Bald Cleft]] (Room 71) | |||
*[[Jawbus]] (Room 72) | |||
*[[Cursya]] (Room 73) | |||
*[[Reversya Cursya]] (Room 73) | |||
*[[Tech Cursya]] (Room 73) | |||
*[[Heavy Cursya]] (Room 73) | |||
*[[Copta]] (Room 74) | |||
*[[Ruff Puff]] (Room 75) | |||
*[[Blastboxer]] (Room 76) | |||
*[[Beepboxer]] (Room 76) | |||
*[[Boomboxer]] (Room 76) | |||
*[[Blue Magiblot]] (Room 77) | |||
*[[Squog]] (Room 77) | |||
*[[Chromeba]] (Room 78) | |||
*[[Blomeba]] (Room 78) | |||
*[[Skellobit|Flip Skellobit]] (Room 79) | |||
*[[Spiky Skellobit|Flip Spiky Skellobit]] (Room 79) | |||
* [[ | ===Rooms 81-89=== | ||
* [[ | *[[Hogarithm]] (Room 81) | ||
* [[ | *[[Tileoid Y]] (Room 81) | ||
* [[Fuzzy]] (Room | *[[Red Magiblot]] (Room 82) | ||
* [[Cherbil]] (Room | *[[Squoinker]] (Room 82) | ||
* [[ | *[[Pink Fuzzy]] (Room 83) | ||
* [[ | *[[Cherbil]] (Room 83) | ||
* [[ | *[[Shlorp]] (Room 84) | ||
* [[ | *[[Spania]] (Room 84) | ||
* [[ | *[[Poison Pokey]] (Room 85) | ||
* [[ | *[[Dark Boo]] (Room 85) | ||
* [[ | *[[Koopatrol]] (Room 86) | ||
* [[ | *[[Magikoopa]] (Room 86) | ||
* [[ | *[[Chromeba]] (Room 87) | ||
*[[Reversya Cursya]] (Room 87) | |||
*[[Copta]] (Room 87) | |||
*[[Ninjoe]] (Room 88) | |||
*[[Ninjohn]] (Room 88) | |||
*[[Headbonk Goomba]] (Room 89) | |||
=== | ===Rooms 91-99=== | ||
*[[Gawbus]] (Room 91) | |||
*[[Ninjerry]] (Rooms 92 and 93) | |||
*[[Ninjohn]] (Room 92) | |||
*[[Ninjoe]] (Room 92) | |||
*[[Skellobit]] (Rooms 93 and 95) | |||
*[[Cursya]] (Room 93) | |||
*[[Fire Bro|Flip Fire Bro]] (Rooms 94 and 96) | |||
*[[Squoinker]] (Room 94) | |||
*[[Spiky Skellobit]] (Room 95) | |||
*[[Boomerang Bro|Flip Boomerang Bro]] (Room 96) | |||
*[[Squiglet]] (Room 97) | |||
*[[Red Chomp]] (Room 98) | |||
*[[Blue Magiblot]] (Room 99) | |||
*[[Red Magiblot]] (Room 99) | |||
*[[Yellow Magiblot]] (Room 99) | |||
===Room 100=== | |||
*[[Wracktail]] (boss) | |||
*[[Wrackle]] | |||
* [[ | |||
* [[ | |||
=== Room | ==Prizes== | ||
*Room 10: [[Tippi]] Card | |||
*Room 20: [[Thoreau]] Card | |||
*Room 30: [[Boomer (Super Paper Mario)|Boomer]] Card | |||
*Room 40: [[Slim (Pixl)|Slim]] Card | |||
*Room 50: [[Thudley]] Card | |||
*Room 60: [[Carrie]] Card | |||
*Room 70: [[Fleep]] Card | |||
*Room 80: [[Cudge]] Card | |||
*Room 90: [[Dottie]] Card | |||
*Room 100: [[Dashell]] (after defeating Wracktail) | |||
==Backgrounds== | |||
<gallery widths="250"> | |||
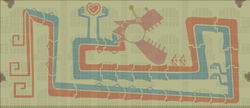
SPM Flipside Pit of 100 Trials Mural 1.png|The background mural of [[Flipside]] and [[Flopside]] seen in rooms 1-25 | |||
SPM Flipside Pit of 100 Trials Mural 2.png|The background mural of [[Fracktail]] seen in rooms 26-50 | |||
SPM Flipside Pit of 100 Trials Mural 3.png|The background mural of [[Merlee's Mansion]] seen in rooms 51-75 | |||
SPM Flipside Pit of 100 Trials Mural 4.png|The background mural of [[Fort Francis]] seen in rooms 76-99 | |||
</gallery> | |||
=== Room | ==Names in other languages== | ||
{{foreign names | |||
|Jap=100部屋ダンジョン | |||
|JapR=Hyaku-heya Danjon | |||
|JapM=100-Room Dungeon | |||
|Spa=Cien Mazmorras de Villacara | |||
|SpaM=Flipside 100 Dungeons | |||
|Ita=Labirinto dei 100 livelli | |||
|ItaM=Labyrinth of the 100 levels | |||
|Fre=Puits des 100 épreuves de Recto | |||
|FreM=Flipside's Well of 100 Trials | |||
|Kor=방 100개의 던전 | |||
|KorR=Bang 100(Baek)gaeui Deonjeon | |||
|KorM=Dungeon of 100 Rooms | |||
|Ger=Grube der 100 Prüfungen | |||
|GerM=Pit of 100 Trials | |||
}} | |||
{{SPM}} | |||
{{ | |||
[[Category:Dungeons]] | [[Category:Dungeons]] | ||
[[Category: | [[Category:Mazes]] | ||
[[Category: | [[Category:Underground areas]] | ||
[[Category: | [[Category:Super Paper Mario locations]] | ||
[[de:Grube der 100 Prüfungen in Flipstadt]] | |||
[[it:Labirinto dei 100 livelli (Svoltadilà)]] | |||
Revision as of 02:44, April 24, 2024
- “DANGER! Do not enter! -Flipside City Hall-”
- —Signpost, Super Paper Mario

The Flipside Pit of 100 Trials is a one hundred-room labyrinth in Super Paper Mario, similar to the Pit of 100 Trials seen in Paper Mario: The Thousand-Year Door. However, in this game, there are two pits – one in Flipside and one in Flopside, the latter of which is called the Flopside Pit of 100 Trials. The switch that opens the Flipside Pit is located above the entrance, which is sealed by blocks. After gaining Boomer, one can go to the lowest level on the outskirts of Flipside. After looking around with Tippi, the player can reveal a route to a bunch of blocks. They can then have Mario flip on the blocks and a secret passage will appear, which will lead to the ledge with the blue block to open the way to the Pit. (The location is also hinted at by Garson.) Alternatively, Luigi can simply hit the switch by doing a super jump.
In the Pit, a random enemy in each room holds a Pit Key to a locked door that proceeds to the next room. The player is given five minutes in every room to find and defeat the enemy holding the key and unlock and enter the locked door. If the player runs out of time, they will receive an instant Game Over. In every tenth room is a Catch Card of a Pixl, a pipe leading out of the pit, and the door to the next room of the pit. At the 100th room, though, the boss Wracktail is found and the pit cannot be escaped until he is defeated. After Wracktail is destroyed, the player obtains the Pixl Dashell. The pipe leading out of the pit will not appear until the player has Dashell.
Both pits have artwork on the walls depicting a Pure Heart and where it is found, which changes every 25 rooms. In the Flipside pit, Rooms 1-25 show the first Pure Heart paired with Flipside and Flopside, and Fracktail is shown with the orange Pure Heart in Rooms 26-50. Rooms 51-75 have Merlee's Mansion, with the corresponding Pure Heart. Rooms 76-99 show Fort Francis with the Pure Heart inside. Room 100 seems to be designed to simulate the area in which Fracktail is fought, with the music from the Yold Desert and a circular patterned floor which can be seen to act like sand when Wracktail rises from the ground.
The walls of the pit are covered with faint images of doors, which each represent the possible location of any door in the pit. This is accurate for the visual LCD style (similar to the Game & Watch series) of the pit, as many devices with this type of screen rely on faint background shapes being filled to appear as images. The rooms in the Pit switch around every time the Pit is entered. This indicates there may be more than 100 rooms in the Pit, although the player only needs to go through 100 rooms to reach Wracktail.
Rooms and Enemies
The enemies start off fairly easy, gradually getting stronger as the player progresses. The list below details the enemies in the Pit and where they appear.
Rooms 1-9
- Squiglet (Rooms 1, 3 and 8)
- Goomba (Rooms 2 and 5)
- Squig (Rooms 3, 7 and 8)
- Sproing-Oing (Rooms 4 and 7)
- Gloomba (Rooms 5 and 9)
- Cherbil (Room 6)
- Poison Cherbil (Room 9)
Rooms 11-19
- Koopa Paratroopa (Room 11)
- Koopa Troopa (Rooms 11, 14, 16 and 19)
- Paragoomba (Room 12)
- Spiked Goomba (Room 12)
- Shlurp (Rooms 13 and 15)
- Bald Cleft (Room 13)
- Flip Goomba (Room 14)
- Boomboxer (Room 15)
- Tileoid G (Room 16)
- Flip Koopa Troopa (Room 17)
- Buzzy Beetle (Room 18)
- Squig (Room 18)
- Koopatrol (Room 19)
- Squiglet (Room 19)
Rooms 21-29
- Spiny (Room 21)
- Boo (Room 22)
- Gloomba (Room 22)
- Fuzzy (Room 23)
- Cherbil (Room 23)
- Boing-Oing (Room 24)
- Sproing-Oing (Room 24)
- Chain Chomp (Room 25)
- Crazee Dayzee (Room 26)
- Paragoomba (Room 26)
- Squiglet (Room 27)
- Hammer Bro (Room 28)
- Koopa Troopa (Room 28)
- Rawbus (Room 29)
Rooms 31-39
- Tileoid B (Room 31)
- Tileoid G (Rooms 31 and 39)
- Longator (Room 32)
- Growmeba (Room 33)
- Cursya (Room 33)
- Squig (Rooms 33, 35 and 37)
- Stone Buzzy (Room 34)
- Bald Cleft (Room 34)
- Choppa (Room 35)
- Ninjoe (Room 36)
- Spike Top (Room 37)
- Buzzy Beetle (Room 37)
- Magikoopa (Room 38)
- Spiked Goomba (Room 38)
- Fire Bro (Room 39)
Rooms 41-49
- Clubba (Room 41 and 48)
- Squiglet (Room 41)
- Pokey (Room 42)
- Gloomba (Room 42)
- Koopa Striker (Room 43)
- Squog (Room 44 and 49)
- Squig (Room 44)
- Cursya (Room 44)
- Tileoid R (Room 45)
- Tileoid B (Room 45)
- Flip Paratroopa (Room 46)
- Flip Goomba (Room 46)
- Ice Cherbil (Room 47)
- Poison Cherbil (Room 47)
- Cherbil (Room 47)
- Magikoopa (Room 48)
Rooms 51-59
- Flip Spiny (Room 51)
- Spiny (Room 51)
- Buzzy Beetle (Room 51)
- Pigarithm (Room 52)
- Spania (Room 53)
- Tileoid B (Room 53)
- Dry Bones (Room 54)
- Clubba (Room 54)
- Hooligon (Room 55)
- Dark Boo (Room 56)
- Tech Cursya (Room 56)
- Zoing-Oing (Room 57)
- Ice Cherbil (Room 57)
- Amazy Dayzee (Room 58)
- Crazee Dayzee (Room 58)
- Yellow Magiblot (Room 59)
- Squig (Room 59)
Rooms 61-69
- Beepboxer (Room 61)
- Heavy Cursya (Room 61)
- Cursya (Room 61)
- Dull Bones (Room 62)
- Dark Boo (Room 62)
- Boomerang Bro (Room 63)
- Clubba (Room 63)
- Tileoid Y (Room 64)
- Tileoid R (Room 64)
- Blomeba (Room 65)
- Growmeba (Room 65)
- Skellobit (Room 66)
- Ninjoe (Room 66)
- Longadile (Room 67)
- Longator (Room 67)
- Flip Hammer Bro (Room 68)
- Squog (Room 68)
- Squoinker (Room 68)
- Soopa Striker (Room 69)
Rooms 71-79
- Moon Cleft (Room 71)
- Bald Cleft (Room 71)
- Jawbus (Room 72)
- Cursya (Room 73)
- Reversya Cursya (Room 73)
- Tech Cursya (Room 73)
- Heavy Cursya (Room 73)
- Copta (Room 74)
- Ruff Puff (Room 75)
- Blastboxer (Room 76)
- Beepboxer (Room 76)
- Boomboxer (Room 76)
- Blue Magiblot (Room 77)
- Squog (Room 77)
- Chromeba (Room 78)
- Blomeba (Room 78)
- Flip Skellobit (Room 79)
- Flip Spiky Skellobit (Room 79)
Rooms 81-89
- Hogarithm (Room 81)
- Tileoid Y (Room 81)
- Red Magiblot (Room 82)
- Squoinker (Room 82)
- Pink Fuzzy (Room 83)
- Cherbil (Room 83)
- Shlorp (Room 84)
- Spania (Room 84)
- Poison Pokey (Room 85)
- Dark Boo (Room 85)
- Koopatrol (Room 86)
- Magikoopa (Room 86)
- Chromeba (Room 87)
- Reversya Cursya (Room 87)
- Copta (Room 87)
- Ninjoe (Room 88)
- Ninjohn (Room 88)
- Headbonk Goomba (Room 89)
Rooms 91-99
- Gawbus (Room 91)
- Ninjerry (Rooms 92 and 93)
- Ninjohn (Room 92)
- Ninjoe (Room 92)
- Skellobit (Rooms 93 and 95)
- Cursya (Room 93)
- Flip Fire Bro (Rooms 94 and 96)
- Squoinker (Room 94)
- Spiky Skellobit (Room 95)
- Flip Boomerang Bro (Room 96)
- Squiglet (Room 97)
- Red Chomp (Room 98)
- Blue Magiblot (Room 99)
- Red Magiblot (Room 99)
- Yellow Magiblot (Room 99)
Room 100
Prizes
- Room 10: Tippi Card
- Room 20: Thoreau Card
- Room 30: Boomer Card
- Room 40: Slim Card
- Room 50: Thudley Card
- Room 60: Carrie Card
- Room 70: Fleep Card
- Room 80: Cudge Card
- Room 90: Dottie Card
- Room 100: Dashell (after defeating Wracktail)
Backgrounds
The background mural of Fracktail seen in rooms 26-50
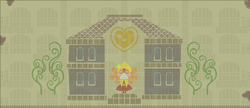
The background mural of Merlee's Mansion seen in rooms 51-75
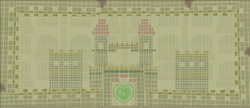
The background mural of Fort Francis seen in rooms 76-99


Names in other languages
| Language | Name | Meaning |
|---|---|---|
| Japanese | 100部屋ダンジョン Hyaku-heya Danjon |
100-Room Dungeon |
| French | Puits des 100 épreuves de Recto |
Flipside's Well of 100 Trials |
| German | Grube der 100 Prüfungen |
Pit of 100 Trials |
| Italian | Labirinto dei 100 livelli |
Labyrinth of the 100 levels |
| Korean | 방 100개의 던전 Bang 100(Baek)gaeui Deonjeon |
Dungeon of 100 Rooms |
| Spanish | Cien Mazmorras de Villacara |
Flipside 100 Dungeons |