Sydney Tour (September 2021): Difference between revisions
m (→Trivia) |
LinkTheLefty (talk | contribs) mNo edit summary |
||
| (96 intermediate revisions by 30 users not shown) | |||
| Line 1: | Line 1: | ||
{{ | {{tour infobox | ||
|image=[[File:MKT Sydney Tour September 2021.png|200px]] | |||
|image= | |||
|start=September 7, 2021<br>11:00 p.m. (PT) | |start=September 7, 2021<br>11:00 p.m. (PT) | ||
|end=September 21, 2021<br>10:59 p.m. (PT) | |end=September 21, 2021<br>10:59 p.m. (PT) | ||
|cups=12 | |cups=12 | ||
|rank=[[Yoshi Cup]] (week 1) | |rank=[[Yoshi Cup]] (week 1)<br>[[Baby Mario Cup]] (week 2) | ||
|coin=[[Sydney Sprint]] | |coin=[[Tour Sydney Sprint|Sydney Sprint]] | ||
|before=[[Kamek Tour|<<]] | |before=[[Kamek Tour|<<]] | ||
|after=>> | |after=[[2nd Anniversary Tour|>>]] | ||
}} | }} | ||
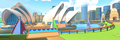
The '''Sydney Tour''' | The '''Sydney Tour''' was the fifty-second tour of ''[[Mario Kart Tour]]'', which began on September 8, 2021 and ended on September 21, 2021. It was the first tour to share a title with [[Sydney Tour (April–May 2021)|a tour]] that was released in the same year, and to share its trailer background color (orange-to-cyan gradient) with the first tour. The tour introduced a new layout of the [[Tour Sydney Sprint|Sydney Sprint]] course, named Sydney Sprint 2. It also introduced a yellow {{wp|boxing kangaroo}}-themed variant of [[Yoshi]], as well as [[Yoshi (species)|Pink Yoshi]] as a reward for placing high in the ranked cups. The Ocean Pipe returned in this tour, with the [[Polka-Dot Manta Glider]] and [[Starry Great Sail]] being added to the aforementioned special pipe, while a new glider called the [[Ship's Wheel (glider)|Ship's Wheel]] also appeared in this special pipe. The original Sydney Sprint course also returns in this tour. | ||
This tour's [[Coin Rush (Mario Kart Tour)|Coin Rush]] course was Sydney Sprint, which was reused from the April–May 2021 Sydney Tour. The menu's background featured the {{wp|Sydney Harbour Bridge}} as the landmark for this tour, which was also reused from the aforementioned tour. | |||
Starting from this tour, [[Yoshi (species)|White Yoshi]] and the [[Iron Cucumber]] are available in all regular tour pipes, including the All-Clear Pipe. | Starting from this tour, [[Yoshi (species)|White Yoshi]] and the [[Iron Cucumber]] are available in all regular tour pipes, including the All-Clear Pipe. | ||
{{br|toc=1}} | |||
{{br}} | ==Spotlights== | ||
{|align=center width=75% cellspacing=0 border=1 cellpadding=3 style="border-collapse:collapse;font-family:Arial;text-align:center" | |||
|-style="background:#89A" | |||
|colspan=3|'''Sydney Pipe 1'''<br>September 7, 2021, 11:00 p.m. (PT) – <br>September 21, 2021 10:59 p.m. (PT) | |||
|colspan=3|'''Sydney Pipe 2'''<br>September 14, 2021, 11:00 p.m. (PT) – <br>September 21, 2021 10:59 p.m. (PT) | |||
|- | |||
|colspan=3|[[File:MKT Tour52 SydneyPipe1.png|x150px]] | |||
|colspan=3|[[File:MKT Tour52 SydneyPipe2.png|x150px]] | |||
|-style="background:#ABC" | |||
!style="width: 15%;"|Driver | |||
!style="width: 15%;"|Kart | |||
!style="width: 15%;"|Glider | |||
!style="width: 15%;"|Drivers | |||
!style="width: 15%;"|Karts | |||
!style="width: 15%;"|Gliders | |||
|- | |||
|[[File:MKT Artwork YoshiKangaroo.png|100x100px]] | |||
|[[File:MKT Icon GreenDoubleDecker.png|100x100px]] | |||
|[[File:MKT Icon SunsetBalloons.png|100x100px]] | |||
|[[File:MKT Artwork BabyMarioKoala.png|100x100px]][[File:Cat Toad Artwork - Super Mario 3D World.png|100x100px]] | |||
|[[File:MKT Icon JetCruiser.png|90x90px]][[File:MKT Icon BlackCatCruiser.png|90x90px]] | |||
|[[File:MKT Icon SurfMaster.png|90x90px]][[File:MKT Icon BlackToeBeanBalloons.png|90x90px]] | |||
|- | |||
|[[Yoshi|Yoshi (Kangaroo)]] | |||
|[[Green Double-Decker]] | |||
|[[Sunset Balloons]] | |||
|[[Baby Mario|Baby Mario (Koala)]] and [[Cat Mario|Cat Toad]] | |||
|[[Jet Cruiser]] and [[Black Cat Cruiser]] | |||
|[[Surf Master]] and [[Black Toe-Bean Balloons]] | |||
|} | |||
==Special pipe== | |||
{|align=center width=75% cellspacing=0 border=1 cellpadding=3 style="border-collapse:collapse; font-family:Arial;text-align:center" | |||
|-style="background:#89A" | |||
|colspan=2|'''Ocean Glider Pipe'''<br>September 11, 2021, 11:00 p.m. (PT) – <br>September 16, 2021, 10:59 p.m. (PT) | |||
|- | |||
|colspan=2|[[File:MKT Tour52 OceanGliderPipe.png|x150px]] | |||
|-style="background:#ABC" | |||
!style="width: 25%;"|High-End Spotlight Glider | |||
!style="width: 50%;"|High-End Gliders | |||
|- | |||
|[[File:MKT Icon ShipsWheel.png|100x100px]] | |||
|[[File:MKT Icon GreatSail.png|100x100px]][[File:MKT Icon StarryGreatSail.png|100x100px]][[File:MKT Icon BlackGreatSail.png|100x100px]][[File:MKT Icon SilverMantaGlider.png|100x100px]][[File:MKT Icon PolkaDotMantaGlider.png|100x100px]][[File:MKT Icon MantaGlider.png|100x100px]] | |||
|- | |||
|[[Ship's Wheel (glider)|Ship's Wheel]] | |||
|[[Great Sail]], [[Starry Great Sail]], [[Black Great Sail]], [[Silver Manta Glider]], [[Polka-Dot Manta Glider]], and [[Manta Glider]] | |||
|} | |||
'''Names in other languages''' | |||
{{foreign names | |||
|Jap= | |||
|JapR= | |||
|JapM= | |||
|ChiS=浩海滑翔翼水管 | |||
|ChiSR=Hàohǎi Huáxiángyì Shuǐguǎn | |||
|ChiSM=Ocean Glider Pipe | |||
|ChiT=海洋滑翔翼水管 | |||
|ChiTR=Hǎiyáng Huáxiángyì Shuǐguǎn | |||
|ChiTM=Ocean Glider Pipe | |||
|Dut= | |||
|DutM= | |||
|Fre= | |||
|FreM= | |||
|Ger=Ozeangleiter-Röhre | |||
|GerM=Ocean Glider Pipe | |||
|Ita=Tubo aria d'oceano | |||
|ItaM=Ocean air pipe | |||
|Kor= | |||
|KorR= | |||
|KorM= | |||
|Por= | |||
|PorM= | |||
|SpaA= | |||
|SpaAM= | |||
|SpaE= | |||
|SpaEM= | |||
}} | |||
==Cups== | |||
{|align=center width=90% cellspacing=0 border=1 cellpadding=3 style="border-collapse:collapse;font-family:Arial;text-align:center" | |||
{{MKT cup table row | |||
|C=Yoshi||Ra=1 | |||
|R1=[[Sydney Sprint 2]]||R1.I=SydneySprint2||R1.1=1,400||R1.2=2,100||R1.3=2,800||R1.4=3,500||R1.5=7,000 | |||
|R2=[[GCN Yoshi Circuit|GCN Yoshi Circuit T]]||R2.I=YoshiCircuitTGCN Yoshi||R2.1=1,300||R2.2=1,900||R2.3=2,500||R2.4=3,200||R2.5=6,300 | |||
|R3=Sydney Sprint 2T||R3.I=SydneySprint2T||R3.1=2,200||R3.2=3,200||R3.3=4,300||R3.4=5,400||R3.5=10,800 | |||
|CN=[[Do Jump Boosts]]||C.I=Tour52 YoshiCupChallenge||CC=[[Baby Mario]]||CT=[[Sydney Sprint]]||C.1=7||C.2=12||C.3=16 | |||
}} | |||
{{MKT cup table row | |||
|C=Kamek||Ra= | |||
|R1=[[SNES Donut Plains 2]]||R1.I=DonutPlains2SNES KingBobomb||R1.1=1,200||R1.2=1,900||R1.3=2,600||R1.4=3,200||R1.5=6,200 | |||
|R2=Sydney Sprint||R2.I=SydneySprint CatToad||R2.1=1,500||R2.2=2,300||R2.3=3,100||R2.4=3,800||R2.5=7,400 | |||
|R3=[[RMX Choco Island 2]]||R3.I=RMXChocoIsland2 CatPeach||R3.1=1,700||R3.2=2,600||R3.3=3,500||R3.4=4,400||R3.5=8,400 | |||
|CN=[[Ring Race]]||C.I=Tour4 BowserCupChallenge||CC=[[Bowser]]||CT=[[SNES Mario Circuit 3]]||C.1=12||C.2=22||C.3=30 | |||
}} | |||
{{MKT cup table row | |||
|C=Baby Mario||Ra=2 | |||
|R1=Sydney Sprint 2R||R1.I=SydneySprint2R||R1.1=1,400||R1.2=2,200||R1.3=3,000||R1.4=3,700||R1.5=6,900 | |||
|R2=[[DS Waluigi Pinball|DS Waluigi Pinball T]]||R2.I=WaluigiPinballTDS Old2||R2.1=1,500||R2.2=2,500||R2.3=3,300||R2.4=4,200||R2.5=7,700 | |||
|R3=Sydney Sprint 2R/T||R3.I=SydneySprint2RT||R3.1=2,400||R3.2=3,900||R3.3=5,200||R3.4=6,500||R3.5=12,100 | |||
|CN=[[Goomba Takedown]]||C.I=Tour4 DryBowserCupChallenge||CC=[[Dry Bowser]]||CT=[[DS Luigi's Mansion]]||C.1=15||C.2=30||C.3=40 | |||
}} | |||
{{MKT cup table row | |||
|C=Wario||Ra= | |||
|R1=Sydney Sprint T||R1.I=SydneySprintT YoshiKangaroo||R1.1=2,300||R1.2=3,800||R1.3=5,200||R1.4=6,500||R1.5=11,600 | |||
|R2=RMX Choco Island 2R||R2.I=RMXChocoIsland2R||R2.1=1,900||R2.2=3,200||R2.3=4,300||R2.4=5,400||R2.5=9,600 | |||
|R3=SNES Mario Circuit 3R||R3.I=MarioCircuit3RSNES Wario||R3.1=1,200||R3.2=2,000||R3.3=2,700||R3.4=3,400||R3.5=6,000 | |||
|CN=[[Snap a Photo]]||C.I=Tour52 WarioCupChallenge||CC=[[Yoshi|Yoshi (Kangaroo)]]||CT=Sydney Sprint 2T||C.1=1||C.2=2||C.3=3 | |||
}} | |||
{{MKT cup table row | |||
|C=Peachette||Ra= | |||
|R1=SNES Donut Plains 2T||R1.I=DonutPlains2TSNES PenguinLuigi||R1.1=1,700||R1.2=2,900||R1.3=3,900||R1.4=4,900||R1.5=8,400 | |||
|R2=Sydney Sprint 2R||R2.I=SydneySprint2R||R2.1=1,500||R2.2=2,500||R2.3=3,400||R2.4=4,200||R2.5=7,300 | |||
|R3=GCN Yoshi Circuit||R3.I=YoshiCircuitGCN Peachette||R3.1=1,200||R3.2=2,000||R3.3=2,700||R3.4=3,400||R3.5=5,900 | |||
|CN=[[Smash Small Dry Bones]]||C.I=Tour38 BabyLuigiCupChallenge||CC=[[Mario]]||CT=[[RMX Rainbow Road 2]]||C.1=4||C.2=7||C.3=10 | |||
}} | |||
{{MKT cup table row | |||
|C=Luigi||Ra= | |||
|R1=DS Luigi's Mansion T||R1.I=LuigisMansionTDS Luigi||R1.1=1,300||R1.2=2,200||R1.3=3,000||R1.4=3,800||R1.5=6,400 | |||
|R2=[[SNES Choco Island 2|SNES Choco Island 2R/T]]||R2.I=ChocoIsland2RTSNES||R2.1=1,400||R2.2=2,400||R2.3=3,200||R2.4=4,100||R2.5=6,800 | |||
|R3=RMX Rainbow Road 2R||R3.I=RMXRainbowRoad2R Rosalina||R3.1=2,000||R3.2=3,500||R3.3=4,700||R3.4=5,900||R3.5=9,900 | |||
|CN=[[Time Trial (Mario Kart Tour)|Time Trial]]||C.I=Tour6 PeachetteCupChallenge||CC=[[Yoshi]]||CT=GCN Yoshi Circuit||C.1=2:50.00||C.2=2:15.00||C.3=2:00.00 | |||
}} | |||
{{MKT cup table row | |||
|C=King Boo||Ra= | |||
|R1=DS Waluigi Pinball||R1.I=WaluigiPinballDS KingBoo||R1.1=1,300||R1.2=2,300||R1.3=3,100||R1.4=3,900||R1.5=6,300 | |||
|R2=[[RMX Vanilla Lake 1|RMX Vanilla Lake 1T]]||R2.I=RMXVanillaLake1T CatToad||R2.1=2,200||R2.2=4,000||R2.3=5,400||R2.4=6,900||R2.5=11,100 | |||
|R3=Sydney Sprint 2||R3.I=SydneySprint2 BirdoBlack||R3.1=1,600||R3.2=2,900||R3.3=4,000||R3.4=5,000||R3.5=8,100 | |||
|CN=[[Break Item Boxes]]||C.I=Tour36 DryBowserCupChallenge||CC=[[Toad]]||CT=SNES Donut Plains 2||C.1=8||C.2=15||C.3=20 | |||
}} | |||
{{MKT cup table row | |||
|C=Mario||Ra= | |||
|R1=RMX Rainbow Road 2T||R1.I=RMXRainbowRoad2T Mario||R1.1=2,500||R1.2=4,600||R1.3=6,300||R1.4=7,900||R1.5=12,400 | |||
|R2=DS Luigi's Mansion R||R2.I=LuigisMansionRDS Pauline||R2.1=1,500||R2.2=2,800||R2.3=3,800||R2.4=4,900||R2.5=7,600 | |||
|R3=SNES Donut Plains 2R||R3.I=DonutPlains2RSNES IceMario||R3.1=1,600||R3.2=3,000||R3.3=4,100||R3.4=5,200||R3.5=8,100 | |||
|CN=[[Combo Attack]]||C.I=Tour10 DaisyCupChallenge||CC=[[Princess Daisy|Daisy]]||CT=SNES Choco Island 2T||C.1=5||C.2=9||C.3=15 | |||
}} | |||
{{MKT cup table row | |||
|C=Toadette||Ra= | |||
|R1=RMX Vanilla Lake 1R||R1.I=RMXVanillaLake1R||R1.1=1,900||R1.2=3,600||R1.3=5,000||R1.4=6,300||R1.5=9,600 | |||
|R2=Sydney Sprint 2T||R2.I=SydneySprint2T||R2.1=2,400||R2.2=4,500||R2.3=6,100||R2.4=7,800||R2.5=11,800 | |||
|R3=SNES Mario Circuit 3||R3.I=MarioCircuit3SNES Toadette||R3.1=1,400||R3.2=2,600||R3.3=3,600||R3.4=4,600||R3.5=6,900 | |||
|CN=[[Steer Clear of Obstacles]]||C.I=Tour7 PeachetteCupChallenge||CC=[[Yoshi]]||CT=GCN Yoshi Circuit||C.1=1||C.2=2||C.3=3 | |||
}} | |||
{{MKT cup table row | |||
|C=Waluigi||Ra= | |||
|R1=DS Waluigi Pinball R||R1.I=WaluigiPinballRDS Waluigi||R1.1=1,500||R1.2=3,000||R1.3=4,100||R1.4=5,200||R1.5=7,600 | |||
|R2=Sydney Sprint R||R2.I=SydneySprintR||R2.1=1,700||R2.2=3,300||R2.3=4,500||R2.4=5,800||R2.5=8,500 | |||
|R3=RMX Choco Island 2T||R3.I=RMXChocoIsland2T BirdoBlack||R3.1=2,500||R3.2=4,900||R3.3=6,700||R3.4=8,500||R3.5=12,500 | |||
|CN=Goomba Takedown||C.I=Tour52 WaluigiCupChallenge||CC=[[Birdo|Birdo (Yellow)]]||CT=Sydney Sprint 2||C.1=30||C.2=60||C.3=80 | |||
}} | |||
{{MKT cup table row | |||
|C=Larry||Ra= | |||
|R1=SNES Mario Circuit 3T||R1.I=MarioCircuit3TSNES Larry||R1.1=1,500||R1.2=2,900||R1.3=4,000||R1.4=5,100||R1.5=7,300 | |||
|R2=RMX Rainbow Road 2||R2.I=RMXRainbowRoad2 CatPeach||R2.1=2,400||R2.2=4,800||R2.3=6,600||R2.4=8,400||R2.5=12,000 | |||
|R3=DS Luigi's Mansion||R3.I=LuigisMansionDS||R3.1=1,500||R3.2=3,000||R3.3=4,100||R3.4=5,300||R3.5=7,500 | |||
|CN=Time Trial||C.I=Tour52 LarryCupChallenge||CC=[[Ice Mario (Super Mario Galaxy)|Ice Mario]]||CT=RMX Vanilla Lake 1R||C.1=1:45:00||C.2=1:30.00||C.3=1:20.00 | |||
}} | |||
{{MKT cup table row | |||
|C=Dry Bowser||Ra= | |||
|R1=GCN Yoshi Circuit R||R1.I=YoshiCircuitRGCN BlackYoshi||R1.1=1,800||R1.2=3,700||R1.3=5,100||R1.4=6,500||R1.5=9,000 | |||
|R2=RMX Vanilla Lake 1||R2.I=RMXVanillaLake1 YoshiKangaroo||R2.1=2,300||R2.2=4,700||R2.3=6,400||R2.4=8,200||R2.5=11,400 | |||
|R3=[[GBA Sunset Wilds|GBA Sunset Wilds R/T]]||R3.I=SunsetWildsRTGBA DryBowser||R3.1=2,700||R3.2=5,500||R3.3=7,600||R3.4=9,700||R3.5=13,500 | |||
|CN=[[Big Reverse Race]]||C.I=Tour4 DonkeyKongCupChallenge||CC=Any character||CT=DS Waluigi Pinball||C.1=50cc||C.2=100cc||C.3=150cc | |||
}} | |||
|} | |||
===Signature kart sets=== | |||
Drivers with a corresponding cup were bumped one rank up in every course of their cup. | |||
{|class="wikitable"style="text-align:center"width=50% | |||
!width=10%|Cup | |||
!width=20%|Driver | |||
!width=20%|Kart | |||
!width=20%|Glider | |||
|- | |||
|Second course of every cup | |||
|[[File:MKT Icon YoshiKangaroo.png|x50px|link=Yoshi|Yoshi (Kangaroo)]] | |||
|[[File:MKT Icon GreenDoubleDecker.png|50px|link=Green Double-Decker]] | |||
|[[File:MKT Icon SunsetBalloons.png|50px|link=Sunset Balloons]] | |||
|- | |||
|Third course of every cup | |||
|[[File:MKT Icon BabyMarioKoala.png|50px|link=Baby Mario|Baby Mario (Koala)]][[File:MKT Icon CatToad.png|50px|link=Cat Mario|Cat Toad]] | |||
|[[File:MKT Icon JetCruiser.png|50px|link=Jet Cruiser]][[File:MKT Icon BlackCatCruiser.png|50px|link=Black Cat Cruiser]] | |||
|[[File:MKT Icon SurfMaster.png|50px|link=Surf Master]][[File:MKT Icon BlackToeBeanBalloons.png|50px|link=Black Toe-Bean Balloons]] | |||
|- | |||
|[[File:MKT Icon Yoshi Cup.png|50px|link=Yoshi Cup]] | |||
|[[File:MKT Icon Yoshi.png|x50px|link=Yoshi]] | |||
|— | |||
|— | |||
|- | |||
|[[File:MKT Icon Kamek Cup.png|50px|link=Kamek Cup]] | |||
|[[File:MKT Icon Kamek.png|x50px|link=Kamek]] | |||
|— | |||
|— | |||
|- | |||
|[[File:MKT Icon Baby Mario Cup.png|50px|link=Baby Mario Cup]] | |||
|[[File:MKT Icon BabyMario.png|x50px|link=Baby Mario]] | |||
|— | |||
|— | |||
|- | |||
|[[File:MKT Icon Wario Cup.png|50px|link=Wario Cup]] | |||
|[[File:MKT Icon Wario.png|x50px|link=Wario]] | |||
|— | |||
|— | |||
|- | |||
|[[File:MKT Icon Peachette Cup.png|50px|link=Peachette Cup]] | |||
|[[File:MKT Icon Peachette.png|x50px|link=Peachette]] | |||
|— | |||
|— | |||
|- | |||
|[[File:MKT Icon Luigi Cup.png|50px|link=Luigi Cup]] | |||
|[[File:MKT Icon Luigi.png|x50px|link=Luigi]] | |||
|— | |||
|— | |||
|- | |||
|[[File:MKT Icon King Boo Cup.png|50px|link=King Boo Cup]] | |||
|[[File:MKT Icon KingBoo.png|x50px|link=King Boo]] | |||
|— | |||
|— | |||
|- | |||
|[[File:MKT Icon Mario Cup.png|50px|link=Mario Cup]] | |||
|[[File:MKT Icon Mario.png|x50px|link=Mario]] | |||
|— | |||
|— | |||
|- | |||
|[[File:MKT Icon Toadette Cup.png|50px|link=Toadette Cup]] | |||
|[[File:MKT Icon Toadette.png|x50px|link=Toadette]] | |||
|— | |||
|— | |||
|- | |||
|[[File:MKT Icon Waluigi Cup.png|50px|link=Waluigi Cup]] | |||
|[[File:MKT Icon Waluigi.png|x50px|link=Waluigi]] | |||
|— | |||
|— | |||
|- | |||
|[[File:MKT Icon Larry Cup.png|50px|link=Larry Cup]] | |||
|[[File:MKT Icon Larry.png|x50px|link=Larry Koopa|Larry]] | |||
|— | |||
|— | |||
|- | |||
|[[File:MKT Icon Dry Bowser Cup.png|50px|link=Dry Bowser Cup]] | |||
|[[File:MKT Icon DryBowser.png|x50px|link=Dry Bowser]] | |||
|— | |||
|— | |||
|} | |||
{| align=center width=40% cellspacing=0 border=1 cellpadding=3 style="border-collapse:collapse; font-family:Arial; text-align:center" | ==Today's Challenge== | ||
|-style="background: #89A" | Players' most recently used kart and glider are chosen, and favourite and favored ones have extra priority. Opponents are arranged randomly. On day 1 of this tour, players finish a race in [[SNES Donut Plains 2]] in the [[Kamek Cup]] using [[King Bob-omb]] for a free pipe launch. Starting from day 2, players have to finish a race in the earliest incomplete course that is not in any of the ranked cups using the driver shown on the course's thumbnail every day to obtain the corresponding reward in the table below. Once all of the courses are completed, the courses are selected at random. | ||
{|align=center width=40% cellspacing=0 border=1 cellpadding=3 style="border-collapse:collapse; font-family:Arial;text-align:center" | |||
|-style="background:#89A" | |||
|'''Day(s)''' | |'''Day(s)''' | ||
|'''Reward''' | |'''Reward''' | ||
| Line 42: | Line 282: | ||
|colspan=2|[[Ruby|Rubies]], [[coin]]s, driver (Normal/Super/High-End), kart (Normal/Super/High-End), glider (Normal/Super/High-End), [[item ticket]]s | |colspan=2|[[Ruby|Rubies]], [[coin]]s, driver (Normal/Super/High-End), kart (Normal/Super/High-End), glider (Normal/Super/High-End), [[item ticket]]s | ||
|} | |} | ||
==Rewards== | ==Rewards== | ||
Gold cells indicate rewards that are exclusive to Gold Pass members. | Gold cells indicate rewards that are exclusive to Gold Pass members. | ||
{|class="wikitable" style="margin:auto; text-align:center" | {|class="wikitable"style="margin:auto;text-align:center" | ||
|- | |- | ||
!colspan=2|[[File:MKT Icon GrandStar.png|20x20px]] 15 | !colspan=2|[[File:MKT Icon GrandStar.png|20x20px]] 15 | ||
| Line 66: | Line 305: | ||
|style=background:gold|[[Surf Master]] | |style=background:gold|[[Surf Master]] | ||
|style=background:silver|[[Pipe Buggy]] | |style=background:silver|[[Pipe Buggy]] | ||
|style=background:gold|[[Birdo | |style=background:gold|[[Birdo|Birdo (Yellow)]] | ||
|style=background:silver|[[Baby Mario]] | |style=background:silver|[[Baby Mario]] | ||
|style=background:gold|[[Yoshi]] | |style=background:gold|[[Yoshi]] | ||
| Line 73: | Line 312: | ||
|} | |} | ||
<br> | <br> | ||
{|class="wikitable" style="margin:auto; text-align:center" | {|class="wikitable"style="margin:auto;text-align:center" | ||
|- | |- | ||
!Grand Stars!![[File:MKT Icon GrandStar.png|20x20px]]!!15!!20!!25!!30!!35!!40!!50!!60!!70!!85!!100!!115!!130!!145!!160!!180!!200!!215!!230!!240!!250!!255!!260!!265!!Total!!Grand total | !Grand Stars!![[File:MKT Icon GrandStar.png|20x20px]]!!15!!20!!25!!30!!35!!40!!50!!60!!70!!85!!100!!115!!130!!145!!160!!180!!200!!215!!230!!240!!250!!255!!260!!265!!Total!!Grand total | ||
| Line 130: | Line 369: | ||
|- | |- | ||
!rowspan=2 colspan=2|[[Level-boost ticket]] | !rowspan=2 colspan=2|[[Level-boost ticket]] | ||
|||||||||||||||||||||||||||||||||||||||||||[[File:MKT Icon Level-boostticket1.png|30px]]||[[File:MKT Icon Level-boostticket4.png|30px]]||[[File:MKT Icon Level-boostticket7.png|30px]]|| | |||||||||||||||||||||||||||||||||||||||||||[[File:MKT Icon Level-boostticket1.png|30px]]||[[File:MKT Icon Level-boostticket4.png|30px]]||[[File:MKT Icon Level-boostticket7.png|30px]]||3 | ||
!rowspan=2|12 | !rowspan=2|12 | ||
|-style=background:gold | |-style=background:gold | ||
|||||||||||||||[[File:MKT Icon Level-boostticket3.png|30px]]||[[File:MKT Icon Level-boostticket2.png|30px]]||[[File:MKT Icon Level-boostticket1.png|30px]]||||[[File:MKT Icon Level-boostticket6.png|30px]]||[[File:MKT Icon Level-boostticket5.png|30px]]||[[File:MKT Icon Level-boostticket4.png|30px]]||||[[File:MKT Icon Level-boostticket9.png|30px]]||[[File:MKT Icon Level-boostticket8.png|30px]]||[[File:MKT Icon Level-boostticket7.png|30px]]|||||||||||||| | |||||||||||||||[[File:MKT Icon Level-boostticket3.png|30px]]||[[File:MKT Icon Level-boostticket2.png|30px]]||[[File:MKT Icon Level-boostticket1.png|30px]]||||[[File:MKT Icon Level-boostticket6.png|30px]]||[[File:MKT Icon Level-boostticket5.png|30px]]||[[File:MKT Icon Level-boostticket4.png|30px]]||||[[File:MKT Icon Level-boostticket9.png|30px]]||[[File:MKT Icon Level-boostticket8.png|30px]]||[[File:MKT Icon Level-boostticket7.png|30px]]||||||||||||||9 | ||
|} | |} | ||
==New content== | ==New content== | ||
===Drivers=== | ===Drivers=== | ||
<gallery> | |||
MKT Artwork PinkYoshi.png|[[Yoshi (species)|Pink Yoshi]] | |||
MKT Artwork YoshiKangaroo.png|[[Yoshi|Yoshi (Kangaroo)]] | |||
</gallery> | |||
===Karts=== | ===Karts=== | ||
<gallery> | |||
MKT Icon GreenDoubleDecker.png|[[Green Double-Decker]] | |||
MKT Icon BlackCatCruiser.png|[[Black Cat Cruiser]] | |||
</gallery> | |||
===Gliders=== | ===Gliders=== | ||
<gallery> | |||
MKT Icon SilverSurfMaster.png|[[Silver Surf Master]] | |||
MKT Icon ShipsWheel.png|[[Ship's Wheel (glider)|Ship's Wheel]] | |||
</gallery> | |||
===Courses=== | ===Courses=== | ||
<gallery heights=50px> | |||
MKT Icon Sydney Sprint 2.png|[[Tour Sydney Sprint|Sydney Sprint 2]] (N, R, T, R/T) | |||
</gallery> | |||
==Paid banners== | |||
{|align=center width=960px cellspacing=0 border=1 cellpadding=3 style="border-collapse:collapse;font-family:Arial;text-align:center" | |||
|-style="background:#ABC" | |||
!Name | |||
!Availability | |||
!Cost | |||
!Contents | |||
!Banner image | |||
|- | |||
|'''Value Pack''' | |||
|September 8, 2021 – September 21, 2021 | |||
|US$1.99 | |||
|[[File:MKT Icon Ruby.png|30px]] [[Ruby|Rubies]] ×5<br> | |||
[[File:MKT Icon StarTicket.png|30px]] [[Star ticket]] ×2<br> | |||
[[File:MKT Icon ItemTicket.png|30px]] [[Item ticket]] ×3 | |||
|[[File:MKT ValuePack.png|x150px]] | |||
|- | |||
|'''Silver Surf Master Pack''' | |||
|September 8, 2021 – September 21, 2021 | |||
|US$19.99 | |||
|[[File:MKT Icon SilverSurfMaster.png|30px]] [[Silver Surf Master]] ×1<br> | |||
[[File:MKT Icon Point-boostticket3.png|30px]] [[Point-boost ticket|Glider point-boost ticket]] ×1<br> | |||
[[File:MKT Icon Ruby.png|30px]] [[Ruby|Rubies]] ×45 | |||
|[[File:MKT Tour52 SilverSurfMasterPack.png|x150px]] | |||
|- | |||
|'''White Yoshi Pack''' | |||
|September 8, 2021 – September 21, 2021 | |||
|US$39.99 | |||
|[[File:MKT Icon WhiteYoshi.png|30px]] [[Yoshi (species)|White Yoshi]] ×1<br> | |||
[[File:MKT Icon WhiteTurboYoshi.png|30px]] [[White Turbo Yoshi]] ×1<br> | |||
[[File:MKT Icon Ruby.png|30px]] [[Ruby|Rubies]] ×90 | |||
|[[File:MKT Tour52 WhiteYoshiPack.png|x150px]] | |||
|- | |||
|'''Calico Parafoil Pack''' | |||
|September 15, 2021 – September 21, 2021 | |||
|US$19.99 | |||
|[[File:MKT Icon CalicoParafoil.png|30px]] [[Calico Parafoil]] ×1<br> | |||
[[File:MKT Icon Point-boostticket3.png|30px]] [[Point-boost ticket|Glider point-boost ticket]] ×1<br> | |||
[[File:MKT Icon Ruby.png|30px]] [[Ruby|Rubies]] ×45 | |||
|[[File:MKT Tour36 CalicoParafoilPack.png|x150px]] | |||
|- | |||
|'''Cat Peach Pack''' | |||
|September 15, 2021 – September 21, 2021 | |||
|US$39.99 | |||
|[[File:MKT Icon CatPeach.png|30px]] [[Cat Mario|Cat Peach]] ×1<br> | |||
[[File:MKT Icon CatCruiser.png|30px]] [[Cat Cruiser]] ×1<br> | |||
[[File:MKT Icon Ruby.png|30px]] [[Ruby|Rubies]] ×90 | |||
|[[File:MKT Tour52 CatPeachPack.png|x150px]] | |||
|} | |||
==Challenges== | |||
{{MKT challenge table | |||
|TCR1=[[File:MKT Icon QuickTicket.png|70px]] [[Quick ticket]] ×1 | |||
|T1.1=115 | |||
|T1.1E=Do 5 {{Color-link|Rocket Start|#A1A1FF|Rocket Starts}}. | |||
|T1.1S=1 | |||
|T1.2=104 | |||
|T1.2E=Use 10 {{Color-link|Mushroom|#A1A1FF|Mushrooms}}. | |||
|T1.2S=1 | |||
|T1.3=099 | |||
|T1.3E=Get 1st place 3 times in a row in races 100cc or above. | |||
|T1.3S=1 | |||
|T1.4=074 | |||
|T1.4E=Send Greeting {{Color-link|Coin|#A1A1FF|Coins}} to a friend. | |||
|T1.4S=2 | |||
|T1.5=227 | |||
|T1.5E=Get 1st place 5 times using {{Color-link|Yoshi|#A1A1FF}}. | |||
|T1.5S=2 | |||
|T1.6=027 | |||
|T1.6E=Get 1 item from the Daily Selects section of the Shop. | |||
|T1.6S=2 | |||
|T1.7=145 | |||
|T1.7E=Cause opponents to crash a total of 10 times on a {{Color-link|Sydney|#A1A1FF}} course. | |||
|T1.7S=2 | |||
|T1.8=173 | |||
|T1.8E=Earn a total score of 20,000 or higher in the {{Color-link|Luigi Cup|#A1A1FF}}. | |||
|T1.8S=2 | |||
|T1.9=008 | |||
|T1.9E=Drive a distance of 20,000 or more. | |||
|T1.9S=2 | |||
|TCR2=[[File:MKT Icon CoinRushTicket.png|70px]] [[Coin Rush ticket]] ×1 | |||
|T2.1=119 | |||
|T2.1E=Do 50 {{Color-link|Mini-Turbo|#A1A1FF}} boosts. | |||
|T2.1S=1 | |||
|T2.2=041 | |||
|T2.2E=Land 5 hits with {{Color-link|Red Shell|#A1A1FF|Red Shells}}. | |||
|T2.2S=1 | |||
|T2.3=069 | |||
|T2.3E=Land 3 hits with {{Color-link|Bob-omb|#A1A1FF|Bob-ombs}}. | |||
|T2.3S=1 | |||
|T2.4=019 | |||
|T2.4E=Cause opponents to crash using a {{Color-link|Mega Mushroom|#A1A1FF}}. | |||
|T2.4S=2 | |||
|T2.5=073 | |||
|T2.5E=Get 1st place a total of 5 times on a {{Color-link|Sydney|#A1A1FF}} course. | |||
|T2.5S=2 | |||
|T2.6=052 | |||
|T2.6E=Use {{Color-link|point-boost ticket|#A1A1FF|point-boost tickets}} 3 times. | |||
|T2.6S=2 | |||
|T2.7=144 | |||
|T2.7E=Do 30 {{Color-link|Trick|#A1A1FF|Jump Boosts}} using a driver wearing a shell. | |||
|T2.7S=2 | |||
|T2.8=165 | |||
|T2.8E=Earn a total score of 25,000 or higher in the {{Color-link|Dry Bowser Cup|#A1A1FF}}. | |||
|T2.8S=2 | |||
|T2.9=082 | |||
|T2.9E=Race in every course of every cup, including bonus challenges. | |||
|T2.9S=2 | |||
|GCR=[[File:MKT Icon 1Ruby.png|70px]] [[Ruby|Rubies]] ×5 | |||
|G.1=119 | |||
|G.1E=Do 10 Ultra {{Color-link|Mini-Turbo|#A1A1FF}} boosts. | |||
|G.1S=1 | |||
|G.2=002 | |||
|G.2E=Land 15 hits with {{Color-link|Banana|#A1A1FF|Bananas}}. | |||
|G.2S=1 | |||
|G.3=101 | |||
|G.3E=Get a Fantastic combo a total of 5 times. | |||
|G.3S=1 | |||
|G.4=070 | |||
|G.4E=Earn a score of 10,000 or higher on 5 courses. | |||
|G.4S=2 | |||
|G.5=082 | |||
|G.5E=Activate {{Color-link|Frenzy|#A1A1FF}} mode 5 times on a Sydney course. | |||
|G.5S=2 | |||
|G.6=057 | |||
|G.6E=Use a {{Color-link|level-boost ticket|#A1A1FF}}. | |||
|G.6S=2 | |||
|G.7=012 | |||
|G.7E=Land 3 hits with {{Color-link|Yoshi's Egg|#A1A1FF}}. | |||
|G.7S=2 | |||
|G.8=183 | |||
|G.8E=Earn a total score of 25,000 or higher in the {{Color-link|Wario Cup|#A1A1FF}}. | |||
|G.8S=2 | |||
|G.9=022 | |||
|G.9E=Cause opponents to crash 3 times while gliding. | |||
|G.9S=2 | |||
}} | |||
<br> | |||
{|align=center width=30% cellspacing=0 border=1 cellpadding=3 style="border-collapse:collapse;font-family:Arial;text-align:center" | |||
|- | |||
!colspan=3 style="background:#EEEEFF"|'''Premium Challenges''' | |||
|- | |||
|colspan=3 style="background:#EEEEFF"|'''Cost:''' US$4.99 | |||
|- | |||
|colspan=3 style="background:#EEEEFF"|'''Three in a row reward:''' [[File:MKT Icon Coins 2.png|60px]] [[Coin|Coins]] ×300 | |||
|- | |||
|colspan=3 style="background:#EEEEFF"|'''Completion reward:''' [[File:MKT Artwork BlackYoshi.png|50px]] [[Yoshi (species)|Black Yoshi]] ×1 | |||
|-style="height:80px" | |||
|width=10% style="background:linear-gradient(#F2E18F,#B9800F)"|[[File:MP9 Birdo Main Artwork.png|50x75px]] | |||
|width=10% style="background:linear-gradient(#F2E18F,#B9800F)"|[[File:MKT Icon TurboBirdo.png|50x75px]] | |||
|width=10% style="background:linear-gradient(#F2E18F,#B9800F)"|[[File:MKT Icon PinkFlowerGlider.png|50x75px]] | |||
|-style="color:#FFF" | |||
|style="background:linear-gradient(#864D00,#A26000);border-top:1px solid #B9800F;"|{{Color-link|Birdo|#A1A1FF}} ×1 | |||
|style="background:linear-gradient(#864D00,#A26000);border-top:1px solid #B9800F;"|{{Color-link|Turbo Birdo|#A1A1FF}} ×1 | |||
|style="background:linear-gradient(#864D00,#A26000);border-top:1px solid #B9800F;"|{{Color-link|Pink Flower Glider|#A1A1FF}} ×1 | |||
|-style="color:#FFF" | |||
|style="background:linear-gradient(#A26000,#C88512);border-top:1px solid #A26000;"|''Land 5 hits with Green Shells.'' | |||
|style="background:linear-gradient(#A26000,#C88512);border-top:1px solid #A26000;"|''Land 10 hits with Bananas.'' | |||
|style="background:linear-gradient(#A26000,#C88512);border-top:1px solid #A26000;"|''Land 10 hits with Bob-ombs.'' | |||
|-style="height:80px" | |||
|width=10% style="background:linear-gradient(#F2E18F,#B9800F)"|[[File:MKT Icon Coins 3.png|70px]] | |||
|width=10% style="background:linear-gradient(#F2E18F,#B9800F)"|[[File:MKT Icon Ruby.png|70px]] | |||
|width=10% style="background:linear-gradient(#F2E18F,#B9800F)"|[[File:MKT Icon Point-boostticket3.png|70px]] | |||
|-style="color:#FFF" | |||
|style="background:linear-gradient(#864D00,#A26000);border-top:1px solid #B9800F;"|{{Color-link|Coin|#A1A1FF|Coins}} ×3,000 | |||
|style="background:linear-gradient(#864D00,#A26000);border-top:1px solid #B9800F;"|{{Color-link|Ruby|#A1A1FF|Rubies}} ×10 | |||
|style="background:linear-gradient(#864D00,#A26000);border-top:1px solid #B9800F;"|Glider {{Color-link|point-boost ticket|#A1A1FF}} ×3 | |||
|-style="color:#FFF" | |||
|style="background:linear-gradient(#A26000,#C88512);border-top:1px solid #A26000;"|''Do 50 Jump Boosts.'' | |||
|style="background:linear-gradient(#A26000,#C88512);border-top:1px solid #A26000;"|''Participate in a race.'' | |||
|style="background:linear-gradient(#A26000,#C88512);border-top:1px solid #A26000;"|''Do 100 Mini-Turbo boosts.'' | |||
|-style="height:80px" | |||
|width=10% style="background:linear-gradient(#F2E18F,#B9800F)"|[[File:MKT Icon Level-boostticket3.png|70px]] | |||
|width=10% style="background:linear-gradient(#F2E18F,#B9800F)"|[[File:MKT Icon Level-boostticket6.png|70px]] | |||
|width=10% style="background:linear-gradient(#F2E18F,#B9800F)"|[[File:MKT Icon Level-boostticket9.png|70px]] | |||
|-style="color:#FFF" | |||
|style="background:linear-gradient(#864D00,#A26000);border-top:1px solid #B9800F;"|Normal glider {{Color-link|level-boost ticket|#A1A1FF}} ×1 | |||
|style="background:linear-gradient(#864D00,#A26000);border-top:1px solid #B9800F;"|Super glider level-boost ticket ×1 | |||
|style="background:linear-gradient(#864D00,#A26000);border-top:1px solid #B9800F;"|High-End glider level-boost ticket ×1 | |||
|-style="color:#FFF" | |||
|style="background:linear-gradient(#A26000,#C88512);border-top:1px solid #A26000;"|''Get 1st place in a race 10 times.'' | |||
|style="background:linear-gradient(#A26000,#C88512);border-top:1px solid #A26000;"|''Get 1st place in a race 15 times.'' | |||
|style="background:linear-gradient(#A26000,#C88512);border-top:1px solid #A26000;"|''Get 1st place in a race 20 times.'' | |||
|} | |||
<br> | |||
{|align=center width=30% cellspacing=0 border=1 cellpadding=3 style="border-collapse:collapse;font-family:Arial;text-align:center" | |||
|- | |||
!colspan=3 style="background:#C3F84E"|'''Tour Multiplayer Challenges''' | |||
|-style="color:#000" | |||
|colspan=3 style="background:#C3F84E"|'''Three in a row reward:''' [[File:MKT Icon Coins 2.png|60px]] [[Coin|Coins]] ×300 | |||
|-style="color:#000" | |||
|colspan=3 style="background:#C3F84E"|'''Completion reward:''' [[File:MKT Icon 1Ruby.png|60px]] [[Ruby|Rubies]] ×5 | |||
|-style="color:#FFF" | |||
|width=10% style="background:#2F5D1C"|[[File:MKT 134CB.png|70px]]<br>[[File:MKT Icon GrandStar.png|15px]] | |||
|width=10% style="background:#2F5D1C"|[[File:MKT 127CB.png|70px]]<br>[[File:MKT Icon GrandStar.png|15px]] | |||
|width=10% style="background:#2F5D1C"|[[File:MKT 147CB.png|70px]]<br>[[File:MKT Icon GrandStar.png|15px]] | |||
|-style="color:#FFF" | |||
|style="background:#2F5D1C;border-top:1px solid #2F5D1C;"|''Do 10 Jump Boosts in multiplayer.'' | |||
|style="background:#2F5D1C;border-top:1px solid #2F5D1C;"|''Land 3 hits with Green Shells in multiplayer.'' | |||
|style="background:#2F5D1C;border-top:1px solid #2F5D1C;"|''Cause opponents to crash 5 times in multiplayer.'' | |||
|-style="color:#FFF" | |||
|width=10% style="background:#2F5D1C"|[[File:MKT 112-3CB.png|70px]]<br>[[File:MKT Icon GrandStar.png|15px]] [[File:MKT Icon GrandStar.png|15px]] | |||
|width=10% style="background:#2F5D1C"|[[File:MKT 112-1CB.png|70px]]<br>[[File:MKT Icon GrandStar.png|15px]] [[File:MKT Icon GrandStar.png|15px]] | |||
|width=10% style="background:#2F5D1C"|[[File:MKT 112CB.png|70px]]<br>[[File:MKT Icon GrandStar.png|15px]] [[File:MKT Icon GrandStar.png|15px]] | |||
|-style="color:#FFF" | |||
|style="background:#2F5D1C;border-top:1px solid #2F5D1C;"|''Join 3 multiplayer races.'' | |||
|style="background:#2F5D1C;border-top:1px solid #2F5D1C;"|''Join 5 multiplayer races.'' | |||
|style="background:#2F5D1C;border-top:1px solid #2F5D1C;"|''Join 10 multiplayer races.'' | |||
|-style="color:#FFF" | |||
|width=10% style="background:#2F5D1C"|[[File:MKT 130CB.png|70px]]<br>[[File:MKT Icon GrandStar.png|15px]] [[File:MKT Icon GrandStar.png|15px]] | |||
|width=10% style="background:#2F5D1C"|[[File:MKT 131CB.png|70px]]<br>[[File:MKT Icon GrandStar.png|15px]] [[File:MKT Icon GrandStar.png|15px]] | |||
|width=10% style="background:#2F5D1C"|[[File:MKT 129CB.png|70px]]<br>[[File:MKT Icon GrandStar.png|15px]] [[File:MKT Icon GrandStar.png|15px]] | |||
|-style="color:#FFF" | |||
|style="background:#2F5D1C;border-top:1px solid #2F5D1C;"|''Get 3rd place or higher in a multiplayer race.'' | |||
|style="background:#2F5D1C;border-top:1px solid #2F5D1C;"|''Get 3rd place or higher 3 times in a multiplayer race.'' | |||
|style="background:#2F5D1C;border-top:1px solid #2F5D1C;"|''Get 3rd place or higher 5 times in a multiplayer race.'' | |||
|} | |||
<br> | |||
{|class="wikitable"style="margin:auto; text-align:center"width=30% | |||
!colspan=2|Total Points Challenge | |||
|- | |||
!Points | |||
!Rewards | |||
|- | |||
!600,000 | |||
|[[File:MKT Icon 1Ruby.png|20px]] [[Ruby|Rubies]] ×3<br> | |||
[[File:MKT Icon ItemTicket.png|30px]] [[Item ticket]]s ×5<br> | |||
[[File:MKT Icon Level-boostticket8.png|30px]] [[Level-boost ticket]] (High-End kart) ×1<br> | |||
[[File:MKT Icon Points-capticket8.png|30px]] [[Points-cap ticket]] (High-End kart) ×1 | |||
|- | |||
!550,000 | |||
|[[File:MKT Icon Coins 3.png|30px]] [[Coin]]s ×3,000<br> | |||
[[File:MKT Icon ItemTicket.png|30px]] Item tickets ×5<br> | |||
[[File:MKT Icon Level-boostticket5.png|30px]] Level-boost ticket (Super kart) ×1<br> | |||
[[File:MKT Icon Points-capticket5.png|30px]] Points-cap ticket (Super kart) ×1 | |||
|- | |||
!500,000 | |||
|[[File:MKT Icon 1Ruby.png|20px]] Rubies ×3<br> | |||
[[File:MKT Icon ItemTicket.png|30px]] Item tickets ×5<br> | |||
[[File:MKT Icon Level-boostticket2.png|30px]] Level-boost ticket (Normal kart) ×1<br> | |||
[[File:MKT Icon Points-capticket2.png|30px]] Points-cap ticket (Normal kart) ×1 | |||
|- | |||
!400,000 | |||
|[[File:MKT Icon Coins 3.png|30px]] Coins ×2,000<br> | |||
[[File:MKT Icon Point-boostticket1.png|30px]] [[Point-boost ticket]]s (driver) ×3 | |||
|- | |||
!300,000 | |||
|[[File:MKT Icon 1Ruby.png|20px]] Rubies ×3<br> | |||
[[File:MKT Icon Point-boostticket2.png|30px]] Point-boost tickets (kart) ×3 | |||
|- | |||
!150,000 | |||
|[[File:MKT Icon Coins 3.png|30px]] Coins ×1,000<br> | |||
[[File:MKT Icon Point-boostticket3.png|30px]] Point-boost tickets (glider) ×3 | |||
|} | |||
==Initial pipe appearance rates== | ==Initial pipe appearance rates== | ||
===All-Clear Pipe=== | ===All-Clear Pipe=== | ||
The All-Clear Pipe randomly shot out one of the following regular High-End items. The appearance rate | The All-Clear Pipe randomly shot out one of the following regular High-End items. The appearance rate can be viewed via the "Pipe content" link on the Gold Pass purchase screen. | ||
{|class="wikitable" style="margin:auto; text-align:center" | {|class="wikitable"style="margin:auto;text-align:center" | ||
!colspan=2|High-End items obtainable from the All-Clear Pipe during the September 2021 Sydney Tour | !colspan=2|High-End items obtainable from the All-Clear Pipe during the September 2021 Sydney Tour | ||
!Rate (each) | !Rate (each) | ||
|- | |- | ||
!High-End drivers | !High-End drivers | ||
|[[Dry Bowser]], [[ | |[[Dry Bowser]], [[Metal Mario]], [[Pink Gold Peach]], [[Cat Mario|Cat Peach]], [[Pauline]], [[Nabbit]], [[King Bob-omb]], [[Peachette]], [[Yoshi (species)|Black Yoshi]], [[Yoshi (species)|White Yoshi]], [[Birdo|Birdo (Black)]], [[Penguin Mario|Penguin Luigi]], [[Dixie Kong]], [[Funky Kong]], [[Ice Mario (Super Mario Galaxy)|Ice Mario]] | ||
|rowspan=3|1.5152% | |rowspan=3|1.5152% | ||
|- | |- | ||
| Line 172: | Line 674: | ||
===Sydney Pipe 1=== | ===Sydney Pipe 1=== | ||
{|class="wikitable" style="margin:auto; text-align:center" | {|class="wikitable"style="margin:auto;text-align:center" | ||
!colspan=16|Items obtained from a new Sydney Pipe 1 | !colspan=16|Items obtained from a new Sydney Pipe 1 | ||
|- | |- | ||
| Line 209: | Line 711: | ||
|} | |} | ||
<br> | <br> | ||
{|class="wikitable"style="margin:auto;text-align:center" | |||
{|class="wikitable" style="margin:auto; text-align:center" | |||
!Class | !Class | ||
!Parts | !Parts | ||
| Line 228: | Line 729: | ||
|- | |- | ||
!High-End drivers | !High-End drivers | ||
|[[Dry Bowser]], [[ | |[[Dry Bowser]], [[Metal Mario]], [[Pink Gold Peach]], [[Cat Mario|Cat Peach]], [[Pauline]], [[Nabbit]], [[King Bob-omb]], [[Peachette]], [[Yoshi (species)|Black Yoshi]], [[Yoshi (species)|White Yoshi]], [[Cat Mario|Cat Toad]], [[Birdo|Birdo (Black)]], [[Baby Mario|Baby Mario (Koala)]], [[Penguin Mario|Penguin Luigi]], [[Dixie Kong]], [[Funky Kong]], [[Ice Mario (Super Mario Galaxy)|Ice Mario]] | ||
|0.0588% | |0.0588% | ||
|- | |- | ||
| Line 240: | Line 741: | ||
|- | |- | ||
!Super drivers | !Super drivers | ||
|[[Donkey Kong]], [[Toad]], [[Bowser]], [[Luigi]], [[Mario]], [[Princess Peach|Peach]], [[Yoshi]], [[Princess Daisy|Daisy]], [[Lakitu]], [[King Boo]], [[Toadette]], [[Bowser Jr.]], [[Waluigi]], [[Wario]], [[Rosalina]], [[Birdo]], [[Diddy Kong]], [[Hammer Bro]], [[Boomerang Bro]], [[Fire Bro]], [[Ice Bro]], [[Red Yoshi]], [[Black Shy Guy]], [[Pink Shy Guy]], [[Toad|Toad (Pit Crew)]], [[Monty Mole]], [[Birdo | |[[Donkey Kong]], [[Toad]], [[Bowser]], [[Luigi]], [[Mario]], [[Princess Peach|Peach]], [[Yoshi]], [[Princess Daisy|Daisy]], [[Lakitu]], [[King Boo]], [[Toadette]], [[Bowser Jr.]], [[Waluigi]], [[Wario]], [[Rosalina]], [[Birdo]], [[Diddy Kong]], [[Hammer Bro]], [[Boomerang Bro]], [[Fire Bro]], [[Ice Bro]], [[Red Yoshi]], [[Black Shy Guy]], [[Pink Shy Guy]], [[Toad|Toad (Pit Crew)]], [[Monty Mole]], [[Birdo|Birdo (Light Blue)]], [[Birdo|Birdo (Yellow)]], [[Roving Racers|Red Koopa (Freerunning)]] | ||
|0.3103% | |0.3103% | ||
|- | |- | ||
| Line 264: | Line 765: | ||
|} | |} | ||
<br> | <br> | ||
===Sydney Pipe 2=== | |||
{|class="wikitable"style="margin:auto;text-align:center" | |||
!colspan=16|Items obtained from a new Sydney Pipe 2 | |||
|- | |||
!rowspan=2|Item | |||
!colspan=3|[[File:MKT Icon Normal.png|50px]]<br>Normal | |||
!colspan=3|[[File:MKT Icon Rare.png|50px]]<br>Super | |||
!colspan=3|[[File:MKT Icon HighEnd.png|50px]]<br>High-End | |||
!colspan=3|[[File:MKT Icon HighEnd.png|50px]]<br>Featured High-End | |||
|- | |||
!Driver | |||
!Kart | |||
!Glider | |||
!Driver | |||
!Kart | |||
!Glider | |||
!Driver | |||
!Kart | |||
!Glider | |||
!Driver | |||
!Kart | |||
!Glider | |||
|- | |||
!Amount | |||
|31 | |||
|25 | |||
|15 | |||
|9 | |||
|7 | |||
|4 | |||
|1 | |||
|1 | |||
|1 | |||
|2 | |||
|2 | |||
|2 | |||
|} | |||
<br> | |||
{|class="wikitable"style="margin:auto;text-align:center" | |||
!Class | |||
!Parts | |||
!Rate (each) | |||
|- | |||
!High-End Spotlight Drivers | |||
|[[Baby Mario|Baby Mario (Koala)]], [[Cat Mario|Cat Toad]] | |||
|1.0000% | |||
|- | |||
!High-End Spotlight Karts | |||
|[[Jet Cruiser]], [[Black Cat Cruiser]] | |||
|1.0000% | |||
|- | |||
!High-End Spotlight Gliders | |||
|[[Surf Master]], [[Black Toe-Bean Balloons]] | |||
|1.0000% | |||
|- | |||
!High-End drivers | |||
|[[Dry Bowser]], [[Metal Mario]], [[Pink Gold Peach]], [[Cat Mario|Cat Peach]], [[Pauline]], [[Nabbit]], [[King Bob-omb]], [[Peachette]], [[Yoshi (species)|Black Yoshi]], [[Yoshi (species)|White Yoshi]], [[Birdo|Birdo (Black)]], [[Yoshi|Yoshi (Kangaroo)]], [[Penguin Mario|Penguin Luigi]], [[Dixie Kong]], [[Funky Kong]], [[Ice Mario (Super Mario Galaxy)|Ice Mario]] | |||
|0.0625% | |||
|- | |||
!High-End karts | |||
|[[B Dasher]], [[Badwagon]], [[Cat Cruiser]], [[Sports Coupe]], [[Circuit Special]], [[Bruiser]], [[Wild Wing]], [[Bumble V]], [[Steel Driver]], [[Macharon]], [[Wildfire Flyer]], [[Red B Dasher]], [[Wild Pink]], [[Choco Macharon]], [[P-Wing (kart)|P-Wing]], [[Black Turbo Birdo]], [[Green Apple Kart]], [[Poison Apple Kart]], [[Dozer Dasher]], [[Banana Master]], [[Offroader]], [[Head Honcho]], [[Pink Wing]], [[Koopa King]], [[Cact-X]], [[Sushi Racer]], [[Green Circuit]], [[Crawly Kart]], [[Iron Cucumber]], [[Cact-Ice]], [[Green Double-Decker]] | |||
|0.0323% | |||
|- | |||
!High-End gliders | |||
|[[Swooper (glider)|Swooper]], [[Cloud Glider]], [[Gold Glider]], [[Pink Gold Paper Glider]], [[Dry Bowser Umbrella]], [[Blizzard Balloons]], [[Sunset Balloons]], [[Starchute]], [[Silver Starchute]], [[Butterfly Wings]], [[Butterfly Sunset]], [[Crimson Crane]], [[Strawberry Donut]], [[Heart Balloons]], [[Great Sail]], [[Black Great Sail]], [[Toe-Bean Balloons]], [[Tropical Glider]], [[8-Bit Star]], [[Manta Glider]], [[Silver Bells]], [[Cheep Cheep Masks]] | |||
|0.0455% | |||
|- | |||
!Super drivers | |||
|[[Donkey Kong]], [[Toad]], [[Bowser]], [[Luigi]], [[Mario]], [[Princess Peach|Peach]], [[Yoshi]], [[Princess Daisy|Daisy]], [[Lakitu]], [[King Boo]], [[Toadette]], [[Bowser Jr.]], [[Waluigi]], [[Wario]], [[Rosalina]], [[Birdo]], [[Diddy Kong]], [[Hammer Bro]], [[Boomerang Bro]], [[Fire Bro]], [[Ice Bro]], [[Red Yoshi]], [[Black Shy Guy]], [[Pink Shy Guy]], [[Toad|Toad (Pit Crew)]], [[Monty Mole]], [[Birdo|Birdo (Light Blue)]], [[Birdo|Birdo (Yellow)]], [[Roving Racers|Red Koopa (Freerunning)]] | |||
|0.3103% | |||
|- | |||
!Super karts | |||
|[[Cucumber]], [[Zucchini]], [[Egg 1]], [[Daytripper]], [[Mach 8]], [[Cloud 9]], [[Soda Jet]], [[Koopa Clown]], [[Poltergust 4000]], [[Royale]], [[Barrel Train]], [[Turbo Yoshi]], [[Blue Seven]], [[Flame Flyer]], [[Para-Wing]], [[Super Blooper (kart)|Super Blooper]], [[Turbo Birdo]], [[Streamliner]], [[DK Jumbo]], [[Red Turbo Yoshi]], [[Light-blue Turbo Birdo]], [[Yellow Turbo Birdo]] | |||
|0.3182% | |||
|- | |||
!Super gliders | |||
|[[Flower Glider]], [[Peach Parasol (glider)|Peach Parasol]], [[BaNaNa Parafoil]], [[Bob-omb Parafoil]], [[Wario Wing]], [[Oilpaper Umbrella]], [[Mushroom Glider]], [[Shell Parachute]], [[Lightning Oilpaper]], [[Blue Flower Glider]], [[Pink Flower Glider]], [[Waluigi Wing]], [[? Block (glider)|? Block]], [[8-Bit Jumping Mario]], [[Eggshell Glider]] | |||
|0.2667% | |||
|- | |||
!Normal drivers | |||
|[[Koopa Troopa]], [[Shy Guy]], [[Dry Bones]], [[Baby Daisy]], [[Baby Luigi]], [[Baby Mario]], [[Baby Peach]], [[Baby Rosalina]], [[Iggy]], [[Larry]], [[Lemmy]], [[Ludwig]], [[Morton]], [[Roy]], [[Wendy]] | |||
|2.0667% | |||
|- | |||
!Normal karts | |||
|[[Birthday Girl]], [[Landship]], [[Bullet Blaster]], [[Mushmellow]], [[Biddybuggy]], [[Pipe Frame]], [[Pipe Buggy]], [[Cheep Charger]], [[Red Kiddie Kart]], [[Koopa Dasher]], [[Green Kiddie Kart]] | |||
|2.2727% | |||
|- | |||
!Normal gliders | |||
|[[Super Glider]], [[Paper Glider]], [[Parachute (glider)|Parachute]], [[Parafoil]], [[Piston Glider]], [[Droplet Glider]], [[BBIA Parafoil]], [[Piranha Plant Parafoil]], [[Minion Paper Glider]] | |||
|1.6667% | |||
|} | |||
<br> | |||
===Ocean Glider Pipe=== | |||
{|class="wikitable"style="margin:auto;text-align:center" | |||
!colspan=16|Items obtained from a new Ocean Glider Pipe | |||
|- | |||
!rowspan=2|Item | |||
!colspan=3|[[File:MKT Icon Normal.png|50px]]<br>Normal | |||
!colspan=3|[[File:MKT Icon Rare.png|50px]]<br>Super | |||
!colspan=3|[[File:MKT Icon HighEnd.png|50px]]<br>High-End | |||
!colspan=3|[[File:MKT Icon HighEnd.png|50px]]<br>Featured High-End | |||
|- | |||
!Driver | |||
!Kart | |||
!Glider | |||
!Driver | |||
!Kart | |||
!Glider | |||
!Driver | |||
!Kart | |||
!Glider | |||
!Driver | |||
!Kart | |||
!Glider | |||
|- | |||
!Amount | |||
|15 | |||
|11 | |||
|8 | |||
|5 | |||
|4 | |||
|3 | |||
|0 | |||
|0 | |||
|3 | |||
|0 | |||
|0 | |||
|1 | |||
|} | |||
<br> | |||
{|class="wikitable"style="margin:auto;text-align:center" | |||
!Class | |||
!Parts | |||
!Rate (each) | |||
|- | |||
!High-End Spotlight Glider | |||
|[[Ship's Wheel (glider)|Ship's Wheel]] | |||
|2.0000% | |||
|- | |||
!High-End gliders | |||
|[[Great Sail]], [[Black Great Sail]], [[Manta Glider]], [[Silver Manta Glider]], [[Polka-Dot Manta Glider]], [[Starry Great Sail]] | |||
|1.0000% | |||
|- | |||
!Super drivers | |||
|[[Donkey Kong]], [[Toad]], [[Bowser]], [[Luigi]], [[Mario]], [[Princess Peach|Peach]], [[Yoshi]], [[Princess Daisy|Daisy]], [[Lakitu]], [[King Boo]], [[Toadette]], [[Bowser Jr.]], [[Waluigi]], [[Wario]], [[Rosalina]], [[Birdo]], [[Diddy Kong]], [[Hammer Bro]], [[Boomerang Bro]], [[Fire Bro]], [[Ice Bro]], [[Red Yoshi]], [[Black Shy Guy]], [[Pink Shy Guy]], [[Toad|Toad (Pit Crew)]], [[Monty Mole]], [[Birdo|Birdo (Light Blue)]], [[Birdo|Birdo (Yellow)]], [[Roving Racers|Red Koopa (Freerunning)]] | |||
|0.3448% | |||
|- | |||
!Super karts | |||
|[[Cucumber]], [[Zucchini]], [[Egg 1]], [[Daytripper]], [[Mach 8]], [[Cloud 9]], [[Soda Jet]], [[Koopa Clown]], [[Poltergust 4000]], [[Royale]], [[Barrel Train]], [[Turbo Yoshi]], [[Blue Seven]], [[Flame Flyer]], [[Para-Wing]], [[Super Blooper (kart)|Super Blooper]], [[Turbo Birdo]], [[Streamliner]], [[DK Jumbo]], [[Red Turbo Yoshi]], [[Light-blue Turbo Birdo]], [[Yellow Turbo Birdo]] | |||
|0.3636% | |||
|- | |||
!Super gliders | |||
|[[Flower Glider]], [[Peach Parasol (glider)|Peach Parasol]], [[BaNaNa Parafoil]], [[Bob-omb Parafoil]], [[Wario Wing]], [[Oilpaper Umbrella]], [[Mushroom Glider]], [[Shell Parachute]], [[Lightning Oilpaper]], [[Blue Flower Glider]], [[Pink Flower Glider]], [[Waluigi Wing]], [[? Block (glider)|? Block]], [[8-Bit Jumping Mario]], [[Eggshell Glider]] | |||
|0.4000% | |||
|- | |||
!Normal drivers | |||
|[[Koopa Troopa]], [[Shy Guy]], [[Dry Bones]], [[Baby Daisy]], [[Baby Luigi]], [[Baby Mario]], [[Baby Peach]], [[Baby Rosalina]], [[Iggy]], [[Larry]], [[Lemmy]], [[Ludwig]], [[Morton]], [[Roy]], [[Wendy]] | |||
|2.0000% | |||
|- | |||
!Normal karts | |||
|[[Birthday Girl]], [[Landship]], [[Bullet Blaster]], [[Mushmellow]], [[Biddybuggy]], [[Pipe Frame]], [[Pipe Buggy]], [[Cheep Charger]], [[Red Kiddie Kart]], [[Koopa Dasher]], [[Green Kiddie Kart]] | |||
|2.0000% | |||
|- | |||
!Normal gliders | |||
|[[Super Glider]], [[Paper Glider]], [[Parachute (glider)|Parachute]], [[Parafoil]], [[Piston Glider]], [[Droplet Glider]], [[BBIA Parafoil]], [[Piranha Plant Parafoil]], [[Minion Paper Glider]] | |||
|1.7778% | |||
|} | |||
<br> | |||
==Token Shop== | |||
The limited-time event where [[event token]]s appeared began on September 8, 2021 and ended on September 21, 2021. The method of earning event tokens was listed as "Cause opponents to crash" on the cup selection screen, but they were actually earned from collecting them in courses. | |||
{|class="wikitable"style="margin:auto;text-align:center"width=50% | |||
!colspan=3|'''Token Shop''' (September 8, 2021 - September 21, 2021) | |||
|- | |||
|[[File:MKT Artwork RedYoshi.png|80x80px]] | |||
|[[File:MKT Icon AppleKart.png|90px]] | |||
|[[File:MKT Icon EggshellGlider.png|80x80px]] | |||
|- | |||
![[Yoshi (species)|Red Yoshi]]<br>[[File:MKT Icon Eventtoken.png|20px]] 100<br>Amount: 1 | |||
![[Apple Kart]]<br>[[File:MKT Icon Eventtoken.png|20px]] 200<br>Amount: 1 | |||
![[Eggshell Glider]]<br>[[File:MKT Icon Eventtoken.png|20px]] 50<br>Amount: 1 | |||
|- | |||
|[[File:MKT Icon 1Ruby.png|55px]] | |||
|[[File:MKT Icon Coins 2.png|80px]] | |||
|[[File:MKT Icon CoinRushTicket.png|70px]] | |||
|- | |||
![[Ruby]] ×3<br>[[File:MKT Icon Eventtoken.png|20px]] 30<br>Amount: 5 | |||
![[Coin]] ×500<br>[[File:MKT Icon Eventtoken.png|20px]] 30<br>Amount: 10 | |||
![[Coin Rush ticket]]<br>[[File:MKT Icon Eventtoken.png|20px]] 20<br>Amount: 1 | |||
|- | |||
|[[File:MKT Icon Point-boostticket1.png|70px]] | |||
|[[File:MKT Icon Point-boostticket2.png|70px]] | |||
|[[File:MKT Icon Point-boostticket3.png|70px]] | |||
|- | |||
![[Point-boost ticket]] (driver)<br>[[File:MKT Icon Eventtoken.png|20px]] 10<br>Amount: 5 | |||
!Point-boost ticket (kart)<br>[[File:MKT Icon Eventtoken.png|20px]] 10<br>Amount: 5 | |||
!Point-boost ticket (glider)<br>[[File:MKT Icon Eventtoken.png|20px]] 10<br>Amount: 5 | |||
|- | |||
|[[File:MKT Icon Level-boostticket1.png|70px]] | |||
|[[File:MKT Icon Level-boostticket4.png|70px]] | |||
|[[File:MKT Icon Level-boostticket7.png|70px]] | |||
|- | |||
![[Level-boost ticket]]<br>(Normal driver)<br>[[File:MKT Icon Eventtoken.png|20px]] 50<br>Amount: 3 | |||
!Level-boost ticket<br>(Super driver)<br>[[File:MKT Icon Eventtoken.png|20px]] 100<br>Amount: 1 | |||
!Level-boost ticket<br>(High-End driver)<br>[[File:MKT Icon Eventtoken.png|20px]] 150<br>Amount: 1 | |||
|- | |||
|[[File:MKT Icon Points-capticket1.png|70px]] | |||
|[[File:MKT Icon Points-capticket4.png|70px]] | |||
|[[File:MKT Icon Points-capticket7.png|70px]] | |||
|- | |||
![[Points-cap ticket]]<br>(Normal driver)<br>[[File:MKT Icon Eventtoken.png|20px]] 100<br>Amount: 1 | |||
!Points-cap ticket<br>(Super driver)<br>[[File:MKT Icon Eventtoken.png|20px]] 150<br>Amount: 1 | |||
!Points-cap ticket<br>(High-End driver)<br>[[File:MKT Icon Eventtoken.png|20px]] 200<br>Amount: 1 | |||
|} | |||
==Tier Shop== | |||
The shop featured a variety of set and randomized items available for purchase. The item slots in the shop are unlocked based on the highest tier of players. | |||
{|class="wikitable"style="margin:auto;text-align:center"width=50% | |||
!colspan=3|Items available in Tier Shop (September 8, 2021 - September 14, 2021) | |||
|- | |||
|[[File:Yoshi - Mario Party 10.png|80x80px]] | |||
|[[File:MKT Icon RedTurboYoshi.png|80px]] | |||
|[[File:MKT Icon TropicalGlider.png|80px]] | |||
|- | |||
![[Yoshi]]<br>[[File:MKT Icon Coin.png|20px]] 3,000<br>Amount: 1 | |||
![[Red Turbo Yoshi]]<br>[[File:MKT Icon Coin.png|20px]] 2,000<br>Amount: 1 | |||
![[Tropical Glider]]<br>[[File:MKT Icon Coin.png|20px]] 10,000<br>Amount: 1 | |||
|- | |||
!colspan=3|Items available in Tier Shop (September 15, 2021 - September 21, 2021) | |||
|- | |||
|[[File:NewSuperMarioBrosUDeluxe Peachette.png|80x80px]] | |||
|[[File:MKT Icon BumbleV.png|80px]] | |||
|[[File:MKT Icon BaNaNaParafoil.png|80px]] | |||
|- | |||
![[Peachette]]<br>[[File:MKT Icon Coin.png|20px]] 12,000<br>Amount: 1 | |||
![[Bumble V]]<br>[[File:MKT Icon Coin.png|20px]] 10,000<br>Amount: 1 | |||
![[BaNaNa Parafoil]]<br>[[File:MKT Icon Coin.png|20px]] 2,000<br>Amount: 1 | |||
|- | |||
!colspan=3|Items available in Tier Shop (September 8, 2021 - September 21, 2021) | |||
|- | |||
|[[File:MKT Icon Level-boostticket1.png|80px]] | |||
|[[File:MKT Icon Level-boostticket2.png|80px]] | |||
|[[File:MKT Icon Level-boostticket3.png|80px]] | |||
|- | |||
![[Level-boost ticket]] (Normal)<br>[[File:MKT Icon Coin.png|20px]] 1,000<br>Amount: 3 per week | |||
!Level-boost ticket (Normal)<br>[[File:MKT Icon Coin.png|20px]] 800<br>Amount: 3 per week | |||
!Level-boost ticket (Normal)<br>[[File:MKT Icon Coin.png|20px]] 800<br>Amount: 3 per week | |||
|- | |||
|[[File:MKT Icon Level-boostticket4.png|80px]]<br>OR<br>[[File:MKT Icon Level-boostticket7.png|80px]] | |||
|[[File:MKT Icon Level-boostticket5.png|80px]]<br>OR<br>[[File:MKT Icon Level-boostticket8.png|80px]] | |||
|[[File:MKT Icon Level-boostticket6.png|80px]]<br>OR<br>[[File:MKT Icon Level-boostticket9.png|80px]] | |||
|- | |||
!Level-boost ticket (Super)<br>[[File:MKT Icon Coin.png|20px]] 4,000<br>Amount: 2 per week<br>OR<br>Level-boost ticket (High-End)<br>[[File:MKT Icon Coin.png|20px]] 15,000<br>Amount: 1 per week | |||
!Level-boost ticket (Super)<br>[[File:MKT Icon Coin.png|20px]] 3,000<br>Amount: 2 per week<br>OR<br>Level-boost ticket (High-End)<br>[[File:MKT Icon Coin.png|20px]] 13,000<br>Amount: 1 per week | |||
!Level-boost ticket (Super)<br>[[File:MKT Icon Coin.png|20px]] 3,000<br>Amount: 2 per week<br>OR<br>Level-boost ticket (High-End)<br>[[File:MKT Icon Coin.png|20px]] 13,000<br>Amount: 1 per week | |||
|- | |||
|[[File:MKT Icon Points-capticket1.png|80px]]<br>OR<br>[[File:MKT Icon Points-capticket2.png|80px]]<br>OR<br>[[File:MKT Icon Points-capticket3.png|80px]] | |||
|[[File:MKT Icon Points-capticket4.png|80px]]<br>OR<br>[[File:MKT Icon Points-capticket5.png|80px]]<br>OR<br>[[File:MKT Icon Points-capticket6.png|80px]] | |||
|[[File:MKT Icon Points-capticket7.png|80px]]<br>OR<br>[[File:MKT Icon Points-capticket8.png|80px]]<br>OR<br>[[File:MKT Icon Points-capticket9.png|80px]] | |||
|- | |||
![[Points-cap ticket]] (Normal)<br>[[File:MKT Icon Coin.png|20px]] 2,000<br>Amount: 1 per week | |||
!Points-cap ticket (Super)<br>[[File:MKT Icon Coin.png|20px]] 5,000<br>Amount: 1 per week | |||
!Points-cap ticket (High-End)<br>[[File:MKT Icon Coin.png|20px]] 20,000<br>Amount: 1 per week | |||
|} | |||
==Profiles== | ==Profiles== | ||
*'''''Mario Kart Tour'' Twitter:''' | *'''''Mario Kart Tour'' Twitter:''' | ||
**"''The Kamek Tour is wrapping up in {{color|#MarioKartTour|blue}}. Next up is the Sydney Tour! First we had [[Baby Mario|a koala]], but what's next?''"<ref>@mariokarttourEN. (September 3, 2021). [https://twitter.com/mariokarttourEN/status/1433671455972241431 ''Twitter'']. Retrieved September 3, 2021.</ref> | **"''The Kamek Tour is wrapping up in {{color|#MarioKartTour|blue}}. Next up is the Sydney Tour! First we had [[Baby Mario|a koala]], but what's next?''"<ref>@mariokarttourEN. (September 3, 2021). [https://twitter.com/mariokarttourEN/status/1433671455972241431 ''Twitter'']. Retrieved September 3, 2021.</ref> | ||
**"''Soak up the sunshine by the ocean in {{color|#MarioKartTour|blue}}! The Sydney Sprint 2 city course takes center stage in the Sydney Tour!''"<ref>@mariokarttourEN. (September 8, 2021). [https://twitter.com/mariokarttourEN/status/1435485551801499650 ''Twitter'']. Retrieved September 10, 2021.</ref> | |||
==Names in other languages== | ==Names in other languages== | ||
| Line 298: | Line 1,066: | ||
==Trivia== | ==Trivia== | ||
*This | *This was the second tour after the [[1st Anniversary Tour]] to have two variants of the same course in a cup, namely [[Sydney Sprint 2]] (both the regular and Trick variant of the course appeared in the [[Yoshi Cup]], and the Reverse and Reverse/Trick variant of the course appeared in the [[Baby Mario Cup]]). | ||
**This was also the first tour to include all four variations of a single track in the tour's ranked cups, with the regular and Trick versions of Sydney Sprint 2 being featured in the first week's ranked cup and the Reverse and Reverse/Trick versions being featured in the second week's ranked cup. | |||
*The [[Kamek Cup]] appeared in this tour despite [[Kamek]] not being available in regular tour pipes or from the All-Clear Pipe, until he became playable in the [[Battle Tour]]. | |||
*This was the second tour to not contain any 3DS courses, the first being the [[Kamek Tour]]. | |||
==References== | ==References== | ||
| Line 305: | Line 1,076: | ||
{{MKT}} | {{MKT}} | ||
[[Category:Mario Kart Tour tours]] | [[Category:Mario Kart Tour tours]] | ||
[[it:Tour di Sydney (settembre 2021)]] | |||
Revision as of 13:07, January 2, 2024
| Sydney Tour | |
|---|---|

| |
| Start date | September 7, 2021 11:00 p.m. (PT) |
| End date | September 21, 2021 10:59 p.m. (PT) |
| Number of cups | 12 |
| Ranked cups | Yoshi Cup (week 1) Baby Mario Cup (week 2) |
| Coin Rush course | Sydney Sprint |
| << List of tours >> | |
The Sydney Tour was the fifty-second tour of Mario Kart Tour, which began on September 8, 2021 and ended on September 21, 2021. It was the first tour to share a title with a tour that was released in the same year, and to share its trailer background color (orange-to-cyan gradient) with the first tour. The tour introduced a new layout of the Sydney Sprint course, named Sydney Sprint 2. It also introduced a yellow boxing kangaroo-themed variant of Yoshi, as well as Pink Yoshi as a reward for placing high in the ranked cups. The Ocean Pipe returned in this tour, with the Polka-Dot Manta Glider and Starry Great Sail being added to the aforementioned special pipe, while a new glider called the Ship's Wheel also appeared in this special pipe. The original Sydney Sprint course also returns in this tour.
This tour's Coin Rush course was Sydney Sprint, which was reused from the April–May 2021 Sydney Tour. The menu's background featured the Sydney Harbour Bridge as the landmark for this tour, which was also reused from the aforementioned tour.
Starting from this tour, White Yoshi and the Iron Cucumber are available in all regular tour pipes, including the All-Clear Pipe.
Spotlights
| Sydney Pipe 1 September 7, 2021, 11:00 p.m. (PT) – September 21, 2021 10:59 p.m. (PT) |
Sydney Pipe 2 September 14, 2021, 11:00 p.m. (PT) – September 21, 2021 10:59 p.m. (PT) | ||||

|

| ||||
| Driver | Kart | Glider | Drivers | Karts | Gliders |
|---|---|---|---|---|---|

|
 
|
||||
| Yoshi (Kangaroo) | Green Double-Decker | Sunset Balloons | Baby Mario (Koala) and Cat Toad | Jet Cruiser and Black Cat Cruiser | Surf Master and Black Toe-Bean Balloons |
Special pipe
| Ocean Glider Pipe September 11, 2021, 11:00 p.m. (PT) – September 16, 2021, 10:59 p.m. (PT) | |

| |
| High-End Spotlight Glider | High-End Gliders |
|---|---|
| Ship's Wheel | Great Sail, Starry Great Sail, Black Great Sail, Silver Manta Glider, Polka-Dot Manta Glider, and Manta Glider |
Names in other languages
| Language | Name | Meaning |
|---|---|---|
| Chinese (simplified) | 浩海滑翔翼水管 Hàohǎi Huáxiángyì Shuǐguǎn |
Ocean Glider Pipe |
| Chinese (traditional) | 海洋滑翔翼水管 Hǎiyáng Huáxiángyì Shuǐguǎn |
Ocean Glider Pipe |
| German | Ozeangleiter-Röhre |
Ocean Glider Pipe |
| Italian | Tubo aria d'oceano |
Ocean air pipe |
Cups
Yoshi Cup Ranked cup (week 1) |
Sydney Sprint 2 |
GCN Yoshi Circuit T |
Sydney Sprint 2T |
Do Jump Boosts | ||||
 Sydney Sprint |
Baby Mario | |||||||
Kamek Cup |
SNES Donut Plains 2 |
Sydney Sprint |
RMX Choco Island 2 |
Ring Race | ||||
 SNES Mario Circuit 3 |
Bowser | |||||||
Baby Mario Cup Ranked cup (week 2) |
Sydney Sprint 2R |
DS Waluigi Pinball T |
Sydney Sprint 2R/T |
Goomba Takedown | ||||
 DS Luigi's Mansion |
Dry Bowser | |||||||
Wario Cup |
Sydney Sprint T |
RMX Choco Island 2R |
SNES Mario Circuit 3R |
Snap a Photo | ||||
 Sydney Sprint 2T |
Yoshi (Kangaroo) | |||||||
Peachette Cup |
SNES Donut Plains 2T |
Sydney Sprint 2R |
GCN Yoshi Circuit |
Smash Small Dry Bones | ||||
 RMX Rainbow Road 2 |
Mario | |||||||
Luigi Cup |
DS Luigi's Mansion T |
SNES Choco Island 2R/T |
RMX Rainbow Road 2R |
Time Trial | ||||
 GCN Yoshi Circuit |
Yoshi | |||||||
King Boo Cup |
DS Waluigi Pinball |
RMX Vanilla Lake 1T |
Sydney Sprint 2 |
Break Item Boxes | ||||
 SNES Donut Plains 2 |
Toad | |||||||
Mario Cup |
RMX Rainbow Road 2T |
DS Luigi's Mansion R |
SNES Donut Plains 2R |
Combo Attack | ||||
 SNES Choco Island 2T |
Daisy | |||||||
Toadette Cup |
RMX Vanilla Lake 1R |
Sydney Sprint 2T |
SNES Mario Circuit 3 |
Steer Clear of Obstacles | ||||
 GCN Yoshi Circuit |
Yoshi | |||||||
Waluigi Cup |
DS Waluigi Pinball R |
Sydney Sprint R |
RMX Choco Island 2T |
Goomba Takedown | ||||
 Sydney Sprint 2 |
Birdo (Yellow) | |||||||
Larry Cup |
SNES Mario Circuit 3T |
RMX Rainbow Road 2 |
DS Luigi's Mansion |
Time Trial | ||||
 RMX Vanilla Lake 1R |
Ice Mario | |||||||
Dry Bowser Cup |
GCN Yoshi Circuit R |
RMX Vanilla Lake 1 |
GBA Sunset Wilds R/T |
Big Reverse Race | ||||
 DS Waluigi Pinball |
Any character | |||||||
Signature kart sets
Drivers with a corresponding cup were bumped one rank up in every course of their cup.
| Cup | Driver | Kart | Glider |
|---|---|---|---|
| Second course of every cup | |||
| Third course of every cup | |||
| — | — | ||
| — | — | ||
| — | — | ||
| — | — | ||
| — | — | ||
| — | — | ||
| — | — | ||
| — | — | ||
| — | — | ||
| — | — | ||
| — | — | ||
| — | — |
Today's Challenge
Players' most recently used kart and glider are chosen, and favourite and favored ones have extra priority. Opponents are arranged randomly. On day 1 of this tour, players finish a race in SNES Donut Plains 2 in the Kamek Cup using King Bob-omb for a free pipe launch. Starting from day 2, players have to finish a race in the earliest incomplete course that is not in any of the ranked cups using the driver shown on the course's thumbnail every day to obtain the corresponding reward in the table below. Once all of the courses are completed, the courses are selected at random.
| Day(s) | Reward |
| 1-4, 6-9, 11-13 | Free pipe launch |
|---|---|
| 5, 10 | Rubies ×5 |
| 14 |  Badge |
| Today's Challenge Pipe | |

| |
| Pipe contents | |
| Rubies, coins, driver (Normal/Super/High-End), kart (Normal/Super/High-End), glider (Normal/Super/High-End), item tickets | |
Rewards
Gold cells indicate rewards that are exclusive to Gold Pass members.
| Piston Glider | Surf Master | Pipe Buggy | Birdo (Yellow) | Baby Mario | Yoshi | Turbo Yoshi | Yellow Turbo Birdo |
| Grand Stars | 15 | 20 | 25 | 30 | 35 | 40 | 50 | 60 | 70 | 85 | 100 | 115 | 130 | 145 | 160 | 180 | 200 | 215 | 230 | 240 | 250 | 255 | 260 | 265 | Total | Grand total | |
|---|---|---|---|---|---|---|---|---|---|---|---|---|---|---|---|---|---|---|---|---|---|---|---|---|---|---|---|
| Free pipe launch | 1 | 1 | 1 | 1 | 4 | ||||||||||||||||||||||
| Coin | 300 | 300 | 300 | 300 | 300 | 500 | 1000 | 3000 | 7000 | ||||||||||||||||||
| 1000 | 1000 | 2000 | 4000 | ||||||||||||||||||||||||
| Rubies | 3 | 3 | 5 | 5 | 5 | 21 | 46 | ||||||||||||||||||||
| 5 | 5 | 5 | 5 | 5 | 25 | ||||||||||||||||||||||
| Item tickets | 10 | 10 | 25 | ||||||||||||||||||||||||
| 15 | 15 | ||||||||||||||||||||||||||
| Star tickets | 4 | 4 | 4 | ||||||||||||||||||||||||
| 0 | |||||||||||||||||||||||||||
| Point-boost tickets | 1 | 1 | 1 | 3 | 6 | ||||||||||||||||||||||
| 3 | 3 | ||||||||||||||||||||||||||
| 1 | 1 | 1 | 3 | 6 | |||||||||||||||||||||||
| 3 | 3 | ||||||||||||||||||||||||||
| 1 | 1 | 1 | 3 | 6 | |||||||||||||||||||||||
| 3 | 3 | ||||||||||||||||||||||||||
| Level-boost ticket | 3 | 12 | |||||||||||||||||||||||||
| 9 | |||||||||||||||||||||||||||
New content
Drivers

Karts
Gliders
Courses
Sydney Sprint 2 (N, R, T, R/T)
Paid banners
| Name | Availability | Cost | Contents | Banner image |
|---|---|---|---|---|
| Value Pack | September 8, 2021 – September 21, 2021 | US$1.99 |
|

|
| Silver Surf Master Pack | September 8, 2021 – September 21, 2021 | US$19.99 |
|

|
| White Yoshi Pack | September 8, 2021 – September 21, 2021 | US$39.99 |
|

|
| Calico Parafoil Pack | September 15, 2021 – September 21, 2021 | US$19.99 |
|

|
| Cat Peach Pack | September 15, 2021 – September 21, 2021 | US$39.99 |
|

|
Challenges
| Tour Challenges 1 | Tour Challenges 2 | Gold Challenges | ||||||||
|---|---|---|---|---|---|---|---|---|---|---|
| Completion reward: |
Completion reward: |
Completion reward: | ||||||||
 |
 |
 |
 |
 |
 |
 |
 |
 | ||
| Do 5 Rocket Starts. | Use 10 Mushrooms. | Get 1st place 3 times in a row in races 100cc or above. | Do 50
|
Land 5 hits with Red Shells. | Land 3 hits with Bob-ombs. | Do 10 Ultra
|
Land 15 hits with Bananas. | Get a Fantastic combo a total of 5 times. | ||
 |
 |
 |
 |
 |
 |
 |
 |
 | ||
| Send Greeting Coins to a friend. | Get 1st place 5 times using | Get 1 item from the Daily Selects section of the Shop. | Cause opponents to crash using a | Get 1st place a total of 5 times on a
|
Use point-boost tickets 3 times. | Earn a score of 10,000 or higher on 5 courses. | Activate
|
Use a | ||
 |
 |
 |
 |
 |
 |
 |
 |
 | ||
Cause opponents to crash a total of 10 times on a
|
Earn a total score of 20,000 or higher in the | Drive a distance of 20,000 or more. | Do 30 Jump Boosts using a driver wearing a shell. | Earn a total score of 25,000 or higher in the | Race in every course of every cup, including bonus challenges. | Land 3 hits with | Earn a total score of 25,000 or higher in the | Cause opponents to crash 3 times while gliding. | ||
| Premium Challenges | ||
|---|---|---|
| Cost: US$4.99 | ||
| Three in a row reward: | ||
Completion reward:  Black Yoshi ×1 Black Yoshi ×1
| ||
|
|
|
| Land 5 hits with Green Shells. | Land 10 hits with Bananas. | Land 10 hits with Bob-ombs. |
| Coins ×3,000 | Rubies ×10 | Glider
|
| Do 50 Jump Boosts. | Participate in a race. | Do 100 Mini-Turbo boosts. |
Normal glider
|
Super glider level-boost ticket ×1 | High-End glider level-boost ticket ×1 |
| Get 1st place in a race 10 times. | Get 1st place in a race 15 times. | Get 1st place in a race 20 times. |
| Tour Multiplayer Challenges | ||
|---|---|---|
| Three in a row reward: | ||
| Completion reward: | ||
 |
 |
 |
| Do 10 Jump Boosts in multiplayer. | Land 3 hits with Green Shells in multiplayer. | Cause opponents to crash 5 times in multiplayer. |
 |
 |
 |
| Join 3 multiplayer races. | Join 5 multiplayer races. | Join 10 multiplayer races. |
 |
 |
 |
| Get 3rd place or higher in a multiplayer race. | Get 3rd place or higher 3 times in a multiplayer race. | Get 3rd place or higher 5 times in a multiplayer race. |
| Total Points Challenge | |
|---|---|
| Points | Rewards |
| 600,000 |
|
| 550,000 |
|
| 500,000 |
|
| 400,000 |
|
| 300,000 |
|
| 150,000 |
|
Initial pipe appearance rates
All-Clear Pipe
The All-Clear Pipe randomly shot out one of the following regular High-End items. The appearance rate can be viewed via the "Pipe content" link on the Gold Pass purchase screen.
Sydney Pipe 1
| Items obtained from a new Sydney Pipe 1 | |||||||||||||||
|---|---|---|---|---|---|---|---|---|---|---|---|---|---|---|---|
| Item | Normal |
Super |
High-End |
Featured High-End | |||||||||||
| Driver | Kart | Glider | Driver | Kart | Glider | Driver | Kart | Glider | Driver | Kart | Glider | ||||
| Amount | 32 | 26 | 16 | 9 | 7 | 4 | 1 | 1 | 1 | 1 | 1 | 1 | |||
Sydney Pipe 2
| Items obtained from a new Sydney Pipe 2 | |||||||||||||||
|---|---|---|---|---|---|---|---|---|---|---|---|---|---|---|---|
| Item | Normal |
Super |
High-End |
Featured High-End | |||||||||||
| Driver | Kart | Glider | Driver | Kart | Glider | Driver | Kart | Glider | Driver | Kart | Glider | ||||
| Amount | 31 | 25 | 15 | 9 | 7 | 4 | 1 | 1 | 1 | 2 | 2 | 2 | |||
Ocean Glider Pipe
| Items obtained from a new Ocean Glider Pipe | |||||||||||||||
|---|---|---|---|---|---|---|---|---|---|---|---|---|---|---|---|
| Item | Normal |
Super |
High-End |
Featured High-End | |||||||||||
| Driver | Kart | Glider | Driver | Kart | Glider | Driver | Kart | Glider | Driver | Kart | Glider | ||||
| Amount | 15 | 11 | 8 | 5 | 4 | 3 | 0 | 0 | 3 | 0 | 0 | 1 | |||
Token Shop
The limited-time event where event tokens appeared began on September 8, 2021 and ended on September 21, 2021. The method of earning event tokens was listed as "Cause opponents to crash" on the cup selection screen, but they were actually earned from collecting them in courses.
| Token Shop (September 8, 2021 - September 21, 2021) | ||
|---|---|---|

|
||
| Red Yoshi Amount: 1 |
Apple Kart Amount: 1 |
Eggshell Glider Amount: 1 |
| Ruby ×3 Amount: 5 |
Coin ×500 Amount: 10 |
Coin Rush ticket Amount: 1 |
| Point-boost ticket (driver) Amount: 5 |
Point-boost ticket (kart) Amount: 5 |
Point-boost ticket (glider) Amount: 5 |
| Level-boost ticket (Normal driver) Amount: 3 |
Level-boost ticket (Super driver) Amount: 1 |
Level-boost ticket (High-End driver) Amount: 1 |
| Points-cap ticket (Normal driver) Amount: 1 |
Points-cap ticket (Super driver) Amount: 1 |
Points-cap ticket (High-End driver) Amount: 1 |
Tier Shop
The shop featured a variety of set and randomized items available for purchase. The item slots in the shop are unlocked based on the highest tier of players.
| Items available in Tier Shop (September 8, 2021 - September 14, 2021) | ||
|---|---|---|

|
||
| Yoshi Amount: 1 |
Red Turbo Yoshi Amount: 1 |
Tropical Glider Amount: 1 |
| Items available in Tier Shop (September 15, 2021 - September 21, 2021) | ||

|
||
| Peachette Amount: 1 |
Bumble V Amount: 1 |
BaNaNa Parafoil Amount: 1 |
| Items available in Tier Shop (September 8, 2021 - September 21, 2021) | ||
| Level-boost ticket (Normal) Amount: 3 per week |
Level-boost ticket (Normal) Amount: 3 per week |
Level-boost ticket (Normal) Amount: 3 per week |
OR |
OR |
OR |
| Level-boost ticket (Super) Amount: 2 per week OR Level-boost ticket (High-End) Amount: 1 per week |
Level-boost ticket (Super) Amount: 2 per week OR Level-boost ticket (High-End) Amount: 1 per week |
Level-boost ticket (Super) Amount: 2 per week OR Level-boost ticket (High-End) Amount: 1 per week |
OR OR |
OR OR |
OR OR |
| Points-cap ticket (Normal) Amount: 1 per week |
Points-cap ticket (Super) Amount: 1 per week |
Points-cap ticket (High-End) Amount: 1 per week |
Profiles
- Mario Kart Tour Twitter:
Names in other languages
| Language | Name | Meaning |
|---|---|---|
| Japanese | シドニーツアー Shidonī Tsuā |
Sydney Tour |
| Chinese (simplified) | 悉尼巡回赛 Xīní Xúnhuísài |
Sydney Tour |
| Chinese (traditional) | 雪梨巡迴賽 Xuělí Xúnhuísài |
Sydney Tour |
| French | Saison de Sydney |
Sydney Season |
| German | Sydney-Tour-Saison |
Sydney Tour Season |
| Italian | Tour di Sydney |
Sydney Tour |
| Korean | 시드니 투어 Sideuni Tueo |
Sydney Tour |
| Portuguese | Temporada de Sydney |
Sydney Season |
| Spanish | Temporada de Sídney |
Sydney Season |
Trivia
- This was the second tour after the 1st Anniversary Tour to have two variants of the same course in a cup, namely Sydney Sprint 2 (both the regular and Trick variant of the course appeared in the Yoshi Cup, and the Reverse and Reverse/Trick variant of the course appeared in the Baby Mario Cup).
- This was also the first tour to include all four variations of a single track in the tour's ranked cups, with the regular and Trick versions of Sydney Sprint 2 being featured in the first week's ranked cup and the Reverse and Reverse/Trick versions being featured in the second week's ranked cup.
- The Kamek Cup appeared in this tour despite Kamek not being available in regular tour pipes or from the All-Clear Pipe, until he became playable in the Battle Tour.
- This was the second tour to not contain any 3DS courses, the first being the Kamek Tour.