Singapore Tour: Difference between revisions
mNo edit summary |
LinkTheLefty (talk | contribs) mNo edit summary |
||
| (28 intermediate revisions by 17 users not shown) | |||
| Line 1: | Line 1: | ||
{{ | {{tour infobox | ||
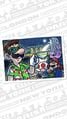
|image=[[File:MKT Singapore Tour.png|200px]] | |image=[[File:MKT Singapore Tour.png|200px]] | ||
|start=January 11, 2022<br>10:00 p.m. (PT) | |start=January 11, 2022<br>10:00 p.m. (PT) | ||
| Line 6: | Line 5: | ||
|cups=12 | |cups=12 | ||
|rank=[[Luigi Cup]] (week 1)<br>[[Kamek Cup]] (week 2) | |rank=[[Luigi Cup]] (week 1)<br>[[Kamek Cup]] (week 2) | ||
|coin=[[Singapore Speedway]] | |coin=[[Tour Singapore Speedway|Singapore Speedway]] | ||
|before=[[New Year's 2022 Tour|<<]] | |before=[[New Year's 2022 Tour|<<]] | ||
|after=[[Wario vs. Waluigi Tour|>>]] | |after=[[Wario vs. Waluigi Tour|>>]] | ||
}} | }} | ||
The '''Singapore Tour''' was the sixty-first tour of ''[[Mario Kart Tour]]'', which began on January 12, 2022, and ended on January 25, 2022. True to its name, the tour featured the debut of a brand new course, [[Singapore Speedway]], | The '''Singapore Tour''' was the sixty-first tour of ''[[Mario Kart Tour]]'', which began on January 12, 2022, and ended on January 25, 2022. True to its name, the tour featured the debut of a brand new city course themed after {{wp|Singapore}}, aptly named [[Tour Singapore Speedway|Singapore Speedway]], making this the first tour to introduce a new city to the game since the [[Sydney Tour (April–May 2021) |April—May 2021 Sydney Tour]] nineteen tours prior. The tour also introduced a new variant of [[Luigi]] in a vacation outfit, as well as the purple [[Roving Racers|Roving Racer]], referred to as Purple Koopa (Freerunning), who was a reward for placing high in the tour's ranked cups, as new drivers. Similar to 2021's [[Berlin Tour]], multiple variants of Luigi, namely [[Builder Mario|Builder Luigi]], Luigi (Classic), and Luigi (Painter) (only [[Penguin Mario|Penguin Luigi]] and Luigi (Lederhosen) are absent), appeared as the spotlight drivers for the second week of the tour. The menu's background featured {{wp|Marina Bay Sands}} and the {{wp|Singapore Flyer}} as the landmarks for this tour. This tour's trailer featured silhouettes of skyscrapers during its opening splash screen. Starting from this tour, the [[#Challenges|Total Points Challenge]] features two challenge cards, allowing players to receive more rewards. | ||
Instead of a traditional announcement by the official ''Mario Kart Tour'' Twitter account, the tour's announcement would be randomly tweeted to users who posted a public tweet with the hashtag #TraveltheWorldwithMarioKart prior to January 31, 2022, 6:59 a.m. PT. The official trailer was released to the public on January 10, 2022, two days before the start of the tour. | Instead of a traditional announcement by the official ''Mario Kart Tour'' Twitter account, the tour's announcement would be randomly tweeted to users who posted a public tweet with the hashtag #TraveltheWorldwithMarioKart prior to January 31, 2022, 6:59 a.m. PT. The official trailer was released to the public on January 10, 2022, two days before the start of the tour. | ||
The eighth set of [[List of challenge cards in Mario Kart Tour#Expert Challenges|Expert Challenges]] was made available at the start of this tour, making this tour the second one since the [[Summer Festival Tour]] to not introduce an Expert Challenges card alongside a [[Team Rally]], but just like in the [[Halloween Tour (2021)|2021 Halloween Tour]], a Team Rally would take place in [[Wario vs. Waluigi Tour|the following tour]]. The eighth set of Expert Challenges ended on the [[Samurai Tour]]. | |||
Starting from this tour, [[Princess Peach|Peach (Explorer)]] and the [[Silver Surf Master]] are available in regular tour pipes, including the All-Clear Pipe. | Starting from this tour, [[Princess Peach|Peach (Explorer)]] and the [[Silver Surf Master]] are available in regular tour pipes, including the All-Clear Pipe. | ||
{{br|toc=1}} | {{br|toc=1}} | ||
==Spotlights== | ==Spotlights== | ||
{| align=center width=75% cellspacing=0 border=1 cellpadding=3 style="border-collapse:collapse; font-family:Arial; text-align:center" | {|align=center width=75% cellspacing=0 border=1 cellpadding=3 style="border-collapse:collapse;font-family:Arial;text-align:center" | ||
|-style="background: #89A" | |-style="background: #89A" | ||
|colspan=3|'''Singapore Pipe 1'''<br>January 11, 2022, 10:00 p.m. (PT) – <br>January 25, 2022, 9:59 p.m. (PT) | |colspan=3|'''Singapore Pipe 1'''<br>January 11, 2022, 10:00 p.m. (PT) – <br>January 25, 2022, 9:59 p.m. (PT) | ||
| Line 27: | Line 25: | ||
|colspan=3|[[File:MKT Tour61 SingaporePipe1.png|x150px]] | |colspan=3|[[File:MKT Tour61 SingaporePipe1.png|x150px]] | ||
|colspan=3|[[File:MKT Tour61 SingaporePipe2.png|x150px]] | |colspan=3|[[File:MKT Tour61 SingaporePipe2.png|x150px]] | ||
|-style="background: #ABC" | |-style="background:#ABC" | ||
! style="width: 15%;"|Drivers | !style="width:15%;"|Drivers | ||
! style="width: 15%;"|Karts | !style="width:15%;"|Karts | ||
! style="width: 15%;"|Gliders | !style="width:15%;"|Gliders | ||
! style="width: 15%;"|Drivers | !style="width:15%;"|Drivers | ||
! style="width: 15%;"|Karts | !style="width:15%;"|Karts | ||
! style="width: 15%;"|Gliders | !style="width:15%;"|Gliders | ||
|- | |- | ||
|[[File:MKT Artwork LuigiVacation.png|100x100px]] | |[[File:MKT Artwork LuigiVacation.png|100x100px]] | ||
| Line 51: | Line 49: | ||
==Special pipe== | ==Special pipe== | ||
{| align=center width=90% cellspacing=0 border=1 cellpadding=3 style="border-collapse:collapse; font-family:Arial; text-align:center" | {|align=center width=90% cellspacing=0 border=1 cellpadding=3 style="border-collapse:collapse; font-family:Arial;text-align:center" | ||
|-style="background: #89A" | |-style="background:#89A" | ||
|colspan=5|'''Pauline Pipe'''<br>January 14, 2022, 10:00 p.m. (PT) – <br>January 21, 2022, 9:59 p.m. (PT) | |colspan=5|'''Pauline Pipe'''<br>January 14, 2022, 10:00 p.m. (PT) – <br>January 21, 2022, 9:59 p.m. (PT) | ||
|- | |- | ||
|colspan=5|[[File:MKT Tour61 PaulinePipe.png|x150px]] | |colspan=5|[[File:MKT Tour61 PaulinePipe.png|x150px]] | ||
|-style="background: #ABC" | |-style="background:#ABC" | ||
! style="width: 30%;"|High-End drivers | !style="width:30%;"|High-End drivers | ||
! style="width: 30%;"|High-End karts | !style="width:30%;"|High-End karts | ||
! style="width: 10%;"|High-End Spotlight glider | !style="width:10%;"|High-End Spotlight glider | ||
! style="width: 20%;"|High-End gliders | !style="width:20%;"|High-End gliders | ||
|- | |- | ||
|[[File:MKT Artwork Pauline.png|100x100px]][[File:MKT Artwork PaulinePartyTime.png|100x100px]][[File:MKT Artwork PaulineRose.png|100x100px]] | |[[File:MKT Artwork Pauline.png|100x100px]][[File:MKT Artwork PaulinePartyTime.png|100x100px]][[File:MKT Artwork PaulineRose.png|100x100px]] | ||
| Line 72: | Line 70: | ||
|[[Rose Parasol]] and [[Magic Parasol]] | |[[Rose Parasol]] and [[Magic Parasol]] | ||
|} | |} | ||
;Names in other languages | ;Names in other languages | ||
{{foreign names | {{foreign names | ||
| Line 104: | Line 101: | ||
==Cups== | ==Cups== | ||
{| align=center width=90% cellspacing=0 border=1 cellpadding=3 style="border-collapse:collapse; font-family:Arial; text-align:center" | {|align=center width=90% cellspacing=0 border=1 cellpadding=3 style="border-collapse:collapse; font-family:Arial;text-align:center" | ||
{{ | {{MKT cup table row | ||
|C=Luigi||Ra=1 | |C=Luigi||Ra=1 | ||
|R1=[[Singapore Speedway|Singapore Speedway T]]||R1.I=SingaporeSpeedwayT||R1.1=1,900||R1.2=2,900||R1.3=3,400||R1.4=3,800||R1.5=9,600 | |R1=[[Tour Singapore Speedway|Singapore Speedway T]]||R1.I=SingaporeSpeedwayT||R1.1=1,900||R1.2=2,900||R1.3=3,400||R1.4=3,800||R1.5=9,600 | ||
|R2=[[DS Waluigi Pinball|DS Waluigi Pinball R/T]]||R2.I=WaluigiPinballRTDS Pauline||R2.1=1,800||R2.2=2,700||R2.3=3,200||R2.4=3,600||R2.5=9,000 | |R2=[[DS Waluigi Pinball|DS Waluigi Pinball R/T]]||R2.I=WaluigiPinballRTDS Pauline||R2.1=1,800||R2.2=2,700||R2.3=3,200||R2.4=3,600||R2.5=9,000 | ||
|R3=Singapore Speedway R||R3.I=SingaporeSpeedwayR||R3.1=1,400||R3.2=2,100||R3.3=2,500||R3.4=2,800||R3.5=7,100 | |R3=Singapore Speedway R||R3.I=SingaporeSpeedwayR||R3.1=1,400||R3.2=2,100||R3.3=2,500||R3.4=2,800||R3.5=7,100 | ||
|CN=[[Ring Race]]||C.I=Tour5 KoopaTroopaCupChallenge||CC=[[Toad]]||CT=[[3DS Toad Circuit]]||C.1=5||C.2=15||C.3=25 | |CN=[[Ring Race]]||C.I=Tour5 KoopaTroopaCupChallenge||CC=[[Toad]]||CT=[[3DS Toad Circuit]]||C.1=5||C.2=15||C.3=25 | ||
}} | }} | ||
{{ | {{MKT cup table row | ||
|C=Daisy||Ra= | |C=Daisy||Ra= | ||
|R1=[[SNES Choco Island 2]]||R1.I=ChocoIsland2SNES Nabbit||R1.1=1,000||R1.2=1,600||R1.3=1,900||R1.4=2,200||R1.5=5,200 | |R1=[[SNES Choco Island 2]]||R1.I=ChocoIsland2SNES Nabbit||R1.1=1,000||R1.2=1,600||R1.3=1,900||R1.4=2,200||R1.5=5,200 | ||
| Line 119: | Line 116: | ||
|CN=[[Goomba Takedown]]||C.I=Tour61 DaisyCupChallenge||CC=[[Rosalina]]||CT=[[RMX Vanilla Lake 1]]||C.1=15||C.2=25||C.3=35 | |CN=[[Goomba Takedown]]||C.I=Tour61 DaisyCupChallenge||CC=[[Rosalina]]||CT=[[RMX Vanilla Lake 1]]||C.1=15||C.2=25||C.3=35 | ||
}} | }} | ||
{{ | {{MKT cup table row | ||
|C=Kamek||Ra=2 | |C=Kamek||Ra=2 | ||
|R1=Singapore Speedway||R1.I=SingaporeSpeedway||R1.1=1,400||R1.2=2,200||R1.3=2,600||R1.4=3,000||R1.5=6,900 | |R1=Singapore Speedway||R1.I=SingaporeSpeedway||R1.1=1,400||R1.2=2,200||R1.3=2,600||R1.4=3,000||R1.5=6,900 | ||
| Line 126: | Line 123: | ||
|CN=[[Glider Challenge]]||C.I=Tour42 LarryCupChallenge||CC=[[Princess Daisy|Daisy]]||CT=SNES Choco Island 2||C.1=150||C.2=250||C.3=450 | |CN=[[Glider Challenge]]||C.I=Tour42 LarryCupChallenge||CC=[[Princess Daisy|Daisy]]||CT=SNES Choco Island 2||C.1=150||C.2=250||C.3=450 | ||
}} | }} | ||
{{ | {{MKT cup table row | ||
|C=Funky Kong||Ra= | |C=Funky Kong||Ra= | ||
|R1=3DS Bowser's Castle T||R1.I=BowsersCastleT3DS PeachExplorer||R1.1=2,100||R1.2=3,400||R1.3=4,000||R1.4=4,600||R1.5=10,400 | |R1=3DS Bowser's Castle T||R1.I=BowsersCastleT3DS PeachExplorer||R1.1=2,100||R1.2=3,400||R1.3=4,000||R1.4=4,600||R1.5=10,400 | ||
| Line 133: | Line 130: | ||
|CN=[[Snap a Photo]]||C.I=Tour61 FunkyKongCupChallenge||CC=[[Luigi|Luigi (Vacation)]]||CT=Singapore Speedway T||C.1=1||C.2=2||C.3=3 | |CN=[[Snap a Photo]]||C.I=Tour61 FunkyKongCupChallenge||CC=[[Luigi|Luigi (Vacation)]]||CT=Singapore Speedway T||C.1=1||C.2=2||C.3=3 | ||
}} | }} | ||
{{ | {{MKT cup table row | ||
|C=Lemmy||Ra= | |C=Lemmy||Ra= | ||
|R1=SNES Choco Island 2T||R1.I=ChocoIsland2TSNES Lemmy||R1.1=1,200||R1.2=2,100||R1.3=2,400||R1.4=2,900||R1.5=6,200 | |R1=SNES Choco Island 2T||R1.I=ChocoIsland2TSNES Lemmy||R1.1=1,200||R1.2=2,100||R1.3=2,400||R1.4=2,900||R1.5=6,200 | ||
| Line 140: | Line 137: | ||
|CN=[[Break Item Boxes]]||C.I=Tour11 MetalMarioCupChallenge||CC=[[Mario]]||CT=[[DS DK Pass]]||C.1=8||C.2=18||C.3=28 | |CN=[[Break Item Boxes]]||C.I=Tour11 MetalMarioCupChallenge||CC=[[Mario]]||CT=[[DS DK Pass]]||C.1=8||C.2=18||C.3=28 | ||
}} | }} | ||
{{ | {{MKT cup table row | ||
|C=Yoshi||Ra= | |C=Yoshi||Ra= | ||
|R1=3DS Toad Circuit R||R1.I=ToadCircuitR3DS WhiteYoshi||R1.1=1,200||R1.2=2,100||R1.3=2,400||R1.4=2,800||R1.5=5,900 | |R1=3DS Toad Circuit R||R1.I=ToadCircuitR3DS WhiteYoshi||R1.1=1,200||R1.2=2,100||R1.3=2,400||R1.4=2,800||R1.5=5,900 | ||
| Line 147: | Line 144: | ||
|CN=[[Time Trial (Mario Kart Tour)|Time Trial]]||C.I=Tour19 BabyDaisyCupChallenge||CC=[[Wario]]||CT=DS Waluigi Pinball R||C.1=2:40.00||C.2=2:20.00||C.3=2:10.00 | |CN=[[Time Trial (Mario Kart Tour)|Time Trial]]||C.I=Tour19 BabyDaisyCupChallenge||CC=[[Wario]]||CT=DS Waluigi Pinball R||C.1=2:40.00||C.2=2:20.00||C.3=2:10.00 | ||
}} | }} | ||
{{ | {{MKT cup table row | ||
|C=Pink Gold Peach||Ra= | |C=Pink Gold Peach||Ra= | ||
|R1=[[SNES Mario Circuit 1|SNES Mario Circuit 1T]]||R1.I=MarioCircuit1TSNES PinkGoldPeach||R1.1=1,300||R1.2=2,400||R1.3=2,700||R1.4=3,200||R1.5=6,600 | |R1=[[SNES Mario Circuit 1|SNES Mario Circuit 1T]]||R1.I=MarioCircuit1TSNES PinkGoldPeach||R1.1=1,300||R1.2=2,400||R1.3=2,700||R1.4=3,200||R1.5=6,600 | ||
| Line 154: | Line 151: | ||
|CN=[[Steer Clear of Obstacles]]||C.I=Tour2 LarryCupChallenge||CC=[[Larry Koopa|Larry]]||CT=3DS Neo Bowser City||C.1=1||C.2=2||C.3=3 | |CN=[[Steer Clear of Obstacles]]||C.I=Tour2 LarryCupChallenge||CC=[[Larry Koopa|Larry]]||CT=3DS Neo Bowser City||C.1=1||C.2=2||C.3=3 | ||
}} | }} | ||
{{ | {{MKT cup table row | ||
|C=Bowser Jr.||Ra= | |C=Bowser Jr.||Ra= | ||
|R1=GCN Dino Dino Jungle||R1.I=DinoDinoJungleGCN DryBowser||R1.1=1,500||R1.2=2,800||R1.3=3,200||R1.4=3,800||R1.5=7,600 | |R1=GCN Dino Dino Jungle||R1.I=DinoDinoJungleGCN DryBowser||R1.1=1,500||R1.2=2,800||R1.3=3,200||R1.4=3,800||R1.5=7,600 | ||
| Line 161: | Line 158: | ||
|CN=[[Do Jump Boosts]]||C.I=Tour12 DryBowserCupChallenge||CC=[[Wendy O. Koopa|Wendy]]||CT=SNES Mario Circuit 1||C.1=5||C.2=7||C.3=10 | |CN=[[Do Jump Boosts]]||C.I=Tour12 DryBowserCupChallenge||CC=[[Wendy O. Koopa|Wendy]]||CT=SNES Mario Circuit 1||C.1=5||C.2=7||C.3=10 | ||
}} | }} | ||
{{ | {{MKT cup table row | ||
|C=Baby Luigi||Ra= | |C=Baby Luigi||Ra= | ||
|R1=3DS Neo Bowser City R||R1.I=NeoBowserCityR3DS Waluigi||R1.1=1,300||R1.2=2,400||R1.3=2,700||R1.4=3,300||R1.5=6,300 | |R1=3DS Neo Bowser City R||R1.I=NeoBowserCityR3DS Waluigi||R1.1=1,300||R1.2=2,400||R1.3=2,700||R1.4=3,300||R1.5=6,300 | ||
| Line 168: | Line 165: | ||
|CN=[[Smash Small Dry Bones]]||C.I=Tour61 BabyLuigiCupChallenge||CC=[[Waluigi]]||CT=3DS Bowser's Castle||C.1=8||C.2=12||C.3=17 | |CN=[[Smash Small Dry Bones]]||C.I=Tour61 BabyLuigiCupChallenge||CC=[[Waluigi]]||CT=3DS Bowser's Castle||C.1=8||C.2=12||C.3=17 | ||
}} | }} | ||
{{ | {{MKT cup table row | ||
|C=Monty Mole||Ra= | |C=Monty Mole||Ra= | ||
|R1=GCN Dino Dino Jungle R||R1.I=DinoDinoJungleRGCN MontyMole||R1.1=1,600||R1.2=3,200||R1.3=3,600||R1.4=4,400||R1.5=8,200 | |R1=GCN Dino Dino Jungle R||R1.I=DinoDinoJungleRGCN MontyMole||R1.1=1,600||R1.2=3,200||R1.3=3,600||R1.4=4,400||R1.5=8,200 | ||
| Line 175: | Line 172: | ||
|CN=[[Combo Attack]]||C.I=Tour21 RosalinaCupChallenge||CC=[[Toadette]]||CT=SNES Donut Plains 1T||C.1=5||C.2=10||C.3=16 | |CN=[[Combo Attack]]||C.I=Tour21 RosalinaCupChallenge||CC=[[Toadette]]||CT=SNES Donut Plains 1T||C.1=5||C.2=10||C.3=16 | ||
}} | }} | ||
{{ | {{MKT cup table row | ||
|C=Hammer Bro||Ra= | |C=Hammer Bro||Ra= | ||
|R1=GBA Sunset Wilds T||R1.I=SunsetWildsTGBA BlackYoshi||R1.1=2,400||R1.2=4,900||R1.3=5,500||R1.4=6,700||R1.5=12,200 | |R1=GBA Sunset Wilds T||R1.I=SunsetWildsTGBA BlackYoshi||R1.1=2,400||R1.2=4,900||R1.3=5,500||R1.4=6,700||R1.5=12,200 | ||
| Line 182: | Line 179: | ||
|CN=Time Trial||C.I=Tour61 HammerBroCupChallenge||CC=Luigi||CT=Singapore Speedway||C.1=1:34.00||C.2=1:24.00||C.3=1:20.00 | |CN=Time Trial||C.I=Tour61 HammerBroCupChallenge||CC=Luigi||CT=Singapore Speedway||C.1=1:34.00||C.2=1:24.00||C.3=1:20.00 | ||
}} | }} | ||
{{ | {{MKT cup table row | ||
|C=Pauline||Ra= | |C=Pauline||Ra= | ||
|R1=SNES Mario Circuit 1R||R1.I=MarioCircuit1RSNES BlackShyGuy||R1.1=1,600||R1.2=3,200||R1.3=3,600||R1.4=4,500||R1.5=7,900 | |R1=SNES Mario Circuit 1R||R1.I=MarioCircuit1RSNES BlackShyGuy||R1.1=1,600||R1.2=3,200||R1.3=3,600||R1.4=4,500||R1.5=7,900 | ||
| Line 190: | Line 187: | ||
}} | }} | ||
|} | |} | ||
===Signature kart sets=== | ===Signature kart sets=== | ||
Drivers with a corresponding cup are bumped one rank up in every course of their cup. | Drivers with a corresponding cup are bumped one rank up in every course of their cup. | ||
{| class="wikitable" style="text-align: center" width=50% | {|class="wikitable"style="text-align:center"width=50% | ||
!width=10%|Cup | !width=10%|Cup | ||
!width=20%|Driver | !width=20%|Driver | ||
| Line 272: | Line 268: | ||
==Today's Challenge== | ==Today's Challenge== | ||
Players' most recently used kart and glider are chosen, and favorite and favored ones have extra priority. Opponents are arranged randomly. On day 1 of this tour, players finish a race in [[SNES Choco Island 2]] in the [[Daisy Cup]] using [[Nabbit]] for a free pipe launch. Starting from day 2, players have to finish a race in the earliest incomplete course that is not in any of the ranked cups using the driver shown on the course's thumbnail every day to obtain the corresponding reward in the table below. Once all of the courses are completed, the courses are selected at random. | Players' most recently used kart and glider are chosen, and favorite and favored ones have extra priority. Opponents are arranged randomly. On day 1 of this tour, players finish a race in [[SNES Choco Island 2]] in the [[Daisy Cup]] using [[Nabbit]] for a free pipe launch. Starting from day 2, players have to finish a race in the earliest incomplete course that is not in any of the ranked cups using the driver shown on the course's thumbnail every day to obtain the corresponding reward in the table below. Once all of the courses are completed, the courses are selected at random. | ||
{|align=center width=40% cellspacing=0 border=1 cellpadding=3 style="border-collapse:collapse;font-family:Arial;text-align:center" | |||
{| align=center width=40% cellspacing=0 border=1 cellpadding=3 style="border-collapse:collapse; font-family:Arial; text-align:center" | |-style="background:#89A" | ||
|-style="background: #89A" | |||
|'''Day(s)''' | |'''Day(s)''' | ||
|'''Reward''' | |'''Reward''' | ||
| Line 298: | Line 293: | ||
==Rewards== | ==Rewards== | ||
Gold cells indicate rewards that are exclusive to Gold Pass members. | Gold cells indicate rewards that are exclusive to Gold Pass members. | ||
{|class="wikitable" style="margin:auto; text-align:center" | {|class="wikitable"style="margin:auto;text-align:center" | ||
|- | |- | ||
!colspan=2|[[File:MKT Icon GrandStar.png|20x20px]] 15 | !colspan=2|[[File:MKT Icon GrandStar.png|20x20px]] 15 | ||
| Line 325: | Line 320: | ||
|} | |} | ||
<br> | <br> | ||
{|class="wikitable" style="margin:auto; text-align:center" | {|class="wikitable"style="margin:auto;text-align:center" | ||
|- | |- | ||
!Grand Stars!![[File:MKT Icon GrandStar.png|20x20px]]!!15!!20!!25!!30!!35!!40!!50!!60!!70!!85!!100!!115!!130!!145!!160!!180!!200!!215!!230!!240!!250!!255!!260!!265!!Total!!Grand total | !Grand Stars!![[File:MKT Icon GrandStar.png|20x20px]]!!15!!20!!25!!30!!35!!40!!50!!60!!70!!85!!100!!115!!130!!145!!160!!180!!200!!215!!230!!240!!250!!255!!260!!265!!Total!!Grand total | ||
| Line 408: | Line 403: | ||
===Courses=== | ===Courses=== | ||
<gallery> | <gallery heights=50px> | ||
MKT Icon Singapore Speedway.png|[[Singapore Speedway]] (N, R, T, R/T) | MKT Icon Singapore Speedway.png|[[Singapore Speedway]] (N, R, T, R/T) | ||
</gallery> | </gallery> | ||
==Paid banners== | ==Paid banners== | ||
{| align=center width=960px cellspacing=0 border=1 cellpadding=3 style="border-collapse:collapse; font-family:Arial; text-align:center" | {|align=center width=960px cellspacing=0 border=1 cellpadding=3 style="border-collapse:collapse;font-family:Arial;text-align:center" | ||
|-style="background: #ABC" | |-style="background:#ABC" | ||
!Name | !Name | ||
!Availability | !Availability | ||
| Line 463: | Line 458: | ||
==Challenges== | ==Challenges== | ||
{{ | {{MKT challenge table | ||
|TCR1=[[File:MKT Icon CoinRushTicket.png|70px]] [[Coin Rush ticket]] ×1 | |TCR1=[[File:MKT Icon CoinRushTicket.png|70px]] [[Coin Rush ticket]] ×1 | ||
|T1.1=115 | |T1.1=115 | ||
|T1.1E=Do 5 {{Color-link|Rocket Start|#A1A1FF|Rocket Starts}}. | |T1.1E=Do 5 {{Color-link|Rocket Start|#A1A1FF|Rocket Starts}}. | ||
|T1.1S=1 | |T1.1S=1 | ||
|T1.2=175- | |T1.2=175-1 | ||
|T1.2E=Land 5 hits with {{Color-link|Red Shell|#A1A1FF|Red Shells}}. | |T1.2E=Land 5 hits with {{Color-link|Red Shell|#A1A1FF|Red Shells}}. | ||
|T1.2S=1 | |T1.2S=1 | ||
| Line 550: | Line 545: | ||
}} | }} | ||
<br> | <br> | ||
{| align=center width=30% cellspacing=0 border=1 cellpadding=3 style="border-collapse:collapse; font-family:Arial; text-align:center" | {|align=center width=30% cellspacing=0 border=1 cellpadding=3 style="border-collapse:collapse;font-family:Arial;text-align:center" | ||
|- | |- | ||
!colspan=3 style="background: #EEEEFF"|'''Premium Challenges''' | !colspan=3 style="background:#EEEEFF"|'''Premium Challenges''' | ||
|- | |- | ||
|colspan=3 style="background: #EEEEFF"|'''Cost:''' US$4.99 | |colspan=3 style="background:#EEEEFF"|'''Cost:''' US$4.99 | ||
|- | |- | ||
|colspan=3 style="background: #EEEEFF"|'''Three in a row reward:''' [[File:MKT Icon Coins 2.png|60px]] [[Coin|Coins]] ×300 | |colspan=3 style="background:#EEEEFF"|'''Three in a row reward:''' [[File:MKT Icon Coins 2.png|60px]] [[Coin|Coins]] ×300 | ||
|- | |- | ||
|colspan=3 style="background: #EEEEFF"|'''Completion reward:''' [[File:MPSR King Bob-omb.png|70px]] [[King Bob-omb]] ×1 | |colspan=3 style="background:#EEEEFF"|'''Completion reward:''' [[File:MPSR King Bob-omb.png|70px]] [[King Bob-omb]] ×1 | ||
|-style="height: 80px" | |-style="height:80px" | ||
|width=10% style="background:linear-gradient(#F2E18F,#B9800F)"|[[File:MK7 RedLakitu Artwork.png|50x75px]] | |width=10% style="background:linear-gradient(#F2E18F,#B9800F)"|[[File:MK7 RedLakitu Artwork.png|50x75px]] | ||
|width=10% style="background:linear-gradient(#F2E18F,#B9800F)"|[[File:MKT Icon TurboBirdo.png|50x75px]] | |width=10% style="background:linear-gradient(#F2E18F,#B9800F)"|[[File:MKT Icon TurboBirdo.png|50x75px]] | ||
|width=10% style="background:linear-gradient(#F2E18F,#B9800F)"|[[File:MKT Icon BaNaNaParafoil.png|50x75px]] | |width=10% style="background:linear-gradient(#F2E18F,#B9800F)"|[[File:MKT Icon BaNaNaParafoil.png|50x75px]] | ||
|-style="color: #FFF" | |-style="color:#FFF" | ||
|style="background:linear-gradient(#864D00,#A26000); border-top:1px solid #B9800F;"|{{Color-link|Lakitu|#A1A1FF}} ×1 | |style="background:linear-gradient(#864D00,#A26000);border-top:1px solid #B9800F;"|{{Color-link|Lakitu|#A1A1FF}} ×1 | ||
|style="background:linear-gradient(#864D00,#A26000); border-top:1px solid #B9800F;"|{{Color-link|Turbo Birdo|#A1A1FF}} ×1 | |style="background:linear-gradient(#864D00,#A26000);border-top:1px solid #B9800F;"|{{Color-link|Turbo Birdo|#A1A1FF}} ×1 | ||
|style="background:linear-gradient(#864D00,#A26000); border-top:1px solid #B9800F;"|{{Color-link|BaNaNa Parafoil|#A1A1FF}} ×1 | |style="background:linear-gradient(#864D00,#A26000);border-top:1px solid #B9800F;"|{{Color-link|BaNaNa Parafoil|#A1A1FF}} ×1 | ||
|-style="color: #FFF" | |-style="color:#FFF" | ||
|style="background:linear-gradient(#A26000,#C88512); border-top:1px solid #A26000;"|''Land 5 hits with Green Shells.'' | |style="background:linear-gradient(#A26000,#C88512);border-top:1px solid #A26000;"|''Land 5 hits with Green Shells.'' | ||
|style="background:linear-gradient(#A26000,#C88512); border-top:1px solid #A26000;"|''Land 10 hits with Bananas.'' | |style="background:linear-gradient(#A26000,#C88512);border-top:1px solid #A26000;"|''Land 10 hits with Bananas.'' | ||
|style="background:linear-gradient(#A26000,#C88512); border-top:1px solid #A26000;"|''Land 10 hits with Bob-ombs.'' | |style="background:linear-gradient(#A26000,#C88512);border-top:1px solid #A26000;"|''Land 10 hits with Bob-ombs.'' | ||
|-style="height: 80px" | |-style="height:80px" | ||
|width=10% style="background:linear-gradient(#F2E18F,#B9800F)"|[[File:MKT Icon Coins 3.png|70px]] | |width=10% style="background:linear-gradient(#F2E18F,#B9800F)"|[[File:MKT Icon Coins 3.png|70px]] | ||
|width=10% style="background:linear-gradient(#F2E18F,#B9800F)"|[[File:MKT Icon Ruby.png|70px]] | |width=10% style="background:linear-gradient(#F2E18F,#B9800F)"|[[File:MKT Icon Ruby.png|70px]] | ||
|width=10% style="background:linear-gradient(#F2E18F,#B9800F)"|[[File:MKT Icon Point-boostticket3.png|70px]] | |width=10% style="background:linear-gradient(#F2E18F,#B9800F)"|[[File:MKT Icon Point-boostticket3.png|70px]] | ||
|-style="color: #FFF" | |-style="color:#FFF" | ||
|style="background:linear-gradient(#864D00,#A26000); border-top:1px solid #B9800F;"|{{Color-link|Coin|#A1A1FF|Coins}} ×3,000 | |style="background:linear-gradient(#864D00,#A26000);border-top:1px solid #B9800F;"|{{Color-link|Coin|#A1A1FF|Coins}} ×3,000 | ||
|style="background:linear-gradient(#864D00,#A26000); border-top:1px solid #B9800F;"|{{Color-link|Ruby|#A1A1FF|Rubies}} ×10 | |style="background:linear-gradient(#864D00,#A26000);border-top:1px solid #B9800F;"|{{Color-link|Ruby|#A1A1FF|Rubies}} ×10 | ||
|style="background:linear-gradient(#864D00,#A26000); border-top:1px solid #B9800F;"|Glider {{Color-link|point-boost ticket|#A1A1FF}} ×3 | |style="background:linear-gradient(#864D00,#A26000);border-top:1px solid #B9800F;"|Glider {{Color-link|point-boost ticket|#A1A1FF}} ×3 | ||
|-style="color: #FFF" | |-style="color:#FFF" | ||
|style="background:linear-gradient(#A26000,#C88512); border-top:1px solid #A26000;"|''Do 50 Jump Boosts.'' | |style="background:linear-gradient(#A26000,#C88512);border-top:1px solid #A26000;"|''Do 50 Jump Boosts.'' | ||
|style="background:linear-gradient(#A26000,#C88512); border-top:1px solid #A26000;"|''Participate in a race.'' | |style="background:linear-gradient(#A26000,#C88512);border-top:1px solid #A26000;"|''Participate in a race.'' | ||
|style="background:linear-gradient(#A26000,#C88512); border-top:1px solid #A26000;"|''Do 100 Mini-Turbo boosts.'' | |style="background:linear-gradient(#A26000,#C88512);border-top:1px solid #A26000;"|''Do 100 Mini-Turbo boosts.'' | ||
|-style="height: 80px" | |-style="height:80px" | ||
|width=10% style="background:linear-gradient(#F2E18F,#B9800F)"|[[File:MKT Icon Level-boostticket3.png|70px]] | |width=10% style="background:linear-gradient(#F2E18F,#B9800F)"|[[File:MKT Icon Level-boostticket3.png|70px]] | ||
|width=10% style="background:linear-gradient(#F2E18F,#B9800F)"|[[File:MKT Icon Level-boostticket6.png|70px]] | |width=10% style="background:linear-gradient(#F2E18F,#B9800F)"|[[File:MKT Icon Level-boostticket6.png|70px]] | ||
|width=10% style="background:linear-gradient(#F2E18F,#B9800F)"|[[File:MKT Icon Level-boostticket9.png|70px]] | |width=10% style="background:linear-gradient(#F2E18F,#B9800F)"|[[File:MKT Icon Level-boostticket9.png|70px]] | ||
|-style="color: #FFF" | |-style="color:#FFF" | ||
|style="background:linear-gradient(#864D00,#A26000); border-top:1px solid #B9800F;"|Normal glider {{Color-link|level-boost ticket|#A1A1FF}} ×1 | |style="background:linear-gradient(#864D00,#A26000);border-top:1px solid #B9800F;"|Normal glider {{Color-link|level-boost ticket|#A1A1FF}} ×1 | ||
|style="background:linear-gradient(#864D00,#A26000); border-top:1px solid #B9800F;"|Super glider level-boost ticket ×1 | |style="background:linear-gradient(#864D00,#A26000);border-top:1px solid #B9800F;"|Super glider level-boost ticket ×1 | ||
|style="background:linear-gradient(#864D00,#A26000); border-top:1px solid #B9800F;"|High-End glider level-boost ticket ×1 | |style="background:linear-gradient(#864D00,#A26000);border-top:1px solid #B9800F;"|High-End glider level-boost ticket ×1 | ||
|-style="color: #FFF" | |-style="color:#FFF" | ||
|style="background:linear-gradient(#A26000,#C88512); border-top:1px solid #A26000;"|''Get 1st place in a race 10 times.'' | |style="background:linear-gradient(#A26000,#C88512);border-top:1px solid #A26000;"|''Get 1st place in a race 10 times.'' | ||
|style="background:linear-gradient(#A26000,#C88512); border-top:1px solid #A26000;"|''Get 1st place in a race 15 times.'' | |style="background:linear-gradient(#A26000,#C88512);border-top:1px solid #A26000;"|''Get 1st place in a race 15 times.'' | ||
|style="background:linear-gradient(#A26000,#C88512); border-top:1px solid #A26000;"|''Get 1st place in a race 20 times.'' | |style="background:linear-gradient(#A26000,#C88512);border-top:1px solid #A26000;"|''Get 1st place in a race 20 times.'' | ||
|} | |} | ||
<br> | <br> | ||
{| align=center width=65% cellspacing=0 border=1 cellpadding=3 style="border-collapse:collapse; font-family:Arial; text-align:center" | {|align=center width=65% cellspacing=0 border=1 cellpadding=3 style="border-collapse:collapse;font-family:Arial;text-align:center" | ||
|- | |- | ||
!colspan=3 style="background: #C3F84E"|'''Kart Pro Challenges''' | !colspan=3 style="background:#C3F84E"|'''Kart Pro Challenges''' | ||
|rowspan=9 style="border-top:1px solid #FFF; border-bottom:1px solid #FFF;" width=5%| | |rowspan=9 style="border-top:1px solid #FFF; border-bottom:1px solid #FFF;"width=5%| | ||
!colspan=3 style="background: #C3F84E"|'''Tour Multiplayer Challenges''' | !colspan=3 style="background:#C3F84E"|'''Tour Multiplayer Challenges''' | ||
|-style="color: #000" | |-style="color:#000" | ||
|colspan=3 style="background: #C3F84E"|'''Three in a row reward:''' [[File:MKT Icon Coins 2.png|60px]] [[Coin|Coins]] ×500 | |colspan=3 style="background:#C3F84E"|'''Three in a row reward:''' [[File:MKT Icon Coins 2.png|60px]] [[Coin|Coins]] ×500 | ||
|colspan=3 style="background: #C3F84E"|'''Three in a row reward:''' [[File:MKT Icon Coins 2.png|60px]] Coins ×300 | |colspan=3 style="background:#C3F84E"|'''Three in a row reward:''' [[File:MKT Icon Coins 2.png|60px]] Coins ×300 | ||
|-style="color: #000" | |-style="color:#000" | ||
|colspan=3 style="background: #C3F84E"|'''Completion reward:''' [[File:MKT Icon Ruby 2.png|70px]] [[Ruby|Rubies]] (depending on player's multiplayer grade) | |colspan=3 style="background:#C3F84E"|'''Completion reward:''' [[File:MKT Icon Ruby 2.png|70px]] [[Ruby|Rubies]] (depending on player's multiplayer grade) | ||
|colspan=3 style="background: #C3F84E"|'''Completion reward:''' [[File:MKT Icon 1Ruby.png|60px]] [[Ruby|Rubies]] ×5 | |colspan=3 style="background:#C3F84E"|'''Completion reward:''' [[File:MKT Icon 1Ruby.png|60px]] [[Ruby|Rubies]] ×5 | ||
|-style="color: #FFF" | |-style="color:#FFF" | ||
|width=10% style="background: #2F5D1C"|[[File:MKT 006PB.png|70px]]<br>[[File:MKT Icon 1Ruby.png|15px]] | |width=10% style="background:#2F5D1C"|[[File:MKT 006PB.png|70px]]<br>[[File:MKT Icon 1Ruby.png|15px]] | ||
|width=10% style="background: #2F5D1C"|[[File:MKT 007PB.png|70px]]<br>[[File:MKT Icon 1Ruby.png|15px]] | |width=10% style="background:#2F5D1C"|[[File:MKT 007PB.png|70px]]<br>[[File:MKT Icon 1Ruby.png|15px]] | ||
|width=10% style="background: #2F5D1C"|[[File:MKT 008PB.png|70px]]<br>[[File:MKT Icon 1Ruby.png|15px]] | |width=10% style="background:#2F5D1C"|[[File:MKT 008PB.png|70px]]<br>[[File:MKT Icon 1Ruby.png|15px]] | ||
|width=10% style="background: #2F5D1C"|[[File:MKT 127CB.png|70px]]<br>[[File:MKT Icon GrandStar.png|15px]] | |width=10% style="background:#2F5D1C"|[[File:MKT 127CB.png|70px]]<br>[[File:MKT Icon GrandStar.png|15px]] | ||
|width=10% style="background: #2F5D1C"|[[File:MKT 049CB.png|70px]]<br>[[File:MKT Icon GrandStar.png|15px]] | |width=10% style="background:#2F5D1C"|[[File:MKT 049CB.png|70px]]<br>[[File:MKT Icon GrandStar.png|15px]] | ||
|width=10% style="background: #2F5D1C"|[[File:MKT 201CB.png|70px]]<br>[[File:MKT Icon GrandStar.png|15px]] | |width=10% style="background:#2F5D1C"|[[File:MKT 201CB.png|70px]]<br>[[File:MKT Icon GrandStar.png|15px]] | ||
|-style="color: #FFF" | |-style="color:#FFF" | ||
|style="background: #2F5D1C; border-top:1px solid #2F5D1C;"|''Join a multiplayer race.'' | |style="background:#2F5D1C;border-top:1px solid #2F5D1C;"|''Join a multiplayer race.'' | ||
|style="background: #2F5D1C; border-top:1px solid #2F5D1C;"|''Join 3 multiplayer races.'' | |style="background:#2F5D1C;border-top:1px solid #2F5D1C;"|''Join 3 multiplayer races.'' | ||
|style="background: #2F5D1C; border-top:1px solid #2F5D1C;"|''Join 5 multiplayer races.'' | |style="background:#2F5D1C;border-top:1px solid #2F5D1C;"|''Join 5 multiplayer races.'' | ||
|style="background: #2F5D1C; border-top:1px solid #2F5D1C;"|''Land 3 hits with Green Shells in multiplayer.'' | |style="background:#2F5D1C;border-top:1px solid #2F5D1C;"|''Land 3 hits with Green Shells in multiplayer.'' | ||
|style="background: #2F5D1C; border-top:1px solid #2F5D1C;"|''Land 3 hits with Bananas in multiplayer.'' | |style="background:#2F5D1C;border-top:1px solid #2F5D1C;"|''Land 3 hits with Bananas in multiplayer.'' | ||
|style="background: #2F5D1C; border-top:1px solid #2F5D1C;"|''Land 3 hits with Bob-ombs in multiplayer.'' | |style="background:#2F5D1C;border-top:1px solid #2F5D1C;"|''Land 3 hits with Bob-ombs in multiplayer.'' | ||
|-style="color: #FFF" | |-style="color:#FFF" | ||
|width=10% style="background: #2F5D1C"|[[File:MKT 011PB.png|70px]]<br>[[File:MKT Icon 1Ruby.png|15px]] | |width=10% style="background:#2F5D1C"|[[File:MKT 011PB.png|70px]]<br>[[File:MKT Icon 1Ruby.png|15px]] | ||
|width=10% style="background: #2F5D1C"|[[File:MKT 013PB.png|70px]]<br>[[File:MKT Icon 1Ruby.png|15px]] [[File:MKT Icon 1Ruby.png|15px]] [[File:MKT Icon 1Ruby.png|15px]] | |width=10% style="background:#2F5D1C"|[[File:MKT 013PB.png|70px]]<br>[[File:MKT Icon 1Ruby.png|15px]] [[File:MKT Icon 1Ruby.png|15px]] [[File:MKT Icon 1Ruby.png|15px]] | ||
|width=10% style="background: #2F5D1C"|[[File:MKT 012PB.png|70px]]<br>[[File:MKT Icon 1Ruby.png|15px]] [[File:MKT Icon 1Ruby.png|15px]] | |width=10% style="background:#2F5D1C"|[[File:MKT 012PB.png|70px]]<br>[[File:MKT Icon 1Ruby.png|15px]] [[File:MKT Icon 1Ruby.png|15px]] | ||
|width=10% style="background: #2F5D1C"|[[File:MKT 041CB.png|70px]]<br>[[File:MKT Icon GrandStar.png|15px]] [[File:MKT Icon GrandStar.png|15px]] | |width=10% style="background:#2F5D1C"|[[File:MKT 041CB.png|70px]]<br>[[File:MKT Icon GrandStar.png|15px]] [[File:MKT Icon GrandStar.png|15px]] | ||
|width=10% style="background: #2F5D1C"|[[File:MKT 138CB.png|70px]]<br>[[File:MKT Icon GrandStar.png|15px]] [[File:MKT Icon GrandStar.png|15px]] | |width=10% style="background:#2F5D1C"|[[File:MKT 138CB.png|70px]]<br>[[File:MKT Icon GrandStar.png|15px]] [[File:MKT Icon GrandStar.png|15px]] | ||
|width=10% style="background: #2F5D1C"|[[File:MKT 210CB.png|70px]]<br>[[File:MKT Icon GrandStar.png|15px]] [[File:MKT Icon GrandStar.png|15px]] | |width=10% style="background:#2F5D1C"|[[File:MKT 210CB.png|70px]]<br>[[File:MKT Icon GrandStar.png|15px]] [[File:MKT Icon GrandStar.png|15px]] | ||
|-style="color: #FFF" | |-style="color:#FFF" | ||
|style="background: #2F5D1C; border-top:1px solid #2F5D1C;"|''Get 1 win in Kart Pro.'' | |style="background:#2F5D1C;border-top:1px solid #2F5D1C;"|''Get 1 win in Kart Pro.'' | ||
|style="background: #2F5D1C; border-top:1px solid #2F5D1C;"|''Achieve a winning streak that includes 3 1st-place wins.'' | |style="background:#2F5D1C;border-top:1px solid #2F5D1C;"|''Achieve a winning streak that includes 3 1st-place wins.'' | ||
|style="background: #2F5D1C; border-top:1px solid #2F5D1C;"|''Achieve a winning streak that includes 2 1st-place wins.'' | |style="background:#2F5D1C;border-top:1px solid #2F5D1C;"|''Achieve a winning streak that includes 2 1st-place wins.'' | ||
|style="background: #2F5D1C; border-top:1px solid #2F5D1C;"|''Land 3 hits with Red Shells in multiplayer.'' | |style="background:#2F5D1C;border-top:1px solid #2F5D1C;"|''Land 3 hits with Red Shells in multiplayer.'' | ||
|style="background: #2F5D1C; border-top:1px solid #2F5D1C;"|''Join a multiplayer race.'' | |style="background:#2F5D1C;border-top:1px solid #2F5D1C;"|''Join a multiplayer race.'' | ||
|style="background: #2F5D1C; border-top:1px solid #2F5D1C;"|''Use the Bullet Bill item in multiplayer.'' | |style="background:#2F5D1C;border-top:1px solid #2F5D1C;"|''Use the Bullet Bill item in multiplayer.'' | ||
|-style="color: #FFF" | |-style="color:#FFF" | ||
|width=10% style="background: #2F5D1C"|[[File:MKT 005PB.png|70px]]<br>[[File:MKT Icon 1Ruby.png|15px]] | |width=10% style="background:#2F5D1C"|[[File:MKT 005PB.png|70px]]<br>[[File:MKT Icon 1Ruby.png|15px]] | ||
|width=10% style="background: #2F5D1C"|[[File:MKT 009PB.png|70px]]<br>[[File:MKT Icon 1Ruby.png|15px]] | |width=10% style="background:#2F5D1C"|[[File:MKT 009PB.png|70px]]<br>[[File:MKT Icon 1Ruby.png|15px]] | ||
|width=10% style="background: #2F5D1C"|[[File:MKT 010PB.png|70px]]<br>[[File:MKT Icon 1Ruby.png|15px]] | |width=10% style="background:#2F5D1C"|[[File:MKT 010PB.png|70px]]<br>[[File:MKT Icon 1Ruby.png|15px]] | ||
|width=10% style="background: #2F5D1C"|[[File:MKT 133CB.png|70px]]<br>[[File:MKT Icon GrandStar.png|15px]] [[File:MKT Icon GrandStar.png|15px]] | |width=10% style="background:#2F5D1C"|[[File:MKT 133CB.png|70px]]<br>[[File:MKT Icon GrandStar.png|15px]] [[File:MKT Icon GrandStar.png|15px]] | ||
|width=10% style="background: #2F5D1C"|[[File:MKT 119-2CB.png|70px]]<br>[[File:MKT Icon GrandStar.png|15px]] [[File:MKT Icon GrandStar.png|15px]] | |width=10% style="background:#2F5D1C"|[[File:MKT 119-2CB.png|70px]]<br>[[File:MKT Icon GrandStar.png|15px]] [[File:MKT Icon GrandStar.png|15px]] | ||
|width=10% style="background: #2F5D1C"|[[File:MKT 147CB.png|70px]]<br>[[File:MKT Icon GrandStar.png|15px]] [[File:MKT Icon GrandStar.png|15px]] | |width=10% style="background:#2F5D1C"|[[File:MKT 147CB.png|70px]]<br>[[File:MKT Icon GrandStar.png|15px]] [[File:MKT Icon GrandStar.png|15px]] | ||
|-style="color: #FFF" | |-style="color:#FFF" | ||
|style="background: #2F5D1C; border-top:1px solid #2F5D1C;"|''Join 10 multiplayer races.'' | |style="background:#2F5D1C;border-top:1px solid #2F5D1C;"|''Join 10 multiplayer races.'' | ||
|style="background: #2F5D1C; border-top:1px solid #2F5D1C;"|''Get 3rd place or higher 3 times in a multiplayer race.'' | |style="background:#2F5D1C;border-top:1px solid #2F5D1C;"|''Get 3rd place or higher 3 times in a multiplayer race.'' | ||
|style="background: #2F5D1C; border-top:1px solid #2F5D1C;"|''Get 3rd place or higher 5 times in a multiplayer race.'' | |style="background:#2F5D1C;border-top:1px solid #2F5D1C;"|''Get 3rd place or higher 5 times in a multiplayer race.'' | ||
|style="background: #2F5D1C; border-top:1px solid #2F5D1C;"|''Do 50 Jump Boosts in multiplayer.'' | |style="background:#2F5D1C;border-top:1px solid #2F5D1C;"|''Do 50 Jump Boosts in multiplayer.'' | ||
|style="background: #2F5D1C; border-top:1px solid #2F5D1C;"|''Do 50 Mini-Turbo boosts in multiplayer.'' | |style="background:#2F5D1C;border-top:1px solid #2F5D1C;"|''Do 50 Mini-Turbo boosts in multiplayer.'' | ||
|style="background: #2F5D1C; border-top:1px solid #2F5D1C;"|''Cause opponents to crash 30 times in multiplayer.'' | |style="background:#2F5D1C;border-top:1px solid #2F5D1C;"|''Cause opponents to crash 30 times in multiplayer.'' | ||
|} | |} | ||
<br> | <br> | ||
{|class="wikitable" style="margin:auto; text-align:center" width=30% | {|class="wikitable"style="margin:auto; text-align:center"width=30% | ||
!colspan=2|Total Points Challenge 1 | !colspan=2|Total Points Challenge 1 | ||
|- | |- | ||
| Line 685: | Line 680: | ||
|} | |} | ||
<br> | <br> | ||
{|class="wikitable" style="margin:auto; text-align:center" width=30% | {|class="wikitable"style="margin:auto; text-align:center"width=30% | ||
!colspan=2|Total Points Challenge 2 | !colspan=2|Total Points Challenge 2 | ||
|- | |- | ||
| Line 721: | Line 716: | ||
===All-Clear Pipe=== | ===All-Clear Pipe=== | ||
The All-Clear Pipe randomly shoots out one of the following regular High-End items. The appearance rate can be viewed via the "Pipe content" link on the Gold Pass purchase screen. | The All-Clear Pipe randomly shoots out one of the following regular High-End items. The appearance rate can be viewed via the "Pipe content" link on the Gold Pass purchase screen. | ||
{|class="wikitable" style="margin:auto; text-align:center" | {|class="wikitable"style="margin:auto;text-align:center" | ||
!colspan=2|High-End items obtainable from the All-Clear Pipe during the Singapore Tour | !colspan=2|High-End items obtainable from the All-Clear Pipe during the Singapore Tour | ||
!Rate (each) | !Rate (each) | ||
|- | |- | ||
!High-End drivers | !High-End drivers | ||
|[[Dry Bowser]], [[ | |[[Dry Bowser]], [[Metal Mario]], [[Pink Gold Peach]], [[Cat Mario|Cat Peach]], [[Pauline]], [[Princess Peach|Peach (Explorer)]], [[Nabbit]], [[King Bob-omb]], [[Peachette]], [[Yoshi (species)|Black Yoshi]], [[Yoshi (species)|White Yoshi]], [[Princess Peach|Peach (Wintertime)]], [[Birdo|Birdo (Black)]], [[Penguin Mario|Penguin Luigi]], [[Dixie Kong]], [[Funky Kong]], [[Ice Mario (Super Mario Galaxy)|Ice Mario]] | ||
|rowspan=3|1.3514% | |rowspan=3|1.3514% | ||
|- | |- | ||
| Line 738: | Line 733: | ||
===Singapore Pipe 1=== | ===Singapore Pipe 1=== | ||
{|class="wikitable" style="margin:auto; text-align:center" | {|class="wikitable"style="margin:auto;text-align:center" | ||
!colspan=16|Items obtained from a new Singapore Pipe 1 | !colspan=16|Items obtained from a new Singapore Pipe 1 | ||
|- | |- | ||
| Line 775: | Line 770: | ||
|} | |} | ||
<br> | <br> | ||
{|class="wikitable"style="margin:auto;text-align:center" | |||
{|class="wikitable" style="margin:auto; text-align:center" | |||
!Class | !Class | ||
!Parts | !Parts | ||
| Line 794: | Line 788: | ||
|- | |- | ||
!High-End drivers | !High-End drivers | ||
|[[Dry Bowser]], [[ | |[[Dry Bowser]], [[Metal Mario]], [[Pink Gold Peach]], [[Pauline]], [[Princess Peach|Peach (Explorer)]], [[Nabbit]], [[King Bob-omb]], [[Peachette]], [[Yoshi (species)|Black Yoshi]], [[Yoshi (species)|White Yoshi]], [[Luigi|Luigi (Painter)]], [[Princess Peach|Peach (Wintertime)]], [[Birdo|Birdo (Black)]], [[Penguin Mario|Penguin Luigi]], [[Dixie Kong]], [[Funky Kong]], [[Builder Mario|Builder Luigi]], [[Luigi|Luigi (Classic)]], [[Ice Mario (Super Mario Galaxy)|Ice Mario]] | ||
|0.0500% | |0.0500% | ||
|- | |- | ||
| Line 806: | Line 800: | ||
|- | |- | ||
!Super drivers | !Super drivers | ||
|[[Donkey Kong]], [[Toad]], [[Bowser]], [[Luigi]], [[Mario]], [[Princess Peach|Peach]], [[Yoshi]], [[Princess Daisy|Daisy]], [[Lakitu]], [[King Boo]], [[Toadette]], [[Bowser Jr.]], [[Waluigi]], [[Wario]], [[Rosalina]], [[Birdo]], [[Diddy Kong]], [[Hammer Bro]], [[Boomerang Bro]], [[Fire Bro]], [[Ice Bro]], [[Red Yoshi]], [[Black Shy Guy]], [[Pink Shy Guy]], [[Toad (species)|Toad (Pit Crew)]], [[Monty Mole]], [[Birdo | |[[Donkey Kong]], [[Toad]], [[Bowser]], [[Luigi]], [[Mario]], [[Princess Peach|Peach]], [[Yoshi]], [[Princess Daisy|Daisy]], [[Lakitu]], [[King Boo]], [[Toadette]], [[Bowser Jr.]], [[Waluigi]], [[Wario]], [[Rosalina]], [[Birdo]], [[Diddy Kong]], [[Hammer Bro]], [[Boomerang Bro]], [[Fire Bro]], [[Ice Bro]], [[Red Yoshi]], [[Black Shy Guy]], [[Pink Shy Guy]], [[Toad (species)|Toad (Pit Crew)]], [[Monty Mole]], [[Birdo|Birdo (Light Blue)]], [[Birdo|Birdo (Yellow)]], [[Roving Racers|Red Koopa (Freerunning)]] | ||
|0.3103% | |0.3103% | ||
|- | |- | ||
| Line 832: | Line 826: | ||
===Singapore Pipe 2=== | ===Singapore Pipe 2=== | ||
{|class="wikitable" style="margin:auto; text-align:center" | {|class="wikitable"style="margin:auto;text-align:center" | ||
!colspan=16|Items obtained from a new Singapore Pipe 2 | !colspan=16|Items obtained from a new Singapore Pipe 2 | ||
|- | |- | ||
| Line 869: | Line 863: | ||
|} | |} | ||
<br> | <br> | ||
{|class="wikitable"style="margin:auto;text-align:center" | |||
{|class="wikitable" style="margin:auto; text-align:center" | |||
!Class | !Class | ||
!Parts | !Parts | ||
| Line 888: | Line 881: | ||
|- | |- | ||
!High-End drivers | !High-End drivers | ||
|[[Dry Bowser]], [[ | |[[Dry Bowser]], [[Metal Mario]], [[Pink Gold Peach]], [[Pauline]], [[Princess Peach|Peach (Explorer)]], [[Nabbit]], [[King Bob-omb]], [[Peachette]], [[Yoshi (species)|Black Yoshi]], [[Yoshi (species)|White Yoshi]], [[Princess Peach|Peach (Wintertime)]], [[Birdo|Birdo (Black)]], [[Penguin Mario|Penguin Luigi]], [[Dixie Kong]], [[Funky Kong]], [[Ice Mario (Super Mario Galaxy)|Ice Mario]], [[Luigi|Luigi (Vacation)]] | ||
|0.0556% | |0.0556% | ||
|- | |- | ||
| Line 900: | Line 893: | ||
|- | |- | ||
!Super drivers | !Super drivers | ||
|[[Donkey Kong]], [[Toad]], [[Bowser]], [[Luigi]], [[Mario]], [[Princess Peach|Peach]], [[Yoshi]], [[Princess Daisy|Daisy]], [[Lakitu]], [[King Boo]], [[Toadette]], [[Bowser Jr.]], [[Waluigi]], [[Wario]], [[Rosalina]], [[Birdo]], [[Diddy Kong]], [[Hammer Bro]], [[Boomerang Bro]], [[Fire Bro]], [[Ice Bro]], [[Red Yoshi]], [[Black Shy Guy]], [[Pink Shy Guy]], [[Toad (species)|Toad (Pit Crew)]], [[Monty Mole]], [[Birdo | |[[Donkey Kong]], [[Toad]], [[Bowser]], [[Luigi]], [[Mario]], [[Princess Peach|Peach]], [[Yoshi]], [[Princess Daisy|Daisy]], [[Lakitu]], [[King Boo]], [[Toadette]], [[Bowser Jr.]], [[Waluigi]], [[Wario]], [[Rosalina]], [[Birdo]], [[Diddy Kong]], [[Hammer Bro]], [[Boomerang Bro]], [[Fire Bro]], [[Ice Bro]], [[Red Yoshi]], [[Black Shy Guy]], [[Pink Shy Guy]], [[Toad (species)|Toad (Pit Crew)]], [[Monty Mole]], [[Birdo|Birdo (Light Blue)]], [[Birdo|Birdo (Yellow)]], [[Roving Racers|Red Koopa (Freerunning)]] | ||
|0.3103% | |0.3103% | ||
|- | |- | ||
| Line 926: | Line 919: | ||
===Pauline Pipe=== | ===Pauline Pipe=== | ||
{|class="wikitable" style="margin:auto; text-align:center" | {|class="wikitable"style="margin:auto;text-align:center" | ||
!colspan=16|Items obtained from a new Pauline Pipe | !colspan=16|Items obtained from a new Pauline Pipe | ||
|- | |- | ||
| Line 963: | Line 956: | ||
|} | |} | ||
<br> | <br> | ||
{|class="wikitable"style="margin:auto;text-align:center" | |||
{|class="wikitable" style="margin:auto; text-align:center" | |||
!Class | !Class | ||
!Parts | !Parts | ||
| Line 986: | Line 978: | ||
|- | |- | ||
!Super drivers | !Super drivers | ||
|[[Donkey Kong]], [[Toad]], [[Bowser]], [[Luigi]], [[Mario]], [[Princess Peach|Peach]], [[Yoshi]], [[Princess Daisy|Daisy]], [[Lakitu]], [[King Boo]], [[Toadette]], [[Bowser Jr.]], [[Waluigi]], [[Wario]], [[Rosalina]], [[Birdo]], [[Diddy Kong]], [[Hammer Bro]], [[Boomerang Bro]], [[Fire Bro]], [[Ice Bro]], [[Red Yoshi]], [[Black Shy Guy]], [[Pink Shy Guy]], [[Toad (species)|Toad (Pit Crew)]], [[Monty Mole]], [[Birdo | |[[Donkey Kong]], [[Toad]], [[Bowser]], [[Luigi]], [[Mario]], [[Princess Peach|Peach]], [[Yoshi]], [[Princess Daisy|Daisy]], [[Lakitu]], [[King Boo]], [[Toadette]], [[Bowser Jr.]], [[Waluigi]], [[Wario]], [[Rosalina]], [[Birdo]], [[Diddy Kong]], [[Hammer Bro]], [[Boomerang Bro]], [[Fire Bro]], [[Ice Bro]], [[Red Yoshi]], [[Black Shy Guy]], [[Pink Shy Guy]], [[Toad (species)|Toad (Pit Crew)]], [[Monty Mole]], [[Birdo|Birdo (Light Blue)]], [[Birdo|Birdo (Yellow)]], [[Roving Racers|Red Koopa (Freerunning)]] | ||
|0.3448% | |0.3448% | ||
|- | |- | ||
| Line 1,013: | Line 1,005: | ||
==Token Shop== | ==Token Shop== | ||
The limited-time event where [[event token]]s appeared began on January 12, 2022 and ended on January 25, 2022. Event tokens could be earned by collecting them on courses. | The limited-time event where [[event token]]s appeared began on January 12, 2022 and ended on January 25, 2022. Event tokens could be earned by collecting them on courses. | ||
{|class="wikitable"style="margin:auto; text-align:center"width=50% | |||
{|class="wikitable" style="margin:auto; text-align:center" width=50% | |||
!colspan=3|'''Token Shop''' (January 12, 2022 - January 25, 2022) | !colspan=3|'''Token Shop''' (January 12, 2022 - January 25, 2022) | ||
|- | |- | ||
| Line 1,060: | Line 1,051: | ||
==Tier Shop== | ==Tier Shop== | ||
The shop features a variety of set and randomized items available for purchase. The item slots in the shop are unlocked based on the highest tier of players. | The shop features a variety of set and randomized items available for purchase. The item slots in the shop are unlocked based on the highest tier of players. | ||
{|class="wikitable"style="margin:auto;text-align:center"width=50% | |||
{| class="wikitable" style="margin:auto; text-align:center" width=50% | |||
!colspan=3|Items available in Tier Shop (January 12, 2022 - January 18, 2022) | !colspan=3|Items available in Tier Shop (January 12, 2022 - January 18, 2022) | ||
|- | |- | ||
| Line 1,108: | Line 1,098: | ||
!Points-cap ticket (High-End)<br>[[File:MKT Icon Coin.png|20px]] 20,000<br>Amount: 1 per week | !Points-cap ticket (High-End)<br>[[File:MKT Icon Coin.png|20px]] 20,000<br>Amount: 1 per week | ||
|} | |} | ||
==Gallery== | |||
<gallery> | |||
MKT Singapore Tour artwork.jpg|Promotional artwork for the tour | |||
</gallery> | |||
==Names in other languages== | ==Names in other languages== | ||
| Line 1,134: | Line 1,129: | ||
|SpaM=Singapore Season | |SpaM=Singapore Season | ||
}} | }} | ||
{{MKT}} | {{MKT}} | ||
[[Category:Mario Kart Tour tours]] | [[Category:Mario Kart Tour tours]] | ||
[[it:Tour di Singapore]] | [[it:Tour di Singapore]] | ||
Latest revision as of 14:00, January 2, 2024
| Singapore Tour | |
|---|---|

| |
| Start date | January 11, 2022 10:00 p.m. (PT) |
| End date | January 25, 2022 9:59 p.m. (PT) |
| Number of cups | 12 |
| Ranked cups | Luigi Cup (week 1) Kamek Cup (week 2) |
| Coin Rush course | Singapore Speedway |
| << List of tours >> | |
The Singapore Tour was the sixty-first tour of Mario Kart Tour, which began on January 12, 2022, and ended on January 25, 2022. True to its name, the tour featured the debut of a brand new city course themed after Singapore, aptly named Singapore Speedway, making this the first tour to introduce a new city to the game since the April—May 2021 Sydney Tour nineteen tours prior. The tour also introduced a new variant of Luigi in a vacation outfit, as well as the purple Roving Racer, referred to as Purple Koopa (Freerunning), who was a reward for placing high in the tour's ranked cups, as new drivers. Similar to 2021's Berlin Tour, multiple variants of Luigi, namely Builder Luigi, Luigi (Classic), and Luigi (Painter) (only Penguin Luigi and Luigi (Lederhosen) are absent), appeared as the spotlight drivers for the second week of the tour. The menu's background featured Marina Bay Sands and the Singapore Flyer as the landmarks for this tour. This tour's trailer featured silhouettes of skyscrapers during its opening splash screen. Starting from this tour, the Total Points Challenge features two challenge cards, allowing players to receive more rewards.
Instead of a traditional announcement by the official Mario Kart Tour Twitter account, the tour's announcement would be randomly tweeted to users who posted a public tweet with the hashtag #TraveltheWorldwithMarioKart prior to January 31, 2022, 6:59 a.m. PT. The official trailer was released to the public on January 10, 2022, two days before the start of the tour.
The eighth set of Expert Challenges was made available at the start of this tour, making this tour the second one since the Summer Festival Tour to not introduce an Expert Challenges card alongside a Team Rally, but just like in the 2021 Halloween Tour, a Team Rally would take place in the following tour. The eighth set of Expert Challenges ended on the Samurai Tour.
Starting from this tour, Peach (Explorer) and the Silver Surf Master are available in regular tour pipes, including the All-Clear Pipe.
Spotlights[edit]
| Singapore Pipe 1 January 11, 2022, 10:00 p.m. (PT) – January 25, 2022, 9:59 p.m. (PT) |
Singapore Pipe 2 January 18, 2022, 10:00 p.m. (PT) – January 25, 2022, 9:59 p.m. (PT) | ||||

|

| ||||
| Drivers | Karts | Gliders | Drivers | Karts | Gliders |
|---|---|---|---|---|---|

|
  |
||||
| Luigi (Vacation) | Roaring Racer | Silver Manta Glider | Luigi (Painter), Builder Luigi, and Luigi (Classic) | Paintster, Black Dozer, and Decal Streamliner | Flying Easel, Ship's Wheel, and Black Great Sail |
Special pipe[edit]
| Pauline Pipe January 14, 2022, 10:00 p.m. (PT) – January 21, 2022, 9:59 p.m. (PT) | ||||

| ||||
| High-End drivers | High-End karts | High-End Spotlight glider | High-End gliders | |
|---|---|---|---|---|
 |
||||
| Pauline, Pauline (Party Time), and Pauline (Rose) | Yellow Taxi, Platinum Taxi, and Red Taxi | Glittering Parasol | Rose Parasol and Magic Parasol | |
- Names in other languages
| Language | Name | Meaning |
|---|---|---|
| Japanese | ポリーンドカン Porīn Dokan |
Pauline Pipe |
| Chinese (simplified) | 宝琳水管 Bǎolín Shuǐguǎn |
Pauline Pipe |
| Chinese (traditional) | 波琳水管 Bōlín Shuǐguǎn |
Pauline Pipe |
| German | Pauline-Röhre |
Pauline Pipe |
| Korean | 폴린토관 Pollin Togwan |
Pauline Pipe |
Cups[edit]
Luigi Cup Ranked cup (week 1) |
Singapore Speedway T |
DS Waluigi Pinball R/T |
Singapore Speedway R |
Ring Race | ||||
 3DS Toad Circuit |
Toad | |||||||
Daisy Cup |
SNES Choco Island 2 |
3DS Bowser's Castle |
3DS Toad Circuit |
Goomba Takedown | ||||
 RMX Vanilla Lake 1 |
Rosalina | |||||||
Kamek Cup Ranked cup (week 2) |
Singapore Speedway |
GBA Sunset Wilds |
Singapore Speedway R/T |
Glider Challenge | ||||
 SNES Choco Island 2 |
Daisy | |||||||
Funky Kong Cup |
3DS Bowser's Castle T |
GCN Dino Dino Jungle T |
RMX Vanilla Lake 1 |
Snap a Photo | ||||
 Singapore Speedway T |
Luigi (Vacation) | |||||||
Lemmy Cup |
SNES Choco Island 2T |
Singapore Speedway R |
GBA Sunset Wilds R |
Break Item Boxes | ||||
 DS DK Pass |
Mario | |||||||
Yoshi Cup |
3DS Toad Circuit R |
3DS Neo Bowser City T |
DS DK Pass R |
Time Trial | ||||
 DS Waluigi Pinball R |
Wario | |||||||
Pink Gold Peach Cup |
SNES Mario Circuit 1T |
RMX Vanilla Lake 1T |
Singapore Speedway |
Steer Clear of Obstacles | ||||
 3DS Neo Bowser City |
Larry | |||||||
Bowser Jr. Cup |
GCN Dino Dino Jungle |
DS DK Pass T |
SNES Choco Island 2R |
Do Jump Boosts | ||||
 SNES Mario Circuit 1 |
Wendy | |||||||
Baby Luigi Cup |
3DS Neo Bowser City R |
Singapore Speedway T |
SNES Donut Plains 1R/T |
Smash Small Dry Bones | ||||
 3DS Bowser's Castle |
Waluigi | |||||||
Monty Mole Cup |
GCN Dino Dino Jungle R |
SNES Mario Circuit 1 |
3DS Bowser's Castle R |
Combo Attack | ||||
 SNES Donut Plains 1T |
Toadette | |||||||
Hammer Bro Cup |
GBA Sunset Wilds T |
DS DK Pass |
3DS Toad Circuit T |
Time Trial | ||||
 Singapore Speedway |
Luigi | |||||||
Pauline Cup |
SNES Mario Circuit 1R |
3DS Neo Bowser City |
RMX Vanilla Lake 1R |
vs. Mega Roy | ||||
 GCN Dino Dino Jungle |
Any character | |||||||
Signature kart sets[edit]
Drivers with a corresponding cup are bumped one rank up in every course of their cup.
| Cup | Driver | Kart | Glider |
|---|---|---|---|
| Second course of every cup | |||
| Third course of every cup | |||
| — | — | ||
| — | — | ||
| — | — | ||
| — | — | ||
| — | — | ||
| — | — | ||
| — | — | ||
| — | — | ||
| — | — | ||
| — | — | ||
| — | — | ||
| — | — |
Today's Challenge[edit]
Players' most recently used kart and glider are chosen, and favorite and favored ones have extra priority. Opponents are arranged randomly. On day 1 of this tour, players finish a race in SNES Choco Island 2 in the Daisy Cup using Nabbit for a free pipe launch. Starting from day 2, players have to finish a race in the earliest incomplete course that is not in any of the ranked cups using the driver shown on the course's thumbnail every day to obtain the corresponding reward in the table below. Once all of the courses are completed, the courses are selected at random.
| Day(s) | Reward |
| 1-4, 6-9, 11-13 | Free pipe launch |
|---|---|
| 5, 10 | Rubies ×5 |
| 14 |  Badge |
| Today's Challenge Pipe | |

| |
| Pipe contents | |
| Rubies, coins, driver (Normal/Super/High-End), kart (Normal/Super/High-End), glider (Normal/Super/High-End), item tickets | |
Rewards[edit]
Gold cells indicate rewards that are exclusive to Gold Pass members.

|
|||||||
| Droplet Glider | Luigi | Birthday Girl | BBIA Parafoil | Wendy | Black B Dasher | Blue Royale | 8-Bit Jumping Luigi |
| Grand Stars | 15 | 20 | 25 | 30 | 35 | 40 | 50 | 60 | 70 | 85 | 100 | 115 | 130 | 145 | 160 | 180 | 200 | 215 | 230 | 240 | 250 | 255 | 260 | 265 | Total | Grand total | |
|---|---|---|---|---|---|---|---|---|---|---|---|---|---|---|---|---|---|---|---|---|---|---|---|---|---|---|---|
| Free pipe launch | 1 | 1 | 1 | 1 | 4 | ||||||||||||||||||||||
| Coin | 300 | 300 | 300 | 300 | 300 | 500 | 1000 | 3000 | 7000 | ||||||||||||||||||
| 1000 | 1000 | 2000 | 4000 | ||||||||||||||||||||||||
| Rubies | 3 | 3 | 5 | 5 | 5 | 21 | 46 | ||||||||||||||||||||
| 5 | 5 | 5 | 5 | 5 | 25 | ||||||||||||||||||||||
| Item tickets | 10 | 10 | 25 | ||||||||||||||||||||||||
| 15 | 15 | ||||||||||||||||||||||||||
| Star tickets | 4 | 4 | 4 | ||||||||||||||||||||||||
| 0 | |||||||||||||||||||||||||||
| Point-boost tickets | 1 | 1 | 1 | 3 | 6 | ||||||||||||||||||||||
| 3 | 3 | ||||||||||||||||||||||||||
| 1 | 1 | 1 | 3 | 6 | |||||||||||||||||||||||
| 3 | 3 | ||||||||||||||||||||||||||
| 1 | 1 | 1 | 3 | 6 | |||||||||||||||||||||||
| 3 | 3 | ||||||||||||||||||||||||||
| Level-boost ticket | 3 | 12 | |||||||||||||||||||||||||
| 9 | |||||||||||||||||||||||||||
New content[edit]
Drivers[edit]

Karts[edit]
Gliders[edit]
Courses[edit]

Singapore Speedway (N, R, T, R/T)
Paid banners[edit]
| Name | Availability | Cost | Contents | Banner image |
|---|---|---|---|---|
| Value Pack | January 12, 2022 – January 25, 2022 | US$1.99 |
|

|
| Luigi Parafoil Pack | January 12, 2022 – January 25, 2022 | US$19.99 |
|

|
| Daisy (Swimwear) Pack | January 12, 2022 – January 25, 2022 | US$39.99 | 
| |
| Festival Wings Pack | January 19, 2022 – January 25, 2022 | US$19.99 |
|

|
| Mario (Sunshine) Pack | January 19, 2022 – January 25, 2022 | US$39.99 |
|

|
Challenges[edit]
| Tour Challenges 1 | Tour Challenges 2 | Gold Challenges | ||||||||
|---|---|---|---|---|---|---|---|---|---|---|
| Completion reward: |
Completion reward: |
Completion reward: | ||||||||
 |
 |
 |
 |
 |
 |
 |
 |
 | ||
| Do 5 Rocket Starts. | Land 5 hits with Red Shells. | Get 1st place in a 100cc or higher race 2 times in a row. | Use 10 Mushrooms. | Land 3 hits with Bob-ombs. | Do 100 Jump Boosts. | Land 15 hits with Bananas. | Land 10 hits with Green Shells. | Use Lightning. | ||
 |
 |
 |
 |
 |
 |
 |
 |
 | ||
| Get 1 item from the Daily Selects section of the Shop. | Get 3rd place or higher in a race 30 times. | Get a Fantastic combo a total of 5 times. | Use point-boost tickets 3 times. | Earn a score of 9,000 or higher using a driver with a mustache. | Send Greeting Coins to a friend. | Use a level-boost ticket. | Activate Frenzy mode 5 times using a driver with a hat. | Cause opponents to crash 3 times while gliding. | ||
 |
 |
 |
 |
 |
 |
 |
 |
 | ||
| Drive a distance of 20,000 or more on a city course. | Cause opponents to crash using a Mega Mushroom. | Race in every course of every cup, including bonus challenges. | Race on 5 city courses. | Earn a total score of 25,000 or higher in the Pauline Cup. | Complete Coin Rush 1 time. | Earn a score of 10,000 or higher using a driver with a mustache. | Earn a total score of 25,000 or higher in the Daisy Cup. | Race in auto mode. | ||
| Premium Challenges | ||
|---|---|---|
| Cost: US$4.99 | ||
| Three in a row reward: | ||
Completion reward:  King Bob-omb ×1 King Bob-omb ×1
| ||

|
||
| Lakitu ×1 | Turbo Birdo ×1 | BaNaNa Parafoil ×1 |
| Land 5 hits with Green Shells. | Land 10 hits with Bananas. | Land 10 hits with Bob-ombs. |
| Coins ×3,000 | Rubies ×10 | Glider point-boost ticket ×3 |
| Do 50 Jump Boosts. | Participate in a race. | Do 100 Mini-Turbo boosts. |
| Normal glider level-boost ticket ×1 | Super glider level-boost ticket ×1 | High-End glider level-boost ticket ×1 |
| Get 1st place in a race 10 times. | Get 1st place in a race 15 times. | Get 1st place in a race 20 times. |
| Kart Pro Challenges | Tour Multiplayer Challenges | |||||
|---|---|---|---|---|---|---|
| Three in a row reward: |
Three in a row reward: | |||||
| Completion reward: |
Completion reward: | |||||
 |
 |
 |
 |
 |
 | |
| Join a multiplayer race. | Join 3 multiplayer races. | Join 5 multiplayer races. | Land 3 hits with Green Shells in multiplayer. | Land 3 hits with Bananas in multiplayer. | Land 3 hits with Bob-ombs in multiplayer. | |
 |
 |
 |
 |
 |
 | |
| Get 1 win in Kart Pro. | Achieve a winning streak that includes 3 1st-place wins. | Achieve a winning streak that includes 2 1st-place wins. | Land 3 hits with Red Shells in multiplayer. | Join a multiplayer race. | Use the Bullet Bill item in multiplayer. | |
 |
 |
 |
 |
 |
 | |
| Join 10 multiplayer races. | Get 3rd place or higher 3 times in a multiplayer race. | Get 3rd place or higher 5 times in a multiplayer race. | Do 50 Jump Boosts in multiplayer. | Do 50 Mini-Turbo boosts in multiplayer. | Cause opponents to crash 30 times in multiplayer. | |
| Total Points Challenge 1 | |
|---|---|
| Points | Rewards |
| 350,000 |
|
| 300,000 |
|
| 250,000 |
|
| 200,000 |
|
| 150,000 |
|
| 100,000 |
|
| Total Points Challenge 2 | |
|---|---|
| Points | Rewards |
| 900,000 |
|
| 800,000 |
|
| 700,000 |
|
| 600,000 |
|
| 500,000 |
|
| 400,000 |
|
Initial pipe appearance rates[edit]
All-Clear Pipe[edit]
The All-Clear Pipe randomly shoots out one of the following regular High-End items. The appearance rate can be viewed via the "Pipe content" link on the Gold Pass purchase screen.
Singapore Pipe 1[edit]
| Items obtained from a new Singapore Pipe 1 | |||||||||||||||
|---|---|---|---|---|---|---|---|---|---|---|---|---|---|---|---|
| Item | Normal |
Super |
High-End |
Featured High-End | |||||||||||
| Driver | Kart | Glider | Driver | Kart | Glider | Driver | Kart | Glider | Driver | Kart | Glider | ||||
| Amount | 31 | 25 | 15 | 9 | 7 | 4 | 1 | 1 | 1 | 2 | 2 | 2 | |||
Singapore Pipe 2[edit]
| Items obtained from a new Singapore Pipe 2 | |||||||||||||||
|---|---|---|---|---|---|---|---|---|---|---|---|---|---|---|---|
| Item | Normal |
Super |
High-End |
Featured High-End | |||||||||||
| Driver | Kart | Glider | Driver | Kart | Glider | Driver | Kart | Glider | Driver | Kart | Glider | ||||
| Amount | 30 | 24 | 14 | 9 | 7 | 4 | 1 | 1 | 1 | 3 | 3 | 3 | |||
Pauline Pipe[edit]
| Items obtained from a new Pauline Pipe | |||||||||||||||
|---|---|---|---|---|---|---|---|---|---|---|---|---|---|---|---|
| Item | Normal |
Super |
High-End |
Featured High-End | |||||||||||
| Driver | Kart | Glider | Driver | Kart | Glider | Driver | Kart | Glider | Driver | Kart | Glider | ||||
| Amount | 13 | 11 | 7 | 5 | 4 | 4 | 2 | 2 | 1 | 0 | 0 | 1 | |||
Token Shop[edit]
The limited-time event where event tokens appeared began on January 12, 2022 and ended on January 25, 2022. Event tokens could be earned by collecting them on courses.
| Token Shop (January 12, 2022 - January 25, 2022) | ||
|---|---|---|

|
||
| Black Shy Guy Amount: 1 |
Turbo Yoshi Amount: 1 |
? Block Amount: 1 |
| Ruby ×3 Amount: 5 |
Coin ×500 Amount: 10 |
Coin Rush ticket Amount: 1 |
| Point-boost ticket (driver) Amount: 5 |
Point-boost ticket (kart) Amount: 5 |
Point-boost ticket (glider) Amount: 5 |
| Item ticket Amount: 10 |
Level-boost ticket (Normal kart) Amount: 3 |
Level-boost ticket (Super kart) Amount: 1 |
| Star ticket Amount: 5 |
Points-cap ticket (Normal kart) Amount: 1 |
Points-cap ticket (Super kart) Amount: 1 |
Tier Shop[edit]
The shop features a variety of set and randomized items available for purchase. The item slots in the shop are unlocked based on the highest tier of players.
| Items available in Tier Shop (January 12, 2022 - January 18, 2022) | ||
|---|---|---|
| Luigi Amount: 1 |
Cucumber Amount: 1 |
Blizzard Balloons Amount: 1 |
| Items available in Tier Shop (January 19, 2022 - January 25, 2022) | ||

|
||
| Black Yoshi Amount: 1 |
Offroader Amount: 1 |
Dry Bowser Umbrella Amount: 1 |
| Items available in Tier Shop (January 12, 2022 - January 25, 2022) | ||
| Level-boost ticket (Normal) Amount: 3 per week |
Level-boost ticket (Normal) Amount: 3 per week |
Level-boost ticket (Normal) Amount: 3 per week |
OR |
OR |
OR |
| Level-boost ticket (Super) Amount: 2 per week OR Level-boost ticket (High-End) Amount: 1 per week |
Level-boost ticket (Super) Amount: 2 per week OR Level-boost ticket (High-End) Amount: 1 per week |
Level-boost ticket (Super) Amount: 2 per week OR Level-boost ticket (High-End) Amount: 1 per week |
OR OR |
OR OR |
OR OR |
| Points-cap ticket (Normal) Amount: 1 per week |
Points-cap ticket (Super) Amount: 1 per week |
Points-cap ticket (High-End) Amount: 1 per week |
Gallery[edit]
Promotional artwork for the tour

Names in other languages[edit]
| Language | Name | Meaning |
|---|---|---|
| Japanese | シンガポールツアー Shingapōru Tsuā |
Singapore Tour |
| Chinese (simplified) | 新加坡巡回赛 Xīnjiāpō Xúnhuísài |
Singapore Tour |
| Chinese (traditional) | 新加坡巡迴賽 Xīnjiāpō Xúnhuísài |
Singapore Tour |
| French | Saison de Singapour |
Singapore Season |
| German | Singapur-Tour-Saison |
Singapore Tour Season |
| Italian | Tour di Singapore |
Singapore Tour |
| Korean | 싱가포르 투어 Sing-gapoleu Tueo |
Singapore Tour |
| Portuguese | Temporada de Singapura |
Singapore Season |
| Spanish | Temporada de Singapur |
Singapore Season |