
2nd Anniversary Tour: Difference between revisions
No edit summary |
m (Text replacement - "{{([Cc]olor|[Cc]olor-link|[Cc]olor-link-external)\|(1=)?([^\|{}\n]+)\|(2=)?([^\|{}\n]+)([\|}])" to "{{$1|$5|$3$6") |
||
| (29 intermediate revisions by 15 users not shown) | |||
| Line 6: | Line 6: | ||
|cups=12 | |cups=12 | ||
|rank=[[Baby Luigi Cup]] (week 1)<br>[[Pink Gold Peach Cup]] (week 2) | |rank=[[Baby Luigi Cup]] (week 1)<br>[[Pink Gold Peach Cup]] (week 2) | ||
|coin=[[London Loop]] | |coin=[[Tour London Loop|London Loop]] | ||
|before=[[Sydney Tour (September 2021)|<<]] | |before=[[Sydney Tour (September 2021)|<<]] | ||
|after=[[Autumn Tour|>>]] | |after=[[Autumn Tour (2021)|>>]] | ||
}} | }} | ||
The '''2nd Anniversary Tour''' was the fifty-third tour of ''[[Mario Kart Tour]]'', which began on September 22, 2021 and ended on October 5, 2021. As the tour's name indicates, it celebrated two years since the official launch of ''Mario Kart Tour'' on September 25, 2019. This tour introduced a new layout of the [[New York Minute]] course, named | The '''2nd Anniversary Tour''' was the fifty-third tour of ''[[Mario Kart Tour]]'', which began on September 22, 2021 and ended on October 5, 2021. As the tour's name indicates, it celebrated two years since the official launch of ''Mario Kart Tour'' on September 25, 2019. This tour introduced a new layout of the [[Tour New York Minute|New York Minute]] course, named New York Minute 4, and it was also the first tour to consist of only city courses, making this tour the first one to not feature any [[classic course]]s, the first to not feature any SNES courses, and the second in a row to introduce a new city course. This was also the first tour since the [[Hammer Bro Tour]] thirty-nine tours prior to only introduce Super drivers, being [[Birdo|Birdo (Blue)]], who was available as a reward for placing high in the ranked cups alongside the [[Blue Turbo Birdo]], making this the first tour to feature a kart as a reward for placing high in the ranked cup. The tour also featured new [[#Challenges|unique challenges]], as well as an upgraded [[#Token Shop|Token Shop]] with some half-price items. Like the [[1st Anniversary Tour]] twenty-five tours prior, this tour only featured ten base courses but totaled up to thirty-five courses including variants (similar to the [[Mario vs. Peach Tour]] four tours prior); the only recurring track was New York Minute 4R/T. | ||
This tour's [[Coin Rush (Mario Kart Tour)|Coin Rush]] course was [[London Loop]], which was reused from the [[London Tour]]. The menu's background featured the {{wp|Empire State Building}} as the landmark for this tour, which was reused from the [[Holiday Tour (2019)|2019 Holiday Tour]] and the | This tour's [[Coin Rush (Mario Kart Tour)|Coin Rush]] course was [[Tour London Loop|London Loop]], which was reused from the [[London Tour]]. The menu's background featured the {{wp|Empire State Building}} as the landmark for this tour, which was reused from the [[Holiday Tour (2019)|2019 Holiday Tour]] and the 1st Anniversary Tour. | ||
{{br|toc=1}} | {{br|toc=1}} | ||
==Spotlights== | ==Spotlights== | ||
{| align=center width=66% cellspacing=0 border=1 cellpadding=3 style="border-collapse:collapse; font-family:Arial; text-align:center" | {|align=center width=66% cellspacing=0 border=1 cellpadding=3 style="border-collapse:collapse;font-family:Arial;text-align:center" | ||
|-style="background: #89A" | |-style="background:#89A" | ||
|'''2nd Anniversary Pipe 1'''<br>September 21, 2021, 11:00 p.m. (PT) – <br>October 5, 2021, 10:59 p.m. (PT) | |'''2nd Anniversary Pipe 1'''<br>September 21, 2021, 11:00 p.m. (PT) – <br>October 5, 2021, 10:59 p.m. (PT) | ||
|'''2nd Anniversary Pipe 2'''<br>September 28, 2021, 11:00 p.m. (PT) – <br>October 5, 2021, 10:59 p.m. (PT) | |'''2nd Anniversary Pipe 2'''<br>September 28, 2021, 11:00 p.m. (PT) – <br>October 5, 2021, 10:59 p.m. (PT) | ||
| Line 23: | Line 22: | ||
|[[File:MKT Tour53 2ndAnniversaryPipe1.png|x150px]] | |[[File:MKT Tour53 2ndAnniversaryPipe1.png|x150px]] | ||
|[[File:MKT Tour53 2ndAnniversaryPipe2.png|x150px]] | |[[File:MKT Tour53 2ndAnniversaryPipe2.png|x150px]] | ||
|-style="background: #ABC" | |-style="background:#ABC" | ||
! style="width: 50%;"|Drivers | !style="width:50%;"|Drivers | ||
! style="width: 50%;"|Drivers | !style="width:50%;"|Drivers | ||
|- | |- | ||
|[[File:MKT Artwork Pauline.png|80x100px]][[File:MKT Artwork MarioHakama.png|80x100px]][[File:MKT Artwork PeachKimono.png|80x100px]][[File:MKT Artwork PeachVacation.png|80x100px]][[File:MKT Artwork LuigiPainter.png|80x100px]] | |[[File:MKT Artwork Pauline.png|80x100px]][[File:MKT Artwork MarioHakama.png|80x100px]][[File:MKT Artwork PeachKimono.png|80x100px]][[File:MKT Artwork PeachVacation.png|80x100px]][[File:MKT Artwork LuigiPainter.png|80x100px]] | ||
| Line 35: | Line 34: | ||
==Special pipes== | ==Special pipes== | ||
{| align=center width=80% cellspacing=0 border=1 cellpadding=3 style="border-collapse:collapse; font-family:Arial; text-align:center" | {|align=center width=80% cellspacing=0 border=1 cellpadding=3 style="border-collapse:collapse;font-family:Arial;text-align:center" | ||
|-style="background: #89A" | |-style="background:#89A" | ||
|colspan=2|'''City Racer Pipe 1'''<br>September 21, 2021, 11:00 p.m. (PT) – <br>September 28, 2021, 10:59 p.m. (PT) | |colspan=2|'''City Racer Pipe 1'''<br>September 21, 2021, 11:00 p.m. (PT) – <br>September 28, 2021, 10:59 p.m. (PT) | ||
|colspan=2|'''City Racer Pipe 2'''<br>September 28, 2021, 11:00 p.m. (PT) – <br>October 5, 2021, 10:59 p.m. (PT) | |colspan=2|'''City Racer Pipe 2'''<br>September 28, 2021, 11:00 p.m. (PT) – <br>October 5, 2021, 10:59 p.m. (PT) | ||
| Line 43: | Line 42: | ||
|colspan=2|[[File:MKT Tour53 CityRacerPipe2.png|x150px]] | |colspan=2|[[File:MKT Tour53 CityRacerPipe2.png|x150px]] | ||
|-style="background: #ABC" | |-style="background: #ABC" | ||
! style="width: 20%;"|High-End Drivers | !style="width:20%;"|High-End Drivers | ||
! style="width: 20%;"|High-End Karts | !style="width:20%;"|High-End Karts | ||
! style="width: 20%;"|High-End Drivers | !style="width:20%;"|High-End Drivers | ||
! style="width: 20%;"|High-End Karts | !style="width:20%;"|High-End Karts | ||
|- | |- | ||
|[[File:MKT Artwork Pauline.png|100x100px]][[File:MKT Artwork MarioRacing.png|100x100px]][[File:MKT Artwork BabyPeachCherub.png|100x100px]][[File:MKT Artwork WaluigiBusDriver.png| 100x100px]] | |[[File:MKT Artwork Pauline.png|100x100px]][[File:MKT Artwork MarioRacing.png|100x100px]][[File:MKT Artwork BabyPeachCherub.png|100x100px]][[File:MKT Artwork WaluigiBusDriver.png| 100x100px]] | ||
| Line 60: | Line 59: | ||
==Cups== | ==Cups== | ||
{| align=center width=90% cellspacing=0 border=1 cellpadding=3 style="border-collapse:collapse; font-family:Arial; text-align:center" | {|align=center width=90% cellspacing=0 border=1 cellpadding=3 style="border-collapse:collapse;font-family:Arial;text-align:center" | ||
{{MKT cup table row | {{MKT cup table row | ||
|C=Baby Luigi||Ra=1 | |C=Baby Luigi||Ra=1 | ||
|R1=[[New York Minute 4]]||R1.I=NewYorkMinute4||R1.1=1,200||R1.2=1,700||R1.3=2,300||R1.4=2,900||R1.5=5,800 | |R1=[[Tour New York Minute|New York Minute 4]]||R1.I=NewYorkMinute4||R1.1=1,200||R1.2=1,700||R1.3=2,300||R1.4=2,900||R1.5=5,800 | ||
|R2=[[Tokyo Blur|Tokyo Blur T]]||R2.I=TokyoBlurT MarioHakama||R2.1=1,600||R2.2=2,400||R2.3=3,200||R2.4=4,000||R2.5=7,900 | |R2=[[Tour Tokyo Blur|Tokyo Blur T]]||R2.I=TokyoBlurT MarioHakama||R2.1=1,600||R2.2=2,400||R2.3=3,200||R2.4=4,000||R2.5=7,900 | ||
|R3=[[Paris Promenade | |R3=[[Tour Paris Promenade|Paris Promenade 2R]]||R3.I=ParisPromenade2R LuigiPainter||R3.1=1,200||R3.2=1,700||R3.3=2,300||R3.4=2,900||R3.5=5,800 | ||
|CN=[[Ring Race]]||C.I=Tour6 ToadCupChallenge||CC=[[Shy Guy]]||CT=[[London Loop]]||C.1=18||C.2=30||C.3=38 | |CN=[[Ring Race]]||C.I=Tour6 ToadCupChallenge||CC=[[Shy Guy]]||CT=[[Tour London Loop|London Loop]]||C.1=18||C.2=30||C.3=38 | ||
}} | }} | ||
{{MKT cup table row | {{MKT cup table row | ||
|C=Hammer Bro||Ra= | |C=Hammer Bro||Ra= | ||
|R1=[[Vancouver Velocity|Vancouver Velocity T]]||R1.I=VancouverVelocityT||R1.1=1,600||R1.2=2,500||R1.3=3,400||R1.4=4,200||R1.5=8,100 | |R1=[[Tour Vancouver Velocity|Vancouver Velocity T]]||R1.I=VancouverVelocityT||R1.1=1,600||R1.2=2,500||R1.3=3,400||R1.4=4,200||R1.5=8,100 | ||
|R2=[[Sydney Sprint]]||R2.I=SydneySprint||R2.1=1,500||R2.2=2,300||R2.3=3,100||R2.4=3,800||R2.5=7,400 | |R2=[[Tour Sydney Sprint|Sydney Sprint]]||R2.I=SydneySprint||R2.1=1,500||R2.2=2,300||R2.3=3,100||R2.4=3,800||R2.5=7,400 | ||
|R3=[[Los Angeles Laps|Los Angeles Laps T]]||R3.I=LosAngelesLapsT HammerBro||R3.1=2,100||R3.2=3,200||R3.3=4,300||R3.4=5,400||R3.5=10,300 | |R3=[[Tour Los Angeles Laps|Los Angeles Laps T]]||R3.I=LosAngelesLapsT HammerBro||R3.1=2,100||R3.2=3,200||R3.3=4,300||R3.4=5,400||R3.5=10,300 | ||
|CN=[[Glider Challenge]]||C.I=Tour8 DaisyCupChallenge||CC=[[Mario|Mario (Hakama)]]||CT=Tokyo Blur||C.1=150||C.2=300||C.3=440 | |CN=[[Glider Challenge]]||C.I=Tour8 DaisyCupChallenge||CC=[[Mario|Mario (Hakama)]]||CT=Tokyo Blur||C.1=150||C.2=300||C.3=440 | ||
}} | }} | ||
{{MKT cup table row | {{MKT cup table row | ||
|C=Pink Gold Peach||Ra=2 | |C=Pink Gold Peach||Ra=2 | ||
|R1=New York Minute 4R/T||R1.I=NewYorkMinute4RT||R1.1=1,600||R1.2=2,600||R1.3=3,500||R1.4=4,400||R1.5=8,100 | |R1=New York Minute 4R/T||R1.I=NewYorkMinute4RT MarioMusician||R1.1=1,600||R1.2=2,600||R1.3=3,500||R1.4=4,400||R1.5=8,100 | ||
|R2=[[Berlin Byways | |R2=[[Tour Berlin Byways|Berlin Byways 2R]]||R2.I=BerlinByways2R||R2.1=1,800||R2.2=2,900||R2.3=4,000||R2.4=5,000||R2.5=9,200 | ||
|R3=London Loop||R3.I=LondonLoop WaluigiBusDriver||R3.1=1,100||R3.2=1,700||R3.3=2,300||R3.4=2,900||R3.5=5,300 | |R3=London Loop||R3.I=LondonLoop WaluigiBusDriver||R3.1=1,100||R3.2=1,700||R3.3=2,300||R3.4=2,900||R3.5=5,300 | ||
|CN=[[Break Item Boxes]]||C.I=Tour53 PinkGoldPeachCupChallenge||CC=[[Princess Peach|Peach]]||CT=Paris Promenade 2||C.1=10||C.2=18||C.3=24 | |CN=[[Break Item Boxes]]||C.I=Tour53 PinkGoldPeachCupChallenge||CC=[[Princess Peach|Peach]]||CT=Paris Promenade 2||C.1=10||C.2=18||C.3=24 | ||
| Line 85: | Line 84: | ||
|C=Daisy||Ra= | |C=Daisy||Ra= | ||
|R1=Los Angeles Laps||R1.I=LosAngelesLaps MarioBaseball||R1.1=1,500||R1.2=2,500||R1.3=3,300||R1.4=4,200||R1.5=7,500 | |R1=Los Angeles Laps||R1.I=LosAngelesLaps MarioBaseball||R1.1=1,500||R1.2=2,500||R1.3=3,300||R1.4=4,200||R1.5=7,500 | ||
|R2= | |R2=London Loop 2||R2.I=LondonLoop2 PeachKimono||R2.1=1,100||R2.2=1,900||R2.3=2,500||R2.4=3,200||R2.5=5,700 | ||
|R3=Paris Promenade 2||R3.I=ParisPromenade2 Daisy||R3.1=1,200||R3.2=2,000||R3.3=2,800||R3.4=3,500||R3.5=6,200 | |R3=Paris Promenade 2||R3.I=ParisPromenade2 Daisy||R3.1=1,200||R3.2=2,000||R3.3=2,800||R3.4=3,500||R3.5=6,200 | ||
|CN=[[Time Trial (Mario Kart Tour)|Time Trial]]||C.I=Tour53 DaisyCupChallenge||CC=[[Baby Mario]]||CT=Sydney Sprint||C.1=2:00.00||C.2=1:52.00||C.3=1:45.00 | |CN=[[Time Trial (Mario Kart Tour)|Time Trial]]||C.I=Tour53 DaisyCupChallenge||CC=[[Baby Mario]]||CT=Sydney Sprint||C.1=2:00.00||C.2=1:52.00||C.3=1:45.00 | ||
| Line 99: | Line 98: | ||
|C=Peach||Ra= | |C=Peach||Ra= | ||
|R1=Sydney Sprint R||R1.I=SydneySprintR||R1.1=1,500||R1.2=2,600||R1.3=3,500||R1.4=4,400||R1.5=7,300 | |R1=Sydney Sprint R||R1.I=SydneySprintR||R1.1=1,500||R1.2=2,600||R1.3=3,500||R1.4=4,400||R1.5=7,300 | ||
|R2= | |R2=Paris Promenade||R2.I=ParisPromenade Peach||R2.1=1,200||R2.2=2,200||R2.3=2,900||R2.4=3,700||R2.5=6,200 | ||
|R3=London Loop T||R3.I=LondonLoopT LuigiClassic||R3.1=1,600||R3.2=2,800||R3.3=3,800||R3.4=4,900||R3.5=8,100 | |R3=London Loop T||R3.I=LondonLoopT LuigiClassic||R3.1=1,600||R3.2=2,800||R3.3=3,800||R3.4=4,900||R3.5=8,100 | ||
|CN=[[Big Reverse Race]]||C.I=Tour35 WendyCupChallenge||CC=Any character||CT=Berlin Byways 2||C.1=50cc||C.2=100cc||C.3=150cc | |CN=[[Big Reverse Race]]||C.I=Tour35 WendyCupChallenge||CC=Any character||CT=Berlin Byways 2||C.1=50cc||C.2=100cc||C.3=150cc | ||
| Line 146: | Line 145: | ||
}} | }} | ||
|} | |} | ||
===Signature kart sets=== | ===Signature kart sets=== | ||
Drivers with a corresponding cup were bumped one rank up in every course of their cup. | Drivers with a corresponding cup were bumped one rank up in every course of their cup. | ||
{| class="wikitable" style="text-align: center" width=50% | {|class="wikitable" style="text-align:center" width=50% | ||
!width=10%|Cup | !width=10%|Cup | ||
!width=20%|Driver | !width=20%|Driver | ||
| Line 233: | Line 231: | ||
==Today's Challenge== | ==Today's Challenge== | ||
Players' most recently used kart and glider are chosen, and favorite and favored ones have extra priority. Opponents are arranged randomly. On day 1 of this tour, players finish a race in [[Vancouver Velocity|Vancouver Velocity T]] in the [[Hammer Bro Cup]] using [[Ice Mario (Super Mario Galaxy)|Ice Mario]] for a free pipe launch. Starting from day 2, players have to finish a race in the earliest incomplete course that is not in any of the ranked cups using the driver shown on the course's thumbnail every day to obtain the corresponding reward in the table below. Once all of the courses are completed, the courses are selected at random. | Players' most recently used kart and glider are chosen, and favorite and favored ones have extra priority. Opponents are arranged randomly. On day 1 of this tour, players finish a race in [[Vancouver Velocity|Vancouver Velocity T]] in the [[Hammer Bro Cup]] using [[Ice Mario (Super Mario Galaxy)|Ice Mario]] for a free pipe launch. Starting from day 2, players have to finish a race in the earliest incomplete course that is not in any of the ranked cups using the driver shown on the course's thumbnail every day to obtain the corresponding reward in the table below. Once all of the courses are completed, the courses are selected at random. | ||
{|align=center width=40% cellspacing=0 border=1 cellpadding=3 style="border-collapse:collapse;font-family:Arial;text-align:center" | |||
{| align=center width=40% cellspacing=0 border=1 cellpadding=3 style="border-collapse:collapse; font-family:Arial; text-align:center" | |-style="background:#89A" | ||
|-style="background: #89A" | |||
|'''Day(s)''' | |'''Day(s)''' | ||
|'''Reward''' | |'''Reward''' | ||
| Line 247: | Line 244: | ||
!14 | !14 | ||
|[[File:MKT 5000QB.png|60px]]<br>Badge | |[[File:MKT 5000QB.png|60px]]<br>Badge | ||
|-style="background: #89A" | |-style="background:#89A" | ||
|colspan=2|'''Today's Challenge Pipe''' | |colspan=2|'''Today's Challenge Pipe''' | ||
|- | |- | ||
|colspan=2|[[File:MKT Tour45 TodaysChallengePipe.png|x150px]] | |colspan=2|[[File:MKT Tour45 TodaysChallengePipe.png|x150px]] | ||
|-style="background: #ABC" | |-style="background:#ABC" | ||
|colspan=2|'''Pipe contents''' | |colspan=2|'''Pipe contents''' | ||
|- | |- | ||
| Line 259: | Line 256: | ||
==Rewards== | ==Rewards== | ||
Gold cells indicate rewards that are exclusive to Gold Pass members. | Gold cells indicate rewards that are exclusive to Gold Pass members. | ||
{|class="wikitable" style="margin:auto; text-align:center" | {|class="wikitable" style="margin:auto;text-align:center" | ||
|- | |- | ||
!colspan=2|[[File:MKT Icon GrandStar.png|20x20px]] 15 | !colspan=2|[[File:MKT Icon GrandStar.png|20x20px]] 15 | ||
| Line 349: | Line 346: | ||
===Drivers=== | ===Drivers=== | ||
<gallery> | <gallery> | ||
MKT Artwork BirdoBlue.png|[[Birdo | MKT Artwork BirdoBlue.png|[[Birdo|Birdo (Blue)]] | ||
</gallery> | </gallery> | ||
| Line 365: | Line 362: | ||
===Courses=== | ===Courses=== | ||
<gallery> | <gallery heights=50px> | ||
MKT Icon New York Minute 4.png|[[New York Minute 4]] (N, R, T, R/T) | MKT Icon New York Minute 4.png|[[Tour New York Minute|New York Minute 4]] (N, R, T, R/T) | ||
</gallery> | </gallery> | ||
==Paid banners== | ==Paid banners== | ||
{| align=center width=960px cellspacing=0 border=1 cellpadding=3 style="border-collapse:collapse; font-family:Arial; text-align:center" | {|align=center width=960px cellspacing=0 border=1 cellpadding=3 style="border-collapse:collapse;font-family:Arial;text-align:center" | ||
|-style="background: #ABC" | |-style="background:#ABC" | ||
!Name | !Name | ||
!Availability | !Availability | ||
| Line 453: | Line 450: | ||
|TCR1=[[File:MKT Icon QuickTicket.png|70px]] [[Quick ticket]] ×1 | |TCR1=[[File:MKT Icon QuickTicket.png|70px]] [[Quick ticket]] ×1 | ||
|T1.1=133 | |T1.1=133 | ||
|T1.1E=Do 20 {{Color-link | |T1.1E=Do 20 {{Color-link|#A1A1FF|Trick|Jump Boosts}}. | ||
|T1.1S=1 | |T1.1S=1 | ||
|T1.2=067 | |T1.2=067 | ||
|T1.2E=Land 5 hits with {{Color-link | |T1.2E=Land 5 hits with {{Color-link|#A1A1FF|Banana|Bananas}}. | ||
|T1.2S=1 | |T1.2S=1 | ||
|T1.3=101 | |T1.3=101 | ||
| Line 471: | Line 468: | ||
|T1.6S=2 | |T1.6S=2 | ||
|T1.7=073 | |T1.7=073 | ||
|T1.7E=Land a hit with a {{Color-link | |T1.7E=Land a hit with a {{Color-link|#A1A1FF|Blooper}}. | ||
|T1.7S=2 | |T1.7S=2 | ||
|T1.8=166 | |T1.8=166 | ||
|T1.8E=Earn a total score of 20,000 or higher in the {{Color-link|Lakitu Cup | |T1.8E=Earn a total score of 20,000 or higher in the {{Color-link|#A1A1FF|Lakitu Cup}}. | ||
|T1.8S=2 | |T1.8S=2 | ||
|T1.9=031 | |T1.9=031 | ||
|T1.9E=Send Greeting {{Color-link | |T1.9E=Send Greeting {{Color-link|#A1A1FF|Coin|Coins}} to a friend. | ||
|T1.9S=2 | |T1.9S=2 | ||
|TCR2=[[File:MKT Icon CoinRushTicket.png|70px]] [[Coin Rush ticket]] ×1 | |TCR2=[[File:MKT Icon CoinRushTicket.png|70px]] [[Coin Rush ticket]] ×1 | ||
|T2.1=115 | |T2.1=115 | ||
|T2.1E=Do 5 {{Color-link|Rocket Start | |T2.1E=Do 5 {{Color-link|#A1A1FF|Rocket Start|Rocket Starts}}. | ||
|T2.1S=1 | |T2.1S=1 | ||
|T2.2=104 | |T2.2=104 | ||
|T2.2E=Use 10 {{Color-link | |T2.2E=Use 10 {{Color-link|#A1A1FF|Mushroom|Mushrooms}}. | ||
|T2.2S=1 | |T2.2S=1 | ||
|T2.3=077 | |T2.3=077 | ||
| Line 490: | Line 487: | ||
|T2.3S=1 | |T2.3S=1 | ||
|T2.4=055 | |T2.4=055 | ||
|T2.4E=Use {{Color-link|point-boost ticket | |T2.4E=Use {{Color-link|#A1A1FF|point-boost ticket|point-boost tickets}} 3 times. | ||
|T2.4S=2 | |T2.4S=2 | ||
|T2.5=095 | |T2.5=095 | ||
|T2.5E=Activate {{Color-link | |T2.5E=Activate {{Color-link|#A1A1FF|Frenzy}} mode 3 times on a city course. | ||
|T2.5S=2 | |T2.5S=2 | ||
|T2.6=375 | |T2.6=375 | ||
| Line 502: | Line 499: | ||
|T2.7S=2 | |T2.7S=2 | ||
|T2.8=179 | |T2.8=179 | ||
|T2.8E=Earn a total score of 20,000 or higher in the {{Color-link|Rosalina Cup | |T2.8E=Earn a total score of 20,000 or higher in the {{Color-link|#A1A1FF|Rosalina Cup}}. | ||
|T2.8S=2 | |T2.8S=2 | ||
|T2.9=5000 | |T2.9=5000 | ||
| Line 509: | Line 506: | ||
|GCR=[[File:MKT Icon 1Ruby.png|70px]] [[Ruby|Rubies]] ×5 | |GCR=[[File:MKT Icon 1Ruby.png|70px]] [[Ruby|Rubies]] ×5 | ||
|G.1=117 | |G.1=117 | ||
|G.1E=Do a total of 5 {{Color-link | |G.1E=Do a total of 5 {{Color-link|#A1A1FF|Slipstream}} boosts. | ||
|G.1S=1 | |G.1S=1 | ||
|G.2=041 | |G.2=041 | ||
|G.2E=Land 10 hits with {{Color-link|Red Shell | |G.2E=Land 10 hits with {{Color-link|#A1A1FF|Red Shell|Red Shells}}. | ||
|G.2S=1 | |G.2S=1 | ||
|G.3=111 | |G.3=111 | ||
|G.3E=Use {{Color-link | |G.3E=Use {{Color-link|#A1A1FF|Lightning}}. | ||
|G.3S=1 | |G.3S=1 | ||
|G.4=246 | |G.4=246 | ||
|G.4E=Use a {{Color-link|level-boost ticket | |G.4E=Use a {{Color-link|#A1A1FF|level-boost ticket}}. | ||
|G.4S=2 | |G.4S=2 | ||
|G.5=084 | |G.5=084 | ||
|G.5E=Do 5 Ultra {{Color-link|Mini-Turbo | |G.5E=Do 5 Ultra {{Color-link|#A1A1FF|Mini-Turbo}} boosts using a driver wearing earrings. | ||
|G.5S=2 | |G.5S=2 | ||
|G.6=048 | |G.6=048 | ||
|G.6E=Cause opponents to crash in {{Color-link | |G.6E=Cause opponents to crash in {{Color-link|#A1A1FF|Frenzy}} mode. | ||
|G.6S=2 | |G.6S=2 | ||
|G.7=061 | |G.7=061 | ||
| Line 530: | Line 527: | ||
|G.7S=2 | |G.7S=2 | ||
|G.8=159 | |G.8=159 | ||
|G.8E=Earn a total score of 25,000 or higher in the {{Color-link|Daisy Cup | |G.8E=Earn a total score of 25,000 or higher in the {{Color-link|#A1A1FF|Daisy Cup}}. | ||
|G.8S=2 | |G.8S=2 | ||
|G.9=020 | |G.9=020 | ||
|G.9E=Take out 5 {{Color-link|traffic cone | |G.9E=Take out 5 {{Color-link|#A1A1FF|traffic cone|traffic cones}}. | ||
|G.9S=2 | |G.9S=2 | ||
}} | }} | ||
<br> | <br> | ||
{| align=center width=65% cellspacing=0 border=1 cellpadding=3 style="border-collapse:collapse; font-family:Arial; text-align:center" | {|align=center width=65% cellspacing=0 border=1 cellpadding=3 style="border-collapse:collapse;font-family:Arial;text-align:center" | ||
|- | |- | ||
!colspan=3 style="background: #EEEEFF"|'''Premium Challenges''' | !colspan=3 style="background:#EEEEFF"|'''Premium Challenges''' | ||
|rowspan=13 style="border-top:1px solid #FFF; border-bottom:1px solid #FFF;" width=5%| | |rowspan=13 style="border-top:1px solid #FFF;border-bottom:1px solid #FFF;" width=5%| | ||
!colspan=3 style="background: #EEEEFF"|'''Premium Challenges+''' | !colspan=3 style="background:#EEEEFF"|'''Premium Challenges+''' | ||
|- | |- | ||
|colspan=3 style="background: #EEEEFF"|'''Cost:''' US$4.99 | |colspan=3 style="background:#EEEEFF"|'''Cost:''' US$4.99 | ||
|colspan=3 style="background: #EEEEFF"|'''Cost:''' US$14.99 | |colspan=3 style="background:#EEEEFF"|'''Cost:''' US$14.99 | ||
|- | |- | ||
|colspan=3 style="background: #EEEEFF"|'''Three in a row reward:''' [[File:MKT Icon Coins 2.png|70px]] [[Coin|Coins]] ×300 | |colspan=3 style="background:#EEEEFF"|'''Three in a row reward:''' [[File:MKT Icon Coins 2.png|70px]] [[Coin|Coins]] ×300 | ||
|colspan=3 style="background: #EEEEFF"|'''Three in a row reward:''' [[File:MKT Icon Coins 2.png|70px]] [[Coin|Coins]] ×300 | |colspan=3 style="background:#EEEEFF"|'''Three in a row reward:''' [[File:MKT Icon Coins 2.png|70px]] [[Coin|Coins]] ×300 | ||
|- | |- | ||
|colspan=3 style="background: #EEEEFF"|'''Completion reward:''' [[File:MKT Artwork ToadPartyTime.png|50x80px]] [[Toad|Toad (Party Time)]] ×1 | |colspan=3 style="background:#EEEEFF"|'''Completion reward:''' [[File:MKT Artwork ToadPartyTime.png|50x80px]] [[Toad|Toad (Party Time)]] ×1 | ||
|colspan=3 style="background: #EEEEFF"|'''Completion reward:''' [[File:MKT Icon Ruby 2.png|50x80px]] [[Ruby|Rubies]] ×20 | |colspan=3 style="background:#EEEEFF"|'''Completion reward:''' [[File:MKT Icon Ruby 2.png|50x80px]] [[Ruby|Rubies]] ×20 | ||
|-style="height: 80px" | |-style="height:80px" | ||
|width=10% style="background:linear-gradient(#F2E18F,#B9800F)"|[[File:MKT Artwork Mario.png|50x80px]] | |width=10% style="background:linear-gradient(#F2E18F,#B9800F)"|[[File:MKT Artwork Mario.png|50x80px]] | ||
|width=10% style="background:linear-gradient(#F2E18F,#B9800F)"|[[File:MKT Icon Super1.png|50x80px]] | |width=10% style="background:linear-gradient(#F2E18F,#B9800F)"|[[File:MKT Icon Super1.png|50x80px]] | ||
| Line 558: | Line 555: | ||
|width=10% style="background:linear-gradient(#F2E18F,#B9800F)"|[[File:MKT Icon Point-boostticket2.png|70px]] | |width=10% style="background:linear-gradient(#F2E18F,#B9800F)"|[[File:MKT Icon Point-boostticket2.png|70px]] | ||
|width=10% style="background:linear-gradient(#F2E18F,#B9800F)"|[[File:MKT Icon Point-boostticket3.png|70px]] | |width=10% style="background:linear-gradient(#F2E18F,#B9800F)"|[[File:MKT Icon Point-boostticket3.png|70px]] | ||
|-style="color: #FFF" | |-style="color:#FFF" | ||
|style="background:linear-gradient(#864D00,#A26000); border-top:1px solid #B9800F;"|{{Color-link | |style="background:linear-gradient(#864D00,#A26000);border-top:1px solid #B9800F;"|{{Color-link|#A1A1FF|Mario}} ×1 | ||
|style="background:linear-gradient(#864D00,#A26000); border-top:1px solid #B9800F;"|{{Color-link|Super 1 | |style="background:linear-gradient(#864D00,#A26000);border-top:1px solid #B9800F;"|{{Color-link|#A1A1FF|Super 1}} ×1 | ||
|style="background:linear-gradient(#864D00,#A26000); border-top:1px solid #B9800F;"|{{Color-link|8-Bit Jumping Mario | |style="background:linear-gradient(#864D00,#A26000);border-top:1px solid #B9800F;"|{{Color-link|#A1A1FF|8-Bit Jumping Mario}} ×1 | ||
|style="background:linear-gradient(#864D00,#A26000); border-top:1px solid #B9800F;"|Point-boost ticket (Driver) ×5 | |style="background:linear-gradient(#864D00,#A26000);border-top:1px solid #B9800F;"|Point-boost ticket (Driver) ×5 | ||
|style="background:linear-gradient(#864D00,#A26000); border-top:1px solid #B9800F;"|Point-boost ticket (Kart) ×5 | |style="background:linear-gradient(#864D00,#A26000);border-top:1px solid #B9800F;"|Point-boost ticket (Kart) ×5 | ||
|style="background:linear-gradient(#864D00,#A26000); border-top:1px solid #B9800F;"|Point-boost ticket (Glider) ×5 | |style="background:linear-gradient(#864D00,#A26000);border-top:1px solid #B9800F;"|Point-boost ticket (Glider) ×5 | ||
|-style="color: #FFF" | |-style="color:#FFF" | ||
|style="background:linear-gradient(#A26000,#C88512); border-top:1px solid #A26000;"|''Land 5 hits with Green Shells.'' | |style="background:linear-gradient(#A26000,#C88512);border-top:1px solid #A26000;"|''Land 5 hits with Green Shells.'' | ||
|style="background:linear-gradient(#A26000,#C88512); border-top:1px solid #A26000;"|''Land 10 hits with Bananas.'' | |style="background:linear-gradient(#A26000,#C88512);border-top:1px solid #A26000;"|''Land 10 hits with Bananas.'' | ||
|style="background:linear-gradient(#A26000,#C88512); border-top:1px solid #A26000;"|''Land 10 hits with Bob-ombs.'' | |style="background:linear-gradient(#A26000,#C88512);border-top:1px solid #A26000;"|''Land 10 hits with Bob-ombs.'' | ||
|style="background:linear-gradient(#A26000,#C88512); border-top:1px solid #A26000;"|''Land 10 hits with Green Shells.'' | |style="background:linear-gradient(#A26000,#C88512);border-top:1px solid #A26000;"|''Land 10 hits with Green Shells.'' | ||
|style="background:linear-gradient(#A26000,#C88512); border-top:1px solid #A26000;"|''Land 20 hits with Bananas.'' | |style="background:linear-gradient(#A26000,#C88512);border-top:1px solid #A26000;"|''Land 20 hits with Bananas.'' | ||
|style="background:linear-gradient(#A26000,#C88512); border-top:1px solid #A26000;"|''Use 30 Mushrooms.'' | |style="background:linear-gradient(#A26000,#C88512);border-top:1px solid #A26000;"|''Use 30 Mushrooms.'' | ||
|-style="height: 80px" | |-style="height:80px" | ||
|width=10% style="background:linear-gradient(#F2E18F,#B9800F)"|[[File:MKT Icon Coins 3.png|70px]] | |width=10% style="background:linear-gradient(#F2E18F,#B9800F)"|[[File:MKT Icon Coins 3.png|70px]] | ||
|width=10% style="background:linear-gradient(#F2E18F,#B9800F)"|[[File:MKT Icon Ruby.png|70px]] | |width=10% style="background:linear-gradient(#F2E18F,#B9800F)"|[[File:MKT Icon Ruby.png|70px]] | ||
| Line 579: | Line 576: | ||
|width=10% style="background:linear-gradient(#F2E18F,#B9800F)"|[[File:MKT Icon Level-boostticket8.png|70px]] | |width=10% style="background:linear-gradient(#F2E18F,#B9800F)"|[[File:MKT Icon Level-boostticket8.png|70px]] | ||
|width=10% style="background:linear-gradient(#F2E18F,#B9800F)"|[[File:MKT Icon Level-boostticket9.png|70px]] | |width=10% style="background:linear-gradient(#F2E18F,#B9800F)"|[[File:MKT Icon Level-boostticket9.png|70px]] | ||
|-style="color: #FFF" | |-style="color:#FFF" | ||
|style="background:linear-gradient(#864D00,#A26000); border-top:1px solid #B9800F;"|{{Color-link | |style="background:linear-gradient(#864D00,#A26000);border-top:1px solid #B9800F;"|{{Color-link|#A1A1FF|Coins}} ×3,000 | ||
|style="background:linear-gradient(#864D00,#A26000); border-top:1px solid #B9800F;"|{{Color-link | |style="background:linear-gradient(#864D00,#A26000);border-top:1px solid #B9800F;"|{{Color-link|#A1A1FF|Ruby|Rubies}} ×10 | ||
|style="background:linear-gradient(#864D00,#A26000); border-top:1px solid #B9800F;"|{{Color-link|Point-boost ticket | |style="background:linear-gradient(#864D00,#A26000);border-top:1px solid #B9800F;"|{{Color-link|#A1A1FF|Point-boost ticket}} (Driver) ×3 | ||
|style="background:linear-gradient(#864D00,#A26000); border-top:1px solid #B9800F;"|Level-boost ticket (High-End driver) ×1 | |style="background:linear-gradient(#864D00,#A26000);border-top:1px solid #B9800F;"|Level-boost ticket (High-End driver) ×1 | ||
|style="background:linear-gradient(#864D00,#A26000); border-top:1px solid #B9800F;"|Level-boost ticket (High-End kart) ×1 | |style="background:linear-gradient(#864D00,#A26000);border-top:1px solid #B9800F;"|Level-boost ticket (High-End kart) ×1 | ||
|style="background:linear-gradient(#864D00,#A26000); border-top:1px solid #B9800F;"|Level-boost ticket (High-End glider) ×1 | |style="background:linear-gradient(#864D00,#A26000);border-top:1px solid #B9800F;"|Level-boost ticket (High-End glider) ×1 | ||
|-style="color: #FFF" | |-style="color:#FFF" | ||
|style="background:linear-gradient(#A26000,#C88512); border-top:1px solid #A26000;"|''Do 50 Jump Boosts.'' | |style="background:linear-gradient(#A26000,#C88512);border-top:1px solid #A26000;"|''Do 50 Jump Boosts.'' | ||
|style="background:linear-gradient(#A26000,#C88512); border-top:1px solid #A26000;"|''Participate in a race.'' | |style="background:linear-gradient(#A26000,#C88512);border-top:1px solid #A26000;"|''Participate in a race.'' | ||
|style="background:linear-gradient(#A26000,#C88512); border-top:1px solid #A26000;"|''Do 100 Mini-Turbo boosts.'' | |style="background:linear-gradient(#A26000,#C88512);border-top:1px solid #A26000;"|''Do 100 Mini-Turbo boosts.'' | ||
|style="background:linear-gradient(#A26000,#C88512); border-top:1px solid #A26000;"|''Do 100 Jump Boosts.'' | |style="background:linear-gradient(#A26000,#C88512);border-top:1px solid #A26000;"|''Do 100 Jump Boosts.'' | ||
|style="background:linear-gradient(#A26000,#C88512); border-top:1px solid #A26000;"|''Do 150 Mini-Turbo boosts.'' | |style="background:linear-gradient(#A26000,#C88512);border-top:1px solid #A26000;"|''Do 150 Mini-Turbo boosts.'' | ||
|style="background:linear-gradient(#A26000,#C88512); border-top:1px solid #A26000;"|''Collect a total of 300 coins in races.'' | |style="background:linear-gradient(#A26000,#C88512);border-top:1px solid #A26000;"|''Collect a total of 300 coins in races.'' | ||
|-style="height: 80px" | |-style="height:80px" | ||
|width=10% style="background:linear-gradient(#F2E18F,#B9800F)"|[[File:MKT Icon Level-boostticket1.png|70px]] | |width=10% style="background:linear-gradient(#F2E18F,#B9800F)"|[[File:MKT Icon Level-boostticket1.png|70px]] | ||
|width=10% style="background:linear-gradient(#F2E18F,#B9800F)"|[[File:MKT Icon Level-boostticket4.png|70px]] | |width=10% style="background:linear-gradient(#F2E18F,#B9800F)"|[[File:MKT Icon Level-boostticket4.png|70px]] | ||
| Line 600: | Line 597: | ||
|width=10% style="background:linear-gradient(#F2E18F,#B9800F)"|[[File:MKT Icon Points-capticket8.png|70px]] | |width=10% style="background:linear-gradient(#F2E18F,#B9800F)"|[[File:MKT Icon Points-capticket8.png|70px]] | ||
|width=10% style="background:linear-gradient(#F2E18F,#B9800F)"|[[File:MKT Icon Points-capticket9.png|70px]] | |width=10% style="background:linear-gradient(#F2E18F,#B9800F)"|[[File:MKT Icon Points-capticket9.png|70px]] | ||
|-style="color: #FFF" | |-style="color:#FFF" | ||
|style="background:linear-gradient(#864D00,#A26000); border-top:1px solid #B9800F;"|{{Color-link|Level-boost ticket | |style="background:linear-gradient(#864D00,#A26000);border-top:1px solid #B9800F;"|{{Color-link|#A1A1FF|Level-boost ticket}} (Normal driver) ×1 | ||
|style="background:linear-gradient(#864D00,#A26000); border-top:1px solid #B9800F;"|Level-boost ticket (Super driver) ×1 | |style="background:linear-gradient(#864D00,#A26000);border-top:1px solid #B9800F;"|Level-boost ticket (Super driver) ×1 | ||
|style="background:linear-gradient(#864D00,#A26000); border-top:1px solid #B9800F;"|Level-boost ticket (High-End driver) ×1 | |style="background:linear-gradient(#864D00,#A26000);border-top:1px solid #B9800F;"|Level-boost ticket (High-End driver) ×1 | ||
|style="background:linear-gradient(#864D00,#A26000); border-top:1px solid #B9800F;"|Points-cap ticket (High-end driver) ×1 | |style="background:linear-gradient(#864D00,#A26000);border-top:1px solid #B9800F;"|Points-cap ticket (High-end driver) ×1 | ||
|style="background:linear-gradient(#864D00,#A26000); border-top:1px solid #B9800F;"|Points-cap ticket (High-end kart) ×1 | |style="background:linear-gradient(#864D00,#A26000);border-top:1px solid #B9800F;"|Points-cap ticket (High-end kart) ×1 | ||
|style="background:linear-gradient(#864D00,#A26000); border-top:1px solid #B9800F;"|Points-cap ticket (High-end glider) ×1 | |style="background:linear-gradient(#864D00,#A26000);border-top:1px solid #B9800F;"|Points-cap ticket (High-end glider) ×1 | ||
|-style="color: #FFF" | |-style="color:#FFF" | ||
|style="background:linear-gradient(#A26000,#C88512); border-top:1px solid #A26000;"|''Get 1st place in a race 10 times.'' | |style="background:linear-gradient(#A26000,#C88512);border-top:1px solid #A26000;"|''Get 1st place in a race 10 times.'' | ||
|style="background:linear-gradient(#A26000,#C88512); border-top:1px solid #A26000;"|''Get 1st place in a race 15 times.'' | |style="background:linear-gradient(#A26000,#C88512);border-top:1px solid #A26000;"|''Get 1st place in a race 15 times.'' | ||
|style="background:linear-gradient(#A26000,#C88512); border-top:1px solid #A26000;"|''Get 1st place in a race 20 times.'' | |style="background:linear-gradient(#A26000,#C88512);border-top:1px solid #A26000;"|''Get 1st place in a race 20 times.'' | ||
|style="background:linear-gradient(#A26000,#C88512); border-top:1px solid #A26000;"|''Get 1st place in a race 30 times.'' | |style="background:linear-gradient(#A26000,#C88512);border-top:1px solid #A26000;"|''Get 1st place in a race 30 times.'' | ||
|} | |} | ||
<br> | <br> | ||
{| align=center width=65% cellspacing=0 border=1 cellpadding=3 style="border-collapse:collapse; font-family:Arial; text-align:center" | {|align=center width=65% cellspacing=0 border=1 cellpadding=3 style="border-collapse:collapse; font-family:Arial;text-align:center" | ||
|- | |- | ||
!colspan=3 style="background: #C3F84E"|'''2nd Anniversary Challenges''' | !colspan=3 style="background:#C3F84E"|'''2nd Anniversary Challenges''' | ||
|rowspan=9 style="border-top:1px solid #FFF; border-bottom:1px solid #FFF;" width=5%| | |rowspan=9 style="border-top:1px solid #FFF;border-bottom:1px solid #FFF;" width=5%| | ||
!colspan=3 style="background: #C3F84E"|'''Tour Multiplayer Challenges''' | !colspan=3 style="background:#C3F84E"|'''Tour Multiplayer Challenges''' | ||
|-style="color: #000" | |-style="color:#000" | ||
|colspan=3 style="background: #C3F84E"|'''Three in a row reward:''' [[File:MKT Icon Coins 2.png|60px]] [[Coin|Coins]] ×300 | |colspan=3 style="background:#C3F84E"|'''Three in a row reward:''' [[File:MKT Icon Coins 2.png|60px]] [[Coin|Coins]] ×300 | ||
|colspan=3 style="background: #C3F84E"|'''Three in a row reward:''' [[File:MKT Icon Coins 2.png|60px]] [[Coin|Coins]] ×50 | |colspan=3 style="background:#C3F84E"|'''Three in a row reward:''' [[File:MKT Icon Coins 2.png|60px]] [[Coin|Coins]] ×50 | ||
|-style="color: #000" | |-style="color:#000" | ||
|colspan=3 style="background: #C3F84E"|'''Completion reward:''' [[File:MKT Artwork MarioClassic.png|40px]] [[Mario|Mario (Classic)]] ×1 | |colspan=3 style="background:#C3F84E"|'''Completion reward:''' [[File:MKT Artwork MarioClassic.png|40px]] [[Mario|Mario (Classic)]] ×1 | ||
|colspan=3 style="background: #C3F84E"|'''Completion reward:''' [[File:MKT Icon 1Ruby.png|60px]] Rubies ×5 | |colspan=3 style="background:#C3F84E"|'''Completion reward:''' [[File:MKT Icon 1Ruby.png|60px]] Rubies ×5 | ||
|-style="color: #FFF" | |-style="color:#FFF" | ||
|width=10% style="background: #2F5D1C"|[[File:MKT 070CB.png|70px]]<br>[[File:MKT Icon 1Ruby.png|15px]] [[File:MKT Icon 1Ruby.png|15px]] [[File:MKT Icon 1Ruby.png|15px]] | |width=10% style="background:#2F5D1C"|[[File:MKT 070CB.png|70px]]<br>[[File:MKT Icon 1Ruby.png|15px]] [[File:MKT Icon 1Ruby.png|15px]] [[File:MKT Icon 1Ruby.png|15px]] | ||
|width=10% style="background: #2F5D1C"|[[File:MKT 335CB.png|70px]]<br>[[File:MKT Icon 1Ruby.png|15px]] [[File:MKT Icon 1Ruby.png|15px]] [[File:MKT Icon 1Ruby.png|15px]] | |width=10% style="background:#2F5D1C"|[[File:MKT 335CB.png|70px]]<br>[[File:MKT Icon 1Ruby.png|15px]] [[File:MKT Icon 1Ruby.png|15px]] [[File:MKT Icon 1Ruby.png|15px]] | ||
|width=10% style="background: #2F5D1C"|[[File:MKT 327CB.png|70px]]<br>[[File:MKT Icon 1Ruby.png|15px]] [[File:MKT Icon 1Ruby.png|15px]] [[File:MKT Icon 1Ruby.png|15px]] | |width=10% style="background:#2F5D1C"|[[File:MKT 327CB.png|70px]]<br>[[File:MKT Icon 1Ruby.png|15px]] [[File:MKT Icon 1Ruby.png|15px]] [[File:MKT Icon 1Ruby.png|15px]] | ||
|width=10% style="background: #2F5D1C"|[[File:MKT 127CB.png|70px]]<br>[[File:MKT Icon GrandStar.png|15px]] | |width=10% style="background:#2F5D1C"|[[File:MKT 127CB.png|70px]]<br>[[File:MKT Icon GrandStar.png|15px]] | ||
|width=10% style="background: #2F5D1C"|[[File:MKT 049CB.png|70px]]<br>[[File:MKT Icon GrandStar.png|15px]] | |width=10% style="background:#2F5D1C"|[[File:MKT 049CB.png|70px]]<br>[[File:MKT Icon GrandStar.png|15px]] | ||
|width=10% style="background: #2F5D1C"|[[File:MKT 146CB.png|70px]]<br>[[File:MKT Icon GrandStar.png|15px]] | |width=10% style="background:#2F5D1C"|[[File:MKT 146CB.png|70px]]<br>[[File:MKT Icon GrandStar.png|15px]] | ||
|-style="color: #FFF" | |-style="color:#FFF" | ||
|style="background: #2F5D1C; border-top:1px solid #2F5D1C;"|''Race on a city course.'' | |style="background: #2F5D1C;border-top:1px solid #2F5D1C;"|''Race on a city course.'' | ||
|style="background: #2F5D1C; border-top:1px solid #2F5D1C;"|''Get 1st place a total of 5 times on a New York course.'' | |style="background: #2F5D1C;border-top:1px solid #2F5D1C;"|''Get 1st place a total of 5 times on a New York course.'' | ||
|style="background: #2F5D1C; border-top:1px solid #2F5D1C;"|''Get 1st place a total of 5 times on a Los Angeles course.'' | |style="background: #2F5D1C;border-top:1px solid #2F5D1C;"|''Get 1st place a total of 5 times on a Los Angeles course.'' | ||
|style="background: #2F5D1C; border-top:1px solid #2F5D1C;"|''Land 3 hits with Green Shells in multiplayer.'' | |style="background: #2F5D1C;border-top:1px solid #2F5D1C;"|''Land 3 hits with Green Shells in multiplayer.'' | ||
|style="background: #2F5D1C; border-top:1px solid #2F5D1C;"|''Land 3 hits with Bananas in multiplayer.'' | |style="background: #2F5D1C;border-top:1px solid #2F5D1C;"|''Land 3 hits with Bananas in multiplayer.'' | ||
|style="background: #2F5D1C; border-top:1px solid #2F5D1C;"|''Do 3 Rocket Starts in multiplayer.'' | |style="background: #2F5D1C;border-top:1px solid #2F5D1C;"|''Do 3 Rocket Starts in multiplayer.'' | ||
|-style="color: #FFF" | |-style="color:#FFF" | ||
|width=10% style="background: #2F5D1C"|[[File:MKT 080CB.png|70px]]<br>[[File:MKT Icon 1Ruby.png|15px]] [[File:MKT Icon 1Ruby.png|15px]] [[File:MKT Icon 1Ruby.png|15px]] | |width=10% style="background:#2F5D1C"|[[File:MKT 080CB.png|70px]]<br>[[File:MKT Icon 1Ruby.png|15px]] [[File:MKT Icon 1Ruby.png|15px]] [[File:MKT Icon 1Ruby.png|15px]] | ||
|width=10% style="background: #2F5D1C"|[[File:MKT 328CB.png|70px]]<br>[[File:MKT Icon 1Ruby.png|15px]] [[File:MKT Icon 1Ruby.png|15px]] [[File:MKT Icon 1Ruby.png|15px]] | |width=10% style="background:#2F5D1C"|[[File:MKT 328CB.png|70px]]<br>[[File:MKT Icon 1Ruby.png|15px]] [[File:MKT Icon 1Ruby.png|15px]] [[File:MKT Icon 1Ruby.png|15px]] | ||
|width=10% style="background: #2F5D1C"|[[File:MKT 371CB.png|70px]]<br>[[File:MKT Icon 1Ruby.png|15px]] [[File:MKT Icon 1Ruby.png|15px]] [[File:MKT Icon 1Ruby.png|15px]] | |width=10% style="background:#2F5D1C"|[[File:MKT 371CB.png|70px]]<br>[[File:MKT Icon 1Ruby.png|15px]] [[File:MKT Icon 1Ruby.png|15px]] [[File:MKT Icon 1Ruby.png|15px]] | ||
|width=10% style="background: #2F5D1C"|[[File:MKT 106CB.png|70px]]<br>[[File:MKT Icon GrandStar.png|15px]] [[File:MKT Icon GrandStar.png|15px]] | |width=10% style="background:#2F5D1C"|[[File:MKT 106CB.png|70px]]<br>[[File:MKT Icon GrandStar.png|15px]] [[File:MKT Icon GrandStar.png|15px]] | ||
|width=10% style="background: #2F5D1C"|[[File:MKT 074CB.png|70px]]<br>[[File:MKT Icon GrandStar.png|15px]] [[File:MKT Icon GrandStar.png|15px]] | |width=10% style="background:#2F5D1C"|[[File:MKT 074CB.png|70px]]<br>[[File:MKT Icon GrandStar.png|15px]] [[File:MKT Icon GrandStar.png|15px]] | ||
|width=10% style="background: #2F5D1C"|[[File:MKT 201CB.png|70px]]<br>[[File:MKT Icon GrandStar.png|15px]] [[File:MKT Icon GrandStar.png|15px]] | |width=10% style="background:#2F5D1C"|[[File:MKT 201CB.png|70px]]<br>[[File:MKT Icon GrandStar.png|15px]] [[File:MKT Icon GrandStar.png|15px]] | ||
|-style="color: #FFF" | |-style="color:#FFF" | ||
|style="background: #2F5D1C; border-top:1px solid #2F5D1C;"|''Get 1st place a total of 5 times on a Paris course.'' | |style="background:#2F5D1C;border-top:1px solid #2F5D1C;"|''Get 1st place a total of 5 times on a Paris course.'' | ||
|style="background: #2F5D1C; border-top:1px solid #2F5D1C;"|''Get 1st place a total of 5 times on a London course.'' | |style="background:#2F5D1C;border-top:1px solid #2F5D1C;"|''Get 1st place a total of 5 times on a London course.'' | ||
|style="background: #2F5D1C; border-top:1px solid #2F5D1C;"|''Get 1st place a total of 5 times on a Berlin course.'' | |style="background:#2F5D1C;border-top:1px solid #2F5D1C;"|''Get 1st place a total of 5 times on a Berlin course.'' | ||
|style="background: #2F5D1C; border-top:1px solid #2F5D1C;"|''Use the Super Star item in multiplayer.'' | |style="background:#2F5D1C;border-top:1px solid #2F5D1C;"|''Use the Super Star item in multiplayer.'' | ||
|style="background: #2F5D1C; border-top:1px solid #2F5D1C;"|''Join a multiplayer race.'' | |style="background:#2F5D1C;border-top:1px solid #2F5D1C;"|''Join a multiplayer race.'' | ||
|style="background: #2F5D1C; border-top:1px solid #2F5D1C;"|''Land 3 hits with Bob-ombs in multiplayer.'' | |style="background:#2F5D1C;border-top:1px solid #2F5D1C;"|''Land 3 hits with Bob-ombs in multiplayer.'' | ||
|-style="color: #FFF" | |-style="color:#FFF" | ||
|width=10% style="background: #2F5D1C"|[[File:MKT 388CB.png|70px]]<br>[[File:MKT Icon 1Ruby.png|15px]] [[File:MKT Icon 1Ruby.png|15px]] [[File:MKT Icon 1Ruby.png|15px]] | |width=10% style="background:#2F5D1C"|[[File:MKT 388CB.png|70px]]<br>[[File:MKT Icon 1Ruby.png|15px]] [[File:MKT Icon 1Ruby.png|15px]] [[File:MKT Icon 1Ruby.png|15px]] | ||
|width=10% style="background: #2F5D1C"|[[File:MKT 082CB.png|70px]]<br>[[File:MKT Icon 1Ruby.png|15px]] [[File:MKT Icon 1Ruby.png|15px]] [[File:MKT Icon 1Ruby.png|15px]] | |width=10% style="background:#2F5D1C"|[[File:MKT 082CB.png|70px]]<br>[[File:MKT Icon 1Ruby.png|15px]] [[File:MKT Icon 1Ruby.png|15px]] [[File:MKT Icon 1Ruby.png|15px]] | ||
|width=10% style="background: #2F5D1C"|[[File:MKT 122CB.png|70px]]<br>[[File:MKT Icon 1Ruby.png|15px]] [[File:MKT Icon 1Ruby.png|15px]] [[File:MKT Icon 1Ruby.png|15px]] | |width=10% style="background:#2F5D1C"|[[File:MKT 122CB.png|70px]]<br>[[File:MKT Icon 1Ruby.png|15px]] [[File:MKT Icon 1Ruby.png|15px]] [[File:MKT Icon 1Ruby.png|15px]] | ||
|width=10% style="background: #2F5D1C"|[[File:MKT 134CB.png|70px]]<br>[[File:MKT Icon GrandStar.png|15px]] [[File:MKT Icon GrandStar.png|15px]] | |width=10% style="background:#2F5D1C"|[[File:MKT 134CB.png|70px]]<br>[[File:MKT Icon GrandStar.png|15px]] [[File:MKT Icon GrandStar.png|15px]] | ||
|width=10% style="background: #2F5D1C"|[[File:MKT 119-2CB.png|70px]]<br>[[File:MKT Icon GrandStar.png|15px]] [[File:MKT Icon GrandStar.png|15px]] | |width=10% style="background:#2F5D1C"|[[File:MKT 119-2CB.png|70px]]<br>[[File:MKT Icon GrandStar.png|15px]] [[File:MKT Icon GrandStar.png|15px]] | ||
|width=10% style="background: #2F5D1C"|[[File:MKT 147CB.png|70px]]<br>[[File:MKT Icon GrandStar.png|15px]] [[File:MKT Icon GrandStar.png|15px]] | |width=10% style="background:#2F5D1C"|[[File:MKT 147CB.png|70px]]<br>[[File:MKT Icon GrandStar.png|15px]] [[File:MKT Icon GrandStar.png|15px]] | ||
|-style="color: #FFF" | |-style="color:#FFF" | ||
|style="background: | |style="background:2F5D1C;border-top:1px solid #2F5D1C;"|''Get 1st place a total of 5 times on a Tokyo course.'' | ||
|style="background: #2F5D1C; border-top:1px solid #2F5D1C;"|''Get 1st place a total of 5 times on a Sydney course.'' | |style="background:#2F5D1C;border-top:1px solid #2F5D1C;"|''Get 1st place a total of 5 times on a Sydney course.'' | ||
|style="background: #2F5D1C; border-top:1px solid #2F5D1C;"|''Get 1st place a total of 5 times on a Vancouver course.'' | |style="background:#2F5D1C;border-top:1px solid #2F5D1C;"|''Get 1st place a total of 5 times on a Vancouver course.'' | ||
|style="background: #2F5D1C; border-top:1px solid #2F5D1C;"|''Do 50 Jump Boosts in multiplayer.'' | |style="background:#2F5D1C;border-top:1px solid #2F5D1C;"|''Do 50 Jump Boosts in multiplayer.'' | ||
|style="background: #2F5D1C; border-top:1px solid #2F5D1C;"|''Do 50 Mini-Turbo boosts in multiplayer.'' | |style="background:#2F5D1C;border-top:1px solid #2F5D1C;"|''Do 50 Mini-Turbo boosts in multiplayer.'' | ||
|style="background: #2F5D1C; border-top:1px solid #2F5D1C;"|''Cause opponents to crash 30 times in multiplayer.'' | |style="background:#2F5D1C;border-top:1px solid #2F5D1C;"|''Cause opponents to crash 30 times in multiplayer.'' | ||
|} | |} | ||
<br> | <br> | ||
{| align=center width=30% cellspacing=0 border=1 cellpadding=3 style="border-collapse:collapse; font-family:Arial; text-align:center" | {|align=center width=30% cellspacing=0 border=1 cellpadding=3 style="border-collapse:collapse;font-family:Arial;text-align:center" | ||
|- | |- | ||
!colspan=3 style="background: #C3F84E"|'''Kart Pro Challenges''' | !colspan=3 style="background:#C3F84E"|'''Kart Pro Challenges''' | ||
|-style="color: #000" | |-style="color:#000" | ||
|colspan=3 style="background: #C3F84E"|'''Three in a row reward:''' [[File:MKT Icon Coins 2.png|60px]] [[Coin|Coins]] ×500 | |colspan=3 style="background:#C3F84E"|'''Three in a row reward:''' [[File:MKT Icon Coins 2.png|60px]] [[Coin|Coins]] ×500 | ||
|-style="color: #000" | |-style="color:#000" | ||
|colspan=3 style="background: #C3F84E"|'''Completion reward:''' [[File:MKT Icon Ruby 2.png|70px]] [[Ruby|Rubies]] (depending on player's multiplayer grade) | |colspan=3 style="background:#C3F84E"|'''Completion reward:''' [[File:MKT Icon Ruby 2.png|70px]] [[Ruby|Rubies]] (depending on player's multiplayer grade) | ||
|-style="color:#FFF" | |||
|width=10% style="background:#2F5D1C"|[[File:MKT 006PB.png|70px]]<br>[[File:MKT Icon 1Ruby.png|15px]] | |||
|width=10% style="background:#2F5D1C"|[[File:MKT 007PB.png|70px]]<br>[[File:MKT Icon 1Ruby.png|15px]] | |||
|width=10% style="background:#2F5D1C"|[[File:MKT 008PB.png|70px]]<br>[[File:MKT Icon 1Ruby.png|15px]] | |||
|-style="color:#FFF" | |||
|style="background:#2F5D1C; border-top:1px solid #2F5D1C;"|''Join a multiplayer race.'' | |||
|style="background:#2F5D1C; border-top:1px solid #2F5D1C;"|''Join 3 multiplayer races.'' | |||
|style="background:#2F5D1C; border-top:1px solid #2F5D1C;"|''Join 5 multiplayer races.'' | |||
|-style="color:#FFF" | |||
|width=10% style="background:#2F5D1C"|[[File:MKT 011PB.png|70px]]<br>[[File:MKT Icon 1Ruby.png|15px]] | |||
|width=10% style="background:#2F5D1C"|[[File:MKT 013PB.png|70px]]<br>[[File:MKT Icon 1Ruby.png|15px]] [[File:MKT Icon 1Ruby.png|15px]] [[File:MKT Icon 1Ruby.png|15px]] | |||
|width=10% style="background:#2F5D1C"|[[File:MKT 012PB.png|70px]]<br>[[File:MKT Icon 1Ruby.png|15px]] [[File:MKT Icon 1Ruby.png|15px]] | |||
|-style="color:#FFF" | |||
|style="background:#2F5D1C;border-top:1px solid #2F5D1C;"|''Get 1 win in Kart Pro.'' | |||
|style="background:#2F5D1C;border-top:1px solid #2F5D1C;"|''Achieve a winning streak that includes 3 1st-place wins.'' | |||
|style="background:#2F5D1C;border-top:1px solid #2F5D1C;"|''Achieve a winning streak that includes 2 1st-place wins.'' | |||
|-style="color:#FFF" | |||
|width=10% style="background:#2F5D1C"|[[File:MKT 005PB.png|70px]]<br>[[File:MKT Icon 1Ruby.png|15px]] | |||
|width=10% style="background:#2F5D1C"|[[File:MKT 009PB.png|70px]]<br>[[File:MKT Icon 1Ruby.png|15px]] | |||
|width=10% style="background:#2F5D1C"|[[File:MKT 010PB.png|70px]]<br>[[File:MKT Icon 1Ruby.png|15px]] | |||
|-style="color: #FFF" | |-style="color: #FFF" | ||
|style="background:#2F5D1C;border-top:1px solid #2F5D1C;"|''Join 10 multiplayer races.'' | |||
|style="background:#2F5D1C;border-top:1px solid #2F5D1C;"|''Get 3rd place or higher 3 times in a multiplayer race.'' | |||
|style="background:#2F5D1C;border-top:1px solid #2F5D1C;"|''Get 3rd place or higher 5 times in a multiplayer race.'' | |||
|style="background: #2F5D1C; border-top:1px solid #2F5D1C;"|''Join 10 multiplayer races.'' | |||
|style="background: #2F5D1C; border-top:1px solid #2F5D1C;"|''Get 3rd place or higher 3 times in a multiplayer race.'' | |||
|style="background: #2F5D1C; border-top:1px solid #2F5D1C;"|''Get 3rd place or higher 5 times in a multiplayer race.'' | |||
|} | |} | ||
<br> | <br> | ||
{|class="wikitable" style="margin:auto; text-align:center" width=30% | {|class="wikitable" style="margin:auto;text-align:center" width=30% | ||
!colspan=2|Total Points Challenge | !colspan=2|Total Points Challenge | ||
|- | |- | ||
| Line 742: | Line 739: | ||
==2-Player Challenge== | ==2-Player Challenge== | ||
{| class="wikitable" style="text-align:center" width=100% | {|class="wikitable" style="text-align:center" width=100% | ||
!rowspan=2|Name | !rowspan=2|Name | ||
!colspan=3|Courses | !colspan=3|Courses | ||
| Line 759: | Line 756: | ||
|- | |- | ||
|rowspan=3|[[File:MKT 2 Player Challenge 2nd Anniversary Tour.png|200px]]<br>'''Vs. City Racers''' | |rowspan=3|[[File:MKT 2 Player Challenge 2nd Anniversary Tour.png|200px]]<br>'''Vs. City Racers''' | ||
|rowspan=3|[[File:MKT Icon Berlin Byways 2.png|150px]]<br>[[Berlin Byways 2]] | |rowspan=3|[[File:MKT Icon Berlin Byways 2.png|150px]]<br>[[Tour Berlin Byways|Berlin Byways 2]] | ||
|rowspan=3|[[File:MKT Icon Sydney Sprint.png|150px]]<br>[[Sydney Sprint]] | |rowspan=3|[[File:MKT Icon Sydney Sprint.png|150px]]<br>[[Tour Sydney Sprint|Sydney Sprint]] | ||
|rowspan=3|[[File:MKT Icon New York Minute 4.png|150px]]<br>[[New York Minute 4]] | |rowspan=3|[[File:MKT Icon New York Minute 4.png|150px]]<br>[[Tour New York Minute|New York Minute 4]] | ||
!Driver | !Driver | ||
|[[File:MKT Icon BabyMarioKoala.png|37px|link=Baby Mario]] | |[[File:MKT Icon BabyMarioKoala.png|37px|link=Baby Mario]] | ||
| Line 790: | Line 787: | ||
===All-Clear Pipe=== | ===All-Clear Pipe=== | ||
The All-Clear Pipe randomly shot out one of the following regular High-End items. The appearance rate can be viewed via the "Pipe content" link on the Gold Pass purchase screen. | The All-Clear Pipe randomly shot out one of the following regular High-End items. The appearance rate can be viewed via the "Pipe content" link on the Gold Pass purchase screen. | ||
{|class="wikitable" style="margin:auto; text-align:center" | {|class="wikitable" style="margin:auto;text-align:center" | ||
!colspan=2|High-End items obtainable from the All-Clear Pipe during the 2nd Anniversary Tour | !colspan=2|High-End items obtainable from the All-Clear Pipe during the 2nd Anniversary Tour | ||
!Rate (each) | !Rate (each) | ||
|- | |- | ||
!High-End drivers | !High-End drivers | ||
|[[Dry Bowser]], [[Metal Mario]], [[Pink Gold Peach]], [[Cat Mario|Cat Peach]], [[Pauline]], [[Nabbit]], [[King Bob-omb]], [[Peachette]], [[Yoshi (species)|Black Yoshi]], [[Yoshi (species)|White Yoshi]], [[Birdo | |[[Dry Bowser]], [[Metal Mario]], [[Pink Gold Peach]], [[Cat Mario|Cat Peach]], [[Pauline]], [[Nabbit]], [[King Bob-omb]], [[Peachette]], [[Yoshi (species)|Black Yoshi]], [[Yoshi (species)|White Yoshi]], [[Birdo|Birdo (Black)]], [[Penguin Mario|Penguin Luigi]], [[Dixie Kong]], [[Funky Kong]], [[Ice Mario (Super Mario Galaxy)|Ice Mario]] | ||
|rowspan=3|1.5152% | |rowspan=3|1.5152% | ||
|- | |- | ||
| Line 807: | Line 804: | ||
===2nd Anniversary Pipe 1=== | ===2nd Anniversary Pipe 1=== | ||
{|class="wikitable" style="margin:auto; text-align:center" | {|class="wikitable" style="margin:auto;text-align:center" | ||
!colspan=16|Items obtained from a new 2nd Anniversary Pipe 1 | !colspan=16|Items obtained from a new 2nd Anniversary Pipe 1 | ||
|- | |- | ||
| Line 844: | Line 841: | ||
|} | |} | ||
<br> | <br> | ||
{|class="wikitable" style="margin:auto;text-align:center" | |||
{|class="wikitable" style="margin:auto; text-align:center" | |||
!Class | !Class | ||
!Parts | !Parts | ||
| Line 855: | Line 851: | ||
|- | |- | ||
!High-End drivers | !High-End drivers | ||
|[[Dry Bowser]], [[Metal Mario]], [[Pink Gold Peach]], [[Cat Mario|Cat Peach]], [[Nabbit]], [[Mario|Mario (Musician)]], [[King Bob-omb]], [[Peachette]], [[Yoshi (species)|Black Yoshi]], [[Yoshi (species)|White Yoshi]], [[Waluigi|Waluigi (Bus Driver)]], [[Birdo | |[[Dry Bowser]], [[Metal Mario]], [[Pink Gold Peach]], [[Cat Mario|Cat Peach]], [[Nabbit]], [[Mario|Mario (Musician)]], [[King Bob-omb]], [[Peachette]], [[Yoshi (species)|Black Yoshi]], [[Yoshi (species)|White Yoshi]], [[Waluigi|Waluigi (Bus Driver)]], [[Birdo|Birdo (Black)]], [[Baby Rosalina|Baby Rosalina (Detective)]], [[Penguin Mario|Penguin Luigi]], [[Mario|Mario (Baseball)]], [[Dixie Kong]], [[Funky Kong]], [[Luigi|Luigi (Lederhosen)]], [[Ice Mario (Super Mario Galaxy)|Ice Mario]] | ||
|0.0526% | |0.0526% | ||
|- | |- | ||
| Line 873: | Line 869: | ||
|- | |- | ||
!Super drivers | !Super drivers | ||
|[[Donkey Kong]], [[Toad]], [[Bowser]], [[Luigi]], [[Mario]], [[Princess Peach|Peach]], [[Yoshi]], [[Princess Daisy|Daisy]], [[Lakitu]], [[King Boo]], [[Toadette]], [[Bowser Jr.]], [[Waluigi]], [[Wario]], [[Rosalina]], [[Birdo]], [[Diddy Kong]], [[Hammer Bro]], [[Boomerang Bro]], [[Fire Bro]], [[Ice Bro]], [[Red Yoshi]], [[Black Shy Guy]], [[Pink Shy Guy]], [[Toad|Toad (Pit Crew)]], [[Monty Mole]], [[Birdo | |[[Donkey Kong]], [[Toad]], [[Bowser]], [[Luigi]], [[Mario]], [[Princess Peach|Peach]], [[Yoshi]], [[Princess Daisy|Daisy]], [[Lakitu]], [[King Boo]], [[Toadette]], [[Bowser Jr.]], [[Waluigi]], [[Wario]], [[Rosalina]], [[Birdo]], [[Diddy Kong]], [[Hammer Bro]], [[Boomerang Bro]], [[Fire Bro]], [[Ice Bro]], [[Red Yoshi]], [[Black Shy Guy]], [[Pink Shy Guy]], [[Toad|Toad (Pit Crew)]], [[Monty Mole]], [[Birdo|Birdo (Light Blue)]], [[Birdo|Birdo (Yellow)]], [[Roving Racers|Red Koopa (Freerunning)]] | ||
|0.3103% | |0.3103% | ||
|- | |- | ||
| Line 899: | Line 895: | ||
===2nd Anniversary Pipe 2=== | ===2nd Anniversary Pipe 2=== | ||
{|class="wikitable" style="margin:auto; text-align:center" | {|class="wikitable" style="margin:auto;text-align:center" | ||
!colspan=16|Items obtained from a new 2nd Anniversary Pipe 2 | !colspan=16|Items obtained from a new 2nd Anniversary Pipe 2 | ||
|- | |- | ||
| Line 936: | Line 932: | ||
|} | |} | ||
<br> | <br> | ||
{|class="wikitable" style="margin:auto;text-align:center" | |||
{|class="wikitable" style="margin:auto; text-align:center" | |||
!Class | !Class | ||
!Parts | !Parts | ||
| Line 947: | Line 942: | ||
|- | |- | ||
!High-End drivers | !High-End drivers | ||
|[[Dry Bowser]], [[Metal Mario]], [[Pink Gold Peach]], [[Cat Mario|Cat Peach]], [[Pauline]], [[Mario|Mario (Hakama)]], [[Princess Peach|Peach (Kimono)]], [[Nabbit]], [[Princess Peach|Peach (Vacation)]], [[King Bob-omb]], [[Peachette]], [[Yoshi (species)|Black Yoshi]], [[Yoshi (species)|White Yoshi]], [[Luigi|Luigi (Painter)]], [[Birdo | |[[Dry Bowser]], [[Metal Mario]], [[Pink Gold Peach]], [[Cat Mario|Cat Peach]], [[Pauline]], [[Mario|Mario (Hakama)]], [[Princess Peach|Peach (Kimono)]], [[Nabbit]], [[Princess Peach|Peach (Vacation)]], [[King Bob-omb]], [[Peachette]], [[Yoshi (species)|Black Yoshi]], [[Yoshi (species)|White Yoshi]], [[Luigi|Luigi (Painter)]], [[Birdo|Birdo (Black)]], [[Penguin Mario|Penguin Luigi]], [[Mario|Mario (Baseball)]], [[Dixie Kong]], [[Funky Kong]], [[Ice Mario (Super Mario Galaxy)|Ice Mario]] | ||
|0.0526% | |0.0526% | ||
|- | |- | ||
| Line 965: | Line 960: | ||
|- | |- | ||
!Super drivers | !Super drivers | ||
|[[Donkey Kong]], [[Toad]], [[Bowser]], [[Luigi]], [[Mario]], [[Princess Peach|Peach]], [[Yoshi]], [[Princess Daisy|Daisy]], [[Lakitu]], [[King Boo]], [[Toadette]], [[Bowser Jr.]], [[Waluigi]], [[Wario]], [[Rosalina]], [[Birdo]], [[Diddy Kong]], [[Hammer Bro]], [[Boomerang Bro]], [[Fire Bro]], [[Ice Bro]], [[Red Yoshi]], [[Black Shy Guy]], [[Pink Shy Guy]], [[Toad|Toad (Pit Crew)]], [[Monty Mole]], [[Birdo | |[[Donkey Kong]], [[Toad]], [[Bowser]], [[Luigi]], [[Mario]], [[Princess Peach|Peach]], [[Yoshi]], [[Princess Daisy|Daisy]], [[Lakitu]], [[King Boo]], [[Toadette]], [[Bowser Jr.]], [[Waluigi]], [[Wario]], [[Rosalina]], [[Birdo]], [[Diddy Kong]], [[Hammer Bro]], [[Boomerang Bro]], [[Fire Bro]], [[Ice Bro]], [[Red Yoshi]], [[Black Shy Guy]], [[Pink Shy Guy]], [[Toad|Toad (Pit Crew)]], [[Monty Mole]], [[Birdo|Birdo (Light Blue)]], [[Birdo|Birdo (Yellow)]], [[Roving Racers|Red Koopa (Freerunning)]] | ||
|0.3103% | |0.3103% | ||
|- | |- | ||
| Line 991: | Line 986: | ||
===City Racer Pipe 1=== | ===City Racer Pipe 1=== | ||
{|class="wikitable" style="margin:auto; text-align:center" | {|class="wikitable" style="margin:auto;text-align:center" | ||
!colspan=11|Items obtained from a new City Racer Pipe 1 | !colspan=11|Items obtained from a new City Racer Pipe 1 | ||
|- | |- | ||
| Line 1,021: | Line 1,016: | ||
|} | |} | ||
<br> | <br> | ||
{|class="wikitable" style="margin:auto;text-align:center" | |||
{|class="wikitable" style="margin:auto; text-align:center" | |||
!Class | !Class | ||
!Parts | !Parts | ||
| Line 1,036: | Line 1,030: | ||
|- | |- | ||
!Super drivers | !Super drivers | ||
|[[Donkey Kong]], [[Toad]], [[Bowser]], [[Luigi]], [[Mario]], [[Princess Peach|Peach]], [[Yoshi]], [[Princess Daisy|Daisy]], [[Lakitu]], [[King Boo]], [[Toadette]], [[Bowser Jr.]], [[Waluigi]], [[Wario]], [[Rosalina]], [[Birdo]], [[Diddy Kong]], [[Hammer Bro]], [[Boomerang Bro]], [[Fire Bro]], [[Ice Bro]], [[Red Yoshi]], [[Black Shy Guy]], [[Pink Shy Guy]], [[Toad|Toad (Pit Crew)]], [[Monty Mole]], [[Birdo | |[[Donkey Kong]], [[Toad]], [[Bowser]], [[Luigi]], [[Mario]], [[Princess Peach|Peach]], [[Yoshi]], [[Princess Daisy|Daisy]], [[Lakitu]], [[King Boo]], [[Toadette]], [[Bowser Jr.]], [[Waluigi]], [[Wario]], [[Rosalina]], [[Birdo]], [[Diddy Kong]], [[Hammer Bro]], [[Boomerang Bro]], [[Fire Bro]], [[Ice Bro]], [[Red Yoshi]], [[Black Shy Guy]], [[Pink Shy Guy]], [[Toad|Toad (Pit Crew)]], [[Monty Mole]], [[Birdo|Birdo (Light Blue)]], [[Birdo|Birdo (Yellow)]], [[Roving Racers|Red Koopa (Freerunning)]] | ||
|0.3448% | |0.3448% | ||
|- | |- | ||
| Line 1,062: | Line 1,056: | ||
===City Racer Pipe 2=== | ===City Racer Pipe 2=== | ||
{|class="wikitable" style="margin:auto; text-align:center" | {|class="wikitable" style="margin:auto;text-align:center" | ||
!colspan=11|Items obtained from a new City Racer Pipe 2 | !colspan=11|Items obtained from a new City Racer Pipe 2 | ||
|- | |- | ||
| Line 1,092: | Line 1,086: | ||
|} | |} | ||
<br> | <br> | ||
{|class="wikitable" style="margin:auto;text-align:center" | |||
{|class="wikitable" style="margin:auto; text-align:center" | |||
!Class | !Class | ||
!Parts | !Parts | ||
| Line 1,107: | Line 1,100: | ||
|- | |- | ||
!Super drivers | !Super drivers | ||
|[[Donkey Kong]], [[Toad]], [[Bowser]], [[Luigi]], [[Mario]], [[Princess Peach|Peach]], [[Yoshi]], [[Princess Daisy|Daisy]], [[Lakitu]], [[King Boo]], [[Toadette]], [[Bowser Jr.]], [[Waluigi]], [[Wario]], [[Rosalina]], [[Birdo]], [[Diddy Kong]], [[Hammer Bro]], [[Boomerang Bro]], [[Fire Bro]], [[Ice Bro]], [[Red Yoshi]], [[Black Shy Guy]], [[Pink Shy Guy]], [[Toad|Toad (Pit Crew)]], [[Monty Mole]], [[Birdo | |[[Donkey Kong]], [[Toad]], [[Bowser]], [[Luigi]], [[Mario]], [[Princess Peach|Peach]], [[Yoshi]], [[Princess Daisy|Daisy]], [[Lakitu]], [[King Boo]], [[Toadette]], [[Bowser Jr.]], [[Waluigi]], [[Wario]], [[Rosalina]], [[Birdo]], [[Diddy Kong]], [[Hammer Bro]], [[Boomerang Bro]], [[Fire Bro]], [[Ice Bro]], [[Red Yoshi]], [[Black Shy Guy]], [[Pink Shy Guy]], [[Toad|Toad (Pit Crew)]], [[Monty Mole]], [[Birdo|Birdo (Light Blue)]], [[Birdo|Birdo (Yellow)]], [[Roving Racers|Red Koopa (Freerunning)]] | ||
|0.3448% | |0.3448% | ||
|- | |- | ||
| Line 1,134: | Line 1,127: | ||
==Token Shop== | ==Token Shop== | ||
The limited-time event where [[event token]]s appeared began on September 22, 2021 and ended on October 5, 2021. Event tokens could be earned by collecting them in courses. | The limited-time event where [[event token]]s appeared began on September 22, 2021 and ended on October 5, 2021. Event tokens could be earned by collecting them in courses. | ||
{| class="wikitable" style="margin:auto; text-align:center" width=50% | {|class="wikitable" style="margin:auto;text-align:center" width=50% | ||
!colspan=3|'''Token Shop''' (September 22, 2021 - October 5, 2021) | !colspan=3|'''Token Shop''' (September 22, 2021 - October 5, 2021) | ||
|- | |- | ||
| Line 1,196: | Line 1,189: | ||
==Tier Shop== | ==Tier Shop== | ||
The shop featured a variety of set and randomized items available for purchase. The item slots in the shop are unlocked based on the highest tier of players. | The shop featured a variety of set and randomized items available for purchase. The item slots in the shop are unlocked based on the highest tier of players. | ||
{|class="wikitable" style="margin:auto;text-align:center" width=50% | |||
{| class="wikitable" style="margin:auto; text-align:center" width=50% | |||
!colspan=3|Items available in Tier Shop (September 22, 2021 - September 28, 2021) | !colspan=3|Items available in Tier Shop (September 22, 2021 - September 28, 2021) | ||
|- | |- | ||
| Line 1,247: | Line 1,239: | ||
==Profiles== | ==Profiles== | ||
*'''''Mario Kart Tour'' Twitter:''' | *'''''Mario Kart Tour'' Twitter:''' | ||
**"''The Sydney Tour is wrapping up in {{color|#MarioKartTour | **"''The Sydney Tour is wrapping up in {{color|blue|#MarioKartTour}}. Next up is the 2nd Anniversary Tour, which will have you racing through eight cities!''"<ref>@mariokarttourEN. (September 17, 2021). [https://twitter.com/mariokarttourEN/status/1438786631268458496 ''Twitter'']. Retrieved September 17, 2021.</ref> | ||
**"''It's time for the 2nd Anniversary Tour! Let's celebrate two years since {{color|#MarioKartTour | **"''It's time for the 2nd Anniversary Tour! Let's celebrate two years since {{color|blue|#MarioKartTour}} was released! Some heated races are about to kick off across eight city courses, and it all starts today!''"<ref>@mariokarttourEN. (September 22, 2021). [https://twitter.com/mariokarttourEN/status/1440556468688797696 ''Twitter'']. Retrieved September 22, 2021.</ref> | ||
==Gallery== | ==Gallery== | ||
Latest revision as of 11:59, June 6, 2024
| 2nd Anniversary Tour | |
|---|---|

| |
| Start date | September 21, 2021 11:00 p.m. (PT) |
| End date | October 5, 2021 10:59 p.m. (PT) |
| Number of cups | 12 |
| Ranked cups | Baby Luigi Cup (week 1) Pink Gold Peach Cup (week 2) |
| Coin Rush course | London Loop |
| << List of tours >> | |
The 2nd Anniversary Tour was the fifty-third tour of Mario Kart Tour, which began on September 22, 2021 and ended on October 5, 2021. As the tour's name indicates, it celebrated two years since the official launch of Mario Kart Tour on September 25, 2019. This tour introduced a new layout of the New York Minute course, named New York Minute 4, and it was also the first tour to consist of only city courses, making this tour the first one to not feature any classic courses, the first to not feature any SNES courses, and the second in a row to introduce a new city course. This was also the first tour since the Hammer Bro Tour thirty-nine tours prior to only introduce Super drivers, being Birdo (Blue), who was available as a reward for placing high in the ranked cups alongside the Blue Turbo Birdo, making this the first tour to feature a kart as a reward for placing high in the ranked cup. The tour also featured new unique challenges, as well as an upgraded Token Shop with some half-price items. Like the 1st Anniversary Tour twenty-five tours prior, this tour only featured ten base courses but totaled up to thirty-five courses including variants (similar to the Mario vs. Peach Tour four tours prior); the only recurring track was New York Minute 4R/T.
This tour's Coin Rush course was London Loop, which was reused from the London Tour. The menu's background featured the Empire State Building as the landmark for this tour, which was reused from the 2019 Holiday Tour and the 1st Anniversary Tour.
SpotlightsEdit
| 2nd Anniversary Pipe 1 September 21, 2021, 11:00 p.m. (PT) – October 5, 2021, 10:59 p.m. (PT) |
2nd Anniversary Pipe 2 September 28, 2021, 11:00 p.m. (PT) – October 5, 2021, 10:59 p.m. (PT) |

|

|
| Drivers | Drivers |
|---|---|
  
|
   
|
| Pauline, Mario (Hakama), Peach (Kimono), Peach (Vacation), and Luigi (Painter) | Luigi (Lederhosen), Mario (Musician), Waluigi (Bus Driver), Baby Rosalina (Detective), and Mario (Baseball) |
Special pipesEdit
| City Racer Pipe 1 September 21, 2021, 11:00 p.m. (PT) – September 28, 2021, 10:59 p.m. (PT) |
City Racer Pipe 2 September 28, 2021, 11:00 p.m. (PT) – October 5, 2021, 10:59 p.m. (PT) | ||

|

| ||
| High-End Drivers | High-End Karts | High-End Drivers | High-End Karts |
|---|---|---|---|
  |
  
|
||
| Pauline, Mario (Racing), Baby Peach (Cherub), and Waluigi (Bus Driver) | Red B Dasher Mk. 2, B Dasher Mk. 2, Pink B Dasher Mk. 2, and Classic B Dasher Mk. 2 | Mario (Sunshine), Luigi (Lederhosen), Rosalina (Aurora), and Baby Mario (Koala) | Sky-Blue B Dasher Mk. 2, Metal B Dasher Mk. 2, Cream B Dasher Mk. 2, and Green B Dasher Mk. 2 |
CupsEdit
Baby Luigi Cup Ranked cup (week 1) |
New York Minute 4 |
Tokyo Blur T |
Paris Promenade 2R |
Ring Race | ||||
 London Loop |
Shy Guy | |||||||
Hammer Bro Cup |
Vancouver Velocity T |
Sydney Sprint |
Los Angeles Laps T |
Glider Challenge | ||||
 Tokyo Blur |
Mario (Hakama) | |||||||
Pink Gold Peach Cup Ranked cup (week 2) |
New York Minute 4R/T |
Berlin Byways 2R |
London Loop |
Break Item Boxes | ||||
 Paris Promenade 2 |
Peach | |||||||
Daisy Cup |
Los Angeles Laps |
London Loop 2 |
Paris Promenade 2 |
Time Trial | ||||
 Sydney Sprint |
Baby Mario | |||||||
Lakitu Cup |
Vancouver Velocity R |
Berlin Byways 2T |
Tokyo Blur |
Snap a Photo | ||||
 New York Minute 4T |
Pauline | |||||||
Peach Cup |
Sydney Sprint R |
Paris Promenade |
London Loop T |
Big Reverse Race | ||||
 Berlin Byways 2 |
Any character | |||||||
Yoshi Cup |
London Loop 2R |
Vancouver Velocity R/T |
New York Minute 4R |
Goomba Takedown | ||||
 Los Angeles Laps |
Birdo | |||||||
Ludwig Cup |
Paris Promenade R/T |
Berlin Byways 2 |
Sydney Sprint R/T |
Steer Clear of Obstacles | ||||
 London Loop 2 |
Koopa Troopa | |||||||
Luigi Cup |
Paris Promenade 2T |
Los Angeles Laps R/T |
Tokyo Blur R |
Time Trial | ||||
 Berlin Byways 2 |
Luigi | |||||||
Mario Cup |
London Loop R |
New York Minute 4T |
Paris Promenade T |
Smash Small Dry Bones | ||||
 Sydney Sprint |
Yoshi | |||||||
Rosalina Cup |
Los Angeles Laps R |
Sydney Sprint T |
Vancouver Velocity |
Combo Attack | ||||
 New York Minute 4T |
Pauline | |||||||
Toad Cup |
Paris Promenade R |
London Loop 2T |
New York Minute 4R/T |
vs. Mega Wario | ||||
 Vancouver Velocity |
Any character | |||||||
Signature kart setsEdit
Drivers with a corresponding cup were bumped one rank up in every course of their cup.
| Cup | Driver | Kart | Glider |
|---|---|---|---|
| First course of every cup | |||
| Second course of every cup | |||
| Third course of every cup | |||
| — | — | ||
| — | — | ||
| — | — | ||
| — | — | ||
| — | — | ||
| — | — | ||
| — | — | ||
| — | — | ||
| — | — | ||
| — | — | ||
| — | — | ||
| — | — |
Today's ChallengeEdit
Players' most recently used kart and glider are chosen, and favorite and favored ones have extra priority. Opponents are arranged randomly. On day 1 of this tour, players finish a race in Vancouver Velocity T in the Hammer Bro Cup using Ice Mario for a free pipe launch. Starting from day 2, players have to finish a race in the earliest incomplete course that is not in any of the ranked cups using the driver shown on the course's thumbnail every day to obtain the corresponding reward in the table below. Once all of the courses are completed, the courses are selected at random.
| Day(s) | Reward |
| 1-4, 6-9, 11-13 | Free pipe launch |
|---|---|
| 5, 10 | Rubies ×5 |
| 14 |  Badge |
| Today's Challenge Pipe | |

| |
| Pipe contents | |
| Rubies, coins, driver (Normal/Super/High-End), kart (Normal/Super/High-End), glider (Normal/Super/High-End), item tickets | |
RewardsEdit
Gold cells indicate rewards that are exclusive to Gold Pass members.

|
||||||
| BBIA Parafoil | Gold Train | Green Kiddie Kart | Gold Pipe Frame | Baby Luigi | Gold Koopa (Freerunning) | Gold Glider |
| Grand Stars | 15 | 20 | 25 | 30 | 35 | 40 | 50 | 60 | 70 | 85 | 100 | 115 | 130 | 145 | 160 | 180 | 200 | 215 | 230 | 240 | 250 | 255 | 260 | 265 | Total | Grand total | |
|---|---|---|---|---|---|---|---|---|---|---|---|---|---|---|---|---|---|---|---|---|---|---|---|---|---|---|---|
| Free pipe launch | 1 | 1 | 1 | 1 | 4 | ||||||||||||||||||||||
| Coin | 300 | 300 | 300 | 300 | 300 | 500 | 1000 | 3000 | 7600 | ||||||||||||||||||
| 1000 | 600 | 1000 | 2000 | 4600 | |||||||||||||||||||||||
| Rubies | 3 | 3 | 5 | 5 | 5 | 21 | 46 | ||||||||||||||||||||
| 5 | 5 | 5 | 5 | 5 | 25 | ||||||||||||||||||||||
| Item tickets | 10 | 10 | 25 | ||||||||||||||||||||||||
| 15 | 15 | ||||||||||||||||||||||||||
| Star tickets | 4 | 4 | 4 | ||||||||||||||||||||||||
| 0 | |||||||||||||||||||||||||||
| Point-boost tickets | 1 | 1 | 1 | 3 | 6 | ||||||||||||||||||||||
| 3 | 3 | ||||||||||||||||||||||||||
| 1 | 1 | 1 | 3 | 6 | |||||||||||||||||||||||
| 3 | 3 | ||||||||||||||||||||||||||
| 1 | 1 | 1 | 3 | 6 | |||||||||||||||||||||||
| 3 | 3 | ||||||||||||||||||||||||||
| Level-boost ticket | 3 | 12 | |||||||||||||||||||||||||
| 9 | |||||||||||||||||||||||||||
New contentEdit
DriversEdit

KartsEdit
CoursesEdit
New York Minute 4 (N, R, T, R/T)
Paid bannersEdit
| Name | Availability | Cost | Contents | Banner image |
|---|---|---|---|---|
| Value Pack | September 22, 2021 – October 5, 2021 | US$1.99 |
|

|
| A 2nd Anniversary Tour Celebration! Sunset Cloud! | September 22, 2021 – October 5, 2021 | US$3.99 | 
| |
| A 2nd Anniversary Tour Celebration! Crimson Hop Rod! | September 22, 2021 – October 5, 2021 | US$3.99 | 
| |
| Luigi (Classic) Pack | September 22, 2021 – October 5, 2021 | US$19.99 |
|

|
| Donkey Kong Jr. (SNES) Pack | September 22, 2021 – October 5, 2021 | US$39.99 |
|

|
| A 2nd Anniversary Tour Celebration! Cleanup Hitter! | September 29, 2021 – October 5, 2021 | US$3.99 | 
| |
| A 2nd Anniversary Tour Celebration! Dark Hop Rod! | September 29, 2021 – October 5, 2021 | US$3.99 | 
| |
| A 2nd Anniversary Tour Celebration! Ice Dozer! | September 29, 2021 – October 5, 2021 | US$3.99 | 
| |
| Penguin Luigi Pack | September 29, 2021 – October 5, 2021 | US$19.99 |
|

|
| Mario (SNES) Pack | September 29, 2021 – October 5, 2021 | US$39.99 |
|

|
ChallengesEdit
| Tour Challenges 1 | Tour Challenges 2 | Gold Challenges | ||||||||
|---|---|---|---|---|---|---|---|---|---|---|
| Completion reward: |
Completion reward: |
Completion reward: | ||||||||
 |
 |
 |
 |
 |
 |
 |
 |
 | ||
| Do 20 Jump Boosts. | Land 5 hits with Bananas. | Race in auto mode. | Do 5 Rocket Starts. | Use 10 Mushrooms. | Get a Fantastic combo a total of 5 times. | Do a total of 5 Slipstream boosts. | Land 10 hits with Red Shells. | Use Lightning. | ||
 |
 |
 |
 |
 |
 |
 |
 |
 | ||
| Get an item from the Tier Shop. | Glide a distance of 2,000 or longer using a driver with a mustache. | Earn a score of 7,000 or higher on 3 T or R/T courses. | Use point-boost tickets 3 times. | Activate Frenzy mode 3 times on a city course. | Get 1 item from the Daily Selects section of the Shop. | Use a level-boost ticket. | Do 5 Ultra Mini-Turbo boosts using a driver wearing earrings. | Cause opponents to crash in Frenzy mode. | ||
 |
 |
 |
 |
 |
 |
 |
 |
 | ||
| Land a hit with a Blooper. | Earn a total score of 20,000 or higher in the Lakitu Cup. | Send Greeting Coins to a friend. | Earn a score of 9,000 or higher using a driver with a hat. | Earn a total score of 20,000 or higher in the Rosalina Cup. | Race in every course of every cup, including bonus challenges. | Cause opponents to crash 5 times in a single race using a driver with a hat. | Earn a total score of 25,000 or higher in the Daisy Cup. | Take out 5 traffic cones. | ||
| Premium Challenges | Premium Challenges+ | |||||
|---|---|---|---|---|---|---|
| Cost: US$4.99 | Cost: US$14.99 | |||||
| Three in a row reward: |
Three in a row reward: | |||||
Completion reward:  Toad (Party Time) ×1 Toad (Party Time) ×1
|
Completion reward: | |||||
| Mario ×1 | Super 1 ×1 | 8-Bit Jumping Mario ×1 | Point-boost ticket (Driver) ×5 | Point-boost ticket (Kart) ×5 | Point-boost ticket (Glider) ×5 | |
| Land 5 hits with Green Shells. | Land 10 hits with Bananas. | Land 10 hits with Bob-ombs. | Land 10 hits with Green Shells. | Land 20 hits with Bananas. | Use 30 Mushrooms. | |
| Coins ×3,000 | Rubies ×10 | Point-boost ticket (Driver) ×3 | Level-boost ticket (High-End driver) ×1 | Level-boost ticket (High-End kart) ×1 | Level-boost ticket (High-End glider) ×1 | |
| Do 50 Jump Boosts. | Participate in a race. | Do 100 Mini-Turbo boosts. | Do 100 Jump Boosts. | Do 150 Mini-Turbo boosts. | Collect a total of 300 coins in races. | |
| Level-boost ticket (Normal driver) ×1 | Level-boost ticket (Super driver) ×1 | Level-boost ticket (High-End driver) ×1 | Points-cap ticket (High-end driver) ×1 | Points-cap ticket (High-end kart) ×1 | Points-cap ticket (High-end glider) ×1 | |
| Get 1st place in a race 10 times. | Get 1st place in a race 15 times. | Get 1st place in a race 20 times. | Get 1st place in a race 15 times. | Get 1st place in a race 20 times. | Get 1st place in a race 30 times. | |
| 2nd Anniversary Challenges | Tour Multiplayer Challenges | |||||
|---|---|---|---|---|---|---|
| Three in a row reward: |
Three in a row reward: | |||||
| Completion reward: |
Completion reward: | |||||
 |
 |
 |
 |
 |
 | |
| Race on a city course. | Get 1st place a total of 5 times on a New York course. | Get 1st place a total of 5 times on a Los Angeles course. | Land 3 hits with Green Shells in multiplayer. | Land 3 hits with Bananas in multiplayer. | Do 3 Rocket Starts in multiplayer. | |
 |
 |
 |
 |
 |
 | |
| Get 1st place a total of 5 times on a Paris course. | Get 1st place a total of 5 times on a London course. | Get 1st place a total of 5 times on a Berlin course. | Use the Super Star item in multiplayer. | Join a multiplayer race. | Land 3 hits with Bob-ombs in multiplayer. | |
 |
 |
 |
 |
 |
 | |
| Get 1st place a total of 5 times on a Tokyo course. | Get 1st place a total of 5 times on a Sydney course. | Get 1st place a total of 5 times on a Vancouver course. | Do 50 Jump Boosts in multiplayer. | Do 50 Mini-Turbo boosts in multiplayer. | Cause opponents to crash 30 times in multiplayer. | |
| Kart Pro Challenges | ||
|---|---|---|
| Three in a row reward: | ||
| Completion reward: | ||
 |
 |
 |
| Join a multiplayer race. | Join 3 multiplayer races. | Join 5 multiplayer races. |
 |
 |
 |
| Get 1 win in Kart Pro. | Achieve a winning streak that includes 3 1st-place wins. | Achieve a winning streak that includes 2 1st-place wins. |
 |
 |
 |
| Join 10 multiplayer races. | Get 3rd place or higher 3 times in a multiplayer race. | Get 3rd place or higher 5 times in a multiplayer race. |
| Total Points Challenge | |
|---|---|
| Points | Reward |
| 600,000 |
|
| 550,000 |
|
| 500,000 |
|
| 400,000 |
|
| 300,000 |
|
| 150,000 |
|
2-Player ChallengeEdit
| Name | Courses | Opponents | ||||||||
|---|---|---|---|---|---|---|---|---|---|---|
| First | Second | Final | 6th | 5th | 4th | 3rd | 2nd | 1st | ||
 Vs. City Racers |
Berlin Byways 2 |
Sydney Sprint |
New York Minute 4 |
Driver | ||||||
| Kart | ||||||||||
| Glider | ||||||||||
Initial pipe appearance ratesEdit
All-Clear PipeEdit
The All-Clear Pipe randomly shot out one of the following regular High-End items. The appearance rate can be viewed via the "Pipe content" link on the Gold Pass purchase screen.
2nd Anniversary Pipe 1Edit
| Items obtained from a new 2nd Anniversary Pipe 1 | |||||||||||||||
|---|---|---|---|---|---|---|---|---|---|---|---|---|---|---|---|
| Item | Normal |
Super |
High-End |
Featured High-End | |||||||||||
| Driver | Kart | Glider | Driver | Kart | Glider | Driver | Kart | Glider | Driver | Kart | Glider | ||||
| Amount | 28 | 25 | 15 | 9 | 7 | 4 | 1 | 3 | 3 | 5 | 0 | 0 | |||
2nd Anniversary Pipe 2Edit
| Items obtained from a new 2nd Anniversary Pipe 2 | |||||||||||||||
|---|---|---|---|---|---|---|---|---|---|---|---|---|---|---|---|
| Item | Normal |
Super |
High-End |
Featured High-End | |||||||||||
| Driver | Kart | Glider | Driver | Kart | Glider | Driver | Kart | Glider | Driver | Kart | Glider | ||||
| Amount | 28 | 25 | 15 | 9 | 7 | 4 | 1 | 3 | 3 | 5 | 0 | 0 | |||
City Racer Pipe 1Edit
| Items obtained from a new City Racer Pipe 1 | ||||||||||
|---|---|---|---|---|---|---|---|---|---|---|
| Item | Normal |
Super |
High-End | |||||||
| Driver | Kart | Glider | Driver | Kart | Glider | Driver | Kart | Glider | ||
| Amount | 12 | 10 | 9 | 5 | 4 | 4 | 3 | 3 | 0 | |
City Racer Pipe 2Edit
| Items obtained from a new City Racer Pipe 2 | ||||||||||
|---|---|---|---|---|---|---|---|---|---|---|
| Item | Normal |
Super |
High-End | |||||||
| Driver | Kart | Glider | Driver | Kart | Glider | Driver | Kart | Glider | ||
| Amount | 12 | 10 | 9 | 5 | 4 | 4 | 3 | 3 | 0 | |
Token ShopEdit
The limited-time event where event tokens appeared began on September 22, 2021 and ended on October 5, 2021. Event tokens could be earned by collecting them in courses.
| Token Shop (September 22, 2021 - October 5, 2021) | ||
|---|---|---|

|
||
| Metal Mario Amount: 1 |
B Dasher Amount: 1 |
Cloud Glider Amount: 1 |

|
||
| Pink Gold Peach Amount: 1 |
Badwagon Amount: 1 |
Swooper Amount: 1 |
| Ruby ×3 Amount: 5 |
Coin ×500 Amount: 5 |
Coin Rush ticket Amount: 1 |
| Level-boost ticket (Normal) Amount: 3 |
Level-boost ticket (Normal) Amount: 3 |
Level-boost ticket (Normal) Amount: 3 |
| Level-boost ticket (Super) Amount: 2 |
Level-boost ticket (Super) Amount: 2 |
Level-boost ticket (Super) Amount: 2 |
| Level-boost ticket (High-End) Amount: 1 |
Level-boost ticket (High-End) Amount: 1 |
Level-boost ticket (High-End) Amount: 1 |
| Points-cap ticket (Normal) Amount: 1 |
Points-cap ticket (Super) Amount: 1 |
Points-cap ticket (High-End) Amount: 1 |
Tier ShopEdit
The shop featured a variety of set and randomized items available for purchase. The item slots in the shop are unlocked based on the highest tier of players.
| Items available in Tier Shop (September 22, 2021 - September 28, 2021) | ||
|---|---|---|

|
||
| Funky Kong Amount: 1 |
Cloud 9 Amount: 1 |
Strawberry Crêpe Amount: 1 |
| Items available in Tier Shop (September 29, 2021 - October 5, 2021) | ||

|
||
| Dixie Kong Amount: 1 |
Sports Coupe Amount: 1 |
8-Bit Jumping Mario Amount: 1 |
| Items available in Tier Shop (September 22, 2021 - October 5, 2021) | ||
| Level-boost ticket (Normal) Amount: 3 per week |
Level-boost ticket (Normal) Amount: 3 per week |
Level-boost ticket (Normal) Amount: 3 per week |
OR |
OR |
OR |
| Level-boost ticket (Super) Amount: 2 per week OR Level-boost ticket (High-End) Amount: 1 per week |
Level-boost ticket (Super) Amount: 2 per week OR Level-boost ticket (High-End) Amount: 1 per week |
Level-boost ticket (Super) Amount: 2 per week OR Level-boost ticket (High-End) Amount: 1 per week |
OR OR |
OR OR |
OR OR |
| Points-cap ticket (Normal) Amount: 1 per week |
Points-cap ticket (Super) Amount: 1 per week |
Points-cap ticket (High-End) Amount: 1 per week |
ProfilesEdit
- Mario Kart Tour Twitter:
- "The Sydney Tour is wrapping up in #MarioKartTour. Next up is the 2nd Anniversary Tour, which will have you racing through eight cities!"[1]
- "It's time for the 2nd Anniversary Tour! Let's celebrate two years since #MarioKartTour was released! Some heated races are about to kick off across eight city courses, and it all starts today!"[2]
GalleryEdit
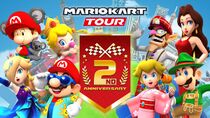
Promotional artwork

Names in other languagesEdit
| Language | Name | Meaning |
|---|---|---|
| Japanese | 2nd アニバーサリーツアー 2nd Anibāsarī Tsuā |
2nd Anniversary Tour |
| Chinese (simplified) | 2nd 周年巡回赛 2nd Zhōunián Xúnhuísài |
2nd Anniversary Tour |
| Chinese (traditional) | 2nd週年巡迴賽 2nd Zhōunián Xúnhuísài |
2nd Anniversary Tour |
| French | Saison 2e anniversaire |
2nd anniversary Season |
| German | 2.-Jubiläum-Tour-Saison |
2nd Anniversary Tour Season |
| Italian | Tour 2° anniversario |
2nd anniversary Tour |
| Korean | 2주년 기념 투어 2 Junyeon Ginyeom Tueo |
2nd Anniversary Tour |
| Portuguese | Temporada do 2° aniversário |
2nd anniversary Season |
| Spanish | Temporada 2.° aniversario |
2nd anniversary Season |