Canyon Layer
| Canyon Layer | |
|---|---|

| |
| Bosses | Grumpy Kong, Mad Mixer, Stompenclomper |
| Terrain strength | ★★☆☆☆ |
| Emerald Rush difficulty | ★★☆☆☆ |
| Banandium Gems | 80 |
| Fossils | 72 |
The Canyon Layer is the fourth layer visited in the Underground World of Donkey Kong Bananza, occupying sublayers 300 to 302. It is a mountainous area with many Mine Cart tracks to help Donkey Kong and Pauline travel along the layer. It is populated by Fractones who mimic the appearance of giraffes, animals which have disappeared from the Underground World. In addition, a large number of smokestacks resembling these animals appear in this layer; another of these appears later, in the Landfill Layer, presumably having fallen down there.[1]
When Donkey Kong and Pauline first reach the Canyon Layer, they meet some Fractone whose bananas were stolen by Void Company, so they head to Longneck Plateau Village to ensure everyone is alright. There, a giraffe-shaped Fractone suggests the duo go to the Banandium Refinery, which they get to after destroying a Terravoider covering a Mine Cart. After using the Kong Bananza to break through the Banandium Refinery's entrance, Donkey Kong and Pauline are confronted by Grumpy Kong, who controls a giant Crockoid-like being to defeat them. After Grumpy Kong's defeat, he gives them a key that opens a Void Stake blocking the way to Sublayer 301. There, Void Company have set up Mad Mixer at the Banandium Refinery, which a Fractone orders Donkey Kong and Pauline to destroy before it explodes. The duo make their way around the refinery to destroy a Terravoider that allows them to use a set of Mine Carts that lead to Mad Mixer, which they destroy by throwing Boom Rocks at it. After escaping the refinery, they make it to Click-Clack Smokestack and enter it to defeat Stompenclomper and enter the next layer.
Sub-locations[edit]
Sublayer 300[edit]
- Longneck Plateau
- Big-Stretch Peak
- Mechaneck Isle
- Click-Clack Smokestack
Sublayer 301[edit]
- Banandium Refinery Offices
- Banandium Refinery Mixer
- Click-Clack Smokestack Depths
Checkpoints[edit]
Sublayer 300[edit]
- Tallfall Cliffs
- Longneck Plateau Village
- Neckreach Smokestack Exit
- Click-Clack Smokestack Roof
Sublayer 301[edit]
- Banandium Refinery Staff Dorms
- Banandium Refinery Gravel Storage
Sublayer 302[edit]
- Sinkhole
Getaways[edit]
Sublayer 300[edit]
- Plateau Village Getaway
- Longneck Plateau Getaway
- Smokestack Getaway
- Big-Stretch Base Getaway
- Big-Stretch Peak Getaway
- Tallfall Cliffs Getaway
- Twin-Horn Smokestacks Getaway
- Mechaneck Isle Getaway
- Foreman Island's Getaway
Sublayer 301[edit]
- Smokestack Interior Getaway
- Banandium Refinery Terrace Getaway
- Banandium Refinery Offices Getaway
Banandium Gems[edit]
- Main article: List of Banandium Gems in the Canyon Layer
There are a total of eighty-eight Banandium Gems (seventy-six regular gems and four bunches of 3) in the Canyon Layer. During Donkey Kong's first visit to this layer, he can collect seventy-five Banandium Gems and the four bunches of 3 gems. After Donkey Kong defeats King K. Rool in New Donk City, another Banandium Gem become available to collect.
Challenges[edit]
Sublayer 300[edit]
- Challenges
- Canyon Layer Challenge Course 1: Kong Bananza: City Smash (Banandium Gems ×3)
- Canyon Layer Challenge Course 2: Thorny Blast Cave (Banandium Gems ×3)
- Canyon Layer Challenge Course 3: Big-Wheel Balloon Hunt (Banandium Gems ×3)
- Canyon Layer Challenge Course 5: Stompy Ascent (Banandium Gems ×3)
- Canyon Layer Battle Challenge 1: Squeeloid ×10 (Banandium Gem ×1)
- Canyon Layer Battle Challenge 2: Squeeloid ×5 (Banandium Gem ×1)
- Canyon Layer Battle Challenge 5: Stompoid ×5 (Banandium Gem ×1)
- Canyon Layer Battle Challenge 6: Stompoid ×2 (Banandium Gem ×1)
- Bonus Stage: Blasting for Gold
Sublayer 301[edit]
- Canyon Layer Challenge Course 4: Spinning Laser Zone (Banandium Gems ×3)
- Canyon Layer Battle Challenge 3: Crockoid x3 (Banandium Gem ×1)
- Canyon Layer Battle Challenge 4: Stompoid x2 (Banandium Gem ×1)
Enemies[edit]
- Wallopoids
- Crockoids
- Squeeloids
- Stompoids
- Grumpy Kong (boss)
- Stompenclomper (boss)
Signs[edit]
- The rainbow-colored smoke spouting out of the smokestack is real pretty... Seems the
 Banandium Gems have sprinkled their glittery colors on all sorts of stuff around here. Can't say we mind such a lovely sight. It inspires everyone to work even harder. —Refinery Foreman
 - Saga of the Exploritone, Verse 2: We worked up our courage and leapt into our first sinkhole... The sensation of landing was jarring but not painful. We recovered quickly. The landscape here is very different than the hilltops we are accustomed to. The dry air and scent of sand on the hot winds is an intriguing change of pace. If the atmosphere of this new land is this exciting, then we cannot wait to meet those who reside here.
- History of the Underhoof Warehouse: We decided to build a warehouse under the village to store Banandium Gems... The drilling work began and continued smoothly until, one day, we unearthed pools of water. Water is an important part of this layer's ecosystem, of course. So we promptly halted drilling. We turned the Underhoof Warehouse into a watering hole where residents could gather and relax.
- History of Twin-Horn Smokestacks: The foreman had a plan to increase our output by doubling up on smokestacks... It was, indeed, a bold plan. But they soon discovered that the number of smokestacks matters less than the size of the smokestacks. Since the output didn't increase as we hoped, the two test smokestacks were decommissioned, mine carts and all.
- Welcome to the Canyon Layer... The upper sublayer has spacious banana warehouses, while the lower sublayer is the larger Banandium Refinery. From warehouse to refinery, this entire layer is dedicated to processing the raw energy of Banandium Gems!
- NOTICE: This is the refinery foreman's private property... Outsiders are not allowed to tread on these grounds. (That means YOU!). And no Getaways or
 Barrel Cannons are to be built around here either. Foreman's orders!
 - History of Neckreach Smokestack: This is the largest smokestack in the Underground World... A great deal of effort went into this smokestack's construction. In fact, the builders who braved great heights to erect it left a little memento behind when they finished. A Banandium Gem sits atop the giraffe horns...where no one can reach it. Those builders must've had a good laugh!
- Guide to the Employee Dormitory: Room and board in this dorm is free so long as you are a refinery employee... The dormitory has been furnished with the highest-quality beds and showering facilities. Not only that, but any banana chips that the refining process produces are yours to eat!
- We discovered a large fossil inside the refinery... According to the report, it was the fossil of a creature that lived on the surface, called a triceratops. At Constructone Developement, we naturally pause construction whenever we find a fossil! We would never bury it in the sand and forget about it just to hit a deadline...
- History of Click-Clack Smokestack: We shall increase our work rate by building a mechanical smokestack... That was the refinery foreman's bold plan anyway, and at first it seemed he was onto something. As productivity increased, more bits and bobs were added to the stack. "More is better!" the foreman declared. But soon so much machinery had been tacked on, the stacks became a chaotic mess...and no work got done at all.
- A Guide to Sturdy Rope: (From your friendly Fractones) You there! Take a look around... Did you happen to notice that you're standing on a platform that hangs precariously from a crane?! Perhaps you didn't! That's because the very platform your life depends on is totally sturdy, even at this great height! It's all thanks to the Fractone-made Sturdy Rope—the latest innovation in high-altitude construction material! Sturdy Rope*: Because a safe, stable workplace is a happy workplace. *Patent pending
- Saga of the Exploritone, Verse 3: We met some creatures here unlike any we have seen before... They had long necks, with a distinctive dappled pattern. Their bodies were flexible and fur covered. We observed them experimenting on Banandium Gems as a energy source. They hope to build the Underground World's greatest refinery someday. They have great ambition. They dream of a day in which their long necks rise above the crowded throngs of history. It is time for us to head to the next sinkhole. What sort of creatures will we meet further down?
Fossils[edit]
- Main article: Fossil
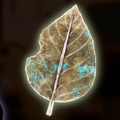
Leaf (×61)
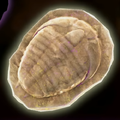
Trilobite (×10)
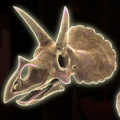
Triceratops (×1)


Names in other languages[edit]
| Language | Name | Meaning | Note(s) | Ref. |
|---|---|---|---|---|
| Japanese | Kōya no Kaisō |
Wilderness Stratum | [2] | |
| Chinese (Simplified) | 荒野的地层 Huāngyě de Dìcěng (Mandarin) Fōngyéh dīk Deihchàhng (Cantonese) |
Wilderness Stratum | [3] | |
| Chinese (Traditional) | 荒野的地層 Huāngyě de Dìcěng (Mandarin) Fōngyéh dīk Deihchàhng (Cantonese) |
Wilderness Stratum | [4] | |
| Dutch | Rotslaag | Rock layer | [5] | |
| French (European) | Strate du canyon | Canyon stratum | [6] | |
| German | Canyonschicht | Canyon Layer | [7] | |
| Italian | Livello del canyon | Canyon level | [8] | |
| Korean | 황야의 계층 Hwangyaui Gyecheung |
Wilderness Layer | [9] | |
| Polish | Warstwa Kanionowa | Canyon Layer | [10] | |
| Portuguese (Brazilian) | Camada do cânion | Canyon layer | [11] | |
| Russian | Регион «Каньон» Region «Kan'on» |
"Canyon" region | [12] | |
| Spanish | Estrato del cañón | Canyon layer | [13] | |
| Thai | ชั้นหุบผา Chán hùp-pǎa |
Canyon layer | [14] |
References[edit]
- ^ Li'l Eelevator, Landfill Layer, when asked "What's this junk?": "Oh, I know!
 Mom told us all about it. She said it's things 'n' stuff that fell down from the upper layers."
- ^ aika (July 20, 2025). 【ドンキーコングバナンザ】荒野の階層 ストーリー攻略 #6 バナモンド化石【Switch2】. Japanese. Retrieved August 1, 2025 from YouTube.
- ^ losss (July 17, 2025). 咚奇刚 蕉力全开 part01. Simplified Chinese. Retrieved August 1, 2025 from YouTube.
- ^ AMU Game Channel (July 18, 2025). 咚奇剛:蕉力全開 劇情攻略 (5) 荒野的地層-地下300層【共46個蕉鑽石】. Traditional Chinese. Retrieved July 31, 2025 from YouTube.
- ^ MEGA album of Dutch Donkey Kong Bananza screenshots
- ^ OcariKnights (August 1, 2025). Canyon sauvage - Donkey Kong Bananza #09 (0:55). French. Retrieved November 1, 2025 from YouTube.
- ^ Domzendo (July 19, 2025). DONKEY KONG BANANZA 🍌 #11: Die Canyon-Schicht. German. Retrieved from YouTube.
- ^ Mariuigi Khed (July 17, 2025). Donkey Kong Bananza ITA [Live #1]. Italian. Retrieved from YouTube.
- ^ 김용녀 (July 19, 2025). 동키콩 바난자 [4화 폴린의 옷을 위해서라면 난 화석을 캘 거에요! | 4K] (1:23). Korean. Retrieved from YouTube.
- ^ In-game name. Donkey Kong Bananza (Ver. 1.5.0). Nintendo. Retrieved January 23, 2026.
- ^ Uns Caras Que Jogam (July 17, 2025). DONKEY KONG BANANZA - Jogo Completo PT-BR (Full Gameplay). Portuguese. Retrieved from YouTube.
- ^ Trueku (August 10, 2025). Donkey Kong Bananza / Донки Конг Бананза [SWITCH 2 Прохождение #2 ХОЛМЫ] (1:18:49). Russian. Retrieved from YouTube.
- ^ DarkPlayer GamingTV (July 20, 2025). DONKEY KONG BANANZA Juego Completo - Gameplay Español (Nintendo Switch 2) 4K (1:43:14). Spanish. Retrieved from YouTube.
- ^ Nintendo (December 22, 2025). เกมแอ็กชัน 3D "ดองกี้คอง บานันซ่า" เวอร์ชันภาษาไทยเปิดให้เล่นแล้ว! พร้อมกันนี้ DLC "DK ไอส์แลนด์ & เอเมอรัลด์รัช" ก็รองรับภาษาไทยแล้วเช่นกัน!. nintendo.com (Thai). Retrieved December 22, 2025.