List of Dream World blocks in Mario & Luigi: Dream Team
- This article is about the blocks in the Dream World from Mario & Luigi: Dream Team. For the ones from the real world, see List of real world blocks in Mario & Luigi: Dream Team.
In Mario & Luigi: Dream Team, Mario and Dreamy Luigi can collect Coins and items from floating blocks -- all throughout the Dream World. There are 5 distinctive types of blocks found in the Dream World:
 ? Block: The basic yellow one, can be striken at any time by anyone.
 M Block: Same function as the ? Block, but is red in color with red M in the white circle, indicating that only Mario can strike it.
 L Block: Same function as the ? Block, but is green in color with green L in the white circle, indicating that only Dreamy Luigi can strike it.
 Attack Piece Block: Multi-colored blocks with the letter "A" on their faces. They resemble differently-colored pieces of a puzzle joined together to make a block, and once they are hit, they give the player a single Attack Piece. Before being hit, the locations of every Attack Piece are shown on the mini-map located on the Touch Screen, giving the player an idea of where they are.
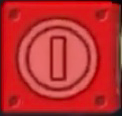 Red Coin Block: A red block with a red coin on it. Striking it spawns 8 Red Coins, which have to be collected quickly. Due to its nature, these blocks are mandatory to be struck to progress.
There are a total of 391 blocks to be found in the Dream World. This page shows the locations of each one and how to get to them. Dream's Deep from Dreamy Mushrise Park and Dream Worlds accessed from Pink Pi'illos from Mushrise Park, Pink Pi'illos 2, 5 and 6 from Dozing Sands, Pink Pi'illos 2 and 4 from Wakeport, Blue Pi'illos and Pink Pi'illos 1, 3, 5 and 6 from Mount Pajamaja, Seabelle and Seatoon Dreampoints from Driftwood Shore, Pi'illo Master 6 from Somnom Woods and Pink Pi'illo from Neo Bowser Castle do not have any blocks at all.
Numbering of the Pi'illos seen on the page corresponds with their placement in the Pi'iilo locations section of the Pi'illo page.
Block locations[edit]
Dreamy Pi'illo Castle[edit]
There are a total of 50 Blocks to find in the Dreamy Pi'illo Castle Dream Worlds:
- The one reached by the Dreampoint holds 8 blocks - 6 ?, 1 M, 1 L
- The one reached by Pink Pi'illo holds 7 ? blocks
- The one reached by the first Blue Pi'illo holds 8 ? blocks
- The one reached by the second Blue Pi'illo holds 27 blocks - 26 ?, 1 M
| Item/s | Description | Image |
|---|---|---|
| Dreampoint | 8 Blocks (6 ?, 1 M, 1 L) | ||
Coin |
In the second scene, above the second moving platform. | _Block_1.png)
|
Five Coin |
In the third scene, in the east of the upper part. | _Block_2.png)
|
Nut |
Same scene, in the southwest part of the lower part. | _Block_3.png)
|
Five Coin |
In the fifth scene, above the second platform. | _Block_4.png)
|
Coin |
Same scene, between third and fourth platforms. | _Block_5.png)
|
Coin |
Same scene, above the fourth platform. | _Block_6.png)
|
10 Coins |
Same scene, above the moving platform. | _Block_7.png)
|
Super Mushroom |
Same scene, above the last platform. | _Block_8.png)
|
| Pink Pi'illo | 7 ? Blocks | ||
Coin |
In the first scene, above the platform. | _Block_1.png)
|
Five Coin |
In the second scene, in the southeast. | _Block_2.png)
|
10 Coins |
Same scene, in the northeast. | _Block_3.png)
|
Five Coin |
Same scene, in the north. | _Block_4.png)
|
Nut |
Same scene, in the northwest. | _Block_5.png)
|
Five Coin |
In the third scene, in the southwest. | _Block_6.png)
|
Five Coin |
Same scene, in the middle-east. | _Block_7.png)
|
| Blue Pi'illo 1 | 8 ? Blocks | ||
Nut |
In the second scene, needs to be brought into the foreground by Sneeze Wind. | _Block_1.png)
|
Five Coin |
In the third scene, in the southwest. Have to be brought into the foreground by Sneeze Wind first. | _Block_2.png)
|
Five Coin |
Same scene, in the southeast. | _Block_3.png)
|
Super Mushroom (middle), Five Coin (rest) |
Same scene, in the middle, above the large platform. Have to be brought into the foreground by Sneeze Wind first. | _Blocks_4-8.png)
|
| Blue Pi'illo 2 | 27 Blocks (26 ?, 1 M) | ||
Coin |
In the second scene, in the middle of the upper part. | _Block_1.png)
|
Mushroom |
In the third scene, in the alcove accessible by a row of ? Blocks (which have to be brought into foreground by Sneeze Wind beforehand). | _Block_2.png)
|
Coin (all 7) |
Same scene, above the first platform. Have to be brought into the foreground by Sneeze Wind first. | _Blocks_3-9.png)
|
Five Coin |
Same scene, in the southeast. | _Block_10.png)
|
10 Coins |
Same scene, in the northeast. | _Block_11.png)
|
Coin (all 10) |
Same scene, in the south. Have to be brought into the foreground by Sneeze Wind first. | _Blocks_12-21.png)
|
Five Coin (middle), Coin (rest) |
Same scene, left of the previous 10. Have to be brought into the foreground by Sneeze Wind first. | _Blocks_22-26.png)
|
Mushroom |
In the second scene, in the middle of the lower part. | _Block_27.png)
|
Dreamy Mushrise Park[edit]
There are a total of 29 Blocks to find in the Dreamy Mushrise Park Dream Worlds:
- The one reached by the Blue Pi'illo holds 1 ? block
- The one reached by the Eldream Pi'illo holds 28 blocks - 16 ?, 2 M, 2 L, 8 Attack Piece
| Item/s | Description | Image |
|---|---|---|
| Blue Pi'illo | 1 ? Block | ||
1-Up Mushroom |
NOTE: Due to wind and boulders, map is unavailable on the exact location, so image is done by the combining the exact location and the last spot where map is available. Above the first platform. |
_Block.png)
|
| Eldream | 28 Blocks (16 ?, 2 M, 2 L, 8 Attack Piece) | ||
Luiginary Ball Attack Piece |
In the second scene, right of the Save Block. | _Block_1.png)
|
Coin |
In the third scene, above the second platform. Have to be brought into the foreground by Sneeze Wind first. | _Block_2.png)
|
Nut |
Same scene, above the fourth platform. Have to be brought into the foreground by Sneeze Wind first. | _Block_3.png)
|
10 Coins |
Same scene, in the middle. Have to be brought into the foreground by Sneeze Wind first. | _Block_4.png)
|
Five Coin, Luiginary Ball Attack Piece |
Same scene, near the exit. ? Block has to be brought into the foreground by Sneeze Wind first. | _Blocks_5-6.png)
|
Luiginary Ball Attack Piece, 10 Coins |
In the fourth scene, above the fourth platform. ? Block has to be brought into the foreground by Sneeze Wind first. | _Blocks_7-8.png)
|
Five Coin |
Same scene, above the fifth platform. Have to be brought into the foreground by Sneeze Wind first. | _Block_9.png)
|
Luiginary Ball Attack Piece |
In the fifth scene, above the turnable platform in the south. | _Block_10.png)
|
Luiginary Ball Attack Piece |
In the ninth scene, at the end of the upper part. | _Block_11.png)
|
Luiginary Ball Attack Piece |
In the tenth scene (Mushrise Park Water-Pipe scene), above the first platform. | _Block_12.png)
|
Coin |
Same scene, above the third-left platform. | _Block_13.png)
|
Syrup Jar |
Same scene, above the fourth-left platform. | _Block_14.png)
|
Luiginary Ball Attack Piece |
Same scene, above the sixth platform. | _Block_15.png)
|
Candy |
In the eleventh scene, at the end of the lower part. | _Block_16.png)
|
Luiginary Ball Attack Piece |
In the twelfth scene, in the southwest. | _Block_17.png)
|
Coin |
Same scene, in the northeast. | _Block_18.png)
|
Super Mushroom |
In the thirteenth scene, at the end. | _Block_19.png)
|
Super Candy |
In the seventh scene, above the cloud. | _Block_20.png)
|
10 Five Coins |
In the sixth scene, above the platform. | _Block_21.png)
|
10 Five Coins |
In the fifth scene, above the stairs in the northwest. | _Block_22.png)
|
10 Coins, Coin Bro Gloves |
In the scene northwest of the fifth scene, at the end. | _Blocks_23-24.png)
|
Supersyrup Jar |
In the fourteenth scene (last non-cloud scene), in the northeast. | _Block_25.png)
|
10 Five Coins |
In the fifteenth scene (first cloud scene), above the second cloud. | _Block_26.png)
|
Candy |
Same scene, above the fourth cloud. | _Block_27.png)
|
Nut |
In the sixteenth scene (second cloud scene), near the exit. | _Block_28.png)
|
Dreamy Dozing Sands[edit]
There are a total of 37 Blocks to find in the Dreamy Dozing Sands Dream Worlds:
- The one reached by the first Deco Pi'illo holds 2 blocks - 1 ?, 1 M
- The one reached by the second Deco Pi'illo holds 2 ? blocks
- The one reached by the third Deco Pi'illo holds 2 ? blocks
- The one reached by the fourth Deco Pi'illo holds 2 ? blocks
- The one reached by the fifth Deco Pi'illo holds 1 ? block
- The one reached by the Dreampoint housing Dream Stone's spirit holds 18 blocks - 5 ?, 1 M, 2 L, 10 Attack Piece
- The one reached by the first Pink Pi'illo holds 1 ? block
- The one reached by the third Pink Pi'illo holds 2 ? blocks
- The one reached by the fourth Pink Pi'illo holds 2 blocks - 1 M, 1 L
- The one reached by the Dreampoint housing Dozing Mattress holds 5 blocks - 4 ?, 1 Red Coin
| Item/s | Description | Image |
|---|---|---|
| Deco Pi'illo 1 | 2 Blocks (1 ?, 1 M) | ||
Five Coin |
In the first scene, near the entrance. | _Block_1.png)
|
Syrup Jar |
Same scene, at the end of the platform. | _Block_2.png)
|
| Deco Pi'illo 2 | 2 ? Blocks | ||
10 Five Coins |
In the second scene, in the middle, on the sixth platform. | _Block_1.png)
|
Nut |
In the third scene, at the end of the second platform. | _Block_2.png)
|
| Deco Pi'illo 3 | 2 ? Blocks | ||
10 Five Coins, Candy |
In the northwest of the scene, above the highest left platform. | _Blocks.png)
|
| Deco Pi'illo 4 | 2 ? Blocks | ||
Shock Bomb |
In the middle of the lower part. | _Block_1.png)
|
Candy |
In the northeast, above the highest right platform. | _Block_2.png)
|
| Deco Pi'illo 5 | 1 ? Block | ||
Syrup Jar |
In the third scene, in the east, above the rightmost platform- | _Block.png)
|
| Dream Stone's spirit Dreampoint | 18 Blocks (5 ?, 1 M, 2 L, 10 Attack Piece) | ||
Luiginary Stack Attack Piece |
In the second scene, above the second platform. | _Block_1.png)
|
Luiginary Stack Attack Piece |
In the fourth scene, above the second platform in the left part. | _Block_2.png)
|
Luiginary Stack Attack Piece |
Same scene, above the highest platform in the right part. | _Block_3.png)
|
Luiginary Stack Attack Piece |
In the fifth scene, in the part accessible by a southeast exit of the previous scene. | _Block_4.png)
|
Five Coin |
Same scene, near the entrance of the scene proper. | _Block_5.png)
|
Refreshing Herb, Luiginary Stack Attack Piece |
Same scene, above the third platform. | _Blocks_6-7.png)
|
Five Coin |
In the sixth scene, near the entrance, above the left platform. | _Block_8.png)
|
Retribution Wear |
In the seventh scene, at the top. | _Block_9.png)
|
Super Mushroom |
In the tenth scene (southwest of the third scene), in the northeast. | _Block_10.png)
|
Luiginary Stack Attack Piece |
Same scene, in the northwest. | _Block_11.png)
|
Nut |
Same scene, in the southwest, near the exit. | _Block_12.png)
|
Luiginary Stack Attack Piece |
In the eleventh scene, above the ground between two spike beds. | _Block_13.png)
|
Luiginary Stack Attack Piece |
Same scene, in the northwest, above the platform near the exit. | _Block_14.png)
|
Shock Bomb, Luiginary Stack Attack Piece |
In the fourteenth scene, above the platform near the entrance. | _Blocks_15-16.png)
|
Luiginary Stack Attack Piece |
Same scene, above the platform near the exit. | _Block_17.png)
|
Syrup Jar |
Same scene, above the fourth platform. | _Block_18.png)
|
| Pink Pi'illo 1 | 1 ? Block | ||
Candy |
At the top of the scene. | _Block.png)
|
| Pink Pi'illo 3 | 2 ? Blocks | ||
1-Up Mushroom, 10-Coin |
Above the fourth platform. | _Blocks.png)
|
| Pink Pi'illo 4 | 2 Blocks (1 M, 1 L) | ||
10 Five Coins |
Above the platform. | _Block_1.png)
|
Nut |
Near the end, left of the Nightmare Chunk. | _Block_2.png)
|
| Dozing Mattress Dreampoint | 5 Blocks (4 ?, 1 Red Coin) | ||
50-Coin |
In the second scene, in the middle. Reachable only with Luiginary Gravity. | _Block_1.png)
|
10-Coin, Ultra Mushroom |
Same scene, in the east. Reachable only with Luiginary Gravity. | _Blocks_2-3.png)
|
Ultrasyrup Jar |
In the third scene, in the northeast. Reachable only with Luiginary Gravity. | _Block_4.png)
|
8 Red Coins |
In the fourth scene, in the middle. | _Block_5.png)
|
Dreamy Wakeport[edit]
There are a total of 55 Blocks to find in the Dreamy Wakeport Dream Worlds:
- The one reached by the Dreampoint with sleeping Big Massif holds 28 blocks - 23 ?, 2 M, 3 Red Coin
- The one reached by the first Pink Pi'illo holds 2 blocks - 1 M, 1 L
- The one reached by the third Pink Pi'illo holds 1 ? block
- The one reached by the Bedsmith Pi'illo holds 23 blocks - 11 ?, 1 M, 1 L, 10 Attack Piece
- The one reached by the fifth Pink Pi'illo holds 1 ? block
| Item/s | Description | Image |
|---|---|---|
| Big Massif Dreampoint | 28 Blocks (23 ?, 2 M, 3 Red Coin) | ||
Five Coin, Supersyrup Jar |
In the second scene, in the east. | _Blocks_1-2.png)
|
Five Coin |
In the scene northeast of the third scene, at the start of the third platform. | _Block_3.png)
|
Five Coin |
In the scene east of the previous one, near the exit. | _Block_4.png)
|
10 Five Coins, Five Coin |
In the scene west of the previous one, in the southwest of the lower part. | _Blocks_5-6.png)
|
Super Mushroom |
Same scene, in the middle of the upper part. Reachable only with slowed down Luiginary Speedometer. | _Block_7.png)
|
Filler Wear |
In the scene west of the scene northwest of the third scene, in the part reached by the upper exit from the previous scene. | _Block_8.png)
|
Five Coin |
Same scene, near the exit pipe. | _Block_9.png)
|
10 Five Coins |
In the first scene of the Thunder Sass area, in the northeast. | _Block_10.png)
|
10-Coin |
Same scene, in the southeast. | _Block_11.png)
|
10-Coin |
In the second scene of the Thunder Sass area, in the middle of the lower part. | _Block_12.png)
|
Super Mushroom |
Same scene, near the exit. Reachable only with slowed down Luiginary Speedometer. | _Block_13.png)
|
4 Five Coins |
In the first scene of the Heavy Zest area, near the entrance pipe. Reachable only with slowed down Luiginary Speedometer. | _Block_14.png)
|
8 Red Coins |
Same scene, at the top. | _Block_15.png)
|
8 Red Coins, Five Coin (both) |
Same scene, in the middle. | _Blocks_16-18.png)
|
8 Red Coins |
Same scene, above the lowest platform. | _Block_19.png)
|
10 Five Coins |
In the second scene of the Heavy Zest area, in the southwest. | _Block_20.png)
|
Super Candy |
Same scene, in the middle-east. | _Block_21.png)
|
10 Five Coins |
In the third scene of the Heavy Zest area, in the southeast. | _Block_22.png)
|
Five Coin, Boo Biscuit, 10 Five Coins, 10-Coin |
Same scene, above the large platform near the exit. 3 out of 4 blocks are reachable only with slowed down Luiginary Speedometer. | _Blocks_23-26.png)
|
Refreshing Herb |
In the third scene of the Sorrow Fist area, in the northwest. | _Block_27.png)
|
10-Coin |
Same scene, near the exit. | _Block_28.png)
|
| Pink Pi'illo 1 | 2 Blocks (1 M, 1 L) | ||
10 10-Coins |
In the middle of the lower part | _Block_1.png)
|
Boo Biscuit |
Above the second stone platform. | _Block_2.png)
|
| Pink Pi'illo 3 | 1 ? Block | ||
Lucky Gloves |
In the second scene, left of the highest left platform. | _Block.png)
|
| Bedsmith | 23 Blocks (11 ?, 1 M, 1 L, 10 Attack Piece) | ||
10-Coin |
In the first scene, in the lower part accessible from the second scene. | _Block_1.png)
|
Luiginary Wall Attack Piece |
In the third scene, above the platform. | _Block_2.png)
|
Luiginary Wall Attack Piece |
In the fourth scene, near the exit, above the red platform. | _Block_3.png)
|
Luiginary Wall Attack Piece |
Same scene, left of the first two platforms. | _Block_4.png)
|
Luiginary Wall Attack Piece |
In the scene west of the fourth scene, at the end. | _Block_5.png)
|
Luiginary Wall Attack Piece |
In the fifth scene, at the end of the lower part. | _Block_6.png)
|
50-Coin |
In the sixth scene (west of the fifth scene), above the left platform next to the upper leftmost platform. | _Block_7.png)
|
Luiginary Wall Attack Piece |
Same scene, above the upper rightmost platform. | _Block_8.png)
|
Luiginary Wall Attack Piece |
In the fifth scene, above the highest platform, reached by jumping from left parasol. | _Block_9.png)
|
Luiginary Wall Attack Piece |
In the seventh scene, above the red platform, right of the last platform. | _Block_10.png)
|
Ultrasyrup Jar |
In the eighth scene, at the end of the lower part. | _Block_11.png)
|
Luiginary Wall Attack Piece |
Same scene, at the end of the middle part. | _Block_12.png)
|
50-Coin |
Same scene, above the second-to-last platform. | _Block_13.png)
|
DoB Wear, Max Mushroom, Luiginary Wall Attack Piece |
In the scene accessed from the left pipe in ninth scene. | _Blocks_14-16.png)
|
Ultra Mushroom (middle), 50-Coin (rest) |
In the tenth scene, in the west part, under the platforms. | _Blocks_17-19.png)
|
10 10-Coins, Secret Box |
In the eleventh scene, above the highest leftmost platform. | _Blocks_20-21.png)
|
10-Coin |
Same scene, above the platform near the start of the upper part. | _Block_22.png)
|
Ultra Mushroom |
Same scene, above the green platform in the upper part. | _Block_23.png)
|
| Pink Pi'illo 5 | 1 ? Block | ||
Silver Statue |
In the middle of the ceiling. Reachable only with Luiginary Gravity. | _Block.png)
|
Dreamy Mount Pajamaja[edit]
There are a total of 71 Blocks to find in the Dreamy Mount Pajamaja Dream Worlds:
- The one reached by the Mega Pi'illo Phil holds 2 blocks - 1 ?, 1 M
- The one reached by the Mega Pi'illo Lowe holds 5 blocks - 3 ?, 1 M, 1 L
- The one reached by the Mega Pi'illo Cush holds 2 blocks - 1 ?, 1 L
- The one reached by the Mega Pi'illo Shawn holds 2 ? blocks
- The one reached by the Dreampoint on the peak of the mountain holds 53 blocks - 34 ?, 4 M, 5 L, 10 Attack Piece
- The one reached by the second Pink Pi'illo holds 2 blocks - 1 ?, 1 M
- The one reached by the fourth Pink Pi'illo holds 3 ? blocks
- The one reached by the Dreampoint housing Pajamaja Rock Frame holds 2 ? blocks
| Item/s | Description | Image |
|---|---|---|
| Mega Pi'illo Phil | 2 Blocks (1 ?, 1 M) | ||
Five Coin |
In the first scene, above the left-most platform. | _Block_1.png)
|
Super Mushroom |
Same scene, above the upper right-most platform. | _Block_2.png)
|
| Mega Pi'illo Lowe | 5 Blocks (3 ?, 1 M, 1 L) | ||
Five Coin |
Near the end of the lower part. | _Block_1.png)
|
10 Five Coins |
End of the lower part. | _Block_2.png)
|
Five Coin |
Near the start of the upper part. | _Block_3.png)
|
Supersyrup Jar, 10-Coin |
Middle of the upper part. | _Blocks_4-5.png)
|
| Mega Pi'illo Cush | 2 Blocks (1 ?, 1 L) | ||
Taunt Ball |
In the first scene, in the middle of the upper part. | _Block_1.png)
|
Ultra Candy |
Same scene, at the end of the middle part. | _Block_2.png)
|
| Mega Pi'illo Shawn | 2 ? Blocks | ||
10-Coin |
In the second scene, near the exit, high in the air. | _Block_1.png)
|
Hiking Boots |
In the third scene, in the upper-east part. | _Block_2.png)
|
| Peak Dreampoint | 53 Blocks (34 ?, 4 M, 5 L, 10 Attack Piece) | ||
Ultrasyrup Jar |
In the second scene, above the shop. | _Block_1.png)
|
10-Coin |
In the third scene, in the middle, above the highest platform. | _Block_2.png)
|
Luiginary Hammer Attack Piece |
Same scene, in the southeast. | _Block_3.png)
|
Super Candy |
In the fourth scene, near the entrance. | _Block_4.png)
|
Five Coin |
Same scene, in the middle, above the only platform. | _Block_5.png)
|
10-Coin, 10 Five Coins, Luiginary Hammer Attack Piece |
Same scene, in the lower east. | _Blocks_6-8.png)
|
Taunt Ball, Five Coin |
Same scene, in the upper east. | _Blocks_9-10.png)
|
10-Coin |
In the fifth scene, at the end of the lower part. | _Block_11.png)
|
Super Nut |
Same scene, above the upper leftmost platform. | _Block_12.png)
|
Luiginary Hammer Attack Piece |
Same scene, above the highest platform before the upper part of the scene. | _Block_13.png)
|
Five Coin |
Same scene, start of the upper part. | _Block_14.png)
|
Luiginary Hammer Attack Piece |
Same scene, above the middle platform above the upper part. | _Block_15.png)
|
10-Coin |
In the sixth scene, above the second fist. | _Block_16.png)
|
10 Five Coins |
Same scene, above the fourth fist. | _Block_17.png)
|
Luiginary Hammer Attack Piece |
Same scene, above the first bridge. | _Block_18.png)
|
Supersyrup Jar, Five Coin |
Same scene, above the second bridge. | _Blocks_19-20.png)
|
Supersyrup Jar |
In the seventh scene, before the last platform in the upper part. | _Block_21.png)
|
Super Nut |
Same scene, after the same platform. | _Block_22.png)
|
Five Coin |
In the eighth scene, near the eastern exit. | _Block_23.png)
|
10 Five Coins |
Same scene, above the platform near the northwestern exit. | _Block_24.png)
|
Refreshing Herb |
Same scene, above the rightmost platform. | _Block_25.png)
|
Luiginary Hammer Attack Piece |
Same scene, above the highest platform. | _Block_26.png)
|
Ultra Mushroom, Ultra Nut |
In the scene east of the eighth scene, at the end. | _Blocks_27-28.png)
|
Luiginary Hammer Attack Piece |
In the ninth scene, in the west of the middle part. | _Block_29.png)
|
10 10-Coins, Five Coin |
In the scene east of the ninth scene, near the entrance. | _Blocks_30-31.png)
|
Koopa Troopa Wear, Luiginary Hammer Attack Piece |
Same scene, above the second and third platforms. | _Blocks_32-33.png)
|
Ultrasyrup Jar |
Same scene, above the fifth platform. | _Block_34.png)
|
Luiginary Hammer Attack Piece |
In the eleventh scene, in the east of the middle part. | _Block_35.png)
|
Super Candy |
Same scene, in the west of the upper part. | _Block_36.png)
|
Luiginary Hammer Attack Piece |
In the scene west of the eleventh scene, above the first platform. | _Block_37.png)
|
10-Coin |
Same scene, near the exit. | _Block_38.png)
|
Boo Biscuit |
In the twelfth scene, above the second platform. | _Block_39.png)
|
10-Coin |
Same scene, above the fourth platform. | _Block_40.png)
|
10-Coin, 10 Five Coin, Supersyrup Jar |
In the fourteenth scene, in the east of the lower part. | _Blocks_41-43.png)
|
Five Coin |
Same scene, in the west of the middle part. | _Block_44.png)
|
10 10-Coins |
Same scene, in the upper east of the upper part. | _Block_45.png)
|
Five Coin, 10-Coin |
In the scene east of the fourteenth scene, above the ground before the gorund with the warp pipe. | _Blocks_46-47.png)
|
Ultra Candy |
Same scene, above the ground with the warp pipe, left of the said pipe. | _Block_48.png)
|
Super Nut |
In the fifteenth scene, in the upper east part. | _Block_49.png)
|
Super Candy |
Same scene, in the upper west part. | _Block_50.png)
|
Five Coin |
In the seventeenth scene, above the icy platform. | _Block_51.png)
|
Five Coin |
Same scene, above the last platform. | _Block_52.png)
|
Super Candy |
In the last scene, above the platform. | _Block_53.png)
|
| Pink Pi'illo 2 | 2 Blocks (1 ?, 1 M) | ||
10 Five Coins |
In the east of the upper part. | _Block_1.png)
|
Secret Box |
In the east of the lower part. | _Block_2.png)
|
| Pink Pi'illo 4 | 3 ? Blocks | ||
Supersyrup Jar, 10-Coin |
In the northeast. | _Blocks_1-2.png)
|
Super Mushroom |
In the southeast. | _Block_3.png)
|
| Pajamaja Rock Frame Dreampoint | 2 ? Blocks | ||
10 10-Coins |
In the second scene, above the fourth platform. | _Block_1.png)
|
10 50-Coins |
In the first scene, in the part reachable from the second scene, near the end. | _Block_2.png)
|
Dreamy Driftwood Shore[edit]
There are a total of 39 Blocks to find in the Dreamy Driftwood Shore Dream Worlds:
- The one reached by the Dreampoint housing Seadric holds 29 blocks - 15 ?, 2 M, 2 L, 10 Attack Piece
- The one reached by the Dreampoint housing Seabury holds 3 blocks - 1 ?, 1 M, 1 L
- The one reached by the first Pink Pi'illo holds 5 blocks - 3 ?, 1 M, 1 L
- The one reached by the second Pink Pi'illo holds 1 ? block
- The one reached by the third Pink Pi'illo holds 2 ? blocks
| Item/s | Description | Image |
|---|---|---|
| Seadric Dreampoint | 29 Blocks (15 ?, 2 M, 2 L, 10 Attack Piece) | ||
Luiginary Flame Attack Piece |
In the first scene, right of the Dream Portal. | _Block_1.png)
|
10-Coin |
NOTE: Following 10 blocks are available only after returning here with one Dream Egg. In the third scene, near the exit pipe. |
_Block_2.png)
|
10-Coin, 50-Coin, 10-Coin, Luiginary Flame Attack Piece |
In the fifth scene, in the east part. The Attack Piece Block is reachable only with Luiginary Gravity. | _Blocks_3-6.png)
|
Luiginary Flame Attack Piece |
In the scene accessed from the west pipe in the fifth scene, in the northwest. Reachable only with Luiginary Gravity. | _Block_7.png)
|
Ultra Mushroom |
Same scene, in the "maze" part, in the southeast. Reachable only with Luiginary Gravity. | _Block_8.png)
|
Luiginary Flame Attack Piece |
Same scene, same part, in the northwest. Reachable only with Luiginary Gravity. | _Block_9.png)
|
Supersyrup Jar |
In the sixth scene, right of the second platform. | _Block_10.png)
|
Luiginary Flame Attack Piece |
Same scene, above the sixth platform. | _Block_11.png)
|
Super Candy |
NOTE: Following 15 blocks are available only after returning here with two Dream Eggs. In the ninth scene, near the exit pipe. |
_Block_12.png)
|
Luiginary Flame Attack Piece |
In the tenth scene, in the west. Reachable only with Luiginary Gravity. | _Block_13.png)
|
Super Nut |
In the eleventh scene, in the northwest. Reachable only with Luiginary Gravity. | _Block_14.png)
|
Ultra Candy, 10 50-Coins |
In the scene accessed by a green pipe in the ground in the eleventh scene, above the fourth and fifth platforms | _Blocks_15-16.png)
|
Luiginary Flame Attack Piece |
Same scene, in the northwest. | _Block_17.png)
|
Ultrasyrup Jar |
In the twelfth scene, in the northeast. Reachable only with Luiginary Gravity. | _Block_18.png)
|
50-Coin |
NOTE: Due to block being above spikes and Bros are moving, map is unavailable on the exact location, so image is done by the combining the exact location and the last spot where map is available. Also applies for the next block. In the thirteenth scene, in the middle, in the air. Reachable only with cone Luiginoid Formation, using Spin Jump and Hover Spin techniques. |
_Block_19.png)
|
50-Coin |
Same scene, in the air, after the spike bed. Reachable only with cone Luiginoid Formation, using Spin Jump and Hover Spin techniques. | _Block_20.png)
|
10-Coin (all 3) |
In the fourteenth scene, in the southwest. | _Blocks_21-23.png)
|
Luiginary Flame Attack Piece |
Same scene, above the previous three. | _Block_24.png)
|
Luiginary Flame Attack Piece |
In the fifteenth scene, in the west. | _Block_25.png)
|
Luiginary Flame Attack Piece |
Same scene, in the east, reachable after stone block rises. | _Block_26.png)
|
POW Scarf |
NOTE: Following three blocks are available only after returning here with three Dream Eggs. In the seventeenth scene, above the second platform. |
_Block_27.png)
|
Ultra Candy |
In the eighteenth scene, in the lower part reachable from nineteenth scene. | _Block_28.png)
|
Ultra Mushroom |
In the twentieth scene, in the northeast. Reachable only with Luiginary Gravity. | _Block_29.png)
|
| Seabury Dreampoint | 3 Blocks (1 ?, 1 M, 1 L) | ||
10-Coin |
In the first scene, in the middle of the upper part. | _Block_1.png)
|
Ultra Candy |
Same scene, at the end of the lower part. | _Block_2.png)
|
Refreshing Herb |
In the second scene, left of the third platform. | _Block_3.png)
|
| Pink Pi'illo 1 | 5 Blocks (3 ?, 1 M, 1 L) | ||
10-Coin, Super Nut, 10-Coin, 10 10-Coins |
In the second scene, near the entrance. | _Blocks_1-4.png)
|
Rookie Gloves |
In the first scene, in the upper part reachable from the second scene. | _Block_5.png)
|
| Pink Pi'illo 2 | 1 ? Block | ||
Silver Statue |
In the middle. | _Block.png)
|
| Pink Pi'illo 3 | 2 ? Blocks | ||
Ultrasyrup Jar, 10 10-Coins |
At the very top. | _Blocks.png)
|
Dream's Deep[edit]
There are a total of 2 ? Blocks to find in the Dream's Deep Dream World reached by a portal in Dreamy Pi'illo Castle reached by Dreampoint.
| Item/s | Description | Image |
|---|---|---|
| Dream's Deep | 2 ? Blocks | ||
Ultrasyrup Jar |
In the fifth scene, left of the lower platform. | _Block_1.png)
|
Secret Box |
Same scene, near the exit. | _Block_2.png)
|
Dreamy Somnom Woods[edit]
There are a total of 62 Blocks to find in the Dreamy Somnom Woods Dream Worlds:
- The one reached by first Pi'illo Master holds 2 ? blocks
- The one reached by second Pi'illo Master holds 5 ? blocks
- The one reached by third Pi'illo Master holds 2 blocks - 1 ?, 1 L
- The one reached by fourth Pi'illo Master holds 1 ? block
- The one reached by fifth Pi'illo Master holds 4 ? blocks
- The one reached by Dreampoint holds 39 blocks - 25 ?, 2 M, 1 L, 10 Attack Piece, 1 Red Coin
- The one reached by first Pink Pi'illo holds 2 ? blocks
- The one reached by second Pink Pi'illo holds 3 blocks - 2 ?, 1 L
- The one reached by third Pink Pi'illo holds 1 ? block
- The one reached by fourth Pink Pi'illo holds 2 blocks - 1 ?, 1 M
- The one reached by fifth Pink Pi'illo holds 1 ? block
| Item/s | Description | Image |
|---|---|---|
| Pi'illo Master 1 | 2 ? Blocks | ||
50-Coin |
Above the platform in the middle of the scene. Reachable with the help of Luiginary Propeller. | _Block_1.png)
|
Ultra Candy |
Above the platform with the wall next to it (the left one). Luiginary Propeller must be active to reach the block. | _Block_2.png)
|
| Pi'illo Master 2 | 5 ? Blocks | ||
50-Coin |
In the first scene, in the southeast. | _Block_1.png)
|
100-Coin |
In the second scene, in the part reached by the lowest exit in the first scene. | _Block_2.png)
|
50-Coin |
Same scene, in the west of the scene. | _Block_3.png)
|
Taunt Ball |
Same scene, above the middle leftmost platform reached by lower right Luiginary Stache Tree. | _Block_4.png)
|
Max Mushroom |
Same scene. above the highest leftomost platform, reached by upper Luiginary Stache Tree. | _Block_5.png)
|
| Pi'illo Master 3 | 2 Blocks (1 ?, 1 L) | ||
50-Coin, Ultra Mushroom |
In the first scene, after going left from Dream Portal. | _Blocks.png)
|
| Pi'illo Master 4 | 1 ? Block | ||
Ultra Mushroom |
In the first scene, at the end of the second platform. | _Block.png)
|
| Pi'illo Master 5 | 4 ? Blocks | ||
Boo Biscuit |
In the first scene, near the exit, partially hidden by leaves. | _Block_1.png)
|
Ultrasyrup Jar |
In the second scene, above the leftmost platform. | _Block_2.png)
|
Ultra Nut |
Same scene, above the platform right of the fourth platform. | _Block_3.png)
|
50-Coin |
Same scene, above the highest platform, left of the Nightmare Chunk. | _Block_4.png)
|
| Dreampoint | 39 Blocks (25 ?, 2 M, 1 L, 10 Attack Piece, 1 Red Coin) | ||
Ultra Nut |
After going through the lower pipe in the first scene, failing both challenges in the next scene and leaving through west exit. | _Block_1.png)
|
Max Syrup Jar, 10 50-Coins, EXP Boots DX |
Same process as the last one but completing the kill monster challenge and then leaving through west exit. | _Blocks_2-4.png)
|
Luiginary Typhoon Attack Piece |
In the scene 2 scenes after completing the coin challenge in the challenge room, in the east of the west part. | _Block_5.png)
|
50-Coin |
In the scene with multiple pipes, near the entrance. | _Block_6.png)
|
50-Coin (? Blocks), Refreshing Herb |
Same scene, above the third platform after going through first pipe. | _Blocks_7-11.png)
|
Luiginary Typhoon Attack Piece |
Same scene, after going through the cross-shaped pipes. | _Block_12.png)
|
Ultrasyrup Jar |
In the scene east of the scene reached by completing coin challenge, near the entrance. Reachable only with Luiginary Propeller activated. | _Block_13.png)
|
8 Red Coins |
In the scene east of the previous one, near the entrance. | _Block_14.png)
|
Luiginary Typhoon Attack Piece |
Same scene, at the top. | _Block_15.png)
|
Ultra Candy |
In the scene reached by lower exit from previous scene. | _Block_16.png)
|
Ultra Candy |
In the scene reached by upper exit from red coin scene, above the middle platform. | _Block_17.png)
|
100-Coin |
In the scene with multiple pipes, in the part reached from the previous scene. | _Block_18.png)
|
Refreshing Herb, Luiginary Typhoon Attack Piece |
In the red coin scene, in the part reached from the scene east of it. | _Blocks_19-20.png)
|
Luiginary Typhoon Attack Piece |
In the scene first covered with leaves, in the middle. | _Block_21.png)
|
50-Coin |
Same scene, above the previous one. | _Block_22.png)
|
Ultra Mushroom |
Same scene, in the northwest. | _Block_23.png)
|
Luiginary Typhoon Attack Piece |
In the multiple pipes scene, above the row of blocks. | _Block_24.png)
|
10 50-Coins |
In the scene west of the tree scene, in the part reached by lower middle exit. | _Block_25.png)
|
Max Nut |
In the scene west of the previous one, in the part reached by the upper exit. | _Block_26.png)
|
Luiginary Typhoon Attack Piece |
Same scene, in the part reached by the middle exit. | _Block_27.png)
|
Luiginary Typhoon Attack Piece |
Same scene, after reached the main part reached by lower exit, then going all the way up. | _Block_28.png)
|
Ultra Nut |
In the scene west of the previous one, in the part reached by upper middle exit. | _Block_29.png)
|
Luiginary Typhoon Attack Piece |
Same scene, in the part reached by lower middle exit. | _Block_30.png)
|
Max Nut |
In the scene reached by a pipe from the previous scene, in the middle of the lower part. | _Block_31.png)
|
Ultrasyrup Jar |
Same scene, left of the left leaves. | _Block_32.png)
|
Luiginary Typhoon Attack Piece |
Same scene, above the platform above the exit pipe. | _Block_33.png)
|
Shock Bomb |
After going through said pipe, block is found left of the sixth platform. Reachable only with Luiginary Propeller activated. | _Block_34.png)
|
Taunt Ball |
In the scene east of this one, in the part reached by upper exit (not the pipe). | _Block_35.png)
|
Refreshing Herb |
In the previous scene, near the exit pipe. Reachable only with Luiginary Propeller activated. | _Block_36.png)
|
Ultrasyrup Jar |
Same scene, above the large platform left of exit pipe. | _Block_37.png)
|
Ultra Candy |
In the scene west of the tree scene, in the part reached by the pipe (on the map reached by the upper west exit of the tree scene) | _Block_38.png)
|
Max Candy |
In the second-to-last scene, near the exit. | _Block_39.png)
|
| Pink Pi'illo 1 | 2 ? Blocks | ||
10 50-Coins |
In the northeast. | _Block_1.png)
|
Refreshing Herb |
In the middle-west, after going through upper pipe. | _Block_2.png)
|
| Pink Pi'illo 2 | 3 Blocks (2 ?, 1 L) | ||
10 50-Coins |
Above the fifth platform. | _Block_1.png)
|
Secret Box |
At the end of the sixth platform. | _Block_2.png)
|
Refreshing Herb |
At the west end of the seventh platform. | _Block_3.png)
|
| Pink Pi'illo 3 | 1 ? Block | ||
Gift Gloves DX |
At the end, right of the Nightmare Chunk. | _Block.png)
|
| Pink Pi'illo 4 | 2 Blocks (1 ?, 1 M) | ||
10 50-Coins |
Right of the Dream Portal. | _Block_1.png)
|
Gold Statue |
Above the right-most platform. | _Block_2.png)
|
| Pink Pi'illo 5 | 1 ? Block | ||
Flame Hammer DX |
Between the two sets of leaves. | _Block.png)
|
Dreamy Neo Bowser Castle[edit]
There are a total of 45 Blocks to find in the Dreamy Neo Bowser Castle Dream Worlds:
- The one reached by first Koopa Clown Car Dreampoint holds 20 blocks - 19 ?, 1 Red Coin
- The one reached by second Koopa Clown Car Dreampoint holds 4 blocks - 3 ?, 1 M
- The one reached by third Koopa Clown Car Dreampoint holds 5 blocks - 4 ?, 1 L
- The one reached by fourth Koopa Clown Car Dreampoint holds 3 blocks - 1 ?, 1 L, 1 Red Coin
- The one reached by first Dark Stone platform Dreampoint holds 1 ? block
- The one reached by second Dark Stone platform Dreampoint holds 3 blocks - 2 ?, 1 M
- The one reached by Dreampoint with the sleeping Bowser holds 9 blocks - 7 ?, 1 M, 1 L
| Item/s | Description | Image |
|---|---|---|
| Koopa Clown Car Dreampoint 1 | 20 Blocks (19 ?, 1 Red Coin) | ||
50-Coin (upper right), 100-Coin (rest) |
In the third scene, left of the entrance pipe. Reachable only with Luiginary Antigravity. | _Blocks_1-3.png)
|
Refreshing Herb (right), 50-Coin (rest) |
Same scene, in the south. Reachable only with Luiginary Antigravity. | _Blocks_4-6.png)
|
Ultra Candy |
Same scene, in the northeast. Reachable only with Luiginary Antigravity. | _Block_7.png)
|
8 Red Coins and 44 Coins |
In the fourth scene, near the exit. Reachable only with Luiginary Antigravity. | _Block_8.png)
|
Max Nut |
In the fifth scene, in the southwest. Reachable only with Luiginary Antigravity. | _Block_9.png)
|
Max Mushroom |
Same scene, in the southeast. Reachable only with Luiginary Antigravity. | _Block_10.png)
|
100-Coin |
Same scene, in the northeast. Reachable only with Luiginary Antigravity. | _Block_11.png)
|
50-Coin |
In the sixth scene, near the entrance. | _Block_12.png)
|
50-Coin |
Same scene, above the upper middle platform. | _Block_13.png)
|
Ultra Mushroom |
Same scene, above the right platform. | _Block_14.png)
|
Max Syrup Jar |
In the second scene, in the part reachable only from previous scene. | _Block_15.png)
|
100-Coin |
In the seventh scene, in the middle. Reachable only with Luiginary Antigravity. | _Block_16.png)
|
Max Candy |
Same scene, in the northeast. Reachable only with Luiginary Antigravity. | _Block_17.png)
|
Ultra Nut |
In the second scene, in the middle of the main part. Reachable only with Luiginary Antigravity. | _Block_18.png)
|
Max Mushroom |
Same scene, in the southeast of the main part. | _Block_19.png)
|
100-Coin |
In the eighth part, near the exit pipe. | _Block_20.png)
|
| Koopa Clown Car Dreampoint 2 | 4 Blocks (3 ?, 1 M) | ||
Max Candy |
In the second scene, in the east. | _Block_1.png)
|
Max Candy |
In the third scene, at the very top. | _Block_2.png)
|
100-Coin |
In the fourth scene, near the entrance. | _Block_3.png)
|
Ultrasyrup Jar |
In the fifth scene, at the end. | _Block_4.png)
|
| Koopa Clown Car Dreampoint 3 | 5 Blocks (4 ?, 1 L) | ||
10 50-Coins |
In the first scene, right of the Dream Portal. | _Block_1.png)
|
50-Coin |
Same scene, near the west exit. | _Block_2.png)
|
Refreshing Herb |
In the second scene, in the west. | _Block_3.png)
|
Ultrasyrup Jar |
In the third scene, near the exit, under the platforms. | _Block_4.png)
|
Dark Boots |
In the fifth scene, right of the exit pipe. | _Block_5.png)
|
| Koopa Clown Car Dreampoint 4 | 3 Blocks (1 ?, 1 L, 1 Red Coin) | ||
8 Red Coins |
In the second scene, in the west. Reachable only with Luiginary Antigravity. | _Block_1.png)
|
100-Coin, Refreshing Herb |
In the third scene, above the platform. | _Blocks_2-3.png)
|
| Dark Stone Platform Dreampoint 1 | 1 ? Block | ||
Max Nut |
In the second scene, near the exit. | _Block.png)
|
| Dark Stone Platform Dreampoint 2 | 3 Blocks (2 ?, 1 M) | ||
100-Coin, 50-Coin |
In the first scene, near the east exit. | _Blocks_1-2.png)
|
Max Nut |
Same scene, above the previous two. | _Block_3.png)
|
| Bowser Dreampoint | 9 Blocks (7 ?, 1 M, 1 L) | ||
Max Mushroom |
In the second scene, near the exit pipe. | _Block_1.png)
|
Secret Box |
In the fourth scene, in the middle. | _Block_2.png)
|
10 100-Coins |
Same scene, near the exit. | _Block_3.png)
|
10 50-Coins |
In the sixth scene, in the middle. | _Block_4.png)
|
Max Nut |
Same scene, above the first straight platform. | _Block_5.png)
|
Max Candy |
In the ninth scene, above the right middle platform. | _Block_6.png)
|
100-Coin |
In the tenth scene (east of the first scene), near the entrance. | _Block_7.png)
|
Max Syrup Jar |
Same scene, near the west exit. | _Block_8.png)
|
Max Candy |
In the eleventh scene, at the very top, before the cannon. | _Block_9.png)
|
Statistics[edit]
This chart shows the number of blocks that can be emptied and the type of the block. Locations are listed in the order the player can visit them.
| Location | ? Blocks | M Blocks | L Blocks | Attack Piece Blocks | Red Coin Blocks | Total |
|---|---|---|---|---|---|---|
| Dreamy Pi'illo Castle (Dreampoint) | 6 | 1 | 1 | 0 | 0 | 8 |
| Dreamy Pi'illo Castle (Pink Pi'illo) | 7 | 0 | 0 | 0 | 0 | 7 |
| Dreamy Pi'illo Castle (Blue Pi'illo 1) | 8 | 0 | 0 | 0 | 0 | 8 |
| Dreamy Pi'illo Castle (Blue Pi'illo 2) | 26 | 1 | 0 | 0 | 0 | 27 |
| Dreamy Mushrise Park (Blue Pi'illo) | 1 | 0 | 0 | 0 | 0 | 1 |
| Dreamy Mushrise Park (Eldream) | 16 | 2 | 2 | 8 | 0 | 28 |
| Dreamy Dozing Sands (Deco Pi'illo 1) | 1 | 1 | 0 | 0 | 0 | 2 |
| Dreamy Dozing Sands (Deco Pi'illo 2) | 2 | 0 | 0 | 0 | 0 | 2 |
| Dreamy Dozing Sands (Deco Pi'illo 3) | 2 | 0 | 0 | 0 | 0 | 2 |
| Dreamy Dozing Sands (Deco Pi'illo 4) | 2 | 0 | 0 | 0 | 0 | 2 |
| Dreamy Dozing Sands (Deco Pi'illo 5) | 1 | 0 | 0 | 0 | 0 | 1 |
| Dreamy Dozing Sands (Dream Stone's spirit Dreampoint) | 5 | 1 | 2 | 10 | 0 | 18 |
| Dreamy Dozing Sands (Pink Pi'illo 1) | 1 | 0 | 0 | 0 | 0 | 1 |
| Dreamy Dozing Sands (Pink Pi'illo 3) | 2 | 0 | 0 | 0 | 0 | 2 |
| Dreamy Dozing Sands (Pink Pi'illo 4) | 0 | 1 | 1 | 0 | 0 | 2 |
| Dreamy Wakeport (Big Massif Dreampoint) | 23 | 2 | 0 | 0 | 3 | 28 |
| Dreamy Wakeport (Pink Pi'illo 1) | 0 | 1 | 1 | 0 | 0 | 2 |
| Dreamy Wakeport (Pink Pi'illo 3) | 1 | 0 | 0 | 0 | 0 | 1 |
| Dreamy Mount Pajamaja (Mega Pi'illo Phil) | 1 | 1 | 0 | 0 | 0 | 2 |
| Dreamy Mount Pajamaja (Mega Pi'illo Lowe) | 3 | 1 | 1 | 0 | 0 | 5 |
| Dreamy Mount Pajamaja (Mega Pi'illo Cush) | 1 | 0 | 1 | 0 | 0 | 2 |
| Dreamy Mount Pajamaja (Mega Pi'illo Shawn) | 2 | 0 | 0 | 0 | 0 | 2 |
| Dreamy Mount Pajamaja (Peak Dreampoint) | 34 | 4 | 5 | 10 | 0 | 53 |
| Dreamy Mount Pajamaja (Pink Pi'illo 2) | 1 | 1 | 0 | 0 | 0 | 2 |
| Dreamy Mount Pajamaja (Pink Pi'illo 4) | 3 | 0 | 0 | 0 | 0 | 3 |
| Dreamy Driftwood Shore (Seadric Dreampoint) | 15 | 2 | 2 | 10 | 0 | 29 |
| Dreamy Driftwood Shore (Seabury Dreampoint) | 1 | 1 | 1 | 0 | 0 | 3 |
| Dreamy Driftwood Shore (Pink Pi'illo 1) | 3 | 1 | 1 | 0 | 0 | 5 |
| Dream's Deep (Dreamy Pi'illo Castle) | 2 | 0 | 0 | 0 | 0 | 2 |
| Dreamy Dozing Sands (Dozing Mattress Dreampoint) | 4 | 0 | 0 | 0 | 1 | 5 |
| Dreamy Mount Pajamaja (Pajamaja Rock Frame Dreampoint) | 2 | 0 | 0 | 0 | 0 | 2 |
| Dreamy Driftwood Shore (Pink Pi'illo 2) | 1 | 0 | 0 | 0 | 0 | 1 |
| Dreamy Driftwood Shore (Pink Pi'illo 3) | 2 | 0 | 0 | 0 | 0 | 2 |
| Dreamy Wakeport (Bedsmith) | 11 | 1 | 1 | 10 | 0 | 23 |
| Dreamy Wakeport (Pink Pi'illo 5) | 1 | 0 | 0 | 0 | 0 | 1 |
| Dreamy Somnom Woods (Pi'illo Master 1) | 2 | 0 | 0 | 0 | 0 | 2 |
| Dreamy Somnom Woods (Pi'illo Master 2) | 5 | 0 | 0 | 0 | 0 | 5 |
| Dreamy Somnom Woods (Pi'illo Master 3) | 1 | 0 | 1 | 0 | 0 | 2 |
| Dreamy Somnom Woods (Pi'illo Master 4) | 1 | 0 | 0 | 0 | 0 | 1 |
| Dreamy Somnom Woods (Pi'illo Master 5) | 4 | 0 | 0 | 0 | 0 | 4 |
| Dreamy Somnom Woods (Dreampoint) | 25 | 2 | 1 | 10 | 1 | 39 |
| Dreamy Somnom Woods (Pink Pi'illo 1) | 2 | 0 | 0 | 0 | 0 | 2 |
| Dreamy Somnom Woods (Pink Pi'illo 2) | 2 | 0 | 1 | 0 | 0 | 3 |
| Dreamy Somnom Woods (Pink Pi'illo 3) | 1 | 0 | 0 | 0 | 0 | 1 |
| Dreamy Somnom Woods (Pink Pi'illo 4) | 1 | 1 | 0 | 0 | 0 | 2 |
| Dreamy Somnom Woods (Pink Pi'illo 5) | 1 | 0 | 0 | 0 | 0 | 1 |
| Dreamy Neo Bowser Castle (Koopa Clown Car Dreampoint 1) | 19 | 0 | 0 | 0 | 1 | 20 |
| Dreamy Neo Bowser Castle (Koopa Clown Car Dreampoint 2) | 3 | 1 | 0 | 0 | 0 | 4 |
| Dreamy Neo Bowser Castle (Koopa Clown Car Dreampoint 3) | 4 | 0 | 1 | 0 | 0 | 5 |
| Dreamy Neo Bowser Castle (Koopa Clown Car Dreampoint 4) | 1 | 0 | 1 | 0 | 1 | 3 |
| Dreamy Neo Bowser Castle (Dark Stone Platform Dreampoint 1) | 1 | 0 | 0 | 0 | 0 | 1 |
| Dreamy Neo Bowser Castle (Dark Stone Platform Dreampoint 2) | 2 | 1 | 0 | 0 | 0 | 3 |
| Dreamy Neo Bowser Castle (Bowser Dreampoint) | 7 | 1 | 1 | 0 | 0 | 9 |
| Total | 275 | 27 | 24 | 58 | 7 | 391 |
See also[edit]
- List of real world blocks in Mario & Luigi: Dream Team
- List of beanholes in Mario & Luigi: Dream Team
- Pi'illo
- List of blocks in Mario & Luigi: Superstar Saga
- List of blocks in Mario & Luigi: Partners in Time
- List of blocks in Mario & Luigi: Bowser's Inside Story
- List of blocks in Mario & Luigi: Paper Jam
- List of blocks in Mario & Luigi: Superstar Saga + Bowser's Minions
- List of blocks in Mario & Luigi: Bowser's Inside Story + Bowser Jr.'s Journey
- List of blocks in Mario & Luigi: Brothership