Mount Pajamaja: Difference between revisions
m (→Description) |
Scrooge200 (talk | contribs) No edit summary |
||
| (22 intermediate revisions by 10 users not shown) | |||
| Line 1: | Line 1: | ||
{{ | {{about|the [[Pi'illo Island]] location|the [[List of bosses|boss]] fought by Giant Luigi in the [[Dream World]]|[[Mount Pajamaja (boss)]]}} | ||
| | {{location infobox | ||
|image=MLDT - MountPajamaja.png | |title=Mount Pajamaja | ||
| | |image=[[File:MLDT - MountPajamaja.png|250px]] | ||
| | |greater_location=[[Pi'illo Island]] | ||
|inhabitants= | |inhabitants= | ||
|first_appearance=''[[Mario & Luigi: Dream Team]]'' ([[List of games by date#2013|2013]]) | |first_appearance=''[[Mario & Luigi: Dream Team]]'' ([[List of games by date#2013|2013]]) | ||
}} | }} | ||
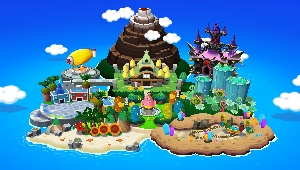
'''Mount Pajamaja''' is a half snowy, half fiery mountain in ''[[Mario & Luigi: Dream Team]]'' that [[Mario]] and [[Luigi]] traverse up with the tour guides, [[Big Massif]] and [[Lil' Massif]], in order to make it to the top, where [[Antasma]] and [[Bowser]] are with the [[Dream Stone]] to stop their plans. Its name is derived from "{{wp|pajamas}}." | |||
'''Mount Pajamaja''' is a half snowy, half fiery mountain in ''[[Mario & Luigi: Dream Team]]'' that [[Mario]] and [[Luigi]] traverse up with the tour guides, [[Big Massif]] and [[Lil' Massif]], in order to make it to the top, where [[Antasma]] and [[Bowser]] are with the [[Dream Stone]] to stop their plans. Its name is | |||
==Description== | ==Description== | ||
Mount Pajamaja is rocky towards the bottom, with some volcanic areas on the inside. Mario and Luigi have to free two [[Mega Pi'illo]]s in order to move on to the next area, but to do so, they must follow Big Massif and Lil' Massif around the mountain. They learn the [[Spin Jump]] | Mount Pajamaja is rocky towards the bottom, with some volcanic areas on the inside. Various gimmicks can be found, such as the [[Gonzola]]. Mario and Luigi have to free two [[Mega Pi'illo]]s in order to move on to the next area, but to do so, they must follow Big Massif and Lil' Massif around the mountain. They learn the [[Spin Jump (Mario & Luigi series)|Spin Jump]] technique along the way, the move required to access and free the first Mega Pi'illo, [[Phil]]. | ||
After traversing up the western side of the mountain, Mario rescues Lowe, the second Mega Pi'illo. The two Pi'illos open up an impassable gate which leads the way to the top of the mountain. To get to the peak, the Bros. must learn the [[Side Drill]] technique. After arriving at the bottom of the snow-capped area, the Bros. can drink from a fountain. This will cause a strange dream leading up to a | After traversing up the western side of the mountain, Mario rescues Lowe, the second Mega Pi'illo. The two Pi'illos open up an impassable gate which leads the way to the top of the mountain. To get to the peak, the Bros. must learn the [[Side Drill]] technique. After arriving at the bottom of the snow-capped area, the Bros. can drink from a fountain. This will cause a strange dream leading up to a fake [[Game Over]] screen. This makes [[Prince Dreambert]] yell "MARIO! LUIGI! WAKE UP! NOW!", waking the brothers up. The water from the fountain completely restores all of their [[Heart Point|HP]] and [[Bros. Point|BP]]. They will encounter another pair of petrified Mega Pi'illos that Luigi will have to rest on for Mario to save them. The two Pi'illos will open up another gate leading to the area where Mario and Luigi will have to fight [[Mammoshka]]. | ||
==Enemies== | ==Enemies== | ||
===First visit=== | |||
<gallery> | <gallery> | ||
Monolift2.png|[[Monolift]]s | Monolift2.png|[[Monolift]]s | ||
| Line 21: | Line 21: | ||
Flibbe R.png|[[Flibbee R|Flibees R]] | Flibbe R.png|[[Flibbee R|Flibees R]] | ||
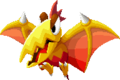
Pi'illodactyl.png|[[Pi'illodactyl]]s (background enemy) | Pi'illodactyl.png|[[Pi'illodactyl]]s (background enemy) | ||
Mammoshka.png|[[Mammoshka]] (boss) | |||
</gallery> | |||
===Path to the Pajamaja Rock Frame=== | |||
<gallery> | |||
MLDT Virus.png|[[Virus]]es | MLDT Virus.png|[[Virus]]es | ||
Monolift R.png|[[Monolift R|Monolifts R]] | Monolift R.png|[[Monolift R|Monolifts R]] | ||
Shy guy airtub.png|[[Shy Guy Airtub]]s (background enemy) | Shy guy airtub.png|[[Shy Guy Airtub]]s (background enemy) | ||
M&LDT Shy Guy.png|[[Shy Guy]]s | M&LDT Shy Guy.png|[[Shy Guy]]s | ||
| Line 29: | Line 33: | ||
==Heroes of Buffness== | ==Heroes of Buffness== | ||
Throughout Mount Pajamaja, various statues depict apparent famed heroes doing the exercise each of them were known for. By each statue, a stone slab rests, with information about them on it. | |||
Throughout Mount Pajamaja, various statues depict apparent famed heroes doing the | |||
===Muscle Lord Benchor=== | ===Muscle Lord Benchor=== | ||
| Line 49: | Line 52: | ||
===Muscle Lord Longbathes=== | ===Muscle Lord Longbathes=== | ||
''The opening of the Great Sauna would never have come to pass without Longbathes. None could match his knowledge of the bathing arts, and he was rightfully revered for it. Claiming the temperature needed to match that of hot magma, he pioneered scalding therapy. No one could approach his love for soaking, and so he soaks here, eternal and pruney.'' | ''The opening of the Great Sauna would never have come to pass without Longbathes. None could match his knowledge of the bathing arts, and he was rightfully revered for it. Claiming the temperature needed to match that of hot magma, he pioneered scalding therapy. No one could approach his love for soaking, and so he soaks here, eternal and pruney.'' | ||
==Pi'illo locations== | |||
{|border=1 cellpadding=2 style="text-align: center; border-collapse: collapse; border: 1px solid black; width:100%" | |||
! colspan="4" style="background:rgb(110,44,0); height:2em" | [[Mount Pajamaja]] – 12 Pi'illos (4 Mega Pi'illos, 2 Blue Pi'illos, 6 Pink Pi'illos) | |||
|-style="background:rgb(110,44,0); height:2em" | |||
!Location | |||
!Necessity | |||
!Type | |||
!Screenshot | |||
|- | |||
|Phil is found where the first Gate is, to the east of the actual gate on some higher ground. | |||
|Required | |||
|[[File:MegaPi'illo.png]]<br>Mega Pi'illo | |||
|[[File:M&LDT Mount Pajamaja Pi'illo 1.png|512px]] | |||
|- | |||
|Lowe is found where the first Gate is, to the west of the actual gate on some higher ground. | |||
|Required | |||
|[[File:MegaPi'illo.png]]<br>Mega Pi'illo | |||
|[[File:M&LDT Mount Pajamaja Pi'illo 2.png|512px]] | |||
|- | |||
|Cush and Shawn are found before the second Gate, Cush is the eastern one, Shawn is the western one. | |||
|Required | |||
|[[File:MegaPi'illo.png]]<br>Mega Pi'illos | |||
|[[File:M&LDT Mount Pajamaja Pi'illo 3.png|512px]] | |||
|- | |||
|This Pi'illo is found in the area to the west of the area to the south of where Mario and Luigi jump off to turn the oxygen valve on, south of the Attack Piece. Without its aid, Mario and Luigi cannot get one of the [[Dropchopper]] Attack Pieces. This Pi'illo must also be rescued first in order to reach the nightmare chunks for Pi'illos 7, 10, and 11. | |||
|Optional | |||
|[[File:BluePi'illo.png]]<br>Blue Pi'illo | |||
|[[File:M&LDT Mount Pajamaja Pi'illo 4.png|512px]] | |||
|- | |||
|This Pi'illo is found in the area leading into the snow-based part of the mountain. Without its aid, Mario and Luigi miss out on gaining EXP Boots. | |||
|Optional | |||
|[[File:BluePi'illo.png]]<br>Blue Pi'illo | |||
|[[File:M&LDT Mount Pajamaja Pi'illo 5.png|512px]] | |||
|- | |||
|This Pi'illo is found in the area the second-furthest east of the first Gate, in the center of the area surrounded by ground of differing levels. | |||
|Optional | |||
|[[File:Pi'illoSprite.png]]<br>Pink Pi'illo | |||
|[[File:M&LDT Mount Pajamaja Pi'illo 6.png|512px]] | |||
|- | |||
|This Pi'illo is found in the area the second-furthest east of the first Gate, next to the bridge leading towards the eastern exit. | |||
|Optional | |||
|[[File:Pi'illoSprite.png]]<br>Pink Pi'illo | |||
|[[File:M&LDT Mount Pajamaja Pi'illo 7.png|512px]] | |||
|- | |||
|This Pi'illo is found in the area where Mario and Luigi jump off to turn the oxygen valve on, at the end of the west whirlwind path. | |||
|Optional | |||
|[[File:Pi'illoSprite.png]]<br>Pink Pi'illo | |||
|[[File:M&LDT Mount Pajamaja Pi'illo 8.png|512px]] | |||
|- | |||
|This Pi'illo is found in the area to the furthest east of the first Gate, on the other side of the gap, in the east. (Spin Jump/Side Drill required) | |||
|Optional | |||
|[[File:Pi'illoSprite.png]]<br>Pink Pi'illo | |||
|[[File:M&LDT Mount Pajamaja Pi'illo 9.png|512px]] | |||
|- | |||
|This Pi'illo is found in the area with the shop, in the far-west at the highest possible level. The Ball Hop can be used to reach this Pi'illo. To acquire otherwise, go to the west of the area with the first gate, and fall at the second spin jump section. The player will land on the higher ground, and will be able to reach the Pi'illo. | |||
|Optional | |||
|[[File:Pi'illoSprite.png]]<br>Pink Pi'illo | |||
|[[File:M&LDT Mount Pajamaja Pi'illo 10.png|512px]] | |||
|- | |||
|This Pi'illo is found in the area to the west of the area with first Gate, on a steel platform higher than any adjacent ground. (Ball Hop required) | |||
|Optional | |||
|[[File:Pi'illoSprite.png]]<br>Pink Pi'illo | |||
|[[File:M&LDT Mount Pajamaja Pi'illo 11.png|512px]] | |||
|} | |||
==Beanhole locations== | |||
{|border=1 cellpadding=2 style="text-align: center; border-collapse: collapse; border: 1px solid black; width:100%" | |||
!colspan="3"style="background:rgb(110,44,0); height:2em"|[[Mount Pajamaja]] – 24 Beans (5 Heart Beans, 3 Bros. Beans, 7 Power Beans, 3 Defense Beans, 3 Speed Beans, 3 Stache Beans) | |||
|-style="background:rgb(110,44,0); height:2em" | |||
!Location | |||
!Type | |||
!Screenshot | |||
|- | |||
|In the area to the right of the first Gate, these 2 Beans are found to the north of the eastern exit. The western one is Stache Bean, the eastern one is Power Bean. (Spin Jump/[[Side Drill]] required) | |||
|Stache and Power | |||
|[[File:M&LDT Mount Pajamaja 1.png|512px]] | |||
|- | |||
|In the area furthest to the east of the first Gate, this Bean is found to the south of a Pink Pi'illo, on some lower ground. (Spin Jump/Side Drill required) | |||
|Power | |||
|[[File:M&LDT Mount Pajamaja 2.png|512px]] | |||
|- | |||
|In the area to the east of where Mario and Luigi learn the Spin Jump, these 2 Beans are found in the south-west on the lowest possible level. The western one is Speed Bean and the eastern one is Power Bean. (Side Drill required) | |||
|Speed and Power | |||
|[[File:M&LDT Mount Pajamaja 3.png|512px]] | |||
|- | |||
|In the area where Mario and Luigi learn the Spin Jump, this Bean is found on a lone stick of ground in the far south. (Spin Jump/Side Drill required) | |||
|Stache | |||
|[[File:M&LDT Mount Pajamaja 4.png|512px]] | |||
|- | |||
|In the area to the south of where Mario and Luigi jump off to turn the oxygen valve on, this Bean is found in the south-west underneath the nearby southward bridge, slightly to the west of it. | |||
|Power | |||
|[[File:M&LDT Mount Pajamaja 5.png|512px]] | |||
|- | |||
|In the area to the west of the area to the south of where Mario and Luigi jump off to turn the oxygen valve on, this Bean is found in the far south-west. | |||
|Bros. | |||
|[[File:M&LDT Mount Pajamaja 6.png|512px]] | |||
|- | |||
|In the area where Mario and Luigi jump off to turn the oxygen valve on, this Bean is found on the lowest level in the south-east, near some slightly higher grey ground. | |||
|Power | |||
|[[File:M&LDT Mount Pajamaja 7.png|512px]] | |||
|- | |||
|In the area where Mario and Luigi jump off to turn the oxygen valve on, this Bean is found on a platform above where the west whirlwind path leads, on the highest platform. | |||
|Heart | |||
|[[File:M&LDT Mount Pajamaja 8.png|512px]] | |||
|- | |||
|In the area where Mario and Luigi jump off to turn the oxygen valve on, this Bean is found on a platform above where the west whirlwind path leads, on the lowest platform. | |||
|Bros. | |||
|[[File:M&LDT Mount Pajamaja 9.png|512px]] | |||
|- | |||
|In the area leading into the snow-based part of the mountain, this Bean is found to the slight east of the fountain on some slightly higher ground. | |||
|Speed | |||
|[[File:M&LDT Mount Pajamaja 10.png|512px]] | |||
|- | |||
|In the first area where Mario and Luigi bump the Massif Bros around using the Spin Jump, these 2 Beans are found in the far-east, out of the way of the Massif Bros.' wrecking path. The northern one is Heart Bean, the southern one is Defense Bean. | |||
|Heart and Defense | |||
|[[File:M&LDT Mount Pajamaja 11.png|512px]] | |||
|- | |||
|In the second area where Mario and Luigi bump the Massif Bros around using the Spin Jump, these 2 Beans are found in the south on the spot of land where the Massif Bros. leave the Bros. The northern one is Heart Bean, the southern one is Speed Bean. | |||
|Heart and Speed | |||
|[[File:M&LDT Mount Pajamaja 12.png|512px]] | |||
|- | |||
|In the area to the east of the second Gate, this Bean is found on the highest possible level on the other side of a metal bridge. | |||
|Defense | |||
|[[File:M&LDT Mount Pajamaja 13.png|512px]] | |||
|- | |||
|In the area with the Dreampoint, these 2 Beans are found to the northwest of the Dreampoint on some higher ground. The eastern one is Heart Bean, the western one is Defense Bean. | |||
|Heart and Defense | |||
|[[File:M&LDT Mount Pajamaja 14.png|512px]] | |||
|- | |||
|In the area where Mario and Luigi are taught the Ball Hop, these 2 Beans are found by the northern exit. The western one is Power Bean, the eastern one is Heart Bean. | |||
|Power and Heart | |||
|[[File:M&LDT Mount Pajamaja 15.png|512px]] | |||
|- | |||
|In the area where Bowser and Antasma scare Mario and Luigi away with the Dreambeats, this Bean is found in the east on much higher ground. (Ball Hop required) | |||
|Power | |||
|[[File:M&LDT Mount Pajamaja 16.png|512px]] | |||
|- | |||
|In the area to the north of where Mario and Luigi jump off to turn the oxygen valve on, this Bean is found behind the gate, between the two blocks. (Ball Hop required) | |||
|Stache | |||
|[[File:M&LDT Mount Pajamaja 17.png|512px]] | |||
|- | |||
|In the area to the east of the Mount Pajamaja Midpoint Warp Pipe, this Bean is found in the far-north. | |||
|Bros. | |||
|[[File:M&LDT Mount Pajamaja 18.png|512px]] | |||
|} | |||
==Block locations== | |||
{|border=1 cellpadding=2 style="text-align: center; border-collapse: collapse; border: 1px solid black; width:100%" | |||
!colspan="3"style="background:brown; height:2em"|[[Mount Pajamaja]] - 58 Blocks (38 ?, 2 M, 5 L, 1 Bros., 1 Random, 10 Attack Piece, 1 Camera) | |||
|-style="background:brown; height:2em" | |||
!Item/s | |||
!Location | |||
!Screenshot | |||
|- | |||
|[[File:M&LDT Syrup.png]]<br>Supersyrup Jar | |||
|In the first scene, in the left Mini-Mario section. | |||
|[[File:Mount Pajamaja Block 1.png]] | |||
|- | |||
|[[File:M&LDT Secret Box.png]]<br>[[Secret Box]] | |||
|Same scene, in the northwest. | |||
|[[File:Mount Pajamaja Block 2.png]] | |||
|- | |||
|[[File:MLSS+BM10Coin.png]]<br>10-Coin | |||
|Same scene, in the northeast. | |||
|[[File:Mount Pajamaja Block 3.png]] | |||
|- | |||
|[[File:MLPJ5Coin.png]]<br>Five Coin | |||
|In the third scene, near the entrance, in front of the stairs. | |||
|[[File:Mount Pajamaja Block 4.png]] | |||
|- | |||
|[[File:DreamTeam1up.png]]<br>1-Up Mushroom | |||
|Same scene, in the northwest. | |||
|[[File:Mount Pajamaja Block 5.png]] | |||
|- | |||
|[[File:MLSS+BM10Coin.png]] [[File:MLDTAttackPiece.png]]<br>10-Coin, Dropchopper Attack Piece | |||
|In the fifth scene, in the Mini-Mario section. | |||
|[[File:Mount Pajamaja Blocks 6-7.png]] | |||
|- | |||
|[[File:MLSSBMRefreshingHerb.png]]<br>Refreshing Herb | |||
|In the scene east of the fifth scene, in the upper left part. | |||
|[[File:Mount Pajamaja Block 8.png]] | |||
|- | |||
|[[File:M&LDT Taunt Ball.png]] [[File:MLSS+BM10Coin.png]] [[File:MLDTAttackPiece.png]]<br>[[Taunt Ball]], 10-Coin, Dropchopper Attack Piece | |||
|Same scene, in the lower part. | |||
|[[File:Mount Pajamaja Blocks 9-11.png]] | |||
|- | |||
|[[File:MLSS+BM10Coin.png]]<br>10-Coin | |||
|In the sixth scene, near the exit. | |||
|[[File:Mount Pajamaja Block 12.png]] | |||
|- | |||
|[[File:M&LDT Taunt Ball.png]]<br>Taunt Ball | |||
|In the seventh scene, near the entrance after the bridge. | |||
|[[File:Mount Pajamaja Block 13.png]] | |||
|- | |||
|[[File:MLDTAttackPiece.png]]<br>Dropchopper Attack Piece | |||
|Same scene, in the middle. | |||
|[[File:Mount Pajamaja Block 14.png]] | |||
|- | |||
|[[File:MLSS+BM10Coin.png]]<br>10-Coin | |||
|Same scene, near the exit. | |||
|[[File:Mount Pajamaja Block 15.png]] | |||
|- | |||
|[[File:M&LDT Taunt Ball.png]]<br>Taunt Ball | |||
|In the fourth scene, in the part accessed by seventh scene, near the entrance. | |||
|[[File:Mount Pajamaja Block 16.png]] | |||
|- | |||
|[[File:MLDTAttackPiece.png]]<br>Dropchopper Attack Piece | |||
|Same scene, in the south, reached by Spin Jump. | |||
|[[File:Mount Pajamaja Block 17.png]] | |||
|- | |||
|[[File:MLPJ5Coin.png]][[File:MLPJ5Coin.png]][[File:MLPJ5Coin.png]][[File:MLPJ5Coin.png]][[File:MLPJ5Coin.png]][[File:MLPJ5Coin.png]][[File:MLPJ5Coin.png]][[File:MLPJ5Coin.png]][[File:MLPJ5Coin.png]][[File:MLPJ5Coin.png]]<br>10 Five Coins | |||
|In the scene east of the fifth scene, in the upper right part. | |||
|[[File:Mount Pajamaja Block 18.png]] | |||
|- | |||
|[[File:MLSS+BM10Coin.png]]<br>10-Coin | |||
|'''NOTE''': Following 11 blocks are available only after returning from Dreamy Mount Pajamaja accessed by Mega Pi'illo Phil.<br>In the eighth scene (west of the third scene), before the lower bridge. | |||
|[[File:Mount Pajamaja Block 19.png]] | |||
|- | |||
|[[File:MLDTAttackPiece.png]]<br>Dropchopper Attack Piece | |||
|In the ninth scene, in the upper left part. | |||
|[[File:Mount Pajamaja Block 20.png]] | |||
|- | |||
|[[File:MLPJ5Coin.png]] [[File:MLSS+BM10Coin.png]][[File:MLSS+BM10Coin.png]][[File:MLSS+BM10Coin.png]][[File:MLSS+BM10Coin.png]][[File:MLSS+BM10Coin.png]][[File:MLSS+BM10Coin.png]][[File:MLSS+BM10Coin.png]][[File:MLSS+BM10Coin.png]][[File:MLSS+BM10Coin.png]][[File:MLSS+BM10Coin.png]]<br>Five Coin, 10 10-Coins | |||
|In the scene west of the ninth scene, in the lower part. | |||
|[[File:Mount Pajamaja Blocks 21-22.png]] | |||
|- | |||
|[[File:M&LDT Nut.png]]<br>Super Nut | |||
|In the tenth scene, in the east of the lower part. | |||
|[[File:Mount Pajamaja Block 23.png]] | |||
|- | |||
|[[File:MLDTAttackPiece.png]]<br>Dropchopper Attack Piece | |||
|Same scene, in the west of the middle part. | |||
|[[File:Mount Pajamaja Block 24.png]] | |||
|- | |||
|[[File:M&LDT Syrup.png]]<br>Supersyrup Jar | |||
|Same scene, in the part with there platforms, above the second one. | |||
|[[File:Mount Pajamaja Block 25.png]] | |||
|- | |||
|[[File:M&LDT Candy.png]]<br>Super Candy | |||
|Same scene, in the alcove reached by a whirlwind. | |||
|[[File:Mount Pajamaja Block 26.png]] | |||
|- | |||
|[[File:M&LDT Shot.png]]<br>Mount Pajamaja Shot | |||
|Same scene, in the west of the upper part. | |||
|[[File:Mount Pajamaja Block 27.png]] | |||
|- | |||
|[[File:MLSS+BM10Coin.png]]<br>10-Coin | |||
|In the eighth scene, after the third bridge. | |||
|[[File:Mount Pajamaja Block 28.png]] | |||
|- | |||
|[[File:MLSS+BM10Coin.png]][[File:MLSS+BM10Coin.png]][[File:MLSS+BM10Coin.png]][[File:MLSS+BM10Coin.png]][[File:MLSS+BM10Coin.png]][[File:MLSS+BM10Coin.png]][[File:MLSS+BM10Coin.png]][[File:MLSS+BM10Coin.png]][[File:MLSS+BM10Coin.png]][[File:MLSS+BM10Coin.png]]<br>10 10-Coins | |||
|In the fifth scene, in the part reached by a whirlwind. | |||
|[[File:Mount Pajamaja Block 29.png]] | |||
|- | |||
|[[File:MLSS+BM10Coin.png]]<br>10-Coin | |||
|'''NOTE''': Following 13 blocks are available only after returning from Dreamy Mount Pajamaja accessed by Mega Pi'illo Lowe.<br>In the twelfth scene (north of the third one), in the west of the middle part. | |||
|[[File:Mount Pajamaja Block 30.png]] | |||
|- | |||
|[[File:MLPJ5Coin.png]][[File:MLPJ5Coin.png]][[File:MLPJ5Coin.png]][[File:MLPJ5Coin.png]][[File:MLPJ5Coin.png]][[File:MLPJ5Coin.png]][[File:MLPJ5Coin.png]][[File:MLPJ5Coin.png]][[File:MLPJ5Coin.png]][[File:MLPJ5Coin.png]]<br>10 Five Coins | |||
|In the thirteenth scene, in the northeast. | |||
|[[File:Mount Pajamaja Block 31.png]] | |||
|- | |||
|[[File:DreamTeam1up.png]]<br>1-Up Deluxe | |||
|In the fourteenth scene, in the part reached by a [[Side Drill]], right of the entrance. | |||
|[[File:Mount Pajamaja Block 32.png]] | |||
|- | |||
|[[File:MLDTAttackPiece.png]]<br>Dropchopper Attack Piece | |||
|Same scene, in the south of the lower-middle part. | |||
|[[File:Mount Pajamaja Block 33.png]] | |||
|- | |||
|[[File:MLSS+BM10Coin.png]]<br>10-Coin | |||
|In the seventeenth scene (3rd snowy scene), in the northwest. | |||
|[[File:Mount Pajamaja Block 34.png]] | |||
|- | |||
|[[File:MLDTAttackPiece.png]]<br>Dropchopper Attack Piece | |||
|Same scene, in the north. | |||
|[[File:Mount Pajamaja Block 35.png]] | |||
|- | |||
|[[File:M&LDT Syrup.png]]<br>Supersyrup Jar | |||
|Same scene, in the southeast. | |||
|[[File:Mount Pajamaja Block 36.png]] | |||
|- | |||
|[[File:DreamTeam1up.png]]<br>1-Up Deluxe | |||
|Same scene, in the southwest. | |||
|[[File:Mount Pajamaja Block 37.png]] | |||
|- | |||
|[[File:M&LDT Secret Box.png]]<br>Secret Box | |||
|In the sixteenth scene, in the south of the middle part. | |||
|[[File:Mount Pajamaja Block 38.png]] | |||
|- | |||
|[[File:MLSS+BM10Coin.png]][[File:MLSS+BM10Coin.png]][[File:MLSS+BM10Coin.png]][[File:MLSS+BM10Coin.png]][[File:MLSS+BM10Coin.png]][[File:MLSS+BM10Coin.png]][[File:MLSS+BM10Coin.png]][[File:MLSS+BM10Coin.png]][[File:MLSS+BM10Coin.png]][[File:MLSS+BM10Coin.png]]<br>10 10-Coins | |||
|In the eighteenth scene (west of the first snowy scene), in the southeast of the lower part. | |||
|[[File:Mount Pajamaja Block 39.png]] | |||
|- | |||
|[[File:MLDTAttackPiece.png]]<br>Dropchopper Attack Piece | |||
|In the nineteenth scene, in the middle, reached by Spin Jump. | |||
|[[File:Mount Pajamaja Block 40.png]] | |||
|- | |||
|[[File:MLSS+BM10Coin.png]]<br>10-Coin | |||
|Same scene, in the northwest. | |||
|[[File:Mount Pajamaja Block 41.png]] | |||
|- | |||
|[[File:Dream Team Hammer.png]]<br>Knockout Hammer | |||
|Same scene, in the west. | |||
|[[File:Mount Pajamaja Block 42.png]] | |||
|- | |||
|[[File:MLPJ5Coin.png]][[File:MLPJ5Coin.png]][[File:MLPJ5Coin.png]][[File:MLPJ5Coin.png]][[File:MLPJ5Coin.png]][[File:MLPJ5Coin.png]][[File:MLPJ5Coin.png]][[File:MLPJ5Coin.png]][[File:MLPJ5Coin.png]][[File:MLPJ5Coin.png]]<br>10 Five Coins | |||
|'''NOTE''': Following 2 blocks are available only after returning from Dreamy Mount Pajamaja accessed by the Mega Pi'illo Cush.<br>In the fifteenth scene, in the upper part. | |||
|[[File:Mount Pajamaja Block 43.png]] | |||
|- | |||
|[[File:M&LDT Nut.png]]<br>Super Nut | |||
|In the eighteenth scene, in the upper part. | |||
|[[File:Mount Pajamaja Block 44.png]] | |||
|- | |||
|[[File:MLDTAttackPiece.png]]<br>Dropchopper Attack Piece | |||
|'''NOTE''': Following 2 blocks are available only after returning from Dreamy Mount Pajamaja accessed by the first Blue Pi'illo.<br>In the scene west of the ninth scene, in the west of the upper part. | |||
|[[File:Mount Pajamaja Block 45.png]] | |||
|- | |||
|[[File:Dream Team Accessory.png]]<br>Silver Statue | |||
|Same scene, east of the upper part. | |||
|[[File:Mount Pajamaja Block 46.png]] | |||
|- | |||
|[[File:Dream Team Boots.png]]<br>EXP Boots | |||
|'''NOTE''': Following blocks is available only after returning from Dreamy Mount Pajamaja accessed by the second Blue Pi'illo.<br>In the fourteenth scene, in the west of the upper-middle part. | |||
|[[File:Mount Pajamaja Block 47.png]] | |||
|- | |||
|[[File:M&LDT Nut.png]]<br>Ultra Nut | |||
|'''NOTE''': Following 11 blocks are available only after learning the Ball Hop during the second visit.<br>In the tenth scene, in the north of the upper part. | |||
|[[File:Mount Pajamaja Block 48.png]] | |||
|- | |||
|[[File:MLPJ50Coin.png]]<br>50-Coin | |||
|Same scene, in the northwest of the upper part. | |||
|[[File:Mount Pajamaja Block 49.png]] | |||
|- | |||
|[[File:Dream Team Boots.png]] [[File:MLSS+BM10Coin.png]][[File:MLSS+BM10Coin.png]][[File:MLSS+BM10Coin.png]][[File:MLSS+BM10Coin.png]][[File:MLSS+BM10Coin.png]][[File:MLSS+BM10Coin.png]][[File:MLSS+BM10Coin.png]][[File:MLSS+BM10Coin.png]][[File:MLSS+BM10Coin.png]][[File:MLSS+BM10Coin.png]]<br>Iron-Ball Boots DX, 10 10-Coins | |||
|In the scene north of the tenth scene, behind the door unlocked by Ball Hop puzzle. | |||
|[[File:Mount Pajamaja Blocks 50-51.png]] | |||
|- | |||
|[[File:MLSS+BM10Coin.png]]<br>10-Coin | |||
|In the twenty-fourth scene (first scene to [[Pajamaja Rock Frame]]), near the start of the middle part. | |||
|[[File:Mount Pajamaja Block 52.png]] | |||
|- | |||
|[[File:MLSS+BM10Coin.png]][[File:MLSS+BM10Coin.png]][[File:MLSS+BM10Coin.png]][[File:MLSS+BM10Coin.png]][[File:MLSS+BM10Coin.png]][[File:MLSS+BM10Coin.png]][[File:MLSS+BM10Coin.png]][[File:MLSS+BM10Coin.png]][[File:MLSS+BM10Coin.png]][[File:MLSS+BM10Coin.png]]<br>10 10-Coins | |||
|Same scene, in the west of the upper part. | |||
|[[File:Mount Pajamaja Block 53.png]] | |||
|- | |||
|[[File:Dream Team Wear.png]]<br>Bros. Wear | |||
|In the scene east of the twenty-fourth scene, in the east of the lower part. | |||
|[[File:Mount Pajamaja Block 54.png]] | |||
|- | |||
|[[File:MLPJ50Coin.png]][[File:MLPJ50Coin.png]][[File:MLPJ50Coin.png]][[File:MLPJ50Coin.png]][[File:MLPJ50Coin.png]][[File:MLPJ50Coin.png]][[File:MLPJ50Coin.png]][[File:MLPJ50Coin.png]][[File:MLPJ50Coin.png]][[File:MLPJ50Coin.png]]<br>10 50-Coins | |||
|Same scene, in the east of the upper part. | |||
|[[File:Mount Pajamaja Block 55.png]] | |||
|- | |||
|[[File:MLPJ50Coin.png]]<br>50-Coin | |||
|In the twenty-fifth scene, in the east of the lower part. | |||
|[[File:Mount Pajamaja Block 56.png]] | |||
|- | |||
|[[File:M&LDT Mushroom.png]] [[File:MLSS+BM10Coin.png]]<br>Ultra Mushroom, 10-Coin | |||
|Same scene, west of the lower part. | |||
|[[File:Mount Pajamaja Blocks 57-58.png]] | |||
|} | |||
==Names in other languages== | ==Names in other languages== | ||
{{M&LDT map}} | |||
{{foreign names | {{foreign names | ||
|Jap=パジャマウンテン | |Jap=パジャマウンテン | ||
|JapR=Pajamaunten | |JapR=Pajamaunten | ||
|JapM= | |JapM=Contraction of "pajama" and "mountain" | ||
|SpaA=Monte Pimayama | |SpaA=Monte Pimayama | ||
|SpaAM= | |SpaAM="Monte" means "mountain", while "Pimayama" is from "pijama" (pajamas) | ||
|SpaE=Monte Pijama | |SpaE=Monte Pijama | ||
|SpaEM=Pajama Mount | |SpaEM=Pajama Mount | ||
| Line 63: | Line 430: | ||
|Ger=Pyjamagipfel | |Ger=Pyjamagipfel | ||
|GerM=Pajama Peak | |GerM=Pajama Peak | ||
| | |FreA=Mont Pyjamama | ||
| | |FreAM=Mount Pajamama | ||
| | |FreE=Mont Pyjama | ||
| | |FreEM=Mount Pajama | ||
|Ita=Pigiamonte | |Ita=Pigiamonte | ||
|ItaM=Pun on "pigiama" (pajamas) and "monte" (mountain) | |ItaM=Pun on "pigiama" (pajamas) and "monte" (mountain) | ||
|Kor=파자마운틴 | |Kor=파자마운틴 | ||
|KorR=Pajamauntin | |KorR=Pajamauntin | ||
|KorM=Portmanteau of | |KorM=Portmanteau of "파자마" (pajama) and "마운틴" (mountain) | ||
|PorE=Monte Pijama | |PorE=Monte Pijama | ||
|PorEM=Literally | |PorEM=Literally means "Mount Pajamas" | ||
|Rus=Грезувий<br>''Grezuviy'' | |Rus=Грезувий<br>''Grezuviy'' | ||
|RusM=Portmanteau of " | |RusM=Portmanteau of "Грезa" (''greza'', dream) and "Bезувий" (''Vezuviy'', Vesuvius) | ||
}} | }} | ||
{{M&LDT}} | {{M&LDT}} | ||
[[Category:Mario & Luigi: Dream Team | [[Category:Mario & Luigi: Dream Team locations]] | ||
[[Category:Mountains]] | [[Category:Mountains]] | ||
[[Category:Volcanic | [[Category:Volcanic areas]] | ||
[[Category:Snowscapes]] | [[Category:Snowscapes]] | ||
[[it:Pigiamonte]] | [[it:Pigiamonte]] | ||
Latest revision as of 04:04, June 14, 2024
- This article is about the Pi'illo Island location. For the boss fought by Giant Luigi in the Dream World, see Mount Pajamaja (boss).
| Mount Pajamaja | |
|---|---|

| |
| First appearance | Mario & Luigi: Dream Team (2013) |
| Greater location | Pi'illo Island |
Mount Pajamaja is a half snowy, half fiery mountain in Mario & Luigi: Dream Team that Mario and Luigi traverse up with the tour guides, Big Massif and Lil' Massif, in order to make it to the top, where Antasma and Bowser are with the Dream Stone to stop their plans. Its name is derived from "pajamas."
Description[edit]
Mount Pajamaja is rocky towards the bottom, with some volcanic areas on the inside. Various gimmicks can be found, such as the Gonzola. Mario and Luigi have to free two Mega Pi'illos in order to move on to the next area, but to do so, they must follow Big Massif and Lil' Massif around the mountain. They learn the Spin Jump technique along the way, the move required to access and free the first Mega Pi'illo, Phil.
After traversing up the western side of the mountain, Mario rescues Lowe, the second Mega Pi'illo. The two Pi'illos open up an impassable gate which leads the way to the top of the mountain. To get to the peak, the Bros. must learn the Side Drill technique. After arriving at the bottom of the snow-capped area, the Bros. can drink from a fountain. This will cause a strange dream leading up to a fake Game Over screen. This makes Prince Dreambert yell "MARIO! LUIGI! WAKE UP! NOW!", waking the brothers up. The water from the fountain completely restores all of their HP and BP. They will encounter another pair of petrified Mega Pi'illos that Luigi will have to rest on for Mario to save them. The two Pi'illos will open up another gate leading to the area where Mario and Luigi will have to fight Mammoshka.
Enemies[edit]
First visit[edit]
Pi'illodactyls (background enemy)

Mammoshka (boss)


Path to the Pajamaja Rock Frame[edit]

Shy Guy Airtubs (background enemy)


Heroes of Buffness[edit]
Throughout Mount Pajamaja, various statues depict apparent famed heroes doing the exercise each of them were known for. By each statue, a stone slab rests, with information about them on it.
Muscle Lord Benchor[edit]
Amid the sweaty furore of the Bodybuilding Siege, Benchor alone kept both his wits and his reps. Prone on the battlefield, he pressed all who tried to cross the field into the vault of the sky. Like an angry gym deity, he kept his core taut as he lifted foes skyward...earthward...skyward. Here he lies for eternity, the earth a damp bench from which he will never again rise.
Muscle Lord Biceptus[edit]
Biceptus almost single-handedly suppressed the Great Protein Rebellion of the Vegebrodies. His turgid biceps were said to be infused with a divine power no amount of lifting could match. When he swung his fist earthward, the very ground would tremble for miles at his might. Let the legends record that no clothes would ever fit this Muscle Lord's body. Ever.
Muscle Lord Tacklecrush[edit]
Tacklecrush led the charge in the legendary Assault on Black Friday Sale Rack. [New Year's Day Sale Rack in the PAL version.] Many foes stood before him, but with a single tackle, he scattered them as a tornado. None could overtake him as he plunged through the fray, leaving only wind and failure behind. Rock hard were his shopping muscles, but none were equal to the hard lock on his wallet.
Muscle Lord Pullurp[edit]
Pullurp was the most celebrated of all athletes who participated in the Ultrapump Games. He lifted his body up with such force that onlookers feared it would crack the firmament. He thrust it downwards with such enthusiasm that he threatened to break the earth's mantle. And yet, his lone failure came on the parallel bars, where the Double Glute Spin eluded him all his life.
Muscle Lord Ballance[edit]
In the war with the Dark Cholesterarians, Ballance secured victory with signature moves. He rolled like a thunderstorm, driving his foes before him then grinding them to dust. His vantage from atop a balance ball allowed him to keep his equilibrium in both battle and life. And his form. His form! His sculptured body would be a template for those who aspire to buffness.
Muscle Lord Longbathes[edit]
The opening of the Great Sauna would never have come to pass without Longbathes. None could match his knowledge of the bathing arts, and he was rightfully revered for it. Claiming the temperature needed to match that of hot magma, he pioneered scalding therapy. No one could approach his love for soaking, and so he soaks here, eternal and pruney.
Pi'illo locations[edit]
| Mount Pajamaja – 12 Pi'illos (4 Mega Pi'illos, 2 Blue Pi'illos, 6 Pink Pi'illos) | |||
|---|---|---|---|
| Location | Necessity | Type | Screenshot |
| Phil is found where the first Gate is, to the east of the actual gate on some higher ground. | Required |  Mega Pi'illo |

|
| Lowe is found where the first Gate is, to the west of the actual gate on some higher ground. | Required | Mega Pi'illo |

|
| Cush and Shawn are found before the second Gate, Cush is the eastern one, Shawn is the western one. | Required | Mega Pi'illos |

|
| This Pi'illo is found in the area to the west of the area to the south of where Mario and Luigi jump off to turn the oxygen valve on, south of the Attack Piece. Without its aid, Mario and Luigi cannot get one of the Dropchopper Attack Pieces. This Pi'illo must also be rescued first in order to reach the nightmare chunks for Pi'illos 7, 10, and 11. | Optional | Blue Pi'illo |

|
| This Pi'illo is found in the area leading into the snow-based part of the mountain. Without its aid, Mario and Luigi miss out on gaining EXP Boots. | Optional | Blue Pi'illo |

|
| This Pi'illo is found in the area the second-furthest east of the first Gate, in the center of the area surrounded by ground of differing levels. | Optional | Pink Pi'illo |

|
| This Pi'illo is found in the area the second-furthest east of the first Gate, next to the bridge leading towards the eastern exit. | Optional | Pink Pi'illo |

|
| This Pi'illo is found in the area where Mario and Luigi jump off to turn the oxygen valve on, at the end of the west whirlwind path. | Optional | Pink Pi'illo |

|
| This Pi'illo is found in the area to the furthest east of the first Gate, on the other side of the gap, in the east. (Spin Jump/Side Drill required) | Optional | Pink Pi'illo |

|
| This Pi'illo is found in the area with the shop, in the far-west at the highest possible level. The Ball Hop can be used to reach this Pi'illo. To acquire otherwise, go to the west of the area with the first gate, and fall at the second spin jump section. The player will land on the higher ground, and will be able to reach the Pi'illo. | Optional | Pink Pi'illo |

|
| This Pi'illo is found in the area to the west of the area with first Gate, on a steel platform higher than any adjacent ground. (Ball Hop required) | Optional | Pink Pi'illo |

|
Beanhole locations[edit]
| Mount Pajamaja – 24 Beans (5 Heart Beans, 3 Bros. Beans, 7 Power Beans, 3 Defense Beans, 3 Speed Beans, 3 Stache Beans) | ||
|---|---|---|
| Location | Type | Screenshot |
| In the area to the right of the first Gate, these 2 Beans are found to the north of the eastern exit. The western one is Stache Bean, the eastern one is Power Bean. (Spin Jump/Side Drill required) | Stache and Power | 
|
| In the area furthest to the east of the first Gate, this Bean is found to the south of a Pink Pi'illo, on some lower ground. (Spin Jump/Side Drill required) | Power | 
|
| In the area to the east of where Mario and Luigi learn the Spin Jump, these 2 Beans are found in the south-west on the lowest possible level. The western one is Speed Bean and the eastern one is Power Bean. (Side Drill required) | Speed and Power | 
|
| In the area where Mario and Luigi learn the Spin Jump, this Bean is found on a lone stick of ground in the far south. (Spin Jump/Side Drill required) | Stache | 
|
| In the area to the south of where Mario and Luigi jump off to turn the oxygen valve on, this Bean is found in the south-west underneath the nearby southward bridge, slightly to the west of it. | Power | 
|
| In the area to the west of the area to the south of where Mario and Luigi jump off to turn the oxygen valve on, this Bean is found in the far south-west. | Bros. | 
|
| In the area where Mario and Luigi jump off to turn the oxygen valve on, this Bean is found on the lowest level in the south-east, near some slightly higher grey ground. | Power | 
|
| In the area where Mario and Luigi jump off to turn the oxygen valve on, this Bean is found on a platform above where the west whirlwind path leads, on the highest platform. | Heart | 
|
| In the area where Mario and Luigi jump off to turn the oxygen valve on, this Bean is found on a platform above where the west whirlwind path leads, on the lowest platform. | Bros. | 
|
| In the area leading into the snow-based part of the mountain, this Bean is found to the slight east of the fountain on some slightly higher ground. | Speed | 
|
| In the first area where Mario and Luigi bump the Massif Bros around using the Spin Jump, these 2 Beans are found in the far-east, out of the way of the Massif Bros.' wrecking path. The northern one is Heart Bean, the southern one is Defense Bean. | Heart and Defense | 
|
| In the second area where Mario and Luigi bump the Massif Bros around using the Spin Jump, these 2 Beans are found in the south on the spot of land where the Massif Bros. leave the Bros. The northern one is Heart Bean, the southern one is Speed Bean. | Heart and Speed | 
|
| In the area to the east of the second Gate, this Bean is found on the highest possible level on the other side of a metal bridge. | Defense | 
|
| In the area with the Dreampoint, these 2 Beans are found to the northwest of the Dreampoint on some higher ground. The eastern one is Heart Bean, the western one is Defense Bean. | Heart and Defense | 
|
| In the area where Mario and Luigi are taught the Ball Hop, these 2 Beans are found by the northern exit. The western one is Power Bean, the eastern one is Heart Bean. | Power and Heart | 
|
| In the area where Bowser and Antasma scare Mario and Luigi away with the Dreambeats, this Bean is found in the east on much higher ground. (Ball Hop required) | Power | 
|
| In the area to the north of where Mario and Luigi jump off to turn the oxygen valve on, this Bean is found behind the gate, between the two blocks. (Ball Hop required) | Stache | 
|
| In the area to the east of the Mount Pajamaja Midpoint Warp Pipe, this Bean is found in the far-north. | Bros. | 
|
Block locations[edit]
| Mount Pajamaja - 58 Blocks (38 ?, 2 M, 5 L, 1 Bros., 1 Random, 10 Attack Piece, 1 Camera) | ||
|---|---|---|
| Item/s | Location | Screenshot |
Supersyrup Jar |
In the first scene, in the left Mini-Mario section. | 
|
Secret Box |
Same scene, in the northwest. | 
|
10-Coin |
Same scene, in the northeast. | 
|
Five Coin |
In the third scene, near the entrance, in front of the stairs. | 
|
1-Up Mushroom |
Same scene, in the northwest. | 
|
10-Coin, Dropchopper Attack Piece |
In the fifth scene, in the Mini-Mario section. | 
|
Refreshing Herb |
In the scene east of the fifth scene, in the upper left part. | 
|
Taunt Ball, 10-Coin, Dropchopper Attack Piece |
Same scene, in the lower part. | 
|
10-Coin |
In the sixth scene, near the exit. | 
|
Taunt Ball |
In the seventh scene, near the entrance after the bridge. | 
|
Dropchopper Attack Piece |
Same scene, in the middle. | 
|
10-Coin |
Same scene, near the exit. | 
|
Taunt Ball |
In the fourth scene, in the part accessed by seventh scene, near the entrance. | 
|
Dropchopper Attack Piece |
Same scene, in the south, reached by Spin Jump. | 
|
10 Five Coins |
In the scene east of the fifth scene, in the upper right part. | 
|
10-Coin |
NOTE: Following 11 blocks are available only after returning from Dreamy Mount Pajamaja accessed by Mega Pi'illo Phil. In the eighth scene (west of the third scene), before the lower bridge. |

|
Dropchopper Attack Piece |
In the ninth scene, in the upper left part. | 
|
Five Coin, 10 10-Coins |
In the scene west of the ninth scene, in the lower part. | 
|
Super Nut |
In the tenth scene, in the east of the lower part. | 
|
Dropchopper Attack Piece |
Same scene, in the west of the middle part. | 
|
Supersyrup Jar |
Same scene, in the part with there platforms, above the second one. | 
|
Super Candy |
Same scene, in the alcove reached by a whirlwind. | 
|
Mount Pajamaja Shot |
Same scene, in the west of the upper part. | 
|
10-Coin |
In the eighth scene, after the third bridge. | 
|
10 10-Coins |
In the fifth scene, in the part reached by a whirlwind. | 
|
10-Coin |
NOTE: Following 13 blocks are available only after returning from Dreamy Mount Pajamaja accessed by Mega Pi'illo Lowe. In the twelfth scene (north of the third one), in the west of the middle part. |

|
10 Five Coins |
In the thirteenth scene, in the northeast. | 
|
1-Up Deluxe |
In the fourteenth scene, in the part reached by a Side Drill, right of the entrance. | 
|
Dropchopper Attack Piece |
Same scene, in the south of the lower-middle part. | 
|
10-Coin |
In the seventeenth scene (3rd snowy scene), in the northwest. | 
|
Dropchopper Attack Piece |
Same scene, in the north. | 
|
Supersyrup Jar |
Same scene, in the southeast. | 
|
1-Up Deluxe |
Same scene, in the southwest. | 
|
Secret Box |
In the sixteenth scene, in the south of the middle part. | 
|
10 10-Coins |
In the eighteenth scene (west of the first snowy scene), in the southeast of the lower part. | 
|
Dropchopper Attack Piece |
In the nineteenth scene, in the middle, reached by Spin Jump. | 
|
10-Coin |
Same scene, in the northwest. | 
|
Knockout Hammer |
Same scene, in the west. | 
|
10 Five Coins |
NOTE: Following 2 blocks are available only after returning from Dreamy Mount Pajamaja accessed by the Mega Pi'illo Cush. In the fifteenth scene, in the upper part. |

|
Super Nut |
In the eighteenth scene, in the upper part. | 
|
Dropchopper Attack Piece |
NOTE: Following 2 blocks are available only after returning from Dreamy Mount Pajamaja accessed by the first Blue Pi'illo. In the scene west of the ninth scene, in the west of the upper part. |

|
Silver Statue |
Same scene, east of the upper part. | 
|
EXP Boots |
NOTE: Following blocks is available only after returning from Dreamy Mount Pajamaja accessed by the second Blue Pi'illo. In the fourteenth scene, in the west of the upper-middle part. |

|
Ultra Nut |
NOTE: Following 11 blocks are available only after learning the Ball Hop during the second visit. In the tenth scene, in the north of the upper part. |

|
50-Coin |
Same scene, in the northwest of the upper part. | 
|
Iron-Ball Boots DX, 10 10-Coins |
In the scene north of the tenth scene, behind the door unlocked by Ball Hop puzzle. | 
|
10-Coin |
In the twenty-fourth scene (first scene to Pajamaja Rock Frame), near the start of the middle part. | 
|
10 10-Coins |
Same scene, in the west of the upper part. | 
|
Bros. Wear |
In the scene east of the twenty-fourth scene, in the east of the lower part. | 
|
10 50-Coins |
Same scene, in the east of the upper part. | 
|
50-Coin |
In the twenty-fifth scene, in the east of the lower part. | 
|
Ultra Mushroom, 10-Coin |
Same scene, west of the lower part. | 
|
Names in other languages[edit]

| Language | Name | Meaning |
|---|---|---|
| Japanese | パジャマウンテン Pajamaunten |
Contraction of "pajama" and "mountain" |
| Dutch | Pyjamapiek |
Pajama Peak |
| French (NOA) | Mont Pyjamama |
Mount Pajamama |
| French (NOE) | Mont Pyjama |
Mount Pajama |
| German | Pyjamagipfel |
Pajama Peak |
| Italian | Pigiamonte |
Pun on "pigiama" (pajamas) and "monte" (mountain) |
| Korean | 파자마운틴 Pajamauntin |
Portmanteau of "파자마" (pajama) and "마운틴" (mountain) |
| Portuguese (NOE) | Monte Pijama |
Literally means "Mount Pajamas" |
| Russian | Грезувий Grezuviy |
Portmanteau of "Грезa" (greza, dream) and "Bезувий" (Vezuviy, Vesuvius) |
| Spanish (NOA) | Monte Pimayama |
"Monte" means "mountain", while "Pimayama" is from "pijama" (pajamas) |
| Spanish (NOE) | Monte Pijama |
Pajama Mount |