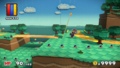
Sacred Forest
| Sacred Forest | |||||||
|---|---|---|---|---|---|---|---|
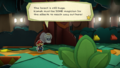
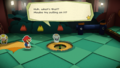
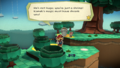
 Huey talking to Mario. | |||||||
| How to access | Obtain the green Mini Paint Star from Mondo Woods | ||||||
| Paint Stars | |||||||
| Colorless spots | 47 | ||||||
| Things | Turnip | ||||||
| Boss | Kamek | ||||||
| |||||||
- “So much for taking a nice stroll through a normal forest...”
- —Huey, Paper Mario: Color Splash
Sacred Forest is a location from Paper Mario: Color Splash. The path leading here is unlocked after getting the green Mini Paint Star from Mondo Woods, and unlocks paths leading to Mustard Café, Cobalt Base, and Green Energy Plant. The Turnip Thing blocks the pipe to the rest of the course until all the members of the Yellow Rescue Squad are found to pull it free. Kamek will fight Mario before he can grab the green Mini Paint Star located here.
Layout[edit]
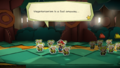
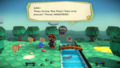
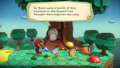
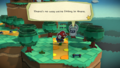
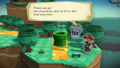
Upon first entering the level, Huey notices that the magic Kamek cast on Mondo Woods has affected the Sacred Forest as well. Going right, Mario will encounter a Toad, being the leader of the yellow Rescue Squad, trying to pull a giant turnip out of a Warp Pipe. He requests that Mario find the 11 members of the yellow Rescue Squad to help him. The level's first Mini Paint Star is located shortly after the pipe, and unlocks access to Mustard Café.
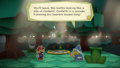
After Mario has assembled the Rescue Squad to the area, he can assist them with pulling out the turnip. As the turnip is pulled out, the pipe breaks and falls. A small green paper is sticking out of the hole, and pulling it reveals a smaller pipe that Mario can go down. The Rescue Squad members admire the turnip, and are sad once Mario squeezes it.
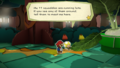
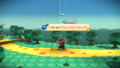
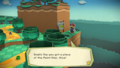
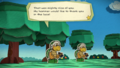
The forest appears to be normal at first, but the areas following it are shrunken down and tiny. Huey notices a Mini Paint Star, which is disassembled and swarmed by Mini Goombas. One Mini Goomba gets stuck on his back, and Mario hammers him to get it off; Huey thanks Mario, but is actually angry. The path ahead splits to go northeast and southeast; the southeast path leads to an endless trail of Small Buzzy Beetles and cannot be fully explored until a path is opened through the northeast path.
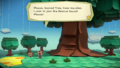
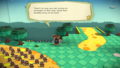
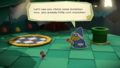
The first piece of the Mini Paint Star can be found to the northeast, held by a Small Cheep Cheep jumping out of the river. Shortly after, Mario and Huey find a piece lying on the ground, and are attacked by Small Goomba Wheels. After the enemies are defeated, the second piece can be collected. At the Old Sacred Tree, a small Toad wishes to join the Rescue Squad, and goes off to Port Prisma to consult the squad leader. Mario must hammer the tree to release a Paint Star Piece, also being ambushed by a Small Goomba Gang.
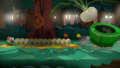
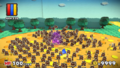
To the south is an area with a Paint Star Piece that has a Small Goomba Gang surrounding it, which instantly defeats Mario if he battles it. To defeat the Small Goombas, he must navigate around them and go behind a tree cutout, revealing a Super Star. He can then run in and grab the Paint Star Piece. To the south, Mario returns to the Small Buzzy Beetle area, and can create a shortcut back to the start of the area. The Small Buzzy Beetles all go into a closed-off area, which Mario can enter through the side as Huey stays behind. He can get the final Paint Star Piece from the area after defeating a Small Buzzy Beetle Gang.
After reassembling the Mini Paint Star, two Small Hammer Bros. appear to attack Mario. Once they are defeated, he can collect it to unlock a path to Cobalt Base.
Much later in the game, after Mario has acquired the Magnifying Glass thing from Tangerino Grill, he can use it to enlarge the pipe in the eastern area of the forest. The pipe leads him to a forested area with a green Mini Paint Star, but before he can obtain it, he must fight Kamek. Kamek shrinks Mario, making his attacks less powerful, and then turns all his cards face-down. As he takes more damage, Kamek reduces Mario's deck to six random cards from his deck, and then removes them and makes him use Battle Spin. After defeating Kamek, he threatens to make Mario huge to trap him in the forest; however, he is weakened and can only make Mario normal size, while all the cards have finally returned to him. Kamek rewards Mario with a Card Max Up, having earned respect for him. Collecting the Mini Paint Star unlocks a path to Green Energy Plant.
Enemies[edit]

Kamek (miniboss)


Required Thing(s)[edit]
- Magnifying Glass (to return the pipe to normal size)
Collectibles[edit]
Additional items not included: Globs of paint/random Coins from hammering/breaking random objects.
Field/Given/Objects[edit]
| Item | Icon | Location | Location Image |
|---|---|---|---|
| Card Max Up | 
|
Given by Kamek after defeating him in the green Mini Paint Star scene. | 
|
| 8 Coins Colorless Paragoomba Battle Card |
8x  
|
In the third scene, found under the rollable ground, which was first taped up by Bowser Tape. | .png)
|
| Colorless Eekhammer Battle Card | 
|
In the fifth scene, found under the rollable ground, which was first taped up by Bowser Tape. | .png)
|
| Paint Star Pieces |     
|
After the blue Mini Paint Star was broken into pieces, they can be found in multiple areas:
|
    
|
| Super Star | 
|
In the fourth scene (Small Goomba Gangs scene), behind the collapsible tree. Required to progress. | .png)
|
| Turnip | 
|
In the first scene, pulled out of the pipe after rescuing all Yellow Rescue Squad members. | .png)
|
Colorless spots[edit]
| Location | Drop | Location Image |
|---|---|---|
Coins |

| |
| None | 
| |
Coins |

| |
 Coins, Big Jump Battle Card |

| |
| Required: Return with Yellow Rescue Squad members. |
 Coins, Jump Battle Card |

|
| Required: Return with Yellow Rescue Squad members. |
 Coins, Hammer Battle Card |

|
| Required: Return with Yellow Rescue Squad members. |
Coins |

|
| Required: Return with Yellow Rescue Squad members. |
 Coins, Worn-Out Jump Battle Card |

|
| Required: Return with Yellow Rescue Squad members. |
Coins |

|
| Required: Return with Yellow Rescue Squad members. |
Coins |

|
| Required: Return with Yellow Rescue Squad members. |
 Coins, Worn-Out Hammer Battle Card |

|
| Required: Return with Yellow Rescue Squad members. |
Coins, Worn-Out Jump Battle Card |

|
| Required: Return with Yellow Rescue Squad members. |
Coins |

|
| Required: Return with Yellow Rescue Squad members. |
Coins |

|
| Required: Return with Yellow Rescue Squad members. |
 Coins, Worn-Out Hammer x5 Battle Card |

|
| Required: Return with Yellow Rescue Squad members. |
Coins |

|
| Required: Return with Yellow Rescue Squad members. |
Coins, Worn-Out Hammer Battle Card |

|
| Required: Return with Yellow Rescue Squad members. |
Coins |

|
| Required: Return with Yellow Rescue Squad members. |
Coins |

|
| Required: Return with Yellow Rescue Squad members. |
Coins |

|
| Required: Return with Yellow Rescue Squad members. |
Coins |

|
| Required: Return with Yellow Rescue Squad members. |
 Coins, Worn-Out Jump x3 Battle Card |

|
| Required: Return with Yellow Rescue Squad members. |
Coins |

|
| Required: Return with Yellow Rescue Squad members. |
Coins |

|
| Required: Return with Yellow Rescue Squad members. |
Coins |

|
| Required: Return with Yellow Rescue Squad members. |
Coins, Worn-Out Jump Battle Card |

|
| Required: Return with Yellow Rescue Squad members. |
Coins |

|
| Required: Return with Yellow Rescue Squad members. |
Coins, Worn-Out Jump Battle Card |

|
| Required: Return with Yellow Rescue Squad members. |
Coins, Worn-Out Hammer Battle Card |

|
| Required: Return with Yellow Rescue Squad members. |
Coins |

|
| Required: Return with Yellow Rescue Squad members. |
Coins |

|
| Required: Return with Yellow Rescue Squad members. |
 Coins, Worn-Out Jump x5 Battle Card |

|
| Required: Return with Yellow Rescue Squad members. |
 Coins, Worn-Out Hammer x3 Battle Card |

|
| Required: Return with Yellow Rescue Squad members. |
Coins |

|
| Required: Return with Yellow Rescue Squad members. |
Coins |

|
| Required: Return with Yellow Rescue Squad members. |
Coins |

|
| Required: Return with Yellow Rescue Squad members. |
Coins, Worn-Out Jump x3 Battle Card |

|
| Required: Return with Yellow Rescue Squad members. |
Coins |

|
| Required: Return with Yellow Rescue Squad members. |
Coins, Worn-Out Hammer x3 Battle Card |

|
| Required: Return with Yellow Rescue Squad members. |
Coins |

|
| Required: Return with Yellow Rescue Squad members. |
Coins, Worn-Out Hammer Battle Card |

|
| Required: Return with Yellow Rescue Squad members. |
Coins |

|
| Required: Return with Yellow Rescue Squad members. |
Coins, Worn-Out Jump Battle Card |

|
| Required: Return with Yellow Rescue Squad members. |
Coins |

|
| Required: Return with Yellow Rescue Squad members. |
Coins |

|
| Required: Return with Yellow Rescue Squad members. |
Coins |

|
| Required: Return with Yellow Rescue Squad members. |
Coins, Worn-Out Jump x3 Battle Card |

|
? Blocks[edit]
| Item | Location | Image |
|---|---|---|
 Eekhammer x2 (colorless) |
In the second scene, right of the entrance pipe. | 
|
 Worn-Out Hammer x3 (colorless) |
Same scene, at the start of the part with shrunk terrain. | 
|
 Worn-Out Jump x3 (colorless) |
In the third scene, near the entrance, behind the flat cardboard tree. | 
|
 Worn-Out Jump x5 (colorless) |
Same scene, after the bridge, on the ground behind the flat cardboard tree. | 
|
Worn-Out Hammer x3 (colorless) |
Same scene, between the eastern exit and Old Sacred Tree. | 
|
 POW Block |
In the fourth scene, near the entrance. | 
|
Worn-Out Hammer x3 (colorless) |
In the fifth scene, behind the ground that can be rolled up. | 
|
Worn-Out Jump x3 (colorless) |
Same scene, behind the bridge. | 
|
Hidden block[edit]
| Item | Description | Image | Image (block/s revealed) |
|---|---|---|---|
POW Block |
In the third scene, found above the circle of flowers. | 
|

|
Cutout[edit]
| Location | Reward | Hint | Image |
|---|---|---|---|
| On the small pipe. The Magnifying Glass Thing must be inserted. | Required for completion | None | 
|
Record[edit]
| File info |
| File info |
| File info |
| File info |
Gallery[edit]
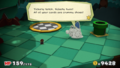
Huey comments on the forest's size
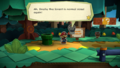
The Rescue Squad captain
Mario and the Rescue Squad pull the Turnip out of the pipe
The Rescue Squad is upset over Mario squeezing the Turnip
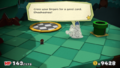
Huey observes a green paper sticking out of the hole
Huey's relief after entering the pipe

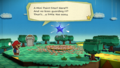
Huey reads a miniature sign
The Mini Paint Star
A Small Goomba gets stuck on Huey's back

Huey in the background after being hit by Mario
The first Paint Star Piece

The Small Goomba Wheels
Mario collects the second Paint Star Piece
Mario pulls up Bowser Tape
A small Toad wishes at the tree
Huey talks to the small Toad
A Paint Star Piece falls from the tree
Mario is warned of a Small Goomba Gang
Mario runs through the Small Goomba Gang
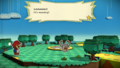
Mario in the Buzzy Beetle area
Mario attempts to enter a small pipe
The fifth and final Paint Star Piece
Huey congratulates Mario

Mario reassembles the Mini Paint Star
Two Small Hammer Bros
The small pipe is enlarged
Mario encounters Kamek
Mario is shrunk by Kamek
Kamek changes Mario's cards
Kamek empties Mario's deck

Kamek admits defeat

Mario gets a Card Max Up


Names in other languages[edit]
| Language | Name | Meaning | Note(s) | Ref. |
|---|---|---|---|---|
| Japanese | コシンボクのはやし Koshinboku no Hayashi |
Woods of Little Sacred Tree | [1] | |
| Dutch | Bonsaibos | Bonsai Forest | [1] | |
| French (Canada) | Bois Bonsaï | Bonsai Woods | [1] | |
| French (Europe) | Bois Bonsaï | Bonsai Woods | [1] | |
| German | Bonsai-Hain | Bonsai Grove | [1] | |
| Italian | Foresta Mignon | Small Forest | [1] | |
| Portuguese (Europe) | Floresta Sagrada | Sacred Forest | [1] | |
| Russian | Карликовая роща Karlikovaya roshcha |
Dwarf Grove | [1] | |
| Spanish (Latin America) | Bosquecillo Sagrado | Sacred Little Woods | [1] | |
| Spanish (Europe) | Bosquecillo Sagrado | Sacred Little Woods | [1] |