Mario & Luigi: Dream Team: Difference between revisions
(→References to other games: "Showtime!") |
m (Changed stache info) |
||
| Line 1,891: | Line 1,891: | ||
*This is the first time in the series that Bowser is consciously the final boss. | *This is the first time in the series that Bowser is consciously the final boss. | ||
*This is the first ''Mario & Luigi'' game that [[Fawful]] does not make an appearance. Although there is an NPC that says one of his main quotes if talked to. Fawful's absence is due to his defeat after ''[[Mario & Luigi: Bowser's Inside Story]]''. | *This is the first ''Mario & Luigi'' game that [[Fawful]] does not make an appearance. Although there is an NPC that says one of his main quotes if talked to. Fawful's absence is due to his defeat after ''[[Mario & Luigi: Bowser's Inside Story]]''. | ||
* | *The Stache point system was dropped again in this game like in [[PiT]]. | ||
*This is the first ''Mario & Luigi'' game that [[Bowser Jr.]] actually makes an appearance. However, he has nothing to do with the story. | *This is the first ''Mario & Luigi'' game that [[Bowser Jr.]] actually makes an appearance. However, he has nothing to do with the story. | ||
*This is the first ''Mario & Luigi'' game where bosses will always drop their exclusive items/gear upon defeat (with the exception of Mammoshka). | *This is the first ''Mario & Luigi'' game where bosses will always drop their exclusive items/gear upon defeat (with the exception of Mammoshka). | ||
Revision as of 09:53, September 11, 2013
Template:Infobox Mario & Luigi: Dream Team (Mario & Luigi RPG 4: Dream Adventure in Japan and Mario & Luigi: Dream Team Bros. in Europe & Australia) is a title for the Nintendo 3DS. It is the fourth installment in the Mario & Luigi series. The game was released in Europe on July 12th, 2013, Australia on July 13th, Japan on July 18th and North America on August 11th. This game is part of "The Year of Luigi", celebrating the 30th anniversary of Luigi's debut. As such, Luigi has a much bigger role in the game than in the previous Mario & Luigi games. A special edition Nintendo 3DS XL with a Luigi themed print was released in Japan as part of the event and includes a digital copy of Mario & Luigi: Dream Team pre installed on the SD card.
Story
Summary
It has been requested that this article be rewritten.
Mario, Luigi, Princess Peach, Toadsworth, and the Toads are invited to Pi'illo Island by Dr. Snoozemore through a message that was delivered by his Broggy. They travel to Pi'illo Island on a blimp. During the flight there, Luigi falls asleep and dreams of Mario fighting Antasma. Afterwards, he dreams of the blimp that they were in to fall and crash into the Pi'illo Blimport, but instead Luigi wakes up and falls to the ground out of confusion. Later on, they reach Pi'illo Castle and re-unite with Starlow, where Peach and Toadsworth accidentally set off a test platform sending them to ancient Pi'illo ruins. Mario & Luigi follow upon pursuing the two through the ruins, find Peach and Toadsworth surrounded by a group of Smoldergeist which flee when the Bros. arrive. Here they find a Pi'illo, which later turns out to be Prince Dreambert. This action causes the Smoldergeist to come back and attack the Bros..
Upon beating the group and leaving the ruins the Bros. come to a collection room. Here Luigi takes a nap on the pillow. After everyone gathers in the collection room, a Dream Portal opens a portal to a place called the Dream World. This allows Antasma, unknown by anyone, to pull Princess Peach into the world against her will. After Mario chases after Peach into Dreamy Pi'illo Castle, with the help of Dreamy Broque Monsieur, he comes across Dreamy Luigi, Luigi's dream representation, who assists Mario through his treks in the Dream World.
Giving chase, the Bros. catch up to Antasma who creates Dreamy Mario to stop Mario, but upon Dreamy Mario's defeat, Antasma creates a portal to Dream's Deep and flees there, sealing it up afterwards to prevent the Bros. from giving chase. Mario and Luigi then find a Nightmare Chunk & break it, freeing Prince Dreambert. He then explains that there were two powers in the on Pi'illo island, the Dream Stone and the Dark Stone, both stones have the power to grant wishes. The Pi'illo folk were protecting the stones from misuse. Then the Bat King, Antasma, came to steal the Dark Stone to fulfill his desires. The Pi'illo could not defeat him, though managed to trap him in the Dream World, however Antasma was able to destroy the Dark Stone at the last second, thus causing the Pi'illos souls to be trapped in Nightmare chunks upon being hit by one, thus rendering them helpless. Prince Dreambert, in a haste to save his fellow people then runs out, the Bros. following him. After catching up to Prince Dreambert and saving some Pi'illos they learn from one in particular that Eldream, a Pi'illo elder, knows how to reach Dream's Deep. The Bros. then set off to find him in Mushrise Park.
Upon arriving at Mushrise Park the Bros. learn that Brickle, the Manager of the park, has Eldream but will not give him up unless they catch him. After the Bros. chase him, gaining hammers during their attempts, they find him on top of a fountain, where he tries to flee but gets stuck in the fountain top. The Bros., going underground, turn up the water pressure causing the fountain to explode, and freeing Brickle. Meanwhile at Brickle's Maintenance hut, Grobot, the hydrozation robot, gets hit by a large piece of the fountain, damaging it and causing it to go haywire. Brickle thanks the Bros. and tells them they can use his bed in his hut. Upon arriving there, Grobot is incredibly unstable and attacks Brickle. It then attacks the Bros. After defeating Grobot, Brickle is heartbroken although quickly gets over it and allows the Bros. to use his bed to free Eldream.
In Dreamy Mushrise Park the Bros. encounter Dreambunny, Eldream's pet rabbit, who's carrying the nightmare chunk containing Eldream. Dreamy Brickle interrupts them though saying the rabbit is what will bring people to his park and competes with the Bros. for it. After Mario and Luigi corner Dreambunny, it gives up the Nightmare Chunk, allowing the Bros. to free Eldream. Eldream opens a portal to Dream's Deep with the use of Dreambunny and then goes to spend some time with his pet. The Bros. enter said portal and proceed to Dream's Deep.
The Bros. quickly corner Antasma but are held back by his obnoxious screeching. Meanwhile in the real world, Starlow is watching Luigi when Kamek appears along with Private Goomp, Corporal Paraplonk and Sergeant Guy, all three now promoted to royal guard. Bowser then enters, demanding the location of Peach, and upon catching the princess's scent, jumps into the Dream Portal. He arrives in Dream's Deep right where the Bros. are confronting Antasma. Upon being convinced by Antasma and his claims of new moves and such, Bowser fights with Antasma against the Bros. After being beaten by the Bros., Antasma increases Bowser's power and floors Mario, Luigi and Peach. Antasma then flees with Bowser, stating they will get Peach later as they have work to do. Eldream who arrives on the scene, helps get the Bros. and Peach back to the Real World.
Back in the Real World, the Bros. learn that Antasma is going after the Dream Stone, which resides in Dozing Sands. Upon reaching Dozing Sands, the Bros. meet Britta, a ruthless construction manager who says she can't help them as there is no more treasure in the already explored areas besides the path with the large sand slide. The Bros. learn that to get up the sand slide they have to find the four Pi'illo Keepers of the Dozites, special stones that fit into Zeekeeper statues, when all collected would allow them to proceed up the sand slide. After finding three of the Dozites, the drill monster, Torkscrew eats the fourth Pi'illo Keeper, resulting in a chase on the Drilldigger. Upon drilling it several times in a chase, it coughs up the Pi'illo Keeper, who, like the other Keepers, was trapped in a nightmare chunk.
After placing the last Dozite in the last statue, the sand slide becomes climbable and Britta races ahead of the Bros. to the newly accessible area in hopes of treasure. Upon reaching the new area Torkscrew attacks Britta and swallows her. After beating Torkscrew to the point of which it explodes, Britta is freed, however fades in and out of consciousness in a bad state and is carried off for medical attention. The Bros. approach the ruins that hold the Dream Stone to discover Antasma and Bowser had already stolen it. Prince Dreambert realizes that the Dream Stone's alter is a Dreampoint, a point where one can enter the Dream World easily. Prince Dreambert suggests that the Bros. try to find the Dream Stone Soul who may be able to tell them where Antasma and Bowser went with the stone. Upon hearing this, Mario enters the Dream World as Luigi sleeps on Prince Dreambert on the Dreampoint, into Dreamy Dozing Sands. After finding the Dream Stone's Soul, it tries to hide as it doesn't want to get involved but is pestered to the point it is consumed by fury, turning into the massive Robo-Drilldigger to get rid of the Bros.. Dreamy Luigi, fusing with many Luiginoids, then becomes Giant Luigi to defeat Robo-Drilldigger. After doing so, the Dream Stone's Soul tells Luigi where the Dream Stone was taking, Mount Pajamaja.
To reach Mount Pajamaja, the Bros. need to take a tour there, signing up requiring them to go to Wakeport. At Wakeport, the Bros. run into Kylie Koopa, who doesn't remember them yet offers them some optional work at her office, and Popple who just robbed a building in broad daylight, who remembers but doesn't recognize the Bros. Upon signing up for the tour and arriving, everyone who signed up but the Bros. flee in fear before the tour even starts. Mario and Luigi learn from one of the two tour guides, Lil'Massif, that the tour can't start unless Big Massif, his older brother and the other tour guide, shows up.
During their search, the Bros. help a Hooskin make a proposal, gaining some items upon doing so and learning of a hint to Big Massif's location. The Bros. later find Big Massif voluntarily asleep on a Dreampoint. Luigi then falls asleep in an attempt to connect to Big Massif's dream to wake him up. The Bros. succeed in both that and in entering Dreamy Wakeport, but discover that to meet Dreamy Big Massif they have to beat his four apprentices with special conditions involved. After beating all four, it is revealed that Dreamy Big Massif was disguised as the Referee. Upon beating Dreamy Big Massif, Big Massif wakes up, notices he slept in and starts the tour to and up Mount Pajamaja.
After climbing up to the summit of Mount Pajamaja, the group comes across the mammoth guardian of the mountain, Mammoshka, who is currently sleeping. The Massif's get by unnoticed but Luigi sneezes, waking up Mammoshka, who gets enraged when it sees the Bros. After beating the Guardian, the Bros. proceed to the summit where they find Antasma, Bowser, Kamek, Private Goomp, Corporal Paraplonk and Sergent Guy with four large speakers. It is revealed that the Dream Stone needs to charge before it can grant wishes. Private Goomp then turns on the speakers and music known as the Dreambeats starts playing, making all who hear it fall asleep, except for Pi'illos, Starlow, Antasma and Bowser (who is covering his ears). The Bros. try to escape but Luigi falls asleep while Mario fights the drowsiness. Prince Dreambert suggests going to the Dream World to escape the music until it's over upon stumbling upon one in their escape. Mario manages to escape the Dreambeats by diving through the Dream Portal of a nearby Dreampoint into Dreamy Mount Pajamaja, but the Dream Portal soon closes as the music has made Luigi so deep in his sleep that it can't remain stable.
Meanwhile, the entire island falls asleep and Dream Orbs, orbs created by those who sleep, are absorbed into the Dream Stone to power it. Mario suggests to cause a eruption in the Dream World's volcano to stir Luigi awake to re-open the Dream Portal. Upon reaching the summit, the Bros. discover the dream version of the mountain volcano, Mt. Pajamaja, is alive and anger it by popping a pimple on its nose. Mt. Pajamaja's reaction sends the Bros. running back to where the Dream Portal was but it hadn't re-appeared yet, leaving the Bros. to face Mt. Pajamaja, resulting in another Giant Luigi battle. After beating the Volcano, the Dream Portal reappears and Mario returns to the real world. Starlow and Prince Dreambert discuss their next plan of action and decide to hide Princess Peach as that would be Bowser's prime target and head back to Pi'illo Castle.
At the crater of Mount Pajamaja the Dream Stone is finished charging and Antasma makes the first wish. Antasma wishes for a Castle for him and Bowser, one that is impenetrable and also one that is feared, and a large castle, a mix between Bowser's and Antasma's designs, comes out of the Dream Stone and floats into the sky. Antasma then tries out the castle and destroys several small islands around Pi'illo island with large lasers. Then a large impenetrable shield surrounds the castle. Bowser dubs this castle Neo Bowser Castle. Antasma then offers Bowser the next wish. When the Bros. arrive at Pi'illo Castle, they find everyone in panic and soon learn what the first wish was for. They decide to find Princess Peach and protect her and find out she's at Driftwood Shore.
When they arrive, they are told to go see Broque Madame who has disguised Peach and Toadsworth as Block folk. It is suggested that Peach should be hidden in the Dream World from Bowser. The Bros. meet Popple again who is on a tour but still can't find anything worth stealing. After that the Bros. find a Dreampoint and they meet Seadric, a Seadring that would be glad to help hide Peach. It is suggested though that Peach should be held deeper in this Dream World and Seadric suggests the use of Dream Eggs to expand the world. Seadric then tells the Bros. to go see his two brothers and one sister to get their three Dream Eggs. After doing so, Seadric expands the world and then tells the Bros. to meet him in the next area after finding the prizes he left for them. After meeting up, the Bros. asked why he left monsters, with Seadric replying that monsters shouldn't be here and that something bad got in. After the final expansion and hiding Peach in the deepest part. It is revealed that Peach was actually Kamek in disguise, along with the royal guard, Private Goomp, Corporal Paraplonk and Sergant Guy, and it's revealed they already had Peach. The royal guard then battles the Bros. and reveal they can only be beaten if all of them are KO'd at once. After doing so, they are demoted to janitors and teleported out by Kamek who then leaves.
The Bros. start looking for a way to get to Neo Bowser Castle when they discover Dr. Snoozemore has returned and go to see him. Upon finding him in the collection room of Pi'illo Castle, he is startled to see a living Pi'illo. He suggest trying to find the Zeekeeper to break the shield around the Castle. Prince Dreambert remembers seeing a Zeekeeper statue in Dream's Deep in Pi'illo Castle. The statue would've allowed the Bros. to find the Zeekeeper's location but to their dismay, it is deactivated. Upon reactivating it, Mario and Luigi learn to summon the Zeekeeper, they must use the Ultibed, which in order to access, must first be built by a Bedsmith once they collect the five Zee Parts scattered across the island.
The Bros. have little trouble getting the parts, but upon finding the Jelly Sheets, a group of Fly Guy Rs steal it. The Bros. locate the group taking a break on the path towards the Blimport. Mario devices a plan to steal the sheets back. While the Bros. sneak by, Starlow and Prince Dreambert have a loud conversation about a rumour of Bowser having a birthmark in a certain place in a certain shape. The Fly Guy Rs get interested and distracted allowing the Bros. to steal it back before having to fight the Fly Guy Rs.
After collecting the necessary parts the Bros. head to Wakeport and run into Popple again, who is trying to steal from Pi'illo-per's, a Pi'illo artifact collector, collection room. The Bros. follow Popple to a sealed-off area full of ruins. Popple mistakes Wiggly, a Wiggler, as a security guard. When the Bros. walk past Popple he pulls them to one side and still doesn't remember them. He then tricks the Bros. into helping him fight Wiggly, by talking first, and then after insulting Wiggly fighting him. Popple causes problems to the Bros. during the battle by enraging Wiggly, preventing a Bro from dodging or saving his own skin. After Wiggly is defeated he turns on the Bros. immediately but is beaten. Upon learning Wiggly wasn't a security guard he insults Wiggly again, getting chased, and claiming he's had enough of the island.
The Bros. then find Pi'illoper who is amazed at the Bros. Pi'illo artifacts and takes them to his prize possession, Bedsmith, who is trapped in a Nightmare Chunk. When the Bros. finally reach the Nightmare Chunk, Earthwake, the guardian holding the nightmare chunk in its head, activates and forms a robot made of buildings resulting in another Giant Luigi battle. After beating Earthwake and breaking the nightmare chunk, Bedsmith is more than happy to help, but needs to meet the Bros. at his workshop in Somnom Woods to build the Ultibed.
After arriving in Somnom Woods, Bedsmith makes the Ultibed, and then tells the Bros. to find the Zeekeeper they would have to sleep in the temple in Somnom Woods. To reach the temple, the Bros. have to free the Pi'illo Masters which hold the keys to reaching the temple. Mario and Luigi, however slightly slowed by the antics of the Nommons, manage to save all six of the Pi'illo Masters and are able to continue towards the temple. Unfortunately, upon reaching the ideal spot for the Ultibed to be slept on, the temple's defence system releases the guardian, Pi'illodium, who then attacks the Bros.
After defeating the guardian, the Bros. then place the Ultibed into position, and Mario enters Dreamy Somnom Woods to find the Zeekeeper. Climbing up the large tree towards where the Zeekeeper sleeps, Mario and Luigi survive several of the tree's confusing tricks and make it to the top, where they find a large rainbow egg (known as the Zee Egg) of which Mario smashes, releasing the Zeekeeper who instantly attacks the Bros., this soon triggering another Giant Luigi battle. After the Zeekeeper is defeated, he notices Prince Dreambert with the Bros. and reverts to his usual casual demeanour, no longer hostile.
Upon hearing the dire situation, the Zeekeeper agrees to help after being promised (against Mario's will) that after Antasma's defeat he would get every single coin Mario has, takes Mario out of the Dream World and then proceeds to scope out Neo Bowser Castle, once doing so returns near the forest entrance, awaiting the Bros. to shatter the barrier. Once they board the Zeekeeper and he flies near the castle, he unleashes the Wakebeam upon the castle, shattering the barrier and causing the castle to plummet in an empty area slightly to the north of where the forest entrance is, right between Mt. Pajamaja and Somnom Woods. The Zeekeeper lands with the Bros., and then rests, allowing Mario and Luigi to then storm the castle once prepared after a shopkeeper rushes by to set up shop near the castle to reap much cash from desperate shoppers.
Upon infiltrating Neo Bowser Castle, Kamek casts a spell on the rooms and passages, making it harder for the Bros. to navigate the castle. Upon doing so, Kamek and Antasma flee into the Dream World through a platform behind a sturdy fence. Mario and Luigi soon figure out the tricky navigation, and eventually are able to chase after the duo into Dreamy Neo Bowser Castle. After hunting down Kamek, they do battle with him, however Kamek exits the battle midway in order to flee to another Dream World, releasing the spell on the areas in Neo Bowser Castle and leaving.
Mario and Luigi follow suit and re-enter Neo Bowser Castle, and proceed deeper. Meanwhile, upon Bowser stating his desire to conquer the world now, Antasma suggests Bowser sleeps due to his potential dream energy being raw and powerful. Bowser agrees to this line of logic, and goes along with the suggestion. Mario and Luigi after continuing through, find Kamek who casts a similar spell as before on to the nearby rooms, making navigation tricky. Antasma appears and once again opens the Dream Portal, the evil duo entering again from a similar fenced off platform.
Upon Mario and Luigi once again maneuvering the tricky corridors of this next area and setting the wind turbines to blow the huge rolling Bob-ombs over a gap in their track and on to the switch removing the gate fence, they return to the platform and re-enter the Dream World. After escaping the rising lava, the Bros. find Kamek disguised as Peach, however do not fall for it this time, causing Kamek to drop the act and engage battle with them yet again. Deep into battle, Kamek once again exits the duel along with the Dream World, heading deeper into the castle yet again, causing the Bros. to follow.
Mario and Luigi quickly catch up to Kamek, startling him as he was in the middle of muddling up the rooms. He flees through another Dream Portal, as like before. The Bros. adapt to this area's emphasis on large rolling Bob-ombs, and manage to lower the gate blocking the platform Luigi would then sleep on. Mario enters the Dream World, and eventually finds Kamek who takes the Bros. head-on this time. After a rough battle, Kamek is defeated soundly, and the magic departs from the Real World, allowing Mario and Luigi to continue upon their leave of the Dream World. The battered Kamek then decides to use the rest of his magic to assist Bowser, and disappears.
Mario and Luigi are once again stopped from their trek deeper into the castle quite soon by several intense flames being shot out of three Dream Worlds, and then realize they must enter each of the Dream Worlds and stop whatever is causing the flames. Upon succeeding in doing so, Mario and Luigi enter the doorway at the end to find Bowser sleeping on Antasma as a pillow with a barrier protecting him. Prince Dreambert states that the strange purple vines they've seen everywhere throughout the castle are what powers the building, and that they originate from Antasma. Luigi suggests they enter Bowser's Dream World, Prince Dreambert realizing they could try what they did with Big Massif with Bowser. Prince Dreambert connects himself to the vines as pillow form, and Luigi sleeps on him, Mario entering the Dream World.
After traversing the Bowser-infested Dream World, the Bros. soon come across Bowser gulping down chunks of meat. Bowser spots Mario and Luigi, and orders to have more meat served to power him up, finishing all the meat, and entering a rage upon finding that out. He starts inhaling the area around him, growing in size just like when he ate the meat. Bowser then jumps off the ground and into a pit in what seems to be a fatal fall. Mario and Luigi run over to where Bowser jumped, and look down in the pit. They see no sign of Bowser, and assume he's been dealt with. Mario and Luigi try to move, but they are knocked back by a Giant Bowser wrecking the place up, clearly unharmed.
Luigi signals Mario that they're going to do what they normally do in this situation, a Giant Battle. The real Luigi confidently signals Starlow, and a Giant Battle commences. Upon Bowser getting struck by Finishing Bros., Mario and Luigi celebrate, only for Kamek and some Magikoopas to appear and power Bowser up, causing the Giant Battle to continue. When Luigi manages to make Bowser woozy and open to damage, the Bros. start up Star Driver, another version of Finishing Bros. where Prince Dreambert powers up the star instead. With this attack being successful, the Bros. defeat Giant Bowser.
Mario and Luigi leave the Dream World and after pursuing the evil duo, discover that Bowser was planning to double-cross Antasma all along. Antasma reveals he had made a wish on the Dream Stone for the ability to create Dream Portals at some point, and flees from Bowser through one. Bowser, meanwhile, flees himself with a Paratroopa holding Princess Peach. Prince Dreambert decides to fight Antasma just as he did centuries ago, and loses. Mario decides to avenge him and jumps into the Dream Portal himself. Dreamy Luigi and a barely conscious Prince Dreambert join in the fight to assist him. After Mario defeats Antasma for good, they leave the Dream World, knowing they still have Bowser to take care of.
Narrowly avoiding Private Goomp, Sergeant Guy, and Corporal Paraplonk's Bob-omb attacks, Mario, Luigi, Starlow, and Prince Dreambert make it to the castle balcony, where Bowser and Peach await. Bowser boasts about the power he now has, with the Dream Stone and Peach in hand. Suddenly, Peach and Starlow activate their wish power from the previous game and, at the request of Prince Dreambert, destroy the Dream Stone. Bowser is initially shocked about this, but then screams in rage, "NOT YET!" as he inhales the Dream Stone's pieces and becomes a form known only as Dreamy Bowser. Mario and Luigi engage battle with him, and upon winning, knock him flying into the sky. Suddenly, without the Dream Stone to maintain it, the castle begins to crumble, but the Zeekeeper gives Mario and friends a lift back to Pi'illo Castle just in time.
Back at the castle, Toadsworth is so relieved to see the princess. Prince Dreambert presents the Zeekeeper with the Dream Stone's essence extracted from Bowser's body, hoping to get it repaired. He does so, but it becomes the Dream Coin, which spouts infinite coins, instead. The Zeekeeper explains that he made it this way because simply having the power to grant all wishes is too risky, and it's more intuitive to "buy" one's wishes. Prince Dreambert, seemingly shocked at what Zeekeeper was doing, pouts at the sight of the concoction, but Broque Monsieur says it'd be a great attraction, and Mario, Luigi, and Peach agree. Meanwhile, Bowser and his minions are desperately trying to escape the island in the Koopa Clown Car, and Bowser announces he will come back for revenge, finally remembering Luigi's name. They are then showered in coins from the Dream Coin, Private Goomp and Sergeant Guy rock the Koopa clown car so much, trying to get coins, that it falls into the ocean. The group then start their vacation, shown during the end credits.
Gameplay
The gameplay shifts between Luigi's dream world, where Mario and Luigi move in a 2-D fashion, and the regular world, where they freely roam the overworld. While Mario is playing inside Luigi's dreams, Starlow can move Luigi's face to affect the area, such as making him sneeze to spin platforms. The battles give the player coins directly from enemies in battle, like Paper Mario: Sticker Star. Badges similar to those in Mario & Luigi: Bowser's Inside Story make a return in this game. Sometimes Gifts also appear in between or after battles. Giant battles from Mario & Luigi's Bowser Inside Story return, this time with Luigi instead of Bowser. The games art style also changes in this installment due to the shift to 3D. Unlike the previous games' basic sprite style, this installment uses a pre-rendered visual that makes the sprites smoother with the backgrounds. The environment use 3D models while in giant battles, characters use 3D models for the first time in the series.
The bottom screen of the 3DS displays the area map. Unlike previous installments, the map shows and follows the actual location of the Bros.
Battle system
The battle system in the overworld is similar to those in previous titles, but the system in Dream World is different, as Mario will fight, merged with Luigi's dream form. As a result, he has higher stats. There are now five categories of attack, as in Mario & Luigi: Partners in Time. They are Jump, Hammer, Item, Luiginary Attacks (in the Dream World) or Bros. Attacks (in the Real World), and Flee. If a player loses a battle and tries again, a sixth option appears, which is the Hint option. Also during battles if the player fails at Bro. moves a numerous amount of times in battle a slo-mo feature will activate allowing for easier hits. There can be more than five enemies in battle, as in Mario & Luigi: Bowser's Inside Story. The Rank feature returns again. One change is the lack of Lakitus from the level up system.
Status Effects
Effects can be caused by enemies, gear and more. Some increase/decrease Mario and Luigi's stats and some them from attacking. In this game, there is no Poison effect like the previous Mario & Luigi games. Enemy effects can't be combined but others can.
| Effect | Type | Effects |
|---|---|---|
| Trip | Enemy Effect | This effect makes either Mario or Luigi trip over, stopping them from avoiding a single attack. There is a rare chance that when it is their turn, they will not get up and attack. |
| Dizzy | This effect causes Dizziness to Mario, Luigi or enemy. They will not be able to attack or dodge for a few hits. | |
| Burn/Char | This effect is similar to the Dizzy effect, but actually hurts Mario, Luigi or an Enemy. The effect ends after being hit either once or twice. | |
| Mini | This effect makes either Mario and Luigi very small. It makes them inflict less damage. When in the dream world, using the jump or hammer attack when mini still causes the Luiginoids to be normal size. | |
| Pow Up | Increase Effect | This effect increases the Power of Mario or Luigi. It can combined with the other increasing effects. |
| Def Up | This effect increases the Defense of Mario or Luigi. | |
| Speed Up | This effect increases the Speed of Mario or Luigi, allowing them to attack more regularly because they are faster than the enemies. | |
| Pow Down | Decrease Effect | This effect decreases the Power of Mario or Luigi. It can combined with the other decreasing effects. |
| Def Down | This effect decreases the Defense of Mario or Luigi. | |
| Speed Down | This effect decreases the Speed of Mario or Luigi, making the enemies attack before Mario and Luigi. |
Out-of-Battle Techniques
There are out-of battle techniques that Mario and Luigi learn throughout their adventure. The first techniques are jumping. The player uses ![]() (or
(or ![]() ) for Mario and
) for Mario and ![]() (or
(or ![]() ) for Luigi. Upon pressing
) for Luigi. Upon pressing ![]() , it will cycle the bros' current techniques, going to to different ones gained later on. There are four sets of different techniques. When in the dream world, the only ability that both of the Bros. can use is the jump ability, while the hammer is exclusive to Mario's hammer and only Luigi can use Luiginary Work Possess.
, it will cycle the bros' current techniques, going to to different ones gained later on. There are four sets of different techniques. When in the dream world, the only ability that both of the Bros. can use is the jump ability, while the hammer is exclusive to Mario's hammer and only Luigi can use Luiginary Work Possess.
| Technique | Button | Set Number | Description | Location Unlocked |
|---|---|---|---|---|
| Jump | 1 | Mario will jump. He can use this to make a starting attack and jump to places that can't be walked to. It is the most commonly used technique in the game. | Start | |
| Same as Mario's jump but for Luigi. | ||||
| Hammer | 2 | Mario hammers whatever is in front of him. He can hit buttons and break Nightmare Chunks that can't be broken with jumping. | Mushrise Park | |
| Luigi hammers Mario so he becomes squashed. Mario will then be able to go into smaller areas that can't be reached normally. If Luigi hammers Mario again he will return to normal size. If Mario is standing on softer ground, Luigi will hammer him into the ground so he can move underground. He can use this ability to dig up beans and other things. Use the A button for Mario to jump out and ground. | Dozing Sands | |||
| Spin Jump | 3 | Mario will jump on Luigi. Pressing A again will initiate the spin jump so Mario and Luigi can spin things and spin other to further away platforms. Press B when Mario is on top of Luigi to return to normal. | Mount Pajamaja | |
| Side Drill | Luigi will jump onto Mario's back; pressing the B button again launches the drill. It will drill whichever way Mario and Luigi are facing. Drilling can smash through rocks, and go into drill cannons that shoot out Mario and Luigi in different directions after Mario and Luigi have drilled in. Pressing the A button while Luigi is on Mario's back to returns them to normal. | |||
| Ball Hop | 4 | Mario and Luigi will jump into ball, which will endlessly jump until the player press A or B again. The jumps that the ball make are higher so the bros can reach higher places. It is also used for Ring Puzzles, where Mario and Luigi must jump through rings without touching the same space again. It is performed in Sonnom woods. | Mount Pajamaja
(Massif Bros. 2nd Tour) | |
| Luiginary Work Possess | 2
(Dream World Only) |
Luigi will fly into any nearby Luiginary work so it can be controlled by Starlow in the real world. This can only be used when in the dream world. | Dreamy Pi'illo Castle |
Luiginary Works
Luiginary Works are special abilities found in the Dream World. When Dreamy Luigi is near a Luiginary Work, both react to each other, causing them to be surrounded by a green light. Dreamy Luigi, then, can "possess" the object, creating a special object that can be controled by the sleepy Luigi, with Starlow's help. As said by Prince Dreambert, the Luiginary Works are the objects of connection between the real world and the Dream World.
| Name | Image | Description/Function | Locations Present | ||
|---|---|---|---|---|---|
| Luiginary Stache Tree |  |
Dreamy Luigi possesses a tree with mustache-like leaves. If Luigi's mustache is pulled and moved, the leaves move the same way, and they can be used as slingshots for Mario. | Dreamy Pi'illo Castle, Dreamy Mushrise Park Dreamy Dozing Sands, Dreamy Sommon Woods, Dreamy Neo Bowser Castle | ||
| Luiginary Sneeze Wind |  |
Dreamy Luigi possesses a whirlwind in the level's background. If Luigi sneezes, it causes a strong gust in the Dream World, which can be useful to knock large blocks, spin platforms and move Blocks from the background to the level. | Dreamy Pi'illo Castle, Dreamy Mushrise Park, Dreamy Wakeport, Dreamy Sommon Woods | ||
| Luiginoid Generator |  |
Dreamy Luigi possesses a constellation in the background. When he does it, the stars turn into Luiginoids that can be stacked to help Mario with strong moves. | Dream's Deep, Dreamy Dozing Sands, Dreamy Wakeport, Dreamy Mt. Pajamaja, Dreamy Driftwood Shore, Dreamy Somnom Woods, Dreamy Neo Bowser Castle | ||
| Moves: | |||||
| Luiginary Stack | Jump, Lean Over, Ground Pound, Crouch, Spring Jump | ||||
| Luiginary Typhoon | Spin Jump, Hover Spin, Tornado | ||||
| Luiginary Ball | Ball Hammer, Hookshot | ||||
| Luiginary Cylinder |  |
Dreamy Luigi possesses a drill. If Starlow spins Luigi's nose, it will cause the drill to spin as well which Mario can then hold onto to reach higher areas. | Dreamy Dozing Sands, Dreamy Driftwood Shore, Dreamy Neo Bowser Castle | ||
| Luiginary Speedometer |  |
Dreamy Luigi possesses a clock which can affect Mario's speed and jumping height. This is done by Starlow either touching Luigi's mustache or nose. Pulling on the right side of the mustache will speed up time, pulling on the left side will slow it down, and tapping Luigi's nose will make everything go at normal speed. | Dreamy Wakeport, Dreamy Sommon Woods, Dreamy Neo Bowser Castle | ||
| Luiginary Ice |  |
Dreamy Luigi possesses a sun. Starlow can move his arm and make him to press a button near the frozen Pi'llow that is used to change the real world from hot to cold and vice-versa. If the real world gets hot, the sun in the Dream World makes the area similar to a desert. If it gets cold, the sun freezes and the Dream World turns snowy. | Dreamy Mount Pajamaja (Dreampoint) | ||
| Luiginary Gravity |  |
Dreamy Luigi possesses a planet. Starlow can rotate a raft that Luigi is sleeping on to change the gravity in the Dream World. | Dreamy Driftwood Shore, Dreamy Dozing Sands, Dreamy Wakeport | ||
| Luiginary Propeller |  |
Dreamy Luigi possesses a giant pinwheel. When Starlow spins Luigi's nose, the pinwheel causes wind in the Dream World. | Dreamy Sommon Woods, Dreamy Neo Bowser Castle | ||
| Luiginary Antigravity |  |
Dreamy Luigi possesses a patch of matter, turning into a circular object with light revolving it, which when activated by Starlow via a switch in the real world, allows Mario to space-swim through the area freely. This is similar to the first time Mario enters the Dream World. | Dreamy Neo Bowser Castle | ||
Giant Battles
Giant battles play similarly to the ones in the previous installment, with the boss on one screen and Dreamy Luigi on the other. The battles now offer a choice of left-handed or right-handed play. Attacks and counter-attacks, like in the prequel, are used by tapping repeatedly, sliding in correct shapes and sliding repeatedly. As the playable character being different in this game, Luigi is instead able to perform a variety of the moves he uses in normal battle, such as his jump and hammer attacks, the latter having two variations. He is also given the option to work together with Mario to perform both a useful healing technique and a spinning stomp attack, as well as a finishing attack involving Mario piercing through the boss in question's weak point while riding a Star thrown by Dreamy Luigi, all of which listed below.
| Type | Attack | Description | Effects |
|---|---|---|---|
| Jump | Jump | Charge up for extra oomph! | The player must slide upwards on the Touch Screen upon Dreamy Luigi having charged up power to stomp the enemy, where the player can slide upwards again to deal maximum damage with a bonus jump to the enemy. |
| Hammer | Hammer Chop | Slide fast for a harder hit! (Slap foes to the background!) | The player must slide across the Touch Screen quickly in order to deal maximum damage with a horizontal hammer swing. |
| Hammer Uppercut
(Unlocked in 2nd Giant Battle) |
Slide fast for a harder hit! (Smack the foe backwards!) | The player must slide upwards on the Touch Screen quickly in order to deal maximum damage with a vertical hammer swing. | |
| Bros. Attack | Rhythm Mushroom | Attack in tandem with Mario! (Touch Mushrooms to heal up!) | The player must tap in time to Mario's mushroom throwing. Eating a mushroom successfully heals Dreamy Luigi a bit. Once the move is completed, Mario tires and is unable to act in the next few turns. |
| Drill Stomp
(Unlocked in 2nd Giant Battle) |
Attack in tandem with Mario! (Spin more for a super stomp!) | The player must rapidly slide their stylus in circles either clockwise or counter-clockwise depending on the prompt on the Touch Screen as Mario and Dreamy Luigi stomp the enemy after each of the (maximum of three) spins. | |
| Final Attack | Finishing Bros. | Aim with the 3DS! | Dreamy Luigi jumps (after the player slides the stylus upwards) into space where he grabs a Star for Mario to ride on and throws it towards the boss, Mario directing to its weak point. The player needs to aim the star by tilting the 3DS. Missing the weak point causes a "OK!" attack. Getting a direct hit will get "Excellent!" with an action replay. |
| Star Driver (Exclusive to Final Giant Battle) | Control the star to attack! | Similar to the Finishing Bros. attack, Dreamy Luigi grabs a star. However, Prince Dreambert powers up the star, making it grow to larger proportions. Mario then rides the star like before, and if the player is successful in avoiding incoming fireballs, the attack is also successful. This is only available after using Finishing Bros. on Giant Bowser. |
Unlockables
Upon completing the game, two new features will be available, Jukebox and Hard Mode. Jukebox allows the player to listen to the game's soundtrack. In Hard Mode, enemies are stronger, and the maximum amount of items the bros can carry is 10. Like the previous games, should the brothers lose in a battle in Hard Mode, rather than having the option to restart it, they will automatically be taken back to the last save point. Upon beating the final boss in Hard Mode, the player gets to view a two-screened image featuring all the main characters and main bosses in the game.
Special Attacks
Bros. Attacks (Real World)
Bros. Attacks are powerful and complex team techniques that Mario and Luigi perform in unison in the Real World. These moves are unlocked by gathering the ten Attack Pieces in a particular area. Like in the prequel, the player is given the option to practice their unlocked Bros. Attacks in the menu. In this game however, certain Bros. Attacks are influenced damage-wise by either Mario's or Luigi's Boots POW stat, Mario's or Luigi's Hammer POW stat, or just Mario's or Luigi's normal POW stat, whose variable POW stat depends on who's performing the attack and how it involves them. Once again exclusive to this game, Mario and Luigi each have Bros. Attacks unique to themselves that only they can activate, excluding the 3D Red/Green Shell which they both share.
| Mario | |||||
|---|---|---|---|---|---|
| Special | Description | Effects | BP | Type | Location |
| 3D Red Shell* | Use the A Button for Mario and the B Button for Luigi, and kick that shell! | Similar to the previous Mario & Luigi games, Mario and Luigi kick a red shell at enemies, first targeting one enemy before moving to the next. If the targeted enemy is in the back, the Bros. will fire the shell at any enemies in the enemy's way. It ends with Mario using a charged kick upon Luigi kicking it to him. | 4 | Jump | Mushrise Park |
| Bye-Bye Cannon | Memorise the order that the shadows of Mario and Luigi launch into the sky. As they land, press the A Button for Mario and the B Button for Luigi. If you get it perfect, they'll descend in the opposite. Stay focused! | Mario and Luigi jump into a cannon. A randomized sequence of them blast out. The player must hit the A and B Buttons in the same sequence Mario and Luigi came out, and if successful, must do the same sequence backwards for maximum damage. | 7 | Jump | Wakeport |
| Bomb Derby | Slide right on the Circle Pad to toss bombs then hit 'em with the A Button! Don't delay your swings! Toss a bunch, feel the tempo, and hit all the bombs! | Using the Circle Pad, Luigi passes bombs to Mario who must hit them towards the enemy before the bombs explode. The last bomb is bigger and likewise does the most damage. | 9 | Hammer | Driftwood Shore |
| Jet-Board Bash | Press and hold the B Button to paddle. As you draw near, press the A Button! | Luigi accelerates face-down on a board, Mario riding, and with the right timing Mario needs to hit the enemy when the board is accelerating at maximum speed to deal the most damage. | 12 | Hammer | Somnom Woods |
| Zee Egg | Slide the Circle Pad left/right to align the Zeekeeper and the Wakeorb. Once the Wakeorb and the Zeekeeper are aligned, Mario or Luigi will jump out! Use the A Button for Mario and the B Button for Luigi to hit the Wakeorb! | Mario throws the Zee Egg, unleashing the Zeekeeper for him to take Mario and Luigi into the skies and prepare a Wakeorb for Mario and Luigi to hammer upon lining up with it for it to crash down on a single target mainly with maximum damage. | 15 | Hammer | Mushrise Park - When the player rescues all Pi'illos, Eldream will reward them with the ten pieces. |
| Luigi | |||||
| Special | Description | Effects | BP | Type | Location |
| 3D Green Shell* | Use the A Button for Mario, and the B Button for Luigi, and kick that shell! | The 3D Green Shell has the brothers kick a green shell. It targets all ground enemies; the shell is kicked at enemies randomly. It ends with Luigi using a charged kick upon Mario kicking it to him. | 4 | Jump | Mushrise Park - All ten pieces are given upon Brickle being freed from the main fountain. |
| Fire Flower | Use the A and B Buttons for the bros. When the fireballs get big, throw 'em! If you throw all big fireballs, it's bonfire time! Mash the A and B Buttons! | Mario and Luigi generate fireballs. Shoot the fireballs when they are their biggest size for more damage. If this is done successfully, the player will get a short time to repeatedly tap A and B for even more damage. | 5 | Normal | Dozing Sands |
| Dropchopper | Tilt the Nintendo 3DS left and right to pilot the craft once Mario and Luigi grab on. Jump up with the A and B Buttons! If you grab on quickly, you'll fly higher. Press the prompted button when you're above a foe for a devastating slam! | Tilting the 3DS to move the Dropchopper, the player must get Mario and Luigi to jump and hang onto it. Afterwards, Mario and Luigi will do a powerful attack downwards on the unsuspecting enemies. The earlier Mario and Luigi jump on and head upwards, the more damage dealt upon impact. | 7 | Jump | Mount Pajamaja |
| Slingsniper* | Slide and hold the Circle Pad down to draw back, hold the B Button, and aim. Tilt the 3DS to line up your target, then release the B Button to launch Luigi! | Mario pulls Luigi back in the string of a Slingsniper. The player must use the 3DS to aim to successful sling Luigi into the target enemy. | 9 | Normal | Mount Pajamaja - All ten pieces are given to Mario and Luigi upon solving a Ball Hop puzzle for the Massif Bros.. |
| Star Rocket | Tilt the 3DS to change the star's trajectory and grab all the litter stars. Use the A and B Buttons as the bro land. More little stars mean more power. | Tilting the 3DS to move the Star Rocket, the player must guide it around to collect all the stars. At the end of the collecting, the player must perform a good timed jump with both Mario and Luigi for lots of damage. | 12 | Jump | Neo Bowser Castle |
Luiginary Attacks (Dream World)
Luiginary Attacks, like Bros. Attacks, are powerful and complex team techniques that Mario and a group Luiginoids perform in unison in the Dream World. These moves are unlocked by gathering the ten Attack Pieces in a particular area. Like with Bros. Attacks, the player is given the option to practice their unlocked Luiginary Attacks in the menu. Much like Bros. Attacks, certain Luiginary Attacks are influenced damage-wise by either Mario and Luigi's Boots POW stat, Mario and Luigi's Hammer POW stat, or just Mario and Luigi's normal POW stat. As Mario battles solo (in a sense) in the Dream World, only he can activate these moves.
| Special | Description | Effects | BP | Type | Location |
|---|---|---|---|---|---|
| Luiginary Ball* | Tilt the Nintendo 3DS to move the ball. Grab Luiginoids to make the ball bigger! Line it up, and kick it with the A Button! A bigger ball means more damage! | Tilt the 3DS to control the small ball of Luiginoids. Use the ball to collect more Luigis for more damage, then kick the ball with A. | 6 | Boots | Dreamy Mushrise Park |
| Luiginary Stack | Jump with the B Button and stack up Luiginoids as straight as possible! While jumping, adjust the landing zone with left/right on the circle pad! Press the B Button as the stack lands. Use the A Button at the end for Mario. | Perform well-timed jumps to make a large, stable stack of Luiginoids. If they are unbalanced, they may fall or inflict less damage. | 10 | Boots | Dreamy Dozing Sands |
| Luiginary Hammer | Press the B Button repeatedly to form the Luiginoids into a giant hammer! It will tilt, so use left/right on the Circle Pad to help Mario keep it balanced. As Mario runs, aim with up/down on the Circle Pad and swing with the A Button. | Mash the B Button to make Luiginoids jump onto Mario's hammer to form a Luiginary Hammer. Use the Circle Pad to balance the unsteady hammer, otherwise Mario will tumble and the Luiginoids will also fall and disperse. | 10 | Hammer | Dreamy Pajamaja |
| Luiginary Flame | The fire will bounce at a steady pace. Press the B Button to make it bigger! Mario will cover the spots where the Luiginoids aren't. Use the A Button here. Press the A Button once to make Mario hammer the flame at the foes! | Press B just as a fireball lands on a group of Luiginoids or A if on just Mario to bounce to the next group. If successful, Mario will volley the fireball with his hammer into the group of enemies. | 14 | Normal | Dreamy Driftwood Shore |
| Luiginary Wall | Use left/right on the Circle Pad to move the A Button to him Dreamy Luigi! Hit Dreamy Luigi where the foes are gathering to deliver more damage! Depeneding on Mario's position when you swing, Dreamy Luigi's angle will change. | Mario will hit Luigi forward, spinning him and charging through all enemies like a game of Breakout. Players will need to avoid focusing on the same spots of the Luiginoid Wall, otherwise the wall will break and the attack will be more likely to fail. | 14 | Hammer | Dreamy Wakeport
(Bedsmith's Pillow) |
| Luiginary Typhoon | Wind up the Luiginoid rope, and yank it with the A Button for a typhoon. You can move the typhoon with the Circle Pad to swallow up your foes. Rapidly press the B Button to deal more damage with the Luiginoids' spin! | Hold B to pull a string of Luiginoids to make a large Luiginary typhoon. The more time players leave before letting go of B, the longer the typhoon will last for. Failure at that point will result in little damage. Pressing B while the Luiginary Typhoon has enemies inside it will make the Luiginoids hit them with their hammers for more damage. | 16 | Hammer | Dreamy Somnom Woods |
* - Mandatory Bros./Luiginary Attacks.
Characters
Playable
- Mario
- Luigi (Real World)
- Dreamy Luigi (Dream World)
- Starlow (Dream World)
Antagonists
Other
- Princess Peach
- Toadsworth
- Toads
- Yoshis
- Starlow
- Pi'illos
- Dreambunny
- Dr. Snoozemore
- Brocks
- Zeekeeper
- Shelltops
- Beanish
- Hooskis
- Dream Stone Soul
- Seadrings
- Kylie Koopa
- Popple
- Wiggler
- Pi'illoper
- Nommons
Enemies
This article is under construction. Therefore, please excuse its informal appearance while it is being worked on. We hope to have it completed soon.
The following is a bestiary for all enemies encountered in the real world and dream worlds of the game, Mario & Luigi: Dream Team. For Common and Rare Drops, values in percentages are the probability of the enemy dropping the item when defeated. Please see the enemies' respective articles or a complete listing of enemy stats for more detailed information.
Real World
| Image | Name | HP | EXP | Coins | Normal Drop (small Gift) | Rare Drop (large Gift) | Location |
|---|---|---|---|---|---|---|---|
| Gromba | 8 | 3 | 1 | Mushroom (10%) | 1-Up Mushroom (4%) | Pi'illo Castle | |

|
Bloatula | 12 | 5 | 4 | Nut (4%) | Secret Box (2%) | Pi'illo Castle |
| Capnap | 16 | 15 | 5 | Mushroom (10%) | Candy (2%) | Mushrise Park | |
| Thorb | 12 | 16 | 6 | Nut (5%) | None | Mushrise Park | |
| Flibbee | 36 | 17 | 7 | Syrup Jar (10%) | So-so Hammer (2%) | Mushrise Park | |
| Flounderflage | 28 | 24 | 8 | Super Nut (6%) | Shock Bomb (5%) | Dozing Sands | |
| Sandoon | 52 | 30 | 12 | Super Mushroom (4%) | None | Dozing Sands | |

|
Caccac | 74 | 32 | 16 | Super Candy (10%) | Bare Boots (4%) | Dozing Sands |
| Hermite Crab | 40 | 55 | 16 | Super Nut (5%) | HP Bangle (3%) | Wakeport | |
| Monolift | 120 | 85 | 20 | Taunt Ball (8%) | Ultra Nut (2%) | Mount Pajamaja | |
| Grumbell | 88 | 90 | 24 | Refreshing Herb (5%) | POW Gloves (2%) | Mount Pajamaja | |

|
Flibbee R | 142 | 75 | 26 | Supersyrup Jar (5%) | None | Mount Pajamaja |
| Pi'illodactyl* | 318 | 200 | 180 | Ultra Candy (80%) | Soft Hammer (20%) | Mount Pajamaja | |
| Durapurl | 89 | 130 | 30 | 1-Up Deluxe (3%) | None | Driftwood Shore | |
| Fly Guy | 138 | 100 | 35 | Super Mushroom (5%) | Mushroom Amulet (1%) | Driftwood Shore | |
| Goomba*** | 54 | 15 | 15 | Boo Biscuit (10%) | Anti-Air Boots (?) | Driftwood Shore, Mushrise Park | |
| File:ShyguyAirtub.jpg | Shy Guy Airtub* | 123 | 250 | 240 | Ultra Candy (80%) | Iron Ball Hammer DX (20%) | Driftwood Shore, Wakeport, Mushrise Park, Dozing Sands |
| Shy Guy** | 35 | 15 | 20 | Ultra Mushroom (5%) | None | Driftwood Shore, Wakeport, Mushrise Park, Dozing Sands | |
| Virus | 106 | 30 | 6 | Secret Box (5%) | POW Mush Jam (1%) | Mount Pajamaja, Dozing Sands, Mushrise Park, Driftwood Shore, Wakeport | |
| Monolift R | 182 | 210 | 35 | Refreshing Herb (10%) | None | Mount Pajamaja | |
| Hermite Crab R | 81 | 220 | 30 | Ultra Nut (5%) | None | Driftwood Shore, Wakeport | |
| Fly Guy R | 149 | 190 | 35 | Ultra Mushroom (5%) | Bros. Wear (2%) | Mushrise Park | |
| Goomba R | 58 | 30 | 10 | Boo Biscuit (10%) | None | Mushrise Park | |
| Bandit (1) | 111 | 110 | 20 | Taunt Ball (10%) | Gift Gloves DX (2%) | Dozing Sands | |
| Bandit (2) | 123 | 100 | 0 | None | None | Somnom Woods* | |
| Golden Egg* | 68 | 0 | 200 | None | None | Somnom Woods | |
| Eyepi'illo | 138 | 290 | 50 | Taunt Ball (5%) | Bare Hammer DX (2%) | Somnom Woods | |

|
Beehoss | 123 | 280 | 60 | Ultrasyrup Jar (3%) | None | Somnom Woods |

|
Boomerang Bro. | 135 | 160 | 30 | Ultra Nut (3%) | Heart Wear (2%) | Somnom Woods |
| Commander Lakitu* | 1 | 100 | 20 | None | Heart Wear (15%) | Somnom Woods | |
| Pi'illodactyl R* | 476 | 600 | 450 | Max Candy (20%) | POW Gloves DX (5%) | Somnom Woods | |
| Fire Bro. | 172 | 300 | 50 | 1-Up Deluxe (4%) | Crystal Boots (3%) | Neo Bowser Castle | |
| Flaming Antasmaton | 190 | 400 | 70 | Ultrasyrup Jar (4%) | Wellington/Farmer Boots (1%) | Neo Bowser Castle | |
| Inky Piranha Plant* | 3 | 100 | 80 | None | None | Neo Bowser Castle | |
| Chain Chomp | 245 | 50 | 80 | Max Nut (8%) | POW Scarf DX (1%) | Neo Bowser Castle | |
| Walker Guy | 136 | 330 | 20 | Max Mushroom (4%) | None | Neo Bowser Castle | |
| Shy Guy Airtub R* | 178 | 500 | 160 | Max Candy (20%) | Soft Hammer DX (5%) | Neo Bowser Castle | |
| Shy Guy R** | 48 | 25 | 20 | Max Mushroom (4%) | None | Neo Bowser Castle |
* - Is a background enemy.
** - Can only be fought if the Shy Guy Airtub (for Shy Guys) or Shy Guy Airtub R (for Shy Guy Rs) is defeated.
*** - Also appears in Dream World.
Dream World
| Image | Name | HP | EXP | Coins | Normal Drop (small Gift) | Rare Drop (large Gift) | Location |
|---|---|---|---|---|---|---|---|
| Dromba | 6 | 1 | 1 (50%) | Mushroom (2%) | Discount Boots (1%) | Dreamy Pi'illo Castle | |
| Storch | 14 | 4 | 3 | Super Mushroom (5%) | None | Dreamy Pi'illo Castle | |
| Dreamcap | 18 | 1 | 1 (20%) | None | None | Dreamy Mushrise Park | |
| Dreamcap Captain | 26 | 6 | 7 | Syrup Jar (10%) | Super Mushroom (2%) | Dreamy Mushrise Park | |
| Propellion | 42 | 8 (10) | 8 | Candy (10%) | None | Dreamy Mushrise Park | |
| Dreamy Sandoon | 38 | 5 (6) | 2 | Super Mushroom (1%) | Boo Biscuit (1%) | Dreamy Dozing Sands | |
| Lob-omb | 42 | 10 (12) | 14 | Supersyrup Jar (5%) | Thick Gloves (3%) | Dreamy Dozing Sands | |
| Skipdrill | 22 | 7 (8) | 3 | Super Candy (1%) | Secret Box (1%) | Dreamy Dozing Sands | |
| Cocoknight | 42 | 10 (14) | 3 | Super Mushroom (1%) | EXP Bro Gloves (1%) | Dreamy Wakeport | |
| Ticksquwak | 90 | 20 (24) | 18 | Supersyrup Jar (5%) | None | Dreamy Wakeport | |
| Chizzle | 44 | 12 (14) | 3 | Ultra Mushroom (1%) | Fighter Wear (1%) | Dreamy Mount Pajamaja | |
| Magmad | 125 | 50 (60) | 20 | Super Candy (5%) | Secret Box (1%) | Dreamy Mount Pajamaja | |
| Icead | 125 | 50 (60) | 20 | Super Candy (5%) | Secret Box (1%) | Dreamy Mount Pajamaja | |
| Lob-omb R | 105 | 30 (36) | 25 | Ultrasyrup Jar (5%) | None | Dreamy Mount Pajamaja | |
| Spiny | 31 | 21 (25) | 4 | Super Candy (1%) | None | Dreamy Driftwood Shore | |
| Lakitu* | 60 | 45 (54) | 25 | Secret Box (10%) | Blunt Hammer (3%) | Dreamy Driftwood Shore | |
| Piranha Plant | 222 | 170 (204) | 30 | Ultra Mushroom (5%) | None | Dreamy Driftwood Shore | |
| Nipper Plant* | 1 | 0 | 10 | None | None | Dreamy Driftwood Shore | |
| Bloopurn | 127 | 75 (90) | 35 | Ultrasyrup Jar (5%) | None | Dreamy Driftwood Shore | |
| Dreamcap R | 74 | 10 (12) | 5 (20%) | None | None | Dreamy Driftwood Shore | |
| Dreamcap Captain R | 116 | 30 (36) | 30 | Shock Bomb (5%) | None | Dreamy Driftwood Shore | |
| Dark Block | 133 | 150 (180) | 40 | Ultra Candy (10%) | Knockout Hammer (3%) | Dream's Deep | |
| Krubbish | 83 | 160 (192) | 45 | Refreshing Herb (10%) | Rookie Gloves (5%) | Dreamy Wakeport | |
| Cocoknight R | 101 | 20 (24) | 5 | Ultrasyrup Jar (1%) | None | Dreamy Wakeport | |
| Pelicrump | 109 | 50 (60) | 10 | Ultra Candy (1%) 1-Up Mushroom (Inside egg) | None | Dreamy Somnom Woods | |
| Spritzbloom | 200 | 160 (192) | 60 | Refreshing Herb (5%) | Flame Hammer DX (3%) | Dreamy Somnom Woods | |
| Skipdrill R | 66 | 35 (42) | 6 | Boo Biscuit (1%) | None | Dreamy Somnom Woods | |
| Mechakoopa | 124 | 40 (48) | 8 | Max Candy (1%) | None | Dreamy Neo Bowser Castle | |
| Big Tail Goomba | 260 | 180 (216) | 84 | Boo Biscuit (5%) | Crystal Hammer (3%) | Dreamy Neo Bowser Castle | |
| Antasman | 204 | 84 (101) | 12 | Secret Box (2%) | Legendary Wear (1%) | Dreamy Neo Bowser Castle | |
| Spiny R | 50 | 56 (67) | 6 | Max Mushroom (2%) | None | Dreamy Neo Bowser Castle | |
| Lakitu R* | 97 | 120 (142) | 60 | Max Syrup Jar (4%) | None | Dreamy Neo Bowser Castle | |
| Golden Beanie | 517 | 4000 (4800) | 800 | Random DX Bean, MINI Boots, MINI Hammer or MINI Gloves (100%) | None | Dreamy Pi'illo Castle, Dreamy Mushrise Park, Dreamy Dozing Sands, Dreamy Wakeport Dreamy Mount Pajamaja, Dreamy Driftwood Shore, Dreamy Somnom Woods, Dreamy Neo Bowser Castle |
* - Is a background enemy.
Bosses
The following is a bestiary for all bosses (and support enemies) encountered in the game Mario & Luigi: Dream Team. Please see the bosses' respective articles or a complete listing of enemy stats for more detailed information.
Normal Bosses
| Image | Name | HP | EXP | Coins | Normal Drop (small Gift) | Rare Drop (large Gift) | Location |
|---|---|---|---|---|---|---|---|
| File:MLDT - Antasma First Battle.png | ???? (Antasma) | 6 | 0 | 0 | None | None | Zeeppelin |
| File:Smoldergeist Sprite.PNG | Smoldergeist | 12 each | 5 (6) | 10 total | None | Cozy Wear (20%) | Pi'illo Castle |
| File:DreamyMario.png | Dreamy Mario | 96 | 75 (90) | 45 | None | So-So Boots (100%) | Dreamy Pi'illo Castle |

|
Grobot | 288 | 250 (300) | 75 | None | So-so Hammer (large Gift) | Mushrise Park |
| File:Bowser and Antasma.png | Bowser and Antasma | Bowser: 233 Antasma bats: 6 |
300 (360) | 0 | Syrup Jar (3%, Antasma bats) | Iron Ball Hammer (100%, Bowser) | Dream's Deep |

|
Torkscrew | 656 | 500 (600) | 260 | None | Coin Boots (100%) | Dozing Sands |
| Sorrow Fist | 395 | 200 (240) | 50 | Super Candy (30%) | HP Knockout Bangle (5%) | Dreamy Wakeport | |

|
Beef Cloud | 357 | 200 (240) | 50 | Super Candy (30%) | HP Knockout Bangle (5%) | Dreamy Wakeport |
| Heavy Zest | 282 | 200 (240) | 50 | Super Candy (30%) | HP Knockout Bangle (5%) | Dreamy Wakeport | |
| Thunder Sass | 140 | 200 (240) | 50 | Super Candy (30%) | HP Knockout Bangle (5%) | Dreamy Wakeport | |

|
Big Massif | Big Massif: 864 Hooraw: 28 |
800 (960) | 250 | None | Knockout Boots (100%) | Dreamy Wakeport |

|
Mammoshka | Mammoshka: 918 Block Monolift: 1 |
1100 (1320) | 350 | None | 1-Up Gloves (50%) | Mount Pajamaja |

|
Elite Trio | Corporal Paraplonk: 415 Private Goomp: 249 Sergeant Guy: 581 Sergeant Guy Cannon: 1 Sub-Goomba: 80 |
2100 (2520) | Corporal Paraplonk: 200 Private Goomp: 300 Sergeant Guy: 5 Sub-Goomba: 5 |
Mushroom (2%, Sub-Goomba) | Counter Wear (100%, Corporal Paraplonk) Action Hammer (100%, Sergeant Guy) Mushroom (100%, Private Goomp) |
Dreamy Driftwood Shore |
| File:Fly Guy R Thieves.png | Fly Guy R Thieves | 149 each | 570 (674) | 105 | Ultra Mushroom (small Gift) | Pi'illo Blimport | |

|
Wiggler | 1485 | 1000 (1200) | 400 | 1-Up Deluxe (50%) | Max Candy (30%) | Wakeport |
| File:PoppleDT.png | Popple | 999 | 500 (600) | 100 | None | Coin Bro Gloves DX (100%) | Wakeport |

|
Pi'illodium | Body: 1673 Wings: 172 Mini Pi'illoid: 1 |
3600 (4120) | 600 | None | Anti-Air Boots DX (100%) | Somnom Woods |

|
Kamek (1) | 1428 | 0 | 0 | None | None | Dreamy Neo Bowser Castle |
|
|
Kamek (2) | 1743 | 0 | 0 | None | None | Dreamy Neo Bowser Castle |
|
|
Kamek (3) | Kamek: 1496 Green Kamek: 816 Red Kamek: 544 White Kamek: 626 |
3000 (3600) | 500 | None | Mushroom Gloves (100%) | Dreamy Neo Bowser Castle |
| File:MLDT - Antasma First Battle.png | Antasma (final time) [1] | Antasma: 2435 Antasmunchie: 90 |
7500 (9000) | 900 | Max Candy (2%, Antasmunchie) | Dark Hammer (100%) | Dreamy Neo Bowser Castle* |
| File:DreamyBowser.png | Dreamy Bowser [2] | Body: 2417 Left Arm: 350 Right Arm: 464 Total: 3213 |
None | None | None | None | Neo Bowser Castle |
*Antasma is not actually fought in the Dreamy Neo Bowser Castle area, but is fought in the dream world after creating a portal to it.
Giant Bosses
| Name | Coins | Item Drops | Location |
|---|---|---|---|
| Robo-Drilldigger | 500 | Snare Boots (large Gift), Super Candy (large Gift), Super Nut (large Gift), 1-Up Deluxe (large Gift) | Dreamy Dozing Sands |
| Mount Pajamaja | 560 | Metal Gloves (large Gift), Ultra Mushroom (large Gift), Ultrasyrup Jar (large Gift), Refreshing Herb (large Gift) | Dreamy Mount Pajamaja |
| Earthwake | 1000 | Filler Gloves DX (large Gift), Ultra Candy (large Gift), Ultra Nut (large Gift), 1-Up Deluxe (large Gift) | Dreamy Wakeport |
| Zeekeeper | 1200 | Boost/Energy Wear (large Gift), Max Candy (large Gift), Max Nut (large Gift), 1-Up Deluxe (large Gift) | Dreamy Somnom Woods |
| Bowser | 2000 | Supreme Hammer (large Gift), Max Candy (large Gift), Max Nut (large Gift), 1-Up Deluxe (large Gift) | Dreamy Neo Bowser Castle |
Battle Ring Bosses
| Image | Name | HP | Recommended Level (Normal/Hard Mode) | One-Time Fee | Turn Limit | Reward | Location |
|---|---|---|---|---|---|---|---|

|
Grobot X | 1133 | 17/22 | 100 Coins | 6 | 600 Coins Zeekeeper's Feathers (first time) |
Battle Ring |
| File:Bowser and Antasma X.png | Bowser X & Antasma X | Bowser X: 771 Antasma X: 19 |
19/24 | 150 Coins | 8 | 900 Coins | Battle Ring |

|
Torkscrew X | 1594 | 23/28 | 200 Coins | 8 | 1200 Coins | Battle Ring |

|
Big Massif X | Big Massif X: 1901 Hooraw X: 53 |
26/31 | 250 Coins | 12 | 1500 Coins | Battle Ring |

|
Mammoshka X | Mammoshka X: 1771 Block Monolift X: 1 |
30/35 | 300 Coins | 16 | 1800 Coins | Battle Ring |

|
Elite Trio X | Corporal Paraplonk X: 780 Private Goomp X: 468 Sergeant Guy X: 1092 Sergeant Guy Cannon X: 1 Sub-Goomba X: 149 |
33/38 | 350 Coins | 12 | 2100 Coins | Battle Ring |

|
Pi'illodium X | Body: 2742 Wings: 282 Mini Pi'illoid X: 86 |
40/45 | 400 Coins | 26 | 2400 Coins | Battle Ring |

|
Antasma X | Antasma X: 3336 Antasmunchie X: 132 |
45/50 | 500 Coins | 14 | 3000 Coins | Battle Ring |
| File:Bowser Jr. & Koopa Clown Car Mario & Luigi Dream Team.png | Battle Medley + Bowser Jr. | Bowser Jr.: 4099 Junior Clown Car: 512 Monty Mole: 1 |
50/55 | 1000 Coins | 45 | 10000 Coins | Battle Ring |
- Battle Medley, like Class 7 in Mario & Luigi: Bowser's Inside Story, has the brothers take on all the previous bosses before facing the final, exclusive boss.
Battle Ring Giant Bosses
| Image | Name | One-Time Fee | Turn Limit (Normal/Hard Mode) | Reward | Location |
|---|---|---|---|---|---|

|
Robo-Drilldigger X | 200 Coins | 10/7 | 1200 Coins | Battle Ring |

|
Mount Pajamaja X | 250 Coins | 13/11 | 1500 Coins | Battle Ring |

|
Earthwake X | 300 Coins | 10 (Both Modes) | 1800 Coins | Battle Ring |

|
Zeekeeper X | 350 Coins | 6/4 | 2100 Coins | Battle Ring |

|
Bowser X | 400 Coins | 6 (Both Modes) | 2400 Coins | Battle Ring |
| Giant Medley | 800 Coins | 41/42 | 8000 Coins | Battle Ring |
- Giant Medley has the brothers face all five bosses in a row.
Items
- ? Blocks
- Coin Blocks
- Attack Piece Blocks
- Coins
- 5 Gold Coins
- 10 Gold Coins
- 50 Gold Coins
- 100 Gold Coins
- White blocks with Kamek's hat and glasses used to reveal warp points from Kamek's spell in Neo Bowser Castle.
List of Usable Items
| Item Name | Image | Description | Effects |
|---|---|---|---|
| Mushroom | Restores 30 HP (to a single bro). | ||
| Super Mushroom | Restores 60 HP (to a single bro). | ||
| Ultra Mushroom | Restores 100 HP (to a single bro). | ||
| Max Mushroom | Restores 160 HP (to a single bro). | ||
| Nut | Restores 15 HP to both Mario and Luigi. | ||
| Super Nut | Restores 30 HP to both Mario and Luigi. | ||
| Ultra Nut | Restores 50 HP to both Mario and Luigi. | ||
| Max Nut | Restores 80 HP to both Mario and Luigi. | ||
| Syrup Jar | Restores 20 BP (to a single bro). | ||
| Supersyrup Jar | Restores 40 BP (to a single bro). | ||
| Ultrasyrup Jar | Restores 60 BP (to a single bro). | ||
| Max Syrup Jar | Restores 80 BP (to a single bro). | ||
| Candy | Restores a little bit of HP and BP (to a single bro). | Restores 40% of a single bro's HP and BP. | |
| Super Candy | Restores a decent amount of HP and BP (to a single bro). | Restores 60% of a single bro's HP and BP. | |
| Ultra Candy | Restores a solid chunk of HP and BP (to a single bro). | Restores 80% of a single bro's HP and BP. | |
| Max Candy | Completely restores both HP and BP (of a single bro). | ||
| 1-Up Mushroom | Revives a fallen bro with half of his HP. | ||
| 1-Up Deluxe | Revives a fallen bro with full HP. | ||
| Refreshing Herb | Cures statuses like BURN, DIZZY, TRIP, and MINI. | ||
| Taunt Ball | Enrages an enemy in the background. Whooooosh! | Brings a background enemy to the battlefield to be fought. | |
| Shock Bomb | Makes enemies dizzy... maybe? | Makes all enemies dizzy. | |
| Boo Biscuit | Grants damage immunity. Helps with dodge training! | ||
| Secret Boxes | Does...who knows what? Use one to find out. | ||
Locations
- Real World (Pi'illo Island)
- Dream World
- Dreamy Pi'illo Castle
- Dreamy Mushrise Park
- Dreamy Dozing Sands
- Dreamy Wakeport
- Dreamy Mount Pajamaja
- Dreamy Driftwood Shore
- Dreamy Somnom Woods
- Dreamy Neo Bowser Castle
- Dream's Deep (accessed from portals in Dreamy Mushrise Park after saving Eldream and in Dreamy Pi'illo Castle after returning to search for the Zeekeeper)
*Neo Bowser Castle was originally not on Pi'illo Island, but floating in the air near the island. However, it crashes onto Pi'illo Island when the Zeekeeper breaks the barrier.
Sidequests
Hooski Trading Quest
In Wakeport during Mario and Luigi's travels, the player may encounter a male Hooski wanting to propose to nearby female, but is lacking the proper proposal gift. Upon Mario and Luigi agreeing to help, they are given a plush Zeekeeper to use in order to get something better to propose with, initiating a brief trading sidequest.
Mario and Luigi first trade the plush Zeekeeper for a rare fruit with a Shelltop in the nearby item shop, afterwards swapping it for a Yoshi egg with a Red Yoshi in the hotel district, which they then swap for a photo of Peach with a Toad by the tour center, which they then swap for the Book of Ruins with a Brock researcher to the north of the Toad, which they then swap for a photo of Queen Bean with a Bean in the gear shop, which they then swap for a lost camera with a Bean in one of the buildings in the hotel district, which they then give to a Toad near the rooftops of the hotel district in exchange for info about a bird burying something between the nearby umbrella and fountain, which then turns out to be upon the Bros. digging it out, a Pi'illo ring which Mario and Luigi hand to the Hooski for him to then propose with, the female accepting after a short cutscene which ends with the Bros. being rewarded greatly with a Sap Hammer, Heart Bean DX, some Rally Wear, and a 1-UP Mushroom, and if the player talks to him afterwards, he'll give the Bros. an idea of where to go next in Wakeport.
Kylie Koopa's Photo Puzzles
During Mario and Luigi's travels in Wakeport, they come across Kylie Koopa upon entering a house, and discover she's the guidebook writer for the island. She offers some work for them, involving them finding camera blocks around the island, bringing them back here and deciphering them. Each shot can be taken back and played as three of the same photo puzzles of differing levels, with each higher level, the photo covers more of the scene, and the games give the player more time to do the puzzle. The Level 1 reward is 100 coins with a time limit of 3 minutes, the Level 2 reward is 300 coins with a time limit of 4 minutes. The level 3 reward is a DX Bean of varying stat with a time limit of 6 minutes.
| Image | Area | Shot Location | Level 1 Prize | Level 2 Prize | Level 3 Prize |
|---|---|---|---|---|---|

|
Pi'illo Blimport | In the area where Mario and Luigi take the Welcome Quiz, this shot is found in the north-east. | 100 coins | 300 coins | Heart Bean DX |

|
Pi'illo Castle | In the room outside the collection room, this shot is found at the highest point in this room in the north-west. A Zeekeeper mascot idles beneath the block for a period of the game, making it inaccessible until he moves. | 100 coins | 300 coins | Bros. Bean DX |

|
Mushrise Park | In the area with the broken main fountain, this shot is found in a camera block in the west, accessed by spin-jumping or side-drilling towards its secluded heights from one of the nearby flowers. (Spin Jump required.) | 100 coins | 300 coins | Power Bean DX |

|
Dozing Sands | In the area to the east of the area with the Dreampoint, this shot is found in a block in the north of the area, floating above some tall pillars. (Ball Hop required.) | 100 coins | 300 coins | Defense Bean DX |

|
Wakeport | Upon Mario and Luigi agreeing to help, Kylie places this block in the room of her house in plain sight. | 100 coins | 300 coins | Speed Bean DX |

|
Mount Pajamaja | In the area where Mario and Luigi can jump off the edge to land near the oxygen valve, in the northwest. | 100 coins | 300 coins | Stache Bean DX |

|
Driftwood Shore | In the beach area with the Warp Pipe, this camera block is found in the north, accessed by smashing a rock blocking a hole Mini Mario can go through to find the block at the end. | 100 coins | 300 coins | Heart Bean DX |

|
Somnom Woods | In the third area with the deadly liquid, this camera block is found in the south, to the south of the bramble tunnel, and to the east of a rock. | 100 coins | 300 coins | Bros. Bean DX |

|
Neo Bowser Castle | In the first area where Kamek flees into the Dream World, this camera block is found in the south-west on its own metal platform in the middle of the lava. | 100 coins | 300 coins | Power Bean DX |
Mad Skillathon
Upon Mario and Luigi's first visit to Wakeport, they may come across a Shelltop on a stand, apparently hosting an event known as the Mad Skillathon, a contest for those with skills, with rewards included. Mario and Luigi, after a short conversation, decide to take part using their Bros. Attacks, as the Shelltop counted those as skills. The Mad Skillathon is much like in Mario and Luigi: Bowser's Inside Story in the sense that it's a Bros. Attack endurance game. After getting S rank in all seven challenges, the player is awarded with the Pro Wear.
These are the list of rewards gained from hitting the B, A or S rank scores, them respectively being 200 for B, 500 for A and 800 for S.
| Bros. Attack | Challenge Description | B-Rank Prize (200) | A-Rank Prize (500) | S-Rank Prize (800) |
|---|---|---|---|---|
| 3D Green Shell | Kick the shell as many times as you can! Drop the boss for 20 points! | 100 coins | 300 coins | Rally Belt |
| Fire Flower | A big flame is worth 3 points! Small flames will net you nothing! | 100 coins | 300 coins | Flame Hammer |
| Bye-Bye Cannon | Jump on monsters to increase your score with each bounce! 1->2->3! | 100 coins | 300 coins | Strike Gloves |
| Dropchopper | Grab timers to increase the time. Then drop on monsters' heads! | 100 coins | 300 coins | Action Boots |
| Bomb Derby | Smack the bombs into the monsters! Watch for different kinds of bombs. | 100 coins | 300 coins | Bare Boots DX |
| Slingsniper | Shoot monsters with the B Button! Try to hit multiple monsters at once. | 100 coins | 300 coins | EXP Bro Gloves DX |
| Star Rocket | Tilt the Star Rocket to collect stars, but avoid damage balloons! | 100 coins | 300 coins | Perfect Bro Gloves |
Battle Broque Madame
Upon Mario and Luigi's first visit to Driftwood Shore, they meet Broque Madame on a stand, who suggests the idea of the Bros. entering her dreams due to her boredom at her shop and her crave for excitement. This is much like the Mad Skillathon, however is the Luiginary Attack version for it.
These are the list of rewards gained from hitting the B, A or S rank scores, them respectively being 200 for B, 500 for A and 800 for S. After getting S rank in all four challenges, the player is awarded with the Supreme Boots.
| Luiginary Attack | Challenge Description | B-Rank Prize (200) | A-Rank Prize (500) | S-Rank Prize (800) |
|---|---|---|---|---|
| Luiginary Ball | Bowl over the small Madames, and then crash into the big Madame! | 100 coins | 300 coins | Coin Boots DX |
| Luiginary Stack | Stack the Luiginoids, and jump on the Broque Madame. Avoid the hazards! | 100 coins | 300 coins | Sap Hammer DX |
| Luiginary Flame | Bounce the flames back, and then use your hammer to hit the last one! | 100 coins | 300 coins | Blunt Hammer DX |
| Luiginary Wall | Hit all of the small Madames back! Hitting items will affect play. | 100 coins | 300 coins | Lucky Gloves DX |
Mole Hunt
In Driftwood Shore, Mario and Luigi come across a Shelltop during their treks in the area. Upon beating his game the second and final mandatory time, the Shelltop allows Mario and Luigi to play upon returning to him at will for the usual price of 10 coins, with the inclusion of prizes if Mario and Luigi are good enough.
- Rewards
- 300 points for 200 coins.
- 400 points for 300 coins.
- 500 points for Bare Hammer DX.
Additional information
For listings of Clothing, Badges, Level Ranks, Enemy Statistics, Level-Up Progressions and Shops in the game, see the respective pages.
For listings of all the Expert Challenges and rewards gained from them, see the respective page.
For listings of all the Pi'illo Locations and Bean Locations in the game, see the respective pages.
Differences from other Mario & Luigi games
- Unlike the other Mario & Luigi games, Mario and Luigi don't let out their battle cries of "Let's-a-go!" and "Okey-dokey!" respectively when starting a battle.
- This is the first time in the series that Peach's Castle isn't the tutorial level.
- This is the first time in the series that the tutorial battle does not feature Bowser.
- This is the first time in the series that has Bowser as a main antagonist.
- Unlike the first three installments, Lakitu does not appear in the Level Up system.
- The art style in this game changed. This is the first game in the Mario & Luigi series to depict the letters on Mario and Luigi's caps as red and green, respectively, instead of black, and to have Luigi's pants reach his shoes, hiding his socks.
- This is the first time in the series Bowser kidnaps Peach as the final boss.
- This is the first time in the series that Bowser is consciously the final boss.
- This is the first Mario & Luigi game that Fawful does not make an appearance. Although there is an NPC that says one of his main quotes if talked to. Fawful's absence is due to his defeat after Mario & Luigi: Bowser's Inside Story.
- The Stache point system was dropped again in this game like in PiT.
- This is the first Mario & Luigi game that Bowser Jr. actually makes an appearance. However, he has nothing to do with the story.
- This is the first Mario & Luigi game where bosses will always drop their exclusive items/gear upon defeat (with the exception of Mammoshka).
- This is the first Mario & Luigi game that the player doesn't lose coins when running away from battles.
Demo
On the day of the game's release in North America, a demo of the game was also released on the Nintendo eShop, making this the first strictly Mario game to have a publicly released demo for download, however it is not available in UK. It uses 1,010 blocks when downloaded, and offers twelve uses. The demo is identical to the E3 demo, having the same three options for gameplay:
- The Real World - the player can explore a segment of Mushrise Park.
- The Dream World - the player can explore a combination of Dreamy Pi'illo Castle and Dreamy Dozing Sands.
- Boss Battle - the player is given the option of either facing Grobot in the real world or Bowser and Antasma in the Dream World.
In Mushrise Park, the objective is to destroy all the rocks, much like how Mario and Luigi must break all the rocks in certain areas upon their return to Mushrise Park. The area has also been changed to prevent the player from exploring other areas. A few areas of the dream world have also been combined to showcase the Luiginary Works. In battle, all Bros. and Luiginary Attacks only use half as much BP as they do in the actual game.
References to other games
- Super Mario Bros.: A remix of this game's main theme is heard while a tutorial is been displayed.
- Super Mario World 2: Yoshi's Island: Part of Driftwood Shore's theme is a remix of this game's title screen music. Bandits originated from this game, too.
- Super Mario 64: One counter-attack Giant Luigi uses against Giant Bowser involves Luigi grabbing him by the tail and spinning him around before launching him off the platform, much like in the Bowser battles of Super Mario 64.
- Paper Mario: In the third and final battle against Kamek in Dreamy Neo Bowser Castle, he will create three different colored clones of himself: red, green and white. The green clone can raise defense like Green Magikoopas and the white clone can heal its allies like White Magikoopas.
- Luigi's Mansion / Luigi's Mansion: Dark Moon: One of the messages from Luigi displayed in Dream's Deep is "I fight ghosts!"
- Super Mario Sunshine: Bowser Jr. uses his paintbrush as an attack.
- Mario & Luigi: Superstar Saga: Popple and other Beanish characters appear in this game. Part of Driftwood Shore's theme is a remix of Oho Oasis. The way the Mario Bros. get to Big Massif's Hooraws by having to go through their own puzzle-filled sections in Dreamy Wakeport is similar to how the the Koopalings in Bowser's Castle were reached in the first game. When fighting Bowser Jr., he may summon two Shy Guys to carry a fiery rope that the brothers have to jump over to dodge in the same manner as the Border Bros. in Superstar Saga. In this game, Somnom Woods serves as the penultimate area after collecting all the vital pieces of the Ultibed, just like how Joke's End was the second-to-last area to visit after collecting all the pieces of the Beanstar.
- When Mario and Luigi are taught the Mini Mario and Mole Mario moves, the character who teaches them says they learnt it from a movie. In Mario & Luigi: Superstar Saga, it's revealed that a movie of their adventure was made after the credits finish.
- Mario & Luigi: Partners in Time: The Bros. Ball attack from this game returns. Also, Bowser resembles Shrowser when possessed by Antasma. Kylie Koopa also reappears along with a picture of a Shroob.
- Mario & Luigi: Bowser's Inside Story: The badges are similar to the ones from this game. Starlow, Broque Monsieur, Broque Madame, Broggy, Private Goomp, Corporal Paraplonk, and Sergeant Guy return as well. Bowser's theme is reused. The Banzai Bill Blaster re-appears as well as a prop during the battlle with Private Goomp, Corporal Paraplonk and Sergeant Guy. In the final battle, before Bowser becomes Dreamy Bowser, he inhales the fragments of the shattered Dream Stone using the inhaling power he received in this game. The Earthwake battle plays out the same as the Tower of Yikk battle. Bowser before his Giant Battle also states he invented transforming into a giant. His cry of "Showtime!" before the battle itself calls back to his battle-opening cry of the previous game.
- New Super Mario Bros. Wii: Kamek is disguised as Princess Peach again.
- Super Mario 3D Land: Grand Tail Goombas (known in this game as Big Tail Goombas) appears in the Neo Bowser Castle dream world.
- New Super Mario Bros. U: Bombs very similar to the ones used by Lemmy Koopa in this game appear in the Bomb Derby attack.
- The Legend of Zelda series: One of the Luiginoid moves is called the "Hookshot", which is executed while Luiginoids are in a ball state. This is likely a reference to the item of the same name.
Reception
The game was positively received. Both Gamespot and IGN gave the game an 8 which is the lowest review in the series by both of them. The reasons for this were that IGN believed that the overworld was less appealing than the Dream World and that the game's intro was sluggish and saturated with tutorials[3]. GameXplain on the other hand believes that the game is fun, despite its minor flaws, and that it lives up to the other installments in the series; the game was given 4 1/2 stars out of 5.
Glitches
- Main article: List of glitches in Mario & Luigi: Dream Team
Staff
- Main article: List of Mario & Luigi: Dream Team staff
Quotes
- Main article: List of quotes in Mario & Luigi: Dream Team
Script
- Main article: Script of Mario & Luigi: Dream Team
Gallery

Mario

Luigi

Starlow
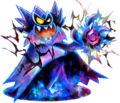
Antasma
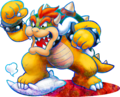
Bowser
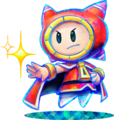
Prince Dreambert

Princess Peach

European logo

Japanese logo

American logo


Media
- Main article: List of media from Mario & Luigi: Dream Team
Update History
Version 1.1
- Nintendo eShop Update Content Description
Fixes a bug that occurs on Mount Pajamaja where the Massifs use a spin jump to break icicles. This bug makes it impossible to proceed past this point if the player takes certain actions. Fixes a bug that prevents the player from finishing the final battle with Antasma. Fixes other issues so that the game plays as intended.
Names in other languages
Trivia
- The name comes from the term "dream team", a team composed of the greatest performers of a certain talent.
- Mario & Luigi Dream Team is the second Mario game to receive an E10 rating by the ESRB for Cartoon Violence, the first being Mario Strikers Charged. The ACB rated this as PG for the same reason.
- This is Bowser Jr.'s first and only appearance in the Mario & Luigi series.
- This is the only Mario & Luigi game where Bowser is never fought by himself, without any enhancements.
- This is the second 3DS game to receive a patch, the first being Mario Kart 7. The patch removes most freezing issues from the game and was released on September 5th.
External links
- Official American website
- Official European Website
- Official Australian Website
- Official Japanese website
References
Template:BoxTop Template:ML:DT Template:Mariogames