User:Green Star/sandbox: Difference between revisions
m (Please don't use categories and mainspace templates as it places your sandbox in those categories) |
Green Star (talk | contribs) No edit summary |
||
| Line 1: | Line 1: | ||
{{new subject}} | |||
{{location-infobox | {{location-infobox | ||
|image= | |image=SpringofRainbowsPMTOK.png | ||
|greaterloc=[[ | |greaterloc=[[Shangri-Spa]] | ||
|first_appearance=''[[Paper Mario: The Origami King]]'' ([[List of games by date#2020|2020]]) | |first_appearance=''[[Paper Mario: The Origami King]]'' ([[List of games by date#2020|2020]]) | ||
}} | }} | ||
The ''' | The '''Spring of Rainbows''' is a location in ''[[Paper Mario: The Origami King]]'', one of the five hot springs found at [[Shangri-Spa]]. This is by far the most exclusive and somewhat secluded spring at the resort, requiring [[Mario]] to use all four of the other springs and fill out a [[Stamp Card]] before earning the [[Spring of Rainbows - VIP]], his ticket into the spring. | ||
The Spring of Rainbows must be visited to restore [[Bowser Jr.]]'s colors as a side effect of using the [[Spring of Jungle Mist]]. The actual entrance into the spring is down a set of stairs west of the plaza. [[Shy Guys Finish Last]] takes place here. Additionally, there are no [[Toad (species)|Toad]]s to be rescued here, and very few other collectibles. | |||
==History== | |||
After filling out the [[Stamp Card]], [[Mario]] must return to the front desk and speak with the receptionist. As a reward, he is given the [[Spring of Rainbows - VIP]], used to enter the spring. Mario, [[Olivia]], [[Bowser Jr.]] and [[Kamek]] must head to the plaza and find a small path to the west, where there is a set of stairs. Walking down these stairs, Mario is asked for his pass. Once he gives up the ticket, he may enter the spring. If Mario tries to give away anything else as a pass, he is declined. | |||
After crossing a windy cavern, Mario, Olivia, Kamek and Bowser Jr. must enter a suspiciously dark cave, with seemingly nothing more than a sign in the center. However, reading it reveals the cave to be the set for a hot new game show, [[Shy Guys Finish Last]]. Mario must compete in the show to be granted access to the actual spring, making it all the more exclusive. Mario is also able to go for a perfect game and/or a Sudden Death round, although he only needs to score 100 points to be able to use the spring. After using the spring, Bowser Jr. gets his colors back, rejuvenating both him and his [[Junior Clown Car]]. Now functioning, Bowser Jr. is able to take them directly to [[Boss Sumo Bro]]. | |||
==Layout== | ==Layout== | ||
Surprisingly, the first area of the spring is a flat, narrow cavern section. At the start is a [[Toad (species)|Toad]] who welcomes Mario and his friends to the spring. Nearby, there is a sign, a [[Not-Bottomless Hole]], and an orbiting [[Fuzzy]]. | |||
==Enemies== | |||
*[[Fuzzy|Fuzzies]] | |||
*[[Rocky Wrench]]es | |||
==Not-Bottomless Holes== | ==Not-Bottomless Holes== | ||
{|border=1 cellpadding=0 style="text-align: center; border-collapse: collapse; border: 1px solid black; width:100%" | {|border=1 cellpadding=0 style="text-align: center; border-collapse: collapse; border: 1px solid black; width:100%" | ||
|- | |- | ||
|There is a [[Not-Bottomless Hole]] in the | |There is a [[Not-Bottomless Hole]] in the ground in the southwest corner of the main room. | ||
|[[File: | |[[File:WaterVellumentalShrineHoleA.jpg|250px]] | ||
|- | |- | ||
|There is a Not-Bottomless Hole in the | |There is a Not-Bottomless Hole in the stairs leading up to the room with the easier tile puzzle. | ||
|[[File: | |[[File:WaterVellumentalShrineHoleB.jpg|250px]] | ||
|- | |- | ||
|There is a Not-Bottomless Hole in the | |There is a Not-Bottomless Hole in the ground in the southeast corner of the main room. | ||
|[[File: | |[[File:WaterVellumentalShrineHoleC.jpg|250px]] | ||
|- | |- | ||
|There is a Not-Bottomless Hole | |There is a Not-Bottomless Hole below the wheel, guarded by [[Swoop]]s. | ||
|[[File: | |[[File:WaterVellumentalShrineHoleD.jpg|250px]] | ||
|- | |- | ||
|There | |There are two Not-Bottomless Holes in the breakable block section. They are both in the walls on the opposite sides of the room. Mario must be careful not to break certain blocks, make it to the end of the section, and walk along the top of the blocks to reach them. | ||
|[[File: | |[[File:WaterVellumentalShrineHoleE.jpg|250px]] | ||
|- | |- | ||
|There are two Not-Bottomless Holes | |There are two Not-Bottomless Holes beneath one of the blocks in this section, closer to the entrance. | ||
|[[File: | |[[File:WaterVellumentalShrineHoleF.jpg|250px]] | ||
|- | |- | ||
|There is a Not-Bottomless Hole | |There is a Not-Bottomless Hole in the wall in the northeast corner of the room with the smaller stone dragon head. | ||
|[[File: | |[[File:WaterVellumentalShrineHoleG.jpg|250px]] | ||
|- | |- | ||
|There is a Not-Bottomless Hole in the | |There is a Not-Bottomless Hole in the right side of the cavern area. | ||
|[[File: | |[[File:WaterVellumentalShrineHoleH.jpg|250px]] | ||
|- | |- | ||
|There is a Not-Bottomless Hole | |There is a Not-Bottomless Hole on the other side of the cavern in the shape of a mushroom, revealed to be the door to a coffee shop when filled in. | ||
|[[File: | |[[File:WaterVellumentalShrineHoleI.jpg|250px]] | ||
|} | |} | ||
| Line 89: | Line 55: | ||
{|border=1 cellpadding=0 style="text-align: center; border-collapse: collapse; border: 1px solid black; width:100%" | {|border=1 cellpadding=0 style="text-align: center; border-collapse: collapse; border: 1px solid black; width:100%" | ||
|- | |- | ||
|Mario must | |Mario must head down below the wheel and continue to the southwest corner to find the chest containing Collectible Treasure #37: Restaurant Fridge. | ||
|[[File: | |[[File:WaterVellumentalShrineCollectibleA.jpg|250px]] | ||
|- | |- | ||
|Mario must | |Mario must hammer around the northwest area below the wheel to find a small set of [[Hidden Block]]s allowing him to enter a tunnel leading to the chest containing Collectible Treasure #38: [[MAX UP Heart]]. | ||
|[[File: | |[[File:WaterVellumentalShrineCollectibleB.jpg|250px]] | ||
|- | |- | ||
|Mario must | |Mario must destroy certain blocks in the block section and keep others, allowing him to hop along them to a small overhead tunnel at the entrance with a chest containing Collectible Treasure #39: [[POW Block]]. | ||
|[[File: | |[[File:WaterVellumentalShrineCollectibleC.png|250px]] | ||
|} | |} | ||
| Line 102: | Line 68: | ||
{|border=1 cellpadding=0 style="text-align: center; border-collapse: collapse; border: 1px solid black; width:100%" | {|border=1 cellpadding=0 style="text-align: center; border-collapse: collapse; border: 1px solid black; width:100%" | ||
|- | |- | ||
|There is a [[? Block]] on the | |There is a [[? Block]] on the west side of the wheel in the main area. | ||
|[[File: | |[[File:WaterVellumentalShrineBlockA.jpg|250px]] | ||
|- | |||
|There are two ? Blocks in the first room west of the main area. One contains a bag of confetti, while the other contains [[Shiny Iron Boots]]. | |||
|[[File:WaterVellumentalShrineBlockB.jpg|250px]] | |||
|- | |||
|There is a ? Block on the east side of the wheel in the main area. | |||
|[[File:WaterVellumentalShrineBlockC.jpg|250px]] | |||
|- | |- | ||
|There | |There is a set of four [[Hidden Block]]s creating a ledge down below the wheel. | ||
|[[File: | |[[File:WaterVellumentalShrineBlockD.jpg|250px]] | ||
|- | |- | ||
|There is a ? Block in the | |There is a ? Block on a ledge in the southeast corner of the block section, right in front of a [[Not-Bottomless Hole]]. | ||
|[[File: | |[[File:WaterVellumentalShrineBlockE.jpg|250px]] | ||
|- | |- | ||
| | |There is a ? Block near the exit of the block section. | ||
|[[File: | |[[File:WaterVellumentalShrineBlockF.jpg|250px]] | ||
|- | |- | ||
| | |There is a ? Block on the left side of the cavern. | ||
|[[File: | |[[File:WaterVellumentalShrineBlockG.jpg|250px]] | ||
|- | |- | ||
| | |There is a ? Block on the right side of the cavern. | ||
|[[File: | |[[File:WaterVellumentalShrineBlockH.jpg|250px]] | ||
|} | |} | ||
{{PMTOK}} | {{PMTOK}} | ||
[[ | [[Category:Paper Mario: The Origami King Places]] | ||
Revision as of 19:21, August 9, 2020
This article is about a subject in an upcoming or recently released game. When the game is released, or more information about this subject is found, this article may need major rewriting. This notice should be removed after a month has passed since the game was first released.
Template:Location-infobox The Spring of Rainbows is a location in Paper Mario: The Origami King, one of the five hot springs found at Shangri-Spa. This is by far the most exclusive and somewhat secluded spring at the resort, requiring Mario to use all four of the other springs and fill out a Stamp Card before earning the Spring of Rainbows - VIP, his ticket into the spring.
The Spring of Rainbows must be visited to restore Bowser Jr.'s colors as a side effect of using the Spring of Jungle Mist. The actual entrance into the spring is down a set of stairs west of the plaza. Shy Guys Finish Last takes place here. Additionally, there are no Toads to be rescued here, and very few other collectibles.
History
After filling out the Stamp Card, Mario must return to the front desk and speak with the receptionist. As a reward, he is given the Spring of Rainbows - VIP, used to enter the spring. Mario, Olivia, Bowser Jr. and Kamek must head to the plaza and find a small path to the west, where there is a set of stairs. Walking down these stairs, Mario is asked for his pass. Once he gives up the ticket, he may enter the spring. If Mario tries to give away anything else as a pass, he is declined.
After crossing a windy cavern, Mario, Olivia, Kamek and Bowser Jr. must enter a suspiciously dark cave, with seemingly nothing more than a sign in the center. However, reading it reveals the cave to be the set for a hot new game show, Shy Guys Finish Last. Mario must compete in the show to be granted access to the actual spring, making it all the more exclusive. Mario is also able to go for a perfect game and/or a Sudden Death round, although he only needs to score 100 points to be able to use the spring. After using the spring, Bowser Jr. gets his colors back, rejuvenating both him and his Junior Clown Car. Now functioning, Bowser Jr. is able to take them directly to Boss Sumo Bro.
Layout
Surprisingly, the first area of the spring is a flat, narrow cavern section. At the start is a Toad who welcomes Mario and his friends to the spring. Nearby, there is a sign, a Not-Bottomless Hole, and an orbiting Fuzzy.
Enemies
Not-Bottomless Holes
| There is a Not-Bottomless Hole in the ground in the southwest corner of the main room. | 
|
| There is a Not-Bottomless Hole in the stairs leading up to the room with the easier tile puzzle. | 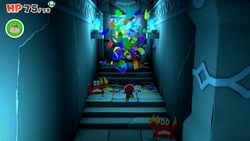
|
| There is a Not-Bottomless Hole in the ground in the southeast corner of the main room. | 
|
| There is a Not-Bottomless Hole below the wheel, guarded by Swoops. | 
|
| There are two Not-Bottomless Holes in the breakable block section. They are both in the walls on the opposite sides of the room. Mario must be careful not to break certain blocks, make it to the end of the section, and walk along the top of the blocks to reach them. | 
|
| There are two Not-Bottomless Holes beneath one of the blocks in this section, closer to the entrance. | 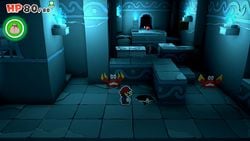
|
| There is a Not-Bottomless Hole in the wall in the northeast corner of the room with the smaller stone dragon head. | 
|
| There is a Not-Bottomless Hole in the right side of the cavern area. | 
|
| There is a Not-Bottomless Hole on the other side of the cavern in the shape of a mushroom, revealed to be the door to a coffee shop when filled in. | 
|
Collectible Treasures
| Mario must head down below the wheel and continue to the southwest corner to find the chest containing Collectible Treasure #37: Restaurant Fridge. | 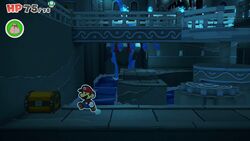
|
| Mario must hammer around the northwest area below the wheel to find a small set of Hidden Blocks allowing him to enter a tunnel leading to the chest containing Collectible Treasure #38: MAX UP Heart. | 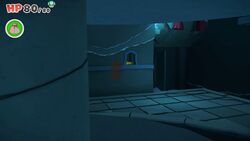
|
| Mario must destroy certain blocks in the block section and keep others, allowing him to hop along them to a small overhead tunnel at the entrance with a chest containing Collectible Treasure #39: POW Block. | 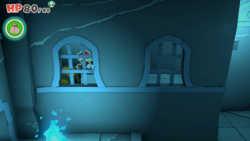
|
? Blocks
| There is a ? Block on the west side of the wheel in the main area. | 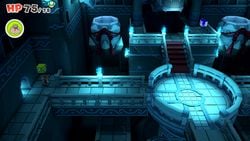
|
| There are two ? Blocks in the first room west of the main area. One contains a bag of confetti, while the other contains Shiny Iron Boots. | 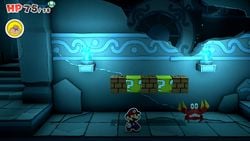
|
| There is a ? Block on the east side of the wheel in the main area. | 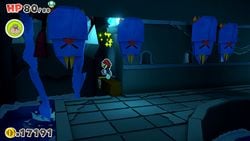
|
| There is a set of four Hidden Blocks creating a ledge down below the wheel. | 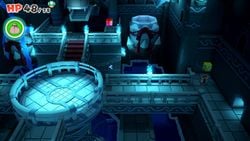
|
| There is a ? Block on a ledge in the southeast corner of the block section, right in front of a Not-Bottomless Hole. | 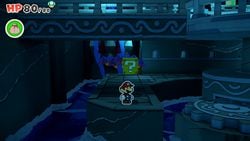
|
| There is a ? Block near the exit of the block section. | 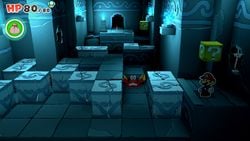
|
| There is a ? Block on the left side of the cavern. | 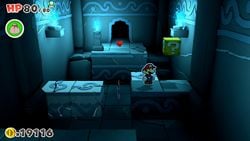
|
| There is a ? Block on the right side of the cavern. | 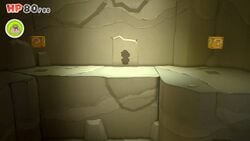
|