Origami Castle: Difference between revisions
(Undo revision 4174585 by 201.207.176.62 (talk) Does not count) Tags: Undo Mobile edit Advanced mobile edit |
|||
| (25 intermediate revisions by 13 users not shown) | |||
| Line 1: | Line 1: | ||
{{ | {{PMTOK location infobox | ||
|image=PMTOK Origami Castle.jpg | |||
|image= | |||
|caption= | |caption= | ||
|toads= | |toads= | ||
| Line 7: | Line 6: | ||
|treasures=6 | |treasures=6 | ||
|blocks=17 | |blocks=17 | ||
|enemies=[[Goomba]]s<br>[[Koopa Troopa]]s<br>[[Ninji]]s<br>[[Hammer Bro]]s<br>[[Boomerang Bro]]s<br>[[Fire Bro]]s<br>[[Ice Bro]]s<br>[[ | |enemies=[[Goomba]]s<br>[[Koopa Troopa]]s<br>[[Spiny|Spinies]]<br>[[Ninji]]s<br>[[Buzzy Beetle]]s<br>[[Hammer Bro]]s<br>[[Boomerang Bro]]s<br>[[Fire Bro]]s<br>[[Ice Bro]]s<br>[[Sledge Bro]]s<br>[[Sumo Bro]]s<br>[[Mechakoopa]]s<br>''[[Paper Macho Koopa Troopa]]s''<br>'''[[Stapler (boss)|Stapler]]'''<br>'''[[King Olly]]''' | ||
|streamer=6B6183 | |streamer=6B6183 | ||
}} | }} | ||
{{Quote|Mario, since I know best, I have refolded this castle in my image. I sincerely hope you enjoy it.|King Olly|Paper Mario: The Origami King}} | |||
'''Origami Castle''' is a location in ''[[Paper Mario: The Origami King]]'', the final area to be visited in the game. It is a corrupted version of [[Peach's Castle]] crafted and ruled by [[King Olly]], who is fought at the end in addition to [[Stapler (boss)|Stapler]]. Almost everything here is made of origami, including the [[Warp Pipe]]s and [[? Block]]s. There are no [[Toad (species)|Toad]]s or [[Not-Bottomless Hole]]s to be found here. | '''Origami Castle''' is a location in ''[[Paper Mario: The Origami King]]'', the final area to be visited in the game. It is a corrupted version of [[Peach's Castle]] crafted and ruled by [[King Olly]], who is fought at the end in addition to [[Stapler (boss)|Stapler]]. Almost everything here is made of origami, including the [[Warp Pipe]]s and [[? Block]]s. There are no [[Toad (species)|Toad]]s or [[Not-Bottomless Hole]]s to be found here. | ||
==History== | ==History== | ||
When [[Mario]], [[Olivia]], [[Bowser]] and [[Luigi]] enter [[Peach's Castle]], [[Princess Peach]] appears and asks that they follow her. Luigi runs toward her and ends up falling into the same trap door Mario fell into at the beginning of the game. Mario, Olivia and Bowser must follow Princess Peach into the next hallway, where she tells them it is an honor to meet [[King Olly]] before the floor retracts, creating a set of stairs pushing them out of the castle. The castle then begins to | When [[Mario]], [[Olivia]], [[Bowser]] and [[Luigi]] enter [[Peach's Castle]], [[Princess Peach]] appears and asks that they follow her. Luigi runs toward her and ends up falling into the same trap door Mario fell into at the beginning of the game. Mario, Olivia and Bowser must follow Princess Peach into the next hallway, where she tells them it is an honor to meet [[King Olly]] before the floor retracts, creating a set of stairs pushing them out of the castle. The castle then begins to unravel and fold into cubes, assembling into a large-scale version of the model found in the [[Origami Craftsman]]'s workshop. Mario, Olivia and Bowser can only enter the castle and hope to rescue Luigi and Princess Peach. | ||
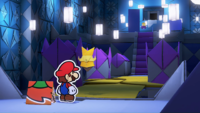
Before they can enter the castle, Mario must use his hammer to flip over two tiles, revealing a [[Magic Circle]] allowing him to use the [[1,000-Fold Arms]] to pull down and open the main doors. However, they are then immediately attacked by two [[Fire Bro]]s. When they enter the castle, they are spotted by two [[Folded Soldiers]], a [[Goomba]] and a [[Koopa Troopa]]. They rush to a nearby King Olly and inform him of their arrival. However, Olly becomes | Before they can enter the castle, Mario must use his hammer to flip over two tiles, revealing a [[Magic Circle]] allowing him to use the [[1,000-Fold Arms]] to pull down and open the main doors. However, they are then immediately attacked by two [[Fire Bro]]s. When they enter the castle, they are spotted by two [[Folded Soldiers]], a [[Goomba]] and a [[Koopa Troopa]]. They rush to a nearby King Olly and inform him of their arrival. However, Olly becomes annoyed they were not able to stop them and feeds them to the hungry floor, which resembles {{wp|paper fortune teller}}s. He welcomes Mario into the castle and is interrupted by Olivia, who tells him he has gone too far. He shrugs this off and leaves them to deal with a number of enemies and obstacles. | ||
[[File:PMTOK Origami Castle Floor 1.png|left|thumb|King Olly confronts Mario, Olivia, and Bowser.]] | |||
When Mario, Olivia and Bowser enter the main hall, they are stopped again by Olly, who slows them down by redirecting the path leading directly to the north end, leading it instead into the rooms left and right of the main hall. Mario must make it through these rooms, fix the path, and make it to the north end. He must then solve the sliding block puzzle to advance to the next rooms. | When Mario, Olivia and Bowser enter the main hall, they are stopped again by Olly, who slows them down by redirecting the path leading directly to the north end, leading it instead into the rooms left and right of the main hall. Mario must make it through these rooms, fix the path, and make it to the north end. He must then solve the sliding block puzzle to advance to the next rooms. | ||
| Line 23: | Line 24: | ||
[[File:PMOK King Olly Throne Room.jpg|thumb|King Olly integrating Princess Peach into the wall of the Origami Castle]] | [[File:PMOK King Olly Throne Room.jpg|thumb|King Olly integrating Princess Peach into the wall of the Origami Castle]] | ||
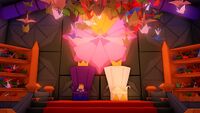
Mario finally enters Olly's throne room, where he is residing in his throne next to a throne presumably meant for Olivia. Here, he shows them the image of Princess Peach, who has become a part of the castle. Olivia also notices the numerous paper cranes in the room. He reveals his plan to create 1,000 paper cranes, granting him a wish he plans to use to turn the [[Toad (species)|Toad]]s into blank paper. Even Bowser is against this, as the effects would be permanent. Olivia reminds Olly he was created by the | Mario finally enters Olly's throne room, where he is residing in his throne next to a throne presumably meant for Olivia. Here, he shows them the image of Princess Peach, who has become a part of the castle. Olivia also notices the numerous paper cranes in the room. He reveals his plan to create 1,000 paper cranes, granting him a wish he plans to use to turn the [[Toad (species)|Toad]]s into blank paper. Even Bowser is against this, as the effects would be permanent. Olivia reminds Olly he was created by the Origami Craftsman, which Olly cites as his reason for all of this. Finally, he tells Mario he plans to use him as the thousandth crane, initiating the final battle. | ||
With Olly defeated once and for all, he becomes too weak to do much of anything. Having finally come to his senses, he sees the error of his ways. Olivia notices a message on his stomach, revealing the Origami Craftsman's true intentions for him, for his fate to be of a fair and kind king. This amuses Olly, who then apologizes to the others for everything he has done. In his dying breaths, he requests Olivia to fold him into the thousandth crane, allowing her to grant a wish of her own. She uses this wish to undo all of the origami done by Olly, thus turning Origami Castle back into Peach's Castle. | With Olly defeated once and for all, he becomes too weak to do much of anything. Having finally come to his senses, he sees the error of his ways. Olivia notices a message on his stomach, revealing the Origami Craftsman's true intentions for him, for his fate to be of a fair and kind king. This amuses Olly, who then apologizes to the others for everything he has done. In his dying breaths, he requests Olivia to fold him into the thousandth crane, allowing her to grant a wish of her own. She uses this wish to undo all of the origami done by Olly, thus turning Origami Castle back into Peach's Castle. | ||
{{br}} | |||
==Layout== | ==Layout== | ||
| Line 33: | Line 35: | ||
*'''Collectible Treasure No. 118''': "''An evil—but admittedly pretty cool—folded version of Princess Peach's Castle created by King Olly.''" | *'''Collectible Treasure No. 118''': "''An evil—but admittedly pretty cool—folded version of Princess Peach's Castle created by King Olly.''" | ||
==Collectible Treasures== | ==Collectibles== | ||
{| | ===Collectible Treasures=== | ||
{| style="text-align: center; width: 100%; margin: 0 auto; border: #6b6486; border-collapse: collapse;" border="1" cellpadding="4" cellspacing="1" | |||
|-style="background: #444544;font-size:14pt;color:white" | |||
!width="10%"|Treasure | |||
!Description | |||
!width=20%|Image | |||
|-style="background: #6b6486;font-size:120%;color:#e6e8e9;border: #6b6486" | |||
!colspan=3|[[List of Collectible Treasures in Paper Mario: The Origami King|{{color|6 treasures|#e6e8e9}}]] | |||
|- | |- | ||
|Collectible Treasure | !style="background-color:#372500;"|[[File:PMTOK Collectible Treasure 113 (Luigi's Kart).jpg|80px|link=Kart]]<br><br>[[Kart|{{color|Luigi's Kart|white}}]] | ||
|Found in a [[? Block]] at the end of the first path in the first room, guarded by a [[Fire Bro]]. | |||
|[[File:OrigamiCastleCollectibleA.png|250px]] | |[[File:OrigamiCastleCollectibleA.png|250px]] | ||
|- | |- | ||
|There is a set of four ? Blocks in the southwest corner of the room left of the main hall. The bottom right block contains | !style="background-color:#372500;"|[[File:PMTOK Collectible Treasure 114 (Bullet Bill).jpg|80px|link=Bullet Bill]]<br><br>[[Bullet Bill|{{color|Bullet Bill|white}}]] | ||
|There is a set of four ? Blocks in the southwest corner of the room left of the main hall. The bottom right block contains the treasure. | |||
|[[File:OrigamiCastleCollectibleB.png|250px]] | |||
|- | |- | ||
|After constructing the origami house in the room right of the main hall, Mario must enter and hit the ? Block in the northwest corner to receive | !style="background-color:#372500;"|[[File:PMTOK Collectible Treasure 115 (Paper Plane Squadron).jpg|80px|link=Paper Plane Squadron]]<br><br>[[Paper Plane Squadron|{{color|Paper Plane Squadron|white}}]] | ||
|After constructing the origami house house in the room right of the main hall, Mario must enter and hit the ? Block in the northwest corner to receive the treasure. | |||
|[[File:OrigamiCastleCollectibleC.png|250px]] | |||
|- | |- | ||
|At the north end of the main hall, to the right of the block puzzle, there is a | !style="background-color:#372500;"|[[File:PMTOK Collectible Treasure 116 (Paper Macho Crater Crashers).jpg|80px|link=Paper Macho Soldier]]<br><br>[[Paper Macho Soldier|{{color|Paper Macho Crater Crashers|white}}]] | ||
| | |At the north end of the main hall, to the right of the block puzzle, there is a Hidden Block containing the treasure. | ||
|[[File:PMTOK Origami Castle Question Block 14.png|250px]] | |||
|- | |- | ||
|After completing the block puzzle, Mario must jump while on the second block on the right to find a Hidden Block containing | !style="background-color:#372500;"|[[File:PMTOK Collectible Treasure 117 (Paper Mistake Buzzy Beetle).jpg|80px|link=Paper Mistake Buzzy Beetle]]<br><br>[[Paper Mistake Buzzy Beetle|{{color|Paper Mistake Buzzy Beetle|white}}]] | ||
|After completing the block puzzle, Mario must jump while on the second block on the right to find a Hidden Block containing the treasure. | |||
|[[File:PMTOK Origami Castle Question Block 15.png|250px]] | |||
|- | |- | ||
|In the center of the room just before the final battle is a ? Block containing | !style="background-color:#372500;"|[[File:PMTOK Collectible Treasure 118 (Origami Castle).jpg|80px|link=Origami Castle]]<br><br>[[Origami Castle|{{color|Origami Castle|white}}]] | ||
| | |In the center of the room just before the final battle is a ? Block containing the treasure. | ||
|[[File:PMTOK Origami Castle Question Block 17.png|250px]] | |||
|} | |} | ||
==? Blocks== | ===? Blocks=== | ||
{| | {| style="text-align: center; width: 100%; margin: 0 auto; border: #6b6486; border-collapse: collapse;" border="1" cellpadding="4" cellspacing="1" | ||
|-style="background: #444544;font-size:14pt;color:white" | |||
!width=10%|Hidden | |||
!width=10%|Item | |||
!Description | |||
!width=20%|Image | |||
|-style="background: #6b6486;font-size:120%;color:#e6e8e9;border: #6b6486" | |||
!colspan=4|[[List of ? Blocks in Paper Mario: The Origami King|{{color|17 blocks|#e6e8e9}}]] | |||
|- | |- | ||
| | | | ||
|[[File:Legendary Hammer PMTOK icon.png|48px]]<br>[[Legendary Hammer]]<br>[[File:Legendary Boots PMTOK icon.png|48px]]<br>[[Legendary Boots]] | |||
|At the foot of Origami Castle is a pair of ? Blocks, one near the [[Save Block]] containing a [[Legendary Hammer]], and another near the [[Musée Champignon]] pipe containing [[Legendary Boots]]. | |||
|[[File:PMTOK Origami Castle Question Blocks 1 and 2.png|250px]] | |||
|- | |- | ||
| | | | ||
|[[File:PMTOK Coin Bag leaf icon.png|48px]]<br>[[Coin|Coin Bag]] | |||
|After pulling down the folded staircase, a folded ? Block rests near the left wall which can be pulled into shape. | |||
|[[File:PMTOK Origami Castle Question Block 3.png|250px]] | |||
|- | |- | ||
| | | | ||
|[[File:PMTOK Coin Bag leaf icon.png|48px]]<br>[[Coin|Coin Bag]] | |||
|Similarly to the previous block, there is a folded ? Block near the right wall containing a coin bag. | |||
|[[File:PMTOK Origami Castle Question Block 4.png|250px]] | |||
|- | |- | ||
| | | | ||
|[[File:PMTOK Collectible Treasure 113 (Luigi's Kart).jpg|80px]]<br>[[Musée Champignon#Treasure Gallery|Collectible Treasure '''#113''']] | |||
|A ? Block containing a Collectible Treasure of Luigi's Kart rests<br>at the end of the left path in the first room, guarded by a [[Fire Bro]]. | |||
|[[File:OrigamiCastleCollectibleA.png|250px]] | |||
|- | |- | ||
| | | | ||
|[[File:PMTOK Magic Circle leaf icon.png|48px]]<br>[[Magic Circle]] | |||
|At the end of the first floor, across a thin platform is a folded ? Block containing a Magic Circle,<br>which can be used to gain access to the next floor. | |||
|[[File:PMTOK Origami Castle Question Block 6.png|250px]] | |||
|- | |- | ||
| | | | ||
|[[File:PMTOK Coin Bag leaf icon.png|32px]]<br>[[Coin|Coin Bag]] '''×2'''<br>[[File:Flashy Mushroom PMTOK icon.png|32px]]<br>[[Flashy Mushroom]]<br>[[File:PMTOK Collectible Treasure 114 (Bullet Bill).jpg|32px]]<br>[[Musée Champignon#Treasure Gallery|Collectible Treasure '''#114''']] | |||
|At the west side of the room with [[Boomerang Bro]]s is a set of four ? Blocks;<br>the first row of blocks each contain coin bags, a [[Flashy Mushroom]] is held in the bottom left,<br>and a Collectible Treasure of a [[Bullet Bill]] is found in the bottom right block. | |||
|[[File:OrigamiCastleCollectibleB.png|250px]] | |||
|- | |- | ||
| | | | ||
|[[File:PMTOK Magic Circle leaf icon.png|48px]]<br>[[Magic Circle]] | |||
|At the north end of the room to the right of the main hall, there is a ? Block containing a Magic Circle used to expand the origami house. | |||
|[[File:PMTOK Origami Castle Question Block 11.png|250px]] | |||
|- | |- | ||
| | | | ||
|[[File:PMTOK Collectible Treasure 115 (Paper Plane Squadron).jpg|80px]]<br>[[Musée Champignon#Treasure Gallery|Collectible Treasure '''#115''']] | |||
|After raising and entering the origami house, a ? Block can be found in the back corner, containing a Collectible Treasure of the [[Paper Plane Squadron]]. | |||
|[[File:OrigamiCastleCollectibleC.png|250px]] | |||
|- | |- | ||
| | | | ||
|[[File:Flashy Mushroom PMTOK icon.png|48px]]<br>[[Flashy Mushroom]] | |||
|To the left of the box puzzle is a ? Block containing a Flashy Mushroom. | |||
|[[File:PMTOK Origami Castle Question Block 13.png|250px]] | |||
|- | |- | ||
|To the | |[[File:Hidden Block Alert PMTOK icon.png|48px]] | ||
| | |[[File:PMTOK Collectible Treasure 116 (Paper Macho Crater Crashers).jpg|80px]]<br>[[Musée Champignon#Treasure Gallery|Collectible Treasure '''#116''']] | ||
|To the right of the box puzzle, symmetrical to the previous block, is a dark panel indicating a Hidden Block with a Collectible Treasure of the [[Paper Macho Soldier|Paper Macho Crater Crashers]]. | |||
|[[File:PMTOK Origami Castle Question Block 14.png|250px]] | |||
|- | |- | ||
|After completing the | |[[File:Hidden Block Alert PMTOK icon.png|48px]] | ||
| | |[[File:PMTOK Collectible Treasure 117 (Paper Mistake Buzzy Beetle).jpg|80px]]<br>[[Musée Champignon#Treasure Gallery|Collectible Treasure '''#117''']] | ||
|After completing the box puzzle, Mario must jump on the box with a dark panel to discover a Hidden Block containing a Collectible Treasure of the [[Paper Mistake Buzzy Beetle]]. | |||
|[[File:PMTOK Origami Castle Question Block 15.png|250px]] | |||
|- | |- | ||
| | | | ||
|[[File:Flashy Mushroom PMTOK icon.png|48px]]<br>[[Flashy Mushroom]] | |||
|After completing the box puzzle, Mario gains access to another ? Block. | |||
|[[File:PMTOK Origami Castle Question Block 16.png|250px]] | |||
|- | |- | ||
| | | | ||
|[[File:PMTOK Collectible Treasure 118 (Origami Castle).jpg|80px]]<br>[[Musée Champignon#Treasure Gallery|Collectible Treasure '''#118''']] | |||
|Across from the final bench leading to [[King Olly]] is a Collectible Treasure of [[Origami Castle]], held in a folded block. | |||
|[[File:PMTOK Origami Castle Question Block 17.png|250px]] | |||
|} | |} | ||
| Line 108: | Line 153: | ||
|Spa=Castillo de Origami | |Spa=Castillo de Origami | ||
|SpaM=Origami Castle | |SpaM=Origami Castle | ||
| | |Fre=Château Origami | ||
| | |FreM=Origami Castle | ||
|Ger=Kastell Knick | |Ger=Kastell Knick | ||
|GerM=Fort Fold or Castle Crease ("Kastell" refers to a quadrangular castle layout) | |GerM=Fort Fold or Castle Crease ("Kastell" refers to a quadrangular castle layout) | ||
| Line 122: | Line 167: | ||
|ChiTR=Zhézhǐ Chéngbǎo | |ChiTR=Zhézhǐ Chéngbǎo | ||
|ChiTM=Origami Castle | |ChiTM=Origami Castle | ||
|Kor=종이접기 성 | |||
|KorR=Jong'i-jeopgi Seong | |||
|KorM=Origami Castle | |||
}} | }} | ||
| Line 130: | Line 178: | ||
{{PMTOK}} | {{PMTOK}} | ||
[[Category:Castles]] | [[Category:Castles]] | ||
[[Category:Paper Mario: The Origami King | [[Category:Paper Mario: The Origami King locations]] | ||
Latest revision as of 14:44, March 30, 2024
| Origami Castle | |
|---|---|
| |
| Collectible Treasures | 6 |
| ? Blocks | 17 |
| Enemies | Goombas Koopa Troopas Spinies Ninjis Buzzy Beetles Hammer Bros Boomerang Bros Fire Bros Ice Bros Sledge Bros Sumo Bros Mechakoopas Paper Macho Koopa Troopas Stapler King Olly |
- “Mario, since I know best, I have refolded this castle in my image. I sincerely hope you enjoy it.”
- —King Olly, Paper Mario: The Origami King
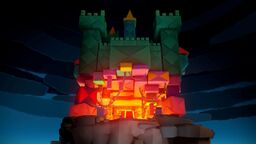
Origami Castle is a location in Paper Mario: The Origami King, the final area to be visited in the game. It is a corrupted version of Peach's Castle crafted and ruled by King Olly, who is fought at the end in addition to Stapler. Almost everything here is made of origami, including the Warp Pipes and ? Blocks. There are no Toads or Not-Bottomless Holes to be found here.
History[edit]
When Mario, Olivia, Bowser and Luigi enter Peach's Castle, Princess Peach appears and asks that they follow her. Luigi runs toward her and ends up falling into the same trap door Mario fell into at the beginning of the game. Mario, Olivia and Bowser must follow Princess Peach into the next hallway, where she tells them it is an honor to meet King Olly before the floor retracts, creating a set of stairs pushing them out of the castle. The castle then begins to unravel and fold into cubes, assembling into a large-scale version of the model found in the Origami Craftsman's workshop. Mario, Olivia and Bowser can only enter the castle and hope to rescue Luigi and Princess Peach.
Before they can enter the castle, Mario must use his hammer to flip over two tiles, revealing a Magic Circle allowing him to use the 1,000-Fold Arms to pull down and open the main doors. However, they are then immediately attacked by two Fire Bros. When they enter the castle, they are spotted by two Folded Soldiers, a Goomba and a Koopa Troopa. They rush to a nearby King Olly and inform him of their arrival. However, Olly becomes annoyed they were not able to stop them and feeds them to the hungry floor, which resembles paper fortune tellers. He welcomes Mario into the castle and is interrupted by Olivia, who tells him he has gone too far. He shrugs this off and leaves them to deal with a number of enemies and obstacles.
When Mario, Olivia and Bowser enter the main hall, they are stopped again by Olly, who slows them down by redirecting the path leading directly to the north end, leading it instead into the rooms left and right of the main hall. Mario must make it through these rooms, fix the path, and make it to the north end. He must then solve the sliding block puzzle to advance to the next rooms.
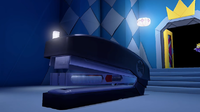
In the following room, Mario is ambushed by an army of Folded Soldiers, although they can be quickly and easily dealt with thanks to the wobbly statue of King Olly nearby. In the room after this, Mario again encounters Olly, who mentions he is wrapping up his final plot. Not able to recruit them, he sics Stapler on them. Mario is able to defeat it, although this soon proves much to Olivia, stunned that her own brother tried to kill her. She sits down on a bench in the next room, wondering if they are powerful enough to stop him. Bowser reassures her by reminding Olivia of everything he has gone through. This cheers Olivia up, prompting her to thank everyone who has helped them along the way.
Mario finally enters Olly's throne room, where he is residing in his throne next to a throne presumably meant for Olivia. Here, he shows them the image of Princess Peach, who has become a part of the castle. Olivia also notices the numerous paper cranes in the room. He reveals his plan to create 1,000 paper cranes, granting him a wish he plans to use to turn the Toads into blank paper. Even Bowser is against this, as the effects would be permanent. Olivia reminds Olly he was created by the Origami Craftsman, which Olly cites as his reason for all of this. Finally, he tells Mario he plans to use him as the thousandth crane, initiating the final battle.
With Olly defeated once and for all, he becomes too weak to do much of anything. Having finally come to his senses, he sees the error of his ways. Olivia notices a message on his stomach, revealing the Origami Craftsman's true intentions for him, for his fate to be of a fair and kind king. This amuses Olly, who then apologizes to the others for everything he has done. In his dying breaths, he requests Olivia to fold him into the thousandth crane, allowing her to grant a wish of her own. She uses this wish to undo all of the origami done by Olly, thus turning Origami Castle back into Peach's Castle.
Layout[edit]
Outside of the castle, there is a Save Block, two ? Blocks, and the sixth and final long-distance Warp Pipe. In the first floor of the castle, there are four ? Blocks, a few Fire Bros, and a Sumo Bro summoned by Olly. The second floor serves as the main hall, with a bridge leading to a block puzzle on the north end; King Olly refolds the bridge to redirect to rooms to the right and left. Both of these rooms are smaller and simpler. To solve the block puzzle on the end of the main hall, Mario must activate a Magic Circle and use the 1,000-Fold Arms to slam in certain blocks, creating a flat path to the doorway to the next area. In the third floor, Mario is ambushed by a number of Folded Soldiers. Fortunately, there is a wobbly statue of King Olly which can be knocked off its pedestal to flip the bridge, sending the unfortunate minions into the hungry floor. In the subsequent rooms, Mario fights Stapler and Olly himself.
Profile[edit]
- Collectible Treasure No. 118: "An evil—but admittedly pretty cool—folded version of Princess Peach's Castle created by King Olly."
Collectibles[edit]
Collectible Treasures[edit]
| Treasure | Description | Image |
|---|---|---|
| 6 treasures | ||
 Luigi's Kart |
Found in a ? Block at the end of the first path in the first room, guarded by a Fire Bro. | 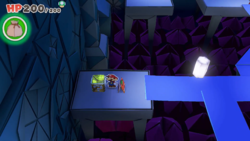
|
 Bullet Bill |
There is a set of four ? Blocks in the southwest corner of the room left of the main hall. The bottom right block contains the treasure. | 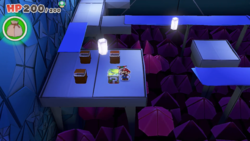
|
 Paper Plane Squadron |
After constructing the origami house house in the room right of the main hall, Mario must enter and hit the ? Block in the northwest corner to receive the treasure. | 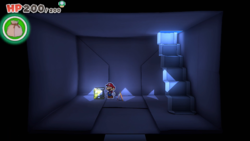
|
 Paper Macho Crater Crashers |
At the north end of the main hall, to the right of the block puzzle, there is a Hidden Block containing the treasure. | 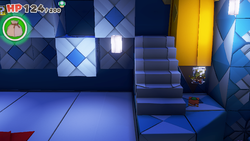
|
 Paper Mistake Buzzy Beetle |
After completing the block puzzle, Mario must jump while on the second block on the right to find a Hidden Block containing the treasure. | 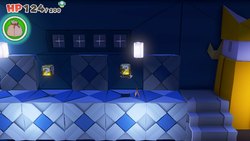
|
 Origami Castle |
In the center of the room just before the final battle is a ? Block containing the treasure. | 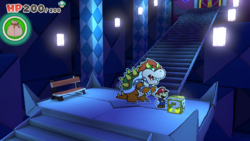
|
? Blocks[edit]
| Hidden | Item | Description | Image |
|---|---|---|---|
| 17 blocks | |||
Legendary Hammer Legendary Boots |
At the foot of Origami Castle is a pair of ? Blocks, one near the Save Block containing a Legendary Hammer, and another near the Musée Champignon pipe containing Legendary Boots. | 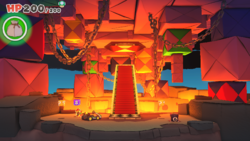
| |
Coin Bag |
After pulling down the folded staircase, a folded ? Block rests near the left wall which can be pulled into shape. | 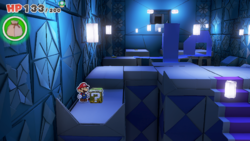
| |
Coin Bag |
Similarly to the previous block, there is a folded ? Block near the right wall containing a coin bag. | 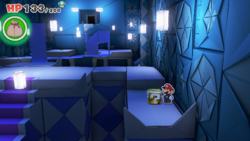
| |
 Collectible Treasure #113 |
A ? Block containing a Collectible Treasure of Luigi's Kart rests at the end of the left path in the first room, guarded by a Fire Bro. |

| |
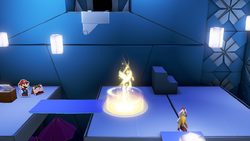
Magic Circle |
At the end of the first floor, across a thin platform is a folded ? Block containing a Magic Circle, which can be used to gain access to the next floor. |
| |
Coin Bag ×2 Flashy Mushroom Collectible Treasure #114 |
At the west side of the room with Boomerang Bros is a set of four ? Blocks; the first row of blocks each contain coin bags, a Flashy Mushroom is held in the bottom left, and a Collectible Treasure of a Bullet Bill is found in the bottom right block. |

| |
Magic Circle |
At the north end of the room to the right of the main hall, there is a ? Block containing a Magic Circle used to expand the origami house. | 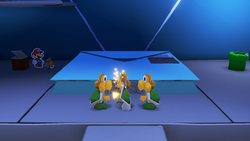
| |
 Collectible Treasure #115 |
After raising and entering the origami house, a ? Block can be found in the back corner, containing a Collectible Treasure of the Paper Plane Squadron. | 
| |
Flashy Mushroom |
To the left of the box puzzle is a ? Block containing a Flashy Mushroom. | 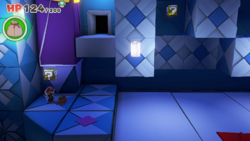
| |
 Collectible Treasure #116 |
To the right of the box puzzle, symmetrical to the previous block, is a dark panel indicating a Hidden Block with a Collectible Treasure of the Paper Macho Crater Crashers. | 
| |
 Collectible Treasure #117 |
After completing the box puzzle, Mario must jump on the box with a dark panel to discover a Hidden Block containing a Collectible Treasure of the Paper Mistake Buzzy Beetle. | 
| |
Flashy Mushroom |
After completing the box puzzle, Mario gains access to another ? Block. | 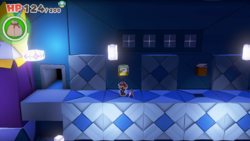
| |
 Collectible Treasure #118 |
Across from the final bench leading to King Olly is a Collectible Treasure of Origami Castle, held in a folded block. | 
| |
Names in other languages[edit]
| Language | Name | Meaning |
|---|---|---|
| Japanese | オリガミ城 Origami Jō |
Origami Castle |
| Chinese (simplified) | 折纸城堡 Zhézhǐ Chéngbǎo |
Origami Castle |
| Chinese (traditional) | 摺紙城堡 Zhézhǐ Chéngbǎo |
Origami Castle |
| Dutch | Origamikasteel |
Origami Castle |
| French | Château Origami |
Origami Castle |
| German | Kastell Knick |
Fort Fold or Castle Crease ("Kastell" refers to a quadrangular castle layout) |
| Italian | Castello Origami |
Origami Castle |
| Korean | 종이접기 성 Jong'i-jeopgi Seong |
Origami Castle |
| Spanish | Castillo de Origami |
Origami Castle |
Trivia[edit]
- Like Black Bowser's Castle in Paper Mario: Color Splash, the music for this area does not change when Mario enters into a battle.
- The music does not change when Mario activates the 1,000-Fold Arms either.
