Map: Difference between revisions
No edit summary |
Megadardery (talk | contribs) (→List of maps in Super Paper Mario: adding images) |
||
| Line 18: | Line 18: | ||
{| style="text-align: center; width: 100%; margin: 0 auto; border-collapse: collapse;" border="1" cellpadding="1" cellspacing="1" | {| style="text-align: center; width: 100%; margin: 0 auto; border-collapse: collapse;" border="1" cellpadding="1" cellspacing="1" | ||
|-style="background: #ABC;" | |-style="background: #ABC;" | ||
!width=" | !width="3%"|Number | ||
!width=" | !width="30%"|Image | ||
!width=" | !width="15%"|Location | ||
!width=" | !width="5%"|Cost | ||
!width=" | !width="17%"|Treasure | ||
!width="30%"|Description | |||
|- | |- | ||
|1 | |1 | ||
|[[File:SPM Map 1.png|250px]] | |||
|Flipside 3rd-Floor | |Flipside 3rd-Floor | ||
|20 | |20 | ||
| Line 31: | Line 33: | ||
|- | |- | ||
|2 | |2 | ||
|[[File:SPM Map 2.png|250px]] | |||
|[[Mirror Hall]] | |[[Mirror Hall]] | ||
|60 | |60 | ||
| Line 37: | Line 40: | ||
|- | |- | ||
|3 | |3 | ||
|[[File:SPM Map 3.png|250px]] | |||
|Flipside Basement 1st Floor | |Flipside Basement 1st Floor | ||
|30 | |30 | ||
| Line 43: | Line 47: | ||
|- | |- | ||
|4 | |4 | ||
|[[File:SPM Map 4.png|250px]] | |||
|[[Flipside Arcade]] | |[[Flipside Arcade]] | ||
|110 | |110 | ||
| Line 49: | Line 54: | ||
|- | |- | ||
|5 | |5 | ||
|[[File:SPM Map 5.png|250px]] | |||
|Flopside 3rd Floor | |Flopside 3rd Floor | ||
|80 | |80 | ||
| Line 55: | Line 61: | ||
|- | |- | ||
|6 | |6 | ||
|[[File:SPM Map 6.png|250px]] | |||
|Chapter 1-1 | |Chapter 1-1 | ||
|20 | |20 | ||
| Line 61: | Line 68: | ||
|- | |- | ||
|7 | |7 | ||
|[[File:SPM Map 7.png|250px]] | |||
|Chapter 1-2 | |Chapter 1-2 | ||
|50 | |50 | ||
| Line 67: | Line 75: | ||
|- | |- | ||
|8 | |8 | ||
|[[File:SPM Map 8.png|250px]] | |||
|[[Green the Bridgemaster]]'s House | |[[Green the Bridgemaster]]'s House | ||
|70 | |70 | ||
| Line 73: | Line 82: | ||
|- | |- | ||
|9 | |9 | ||
|[[File:SPM Map 9.png|250px]] | |||
|Chapter 1-3 | |Chapter 1-3 | ||
|40 | |40 | ||
| Line 79: | Line 89: | ||
|- | |- | ||
|10 | |10 | ||
|[[File:SPM Map 10.png|250px]] | |||
|Chapter 1-3 | |Chapter 1-3 | ||
|40 | |40 | ||
| Line 85: | Line 96: | ||
|- | |- | ||
|11 | |11 | ||
|[[File:SPM Map 11.png|250px]] | |||
|Chapter 1-4 | |Chapter 1-4 | ||
|70 | |70 | ||
| Line 91: | Line 103: | ||
|- | |- | ||
|12 | |12 | ||
|[[File:SPM Map 12.png|250px]] | |||
|Chapter 2-1 | |Chapter 2-1 | ||
|20 | |20 | ||
| Line 97: | Line 110: | ||
|- | |- | ||
|13 | |13 | ||
|[[File:SPM Map 13.png|250px]] | |||
|Chapter 2-2 | |Chapter 2-2 | ||
|50 | |50 | ||
|[[Catch Card SP]] | |[[Catch Card SP]] | ||
|The map shows a building somewhere. | |The map shows a building somewhere. | ||
|- | |- | ||
|14 | |14 | ||
|[[File:SPM Map 14.png|250px]] | |||
|Chapter 2-2 | |Chapter 2-2 | ||
|50 | |50 | ||
| Line 110: | Line 124: | ||
|- | |- | ||
|15 | |15 | ||
|[[File:SPM Map 15.png|250px]] | |||
|Chapter 2-3 | |Chapter 2-3 | ||
|100 | |100 | ||
| Line 116: | Line 131: | ||
|- | |- | ||
|16 | |16 | ||
|[[File:SPM Map 16.png|250px]] | |||
|Chapter 2-4 | |Chapter 2-4 | ||
|30 | |30 | ||
| Line 122: | Line 138: | ||
|- | |- | ||
|17 | |17 | ||
|[[File:SPM Map 17.png|250px]] | |||
|Chapter 2-4 | |Chapter 2-4 | ||
|50 | |50 | ||
| Line 128: | Line 145: | ||
|- | |- | ||
|18 | |18 | ||
|[[File:SPM Map 18.png|250px]] | |||
|Chapter 3-1 | |Chapter 3-1 | ||
|10 | |10 | ||
| Line 134: | Line 152: | ||
|- | |- | ||
|19 | |19 | ||
|[[File:SPM Map 19.png|250px]] | |||
|Chapter 3-1 | |Chapter 3-1 | ||
|90 | |90 | ||
| Line 140: | Line 159: | ||
|- | |- | ||
|20 | |20 | ||
|[[File:SPM Map 20.png|250px]] | |||
|Chapter 3-2 | |Chapter 3-2 | ||
|80 | |80 | ||
| Line 146: | Line 166: | ||
|- | |- | ||
|21 | |21 | ||
|[[File:SPM Map 21.png|250px]] | |||
|Chapter 3-2 | |Chapter 3-2 | ||
|180 | |180 | ||
| Line 152: | Line 173: | ||
|- | |- | ||
|22 | |22 | ||
|[[File:SPM Map 22.png|250px]] | |||
|Chapter 3-3 | |Chapter 3-3 | ||
|130 | |130 | ||
| Line 158: | Line 180: | ||
|- | |- | ||
|23 | |23 | ||
|[[File:SPM Map 23.png|250px]] | |||
|Chapter 3-4 | |Chapter 3-4 | ||
|230 | |230 | ||
| Line 164: | Line 187: | ||
|- | |- | ||
|24 | |24 | ||
|[[File:SPM Map 24.png|250px]] | |||
|Chapter 3-4 | |Chapter 3-4 | ||
|40 | |40 | ||
| Line 170: | Line 194: | ||
|- | |- | ||
|25 | |25 | ||
|[[File:SPM Map 25.png|250px]] | |||
|Chapter 4-2 | |Chapter 4-2 | ||
|30 | |30 | ||
| Line 176: | Line 201: | ||
|- | |- | ||
|26 | |26 | ||
|[[File:SPM Map 26.png|250px]] | |||
|Chapter 4-2 | |Chapter 4-2 | ||
|70 | |70 | ||
| Line 182: | Line 208: | ||
|- | |- | ||
|27 | |27 | ||
|[[File:SPM Map 27.png|250px]] | |||
|Chapter 4-3 | |Chapter 4-3 | ||
|80 | |80 | ||
| Line 188: | Line 215: | ||
|- | |- | ||
|28 | |28 | ||
|[[File:SPM Map 28.png|250px]] | |||
|Chapter 4-4 | |Chapter 4-4 | ||
|90 | |90 | ||
| Line 194: | Line 222: | ||
|- | |- | ||
|29 | |29 | ||
|[[File:SPM Map 29.png|250px]] | |||
|Chapter 4-4 | |Chapter 4-4 | ||
|80 | |80 | ||
| Line 200: | Line 229: | ||
|- | |- | ||
|30 | |30 | ||
|[[File:SPM Map 30.png|250px]] | |||
|Chapter 5-1 | |Chapter 5-1 | ||
|120 | |120 | ||
| Line 206: | Line 236: | ||
|- | |- | ||
|31 | |31 | ||
|[[File:SPM Map 31.png|250px]] | |||
|Chapter 5-1 | |Chapter 5-1 | ||
|10 | |10 | ||
| Line 212: | Line 243: | ||
|- | |- | ||
|32 | |32 | ||
|[[File:SPM Map 32.png|250px]] | |||
|Chapter 5-2 | |Chapter 5-2 | ||
|20 | |20 | ||
| Line 218: | Line 250: | ||
|- | |- | ||
|33 | |33 | ||
|[[File:SPM Map 33.png|250px]] | |||
|Chapter 5-2 | |Chapter 5-2 | ||
|110 | |110 | ||
| Line 224: | Line 257: | ||
|- | |- | ||
|34 | |34 | ||
|[[File:SPM Map 34.png|250px]] | |||
|Chapter 5-3 | |Chapter 5-3 | ||
|70 | |70 | ||
| Line 230: | Line 264: | ||
|- | |- | ||
|35 | |35 | ||
|[[File:SPM Map 35.png|250px]] | |||
|Chapter 5-3 | |Chapter 5-3 | ||
|60 | |60 | ||
| Line 236: | Line 271: | ||
|- | |- | ||
|36 | |36 | ||
|[[File:SPM Map 36.png|250px]] | |||
|Chapter 5-4 | |Chapter 5-4 | ||
|140 | |140 | ||
| Line 242: | Line 278: | ||
|- | |- | ||
|37 | |37 | ||
|[[File:SPM Map 37.png|250px]] | |||
|Chapter 5-4 | |Chapter 5-4 | ||
|60 | |60 | ||
| Line 248: | Line 285: | ||
|- | |- | ||
|38 | |38 | ||
|[[File:SPM Map 38.png|250px]] | |||
|Chapter 7-1 | |Chapter 7-1 | ||
|70 | |70 | ||
| Line 254: | Line 292: | ||
|- | |- | ||
|39 | |39 | ||
|[[File:SPM Map 39.png|250px]] | |||
|Chapter 7-1 | |Chapter 7-1 | ||
|80 | |80 | ||
| Line 260: | Line 299: | ||
|- | |- | ||
|40 | |40 | ||
|[[File:SPM Map 40.png|250px]] | |||
|Chapter 7-2 | |Chapter 7-2 | ||
|80 | |80 | ||
| Line 266: | Line 306: | ||
|- | |- | ||
|41 | |41 | ||
|[[File:SPM Map 41.png|250px]] | |||
|Chapter 7-2 | |Chapter 7-2 | ||
|70 | |70 | ||
| Line 272: | Line 313: | ||
|- | |- | ||
|42 | |42 | ||
|[[File:SPM Map 42.png|250px]] | |||
|Chapter 7-3 | |Chapter 7-3 | ||
|150 | |150 | ||
| Line 278: | Line 320: | ||
|- | |- | ||
|43 | |43 | ||
|[[File:SPM Map 43.png|250px]] | |||
|Chapter 7-4 | |Chapter 7-4 | ||
|90 | |90 | ||
| Line 284: | Line 327: | ||
|- | |- | ||
|44 | |44 | ||
|[[File:SPM Map 44.png|250px]] | |||
|Chapter 7-4 | |Chapter 7-4 | ||
|100 | |100 | ||
| Line 290: | Line 334: | ||
|- | |- | ||
|45 | |45 | ||
|[[File:SPM Map 45.png|250px]] | |||
|Chapter 7-4 | |Chapter 7-4 | ||
|190 | |190 | ||
| Line 296: | Line 341: | ||
|- | |- | ||
|46 | |46 | ||
|[[File:SPM Map 46.png|250px]] | |||
|Chapter 8-1 | |Chapter 8-1 | ||
|160 | |160 | ||
| Line 302: | Line 348: | ||
|- | |- | ||
|47 | |47 | ||
|[[File:SPM Map 47.png|250px]] | |||
|Chapter 8-3 | |Chapter 8-3 | ||
|200 | |200 | ||
| Line 308: | Line 355: | ||
|- | |- | ||
|48 | |48 | ||
|[[File:SPM Map 48.png|250px]] | |||
|Chapter 8-4 | |Chapter 8-4 | ||
|90 | |90 | ||
Revision as of 13:40, January 25, 2014
It has been requested that this article be rewritten.
- “As long as you have a map, you'll feel safer in foreign lands, right?”
- —Border Bros., Mario & Luigi: Superstar Saga
A map is an item used in all of the Mario role playing games. It shows Mario's current position in a certain area, and is usually received near the start of the game. In Mario & Luigi: Superstar Saga, the player could get the Beanbean Map by defeating the Border Bros. in a game of Border Jump. A map is also received at the start of the game in Paper Mario and Paper Mario: The Thousand-Year Door.
In some games, such as Super Mario RPG: Legend of the Seven Stars, the map is more of a feature rather than an item; these maps (which are sometimes called map screens) are mere portals to the other places in the game. Map screens have even appeared in side-scrolling games such as Super Mario Bros. 3 (which was the first Mario game any type of map appeared in) and Super Mario World, which had a fully connected (or seamless) world map. New Super Mario Bros. U also features a seamless world map, much like Super Mario World.
The Super Mario RPG: Legend of the Seven Stars map is notable for being both a feature and an item, as it is used as a feature but given to Mario (by the Chancellor) as if it were an item. The Super Mario Sunshine, the map was similarly "given" to Mario towards the beginning of the game (this time by a Pianta known to play for the Doot Doot Sisters), although this Map is not literally given as Mario could use it before it was "received" from the Pianta. Luigi also used a map to find his mansion in Luigi's Mansion.
In Super Paper Mario, the player can purchase maps from Flamm. These maps will lead Mario and the heroes to hidden treasures throughout the game. All maps are purchased with coins. Once the heroes find the area with the hidden treasure, they must use the Pixl Fleep, move him over the treasure spot on the screen and press ![]() to flip and find the treasure. Many of the treasures are Catch Cards, and sometimes a character's Catch Card can even be found using a map before the character themself appears in the game, such as King Sammer V, Welderberg, and Brobot L-Type, to name a few.
to flip and find the treasure. Many of the treasures are Catch Cards, and sometimes a character's Catch Card can even be found using a map before the character themself appears in the game, such as King Sammer V, Welderberg, and Brobot L-Type, to name a few.
Notable maps
List of maps in Super Paper Mario
| Number | Image | Location | Cost | Treasure | Description |
|---|---|---|---|---|---|
| 1 | 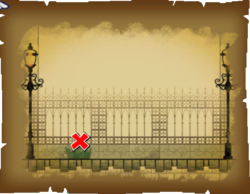
|
Flipside 3rd-Floor | 20 | Gold Bar | This map shows a familiar spot. |
| 2 | 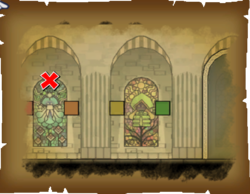
|
Mirror Hall | 60 | Welderberg Catch Card | The map shows colorful objects in a row. |
| 3 | 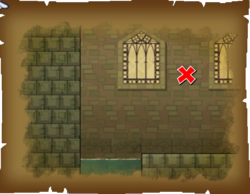
|
Flipside Basement 1st Floor | 30 | Ultra Shroom Shake | The map shows an underground area. |
| 4 | 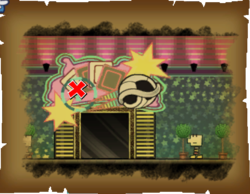
|
Flipside Arcade | 110 | King Sammer Catch Card | The map shows a door with an unusual design. |
| 5 | 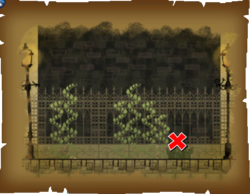
|
Flopside 3rd Floor | 80 | O'Chunks Catch Card | The map shows something solid black. |
| 6 | 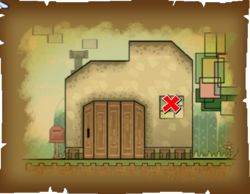
|
Chapter 1-1 | 20 | Bestovius Catch Card | The map shows a house. |
| 7 | 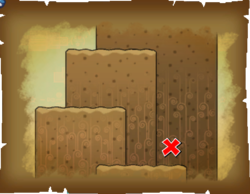
|
Chapter 1-2 | 50 | Golden Leaf | The map shows a vertically climbing set of hills. |
| 8 | 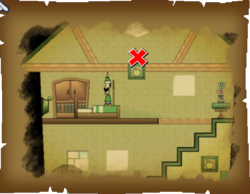
|
Green the Bridgemaster's House | 70 | Brobot L-Type Catch Card | The map shows a room decked out in pretty colors. |
| 9 | 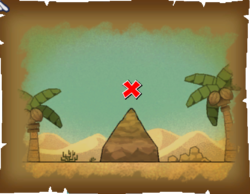
|
Chapter 1-3 | 40 | Gold Bar x3 | The map shows a rock somewhere. |
| 10 | 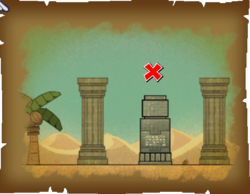
|
Chapter 1-3 | 40 | Fracktail Catch Card | The map shows a desert somewhere. |
| 11 | 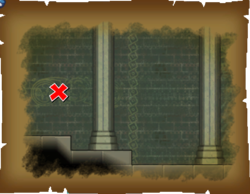
|
Chapter 1-4 | 70 | Merlumina Catch Card | The map shows a mysterious locale. |
| 12 | 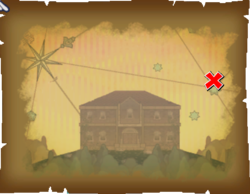
|
Chapter 2-1 | 20 | Shooting Star | The map shows a suspicious building. |
| 13 | 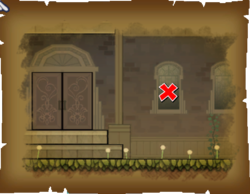
|
Chapter 2-2 | 50 | Catch Card SP | The map shows a building somewhere. |
| 14 | 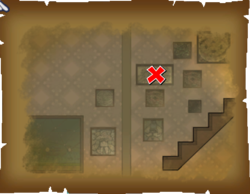
|
Chapter 2-2 | 50 | Gnip Catch Card | The map shows the inside of a building. |
| 15 | 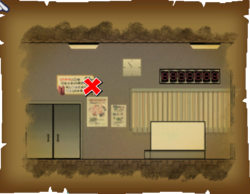
|
Chapter 2-3 | 100 | Mimi Card | The map shows a place where you exchange money. |
| 16 | 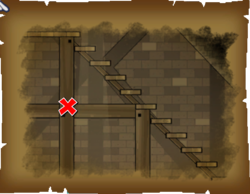
|
Chapter 2-4 | 30 | Gold Bar x3 | The map shows a staircase. |
| 17 | 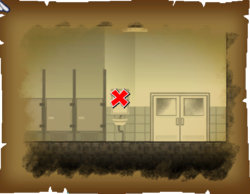
|
Chapter 2-4 | 50 | Dried Mushroom | The map shows a fragrant locale. |
| 18 | 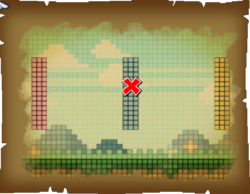
|
Chapter 3-1 | 10 | Back Cursya Catch Card | The map shows a place decked out in three colors. |
| 19 | 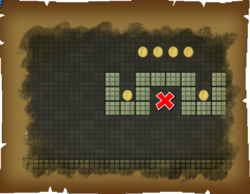
|
Chapter 3-1 | 90 | Ultra Shroom Shake | The map shows a spot filled with memories. |
| 20 | 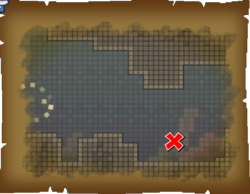
|
Chapter 3-2 | 80 | Big Blooper Catch Card | The map shows a hidden treasure underwater. |
| 21 | 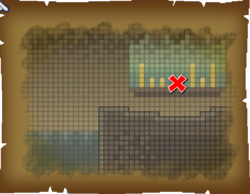
|
Chapter 3-2 | 180 | Power Plus | The map shows a place where treasure abounds. |
| 22 | 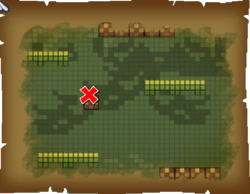
|
Chapter 3-3 | 130 | Dimentio Catch Card | The map shows a section of a big tree. |
| 23 | 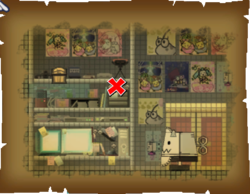
|
Chapter 3-4 | 230 | Tiptron Catch Card | The map shows a large room that's been oddly decorated. |
| 24 | 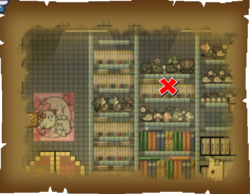
|
Chapter 3-4 | 40 | Francis Catch Card | The map shows a place that may have too much treasure. |
| 25 | 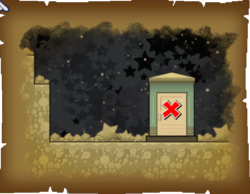
|
Chapter 4-2 | 30 | Squirps Catch Card | The map shows a smelly spot in an unexpected place. |
| 26 | 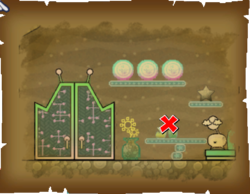
|
Chapter 4-2 | 70 | Hooligon Catch Card | The map shows the location of a person's hidden treasure. |
| 27 | 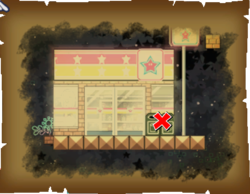
|
Chapter 4-3 | 80 | Mr. L Catch Card | The map shows a shop somewhere. |
| 28 | 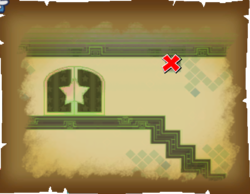
|
Chapter 4-4 | 90 | Brobot Catch Card | The map shows a treasure in a forbidden place. |
| 29 | 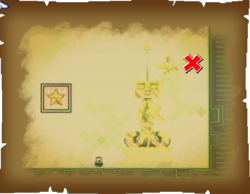
|
Chapter 4-4 | 80 | HP Plus | The map shows a love transmitter to the future. |
| 30 | 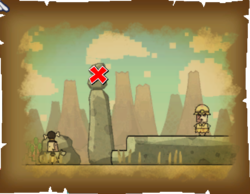
|
Chapter 5-1 | 120 | Muth Catch Card | CRAGLEY HO! The map shows a treasure on a rock tower. |
| 31 | 
|
Chapter 5-1 | 10 | Flint Cragley Catch Card | The map shows a hard to find spot. |
| 32 | 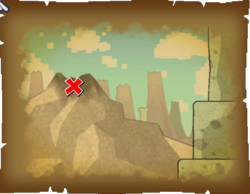
|
Chapter 5-2 | 20 | Fire Burst | The map shows a large volcano. |
| 33 | 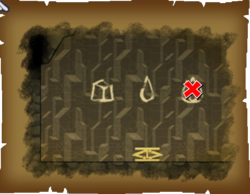
|
Chapter 5-2 | 110 | Ultra Shroom Shake | The map shows a treasure-filled place in a volcano. |
| 34 | 
|
Chapter 5-3 | 70 | Shooting Star | The map shows the inside of a cave. |
| 35 | 
|
Chapter 5-3 | 60 | Hornfels & Monzo Catch Card | The map shows tracks like those used by a small train. |
| 36 | 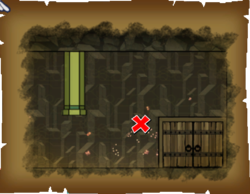
|
Chapter 5-4 | 140 | Poison Mushroom | The map shows a pipe and a door in a cave somewhere. |
| 37 | 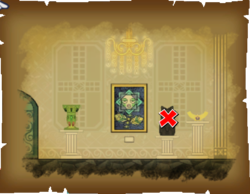
|
Chapter 5-4 | 60 | King Croacus Catch Card | The map shows a treasure among treasures, so to speak. |
| 38 | 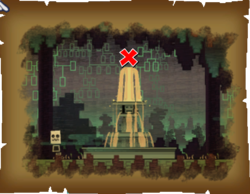
|
Chapter 7-1 | 70 | Jaydes Catch Card | The map shows something that defies gravity. |
| 39 | 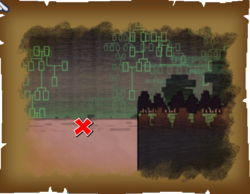
|
Chapter 7-1 | 80 | Underhand Catch Card | The map shows a river flowing with the tears of evildoers. |
| 40 | 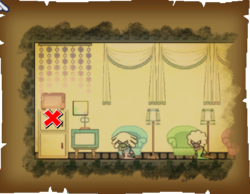
|
Chapter 7-2 | 80 | Trial Stew | The map shows a treasure in an unopened box. |
| 41 | 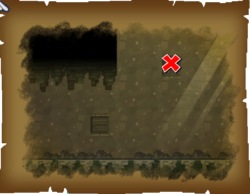
|
Chapter 7-2 | 70 | Underchomp Catch Card | The map shows a place between sky and earth. |
| 42 | 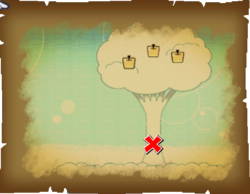
|
Chapter 7-3 | 150 | Gold Bar x3 | The map shows an oddly colored tree. |
| 43 | 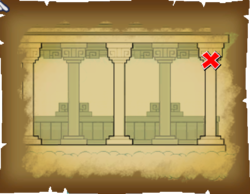
|
Chapter 7-4 | 90 | Grambi Catch Card | The map shows several similar objects in a row. |
| 44 | 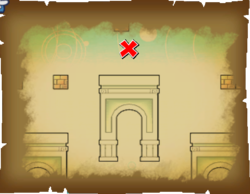
|
Chapter 7-4 | 100 | Luvbi Catch Card | The map shows a white platform in a blue sky. |
| 45 | 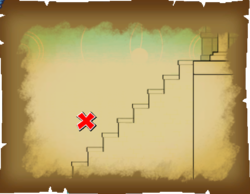
|
Chapter 7-4 | 190 | Bonechill Catch Card | The map shows a white staircase. |
| 46 | 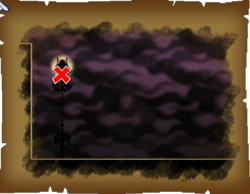
|
Chapter 8-1 | 160 | Nastasia Catch Card | The map shows light that dispels the darkness. |
| 47 | 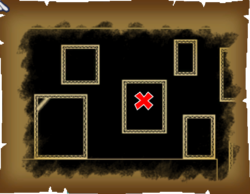
|
Chapter 8-3 | 200 | Super Dimentio Catch Card | The map shows devices floating in the darkness. |
| 48 | 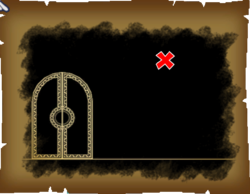
|
Chapter 8-4 | 90 | Count Bleck Catch Card | Where is this place? There are so many black walls... |
Template:BoxTop Template:Super Mario RPG
