This Week's Ranking
- See also: All-Cup Ranking
This Week's Ranking,[1] also referred to as simply rankings,[2] is a competitive feature in Mario Kart Tour wherein each player is ranked against nineteen other random players based on their total score in a given cup for the duration of one week. The ranking is dynamic, with players potentially overtaking each other on the leaderboard as the week progresses. The quality of a player's opponents is determined by that player's tier, which changes depending on the player's placement by the end of one ranking cycle. Placing sufficiently by the end of the ranking cycle high nets the player in-game rewards, such as rubies, coins, drivers, and vehicle parts.
A related aspect of the game, the Friend Ranking, prompts the player to compete alongside their in-game friends for a collective high score within the same cup eligible for This Week's Ranking.
Overview[edit]
Every Wednesday at 10:00 p.m. PT, a new cup of the current tour is selected to host a ranking mode. For one week, the player is automatically added to two rankings corresponding to that cup, namely This Week's Ranking and the Friend Ranking, each with different conditions. Tapping on an opponent's listing in a leaderboard leads directly to the "Tour Records" section of their player profile, which shows the scores they attained in the three ranking-eligible courses of the current week.
This Week's Ranking[edit]
In This Week's Ranking, a player competes against nineteen others for the highest total score across all courses in that cup, except for its bonus challenge. The game randomly draws these nineteen opponents from its playerbase. However, the player facing these opponents may not appear as an opponent to them in turn.[3][A]
Each player is assigned a tier, which is influenced by their placement at the end of a ranking cycle. Depending on this placement, the player is promoted, demoted, or kept at a certain tier. This system helps group players of a similar skill level and loadout; thus, the higher one's tier is, the more challenging their opponents are likely to be. The following chart outlines the evolution of the player's tier based on their placement at different tiers.
| Placement | Tier change | |||||||
|---|---|---|---|---|---|---|---|---|
| From tier 1 | From tier 21 | From tier 22 | From tier 25 | From tier 30 | From tier 35 | From tier 99 | ||
| 1 | +3 | +3 | +3 | +3 | +2 | +1 | 0 | |
| 2 | +3 | +2 | +2 | +2 | +1 | +1 | 0 | |
| 3 | +3 | +1 | +1 | +1 | +1 | +1 | 0 | |
| 4 | +2 | +1 | +1 | +1 | +1 | 0 | -1 | |
| 5 | +2 | +1 | +1 | +1 | +1 | 0 | -1 | |
| 6 | +2 | +1 | +1 | +1 | 0 | -1 | -1 | |
| 7 | +1 | +1 | +1 | 0 | 0 | -1 | -1 | |
| 8 | +1 | +1 | 0 | 0 | -1 | -1 | -1 | |
| 9 | +1 | 0 | 0 | -1 | -1 | -1 | -1 | |
| 10 | +1 | 0 | -1 | -1 | -1 | -1 | -1 | |
| 11–15 | 0 | -1 | -1 | -1 | -1 | -1 | -1 | |
| 16–19 | 0 | -1 | -1 | -1 | -1 | -1 | -1 | |
| 20 | 0 | -1 | -2 | -2 | -2 | -2 | -2 | |
A player's tier is updated only when they open the game again after a new ranking cycle begins. This means that if the player skips entire consecutive cycles by not playing the game, their tier remains unchanged until they participate in a new ranked cup.
Friend Ranking[edit]
In the Friend Ranking, introduced in the Baby Rosalina Tour, the player and their in-game friends try to achieve a group high score within the current week's ranked cup. While the cycles of the Friend Ranking overlap with those of This Week's Ranking, the former does not feature a tier system. In this ranking, there are three point thresholds for the players to reach. At the end of a ranking cycle, all players in the ranking receive a sum of coins for each point threshold they managed to surpass as a group. In the Flower Tour only, players received rubies instead of coins.
The following are the thresholds and their corresponding rewards during different periods of time:
| Total points of player and friends | Coins (until August 5, 2020) |
Coins (since August 12, 2020) |
Rubies (Flower Tour) |
|---|---|---|---|
| 50,000 | 100 | 100 | 2 |
| 80,000 | 500 | 300 | 3 |
| 150,000 | 1000 | 600 | 5 |
Related challenges[edit]
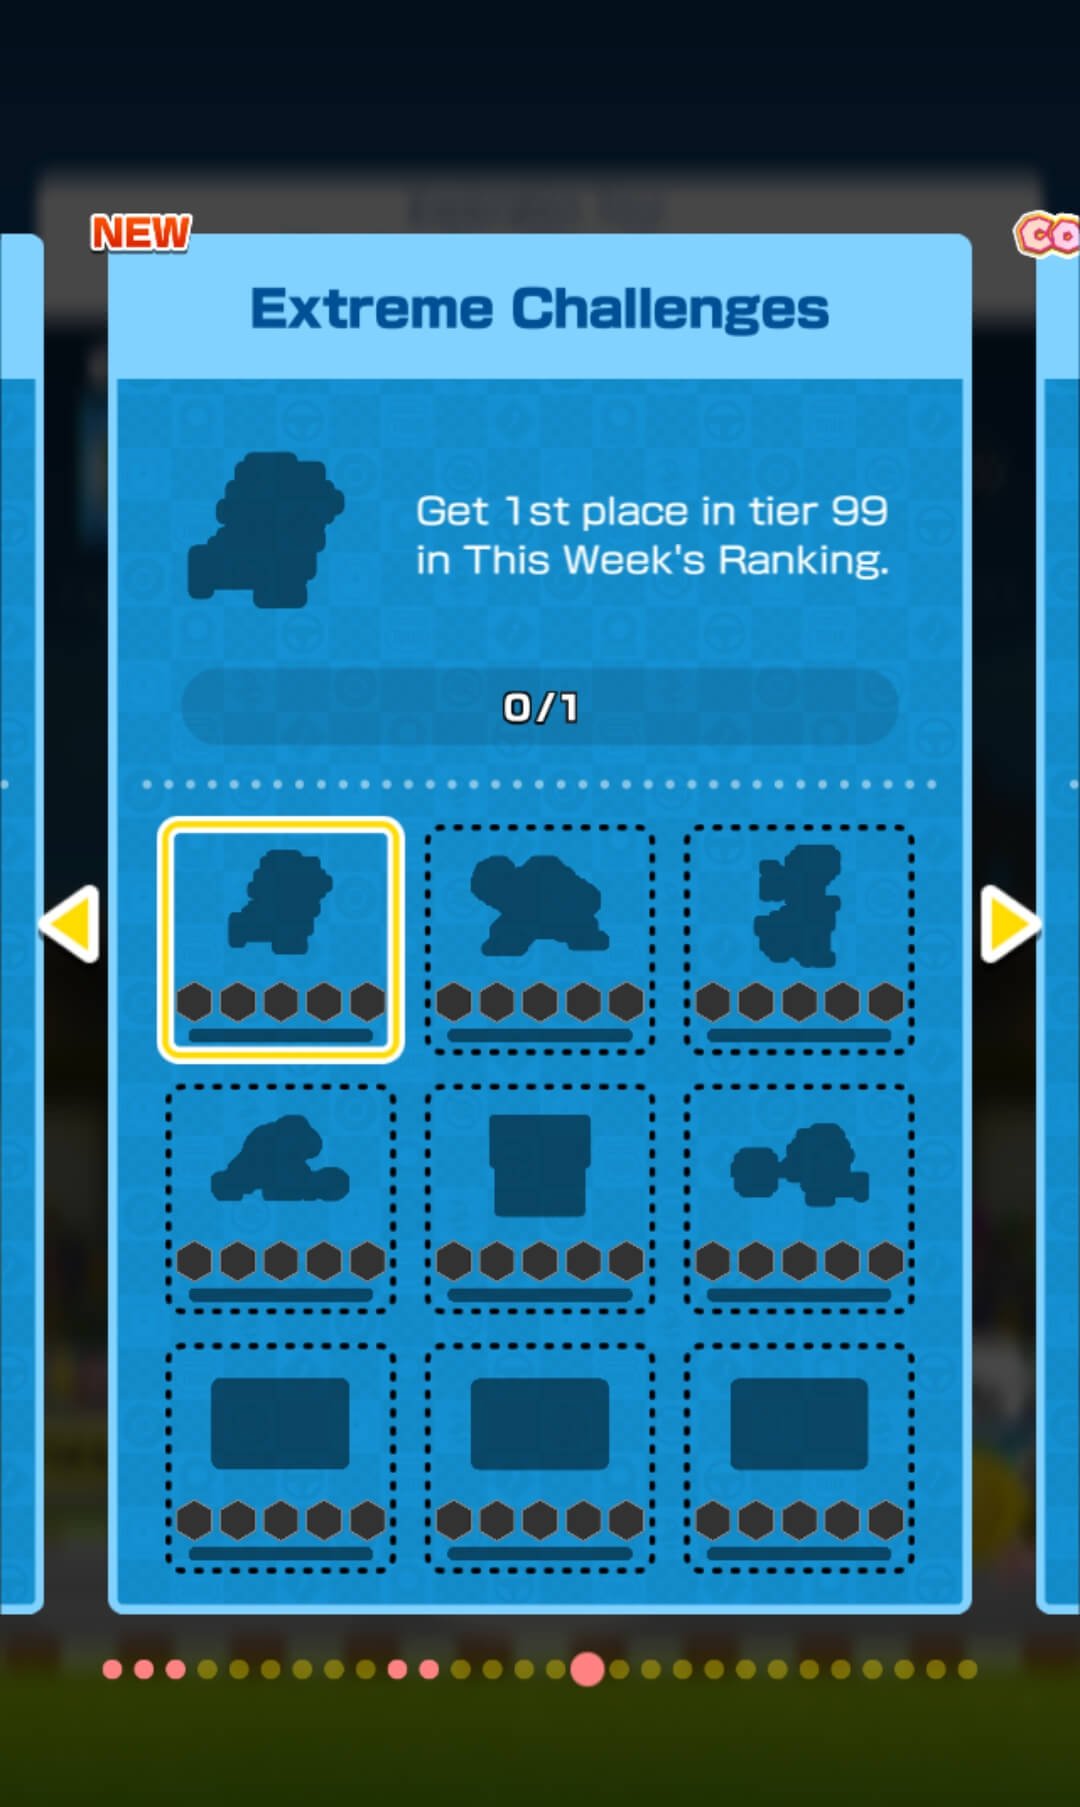
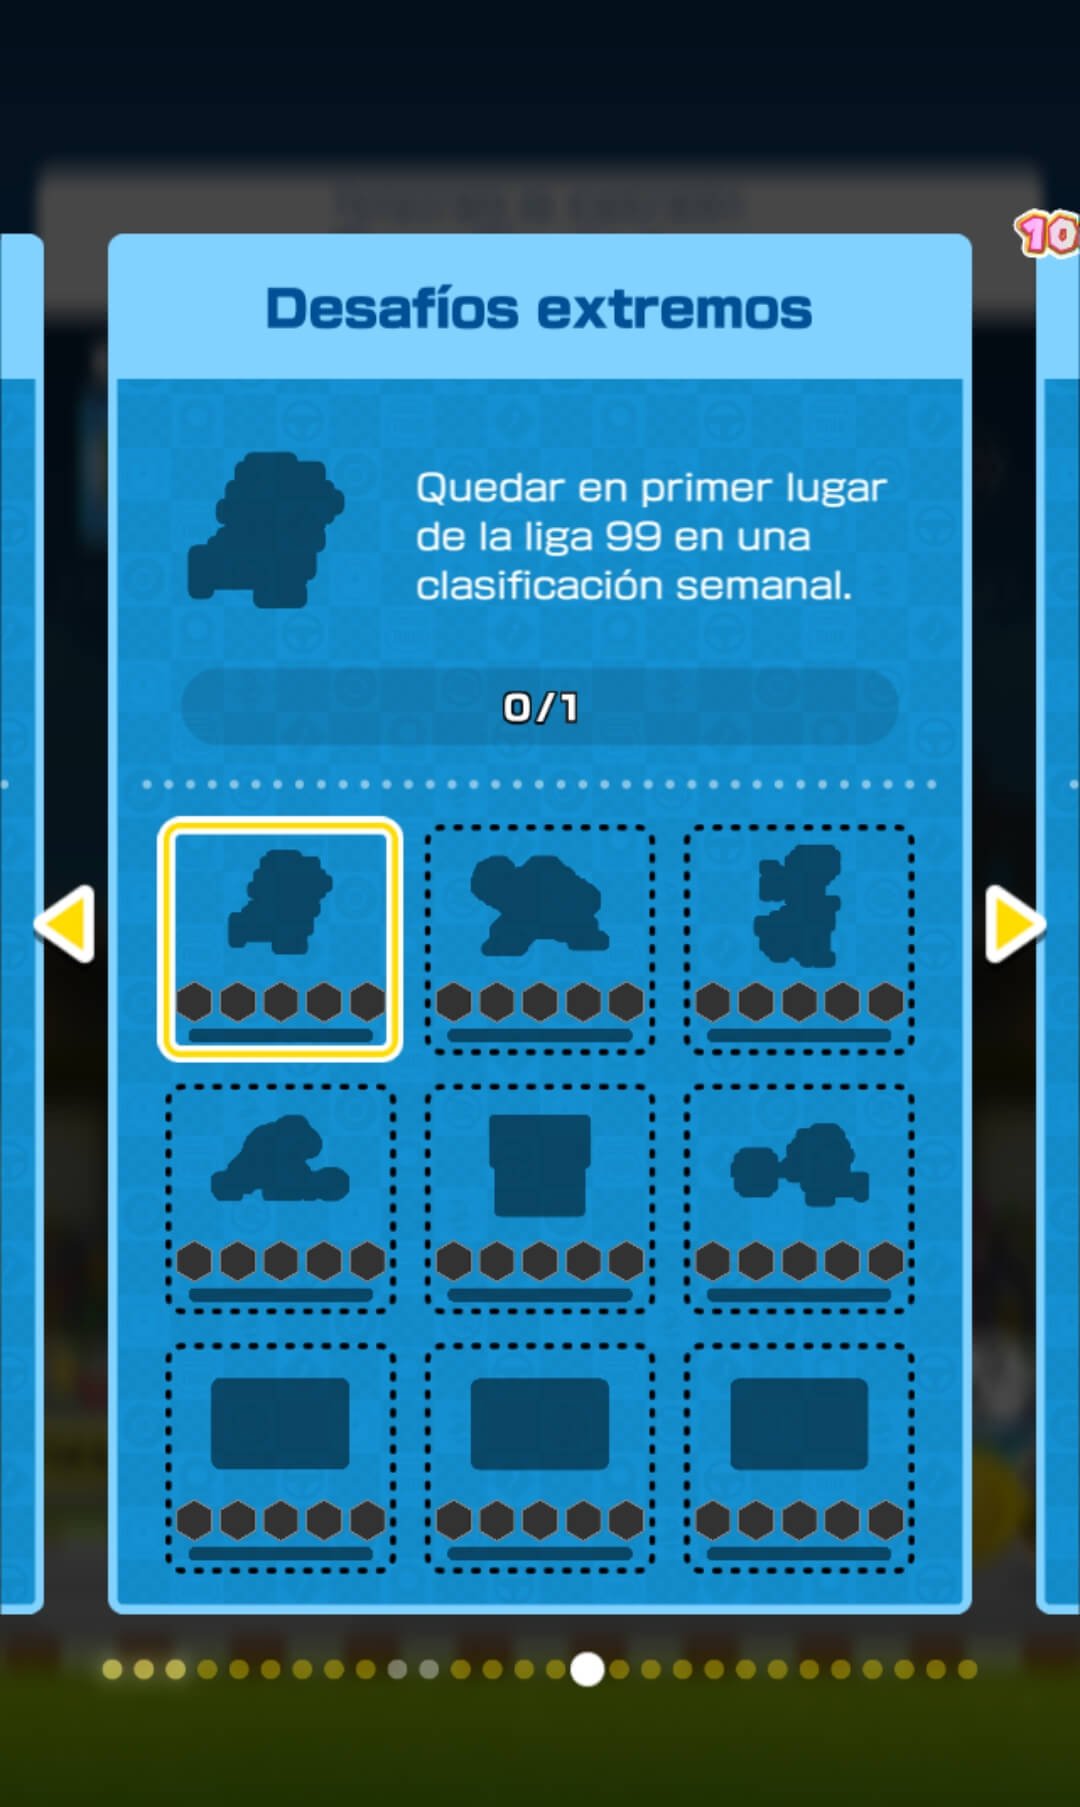
The game presents a series of challenges tied to the player's performance and progression within rankings. Each card of the Standard Challenges set labeled "2-1", "2-2", and onward includes one objective of reaching a given tier, ranging from tier 5 to 30. The Tier Challenges, permanently added at the start of the 2022 Mii Tour, feature a host of ranking-related objectives, including reaching certain tiers, securing first place multiple times in This Week's Ranking, racing on a ranked cup's course a number of times, and surpassing a certain score in a ranked cup. As of the 2023 Yoshi Tour, completing all Tier Challenges, which culminates in reaching tier 99, unlocks an additional card of Extreme Challenges, which focus on getting first place in This Week's Ranking a certain amount of times while in tier 99. Like other challenges in the game, completing any of the objectives so described rewards the player with rubies and a special badge. When clearing a challenge whose goal is reaching a certain tier, the player earns a badge indicating that tier.
Ranking Bonuses[edit]
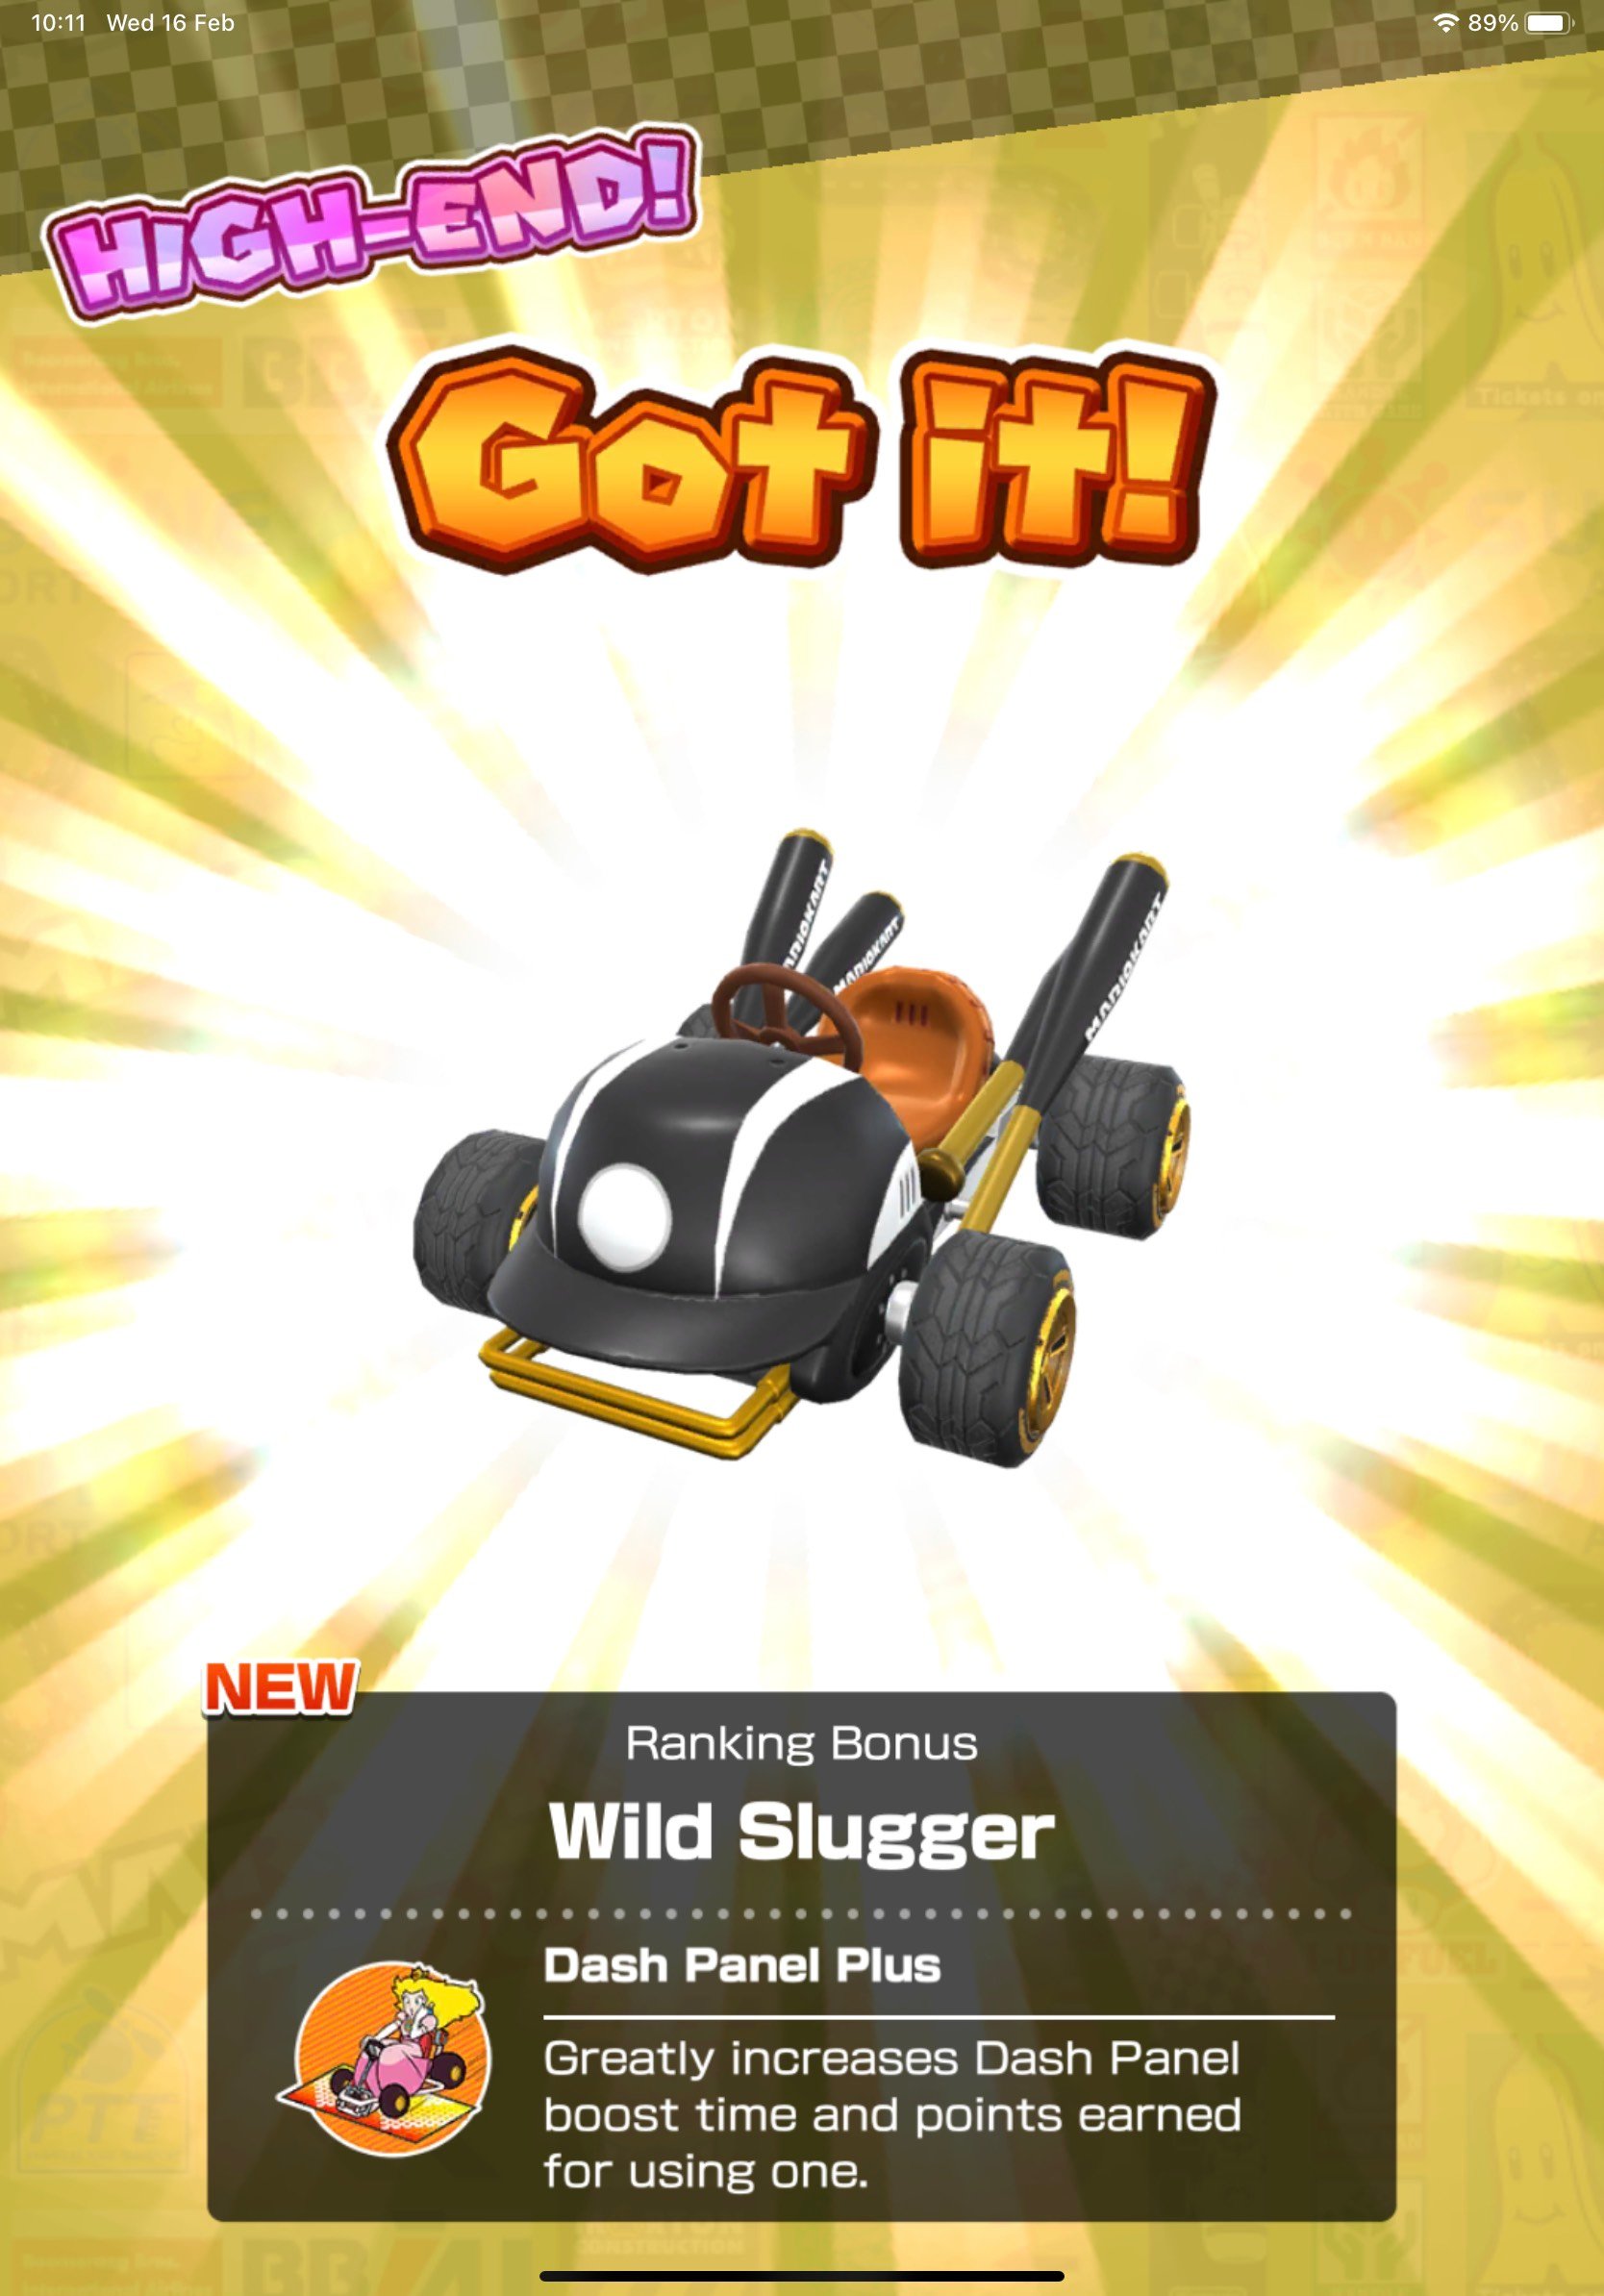
The player can earn various rewards, called Ranking Bonuses,[8] by finishing somewhere within or slightly below the top half of the leaderboard in This Week's Ranking. The amount and quality of the Ranking Bonuses earned by the end of a cycle depends on the player's tier and placement. To view the rewards of a given position in the current week, the player has to click on the icon to the left of that position in the leaderboard.
General[edit]
Every ranking cycle so far has featured a selection of inventory items as Ranking Bonuses, such as rubies, coins, and point-boost tickets. As of the Cooking Tour, points-cap tickets are also included in the general pool of Ranking Bonuses. Points-boost tickets and points-cap tickets earned from rankings rotate between driver, kart, and glider tickets on a weekly basis.
The following chart shows the Ranking Bonuses earned for each placement and tier.
| Placement | Rewards | ||||||||||
|---|---|---|---|---|---|---|---|---|---|---|---|
| From tier 1 | From tier 11 | From tier 21 | From tier 25 | From tier 30 | From tier 35 | From tier 40 | From tier 45 | From tier 50 | From tier 60 | From tier 80 | |
| 1 | Rubies ×20 Coins ×1,000 Point-boost tickets ×3 of each type |
Rubies ×25 Coins ×1,100 Point-boost tickets ×3 of each type |
Rubies ×25 Coins ×1,200 Point-boost tickets ×3 of each type |
Rubies ×25 Coins ×1,200 Point-boost tickets ×3 Points-cap tickets ×1 Normal |
Rubies ×25 Coins ×1,500 Point-boost tickets ×3 Points-cap tickets ×1 Super, ×1 Normal |
Rubies ×25 Coins ×1,500 Points-cap tickets ×2 High-End, ×2 Super, ×2 Normal |
Rubies ×25 Coins ×2,000 Points-cap tickets ×4 High-End, ×4 Super, ×4 Normal |
Rubies ×25 Coins ×2,000 Points-cap tickets ×5 High-End, ×5 Super, x5 Normal |
Rubies ×25 Coins ×2,000 Points-cap tickets ×6 High-End, ×6 Super, ×6 Normal |
Rubies ×25 Coins ×2,000 Points-cap tickets ×7 High-End, ×7 Super, ×7 Normal |
Rubies ×30 Coins ×2,000 Points-cap tickets ×8 High-End, ×8 Super, ×8 Normal |
| 2 | Rubies ×15 Coins ×1,000 Point-boost tickets ×2 of each type |
Rubies ×20 Coins ×1,100 Point-boost tickets ×2 of each type |
Rubies ×20 Coins ×1,200 Point-boost tickets ×2 of each type |
Rubies ×20 Coins ×1,200 Point-boost tickets ×2 Points-cap tickets ×1 Normal |
Rubies ×20 Coins ×1,200 Point-boost tickets ×2 Points-cap tickets ×1 Normal |
Rubies ×20 Coins ×1,200 Point-boost tickets ×3 Points-cap tickets ×1 Super, ×1 Normal |
Rubies ×20 Coins ×1,200 Points-cap tickets ×3 High-End, ×3 Super, ×3 Normal |
Rubies ×20 Coins ×1,200 Points-cap tickets ×4 High-End, ×4 Super, ×4 Normal |
Rubies ×20 Coins ×1,500 Points-cap tickets ×5 High-End, ×5 Super, ×5 Normal |
Rubies ×20 Coins ×1,500 Points-cap tickets ×6 High-End, ×6 Super, ×6 Normal |
Rubies ×20 Coins ×1,500 Points-cap tickets ×7 High-End, ×7 Super, ×7 Normal |
| 3 | Rubies ×10 Coins ×1,000 Point-boost tickets ×1 of each type |
Rubies ×15 Coins ×1,100 Point-boost tickets ×1 of each type |
Rubies ×15 Coins ×1,200 Point-boost tickets ×1 of each type |
Rubies ×15 Coins ×1,200 Point-boost tickets ×1 Points-cap tickets ×1 Normal |
Rubies ×15 Coins ×1,200 Point-boost tickets ×1 Points-cap tickets ×1 Normal |
Rubies ×15 Coins ×1,200 Point-boost tickets ×2 Points-cap tickets ×1 Normal |
Rubies ×15 Coins ×1,200 Points-cap tickets ×2 High-End, ×2 Super, ×2 Normal |
Rubies ×15 Coins ×1,200 Points-cap tickets ×3 High-End, ×3 Super, ×3 Normal |
Rubies ×15 Coins ×1,200 Points-cap tickets ×4 High-End, ×4 Super, ×4 Normal |
Rubies ×15 Coins ×1,200 Points-cap tickets ×5 High-End, ×5 Super, ×5 Normal |
Rubies ×15 Coins ×1,200 Points-cap tickets ×6 High-End, ×6 Super, ×6 Normal |
| 4 | Rubies ×5 Coins ×500 |
Rubies ×10 Coins ×600 |
Rubies ×10 Coins ×600 |
Rubies ×10 Coins ×600 |
Rubies ×10 Coins ×600 Point-boost tickets ×1 |
Rubies ×10 Coins ×600 Point-boost tickets ×1 |
Rubies ×10 Coins ×600 Points-cap tickets ×1 High-End, ×2 Super, ×2 Normal |
Rubies ×10 Coins ×600 Points-cap tickets ×2 High-End, ×2 Super, ×2 Normal |
Rubies ×10 Coins ×600 Points-cap tickets ×3 High-End, ×3 Super, ×3 Normal |
Rubies ×10 Coins ×600 Points-cap tickets ×4 High-End, ×4 Super, ×4 Normal |
Rubies ×10 Coins ×600 Points-cap tickets ×5 High-End, ×5 Super, ×5 Normal |
| 5 | |||||||||||
| 6 | |||||||||||
| 7 | Coins ×300 | Rubies ×5 Coins ×400 |
Rubies ×5 Coins ×400 |
Rubies ×5 Coins ×400 |
Rubies ×5 Coins ×400 |
Rubies ×5 Coins ×400 |
Rubies ×5 Coins ×400 Points-cap tickets ×2 Super, ×2 Normal |
Rubies ×5 Coins ×400 Points-cap tickets x1 High-End, ×1 Super, ×2 Normal |
Rubies ×5 Coins ×400 Points-cap tickets x1 High-End, ×2 Super, ×2 Normal |
Rubies ×5 Coins ×400 Points-cap tickets x2 High-End, ×2 Super, ×2 Normal |
Rubies ×5 Coins ×400 Points-cap tickets ×3 High-End, ×3 Super, ×3 Normal |
| 8 | |||||||||||
| 9 | |||||||||||
| 10 | |||||||||||
| 11–15 | No reward | ? | ? | Points-cap tickets ×1 Normal | Points-cap tickets ×1 Super, ×1 Normal | Points-cap tickets ×1 Super, ×1 Normal | Points-cap tickets ×1 High-end, ×1 Super, ×1 Normal | Points-cap tickets ×1 High-end, ×1 Super, ×1 Normal | |||
| 16–19 | No reward | ||||||||||
| 20 | No reward | ||||||||||
Tour-specific[edit]
In many tours, players are also awarded certain drivers, karts, and gliders for placing high in rankings. These items can be either Super or High-End, with High-End items requiring higher placements to obtain.
Below is a list of tour-specific Ranking Bonuses throughout the game's history.


Occurrence of courses in rankings[edit]
The table below shows the amount of times each course in the game was featured in a ranked cup.
| Group | Course name | No. of times it was part of a ranked cup | |
|---|---|---|---|
| Up to and including the 2023 Anniversary Tour (i.e. excluding reruns) |
Total (i.e. including reruns) as of July 27, 2026 | ||
| New courses | New York Minute | 1 | 1 |
| New York Minute R | 0 | 0 | |
| New York Minute T | 1 | 4 | |
| New York Minute R/T | 0 | 0 | |
| New York Minute 2 | 1 | 1 | |
| New York Minute 2R | 0 | 0 | |
| New York Minute 2T | 1 | 1 | |
| New York Minute 2R/T | 0 | 0 | |
| New York Minute 3 | 1 | 1 | |
| New York Minute 3R | 0 | 0 | |
| New York Minute 3T | 1 | 3 | |
| New York Minute 3R/T | 1 | 1 | |
| New York Minute 4 | 1 | 1 | |
| New York Minute 4R | 0 | 0 | |
| New York Minute 4T | 0 | 0 | |
| New York Minute 4R/T | 1 | 1 | |
| Tokyo Blur | 1 | 1 | |
| Tokyo Blur R | 1 | 1 | |
| Tokyo Blur T | 1 | 1 | |
| Tokyo Blur R/T | 1 | 1 | |
| Tokyo Blur 2 | 1 | 1 | |
| Tokyo Blur 2R | 1 | 1 | |
| Tokyo Blur 2T | 1 | 1 | |
| Tokyo Blur 3 | 1 | 1 | |
| Tokyo Blur 3R | 0 | 0 | |
| Tokyo Blur 3T | 2 | 5 | |
| Tokyo Blur 3R/T | 1 | 1 | |
| Tokyo Blur 4 | 1 | 1 | |
| Tokyo Blur 4R | 0 | 0 | |
| Tokyo Blur 4T | 1 | 4 | |
| Tokyo Blur 4R/T | 1 | 1 | |
| Paris Promenade | 1 | 1 | |
| Paris Promenade R | 1 | 1 | |
| Paris Promenade T | 1 | 1 | |
| Paris Promenade R/T | 1 | 3 | |
| Paris Promenade 2 | 0 | 0 | |
| Paris Promenade 2R | 2 | 2 | |
| Paris Promenade 2T | 2 | 2 | |
| Paris Promenade 2R/T | 0 | 0 | |
| Paris Promenade 3 | 1 | 1 | |
| Paris Promenade 3R | 0 | 0 | |
| Paris Promenade 3T | 0 | 0 | |
| Paris Promenade 3R/T | 1 | 1 | |
| London Loop | 1 | 1 | |
| London Loop R | 2 | 1 | |
| London Loop T | 1 | 1 | |
| London Loop R/T | 0 | 0 | |
| London Loop 2 | 1 | 1 | |
| London Loop 2R | 0 | 0 | |
| London Loop 2T | 1 | 1 | |
| London Loop 2R/T | 0 | 0 | |
| London Loop 3 | 1 | 1 | |
| London Loop 3R | 0 | 0 | |
| London Loop 3T | 1 | 1 | |
| London Loop 3R/T | 1 | 1 | |
| Vancouver Velocity | 0 | 0 | |
| Vancouver Velocity R | 2 | 2 | |
| Vancouver Velocity T | 1 | 1 | |
| Vancouver Velocity R/T | 0 | 0 | |
| Vancouver Velocity 2 | 1 | 1 | |
| Vancouver Velocity 2R | 1 | 1 | |
| Vancouver Velocity 2T | 1 | 1 | |
| Vancouver Velocity 2R/T | 1 | 1 | |
| Vancouver Velocity 3 | 1 | 4 | |
| Vancouver Velocity 3R | 1 | 4 | |
| Vancouver Velocity 3T | 0 | 0 | |
| Vancouver Velocity 3R/T | 1 | 4 | |
| Los Angeles Laps | 1 | 1 | |
| Los Angeles Laps R | 0 | 0 | |
| Los Angeles Laps T | 1 | 4 | |
| Los Angeles Laps R/T | 1 | 1 | |
| Los Angeles Laps 2 | 1 | 1 | |
| Los Angeles Laps 2R | 1 | 1 | |
| Los Angeles Laps 2T | 1 | 1 | |
| Los Angeles Laps 2R/T | 1 | 1 | |
| Los Angeles Laps 3 | 2 | 4 | |
| Los Angeles Laps 3R | 0 | 0 | |
| Los Angeles Laps 3T | 1 | 4 | |
| Los Angeles Laps 3R/T | 2 | 2 | |
| Merry Mountain | 1 | 1 | |
| Merry Mountain R | 1 | 1 | |
| Merry Mountain T | 2 | 5 | |
| Merry Mountain R/T | 2 | 5 | |
| Berlin Byways | 1 | 1 | |
| Berlin Byways R | 1 | 3 | |
| Berlin Byways T | 0 | 0 | |
| Berlin Byways R/T | 1 | 4 | |
| Berlin Byways 2 | 1 | 1 | |
| Berlin Byways 2R | 1 | 1 | |
| Berlin Byways 2T | 1 | 1 | |
| Berlin Byways 2R/T | 1 | 1 | |
| Berlin Byways 3 | 0 | 0 | |
| Berlin Byways 3R | 0 | 0 | |
| Berlin Byways 3T | 1 | 1 | |
| Berlin Byways 3R/T | 0 | 0 | |
| Ninja Hideaway | 2 | 5 | |
| Ninja Hideaway R | 1 | 1 | |
| Ninja Hideaway T | 2 | 2 | |
| Ninja Hideaway R/T | 3 | 6 | |
| Sydney Sprint | 1 | 1 | |
| Sydney Sprint R | 1 | 4 | |
| Sydney Sprint T | 1 | 1 | |
| Sydney Sprint R/T | 0 | 0 | |
| Sydney Sprint 2 | 1 | 1 | |
| Sydney Sprint 2R | 1 | 1 | |
| Sydney Sprint 2T | 1 | 1 | |
| Sydney Sprint 2R/T | 1 | 1 | |
| Sydney Sprint 3 | 1 | 1 | |
| Sydney Sprint 3R | 0 | 0 | |
| Sydney Sprint 3T | 0 | 0 | |
| Sydney Sprint 3R/T | 1 | 3 | |
| Singapore Speedway | 1 | 1 | |
| Singapore Speedway R | 1 | 1 | |
| Singapore Speedway T | 1 | 1 | |
| Singapore Speedway R/T | 1 | 1 | |
| Singapore Speedway 2 | 0 | 0 | |
| Singapore Speedway 2R | 1 | 1 | |
| Singapore Speedway 2T | 1 | 1 | |
| Singapore Speedway 2R/T | 1 | 1 | |
| Singapore Speedway 3 | 1 | 4 | |
| Singapore Speedway 3R | 0 | 0 | |
| Singapore Speedway 3T | 0 | 0 | |
| Singapore Speedway 3R/T | 1 | 4 | |
| Amsterdam Drift | 1 | 1 | |
| Amsterdam Drift R | 1 | 1 | |
| Amsterdam Drift T | 1 | 1 | |
| Amsterdam Drift R/T | 1 | 1 | |
| Amsterdam Drift 2 | 1 | 4 | |
| Amsterdam Drift 2R | 1 | 1 | |
| Amsterdam Drift 2T | 1 | 1 | |
| Amsterdam Drift 2R/T | 1 | 1 | |
| Amsterdam Drift 3 | 2 | 7 | |
| Amsterdam Drift 3R | 0 | 0 | |
| Amsterdam Drift 3T | 0 | 0 | |
| Amsterdam Drift 3R/T | 1 | 4 | |
| Bangkok Rush | 1 | 1 | |
| Bangkok Rush R | 1 | 1 | |
| Bangkok Rush T | 1 | 1 | |
| Bangkok Rush R/T | 1 | 1 | |
| Bangkok Rush 2 | 0 | 0 | |
| Bangkok Rush 2R | 1 | 4 | |
| Bangkok Rush 2T | 0 | 0 | |
| Bangkok Rush 2R/T | 1 | 3 | |
| Bangkok Rush 3 | 1 | 4 | |
| Bangkok Rush 3R | 0 | 0 | |
| Bangkok Rush 3R | 0 | 0 | |
| Bangkok Rush 3R/T | 0 | 0 | |
| Sky-High Sundae | 2 | 4 | |
| Sky-High Sundae R | 1 | 3 | |
| Sky-High Sundae T | 1 | 1 | |
| Sky-High Sundae R/T | 1 | 1 | |
| Piranha Plant Cove | 1 | 4 | |
| Piranha Plant Cove R | 1 | 4 | |
| Piranha Plant Cove T | 0 | 0 | |
| Piranha Plant Cove R/T | 1 | 4 | |
| Piranha Plant Cove 2 | 1 | 4 | |
| Piranha Plant Cove 2R | 1 | 4 | |
| Piranha Plant Cove 2T | 1 | 4 | |
| Piranha Plant Cove 2R/T | 0 | 0 | |
| Piranha Plant Cove 3 | 1 | 4 | |
| Piranha Plant Cove 3R | 0 | 0 | |
| Piranha Plant Cove 3T | 0 | 0 | |
| Piranha Plant Cove 3R/T | 1 | 4 | |
| Yoshi's Island | 1 | 4 | |
| Yoshi's Island R | 0 | 0 | |
| Yoshi's Island T | 0 | 0 | |
| Yoshi's Island R/T | 1 | 4 | |
| Athens Dash | 1 | 4 | |
| Athens Dash R | 0 | 0 | |
| Athens Dash T | 0 | 0 | |
| Athens Dash R/T | 1 | 4 | |
| Athens Dash 2 | 0 | 0 | |
| Athens Dash 2R | 0 | 0 | |
| Athens Dash 2T | 1 | 4 | |
| Athens Dash 2R/T | 1 | 3 | |
| Athens Dash 3 | 1 | 3 | |
| Athens Dash 3R | 0 | 0 | |
| Athens Dash 3T | 0 | 0 | |
| Athens Dash 3R/T | 0 | 0 | |
| Rome Avanti | 1 | 4 | |
| Rome Avanti R | 0 | 0 | |
| Rome Avanti T | 0 | 0 | |
| Rome Avanti R/T | 1 | 4 | |
| Rome Avanti 2 | 0 | 0 | |
| Rome Avanti 2R | 1 | 4 | |
| Rome Avanti 2T | 1 | 4 | |
| Rome Avanti 2R/T | 0 | 0 | |
| Rome Avanti 3 | 1 | 3 | |
| Rome Avanti 3R | 0 | 0 | |
| Rome Avanti 3T | 0 | 0 | |
| Rome Avanti 3R/T | 0 | 0 | |
| Piranha Plant Pipeline | 1 | 4 | |
| Piranha Plant Pipeline R | 0 | 0 | |
| Piranha Plant Pipeline T | 0 | 0 | |
| Piranha Plant Pipeline R/T | 1 | 4 | |
| Squeaky Clean Sprint | 1 | 3 | |
| Squeaky Clean Sprint R | 1 | 3 | |
| Squeaky Clean Sprint T | 0 | 0 | |
| Madrid Drive | 1 | 3 | |
| Madrid Drive R | 0 | 0 | |
| Madrid Drive T | 0 | 0 | |
| Madrid Drive R/T | 0 | 0 | |
| Madrid Drive 2 | 1 | 3 | |
| Madrid Drive 2R | 0 | 0 | |
| Madrid Drive 2T | 0 | 0 | |
| Madrid Drive 2R/T | 0 | 0 | |
| Madrid Drive 3 | 1 | 3 | |
| Madrid Drive 3R | 0 | 0 | |
| Madrid Drive 3T | 0 | 0 | |
| Madrid Drive 3R/T | 0 | 0 | |
| Remix courses | RMX Mario Circuit 1 | 2 | 2 |
| RMX Mario Circuit 1R | 0 | 0 | |
| RMX Mario Circuit 1T | 1 | 1 | |
| RMX Mario Circuit 1R/T | 2 | 2 | |
| RMX Choco Island 1 | 3 | 3 | |
| RMX Choco Island 1R | 0 | 0 | |
| RMX Choco Island 1T | 1 | 1 | |
| RMX Choco Island 1R/T | 2 | 2 | |
| RMX Choco Island 2 | 2 | 2 | |
| RMX Choco Island 2R | 2 | 2 | |
| RMX Choco Island 2T | 1 | 1 | |
| RMX Choco Island 2R/T | 1 | 4 | |
| RMX Rainbow Road 1 | 4 | 4 | |
| RMX Rainbow Road 1R | 1 | 1 | |
| RMX Rainbow Road 1T | 1 | 1 | |
| RMX Rainbow Road 1R/T | 4 | 4 | |
| RMX Rainbow Road 2 | 2 | 2 | |
| RMX Rainbow Road 2R | 0 | 0 | |
| RMX Rainbow Road 2T | 4 | 4 | |
| RMX Rainbow Road 2R/T | 3 | 6 | |
| RMX Vanilla Lake 1 | 1 | 1 | |
| RMX Vanilla Lake 1R | 2 | 2 | |
| RMX Vanilla Lake 1T | 1 | 1 | |
| RMX Vanilla Lake 1R/T | 0 | 0 | |
| RMX Vanilla Lake 2 | 1 | 3 | |
| RMX Vanilla Lake 2R | 0 | 0 | |
| RMX Vanilla Lake 2T | 0 | 0 | |
| RMX Vanilla Lake 2R/T | 1 | 3 | |
| RMX Ghost Valley 1 | 1 | 1 | |
| RMX Ghost Valley 1R | 2 | 5 | |
| RMX Ghost Valley 1T | 2 | 2 | |
| RMX Ghost Valley 1R/T | 3 | 3 | |
| RMX Bowser's Castle 1 | 0 | 0 | |
| RMX Bowser's Castle 1R | 1 | 1 | |
| RMX Bowser's Castle 1T | 1 | 1 | |
| RMX Bowser's Castle 1R/T | 1 | 4 | |
| RMX Donut Plains 1 | 1 | 4 | |
| RMX Donut Plains 1R | 0 | 0 | |
| RMX Donut Plains 1T | 0 | 0 | |
| RMX Donut Plains 1R/T | 1 | 4 | |
| SNES | Mario Circuit 1 | 3 | 3 |
| Mario Circuit 1R | 1 | 1 | |
| Mario Circuit 1R/T | 2 | 5 | |
| Donut Plains 1 | 2 | 2 | |
| Donut Plains 1R | 1 | 1 | |
| Donut Plains 1T | 1 | 1 | |
| Donut Plains 1R/T | 1 | 1 | |
| Ghost Valley 1 | 1 | 1 | |
| Ghost Valley 1R | 4 | 4 | |
| Ghost Valley 1T | 1 | 1 | |
| Ghost Valley 1R/T | 1 | 1 | |
| Mario Circuit 2 | 1 | 1 | |
| Mario Circuit 2R | 2 | 2 | |
| Mario Circuit 2T | 1 | 1 | |
| Mario Circuit 2R/T | 2 | 2 | |
| Choco Island 1 | 2 | 2 | |
| Choco Island 1R | 1 | 1 | |
| Choco Island 1T | 1 | 1 | |
| Choco Island 1R/T | 1 | 1 | |
| Donut Plains 2 | 1 | 1 | |
| Donut Plains 2R | 0 | 0 | |
| Donut Plains 2T | 2 | 2 | |
| Donut Plains 2R/T | 3 | 3 | |
| Mario Circuit 3 | 3 | 3 | |
| Mario Circuit 3R | 1 | 1 | |
| Mario Circuit 3T | 1 | 1 | |
| Mario Circuit 3R/T | 1 | 1 | |
| Choco Island 2 | 3 | 3 | |
| Choco Island 2R | 1 | 1 | |
| Choco Island 2T | 1 | 1 | |
| Choco Island 2R/T | 0 | 0 | |
| Vanilla Lake 1 | 1 | 1 | |
| Vanilla Lake 1R | 1 | 1 | |
| Vanilla Lake 1T | 4 | 4 | |
| Vanilla Lake 1R/T | 2 | 2 | |
| Bowser Castle 3 | 1 | 4 | |
| Bowser Castle 3R | 0 | 0 | |
| Bowser Castle 3T | 0 | 0 | |
| Bowser Castle 3R/T | 1 | 4 | |
| Donut Plains 3 | 1 | 4 | |
| Donut Plains 3R | 0 | 0 | |
| Donut Plains 3T | 1 | 4 | |
| Donut Plains 3R/T | 1 | 4 | |
| Koopa Troopa Beach 2 | 3 | 3 | |
| Koopa Troopa Beach 2R | 0 | 0 | |
| Koopa Troopa Beach 2T | 3 | 3 | |
| Koopa Troopa Beach 2R/T | 0 | 0 | |
| Ghost Valley 2 | 2 | 5 | |
| Ghost Valley 2R | 0 | 0 | |
| Ghost Valley 2T | 1 | 1 | |
| Ghost Valley 2R/T | 1 | 4 | |
| Vanilla Lake 2 | 1 | 1 | |
| Vanilla Lake 2R | 1 | 1 | |
| Vanilla Lake 2T | 1 | 1 | |
| Vanilla Lake 2R/T | 0 | 0 | |
| Rainbow Road | 3 | 3 | |
| Rainbow Road R | 2 | 2 | |
| Rainbow Road T | 2 | 2 | |
| Rainbow Road R/T | 1 | 1 | |
| N64 | Luigi Raceway | 1 | 4 |
| Luigi Raceway R | 1 | 1 | |
| Luigi Raceway T | 1 | 1 | |
| Luigi Raceway R/T | 1 | 4 | |
| Koopa Troopa Beach | 3 | 3 | |
| Koopa Troopa Beach R | 2 | 2 | |
| Koopa Troopa Beach T | 0 | 0 | |
| Koopa Troopa Beach R/T | 2 | 2 | |
| Kalimari Desert | 5 | 5 | |
| Kalimari Desert R | 1 | 1 | |
| Kalimari Desert T | 1 | 1 | |
| Kalimari Desert R/T | 0 | 0 | |
| Kalimari Desert 2 | 1 | 1 | |
| Kalimari Desert 2R | 5 | 5 | |
| Kalimari Desert 2T | 0 | 0 | |
| Kalimari Desert 2R/T | 2 | 2 | |
| Frappe Snowland | 2 | 2 | |
| Frappe Snowland R | 0 | 0 | |
| Frappe Snowland T | 3 | 3 | |
| Frappe Snowland R/T | 2 | 2 | |
| Choco Mountain | 1 | 1 | |
| Choco Mountain R | 0 | 0 | |
| Choco Mountain T | 2 | 2 | |
| Choco Mountain R/T | 4 | 10 | |
| Mario Raceway | 1 | 4 | |
| Mario Raceway R | 0 | 0 | |
| Mario Raceway T | 0 | 0 | |
| Mario Raceway R/T | 1 | 4 | |
| Royal Raceway | 3 | 3 | |
| Royal Raceway R | 3 | 3 | |
| Royal Raceway T | 3 | 3 | |
| Royal Raceway R/T | 4 | 4 | |
| Yoshi Valley | 1 | 1 | |
| Yoshi Valley R | 0 | 0 | |
| Yoshi Valley T | 1 | 1 | |
| Yoshi Valley R/T | 1 | 4 | |
| GBA | Peach Circuit | 1 | 4 |
| Peach Circuit R | 0 | 0 | |
| Peach Circuit T | 1 | 4 | |
| Peach Circuit R/T | 1 | 3 | |
| Riverside Park | 0 | 0 | |
| Riverside Park R | 1 | 4 | |
| Riverside Park T | 2 | 8 | |
| Riverside Park R/T | 0 | 0 | |
| Bowser's Castle 1 | 1 | 1 | |
| Bowser's Castle 1R | 0 | 0 | |
| Bowser's Castle 1T | 1 | 1 | |
| Bowser's Castle 1R/T | 1 | 4 | |
| Boo Lake | 1 | 4 | |
| Boo Lake R | 0 | 0 | |
| Boo Lake T | 1 | 4 | |
| Boo Lake R/T | 1 | 4 | |
| Bowser's Castle 2 | 2 | 2 | |
| Bowser's Castle 2R | 1 | 1 | |
| Bowser's Castle 2T | 2 | 2 | |
| Bowser's Castle 2R/T | 2 | 2 | |
| Luigi Circuit | 1 | 3 | |
| Luigi Circuit R | 0 | 0 | |
| Luigi Circuit T | 1 | 4 | |
| Luigi Circuit R/T | 1 | 3 | |
| Sky Garden | 1 | 1 | |
| Sky Garden R | 1 | 1 | |
| Sky Garden T | 2 | 2 | |
| Sky Garden R/T | 1 | 4 | |
| Cheep-Cheep Island | 2 | 2 | |
| Cheep-Cheep Island R | 1 | 1 | |
| Cheep-Cheep Island T | 3 | 3 | |
| Cheep-Cheep Island R/T | 1 | 4 | |
| Sunset Wilds | 4 | 4 | |
| Sunset Wilds R | 1 | 4 | |
| Sunset Wilds T | 3 | 3 | |
| Sunset Wilds R/T | 3 | 3 | |
| Snow Land | 1 | 4 | |
| Snow Land R | 0 | 0 | |
| Snow Land T | 1 | 4 | |
| Snow Land R/T | 1 | 4 | |
| Yoshi Desert | 1 | 4 | |
| Yoshi Desert R | 1 | 4 | |
| Yoshi Desert T | 0 | 0 | |
| Yoshi Desert R/T | 1 | 4 | |
| Bowser's Castle 3 | 1 | 1 | |
| Bowser's Castle 3R | 1 | 4 | |
| Bowser's Castle 3T | 1 | 1 | |
| Bowser's Castle 3R/T | 1 | 7 | |
| Lakeside Park | 1 | 4 | |
| Lakeside Park R | 0 | 0 | |
| Lakeside Park T | 1 | 3 | |
| Lakeside Park R/T | 0 | 0 | |
| Bowser's Castle 4 | 1 | 4 | |
| Bowser's Castle 4R | 0 | 0 | |
| GCN | Baby Park | 1 | 1 |
| Baby Park R | 1 | 1 | |
| Baby Park T | 1 | 1 | |
| Baby Park R/T | 2 | 8 | |
| Mushroom Bridge | 0 | 0 | |
| GCN Mushroom Bridge R | 1 | 4 | |
| GCN Mushroom Bridge T | 1 | 4 | |
| Mushroom Bridge R/T | 0 | 0 | |
| Daisy Cruiser | 2 | 5 | |
| Daisy Cruiser R | 1 | 1 | |
| Daisy Cruiser T | 1 | 1 | |
| Daisy Cruiser R/T | 1 | 3 | |
| Waluigi Stadium | 0 | 0 | |
| Waluigi Stadium R | 0 | 0 | |
| Waluigi Stadium T | 1 | 4 | |
| Waluigi Stadium R/T | 0 | 0 | |
| Yoshi Circuit | 5 | 5 | |
| Yoshi Circuit R | 3 | 3 | |
| Yoshi Circuit T | 2 | 2 | |
| Yoshi Circuit R/T | 3 | 3 | |
| DK Mountain | 1 | 4 | |
| DK Mountain R | 0 | 0 | |
| DK Mountain T | 0 | 0 | |
| DK Mountain R/T | 1 | 4 | |
| Dino Dino Jungle | 7 | 7 | |
| Dino Dino Jungle R | 1 | 1 | |
| Dino Dino Jungle T | 3 | 3 | |
| Dino Dino Jungle R/T | 1 | 4 | |
| DS | Luigi's Mansion | 4 | 4 |
| Luigi's Mansion R | 3 | 3 | |
| Luigi's Mansion T | 2 | 2 | |
| Luigi's Mansion R/T | 1 | 1 | |
| Waluigi Pinball | 3 | 3 | |
| Waluigi Pinball R | 2 | 2 | |
| Waluigi Pinball T | 2 | 2 | |
| Waluigi Pinball R/T | 2 | 2 | |
| Shroom Ridge | 1 | 4 | |
| Shroom Ridge R | 0 | 0 | |
| Shroom Ridge T | 0 | 0 | |
| Shroom Ridge R/T | 1 | 4 | |
| DK Pass | 3 | 3 | |
| DK Pass R | 1 | 1 | |
| DK Pass T | 3 | 3 | |
| DK Pass R/T | 3 | 3 | |
| Mario Circuit | 1 | 4 | |
| Mario Circuit R | 0 | 0 | |
| Mario Circuit T | 1 | 4 | |
| Mario Circuit R/T | 1 | 4 | |
| Airship Fortress | 3 | 3 | |
| Airship Fortress R | 0 | 0 | |
| Airship Fortress T | 2 | 2 | |
| Airship Fortress R/T | 1 | 1 | |
| Peach Gardens | 1 | 4 | |
| Peach Gardens R | 1 | 4 | |
| Peach Gardens T | 1 | 4 | |
| Peach Gardens R/T | 1 | 4 | |
| Wii | Mushroom Gorge | 1 | 1 |
| Mushroom Gorge R | 1 | 1 | |
| Mushroom Gorge T | 2 | 2 | |
| Mushroom Gorge R/T | 1 | 4 | |
| Coconut Mall | 2 | 5 | |
| Coconut Mall R | 1 | 1 | |
| Cocounut Mall T | 1 | 1 | |
| Coconut Mall R/T | 1 | 4 | |
| DK Summit | 1 | 1 | |
| DK Summit R | 1 | 1 | |
| DK Summit T | 2 | 2 | |
| DK Summit R/T | 1 | 4 | |
| Daisy Circuit | 1 | 4 | |
| Daisy Circuit R | 0 | 0 | |
| Daisy Circuit T | 1 | 3 | |
| Daisy Circuit R/T | 1 | 4 | |
| Koopa Cape | 1 | 1 | |
| Koopa Cape R | 1 | 1 | |
| Koopa Cape T | 1 | 1 | |
| Koopa Cape R/T | 2 | 8 | |
| Maple Treeway | 3 | 3 | |
| Maple Treeway T | 3 | 3 | |
| Maple Treeway R | 1 | 1 | |
| Maple Treeway R/T | 2 | 5 | |
| Dry Dry Ruins | 1 | 4 | |
| Dry Dry Ruins R | 0 | 0 | |
| Dry Dry Ruins T | 1 | 4 | |
| Dry Dry Ruins R/T | 1 | 4 | |
| Moonview Highway | 1 | 4 | |
| Moonview Highway R | 1 | 4 | |
| Moonview Highway T | 1 | 3 | |
| Moonview Highway R/T | 0 | 0 | |
| Rainbow Road | 1 | 4 | |
| Rainbow Road R | 0 | 0 | |
| Rainbow Road T | 1 | 4 | |
| Rainbow Road R/T | 1 | 4 | |
| 3DS | Toad Circuit | 4 | 4 |
| Toad Circuit R | 1 | 1 | |
| Toad Circuit T | 1 | 1 | |
| Toad Circuit R/T | 2 | 2 | |
| Daisy Hills | 1 | 1 | |
| Daisy Hills R | 2 | 2 | |
| Daisy Hills T | 2 | 2 | |
| Daisy Hills R/T | 2 | 2 | |
| Cheep Cheep Lagoon | 4 | 4 | |
| Cheep Cheep Lagoon R | 3 | 3 | |
| Cheep Cheep Lagoon T | 0 | 0 | |
| Cheep Cheep Lagoon R/T | 1 | 1 | |
| Shy Guy Bazaar | 4 | 4 | |
| Shy Guy Bazaar R | 3 | 3 | |
| Shy Guy Bazaar T | 2 | 2 | |
| Shy Guy Bazaar R/T | 0 | 0 | |
| Mario Circuit | 1 | 1 | |
| Mario Circuit R | 3 | 3 | |
| Mario Circuit T | 3 | 3 | |
| Mario Circuit R/T | 4 | 4 | |
| Rock Rock Mountain | 2 | 2 | |
| Rock Rock Mountain R | 1 | 1 | |
| Rock Rock Mountain T | 2 | 2 | |
| Piranha Plant Slide | 1 | 1 | |
| Piranha Plant Slide R | 0 | 0 | |
| Piranha Plant Slide T | 1 | 1 | |
| Piranha Plant Slide R/T | 1 | 4 | |
| Wario Shipyard | 1 | 1 | |
| Wario Shipyard R | 1 | 1 | |
| Wario Shipyard T | 1 | 1 | |
| Wario Shipyard R/T | 3 | 6 | |
| Neo Bowser City | 4 | 4 | |
| Neo Bowser City R | 4 | 4 | |
| Neo Bowser City T | 2 | 2 | |
| Neo Bowser City R/T | 0 | 0 | |
| Rosalina's Ice World | 1 | 1 | |
| Rosalina's Ice World R | 3 | 5 | |
| Rosalina's Ice World T | 3 | 3 | |
| Rosalina's Ice World R/T | 3 | 3 | |
| Bowser's Castle | 1 | 1 | |
| Bowser's Castle R | 2 | 5 | |
| Bowser's Castle T | 2 | 2 | |
| Bowser's Castle R/T | 1 | 1 | |
| Rainbow Road | 2 | 2 | |
| Rainbow Road R | 3 | 3 | |
| Rainbow Road T | 1 | 1 | |
| Rainbow Road R/T | 3 | 3 | |
| Battle courses | New York Minute B | 1 | 4 |
| Paris Promenade B | 2 | 7 | |
| GBA Battle Course 1 | 2 | 8 | |
| GCN Cookie Land | 1 | 4 | |
| DS Twilight House | 1 | 4 | |
Names in other languages[edit]
- Rankings
| Language | Name | Meaning | Note(s) | Ref. |
|---|---|---|---|---|
| Japanese | ランキング rankingu |
rankings | [9] | |
| Chinese | 排行榜 páihángbǎng |
rankings | [10][11] | |
| French | classements | rankings | [12] | |
| German | Ranglisten | rankings | [13] | |
| Italian | classifiche | rankings | [14] | |
| Korean | 랭킹에 raengking'e |
rankings | [15] | |
| Portuguese (Brazil) | classificações | rankings | [16] | |
| Spanish | clasificación | ranking | [17][18] |
- This Week's Ranking
| Language | Name | Meaning | Note(s) | Ref. |
|---|---|---|---|---|
| Japanese | ランキング rankingu |
ranking | [19] | |
| Chinese | 排行榜 páihángbǎng |
ranking | [20][21] | |
| French | classement hebdo | weekly ranking | [22] | |
| German | wöchentlichen Rangliste | weekly ranking | [23] | |
| Italian | classifica settimanale | weekly ranking | [24] | |
| Korean | 랭킹 raengking |
ranking | [25] | |
| Portuguese | classificação semanal | weekly ranking | [26] | |
| Spanish | clasificación semanal | weekly ranking | [27] |
- Friend Ranking
| Language | Name | Meaning | Note(s) | Ref. |
|---|---|---|---|---|
| Japanese | フレンドランキング furendo rankingu |
friend ranking | [?] | |
| Chinese | 好友排行榜 hǎoyǒu páihángbǎng |
friend ranking | [?] | |
| French | classement des amis | friend ranking | [?] | |
| German | Freundes-Rangliste | friend ranking | [?] | |
| Italian | classifica degli amici | friend ranking | [?] | |
| Korean | 친구 랭킹 chingu raengking |
friend ranking | [?] | |
| Portuguese | classificação dos amigos | friend ranking | [?] | |
| Spanish | clasificación de amigos | friend ranking | [?] |
Footnotes and references[edit]
Footnotes[edit]
- ^ Reddit user Ludwig_von_Wu shared[4] in-game captures of ranking leaderboards from two different players, "Carlos85 YT" and "Wattdem", both taken during the same week of the Samurai Tour. While Carlos85 YT appears in Wattdem's leaderboard,[5] the reverse is not true.[6] In a subsequent reply, Ludwig_von_Wu notes that, while it is technically possible that the Carlos85 YT seen in Wattdem's leaderboard is a different player that had the same username at the time, it is highly unlikely, as Carlos85 YT is shown in both captures to own a Top 10 badge depicting Baby Mario (Koala), which was only awarded to the 10 highest-scoring players in the All-Cup Ranking of the April–May 2021 Sydney Tour.[7]
References[edit]
- ^ "Get 1st place in tier 99 in This Week's Ranking." – one of the Extreme Challenges, Mario Kart Tour. (Screenshot.)
- ^ How do rankings work?. Nintendo (American English). Retrieved February 16, 2025 from faq.mariokarttour.com. (Archived September 16, 2025, 19:39:16 UTC via Wayback Machine.)
- ^ October 30, 2019. Proof that the people you are matched with aren’t matched with you. Any idea why?. Reddit (/r/MarioKartTour). Retrieved February 16, 2025. (Archived June 17, 2023, 17:10:26 UTC via Wayback Machine.)
- ^ Ludwig_von_Wu (February 1, 2023). Comment on topic titled "'Your ranked group isn't directly competing with you; each player has their own unique group.': I still have a hard time believing it.". Reddit (/r/MarioKartTour). Retrieved February 16, 2025. (Archived February 16, 2025, 19:33:05 UTC via Wayback Machine.)
- ^ CocaineBiceps420 (March 23, 2022). Looks like I’ll have to try and get the King Boo suit next week with Carlos on my ranked lol. Reddit (/r/MarioKartTour). Retrieved February 16, 2025. (Archived March 23, 2022, 20:13:21 UTC via Wayback Machine.)
- ^ Carlos85 (March 23, 2022). SAMURAI TOUR (Week 1 Pipe Pulls + Ranked Cup) | Mario Kart Tour (1:13:02). YouTube. Retrieved February 15, 2025. (Archived February 22, 2025, 12:50:06 UTC via Wayback Machine.)
- ^ All-Cup Ranking for the Sydney Tour (April–May 2021). mariokarttour.com (American English). Archived February 17, 2025, 10:12:23 UTC from the original via Wayback Machine. Retrieved February 17, 2025.
The ranking shows players with the tags and badges they had at the time, and does not account for subsequent changes to their profile. - ^ The label "Ranking Bonus" is displayed on-screen when the player wins an item from rankings. Example screenshot.
- ^ ランキングの仕組みについて教えてください。. Nintendo (Japanese). Retrieved February 16, 2025 from faq.mariokarttour.com. (Archived September 15, 2025, 15:12:54 UTC via Wayback Machine.)
- ^ 请告诉我排行榜的详情。. Nintendo (Simplified Chinese). Retrieved February 16, 2025 from faq.mariokarttour.com. (Archived October 17, 2025, 03:46:22 UTC via Wayback Machine.)
- ^ 請告訴我排行榜的詳情。. Nintendo (Traditional Chinese). Retrieved February 16, 2025 from faq.mariokarttour.com. (Archived September 15, 2025, 16:46:11 UTC via Wayback Machine.)
- ^ Comment fonctionnent les classements ?. Nintendo (French). Retrieved February 16, 2025 from faq.mariokarttour.com. (Archived August 3, 2025, 15:11:18 UTC via Wayback Machine.)
- ^ Wie funktionieren Ranglisten?. Nintendo (German). Retrieved February 16, 2025 from faq.mariokarttour.com. (Archived October 7, 2025, 03:28:04 UTC via Wayback Machine.)
- ^ Come funzionano le classifiche?. Nintendo (Italian). Retrieved February 16, 2025 from faq.mariokarttour.com. (Archived September 8, 2025, 07:15:14 UTC via Wayback Machine.)
- ^ 랭킹에 대해서 알려 주세요.. Nintendo (Korean). Retrieved February 16, 2025 from faq.mariokarttour.com. (Archived August 3, 2025, 15:04:16 UTC via Wayback Machine.)
- ^ Como funcionam as classificações?. Nintendo (Brazilian Portuguese). Retrieved February 16, 2025 from faq.mariokarttour.com. (Archived August 7, 2025, 20:03:32 UTC via Wayback Machine.)
- ^ ¿Cómo funciona la clasificación?. Nintendo (Mexican Spanish). Retrieved February 16, 2025 from faq.mariokarttour.com. (Archived October 7, 2025, 03:26:59 UTC via Wayback Machine.)
- ^ ¿Cómo funciona la clasificación?. Nintendo (European Spanish). Retrieved February 16, 2025 from faq.mariokarttour.com. (Archived October 16, 2025, 03:34:53 UTC via Wayback Machine.)
- ^ 「リーグ99のランキングで1位をとる」 – one of the Extreme Challenges, Mario Kart Tour. Japanese. (Screenshot.)
- ^ "在联赛99的排行榜中获得第1名。" – one of the Extreme Challenges, Mario Kart Tour. Simplified Chinese. (Screenshot.)
- ^ 「在聯賽99的排行榜中取得第1名。」 – one of the Extreme Challenges, Mario Kart Tour. Traditional Chinese. (Screenshot.)
- ^ « Terminez à la 1re place de la ligue 99 du classement hebdo. » – one of the Extreme Challenges, Mario Kart Tour. French. (Screenshot.)
- ^ „Erreiche Platz 1 in Rangliste 99 in der wöchentlichen Rangliste.“ – one of the Extreme Challenges, Mario Kart Tour. German. (Screenshot.)
- ^ «Piazzati al 1° posto nella classifica settimanale della lega 99.» – one of the Extreme Challenges, Mario Kart Tour. Italian. (Screenshot.)
- ^ "리그 99의 랭킹에서1위를 한다" – one of the Extreme Challenges, Mario Kart Tour. Korean. (Screenshot.)
- ^ "Chegue em primeiro lugar na classificação semanal da liga 99." – one of the Extreme Challenges, Mario Kart Tour. Portuguese. (Screenshot.)
- ^ «Quedar en primer lugar de la liga 99 en una clasificación semanal.» – one of the Extreme Challenges, Mario Kart Tour. European Spanish and Latin American Spanish. (Screenshot.)
| Mario Kart Tour miscellaneous | ||
|---|---|---|
| Bonus challenges | Ready, Set, Rocket Start • Ring Race • Do Jump Boosts • Big Reverse Race • Goomba Takedown • Glider Challenge • Steer Clear of Obstacles • Vs. Mega • Smash Small Dry Bones • Break Item Boxes • Time Trial • Combo Attack • Take them out quick! • Snap a Photo • Precision Gliding • Big Reverse Race vs. 100 | |
| Cups | Baby Daisy Cup • Baby Luigi Cup • Baby Mario Cup • Baby Peach Cup • Baby Rosalina Cup • Birdo Cup • Boomerang Bro Cup • Bowser Cup • Bowser Jr. Cup • Cat Peach Cup • Chargin' Chuck Cup • Daisy Cup • Diddy Kong Cup • Dixie Kong Cup • Donkey Kong Cup • Dry Bones Cup • Dry Bowser Cup • Fire Bro Cup • Fire Rosalina Cup • Funky Kong Cup • Gold Mario Cup • Hammer Bro Cup • Ice Bro Cup • Ice Mario Cup • Iggy Cup • Kamek Cup • King Bob-omb Cup • King Boo Cup • Koopa Troopa Cup • Lakitu Cup • Larry Cup • Lemmy Cup • Ludwig Cup • Luigi Cup • Mario Cup • Metal Mario Cup • Mii Cup • Monty Mole Cup • Morton Cup • Nabbit Cup • Pauline Cup • Peach Cup • Peachette Cup • Pink Gold Peach Cup • Poochy Cup • Rosalina Cup • Roy Cup • Shy Guy Cup • Tanooki Mario Cup • Toad Cup • Toadette Cup • Waluigi Cup • Wario Cup • Wendy Cup • Yoshi Cup | |
| Tours | 2019 | New York Tour • Tokyo Tour • Halloween Tour • Paris Tour • Winter Tour • London Tour • Holiday Tour |
| 2020 | New Year's Tour • Ice Tour • Valentine's Tour • Vancouver Tour • Mario Bros. Tour • Baby Rosalina Tour • Hammer Bro Tour • Yoshi Tour • Trick Tour • Flower Tour • Jungle Tour • Cooking Tour • Peach Tour • Marine Tour • Exploration Tour • Wild West Tour • Pirate Tour • Summer Festival Tour • Super Mario Kart Tour • Los Angeles Tour • 1st Anniversary Tour • Halloween Tour • Sunset Tour • Mario vs. Luigi Tour • Winter Tour • Rosalina Tour • New Year's 2021 Tour | |
| 2021 | Berlin Tour • Cat Tour • Peach vs. Daisy Tour • Snow Tour • Mario Tour • Yoshi Tour • Ninja Tour • Sydney Tour (April–May) • Bowser vs. DK Tour • Trick Tour • Wedding Tour • Paris Tour • Summer Tour • Los Angeles Tour • Mario vs. Peach Tour • Frost Tour • Kamek Tour • Sydney Tour (September) • 2nd Anniversary Tour • Autumn Tour • Halloween Tour • Toad vs. Toadette Tour • Space Tour • Holiday Tour • Penguin Tour • New Year's 2022 Tour | |
| 2022 | Singapore Tour • Wario vs. Waluigi Tour • Los Angeles Tour • Sky Tour • Mii Tour • Samurai Tour • Yoshi Tour • Amsterdam Tour • Doctor Tour • Peach vs. Bowser Tour (May) • Cat Tour • Metropolitan Tour • Bangkok Tour • Piranha Plant Tour • Ocean Tour • Sundae Tour • Bowser Tour • Mario vs. Luigi Tour • Anniversary Tour • Battle Tour • Halloween Tour • Autumn Tour • Animal Tour • Peach vs. Bowser Tour (November–December) • Holiday Tour • New Year's Tour | |
| 2023 | Space Tour • Winter Tour • Exploration Tour • Doctor Tour • Mario Tour • Ninja Tour • Yoshi Tour • Spring Tour • Bowser Tour • Mii Tour • Princess Tour • Mario vs. Luigi Tour • Night Tour • Pipe Tour • Sunshine Tour • Vacation Tour • Summer Tour • Sundae Tour • Anniversary Tour | |
| Items | Regular items | Banana • Green Shell • Red Shell • Spiny Shell • Bob-omb • Mushroom • Mega Mushroom • Bullet Bill • Blooper • Lightning • Super Horn • Coin • Star • Feathera |
| Special items | Triple Bananas • Giant Banana • Triple Green Shells • Bowser's Shell • Double Bob-ombs • Triple Mushrooms • Fire Flower • Boomerang Flower • Ice Flower • Heart • Yoshi's Egg • Birdo's Egg • Bubble • Banana Barrels • Mushroom Cannon • Bob-omb Cannon • Lucky Seven • Dash Ring • Coin Box • Hammer • Giga Bob-omb • Super Bell • Super Leaf • Capsule | |
| Inventory items | Coin • Coin Rush ticket • Event tokena • Grand Star • Item ticket • Level-boost ticket • Point-boost ticket • Points-cap ticketa • Ruby • Star ticket • Team tokena • Quick ticket | |
| Course elements | Interactable | ? Block • Anchor • Banzai Bill • Barrel • Barrel Bomb • Bath Bomb • Barrel Cannon • Beach Ball • Big egg • Blimp • Bone Piranha Plant • Boulder • Bumper • Burner • Cannon • Ceiling Needle • Chain Chomp • Cheep Cheep • Clampy • Crate • Dash Panel • Exploring Shy Guy • Falling Pillar • Festive tree • Fire Piranha Plant • Flipper • Floaty • Flying Shy Guy • Fuzzy • Glide Ramp • Goal Ring • Goat • Goomba • Goomba Tower • Half-pipe • Hoop • Hot-air balloon • Inky Piranha Plant • Jack-o'-lantern • Jar • Jellybeam • Jump Boost field • Kadomatsu • Kanaami road • Lava Bubble • Lava Geyser • Leaf pile • Maw-Ray • Mecha Cheep • Metal ball • Mud • Mushroom Platform • Mushroom Trampoline • Noshi • Oil slick • Penguin • Pipe • Piranha Plant • Pokey • Puddle • Ramp • Rocky Wrench • Rolling rock • Shoe • Sidestepper • Skating Shy Guy • Snake jar • Snow block • Snowball • Snowboarding Shy Guy • Snowperson • Soccer Ball • Spider Web • Spinning tube / Paddle wheel • Spring egg • Star Ring • Star Thwomp • Stilt Guy • Swoop • Table • Thwomp • Toy Duck • Toy Goomba • Traffic (Bus (Wiggler Wagon) · Car (Bob-omb Car · Mushroom car) · Cargo truck (Dash panel ramp truck) · Pickup truck) • Traffic cone • Train • Walking Tree • Water Geyser • Wiggler • Whomp • Winged Cloud • Wooden cutout |
| Non-interactable | Big Cheep Cheep • Boo • Boo Buddies • Bulber • Goonie • Huffin Puffin • Ice • Incoming Chomp • Nep-Enut • Note Block • Painting • Petal Guy • Shy Guy Tent • Star Bit • Vase | |
| Techniques | Drift • Hop • Jump Boost • Mini-Turbo • Rocket Start • Slipstream | |
| Favored and favorite courses | New (Amsterdam Drift · Athens Dash · Bangkok Rush · Berlin Byways · London Loop · Los Angeles Laps · New York Minute · Paris Promenade · Piranha Plant Cove · Rome Avanti · Singapore Speedway · Sydney Sprint · Tokyo Blur · Vancouver Velocity) • Remix • Super Mario Kart (SNES) • Mario Kart 64 (N64) • Mario Kart: Super Circuit (GBA) • Mario Kart: Double Dash!! (GCN) • Mario Kart DS (DS) • Mario Kart Wii (Wii) • Mario Kart 7 (3DS) • Battle | |
| Notable areas, landmarks, and sightings | City courses | Amsterdam (Canal) • Athens (Hadrian's Arch · Parthenon) • Bangkok • Berlin (Berlin Wall · Brandenburg Gate · Charlottenburg Palace) • London (Big Ben · Tower Bridge · Tower of London) • Madrid (Prado Museum · Ventas Bullring) • New York (Empire State Building · Statue of Liberty · Rockefeller Center) • Paris (Arc de Triomphe · Cathedral of Notre Dame · Eiffel Tower · Louvre) • Rome (Colosseum · Spanish Steps · Trevi Fountain) • Sydney • Tokyo • Vancouver |
| Other | Boo Woods • Bowser's Castle • Daisy Cruiser • Hammer Bros. Sphinx • Luigi's Mansion • Peach's Castle | |
| Galleries | Miscellaneous | Artwork • Badges • Screenshots • Sprites and models |
| Course icons | Original courses • Remix courses • SNES courses • N64 courses • GBA courses • GCN courses • DS courses • Wii courses • 3DS courses • Battle courses | |
| Music | "Bangkok Rush" • "Merry Mountain" • "Ninja Hideaway" • "Piranha Plant Cove" • "Los Angeles Laps" • "Singapore Speedway" • "Tokyo Blur" • "Vancouver Velocity" | |
| Related content on social media | "I Love Mario Kart Tour" • #MKTPerfectShot • MKT Report | |
| Miscellaneous | Action names in other languages • All-Cup Ranking • Badges (Common badges • Gold badges) • Challenge cards • Christmas • Coin Rush • Driver variants • Emblem • Experience Point • Finish line • Frenzy • In-game statistics • Item probability distributions • Multimedia • Mii Racing Suit profiles and statistics (Red–Dolphin · Cheep Cheep–Pokey · Piranha Plant–Koopa Clown) • Pipe • Pre-release and unused content • Race points system • Smart Steering • Special pipe • Special skill • Sponsors • Star Wand • This Week's Ranking • Jump Boost animations • Underwater driving • Update history | |