Gallery:Super Mario World: Difference between revisions
LuigiStar445 (talk | contribs) No edit summary |
m (Text replacement - "{{[Mm]ore images" to "{{image|more=yes") |
||
| (36 intermediate revisions by 20 users not shown) | |||
| Line 15: | Line 15: | ||
==Box art / Virtual Console icons== | ==Box art / Virtual Console icons== | ||
<gallery> | <gallery> | ||
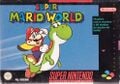
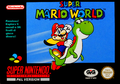
Super Mario World Box.png|North American box art | Super Mario World Box.png|North American box art | ||
SMWBackCoverAmerica.jpg|North American box art (back) | SMWBackCoverAmerica.jpg|North American box art (back) | ||
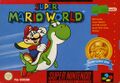
SMW PC Cover.jpg|North American box art ([[Player's Choice]]) | SMW PC Cover.jpg|North American box art ([[Player's Choice]]) | ||
SMW Box CAN.jpg|Canadian box art | |||
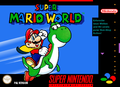
Super Mario World - Box art EU.png|European box art | Super Mario World - Box art EU.png|European box art | ||
SMW Box FRA.jpg|French and Dutch box art | |||
Nintendo Classics SMW Box FR.jpg|French and Dutch box art (Nintendo Classics) | |||
SMW Box ESP.jpg|Spanish box art | |||
SMW-Boxart-Ita-GIG.png|Italian box art | SMW-Boxart-Ita-GIG.png|Italian box art | ||
Super Mario World - Box DE.png|German box art | Super Mario World - Box DE.png|German box art | ||
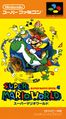
SMW SuperFamicomBox.jpg|Japanese box art | SMW Box DE Classic Series.jpg|German box art (Super Classic Series) | ||
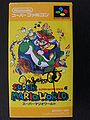
SMW SuperFamicomBox.jpg|Japanese box art | |||
SuperMarioWorldJapaneseBox.jpg|Japanese box art, signed by [[Shigeru Miyamoto]] | SuperMarioWorldJapaneseBox.jpg|Japanese box art, signed by [[Shigeru Miyamoto]] | ||
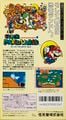
SuperMarioWorldBoxBack.jpg|Japanese box art (back) | SuperMarioWorldBoxBack.jpg|Japanese box art (back) | ||
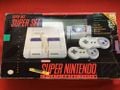
SNES Box SMW.jpg|SNES bundle | SNES Box SMW.jpg|SNES bundle | ||
SNES Mario Bundle Box FR.jpg|SNES bundle pack with ''[[Super Mario All-Stars]]'' and ''Super Mario World'' | |||
SMWicon.png|Wii U [[Virtual Console]] | SMWicon.png|Wii U [[Virtual Console]] | ||
SMWN3DSVC.jpg|New 3DS Virtual Console | SMWN3DSVC.jpg|New 3DS Virtual Console | ||
| Line 97: | Line 100: | ||
SMW Art - Flying Yoshi.png|Yoshi flying | SMW Art - Flying Yoshi.png|Yoshi flying | ||
SMW Art - Flying Blue Yoshi.png|Blue Yoshi flying | SMW Art - Flying Blue Yoshi.png|Blue Yoshi flying | ||
SMW Artwork Blue Yoshi.png|Blue Yoshi flying | |||
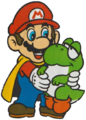
SMW-Mario and Yoshi Egg.png|[[Mario]] finding an [[Yoshi's Egg|egg]] | SMW-Mario and Yoshi Egg.png|[[Mario]] finding an [[Yoshi's Egg|egg]] | ||
Babyyoshihatch.png|Green [[Baby Yoshi|Mini-Yoshi]] hatching from its egg | Babyyoshihatch.png|Green [[Baby Yoshi|Mini-Yoshi]] hatching from its egg | ||
Yoshihold.jpg|Mario carrying a green Mini-Yoshi | Yoshihold.jpg|Mario carrying a green Mini-Yoshi | ||
SMW Artwork Cape Mario and Baby Yoshi.png|Caped Mario holding a green Mini-Yoshi | SMW Artwork Cape Mario and Baby Yoshi.png|Caped Mario holding a green Mini-Yoshi | ||
SMW Artwork Baby Yoshi.png|Green Mini-Yoshi | |||
Red Baby Yoshi SMW artwork.jpg|Red Mini-Yoshi | Red Baby Yoshi SMW artwork.jpg|Red Mini-Yoshi | ||
Blue Baby Yoshi SMW artwork.jpg|Blue Mini-Yoshi | Blue Baby Yoshi SMW artwork.jpg|Blue Mini-Yoshi | ||
| Line 129: | Line 133: | ||
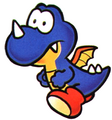
Morton Koopa Jr. SMW artwork.jpg|Morton Koopa Jr. | Morton Koopa Jr. SMW artwork.jpg|Morton Koopa Jr. | ||
ReznorSMW.jpg|[[Reznor]] | ReznorSMW.jpg|[[Reznor]] | ||
Mario Portal JP SMW Reznor art.png|Reznor (Mario Portal) | |||
Reznor spit fireball SMW artwork.jpg|Reznor spitting out fire | |||
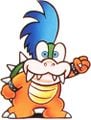
LemmyKoopa2 SMB3.png|[[Lemmy Koopa]] | LemmyKoopa2 SMB3.png|[[Lemmy Koopa]] | ||
Lemmy Koopa SMW artwork.jpg|Lemmy Koopa | Lemmy Koopa SMW artwork.jpg|Lemmy Koopa | ||
| Line 140: | Line 146: | ||
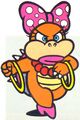
Larry Koopa SMW artwork.jpg|Larry Koopa | Larry Koopa SMW artwork.jpg|Larry Koopa | ||
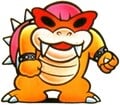
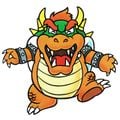
BowserSMW1.png|[[Bowser]] | BowserSMW1.png|[[Bowser]] | ||
SMW Mario Portal Bowser Artwork.png|Bowser (Mario Portal) | |||
File:Bowser SMB3 artwork.jpg|Bowser | File:Bowser SMB3 artwork.jpg|Bowser | ||
File:SMBTLL-Bowser Art2.png|Bowser | File:SMBTLL-Bowser Art2.png|Bowser | ||
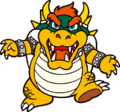
Bowser SMW alt artwork.jpg|Bowser | Bowser SMW alt artwork.jpg|Bowser | ||
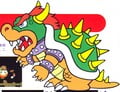
SMW Bowser artwork merch.jpg|Bowser | SMW Bowser artwork merch.jpg|Bowser | ||
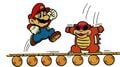
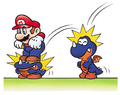
Mario fighting Iggy SMW art.jpg|Mario fighting Iggy in [[1 Iggy's Castle|#1 Iggy's Castle]] | Mario fighting Iggy SMW art.jpg|Mario fighting Iggy in [[1 Iggy's Castle|#1 Iggy's Castle]] | ||
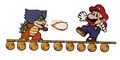
SMWMortonKoopaJr.png|Mario fighting Morton in [[2 Morton's Castle|#2 Morton's Castle]] | SMWMortonKoopaJr.png|Mario fighting Morton in [[2 Morton's Castle|#2 Morton's Castle]] | ||
| Line 155: | Line 161: | ||
===Enemies=== | ===Enemies=== | ||
{{more | {{image|more=yes|Artwork for many other enemies exists scattered throughout guides (mostly Japanese) and other supplementary materials, such as being used on the pinball machine.}} | ||
<gallery> | <gallery> | ||
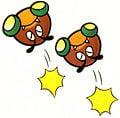
SMWBanzaiBill.jpg|[[Banzai Bill]] | SMWBanzaiBill.jpg|[[Banzai Bill]] | ||
| Line 163: | Line 169: | ||
Blurp.jpg|[[Blurp]] | Blurp.jpg|[[Blurp]] | ||
SMW Art - Bob ombs.png|[[Bob-omb]]s | SMW Art - Bob ombs.png|[[Bob-omb]]s | ||
SMW Bony Beetle. | SMW Artwork Bony Beetle.png|[[Bony Beetle]] | ||
SMW Art - Boo Buddies.png|[[Boo|Boo Buddies]] | SMW Art - Boo Buddies.png|[[Boo|Boo Buddies]] | ||
SMBLL Bullet Bill Artwork.jpg|[[Bullet Bill]] | SMBLL Bullet Bill Artwork.jpg|[[Bullet Bill]] | ||
SMW Artwork Bullet Bill.png|Bullet Bill | |||
SSBU Chargin' Chuck Spirit.png|[[Chargin' Chuck]] | SSBU Chargin' Chuck Spirit.png|[[Chargin' Chuck]] | ||
SMW Art - Chargin Chucks.png|Chargin' Chucks | SMW Art - Chargin Chucks.png|Chargin' Chucks | ||
| Line 184: | Line 191: | ||
SMW Art - Jumping Piranha Plant.png|[[Jumping Piranha Plant]] | SMW Art - Jumping Piranha Plant.png|[[Jumping Piranha Plant]] | ||
Koopa Paratroopa SMW artwork.jpg|[[Koopa Paratroopa|Koopa Paratroopa]] | Koopa Paratroopa SMW artwork.jpg|[[Koopa Paratroopa|Koopa Paratroopa]] | ||
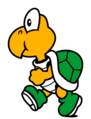
SMWKoopa.png|[[Koopa Troopa]] | SMWKoopa.png|[[Koopa Troopa]] (Green) | ||
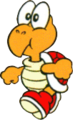
SMW Artwork Koopa Troopa (Red).png|Koopa Troopa (Red) | |||
Beach Koopa SMW.jpg|[[Beach Koopa|Koopa without a Shell]] | Beach Koopa SMW.jpg|[[Beach Koopa|Koopa without a Shell]] | ||
Lakitu SMW Art.jpg|[[Lakitu]] | Lakitu SMW Art.jpg|[[Lakitu]] | ||
SMW Artwork Li'l Sparky.png|[[Lil Sparky]] | SMW Artwork Li'l Sparky.png|[[Lil Sparky]] | ||
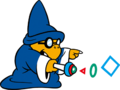
SMW Art - Magikoopa.png|[[Magikoopa]] | SMW Art - Magikoopa.png|[[Magikoopa]] | ||
SMW Mario Portal Magikoopa Artwork.png|Magikoopa | |||
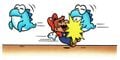
SMW Art - Rex Stomp.png|[[Mario]] stomping on some Rexes | SMW Art - Rex Stomp.png|[[Mario]] stomping on some Rexes | ||
SMW Artwork Mechakoopa.png|[[Mechakoopa]] | |||
Mega Mole.png|[[Mega Mole]] | Mega Mole.png|[[Mega Mole]] | ||
SMW MontyMole.png|[[Monty Mole]] | SMW MontyMole.png|[[Monty Mole]] | ||
| Line 204: | Line 213: | ||
SMW Art - Rip Van Fish.png|[[Rip Van Fish]] | SMW Art - Rip Van Fish.png|[[Rip Van Fish]] | ||
SMWSpikeTop.png|[[Spike Top]] | SMWSpikeTop.png|[[Spike Top]] | ||
SMW Artwork Spike Top.png|Spike Top | |||
SMW Sumo Bros Artwork.jpg|[[Sumo Bro]]thers | SMW Sumo Bros Artwork.jpg|[[Sumo Bro]]thers | ||
SMW Art - Super Koopa.png|[[Super Koopa (enemy)|Super Koopas]] | SMW Art - Super Koopa.png|[[Super Koopa (enemy)|Super Koopas]] | ||
SMW Artwork Swoop.png|[[Swoop]]er | SMW Artwork Swoop.png|[[Swoop]]er | ||
SMB3 Thwomp.jpg|[[Thwomp]] | SMB3 Thwomp.jpg|[[Thwomp]] | ||
Torpedo Ted SMW artwork.jpg|[[Torpedo Ted]] | Torpedo Ted SMW artwork.jpg|[[Torpedo Ted]] | ||
Torpedo Hasshadai SMW Artwork.jpg|[[Torpedo tube]] | |||
SMW Art - Urchin.png|[[Urchin]] | SMW Art - Urchin.png|[[Urchin]] | ||
SMW Art - Wiggler.png|[[Wiggler]] | SMW Art - Wiggler.png|[[Wiggler]] | ||
| Line 245: | Line 255: | ||
===Scenes and miscellaneous artwork=== | ===Scenes and miscellaneous artwork=== | ||
<gallery> | <gallery> | ||
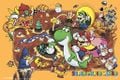
Box art - Super Mario World.png|International key artwork | |||
SMW group art.jpg|Japanese key artwork | |||
Promotional poster Super Mario World.png|A promotional poster for the game | Promotional poster Super Mario World.png|A promotional poster for the game | ||
SMW Art - Planet.png|The world which is seen on the poster | SMW Art - Planet.png|The world which is seen on the poster | ||
SMWPic.jpg|An alternate poster scene | SMWPic.jpg|An alternate poster scene | ||
MarioWorldPromoArtwork.jpg|Another promotional poster for the game | MarioWorldPromoArtwork.jpg|Another promotional poster for the game | ||
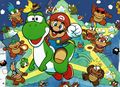
SMWGroupPoster.jpg| | SMWGroupPoster.jpg|Artwork from a Japanese poster | ||
SMW Art - Dinosaur Land.png|[[Dinosaur Land]] | SMW Art - Dinosaur Land.png|[[Dinosaur Land]] | ||
Valley of Bowser entrance artwork.jpg|Entrance to Valley of Bowser | |||
Yoshi's Island SMW group artwork.jpg|[[Yoshi's Island (location)|Yoshi's Island]] | Yoshi's Island SMW group artwork.jpg|[[Yoshi's Island (location)|Yoshi's Island]] | ||
SMW Art - Donut Plains.png|[[Donut Plains]] | SMW Art - Donut Plains.png|[[Donut Plains]] | ||
| Line 257: | Line 270: | ||
SMW Forest of Illusion Scene Artwork.png|[[Forest of Illusion]] | SMW Forest of Illusion Scene Artwork.png|[[Forest of Illusion]] | ||
SMW Art - Chocolate Island.png|[[Chocolate Island]] | SMW Art - Chocolate Island.png|[[Chocolate Island]] | ||
SMWBowser.jpg|[[Valley of Bowser]] | SMWBowser.jpg|[[Valley of Bowser]] | ||
SMW Art - Star World.png|[[Star World]] | SMW Art - Star World.png|[[Star World]] | ||
Special World.jpg|[[Special Zone]] | Special World.jpg|[[Special Zone]] | ||
SMW StoryBookCover.jpeg|Artwork used for ''Super Mario World''{{'}}s Japanese story book cover art | |||
Classic SNES Nintendo Power 1.jpg|[[Nintendo Power]]-style poster for ''Super Mario World'' for the SNES Classic Edition. | Classic SNES Nintendo Power 1.jpg|[[Nintendo Power]]-style poster for ''Super Mario World'' for the SNES Classic Edition. | ||
</gallery> | </gallery> | ||
====Shogakukan guide==== | ====Shogakukan guide==== | ||
<gallery> | <gallery> | ||
Mario SMW Shogakukan artwork.jpg|Mario | Mario SMW Shogakukan artwork.jpg|Mario | ||
| Line 279: | Line 290: | ||
Mario SMW.gif|Small Mario walking | Mario SMW.gif|Small Mario walking | ||
Red Yoshi SMW.png|Small Mario and [[Yoshi (species)|Red Yoshi]] | Red Yoshi SMW.png|Small Mario and [[Yoshi (species)|Red Yoshi]] | ||
SMW Invincible Mario sprite.gif|[[Invincible Mario]] | |||
SMW Mario.png|[[Super Mario (form)|Super Mario]] | SMW Mario.png|[[Super Mario (form)|Super Mario]] | ||
Navmario.gif|Super Mario walking | Navmario.gif|Super Mario walking | ||
| Line 297: | Line 309: | ||
MarioandYoshi.gif|[[Cape Mario|Caped Mario]] pointing for Yoshi to stick out his tongue | MarioandYoshi.gif|[[Cape Mario|Caped Mario]] pointing for Yoshi to stick out his tongue | ||
Yellow Yoshi SMW.png|Caped Mario and Yellow Yoshi | Yellow Yoshi SMW.png|Caped Mario and Yellow Yoshi | ||
SMW-GreenYoshiMapAnimated.gif|Green Yoshi on the overworld map | |||
SMWBalloonMarioSmallSprite.png|Small [[Balloon Mario]] | SMWBalloonMarioSmallSprite.png|Small [[Balloon Mario]] | ||
SMW P-Balloon Mario.png|Super Balloon Mario | SMW P-Balloon Mario.png|Super Balloon Mario | ||
| Line 325: | Line 338: | ||
===Bosses=== | ===Bosses=== | ||
<gallery> | <gallery class="graybg"> | ||
SMWIggyKoopaSprite.png|[[Iggy Koopa]] | |||
SMW_IggyWalking.gif|Iggy Koopa walking | |||
SMW Iggy spin.gif|Iggy Koopa spinning in his shell | |||
SMWIggyKoopaBetaSprite.png|Iggy Koopa's [[list of Super Mario World pre-release and unused content|unused]] hair tiles | SMWIggyKoopaBetaSprite.png|Iggy Koopa's [[list of Super Mario World pre-release and unused content|unused]] hair tiles | ||
SMWIggyKoopaCreditsSprite.png|Iggy Koopa, as he appears in the credits | SMWIggyKoopaCreditsSprite.png|Iggy Koopa, as he appears in the credits | ||
BigBoo SMW.png|[[Big Boo]] | BigBoo SMW.png|[[Big Boo]] | ||
SMWMortonKoopaJrSprite.png|[[Morton Koopa Jr.]] | |||
Ani 4morton.gif|Morton Koopa Jr. walking | |||
SMWMortonKoopaJrInjured.png|Morton Koopa Jr. after being stomped on | SMWMortonKoopaJrInjured.png|Morton Koopa Jr. after being stomped on | ||
SMWMortonKoopaJrCreditsSprite.png|Morton Koopa Jr., as he appears in the credits | SMWMortonKoopaJrCreditsSprite.png|Morton Koopa Jr., as he appears in the credits | ||
SMW Reznor.gif|[[Reznor]] | SMW Reznor.gif|[[Reznor]] | ||
SMW LemmyKoopaSprite.png|[[Lemmy Koopa]] | |||
SMW LemmyKoopaWounded.gif|Lemmy Koopa | SMW Lemmy taunt 1st.gif|Lemmy Koopa taunting | ||
SMW Lemmy taunt 2nd.gif|Lemmy Koopa taunting | |||
SMW Lemmy taunt 3rd.gif|Lemmy Koopa taunting | |||
SMW Lemmy taunt 4th.gif|Lemmy Koopa taunting | |||
SMW Lemmy taunt 5th.gif|Lemmy Koopa taunting | |||
SMW Lemmy taunt 6th.gif|Lemmy Koopa taunting | |||
SMW Lemmy taunt 7th.gif|Lemmy Koopa taunting | |||
SMW Lemmy taunt 8th.gif|Lemmy Koopa taunting | |||
SMW LemmyKoopaWounded.gif|Lemmy Koopa after being stomped on | |||
SMW Lemmy decoy.png|Lemmy Koopa's decoy | SMW Lemmy decoy.png|Lemmy Koopa's decoy | ||
SMWLudwigvonKoopaSprite.png|[[Ludwig von Koopa]] | SMWLudwigvonKoopaSprite.png|[[Ludwig von Koopa]] | ||
SMW Ludwig spin.gif|Ludwig von Koopa spinning in his shell | |||
SMWLudwigvonKoopaInjured.png|Ludwig von Koopa after being stomped on | SMWLudwigvonKoopaInjured.png|Ludwig von Koopa after being stomped on | ||
SMWLudwigvonKoopaCreditsSprite.png|Ludwig von Koopa, as he appears in the credits | SMWLudwigvonKoopaCreditsSprite.png|Ludwig von Koopa, as he appears in the credits | ||
SMWRoyKoopaSprite.png|[[Roy Koopa]] | SMWRoyKoopaSprite.png|[[Roy Koopa]] | ||
SMW Roy walk.gif|Roy Koopa walking | |||
SMWRoyKoopaInjured.png|Roy Koopa after being stomped on | SMWRoyKoopaInjured.png|Roy Koopa after being stomped on | ||
SMWRoyKoopaCreditsSprite.png|Roy Koopa, as he appears in the credits | SMWRoyKoopaCreditsSprite.png|Roy Koopa, as he appears in the credits | ||
SMWWendyO.KoopaSprite.png|[[Wendy O. Koopa]] | SMWWendyO.KoopaSprite.png|[[Wendy O. Koopa]] | ||
SMW | SMW Wendy taunt 1st.gif|Wendy O. Koopa taunting | ||
SMW Wendy taunt 2nd.gif|Wendy O. Koopa taunting | |||
SMW Wendy taunt 3rd.gif|Wendy O. Koopa taunting | |||
SMW Wendy taunt 4th.gif|Wendy O. Koopa taunting | |||
SMW Wendy taunt 5th.gif|Wendy O. Koopa taunting | |||
SMW Wendy taunt 6th.gif|Wendy O. Koopa taunting | |||
SMW Wendy taunt 7th.gif|Wendy O. Koopa taunting | |||
SMW Wendy taunt 8th.gif|Wendy O. Koopa taunting | |||
SMW Wendy hit.gif|Wendy O. Koopa after being stomped on | |||
SMW Wendy decoy.png|Wendy O. Koopa's decoy | SMW Wendy decoy.png|Wendy O. Koopa's decoy | ||
SMWLarryKoopaSprite.png|[[Larry Koopa]] | |||
SMW LarryWalking.gif|Larry Koopa walking | |||
SMW Larry spin.gif|Larry Koopa spinning in his shell | |||
SMW-Bowser in Koopa Clown Car.gif|[[Bowser]] | SMW-Bowser in Koopa Clown Car.gif|[[Bowser]] | ||
Bowser Mad SMW.gif|Bowser at the 3rd part of the fight | Bowser Mad SMW.gif|Bowser at the 3rd part of the fight | ||
| Line 411: | Line 444: | ||
Fishing Boo SMW sprite.png|[[Fishing Boo|Fishin' Boo]] | Fishing Boo SMW sprite.png|[[Fishing Boo|Fishin' Boo]] | ||
Fishin' Lakitu.png|[[Fishin' Lakitu]] | Fishin' Lakitu.png|[[Fishin' Lakitu]] | ||
Rainbowshell.gif|[[Shell (flashing)|Flashing | Rainbowshell.gif|[[Shell (flashing)|Flashing shell]] | ||
Flashing Koopa Mask sprite SMW.gif|Flashing | Flashing Koopa Mask sprite SMW.gif|Flashing shell (Fall) | ||
Mine SMW.png|[[Mine|Floating Mine]] | |||
SMW Flying Goomba Sprite.gif|[[Paragaloomba|Flying Goomba]] | SMW Flying Goomba Sprite.gif|[[Paragaloomba|Flying Goomba]] | ||
Fuzzy.gif|[[Fuzzy]] | Fuzzy.gif|[[Fuzzy]] | ||
| Line 489: | Line 523: | ||
ThwompSMW.png|[[Thwomp]] | ThwompSMW.png|[[Thwomp]] | ||
ThwompAngry.png|Thwomp | ThwompAngry.png|Thwomp | ||
SMW Torpedo Ted.png|[[Torpedo Ted]] | SMW Torpedo Ted.png|[[Torpedo Ted]] | ||
SMW Torpedo Ted cast.png|Torpedo Ted (cast roll) | SMW Torpedo Ted cast.png|Torpedo Ted (cast roll) | ||
SMW Torpedo Hasshadai.png|[[Torpedo tube]] | |||
SMW BillBlaster.png|[[Bill Blaster|Turtle Cannon]] | SMW BillBlaster.png|[[Bill Blaster|Turtle Cannon]] | ||
Urchin SMW.png|[[Urchin]] | Urchin SMW.png|[[Urchin]] | ||
| Line 541: | Line 575: | ||
SMW MaskShell Green.png|Green Shell (Fall) | SMW MaskShell Green.png|Green Shell (Fall) | ||
SMW Hard Block.png|[[Hard Block]] | SMW Hard Block.png|[[Hard Block]] | ||
SMW Ice Block.png|[[Ice Block]] | |||
ItemStock.png|[[Item storage|Item Stock]] | ItemStock.png|[[Item storage|Item Stock]] | ||
SMW Jump Block.png|[[Note Block|Jump Block]] | SMW Jump Block.png|[[Note Block|Jump Block]] | ||
| Line 576: | Line 611: | ||
FlyingBlockSMW.gif|[[Flying ? Block|Flying Prize Block]] | FlyingBlockSMW.gif|[[Flying ? Block|Flying Prize Block]] | ||
Red Question Mark Block.png|Red ? Block | Red Question Mark Block.png|Red ? Block | ||
SMW Blue Exclamation Mark Block.png|Blue | SMW Blue Exclamation Mark Block.png|[[! Block|Blue Block]] | ||
SMW Green Exclamation Mark Block.png|Green | SMW Green Exclamation Mark Block.png|Green Block | ||
SMW Red Exclamation Mark Block.png|Red | SMW Red Exclamation Mark Block.png|Red Block | ||
SMW Yellow Exclamation Mark Block.png|Yellow | SMW Yellow Exclamation Mark Block.png|Yellow Block | ||
Blue Switch.png| | Blue Switch.png|[[! Switch|Blue Switch]] | ||
Green Switch.png|Green | Green Switch.png|Green Switch | ||
Red Switch.png|Red | Red Switch.png|Red Switch | ||
YellowSwitch-SMW.png|Yellow | YellowSwitch-SMW.png|Yellow Switch | ||
SMW YoshiEgg Green.png|[[Yoshi's Egg|Egg]] | SMW YoshiEgg Green.png|[[Yoshi's Egg|Egg]] | ||
SMW YoshiEgg Red.png|Egg | SMW YoshiEgg Red.png|Egg | ||
| Line 592: | Line 627: | ||
<gallery caption="Map sprites"> | <gallery caption="Map sprites"> | ||
SMW MapIcon Castle.png|A [[castle]] | SMW MapIcon Castle.png|A [[castle]] | ||
DestroyedCastle-SMW.png|A destroyed castle | DestroyedCastle-SMW.png|A destroyed castle/fortress | ||
SMW MapIcon Fortress.png|A [[fortress]] | SMW MapIcon Fortress.png|A [[fortress]] | ||
SMW MapIcon GhostHouse.png|A [[Ghost House]] | |||
SMW MapIcon SwitchPalace-Yellow.png|The [[Yellow Switch Palace]] | |||
SMW MapIcon SwitchPalace-Green.png|The [[Green Switch Palace]] | |||
SMW MapIcon SwitchPalace-Red.png|The [[Red Switch Palace]] | |||
SMW MapIcon SwitchPalace-Blue.png|The [[Blue Switch Palace]] | |||
SMW MapIcon YoshisHouse.png|[[Yoshi's House]] | |||
SMW MapIcon Level1.gif|An icon for a course that only has one exit | SMW MapIcon Level1.gif|An icon for a course that only has one exit | ||
SMW MapIcon Level2.gif|An icon for a course that has two exits | SMW MapIcon Level2.gif|An icon for a course that has two exits | ||
SMW MapIcon Cave1.gif|An icon for an underground course that only has one exit | |||
SMW MapIcon Cave2.gif|An icon for an underground course that has two exits | |||
SMW MapIcon LevelPond1.gif|An icon for an underwater course that only has one exit | |||
SMW MapIcon LevelPond2.gif|An icon for an underwater course that has two exits | |||
SMW MapIcon LevelLarge1.gif|An icon for a long course that only has one exit | SMW MapIcon LevelLarge1.gif|An icon for a long course that only has one exit | ||
SMW MapIcon LevelLarge2.gif|An icon for a long course that has two exits | SMW MapIcon LevelLarge2.gif|An icon for a long course that has two exits | ||
SMW MapIcon BowsersCastle.png|[[Bowser's Castle]] (international versions) | |||
Star Road.png|[[Star Road (Super Mario World)|Star Road]] | Star Road.png|[[Star Road (Super Mario World)|Star Road]] | ||
SMW SNES logo.png|[[Super Nintendo Entertainment System|SNES]] Japanese and PAL logo | |||
</gallery> | </gallery> | ||
| Line 630: | Line 677: | ||
SMWEdibleDolphin.png|Yoshi eating a Dolphin (Japanese version only) | SMWEdibleDolphin.png|Yoshi eating a Dolphin (Japanese version only) | ||
Donutplanicies.png|[[Donut Plains]] | Donutplanicies.png|[[Donut Plains]] | ||
GreenSwitch.png|Mario and Yoshi | GreenSwitch.png|Mario and Yoshi pressing the Green Switch in [[Green Switch Palace]]. | ||
Red Yoshi Fire.png|Mario on a Red Yoshi, spitting fireballs. | Red Yoshi Fire.png|Mario on a Red Yoshi, spitting fireballs. | ||
MortonsRoom.png|[[Morton Koopa Jr.]] Boss Battle | MortonsRoom.png|[[Morton Koopa Jr.]] Boss Battle | ||
| Line 639: | Line 686: | ||
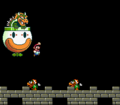
SMWMvsB.png|Battle with [[Bowser]] | SMWMvsB.png|Battle with [[Bowser]] | ||
SMWend.png|The end of the game | SMWend.png|The end of the game | ||
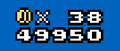
Super Mario World score bar.png|The [[Point|score bar]] and coin count in-game | |||
</gallery> | </gallery> | ||
| Line 644: | Line 692: | ||
<gallery> | <gallery> | ||
Peach Kissing Mario SMW.gif|Peach kissing Mario | Peach Kissing Mario SMW.gif|Peach kissing Mario | ||
SMW-Japanese Artwork.jpg|[[Super Mario World (album)|Album]] cover | |||
SMW box plush merch.jpg|Vic Tokai ''Super Mario World'' plush set packaging | SMW box plush merch.jpg|Vic Tokai ''Super Mario World'' plush set packaging | ||
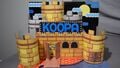
SMW paper castle merch.jpg|Assembled paper craft [[Bowser's Castle]] included in the Vic Tokai plush set | SMW paper castle merch.jpg|Assembled paper craft [[Bowser's Castle]] included in the Vic Tokai plush set | ||
Latest revision as of 20:25, May 28, 2024
This is a gallery of images for the game Super Mario World. For a gallery of images released with the remake included in Super Mario All-Stars + Super Mario World, see Gallery:Super Mario All-Stars. For a gallery of images released with the remake included in Super Mario World: Super Mario Advance 2, see Gallery:Super Mario World: Super Mario Advance 2. For a gallery of images of the Super Mario World television series, see Gallery:Super Mario World (television series).
Logos[edit]

International logo

International logo, without shadows

Alternate international logo
Japanese logo and logo used for Super Mario Maker

Japanese logo without the "Super Mario Bros. 4" text

International in-game logo

Japanese in-game logo


_-_Super_Mario_World.png)
Box art / Virtual Console icons[edit]
North American box art
North American box art (back)
North American box art (Player's Choice)
Canadian box art
European box art
French and Dutch box art
French and Dutch box art (Nintendo Classics)
Spanish box art
Italian box art
German box art
German box art (Super Classic Series)
Japanese box art
Japanese box art, signed by Shigeru Miyamoto
Japanese box art (back)
SNES bundle
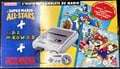
SNES bundle pack with Super Mario All-Stars and Super Mario World
Wii U Virtual Console

New 3DS Virtual Console


Cartridges[edit]
NTSC-U first version
NTSC-U second version
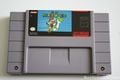
NTSC-U third version
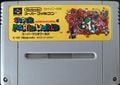
NTSC-J version

PAL SNES first version
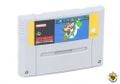
PAL SNES second version
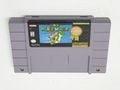
NTSC-U Player's Choice version


Artwork[edit]
Mario[edit]
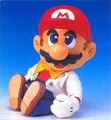
Mario

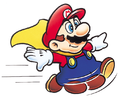
Mario running
Mario jumping
Mario crouching
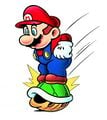
Mario using a Revolving Door
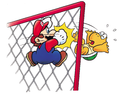
Mario punching a Climbing Koopa through a fence
Mario stomping on a Green Shell
Mario stomping on a Koopa Troopa
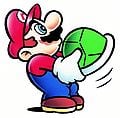
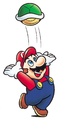
Mario holding a Green Shell
Mario carrying a shell underwater
Mario tossing a shell upwards
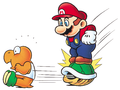
Mario kicking a shell into some Goombas
Mario holding a Super Koopa
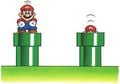
Mario going down a Warp Pipe
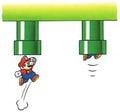
Mario going up a Warp Pipe
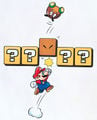
Mario jumping at blocks
Mario using a Triangular Block
Mario swimming
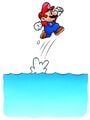
Mario jumping out of the water
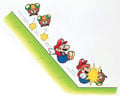
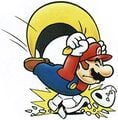
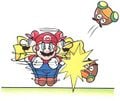
Mario sliding into some Goombas
Caped Mario running
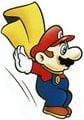
Caped Mario jumping

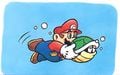
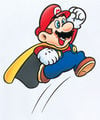
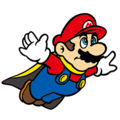
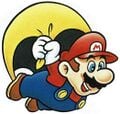
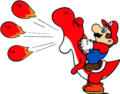
Caped Mario flying
Caped Mario flying (Mario Portal)
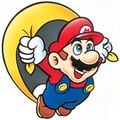
Caped Mario flying
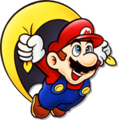
Caped Mario flying (alternate)
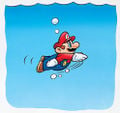
Caped Mario gliding
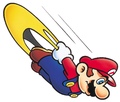
Caped Mario diving
Caped Mario landing on a Dry Bones
Caped Mario performing a soft landing
Caped Mario hard landing
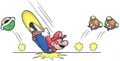
Caped Mario spinning into some Goombas

Caped Mario Spin Jumping on a Dry Bones
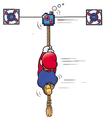
Mario clinging on a moving Rope


Yoshis[edit]
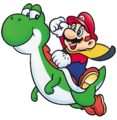
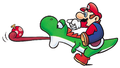
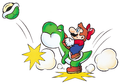
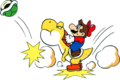
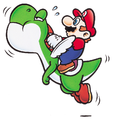
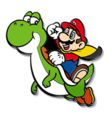
Caped Mario riding Yoshi
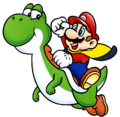
Caped Mario riding Yoshi
Yoshi eating a berry
Yoshi jumping on a Triangular Block
Yoshi breathing fire
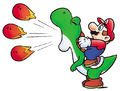
Red Yoshi breathing fire
Yoshi creating sand clouds
Yellow Yoshi creating sand clouds
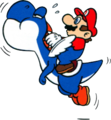
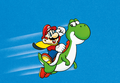
Yoshi flying
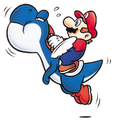
Blue Yoshi flying
Blue Yoshi flying
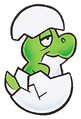
Green Mini-Yoshi hatching from its egg
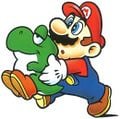
Mario carrying a green Mini-Yoshi
Caped Mario holding a green Mini-Yoshi
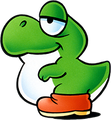
Green Mini-Yoshi

Red Mini-Yoshi
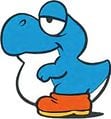
Blue Mini-Yoshi
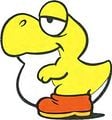
Yellow Mini-Yoshi


Other characters[edit]
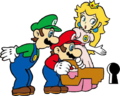
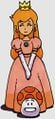
Mario using a Key with Luigi and Princess Toadstool
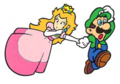
Princess Toadstool and Luigi
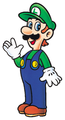
Luigi
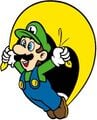
Caped Luigi
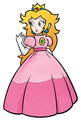
Princess Toadstool
Princess Toadstool
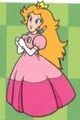
Princess Toadstool with a Mushroom (Shogakukan Book)
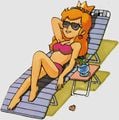
Princess Toadstool on vacation (Shogakukan Book)
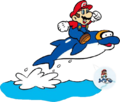
Mario riding a Dolphin
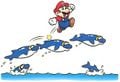
Mario jumping on some Dolphins


Bosses[edit]
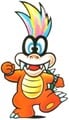
Iggy Koopa
Morton Koopa Jr.
Reznor (Mario Portal)
Reznor spitting out fire
Lemmy Koopa
Ludwig von Koopa
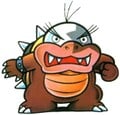
Roy Koopa
Wendy O. Koopa
Larry Koopa
Bowser (Mario Portal)
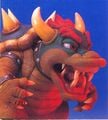
Bowser
Bowser
Bowser
Bowser
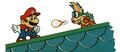
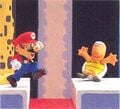
Mario fighting Iggy in #1 Iggy's Castle
Mario fighting Morton in #2 Morton's Castle
Lemmy emerging from a pipe in #3 Lemmy's Castle
Mario fighting Ludwig in #4 Ludwig's Castle
Mario fighting Roy in #5 Roy's Castle
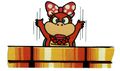
Wendy emerging from a pipe in #6 Wendy's Castle
Mario fighting Larry in #7 Larry's Castle


Enemies[edit]
It has been requested that more images be uploaded for this article. Remove this notice only after the additional images have been added. Specific(s): Artwork for many other enemies exists scattered throughout guides (mostly Japanese) and other supplementary materials, such as being used on the pinball machine.
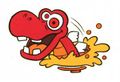
Blargg
Bullet Bill

Chargin' Chucks
Eeries
Goomba
A Goomba in a bubble
Goombas
Koopa Troopa (Green)
Koopa Troopa (Red)
Magikoopa
Mario stomping on some Rexes
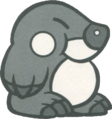
Monty Mole
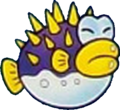
Porcu-Puffer
Rex
Spike Top
Wiggler


.png)


Items[edit]
Jumping Board
Switch Block


Scenes and miscellaneous artwork[edit]
International key artwork
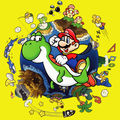
Japanese key artwork
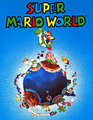
A promotional poster for the game
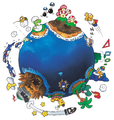
The world which is seen on the poster

An alternate poster scene
Another promotional poster for the game
Artwork from a Japanese poster
Entrance to Valley of Bowser
Artwork used for Super Mario World's Japanese story book cover art
Nintendo Power-style poster for Super Mario World for the SNES Classic Edition.


Shogakukan guide[edit]
Mario
Mario jumping toward a Koopa in a castle area
Bowser
A Koopa Troopa and a Wiggler


Sprites[edit]
Mario and Friends[edit]

Small Mario walking

Small Mario and Red Yoshi

Super Mario walking

Super Mario looking up

Super Mario climbing a fence

Super Mario doing the V sign

Super Mario does a Spin Jump

Super Mario after being caught in an explosion

Super Mario and Yoshi

Super Mario and Yoshi walking

Fire Mario and Blue Yoshi

Caped Mario

Caped Mario does a Spin Jump

Caped Mario does a Spin Jump while falling

Caped Mario and Yoshi

Caped Mario pointing for Yoshi to stick out his tongue

Caped Mario and Yellow Yoshi

Green Yoshi on the overworld map

Small Balloon Mario

Super Balloon Mario

Fire Balloon Mario

Caped Balloon Mario

Yoshi

Yoshi in a Warp Pipe

Red Yoshi

Blue Yoshi

Yellow Yoshi

Red Mini-Yoshi

Blue Mini-Yoshi

Yellow Mini-Yoshi

Yellow Mini-Yoshi

Dolphin moving

Small Luigi

Super Luigi

Fire Luigi

Caped Luigi

Small Balloon Luigi

Super Balloon Luigi

Fire Balloon Luigi

Caped Balloon Luigi


Bosses[edit]

Iggy Koopa walking

Iggy Koopa spinning in his shell

Iggy Koopa's unused hair tiles

Iggy Koopa, as he appears in the credits

Morton Koopa Jr. walking

Morton Koopa Jr. after being stomped on

Morton Koopa Jr., as he appears in the credits

Lemmy Koopa taunting

Lemmy Koopa taunting

Lemmy Koopa taunting

Lemmy Koopa taunting

Lemmy Koopa taunting

Lemmy Koopa taunting

Lemmy Koopa taunting

Lemmy Koopa taunting

Lemmy Koopa after being stomped on

Lemmy Koopa's decoy

Ludwig von Koopa spinning in his shell

Ludwig von Koopa after being stomped on

Ludwig von Koopa, as he appears in the credits

Roy Koopa walking

Roy Koopa after being stomped on

Roy Koopa, as he appears in the credits

Wendy O. Koopa taunting

Wendy O. Koopa taunting

Wendy O. Koopa taunting

Wendy O. Koopa taunting

Wendy O. Koopa taunting

Wendy O. Koopa taunting

Wendy O. Koopa taunting

Wendy O. Koopa taunting

Wendy O. Koopa after being stomped on

Wendy O. Koopa's decoy

Larry Koopa walking

Larry Koopa spinning in his shell

Bowser at the 3rd part of the fight


Enemies[edit]

Amazing Flyin' Hammer Brother

Red Beach Koopa

Blue Beach Koopa

Yellow Beach Koopa

Big Boo

Big Boo (cast roll)

Blargg peeking out from the lava

Bony Beetle

Bony Beetle (cast roll)

Boo Buddy

Boo Buddy

Boo Buddy

Boo Buddies

Bowser's fireball

Bowser's fireball

Gray Bowser Statue

Gold Bowser Statue

Buzzy Beetle

Buzzy Beetle

Cheep Cheep on land

Green Climbing Koopa

Red Climbing Koopa

Dino Rhino breathing (unused)

Dino-Torch

Dry Bones

Dry Bones (cast roll)

Flashing shell (Fall)

Red Koopa Paratroopa

Yellow Koopa Paratroopa

Green Koopa Paratroopa (Fall)

Red Koopa Paratroopa (Fall)

Yellow Koopa Paratroopa (Fall)

Red Koopa Troopa

Blue Koopa Troopa

Yellow Koopa Troopa

Lakitu

Lava Bubble

Lookout Chuck

Lookout Chuck (cast roll)
Magikoopa

Green Mask Koopa

Red Mask Koopa

Blue Mask Koopa

Yellow Mask Koopa

Monty Mole

Monty Mole

Para-Goomba (cast roll)

Piranha Plant (Fall)

Piranha Plant (unused)

Pokey

Rex

Rip Van Fish

Spiny Egg (cast roll)

Sumo Brother (cast roll)

Red Super Koopa

Blue Super Koopa

Blue Super Koopa

Flashing Blue Super Koopa

Flashing Blue Super Koopa

Swooper

Swooper (unused)

Thwomp

Torpedo Ted (cast roll)

Wiggler


.png)


Items and objects[edit]
- In-play sprites

Flying 1-Up Mushroom (unused)

Green Berry (static sprite)

Blue Shell (Fall)

A boss door

A brown boss door

A Cheep Cheep encased in a bubble

A Galoomba encased in a bubble

A Super Mushroom encased in a bubble

A Bob-omb encased in a bubble

Blue Dotted Line Block

Green Dotted Line Block

Red Dotted Line Block

Yellow Dotted Line Block

Flashing Grab Block

Green Shell (Fall)

ON/OFF Switch (on)

ON/OFF Switch (off)

Unused platform

Flying Red Coin (unused)

Red Shell (Fall)

Unused small door

Yellow Shell (Fall)

Red ? Block

Green Block

Red Block

Yellow Block

Green Switch

Red Switch

Yellow Switch

Egg

Egg

Egg

Egg


- Map sprites

A castle

A destroyed castle/fortress

A fortress

An icon for a course that only has one exit

An icon for a course that has two exits

An icon for an underground course that only has one exit

An icon for an underground course that has two exits

An icon for an underwater course that only has one exit

An icon for an underwater course that has two exits

An icon for a long course that only has one exit

An icon for a long course that has two exits

Bowser's Castle (international versions)

SNES Japanese and PAL logo


Miscellaneous[edit]

Reznor's sign (Japanese version)

Reznor's sign (International version)

Bowser's Castle (Japanese version)

Bowser's Castle (International version)

Yoshi's mailbox (Japanese version)

Yoshi's mailbox (International version)


SNES Test Program sprites[edit]

Raccoon Mario sprite

An unused sprite of small Mario jumping
Screenshots[edit]
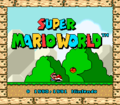
Title screen
File select screen (North American)
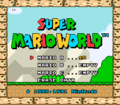
File select screen (Japanese)
File select screen (PAL)
Mode select screen (International)
Mode select screen (Japanese)
Yoshi's Island 2
Yoshi eating a Dolphin (Japanese version only)
Mario and Yoshi pressing the Green Switch in Green Switch Palace.

Mario on a Red Yoshi, spitting fireballs.
Morton Koopa Jr. Boss Battle
Ludwig von Koopa Boss Battle
Roy Koopa Boss Battle
Wendy O. Koopa Boss Battle
Larry Koopa Boss Battle
Battle with Bowser
The end of the game
The score bar and coin count in-game


Miscellaneous[edit]

Peach kissing Mario

Album cover
Vic Tokai Super Mario World plush set packaging
Assembled paper craft Bowser's Castle included in the Vic Tokai plush set
Size chart from the 1996 Nintendo Character Manual

Super Mario World pre-launch Japanese commercial
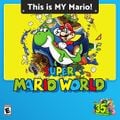
"This is MY Mario!" promotional online asset for the Super Mario Bros. 35th Anniversary (2020)
Promotional pin representing Super Mario World, released for the Super Mario Bros. 35th Anniversary (2020)
Promotional display of the game alongside the Super Famicom, for the Super Mario Bros. 35th Anniversary (2020)
Promotional display of the entire Super Mario series released from 1985 to 2020, for the Super Mario Bros. 35th Anniversary (2020)


| Super Mario World / Super Mario World: Super Mario Advance 2 | |
|---|---|
| Protagonists | Mario • Luigi • Princess Toadstool • Yoshi • Red Yoshi • Blue Yoshi • Yellow Yoshi • Baby Yoshi • Dolphin |
| Bosses | Koopalings (Iggy Koopa · Morton Koopa Jr. · Lemmy Koopa · Ludwig von Koopa · Roy Koopa · Wendy O. Koopa · Larry Koopa) • Bowser • Reznor • Big Boo |
| Items | 1-Up Mushroom • 3-Up Moon • Berry • Bonus Coin • Cape Feather • Coin • Control Coin • Dragon Coin • Yoshi's Egg • Fire Flower • Gray Coin • Lakitu's Cloud • Magic Ball • Power Balloon • Super Mushroom • Super Star • Yoshi's Wings |
| Objects | ! Switch • Arrow Sign • Beanstalk • Blue Door • Bonus block • Bridge • Empty Block • Bubble • Cloud Block • Coin Block • Coin countera • Count-Lift • Diagonal platform • Dotted-Line Block • ! Block • Fence • Flimsy Lift • Flying Platform • Flying Prize Block • Grab Block • Gray Block • Gray P Switch • Hidden Block • Ice Block • Note Block • Jumping Board • Key • Lift • Message Block • ON/OFF Switch • Piston Lift • Prize Block • Revolving Door • Rope • Rotating Block • Roulette Block • Semisolid Platform • Single Swing Lift • Skull Raft • Snake platform • Spring platform • Star Road • Stretch Block • Switch Block • Triangular Block • Triple Swing Lift • Yellow Door • Yoshi Cloud |
| Worlds of Dinosaur Land | Yoshi's Island • Donut Plains • Vanilla Dome • Twin Bridges • Forest of Illusion • Chocolate Island • Valley of Bowser • Star World • Special Zone |
| Moves | Crouch • Dash • Fly • Jump • Shell Toss • Slide • Spin Jump • Stomp • Swallow • Swim |
| Enemies and obstacles | Amazing Flyin' Hammer Brother • Ball 'N' Chain • Banzai Bill • Big Boo • Big Bubble • Big Steely • Blargg • Blurp • Bob-omb • Bony Beetle • Boo Buddy • Boo Buddy Block • Boo Buddy Snake • Boo Crew • Bowser Statue • Bullet Bill • Buzzy Beetle • Chainsaw • Chargin' Chuck • Cheep Cheep • Circling Boo Buddies • Climbing Koopa • Dino-Rhino • Dino-Torch • Disappearing Boo Buddy • Dry Bones • Eerie • Falling spike • Fire Snake • Fishbone • Fishin' Boo • Fishin' Lakitu • Floating Mine • Flying Goomba • Fuzzy • Goomba • Grinder • Hothead • Jumping Fire Piranha Plant • Jumping Piranha Plant • Koopa Paratroopa • Koopa Troopa • Koopa without a Shell • Lakitu • Lakitu in a Pipe • Lava • Lava Bubble • Lil Sparky • Magikoopa • Mechakoopa • Mega Mole • Monty Mole • Muncher • Ninji • Para-bomb • Para-Goomba • Pillar • Piranha Plant • Pit • Pokey • Porcu-Puffer • Rex • Rip Van Fish • Shell (flashing) • Skewer • Spike • Spike (Super Mario World) • Spike Top • Spiny • Spiny Egg • Sumo Brother • Super Koopa • Swooper • Thwimp • Thwomp • Torpedo Ted • Torpedo tube • Turtle Cannon • Urchin • Volcano Lotus • Wiggler |
| Other | 1-Up Chamber • Bonus game • Bonus Star • Fall • Giant Gate • Item Stock • Keyhole • Midway Gate • Sand cloud • Timer • Tourist Tips |
| Miscellaneous | Glitches • Mario Bros.a • Pre-release and unused content • Super Mario World (soundtrack album) • Super Mario World (Wonder Life Special: Nintendo Official Guidebook) • SNES Staff • GBA Staff |