Gallery:Wario Land 3: Difference between revisions
m (Text replacement - "\n{3,}==" to " ==") |
m (→Logos) |
||
| (19 intermediate revisions by 11 users not shown) | |||
| Line 1: | Line 1: | ||
{{italic title}} | {{italic title}} | ||
This is a gallery of images for the game ''[[Wario Land 3]]''. | This is a gallery of images for the game ''[[Wario Land 3]]''. | ||
==Logos== | ==Logos== | ||
<gallery widths= | {{more images|Japanese logo}} | ||
Wario_Land_3_Logo.png| | <gallery heights=170px widths=270px> | ||
Wario_Land_3_Logo.png|Internaional logo | |||
WL3IngameLogo.png|In-game logo | WL3IngameLogo.png|In-game logo | ||
</gallery> | </gallery> | ||
| Line 18: | Line 18: | ||
Invisible Wario WL3.png|[[Invisible Wario]] | Invisible Wario WL3.png|[[Invisible Wario]] | ||
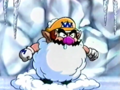
Snowman Wario WL3.png|[[Snowman Wario]] | Snowman Wario WL3.png|[[Snowman Wario]] | ||
Vampire Wario normal WL3.png|[[Vampire Wario]] | Vampire Wario normal WL3.png|[[Vampire Wario]] | ||
Vampire Wario bat WL3.png| | Vampire Wario bat WL3.png|[[Bat Wario|Bat-Wario]] | ||
</gallery> | </gallery> | ||
===Enemies=== | ===Enemies=== | ||
<gallery> | <gallery> | ||
WL3Hammerbot.png|[[Hammer-bot]] | WL3Hammerbot.png|[[Hammer-Bot|Hammer-bot]] | ||
Mad Scienstein WL3.png|[[Mad Scienstein]] | Mad Scienstein WL3.png|[[Mad Scienstein]] | ||
WL3Spear-bot.png|[[Spear-bot]] | WL3Spear-bot.png|[[Spear-bot]] | ||
WL3Spearhead.png|[[Spearhead (enemy)|Spearhead]] | WL3Spearhead.png|[[Spearhead (enemy)|Spearhead]] | ||
</gallery> | |||
===Miscellaneous=== | |||
<gallery> | |||
Music Box of WL3.png|[[Music box (world)|Music box]] (day) | |||
WL3 Music Box World Night.jpg|Music box (night) | |||
</gallery> | </gallery> | ||
| Line 71: | Line 77: | ||
===Enemies=== | ===Enemies=== | ||
<gallery> | <gallery> | ||
Wario_Tadpole.png|[[Akamajakushi]] | |||
Applby.PNG|[[Appleby]] | Applby.PNG|[[Appleby]] | ||
Beamrobota.PNG|[[Beam Robota]] | Beamrobota.PNG|[[Beam Robota]] | ||
Birds.PNG|[[Bird ( | Birds.PNG|[[Bird (Wario Land series)|Bird]] | ||
Brrr Bear.PNG|[[Brrr Bear]] | Brrr Bear.PNG|[[Brrr Bear]] | ||
Count Richter.PNG|[[Count Richtertoffen]] | Count Richter.PNG|[[Count Richtertoffen]] | ||
| Line 82: | Line 89: | ||
Hidama.png|[[Flame (Wario Land 3)|Flame]] | Hidama.png|[[Flame (Wario Land 3)|Flame]] | ||
Futamogu WL3.png|[[Futamogu]] | Futamogu WL3.png|[[Futamogu]] | ||
Hammerbot.PNG|[[Hammer-bot]] | Hammerbot.PNG|[[Hammer-Bot|Hammer-bot]] | ||
Water Spark.PNG|[[Haridama]] | |||
Roofslime.PNG|[[Hebarii]] | Roofslime.PNG|[[Hebarii]] | ||
Kobats.PNG|[[Kobatto]] | Kobats.PNG|[[Kobatto]] | ||
Chestnut WL3.png|[[Kuri]] | Chestnut WL3.png|[[Kuri]] | ||
WL3 Kushimushi Sprite.png|[[Kushimushi]] | WL3 Kushimushi Sprite.png|[[Kushimushi]] | ||
Madscience.png|[[Mad Scienstein]] | Madscience.png|[[Mad Scienstein]] | ||
Water hand.PNG|[[Mizu no te]] | |||
Mizuuo.png|[[Mizuuo]] | Mizuuo.png|[[Mizuuo]] | ||
Mrmoon.PNG|[[Mr. Moon]] | Mrmoon.PNG|[[Mr. Moon]] | ||
| Line 98: | Line 105: | ||
Paragoom.PNG|[[Para-Goom]] | Paragoom.PNG|[[Para-Goom]] | ||
Jellybob.PNG]]|[[Jellybob (Wario Land 3)|Pneumo]] | Jellybob.PNG]]|[[Jellybob (Wario Land 3)|Pneumo]] | ||
PrinceFroggy WL3.png|[[ | PrinceFroggy WL3.png|[[Lump|Prince Froggy]] | ||
Lumpy WL3.png|[[ | Lumpy WL3.png|[[Lump|Red froggy]] | ||
Robo-Mouse.PNG|[[Robo-Mouse]] | Robo-Mouse.PNG|[[Robo-Mouse]] | ||
SeeingEyeDoor.png|[[Seeing-eye door]] | SeeingEyeDoor.png|[[Seeing-eye door]] | ||
Laser Grid.gif|[[Sensor]] | |||
Silky.png|[[Silky]] | Silky.png|[[Silky]] | ||
Giant Snake WL3.png|[[Snake (Wario Land 3)|Snake]] | Giant Snake WL3.png|[[Snake (Wario Land 3)|Snake]] | ||
| Line 109: | Line 116: | ||
Spearhead.png|[[Spearhead (enemy)|Spearhead]] | Spearhead.png|[[Spearhead (enemy)|Spearhead]] | ||
Mrsun.PNG|[[Sun (Wario Land 3)|Sun]] | Mrsun.PNG|[[Sun (Wario Land 3)|Sun]] | ||
ghostpest.PNG|[[Teruteru]] | ghostpest.PNG|[[Teruteru]] | ||
Thorn BotWR.gif|[[Spike (Wario Land series)|Spike]] | Thorn BotWR.gif|[[Spike (Wario Land series)|Spike]] | ||
sand hand.PNG|[[Suna kara te]] | |||
CactusSlime WL3.png|[[Togēba]] | CactusSlime WL3.png|[[Togēba]] | ||
Togeuo.PNG|[[Togeuo]] | |||
Webber.PNG|[[Webber]] | Webber.PNG|[[Webber]] | ||
Zombiewl3.PNG|[[Zombie]] | Zombiewl3.PNG|[[Zombie]] | ||
| Line 127: | Line 133: | ||
WL3Coin2.png|Colored coin | WL3Coin2.png|Colored coin | ||
WL3Coin3.png|Colored coin | WL3Coin3.png|Colored coin | ||
WL3 Key. | WL3 Gray Key.png|[[Key]] | ||
WL3 Red Key.png|Key | |||
WL3 Green Key.png|Key | |||
WL3 Blue Key.png|Key | |||
</gallery> | </gallery> | ||
| Line 144: | Line 153: | ||
WL3 title screen.png|Title screen | WL3 title screen.png|Title screen | ||
Bulldogbp9.png|[[Wario]] flying the [[Bulldog]] | Bulldogbp9.png|[[Wario]] flying the [[Bulldog]] | ||
WL3 S ActionHelp ZiplineHandle.png|Action Help of Wario holding a zipline handle. | |||
WL3 S ATownInChaos5.PNG|Wario battling [[Shoot]] | WL3 S ATownInChaos5.PNG|Wario battling [[Shoot]] | ||
ATC5.PNG|Wario encountering a [[Togēba]]. | ATC5.PNG|Wario encountering a [[Togēba]]. | ||
| Line 152: | Line 162: | ||
MusicBoxesWL3.png|Wario giving the Music Boxes to a hidden figure | MusicBoxesWL3.png|Wario giving the Music Boxes to a hidden figure | ||
Rudy the Clown WL3 battle.png|The hidden figure reveals its true form: [[Rudy]] | Rudy the Clown WL3 battle.png|The hidden figure reveals its true form: [[Rudy]] | ||
WL3 Game Over.png|[[Game Over]] | |||
WL3 Perfect!.png|The screen shown when the player collects all of the treasures | |||
WL3 GB notice.png|The notice displayed when the game is booted in [[Game Boy]] mode | |||
</gallery> | </gallery> | ||
==Box art== | ==Box art== | ||
<gallery> | <gallery> | ||
Warioland3.jpg|North American box art | Warioland3.jpg|North American box art | ||
WL3BackAmerica.jpg|North American box art (back) | WL3BackAmerica.jpg|North American box art (back) | ||
Wario Land 3 JP cover.jpg|Japanese box art | Wario Land 3 EUR cover.jpg|European box art | ||
WL3BackEurope.jpg|European box art (back) | |||
WL3 Box AU.jpg|Australian box art | |||
Wario Land 3 JP cover.jpg|Japanese box art | |||
WL3BackJapan.jpg|Japanese box art (back) | WL3BackJapan.jpg|Japanese box art (back) | ||
</gallery> | </gallery> | ||
==Miscellaneous== | ==Miscellaneous== | ||
<gallery> | <gallery> | ||
WL3JCMWario.png|Japanese commercial | |||
WL3JCMFlatWario.png|Japanese commercial | |||
WL3JCMHotWario.png|Japanese commercial | |||
WL3JCMVampireWario.png|Japanese commercial | |||
WL3JCMSnowmanWario.png|Japanese commercial | |||
WL3icon.png|Nintendo 3DS [[Virtual Console]] icon | WL3icon.png|Nintendo 3DS [[Virtual Console]] icon | ||
WL3 | WL3 3DS VC trailer pic.jpg|Promotional artwork for the Nintendo 3DS Virtual Console release in Europe | ||
</gallery> | </gallery> | ||
{{Galleries}} | {{Galleries}} | ||
{{WL3}} | {{WL3}} | ||
[[Category:Galleries]] | [[Category:Galleries]] | ||
[[Category:Wario Land 3|*]] | [[Category:Wario Land 3|*]] | ||
[[de:Wario Land 3/Galerie]] | |||
Revision as of 03:36, April 3, 2024
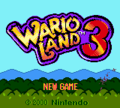
This is a gallery of images for the game Wario Land 3.
Logos
Internaional logo

In-game logo

Artwork
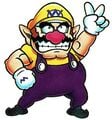
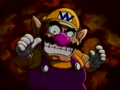
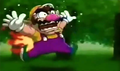
Wario

Wario artwork, as seen on the cover
Wario striking his victory pose


Enemies


Miscellaneous
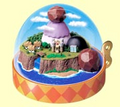
Music box (day)
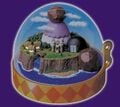
Music box (night)


Sprites
Wario

Wario (sleeping)

Hot Wario

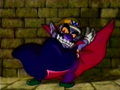
Vampire Wario (Normal Form)

Vampire Wario (Bat Form)


Bosses


Enemies


Items

Colored coin

Colored coin

Colored coin

Key

Key

Key


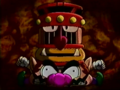
Music Boxes

The first Music Box

The second Music Box

The third Music Box

The fourth Music Box

The fifth Music Box


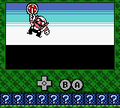
Screenshots

Language select
Title screen
Action Help of Wario holding a zipline handle.
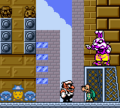
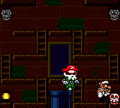
Wario battling Shoot
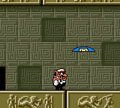
Wario encountering a Togēba.
Wario opening a blue treasure chest.
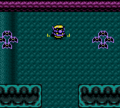
Vampire Wario flying through the Forest of Fear
Wario battling Jamano
- TBBS2.PNG
Wario avoiding a Brrr Bear's attack
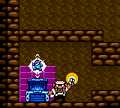
Wario giving the Music Boxes to a hidden figure
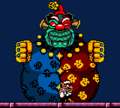
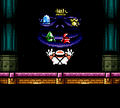
The hidden figure reveals its true form: Rudy

The screen shown when the player collects all of the treasures
The notice displayed when the game is booted in Game Boy mode


Box art
North American box art

North American box art (back)
European box art
European box art (back)
Australian box art
Japanese box art
Japanese box art (back)


Miscellaneous
Japanese commercial
Japanese commercial
Japanese commercial
Japanese commercial
Japanese commercial

Nintendo 3DS Virtual Console icon
Promotional artwork for the Nintendo 3DS Virtual Console release in Europe


| Wario Land 3 | ||||
|---|---|---|---|---|
| Main characters | Wario • A hidden figure | |||
| Supporters | Owl • Turtle | |||
| Bosses | A hidden figure • Anonster • Doll Boy • Jamano • Muddee • Pesce • Scowler • Shoot • Wolfenboss • Wormwould • Yellow Belly | |||
| Items | Coin • Colored coin • Key • Music Box • Musical Coin • Treasure | |||
| Objects | Barrel • Big Brick • Bomb • Bonfire Block • Brick • Doughnut block • Enemy Block • Flame block • Goal door • Itodama Block • Leaf Platform • Stove • Switch • Treasure chest | |||
| Levels | North | The Temple • Out of the Woods • The Peaceful Village • The Vast Plain • Bank of the Wild River • The Tidal Coast • Sea Turtle Rocks | ||
| West | Desert Ruins • The Volcano's Base • The Pool of Rain • A Town in Chaos • Beneath the Waves • The West Crater | |||
| South | The Grasslands • The Big Bridge • Tower of Revival • The Steep Canyon • Cave of Flames • Above the Clouds | |||
| East | The Stagnant Swamp • The Frigid Sea • Castle of Illusions • The Colossal Hole • The Warped Void • The East Crater • Forest of Fear | |||
| Reactions | Ball • Ball o' String Wario • Bouncy Wario • Bubble Wario • Crazy Wario • Electric Wario • Fat Wario • Flat Wario • Hot Wario • Ice Skatin' Wario • Invisible Wario • Puffy Wario • Snowman Wario • Vampire Wario and Bat-Wario • Zombie Wario | |||
| Enemies | Akamajakushi • Appleby • Beam Robota • Bird • Brrr Bear • Count Richtertoffen • Denki • Doughnuteer • Electric Lamp • Fire Robota • Futamogu • Hammer-bot • Haridama • Hebarii • Kobatto • Kuri • Kushimushi • Mad Scienstein • Mizu no te • Mizuuo • Mr. Moon • Nobiiru • Octohōn • Omodon • Omodonmeka • Para-Goom • Pneumo • Prince Froggy • Robo-Mouse • Seeing-eye door • Sensor • Silky • Snake • Spark • Spear-bot • Spearhead • Spike • Sun • Suna kara te • Teruteru • Togēba • Togeuo • Torch • Webber • Zombie | |||
| Miscellaneous | Garlic • Gallery • Staff | |||