Tidal Trouble: Difference between revisions
(update layou) |
(dkwiki) |
||
| Line 1: | Line 1: | ||
{{levelbox | {{levelbox | ||
|image=[[File:Tidal Trouble.png]] | |image=[[File:Tidal Trouble.png]] | ||
|code=1 - 3 | |code=1 - 3 | ||
| Line 11: | Line 10: | ||
'''Tidal Trouble''' is the third [[level]] of ''[[Donkey Kong Country 3: Dixie Kong's Double Trouble!]]'' It is located in [[Lake Orangatanga]], the game's first world. | '''Tidal Trouble''' is the third [[level]] of ''[[Donkey Kong Country 3: Dixie Kong's Double Trouble!]]'' It is located in [[Lake Orangatanga]], the game's first world. | ||
==Summary== | |||
Tidal Trouble is the second level to take place on a series of boardwalks, after [[Lakeside Limbo]]. There is a current in the water flowing left, in the opposite direction that [[Dixie Kong|Dixie]] and [[Kiddy Kong|Kiddy]] must go. The [[Kong]]s must jump out the water to continue moving against the force of the current. The Kongs must watch out that the current does not shift them into [[Koco]]s. On the boardwalks, the Kongs encounter [[Knocka]]s, [[Buzz (enemy)|Buzz]]es, [[Booty Bird]]s, and [[Knik-Knak]]s. A single [[Kobble]] also appears in the level (but is removed from the [[Game Boy Advance]] version). | |||
The second section of the level features more swimming. During the section, the Kongs must avoid the Buzzes above the water, as well as the Kocos in the water. A [[Lurchin]] is featured in a [[Bonus Level]] as well. For a brief part of the level, the Kongs can enter an [[Animal Barrel]] to transform into [[Enguarde the Swordfish|Enguarde]], which is directly under the second Knocka. | |||
==Layout== | ==Layout== | ||
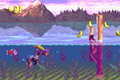
[[File:Tidal Trouble DKC3 shot 2.png|thumb|left|Dixie jumps over a thin, wooden structure.]] | [[File:Tidal Trouble DKC3 shot 2.png|thumb|left|Dixie jumps over a thin, wooden structure.]] | ||
The Kongs begin the level under a small tunnel with a series of boardwalks ahead of it, which support a [[Koin]]. After passing the foe, climbing up a small ledge, and heading down a ramp, which contains a Kobble in the SNES version, the apes reach an area of water that they must swim through to reach | The Kongs begin the level under a small tunnel with a series of boardwalks ahead of it, which support a [[Koin]]. After passing the foe, climbing up a small ledge, and heading down a ramp, which contains a Kobble in the SNES version, the apes reach an area of water that they must swim through, with some individual [[banana]]s placed along the way, to reach another wooden platform. The [[K-O-N-G Letters|letter K]] floats above the water, which contains a few [[banana]]s. Once they make their way onto the wooden platform, they can find a [[Bear Coin]] and a Buzz with a [[DK Barrel]] above it. As the primates travel ahead of here, they encounter a Koco in a long area of water. A thin, wooden structure stands in the water that they must hop over to move closer to a set of boardwalks that hold a pair of Knockas that are separated by a raised section of the platforms. An [[Animal Barrel]] that can turn the Kongs into Enguarde sits under the boards, and the letter O floats over the water after them. As the apes swim through the water, they encounter a few Kocos. They must maneuver over and under them to reach another set of boards that are supported over a pair of Kocos that block the way into a [[Bonus Barrel]]. After the primates travel across the flat boards, which carry a lone Knocka, they reach another area of water with a [[No Animal Sign]] in it. If they manage to pass a pair of Kocos and a thin, wooden structure in the liquid, they can reach a [[Star Barrel]] and a DK Barrel. | ||
Two buzzes follow the DK Barrel: The first Buzz hovers under a Bear Coin over the water, while the other hovers above a thin, wooden structure. Four more of these thin structures are ahead, and as the heroes travel over them, they come past a Buzz, found between the first two structures, and a Koco, who is located between the last two structures. A trail of bananas near here leads the Kongs under another Buzz and a Koco. A second Koco swims to the right of the foes, and it is followed by a pair of Knik-Knaks that float over the shallow water. They can be bounced on to reach a raised platform with a Knocka and a Booty Bird on it. The bird enemy can be defeated to gain the letter N. If the primates choose not to jump onto this platform, they can head under it, grabbing a hidden Bear Coin on the way. | Two buzzes follow the DK Barrel: The first Buzz hovers under a Bear Coin over the water, while the other hovers above a thin, wooden structure. Four more of these thin structures are ahead, and as the heroes travel over them, they come past a Buzz, found between the first two structures, and a Koco, who is located between the last two structures. A trail of bananas near here leads the Kongs under another Buzz and a Koco. A second Koco swims to the right of the foes, and it is followed by a pair of Knik-Knaks that float over the shallow water. They can be bounced on to reach a raised platform with a Knocka and a Booty Bird on it. The bird enemy can be defeated to gain the letter N. If the primates choose not to jump onto this platform, they can head under it, grabbing a hidden Bear Coin on the way. | ||
| Line 64: | Line 66: | ||
|[[File:Red Extra Life Balloon DKC3.png]] | |[[File:Red Extra Life Balloon DKC3.png]] | ||
|[[Red Balloon]] | |[[Red Balloon]] | ||
|1 (hidden | |1 (hidden under a cracked floor to the left of the Level Flag) | ||
|} | |} | ||
| Line 73: | Line 75: | ||
|- | |- | ||
|[[File:Letter K.png]] | |[[File:Letter K.png]] | ||
|The letter K | |The letter K is floating above the first gap of water, which appears right before the first DK Barrel in the level. | ||
|- | |- | ||
|[[File:Letter O.png]] | |[[File:Letter O.png]] | ||
|After | |After the second Knocka, the Kongs can jump to the letter O in the air before going into the water below. | ||
|- | |- | ||
|[[File:Letter N.png]] | |[[File:Letter N.png]] | ||
|On the small platform just before the second Bonus | |On the small platform just before the second Bonus Barrel, the Kongs can defeat a Booty Bird for the letter N. | ||
|- | |- | ||
|[[File:Letter G.png]] | |[[File:Letter G.png]] | ||
|The letter G | |The letter G is hovering next to the last Buzz, who is above the water shortly before the Level Flag. | ||
|} | |} | ||
| Line 91: | Line 93: | ||
|- | |- | ||
| | | | ||
|At the | |At the very start, the Kongs start under a roof, which has a [[Steel Barrel]] on it. To the right from where the Kongs start is a group of bananas shaping an {{button|snes|A}} (or {{button|GBA|R}} in the Game Boy Advance remake), indicating the button that the player must press to perform a [[Team-up]] throw. With the move, they can go on the roof, pick up the Steel Barrel, and continue onward a bit until they find the [[Koin]]. They must throw the Steel Barrel to the right at a wall behind Koin for it to bounce off and hit Koin from behind. This causes Koin to be defeated, and the Kongs earn the [[DK Coin]]. | ||
|} | |} | ||
| Line 101: | Line 103: | ||
|- | |- | ||
|[[File:Tidal Trouble Bonus Area 1.png]] | |[[File:Tidal Trouble Bonus Area 1.png]] | ||
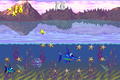
|'''''Collect 30 Stars!'''''<br> | |'''''Collect 30 Stars!'''''<br>After the letter O, the Kongs can swim by some Kocos in a straightforward path to a [[Bonus Barrel]]. They can also enter the Enguarde Barrel under the boardwalk. Enguarde can then do a [[super move|supercharge]] to quickly charge through the Kocos and enter the Bonus Barrel. Tidal Trouble is the first level where the "B" on the Bonus Barrel swirls and dissolves. In the [[Bonus Level]], the Kongs or Enguarde have 20 seconds to collect 30 [[Star (Donkey Kong Country series)|star]]s in a wide area. A Lurchin is at the bottom-center and must be avoided. After the Kongs or Enguarde collect every star, the [[Bonus Coin]] appears at the right end. | ||
|- | |- | ||
|[[File:Tidal Trouble Bonus Level 2.png]] | |[[File:Tidal Trouble Bonus Level 2.png]] | ||
|'''''Bash the Baddies!'''''<br>After the Star Barrel, the Kongs can find two Knik-Knaks | |'''''Bash the Baddies!'''''<br>After the Star Barrel, the Kongs can find two Knik-Knaks in midair. They must jump on them to reach a high boardwalk. From there, Kiddy must take the lead and roll towards the water. Kiddy must perform a [[Water Skip]] a few times and go up to a small platform with a Bonus Barrel above. If Kiddy misses the platform, he is forced to restart the level to reach the area, as he and Dixie cannot go back on the high boardwalks again. The Bonus Barrel is easier to reach in the [[Game Boy Advance]] version, as Dixie can simply use her [[Helicopter Spin]] to reach the platform with the Bonus Barrel above, or the Kongs can jump up to the wooden platform from the water. | ||
In the Bonus Level, | In the Bonus Level, the Kongs have 10 seconds to move along a tightrope and defeat four Knik-Knaks. After every enemy is defeated, the Bonus Coin appears to the very right in the water below. | ||
|} | |} | ||
| Line 115: | Line 117: | ||
===Super Nintendo Entertainment System=== | ===Super Nintendo Entertainment System=== | ||
<gallery> | <gallery> | ||
Tidal Trouble DKC3 start.png|The Kongs start the level | |||
Tidal Trouble DKC3 Knocka.png|The Kongs are knocked back by a Knocka | |||
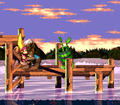
Tidal Trouble DKC3 shot 3.png|Dixie jumps towards the letter O | Tidal Trouble DKC3 shot 3.png|Dixie jumps towards the letter O | ||
Tidal Trouble DKC3 shot 4.png|The Kongs stand under | Tidal Trouble DKC3 Enguarde Barrel.png|Dixie swims to the Enguarde Barrel | ||
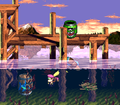
Tidal Trouble DKC3 shot 4.png|The Kongs stand under the second Bonus Barrel | |||
Tidal Trouble DKC3 letter G.png|The letter G | |||
</gallery> | </gallery> | ||
| Line 122: | Line 128: | ||
<gallery> | <gallery> | ||
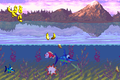
Tidal Trouble DKC3 GBA.png|Kiddy jumps to the letter K | Tidal Trouble DKC3 GBA.png|Kiddy jumps to the letter K | ||
Tidal Trouble GBA Koco.png|The Kongs swim past a Koco | |||
Tidal Trouble GBA Enguarde and Koco.png|Enguarde defeats a Koco | |||
Tidal Trouble GBA Bonus Level 1.png|Enguarde in the first Bonus Level | |||
Tidal Trouble GBA Bear Coin.png|The Kongs encounter a Buzz with a Bear Coin over its head | |||
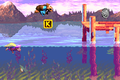
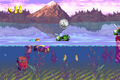
Tidal Trouble DKC3 GBA 2.png|The Kongs approach a DK Barrel located underwater | Tidal Trouble DKC3 GBA 2.png|The Kongs approach a DK Barrel located underwater | ||
</gallery> | </gallery> | ||
Revision as of 16:58, November 3, 2019
Template:Levelbox Tidal Trouble is the third level of Donkey Kong Country 3: Dixie Kong's Double Trouble! It is located in Lake Orangatanga, the game's first world.
Summary
Tidal Trouble is the second level to take place on a series of boardwalks, after Lakeside Limbo. There is a current in the water flowing left, in the opposite direction that Dixie and Kiddy must go. The Kongs must jump out the water to continue moving against the force of the current. The Kongs must watch out that the current does not shift them into Kocos. On the boardwalks, the Kongs encounter Knockas, Buzzes, Booty Birds, and Knik-Knaks. A single Kobble also appears in the level (but is removed from the Game Boy Advance version).
The second section of the level features more swimming. During the section, the Kongs must avoid the Buzzes above the water, as well as the Kocos in the water. A Lurchin is featured in a Bonus Level as well. For a brief part of the level, the Kongs can enter an Animal Barrel to transform into Enguarde, which is directly under the second Knocka.
Layout

The Kongs begin the level under a small tunnel with a series of boardwalks ahead of it, which support a Koin. After passing the foe, climbing up a small ledge, and heading down a ramp, which contains a Kobble in the SNES version, the apes reach an area of water that they must swim through, with some individual bananas placed along the way, to reach another wooden platform. The letter K floats above the water, which contains a few bananas. Once they make their way onto the wooden platform, they can find a Bear Coin and a Buzz with a DK Barrel above it. As the primates travel ahead of here, they encounter a Koco in a long area of water. A thin, wooden structure stands in the water that they must hop over to move closer to a set of boardwalks that hold a pair of Knockas that are separated by a raised section of the platforms. An Animal Barrel that can turn the Kongs into Enguarde sits under the boards, and the letter O floats over the water after them. As the apes swim through the water, they encounter a few Kocos. They must maneuver over and under them to reach another set of boards that are supported over a pair of Kocos that block the way into a Bonus Barrel. After the primates travel across the flat boards, which carry a lone Knocka, they reach another area of water with a No Animal Sign in it. If they manage to pass a pair of Kocos and a thin, wooden structure in the liquid, they can reach a Star Barrel and a DK Barrel.
Two buzzes follow the DK Barrel: The first Buzz hovers under a Bear Coin over the water, while the other hovers above a thin, wooden structure. Four more of these thin structures are ahead, and as the heroes travel over them, they come past a Buzz, found between the first two structures, and a Koco, who is located between the last two structures. A trail of bananas near here leads the Kongs under another Buzz and a Koco. A second Koco swims to the right of the foes, and it is followed by a pair of Knik-Knaks that float over the shallow water. They can be bounced on to reach a raised platform with a Knocka and a Booty Bird on it. The bird enemy can be defeated to gain the letter N. If the primates choose not to jump onto this platform, they can head under it, grabbing a hidden Bear Coin on the way.
After they travel over or under the board, they approach a pair of Kocos that they must jump over to discover a thin and tall platform, which stands under a Bonus Barrel. They can find another pair of Kocos stacked on top of each other nearby, and these enemies are followed by an additional thin, wooden structure that is guarded by a Buzz that moves up and down. On the other side of the structure, the apes can find a DK Barrel and a banana trail that leads them under a Buzz and a Koco. Once they travel under these foes and dodge an additional Koco, they come towards another group containing a Buzz and a Koco, who are followed by the letter G, which floats over the rough water. A thin structure is ahead of here that the Kongs must jump through to reach a Koco and a set of boards that support a Knocka and a Level Flag. Kiddy Kong can be thrown at a crack in the ground immediately before the flag to reveal and opening with an Extra Life Balloon and a Barrel Cannon in it.
Enemies
| Name | Count |
|---|---|
Booty Bird |
1 |
Buzz (green) |
8 |
Knik-Knak (red) |
6 |
Knocka |
4 |
Kobble |
1 |
Koco |
Green: 16 Red: 4 Total: 20 |
Lurchin |
1 |
Items and objects
| Sprite | Name | Count |
|---|---|---|
| Banana | 118 (5 from a Bonus Level) | |
| Bear Coin | 2 | |
| Red Balloon | 1 (hidden under a cracked floor to the left of the Level Flag) |
K-O-N-G Letters
| Letter | Location |
|---|---|
| The letter K is floating above the first gap of water, which appears right before the first DK Barrel in the level. | |
| After the second Knocka, the Kongs can jump to the letter O in the air before going into the water below. | |
| On the small platform just before the second Bonus Barrel, the Kongs can defeat a Booty Bird for the letter N. | |
| The letter G is hovering next to the last Buzz, who is above the water shortly before the Level Flag. |
DK Coin
| Image | Location |
|---|---|
| At the very start, the Kongs start under a roof, which has a Steel Barrel on it. To the right from where the Kongs start is a group of bananas shaping an |
Secrets
Bonus Levels
| Image | Type and description |
|---|---|

|
Collect 30 Stars! After the letter O, the Kongs can swim by some Kocos in a straightforward path to a Bonus Barrel. They can also enter the Enguarde Barrel under the boardwalk. Enguarde can then do a supercharge to quickly charge through the Kocos and enter the Bonus Barrel. Tidal Trouble is the first level where the "B" on the Bonus Barrel swirls and dissolves. In the Bonus Level, the Kongs or Enguarde have 20 seconds to collect 30 stars in a wide area. A Lurchin is at the bottom-center and must be avoided. After the Kongs or Enguarde collect every star, the Bonus Coin appears at the right end. |

|
Bash the Baddies! After the Star Barrel, the Kongs can find two Knik-Knaks in midair. They must jump on them to reach a high boardwalk. From there, Kiddy must take the lead and roll towards the water. Kiddy must perform a Water Skip a few times and go up to a small platform with a Bonus Barrel above. If Kiddy misses the platform, he is forced to restart the level to reach the area, as he and Dixie cannot go back on the high boardwalks again. The Bonus Barrel is easier to reach in the Game Boy Advance version, as Dixie can simply use her Helicopter Spin to reach the platform with the Bonus Barrel above, or the Kongs can jump up to the wooden platform from the water. In the Bonus Level, the Kongs have 10 seconds to move along a tightrope and defeat four Knik-Knaks. After every enemy is defeated, the Bonus Coin appears to the very right in the water below. |
Warp Barrel
After passing the level's first Koco, the Kongs must jump onto a short platform. Kiddy must then throw Dixie northwest into the hidden Warp Barrel, which sends them to the Level Flag.
Gallery
Super Nintendo Entertainment System
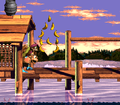
The Kongs start the level
The Kongs are knocked back by a Knocka

Dixie jumps towards the letter O
Dixie swims to the Enguarde Barrel

The Kongs stand under the second Bonus Barrel
- Tidal Trouble DKC3 letter G.png
The letter G


Game Boy Advance
Kiddy jumps to the letter K
The Kongs swim past a Koco
Enguarde defeats a Koco
Enguarde in the first Bonus Level
The Kongs encounter a Buzz with a Bear Coin over its head

The Kongs approach a DK Barrel located underwater


Names in other languages
| Language | Name | Meaning |
|---|---|---|
| Japanese | 流れに逆らえ Nagare ni sakarae |
Go against the Flow |
| German | Gezeiten Pleiten |
Tidal Washouts |
| Italian | Trincea Marea |
Trench Tide |
| Spanish | Contracorriente |
Against the Flow |