Paperize
| It has been suggested that this page be split into List of Scrap Paperization locations in Paper Mario: Sticker Star. Reason: Trying to create sections for each portion of this really complex move is stymied by the long table of contents created by having the list of locations on this page (discuss) |
It has been requested that more images be uploaded for this article. Remove this notice only after the additional images have been added. Specifics: There are four distinct kinds of things that can happen with paperization. This article has an image of one of them. It needs an image of putting a scrap into a course, an image of taking a scrap out of a course, and an image of taking Luigi out of a course. Images of Kamek and Bowser Jr. using paperization would also be very useful. The infobox needs a new image because the Shy Guy Jungle one's caption is very important, preferably one of Mario and Kersti floating before the player selects a sticker or scrap. Images of two sets of the Sticker Museum's exibits, one from the battle sticker set and the other from the thing sticker set.
| Paperize | |||
|---|---|---|---|
| Appears in | Paper Mario: Sticker Star (2012) | ||
| Used by | Mario | ||
| Effect | Kersti transforms the world into a sheet of paper, allowing Mario to modify it as though it is a scrapbook. Stick stickers into paperization zones, restore scraps to the world, take objects out of the world and convert them into scraps | ||
| Input method | |||
| Performed before | Stick Smooth | ||
| |||
- “How's that? Mind blown? Yeah. Time's stopped, and the world's become as flat as a piece of paper. That's what I call "paperization"!”
- —Kersti, Paper Mario: Sticker Star
Paperize (known as paperise in Europe and Australia and also called paperization or paperisation) is one of Kersti's abilities in Paper Mario: Sticker Star. It allows Mario to turn the surrounding environment into a sheet of paper that he can then stick his stickers onto for various effects when the world returns to normal. Further, he can tear certain objects out of the world and turn them into scraps, leaving behind a purple void that cannot be interacted with in any way. Lastly, he can paste scraps into these voids on the paper to restore the object to the world. Paperization is used extensively in the game to solve puzzles. Kersti is well versed in its capabilities, and if she is asked for advice in many instances that require paperization to proceed she will tell Mario to consider using it. Kersti grants this ability to the player in Warm Fuzzy Plains in order to counteract Bowser Jr.'s use of it, and then the player can use it at any point. Paperization can only be performed in the field, and cannot be performed if Kersti is separated from Mario.

To paperize, the player has to press the ![]() button. Mario spins around while Kersti stops time and projects a blue afterimage of a crown. The screen zooms out slightly. Then Kersti lifts Mario up and outside the course. The screen zooms back in, and while doing so the entire on-screen area is converted into a sheet of paper, which falls backward and lands face up in a multicolored space. Mario and Kersti float over the picture, and Mario can choose an item from his album to paste onto the scene. By default, the game locks the player into picking a sticker, flipping the album to the "Stickers" section and preventing them from selecting another section. After making a selection, the player can move Mario and Kersti around the picture with the
button. Mario spins around while Kersti stops time and projects a blue afterimage of a crown. The screen zooms out slightly. Then Kersti lifts Mario up and outside the course. The screen zooms back in, and while doing so the entire on-screen area is converted into a sheet of paper, which falls backward and lands face up in a multicolored space. Mario and Kersti float over the picture, and Mario can choose an item from his album to paste onto the scene. By default, the game locks the player into picking a sticker, flipping the album to the "Stickers" section and preventing them from selecting another section. After making a selection, the player can move Mario and Kersti around the picture with the ![]() to pick where to stick the item, or put the item back in the album with the
to pick where to stick the item, or put the item back in the album with the ![]() to make another choice. The shadow of the held item is projected onto the picture to make aligning the item with the location easier. Pressing
to make another choice. The shadow of the held item is projected onto the picture to make aligning the item with the location easier. Pressing ![]() has Mario and Kersti drop down to stick the item onto the paper. Mario's trajectory is autocorrected if he is just off from a valid location as well as if he would not land in the center of a valid location. If the location picked is a valid location for the item, the player must then move the
has Mario and Kersti drop down to stick the item onto the paper. Mario's trajectory is autocorrected if he is just off from a valid location as well as if he would not land in the center of a valid location. If the location picked is a valid location for the item, the player must then move the ![]() to the left and right, moving Mario across the sticker or scrap so that he can smooth out the item's left and right edge. Mario moves slower when he is in the process of smoothing out the edge, and a burst of star effects appears when an edge fully flattened. While smoothing, Mario cannot move past the edges of the item. When both edges are flat, the item is fully applied and thus permanently removed from the album. The
to the left and right, moving Mario across the sticker or scrap so that he can smooth out the item's left and right edge. Mario moves slower when he is in the process of smoothing out the edge, and a burst of star effects appears when an edge fully flattened. While smoothing, Mario cannot move past the edges of the item. When both edges are flat, the item is fully applied and thus permanently removed from the album. The ![]() button can be used during the smoothing process to cancel and return to selecting an item.
button can be used during the smoothing process to cancel and return to selecting an item.
If the player tries to put a sticker or a scrap is not in a valid location, their attempt to stick the item to the paper is cancelled. Mario and Kersti return to their higher elevation, and the item is returned to the album. If there are no valid locations on the sheet of paper to place anything, paperization ends immediately at this point. Similarly, if the player cancels sticking when there no valid locations, paperization ends. If there are valid locations in either scenario, the player is instead prompted on if they want to continue sticking or not. Paperization ends if the player picks "No" but continues from selecting an item if the player selects "Yes". If an item is placed in a valid location, and there are other valid locations on the sheet of paper, the player is also prompted on if they want to continue sticking or not. Lastly, if the item is placed in a valid location, and there are no other valid locations on the sheet of paper, paperization ends. The player can choose to end paperization at any time by pressing ![]() when selecting a sticker or scrap from the album. When paperizaiton ends, Kersti lifts Mario away and the course returns to normal. Mario and Kersti land precisely where they were before they started paperization, and time resumes. If items were placed during paperization, they take effect starting at this point. If something useful will happen as a result of paperization a burst of stars appears from areas being affected, accompanied by yellow and blue energy effects, blue ring effects, and a jingle.
when selecting a sticker or scrap from the album. When paperizaiton ends, Kersti lifts Mario away and the course returns to normal. Mario and Kersti land precisely where they were before they started paperization, and time resumes. If items were placed during paperization, they take effect starting at this point. If something useful will happen as a result of paperization a burst of stars appears from areas being affected, accompanied by yellow and blue energy effects, blue ring effects, and a jingle.
Areas that can be affected by placing stickers are paperization zones: faint boxes with a red or blue dotted outline. Such areas can only be seen while using paperization. If a paperization zone is mostly but not completely on screen when paperization is used, the screen may scroll slightly to get the box completely in frame. Paperization zones are not shown if the zone is obscured by other terrain, and cannot be used in such circumstances.
- Boxes of varying size with blue outlines that are normal. Paperizing stickers into them has a effect dependent on which course or neutral area the box is in and its location within the course or nuetral area. Stickers that are too large cannot be put into these paperization zones at all, with Mario failing to stick them in. Some of these allow the player to put any kind of sticker in them, but others will only accept the correct kind of sticker. If an incorrect sticker is placed, then instead of a useful effect happening upon time resuming, the sticker turns gray and peels off of the location. The sticker fades away, and thus is irretrievable.
- Large boxes with blue outlines that are odd. The first time the player paperizes in an location with this kind of paperization zone, Kersti notes that she has never seen paperization zones like these prior to Paper Mario: Sticker Star. These paperization zones are exclusively for thing stickers, and paperizing stickers into them will cause the thing do something dependent on which course or neutral area the zone is in and its location within the course or neutral area. If an incorrect sticker is placed, then the same lack of effect happens as with a normal small paperization zone with blue outlines.
- Small boxes with red outlines that are normal. Paperizing stickers into them always transforms the paperization zone into a fully visible ? Block. Stickers that are too large cannot be put into these paperization zones at all, with Mario failing to stick them in. When the ? Block is hit, it dispenses an item based on what sticker was put into the paperization zone. It could be a stronger version of the original sticker, a completely different sticker, multiple stickers that may be either of the two prior results, coins, or hearts. Unlike the other two kinds of paperization zones, any kind of sticker of the right size can be placed in these to have an effect. Pink flowers and Tree stumps with a red ring often indicate a paperization zone with red outlines is directly above them, although this is not a strict rule. ? Blocks created this way revert to being paperization zones when the player leaves the course.
The Sticker Museum is a building where Mario is tasked with collecting every battle sticker and thing sticker in the game to put on display. Each of the incomplete exhibit has a special paperization zone of the normal box with blue outlines kind that only accepts the exact sticker that that exhibit is meant to display. Each frame has an afterimage of the sticker that the papeization zone needs. All of the paperization zones work in the exact same way: they complete the exhibit by adding the sticker, and in doing so a plaque appears below the frame where the player can read the sticker's entry on Sticky Wiki. When paperization is performed in the Sticker Museum, the screen zooms in before Mario performs the spin and returns to its normal field of view when paperization concludes.
Areas where something has been removed from the course are swirling purple voids, which have a distinctive sound effect even outside of paperization. A Toad who gets trapped inside one such space describes it as a "netherworld".[1] Hitting these spaces with Mario's jump or hammer makes dust appear instead of the object's normal effect. The voids also cannot be checked, used, or stood on like the real object. If Mario paperizes around these spaces, the game locks the player into picking a scrap, flipping the album to the "Scraps" section and preventing them from selecting another section. If a void is not completely on screen when paperize is used, the screen may scroll significantly to get the void completely in frame. Scraps can only be stuck to voids that perfectly match their shape, and are returned to the album otherwise. The effect of paperizing to stick scraps almost always has the same effect of restoring the object in the course, save for one exception.
Certain objects that appear to be completely normal can be removed from the course through paperization. These act very similarly to the voids, and likewise lock the album into the "Scraps" section. When an object that can be removed from a course is in an area during paperization, its upper right corner will peel outward and reveal a void behind it. The game does not have the player pick a scrap from the album. Instead, it skips to movement. Mario has to be moved over to the peeling object with the ![]() , then drop to pull the object off the sheet of paper with the
, then drop to pull the object off the sheet of paper with the ![]() . This collects the object as a scrap and leaves a swirling purple void behind, but lacks the energy and ring effects of sticking scraps onto the paper. Mario and Kersti cannot be lowered toward any object that is not peeling, with the
. This collects the object as a scrap and leaves a swirling purple void behind, but lacks the energy and ring effects of sticking scraps onto the paper. Mario and Kersti cannot be lowered toward any object that is not peeling, with the ![]() button being ignored if they are not over the peeling object. As all areas with this kind of object only have one of this kind of object in them, paperization ends immediately after removing such an object.
button being ignored if they are not over the peeling object. As all areas with this kind of object only have one of this kind of object in them, paperization ends immediately after removing such an object.
There is one puzzle in the game which is simply to remove an object by the aforementionmed method, the fountain in Decalburg to be precise, but most puzzles require the player to do something more useful than create an inert void. At first, it is possible for the scrap Mario gains to automatically rotate or flip over after being put in the album. All such objects are symmetrical such that the rotated or flipped scrap perfectly matches the void that removing the object created. As such, the object can be returned to the course through paperization, where its new orientation is more useful than its original orientation. These kinds of obstacles are often telegraphed by their initial orientation being outright incorrect. For example, a section of a wall that can be removed then automatically rotate will have its pattern not match the pattern of the surrounding wall. If there is a door on that wall, it might be aligned with the side of the building rather than the bottom, which is clearly "off" since the player can only enter doors at ground level. Other times, Mario can tear out an object from another area whose scrap has the same shape as the void created by removing the object from the first area. This enables Mario to swap the locations of both objects by putting the scraps into the void that does not correspond with the objects' original locations, and the new locations of the objects are invariably more useful than the original locations. Scraps that must be placed into a different area to progress are unable to be put back into their original location, and when a scrap is placed where it belongs, the object is unable to be peeled off again.
Luigi is hiding in five courses of the game, specifically in one course of each world from World 1 to World 5. He is facing away from the screen, and paperization can be used to retrieve him. Luigi is similar to removable objects in the game except that when he is present and the player paperizes, the album is locked to the "Stickers" section. Luigi does not peel upward when he is on the sheet of paper, instead turning to face the screen. Once peeled off the paper, he does not leave a void behind and he does not go into the album as a scrap. Instead, he runs to the side and jumps off the paper, falling off the screen. Each time the player finds and peels away Luigi, an article of a newspaper appears in a house in Decalburg, with the article corresponding the course the player did this in. It describes Luigi being sighted in the course, but no one knows who Luigi is so the articles instead refer to him as a "mysterious green guy". If Luigi is found in all five of the courses, he leads the parade at the Sticker Fest at the end of the game.
Kamek and Bowser Jr. are capable of paperizing as well, and use this power to inconvenience Mario by removing objects that he needs to utilize to proceed. For instance, they can take a Wooden Bridge Mario needs to use to cross a river, or take the Comet Piece Mario needs to complete a course. These characters hide the resulting scrap elsewhere, rather than giving it to Mario after a battle. Oddly, when they start paperize, an afterimage of a blue crown also appears. When they stop paperizing, black and purple energy effects and black ring effects appear. A negative jingle plays as well, mirroring the light and positve sounds of Kersti's version.
The Toads are implied to not understand paperization, given that the captain of a boat at Surfshine Harbor does not understand that their boat stopped working because the steering wheel was torn from the world, and a Toad in Decalburg freaks out after Mario tears the town's fountain out of the world because to them the fountain vanished. However, the Sticker Museum curator does understand how paperization works given that Mario has to paperize to fill each exhibit. He also assumes Mario knows how to stick the stickers in, and Mario's only means of sticking stickers anywhere is paperization.[2]
There are 155 spots where paperization can be used to an effect. Shaved Ice Cave and Bowser's Sky Castle are the only courses that lack both paperization zones and swirling purple voids.
Decalburg and Surfshine Harbor[edit]
This section is a stub. Please consider expanding it to include any missing information. Specifics: The Sticker Museum has a paperization zone for every battle sticker and every thing sticker in the game.
There are a total of 5 paperizations to be performed in the two neutral areas:
- Decalburg has 1 Scrap Paperization
- Surfshine Harbor has 4 Paperizations - 2 Scrap, 2 Sticker
Decalburg[edit]
There are a total of 1 Scrap Paperization to be performed in Decalburg.
| Scrap/Sticker needed | Description | Necessity | Image |
|---|---|---|---|
| Decalburg | 1 Scrap Paperization | |||
 Decalburg Fountain |
In the third scene, in the middle. Paperize is used two times: first to free Sticker Museum curator, second to put the fountain back. Available only after learning Paperization in Warm Fuzzy Plains. | Optional | 
|
Surfshine Harbor[edit]
There are a total of 4 Paperizations to be performed in Surfshine Harbor.
| Scrap/Sticker needed | Description | Necessity | Image |
|---|---|---|---|
| Surfshine Harbor | 4 Paperizations (2 Scrap, 2 Sticker) | |||
 Warehouse Door |
In the first scene, in the end of the warehouse. Paperize is used twice here: first to remove the door and to turn it the right way, second to put it back. | Required | 
|
 Lightbulb |
In the basement of the middle warehouse. | Required | 
|
  Scissors or Hair Shears |
In the back of the second scene, reached by going between the crates. | Required | 
|
 Ship's Wheel |
Inside the ship. | Required | 
|
World 1[edit]
There are a total of 26 Paperizations to be performed in the entirety of World 1:
- Warm Fuzzy Plains has 4 Paperizations - 1 Scrap, 3 Sticker
- Bouquet Gardens has 6 Sticker Paperizations
- Water's Edge Way has 3 Paperizations - 1 Scrap, 2 Sticker
- Hither Thither Hill has 4 Paperizations - 1 Scrap, 3 Sticker
- Whammino Mountain has 3 Paperizations - 1 Scrap, 2 Sticker
- Goomba Fortress has 6 Paperizations - 1 Scrap, 4 Sticker, 1 Luigi Sighting
World 1-1: Warm Fuzzy Plains[edit]
There are a total of 4 Paperizations to be performed in World 1-1: Warm Fuzzy Plains:
- 1 Scrap Paperization
- 3 Sticker Paperizations
| Scrap/Sticker needed | Description | Necessity | Image |
|---|---|---|---|
| Warm Fuzzy Plains | 4 Paperizations (1 Scrap, 3 Sticker) | |||
 Wooden Bridge |
In the second scene, in the middle of the lower part. Automatically started after collecting the Wooden Bridge scrap and going close to the spot. | Required | 
|
| Random 1x1 Sticker | Same scene, in the east, above the stump. | Optional | 
|
| Random 1x1 Sticker | In the third scene, above the circle of flower that can be bloomed by using a hammer that can be found in the lower part in the west. | Optional | 
|
 Secret Door |
Same scene, in the middle of the lower part, on the wall. Available only after getting access to Outlook Point and getting Secret Door sticker from there. | Optional | 
|
World 1-2: Bouquet Gardens[edit]
There are a total of 6 Sticker Paperizations to be performed in World 1-2: Bouquet Gardens.
| Scrap/Sticker needed | Location | Necessity | Image |
|---|---|---|---|
| Bouquet Gardens | 6 Sticker Paperizations | |||
| Random 1x1 Sticker | In the fourth scene, found above the right circle of flowers that can be bloomed by hammering. | Optional | 
|
| Random 1x1 Sticker | In the fifth scene, found above the circle of flowers that can be bloomed by hammering. | Optional | 
|
| Any combination of 3 Flower stickers | In the third scene, after getting enough flower stickers. Using any combination of 3 flower stickers causes the garden to bloom, rewarding Mario with 2 of every sticker used. When garden blooms for the first time, Toad next to it is overjoyed and gives Mario a HP-Up Heart. | Optional | 
|
Secret Door |
In the seventh scene, in the middle of the lower part on the wall. Available only after getting access to Outlook Point and getting Secret Door sticker from there. | Optional | 
|
World 1-3: Water's Edge Way[edit]
There are a total of 3 Paperizations to be performed in World 1-3: Water's Edge Way:
- 1 Scrap Paperization
- 2 Sticker Paperizations
| Scrap/Sticker needed | Location | Necessity | Image |
|---|---|---|---|
| Water's Edge Way | 3 Paperizations (1 Scrap, 2 Sticker) | |||
| Random 1x1 Sticker | In the third scene, above the flower found under the bridge. | Optional | 
|
 Comet Piece |
In the second scene, in the northeast. Available only after getting the Comet Piece scrap in the fifth scene (the underground one). | Required | 
|
Secret Door |
In the fifth scene, in the east part on the wall. Available only after getting access to Outlook Point and getting Secret Door sticker from there. | Optional | 
|
World 1-4: Hither Thither Hill[edit]
There are a total of 4 Paperizations to be performed in World 1-4: Hither Thither Hill:
- 1 Scrap Paperization
- 3 Sticker Paperizations
| Scrap/Sticker needed | Location | Necessity | Image |
|---|---|---|---|
| Hither Thither Hill | 4 Paperizations (1 Scrap, 3 Sticker) | |||
 Fan |
In the first outdoor scene, above the stump left of the windmill. | *Required/Optional | 
|
| Random 1x1 Sticker | In the second outdoor scene, in the lower part, above the circle of flowers that can be bloomed by hammering. | Optional | 
|
 Green Warp Pipe |
In the second underground scene, near the entrance warp pipe in the west. | *Required/Optional | 
|
Secret Door |
In the third outdoor scene, on the wall of the upper part. Available only after getting access to Outlook Point and getting Secret Door sticker from there. | Optional | 
|
*If Whammino Mountain hasn't been completed, the paperizations are required. Otherwise, they're optional.
World 1-5: Whammino Mountain[edit]
There are a total of 3 Paperizations to be performed in World 1-5: Whammino Mountain:
- 1 Scrap Paperization
- 2 Sticker Paperizations
| Scrap/Sticker needed | Location | Necessity | Image |
|---|---|---|---|
| Whammino Mountain | 3 Paperizations (1 Scrap, 2 Stickers) | |||
 White Gate |
In the third scene, in the middle of the lower part. Available only after getting the White Gate scrap from the second scene (which in turn is only available after knocking down the tree in the fourth scene, causing a chain reaction). | *Required/Optional | 
|
| Random 1x1 Sticker | Same scene, above the right flower found in the upper part. | Optional | 
|
Secret Door |
In the undeground scene connecting first and fourth scene via warp pipes, in the middle, on the wall. Available only after getting access to Outlook Point and getting Secret Door sticker from there. | Optional | 
|
*If Hither Thither Hill hasn't been completed, the paperization is required. Otherwise, it is optional.
World 1-6: Goomba Fortress[edit]
There are a total of 6 Paperizations to be performed in World 1-5: Goomba Fortress:
- 1 Scrap Paperization
- 4 Sticker Paperizations
- 1 Luigi Sighting
| Scrap/Sticker needed | Location | Necessity | Image |
|---|---|---|---|
| Goomba Fortress | 6 Paperizations (1 Scrap, 4 Stickers, 1 Luigi sighting) | |||
| 2 Random 1x1 Stickers | In the east scene. After activating the fans in the background by stepping on the bridge, Mario can use Paperization to stuck two 1x1 stickers to temporarily stop them, so he can reach the exit. | Required | 
|
 Block Switch |
In the northwest scene, in the middle. Paperize is used two times: first to take out the Block Switch scrap to make it turn in the right direction, second to put it back. | Required | 
|
Luigi |
In the west scene, seen in the background in the northeast. | Optional | 
|
| Random 1x1 Sticker | In the tower scene, in the middle of the lowest part. | Optional | 
|
Secret Door |
In the east scene, in the middle of the lower part. Available only after getting access to Outlook Point and getting Secret Door sticker from there. | Optional | 
|
World 2[edit]
There are a total of 35 Paperizations to be performed in the entirety of World 2:
- Drybake Desert has 12 Sticker Paperizations
- Yoshi Sphinx has 3 Sticker Paperizations
- Sandshifter Ruins has 2 Sticker Paperizations
- Damp Oasis has 3 Sticker Paperizations
- Drybake Stadium has 15 Paperizations - 5 Scrap, 9 Sticker, 1 Luigi Sighting
World 2-1: Drybake Desert[edit]
There are a total of 12 Sticker Paperizations to be performed in World 2-1: Drybake Desert.
| Scrap/Sticker needed | Description | Necessity | Image |
|---|---|---|---|
| Drybake Desert | 12 Sticker Paperizations | |||
| Jump/Iron Jump/Line Jump (any 1x1 variety)+Hammer/Hurlhammer/Slaphammer (any 1x1 variety)+any 1x1 Mushroom (but Poison Mushroom)+Poison Mushroom+any Spike Helmet+any Flower | In the first scene, the exit. Combination of 6 1x1 stickers is required to open the door. | Required | 
|
| Random 1x1 Sticker | In the third scene, after reaching the highest point of the scene. | Optional | 
|
| Random 1x1 Sticker | Same scene, near the exit, behind some flat rocks. | Optional | 
|
| Random 1x1 Sticker | In the fifth scene, near the exit between two Brick Blocks. | Optional | 
|
| Random 1x1 Sticker | In the underground scene, near the upper ? Block. Together with two Hidden Blocks right of it, it acts as platforms to reach said ? Block. | Optional | 
|
| Random 1x1 Sticker | In the sixth scene (pyramid one), near the Comet Piece, to the right. | Optional | 
|
Secret Door |
Same scene, at the back side of the pyramid. Available only after getting access to Outlook Point and getting Secret Door sticker from there. | Optional | 
|
World 2-2: Yoshi Sphinx[edit]
There are a total of 3 Sticker Paperizations to be performed in World 2-2: Yoshi Sphinx.
| Scrap/Sticker needed | Description | Necessity | Image |
|---|---|---|---|
| Yoshi Sphinx | 3 Sticker Paperizations | |||
| Random 1x1 Sticker | In the first scene, in the north, above the flower. | Optional | 
|
| Random 1x1 Sticker | In the scene reached by a north opening in the third sphinx scene, at the top, under the ? Block. | Optional | 
|
Secret Door |
In the second scene, at the left side of the sphinx. Available only after getting access to Outlook Point and getting Secret Door sticker from there. | Optional | 
|
World 2-3: Sandshifter Ruins[edit]
There are a total of 2 Sticker Paperizations to be performed in World 2-3: Sandshifter Ruins.
| Scrap/Sticker needed | Description | Necessity | Image |
|---|---|---|---|
| Sandshifter Ruins | 2 Sticker Paperizations | |||
| Random 1x1 Sticker | At the bottom of the main scene by going right->right->left->left (only during the subsequent visits) and going through the door is a scene with multiple sarcophagi. Between two hidden blocks. Together with them, these three blocks act as platforms to reach a ? Block above the spikes. | Optional | 
|
Secret Door |
In the scene reached by a door by going right->right->right from the top of the main scene, on the wall after entering. Available only after getting access to Outlook Point and getting Secret Door sticker from there. | Optional | 
|
World 2-4: Damp Oasis[edit]
There are a total of 3 Sticker Paperizations to be performed in World 2-4: Damp Oasis.
| Scrap/Sticker needed | Description | Necessity | Image |
|---|---|---|---|
| Damp Oasis | 3 Sticker Paperizations | |||
 Vacuum |
Left of the entrance to the second scene. | Required | 
|
 Faucet |
In the northwest of the second scene. | Required | 
|
Secret Door |
In the first scene, after going left from the entrance, on the wall. Available only after getting access to Outlook Point and getting Secret Door sticker from there. | Optional | 
|
World 2-5: Drybake Stadium[edit]
There are a total of 15 Paperizations to be performed in World 2-5: Drybake Stadium:
- 5 Scrap Paperizations
- 9 Sticker Paperizations
- 1 Luigi Sighting
| Scrap/Sticker needed | Description | Necessity | Image |
|---|---|---|---|
| Drybake Stadium | 15 Paperizations (5 Scraps, 9 Stickers, 1 Luigi sighting) | |||
 3 Tablet Pieces |
In the first scene, at the top. | Required | 
|
| Jump/Iron Jump/Line Jump (any 1x1 variety)+Hammer/Hurlhammer/Slaphammer (any 1x1 variety) | On the exit of the first floor. | Required | 
|
 Stone Entry |
At the end of the second floor. | Required | 
|
| Random 1x1 Sticker | On the third floor, between the two broken pillars. Acts as a platform to reach the second pillar with Line Jump sticker on it. | Optional | 
|
| Hammer/Hurlhammer/Slaphammer (any 1x1 variety)+any Spike Helmet+Jump/Iron Jump/Line Jump (any 1x1 variety) | On the exit of the third floor. | Required | 
|
Luigi |
In the outside area reached by a second exit on the fourth floor, on the right end, in the window. | Optional | 
|
 Tower's Outer Wall |
In the outside are reached by a third exit on the fourth floor, at the end. Paperize is used twice here: first to remove the door and to turn it the right way, second to put it back. | Required | 
|
| Any Flower+any POW Block | On the exit of the fifth floor. | Required | 
|
Secret Door |
In the first scene, right next to the entrance. Available only after getting access to Outlook Point and getting Secret Door sticker from there. | Optional | 
|
World 3[edit]
There are a total of 33 Paperizations to be performed in the entirety of World 3:
- Leaflitter Path has 3 Sticker Paperizations
- The Bafflewood has 6 Sticker Paperizations
- Strike Lake has 3 Sticker Paperizations
- Loop Loop River has 2 Sticker Paperizations
- Outlook Point has 1 Sticker Paperization
- Wiggler's Tree House has 4 Paperizations - 3 Scrap, 1 Sticker
- Rustle Burrow has 3 Paperizations - 1 Scrap, 2 Sticker
- Tree Branch Trail has 2 Sticker Paperizations
- Gauntlet Pond has 3 Sticker Paperizations
- Stump Glade has 1 Sticker Paperization
- Holey Thicket has 2 Paperizations - 1 Scrap, 1 Sticker
- Whitecap Beach has 3 Paperizations - 2 Sticker, 1 Luigi Sighting
World 3-1: Leaflitter Path[edit]
There are a total of 3 Sticker Paperizations to be performed in World 3-1: Leaflitter Path.
| Scrap/Sticker needed | Description | Necessity | Image |
|---|---|---|---|
| Leaflitter Path | 3 Sticker Paperizations | |||
 Trumpet |
In the second scene, on the stump with partially eaten fruit bush. | Required | 
|
| Random 1x1 Sticker | In the fifth scene, in the middle between Recovery Block and Save Block and above circle of flower that can be bloomed by hammering. | Optional | 
|
Secret Door |
In the fourth scene, in the middle, after the first poison lake, on the wall. Available only after getting access to Outlook Point and getting Secret Door sticker from there. | Optional | 
|
World 3-2: The Bafflewood[edit]
There are a total of 6 Sticker Paperizations to be performed in World 3-2: The Bafflewood.
| Scrap/Sticker needed | Description | Necessity | Image |
|---|---|---|---|
| The Bafflewood | 6 Sticker Paperizations | |||
| Random 1x1 Sticker | In the scene reached by going right from the fourth scene, above the circle of flowers that can be bloomed by hammering. | Optional | 
|
| 4 random 1x1 Stickers | In the scene reached by going north from the fourth scene, found above the circles of flowers thac can be bloomed by hammering in front of every exit but the southwest one. | Optional | 
|
Secret Door |
In the scene reached by going right from the fourth scene, in the southeast. Available only after getting access to Outlook Point and getting Secret Door sticker from there. | Optional | 
|
World 3-4: Strike Lake[edit]
There are a total of 3 Sticker Paperizations to be performed in World 3-4: Strike Lake.
| Scrap/Sticker needed | Description | Necessity | Image |
|---|---|---|---|
| Strike Lake | 3 Sticker Paperizations | |||
Secret Door |
In the third scene, in the southwest. Available only after getting access to Outlook Point and getting Secret Door sticker from there. | Optional | 
|
 Bowling Ball |
In the scene north of the second scene, on the stump on the right. Available only after getting the Bowling Ball thing in The Bafflewood (available after the Wiggler Segment from Stump Glade runs there). | Required | 
|
| Random 1x1 Sticker | In the second scene, in the southeast, above the circle of flowers that can be bloomed by hammering. Available only after defeating Gooper Blooper. | Optional | 
|
World 3-5: Loop Loop River[edit]
There are a total of 2 Sticker Paperizations to be performed in World 3-5: Loop Loop River.
| Scrap/Sticker needed | Description | Necessity | Image |
|---|---|---|---|
| Loop Loop River | 2 Sticker Paperizations | |||
| Random 1x1 Sticker | In the west scene, in the middle, in the circle of flowers that can be bloomed by hammering. | Optional | 
|
Secret Door |
In the leower middle scene, in the northeast. Available only after getting access to Outlook Point and getting Secret Door sticker from there. | Optional | 
|
World 3-6: Outlook Point[edit]
There is only 1 Sticker Paperization to be performed in World 3-6: Outlook Point.
| Scrap/Sticker needed | Description | Necessity | Image |
|---|---|---|---|
| Outlook Point | 1 Sticker Paperization | |||
Secret Door |
In the shop area, in the low part. | Required | 
|
World 3-3: Wiggler's Tree House[edit]
There are a total of 4 Paperizations to be performed in World 3-3: Wiggler's Tree House:
- 3 Scrap Paperizations
- 1 Sticker Paperization
| Scrap/Sticker needed | Description | Necessity | Image |
|---|---|---|---|
| Wiggler's Tree House | 4 Paperizations (3 Scraps, 1 Sticker) | |||
Secret Door |
On the second floor, in the east. | Optional | 
|
 Tree Stump |
At the top of the tree. Available after saving the first Wiggler Segment and taking the Tree Stump scrap from Loop Loop River. | Required | 
|
 Tree Stump |
Same scene, available after saving the second Wiggler Segment and taking the Tree Stump scrap from Tree Branch Trail. | Required | 
|
   .png) 4 Wiggler Segments |
Same scene, available after saving the third and fourth Wiggler Segments from The Bafflewood and Surfshine Harbor. | Required | 
|
World 3-7: Rustle Burrow[edit]
There are a total of 3 Paperizations to be performed in World 3-7: Rustle Burrow:
- 1 Scrap Paperization
- 2 Sticker Paperizations
| Scrap/Sticker needed | Description | Necessity | Image |
|---|---|---|---|
| Rustle Burrow | 3 Paperizations (1 Scrap, 2 Stickers) | |||
 Burrow Door |
In the scene south of the third scene, at the end of the left stairs. | Required | 
|
Secret Door |
In the second scene, near the end of the upper part. | Optional | 
|
| Random 1x1 Sticker | In the scene north of the third scene, in the secret area to the left, above the circle of flowers that can be bloomed by hammering. | Optional | 
|
World 3-8: Tree Branch Trail[edit]
There are a total of 2 Sticker Paperizations to be performed in World 3-8: Tree Branch Trail.
| Scrap/Sticker needed | Description | Necessity | Image |
|---|---|---|---|
| Tree Branch Trail | 2 Sticker Paperizations | |||
Secret Door |
In the first scene, near the entrance. | Optional | 
|
| Random 1x1 Sticker | In the second scene, in the southwest. Available only after defeating Gooper Blooper. | Optional | 
|
World 3-9: Gauntlet Pond[edit]
There are a total of 3 Sticker Paperizations to be performed in World 3-9: Gauntlet Pond.
| Scrap/Sticker needed | Description | Necessity | Image |
|---|---|---|---|
| Gauntlet Pond | 3 Sticker Paperizations | |||
Secret Door |
In the second scene, in the middle of the lower part. | Optional | 
|
| Random 1x1 Sticker | In the first scene, to the right of the entrance from the third scene. | Required | 
|
| Random 1x1 Sticker | In the third scene, in the northeast. Available only after defeating Gooper Blooper. | Optional | 
|
World 3-10: Stump Glade[edit]
There is only 1 Sticker Paperization to be performed in World 3-10: Stump Glade.
| Scrap/Sticker needed | Description | Necessity | Image |
|---|---|---|---|
| Stump Glade | 1 Sticker Paperization | |||
Secret Door |
In the storage room after beating Snifit or Whiffit, to the north. | Optional | 
|
World 3-11: Holey Thicket[edit]
There are a total of 2 Paperizations to be performed in World 3-11: Holey Thicket:
- 1 Scrap Paperization
- 1 Sticker Paperization
| Scrap/Sticker needed | Description | Necessity | Image |
|---|---|---|---|
| Holey Thicket | 2 Paperizations (1 Scrap, 1 Sticker) | |||
 Bowser Tape |
In the second scene, found near the exit. | Required | 
|
Secret Door |
In the fourth scene, in the upper part. | Optional | 
|
World 3-12: Whitecap Beach[edit]
There are a total of 3 Paperizations to be performed in World 3-12: Whitecap Beach:
- 2 Sticker Paperizations
- 1 Luigi Sighting
| Scrap/Sticker needed | Description | Necessity | Image |
|---|---|---|---|
| Whitecap Beach | 3 Paperizations (2 Stickers, 1 Luigi sighting) | |||
Luigi |
In the first scene, seen in the background from the dock. | Optional | 
|
Secret Door |
In the second scene, found behind the Wiggler, on the wall. | Optional | 
|
| Random 1x1 Sticker | In the fourth scene, above the flower next to the entrance. | Optional | 
|
World 4[edit]
There are a total of 27 Paperizations to be performed in the entirety of World 4:
- Snow Rise has 5 Paperizations - 1 Scrap, 4 Sticker
- Ice Flow has 5 Sticker Paperizations
- The Enigmansion has 9 Paperizations - 7 Scrap, 2 Sticker
- Whiteout Valley has 3 Paperizations - 1 Scrap, 1 Sticker, 1 Luigi Sighting
- Bowser's Snow Fort has 5 Paperizations - 3 Scrap, 2 Sticker
World 4-1: Snow Rise[edit]
There are a total of 5 Paperizations to be performed in World 4-1: Snow Rise:
- 1 Scrap Paperization
- 4 Sticker Paperizations
| Scrap/Sticker needed | Description | Necessity | Image |
|---|---|---|---|
| Snow Rise | 5 Paperizations (1 Scrap, 4 Stickers) | |||
| Any Fire Flower or any Burnhammer | In the first scene, near the exit. Using any fire based sticker melts the snow of the ice-cream like platform to reveal a Pipe in a Cave scrap. | Required | 
|
| Random 1x1 Sticker | In the third scene, near the entrance, above the circle of flowers that can be bloomed after hammering. | Optional | 
|
 Radiator |
In the second scene, near the upper right entrance. | Required | 
|
Secret Door |
Same scene, in the middle of the lower part. | Optional | 
|
 Pipe in a Cave |
In the third scene, in the southeast. | Required | 
|
World 4-2: Ice Flow[edit]
There are a total of 5 Sticker Paperizations to be performed in World 4-2: Ice Flow.
| Scrap/Sticker needed | Description | Necessity | Image |
|---|---|---|---|
| Ice Flow | 5 Sticker Paperizations | |||
Secret Door |
In the second scene, in the middle to the west. | Optional | 
|
| 4 Random 1x1 Stickers | In the fourth scene, in the west of the middle part. | Optional | 
|
World 4-3: The Enigmansion[edit]
There are a total of 9 Paperizations to be performed in World 4-3: The Enigmansion:
- 7 Scrap Paperizations
- 2 Sticker Paperizations
| Scrap/Sticker needed | Description | Necessity | Image |
|---|---|---|---|
| The Enigmansion | 9 Paperizations (7 Scraps, 2 Stickers) | |||
 ↓  Mansion Safe→Mansion Bookcase |
In the hallway, there is a safe left of the bookcase. Paperize is used twice here: first to take out the Mansion Safe scrap, later to put Mansion Bookcase scrap in its place. | Required | 
|
 ↓  Mansion Door→Mansion Wall |
In the room after going through the door on the left of the hallway. Paperize is used twice here: first to take out the Mansion Door scrap, later to put Mansion Wall scrap in its place. | Required | 
|
↓ Mansion Wall→Mansion Door |
IIn the room left of the previous one. Paperize is used twice here: first to take out the Mansion Wall scrap, then to put Mansion Door scrap in its place. | Required | 
|
↓ Mansion Bookcase→Mansion Safe |
In the room after going through the door in the middle of the hallway. Paperize is used twice here: first to take out the Mansion Bookcase scrap, then to put the Mansion Safe scrap in its place. | Required | 
|
Secret Door |
In the room with the shortcut to Decalburg, at the end of the upper part. | Optional | 
|
 ↓  Steward's Portrait→Mansion Door |
In the first room, in the north of the second floor. Paperize is used twice here: first to take out Steward's Portrait scrap, then to put Mansion Door scrap in its place. | Required | 
|
| Random 1x1 Sticker | In the dining hall, above the red wilted flower. | Optional | 
|
Steward's Portrait |
There are three door in the upper part of the dining hall. This spot is found behind the middle one. | Required | 
|
 Big Bookcase |
In the room right of the first room, in the northeast. | Required | 
|
World 4-5: Whiteout Valley[edit]
There are a total of 3 Paperizations to be performed in World 4-5: Whiteout Valley:
- 1 Scrap Paperization
- 1 Sticker Paperization
- 1 Luigi Sighting
| Scrap/Sticker needed | Description | Necessity | Image |
|---|---|---|---|
| Whiteout Valley | 3 Paperizations (1 Scrap, 1 Sticker, 1 Luigi sighting) | |||
Secret Door |
In the first scene, near the start of the cave. | Optional | 
|
 Forebear's Portrait |
Same scene, at the end of the cave. | Required | 
|
Luigi |
In the fourth scene, found sitting on the chairlift going down. | Optional | 
|
World 4-6: Bowser's Snow Fort[edit]
There are a total of 5 Paperizations to be performed in World 4-6: Bowser's Snow Fort:
- 3 Scrap Paperizations
- 2 Sticker Paperizations
| Scrap/Sticker needed | Description | Necessity | Image |
|---|---|---|---|
| Bowser's Snow Fort | 5 Paperizations (3 Scraps, 2 Stickers) | |||
Secret Door |
In the first scene, in the middle part, the right entrance. | Optional | 
|
| Random 1x1 Sticker | In the first minecart scene, there is a number of Brick Blocks on the inaccesible rail, with a hole between them. Paperizing here causes the Shy Guy in the minecart who is only on this rail to drop Mine-Cart Rail scrap. | Required | 
|
 Mine-Cart Rail |
Same scene, near the end. | Required | 
|
 Diagonal Rail |
In the second minecart scene, in the middle of the lowest part. Paperize is used twice here: first to take out the scrap and turn it the right way, second to put it back. | Required | 
|
 Mine-Cart Exit |
Same scene, at the very end. | Required | 
|
World 5[edit]
There are a total of 26 Paperizations to be performed in the entirety of World 5:
- Shy Guy Jungle has 11 Paperizations - 3 Scrap, 8 Sticker
- Jungle Rapids has 1 Sticker Paperization
- Long Fall Falls has 2 Paperizations - 1 Scrap, 1 Sticker
- Chomp Ruins has 4 Paperizations - 3 Scrap, 1 Sticker
- Rugged Road has 7 Paperizations - 4 Scrap, 2 Sticker, 1 Luigi Sighting
- Rumble Volcano has 1 Sticker Paperization
World 5-1: Shy Guy Jungle[edit]
There are a total of 11 Paperizations to be performed in World 5-1: Shy Guy Jungle:
- 3 Scrap Paperizations
- 8 Sticker Paperizations
| Scrap/Sticker needed | Description | Necessity | Image |
|---|---|---|---|
| Shy Guy Jungle | 11 Paperizations (3 Scraps, 8 Stickers) | |||
| Random 1x1 Sticker | In the first scene, above the circle of flowers that can be bloomed by hammering, found in the west upper part. | Optional | 
|
| Random 1x1 Sticker | Same scene, above the flower in the upper east part. | Optional | 
|
  Upright Vacuum or Vacuum or Goat |
In the fourth scene (first left scene), in the middle. | Optional | 
|
| 4 Random 1x1 Stickers | In the fifth scene (second left scene), above the stumps. | Optional | 
|
Secret Door |
In the seventh scene (second right scene), in the northeast. | Optional | 
|
 3 Bridge Parts |
In the third scene, north of the stairs. | Required | 
|
World 5-2: Jungle Rapids[edit]
There is only 1 Sticker Paperization to be performed in World 5-2: Jungle Rapids.
| Scrap/Sticker needed | Description | Necessity | Image |
|---|---|---|---|
| Jungle Rapids | 1 Sticker Paperization | |||
Secret Door |
In the first scene, in the southeast. | Optional | 
|
World 5-3: Long Fall Falls[edit]
There are a total of 2 Paperizations to be performed in World 5-3: Long Fall Falls:
- 1 Scrap Paperization
- 1 Sticker Paperization
| Scrap/Sticker needed | Description | Necessity | Image |
|---|---|---|---|
| Long Fall Falls | 2 Paperizations (1 Scrap, 1 Sticker) | |||
Secret Door |
In the second scene, after choosing to go forward at the crossing, reaching the dry land and then going to the west end. Outline for the Secret Door is then found on the wall. | Optional | 
|
 Jungle Floodgate |
Same scene, after choosing to go left at the crossing. Paperize is used twice here: first to take out the Jungle Floodgate scrap and turn it the right way, second to put it back. | Required | 
|
World 5-4: Chomp Ruins[edit]
There are a total of 4 Paperizations to be performed in World 5-4: Chomp Ruins:
- 3 Scrap Paperizations
- 1 Sticker Paperization
| Scrap/Sticker needed | Description | Necessity | Image |
|---|---|---|---|
| Chomp Ruins | 4 Paperizations (3 Scraps, 1 Sticker) | |||
 Ruin Slope |
In the first inside scene. Paperize is used twice here: first to take Ruin Slope scrap and turn it the right way, second to put it back. | Required | 
|
Secret Door |
In the right upper part of second inside scene. | Optional | 
|
 Bomp |
In the fourth inside scene, right of the Bomp. | Required | 
|
 Ruin Floor |
In the third inside scene, left of the entrance. | Required | 
|
World 5-5: Rugged Road[edit]
There are a total of 7 Paperizations to be performed in World 5-5: Rugged Road:
- 4 Scrap Paperizations
- 2 Sticker Paperizations
- 1 Luigi Sighting
| Scrap/Sticker needed | Description | Necessity | Image |
|---|---|---|---|
| Rugged Road | 7 Paperizations (4 Scraps, 2 Stickers, 1 Luigi sighting) | |||
| Any ice-based Thing Sticker | In the first scene, there is a rectangle in the volcano in the background. By putting any ice-based Thing sticker there, all lava is frozen solid, creating a path forward. | Required | 
|
Secret Door |
Same scene after lava is frozen solid, on the wall after the second frozen gush of lava. | Optional | 
|
 ↓  Mountain Hole→Mountain Boulder |
In the second scene, after the second lava river. Paperize is used twice here: first to take out Mountain Hole scrap, later to put Mountain Boulder in its place. | Required | 
|
↓ Mountain Boulder→Mountain Hole |
In the third scene, near the entrance of the lower part. Paperize is used twice here: first to take out Mountain Boulder scrap, then to put Mountain Hole in its place. | Required | 
|
Luigi |
In the Bubbling Waters Natural Hot Springs (area reached by jumping into the second hole in the fourth scene), found in the water. | Optional | 
|
 Cracked Boulder |
In the fifth scene, in the middle of the lower part. | Required | 
|
 Huge Mountain Slab |
After putting in the previous scrap and then hammering the crack. Paperize is used twice here: first to flip the Huge Mountain Slab scrap, then to put it back. Doing so makes the Comet Piece collectable. | Required | 
|
World 5-6: Rumble Volcano[edit]
There is only 1 Sticker Paperization to be performed in World 5-6: Rumble Volcano.
| Scrap/Sticker needed | Description | Necessity | Image |
|---|---|---|---|
| Rumble Volcano | 1 Sticker Paperization | |||
Secret Door |
In the scene left of the highest point the rising platform can take. Available only after defeating Petey Piranha and returning here. | Optional | 
|
World 6[edit]
There are a total of 3 Paperizations to be performed in the entirety of World 6:
- Gate Cliff has 1 Scrap Paperization
- Bowser Jr.'s Flotilla has 2 Paperizations - 1 Scrap, 1 Sticker
World 6-1: Gate Cliff[edit]
There is only 1 Scrap Paperization to be performed in World 6-1: Gate Cliff.
| Scrap/Sticker needed | Description | Necessity | Image |
|---|---|---|---|
| Gate Cliff | 1 Scrap Paperization | |||
 Hidden Bowser Castle |
After collecting five Royal Stickers and activating them in the album. Paperize is used twice here: first to take out the Hidden Bowser Castle scrap and flip it right way, second to put it back. | Required | 
|
World 6-2: Bowser Jr.'s Flotilla[edit]
There are a total of 2 Paperizations to be performed in World 6-2: Bowser Jr.'s Flotilla:
- 1 Scrap Paperization
- 1 Sticker Paperization
| Scrap/Sticker needed | Description | Necessity | Image |
|---|---|---|---|
| Bowser Jr.'s Flotilla | 2 Paperizations (1 Scrap, 1 Sticker) | |||
Secret Door |
In the first inside scene, in the northwest. | Optional | 
|
 Banzai Bill Cannon |
In the third inside scene, in the left part. Paperize is used twice here: first to take out the Banzai Bill Cannon scrap and flip it around, second to put it back. | Required | 
|
Statistics[edit]
This chart shows the number of spots where Mario can paperize for each location and the type of paperization, with the total amount at the bottom. Locations are listed in the order the player can use Paperize in them (with an exception of Surfshine Harbor, which can be visited any time).
| Location | Scraps | Stickers | Luigi sightings | Total number of paperization spots |
|---|---|---|---|---|
| Warm Fuzzy Plains | 1 | 3 | 0 | 4 |
| Decalburg | 1 | 0 | 0 | 1 |
| Bouquet Gardens | 0 | 6 | 0 | 6 |
| Water's Edge Way | 1 | 2 | 0 | 3 |
| Hither Thither Hill | 1 | 3 | 0 | 4 |
| Whammino Mountain | 1 | 2 | 0 | 3 |
| Goomba Fortress | 1 | 4 | 1 | 6 |
| Drybake Desert | 0 | 12 | 0 | 12 |
| Yoshi Sphinx | 0 | 3 | 0 | 3 |
| Sandshifter Ruins | 0 | 2 | 0 | 2 |
| Surfshine Harbor | 2 | 2 | 0 | 4 |
| Damp Oasis | 0 | 3 | 0 | 3 |
| Drybake Stadium | 5 | 9 | 1 | 15 |
| Leaflitter Path | 0 | 3 | 0 | 3 |
| The Bafflewood | 0 | 6 | 0 | 6 |
| Strike Lake | 0 | 3 | 0 | 3 |
| Loop Loop River | 0 | 2 | 0 | 2 |
| Outlook Point | 0 | 1 | 0 | 1 |
| Wiggler's Tree House | 3 | 1 | 0 | 4 |
| Rustle Burrow | 1 | 2 | 0 | 3 |
| Tree Branch Trail | 0 | 2 | 0 | 2 |
| Gauntlet Pond | 0 | 3 | 0 | 3 |
| Stump Glade | 0 | 1 | 0 | 1 |
| Holey Thicket | 1 | 1 | 0 | 2 |
| Whitecap Beach | 0 | 2 | 1 | 3 |
| Snow Rise | 1 | 4 | 0 | 5 |
| Ice Flow | 0 | 5 | 0 | 5 |
| The Enigmansion | 7 | 2 | 0 | 9 |
| Whiteout Valley | 1 | 1 | 1 | 3 |
| Bowser's Snow Fort | 3 | 2 | 0 | 5 |
| Shy Guy Jungle | 3 | 8 | 0 | 11 |
| Jungle Rapids | 0 | 1 | 0 | 1 |
| Long Fall Falls | 1 | 1 | 0 | 2 |
| Chomp Ruins | 3 | 1 | 0 | 4 |
| Rugged Road | 4 | 2 | 1 | 7 |
| Rumble Volcano | 0 | 1 | 0 | 1 |
| Gate Cliff | 1 | 0 | 0 | 1 |
| Bowser Jr.'s Flotilla | 1 | 1 | 0 | 2 |
| Total | 43 | 107 | 5 | 155 |
Profiles[edit]
Paper Mario: Sticker Star[edit]
- Website description:
- English (United States):
The world is riddled with gaping holes and secret spaces that need to be fixed with a well-placed sticker. In order to make this happen, sometimes you’ll need to stop time and turn the whole world into a flat sheet of paper—this is called 'Paperizing'. It allows you to patch-up these problems with a well-placed sticker and continue on your adventure.
- English (United States):
Gallery[edit]
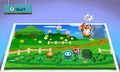
Mario using Paperization in Bouquet Gardens

Names in other languages[edit]
| Language | Name | Meaning | Notes |
|---|---|---|---|
| Japanese | ペパライズ[?] Peparaizu |
Paperize | |
| Chinese | 纸片变变变 (Simplified) 紙片變變變 (Traditional)[?] Zhǐpiàn Biànbiànbiàn |
Paper Hocus-Pocus | |
| French (Canada) | Aplatir[?] | Flatten | |
| French (Europe) | Papiériser Papiérisation[?] |
Paperize Paperization |
|
| German | Papierisieren[?] | Paperize | |
| Italian | Cartificazione[?] | Paperization | |
| Spanish | Papelizar[?] | Paperize |
See also[edit]
References[edit]
- ^ "Time came for the de-burrito procedure, and before I could say 'boy howdy' I was smooshed into some kinda netherworld under that fountain"- Sticker Museum curator, in Decalburg – November 11, 2012. Paper Mario: Sticker Star. Nintendo of America.
- ^ "As for how to stick 'em, I don't suspect I need to tell such an enthusiast as yourself how to perform THAT operation."- Sticker Museum curator, in Decalburg – November 11, 2012. Paper Mario: Sticker Star. Nintendo of America.