Haunted Hall: Difference between revisions
mNo edit summary |
m (Text replacement - "<br />" to "<br>") |
||
| (38 intermediate revisions by 20 users not shown) | |||
| Line 1: | Line 1: | ||
{{ | {{level infobox | ||
|title=Haunted Hall | |title=Haunted Hall | ||
|image=[[File:HauntedHallSNES1.png | |image=[[File:HauntedHallSNES1.png]] | ||
|code=5 - 2 | |code=5 - 2 | ||
|world=[[Gloomy Gulch]] | |||
|game=''[[Donkey Kong Country 2: Diddy's Kong Quest]] | |game=''[[Donkey Kong Country 2: Diddy's Kong Quest]] | ||
| | |track=Haunted Chase | ||
|before=[[Ghostly Grove (Donkey Kong Country 2: Diddy's Kong Quest)|<<]] | |before=[[Ghostly Grove (Donkey Kong Country 2: Diddy's Kong Quest)|<<]] | ||
|after=[[Gusty Glade (Donkey Kong Country 2: Diddy's Kong Quest)|>>]] | |after=[[Gusty Glade (Donkey Kong Country 2: Diddy's Kong Quest)|>>]] | ||
}} | }} | ||
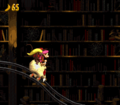
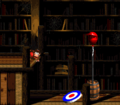
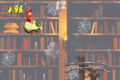
'''Haunted Hall''' is the twenty-fourth level of ''[[Donkey Kong Country 2: Diddy's Kong Quest]]'' | '''Haunted Hall''' is the twenty-fourth level of ''[[Donkey Kong Country 2: Diddy's Kong Quest]]'' and the second level of [[Gloomy Gulch]]. It takes place in an old, abandoned library, and Haunted Hall is the last level where [[Diddy Kong|Diddy]] and [[Dixie Kong|Dixie]] ride a [[Roller Coaster]], which they do mostly throughout. There are four [[Kackle]]s in the stage, each wearing a uniquely colored bandana, and they are encountered in order from blue, green, yellow and dark red. Each Kackle has their own portion contained between two gates, so as soon as the [[Kong]]s go through an entry gate, a countdown timer appears on the screen, and a Kackle begins to chase them. The Kongs must prevent it from running out, because if it does, the Kackle briefly materializes and injures one of the Kongs. Running into [[Plus and Minus Barrels|Plus Barrel]]s increases the timer, helping to negate the countdown. At the same time, however, Diddy and Dixie must avoid hitting the antonymous Minus Barrels. In the later parts of Haunted Hall, some of the Plus Barrels are harder to reach, and in some cases, both a Plus and Minus Barrel are grouped together. | ||
Haunted Hall is one of two levels (the other being [[Castle Crush]]) without an identically-named level in ''[[Donkey Kong Land 2]]'', which has [[Krazy Koaster]] instead of Haunted Hall. However, the Gloomy Gulch map was not altered to reflect this, making it appear as if Krazy Koaster takes place in the same area as Haunted Hall. | |||
The | ==Layout== | ||
[[File:HauntedHall4GBA.png|thumb|left|Haunted Hall in the Game Boy Advance version]] | |||
The level begins on a large, wooden platform with a gap ahead of it. Two hooks are above the gap to aid the heroes in crossing. Inside of this gap, the Kongs can find a [[Dixie Barrel]] that is able to fire them to a [[golden feather]], and then back onto the starting platform. A track is also on the other side of the pit with a [[Roller Coaster]] on it. As soon as the cart is entered, it begins to move and take the Kongs along a bumpy path to a small ramp with the first [[DK Barrel]] near it. There is a gate near here. When it is entered, a Kackle with a blue bandanna starts to chase the primates. As it chases them, the heroes ride up a hill towards a Plus Barrel, followed by another on the bumpy track. A gap is right after this with the letter K above it. As the two friends travel farther ahead, they ride up a hill with another Plus Barrel on it. The track soon flattens out. As the [[Roller Coaster]] moves along it, it approaches two Minus Barrels with only a small space between them. A gate is after the pair, and when it is passed through, the Kackle ceases to chase them. | |||
A bumpy path is after here. A hill is at the end of it that pulls the heroes downwards. As they ride down the hill, they can notice a separate track hidden nearby that leads to two [[Bonus Level]]s. If the miss this track, they ride across a track with two Zingers above it. Shortly after passing the two foes, they ride through the second gate, causing the second Kackle to chase them. Upon entering the gate, they ride up and down a large hill. A Plus Barrel is on the way down it, while another is at the bottom of the hill. Three more Plus Barrels are along the bumpy trail ahead, but each of them only replenish a few seconds. After the third barrel, the Kongs ride up a hill and approach a gap that they must pass. They ride down a hill after this, traveling towards another Plus Barrel. There is a small gap ahead, but a lower track is in it. A [[Banana Coin]] sits on it. Once this small section is passed, the primates come up to a Plus Barrel, followed by another just before a gap with the letter O in it. A Plus Barrel is also at the edge of the other side of the gap. A gate is just ahead of here, and the Kackle stops chasing them when it is passed. The level's [[Star Barrel]] floats at the top of a hill found after here. | |||
After the Kongs ride down this hill and then wind up another, they come across a gate. Once it is passed and the heroes ride down to the bottom of a hill, a Kackle pursues them again. It chases them into an area full of Minus Barrels, which only decrease the thirty seconds that they begin the area with. They ride towards a pair of Minus Barrels at the start of this chase. A small gap is between the objects. Three more Minus Barrels are along a rather flat part of the track found just after a larger gap. An even larger abyss is after these barrels, but a piece of a track is in it with a Banana Coin on it, so the heroes can cross. A Minus Barrel hangs off the edge of the track right after these gaps. Soon, the primates ride down a small hill leading towards a Minus Barrel with the letter N next to it. An abyss follows here with one more Minus Barrel found in the air at the other side of it. Once they pass this, they travel towards another gate. The Kackle stops chasing them when it is passed. A bumpy track is ahead of here. There are two more tracks found separate from each other nearby. The bottom route leads to a Bonus Level, while the top one leads over a tunnel towards some Zingers. Once they pass this area, they wind over a small hill and pass through another gate. As a result, a Kackle chases them into an area with a mixture of Plus and Minus Barrels in it. A Plus and a Minus Barrel can be found just ahead of here, and they are placed right next to each other. | |||
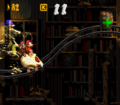
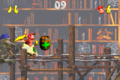
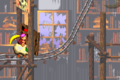
[[File:Haunted Hall DKC2 Kackle purple.png|thumb|The Kongs flee from the last, dark red-bandanna Kackle.]] | |||
Two small gaps are after the barrels, and a track is between the two gaps with a Plus Barrel on it. Another Plus Barrel and a Minus Barrel float in the air after the gap. As the heroes ride up and down the two hills that follow, they come towards a Minus Barrel. Another one of these unhelpful barrels appears after a gap at the top of the hills. The letter G stands next to it. The Kongs ride past four more Plus and Minus Barrels on a bumpy trail just before reaching the next gap. A Plus and Minus Barrel found close together are just after it, located just before another gap. A hill leading downwards to another gap is on the other side of this abyss. It is followed by another gap with a straight, bumpy track after it. Plus and Minus Barrels are placed along this piece of the track. Two more gaps are ahead, and a Minus Barrel waits after each one. Once the heroes pass this final Minus Barrel, they pass through a gate, stopping the dangerous Kackle. They then head over a flat pathway leading into a tunnel to the last area. | |||
The Kongs enter the room on a raised platform, and can jump on the [[End of Level Target]] located below and next to the raised platform. Its prizes include a [[Banana Bunch]], Banana Coin, or a [[Red Balloon]]. | |||
{{br|left}} | |||
== | ==Profiles== | ||
*<u>'''Player's Guide'''</u> (page 88): ''You'll go back to the track for this cursed roller coaster stage. Fight the impulse to jump at every barrel you see. If you break too many Minus Barrels, Kackle will subtract one of you from the game!'' | |||
* | *<u>'''German Player's Guide'''</u> (page 76): ''Ein rollender Totenschädel, einige steile Abfahrten, viele unterbrochene Gleise und ferting ist das Rezept für eine Alptraum-Achterbahnfahrt de Extraklasse. Dixie sollte bei dem berauschenden Tempo nicht die Nerven verlieren und ihren Haarzopf gut zubinden.'' (''A rolling skull, some steep drops, lots of broken tracks and ferting is the recipe for a nightmare roller coaster ride of the highest order. Dixie shouldn't lose her nerve at the exhilarating pace and tie her hair tightly.'') | ||
* | |||
== | ==Enemies== | ||
The following enemies appear in the following quantities: | |||
<gallery> | |||
Kackle DKC2 blue.png|[[Kackle]] (4) | |||
Zinger DKC2 yellow.png|[[Zinger]] (yellow) (5) | |||
</gallery> | |||
== | ==Items and objects== | ||
The following items and objects appear in the following quantities: | |||
<gallery> | |||
Banana DKC SNES.png|[[Banana]] (113) | |||
Banana Coin.png|[[Banana Coin]] (2) | |||
DK Barrel.png|[[DK Barrel]] (2) | |||
</gallery> | |||
=== | ===KONG Letters=== | ||
* | *'''K:''' Above the first gap in the stage. | ||
*'''O:''' Between two Plus Barrels after a Banana Coin, just before the Star Barrel. | |||
*'''N:''' Just after the Star Barrel, the Kongs enter the following gate where they encounter the third Kackle. After passing a Banana Coin, the Kongs can find the "N" right next to a Minus Barrel. | |||
*'''G:''' Like the letter "N", the Kongs can also find the letter "G" to the left of a Minus Barrel. It is found after driving across first long rail of the final Kackle pursuit. | |||
===Key items=== | |||
[[File:Haunted Hall Feather DKC2 GBA.png|thumb|The location of the golden feather in the Game Boy Advance version]] | |||
*'''[[DK Coin|Cranky's Video Game Hero Coin]]:''' In the room with the [[End of Level Target]], the Kongs must walk into a tunnel on the left to obtain the Video Game Hero Coin, after which the Auto-Fire Barrel blasts them back out. | |||
*'''[[Golden feather]] (Game Boy Advance version only):''' At the start of the level, the Kongs must fall into a pit right before the Roller Coaster. A [[Diddy & Dixie Barrels|Dixie Barrel]] is located below, alluded by a lone [[banana]], and it blasts Dixie to the golden feather, then an Auto-Fire Barrel blasts her back on the main stage. It is also possible for Diddy to collect it from doing precise [[Cartwheel Attack]] to it, then landing in the Auto-Fire Barrel. | |||
*'''[[Photograph]] (Game Boy Advance version only):''' It is in the same tunnel that is left of the End of Level Target. By collecting it, the Kongs obtain a photo of Kackle on the [[Scrapbook (Donkey Kong Country series)|Scrapbook]]'s fifth page. | |||
{{br}} | |||
==Bonus Levels== | |||
[[File:Haunted Hall Bonus Area 2.png|thumb|The second Bonus Level]] | |||
Haunted Hall has three Bonus Levels, listed by type: | |||
*'''''Find the Token!''''': After escaping from the first Kackle, the Kongs must jump to a nearby rail. There are two tunnels, each leading to a different Bonus Area. The Kongs must ignore entering the lower tunnel, as driving into the upper one leads into the first Bonus Area. The Bonus Area's objective is to collect its [[Kremkoin]] within fifteen seconds. The challenge begins with the Kongs riding on a straight track. They soon drive up a steep hill with a Plus Barrel at the top. Upon touching it, the Roller Coaster drives backward. The Kongs must carefully direct to jump from the raised rail segments until reaching the [[Kremkoin]]. | |||
*'''''Collect the Stars!''''': Regardless of winning or losing at the first Bonus Area, the Roller Coaster drives backward out its entrance. It then suddenly dashes forward and enters the lower tunnel, leading into the second Bonus Level. Alternatively, the Kongs can drive into the lower tunnel first to directly start the second Bonus Area, although this does not allow them to access the first one directly afterward. The objective is for the Kongs to collect 120 stars within 17 seconds as the Roller Coaster moves forward. Once the Kongs have obtained all of them, a Kremkoin spawns just outside the stage's exit. The Kongs exit out from the other side of the lower tunnel. | |||
*'''''Find the Token!''''': Just after they escape from the third Kackle, the Kongs reach a fork. They must jump the Roller Coaster on the lower rail for it to drive in the tunnel leading into the third and final Bonus Area. The Kongs have ten seconds to obtain the end Kremkoin. The area is divided into rail sections, so the Kongs are prone to falling down a gap. They must quickly jump the Roller Coaster between each rail segment until reaching the end Kremkoin. | |||
{{br}} | |||
==Gallery== | ==Gallery== | ||
<gallery> | <gallery> | ||
KackleScene.jpg|Artwork of Haunted Hall. | KackleScene.jpg|Artwork of Haunted Hall. | ||
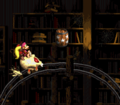
Haunted Hall DKC2 shot.png|The Kongs ride down a small hill. | |||
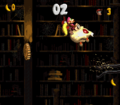
HauntedHallSNES3.png|The first Kackle of the level chasing the Kongs. | |||
HauntedHall2GBA.png|The Kongs ride under a Zinger in the Game Boy Advance version | Haunted Hall Bonus Area 1.png|The first Bonus Level | ||
HauntedHall3GBA.png|Diddy and Dixie passing through one of the gates. | Haunted Hall DKC2 Star Barrel.png|The Star Barrel | ||
Haunted Hall DKC2 end.png|The End of Level Target | |||
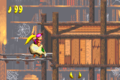
Kackle in Haunted Hall DKC2 GBA.png|A Kackle chases after the Kongs in the Game Boy Advance version. | |||
HauntedHall1GBA.png|The Kongs drive into the entrance to the second Bonus Level in the Game Boy Advance version. | |||
HauntedHall2GBA.png|The Kongs ride under a Zinger in the Game Boy Advance version. | |||
HauntedHall3GBA.png|Diddy and Dixie passing through one of the gates in the Game Boy Advance version. | |||
Haunted Hall Bonus Area 3 GBA.png|The third Bonus Level in the Game Boy Advance version | |||
</gallery> | </gallery> | ||
==Names in other languages== | ==Names in other languages== | ||
{{foreign names | {{foreign names | ||
|Jap=ゴーストコースター | |Jap=ゴーストコースター | ||
|JapR=Gōsuto | |JapR=Gōsuto Kōsutā | ||
|JapM=Ghost Coaster | |JapM=Ghost Coaster | ||
|Spa=Sala Encantada | |Spa=Sala Encantada | ||
|SpaM=Enchanted Hall | |SpaM=Enchanted Hall | ||
| | |Fre=Antre Hanté | ||
| | |FreM=Haunted Den | ||
|Ger=Spuk-Halle (SNES)<br | |Ger=Spuk-Halle (SNES)<br>Spukhalle (GBA) | ||
|GerM=Spook Hall | |GerM=Spook Hall | ||
|Ita=Casa Stregata | |||
|ItaM=Haunted House | |||
}} | }} | ||
{{DKC2}} | {{DKC2}} | ||
[[Category:Crocodile Isle]] | [[Category:Crocodile Isle]] | ||
[[Category:Haunted | [[Category:Haunted areas]] | ||
[[Category:Railways]] | [[Category:Railways]] | ||
[[Category:Donkey Kong Country 2: Diddy's Kong Quest levels]] | |||
[[Category:Donkey Kong Country 2: Diddy's Kong Quest | |||
Latest revision as of 12:20, April 1, 2024
| Level | |
|---|---|
| Haunted Hall | |

| |
| Level code | 5 - 2 |
| World | Gloomy Gulch |
| Game | Donkey Kong Country 2: Diddy's Kong Quest |
| Music track | Haunted Chase |
| << Directory of levels >> | |
Haunted Hall is the twenty-fourth level of Donkey Kong Country 2: Diddy's Kong Quest and the second level of Gloomy Gulch. It takes place in an old, abandoned library, and Haunted Hall is the last level where Diddy and Dixie ride a Roller Coaster, which they do mostly throughout. There are four Kackles in the stage, each wearing a uniquely colored bandana, and they are encountered in order from blue, green, yellow and dark red. Each Kackle has their own portion contained between two gates, so as soon as the Kongs go through an entry gate, a countdown timer appears on the screen, and a Kackle begins to chase them. The Kongs must prevent it from running out, because if it does, the Kackle briefly materializes and injures one of the Kongs. Running into Plus Barrels increases the timer, helping to negate the countdown. At the same time, however, Diddy and Dixie must avoid hitting the antonymous Minus Barrels. In the later parts of Haunted Hall, some of the Plus Barrels are harder to reach, and in some cases, both a Plus and Minus Barrel are grouped together.
Haunted Hall is one of two levels (the other being Castle Crush) without an identically-named level in Donkey Kong Land 2, which has Krazy Koaster instead of Haunted Hall. However, the Gloomy Gulch map was not altered to reflect this, making it appear as if Krazy Koaster takes place in the same area as Haunted Hall.
Layout[edit]

The level begins on a large, wooden platform with a gap ahead of it. Two hooks are above the gap to aid the heroes in crossing. Inside of this gap, the Kongs can find a Dixie Barrel that is able to fire them to a golden feather, and then back onto the starting platform. A track is also on the other side of the pit with a Roller Coaster on it. As soon as the cart is entered, it begins to move and take the Kongs along a bumpy path to a small ramp with the first DK Barrel near it. There is a gate near here. When it is entered, a Kackle with a blue bandanna starts to chase the primates. As it chases them, the heroes ride up a hill towards a Plus Barrel, followed by another on the bumpy track. A gap is right after this with the letter K above it. As the two friends travel farther ahead, they ride up a hill with another Plus Barrel on it. The track soon flattens out. As the Roller Coaster moves along it, it approaches two Minus Barrels with only a small space between them. A gate is after the pair, and when it is passed through, the Kackle ceases to chase them.
A bumpy path is after here. A hill is at the end of it that pulls the heroes downwards. As they ride down the hill, they can notice a separate track hidden nearby that leads to two Bonus Levels. If the miss this track, they ride across a track with two Zingers above it. Shortly after passing the two foes, they ride through the second gate, causing the second Kackle to chase them. Upon entering the gate, they ride up and down a large hill. A Plus Barrel is on the way down it, while another is at the bottom of the hill. Three more Plus Barrels are along the bumpy trail ahead, but each of them only replenish a few seconds. After the third barrel, the Kongs ride up a hill and approach a gap that they must pass. They ride down a hill after this, traveling towards another Plus Barrel. There is a small gap ahead, but a lower track is in it. A Banana Coin sits on it. Once this small section is passed, the primates come up to a Plus Barrel, followed by another just before a gap with the letter O in it. A Plus Barrel is also at the edge of the other side of the gap. A gate is just ahead of here, and the Kackle stops chasing them when it is passed. The level's Star Barrel floats at the top of a hill found after here.
After the Kongs ride down this hill and then wind up another, they come across a gate. Once it is passed and the heroes ride down to the bottom of a hill, a Kackle pursues them again. It chases them into an area full of Minus Barrels, which only decrease the thirty seconds that they begin the area with. They ride towards a pair of Minus Barrels at the start of this chase. A small gap is between the objects. Three more Minus Barrels are along a rather flat part of the track found just after a larger gap. An even larger abyss is after these barrels, but a piece of a track is in it with a Banana Coin on it, so the heroes can cross. A Minus Barrel hangs off the edge of the track right after these gaps. Soon, the primates ride down a small hill leading towards a Minus Barrel with the letter N next to it. An abyss follows here with one more Minus Barrel found in the air at the other side of it. Once they pass this, they travel towards another gate. The Kackle stops chasing them when it is passed. A bumpy track is ahead of here. There are two more tracks found separate from each other nearby. The bottom route leads to a Bonus Level, while the top one leads over a tunnel towards some Zingers. Once they pass this area, they wind over a small hill and pass through another gate. As a result, a Kackle chases them into an area with a mixture of Plus and Minus Barrels in it. A Plus and a Minus Barrel can be found just ahead of here, and they are placed right next to each other.

Two small gaps are after the barrels, and a track is between the two gaps with a Plus Barrel on it. Another Plus Barrel and a Minus Barrel float in the air after the gap. As the heroes ride up and down the two hills that follow, they come towards a Minus Barrel. Another one of these unhelpful barrels appears after a gap at the top of the hills. The letter G stands next to it. The Kongs ride past four more Plus and Minus Barrels on a bumpy trail just before reaching the next gap. A Plus and Minus Barrel found close together are just after it, located just before another gap. A hill leading downwards to another gap is on the other side of this abyss. It is followed by another gap with a straight, bumpy track after it. Plus and Minus Barrels are placed along this piece of the track. Two more gaps are ahead, and a Minus Barrel waits after each one. Once the heroes pass this final Minus Barrel, they pass through a gate, stopping the dangerous Kackle. They then head over a flat pathway leading into a tunnel to the last area.
The Kongs enter the room on a raised platform, and can jump on the End of Level Target located below and next to the raised platform. Its prizes include a Banana Bunch, Banana Coin, or a Red Balloon.
Profiles[edit]
- Player's Guide (page 88): You'll go back to the track for this cursed roller coaster stage. Fight the impulse to jump at every barrel you see. If you break too many Minus Barrels, Kackle will subtract one of you from the game!
- German Player's Guide (page 76): Ein rollender Totenschädel, einige steile Abfahrten, viele unterbrochene Gleise und ferting ist das Rezept für eine Alptraum-Achterbahnfahrt de Extraklasse. Dixie sollte bei dem berauschenden Tempo nicht die Nerven verlieren und ihren Haarzopf gut zubinden. (A rolling skull, some steep drops, lots of broken tracks and ferting is the recipe for a nightmare roller coaster ride of the highest order. Dixie shouldn't lose her nerve at the exhilarating pace and tie her hair tightly.)
Enemies[edit]
The following enemies appear in the following quantities:


Items and objects[edit]
The following items and objects appear in the following quantities:

Banana (113)

Banana Coin (2)

DK Barrel (2)


KONG Letters[edit]
- K: Above the first gap in the stage.
- O: Between two Plus Barrels after a Banana Coin, just before the Star Barrel.
- N: Just after the Star Barrel, the Kongs enter the following gate where they encounter the third Kackle. After passing a Banana Coin, the Kongs can find the "N" right next to a Minus Barrel.
- G: Like the letter "N", the Kongs can also find the letter "G" to the left of a Minus Barrel. It is found after driving across first long rail of the final Kackle pursuit.
Key items[edit]

- Cranky's Video Game Hero Coin: In the room with the End of Level Target, the Kongs must walk into a tunnel on the left to obtain the Video Game Hero Coin, after which the Auto-Fire Barrel blasts them back out.
- Golden feather (Game Boy Advance version only): At the start of the level, the Kongs must fall into a pit right before the Roller Coaster. A Dixie Barrel is located below, alluded by a lone banana, and it blasts Dixie to the golden feather, then an Auto-Fire Barrel blasts her back on the main stage. It is also possible for Diddy to collect it from doing precise Cartwheel Attack to it, then landing in the Auto-Fire Barrel.
- Photograph (Game Boy Advance version only): It is in the same tunnel that is left of the End of Level Target. By collecting it, the Kongs obtain a photo of Kackle on the Scrapbook's fifth page.
Bonus Levels[edit]

Haunted Hall has three Bonus Levels, listed by type:
- Find the Token!: After escaping from the first Kackle, the Kongs must jump to a nearby rail. There are two tunnels, each leading to a different Bonus Area. The Kongs must ignore entering the lower tunnel, as driving into the upper one leads into the first Bonus Area. The Bonus Area's objective is to collect its Kremkoin within fifteen seconds. The challenge begins with the Kongs riding on a straight track. They soon drive up a steep hill with a Plus Barrel at the top. Upon touching it, the Roller Coaster drives backward. The Kongs must carefully direct to jump from the raised rail segments until reaching the Kremkoin.
- Collect the Stars!: Regardless of winning or losing at the first Bonus Area, the Roller Coaster drives backward out its entrance. It then suddenly dashes forward and enters the lower tunnel, leading into the second Bonus Level. Alternatively, the Kongs can drive into the lower tunnel first to directly start the second Bonus Area, although this does not allow them to access the first one directly afterward. The objective is for the Kongs to collect 120 stars within 17 seconds as the Roller Coaster moves forward. Once the Kongs have obtained all of them, a Kremkoin spawns just outside the stage's exit. The Kongs exit out from the other side of the lower tunnel.
- Find the Token!: Just after they escape from the third Kackle, the Kongs reach a fork. They must jump the Roller Coaster on the lower rail for it to drive in the tunnel leading into the third and final Bonus Area. The Kongs have ten seconds to obtain the end Kremkoin. The area is divided into rail sections, so the Kongs are prone to falling down a gap. They must quickly jump the Roller Coaster between each rail segment until reaching the end Kremkoin.
Gallery[edit]

Artwork of Haunted Hall.
The Kongs ride down a small hill.
The first Kackle of the level chasing the Kongs.
The first Bonus Level
The Star Barrel
The End of Level Target
A Kackle chases after the Kongs in the Game Boy Advance version.
The Kongs drive into the entrance to the second Bonus Level in the Game Boy Advance version.
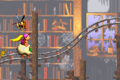
The Kongs ride under a Zinger in the Game Boy Advance version.
Diddy and Dixie passing through one of the gates in the Game Boy Advance version.
The third Bonus Level in the Game Boy Advance version


Names in other languages[edit]
| Language | Name | Meaning |
|---|---|---|
| Japanese | ゴーストコースター Gōsuto Kōsutā |
Ghost Coaster |
| French | Antre Hanté |
Haunted Den |
| German | Spuk-Halle (SNES) Spukhalle (GBA) |
Spook Hall |
| Italian | Casa Stregata |
Haunted House |
| Spanish | Sala Encantada |
Enchanted Hall |