Gallery:Mario Kart Wii: Difference between revisions
No edit summary |
No edit summary |
||
| Line 1,708: | Line 1,708: | ||
====Nitro Courses==== | ====Nitro Courses==== | ||
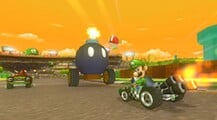
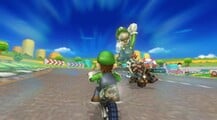
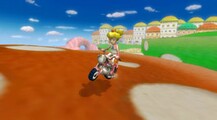
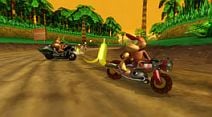
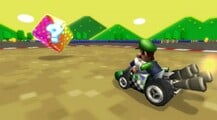
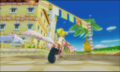
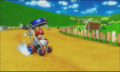
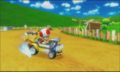
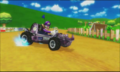
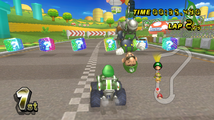
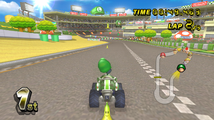
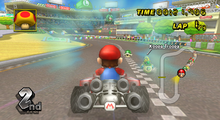
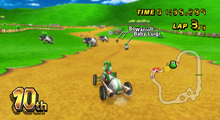
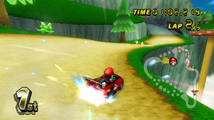
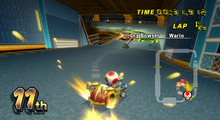
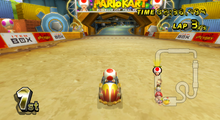
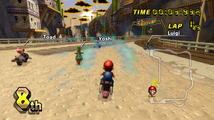
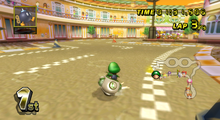
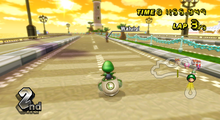
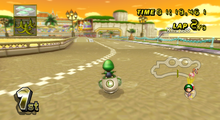
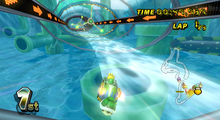
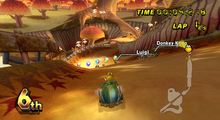
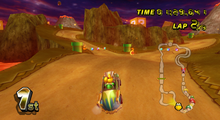
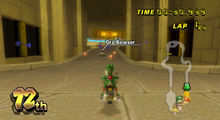
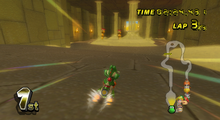
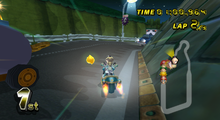
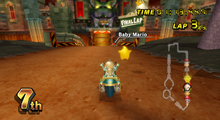
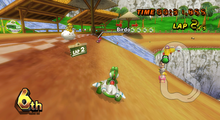
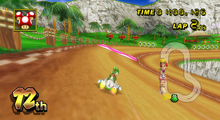
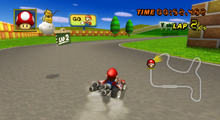
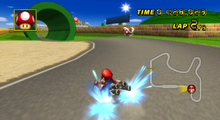
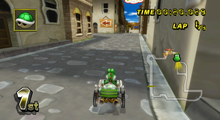
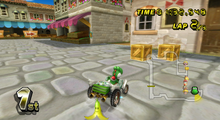
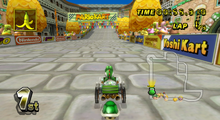
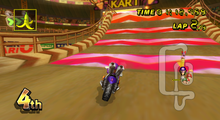
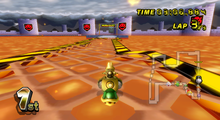
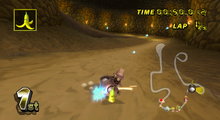
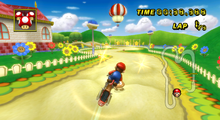
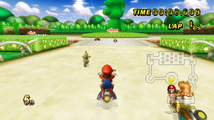
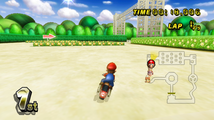
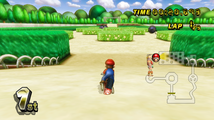
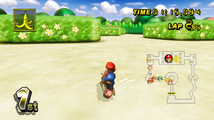
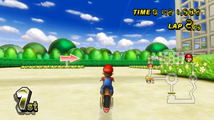
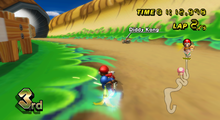
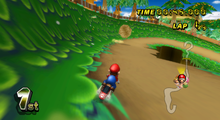
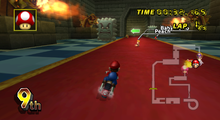
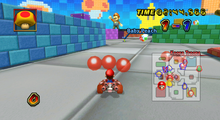
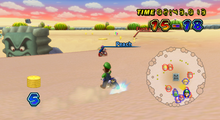
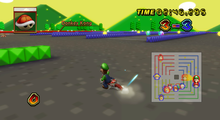
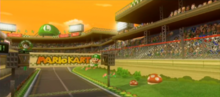
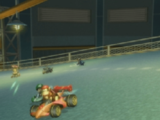
===== | =====Luigi Circuit===== | ||
<gallery widths="220"> | |||
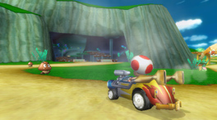
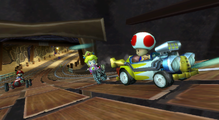
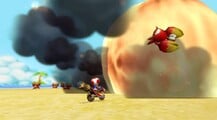
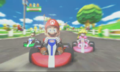
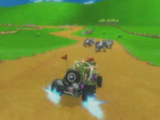
MKW Luigi Circuit Screenshot.png|[[Baby Luigi]] on the first stretch of the course | |||
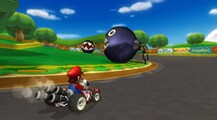
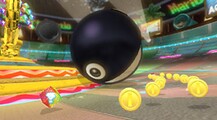
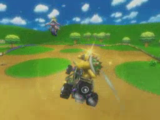
MKW POW Block Hit.png | |||
LuigiCircuit2.png|On the dirt area near the grandstand with the [[Luigi Cap]] | |||
File:MKW Mega Mario.png | |||
MKW Yoshi Slipstreaming Screenshot.png|[[Yoshi]] [[Slipstream]]ing | |||
LuigiCircuitWii3.png|On the Dash Panels in the final curve | |||
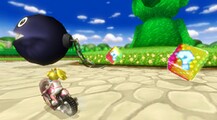
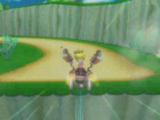
MKWiiPOWBlock.png|Yoshi about to cross the finish line with a [[POW Block]] above his kart | |||
</gallery> | |||
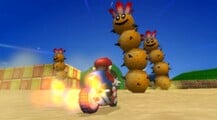
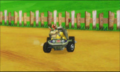
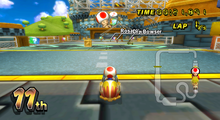
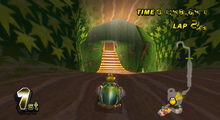
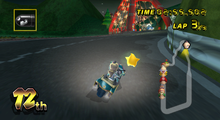
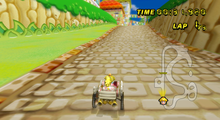
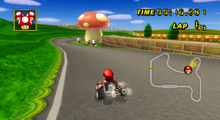
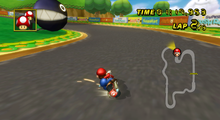
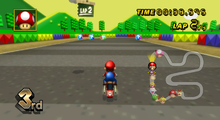
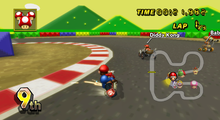
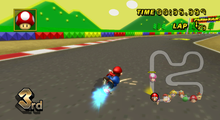
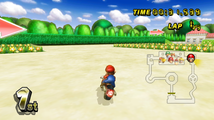
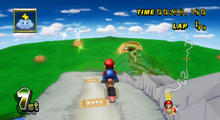
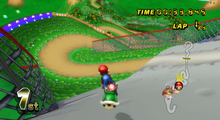
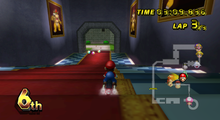
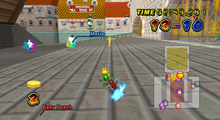
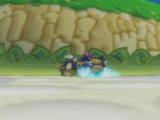
=====Moo Moo Meadows===== | |||
<gallery widths="220"> | |||
MKWii-MooMooMeadows1.png|The left turn at the start | |||
MKWii-MooMooMeadows2.png|The area filled with [[Moo Moo]]s | |||
MKWii-MooMooMeadows3.png|The [[Monty Mole]] area | |||
</gallery> | |||
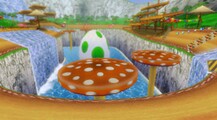
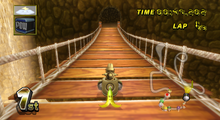
=====Mushroom Gorge===== | |||
<gallery widths="220"> | |||
MushroomGorge-Start-MKWii.png|Toadette in the beginning part of the track | |||
Mushroom Gorge 2.png|The bridge | |||
MKWiiBooster.png|A [[Dash Panel]] | |||
Mushroom Gorge Side Route.png|The alternate route before the cave | |||
Mushroom Gorge Cave.png|Inside the cave | |||
Toad'sFace Mushroom Gorge.png|The last turn where the [[Goomba]]s are | |||
</gallery> | |||
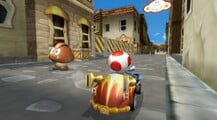
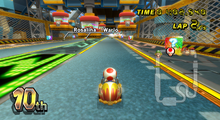
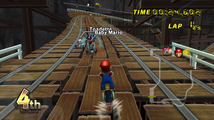
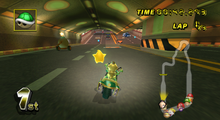
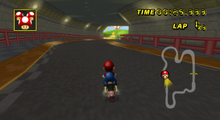
=====Toad's Factory===== | |||
<gallery widths="220"> | |||
MKW Toads Factory Machines.png|Toad racing near the hydraulic machines | |||
MKW Toads Factory Conveyors.png|Toad approaching the hall with conveyor belts | |||
MKW Toads Factory Platforms.png|The area with the floating platforms and conveyor belts | |||
MKW Toads Factory Red Room.png|The red room | |||
MKW Toads Factory Mud.png|The muddy tractor area | |||
MKW Toads Factory Goal.png|The end of the course | |||
</gallery> | |||
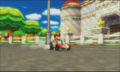
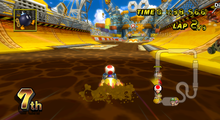
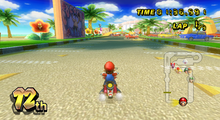
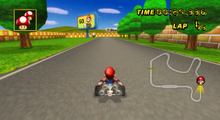
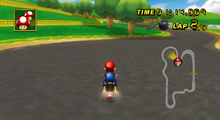
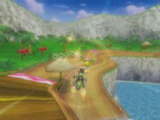
=====Mario Circuit===== | |||
<gallery widths="220"> | |||
MKW Mario Circuit Item Boxes.png|The main town area | |||
MKW Mario Circuit Chain Chomp.png|Near the [[Chain Chomp]] and the ramp | |||
MKW Mario Circuit Straight.png|Just after the overhang | |||
MKW Mario Circuit 4-Player.jpg|4-player | |||
</gallery> | |||
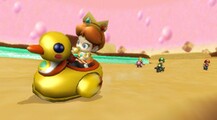
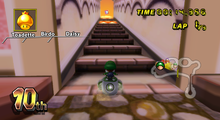
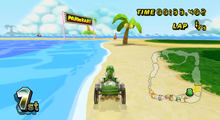
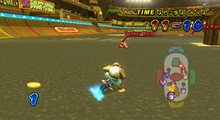
=====Coconut Mall===== | |||
<gallery widths="220"> | |||
MKWii-CoconutMall1.png|The mall entrance | |||
MKW Coconut Mall screenshot.png|The area before the second set of escalators that lead upwards. | |||
MKWii-CoconutMall7.png|The off-road shortcut | |||
MKWii-CoconutMall2.png|[[Toadette]] racing on Coconut Mall | |||
MKWii-CoconutMall3.png|The stairway after the second set of escalators | |||
MKWii-CoconutMall4.png|Players can choose which path to take to exit the mall. | |||
MKWii-CoconutMall5.png|The upper exit | |||
MKWii-CoconutMall8.png|The lower exit | |||
MKWii-CoconutMall6.png|The parking lot | |||
MKW upside down kart.jpg|A glitch that causes the kart to flip upside-down | |||
</gallery> | |||
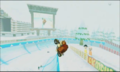
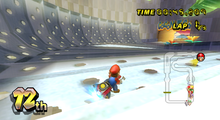
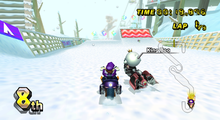
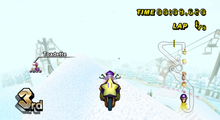
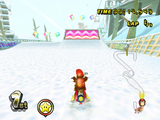
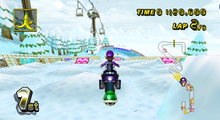
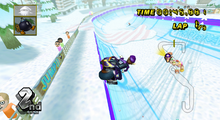
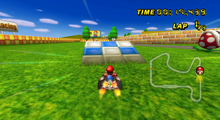
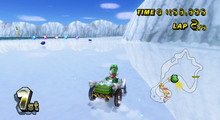
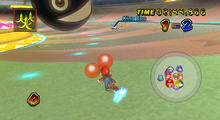
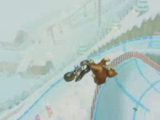
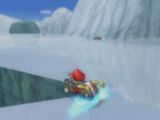
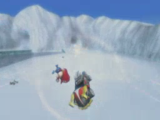
=====DK Summit===== | |||
<gallery widths="220"> | |||
MKWii-DKSummit1.png|The cannon entrance | |||
DK Summit MKWii photo.png|The area after the first [[Half-pipe (object)|half-pipe]]s and before the two ramps | |||
MKW DK Summit Snowboard Section.png|The second half-pipe area, with [[Shy Guy]]s snowboarding | |||
MKWii-DKSummit2.png|Players get fired from the cannon | |||
MKWii-DKSummit3.png|The two ramps, seen at a different angle | |||
MKWii-DKSummit4.png|The moguls-like area, seen at a different angle | |||
MKWii-DKSummit5.png|The half-pipe area with [[Snowboarding Shy Guy|Shy Guy Snowboarder]]s | |||
</gallery> | |||
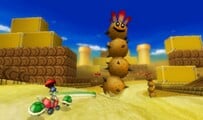
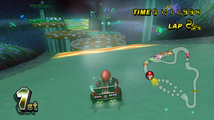
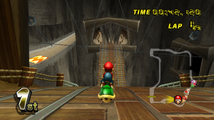
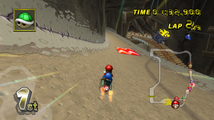
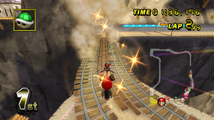
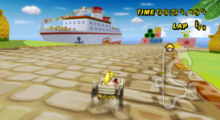
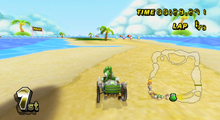
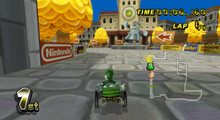
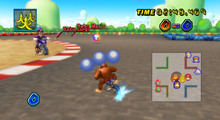
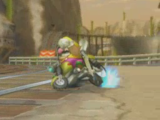
=====Wario's Gold Mine===== | |||
<gallery widths="220"> | |||
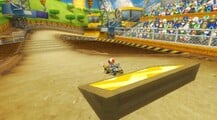
MKW Wario's Gold Mine Starting Turn.png|The beginning of the course | |||
File:Wario Gold Mine MKW screenshot.png | |||
MKW Wario's Gold Mine Cave Exit.png|After the area with [[Swoop]]ers | |||
MKW Wario's Gold Mine Second Dip.png|The dip leading to a ramp | |||
MKW Wario's Gold Mine Split Path.png|Near the exit of the gold mine | |||
MKW Wario's Gold Mine Third Dip.png|The dip leading outside | |||
MKW Wario's Gold Mine Secret Path.png|The alternate route | |||
MKW Wario's Gold Mine Ending Turn.png|The exit of the secret path | |||
</gallery> | |||
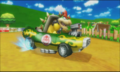
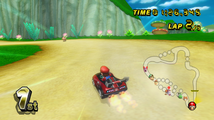
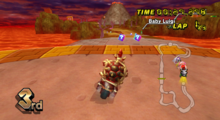
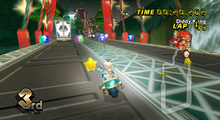
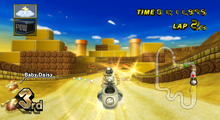
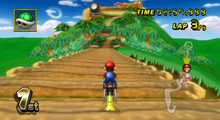
=====Daisy Circuit===== | |||
<gallery widths="220"> | <gallery widths="220"> | ||
Daisy circuit1.png|[[Daisy Circuit]] | Daisy circuit1.png|[[Daisy Circuit]] | ||
MKW Daisy Circuit Shortcut.png|The shortcut | |||
MKWii-DaisyCircuit1.png|The first turn | |||
MKWii-DaisyCircuit2.png|Inside the tunnel | |||
MKWii-DaisyCircuit3.png|The lighthouse | |||
MKWii-DaisyCircuit4.png|A billboard that reads "Daisy Candy" | |||
</gallery> | |||
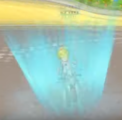
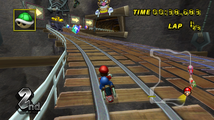
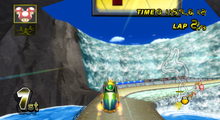
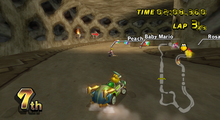
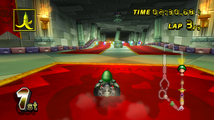
=====Koopa Cape===== | |||
<gallery widths="220"> | |||
MKW Koopa Cape.png|[[Wii Koopa Cape|Koopa Cape]] | MKW Koopa Cape.png|[[Wii Koopa Cape|Koopa Cape]] | ||
MKW Rocket Start.png|The cliff area at the start of the track | |||
MKWii-KoopaCape1.png|The first jump ramp | |||
MKWii-KoopaCape2.png|The forest area, with rivers and Item Boxes | |||
Koopa Zapper.png | |||
MKWii-KoopaCape3.png|The glass tunnel, underwater | |||
MKWii-KoopaCape5.png|The glass tunnel exit | |||
MKWii-KoopaCape4.png|The last turn before reaching the finish line | |||
</gallery> | |||
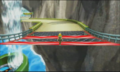
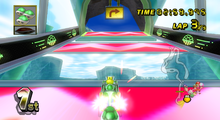
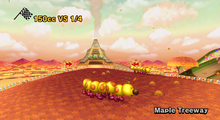
=====Maple Treeway===== | |||
<gallery widths="220"> | |||
MKW Maple Treeway Intro.png|[[Wii Maple Treeway|Maple Treeway]] | MKW Maple Treeway Intro.png|[[Wii Maple Treeway|Maple Treeway]] | ||
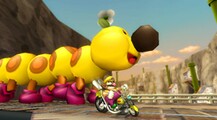
Mapletreeway3.png|The [[Big Wiggler]] area | |||
Mapletreeway1.png|Right after the starting line | |||
Mapletreeway4.png|The narrow straight path, after the [[Half-pipe (object)|vertical dash panel]] | |||
MKW Maple Treeway Before Wavy Bridge.png|Just before the wavy bridge | |||
</gallery> | |||
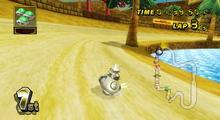
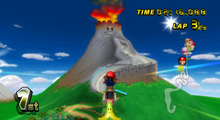
=====Grumble Volcano===== | |||
<gallery widths="220"> | |||
Grumble Volcano.png|[[Wii Grumble Volcano|Grumble Volcano]] | Grumble Volcano.png|[[Wii Grumble Volcano|Grumble Volcano]] | ||
Grumblevolcano1.png|The road inside the volcano | |||
Grumblevolcano3.png|Through the lava cave | |||
Grumblevolcano2.png|On the moving platforms | |||
Grumblevolcano4.png|Just after the [[Volcanic Debris]] area and before the splitting path | |||
</gallery> | </gallery> | ||
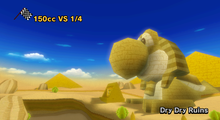
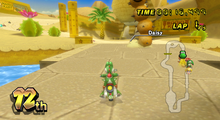
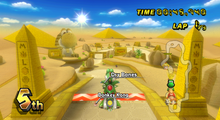
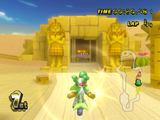
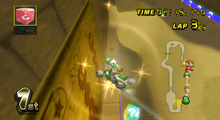
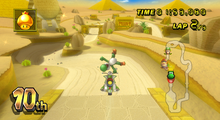
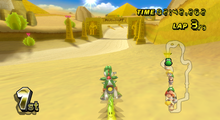
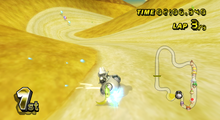
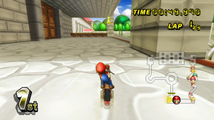
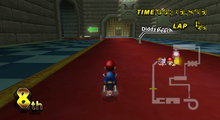
=====Dry Dry Ruins===== | |||
===== | |||
<gallery widths="220"> | <gallery widths="220"> | ||
Dry Dry Ruins.png|[[Dry Dry Ruins (race course)|Dry Dry Ruins]] | Dry Dry Ruins.png|[[Dry Dry Ruins (race course)|Dry Dry Ruins]] | ||
MKW Dry Dry Ruins Yoshi statue.png|The starting line with the Yoshi Sphinx | |||
DryDryRuins5.png|The pillars at the start of the course | |||
Drydryruins2.png|Crossing the bridge through the oasis | |||
Drydryruins4.png|Entering the temple | |||
Drydryruins5.png|Going out of the temple and the shortcut ahead | |||
MKWii-DryDryRuins1.png|The downhill path, leading to the bridge | |||
MKWii-DryDryRuins2.png|The temple entrance | |||
MKWii-DryDryRuins3.png|The half-pipes | |||
MKWii-DryDryRuins4.png|The room that gets filled up with sand | |||
MKWii-DryDryRuins7.png|The room that gets filled up with sand, during the final lap | |||
MKWii-DryDryRuins5.png|[[Yoshi]] approaches the off-road shortcut outside the temple, near the end of the course. | |||
MKWii-DryDryRuins6.png|Yoshi reaching the finish line | |||
</gallery> | |||
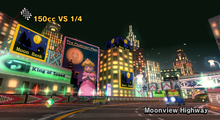
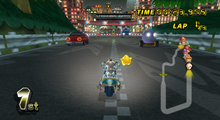
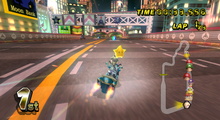
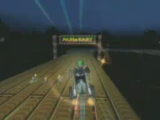
=====Moonview Highway===== | |||
<gallery widths="220"> | |||
Moonviewhighway.png|[[Moonview Highway]] | Moonviewhighway.png|[[Moonview Highway]] | ||
MoonviewHighway-MKW.png | |||
Moonviewhighway3.png|One of the first turns of the course | |||
MoonviewHighway5.png|The bridge that leads to the city section | |||
Moonviewhighway2.png|The tunnel filled with cars and Dash Panels | |||
MKW Moonview Highway Starting Turns.png|After the first two turns, an alternate route exists, which involves going uphill. | |||
MKW Moonview Highway Red Bridge.png|The sharp turn before reaching the bridge | |||
MKW Moonview Highway Entering the City.png|Reaching the tollbooth to the city | |||
MKW Moonview Highway in the City.png|The city area features some dash panels and moving item boxes. | |||
MKW Moonview Highway Exit Toll.png|The tollbooth, leading back to the finish line | |||
MKW Moonview Highway Secret Ramp.png|The alternate route has a jump ramp, along with some item boxes. | |||
</gallery> | |||
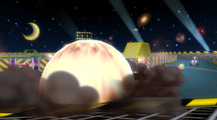
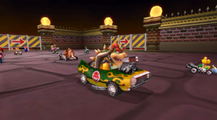
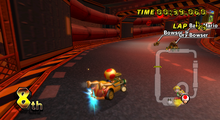
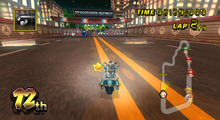
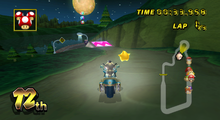
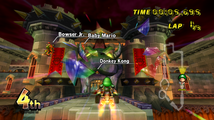
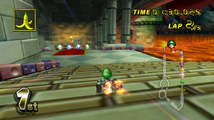
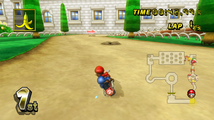
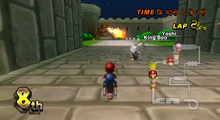
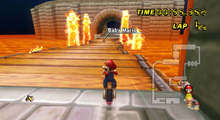
=====Bowser's Castle===== | |||
<gallery widths="220"> | |||
BowsersCastleMKW.png|[[Bowser's Castle (Mario Kart Wii)|Bowser's Castle]] | BowsersCastleMKW.png|[[Bowser's Castle (Mario Kart Wii)|Bowser's Castle]] | ||
MKW Bowser Castle Start.png|The start of the track | |||
BCW2.png|Right before the entrance | |||
BCW1.png|The wavy hall | |||
BCW3.png|The area with the lava on the extreme right | |||
BCW4.png|In the [[Mecha Bowser]] area | |||
BCW5.png|The curve with fire pillars in it | |||
BCW6.png|After the triple [[Thwomp]]s before the ramp | |||
BCW7.png|The fire pillar area, just before the finish line | |||
</gallery> | |||
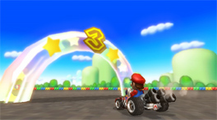
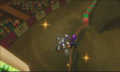
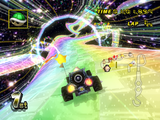
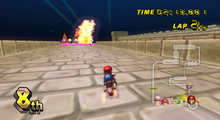
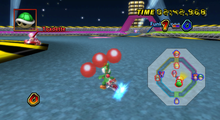
=====Rainbow Road===== | |||
<gallery widths="220"> | |||
MKW Rainbow Road Overview.png|[[Wii Rainbow Road|Rainbow Road]] | MKW Rainbow Road Overview.png|[[Wii Rainbow Road|Rainbow Road]] | ||
MKWii-RainbowRoad1.png|The downhill portion of the track | |||
MKWii-RainbowRoad2.png|The wavy road | |||
MKWii-RainbowRoad3.png|The figure-8 part of the track | |||
MKWii-RainbowRoad4.png|The [[Launch Star]] tunnel | |||
MKWii-RainbowRoad5.png|The last tunnel before reaching the finish line | |||
</gallery> | </gallery> | ||
====Retro Courses==== | ====Retro Courses==== | ||
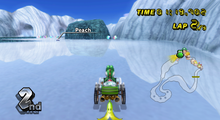
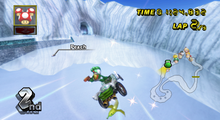
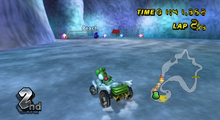
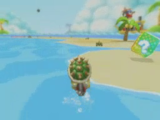
===== | =====GCN Peach Beach===== | ||
<gallery widths="220"> | |||
GCNPeachBeach-MKWii.png|The shipyard | |||
MKW Peach Beach ramp.png|The shortcut ramp | |||
MKW Peach Beach Finish.png|The finish line | |||
</gallery> | |||
=====DS Yoshi Falls===== | |||
<gallery widths="220"> | |||
DSYoshiFalls1-MKWii.png|The first waterfall | |||
DSYoshiFalls2-MKWii.png|The second bridge | |||
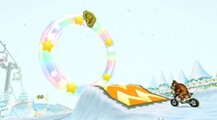
DSYoshiFalls3-MKWii.png|Players can do [[trick]]s with one of the jumps | |||
DSYoshiFalls4-MKWii.png|The third waterfall | |||
DSYoshiFalls5-MKWii.png|A set of Dash Panels appear before the goal | |||
</gallery> | |||
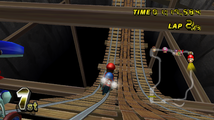
=====SNES Ghost Valley 2===== | |||
<gallery widths="220"> | |||
MKW SNES Ghost Valley 2 Screenshot 1.png|A straight path after some sharp turns | |||
MKW SNES Ghost Valley 2 Screenshot 2.png|Boos make an appearance around some turns | |||
MKW SNES Ghost Valley 2 Screenshot 3.png|The road to the goal | |||
</gallery> | |||
=====N64 Mario Raceway===== | |||
<gallery widths="220"> | |||
MKW N64 Mario Raceway First Turn.png|The beginning of the track | |||
MKW N64 Mario Raceway Large Mushroom.png|The large mushroom, along with some [[Piranha Plant]]s | |||
MKW N64 Mario Raceway Ramp.png|The [[ramp]] shortcut | |||
MKW N64 Mario Raceway Rotating Sign.png|The rotating sign appears different from the original | |||
MKW N64 Mario Raceway Large Pipe.png|The large pipe | |||
</gallery> | |||
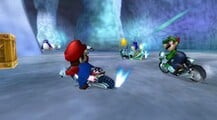
=====N64 Sherbet Land===== | |||
<gallery widths="220"> | |||
N64SherbetLand1-MKWii.png|The first turn after the starting line | |||
N64SherbetLand2-MKWii.png|A two-way passage | |||
N64SherbetLand3-MKWii.png|One of the passages has a trick ramp | |||
N64SherbetLand4-MKWii.png|Inside the cave | |||
N64SherbetLand5-MKWii.png|Outside the cave | |||
</gallery> | |||
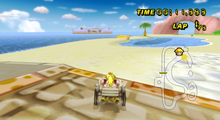
=====GBA Shy Guy Beach===== | |||
<gallery widths="220"> | |||
MKW GBA Shy Guy Beach Pirate Ship.png|The [[Shy Guy Galleon]] with a new design | |||
MKW GBA Shy Guy Beach Shortcut.png|The off-road shortcut | |||
MKW GBA Shy Guy Beach Two Way Passage.png|The two-way passage before the finish line | |||
MKW GBA Shy Guy Beach Goal.png|Yoshi as he nears the [[Finish Line (object)|finish line]] | |||
</gallery> | |||
=====DS Delfino Square===== | |||
<gallery widths="220"> | |||
DSDelfinoSquare1-MKWii.png|The Pianta statue, which is displayed at the first turn | |||
DSDelfinoSquare2-MKWii.png|The two-way passage | |||
DSDelfinoSquare3-MKWii.png|An off-road shortcut exists past the crates. | |||
DSDelfinoSquare4-MKWii.png|The bridge acts as a trick ramp when risen. | |||
DSDelfinoSquare5-MKWii.png|Reaching the finish line | |||
</gallery> | |||
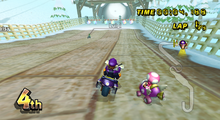
=====GCN Waluigi Stadium===== | |||
<gallery widths="220"> | |||
MKW Waluigi Stadium Start.png|[[Waluigi]] at the starting line of his stadium, waiting for the race to begin | |||
MKW Bowser in Offroader screenshot.png|[[Bowser]] races on the course | |||
GCNWaluigiStadium1-MKWii.png|[[Half-pipe (object)|Vertical dash panels]] have been added at spots | |||
GCNWaluigiStadium2-MKWii.png|The path with Fire Bars and Piranha Plant walls | |||
GCNWaluigiStadium3-MKWii.png|A few jumps before the right-hand turn | |||
GCNWaluigiStadium4-MKWii.png|The final jump before the finish line | |||
</gallery> | |||
=====DS Desert Hills===== | |||
<gallery widths="220"> | <gallery widths="220"> | ||
Desert Hills.png|{{classic-link|DS|Desert Hills}} | Desert Hills.png|{{classic-link|DS|Desert Hills}} | ||
DSDesertHills1-MKWii.png|The first turn on the track | |||
DSDesertHills2-MKWii.png|A trick can be performed on one of the jumps. | |||
DSDesertHills3-MKWii.png|Corkscrew | |||
DSDesertHills4-MKWii.png|After a set amount of time (usually after the start of the second lap), the [[Angry Sun]] releases [[Fire Snake]]s onto the track. | |||
</gallery> | |||
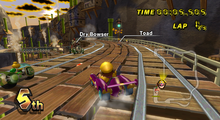
=====GBA Bowser Castle 3===== | |||
<gallery widths="220"> | |||
MKW GBA Bowser Castle 3 Intro.png|{{classic-link|GBA|Bowser Castle 3}} | MKW GBA Bowser Castle 3 Intro.png|{{classic-link|GBA|Bowser Castle 3}} | ||
MKW GBA Bowser Castle 3 Thwomps.png|[[Dry Bones]] approaching the first set of [[Thwomp]]s | |||
MKW GBA Bowser Castle 3 Yellow Jumps.png|Dry Bones on the ramp section | |||
BowserCastle3MKWii.png|[[Dry Bowser]] at the end of the jump section | |||
MKW GBA Bowser Castle 3 Trick Ramp.png|Dry Bones approaching the [[Dash Panel]] ramp | |||
MKW GBA Bowser Castle 3 Finish Line.png|Dry Bones on the grid approaching the starting line | |||
</gallery> | |||
=====N64 DK's Jungle Parkway===== | |||
<gallery widths="220"> | |||
D.K.'s Jungle Parkway.png|{{classic-link|N64|DK's Jungle Parkway}} | D.K.'s Jungle Parkway.png|{{classic-link|N64|DK's Jungle Parkway}} | ||
MarioKartWii-DKJungleParkway1.png|The paddle steamer now has tourists on it. | |||
MarioKartWii-DKJungleParkway2.png|The long jump | |||
MKW N64 DK's Jungle Parkway Bridge Screenshot.png|The bridge leading to the cave | |||
MKW N64 DK's Jungle Parkway Cave Interior Screenshot.png|The cave interior | |||
</gallery> | |||
=====GCN Mario Circuit===== | |||
<gallery widths="220"> | |||
MKWii GCNMario.png|{{classic-link|GCN|Mario Circuit}} | MKWii GCNMario.png|{{classic-link|GCN|Mario Circuit}} | ||
MKW GCN Mario Circuit First Sharp Turn.png|The first sharp turn | |||
GCNMarioCircuit2-MKWii.png|The Chain Chomp on the circular turn | |||
MKW GCN Mario Circuit Tunnel Inside.png|The tunnel | |||
GCNMarioCircuit4-MKWii.png|[[Mario]] performing a trick on the bumpy road | |||
</gallery> | </gallery> | ||
=====SNES Mario Circuit 3===== | |||
===== | |||
<gallery widths="220"> | <gallery widths="220"> | ||
MKW SNES Mario Circuit 3 Overview.png|{{classic-link|SNES|Mario Circuit 3}} | MKW SNES Mario Circuit 3 Overview.png|{{classic-link|SNES|Mario Circuit 3}} | ||
MKW SNES Mario Circuit 3 Screenshot 1.png|A large circular turn | |||
MKW SNES Mario Circuit 3 Screenshot 2.png|A sharp U-turn | |||
MKW SNES Mario Circuit 3 Screenshot 3.png|The [[Dash Panel|Zipper]] near the goal | |||
</gallery> | |||
=====DS Peach Gardens===== | |||
<gallery widths="220"> | |||
MKWii Peach Gardens.png|{{classic-link|DS|Peach Gardens}} | MKWii Peach Gardens.png|{{classic-link|DS|Peach Gardens}} | ||
MKW Peach Gardens Starting Line.png|Beginning of the course | |||
MKW Peach Gardens Orange Flower Corner.png|Semicircular turn | |||
MKW Peach Gardens First Square Terrace.png|Square terrace | |||
MKW Peach Gardens Entering the Chomp Maze.png|Before the maze-like section | |||
MKW Peach Gardens Inside the Chomp Maze.png|Maze-like section | |||
Peach Gardens Wii After Hurdle.png|After the section | |||
MKW Peach Gardens Second Square Terrace.png|Second square terrace | |||
MKW Peach Gardens Dirt Road.png|Dirt road | |||
MKW Peach Gardens Castle Steps.png|The straight walkway | |||
</gallery> | |||
=====GCN DK Mountain===== | |||
<gallery widths="220"> | |||
DK Mountain.png|{{classic-link|GCN|DK Mountain}} | DK Mountain.png|{{classic-link|GCN|DK Mountain}} | ||
MKW GCN DK Mountain Entering The Cannon.png|The road to the cannon | |||
MKW GCN DK Mountain Fired From Cannon.png|Racers get fired from the cannon. | |||
MKW GCN DK Mountain Trick Ramps.png|[[Half-pipe (object)|Vertical dash panel]]s have been added at spots. | |||
MKW GCN DK Mountain Grassy Turns.png|The sharp turns have more room to work with. | |||
MKW GCN DK Mountain Ravine.png|The circular turn with the ravine | |||
MKW GCN DK Mountain Bridge.png|The moving bridge | |||
</gallery> | |||
=====N64 Bowser's Castle===== | |||
<gallery widths="220"> | |||
N64BowserCastle-MKWii.png|{{classic-link|N64|Bowser's Castle}} | N64BowserCastle-MKWii.png|{{classic-link|N64|Bowser's Castle}} | ||
MKWii N64BowserCastle1.png|The giant Bowser statue | |||
MKWii N64BowserCastle2.png|The caged Thwomp no longer appears discolored. | |||
MKWii N64BowserCastle3.png|The Thwomps in this area no longer make sinister laughs, but they do shake when racers get close. | |||
MKWii N64BowserCastle4.png|The stairway features newer portraits of Bowser. | |||
MKWii N64BowserCastle5.png|At the castle exit, lava geysers can be seen when the player crosses the bridge. | |||
MKWii N64BowserCastle6.png|Starting with the second lap, the first jump on the castle's roof will have one of two lava geysers spawning at the jump point. | |||
</gallery> | </gallery> | ||
====Wii battle courses==== | ====Wii battle courses==== | ||
<gallery widths=" | =====Block Plaza===== | ||
<gallery widths="220"> | |||
Block Plaza.png|[[Block Plaza]] | Block Plaza.png|[[Block Plaza]] | ||
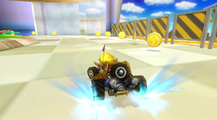
BlockPlaza-BalloonBattle-MKWii.png|[[Mario]] competes in a Balloon Battle at Block Plaza. | |||
</gallery> | |||
=====Delfino Pier===== | |||
<gallery widths="220"> | |||
Delfino Pier.png|[[Delfino Pier]] | Delfino Pier.png|[[Delfino Pier]] | ||
DelfinoPier-CoinRunners-MKWii.png|Delfino Pier during gameplay | |||
</gallery> | |||
=====Funky Stadium===== | |||
<gallery widths="220"> | |||
MKW Funky Stadium Overview.png|[[Funky Stadium]] | MKW Funky Stadium Overview.png|[[Funky Stadium]] | ||
MKW Funky Stadium Coin Runners.png|Funky Stadium during gameplay | |||
</gallery> | |||
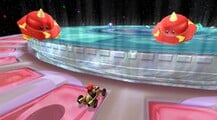
=====Chain Chomp Wheel===== | |||
<gallery widths="220"> | |||
Chain Chomp Roulette.png|[[Chain Chomp Wheel]] | Chain Chomp Roulette.png|[[Chain Chomp Wheel]] | ||
Chain_Chomp_Wheel.png|[[Mario]] competes in a [[Balloon Battle]] at Chain Chomp Wheel. | |||
</gallery> | |||
=====Thwomp Desert===== | |||
<gallery widths="220"> | |||
Thwomp Desert.png|[[Thwomp Desert]] | Thwomp Desert.png|[[Thwomp Desert]] | ||
ThwompDesertScreenshot.png|Thwomp Desert during gameplay | |||
</gallery> | </gallery> | ||
====Retro battle courses==== | ====Retro battle courses==== | ||
<gallery widths=" | =====SNES Battle Course 4===== | ||
<gallery widths="220"> | |||
Battle Course 4 (SNES).png|{{classic-link|SNES|Battle Course 4}} | Battle Course 4 (SNES).png|{{classic-link|SNES|Battle Course 4}} | ||
MKW SNES Battle Course 4 Gameplay.png|Battle Course 4 during gameplay. | |||
</gallery> | |||
=====GBA Battle Course 3===== | |||
<gallery widths="220"> | |||
Battle Course 3 (GBA).png|{{classic-link|GBA|Battle Course 3}} | Battle Course 3 (GBA).png|{{classic-link|GBA|Battle Course 3}} | ||
MKW GBA Battle Course 3 Gameplay.png|The course in ''Mario Kart Wii'' during gameplay | |||
</gallery> | |||
=====N64 Skyscraper===== | |||
<gallery widths="220"> | |||
N64Skyscraper-MKWii.png|{{classic-link|N64|Skyscraper}} | N64Skyscraper-MKWii.png|{{classic-link|N64|Skyscraper}} | ||
MKW N64 Skyscraper Gameplay.png|The course as it is seen during gameplay | |||
</gallery> | |||
=====GCN Cookie Land===== | |||
<gallery widths="220"> | |||
Cookie Land.png|{{classic-link|GCN|Cookie Land}} | Cookie Land.png|{{classic-link|GCN|Cookie Land}} | ||
MKW GCN Cookie Land Gameplay.png | |||
</gallery> | |||
=====DS Twilight House===== | |||
<gallery widths="220"> | |||
Twilight House.png|{{classic-link|DS|Twilight House}} | Twilight House.png|{{classic-link|DS|Twilight House}} | ||
MKW DS Twilight House Gameplay.png|[[Yoshi]] participates in Balloon Battle | |||
</gallery> | |||
====Tournaments==== | |||
=====Galaxy Colosseum===== | |||
<gallery widths="220"> | |||
Topman MKWii.jpg|[[Diddy Kong]] battling a Spiky Topman on the stage | |||
</gallery> | |||
====Award Ceremony==== | |||
<gallery widths="220"> | |||
File:MushroomCupMKW.png|[[Mushroom Cup]] | |||
MKW Flower Cup Screenshot.png|[[Flower Cup]] | |||
Star Cup.png|[[Star Cup]] | |||
MKW Special Cup Screenshot.png|[[Special Cup]] | |||
MKW Shell Cup Screenshot.png|[[Shell Cup]] | |||
MKW Banana Cup Screenshot.png|[[Banana Cup]] | |||
MKW Leaf Cup Screenshot.png|[[Leaf Cup]] | |||
MKW Lightning Cup Screenshot.png|[[Lightning Cup]] | |||
</gallery> | </gallery> | ||
====Ending credits==== | ====Ending credits==== | ||
=====50cc-150cc===== | =====50cc-150cc===== | ||
Revision as of 18:41, June 10, 2023
- See also: Gallery:Mario Kart Wii trading cards
This is a gallery of images for Mario Kart Wii.
Logos
International logo
Japanese logo
Korean logo
Chinese logo (unreleased)

Preliminary logo (E3 2007)
Artwork
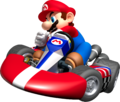
Mario drifting on his Standard Kart M

Mario tricking
Mario lobbing a Bob-omb
Luigi tricking
Baby Mario tricking


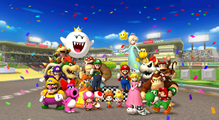
Group art
Luigi Circuit group image artwork
Mario and Luigi
Mario and Luigi on their bikes


Characters
Small
Baby Mario
Baby Luigi
Baby Peach
Baby Daisy
Toad
Toadette
Koopa Troopa
Dry Bones


Medium
Mario
Luigi
Princess Peach
Princess Daisy
Yoshi
Birdo
Diddy Kong
Bowser Jr.


Large
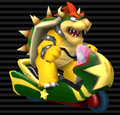
Wario
Waluigi
Donkey Kong
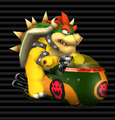
Bowser
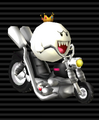
King Boo
Rosalina
Funky Kong
Dry Bowser


Items


Sprites and models
Positions

1st icon
2nd icon

3rd icon
4th icon

5th icon
6th icon
7th icon
8th icon
9th icon
10th icon
11th icon
12th icon


Characters
Mugshots


Unused characters

Paratroopa (unused)

Hammer Bro (unused)

Petey Piranha (unused)
Map icons
Characters
Online tournaments

Pokey Body Segment


Emblems

Mario and Baby Mario

Luigi and Baby Luigi

Male Mii

Female Mii
Course maps
Mushroom Cup


Flower Cup


Star Cup


Special Cup


Shell Cup


Banana Cup


Leaf Cup


Lightning Cup


Battle Mode


Course banners
Mushroom Cup
Luigi Circuit (Sunset)
Flower Cup
Star Cup
Special Cup
Shell Cup
Banana Cup
Leaf Cup
Lightning Cup
Battle Mode
Tournaments
Course previews
Mushroom Cup
Flower Cup
Star Cup
Special Cup
Shell Cup
Banana Cup
Leaf Cup
Lightning Cup
Battle Mode


Items


Vehicles
It has been requested that more images be uploaded for this section. Remove this notice only after the additional image(s) have been added. Reason: all the Standard bikes and karts
Small karts
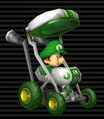
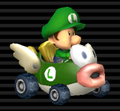
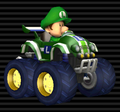
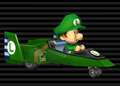
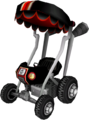
Baby Mario's Standard Kart S
Baby Mario's Booster Seat
Baby Mario's Mini Beast
Baby Mario's Cheep Charger
Baby Mario's Tiny Titan
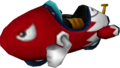
Baby Mario's Blue Falcon
Baby Luigi's Standard Kart S
Baby Luigi's Booster Seat

Baby Luigi's Mini Beast
Baby Luigi's Cheep Charger
Baby Luigi's Tiny Titan
Baby Luigi's Blue Falcon
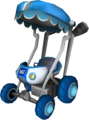
Baby Peach's Booster Seat
Baby Peach's Mini Beast
Baby Peach's Cheep Charger
Baby Peach's Tiny Titan
Baby Peach's Blue Falcon

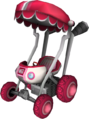
Baby Daisy's Booster Seat
Baby Daisy's Mini Beast
Baby Daisy's Cheep Charger
Baby Daisy's Tiny Titan

Baby Daisy's Blue Falcon
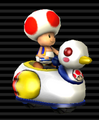
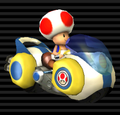
Toad's Booster Seat
Toad's Mini Beast
Toad's Cheep Charger
Toad's Tiny Titan
Toad's Blue Falcon
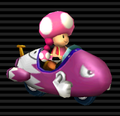
Toadette's Booster Seat
Toadette's Mini Beast
Toadette's Cheep Charger
Toadette's Tiny Titan
Toadette's Blue Falcon
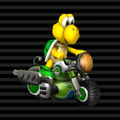
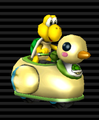
Koopa Troopa's Booster Seat
Koopa Troopa's Mini Beast

Koopa Troopa's Cheep Charger
Koopa Troopa's Tiny Titan
Koopa Troopa's Blue Falcon
Dry Bones's Booster Seat
Dry Bones's Mini Beast
Dry Bones's Cheep Charger
Dry Bones's Tiny Titan

Dry Bones's Blue Falcon
Male Mii's Booster Seat
Male Mii's Mini Beast
Male Mii's Cheep Charger
Male Mii's Tiny Titan
Male Mii's Blue Falcon
Female Mii's Booster Seat
Female Mii's Mini Beast
Female Mii's Cheep Charger
Female Mii's Tiny Titan
Female Mii's Blue Falcon


Small bikes
Baby Mario's Standard Bike S
Baby Mario's Bullet Bike

Baby Mario's Bit Bike
Baby Mario's Quacker
Baby Mario's Magikruiser
Baby Mario's Jet Bubble
Baby Luigi's Bullet Bike
Baby Luigi's Bit Bike

Baby Luigi's Quacker
Baby Luigi's Magikruiser
Baby Luigi's Jet Bubble
Baby Peach's Bullet Bike
Baby Peach's Bit Bike
Baby Peach's Quacker
Baby Peach's Magikruiser
Baby Peach's Jet Bubble
Baby Daisy's Bullet Bike
Baby Daisy's Bit Bike
Baby Daisy's Quacker
Baby Daisy's Magikruiser

Baby Daisy's Jet Bubble
Toad's Bullet Bike
Toad's Bit Bike
Toad's Quacker
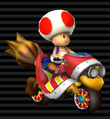
Toad's Magikruiser
Toad's Jet Bubble
Toadette's Bullet Bike
Toadette's Bit Bike
Toadette's Quacker
Toadette's Magikruiser
Toadette's Jet Bubble
Koopa Troopa's Bullet Bike
Koopa Troopa's Bit Bike
Koopa Troopa's Quacker
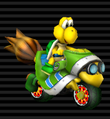
Koopa Troopa's Magikruiser
Koopa Troopa's Jet Bubble
Dry Bones's Bullet Bike

Dry Bones's Bit Bike
Dry Bones's Quacker

Dry Bones's Magikruiser
Dry Bones's Jet Bubble
Male Mii's Bullet Bike
Male Mii's Bit Bike
Male Mii's Quacker
Male Mii's Magikruiser
Male Mii's Jet Bubble
Female Mii's Bullet Bike
Female Mii's Bit Bike
Female Mii's Quacker
Female Mii's Magikruiser
Female Mii's Jet Bubble


Medium karts
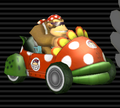
Mario's Standard Kart M
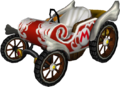
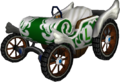
Mario's Classic Dragster
Mario's Wild Wing
Mario's Super Blooper
Mario's Daytripper
Mario's Sprinter
Luigi's Classic Dragster
Luigi's Wild Wing
Luigi's Super Blooper

Luigi's Daytripper
Luigi's Sprinter
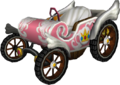
Peach's Classic Dragster
Peach's Wild Wing
Peach's Super Blooper
Peach's Daytripper
Peach's Sprinter
Daisy's Classic Dragster
Daisy's Wild Wing
Daisy's Super Blooper
Daisy's Daytripper
Daisy's Sprinter
Yoshi's Classic Dragster
Yoshi's Wild Wing
Yoshi's Super Blooper
Yoshi's Daytripper
Yoshi's Sprinter
Birdo's Classic Dragster
Birdo's Wild Wing
Birdo's Super Blooper
Birdo's Daytripper
Birdo's Sprinter
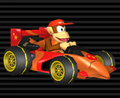
Diddy Kong's Classic Dragster
Diddy Kong's Wild Wing
Diddy Kong's Super Blooper
Diddy Kong's Daytripper
Diddy Kong's Sprinter
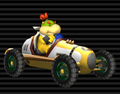
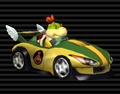
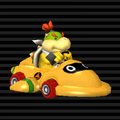
Bowser Jr.'s Classic Dragster
Bowser Jr.'s Wild Wing
Bowser Jr.'s Super Blooper
Bowser Jr.'s Daytripper
Bowser Jr.'s Sprinter
Male Mii's Classic Dragster
Male Mii's Wild Wing
Male Mii's Super Blooper

Male Mii's Daytripper
Male Mii's Sprinter
Female Mii's Classic Dragster
Female Mii's Wild Wing

Female Mii's Super Blooper

Female Mii's Daytripper
Female Mii's Sprinter
Red Team Standard Kart M
Blue Team Standard Kart M


Medium bikes
Mario's Mach Bike
Mario's Sugarscoot
Mario's Zip Zip
Mario's Sneakster
Mario's Dolphin Dasher
Luigi's Mach Bike
Luigi's Sugarscoot
Luigi's Zip Zip
Luigi's Sneakster
Luigi's Dolphin Dasher
Peach's Mach Bike

Peach's Sugarscoot
Peach's Zip Zip
Peach's Sneakster
Peach's Dolphin Dasher
Daisy's Mach Bike
Daisy's Sugarscoot
Daisy's Zip Zip

Daisy's Sneakster

Daisy's Dolphin Dasher
Yoshi's Mach Bike
Yoshi's Sugarscoot
Yoshi's Zip Zip
Yoshi's Sneakster
Yoshi's Dolphin Dasher
Birdo's Mach Bike
Birdo's Sugarscoot
Birdo's Zip Zip
Birdo's Sneakster
Birdo's Dolphin Dasher
Diddy Kong's Mach Bike
Diddy Kong's Sugarscoot
Diddy Kong's Zip Zip
Diddy Kong's Sneakster
Diddy Kong's Dolphin Dasher
Bowser Jr.'s Standard Bike M
Bowser Jr.'s Mach Bike
Bowser Jr.'s Sugarscoot
Bowser Jr.'s Zip Zip
Bowser Jr.'s Sneakster

Bowser Jr.'s Dolphin Dasher
Male Mii's Mach Bike
Male Mii's Sugarscoot
Male Mii's Zip Zip

Male Mii's Sneakster
Male Mii's Dolphin Dasher
Female Mii's Mach Bike
Female Mii's Sugarscoot
Female Mii's Zip Zip
Female Mii's Sneakster
Female Mii's Dolphin Dasher


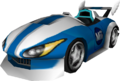
Large karts
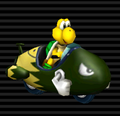
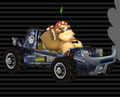
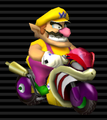
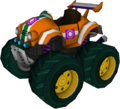
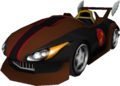
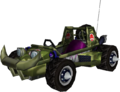
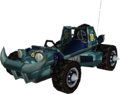
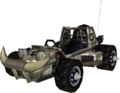
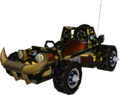
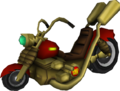
Wario's Offroader
Wario's Flame Flyer
Wario's Piranha Prowler
Wario's Jetsetter
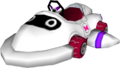
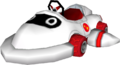
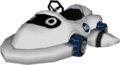
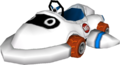
Wario's Honeycoupe
Waluigi's Offroader
Waluigi's Flame Flyer
Waluigi's Piranha Prowler
Waluigi's Jetsetter

Waluigi's Honeycoupe
Donkey Kong's Offroader
Donkey Kong's Flame Flyer
Donkey Kong's Piranha Prowler

Donkey Kong's Jetsetter
Donkey Kong's Honeycoupe
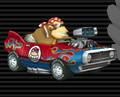
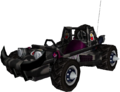
Bowser's Offroader
Bowser's Flame Flyer

Bowser's Piranha Prowler
Bowser's Jetsetter
Bowser's Honeycoupe
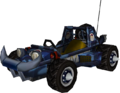
King Boo's Offroader
King Boo's Flame Flyer
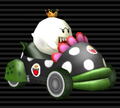
King Boo's Piranha Prowler
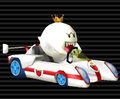
King Boo's Jetsetter
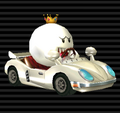
King Boo's Honeycoupe
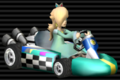
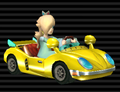
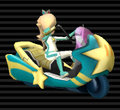
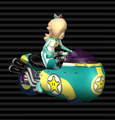
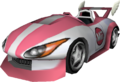
Rosalina's Standard Kart L
Rosalina's Offroader
Rosalina's Flame Flyer
Rosalina's Piranha Prowler
Rosalina's Jetsetter
Rosalina's Honeycoupe
Funky Kong's Offroader
Funky Kong's Flame Flyer
Funky Kong's Piranha Prowler
Funky Kong's Jetsetter
Funky Kong's Honeycoupe

Dry Bowser's Offroader
Dry Bowser's Flame Flyer
Dry Bowser's Piranha Prowler
Dry Bowser's Jetsetter
Dry Bowser's Honeycoupe
Male Mii's Offroader
Male Mii's Flame Flyer
Male Mii's Piranha Prowler
Male Mii's Jetsetter
Male Mii's Honeycoupe
Female Mii's Offroader
Female Mii's Flame Flyer
Female Mii's Piranha Prowler
Female Mii's Jetsetter
Female Mii's Honeycoupe


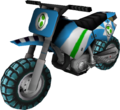
Large bikes
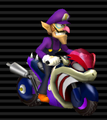
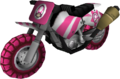
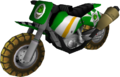
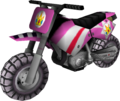
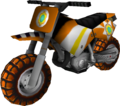
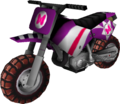
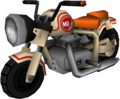
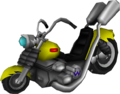
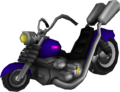
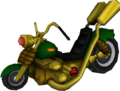
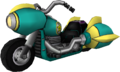
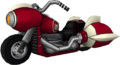
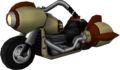
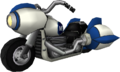
Wario's Flame Runner
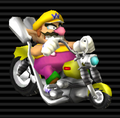
Wario's Wario Bike

Wario's Shooting Star

Wario's Spear
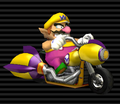
Wario's Phantom
Waluigi's Flame Runner
Waluigi's Wario Bike
Waluigi's Shooting Star
Waluigi's Spear
Waluigi's Phantom
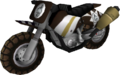
Donkey Kong's Flame Runner
Donkey Kong's Wario Bike
Donkey Kong's Shooting Star
Donkey Kong's Spear
Donkey Kong's Phantom
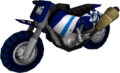
Bowser's Standard Bike L
Bowser's Flame Runner
Bowser's Wario Bike
Bowser's Shooting Star
Bowser's Spear

Bowser's Phantom
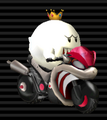
King Boo's Flame Runner
King Boo's Wario Bike
King Boo's Shooting Star
King Boo's Spear
King Boo's Phantom
Rosalina's Flame Runner
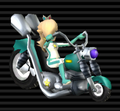
Rosalina's Wario Bike
Rosalina's Shooting Star
Rosalina's Spear
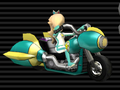
Rosalina's Phantom
Funky Kong's Flame Runner
Funky Kong's Wario Bike
Funky Kong's Shooting Star
Funky Kong's Spear
Funky Kong's Phantom

Dry Bowser's Flame Runner
Dry Bowser's Wario Bike
Dry Bowser's Shooting Star
Dry Bowser's Spear

Dry Bowser's Phantom
Male Mii's Flame Runner
Male Mii's Wario Bike
Male Mii's Shooting Star
Male Mii's Spear
Male Mii's Phantom
Female Mii's Flame Runner
Female Mii's Wario Bike
Female Mii's Shooting Star
Female Mii's Spear
Female Mii's Phantom
Red Team Standard Bike L
Blue Team Standard Bike L


In-game models


Data-rendered models
It has been requested that more images be uploaded for this article. Remove this notice only after the additional image(s) have been added. Reason: Other characters' idles and select animations should probably be rendered.
Characters


Select screen


Selected


Awards

Princess Daisy
Princess Peach
Rosalina


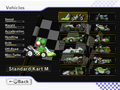
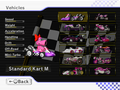
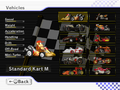
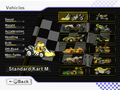
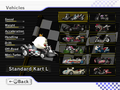
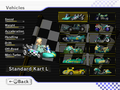
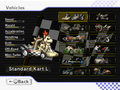
Vehicles
Small
Standard Kart S
Baby Mario's Standard Kart S
Baby Luigi's Standard Kart S
Baby Peach's Standard Kart S

Baby Daisy's Standard Kart S
Toad's Standard Kart S
Toadette's Standard Kart S
Koopa Troopa's Standard Kart S
Dry Bones's Standard Kart S
Small Male Mii's Standard Kart S
Small Female Mii's Standard Kart S
_Model.png)
_Model.png)
_Model.png)
_Model.png)
_Model.png)
_Model.png)
_Model.png)
_Model.png)
_Model.png)
_Model.png)
Standard Bike S
Baby Mario's Standard Bike S
Baby Luigi's Standard Bike S
Baby Peach's Standard Bike S
Baby Daisy's Standard Bike S
Toad's Standard Bike S
Toadette's Standard Bike S
Koopa Troopa's Standard Bike S
Dry Bones's Standard Bike S
Small Male Mii's Standard Bike S
Small Female Mii's Standard Bike S
_Model.png)
_Model.png)
_Model.png)
_Model.png)
_Model.png)
_Model.png)
_Model.png)
_Model.png)
_Model.png)
_Model.png)
Booster Seat
Baby Mario's Booster Seat
Baby Luigi's Booster Seat
Baby Peach's Booster Seat
Baby Daisy's Booster Seat
Toad's Booster Seat
Toadette's Booster Seat
Koopa Troopa's Booster Seat
Dry Bones's Booster Seat
Small Male Mii's Booster Seat
Small Female Mii's Booster Seat
_Model.png)
_Model.png)
_Model.png)
_Model.png)
_Model.png)
_Model.png)
_Model.png)
_Model.png)
_Model.png)
_Model.png)
Bullet Bike
Baby Mario's Bullet Bike
Baby Luigi's Bullet Bike
Baby Peach's Bullet Bike
Baby Daisy's Bullet Bike
Toad's Bullet Bike
Toadette's Bullet Bike
Koopa Troopa's Bullet Bike
Dry Bones's Bullet Bike

Small Male Mii's Bullet Bike
Small Female Mii's Bullet Bike
_Model.png)
_Model.png)
_Model.png)
_Model.png)
_Model.png)
_Model.png)
_Model.png)
_Model.png)
_Model.png)
_Model.png)
Mini Beast
Baby Mario's Mini Beast
Baby Luigi's Mini Beast
Baby Peach's Mini Beast
Baby Daisy's Mini Beast
Toad's Mini Beast
Toadette's Mini Beast
Koopa Troopa's Mini Beast
Dry Bones's Mini Beast
Small Male Mii's Mini Beast
Small Female Mii's Mini Beast
_Model.png)
_Model.png)
_Model.png)
_Model.png)
_Model.png)
_Model.png)
_Model.png)
_Model.png)
_Model.png)
_Model.png)
Bit Bike
Baby Mario's Bit Bike
Baby Luigi's Bit Bike
Baby Peach's Bit Bike
Baby Daisy's Bit Bike
Toad's Bit Bike
Toadette's Bit Bike
Koopa Troopa's Bit Bike
Dry Bones's Bit Bike
Small Male Mii's Bit Bike
Small Female Mii's Bit Bike
_Model.png)
_Model.png)
_Model.png)
_Model.png)
_Model.png)
_Model.png)
_Model.png)
_Model.png)
_Model.png)
_Model.png)
Cheep Charger
Baby Mario's Cheep Charger
Baby Luigi's Cheep Charger
Baby Peach's Cheep Charger
Baby Daisy's Cheep Charger
Toad's Cheep Charger

Toadette's Cheep Charger
Koopa Troopa's Cheep Charger
Dry Bones's Cheep Charger
Small Male Mii's Cheep Charger
Small Female Mii's Cheep Charger
_Model.png)
_Model.png)
_Model.png)
_Model.png)
_Model.png)
_Model.png)
_Model.png)
_Model.png)
_Model.png)
_Model.png)
Quacker
Baby Mario's Quacker
Baby Luigi's Quacker
Baby Peach's Quacker
Baby Daisy's Quacker
Toad's Quacker
Toadette's Quacker
Koopa Troopa's Quacker

Dry Bones's Quacker
Small Male Mii's Quacker
Small Female Mii's Quacker
_Model.png)
_Model.png)
_Model.png)
_Model.png)
_Model.png)
_Model.png)
_Model.png)
_Model.png)
_Model.png)
_Model.png)
Tiny Titan

Baby Mario's Tiny Titan
Baby Luigi's Tiny Titan
Baby Peach's Tiny Titan
Baby Daisy's Tiny Titan
Toad's Tiny Titan
Toadette's Tiny Titan

Koopa Troopa's Tiny Titan
Dry Bones's Tiny Titan
Small Male Mii's Tiny Titan
Small Female Mii's Tiny Titan
_Model.png)
_Model.png)
_Model.png)
_Model.png)
_Model.png)
_Model.png)
_Model.png)
_Model.png)
_Model.png)
_Model.png)
Magikruiser
Baby Mario's Magikruiser
Baby Luigi's Magikruiser
Baby Peach's Magikruiser
Baby Daisy's Magikruiser

Toad's Magikruiser
Toadette's Magikruiser
Koopa Troopa's Magikruiser
Dry Bones's Magikruiser
Small Male Mii's Magikruiser
Small Female Mii's Magikruiser
_Model.png)
_Model.png)
_Model.png)
_Model.png)
_Model.png)
_Model.png)
_Model.png)
_Model.png)
_Model.png)
_Model.png)
Blue Falcon
Baby Mario's Blue Falcon
Baby Luigi's Blue Falcon
Baby Peach's Blue Falcon
Baby Daisy's Blue Falcon
Toad's Blue Falcon
Toadette's Blue Falcon
Koopa Troopa's Blue Falcon
Dry Bones's Blue Falcon
Small Male Mii's Blue Falcon
Small Female Mii's Blue Falcon
_Model.png)
_Model.png)
_Model.png)
_Model.png)
_Model.png)
_Model.png)
_Model.png)
_Model.png)
_Model.png)
_Model.png)
Jet Bubble

Baby Mario's Jet Bubble
Baby Luigi's Jet Bubble
Baby Peach's Jet Bubble
Baby Daisy's Jet Bubble
Toad's Jet Bubble
Toadette's Jet Bubble
Koopa Troopa's Jet Bubble
Dry Bones's Jet Bubble
Small Male Mii's Jet Bubble

Small Female Mii's Jet Bubble
_Model.png)
_Model.png)
_Model.png)
_Model.png)
_Model.png)
_Model.png)
_Model.png)
_Model.png)
_Model.png)
_Model.png)
Medium
Standard Kart M
Mario's Standard Kart M
Luigi's Standard Kart M
Peach's Standard Kart M

Daisy's Standard Kart M
Yoshi's Standard Kart M
Birdo's Standard Kart M
Diddy Kong's Standard Kart M
Bowser Jr.'s Standard Kart M
Medium Male Mii's Standard Kart M
Medium Female Mii's Standard Kart M
_Model.png)
_Model.png)
_Model.png)
_Model.png)
_Model.png)
_Model.png)
_Model.png)
_Model.png)
_Model.png)
_Model.png)
Standard Bike M
Mario's Standard Bike M
Luigi's Standard Bike M
Peach's Standard Bike M
Daisy's Standard Bike M
Yoshi's Standard Bike M
Birdo's Standard Bike M

Diddy Kong's Standard Bike M
Bowser Jr.'s Standard Bike M
Medium Male Mii's Standard Bike M
Medium Female Mii's Standard Bike M
_Model.png)
_Model.png)
_Model.png)
_Model.png)
_Model.png)
_Model.png)
_Model.png)
_Model.png)
_Model.png)
_Model.png)
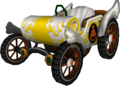
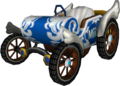
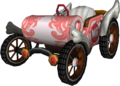
Classic Dragster
Mario's Classic Dragster
Luigi's Classic Dragster

Peach's Classic Dragster
Daisy's Classic Dragster
Yoshi's Classic Dragster

Birdo's Classic Dragster

Diddy Kong's Classic Dragster
Bowser Jr.'s Classic Dragster
Medium Male Mii's Classic Dragster
Medium Female Mii's Classic Dragster
_Model.png)
_Model.png)
_Model.png)
_Model.png)
_Model.png)
_Model.png)
_Model.png)
_Model.png)
_Model.png)
_Model.png)
Mach Bike
Mario's Mach Bike
Luigi's Mach Bike
Peach's Mach Bike

Daisy's Mach Bike
Yoshi's Mach Bike
Birdo's Mach Bike

Diddy Kong's Mach Bike
Bowser Jr.'s Mach Bike
Medium Male Mii's Mach Bike
Medium Female Mii's Mach Bike
_Model.png)
_Model.png)
_Model.png)
_Model.png)
_Model.png)
_Model.png)
_Model.png)
_Model.png)
_Model.png)
_Model.png)
Wild Wing
Mario's Wild Wing
Luigi's Wild Wing
Peach's Wild Wing
Daisy's Wild Wing
Yoshi's Wild Wing
Birdo's Wild Wing
Diddy Kong's Wild Wing

Bowser Jr.'s Wild Wing
Medium Male Mii's Wild Wing
Medium Female Mii's Wild Wing
_Model.png)
_Model.png)
_Model.png)
_Model.png)
_Model.png)
_Model.png)
_Model.png)
_Model.png)
_Model.png)
_Model.png)
Sugarscoot
Mario's Sugarscoot
Luigi's Sugarscoot

Peach's Sugarscoot
Daisy's Sugarscoot
Yoshi's Sugarscoot
Birdo's Sugarscoot
Diddy Kong's Sugarscoot
Bowser Jr.'s Sugarscoot
Medium Male Mii's Sugarscoot

Medium Female Mii's Sugarscoot
_Model.png)
_Model.png)
_Model.png)
_Model.png)
_Model.png)
_Model.png)
_Model.png)
_Model.png)
_Model.png)
_Model.png)
Super Blooper
Mario's Super Blooper
Luigi's Super Blooper
Peach's Super Blooper
Daisy's Super Blooper
Yoshi's Super Blooper
Birdo's Super Blooper
Diddy Kong's Super Blooper

Bowser Jr.'s Super Blooper
Medium Male Mii's Super Blooper
Medium Female Mii's Super Blooper
_Model.png)
_Model.png)
_Model.png)
_Model.png)
_Model.png)
_Model.png)
_Model.png)
_Model.png)
_Model.png)
_Model.png)
Zip Zip
Mario's Zip Zip
Luigi's Zip Zip
Peach's Zip Zip
Daisy's Zip Zip
Yoshi's Zip Zip
Birdo's Zip Zip
Diddy Kong's Zip Zip
Bowser Jr.'s Zip Zip

Medium Male Mii's Zip Zip
Medium Female Mii's Zip Zip
_Model.png)
_Model.png)
_Model.png)
_Model.png)
_Model.png)
_Model.png)
_Model.png)
_Model.png)
_Model.png)
_Model.png)
Daytripper
Mario's Daytripper
Luigi's Daytripper
Peach's Daytripper
Daisy's Daytripper
Yoshi's Daytripper
Birdo's Daytripper
Diddy Kong's Daytripper
Bowser Jr.'s Daytripper
Medium Male Mii's Daytripper
Medium Female Mii's Daytripper
_Model.png)
_Model.png)
_Model.png)
_Model.png)
_Model.png)
_Model.png)
_Model.png)
_Model.png)
_Model.png)
_Model.png)
Sneakster
Mario's Sneakster
Luigi's Sneakster
Peach's Sneakster
Daisy's Sneakster
Yoshi's Sneakster

Birdo's Sneakster
Diddy Kong's Sneakster
Bowser Jr.'s Sneakster
Medium Male Mii's Sneakster
Medium Female Mii's Sneakster
_Model.png)
_Model.png)
_Model.png)
_Model.png)
_Model.png)
_Model.png)
_Model.png)
_Model.png)
_Model.png)
_Model.png)
Sprinter
Mario's Sprinter
Luigi's Sprinter

Peach's Sprinter
Daisy's Sprinter
Yoshi's Sprinter
Birdo's Sprinter
Diddy Kong's Sprinter
Bowser Jr.'s Sprinter

Medium Male Mii's Sprinter
Medium Female Mii's Sprinter
_Model.png)
_Model.png)
_Model.png)
_Model.png)
_Model.png)
_Model.png)
_Model.png)
_Model.png)
_Model.png)
_Model.png)
Dolphin Dasher
Mario's Dolphin Dasher
Luigi's Dolphin Dasher
Peach's Dolphin Dasher
Daisy's Dolphin Dasher

Yoshi's Dolphin Dasher
Birdo's Dolphin Dasher
Diddy Kong's Dolphin Dasher
Bowser Jr.'s Dolphin Dasher
Medium Male Mii's Dolphin Dasher
Medium Female Mii's Dolphin Dasher
_Model.png)
_Model.png)
_Model.png)
_Model.png)
_Model.png)
_Model.png)
_Model.png)
_Model.png)
_Model.png)
_Model.png)
Large
Standard Kart L
Wario's Standard Kart L
Waluigi's Standard Kart L
Donkey Kong's Standard Kart L
Bowser's Standard Kart L
King Boo's Standard Kart L
Rosalina's Standard Kart L
Funky Kong's Standard Kart L
Dry Bowser's Standard Kart L
Large Male Mii's Standard Kart L
Large Female Mii's Standard Kart L
_Model.png)
_Model.png)
_Model.png)
_Model.png)
_Model.png)
_Model.png)
_Model.png)
_Model.png)
_Model.png)
_Model.png)
Standard Bike L
Wario's Standard Bike L
Waluigi's Standard Bike L
Donkey Kong's Standard Bike L
Bowser's Standard Bike L
King Boo's Standard Bike L
Rosalina's Standard Bike L
Funky Kong's Standard Bike L
Dry Bowser's Standard Bike L
Large Male Mii's Standard Bike L
Large Female Mii's Standard Bike L
_Model.png)
_Model.png)
_Model.png)
_Model.png)
_Model.png)
_Model.png)
_Model.png)
_Model.png)
_Model.png)
_Model.png)
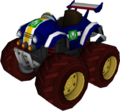
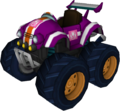
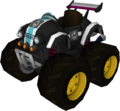
Offroader
Wario's Offroader
Waluigi's Offroader
Donkey Kong's Offroader
Bowser's Offroader
King Boo's Offroader
Rosalina's Offroader
Funky Kong's Offroader
Dry Bowser's Offroader
Large Male Mii's Offroader
Large Female Mii's Offroader
_Model.png)
_Model.png)
_Model.png)
_Model.png)
_Model.png)
_Model.png)
_Model.png)
_Model.png)
_Model.png)
_Model.png)
Flame Runner
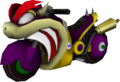
Wario's Flame Runner
Waluigi's Flame Runner
Donkey Kong's Flame Runner
Bowser's Flame Runner
King Boo's Flame Runner

Rosalina's Flame Runner
Funky Kong's Flame Runner
Dry Bowser's Flame Runner
Large Male Mii's Flame Runner

Large Female Mii's Flame Runner
_Model.png)
_Model.png)
_Model.png)
_Model.png)
_Model.png)
_Model.png)
_Model.png)
_Model.png)
_Model.png)
_Model.png)
Flame Flyer
Wario's Flame Flyer
Waluigi's Flame Flyer
Donkey Kong's Flame Flyer
Bowser's Flame Flyer

King Boo's Flame Flyer
Rosalina's Flame Flyer
Funky Kong's Flame Flyer
Dry Bowser's Flame Flyer
Large Male Mii's Flame Flyer
Large Female Mii's Flame Flyer
_Model.png)
_Model.png)
_Model.png)
_Model.png)
_Model.png)
_Model.png)
_Model.png)
_Model.png)
_Model.png)
_Model.png)
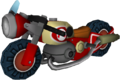
Wario Bike
Wario's Wario Bike
Waluigi's Wario Bike
Donkey Kong's Wario Bike
Bowser's Wario Bike
King Boo's Wario Bike
Rosalina's Wario Bike
Funky Kong's Wario Bike
Dry Bowser's Wario Bike
Large Male Mii's Wario Bike
Large Female Mii's Wario Bike
_Model.png)
_Model.png)
_Model.png)
_Model.png)
_Model.png)
_Model.png)
_Model.png)
_Model.png)
_Model.png)
_Model.png)
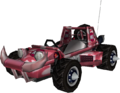
Piranha Prowler
Wario's Piranha Prowler
Waluigi's Piranha Prowler
Donkey Kong's Piranha Prowler
Bowser's Piranha Prowler
King Boo's Piranha Prowler
Rosalina's Piranha Prowler
Funky Kong's Piranha Prowler
Dry Bowser's Piranha Prowler
Large Male Mii's Piranha Prowler
Large Female Mii's Piranha Prowler
_Model.png)
_Model.png)
_Model.png)
_Model.png)
_Model.png)
_Model.png)
_Model.png)
_Model.png)
_Model.png)
_Model.png)
Shooting Star
Wario's Shooting Star
Waluigi's Shooting Star
Donkey Kong's Shooting Star
Bowser's Shooting Star
King Boo's Shooting Star

Rosalina's Shooting Star

Funky Kong's Shooting Star
Dry Bowser's Shooting Star

Large Male Mii's Shooting Star
Large Female Mii's Shooting Star
_Model.png)
_Model.png)
_Model.png)
_Model.png)
_Model.png)
_Model.png)
_Model.png)
_Model.png)
_Model.png)
_Model.png)
Jetsetter
Wario's Jetsetter
Waluigi's Jetsetter
Donkey Kong's Jetsetter
Bowser's Jetsetter
King Boo's Jetsetter
Rosalina's Jetsetter

Funky Kong's Jetsetter
Dry Bowser's Jetsetter
Large Male Mii's Jetsetter
Large Female Mii's Jetsetter
_Model.png)
_Model.png)
_Model.png)
_Model.png)
_Model.png)
_Model.png)
_Model.png)
_Model.png)
_Model.png)
_Model.png)
Spear

Wario's Spear

Waluigi's Spear
Donkey Kong's Spear
Bowser's Spear
King Boo's Spear
Rosalina's Spear
Funky Kong's Spear
Dry Bowser's Spear
Large Male Mii's Spear
Large Female Mii's Spear
_Model.png)
_Model.png)
_Model.png)
_Model.png)
_Model.png)
_Model.png)
_Model.png)
_Model.png)
_Model.png)
_Model.png)
Honeycoupe
Wario's Honeycoupe

Waluigi's Honeycoupe

Donkey Kong's Honeycoupe
Bowser's Honeycoupe
King Boo's Honeycoupe
Rosalina's Honeycoupe

Funky Kong's Honeycoupe
Dry Bowser's Honeycoupe
Large Male Mii's Honeycoupe
Large Female Mii's Honeycoupe
_Model.png)
_Model.png)
_Model.png)
_Model.png)
_Model.png)
_Model.png)
_Model.png)
_Model.png)
_Model.png)
_Model.png)
Phantom
Wario's Phantom
Waluigi's Phantom
Donkey Kong's Phantom
Bowser's Phantom
King Boo's Phantom
Rosalina's Phantom
Funky Kong's Phantom
Dry Bowser's Phantom
Large Male Mii's Phantom
Large Female Mii's Phantom
_Model.png)
_Model.png)
_Model.png)
_Model.png)
_Model.png)
_Model.png)
_Model.png)
_Model.png)
_Model.png)
_Model.png)
Items

Bullet Bill (low poly)

POW Block (in use)


Miscellaneous models
Lightning Cup trophy

Battle Mode Balloon
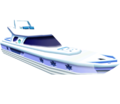
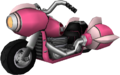
Daisy Circuit Yacht
Menu flag

Two Penguins


Miscellaneous graphics
Start-up screen, on the Disc Channel.

A Wiggler icon used in tournaments.

A fireball icon used in tournaments.

Screenshots
E3 and Business Summit 2007


October 2007 Media Summit


GDC 2008


Final game


- 2009-TournamentFebruary1-1.jpg


Title screens
The main title screen with Mario and Luigi.
Mario's first title screen.
Mario's second title screen.
Luigi's title screen.
Princess Peach's title screen.
Bowser's title screen.


Demo movie
Wii Wheel
Luigi, Mario, and Peach racing on Mario Circuit
Mario drifting on Moo Moo Meadows
Mario tricking from a ramp on Moo Moo Meadows
Luigi performing a wheelie on Luigi Circuit
Peach racing on GCN Peach Beach
Peach tricking from a ramp on Coconut Mall

Mario tricking from a ramp on Mario Circuit
Koopa Troopa tricking from a ramp on Koopa Cape
Koopa Troopa drifting on DS Yoshi Falls
Baby Mario drifting on Moo Moo Meadows
Toad drifting on Moo Moo Meadows
Peach drifting on Moo Moo Meadows
Yoshi drifting on Moo Moo Meadows
Waluigi drifting on Moo Moo Meadows
Bowser drifting on Moo Moo Meadows
Donkey Kong, Waluigi, Wario, and Bowser racing on Wario's Gold Mine
Bowser racing on Moo Moo Meadows
Waluigi tricking on the halfpipe on GCN Waluigi Stadium
Donkey Kong tricking on the halfpipe on DK Summit
Wario tricking on Wario's Gold Mine
Mario racing on Mario Circuit


Menus
The character select screen with all characters unlocked.
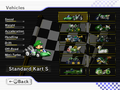
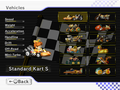

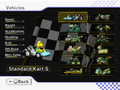
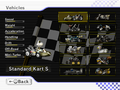
The vehicle select screen with all small vehicles unlocked.
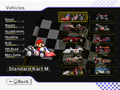
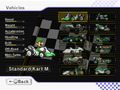
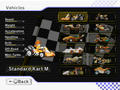
The vehicle select screen with all medium vehicles unlocked.
The vehicle select screen with all large vehicles unlocked.
The cup select screen.


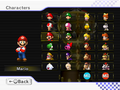
Characters
Small


Medium


Large


Characters (selected)
Small


Medium


Large


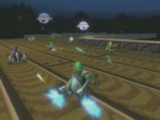
Nitro Courses
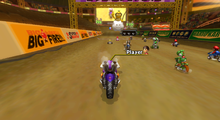
Luigi Circuit
Baby Luigi on the first stretch of the course
On the dirt area near the grandstand with the Luigi Cap
On the Dash Panels in the final curve
Yoshi about to cross the finish line with a POW Block above his kart


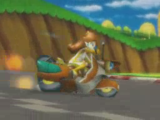
Moo Moo Meadows
The left turn at the start
The area filled with Moo Moos
The Monty Mole area


Mushroom Gorge
Toadette in the beginning part of the track
The bridge
The alternate route before the cave
Inside the cave
The last turn where the Goombas are


Toad's Factory
Toad racing near the hydraulic machines
Toad approaching the hall with conveyor belts
The area with the floating platforms and conveyor belts
The red room
The muddy tractor area
The end of the course


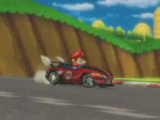
Mario Circuit
The main town area
Near the Chain Chomp and the ramp
Just after the overhang
4-player


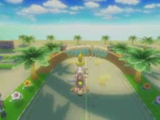
Coconut Mall
The mall entrance
The area before the second set of escalators that lead upwards.

The off-road shortcut
Toadette racing on Coconut Mall
The stairway after the second set of escalators
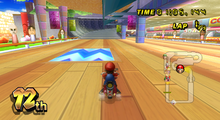
Players can choose which path to take to exit the mall.
The upper exit
The lower exit
The parking lot
A glitch that causes the kart to flip upside-down


DK Summit
The cannon entrance
The area after the first half-pipes and before the two ramps

The second half-pipe area, with Shy Guys snowboarding
Players get fired from the cannon
The two ramps, seen at a different angle
The moguls-like area, seen at a different angle
The half-pipe area with Shy Guy Snowboarders


Wario's Gold Mine
The beginning of the course
After the area with Swoopers
The dip leading to a ramp
Near the exit of the gold mine
The dip leading outside
The alternate route
The exit of the secret path


Daisy Circuit
The shortcut
The first turn

Inside the tunnel
The lighthouse
A billboard that reads "Daisy Candy"


Koopa Cape
The cliff area at the start of the track
The first jump ramp
The forest area, with rivers and Item Boxes
The glass tunnel, underwater
The glass tunnel exit
The last turn before reaching the finish line


Maple Treeway
The Big Wiggler area
Right after the starting line
The narrow straight path, after the vertical dash panel

Just before the wavy bridge


Grumble Volcano

The road inside the volcano
Through the lava cave
On the moving platforms
Just after the Volcanic Debris area and before the splitting path


Dry Dry Ruins
The starting line with the Yoshi Sphinx
The pillars at the start of the course
Crossing the bridge through the oasis
Entering the temple
Going out of the temple and the shortcut ahead

The downhill path, leading to the bridge
The temple entrance
The half-pipes

The room that gets filled up with sand
The room that gets filled up with sand, during the final lap
Yoshi approaches the off-road shortcut outside the temple, near the end of the course.
Yoshi reaching the finish line


Moonview Highway
One of the first turns of the course
The bridge that leads to the city section
The tunnel filled with cars and Dash Panels

After the first two turns, an alternate route exists, which involves going uphill.
The sharp turn before reaching the bridge
Reaching the tollbooth to the city
The city area features some dash panels and moving item boxes.
The tollbooth, leading back to the finish line
The alternate route has a jump ramp, along with some item boxes.


Bowser's Castle
The start of the track
Right before the entrance
The wavy hall
The area with the lava on the extreme right
In the Mecha Bowser area
The curve with fire pillars in it
After the triple Thwomps before the ramp
The fire pillar area, just before the finish line


Rainbow Road
The downhill portion of the track
The wavy road
The figure-8 part of the track
The Launch Star tunnel
The last tunnel before reaching the finish line


Retro Courses
GCN Peach Beach
The shipyard
The shortcut ramp
The finish line


DS Yoshi Falls
The first waterfall
The second bridge
Players can do tricks with one of the jumps
The third waterfall
A set of Dash Panels appear before the goal


SNES Ghost Valley 2
A straight path after some sharp turns
Boos make an appearance around some turns
The road to the goal


N64 Mario Raceway
The beginning of the track
The large mushroom, along with some Piranha Plants
The ramp shortcut
The rotating sign appears different from the original
The large pipe


N64 Sherbet Land

The first turn after the starting line
A two-way passage
One of the passages has a trick ramp
Inside the cave
Outside the cave


GBA Shy Guy Beach

The Shy Guy Galleon with a new design

The off-road shortcut
The two-way passage before the finish line
Yoshi as he nears the finish line


DS Delfino Square
The Pianta statue, which is displayed at the first turn
The two-way passage
An off-road shortcut exists past the crates.
The bridge acts as a trick ramp when risen.
Reaching the finish line


GCN Waluigi Stadium
Waluigi at the starting line of his stadium, waiting for the race to begin
Bowser races on the course
Vertical dash panels have been added at spots
The path with Fire Bars and Piranha Plant walls

A few jumps before the right-hand turn
The final jump before the finish line


DS Desert Hills
The first turn on the track
A trick can be performed on one of the jumps.
Corkscrew
After a set amount of time (usually after the start of the second lap), the Angry Sun releases Fire Snakes onto the track.


GBA Bowser Castle 3
Dry Bones on the ramp section
Dry Bowser at the end of the jump section
Dry Bones approaching the Dash Panel ramp
Dry Bones on the grid approaching the starting line


N64 DK's Jungle Parkway
The paddle steamer now has tourists on it.
The long jump
The bridge leading to the cave
The cave interior


GCN Mario Circuit
The first sharp turn
The Chain Chomp on the circular turn
The tunnel
Mario performing a trick on the bumpy road


SNES Mario Circuit 3
A large circular turn
A sharp U-turn
The Zipper near the goal


DS Peach Gardens
Beginning of the course

Semicircular turn
Square terrace
Before the maze-like section
Maze-like section
After the section
Second square terrace
Dirt road
The straight walkway


GCN DK Mountain
The road to the cannon
Racers get fired from the cannon.
Vertical dash panels have been added at spots.
The sharp turns have more room to work with.
The circular turn with the ravine
The moving bridge


N64 Bowser's Castle
The giant Bowser statue
The caged Thwomp no longer appears discolored.
The Thwomps in this area no longer make sinister laughs, but they do shake when racers get close.
The stairway features newer portraits of Bowser.
At the castle exit, lava geysers can be seen when the player crosses the bridge.
Starting with the second lap, the first jump on the castle's roof will have one of two lava geysers spawning at the jump point.


Wii battle courses
Block Plaza
Mario competes in a Balloon Battle at Block Plaza.


Delfino Pier
Delfino Pier during gameplay


Funky Stadium
Funky Stadium during gameplay


Chain Chomp Wheel
Mario competes in a Balloon Battle at Chain Chomp Wheel.


Thwomp Desert
Thwomp Desert during gameplay


Retro battle courses
SNES Battle Course 4
Battle Course 4 during gameplay.
.png)

GBA Battle Course 3
The course in Mario Kart Wii during gameplay
.png)

N64 Skyscraper
The course as it is seen during gameplay


GCN Cookie Land


DS Twilight House

Yoshi participates in Balloon Battle


Tournaments
Galaxy Colosseum

Diddy Kong battling a Spiky Topman on the stage

Award Ceremony


Ending credits
50cc-150cc
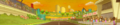
The sunset version of Luigi Circuit
Waluigi racing on Luigi Circuit
Luigi racing on Luigi Circuit
Luigi drifting on Luigi Circuit
Bowser drifting on Moo Moo Meadows
Peach and Bowser tricking on Moo Moo Meadows
Baby Peach tricking on Mushroom Gorge
Toad tricking on Toad's Factory
Diddy Kong driving on an early version of the Sprinter kart on Toad's Factory
Waluigi drifting on GCN Peach Beach
Koopa Troopa tricking on DS Yoshi Falls
Koopa Troopa drifting on DS Yoshi Falls
Luigi tricking on SNES Ghost Valley 2
Luigi drifting on SNES Ghost Valley 2
Daisy racing on Mario Circuit
Mario racing on Mario Circuit
Peach tricking on Coconut Mall
Donkey Kong tricking on DK Summit

Wario drifting on Wario's Gold Mine
Baby Mario racing on N64 Sherbet Land
Baby Mario drifting on N64 Sherbet Land
Baby Mario tricking on N64 Sherbet Land
Bowser racing on GBA Shy Guy Beach

Bowser tricking on GBA Shy Guy Beach
Waluigi tricking on GCN Waluigi Stadium
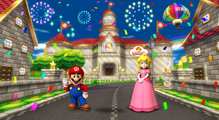
The original ending with Mario and Princess Peach at Mario Circuit at the end of the credits


Mirror
The true ending (with everything unlocked) with the entire cast at Luigi Circuit at the end of the credits

Box art
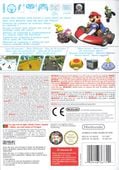
North American box art
North American box art (back)
European box art
European box art (back)
French box art
Dutch box art
Spanish box art
Portuguese box art
Russian box art

German box art (PEGI rating)
German box art (USK rating)
European box art (Rerelease)
European box art (Nintendo Selects)
Australian box art
Japanese box art
Korean box art


Wii Wheel Bundle
North American box art
European box art
European box art (Rerelease)
Australian box art
Japanese box art
Japanese box art (back)


Miscellaneous

Save data Icon
Prima Games official guide
Mario Kart Wii Platinum Soundtrack album cover


| Mario Kart Wii | ||
|---|---|---|
| Drivers | ||
| Small | Baby Mario • Baby Luigi • Baby Peach • Baby Daisy • Toad • Toadette • Koopa Troopa • Dry Bones | |
| Medium | Mario • Luigi • Princess Peach • Princess Daisy • Yoshi • Birdo • Diddy Kong • Bowser Jr. | |
| Large | Wario • Waluigi • Donkey Kong • Bowser • King Boo • Rosalina • Funky Kong • Dry Bowser | |
| Any | Mii | |
| Vehicles | ||
| Karts | Small | Standard Kart S • Booster Seat • Mini Beast • Cheep Charger • Tiny Titan • Blue Falcon |
| Medium | Standard Kart M • Classic Dragster • Wild Wing • Super Blooper • Daytripper • Sprinter | |
| Large | Standard Kart L • Offroader • Flame Flyer • Piranha Prowler • Jetsetter • Honeycoupe | |
| Bikes | Small | Standard Bike S • Bullet Bike • Bit Bike • Quacker • Magikruiser • Jet Bubble |
| Medium | Standard Bike M • Mach Bike • Sugarscoot • Zip Zip • Sneakster • Dolphin Dasher | |
| Large | Standard Bike L • Flame Runner • Wario Bike • Shooting Star • Spear • Phantom | |
| Courses | ||
| Wii Grand Prix | Mushroom Cup | Luigi Circuit • Moo Moo Meadows • Mushroom Gorge • Toad's Factory |
| Flower Cup | Mario Circuit • Coconut Mall • DK Summit • Wario's Gold Mine | |
| Star Cup | Daisy Circuit • Koopa Cape • Maple Treeway • Grumble Volcano | |
| Special Cup | Dry Dry Ruins • Moonview Highway • Bowser's Castle • Rainbow Road | |
| Retro Grand Prix | Shell Cup | GCN Peach Beach • DS Yoshi Falls • SNES Ghost Valley 2 • N64 Mario Raceway |
| Banana Cup | N64 Sherbet Land • GBA Shy Guy Beach • DS Delfino Square • GCN Waluigi Stadium | |
| Leaf Cup | DS Desert Hills • GBA Bowser Castle 3 • N64 DK's Jungle Parkway • GCN Mario Circuit | |
| Lightning Cup | SNES Mario Circuit 3 • DS Peach Gardens • GCN DK Mountain • N64 Bowser's Castle | |
| Battle stages | Wii stages | Block Plaza • Delfino Pier • Funky Stadium • Chain Chomp Wheel • Thwomp Desert |
| Retro stages | SNES Battle Course 4 • GBA Battle Course 3 • N64 Skyscraper • GCN Cookie Land • DS Twilight House | |
| Other | Galaxy Colosseum | |
| Other | ||
| Items and objects | Item Box items | Banana • Blooper • Bob-omb • Bullet Bill • Fake Item Box • Golden Mushroom • Green Shell • Lightning • Mega Mushroom • Mushroom • POW Block • Red Shell • Spiny Shell • Super Star • Thunder Cloud • Triple Bananas • Triple Green Shells • Triple Mushrooms • Triple Red Shells |
| Other | Barrel Cannon • Cannon • Coin • Dash Panel • Halfpipe-style boost ramp • Hot-air balloon • Launch Star • Leaf pile • Mushroom Trampoline • Ramp • Trophy | |
| Background characters and species | Big Cheep Cheep • Birdo • Boo • Delfino Oak Tree • Goomba • Hammer Bro • Lakitu • Mii • Monty Mole • Moo Moo • Noki • Petey Piranha • Penguin • Pianta • Shy Guy • Sledge Bro • Toad • Unagi • Yoshi • Yoshi's Egg | |
| Enemies and obstacles | Angry Sun • Baby Penguin • Big Pokey • Big Wiggler • Bob-omb Car • Boulder • Bowser Statue • Car • Mine Cart • Cataquack • Chain Chomp • Delfino Oak Tree • Falling Pillar • Fire Bar • Fire Chain • Fire Snake • Ghost • Goomba • Koopa Zapper • Lava • Lava Geyser • Mecha Bowser • Mecha Piranha Plant • Monty Mole • Moo Moo • Oil slick • Penguin • Piranha Plant • Pirate Guy • Podoboo • Pokey • Shy Guy Galleon • Shy Guy Snowboarder • Sidestepper • Spiky Topman • Swoop • Thwomp • Topman • Truck • Warp Pipe • Volcanic debris | |
| Techniques | Drift • Hop • Mini-Turbo • Rocket Start • Slipstream • Spin Turn • Trick • Wheelie | |
| Miscellaneous | Daisy Cruiser • Emblem • Finish line • Gallery • Glitches • Item probability distributions • Mario Kart Channel tournaments • Mario Kart Wii Grand Prix • Mario Kart Wii Platinum Soundtrack • Pre-release and unused content • Sponsors • Staff • Trading cards | |