Rattle Battle (Donkey Kong Country 2: Diddy's Kong Quest): Difference between revisions
m (Text replacement - "Category:Donkey Kong Country 2: Diddy's Kong Quest Levels" to "Category:Donkey Kong Country 2: Diddy's Kong Quest levels") |
No edit summary |
||
| (15 intermediate revisions by 8 users not shown) | |||
| Line 1: | Line 1: | ||
{{italic title|id=yes}} | {{italic title|id=yes}} | ||
{{ | {{level infobox | ||
|image=[[File:Rattle Battle.png]] | |image=[[File:Rattle Battle.png]] | ||
|code=3 - 4 | |code=3 - 4 | ||
|world=[[Krem Quay]] | |world=[[Krem Quay]] | ||
|game=''[[Donkey Kong Country 2: Diddy's Kong Quest]]'' | |game=''[[Donkey Kong Country 2: Diddy's Kong Quest]]'' | ||
| | |track=Snakey Chantey | ||
|before=[[Krockhead Klamber (Donkey Kong Country 2: Diddy's Kong Quest)|<<]] | |before=[[Krockhead Klamber (Donkey Kong Country 2: Diddy's Kong Quest)|<<]] | ||
|after=[[Slime Climb (Donkey Kong Country 2: Diddy's Kong Quest)|>>]] | |after=[[Slime Climb (Donkey Kong Country 2: Diddy's Kong Quest)|>>]] | ||
|secret=<sup>[[Black Ice Battle (Donkey Kong Country 2: Diddy's Kong Quest)|KK]]</sup> | |||
}} | }} | ||
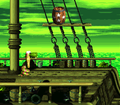
'''Rattle Battle''' is the fourteenth level of ''[[Donkey Kong Country 2: Diddy's Kong Quest]]'' and the fourth level of [[Krem Quay]]. From the world map, Rattle Battle is shown to take place on the deck of [[Glimmer's Galleon (Donkey Kong Country 2: Diddy's Kong Quest)|Glimmer's Galleon]], and features green water in the background. | '''Rattle Battle''' is the fourteenth level of ''[[Donkey Kong Country 2: Diddy's Kong Quest]]'' and the fourth level of [[Krem Quay]]. From the world map, Rattle Battle is shown to take place on the deck of [[Glimmer's Galleon (Donkey Kong Country 2: Diddy's Kong Quest)|Glimmer's Galleon]], and features green water in the background. [[Diddy Kong]] and [[Dixie Kong]] are transformed into [[Rattly]] for most of the level, as they must enter his [[Animal Barrel|Rattly Barrel]] found in a cabin shortly after the start. The level requires Rattly to use his high jumping ability and the even higher [[super move|Superjump]] to both reach higher areas and continue further into the level. The most common enemies in the level are [[Zinger]]s and [[Kaboing]]s (both their gray and uncommon green variant). There are also [[Kannon]]s, who blast out either cannonballs or barrels. Jumping from a Kannon's barrels is another way for Rattly to go across gaps. The level's theme is "Snakey Chantey," which also has an arrangement in ''[[Super Smash Bros. Ultimate]]''. | ||
The most common enemies in the level are [[Zinger]]s and [[Kaboing]]s (both their gray and uncommon green variant) | |||
==Layout== | ==Layout== | ||
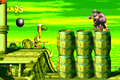
[[File: | [[File:Rattle Battle DKC2 GBA.png|thumb|left|Rattle Battle in the Game Boy Advance version]] | ||
The level begins on a ship deck under a hidden [[Blast Barrel]] that can shoot the heroes into the air and onto a high section of the ship that contains a [[Banana Coin]], a [[Banana Bunch]], and a [[Bonus Barrel]]. Across from the level's start, there is an entryway that leads into part of the ship. Here, the Kongs can find an Animal Barrel with a trio of bananas under it. If they enter the barrel, they turn into Rattly, who must proceed by heading through the nearby entryway on the end of the room. After traveling through the opening, the rattlesnake finds himself outside on the ship deck again. Above him, there is a [[DK Barrel]] with a few bananas around it. A pile of two large barrels is also ahead, but a Kaboing bounces in front of it. If Rattly reaches the top of these barrels, he can collect the [[ | The level begins on a ship deck under a hidden [[Blast Barrel]] that can shoot the heroes into the air and onto a high section of the ship that contains a [[Banana Coin]], a [[Banana Bunch]], and a [[Bonus Barrel]]. Across from the level's start, there is an entryway that leads into part of the ship, which strongly resembles the cabin with K. Rool's ransom note in [[Pirate Panic (Donkey Kong Country 2: Diddy's Kong Quest)|Pirate Panic]]. Here, the Kongs can find an Animal Barrel with a trio of bananas under it. If they enter the barrel, they turn into Rattly, who must proceed by heading through the nearby entryway on the end of the room. After traveling through the opening, the rattlesnake finds himself outside on the ship deck again. Above him, there is a [[DK Barrel]] with a few bananas around it. A pile of two large barrels is also ahead, but a Kaboing bounces in front of it. If Rattly reaches the top of these barrels, he can collect the [[KONG Letters|letter K]] that is placed on top of them. After passing some bananas that float in the air, Rattly makes his way up a small stairway and to a pair of Kaboings that jump in front of a large barrel. He can use this barrel to help him cross a small pit nearby. On the other side of this pit, there is another Kaboing and a lone Banana Bunch. A pit is also ahead of here with a Flitter flying above it. The enemy can be bounced on to help the rattlesnake cross the pit, even though Rattly's jumping abilities can also allow him to cross the pit with a single jump. | ||
A trio of Kaboings bounce in the area ahead of here, and they are followed by a Zinger above a large barrel. The Zinger flies in front of a Banana Coin, so Rattly must defeat the foe in order to grab the item safely. The rattlesnake can find another DK Barrel ahead of here, along with some more Kaboings and some large barrels that he can use to help him cross an additional pit. Although he can cross this pit with his jumping ability alone, a Zinger is also above the abyss, and it can be bounced on to help him cross. Once the pit is crossed, Rattly approaches some Kaboings, two of which that bounce on the edges of a small gap. The [[Animal Friend]] is able to jump into this gap without falling in the water, as ground is at bottom of the gap. From the inside of this gap, he can head to the left to find a Bonus Barrel, or he can travel right to discover a Blast Barrel that immediately shoots him back onto the top of the ship deck when entered. A pit is farther ahead of here, and it is noticeably wider than the previous ones in the level. Two Zingers float in the pit, and one of them circles the letter O. Once Rattly crosses the pit, either by bouncing over it or by bouncing on the Zingers to cross, he approaches a Kaboing and a small stairway leading downwards. Some more Kaboings are after here, and they bounce on top of a large pile of barrels with a Zinger flying in front of it. The level's [[DK Coin]] hides in an area inside the ship, which is placed to the right of the Zinger. The large barrel pile is followed by a small pit, and once the pit it crossed, Rattly can find the level's [[Star Barrel]]. | A trio of Kaboings bounce in the area ahead of here, and they are followed by a Zinger above a large barrel. The Zinger flies in front of a Banana Coin, so Rattly must defeat the foe in order to grab the item safely. The rattlesnake can find another DK Barrel ahead of here, along with some more Kaboings and some large barrels that he can use to help him cross an additional pit. Although he can cross this pit with his jumping ability alone, a Zinger is also above the abyss, and it can be bounced on to help him cross. Once the pit is crossed, Rattly approaches some Kaboings, two of which that bounce on the edges of a small gap. The [[Animal Friend]] is able to jump into this gap without falling in the water, as ground is at bottom of the gap. From the inside of this gap, he can head to the left to find a Bonus Barrel, or he can travel right to discover a Blast Barrel that immediately shoots him back onto the top of the ship deck when entered. A pit is farther ahead of here, and it is noticeably wider than the previous ones in the level. Two Zingers float in the pit, and one of them circles the letter O. Once Rattly crosses the pit, either by bouncing over it or by bouncing on the Zingers to cross, he approaches a Kaboing and a small stairway leading downwards. Some more Kaboings are after here, and they bounce on top of a large pile of barrels with a Zinger flying in front of it. The level's [[DK Coin|Video Game Hero Coin]] hides in an area inside the ship, which is placed to the right of the Zinger. The large barrel pile is followed by a small pit, and once the pit it crossed, Rattly can find the level's [[Star Barrel]]. | ||
The Star Barrel is followed by two small ledges with a DK Barrel and some bananas around them. A pile of six large barrels is after the ledges, and a Kannon with a Banana Coin behind it stands on it. Once the rattlesnake passes a few bananas located after this foe, he reaches a small pit with a Zinger above it. If he manages to cross this pit, he can find some more bananas and a Kaboing that bounces in front of a few large barrels. A [[golden feather]], found only in the [[Game Boy Advance]] version of the game, is placed on top of these barrels. The letter N and some bananas float above a pit placed nearby. A Kannon shoots barrels over this pit, which must be crossed to progress to an additional pit with a Zinger above it. On the other side of this abyss, Rattly can find a large barrel with an arrow, formed by bananas, above it. The arrow points upwards, where a Bonus Barrel is hidden. A DK Barrel is ahead of here, being followed by some larger barrels that Kaboings bounce on. Once these foes and the barrels are passed, the rattlesnake makes his way down a small stairway and towards a pit with a Zinger above it. | |||
The Star Barrel is followed by two small ledges with a DK Barrel and some bananas around them. A pile of six large barrels is after the ledges, and a Kannon with a Banana Coin behind it stands on it. Once the rattlesnake passes a few bananas located after this foe, he reaches a small pit with a Zinger above it. If he manages to cross this pit, he can find some more bananas and a Kaboing that bounces in front of a few large barrels. A [[ | |||
The only way to cross this pit is by first bouncing off of the Zinger and then landing on the other side of the pit, where a [[kannonball]]-shooting Kannon stands. Another Kannon is located on top of some large barrels piled nearby, and it shoots kannonballs downwards. There is a small abyss farther ahead of this foe, and a Zinger flies above it. If this pit is successfully crossed, Rattly makes his way towards a large pile of barrels with many Kaboings on them. In the Game Boy Advance version of the game, one of these Kaboings sports a camera icon above its head, indicating that it is in possession of a [[photograph]]. The letter G is also on the barrel pile, which is followed by a pit that can only be crossed by bouncing off of the barrels shot by a Kannon on the other side of it. Once this pit is crossed, the rattlesnake makes his way down a small stairway with a Kaboing near it. On the bottom of the stairs, there is a Kannon, who stands on top of a pile of barrels and shoots kannonballs on the ground below it. After Rattly passes another pile of two barrels and heads up a small stairway, he comes up to a [[No Animal Sign]]. When this is passed, he turns back into the Kongs, who are given a Banana Bunch as a prize. An [[End of Level Target]] is located just ahead of here, and if it is jumped on, the level is completed. A [[Dixie Barrel]] is positioned above this target, and if the heroes shoot to the target with this barrel, they win a prize from the target, such as a [[Red Balloon|Life Balloon]]. A DK Barrel is also hidden to the right of the target, and it is able to give the player Dixie Kong if they need her to enter the Dixie Barrel. | The only way to cross this pit is by first bouncing off of the Zinger and then landing on the other side of the pit, where a [[Cannonball|kannonball]]-shooting Kannon stands. Another Kannon is located on top of some large barrels piled nearby, and it shoots kannonballs downwards. There is a small abyss farther ahead of this foe, and a Zinger flies above it. If this pit is successfully crossed, Rattly makes his way towards a large pile of barrels with many Kaboings on them. In the Game Boy Advance version of the game, one of these Kaboings sports a camera icon above its head, indicating that it is in possession of a [[photograph]]. The letter G is also on the barrel pile, which is followed by a pit that can only be crossed by bouncing off of the barrels shot by a Kannon on the other side of it. Once this pit is crossed, the rattlesnake makes his way down a small stairway with a Kaboing near it. On the bottom of the stairs, there is a Kannon, who stands on top of a pile of barrels and shoots kannonballs on the ground below it. After Rattly passes another pile of two barrels and heads up a small stairway, he comes up to a [[No Animal Sign]]. When this is passed, he turns back into the Kongs, who are given a Banana Bunch as a prize. An [[End of Level Target]] is located just ahead of here, and if it is jumped on, the level is completed. A [[Dixie Barrel]] is positioned above this target, and if the heroes shoot to the target with this barrel, they win a prize from the target, such as a [[Red Balloon|Life Balloon]]. A DK Barrel is also hidden to the right of the target, and it is able to give the player Dixie Kong if they need her to enter the Dixie Barrel. | ||
==Enemies== | ==Enemies== | ||
The following enemies appear in the following quantities: | |||
<gallery> | |||
Flitter DKC2.png|[[Flitter]] (1) | |||
Kaboing DKC2 gray.png|[[Kaboing]] (gray) (14) | |||
Kaboing DKC2 green.png|Kaboing (green) (13) | |||
Kannon DKC2 enemy.png|[[Kannon]] (6) | |||
Zinger DKC2 yellow.png|[[Zinger]] (yellow) (16) | |||
</gallery> | |||
| | |||
==Items and objects== | ==Items and objects== | ||
The following items and objects appear in the following quantities, and items marked in '''bold''' are also an [[End of Level Target]] prize: | |||
<gallery> | |||
Banana DKC SNES.png|[[Banana]] (125) | |||
Banana Bunch DKC SNES.png|'''[[Banana Bunch]]''' (1) | |||
Banana Coin.png|'''[[Banana Coin]]''' (3) | |||
DK Barrel.png|[[DK Barrel]] (5) | |||
Red Extra Life Balloon DKC2.png|'''[[Red Balloon|Life Balloon]]''' (1) | |||
| | </gallery> | ||
===KONG Letters=== | |||
*'''K:''' After exiting the cabin, Rattly can find the letter K floating slightly over a stack of two barrel platforms. | |||
*'''O:''' After the second Bonus Level, Rattly encounters a Zinger circling around the letter O. To safely collect it, Rattly must bounce on the Zinger when it is underneath the letter O. | |||
*'''N:''' Shortly after the Star Barrel, Rattly can find the letter N hovering over a gap, which is just after a green Kaboing. | |||
*'''G:''' After the third Bonus Level, Rattly has to continue past three green Kaboings and two Kannons. He then encounters four green Kaboings from some stacked barrels. The letter G is hovering over the highest stack of three barrels to the right. | |||
=== | ===Key items=== | ||
*'''[[DK Coin|Cranky's Video Game Hero Coin]]:''' After the second Bonus Level, Rattly encounters some Kaboings and a Zinger around a few columns of two barrels stacked onto each other. A small gap divides the stacks of barrel from the next portion of the shipwreck. If Rattly is on the ground beneath the stack of barrels, the player can see a lone banana from a small window at the bottom-left of the following portion of the ship. Rattly must jump to the banana to enter a hidden alcove, to be caught in an Arrow Barrel, which blasts him up to a Video Game Hero Coin and back onto the main path, before the Star Barrel. | |||
*'''[[Golden feather]] ([[Donkey Kong Country 2 (Game Boy Advance)|Game Boy Advance version]] only):''' After passing the Star Barrel, Rattly encounters the first Kannon of the level. He must continue past the Kannon and jump across the following abyss. Rattly then encounters a green Kaboing on a barrel platform, and to the left is a stack of two large barrels, which the golden feather is hovering over. | |||
*'''[[Photograph]] (Game Boy Advance version only):''' Late into the level, around where the letter G is, Rattly encounters four green Kaboings. The third one has a photograph icon floating over its head. If Rattly defeats it, the Kongs obtain a picture of a Kaboing in the second page of the [[Scrapbook (Donkey Kong Country series)|scrapbook]]. | |||
| | |||
=== | ==Bonus Levels== | ||
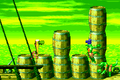
[[File:Rattle Battle Bonus Area 1.png|thumb|The first Bonus Level of Rattle Battle involves jumping from several barrel stacks]] | |||
Rattle Battle has three [[Bonus Level]]s, listed by their type: | |||
*'''''Find the Token!''''': At the start of the level, the Kongs must jump straight up to enter a hidden Blast Barrel, which shoots them onto a higher part of the ship. From there, Diddy and Dixie can find a Banana Coin, a Banana Bunch, and a Bonus Barrel, which can be entered using a [[team up]] throw. In the Bonus Level, the Kongs have 25 seconds to go through a vertical area, jump from several barrel platforms along the way, and obtain the [[Kremkoin]], which is hovering above two stacks of barrels at the top right of the area. | |||
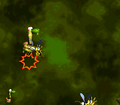
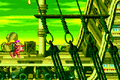
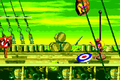
*'''''Find the Token!''''': After passing the second DK Barrel, Rattly has to bounce onto a Zinger to reach a higher portion of the shipwreck, where he encounters a few gray Kaboings. Rattly must fall into the gap below, which is hinted at by two bananas, to land on a wooden platform. He must go left and enter a hole, where he can enter into a Bonus Barrel. The Bonus Level takes place in a rigging area with a green sky in the background, and Rattly is given ten seconds to bounce from seven Zingers to travel across a wide gap and collect the Kremkoin. | |||
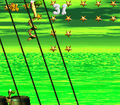
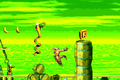
*'''''Collect the Stars!''''': After the letter N, Rattly must bounce on a Zinger to get up onto a higher portion of the shipwreck. A large barrel platform appears at the very left of the next portion, and above it is a group of bananas arranged as an up arrow. The specified direction indicates that Rattly must perform a Superjump, and by doing so, he enters up into a Bonus Barrel, which floats high into the air. In the Bonus Level, Rattly has 40 seconds to collect 75 [[Star (Donkey Kong franchise)|star]]s by bouncing from stacks of barrel platforms. After collecting every star, Rattly can collect the Kremkoin, which appears in the center above the two rightmost barrel stacks. | |||
| | |||
In the | |||
In the Bonus Level, Rattly | |||
==Gallery== | ==Gallery== | ||
===Super Nintendo Entertainment System=== | ===Super Nintendo Entertainment System=== | ||
<gallery> | <gallery> | ||
RattleBattleSNES.png|Rattly makes his way to the ship deck. | |||
Rattle Battle DKC2 two Kaboings.png|Rattly encounters two Kaboings at the start of the level | Rattle Battle DKC2 two Kaboings.png|Rattly encounters two Kaboings at the start of the level | ||
Rattle Battle DKC2 shot.png|Rattly jumps from a barrel platform | Rattle Battle DKC2 shot.png|Rattly jumps from a barrel platform | ||
Rattle Battle DKC2 shot 2.png|Rattly crosses the pit with the letter N above it. | |||
Rattle Battle DKC2 Star Barrel.png|Rattly goes to the Star Barrel | Rattle Battle DKC2 Star Barrel.png|Rattly goes to the Star Barrel | ||
Rattle Battle Bonus Area 2.png|The second Bonus Level | |||
Rattle Battle Bonus Area 3.png|The third Bonus Level | |||
Rattle Battle DKC2 letter G.png|Rattly at the letter G | Rattle Battle DKC2 letter G.png|Rattly at the letter G | ||
Rattle Battle DKC2 End of Level Target.png|The Kongs at the end of the level | Rattle Battle DKC2 End of Level Target.png|The Kongs at the end of the level | ||
| Line 154: | Line 77: | ||
Rattle Battle GBA Bonus Level 1.png|Diddy and Dixie reach the end of the first Bonus Level | Rattle Battle GBA Bonus Level 1.png|Diddy and Dixie reach the end of the first Bonus Level | ||
Rattle Battle GBA letter K.png|Rattly jumping to the letter K | Rattle Battle GBA letter K.png|Rattly jumping to the letter K | ||
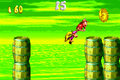
Rattle Battle GBA Zinger and Banana Coin.png|Rattly jumping to a Zinger who is just above a Banana | Rattle Battle GBA Zinger and Banana Coin.png|Rattly jumping to a Zinger who is just above a Banana Coin. | ||
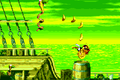
Rattle Battle GBA Kannon.png|Rattly avoids a kannonball shot by a Kannon | Rattle Battle GBA Kannon.png|Rattly avoids a kannonball shot by a Kannon | ||
Rattle Battle GBA photograph.png|The Kaboing with the level's photograph | Rattle Battle GBA photograph.png|The Kaboing with the level's photograph | ||
| Line 167: | Line 90: | ||
|Spa=Batalla Sonajero/Cascabel | |Spa=Batalla Sonajero/Cascabel | ||
|SpaM=Rattle Battle | |SpaM=Rattle Battle | ||
| | |Fre=Bataille Canaille | ||
| | |FreM=Blackguard Battle | ||
|Ger=Klapper Misere (SNES)<br | |Ger=Klapper Misere (SNES)<br>Klapper-Misere (GBA) | ||
|GerM=Rattle Misery | |GerM=Rattle Misery | ||
|Ita=Serpente a Molla | |||
|ItaM=Spring Snake | |||
}} | }} | ||
{{DKC2}} | {{DKC2}} | ||
[[Category:Crocodile Isle]] | [[Category:Crocodile Isle]] | ||
[[Category:Pirate areas]] | |||
[[Category:Donkey Kong Country 2: Diddy's Kong Quest levels]] | [[Category:Donkey Kong Country 2: Diddy's Kong Quest levels]] | ||
Revision as of 16:18, January 20, 2024
| Level | |
|---|---|
| Rattle Battle | |

| |
| Level code | 3 - 4 |
| World | Krem Quay |
| Game | Donkey Kong Country 2: Diddy's Kong Quest |
| Music track | Snakey Chantey |
| << Directory of levels >> KK | |
Rattle Battle is the fourteenth level of Donkey Kong Country 2: Diddy's Kong Quest and the fourth level of Krem Quay. From the world map, Rattle Battle is shown to take place on the deck of Glimmer's Galleon, and features green water in the background. Diddy Kong and Dixie Kong are transformed into Rattly for most of the level, as they must enter his Rattly Barrel found in a cabin shortly after the start. The level requires Rattly to use his high jumping ability and the even higher Superjump to both reach higher areas and continue further into the level. The most common enemies in the level are Zingers and Kaboings (both their gray and uncommon green variant). There are also Kannons, who blast out either cannonballs or barrels. Jumping from a Kannon's barrels is another way for Rattly to go across gaps. The level's theme is "Snakey Chantey," which also has an arrangement in Super Smash Bros. Ultimate.
Layout

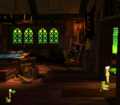
The level begins on a ship deck under a hidden Blast Barrel that can shoot the heroes into the air and onto a high section of the ship that contains a Banana Coin, a Banana Bunch, and a Bonus Barrel. Across from the level's start, there is an entryway that leads into part of the ship, which strongly resembles the cabin with K. Rool's ransom note in Pirate Panic. Here, the Kongs can find an Animal Barrel with a trio of bananas under it. If they enter the barrel, they turn into Rattly, who must proceed by heading through the nearby entryway on the end of the room. After traveling through the opening, the rattlesnake finds himself outside on the ship deck again. Above him, there is a DK Barrel with a few bananas around it. A pile of two large barrels is also ahead, but a Kaboing bounces in front of it. If Rattly reaches the top of these barrels, he can collect the letter K that is placed on top of them. After passing some bananas that float in the air, Rattly makes his way up a small stairway and to a pair of Kaboings that jump in front of a large barrel. He can use this barrel to help him cross a small pit nearby. On the other side of this pit, there is another Kaboing and a lone Banana Bunch. A pit is also ahead of here with a Flitter flying above it. The enemy can be bounced on to help the rattlesnake cross the pit, even though Rattly's jumping abilities can also allow him to cross the pit with a single jump.
A trio of Kaboings bounce in the area ahead of here, and they are followed by a Zinger above a large barrel. The Zinger flies in front of a Banana Coin, so Rattly must defeat the foe in order to grab the item safely. The rattlesnake can find another DK Barrel ahead of here, along with some more Kaboings and some large barrels that he can use to help him cross an additional pit. Although he can cross this pit with his jumping ability alone, a Zinger is also above the abyss, and it can be bounced on to help him cross. Once the pit is crossed, Rattly approaches some Kaboings, two of which that bounce on the edges of a small gap. The Animal Friend is able to jump into this gap without falling in the water, as ground is at bottom of the gap. From the inside of this gap, he can head to the left to find a Bonus Barrel, or he can travel right to discover a Blast Barrel that immediately shoots him back onto the top of the ship deck when entered. A pit is farther ahead of here, and it is noticeably wider than the previous ones in the level. Two Zingers float in the pit, and one of them circles the letter O. Once Rattly crosses the pit, either by bouncing over it or by bouncing on the Zingers to cross, he approaches a Kaboing and a small stairway leading downwards. Some more Kaboings are after here, and they bounce on top of a large pile of barrels with a Zinger flying in front of it. The level's Video Game Hero Coin hides in an area inside the ship, which is placed to the right of the Zinger. The large barrel pile is followed by a small pit, and once the pit it crossed, Rattly can find the level's Star Barrel.
The Star Barrel is followed by two small ledges with a DK Barrel and some bananas around them. A pile of six large barrels is after the ledges, and a Kannon with a Banana Coin behind it stands on it. Once the rattlesnake passes a few bananas located after this foe, he reaches a small pit with a Zinger above it. If he manages to cross this pit, he can find some more bananas and a Kaboing that bounces in front of a few large barrels. A golden feather, found only in the Game Boy Advance version of the game, is placed on top of these barrels. The letter N and some bananas float above a pit placed nearby. A Kannon shoots barrels over this pit, which must be crossed to progress to an additional pit with a Zinger above it. On the other side of this abyss, Rattly can find a large barrel with an arrow, formed by bananas, above it. The arrow points upwards, where a Bonus Barrel is hidden. A DK Barrel is ahead of here, being followed by some larger barrels that Kaboings bounce on. Once these foes and the barrels are passed, the rattlesnake makes his way down a small stairway and towards a pit with a Zinger above it.
The only way to cross this pit is by first bouncing off of the Zinger and then landing on the other side of the pit, where a kannonball-shooting Kannon stands. Another Kannon is located on top of some large barrels piled nearby, and it shoots kannonballs downwards. There is a small abyss farther ahead of this foe, and a Zinger flies above it. If this pit is successfully crossed, Rattly makes his way towards a large pile of barrels with many Kaboings on them. In the Game Boy Advance version of the game, one of these Kaboings sports a camera icon above its head, indicating that it is in possession of a photograph. The letter G is also on the barrel pile, which is followed by a pit that can only be crossed by bouncing off of the barrels shot by a Kannon on the other side of it. Once this pit is crossed, the rattlesnake makes his way down a small stairway with a Kaboing near it. On the bottom of the stairs, there is a Kannon, who stands on top of a pile of barrels and shoots kannonballs on the ground below it. After Rattly passes another pile of two barrels and heads up a small stairway, he comes up to a No Animal Sign. When this is passed, he turns back into the Kongs, who are given a Banana Bunch as a prize. An End of Level Target is located just ahead of here, and if it is jumped on, the level is completed. A Dixie Barrel is positioned above this target, and if the heroes shoot to the target with this barrel, they win a prize from the target, such as a Life Balloon. A DK Barrel is also hidden to the right of the target, and it is able to give the player Dixie Kong if they need her to enter the Dixie Barrel.
Enemies
The following enemies appear in the following quantities:


Items and objects
The following items and objects appear in the following quantities, and items marked in bold are also an End of Level Target prize:

Banana (125)

Banana Bunch (1)

Banana Coin (3)

DK Barrel (5)

Life Balloon (1)


KONG Letters
- K: After exiting the cabin, Rattly can find the letter K floating slightly over a stack of two barrel platforms.
- O: After the second Bonus Level, Rattly encounters a Zinger circling around the letter O. To safely collect it, Rattly must bounce on the Zinger when it is underneath the letter O.
- N: Shortly after the Star Barrel, Rattly can find the letter N hovering over a gap, which is just after a green Kaboing.
- G: After the third Bonus Level, Rattly has to continue past three green Kaboings and two Kannons. He then encounters four green Kaboings from some stacked barrels. The letter G is hovering over the highest stack of three barrels to the right.
Key items
- Cranky's Video Game Hero Coin: After the second Bonus Level, Rattly encounters some Kaboings and a Zinger around a few columns of two barrels stacked onto each other. A small gap divides the stacks of barrel from the next portion of the shipwreck. If Rattly is on the ground beneath the stack of barrels, the player can see a lone banana from a small window at the bottom-left of the following portion of the ship. Rattly must jump to the banana to enter a hidden alcove, to be caught in an Arrow Barrel, which blasts him up to a Video Game Hero Coin and back onto the main path, before the Star Barrel.
- Golden feather (Game Boy Advance version only): After passing the Star Barrel, Rattly encounters the first Kannon of the level. He must continue past the Kannon and jump across the following abyss. Rattly then encounters a green Kaboing on a barrel platform, and to the left is a stack of two large barrels, which the golden feather is hovering over.
- Photograph (Game Boy Advance version only): Late into the level, around where the letter G is, Rattly encounters four green Kaboings. The third one has a photograph icon floating over its head. If Rattly defeats it, the Kongs obtain a picture of a Kaboing in the second page of the scrapbook.
Bonus Levels

Rattle Battle has three Bonus Levels, listed by their type:
- Find the Token!: At the start of the level, the Kongs must jump straight up to enter a hidden Blast Barrel, which shoots them onto a higher part of the ship. From there, Diddy and Dixie can find a Banana Coin, a Banana Bunch, and a Bonus Barrel, which can be entered using a team up throw. In the Bonus Level, the Kongs have 25 seconds to go through a vertical area, jump from several barrel platforms along the way, and obtain the Kremkoin, which is hovering above two stacks of barrels at the top right of the area.
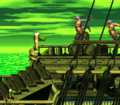
- Find the Token!: After passing the second DK Barrel, Rattly has to bounce onto a Zinger to reach a higher portion of the shipwreck, where he encounters a few gray Kaboings. Rattly must fall into the gap below, which is hinted at by two bananas, to land on a wooden platform. He must go left and enter a hole, where he can enter into a Bonus Barrel. The Bonus Level takes place in a rigging area with a green sky in the background, and Rattly is given ten seconds to bounce from seven Zingers to travel across a wide gap and collect the Kremkoin.
- Collect the Stars!: After the letter N, Rattly must bounce on a Zinger to get up onto a higher portion of the shipwreck. A large barrel platform appears at the very left of the next portion, and above it is a group of bananas arranged as an up arrow. The specified direction indicates that Rattly must perform a Superjump, and by doing so, he enters up into a Bonus Barrel, which floats high into the air. In the Bonus Level, Rattly has 40 seconds to collect 75 stars by bouncing from stacks of barrel platforms. After collecting every star, Rattly can collect the Kremkoin, which appears in the center above the two rightmost barrel stacks.
Gallery
Super Nintendo Entertainment System
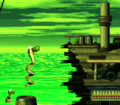
Rattly makes his way to the ship deck.
Rattly encounters two Kaboings at the start of the level
Rattly jumps from a barrel platform
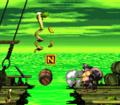
Rattly crosses the pit with the letter N above it.
Rattly goes to the Star Barrel
The second Bonus Level
The third Bonus Level

Rattly at the letter G
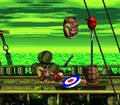
The Kongs at the end of the level


Game Boy Advance
The Kongs at the very start of the level
Diddy and Dixie reach the end of the first Bonus Level
Rattly jumping to the letter K
Rattly jumping to a Zinger who is just above a Banana Coin.
Rattly avoids a kannonball shot by a Kannon
The Kaboing with the level's photograph
Dixie performs on her guitar from the End of Level Target


Names in other languages
| Language | Name | Meaning |
|---|---|---|
| Japanese | ラトリーに大へんしん Ratorī ni Daihenshin |
Great Transformation into Rattly |
| French | Bataille Canaille |
Blackguard Battle |
| German | Klapper Misere (SNES) Klapper-Misere (GBA) |
Rattle Misery |
| Italian | Serpente a Molla |
Spring Snake |
| Spanish | Batalla Sonajero/Cascabel |
Rattle Battle |