Lockjaw's Locker (Donkey Kong Country 2: Diddy's Kong Quest): Difference between revisions
mNo edit summary |
LinkTheLefty (talk | contribs) mNo edit summary |
||
| (33 intermediate revisions by 10 users not shown) | |||
| Line 1: | Line 1: | ||
{{italic title| | {{italic title|id=yes}} | ||
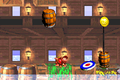
{{ | {{level infobox | ||
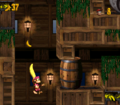
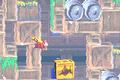
|image=[[File:LockjawsLockerSNES1.png]] | |||
|image=[[File:LockjawsLockerSNES1.png | |||
|code=1 - 4 | |code=1 - 4 | ||
|world=[[Gangplank Galleon (world)|Gangplank Galleon]] | |world=[[Gangplank Galleon (world)|Gangplank Galleon]] | ||
|game=''[[Donkey Kong Country 2: Diddy's Kong Quest]]'' | |game=''[[Donkey Kong Country 2: Diddy's Kong Quest]]'' | ||
| | |track=Lockjaw's Saga | ||
|before=[[Gangplank Galley (Donkey Kong Country 2: Diddy's Kong Quest)|<<]] | |before=[[Gangplank Galley (Donkey Kong Country 2: Diddy's Kong Quest)|<<]] | ||
|after=[[Topsail Trouble (Donkey Kong Country 2: Diddy's Kong Quest)|>>]] | |after=[[Topsail Trouble (Donkey Kong Country 2: Diddy's Kong Quest)|>>]] | ||
}} | }} | ||
'''Lockjaw's Locker''' is the fourth level in | '''Lockjaw's Locker''' is the fourth level in ''[[Donkey Kong Country 2: Diddy's Kong Quest]]'', as well as of [[Gangplank Galleon (world)|Gangplank Galleon]]. It is the first underwater level of the game. As such, it is also the first level with underwater enemies, such as [[Flotsam]]s, [[Lockjaw]]s, and [[Shuri]]s. Lockjaw's Locker takes place in a flooded ship cargo. There are two [[animal crate]]s containing [[Enguarde]], which is coincidentally also the case in ''[[Donkey Kong Country]]''{{'}}s [[Coral Capers]]. While Enguarde is not required for completing the level, he does assist [[Diddy Kong]] and [[Dixie Kong]] with defeating underwater foes, and is required to enter Lockjaw Locker's single [[Bonus Area]]. There are items such as [[banana]]s placed between the walls, and the [[Kong]]s can optionally swim to them through hidden paths to obtain them. | ||
The first Enguarde Box is located down a path just beneath the first Lockjaw. The second Enguarde Box is found by swimming down a path just after the first Shuri. Unlike Coral Capers, the two Enguardes cannot appear together because of a [[No Animal Sign]] which appears some place between their locations. | |||
==Layout== | |||
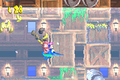
[[File:Lockjaws Locker DKC2 GBA.png|thumb|left|Lockjaw's Locker in the Game Boy Advance version]] | |||
When the Kongs begin the level, they find themselves falling downwards between many large crates and barrels in the ship's cargo hold. As they fall, they come up to a long, curvy trail of bananas, until they eventually land on some solid crates that they can walk along. If they press to the right against the wall as they fall, they can also access a hidden passage containing two [[Banana Coin]]s and a [[Banana Bunch]]. Once the Kongs reach the ground area, they can find a Klomp ahead of them, who walks near an alcove full of water and some bananas. On the other side of the alcove, they can find a [[DK Barrel]] and two Klomps that march on a crate and a treasure chest full of banana peels. A wider alcove full of water is ahead of here with the [[KONG Letters|letter K]] and a Flotsam above it. A Banana Bunch also hovers over the water. Once they cross the alcove, the water begins to rise, allowing them to travel upwards over a higher piece of sunken luggage. As they swim through this area, they come past a few Flotsams and a Lockjaw, who are followed by a line of bananas and another DK Barrel. | |||
A hidden passage between some crates is also in this area, and it contains a long trail of bananas and two Banana Coins. There is another hidden passage under a crate found below the aforementioned DK Barrel, and if the primates swim through it, they can find a room containing an [[animal crate]] with Enguarde inside of it. An additional area is above the DK Barrel as well that contains a group of bananas that form the letter A and the entrance to a Bonus Level. If the primates travel forward from the DK Barrel, they come up to some more Flotsams and another Lockjaw, whom the letter O can be found under amongst some bananas in an alcove. After they pass this foe, they find a pathway leading upwards past a few Flotsams that swim in a horizontal path across the area. At the top this pathway, the water begins to lower. A [[No Animal Sign]] sits on some of the luggage to the left of here, and the primates can only get Enguarde over to it if they swim towards it before the water becomes too shallow. Otherwise, they have to dismount from the helper and continue past the sign on foot. If they manage to reach the sign with the swordfish, the helper disappears and they are given a red [[Extra Life Balloon]]. An area full of water follows the sign, and if the Kongs swim to the bottom of it, they can find a [[Star Barrel]]. | |||
After the two friends pass the Star Barrel, they find a passage leading upwards past a DK Barrel and a Flotsam. As they continue past the Flotsam, the water begins to rise again, allowing them to travel higher into a wide area with the letter N in the corner of it. If they head west from the letter N, they come past a Shuri and then past a few Flotsams. Another Shuri follows these enemies, and if the primates feel along the ground below it, they can find a hidden passage on the other side of the crates that contains many bananas and two Banana Coins. A room containing another animal crate with Enguarde is at the end of this passage, along with a single Lockjaw. If the heroes head north from the aforementioned Shuri, they come up to a trail of bananas and past a few Flotsams to reach a wide area full of Lockjaws. An alcove is above the first Lockjaw that contains several bananas and the letter G. | |||
In a lower part of the area, they can also find more bananas and a Banana Coin in some alcoves. Once the heroes travel past all of the Lockjaws, they come through a wide passage containing a few Shuris and then access a large area, where the water begins to lower. They can find a hidden area above some crates containing many bananas and a [[DK Coin|Video Game Hero Coin]] if they quickly travel to the east before the water lowers too much. If they do not reach this section of the level, the water lowers them down to a passage that contains a few Flotsams. After passing the foes, the group reaches a No Animal Sign on top of some large barrels. If the sign is reached with Enguarde, who disappears before passing it, they are given a Banana Bunch. An [[End of Level Target]] is ahead of here, and the Kongs successfully complete the level when it is hit. If they shoot to the target from a nearby [[Barrel Cannon]], they win a prize after completing the level. The prizes include a Banana Bunch, red Extra Life Balloon, or a Banana Coin. | |||
==Enemies== | |||
The following enemies appear in the following quantities, and enemies marked in '''bold''' make their debut in the level: | |||
<gallery> | |||
Flotsam DKC2 blue.png|'''[[Flotsam]] (blue)''' (10) | |||
Flotsam DKC2 green.png|'''Flotsam (green)''' (5) | |||
Klomp DKC2.png|[[Klomp]] (3) | |||
Lockjaw DKC2.png|'''[[Lockjaw]]''' (6) | |||
Shuri DKC2.png|'''[[Shuri]]''' (4) | |||
</gallery> | |||
==Items and objects== | |||
The following items and objects appear in the following quantities: | |||
<gallery> | |||
Banana Coin.png|[[Banana Coin]] (6) | |||
DK Barrel.png|[[DK Barrel]] (4) | |||
</gallery> | |||
===KONG Letters=== | |||
*'''K:''' Floating above the first Flotsam in the level. | |||
*'''O:''' After the Kongs pass the second DK Barrel in the level, they must swim beneath a Lockjaw to obtain the letter O in an alcove. | |||
*'''N:''' After passing the Star Barrel, the Kongs must swim up. When they encounter a Flotsam, they must swim up-right to find the letter N. | |||
*'''G:''' Near the end of the level, the Kongs enter an area with a few Lockjaws. The letter G is located in an upper-left alcove, which is guarded by a Lockjaw. | |||
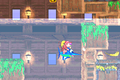
== | ===Key items=== | ||
[[File:LockjawsLockerSNES5.png|thumb|The location of the Video Game Hero Coin in Lockjaw Locker]] | |||
*[[DK Coin|Cranky's Video Game Hero Coin]]: After the letter G, the Kongs must continue going right until they pass two Shuri. Just when they reach a wide, open path leading below, the Kongs must quickly swim right and follow a trail of bananas. The bananas lead them to a floating platform and down to the Video Game Hero Coin. They can also use Enguarde's [[super move|Superstab]] to get onto the platform more easily. If the Kongs miss the platform, they can use [[team up]] from the No Animal Sign just before the [[End of Level Target]]. | |||
* | *[[Golden feather]] (Game Boy Advance version only): After passing the first Bonus Area, the Kongs must continue onward and travel up past two yellow Flotsams. After reaching the end of the vertical path, the Kongs must swim through a wall to the right to obtain the golden feather in a small, enclosed area. | ||
*[[Photograph]] (Game Boy Advance version only): With Enguarde, the Kongs must approach the last No Animal Sign, just after the Video Game Hero Coin. The Kongs and Enguarde must then backtrack and swim through a pathway at the leftmost side. This leads into an enclosed area with a Flotsam. Enguarde must defeat the Flotsam, which rewards Kongs with a photograph of Flotsam for the fourth page of their [[Scrapbook (Donkey Kong Country series)|Scrapbook]]. | |||
{{br}} | |||
[[ | |||
* | |||
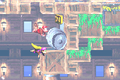
==== | ==Bonus Level== | ||
* | [[File:LockjawsLockerSNES3.png|thumb|The Bonus Level of Lockjaw Locker]] | ||
== | Lockjaw Locker has only one Bonus Level, listed by its type: | ||
*'''Find the Token!''': After breaking the first Enguarde Box, the Kongs must swim to a nearby DK Barrel and move straight up. In the enclosed space, Enguarde must use his Superstab move, which is hinted at by a group of bananas in an 'A' formation (or 'R' the Game Boy Advance version), and charge into a breakable wall, with a lone banana on its surface. The objective is to find the [[Kremkoin]] at the end of the maze within 40 seconds. | |||
==Warp Barrel== | |||
At the very start, after the Kongs fall down into the level, they encounter a Klomp. They must use team up to reach a cranny found above the center of the platform and enter the [[Warp Barrel]]. The warp zone takes place in a tight room featuring a large group of bananas arranged in the shape of an exclamation mark. This area is flooded with water, which drops just after the Kongs move forward. By exiting the warp room, the Kongs are dropped off at the No Animal Sign just before the End of Level Target. | |||
==Gallery== | ==Gallery== | ||
===Super Nintendo Entertainment System=== | |||
<gallery> | <gallery> | ||
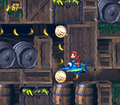
LockjawsLockerSNES4.png|Diddy Kong | LockjawsLockerSNES2.png|Dixie Kong falls between the crates at the beginning of the level | ||
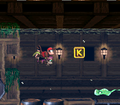
LockjawsLocker-SNES-K.png|The location of the letter K | |||
LockjawsLockerSNES4.png|Diddy Kong defeats two [[Klomp]]s with his [[Cartwheel Attack]] | |||
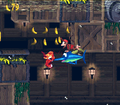
Lockjaw's Locker DKC2 Flotsams.png|The Kongs and Enguarde beneath two Flotsams | |||
[[File:Lockjaw Locker DKC2.png|The Kongs swim past a Flotsam | |||
Lockjaw's Locker DKC2 trail.png|Diddy and Enguarde find two Banana Coins down a narrow path | |||
Lockjaw's Locker DKC2 Enguarde Crate 2.png|The location of the second Enguarde Box | |||
Lockjaw's Locker DKC2 stab.png|Enguarde stabs a Lockjaw just before the letter G | |||
</gallery> | |||
===Game Boy Advance=== | |||
<gallery> | |||
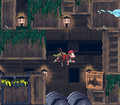
Lockjaw's Locker GBA Klomp.png|Diddy approaching a Klomp | |||
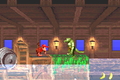
Lockjaw's Locker GBA Enguarde Crate 1.png|The Kongs find the first Enguarde Box | |||
Lockjaw's Locker GBA Bonus Area entrance.png|Enguarde breaks open the first Bonus Area's entrance | |||
Lockjaw's Locker GBA Golden Feather.png|The location of the golden feather | |||
LockjawsLocker-GBA-N.png|Location of the letter N | |||
Lockjaw's Locker GBA end.png|The [[End of Level Target]] at the end of the level | |||
</gallery> | </gallery> | ||
==Names in other languages== | ==Names in other languages== | ||
{{foreign names | {{foreign names | ||
|Jap=船ぞこダイビング | |||
|JapR=Funazoko Daibingu | |||
|JapM=Ship-Bottom Diving | |||
|Spa=Sala del Trismo | |Spa=Sala del Trismo | ||
|SpaM=Lockjaw's Chamber | |SpaM=Lockjaw's Chamber | ||
| | |Fre=Casier de Lockjaw | ||
| | |FreM=Lockjaw's Locker | ||
|Ger=Sinkender Holländer (SNES)<br | |Ger=Sinkender Holländer (SNES)<br>Lockjaws Revier (GBA) | ||
|GerM=Sinking Dutchman (reference to the '' | |GerM=Sinking Dutchman (reference to the ''{{wp|Flying Dutchman}}'')<br>Lockjaw's Territory | ||
|Ita=Stiva a Mollo | |Ita=Stiva a Mollo | ||
|ItaM=Soaked Ship Cellar | |ItaM=Soaked Ship Cellar | ||
}} | }} | ||
{{DKC2}} | {{DKC2}} | ||
[[Category:Pirate areas]] | |||
[[Category:Aquatic areas]] | |||
[[Category:Crocodile Isle]] | [[Category:Crocodile Isle]] | ||
[[Category:Donkey Kong Country 2: Diddy's Kong Quest | [[Category:Donkey Kong Country 2: Diddy's Kong Quest levels]] | ||
Latest revision as of 13:13, March 30, 2024
| Level | |
|---|---|
| Lockjaw's Locker | |

| |
| Level code | 1 - 4 |
| World | Gangplank Galleon |
| Game | Donkey Kong Country 2: Diddy's Kong Quest |
| Music track | Lockjaw's Saga |
| << Directory of levels >> | |
Lockjaw's Locker is the fourth level in Donkey Kong Country 2: Diddy's Kong Quest, as well as of Gangplank Galleon. It is the first underwater level of the game. As such, it is also the first level with underwater enemies, such as Flotsams, Lockjaws, and Shuris. Lockjaw's Locker takes place in a flooded ship cargo. There are two animal crates containing Enguarde, which is coincidentally also the case in Donkey Kong Country's Coral Capers. While Enguarde is not required for completing the level, he does assist Diddy Kong and Dixie Kong with defeating underwater foes, and is required to enter Lockjaw Locker's single Bonus Area. There are items such as bananas placed between the walls, and the Kongs can optionally swim to them through hidden paths to obtain them.
The first Enguarde Box is located down a path just beneath the first Lockjaw. The second Enguarde Box is found by swimming down a path just after the first Shuri. Unlike Coral Capers, the two Enguardes cannot appear together because of a No Animal Sign which appears some place between their locations.
Layout[edit]

When the Kongs begin the level, they find themselves falling downwards between many large crates and barrels in the ship's cargo hold. As they fall, they come up to a long, curvy trail of bananas, until they eventually land on some solid crates that they can walk along. If they press to the right against the wall as they fall, they can also access a hidden passage containing two Banana Coins and a Banana Bunch. Once the Kongs reach the ground area, they can find a Klomp ahead of them, who walks near an alcove full of water and some bananas. On the other side of the alcove, they can find a DK Barrel and two Klomps that march on a crate and a treasure chest full of banana peels. A wider alcove full of water is ahead of here with the letter K and a Flotsam above it. A Banana Bunch also hovers over the water. Once they cross the alcove, the water begins to rise, allowing them to travel upwards over a higher piece of sunken luggage. As they swim through this area, they come past a few Flotsams and a Lockjaw, who are followed by a line of bananas and another DK Barrel.
A hidden passage between some crates is also in this area, and it contains a long trail of bananas and two Banana Coins. There is another hidden passage under a crate found below the aforementioned DK Barrel, and if the primates swim through it, they can find a room containing an animal crate with Enguarde inside of it. An additional area is above the DK Barrel as well that contains a group of bananas that form the letter A and the entrance to a Bonus Level. If the primates travel forward from the DK Barrel, they come up to some more Flotsams and another Lockjaw, whom the letter O can be found under amongst some bananas in an alcove. After they pass this foe, they find a pathway leading upwards past a few Flotsams that swim in a horizontal path across the area. At the top this pathway, the water begins to lower. A No Animal Sign sits on some of the luggage to the left of here, and the primates can only get Enguarde over to it if they swim towards it before the water becomes too shallow. Otherwise, they have to dismount from the helper and continue past the sign on foot. If they manage to reach the sign with the swordfish, the helper disappears and they are given a red Extra Life Balloon. An area full of water follows the sign, and if the Kongs swim to the bottom of it, they can find a Star Barrel.
After the two friends pass the Star Barrel, they find a passage leading upwards past a DK Barrel and a Flotsam. As they continue past the Flotsam, the water begins to rise again, allowing them to travel higher into a wide area with the letter N in the corner of it. If they head west from the letter N, they come past a Shuri and then past a few Flotsams. Another Shuri follows these enemies, and if the primates feel along the ground below it, they can find a hidden passage on the other side of the crates that contains many bananas and two Banana Coins. A room containing another animal crate with Enguarde is at the end of this passage, along with a single Lockjaw. If the heroes head north from the aforementioned Shuri, they come up to a trail of bananas and past a few Flotsams to reach a wide area full of Lockjaws. An alcove is above the first Lockjaw that contains several bananas and the letter G.
In a lower part of the area, they can also find more bananas and a Banana Coin in some alcoves. Once the heroes travel past all of the Lockjaws, they come through a wide passage containing a few Shuris and then access a large area, where the water begins to lower. They can find a hidden area above some crates containing many bananas and a Video Game Hero Coin if they quickly travel to the east before the water lowers too much. If they do not reach this section of the level, the water lowers them down to a passage that contains a few Flotsams. After passing the foes, the group reaches a No Animal Sign on top of some large barrels. If the sign is reached with Enguarde, who disappears before passing it, they are given a Banana Bunch. An End of Level Target is ahead of here, and the Kongs successfully complete the level when it is hit. If they shoot to the target from a nearby Barrel Cannon, they win a prize after completing the level. The prizes include a Banana Bunch, red Extra Life Balloon, or a Banana Coin.
Enemies[edit]
The following enemies appear in the following quantities, and enemies marked in bold make their debut in the level:


Items and objects[edit]
The following items and objects appear in the following quantities:

Banana Coin (6)

DK Barrel (4)


KONG Letters[edit]
- K: Floating above the first Flotsam in the level.
- O: After the Kongs pass the second DK Barrel in the level, they must swim beneath a Lockjaw to obtain the letter O in an alcove.
- N: After passing the Star Barrel, the Kongs must swim up. When they encounter a Flotsam, they must swim up-right to find the letter N.
- G: Near the end of the level, the Kongs enter an area with a few Lockjaws. The letter G is located in an upper-left alcove, which is guarded by a Lockjaw.
Key items[edit]

- Cranky's Video Game Hero Coin: After the letter G, the Kongs must continue going right until they pass two Shuri. Just when they reach a wide, open path leading below, the Kongs must quickly swim right and follow a trail of bananas. The bananas lead them to a floating platform and down to the Video Game Hero Coin. They can also use Enguarde's Superstab to get onto the platform more easily. If the Kongs miss the platform, they can use team up from the No Animal Sign just before the End of Level Target.
- Golden feather (Game Boy Advance version only): After passing the first Bonus Area, the Kongs must continue onward and travel up past two yellow Flotsams. After reaching the end of the vertical path, the Kongs must swim through a wall to the right to obtain the golden feather in a small, enclosed area.
- Photograph (Game Boy Advance version only): With Enguarde, the Kongs must approach the last No Animal Sign, just after the Video Game Hero Coin. The Kongs and Enguarde must then backtrack and swim through a pathway at the leftmost side. This leads into an enclosed area with a Flotsam. Enguarde must defeat the Flotsam, which rewards Kongs with a photograph of Flotsam for the fourth page of their Scrapbook.
Bonus Level[edit]

Lockjaw Locker has only one Bonus Level, listed by its type:
- Find the Token!: After breaking the first Enguarde Box, the Kongs must swim to a nearby DK Barrel and move straight up. In the enclosed space, Enguarde must use his Superstab move, which is hinted at by a group of bananas in an 'A' formation (or 'R' the Game Boy Advance version), and charge into a breakable wall, with a lone banana on its surface. The objective is to find the Kremkoin at the end of the maze within 40 seconds.
Warp Barrel[edit]
At the very start, after the Kongs fall down into the level, they encounter a Klomp. They must use team up to reach a cranny found above the center of the platform and enter the Warp Barrel. The warp zone takes place in a tight room featuring a large group of bananas arranged in the shape of an exclamation mark. This area is flooded with water, which drops just after the Kongs move forward. By exiting the warp room, the Kongs are dropped off at the No Animal Sign just before the End of Level Target.
Gallery[edit]
Super Nintendo Entertainment System[edit]
Dixie Kong falls between the crates at the beginning of the level
The location of the letter K
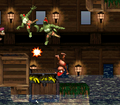
Diddy Kong defeats two Klomps with his Cartwheel Attack
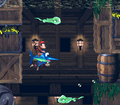
The Kongs and Enguarde beneath two Flotsams
Diddy and Enguarde find two Banana Coins down a narrow path
The location of the second Enguarde Box
Enguarde stabs a Lockjaw just before the letter G


Game Boy Advance[edit]
Diddy approaching a Klomp
The Kongs find the first Enguarde Box
Enguarde breaks open the first Bonus Area's entrance
The location of the golden feather
Location of the letter N
The End of Level Target at the end of the level


Names in other languages[edit]
| Language | Name | Meaning |
|---|---|---|
| Japanese | 船ぞこダイビング Funazoko Daibingu |
Ship-Bottom Diving |
| French | Casier de Lockjaw |
Lockjaw's Locker |
| German | Sinkender Holländer (SNES) Lockjaws Revier (GBA) |
Sinking Dutchman (reference to the Flying Dutchman) Lockjaw's Territory |
| Italian | Stiva a Mollo |
Soaked Ship Cellar |
| Spanish | Sala del Trismo |
Lockjaw's Chamber |