Jungle Hijinxs (Donkey Kong Country): Difference between revisions
(likewise) |
|||
| Line 1: | Line 1: | ||
{{italic title|id=yes}} | {{italic title|id=yes}} | ||
{{image|Warp Barrel screenshot}} | |||
{{level infobox | {{level infobox | ||
|world=[[Kongo Jungle]] | |world=[[Kongo Jungle]] | ||
| Line 9: | Line 10: | ||
|track=[[DK Island Swing]] | |track=[[DK Island Swing]] | ||
}} | }} | ||
'''Jungle Hijinxs''', also spelled '''Jungle Hijinx''',<ref>''Nintendo Magazine System'' (UK) issue 28, page 59.</ref> is the first [[level]] of ''[[Donkey Kong Country]]'' and of the first world, [[Kongo Jungle]]. | '''Jungle Hijinxs''', also spelled '''Jungle Hijinx''',<ref>''Nintendo Magazine System'' (UK) issue 28, page 59.</ref> is the first [[level]] of ''[[Donkey Kong Country]]'' and of the first world, [[Kongo Jungle]]. Being the first level, Jungle Hijinxs is simple, having few [[pit]]s and consisting of basic enemies. During the latter half, the Kongs can find an [[animal crate]] with [[Rambi]]. The music for Jungle Hijinxs as well as other jungle levels, "[[DK Island Swing]]," went on to become an iconic theme in various ''[[Super Mario (franchise)|Super Mario]]'' games, especially jungle settings that involve [[Donkey Kong]]. | ||
The [[Game Boy Color]] and [[Game Boy Advance]] versions of this level both take place during mid-day instead of sunset/dusk, and the sky never changes. This was likely done due to technical limitations or so that players could navigate through the level without losing visibility (the Game Boy Color and original GBA had no backlight to make the screen brighter). | |||
The | |||
In the [[List of Donkey Kong Country pre-release and unused content|pre-release version]] of ''Donkey Kong Country'', Jungle Hijinxs had a nighttime setting. Additionally, Jungle Hijinxs was originally known as "Jungle Japes", a name eventually used for the first level of ''[[Donkey Kong 64]]''. | |||
==Layout== | ==Layout== | ||
[[File:Jungle Hijinxs SNES 3.png|thumb|left|The Kongs riding on Rambi, who defeats a Gnawty]] | [[File:Jungle Hijinxs SNES 3.png|thumb|left|The Kongs riding on Rambi, who defeats a Gnawty]] | ||
The level starts when [[Donkey Kong]] shoots out of his tree house and then lands onto the ground. If Donkey Kong enters his [[banana hoard|banana cave]], he finds it empty, while if he enters his tree house found higher up, he can nab a [[Red Balloon|Life Balloon]] to gain an extra life along the way. Donkey Kong must continue a few steps to encounter a [[Gnawty]] and Diddy Kong stuck in a DK Barrel | The level starts when [[Donkey Kong]] shoots out of his [[DK's Tree House|tree house]] and then lands onto the ground. If Donkey Kong enters his [[banana hoard|banana cave]], he finds it empty, while if he enters his tree house found higher up, he can nab a [[Red Balloon|Life Balloon]] to gain an extra life along the way. Donkey Kong must continue a few steps to encounter a [[Gnawty]] and Diddy Kong stuck in a DK Barrel. Alternatively, from the treehouse's entrance, the Kongs have the option to hop from several treetops and collect two Life Balloons and one [[Green Balloon|2-Up Balloon]]. There is also a [[Iron Barrel|steel keg]] that the Kongs can optionally ride; by jumping from the treetops and then down a gap with a group of bananas forming a down arrow, Donkey Kong and Diddy Kong land on a ground patch, which breaks open to reveal a steel keg. By throwing it at DK's Tree House on the left, the steel keg ricochets and rolls in the Kongs' direction. They must jump on the steel keg, which they can ride until it falls into a gap shortly after the Rambi Crate. After the aforementioned 2-Up Balloon, the Kongs must continue along to a raised piece of land with a Kritter on it and a Gnawty underneath it so they can obtain the letter K of the [[KONG Letters|K-O-N-G Letters]]. Afterwards, the Kongs encounter two Kritters on two raised pieces of land and two [[Klump]]s, whom they must defeat to continue along so they can reach the [[Star Barrel|Continue Barrel]] and the letter O next to it. | ||
Next, the Kongs come past another DK Barrel and the letter O to encounter a Necky, who shoots nuts at them as a weapon and along the way. The foe stands on a raised area of land with a few bananas and an [[Expresso]] [[animal token|Token]] on it. They can hop onto Rambi, found in his crate nearby, who helps them defeat the three Gnawties in their path and find the letter N just ahead. Next, Rambi and the Kongs can either enter a Bonus Level to instantly gain the letter G upon exiting it, or hop onto some ledges acting as stairs so they can climb and jump onto the tree holding the letter G. The Kongs and Rambi can fall down from the treetops to break a barrier to find another Bonus Level which they can enter. They can either enter it to continue along if they finish it, or continue down the path, defeating a Klump, hopping over a ledge, and then going to the level's exit on the way, where Rambi stays. The exit then allows the Kongs to move into the [[Ropey Rampage|next level]]. | Next, the Kongs come past another DK Barrel and the letter O to encounter a Necky, who shoots nuts at them as a weapon and along the way. The foe stands on a raised area of land with a few bananas and an [[Expresso]] [[animal token|Token]] on it. They can hop onto Rambi, found in his crate nearby, who helps them defeat the three Gnawties in their path and find the letter N just ahead. Next, Rambi and the Kongs can either enter a Bonus Level to instantly gain the letter G upon exiting it (except in the Game Boy Color version), or hop onto some ledges acting as stairs so they can climb and jump onto the tree holding the letter G. The Kongs and Rambi can fall down from the treetops to break a barrier to find another Bonus Level which they can enter. They can either enter it to continue along if they finish it, or continue down the path, defeating a Klump, hopping over a ledge, and then going to the level's exit on the way, where Rambi stays. Optionally, if the player climbs the hill above the exit sign and jumps off Rambi, they can get a hidden [[Blue Balloon]]. The exit then allows the Kongs to move into the [[Ropey Rampage|next level]]. Additionally, when the Kongs reach the end of the level, it gets dark and becomes nighttime, which continues over into the next level, [[Ropey Rampage]]; neither of these occur in the Game Boy Color and Game Boy Advance versions. | ||
==Enemies== | ==Enemies== | ||
The following enemies appear in the following quantities: | |||
<gallery> | |||
Gnawty.png|[[Gnawty]] (5) | |||
Klump DKC sprite.png|[[Klump]] (3) | |||
Kritter-DKC.png|6 (5 in GBC) | |||
Necky perched DKC.png|[[Necky]] (perched) (1) | |||
</gallery> | |||
|6 ( | |||
==Items and objects== | ==Items and objects== | ||
The following items and objects appear in the following quantities: | |||
<gallery> | |||
Banana DKC SNES.png|[[Banana]] (74){{footnote|main|a}} | |||
Banana Bunch DKC SNES.png|[[Banana Bunch]] (18){{footnote|main|b}} | |||
Blue Balloon DKC SNES.png|[[Blue Balloon]] | |||
DK Barrel DKC.png|[[DK Barrel]] (2){{footnote|main|c}} | |||
Expresso Token Sprite SNES.png|[[Expresso]] [[animal token|Token]]{{footnote|main|d}} | |||
| | Green Balloon DKC SNES.png|[[Green Balloon]] (1) | ||
| | Red Balloon DKC SNES.png|[[Red Balloon]] (5){{footnote|main|e}} | ||
Steel Keg DKC.png|[[Iron Barrel|Steel keg]] (1) | |||
</gallery> | |||
| | {{footnote|note|a|40 of the bananas appear in the first Bonus Level}} | ||
{{footnote|note|b|14 of the Banana Bunches are hidden underground}} | |||
{{footnote|note|c|The first DK Barrel is located after the first Gnawty, and the second one is beneath the letter O.}} | |||
| | {{footnote|note|d|One of the Expresso Tokens appears in a Bonus Level}} | ||
{{footnote|note|e|One of the Red Balloons is in DK's Tree House, and another is in the first Bonus Level}} | |||
| | |||
| | |||
| | |||
| | |||
| | |||
| | |||
| | |||
|} | |||
===K-O-N-G Letters=== | ===K-O-N-G Letters=== | ||
*'''K''': The letter K is floating above the first ledge, which itself has the first Kritter. | |||
*'''O''': The letter O is to the upper-right of the Continue Barrel. | |||
*'''N''': The letter N is near the Rambi Crate, next to a group of three Gnawties, and just before a pit. | |||
*'''G''': The letter G is floating above two treetops, found after moving up a set of stairs with Rambi. | |||
=== | ===Key items=== | ||
[[File:Jungle Hijinxs Photograph 2.png|thumb|The location of the second photograph in the Game Boy Advance version]] | |||
*'''[[DK Sticker Pack]]''' (Game Boy color version only): Just before the level exit, [[Donkey Kong]] must go to a ledge below, with a [[green banana]] hinting to the DK Sticker Pack. Donkey Kong can [[Hand Slap]] the Banana Bunch to obtain the DK Sticker Pack. | |||
*'''[[Photograph]]''' (Game Boy Advance version only): | |||
*#Hidden behind a large bunch of bananas on the left side of DK's Tree House. The photograph shows [[Donkey Kong]] and [[Diddy Kong]] swinging from vines, an artwork used for the original version's title screen, and appears on the 11th page of the [[Scrapbook]]. | |||
*#Appears between a trail of bananas in the first Bonus Level. The photograph shows Donkey Kong sitting on Rambi on the 8th page of the Scrapbook. | |||
== | ==Bonus Levels== | ||
Jungle Hijinxs has two [[Bonus Level]]s, listed by type (applying exclusively to the Game Boy Advance version): | |||
{| | {{multiframe|[[File:JungleHijinxs-Bonus1.png|180px]] [[File:JungleHijinxs-Bonus2.png|180px]]|size=380|The first and second Bonus Levels, respectively}} | ||
*'''''Find the Exit!''''': After obtaining the letter N, the Kongs must continue to a nearby wall and break it open with a barrel or [[Rambi the Rhino|Rambi]]. The opening leads into the first [[Bonus room|Bonus Level]], where the Kongs and Rambi can collect several [[banana]]s and a [[Red Balloon|Life Balloon]] toward the exit. | |||
*'''''Stop the Barrel!''''': After exiting or passing the first Bonus Level's exit, the Kongs reach a treetops with the letter G. A small bump in the ground is directly below, and its left wall can break open from either Rambi or a barrel. In the Bonus Level, the Kongs must stop each of the three barrels to depict the same [[animal token]]. If done correctly, the Kongs are rewarded with that animal token. If the Kongs stop a barrel when a different one is shown, they lose. | |||
{{br}} | |||
==Warp Barrel== | |||
At the start, the Kongs must move across some treetops. From the third treetop, the Kongs must walk off the right to be caught by a Warp Barrel. After taking the narrow warp path, the Kongs fall on a raised patch of ground above the second Bonus Level entrance. This [[Warp Barrel]] exclusively appears in the Game Boy Advance version. | |||
{{ | |||
==Gallery== | ==Gallery== | ||
| Line 151: | Line 78: | ||
<gallery> | <gallery> | ||
Jungle Hijinxs design.jpg|Concept of Jungle Hijinxs | Jungle Hijinxs design.jpg|Concept of Jungle Hijinxs | ||
JungleHijinxs-K.png|The location of the letter K | |||
Jungle Hijinxs two Klumps.png|Donkey Kong defeats a Klump | Jungle Hijinxs two Klumps.png|Donkey Kong defeats a Klump | ||
Jungle Hijinxs SNES 2.png|The location of the letter O | |||
Jungle Hijinxs SNES 4.png|The Kongs next to an [[Expresso]] [[animal token|Token]] beneath the level's only perched Necky. | Jungle Hijinxs SNES 4.png|The Kongs next to an [[Expresso]] [[animal token|Token]] beneath the level's only perched Necky. | ||
Jungle Hijinxs SNES 5.png|Donkey Kong stands next to a banana trail | Jungle Hijinxs SNES 5.png|Donkey Kong stands next to a banana trail | ||
JungleHijinxs-N.png|The location of the letter N | |||
JungleHijinxs-G.png|The location of the letter G | |||
Jungle Hijinxs SNES 7.png|Diddy celebrates after winning a Bonus Level | Jungle Hijinxs SNES 7.png|Diddy celebrates after winning a Bonus Level | ||
Jungle Hijinxs SNES 8.png|The Kongs reach the end of the level | Jungle Hijinxs SNES 8.png|The Kongs reach the end of the level | ||
| Line 166: | Line 97: | ||
Jungle Hijinxs GBC Bonus Area 1.png|Rambi going through the first Bonus Level | Jungle Hijinxs GBC Bonus Area 1.png|Rambi going through the first Bonus Level | ||
Jungle Hijinxs GBC Klump and barrel.png|Rambi approaching a Klump after the second Bonus Level | Jungle Hijinxs GBC Klump and barrel.png|Rambi approaching a Klump after the second Bonus Level | ||
Sticker Pad JH.png|Location of the DK Sticker Pack | |||
Jungle Hijinxs GBC exit.png|Rambi reaches the level exit | Jungle Hijinxs GBC exit.png|Rambi reaches the level exit | ||
</gallery> | </gallery> | ||
| Line 195: | Line 127: | ||
|PorM=Wild Way | |PorM=Wild Way | ||
}} | }} | ||
==References== | ==References== | ||
Revision as of 16:33, November 24, 2023
It has been requested that at least one image be uploaded for this article. Remove this notice only after the additional image(s) have been added. Reason: Warp Barrel screenshot
| Level | |
|---|---|
| Jungle Hijinxs | |

| |
| Level code | 1-1 |
| World | Kongo Jungle |
| Game | Donkey Kong Country |
| Music track | DK Island Swing |
| << Directory of levels >> | |
Jungle Hijinxs, also spelled Jungle Hijinx,[1] is the first level of Donkey Kong Country and of the first world, Kongo Jungle. Being the first level, Jungle Hijinxs is simple, having few pits and consisting of basic enemies. During the latter half, the Kongs can find an animal crate with Rambi. The music for Jungle Hijinxs as well as other jungle levels, "DK Island Swing," went on to become an iconic theme in various Super Mario games, especially jungle settings that involve Donkey Kong.
The Game Boy Color and Game Boy Advance versions of this level both take place during mid-day instead of sunset/dusk, and the sky never changes. This was likely done due to technical limitations or so that players could navigate through the level without losing visibility (the Game Boy Color and original GBA had no backlight to make the screen brighter).
In the pre-release version of Donkey Kong Country, Jungle Hijinxs had a nighttime setting. Additionally, Jungle Hijinxs was originally known as "Jungle Japes", a name eventually used for the first level of Donkey Kong 64.
Layout

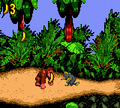
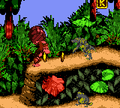
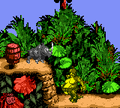
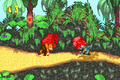
The level starts when Donkey Kong shoots out of his tree house and then lands onto the ground. If Donkey Kong enters his banana cave, he finds it empty, while if he enters his tree house found higher up, he can nab a Life Balloon to gain an extra life along the way. Donkey Kong must continue a few steps to encounter a Gnawty and Diddy Kong stuck in a DK Barrel. Alternatively, from the treehouse's entrance, the Kongs have the option to hop from several treetops and collect two Life Balloons and one 2-Up Balloon. There is also a steel keg that the Kongs can optionally ride; by jumping from the treetops and then down a gap with a group of bananas forming a down arrow, Donkey Kong and Diddy Kong land on a ground patch, which breaks open to reveal a steel keg. By throwing it at DK's Tree House on the left, the steel keg ricochets and rolls in the Kongs' direction. They must jump on the steel keg, which they can ride until it falls into a gap shortly after the Rambi Crate. After the aforementioned 2-Up Balloon, the Kongs must continue along to a raised piece of land with a Kritter on it and a Gnawty underneath it so they can obtain the letter K of the K-O-N-G Letters. Afterwards, the Kongs encounter two Kritters on two raised pieces of land and two Klumps, whom they must defeat to continue along so they can reach the Continue Barrel and the letter O next to it.
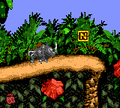
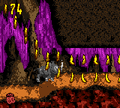
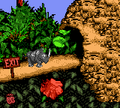
Next, the Kongs come past another DK Barrel and the letter O to encounter a Necky, who shoots nuts at them as a weapon and along the way. The foe stands on a raised area of land with a few bananas and an Expresso Token on it. They can hop onto Rambi, found in his crate nearby, who helps them defeat the three Gnawties in their path and find the letter N just ahead. Next, Rambi and the Kongs can either enter a Bonus Level to instantly gain the letter G upon exiting it (except in the Game Boy Color version), or hop onto some ledges acting as stairs so they can climb and jump onto the tree holding the letter G. The Kongs and Rambi can fall down from the treetops to break a barrier to find another Bonus Level which they can enter. They can either enter it to continue along if they finish it, or continue down the path, defeating a Klump, hopping over a ledge, and then going to the level's exit on the way, where Rambi stays. Optionally, if the player climbs the hill above the exit sign and jumps off Rambi, they can get a hidden Blue Balloon. The exit then allows the Kongs to move into the next level. Additionally, when the Kongs reach the end of the level, it gets dark and becomes nighttime, which continues over into the next level, Ropey Rampage; neither of these occur in the Game Boy Color and Game Boy Advance versions.
Enemies
The following enemies appear in the following quantities:


Items and objects
The following items and objects appear in the following quantities:

Banana Bunch (18)b

Green Balloon (1)

Red Balloon (5)e

Steel keg (1)


a - 40 of the bananas appear in the first Bonus Level
b - 14 of the Banana Bunches are hidden underground
c - The first DK Barrel is located after the first Gnawty, and the second one is beneath the letter O.
d - One of the Expresso Tokens appears in a Bonus Level
e - One of the Red Balloons is in DK's Tree House, and another is in the first Bonus Level
K-O-N-G Letters
- K: The letter K is floating above the first ledge, which itself has the first Kritter.
- O: The letter O is to the upper-right of the Continue Barrel.
- N: The letter N is near the Rambi Crate, next to a group of three Gnawties, and just before a pit.
- G: The letter G is floating above two treetops, found after moving up a set of stairs with Rambi.
Key items

- DK Sticker Pack (Game Boy color version only): Just before the level exit, Donkey Kong must go to a ledge below, with a green banana hinting to the DK Sticker Pack. Donkey Kong can Hand Slap the Banana Bunch to obtain the DK Sticker Pack.
- Photograph (Game Boy Advance version only):
- Hidden behind a large bunch of bananas on the left side of DK's Tree House. The photograph shows Donkey Kong and Diddy Kong swinging from vines, an artwork used for the original version's title screen, and appears on the 11th page of the Scrapbook.
- Appears between a trail of bananas in the first Bonus Level. The photograph shows Donkey Kong sitting on Rambi on the 8th page of the Scrapbook.
Bonus Levels
Jungle Hijinxs has two Bonus Levels, listed by type (applying exclusively to the Game Boy Advance version):


- Find the Exit!: After obtaining the letter N, the Kongs must continue to a nearby wall and break it open with a barrel or Rambi. The opening leads into the first Bonus Level, where the Kongs and Rambi can collect several bananas and a Life Balloon toward the exit.
- Stop the Barrel!: After exiting or passing the first Bonus Level's exit, the Kongs reach a treetops with the letter G. A small bump in the ground is directly below, and its left wall can break open from either Rambi or a barrel. In the Bonus Level, the Kongs must stop each of the three barrels to depict the same animal token. If done correctly, the Kongs are rewarded with that animal token. If the Kongs stop a barrel when a different one is shown, they lose.
Warp Barrel
At the start, the Kongs must move across some treetops. From the third treetop, the Kongs must walk off the right to be caught by a Warp Barrel. After taking the narrow warp path, the Kongs fall on a raised patch of ground above the second Bonus Level entrance. This Warp Barrel exclusively appears in the Game Boy Advance version.
Gallery
Super Nintendo Entertainment System

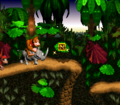
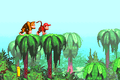
Concept of Jungle Hijinxs
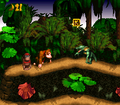
The location of the letter K
Donkey Kong defeats a Klump
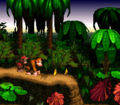
The location of the letter O
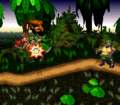
Donkey Kong stands next to a banana trail
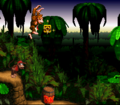
The location of the letter N
The location of the letter G
Diddy celebrates after winning a Bonus Level
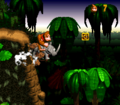
The Kongs reach the end of the level


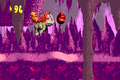
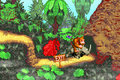
Game Boy Color
Donkey Kong selecting Jungle Hijinxs from the map
Donkey Kong encounters the first Gnawty
Donkey Kong holding a barrel at a Kritter

Diddy next to the Star Barrel and letter O
Rambi approaching the letter N
Rambi going through the first Bonus Level
Rambi approaching a Klump after the second Bonus Level

Location of the DK Sticker Pack
Rambi reaches the level exit


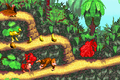
Game Boy Advance
Donkey Kong encounters the first Gnawty
The Kongs walking on the treetops, above the letter K
The Kongs run past the Necky and Expresso Token
The Kongs and Rambi jump at the Life Balloon in the first Bonus Level
The Kongs and Rambi exit the level


Names in other languages
| Language | Name | Meaning |
|---|---|---|
| Japanese | バナナジャングル Banana janguru |
Banana Jungle |
| German | Dschungel-Fieber |
Jungle Fever |
| Italian | Baldoria nella Giungla (SNES)[2] Giungla Gincana (GBC and GBA) |
Spree in the Jungle Gymkhana Jungle; same as Jungle Jinx |
| Portuguese | Via Selvagem |
Wild Way |
| Spanish | Jungla Hijinxs |
Hijinxs Jungle |