Ghostly Grove (Donkey Kong Country 2: Diddy's Kong Quest): Difference between revisions
m (Now I got the difficulty!) |
LinkTheLefty (talk | contribs) mNo edit summary |
||
| (107 intermediate revisions by 46 users not shown) | |||
| Line 1: | Line 1: | ||
{{ | {{italic title|id=yes}} | ||
| | {{level infobox | ||
|image=[[ | |image=[[File:Ghostly Grove DKC2 large pit.png]] | ||
|code = | |code=5 - 1 | ||
|game = ''[[Donkey Kong Country 2: Diddy's Kong Quest]]'' | |world=[[Gloomy Gulch]] | ||
| | |game=''[[Donkey Kong Country 2: Diddy's Kong Quest]]'' | ||
|track=Forest Interlude | |||
|before = [[ | |before=[[King Zing Sting (Donkey Kong Country 2: Diddy's Kong Quest)|<<]] | ||
|after = [[Haunted Hall|>>]] | |after=[[Haunted Hall|>>]] | ||
}} | }} | ||
'''Ghostly Grove''' is the twenty-third [[level]] of ''[[Donkey Kong Country 2: Diddy's Kong Quest]]''. It is also the first area of [[Gloomy Gulch]]. This level is set in an eerie forest and marks first appearance of the [[Rope (ghost)|rope]]s, which appear throughout. [[Diddy Kong|Diddy]] and [[Dixie Kong]] need to time their [[jump]]s in order to utilize the ropes to their advantage. They cannot hang onto them long, as the ropes might disappear before they get off, thus making them fall. | |||
==Layout== | |||
[[File:Ghostly Grove DKC2 GBA.png|thumb|left|Ghostly Grove in the Game Boy Advance version]] | |||
At the beginning of the level, the Kongs can find a Kloak, above themselves that throws items to them. Klomps stomp along the long and rather flat pathway ahead. A rope is on the way down the pathway, and a [[DK Barrel]] wobbles next to it. A second rope is above a prickly Spiny found in a small alcove. The rope can be used to reach a higher area of land. There is a small alcove in the ground near here with a Klampon and a Spiny in it. The [[KONG Letters|letter K]] floats above the dangerous foes. A Klobber also waits in its barrel at the edge of a cliff just ahead. An abyss is next to the [[Kremling]] enemy. | |||
A rope floats above it that must be used to cross, and a [[Banana Coin]] is also in the gap. On the other side of the gap, a trio of Klampon patrol the area. A wide abyss is after them with a pair of ropes above it, and a Flitter also flies in the gap. If the Kongs cross this and reach land, they can find another Klobber and two mighty Krunchas on raised piece of land. A flat pathway with a Spiny walking along it is ahead at a slightly lower elevation with a rope appearing and disappearing above it. It can be climbed to reach the letter O. After passing a small gap, the heroes approach a Klobber on a platform. Another abyss follows it, but it can only be crossed with the help of a rope. Luckily, one of these ghostly objects is present in the gap, although a Zinger is near it. A barrel and a lone Klobber can be found immediately after the pit. They are located just before a pair of Krunches, who are both found on pieces of land at different elevations. In a higher area of land ahead, another Klobber can be found. The [[Star Barrel]] is nearby immediately after a Spiny in a small alcove. | |||
Ahead, the Kongs can find a wobbling DK Barrel in front of a Kloak, who throws Spinies at them. After tossing the enemy, the Kloak leaves, allowing the Kongs to safely progress to an abyss near its previous spot. A rope must be used to cross. A platform with a Kaboom on it is located after this abyss. Another gap is immediately after the foe, and it is filled with ropes, [[banana]]s, and a lone Zinger. Once it is crossed, the heroes can reach a large area of land with a Klobber and a Kaboom on it. They hide in barrels in front of a raised piece of ground. A [[Treasure Chest]] containing the letter N is here. After crossing a small gap that follows the two Kremling enemies, the heroes find themselves on a large area of land with two Klampons on it. A pair of ropes are in the air above the [[Klaptrap]]-like foes, but they do not appear visible for more than a few seconds. They can be used to reach a [[Bonus Barrel]]. A wide abyss can be found farther ahead. Two ropes placed in it can assist the duo in crossing. A Zinger stands in their way as they travel over the pit, which is followed by a flat piece of land with two Kabooms on it. A DK Barrel is also here. | |||
Another abyss with more ropes in it follows the Kabooms. The heroes must climb upwards using the ropes to reach a higher platform located immediately after a stationary Zinger. Two Klampons are here that march along some stair-like piece of land. Spinies can be found soon after them under a formation of bananas. The bananas form a circle, which has the invisible letter G within it. Another large pit is ahead, but it can be crossed with the help from a trio of ropes. A Zinger is after each of the ghostly beings. A small platform is present at the opposite side of the gap. Here, a Kloak can be found floating over another abyss. After it hurls a single barrel at the Kongs, it floats away. Five ropes are located in the large gap that this Kloak is found above. They can aid the heroes in crossing the gap. If the two friends manage to cross, they can find the [[End of Level Target]] on a solid piece of land. If they land on it, the level is completed. If they jump on the target from the final rope in the level, they win a prize. | |||
{{ | {{br}} | ||
[[ | ==Enemies== | ||
[[Category: | The following enemies appear in the following quantities, and enemies marked in '''bold''' debut in this level: | ||
[[Category: | <gallery> | ||
[[Category: | Flitter DKC2.png|[[Flitter]] (1) | ||
Kaboom DKC2.png|'''[[Kaboom]]''' (4) | |||
Klampon DKC2.png|[[Klampon]] (8) | |||
Klobber DKC2 green.png|[[Klobber]] (green) (6) | |||
Klomp DKC2.png|[[Klomp]] (3) | |||
Kloak DKC2.png|[[Kloak]] (4) | |||
Kruncha DKC2 blue.png|[[Kruncha]] (blue) (4) | |||
Rope DKC2 sprite.png|'''[[Rope (ghost)|Rope]]''' (30) | |||
Spiny DKC2.png|[[Spiny (Donkey Kong Country 2: Diddy's Kong Quest)|Spiny]] (7) | |||
Zinger DKC2 yellow.png|[[Zinger]] (yellow) (7) | |||
Zinger DKC2 red.png|Zinger (red) (1) | |||
</gallery> | |||
==Items and objects== | |||
The following items and objects appear in the following quantities: | |||
<gallery> | |||
Banana Coin.png|[[Banana Coin]] (2) | |||
DK Barrel.png|[[DK Barrel]] (3) | |||
</gallery> | |||
===KONG Letters=== | |||
*'''K:''' Near the start of the level, the letter K is hovering over a small gap with a Klampon and a Spiny. | |||
*'''O:''' Shortly after passing the first pair of Krunchas, the Kongs can find a rope and the letter O floating above the Spiny. The Kongs can obtain the letter O by either jumping from the rope or by using [[team up]]. | |||
*'''N:''' Sometime after passing the Star Barrel, the Kongs encounter both a Klobber and a Kaboom next to each other. The letter N is hidden inside a chest above them, and the Kongs can reveal the letter by attack either enemy with the chest. | |||
*'''G:''' Late into the level, the Kongs can find a group of bananas arranged in a circular shape. By using [[team up]], they can obtain the invisible letter G in the center. | |||
===Key items=== | |||
[[File:GhostlyGroveSNES7.png|thumb|The location of the Video Game Hero Coin]] | |||
*'''[[DK Coin|Cranky's Video Game Hero]]:''' Just after the letter O, the Kongs must jump into the following pit but move left to land into a barely visible Auto-Fire Barrel, which blasts them to the Video Game Hero Coin and an upward-facing Auto-Fire Barrel that blasts them back on ground. This barrel can be reached by Dixie using her [[Helicopter Spin]] or if Diddy executes a long roll jump. | |||
*'''[[Golden feather]] (Game Boy Advance version only):''' Floating in the small pit right before the two Ghost Ropes leading to the second Bonus Area. The Kongs must jump into the center of the pit, where they are immediately caught by a hook. They automatically obtain the golden feather, which is floating directly beneath. | |||
*'''[[Photograph]] (Game Boy Advance version only):''' At the very start, the Kongs are located beneath a Kloak, who is hovering over them. They can obtain the [[photograph]] by defeating the Kloak. This puts a photograph of [[Kloak]] into the fifth page of the [[Scrapbook (Donkey Kong Country series)|Scrapbook]]. | |||
{{br}} | |||
==Bonus Levels== | |||
{{multiframe|[[File:Ghostly Grove Bonus Area 1.png|200px]] [[File:Ghostly Grove GBA Bonus Area 2.png|200px]]|size=420|The first and second Bonus Levels respectively}} | |||
Ghostly Grove has two Bonus Levels, listed by their type: | |||
*'''Find the Token!''': When the Kongs encounter the second pair of Krunchas, they must pick up a [[Barrel]] and throw it at a wall just after them, right next to a single [[banana]]. This opens the entrance to the [[Bonus Area]]. Here, the Kongs have 20 seconds to throw a [[Chest]] at a red [[Zinger]] five times, causing it to finally break and reveal the [[Kremkoin]] inside. | |||
*'''Find the Token!''': Some time after the Star Barrel, the Kongs can find two Klampons, with two ropes above them. Both ropes share a pattern of simultaneously vanishing then reappearing (taking noticeably less time than the other ropes throughout the level to do so), meaning that the Kongs should quickly jump from both of them and into the Bonus Barrel above. The Bonus Area's objective is for the Kongs to jump between four ropes (with two bananas located to the right of each rope) to cross an abyss and collect the Kremkoin from a platform on the right. They only have ten seconds to accomplish this. The Kongs lose at the Bonus Area if they fall into the pit. | |||
{{br}} | |||
==Gallery== | |||
<gallery> | |||
Gloomy Gulch DKC2 art.png|A 3D rendered artwork of a glade-like portion in Gloomy Gulch, which is perhaps Ghostly Grove's, judging by the colors used. | |||
Ghostly Grove DKC2 shot.png|The very start of the level | |||
GhostlyGroveSNES1.png|Diddy and Dixie find a rope | |||
GhostlyGroveSNES2.png|Diddy Kong hangs on a rope at the beginning of the level. | |||
GhostlyGroveSNES3.png|Diddy jumping above a Zinger. | |||
Ghostly Grove DKC2 rope.png|The Kongs holding onto a rope. | |||
GhostlyGroveSNES6.png|Diddy Kong defeats a Zinger with a TNT Barrel | |||
Ghostly Grove DKC2 end.png|Dixie jumping toward the End of Level Target | |||
Ghostly Grove DKC2 GBA start.png|The start of the level, where the photograph is located, in the Game Boy Advance version | |||
GhostlyGrove-GBA-K.png|The letter K in the Game Boy Advance version | |||
GhostlyGrove-GBA-O.png|The letter O in the Game Boy Advance version | |||
</gallery> | |||
==Names in other languages== | |||
{{foreign names | |||
|Jap=おばけロープのもり | |||
|JapR=Obake Rōpu no Mori | |||
|JapM=Ghost Rope Woods | |||
|Spa=Bosque Fantasmal | |||
|SpaM=Ghostly Forest | |||
|Fre=Funeste Futaie | |||
|FreM=Disastrous Grove | |||
|Ger=Geister Grube (SNES)<br>Geistergrube (GBA) | |||
|GerM=Ghost Pit | |||
|Ita=Liane Fantasma | |||
|ItaM=Ghost Lianas | |||
}} | |||
{{DKC2}} | |||
[[Category:Haunted forests]] | |||
[[Category:Crocodile Isle]] | |||
[[Category:Donkey Kong Country 2: Diddy's Kong Quest levels]] | |||
Latest revision as of 13:19, March 30, 2024
| Level | |
|---|---|
| Ghostly Grove | |

| |
| Level code | 5 - 1 |
| World | Gloomy Gulch |
| Game | Donkey Kong Country 2: Diddy's Kong Quest |
| Music track | Forest Interlude |
| << Directory of levels >> | |
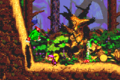
Ghostly Grove is the twenty-third level of Donkey Kong Country 2: Diddy's Kong Quest. It is also the first area of Gloomy Gulch. This level is set in an eerie forest and marks first appearance of the ropes, which appear throughout. Diddy and Dixie Kong need to time their jumps in order to utilize the ropes to their advantage. They cannot hang onto them long, as the ropes might disappear before they get off, thus making them fall.
Layout[edit]

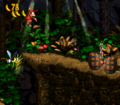
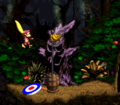
At the beginning of the level, the Kongs can find a Kloak, above themselves that throws items to them. Klomps stomp along the long and rather flat pathway ahead. A rope is on the way down the pathway, and a DK Barrel wobbles next to it. A second rope is above a prickly Spiny found in a small alcove. The rope can be used to reach a higher area of land. There is a small alcove in the ground near here with a Klampon and a Spiny in it. The letter K floats above the dangerous foes. A Klobber also waits in its barrel at the edge of a cliff just ahead. An abyss is next to the Kremling enemy.
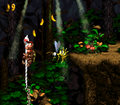
A rope floats above it that must be used to cross, and a Banana Coin is also in the gap. On the other side of the gap, a trio of Klampon patrol the area. A wide abyss is after them with a pair of ropes above it, and a Flitter also flies in the gap. If the Kongs cross this and reach land, they can find another Klobber and two mighty Krunchas on raised piece of land. A flat pathway with a Spiny walking along it is ahead at a slightly lower elevation with a rope appearing and disappearing above it. It can be climbed to reach the letter O. After passing a small gap, the heroes approach a Klobber on a platform. Another abyss follows it, but it can only be crossed with the help of a rope. Luckily, one of these ghostly objects is present in the gap, although a Zinger is near it. A barrel and a lone Klobber can be found immediately after the pit. They are located just before a pair of Krunches, who are both found on pieces of land at different elevations. In a higher area of land ahead, another Klobber can be found. The Star Barrel is nearby immediately after a Spiny in a small alcove.
Ahead, the Kongs can find a wobbling DK Barrel in front of a Kloak, who throws Spinies at them. After tossing the enemy, the Kloak leaves, allowing the Kongs to safely progress to an abyss near its previous spot. A rope must be used to cross. A platform with a Kaboom on it is located after this abyss. Another gap is immediately after the foe, and it is filled with ropes, bananas, and a lone Zinger. Once it is crossed, the heroes can reach a large area of land with a Klobber and a Kaboom on it. They hide in barrels in front of a raised piece of ground. A Treasure Chest containing the letter N is here. After crossing a small gap that follows the two Kremling enemies, the heroes find themselves on a large area of land with two Klampons on it. A pair of ropes are in the air above the Klaptrap-like foes, but they do not appear visible for more than a few seconds. They can be used to reach a Bonus Barrel. A wide abyss can be found farther ahead. Two ropes placed in it can assist the duo in crossing. A Zinger stands in their way as they travel over the pit, which is followed by a flat piece of land with two Kabooms on it. A DK Barrel is also here.
Another abyss with more ropes in it follows the Kabooms. The heroes must climb upwards using the ropes to reach a higher platform located immediately after a stationary Zinger. Two Klampons are here that march along some stair-like piece of land. Spinies can be found soon after them under a formation of bananas. The bananas form a circle, which has the invisible letter G within it. Another large pit is ahead, but it can be crossed with the help from a trio of ropes. A Zinger is after each of the ghostly beings. A small platform is present at the opposite side of the gap. Here, a Kloak can be found floating over another abyss. After it hurls a single barrel at the Kongs, it floats away. Five ropes are located in the large gap that this Kloak is found above. They can aid the heroes in crossing the gap. If the two friends manage to cross, they can find the End of Level Target on a solid piece of land. If they land on it, the level is completed. If they jump on the target from the final rope in the level, they win a prize.
Enemies[edit]
The following enemies appear in the following quantities, and enemies marked in bold debut in this level:

Flitter (1)

Kaboom (4)

Klampon (8)

Klobber (green) (6)

Klomp (3)

Kloak (4)

Kruncha (blue) (4)

Rope (30)

Spiny (7)

Zinger (yellow) (7)

Zinger (red) (1)


Items and objects[edit]
The following items and objects appear in the following quantities:

Banana Coin (2)

DK Barrel (3)


KONG Letters[edit]
- K: Near the start of the level, the letter K is hovering over a small gap with a Klampon and a Spiny.
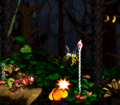
- O: Shortly after passing the first pair of Krunchas, the Kongs can find a rope and the letter O floating above the Spiny. The Kongs can obtain the letter O by either jumping from the rope or by using team up.
- N: Sometime after passing the Star Barrel, the Kongs encounter both a Klobber and a Kaboom next to each other. The letter N is hidden inside a chest above them, and the Kongs can reveal the letter by attack either enemy with the chest.
- G: Late into the level, the Kongs can find a group of bananas arranged in a circular shape. By using team up, they can obtain the invisible letter G in the center.
Key items[edit]

- Cranky's Video Game Hero: Just after the letter O, the Kongs must jump into the following pit but move left to land into a barely visible Auto-Fire Barrel, which blasts them to the Video Game Hero Coin and an upward-facing Auto-Fire Barrel that blasts them back on ground. This barrel can be reached by Dixie using her Helicopter Spin or if Diddy executes a long roll jump.
- Golden feather (Game Boy Advance version only): Floating in the small pit right before the two Ghost Ropes leading to the second Bonus Area. The Kongs must jump into the center of the pit, where they are immediately caught by a hook. They automatically obtain the golden feather, which is floating directly beneath.
- Photograph (Game Boy Advance version only): At the very start, the Kongs are located beneath a Kloak, who is hovering over them. They can obtain the photograph by defeating the Kloak. This puts a photograph of Kloak into the fifth page of the Scrapbook.
Bonus Levels[edit]


Ghostly Grove has two Bonus Levels, listed by their type:
- Find the Token!: When the Kongs encounter the second pair of Krunchas, they must pick up a Barrel and throw it at a wall just after them, right next to a single banana. This opens the entrance to the Bonus Area. Here, the Kongs have 20 seconds to throw a Chest at a red Zinger five times, causing it to finally break and reveal the Kremkoin inside.
- Find the Token!: Some time after the Star Barrel, the Kongs can find two Klampons, with two ropes above them. Both ropes share a pattern of simultaneously vanishing then reappearing (taking noticeably less time than the other ropes throughout the level to do so), meaning that the Kongs should quickly jump from both of them and into the Bonus Barrel above. The Bonus Area's objective is for the Kongs to jump between four ropes (with two bananas located to the right of each rope) to cross an abyss and collect the Kremkoin from a platform on the right. They only have ten seconds to accomplish this. The Kongs lose at the Bonus Area if they fall into the pit.
Gallery[edit]
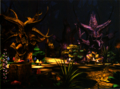
A 3D rendered artwork of a glade-like portion in Gloomy Gulch, which is perhaps Ghostly Grove's, judging by the colors used.
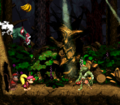
The very start of the level
Diddy and Dixie find a rope
Diddy Kong hangs on a rope at the beginning of the level.
Diddy jumping above a Zinger.
The Kongs holding onto a rope.
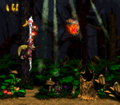
Diddy Kong defeats a Zinger with a TNT Barrel
Dixie jumping toward the End of Level Target
The start of the level, where the photograph is located, in the Game Boy Advance version

The letter K in the Game Boy Advance version

The letter O in the Game Boy Advance version


Names in other languages[edit]
| Language | Name | Meaning |
|---|---|---|
| Japanese | おばけロープのもり Obake Rōpu no Mori |
Ghost Rope Woods |
| French | Funeste Futaie |
Disastrous Grove |
| German | Geister Grube (SNES) Geistergrube (GBA) |
Ghost Pit |
| Italian | Liane Fantasma |
Ghost Lianas |
| Spanish | Bosque Fantasmal |
Ghostly Forest |