Gangplank Galley (Donkey Kong Country 2: Diddy's Kong Quest): Difference between revisions
Fawfulfury65 (talk | contribs) (perfect) |
No edit summary |
||
| (68 intermediate revisions by 29 users not shown) | |||
| Line 1: | Line 1: | ||
{{ | {{italic title|id=yes}} | ||
| | {{level infobox | ||
|image=[[File: | |image=[[File:Gangplank Galley DKC2 shot 2.png]] | ||
|code=1 - 3 | |code=1 - 3 | ||
|game=''[[Donkey Kong Country 2: Diddy's Kong Quest | |world=[[Gangplank Galleon (world)|Gangplank Galleon]] | ||
| | |game=''[[Donkey Kong Country 2: Diddy's Kong Quest]]'' | ||
|before=[[Mainbrace Mayhem|<<]] | |track=Klomp's Romp | ||
|after=[[Lockjaw's Locker|>>]] | |before=[[Mainbrace Mayhem (Donkey Kong Country 2: Diddy's Kong Quest)|<<]] | ||
|after=[[Lockjaw's Locker (Donkey Kong Country 2: Diddy's Kong Quest)|>>]] | |||
}} | }} | ||
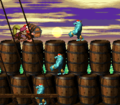
'''Gangplank Galley''' is the third level of | '''Gangplank Galley''' is the third level of ''[[Donkey Kong Country 2: Diddy's Kong Quest]]'' and the third level of the first world, [[Gangplank Galleon (world)|Gangplank Galleon]]. It is similar to the first level, [[Pirate Panic (Donkey Kong Country 2: Diddy's Kong Quest)|Pirate Panic]], taking place on a wrecked pirate ship, and the sun sets slowly over the course of the level. [[Kaboing]]s and [[Kruncha]]s are the newly introduced enemies in the level. Throughout the level, there are [[hook]]s that [[Diddy Kong|Diddy]] and [[Dixie Kong]] can grapple on to reach higher areas or to cross wide gaps. Secret items are often hidden on the highly stacked barrels. An [[Invincibility Barrel|Exclamation Point Barrel]] first appears in this level, located near the end. The water in the background is green during the sunset. In the Game Boy Advance version, it has a more grayish appearance. | ||
==Layout== | |||
[[File:Gangplank Galley GBA letter K.png|thumb|left|Gangplank Galley's appearance in the Game Boy Advance version]] | |||
{{multiple image|direction=horizontal|footer=A comparison of the day to evening transitional effect.|width=200|image1=Gangplank Galley start.png|image2=Gangplank Galley evening start.png}} | |||
The Kongs begin the level in front of a large pile of barrels with a [[Bonus Barrel]] on top of them and a few hooks to the right of it that hang above a [[Banana Bunch]] and the level's [[DK Coin|Video Game Hero Coin]]. In front of the barrels, the primates can find a Kaboing and a pair of ledges with a Klomp between them. A few barrels are stacked up ahead of here that the Kongs can climb on to reach a few bananas and a [[DK Barrel]], which is followed by a small stairway that a few Kaboings hop along. At the top of the stairs, the heroes can find a [[treasure chest]] that contains a Banana Bunch. After they travel down an additional stairway, they come up to a few barrel platforms with two Klomps on top of and in front of them. The barrels can be climbed on to aid the heroes in reaching a higher ledge with a hook above it that hangs next to the [[KONG Letters|letter K]]. | |||
If the primates continue from here, they come down another small stairway with a few Kaboings on it. A pair of barrels is at the bottom of the stairway that can be used to reach a trio of hooks that can be climbed to reach a DK Barrel and the bananas under it. A treasure chest that contains a red [[Extra Life Balloon]] is also under the DK Barrel, which is followed by a ledge with a Neek on top of it. The heroes can spot a trail of bananas leading upwards near the rat enemy, and a hidden [[Barrel Cannon]] is above it that can shoot them onto a tall stack of barrels. Two more tall piles of barrels are after this stack, and between each of them is a hook with a Banana Bunch or the letter O below it. If the primates do not travel along these barrels, they must instead travel through a lower part of the ship that is full of Kaboings. After they climb out of this lower area, they come up to a Neek and a barrel platform that is followed by a small ledge with a Banana Coin-containing treasure chest at the bottom of it. Once the Kongs climb a small stairway with a Klomp at the top of it, they can discover a Star Barrel. | |||
The primates can find a large set of barrels at the bottom of a stairway located after the Star Barrel. A Kruncha and the letter N are above the barrels, while a Klomp and a DK Barrel are in front of them. After the heroes climb to the top of a nearby stairway that Neeks march along, they come up to a wide abyss that they can cross with the use of a hook floating over it. On the other side of the pit, there is a treasure chest that holds a Banana Bunch. It is followed by a large group of barrels that form two rows. A Kruncha is on each of the rows, and an additional Kruncha marches in front of the barrels. Another wide abyss follows here, and it contains two hooks that the heroes can use to cross it. They can find an Exclamation Point Barrel on the other side of the pit that makes them invincible for a limited amount of time when they hit it. | |||
A stairway follows the barrel that a few Neeks march along. Two pairs of large barrels are ahead of here. While the first pair stands behind a Kruncha and holds a few bananas, the other supports a Kruncha and sits behind some bananas. A Banana Bunch is located to the right of the second barrel pair, and a small stairway with a Kaboing on it is below it. On the bottom of these stairs, the Kongs can find a large stack of barrels that hold a few Krunchas, a treasure chest that holds a red Extra Life Balloon, and two bananas. A Bonus Barrel is also above it. Once the Kongs head past the pile of barrels, they make their way up a set of stairs with a few Kaboings on them and then approach a wide abyss with some hooks above it. Once they cross the pit, they come up to the [[End of Level Target]]. If they jump on the target from the ground, they simply complete the level, but if they jump on it from a nearby hook, they complete the level and earn a prize. In the [[Game Boy Advance]] version, the Kongs can find three Banana Coins hidden past the End of Level Target. | |||
{{br|left}} | |||
==Enemies== | |||
The following enemies appear in the following quantities, and enemies that debut in the level are marked in '''bold''': | |||
<gallery> | |||
Kaboing DKC2 gray.png|'''[[Kaboing]]''' (gray) (12) | |||
Klomp DKC2.png|[[Klomp]] (5) | |||
Kruncha DKC2 blue.png|'''[[Kruncha]]''' (10) | |||
Neek DKC2.png|[[Neek]] (6) | |||
Zinger DKC2 red.png|[[Zinger]] (red) (1){{footnote|main|a}} | |||
</gallery> | |||
{{footnote|note|a|Appears only in a Bonus Level}} | |||
==Items and objects== | |||
== | The following enemies appear in the following quantities: | ||
The | |||
<gallery> | |||
Banana DKC SNES.png|[[Banana]] (167){{footnote|main|b}} | |||
Banana Bunch DKC SNES.png|[[Banana Bunch]] (2){{footnote|main|c}} | |||
Banana Coin.png|[[Banana Coin]] (6){{footnote|main|d}} | |||
DK Barrel.png|[[DK Barrel]] (3) | |||
Invincibility Barrel.png|[[Invincibility Barrel|Exclamation Point Barrel]] | |||
Red Extra Life Balloon DKC2.png|[[Red Balloon]] (3){{footnote|main|e}} | |||
Treasure Chest DKC2.png|[[Treasure chest]] (10){{footnote|main|f}} | |||
</gallery> | |||
{{footnote|note|b|Of the 167 bananas, 34 of them are in the Bonus Areas.}} | |||
{{footnote|note|c|Both Banana Bunches are an End of Level Target prize.}} | |||
{{footnote|note|d|One of the Banana Coins is an End of Level Target prize.}} | |||
{{footnote|note|e|Two of the Red Balloons each appear in a treasure chest, and one is an End of Level Target prize.}} | |||
{{footnote|note|f|Of the 10 treasure chests, 4 of them are in a Bonus Area.}} | |||
===KONG Letters=== | |||
*'''K:''' Located next to a hook after a pair of two Klomps. | |||
*'''O:''' After the Kongs pass the second DK Barrel in the level, they can find a trail of bananas beneath a [[Blast Barrel]]. Using their team up move, the Kongs can enter the barrel, which blasts them on top of the adjacent stack of barrels. The Kongs must jump from a hook and onto the next stack of barrels. The letter O is hanging beneath the second hook. | |||
*'''N:''' After the Star Barrel, the Kongs must jump onto some barrel platforms guarded by a Kruncha. They can obtain the letter N, which is hovering above the center. | |||
*'''G:''' Just after the Exclamation Point Barrel, the Kongs stumble upon a treasure chest which they can attack an enemy with. By doing so, the chest releases the letter G. | |||
===Key items=== | |||
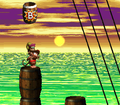
[[File:Gangplank Galley DKC2 DK Coin.png|thumb|The Video Game Hero Coin]] | |||
*'''[[DK Coin|Cranky's Video Game Hero Coin]]''': The Video Game Hero Coin is near the first Bonus Level. From the top of the stack of barrels, just below the [[Bonus Barrel]], [[Dixie Kong|Dixie]] must use her [[Helicopter Spin]] to hover all the way right to grab onto a hook in the air. Dixie must jump to the third hook to obtain the Video Game Hero Coin. In the Game Boy Advance version, Diddy can reach the Bonus Area by performing a [[cartwheel]] jump. | |||
*'''[[Golden feather]]''' (Game Boy Advance version only): After the Star Barrel, the Kongs encounter a gap which they need to cross by jumping from the hooks. Instead of doing this, the Kongs must jump toward a banana below, which indicates a hidden Blast Barrel. It shoots the Kongs through a path below the ship where they obtain three Banana Coins, some bananas, and a golden feather, before another Blast Barrel blasts them back on the main path. | |||
{{br}} | |||
==Bonus Levels== | |||
Gangplank Galley has two Bonus Levels, listed by type: | |||
{{multiframe|[[File:Gangplank Galley Bonus Area 1 GBA.png|200px]] [[File:Gangplank Galley Bonus Area 2.png|200px]]|size=420|The first and second Bonus Levels respectively}} | |||
*'''''Find the Kremkoin!''''': The first Bonus Barrel appears directly above the starting point. The Kongs must reach the top of the stack of barrel platforms and then jump into a Bonus Barrel located above the highest barrel. The Bonus Area appears to take place in the cabin at the start of Pirate Panic. Here, the Kongs have ten seconds to obtain the [[Kremkoin]] in one of the four treasure chests. They can break the chests by throwing them at a red Zinger, and three of the chests contain bananas. After breaking the correct treasure chest, the Kongs can grab the Kremkoin within the remaining time. | |||
*'''''Find the Kremkoin!''''': The second and final Bonus Barrel is near the end of the level. After the Kongs cross the big gap with two hooks over it, they must jump at a nearby Exclamation Point Barrel. With its temporary invincibility, the Kongs must quickly run to a series of barrel stacks with a Kruncha on each. Like the first Bonus Barrel, the second one appears above the tallest stack of barrels. They can reach the top by either jumping from the stacks or by using [[team up]] from the stack with a treasure chest. In the Bonus Area, the Kongs only have 15 seconds to obtain the Kremkoin on top of a tall stack of barrels. They must quickly jump from some hooks, arranged in a "C" shape, to obtain the Kremkoin at the top. | |||
==Warp Barrel== | |||
By using team up to the right of the first Bonus Barrel, the Kongs can enter the [[Warp Barrel]] from above them. This transports them into a small room with many bananas in the center. If the Kongs walk out the exit to the right, they are blasted back into the main level, on a hook located immediately before the End of Level Target. | |||
==Gallery== | ==Gallery== | ||
===Super Nintendo Entertainment System=== | |||
<gallery> | |||
Gangplank Galley DKC2 shot.png|Diddy Kong runs beneath some large barrels. | |||
Gangplank Galley DKC2 cartwheel into Kaboings.png|Diddy cartwheeling into Kaboings | |||
Gangplank Galley DKC2 letter O.png|Dixie jumps to the letter O | |||
Gangplank Galley DKC2 shot 3.png|Diddy runs on some barrel platforms between a Kruncha and Klomp | |||
GangplankGalleySNES.png|Diddy holding a treasure chest near a Kruncha on top of some barrel platforms. | |||
Gangplank Galley DKC2 second Bonus Barrel.png|The Kongs stand beneath the second Bonus Barrel, in a team up posture | |||
</gallery> | </gallery> | ||
==Names in | |||
{{ | ===Game Boy Advance=== | ||
<gallery> | |||
Gangplank Galley DKC2 GBA.png|The Kongs jumping from hooks | |||
Gangplank Galley GBA Bonus Area 2.png|The Kongs jump from hooks in the second Bonus Area | |||
Gangplank Galley GBA end.png|The Kongs hanging from a hook right next to the End of Level Target | |||
</gallery> | |||
==Names in other languages== | |||
{{foreign names | |||
|Jap=アスレチック デッキ | |||
|JapR=Asurechikku Dekki | |||
|JapM=Athletic Deck | |||
|Spa=Galera Plancha | |Spa=Galera Plancha | ||
|SpaM=Planch Galley | |SpaM=Planch Galley | ||
|Fre=Passerelle de la Galère | |||
|FreM=Bridge Galley | |||
|Ger=Schiff Ahoi! | |Ger=Schiff Ahoi! | ||
|GerM=Ship Ahoy!}} | |GerM=Ship Ahoy! | ||
|Ita=Ponte sui Pericoli | |||
|ItaM=Bridge on Dangers | |||
}} | |||
{{DKC2}} | {{DKC2}} | ||
[[Category:Pirate areas]] | |||
[[Category: | |||
[[Category:Crocodile Isle]] | [[Category:Crocodile Isle]] | ||
[[Category:Donkey Kong Country 2: Diddy's Kong Quest levels]] | |||
[[Category:Donkey Kong Country 2: Diddy's Kong Quest | |||
Latest revision as of 16:02, January 20, 2024
| Level | |
|---|---|
| Gangplank Galley | |

| |
| Level code | 1 - 3 |
| World | Gangplank Galleon |
| Game | Donkey Kong Country 2: Diddy's Kong Quest |
| Music track | Klomp's Romp |
| << Directory of levels >> | |
Gangplank Galley is the third level of Donkey Kong Country 2: Diddy's Kong Quest and the third level of the first world, Gangplank Galleon. It is similar to the first level, Pirate Panic, taking place on a wrecked pirate ship, and the sun sets slowly over the course of the level. Kaboings and Krunchas are the newly introduced enemies in the level. Throughout the level, there are hooks that Diddy and Dixie Kong can grapple on to reach higher areas or to cross wide gaps. Secret items are often hidden on the highly stacked barrels. An Exclamation Point Barrel first appears in this level, located near the end. The water in the background is green during the sunset. In the Game Boy Advance version, it has a more grayish appearance.
Layout[edit]


The Kongs begin the level in front of a large pile of barrels with a Bonus Barrel on top of them and a few hooks to the right of it that hang above a Banana Bunch and the level's Video Game Hero Coin. In front of the barrels, the primates can find a Kaboing and a pair of ledges with a Klomp between them. A few barrels are stacked up ahead of here that the Kongs can climb on to reach a few bananas and a DK Barrel, which is followed by a small stairway that a few Kaboings hop along. At the top of the stairs, the heroes can find a treasure chest that contains a Banana Bunch. After they travel down an additional stairway, they come up to a few barrel platforms with two Klomps on top of and in front of them. The barrels can be climbed on to aid the heroes in reaching a higher ledge with a hook above it that hangs next to the letter K.
If the primates continue from here, they come down another small stairway with a few Kaboings on it. A pair of barrels is at the bottom of the stairway that can be used to reach a trio of hooks that can be climbed to reach a DK Barrel and the bananas under it. A treasure chest that contains a red Extra Life Balloon is also under the DK Barrel, which is followed by a ledge with a Neek on top of it. The heroes can spot a trail of bananas leading upwards near the rat enemy, and a hidden Barrel Cannon is above it that can shoot them onto a tall stack of barrels. Two more tall piles of barrels are after this stack, and between each of them is a hook with a Banana Bunch or the letter O below it. If the primates do not travel along these barrels, they must instead travel through a lower part of the ship that is full of Kaboings. After they climb out of this lower area, they come up to a Neek and a barrel platform that is followed by a small ledge with a Banana Coin-containing treasure chest at the bottom of it. Once the Kongs climb a small stairway with a Klomp at the top of it, they can discover a Star Barrel.
The primates can find a large set of barrels at the bottom of a stairway located after the Star Barrel. A Kruncha and the letter N are above the barrels, while a Klomp and a DK Barrel are in front of them. After the heroes climb to the top of a nearby stairway that Neeks march along, they come up to a wide abyss that they can cross with the use of a hook floating over it. On the other side of the pit, there is a treasure chest that holds a Banana Bunch. It is followed by a large group of barrels that form two rows. A Kruncha is on each of the rows, and an additional Kruncha marches in front of the barrels. Another wide abyss follows here, and it contains two hooks that the heroes can use to cross it. They can find an Exclamation Point Barrel on the other side of the pit that makes them invincible for a limited amount of time when they hit it.
A stairway follows the barrel that a few Neeks march along. Two pairs of large barrels are ahead of here. While the first pair stands behind a Kruncha and holds a few bananas, the other supports a Kruncha and sits behind some bananas. A Banana Bunch is located to the right of the second barrel pair, and a small stairway with a Kaboing on it is below it. On the bottom of these stairs, the Kongs can find a large stack of barrels that hold a few Krunchas, a treasure chest that holds a red Extra Life Balloon, and two bananas. A Bonus Barrel is also above it. Once the Kongs head past the pile of barrels, they make their way up a set of stairs with a few Kaboings on them and then approach a wide abyss with some hooks above it. Once they cross the pit, they come up to the End of Level Target. If they jump on the target from the ground, they simply complete the level, but if they jump on it from a nearby hook, they complete the level and earn a prize. In the Game Boy Advance version, the Kongs can find three Banana Coins hidden past the End of Level Target.
Enemies[edit]
The following enemies appear in the following quantities, and enemies that debut in the level are marked in bold:


a - Appears only in a Bonus Level
Items and objects[edit]
The following enemies appear in the following quantities:

Banana Bunch (2)c

Banana Coin (6)d

DK Barrel (3)

Red Balloon (3)e

Treasure chest (10)f


b - Of the 167 bananas, 34 of them are in the Bonus Areas.
c - Both Banana Bunches are an End of Level Target prize.
d - One of the Banana Coins is an End of Level Target prize.
e - Two of the Red Balloons each appear in a treasure chest, and one is an End of Level Target prize.
f - Of the 10 treasure chests, 4 of them are in a Bonus Area.
KONG Letters[edit]
- K: Located next to a hook after a pair of two Klomps.
- O: After the Kongs pass the second DK Barrel in the level, they can find a trail of bananas beneath a Blast Barrel. Using their team up move, the Kongs can enter the barrel, which blasts them on top of the adjacent stack of barrels. The Kongs must jump from a hook and onto the next stack of barrels. The letter O is hanging beneath the second hook.
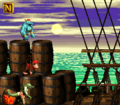
- N: After the Star Barrel, the Kongs must jump onto some barrel platforms guarded by a Kruncha. They can obtain the letter N, which is hovering above the center.
- G: Just after the Exclamation Point Barrel, the Kongs stumble upon a treasure chest which they can attack an enemy with. By doing so, the chest releases the letter G.
Key items[edit]

- Cranky's Video Game Hero Coin: The Video Game Hero Coin is near the first Bonus Level. From the top of the stack of barrels, just below the Bonus Barrel, Dixie must use her Helicopter Spin to hover all the way right to grab onto a hook in the air. Dixie must jump to the third hook to obtain the Video Game Hero Coin. In the Game Boy Advance version, Diddy can reach the Bonus Area by performing a cartwheel jump.
- Golden feather (Game Boy Advance version only): After the Star Barrel, the Kongs encounter a gap which they need to cross by jumping from the hooks. Instead of doing this, the Kongs must jump toward a banana below, which indicates a hidden Blast Barrel. It shoots the Kongs through a path below the ship where they obtain three Banana Coins, some bananas, and a golden feather, before another Blast Barrel blasts them back on the main path.
Bonus Levels[edit]
Gangplank Galley has two Bonus Levels, listed by type:


- Find the Kremkoin!: The first Bonus Barrel appears directly above the starting point. The Kongs must reach the top of the stack of barrel platforms and then jump into a Bonus Barrel located above the highest barrel. The Bonus Area appears to take place in the cabin at the start of Pirate Panic. Here, the Kongs have ten seconds to obtain the Kremkoin in one of the four treasure chests. They can break the chests by throwing them at a red Zinger, and three of the chests contain bananas. After breaking the correct treasure chest, the Kongs can grab the Kremkoin within the remaining time.
- Find the Kremkoin!: The second and final Bonus Barrel is near the end of the level. After the Kongs cross the big gap with two hooks over it, they must jump at a nearby Exclamation Point Barrel. With its temporary invincibility, the Kongs must quickly run to a series of barrel stacks with a Kruncha on each. Like the first Bonus Barrel, the second one appears above the tallest stack of barrels. They can reach the top by either jumping from the stacks or by using team up from the stack with a treasure chest. In the Bonus Area, the Kongs only have 15 seconds to obtain the Kremkoin on top of a tall stack of barrels. They must quickly jump from some hooks, arranged in a "C" shape, to obtain the Kremkoin at the top.
Warp Barrel[edit]
By using team up to the right of the first Bonus Barrel, the Kongs can enter the Warp Barrel from above them. This transports them into a small room with many bananas in the center. If the Kongs walk out the exit to the right, they are blasted back into the main level, on a hook located immediately before the End of Level Target.
Gallery[edit]
Super Nintendo Entertainment System[edit]
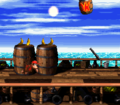
Diddy Kong runs beneath some large barrels.
Diddy cartwheeling into Kaboings
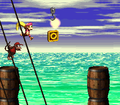
Dixie jumps to the letter O
Diddy runs on some barrel platforms between a Kruncha and Klomp
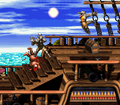
Diddy holding a treasure chest near a Kruncha on top of some barrel platforms.
The Kongs stand beneath the second Bonus Barrel, in a team up posture


Game Boy Advance[edit]
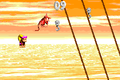
The Kongs jumping from hooks
The Kongs jump from hooks in the second Bonus Area

The Kongs hanging from a hook right next to the End of Level Target


Names in other languages[edit]
| Language | Name | Meaning |
|---|---|---|
| Japanese | アスレチック デッキ Asurechikku Dekki |
Athletic Deck |
| French | Passerelle de la Galère |
Bridge Galley |
| German | Schiff Ahoi! |
Ship Ahoy! |
| Italian | Ponte sui Pericoli |
Bridge on Dangers |
| Spanish | Galera Plancha |
Planch Galley |