Gallery:Donkey Kong Country Returns: Difference between revisions
Reddragon19k (talk | contribs) |
|||
| (146 intermediate revisions by 57 users not shown) | |||
| Line 1: | Line 1: | ||
{{italic title}} | |||
This is a gallery of images for the game ''[[Donkey Kong Country Returns]]''. For a gallery of images originating from the remake ''[[Donkey Kong Country Returns 3D]]'', see [[Gallery:Donkey Kong Country Returns 3D|here]]. | |||
==Logos== | |||
<gallery widths="220"> | |||
Logo DKCR.png|Early logo | |||
JP_LogoDKCR.png|Japanese logo | |||
CN LogoDKCR.jpg|Chinese logo | |||
</gallery> | |||
== | ==Artwork== | ||
=== | ===Characters=== | ||
<gallery> | |||
DonkeyDKCR.png|[[Donkey Kong]] | |||
DonkeyKCR.png|Donkey Kong | |||
DiddyDKCR.png|[[Diddy Kong]] with his new jet pack. | |||
DiddyKCR.png|Diddy Kong | |||
DKandDiddy DKCR.png|Donkey and Diddy Kong. | |||
DKCR-Donkey Kong and Diddy Kong Artwork.png|Donkey Kong running with Diddy Kong on his back. | |||
CrankyDKCR.png|[[Cranky Kong]] | |||
Rambi DKCR.png|[[Rambi the Rhino]] | |||
SquawksDKCR.png|[[Squawks the Parrot]] | |||
Squawks - Donkey Kong Country Returns.png|Second art of Squawks the Parrot | |||
TutorialPig.png|[[Professor Chops|Tutorial Pig]] | |||
Tutorial Pig Barrel Artwork - Donkey Kong Country Returns.png|Tutorial Pig in a [[barrel]] | |||
DKCR promo artwork.jpg|Promotional group artwork used in the box art. | |||
</gallery> | |||
</gallery | |||
=== | ===Tikis=== | ||
<gallery> | |||
TikiTakTribe.png|The nine leaders of the [[Tiki Tak Tribe]]. | |||
TikiDKCR.png|Kalimba | |||
Tiki2.png|Maraca Gang | |||
Gong_Tiki.png|Gong-Oh | |||
Tiki4.png|Banjo Bottom | |||
Tiki5.png|Wacky Pipes | |||
Tiki6.png|Xylobone | |||
Tiki7.png|Cordian | |||
TikiGoon.png|[[Tiki Goon]] | |||
DKCR Tiki Tank Artwork.png|[[Tiki Tank]] | |||
TikiBuzz.png|[[Tiki Buzz]] | |||
</gallery> | |||
</gallery | |||
=== | ===Domestic enemies and bosses=== | ||
<gallery> | |||
Awk.png|[[Awk]] | |||
Pinchly Render.png|[[Pinchly]] | |||
Toothberry.png|[[Toothberry]] | |||
Mugly Artwork - Donkey Kong Country Returns.png|[[Mugly]] | |||
Stu Artwork - Donkey Kong Country Returns.png|[[Stu]] | |||
</gallery> | |||
</gallery | |||
=== | ===Items=== | ||
<gallery> | |||
BananaDKCR.png|[[Banana]] | |||
BananabunchDKCR.png|Banana Bunch | |||
BananacoinDKCR.png|[[Banana Coin]] | |||
BalloonDKCR.png|[[Extra Life Balloon]] | |||
</gallery | PuzzlePieceDKCR.png|[[Puzzle Piece (Donkey Kong Country series)|Puzzle Piece]] | ||
BarrelDKCR.png|[[Barrel]] | |||
DKBarrelDKCR.png|[[DK Barrel]] | |||
MinecartDKCR.png|[[Minecart]] | |||
</gallery> | |||
=== | ===In-game model renders=== | ||
< | <gallery> | ||
DKAndElephantDKCR.png|Donkey Kong riding on an elephant | |||
ColonelPluckDKCR.png|[[Colonel Pluck]] | |||
</gallery></ | SquiddicusDKCR.png|[[Squiddicus]] | ||
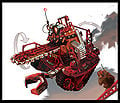
FactoryRobotDKCR.png|A robot found in [[Handy Hazards]] | |||
Super Kong.png|[[Super Kong]] | |||
Super Diddy Kong.png|Super [[Diddy Kong]] | |||
Mirror Mode.png|Mirror Mode item | |||
</gallery> | |||
===Concept artwork=== | |||
<gallery> | |||
Frogoon.png|[[Frogoon]] | |||
Awkconcept.png|[[Awk]] | |||
Crabs Concept Art.png|[[Pinchly]] and Pal | |||
Snaggle.png|[[Snaggles]] | |||
DKCR Concept Art Squid.png|[[Squiddicus]] | |||
StiltsDKCR.png|[[Stilts (enemy)|Stilts]] | |||
Humzee.png|[[Humzee]] | |||
Squeeklyfamily.png|[[Squeekly|Squeeklies]] | |||
Skittler.png|[[Skittler]] | |||
Animalfriendsdkcr.png|The animals of the game. | |||
Squidly.png|[[Squidly]] | |||
Toothberry1.png|[[Toothberry|Toothberries]] and [[Cageberry]] | |||
TikiPop.png|[[Tiki Pop]] | |||
MoleMiner.png|[[Mole Guard]] | |||
Buzzbite.png|[[Buzzbite]]s | |||
ChompDKCR.png|Various [[Chomp (Donkey Kong Country series)|Chomp]]s | |||
Skellirex.png|[[Skellirex]] | |||
Boneheady.png|[[Bonehead Jed]] | |||
Kowalee DKCR concept.png|[[Kowalee]] | |||
Readybotsdk.png|[[Pogobot]], a Red [[Pyrobot]], and an unused bot. | |||
ScreamingPillar.png|[[Screaming Pillar]]s | |||
Tikibuzzca.png|[[Tiki Buzz]] | |||
Tikitankca.png|[[Tiki Tank]]s | |||
TikiBoing.png|[[Tiki Boing]]s | |||
TikiTorch.png|[[Tiki Torch]]s | |||
Tikipilot.png|[[Tiki Pilot]] | |||
Tikilineup.png|[[Tiki Goon]] and its line up. | |||
Lavatiki.png|Lava Tiki | |||
TikiExtremes.png|Tiki Extremes | |||
Tikitongstoryboard.png|Tiki Tong tower storyboard. | |||
Muglyconcept.png|[[Mugly]] | |||
Scurvycrewconcept.png|[[Scurvy Crew]] | |||
Stuconcept.png|[[Stu]] | |||
Minermaxconcept.png|[[Mole Miner Max]] | |||
MoleMiner1.png|[[Mole Miner]]s and Max | |||
Mangorubyconcept.png|[[Mangoruby]] | |||
Thuglyconcept.png|[[Thugly]] | |||
DKCR Artwork Stampfobot 0815.png|[[Stompybot 3000]] | |||
Tikitongtowerconcept.png|Tiki Tong Tower | |||
Tikitongconcept.png|[[Tiki Tong]] | |||
Dkcr concept art-13.jpg|Waterfalls in the [[Jungle (Donkey Kong Country Returns)|Jungle]] | |||
Dkcr concept art-2.jpg|The [[Ruins]] | |||
Dkcr concept art-16.jpg|[[Mast Blast]] | |||
Dkcr concept art-3.jpg|An underwater scene | |||
Dkcr concept art-5.jpg|Another scene of the [[Ruins]] | |||
Dkcr concept art-10.jpg|The [[Forest (Donkey Kong Country Returns)|Forest]] | |||
Dkcr concept art-1.jpg|The [[Cliff]] | |||
Dkcr concept art-19.jpg|The [[Factory (Donkey Kong Country Returns)|Factory]] | |||
Dkcr concept art-14.jpg|Another scene of the [[Factory (Donkey Kong Country Returns)|Factory]] | |||
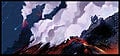
Volcanoeruptions.png|A scene of the [[Volcano]] erupting. | |||
Hutexterior.png|Donkey Kong outside of his tree house. | |||
Dkcr concept art-12.jpg|Another scene of the [[Ruins]]. | |||
Tutorialpigconcept.png|[[Professor Chops|Tutorial Pig]] | |||
Dktreehouse.png|Inside [[DK's Tree House]] | |||
CrankyShopPicture.png|[[Cranky Kong's Shop]] | |||
Kongportrait.png|A portrait of Donkey Kong and Diddy Kong. | |||
Petroglyph.png|Petroglyph reference of [[Donkey Kong (game)|Donkey Kong]]. | |||
Molercarts.png|Donkey Kong and Mole Miners on carts. | |||
Dkcr concept art-6.jpg|Battling a buzzard in the [[Cliff]] | |||
Dkcr concept art-17.jpg|Another scene of the [[Volcano]] | |||
Dkcr concept art-7.jpg|[[Donkey Kong]] and robot | |||
Goldentemple.png|Donkey Kong in the [[Golden Temple]] level. | |||
Bananacoaster.png|The Banana coaster | |||
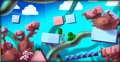
Paperdklevel.png|In a paper-based level | |||
Wackyblocks.png|A ''Super Mario Bros.'' level | |||
Puddingwonderland.png|Pudding Wonderland | |||
Dkcr concept art-8.jpg|In a [[Virtual Boy]] world | |||
Gtemple.png|The Golden temple | |||
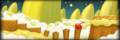
Crackerpudding.png|A level featuring crackers and pudding. | |||
Goldentemp.png|The entrance of the temple | |||
Goldentem2.png|Another scene of the Golden Temple. | |||
Rambiconcept.png|[[Rambi the Rhino]] | |||
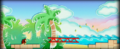
Dkcr concept art-18.jpg|The [[Beach]] | |||
Dkcr concept art-4.jpg|Battling a giant moray eel. | |||
Dkcr concept art-15.jpg|[[Prehistoric Path]] in the [[Cliff]]. | |||
BopapodamusSS.png|[[Bopapodamus]] | |||
Treetopdkcr.png|Tree Top Village | |||
Duskycliff.png|Another scene of the Cliff area. | |||
Dkfactoryart.png|A factory level feature several Game & Watch systems and a SNES controller. | |||
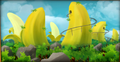
Dkcr concept art-11.jpg|A [[Banana]]-like enemy in the [[Volcano]] | |||
Angry Banana DKCR sprite.png|Alternate version of previous concept, without Donkey Kong | |||
Templemoument.png|The golden temple monument | |||
Dkcr concept art-9.jpg|In a ''[[Super Mario Bros. 2]]'' level | |||
</gallery> | |||
==Sprites== | |||
===World icons=== | |||
<gallery> | |||
DKCR Jungle Icon.png|The Jungle | |||
DKCR Beach Icon.png|The Beach | |||
DKCR Ruins Icon.png|The Ruins | |||
DKCR Cave Icon.png|The Cave | |||
DKCR Forest Icon.png|The Forest | |||
DKCR Cliff Icon.png|The Cliff | |||
DKCR Factory Icon.png|The Factory | |||
DKCR Volcano Icon.png|The Volcano | |||
DKCR Golden Temple Icon.png|The Golden Temple | |||
</gallery> | |||
===Boss icons=== | |||
<gallery> | |||
DKCR Kalimba.png|Kalimba | |||
DKCR Maraca Gang.png|Maraca Gang | |||
DKCR Gong-Oh.png|Gong-Oh | |||
DKCR Banjo Bottom.png|Banjo Bottom | |||
DKCR Wacky Pipes.png|Wacky Pipes | |||
DKCR Xylobone.png|Xylobone | |||
DKCR Cordian.png|Cordian | |||
</gallery> | |||
===Miscellaneous=== | |||
<gallery> | |||
DKCR DK Island Icon.png|Donkey Kong Island | |||
DKCR Free View Icon.png|Freelook | |||
DKCR Time Attack Icon.png|Time Attack | |||
DKCR Bonus Stage Icon.png|Bonus Stage | |||
</gallery> | |||
==Screenshots== | |||
<gallery widths="180" heights="100"> | |||
Donkey Kong Country Returns Title Screen.png|The title screen | |||
Donkey Kong Island.png|[[Donkey Kong Island]] | |||
ElephantDKCR.png|An elephant in the opening cutscene | |||
Kalimba DKCR opening scene.png|Kalimba Tiki, after being released from the volcano in the opening cutscene | |||
Kalimba hypnotize DK attempt DKCR.jpg|Kalimba Tiki attempts to hypnotize Donkey Kong | |||
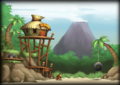
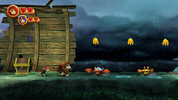
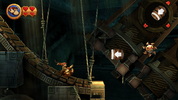
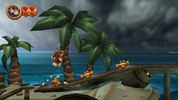
Poppin' Planks DKCR shot 2.png|[[Poppin' Planks]] | |||
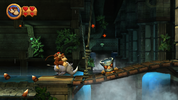
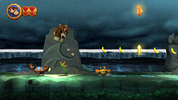
DKCR Crazy Cart 1.png|Donkey Kong in a jungle level, [[Crazy Cart]] | |||
Rickety Rails DKCR.png|Donkey Kong in a Mine Cart level, [[Rickety Rails]] | |||
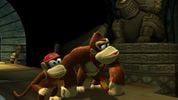
DKCR Temple Topple 1.png|Donkey Kong and Diddy Kong, riding on Rambi. | |||
Sunshet Shore Tiki Bush DKCR.png|DK and Diddy find a Mimic in Sunset Shore. | |||
DKCR Stormy Shore 4.png | |||
Tidal Terror DKCR.png | |||
Tidal Terror DKCR shot 2.png|Donkey Kong near a [[KONG Letters|K-O-N-G Letter]]. | |||
Tidal Terror DKCR shot 3.png|The Kongs approach some crab enemies. | |||
Tidal Terror DKCR shot 4.png|The Kongs approach some crab enemies. | |||
Button Bash DKCR.png | |||
Button Bash DKCR shot.png | |||
Button Bash DKCR shot 2.png|The Kongs sliding down a ramp. | |||
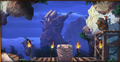
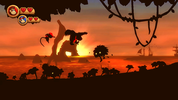
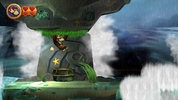
DKCR Stormy Shore 2.png|[[Squiddicus]] in [[Stormy Shore]] | |||
Damp Dungeon DKCR.png | |||
Damp Dungeon DKCR shot 2.png | |||
Gong-Oh punch DKCR.jpg|Donkey Kong about to punch [[Tiki Tak Tribe|Gong-Oh]]. | |||
Wonky Waterway DKCR DK Statue.png|A statue of Donkey Kong Sr., holding a Wii controller. | |||
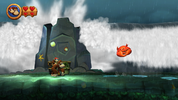
Rocket Barrel Ride DKCR.png|Donkey Kong and Diddy Kong riding a rocket barrel. | |||
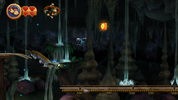
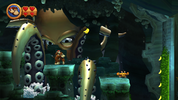
Crowded Cavern DKCR.png|A [[Big Squeekly]] in [[Crowded Cavern]]. | |||
Muncher Marathon DKCR.png|The Kongs dealing with purple spider enemies. | |||
DKCRdonkeydiddy.jpg | |||
DKCR Boulder Roller 1.png | |||
DKCR Foggy Fumes Mr G&W.png|[[Mr. Game & Watch]] makes a cameo appearance. | |||
Tiki Tong DKCR cutscene.png|The Kongs face-off against [[Tiki Tong]]. | |||
Golden Banana DKCR.png|Donkey Kong and Diddy Kong at the [[Golden Temple]]. | |||
JungleHijinxs-Mirror-DKCR.png|Jungle Hijinxs, in Mirror Mode. | |||
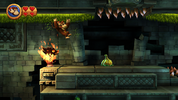
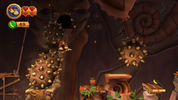
DKCR Sceamingpillars.png|[[Screaming Pillar]]s in [[Canopy Cannons]]. | |||
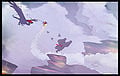
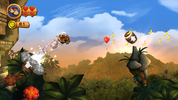
DKCR Seagulls.jpg|Seagulls | |||
DK Country Returns Puzzle.gif|The game seen in the Nintendo 3DS StreetPass Mii Plaza game Puzzle Swap. | |||
</gallery> | |||
===Worlds=== | |||
<gallery widths="180" heights="100"> | |||
JungleDKCR.png|[[Jungle (Donkey Kong Country Returns)|World 1]] | |||
Beach DKCR.png|[[Beach|World 2]] | |||
RuinsDKCR.png|[[Ruins|World 3]] | |||
CaveDKCR.png|[[Cave|World 4]] | |||
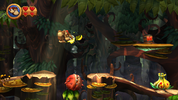
Forest DKCR.png|[[Forest (Donkey Kong Country Returns)|World 5]] | |||
Cliff DKCR.png|[[Cliff|World 6]] | |||
Factory DKCR.png|[[Factory (Donkey Kong Country Returns)|World 7]] | |||
VolcanoDKCR.png|[[Volcano|World 8]] | |||
DKCR Golden Temple Map.png|[[Golden Temple|World 9]] | |||
</gallery> | |||
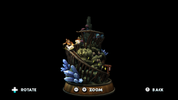
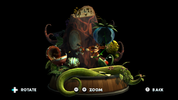
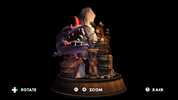
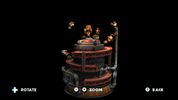
===Dioramas=== | |||
<gallery widths="180" heights="100"> | |||
Diorama1-DKCR.png|Jungle diorama | |||
Diorama2-DKCR.png|Beach diorama | |||
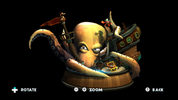
Diorama3-DKCR.png|Ruins diorama | |||
Diorama4-DKCR.png|Cave diorama | |||
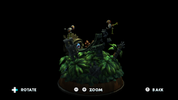
Diorama5-DKCR.png|Forest diorama | |||
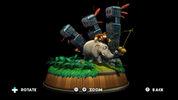
Diorama6-DKCR.png|Cliff diorama | |||
Diorama7-DKCR.png|Factory diorama | |||
Diorama8-DKCR.png|Volcano diorama | |||
</gallery> | |||
===E3 2010=== | |||
<gallery widths="180" heights="100"> | |||
01_DKCR.png|[[Jungle Hijinxs (Donkey Kong Country Returns)|Jungle Hijinxs]] | |||
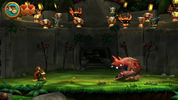
DKCR Mugly Defeated Screenshot.png|Mugly gets defeated. | |||
DKCR Canopy Cannons 3.png | |||
DKCR Stormy Shore 3.png | |||
05_DKCR.png|A cutscene | |||
06_DKCR.png | |||
DKCR Vine Valley 1.png | |||
DKCR Roasting Rails Letter K.png | |||
DKCR Vine Valley 2.png | |||
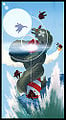
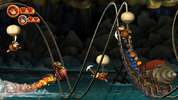
DKCR Stormy Shore 1.png|[[Squiddicus]] attacks a pirate ship in [[Stormy Shore]]. | |||
DKCR Canopy Cannons 1.png | |||
12_DKCR.png | |||
DKCR Crazy Cart 2.png | |||
14_DKCR.png | |||
DKCR Cannon Cluster 1.png|[[Cannon Cluster]] | |||
Mugly DKCR E32010.png|Boss battle against Mugly. | |||
DKCR Screenswing.png|The Kongs swing on vines. | |||
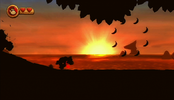
Sunset Shore DKCR E32010.png|The Kongs in [[Sunset Shore]]. | |||
</gallery> | |||
==Box art== | |||
<gallery> | |||
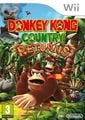
DKCRBoxart.jpg|North American box art (Front) | |||
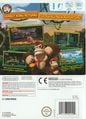
DKCRBackAmerica.jpg|North American box art (Back) | |||
DKCRAUScover.jpg|Australian box art | |||
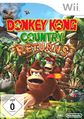
DKCREU.jpg|European box art (Front) | |||
DKCRBackEurope.jpg|European box art (Back) | |||
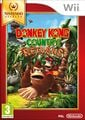
Nintendo Selects Box EU - Donkey Kong Country Returns.jpg|European [[Nintendo Selects]] box art | |||
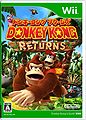
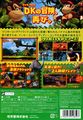
JPDKCR box.jpg|Japanese box art (Front) | |||
DKCRBackJapan.jpg|Japanese box art (Back) | |||
DKCR Germany Box.jpg|Germany box art | |||
</gallery> | |||
==Miscellaneous== | |||
<gallery> | |||
Prima Guide-DKCR.JPG|[[Prima Games]] official guide | |||
</gallery> | |||
{{Galleries}} | {{Galleries}} | ||
[[Category:Galleries| | {{DKCR}} | ||
[[Category:Galleries]] | |||
[[Category:Donkey Kong Country Returns|*]] | |||
[[de:Donkey Kong Country Returns/Galerie]] | |||
Revision as of 19:21, April 9, 2024
This is a gallery of images for the game Donkey Kong Country Returns. For a gallery of images originating from the remake Donkey Kong Country Returns 3D, see here.
Logos

Early logo
Japanese logo

Chinese logo


Artwork
Characters
Donkey Kong
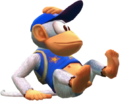
Diddy Kong with his new jet pack.
Diddy Kong
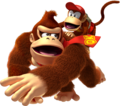
Donkey and Diddy Kong.
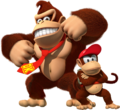
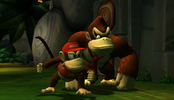
Donkey Kong running with Diddy Kong on his back.
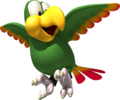
Second art of Squawks the Parrot

Tutorial Pig in a barrel
Promotional group artwork used in the box art.


Tikis
The nine leaders of the Tiki Tak Tribe.
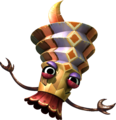
Kalimba
Maraca Gang
Gong-Oh

Banjo Bottom

Wacky Pipes
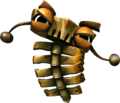
Xylobone
Cordian


Domestic enemies and bosses


Items
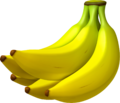
Banana Bunch


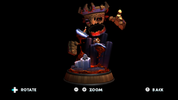
In-game model renders
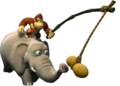
Donkey Kong riding on an elephant
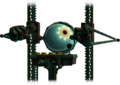
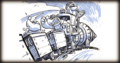
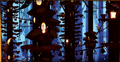
A robot found in Handy Hazards
Super Diddy Kong

Mirror Mode item


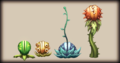
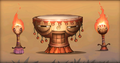
Concept artwork
Pinchly and Pal
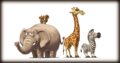
The animals of the game.
Various Chomps
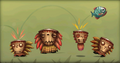
Tiki Goon and its line up.
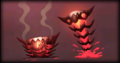
Lava Tiki
Tiki Extremes

Tiki Tong tower storyboard.
Mole Miners and Max
Tiki Tong Tower
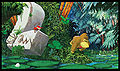
Waterfalls in the Jungle
The Ruins
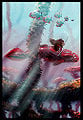
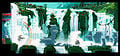
An underwater scene
Another scene of the Ruins
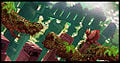
The Forest
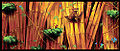
The Cliff
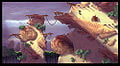
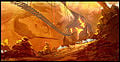
The Factory
Another scene of the Factory
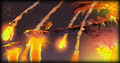
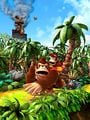
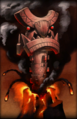
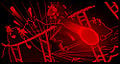
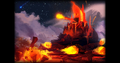
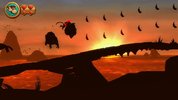
A scene of the Volcano erupting.
Donkey Kong outside of his tree house.
Another scene of the Ruins.
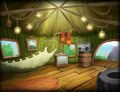
Inside DK's Tree House
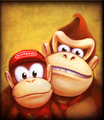
A portrait of Donkey Kong and Diddy Kong.
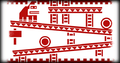
Petroglyph reference of Donkey Kong.
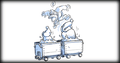
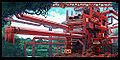
Donkey Kong and Mole Miners on carts.
Battling a buzzard in the Cliff
Another scene of the Volcano
Donkey Kong and robot

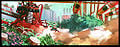
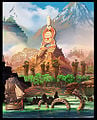
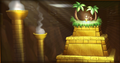
Donkey Kong in the Golden Temple level.
The Banana coaster
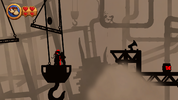
In a paper-based level
A Super Mario Bros. level
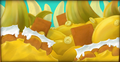
Pudding Wonderland
In a Virtual Boy world
The Golden temple
A level featuring crackers and pudding.
The entrance of the temple
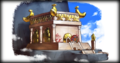
Another scene of the Golden Temple.
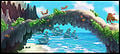
The Beach
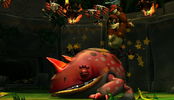
Battling a giant moray eel.
Prehistoric Path in the Cliff.
Tree Top Village
Another scene of the Cliff area.
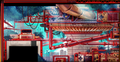
A factory level feature several Game & Watch systems and a SNES controller.
Alternate version of previous concept, without Donkey Kong
The golden temple monument
In a Super Mario Bros. 2 level


Sprites
World icons
The Jungle
The Beach
The Ruins
The Cave
The Forest
The Cliff
The Factory
The Volcano
The Golden Temple
Boss icons
Kalimba
Maraca Gang
Gong-Oh
Banjo Bottom
Wacky Pipes
Xylobone
Cordian


Miscellaneous
Donkey Kong Island
Freelook
Time Attack
Bonus Stage
Screenshots
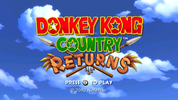
The title screen
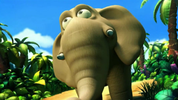
An elephant in the opening cutscene
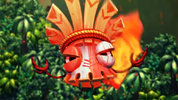
Kalimba Tiki, after being released from the volcano in the opening cutscene
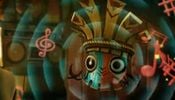
Kalimba Tiki attempts to hypnotize Donkey Kong
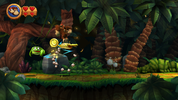
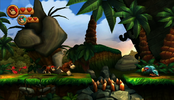
Donkey Kong in a jungle level, Crazy Cart
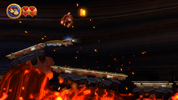
Donkey Kong in a Mine Cart level, Rickety Rails
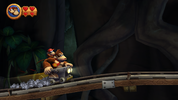
Donkey Kong and Diddy Kong, riding on Rambi.
DK and Diddy find a Mimic in Sunset Shore.
Donkey Kong near a K-O-N-G Letter.
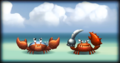
The Kongs approach some crab enemies.
The Kongs approach some crab enemies.

The Kongs sliding down a ramp.

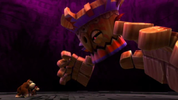
Donkey Kong about to punch Gong-Oh.

A statue of Donkey Kong Sr., holding a Wii controller.
Donkey Kong and Diddy Kong riding a rocket barrel.
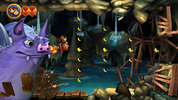
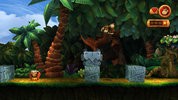
A Big Squeekly in Crowded Cavern.
The Kongs dealing with purple spider enemies.
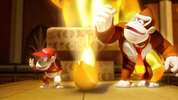
Mr. Game & Watch makes a cameo appearance.
The Kongs face-off against Tiki Tong.
Donkey Kong and Diddy Kong at the Golden Temple.
Jungle Hijinxs, in Mirror Mode.
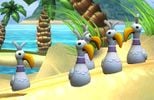
Seagulls

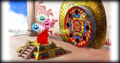
The game seen in the Nintendo 3DS StreetPass Mii Plaza game Puzzle Swap.


Worlds


Dioramas
Jungle diorama
Beach diorama
Ruins diorama
Cave diorama
Forest diorama
Cliff diorama
Factory diorama
Volcano diorama


E3 2010
Mugly gets defeated.
A cutscene
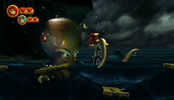
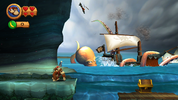
Squiddicus attacks a pirate ship in Stormy Shore.
Boss battle against Mugly.
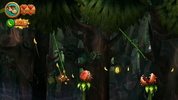
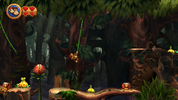
The Kongs swing on vines.
The Kongs in Sunset Shore.


Box art
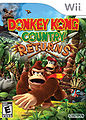
North American box art (Front)
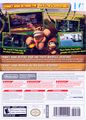
North American box art (Back)
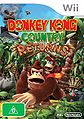
Australian box art
European box art (Front)
European box art (Back)
European Nintendo Selects box art
Japanese box art (Front)
Japanese box art (Back)
Germany box art


Miscellaneous
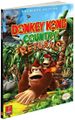
Prima Games official guide

| Donkey Kong Country Returns / Donkey Kong Country Returns 3D / Donkey Kong Country Returns HD | ||
|---|---|---|
| Characters | Protagonists | Donkey Kong • Diddy Kong • Cranky Kong • Rambi • Squawks • Super Kong • Tutorial Pig • Wigglevine |
| Bosses | Mugly • Scurvy Crew • Stu • Mole Miner Max/Train • Mangoruby • Thugly • Colonel Pluck • Tiki Tong | |
| Enemies and obstacles | Tiki Tak Tribe | Fireball • Flaming Tiki Buzz • Giga Goro Ball • Screaming Pillar • Screaming Pillar (big) • Tiki Boing • Tiki Bomber • Tiki Buzz • Tiki Doom • Tiki Goon • Tiki Pilot • Tiki Pop • Tiki Seeker • Tiki Tank • Tiki Tong Tower • Tiki Torch • Tiki Tork • Tiki Zing • Tiki Zing (big) • Tiki Zing (Foggy Fumes) |
| Other | Ack • AckStack • Ape-Eating Plant • Awk • Big Squeekly • Bonehead Jed • Bopapodamus • Bowling bird • BuckBomb • BuckBot • Buzzbite • Cageberry • Char-Char • Chomp • Chū Komorin • Electrasquid • Electroid • Fireball • Firebite • Frogoon • Giant Chomp • Giga Rangwi • Green Chomp • Hopgoon • Hothead Jed • Humzee • Jellybob • Kowalee • Leaping flame • Mimic • Mole Guard • Mole Miner • Muncher • Pinchly • Rawk • Ready-Bots (Pogobot • Pyrobot) • Rentamaguma • Robobī • Shooting Chomp • Skellirex • Skittler • Skittler Pillar • Skullyrex • Snaggles • Snippys • Squeekly • Squiddicus • Squidly • Stilts • Toothberry • Wiggle • Yellow Snaggles | |
| Objects | Items | Banana • Banana Bunch • Banana Coin • Banana Juice • Crash Guard* • Green Balloon* • Heart • Heart Boost • K-O-N-G Letters • Map Key • Puzzle Piece • Rare Orb • Red Balloon |
| Barrels | Barrel Cannon • Blast Barrel • DK Barrel • Regular Barrel • Slot Machine Barrel | |
| Miscellaneous | Bag • Container • Green surface • Rambi Crate • Red and blue blocks • Tire • Train • Trapdoor | |
| Vehicles | Mine Cart • Rocket Barrel | |
| Moves | Barrel Roll (Cartwheel Attack) • Blow • Cling • Ground Pound (Popgun Pound) • Ranged attack | |
| Levels | Jungle | Jungle Hijinxs • King of Cling • Tree Top Bop • Sunset Shore • Canopy Cannons • Crazy Cart • Platform Panic • Mugly's Mound |
| Beach | Poppin' Planks • Sloppy Sands • Peaceful Pier • Cannon Cluster • Stormy Shore • Blowhole Bound • Tidal Terror • Tumblin' Temple • Pinchin' Pirates | |
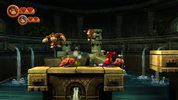
| Ruins | Wonky Waterway • Button Bash • Mast Blast • Damp Dungeon • Itty Bitty Biters • Temple Topple • Shifty Smashers • Ruined Roost | |
| Cave | Rickety Rails • Grip 'n' Trip • Bombs Away • Mole Patrol • Crowded Cavern • Jagged Jewels • The Mole Train | |
| Forest | Vine Valley • Clingy Swingy • Flutter Flyaway • Tippin' Totems • Longshot Launch • Springy Spores • Wigglevine Wonders • Muncher Marathon • Blast & Bounce • Mangoruby Run | |
| Cliff | Sticky Situation • Prehistoric Path • Weighty Way • Boulder Roller • Precarious Plateau • Crumble Canyon • Tippy Shippy • Clifftop Climb • Perilous Passage • Thugly's Highrise | |
| Factory | Foggy Fumes • Slammin' Steel • Handy Hazards • Gear Getaway • Cog Jog • Switcheroo • Music Madness • Lift-off Launch • Treacherous Track • Feather Fiend | |
| Volcano | Furious Fire • Hot Rocket • Roasting Rails • Smokey Peak • Bobbing Basalt • Moving Melters • Red Red Rising • Five Monkey Trial • Tiki Tong Terror | |
| Cloud*+ | Crushin' Columns*+ • Gushin' Geysers*+ • Spiky Surprise*+ • Mischievous Moles*+ • Topsy Turvy*+ • Tar Ball Fall*+ • Robo Factory*+ • Lavawheel Volcano*+ • Golden Temple | |
| Further info | Donkey Kong Returns Original Sound Track • Extras (image names in other languages) • Gallery • Staff | |
| Related Play Nintendo activities: Can’t-miss games • Who are these jerks of the jungle? | ||