Switcheroo
| Level | |||||||
|---|---|---|---|---|---|---|---|
| Switcheroo | |||||||
| |||||||
| Level code | 7-6 | ||||||
| World | Factory | ||||||
| Game | Donkey Kong Country Returns (3D/HD) | ||||||
| Music track | Life in the Mines Returns | ||||||
| |||||||
Switcheroo is the fifty-second level in Donkey Kong Country Returns and its Nintendo 3DS and Nintendo Switch ports, as well as the sixth level in the Factory world.
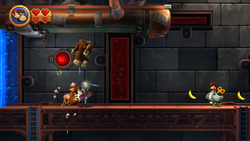
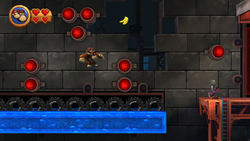
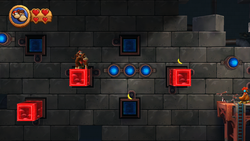
This level takes place in a factory full of reversible walls. The platforms must be activated by hitting switches on the walls, which are automatically pressed when Donkey or Diddy Kong pass over them. However, only one type of platform can appear at a time, so if the Kongs want to change the platform that is sticking out of the wall for use, they have to hit the colored buttons placed all over the level to switch the types of platforms. The red and blue platforms are vital to this level, as they are needed to cross the many large abysses around the level. They can also serve as weapons against enemies; if an enemy moves in front of a platform that is not activated, the Kongs can hit the switch to make it shoot out of the wall and defeat that foe. Enemies in this level include Electroids, BuckBots, BuckBombs, and Pyrobots. Tires also make an appearance as a common obstacle in this level. This level is very similar to the Flip-Out Galaxy from Super Mario Galaxy 2.
The background music, a rendition of "Life in the Mines" from Donkey Kong Country, also changes depending on the active color.
In the Time Attack mode, a time of 1:08:00 is needed for a shiny gold medal, a time of 1:24:00 for gold, a time of 1:41:00 for silver, and a time of 2:25:00 for bronze.
Overview[edit]
The level begins in a straight, flat area with a sign in the background that shows a large, red switch that the Kongs must find. Ahead are a few red walls with blue barriers within the walls between them. When the buttons between every red or blue wall are hit, the two differently colored barriers alternate on sticking out of the wall. A few BuckBots and BuckBombs walk along the Kong's path until they reach a blue platform sticking out of the wall. It can be used to reach a switch that makes red platforms higher above appear. There are two red platforms in this area, and one is on the left, while another is on the right. The platform on the left leads through a narrow passage with some robotic enemies and a Barrel Cannon leading to a Bonus Level, but the opposite platform lets the primates progress to a Pyrobot.
Ahead of the Pyrobot are red platforms set up like stairs going down the area above a large abyss. Between them is a blue platform in the wall that can be pulled out by hitting a switch. Another switch is above the last red platform to make it appear after the Kongs activate the blue platform. The area following this is made up of a large section of ground with a DK Barrel and some electric currents running through a small gap in it. Above the gap is a red platform with a tire on it; the tire can be placed over the electric currents if the red platform is moved into the wall by using a nearby platform. When the Kongs use the tire, it bounces them to the switch above the red platform that once held the tire. When they hit it, the red platform reappears and helps the Kongs reach two platforms with round beakers in them. After that is a wide area with a long, blue platform sticking out of the wall. The platform must be used to cross a large abyss, but walls are covered in switches ahead that are in the Kongs' way. They cannot avoid the switches to keep the blue platform, so they can instead use two swinging vines to cross through the area. The letter K of the K-O-N-G Letters is between these two vines, and some BuckBots are around them as well.
When the Kongs reach the end of the long, blue platform, they access a solid area of ground with a gap. On the other side of the gap is a blue wall and a Pyrobot. The blue way can be moved out of the way by hitting a switch above the gap. A bridge made by a red platform leads the heroes to a group of Electroids that form a line which goes across the following area, which the heroes must climb. Hitting a switch makes blue platforms stick out of the wall that defeat them. As they use these blue platforms to climb a short part of the area, they come up to red switches that make red platforms appear in the blue platforms' places. Another switch is after these red platforms, which makes blue switches appear above them as they move into the wall. As the primates climb the last few platforms, they reach the letter O and a wall of switches that can be hit to make one last red platform appear to let them travel down a straight pathway to reach the Tutorial Pig at the checkpoint.
After the checkpoint is a red wall that can be moved out of the way with a switch after the Tutorial Pig and a large abyss that can only be crossed by using red and blue platforms. They must hit switches to make the red and blue platforms alternate to grab collectibles, including an Extra Life Balloon, and also to travel safely. On the other side of the large gap is a solid area of ground that is placed under a switch that can make a red wall appear or disappear. They should pass the wall when it is out of their way to come up to a chicken robot enemy and another DK Barrel. Another long, blue platform stretches over a gap in the following area. It is covered in tires, which can be useful in jumping over a small group of switches that can make the blue platform disappear and overall cause the Kongs to fall. A switch at the end of this blue platform is in the air to make a red platform nearby appear. When they land on this, they find more tires all over the area.
They should carefully bounce on them to avoid hitting switches placed at the top and bottom of the area, as if they hit a switch, the red platform disappears until they hit a switch again. The letter N is between the switches in the center of the area. There is a blue platform after this that must be activated by hitting a switch placed between it and the red switch. As before, the primates must bounce on tires to avoid hitting switches placed all around the area. Soon, the Kongs land on a solid section of ground with an electrical enemy on it. The only way to pass this foe is by hitting a switch the makes a red barrier shoot out of the wall and push the enemies away. When they are gone, the heroes can hit the switch again to pass the red barrier and then cross a gap to meet the Tutorial Pig at another checkpoint.
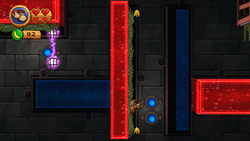
Ahead of the checkpoint is a gap that leads onto a blue platform sticking out of the wall. The Kongs must hit a red switch at the end of it to make a red platform appear right next to it to help the primates progress. A switch is placed above a blue platform in the wall next to this red platform; it must be hit to make this blue platform appear for the Kongs to use. The Kongs can use the same switch again from the blue platform to make a red ceiling appear with some green turf that they can climb on. As they climb, an electric enemy stands in their way. They must avoid it by crouching on a red platform placed below the grassy turf. In the middle of this platform is a tire, while above it to the left and right are switches. A Banana Coin is also on the left side of the red platform, while the letter G is on the right side of it. If the Kongs manage to get to the other side of the electric enemy here, they can use the tire to reach the grassy turf above them, while trying to avoid the two switches surrounding them, as the switches make the red platforms that the Kongs need disappear. The grassy turf lets the Kongs climb over a gap to a switch that is placed right above a blue platform that is located inside of the wall.
When hit, the blue platform quickly emerges from the wall to hold the Kongs above the abyss below. An electric enemy attacks the primates here, but once they avoid it, they can make their way to a tall, rectangular, blue platform lined with climbable turf. They can climb down the turf to reach the bottom of the platform, which stretches across most of the area, to reach another switch. Parallel to the blue platform is a red one with turf lined across it as well. They should hit the switch to make this red wall appear. If they climb up to the top of the platform, they can make a jump across a gap to a wide red platform. Climbable turf is on the ceiling above this platform, and a few electric enemies move around it. After they avoid these enemies, they can reach another red platform placed below them with two chicken enemies on it. They should avoid the enemies and then travel back up to the turf while hitting a nearby switch to make a blue platform appear nearby.
This platform is covered in tires and has two switches at the center of it. The primates must keep away from the switches to avoid falling while dodging an electric enemy at the same time. Eventually, they can reach a ceiling of turf that they can climb to reach a switch that is placed above a red platform. If they hit the switch, the red platform appears for them to stand on. On the platform, they can avoid a purple electric enemy and then cross a small gap to reach solid ground again. Here, there are two robotic chicken enemies and a fire-breathing robot. Behind the enemies are blue platforms that can be activated in the place of the red platform above them if the Kongs hit the switch located between them. When they climb up the blue platforms, they should activate the red ones with a switch, and then do the same thing again to make blue platform appear in a higher part of the area, until they reach two final red platforms under a solid platform. Above this solid platform is the Slot Machine Barrel.
Enemies[edit]
| Image | Name | Count |
|---|---|---|
| BuckBomb | 8 | |
| BuckBot | 6 | |

|
Electroid | 19 |
| Pyrobot | 2 |
Items[edit]
| Image | Name | Count |
|---|---|---|
| Banana Coin | 11 | |
| DK Barrel | 2 | |
| Extra Life Balloon | 3 | |

|
Heart | 1 |
K-O-N-G Letters[edit]
| Image | Letter | Location |
|---|---|---|
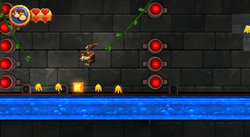
|
K | Shortly after the first Puzzle Piece, the Kongs come up to an area with a long, blue platform placed all the way across a wide abyss. The letter K is here between two walls of switches and two swinging vines. The heroes should hit the switches so that the blue platform appears under the letter K and then grab it. |
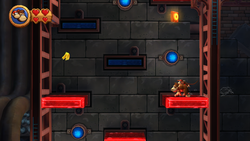
|
O | As the Kongs climb the red and blue platforms in the area immediately after the passage into the rocket switch, they come up to the letter O near the top of the area. |
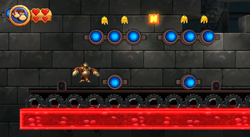
|
N | Shortly after the third Puzzle Piece, the Kongs get onto a red platform covered in tires. Between the many switches above it is the letter N. |
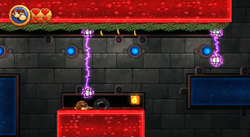
|
G | After the primates climb along the climbable turf following the second checkpoint, they should fall down to a red platform to find the letter G on the right side of it. |
Puzzle Pieces[edit]
| Image | Number | Location |
|---|---|---|
|
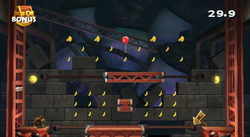
1 | When the Kongs reach the first Pyrobot, they should head backwards and roll-jump off of a red platform to reach another on the other side of the area. Ahead of it is a narrow passage with two robot enemies and a Barrel Cannon that leads to a Bonus Level. There, the Kongs must collect 47 bananas, two Banana Coins, and an Extra Life Balloon around two moving platforms within thirty seconds to make a Puzzle Piece appear. |
|
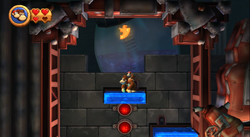
2 | Immediately after the letter O, the Kongs should roll-jump from the last blue platform to an area of solid ground before the first checkpoint and pass under a wall of switches. If they manage to avoid the switches, they can roll-jump again and go into the line of switches to make a red platform appear nearby. If they Kongs already have the red platforms activated right before this point, they cannot reach this platform due to the wall of switches being in their way. However, if they do make it to the platform, they can continue up blue platforms after hitting more switches to reach the second Puzzle Piece. |
|
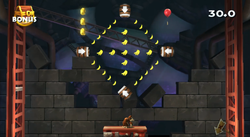
3 | After the checkpoint, the Kongs reach a few red and blue square-shaped platforms placed over a wide abyss. If they roll-jump from the last blue platform at the top of the area, they can reach a metallic platform with a Barrel Cannon on it. The barrel can shoot them into a Bonus Level, where they must shoot around an area with four barrels to grab sixty-five bananas, three Banana Coins, and an Extra Life Balloon. If everything is grabbed within thirty seconds, a Puzzle Piece appears. |
|
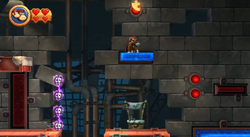
4 | When the Kongs access the second blue platform after the second checkpoint, they should roll jump backwards into a pair of switches to reach a small, red platform. They should roll jump through more switches after this to reach a blue platform with the fourth Puzzle Piece above it. |
|
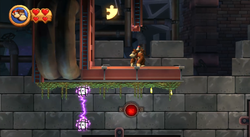
5 | At the end of the level, the primates should jump on the blue platform to the left of the final Pyrobot and then roll-jump to the left. They should then land in a hidden area with the fifth and final Puzzle Piece. |
Rocket Switch[edit]
| Image | Location |
|---|---|
|
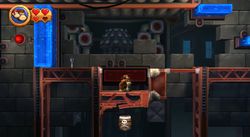
Shortly after the letter K, the Kongs come across a bridge formed by a red platform, which is located just above a cracked girder. Just after this is a group of three electric enemies, each placed in front of a small, blue platform that is pushed into the fall. They should hit a nearby switch to make the blue platforms appear, and then head backwards to find that the red bridge platform is now gone. If they pound on the cracked girder that was under it, they break through, land in a Barrel Cannon, and are shot into a secret area with the red switch. They should hit the button to help power up the rocket in Lift-off Launch. |
Names in other languages[edit]
| Language | Name | Meaning | Note(s) | Ref. |
|---|---|---|---|---|
| Japanese | オン・オフスイッチ On Ofu Suitchi |
On/Off Switch | [?] | |
| Chinese (Simplified) | ON・OFF开关 ON・OFF Kāiguān |
ON・OFF Switch | [?] | |
| Chinese (Traditional) | ON・OFF開關 ON・OFF Kāiguān |
ON・OFF Switch | [?] | |
| French (Canadian) | Tactique Chromatique | Chromatic Tactic | [?] | |
| German | Schalterverwalter | Switch Manager | [?] | |
| Italian | Officina pulsante | Pulsating Workshop | [?] | |
| Spanish | Interruptores Infames | Dreadful Switches | [?] |
