List of Power Moons in the Seaside Kingdom: Difference between revisions
From the Super Mario Wiki, the Mario encyclopedia
Jump to navigationJump to search
No edit summary |
m (Text replacement - "<br/>" to "<br>") |
||
| (34 intermediate revisions by 20 users not shown) | |||
| Line 1: | Line 1: | ||
This is a list of the 71 [[Power Moon]]s (70 regular Power Moons and 1 [[Multi Moon]]) that can be found in the [[Seaside Kingdom]] of ''[[Super Mario Odyssey]]''. | |||
This is a list of the 71 [[Power Moon]]s that can be found in the [[Seaside Kingdom]] of ''[[Super Mario Odyssey]]''. | {|class="wikitable"text-align="center" | ||
{|class="wikitable" text-align="center" | |||
!# | !# | ||
!Power Moon | !Power Moon | ||
| Line 9: | Line 7: | ||
|- | |- | ||
!1 | !1 | ||
|style="text-align:center;"|[[File:SMO Seaside Moon 1.png|200px]]<br>The Stone Pillar Seal | |style="text-align:center;"|{{anchor|The Stone Pillar Seal}}[[File:SMO Seaside Moon 1.png|200px]]<br>The Stone Pillar Seal | ||
|This Power Moon can be found on top of a grassy platform in the middle of the area and can be reached by [[capture|capturing]] a [[Gushen]] and floating up to it. Collecting it unplugs the first seal. | |This Power Moon can be found on top of a grassy platform in the middle of the area and can be reached by [[capture|capturing]] a [[Gushen]] and floating up to it. Collecting it unplugs the first seal. | ||
|Available from the start. | |Available from the start. | ||
|- | |- | ||
!2 | !2 | ||
|style="text-align:center;"|[[File:SMO Seaside Moon 2.png|200px]]<br>The Lighthouse Seal | |style="text-align:center;"|{{anchor|The Lighthouse Seal}}[[File:SMO Seaside Moon 2.png|200px]]<br>The Lighthouse Seal | ||
|Mario must make it to the top of the Lighthouse in order to obtain this Power Moon. Collecting it unplugs the second seal. | |Mario must make it to the top of the Lighthouse in order to obtain this Power Moon. Collecting it unplugs the second seal. | ||
|Available from the start. | |Available from the start. | ||
|- | |- | ||
!3 | !3 | ||
|style="text-align:center;"|[[File:SMO Seaside Moon 3.png|200px]]<br>The Hot Spring Seal | |style="text-align:center;"|{{anchor|The Hot Spring Seal}}[[File:SMO Seaside Moon 3.png|200px]]<br>The Hot Spring Seal | ||
|At the Hot Spring Island, Mario must capture a Gushen and spray the [[lava]] to make a safe path for him to collect the Power Moon, which is found underwater in the hot spring. Collecting it unplugs the third seal. | |At the Hot Spring Island, Mario must capture a Gushen and spray the [[lava]] to make a safe path for him to collect the Power Moon, which is found underwater in the hot spring. Collecting it unplugs the third seal. | ||
|Available from the start. | |Available from the start. | ||
|- | |- | ||
!4 | !4 | ||
|style="text-align:center;"|[[File:SMO Seaside Moon 4.png|200px]]<br>The Seal Above the Canyon | |style="text-align:center;"|{{anchor|The Seal Above the Canyon}}[[File:SMO Seaside Moon 4.png|200px]]<br>The Seal Above the Canyon | ||
|Mario must make it through the Rolling Canyon area with the [[ | |Mario must make it through the Rolling Canyon area with the [[shell (Super Mario Odyssey)|shell]]s and past the wall of [[crate]]s to find this Power Moon. Collecting it unplugs the fourth and final seal. | ||
|Available from the start. | |Available from the start. | ||
|- | |- | ||
!5 | !5 | ||
|style="text-align:center;"|[[File:TheGlassisHalfEmpty.png|200px]]<br>[[The Glass Is Half Empty!]] | |style="text-align:center;"|[[File:TheGlassisHalfEmpty.png|200px]]<br>[[The Glass Is Half Empty!|The Glass Is Half Full!]] | ||
|Mario must defeat [[Mollusque-Lanceur]], after which he will be rewarded with a [[Multi Moon]]. | |Mario must defeat [[Mollusque-Lanceur]], after which he will be rewarded with a [[Multi Moon]]. | ||
|Available after breaking all four seals. | |Available after breaking all four seals. | ||
|- | |- | ||
!6 | !6 | ||
|style="text-align:center;"|[[File:SMO Seaside Moon 6.png|200px]]<br>On the Cliff Overlooking the Beach | |style="text-align:center;"|{{anchor|On the Cliff Overlooking the Beach}}[[File:SMO Seaside Moon 6.png|200px]]<br>On the Cliff Overlooking the Beach | ||
|To the right of the [[Odyssey]] near the two [[Goomba]]s wearing pirate hats, the player can find this Power Moon on a high cliff. Mario must capture a Gushen in order to obtain it. | |To the right of the [[Odyssey]] near the two [[Goomba]]s wearing pirate hats, the player can find this Power Moon on a high cliff. Mario must capture a Gushen in order to obtain it. | ||
|Available from the start. | |Available from the start. | ||
|- | |- | ||
!7 | !7 | ||
|style="text-align:center;"|[[File:SMO Seaside Moon 7.png|200px]]<br>Ride the Jetstream | |style="text-align:center;"|{{anchor|Ride the Jetstream}}[[File:SMO Seaside Moon 7.png|200px]]<br>Ride the Jetstream | ||
|The player can find a hidden alcove to the right of the Odyssey near the [[Binoculars]]. Mario must capture a Gushen and float up into the alcove and then right to find this Power Moon above a shallow pool of water. | |The player can find a hidden alcove to the right of the Odyssey near the [[Binoculars]]. Mario must capture a Gushen and float up into the alcove and then right to find this Power Moon above a shallow pool of water. | ||
|Available from the start. | |Available from the start. | ||
|- | |- | ||
!8 | !8 | ||
|style="text-align:center;"|[[File:SMO Seaside Moon 8.png|200px]]<br>Ocean-Bottom Maze: Treasure | |style="text-align:center;"|{{anchor|Ocean-Bottom Maze: Treasure}}[[File:SMO Seaside Moon 8.png|200px]]<br>Ocean-Bottom Maze: Treasure | ||
|Near the Glass Palace checkpoint, the player can find a set of four [[8-Bit Pipe]]s which all lead to an 8-Bit section flat on the underwater floor. Mario must make it successfully through this 8-Bit section to obtain the Power Moon. | |Near the Glass Palace checkpoint, the player can find a set of four [[8-Bit Pipe]]s which all lead to an 8-Bit section flat on the underwater floor. Mario must make it successfully through this 8-Bit section to obtain the Power Moon. | ||
|Available from the start. | |Available from the start. | ||
|- | |- | ||
!9 | !9 | ||
|style="text-align:center;"|[[File:SMO Seaside Moon 9.png|200px]]<br>Ocean-Bottom Maze: Hidden Room | |style="text-align:center;"|{{anchor|Ocean-Bottom Maze: Hidden Room}}[[File:SMO Seaside Moon 9.png|200px]]<br>Ocean-Bottom Maze: Hidden Room | ||
|In the same 8-Bit area as the "Ocean-Bottom Maze: Treasure" Power Moon, Mario must enter the bottom right 8-Bit Pipe. When he enters the section, he must kick a [[Koopa Troopa]] shell into a [[Brick Block]] that is blocking the entrance to a hidden alcove containing the Power Moon. | |In the same 8-Bit area as the "Ocean-Bottom Maze: Treasure" Power Moon, Mario must enter the bottom right 8-Bit Pipe. When he enters the section, he must kick a [[Koopa Troopa]] shell into a [[Brick Block]] that is blocking the entrance to a hidden alcove containing the Power Moon. | ||
|Available from the start. | |Available from the start. | ||
|- | |- | ||
!10 | !10 | ||
|style="text-align:center;"|[[File:SMO Seaside Moon 10.png|200px]]<br>Underwater Highway Tunnel | |style="text-align:center;"|{{anchor|Underwater Highway Tunnel}}[[File:SMO Seaside Moon 10.png|200px]]<br>Underwater Highway Tunnel | ||
|To the northwest of the | |To the northwest of the Lighthouse checkpoint, the player can find three [[Cheep Cheep]]s swimming in front of a short tunnel. The player can capture one of the Cheep Cheeps and find a small hole covered by Brick Blocks. Mario must break through these blocks to find the Power Moon hidden inside the hole. | ||
|Available from the start. | |Available from the start. | ||
|- | |- | ||
!11 | !11 | ||
|style="text-align:center;"|[[File:SMO Seaside Moon 11.png|200px]]<br>Shh! It's a Shortcut! | |style="text-align:center;"|{{anchor|Shh! It's a Shortcut!}}[[File:SMO Seaside Moon 11.png|200px]]<br>Shh! It's a Shortcut! | ||
|Near the Ocean Trench East checkpoint, the player must capture a Cheep Cheep and then go a little to the left to find a hole with a path leading to the Power Moon inside. | |Near the Ocean Trench East checkpoint, the player must capture a Cheep Cheep and then go a little to the left to find a hole with a path leading to the Power Moon inside. | ||
|Available from the start. | |Available from the start. | ||
|- | |- | ||
!12 | !12 | ||
|style="text-align:center;"|[[File:SMO Seaside Moon 12.png|200px]]<br>Gap in the Ocean Trench | |style="text-align:center;"|{{anchor|Gap in the Ocean Trench}}[[File:SMO Seaside Moon 12.png|200px]]<br>Gap in the Ocean Trench | ||
|Near the Ocean Trench East checkpoint, the player must capture a Cheep Cheep and swim forward and down to see the [[Sphynx]]. A hole can be found on the right side wall near the Sphynx which leads to a path with the Power Moon at the end. | |Near the Ocean Trench East checkpoint, the player must capture a Cheep Cheep and swim forward and down to see the [[Sphynx]]. A hole can be found on the right side wall near the Sphynx which leads to a path with the Power Moon at the end. | ||
|Available from the start. | |Available from the start. | ||
|- | |- | ||
!13 | !13 | ||
|style="text-align:center;"|[[File:SMO Seaside Moon 13.png|200px]]<br>Slip Through the Nesting Spot | |style="text-align:center;"|{{anchor|Slip Through the Nesting Spot}}[[File:SMO Seaside Moon 13.png|200px]]<br>Slip Through the Nesting Spot | ||
|Near the Hot Spring Island checkpoint, the player must capture a Cheep Cheep and find a hole to the northeastern side of the area. Mario must avoid the [[Maw-Ray]]s inside the hole to obtain this Power Moon. | |Near the Hot Spring Island checkpoint, the player must capture a Cheep Cheep and find a hole to the northeastern side of the area. Mario must avoid the [[Maw-Ray]]s inside the hole to obtain this Power Moon. | ||
|Available from the start. | |Available from the start. | ||
|- | |- | ||
!14 | !14 | ||
|style="text-align:center;"|[[File:SMO Seaside Moon 14.png|200px]]<br>Merci, Dorrie! | |style="text-align:center;"|{{anchor|Merci, Dorrie!}}[[File:SMO Seaside Moon 14.png|200px]]<br>Merci, Dorrie! | ||
|The player can find this Power Moon floating underneath the purple [[Dorrie]] that swims around the area. | |The player can find this Power Moon floating underneath the purple [[Dorrie]] that swims around the area. | ||
|Available from the start. | |Available from the start. | ||
|- | |- | ||
!15 | !15 | ||
|style="text-align:center;"|[[File:SMO Seaside Moon 15.png|200px]]<br>Bonjour, Dorrie! | |style="text-align:center;"|{{anchor|Bonjour, Dorrie!}}[[File:SMO Seaside Moon 15.png|200px]]<br>Bonjour, Dorrie! | ||
|The player can find this Power Moon floating high above the yellow Dorrie that swims around the area. It can be obtained by capturing [[Glydon]] on the Lighthouse and flying into it or by capturing a Gushen and floating into it. | |The player can find this Power Moon floating high above the yellow Dorrie that swims around the area. It can be obtained by capturing [[Glydon]] on the Lighthouse and flying into it or by capturing a Gushen and floating into it. | ||
|Available | |Available after collecting the "The Glass Is Half Full!" Multi Moon. | ||
|- | |- | ||
!16 | !16 | ||
|style="text-align:center;"|[[File:SMO Seaside Moon 16.png|200px]]<br>Under a Dangerous Ceiling | |style="text-align:center;"|{{anchor|Under a Dangerous Ceiling}}[[File:SMO Seaside Moon 16.png|200px]]<br>Under a Dangerous Ceiling | ||
|Near the Ocean Trench East checkpoint, the player can find this Power Moon by ground pounding a glowing spot on a mound found among many [[Komboo]]s walking on the ceiling above. | |Near the Ocean Trench East checkpoint, the player can find this Power Moon by ground pounding a glowing spot on a mound found among many [[Komboo]]s walking on the ceiling above. | ||
|Available from the start. | |Available from the start. | ||
|- | |- | ||
!17 | !17 | ||
|style="text-align:center;"|[[File:SMO Seaside Moon 17.png|200px]]<br>What the Waves Left Behind | |style="text-align:center;"|{{anchor|What the Waves Left Behind}}[[File:SMO Seaside Moon 17.png|200px]]<br>What the Waves Left Behind | ||
|Near the Rolling Canyon checkpoint, the player can find this Power Moon in a circular hole among the gray rock path. Mario must defeat the Komboo protecting it and ground pound the spot to obtain it. | |Near the Rolling Canyon checkpoint, the player can find this Power Moon in a circular hole among the gray rock path. Mario must defeat the Komboo protecting it and ground pound the spot to obtain it. | ||
|Available from the start. | |Available from the start. | ||
|- | |- | ||
!18 | !18 | ||
|style="text-align:center;"|[[File:SMO Seaside Moon 18.png|200px]]<br>The Back Canyon: Excavate! | |style="text-align:center;"|{{anchor|The Back Canyon: Excavate!}}[[File:SMO Seaside Moon 18.png|200px]]<br>The Back Canyon: Excavate! | ||
|On the left side of the Rolling Canyon checkpoint, the player can find this Power Moon by going on a few grassy platforms to find it hidden on a glowing spot with a [[Moonsnake]] rolling in its path. Mario must ground pound the glowing spot to obtain the Power Moon. | |On the left side of the Rolling Canyon checkpoint, the player can find this Power Moon by going on a few grassy platforms to find it hidden on a glowing spot with a [[Moonsnake]] rolling in its path. Mario must ground pound the glowing spot to obtain the Power Moon. | ||
|Available from the start. | |Available from the start. | ||
|- | |- | ||
!19 | !19 | ||
|style="text-align:center;"|[[File:SMO Seaside Moon 19.png|200px]]<br>Bubblaine Northern Reaches | |style="text-align:center;"|{{anchor|Bubblaine Northern Reaches}}[[File:SMO Seaside Moon 19.png|200px]]<br>Bubblaine Northern Reaches | ||
|Near the Ocean Trench East checkpoint, the player can find three small mounds along with a larger mound in the middle of the three. Mario must ground pound each mound which each has a glowing spot and then ground pound the large middle mound to obtain this Power Moon. Each time Mario pounds the mounds, a group of Komboos will appear. | |Near the Ocean Trench East checkpoint, the player can find three small mounds along with a larger mound in the middle of the three. Mario must ground pound each mound which each has a glowing spot and then ground pound the large middle mound to obtain this Power Moon. Each time Mario pounds the mounds, a group of Komboos will appear. | ||
|Available from the start. | |Available from the start. | ||
|- | |- | ||
!20 | !20 | ||
|style="text-align:center;"|[[File:SMO Seaside Moon 20.png|200px]]<br>Wriggling on the Sandy Bottom | |style="text-align:center;"|{{anchor|Wriggling on the Sandy Bottom}}[[File:SMO Seaside Moon 20.png|200px]]<br>Wriggling on the Sandy Bottom | ||
|Near the Lighthouse, the player can find two Cheep Cheeps swimming. Under them is a hidden door which leads to a bonus area. In this bonus area, Mario must ground pound the | |Near the Lighthouse, the player can find two Cheep Cheeps swimming. Under them is a hidden door which leads to a bonus area. In this bonus area, Mario must ground pound the [[Lurker]] to obtain the Power Moon. | ||
|Available from the start. | |Available from the start. | ||
|- | |- | ||
!21 | !21 | ||
|style="text-align:center;"|[[File:SMO Seaside Moon 21.png|200px]]<br>Glass Palace Treasure Chest | |style="text-align:center;"|{{anchor|Glass Palace Treasure Chest}}[[File:SMO Seaside Moon 21.png|200px]]<br>Glass Palace Treasure Chest | ||
|The player can find this Power Moon underneath the Glass Palace in a treasure chest near three swimming Cheep Cheeps and a group of Komboos. | |The player can find this Power Moon underneath the Glass Palace in a treasure chest near three swimming Cheep Cheeps and a group of Komboos. | ||
|Available from the start. | |Available from the start. | ||
|- | |- | ||
!22 | !22 | ||
|style="text-align:center;"|[[File:SMO Seaside Moon 22.png|200px]]<br>Treasure Trap Hidden in the Inlet | |style="text-align:center;"|{{anchor|Treasure Trap Hidden in the Inlet}}[[File:SMO Seaside Moon 22.png|200px]]<br>Treasure Trap Hidden in the Inlet | ||
|Near the Beach House checkpoint, the player can find a small hole underneath the water in a river to the left of the checkpoint. Inside is an area with four treasure chests. Mario must open each treasure chest in the correct order to obtain this Power Moon. | |Near the Beach House checkpoint, the player can find a small hole underneath the water in a river to the left of the checkpoint. Inside is an area with four treasure chests. Mario must open each treasure chest in the correct order to obtain this Power Moon. | ||
The order of the treasure chests is the same order that was used to get the [[Treasure in the Ocean Cave]] [[Power Star]] in ''[[Super Mario 64]]''{{'}}s [[Jolly Roger Bay]]. | |||
|Available from the start. | |Available from the start. | ||
|- | |- | ||
!23 | !23 | ||
|style="text-align:center;"|[[File:SMO Seaside Moon 23.png|200px]]<br>Sea Gardening: Inlet Seed | |style="text-align:center;"|{{anchor|Sea Gardening: Inlet Seed}}[[File:SMO Seaside Moon 23.png|200px]]<br>Sea Gardening: Inlet Seed | ||
|In the small river to the | |In the small river to the right of the Beach House checkpoint, the player can find a seed sitting underwater on the ground. Mario must pick up the seed and bring it to one of the flower pots on the roof of the Beach House. He must wait for the Power Moon to sprout from a vine, or use a [[Gushen]]'s water attack to accelerate the growth process. | ||
|Available from the start. | |Available from the start. | ||
|- | |- | ||
!24 | !24 | ||
|style="text-align:center;"|[[File:SMO Seaside Moon 24.png|200px]]<br>Sea Gardening: Canyon Seed | |style="text-align:center;"|{{anchor|Sea Gardening: Canyon Seed}}[[File:SMO Seaside Moon 24.png|200px]]<br>Sea Gardening: Canyon Seed | ||
|At the end of the area near the "The Back Canyon: Excavate!" Power Moon, the player can find a seed. Mario must pick up the seed and bring it to one of the flower pots on the roof of the Beach House. He must wait for the Power Moon to sprout from a vine. | |At the end of the area near the "The Back Canyon: Excavate!" Power Moon, the player can find a seed. Mario must pick up the seed and bring it to one of the flower pots on the roof of the Beach House. He must wait for the Power Moon to sprout from a vine, or use a Gushen's water attack to accelerate the growth process. | ||
|Available from the start. | |Available from the start. | ||
|- | |- | ||
!25 | !25 | ||
|style="text-align:center;"|[[File:SMO Seaside Moon 25.png|200px]]<br>Sea Gardening: Hot-Spring Seed | |style="text-align:center;"|{{anchor|Sea Gardening: Hot-Spring Seed}}[[File:SMO Seaside Moon 25.png|200px]]<br>Sea Gardening: Hot-Spring Seed | ||
|Near the Hot Spring Island checkpoint, the player can find a seed sitting on a rocky platform along with a Gushen. Mario must pick up the seed and bring it to one of the flower pots on the roof of the Beach House. He must wait for the Power Moon to sprout from a vine. | |Near the Hot Spring Island checkpoint, the player can find a seed sitting on a rocky platform along with a Gushen. Mario must pick up the seed and bring it to one of the flower pots on the roof of the Beach House. He must wait for the Power Moon to sprout from a vine, or use a Gushen's water attack to accelerate the growth process. | ||
|Available from the start. | |Available from the start. | ||
|- | |- | ||
!26 | !26 | ||
|style="text-align:center;"|[[File:SMO Seaside Moon 26.png|200px]]<br>Sea Gardening: Ocean Trench Seed | |style="text-align:center;"|{{anchor|Sea Gardening: Ocean Trench Seed}}[[File:SMO Seaside Moon 26.png|200px]]<br>Sea Gardening: Ocean Trench Seed | ||
|Near the Ocean Trench East checkpoint and sitting next to the Sphynx, the player can find a seed sitting underwater. Mario must pick up the seed and bring it to one of the flower pots on the roof of the Beach House. He must wait for the Power Moon to sprout from a vine. | |Near the Ocean Trench East checkpoint and sitting next to the Sphynx, the player can find a seed sitting underwater. Mario must pick up the seed and bring it to one of the flower pots on the roof of the Beach House. He must wait for the Power Moon to sprout from a vine, or use a Gushen's water attack to accelerate the growth process. | ||
|Available from the start. | |Available from the start. | ||
|- | |- | ||
!27 | !27 | ||
|style="text-align:center;"|[[File:SMO Seaside Moon 27.png|200px]]<br>Seaside Kingdom Timer Challenge 1 | |style="text-align:center;"|{{anchor|Seaside Kingdom Timer Challenge 1}}[[File:SMO Seaside Moon 27.png|200px]]<br>Seaside Kingdom Timer Challenge 1 | ||
|Near the Hot Spring Island checkpoint, the player can find a hole underwater containing a [[ | |Near the Hot Spring Island checkpoint, the player can find a hole underwater containing a [[ground-pound switch]]. Mario must hit the switch and then quickly make it through a short 8-Bit section to obtain the Power Moon before the switch's effect wears off. | ||
|Available from the start. | |Available from the start. | ||
|- | |- | ||
!28 | !28 | ||
|style="text-align:center;"|[[File:SMO Seaside Moon 28.png|200px]]<br>Seaside Kingdom Timer Challenge 2 | |style="text-align:center;"|{{anchor|Seaside Kingdom Timer Challenge 2}}[[File:SMO Seaside Moon 28.png|200px]]<br>Seaside Kingdom Timer Challenge 2 | ||
|Near the Glass Palace, the player can find a [[Scarecrow (object)|scarecrow]] underwater. Mario must throw Cappy onto the scarecrow and then quickly swim over to the Power Moon before the timer runs out. | |Near the Glass Palace, the player can find a [[Scarecrow (object)|scarecrow]] underwater. Mario must throw Cappy onto the scarecrow and then quickly swim over to the Power Moon before the timer runs out. | ||
|Available | |Available after collecting the "The Glass Is Half Full!" Multi Moon. | ||
|- | |- | ||
!29 | !29 | ||
|style="text-align:center;"|[[File:SMO Seaside Moon 29.png|200px]]<br>Found on the Beach! Good Dog! | |style="text-align:center;"|{{anchor|Found on the Beach! Good Dog!}}[[File:SMO Seaside Moon 29.png|200px]]<br>Found on the Beach! Good Dog! | ||
|Near the [[Odyssey]], the player can find a [[ | |Near the [[Odyssey]], the player can find a [[Nintendog]] wearing a fedora. Mario must guide the Nintendog around the area with the binoculars to find a glowing spot near the gray rocks. The Nintendog will start trying to dig it up, but Mario must ground pound the spot to obtain the Power Moon. | ||
|Available | |Available after collecting the "The Glass Is Half Full!" Multi Moon. | ||
|- | |- | ||
!30 | !30 | ||
|style="text-align:center;"|[[File:SMO Seaside Moon 30.png|200px]]<br>Moon Shards in the Sea | |style="text-align:center;"|{{anchor|Moon Shards in the Sea}}[[File:SMO Seaside Moon 30.png|200px]]<br>Moon Shards in the Sea | ||
|Near the Rolling Canyon checkpoint, the player can find a scarecrow underwater. Throwing Cappy onto the scarecrow opens up a gate leading to a hidden underwater area. Mario must collect all five [[Moon Shard]]s in the area while avoiding Maw-Rays to obtain this Power Moon. | |Near the Rolling Canyon checkpoint, the player can find a scarecrow underwater. Throwing Cappy onto the scarecrow opens up a gate leading to a hidden underwater area. Mario must collect all five [[Moon Shard]]s in the area while avoiding Maw-Rays to obtain this Power Moon. | ||
|Available from the start. | |Available from the start. | ||
|- | |- | ||
!31 | !31 | ||
|style="text-align:center;"|[[File:SMO Seaside Moon 31.png|200px]]<br>Taking Notes: Ocean Surface Dash | |style="text-align:center;"|{{anchor|Taking Notes: Ocean Surface Dash}}[[File:SMO Seaside Moon 31.png|200px]]<br>Taking Notes: Ocean Surface Dash | ||
|Near the Beach House checkpoint, the player can find a rainbow-colored treble clef. Mario must throw Cappy at the [[Rocket Flower]] next to it and run across the water and collect the line of [[ | |Near the Beach House checkpoint, the player can find a rainbow-colored treble clef. Mario must throw Cappy at the [[Rocket Flower]] next to it and run across the water and collect the line of [[note]]s to obtain this Power Moon. A Gushen can also be used to complete this. | ||
|Available from the start. | |Available from the start. | ||
|- | |- | ||
!32 | !32 | ||
|style="text-align:center;"|[[File:SMO Seaside Moon 32.png|200px]]<br>Love by the Seaside | |style="text-align:center;"|{{anchor|Love by the Seaside}}[[File:SMO Seaside Moon 32.png|200px]]<br>Love by the Seaside | ||
|Mario must capture and create a [[Goomba | |Mario must capture and create a [[Goomba Tower]] and meet with [[Goombette]], who can be found on a platform in the Rolling Canyon path with the shells. She will reward Mario with the Power Moon when he meets her. | ||
|Available from the start. | |Available from the start. | ||
|- | |- | ||
!33 | !33 | ||
|style="text-align:center;"|[[File:SMO Seaside Moon 33.png|200px]]<br>Lighthouse Leaper | |style="text-align:center;"|{{anchor|Lighthouse Leaper}}[[File:SMO Seaside Moon 33.png|200px]]<br>Lighthouse Leaper | ||
|Mario must go to the top of the Lighthouse and capture Glydon. He must fly over to a [[Bubblainian]] who is found near the Glass Palace. Upon doing so, the Bubblainian will be impressed by Mario's flying abilities and will reward him with the Power Moon. | |Mario must go to the top of the Lighthouse and capture Glydon. He must fly over to a [[Bubblainian]] who is found near the Glass Palace. Upon doing so, the Bubblainian will be impressed by Mario's flying abilities and will reward him with the Power Moon. | ||
|Available | |Available after collecting the "The Glass Is Half Full!" Multi Moon. | ||
|- | |- | ||
!34 | !34 | ||
|style="text-align:center;"|[[File:SMO Seaside Moon 34.png|200px]]<br>Good Job, Captain Toad! | |style="text-align:center;"|{{anchor|Good Job, Captain Toad!}}[[File:SMO Seaside Moon 34.png|200px]]<br>Good Job, Captain Toad! | ||
|Mario must capture a Gushen and take it to the end of the Rolling Canyon path. Mario can find [[Captain Toad]] on a higher platform near the "The Seal Above the Canyon" Power Moon, who will reward Mario with the Power Moon when he speaks to him. | |Mario must capture a Gushen and take it to the end of the Rolling Canyon path. Mario can find [[Captain Toad]] on a higher platform near the "The Seal Above the Canyon" Power Moon, who will reward Mario with the Power Moon when he speaks to him. | ||
|Available from the start. | |Available from the start. | ||
|- | |- | ||
!35 | !35 | ||
|style="text-align:center;"|[[File:SMO Seaside Moon 35.png|200px]]<br>Ocean Quiz: Good! | |style="text-align:center;"|{{anchor|Ocean Quiz: Good!}}[[File:SMO Seaside Moon 35.png|200px]]<br>Ocean Quiz: Good! | ||
|Near the Ocean Trench East checkpoint, the player can find the Sphynx in the deep area to the southwest of the checkpoint. If Mario can answer five of its questions correctly, the player will be rewarded with a Power Moon. The answers are "Bubblaine", "Four", "Attack", "Resort Outfit", and "To ask questions". | |Near the Ocean Trench East checkpoint, the player can find the Sphynx in the deep area to the southwest of the checkpoint. If Mario can answer five of its questions correctly, the player will be rewarded with a Power Moon. The answers are "Bubblaine", "Four", "Attack", "Resort Outfit", and "To ask questions". | ||
|Available from the start. | |Available from the start. | ||
|- | |- | ||
!36 | !36 | ||
|style="text-align:center;"|[[File:SMO Seaside Moon 36.png|200px]]<br>Shopping in Bubblaine | |style="text-align:center;"|{{anchor|Shopping in Bubblaine}}[[File:SMO Seaside Moon 36.png|200px]]<br>Shopping in Bubblaine | ||
|The player can purchase this Power Moon from the yellow [[Crazy Cap]] shop for 100 gold coins. | |The player can purchase this Power Moon from the yellow [[Crazy Cap]] shop for 100 gold coins. | ||
|Available from the start. | |Available from the start. | ||
|- | |- | ||
!37 | !37 | ||
|style="text-align:center;"|[[File:SMO Seaside Moon 37.png|200px]]<br>Beach Volleyball: Champ | |style="text-align:center;"|{{anchor|Beach Volleyball: Champ}}[[File:SMO Seaside Moon 37.png|200px]]<br>Beach Volleyball: Champ | ||
|In the [[Beach Volleyball (Super Mario Odyssey)|Beach Volleyball]] minigame, Mario must hit the ball back and forth 15 times in a row to obtain this Power Moon. | |In the [[Beach Volleyball (Super Mario Odyssey)|Beach Volleyball]] minigame, Mario must hit the ball back and forth 15 times in a row to obtain this Power Moon. | ||
|Available | |Available after collecting the "The Glass Is Half Full!" Multi Moon. | ||
|- | |- | ||
!38 | !38 | ||
|style="text-align:center;"|[[File:SMO Seaside Moon 38.png|200px]]<br>Beach Volleyball: Hero of the Beach! | |style="text-align:center;"|{{anchor|Beach Volleyball: Hero of the Beach!}}[[File:SMO Seaside Moon 38.png|200px]]<br>Beach Volleyball: Hero of the Beach! | ||
|In the Beach Volleyball minigame, Mario must hit the ball back and forth 100 times in a row to obtain this Power Moon. | |In the Beach Volleyball minigame, Mario must hit the ball back and forth 100 times in a row to obtain this Power Moon. | ||
|Available | |Available after collecting the "The Glass Is Half Full!" Multi Moon. | ||
|- | |- | ||
!39 | !39 | ||
|style="text-align:center;"|[[File:SMO Seaside Moon 39.png|200px]]<br>Looking Back in the Dark Waterway | |style="text-align:center;"|{{anchor|Looking Back in the Dark Waterway}}[[File:SMO Seaside Moon 39.png|200px]]<br>Looking Back in the Dark Waterway | ||
|The player can find a hole with a few [[ | |The player can find a hole with a few [[coin ring]]s which leads to the [[Underwater Tunnel to the Lighthouse]]. In the first part with the three swimming Cheep Cheeps, Mario can find this Power Moon inside a small hole in the wall to the left side. | ||
|Available from the start. | |Available from the start. | ||
|- | |- | ||
!40 | !40 | ||
|style="text-align:center;"|[[File:SMO Seaside Moon 40.png|200px]]<br>The Sphynx's Underwater Vault | |style="text-align:center;"|{{anchor|The Sphynx's Underwater Vault}}[[File:SMO Seaside Moon 40.png|200px]]<br>The Sphynx's Underwater Vault | ||
|Near the Ocean Trench East checkpoint, the player can find the Sphynx in the deep area to the southwest of the checkpoint. If Mario can answer one of its questions correctly, the Sphynx will open up a doorway which leads to an underwater area with a treasure chest containing the Power Moon. | |Near the Ocean Trench East checkpoint, the player can find the Sphynx in the deep area to the southwest of the checkpoint. If Mario can answer one of its questions correctly, the Sphynx will open up a doorway which leads to an underwater area with a treasure chest containing the Power Moon. | ||
|Available from the start. | |Available from the start. | ||
|- | |- | ||
!41 | !41 | ||
|style="text-align:center;"|[[File:SMO Seaside Moon 41.png|200px]]<br>A Rumble on the Seaside Floor | |style="text-align:center;"|{{anchor|A Rumble on the Seaside Floor}}[[File:SMO Seaside Moon 41.png|200px]]<br>A Rumble on the Seaside Floor | ||
|Near the Odyssey, the player can find a [[Warp Pipe]] on the wall which takes Mario to a room. Inside this room, Mario must ground pound a certain part of the floor to obtain this Power Moon. It can be found more easily if the player has the rumble effect on their controller activated. | |Near the Odyssey, the player can find a [[Warp Pipe]] on the wall which takes Mario to a room. Inside this room, Mario must ground pound a certain part of the floor to obtain this Power Moon. It can be found more easily if the player has the rumble effect on their controller activated. | ||
|Available from the start. | |Available from the start. | ||
|- | |- | ||
!42 | !42 | ||
|style="text-align:center;"|[[File:SMO Seaside Moon 42.png|200px]]<br>A Relaxing Dance | |style="text-align:center;"|{{anchor|A Relaxing Dance}}[[File:SMO Seaside Moon 42.png|200px]]<br>A Relaxing Dance | ||
|The player must purchase the Resort Hat and Resort Outfit from the purple Crazy Cap shop and then talk to a Bubblainian who will unlock a door to the Beach House. Inside, Mario must dance with two other Bubblainians for a few seconds, after which Mario will be rewarded with a Power Moon. | |The player must purchase the Resort Hat and Resort Outfit or the Sunshine Shades and Sunshine Outfit from the purple Crazy Cap shop and then talk to a Bubblainian who will unlock a door to the Beach House. Inside, Mario must dance with two other Bubblainians for a few seconds, after which Mario will be rewarded with a Power Moon. | ||
|Available from the start. | |Available from the start. | ||
|- | |- | ||
!43 | !43 | ||
|style="text-align:center;"|[[File:SMO Seaside Moon 43.png|200px]]<br>Wading in the Cloud Sea | |style="text-align:center;"|{{anchor|Wading in the Cloud Sea}}[[File:SMO Seaside Moon 43.png|200px]]<br>Wading in the Cloud Sea | ||
|Near the Beach House, the player can find a higher cliff with a [[Mini Rocket]] on top of it which leads to a bonus area. In this bonus area, Mario must make it through a large chasm filled with clouds and enemies such as [[Pulse Beam]]s and [[Burrbo]]s. | |Near the Beach House, the player can find a higher cliff with a [[Mini Rocket]] on top of it which leads to a bonus area. In this bonus area, Mario must make it through a large chasm filled with clouds and enemies such as [[Pulse Beam]]s and [[Burrbo]]s. | ||
|Available from the start. | |Available from the start. | ||
|- | |- | ||
!44 | !44 | ||
|style="text-align:center;"|[[File:SMO Seaside Moon 44.png|200px]]<br>Sunken Treasure in the Cloud Sea | |style="text-align:center;"|{{anchor|Sunken Treasure in the Cloud Sea}}[[File:SMO Seaside Moon 44.png|200px]]<br>Sunken Treasure in the Cloud Sea | ||
|In the area with the "Wading in the Cloud Sea" Power Moon, the player can find a thin pathway hidden by clouds that is off of the normal route. Following this path leads to a square platform with a treasure chest hidden in more clouds that contains the Power Moon. | |In the area with the "Wading in the Cloud Sea" Power Moon, the player can find a thin pathway hidden by clouds that is off of the normal route. Following this path leads to a square platform with a treasure chest hidden in more clouds that contains the Power Moon. | ||
|Available from the start. | |Available from the start. | ||
|- | |- | ||
!45 | !45 | ||
|style="text-align:center;"|[[File:SMO Seaside Moon 45.png|200px]]<br>Fly Through the Narrow Valley | |style="text-align:center;"|{{anchor|Fly Through the Narrow Valley}}[[File:SMO Seaside Moon 45.png|200px]]<br>Fly Through the Narrow Valley | ||
|To the right of where the Beach Volleyball minigame is played, the player can find a hidden alcove with a door that leads to a bonus area. The player must capture a Gushen first to reach it. Inside the bonus area, Mario must capture multiple Gushens to make it past several bottomless pits and pits of poisoned water. | |To the right of where the Beach Volleyball minigame is played, the player can find a hidden alcove with a door that leads to a bonus area. The player must capture a Gushen first to reach it. Inside the bonus area, Mario must capture multiple Gushens to make it past several bottomless pits and pits of poisoned water. | ||
|Available from the start. | |Available from the start. | ||
|- | |- | ||
!46 | !46 | ||
|style="text-align:center;"|[[File:SMO Seaside Moon 46.png|200px]]<br>Treasure Chest in the Narrow Valley | |style="text-align:center;"|{{anchor|Treasure Chest in the Narrow Valley}}[[File:SMO Seaside Moon 46.png|200px]]<br>Treasure Chest in the Narrow Valley | ||
|In the area with the "Fly Through the Narrow Valley" Power Moon, the player can find a treasure chest past the part where Mario normally falls down to collect the aforementioned Power Moon. This treasure chest contains another Power Moon. | |In the area with the "Fly Through the Narrow Valley" Power Moon, the player can find a treasure chest past the part where Mario normally falls down to collect the aforementioned Power Moon. This treasure chest contains another Power Moon. | ||
|Available from the start. | |Available from the start. | ||
|- | |- | ||
!47 | !47 | ||
|style="text-align:center;"|[[File:SMO Seaside Moon 47.png|200px]]<br>Hurry and Stretch | |style="text-align:center;"|{{anchor|Hurry and Stretch}}[[File:SMO Seaside Moon 47.png|200px]]<br>Hurry and Stretch | ||
|In the northeast of the kingdom underwater, the player can find an alcove with a door which leads to a bonus area. In this bonus area, Mario must capture a few [[Uproot]]s and make it through an upwards area infested with Moonsnakes and rising lava. | |In the northeast of the kingdom underwater, the player can find an alcove with a door which leads to a bonus area. In this bonus area, Mario must capture a few [[Uproot]]s and make it through an upwards area infested with Moonsnakes and rising lava. Even in Assist Mode, Mario will die and lose 10 coins if he touches lava. | ||
|Available from the start. | |Available from the start. | ||
|- | |- | ||
!48 | !48 | ||
|style="text-align:center;"|[[File:SMO Seaside Moon 48.png|200px]]<br>Stretch on the Side Path | |style="text-align:center;"|{{anchor|Stretch on the Side Path}}[[File:SMO Seaside Moon 48.png|200px]]<br>Stretch on the Side Path | ||
|In the area with the "Hurry and Stretch" Power Moon in the part with the narrow path, the player can find this Power Moon floating above the right side and must stretch upwards to collect it. | |In the area with the "Hurry and Stretch" Power Moon in the part with the narrow path, the player can find this Power Moon floating above the right side and must stretch upwards to collect it. | ||
|Available from the start. | |Available from the start. | ||
|- | |- | ||
!49 | !49 | ||
|style="text-align:center;"|[[File:SMO Seaside Moon 49.png|200px]]<br>Secret Path to Bubblaine! | |style="text-align:center;"|{{anchor|Secret Path to Bubblaine!}}[[File:SMO Seaside Moon 49.png|200px]]<br>Secret Path to Bubblaine! | ||
|This Power Moon can be found on top of the Diving Platform. To reach it, the player must travel through a painting located in a different kingdom: | |This Power Moon can be found on top of the Diving Platform. To reach it, the player must travel through a painting located in a different kingdom: | ||
*In [[Bowser's Kingdom]], the painting can be found behind the left building at the Main Courtyard Entrance. | *In [[Bowser's Kingdom]], the painting can be found behind the left building at the Main Courtyard Entrance. | ||
*In the [[Mushroom Kingdom (Super Mario Odyssey)|Mushroom Kingdom]], the painting can be found between some trees near the Odyssey. | *In the [[Mushroom Kingdom (Super Mario Odyssey)|Mushroom Kingdom]], the painting can be found between some trees near the Odyssey. | ||
|Available from the start (Mushroom Kingdom).<br | |Available from the start (Mushroom Kingdom).<br><br>Available after defeating Bowser in the Moon Kingdom (Bowser's Kingdom). | ||
|- | |- | ||
!50 | !50 | ||
|style="text-align:center;"|[[File:SMO Seaside Moon 50.png|200px]]<br>Found with Seaside Kingdom Art | |style="text-align:center;"|{{anchor|Found with Seaside Kingdom Art}}[[File:SMO Seaside Moon 50.png|200px]]<br>Found with Seaside Kingdom Art | ||
|Near the gray boulders to right of the Odyssey and up on a higher platform, the player can find a piece of [[Hint Art]]. The Hint Art shows the word "KEEP" written in a blocky design with a Power Moon above the first "E". The player must travel back to the [[Metro Kingdom]], where they can find the words "KEEP CLEAR" written on the ground near the Main Street Entrance. Mario must ground pound where the Power Moon is shown on the Hint Art to obtain it. | |Near the gray boulders to right of the Odyssey and up on a higher platform, the player can find a piece of [[Hint Art]]. The Hint Art shows the word "KEEP" written in a blocky design with a Power Moon above the first "E". The player must travel back to the [[Metro Kingdom]], where they can find the words "KEEP CLEAR" written on the ground near the Main Street Entrance. Mario must ground pound where the Power Moon is shown on the Hint Art to obtain it. | ||
|Available from the start. | |Available from the start. | ||
|- | |- | ||
!51 | !51 | ||
|style="text-align:center;"|[[File:SMO Seaside Moon 51.png|200px]]<br>Seaside Kingdom Regular Cup | |style="text-align:center;"|{{anchor|Seaside Kingdom Regular Cup}}[[File:SMO Seaside Moon 51.png|200px]]<br>Seaside Kingdom Regular Cup | ||
|At the Island above Ocean Trench East, the player can find a Koopa Troopa hosting the Koopa Freerunning mini-game. Mario must enter the race and then reach the finish line in first place to be awarded a Power Moon. | |At the Island above Ocean Trench East, the player can find a Koopa Troopa hosting the Koopa Freerunning mini-game. Mario must enter the race and then reach the finish line in first place to be awarded a Power Moon. | ||
|Available after defeating Bowser in the Moon Kingdom. | |Available after defeating Bowser in the Moon Kingdom. | ||
|- | |- | ||
!52 | !52 | ||
|style="text-align:center;"|[[File:SMO Seaside Moon 52.png|200px]]<br>Peach in the Seaside Kingdom | |style="text-align:center;"|{{anchor|Peach in the Seaside Kingdom}}[[File:SMO Seaside Moon 52.png|200px]]<br>Peach in the Seaside Kingdom | ||
|Mario must meet Peach at the top of the water fountain by jumping into one of the geysers. | |Mario must meet Peach at the top of the water fountain by jumping into one of the geysers. | ||
|Available after | |Available after talking to the Toad outside Peach's Castle (Mushroom Kingdom). | ||
|- | |- | ||
!53 | !53 | ||
|style="text-align:center;"|[[File:SMO Seaside Moon 53.png|200px]]<br>Above the Parasol: Catch! | |style="text-align:center;"|{{anchor|Above the Parasol: Catch!}}[[File:SMO Seaside Moon 53.png|200px]]<br>Above the Parasol: Catch! | ||
| | |The player can find this Power Moon floating above the umbrella to the left of the Beach House. Mario can either jump on the umbrella to catch it or capture a Gushen and float to it. | ||
|Available after opening this kingdom's [[Moon Rock]]. | |Available after opening this kingdom's [[Moon Rock]]. | ||
|- | |- | ||
!54 | !54 | ||
|style="text-align:center;"|[[File:SMO Seaside Moon 54.png|200px]]<br>What Shines Inside the Glass | |style="text-align:center;"|{{anchor|What Shines Inside the Glass}}[[File:SMO Seaside Moon 54.png|200px]]<br>What Shines Inside the Glass | ||
| | |This Power Moon can be found at the very bottom on the inside of the Glass Tower. | ||
|Available after opening this kingdom's Moon Rock. | |Available after opening this kingdom's Moon Rock. | ||
|- | |- | ||
!55 | !55 | ||
|style="text-align:center;"|[[File:SMO Seaside Moon 55.png|200px]]<br>A Fine Detail on the Glass | |style="text-align:center;"|{{anchor|A Fine Detail on the Glass}}[[File:SMO Seaside Moon 55.png|200px]]<br>A Fine Detail on the Glass | ||
| | |This Power Moon can be found on the Glass Tower on one if its handle designs. | ||
|Available after opening this kingdom's Moon Rock. | |Available after opening this kingdom's Moon Rock. | ||
|- | |- | ||
!56 | !56 | ||
|style="text-align:center;"|[[File:SMO Seaside Moon 56.png|200px]]<br>Underwater Highway West: Explore! | |style="text-align:center;"|{{anchor|Underwater Highway West: Explore!}}[[File:SMO Seaside Moon 56.png|200px]]<br>Underwater Highway West: Explore! | ||
| | |This Power Moon can be found to the west of the kingdom near a couple of rolling Moonsnakes. | ||
|Available after opening this kingdom's Moon Rock. | |Available after opening this kingdom's Moon Rock. | ||
|- | |- | ||
!57 | !57 | ||
|style="text-align:center;"|[[File:SMO Seaside Moon 57.png|200px]]<br>Underwater Highway East: Explore! | |style="text-align:center;"|{{anchor|Underwater Highway East: Explore!}}[[File:SMO Seaside Moon 57.png|200px]]<br>Underwater Highway East: Explore! | ||
| | |This Power Moon can be found to the east of the kingdom near the Hot Spring Island checkpoint. | ||
|Available after opening this kingdom's Moon Rock. | |Available after opening this kingdom's Moon Rock. | ||
|- | |- | ||
!58 | !58 | ||
|style="text-align:center;"|[[File:SMO Seaside Moon 58.png|200px]]<br>Rapid Ascent on Hot | |style="text-align:center;"|{{anchor|Rapid Ascent on Hot Spring Island}}[[File:SMO Seaside Moon 58.png|200px]]<br>Rapid Ascent on Hot Spring Island | ||
| | |This Power Moon can be found high above the larger pool in the Hot Spring Island and can be obtained by capturing a Gushen. | ||
|Available after opening this kingdom's Moon Rock. | |Available after opening this kingdom's Moon Rock. | ||
|- | |- | ||
!59 | !59 | ||
|style="text-align:center;"|[[File:SMO Seaside Moon 59.png|200px]]<br>A Light Next to the Lighthouse | |style="text-align:center;"|{{anchor|A Light Next to the Lighthouse}}[[File:SMO Seaside Moon 59.png|200px]]<br>A Light Next to the Lighthouse | ||
| | |The player can find this Power Moon by throwing and spinning Cappy onto the top of the pole that is used to get to the top of the Lighthouse. | ||
|Available after opening this kingdom's Moon Rock. | |Available after opening this kingdom's Moon Rock. | ||
|- | |- | ||
!60 | !60 | ||
|style="text-align:center;"|[[File:SMO Seaside Moon 60.png|200px]]<br>The Tall Rock Shelf in the Deep Ocean | |style="text-align:center;"|{{anchor|The Tall Rock Shelf in the Deep Ocean}}[[File:SMO Seaside Moon 60.png|200px]]<br>The Tall Rock Shelf in the Deep Ocean | ||
| | |The player can find this Power Moon near the Ocean Trench East checkpoint near the Sphynx. To obtain it, Mario must throw and spin Cappy onto a small glowing rock that is sticking out of the ground to the right in the deep area. | ||
|Available after opening this kingdom's Moon Rock. | |Available after opening this kingdom's Moon Rock. | ||
|- | |- | ||
!61 | !61 | ||
|style="text-align:center;"|[[File:SMO Seaside Moon 61.png|200px]]<br>At the Base of the Lighthouse | |style="text-align:center;"|{{anchor|At the Base of the Lighthouse}}[[File:SMO Seaside Moon 61.png|200px]]<br>At the Base of the Lighthouse | ||
| | |The player can find this Power Moon by ground pounding a glowing spot in between two blue rock formations underwater near the Lighthouse. | ||
|Available after opening this kingdom's Moon Rock. | |Available after opening this kingdom's Moon Rock. | ||
|- | |- | ||
!62 | !62 | ||
|style="text-align:center;"|[[File:SMO Seaside Moon 62.png|200px]]<br>Bird Traveling Over the Ocean | |style="text-align:center;"|{{anchor|Bird Traveling Over the Ocean}}[[File:SMO Seaside Moon 62.png|200px]]<br>Bird Traveling Over the Ocean | ||
| | |The player can find this Power Moon by capturing a Gushen and catching a bird that is seen flying around the kingdom. | ||
|Available after opening this kingdom's Moon Rock. | |Available after opening this kingdom's Moon Rock. | ||
|- | |- | ||
!63 | !63 | ||
|style="text-align:center;"|[[File:SMO Seaside Moon 63.png|200px]]<br>Caught Hopping at Glass Palace! | |style="text-align:center;"|{{anchor|Caught Hopping at Glass Palace!}}[[File:SMO Seaside Moon 63.png|200px]]<br>Caught Hopping at Glass Palace! | ||
| | |The player can find a [[rabbit]] roaming around the Glass Tower and must catch it to obtain this Power Moon. | ||
|Available after opening this kingdom's Moon Rock. | |Available after opening this kingdom's Moon Rock. | ||
|- | |- | ||
!64 | !64 | ||
|style="text-align:center;"|[[File:SMO Seaside Moon 64.png|200px]]<br>Seaside Kingdom Timer Challenge 3 | |style="text-align:center;"|{{anchor|Seaside Kingdom Timer Challenge 3}}[[File:SMO Seaside Moon 64.png|200px]]<br>Seaside Kingdom Timer Challenge 3 | ||
| | |The player must throw Cappy onto a scarecrow at the top of the Lighthouse and must quickly make it to the Power Moon which can be seen on a far away platform in the water. | ||
|Available after opening this kingdom's Moon Rock. | |Available after opening this kingdom's Moon Rock. | ||
|- | |- | ||
!65 | !65 | ||
|style="text-align:center;"|[[File:SMO Seaside Moon 65.png|200px]]<br>Taking Notes: Ocean-Bottom Maze | |style="text-align:center;"|{{anchor|Taking Notes: Ocean-Bottom Maze}}[[File:SMO Seaside Moon 65.png|200px]]<br>Taking Notes: Ocean-Bottom Maze | ||
| | |In the 8-Bit area with the "Ocean-Bottom Maze: Treasure" Power Moon, the player can find a rainbow-colored treble clef. Mario must touch it and then quickly collect all of the notes that appear. | ||
|Available after opening this kingdom's Moon Rock. | |Available after opening this kingdom's Moon Rock. | ||
|- | |- | ||
!66 | !66 | ||
|style="text-align:center;"|[[File:SMO Seaside Moon 66.png|200px]]<br>Taking Notes in the Sea | |style="text-align:center;"|{{anchor|Taking Notes in the Sea}}[[File:SMO Seaside Moon 66.png|200px]]<br>Taking Notes in the Sea | ||
| | |Near the Glass Palace checkpoint, the player can find a rainbow-colored treble clef on top of a column underwater. The player must touch it and quickly collect the three circles of notes before they disappear. | ||
|Available after opening this kingdom's Moon Rock. | |Available after opening this kingdom's Moon Rock. | ||
|- | |- | ||
!67 | !67 | ||
|style="text-align:center;"|[[File:SMO Seaside Moon 67.png|200px]]<br>Seaside Kingdom Master Cup | |style="text-align:center;"|{{anchor|Seaside Kingdom Master Cup}}[[File:SMO Seaside Moon 67.png|200px]]<br>Seaside Kingdom Master Cup | ||
|At the Island above Ocean Trench East, the player can find a Koopa Troopa hosting the Koopa Freerunning mini-game. Mario must enter the race and then reach the finish line in first place to be awarded a Power Moon. | |At the Island above Ocean Trench East, the player can find a Koopa Troopa hosting the Koopa Freerunning mini-game. Mario must enter the race and then reach the finish line in first place to be awarded a Power Moon. | ||
|Available after opening this kingdom's Moon Rock and collecting the "Seaside Kingdom Regular Cup" Power Moon. | |Available after opening this kingdom's Moon Rock and collecting the "Seaside Kingdom Regular Cup" Power Moon. | ||
|- | |- | ||
!68 | !68 | ||
|style="text-align:center;"|[[File:SMO Seaside Moon 68.png|200px]]<br>Aim! Poke! | |style="text-align:center;"|{{anchor|Aim! Poke!}}[[File:SMO Seaside Moon 68.png|200px]]<br>Aim! Poke! | ||
| | |Near the Rolling Canyon checkpoint, the player can find a [[Moon Pipe]] underwater, which leads to a bonus area. In this bonus area, Mario must capture a [[Pokio]] and knock a few [[boulder]]s into breakable blocks that are blocking the path and a gate to the Power Moon. | ||
|Available after opening this kingdom's Moon Rock. | |Available after opening this kingdom's Moon Rock. | ||
|- | |- | ||
!69 | !69 | ||
|style="text-align:center;"|[[File:SMO Seaside Moon 69.png|200px]]<br>Poke! Roll! | |style="text-align:center;"|{{anchor|Poke! Roll!}}[[File:SMO Seaside Moon 69.png|200px]]<br>Poke! Roll! | ||
| | |In the area with the "Aim! Poke!" Power Moon, the player must capture a Pokio and knock a boulder into a single breakable block that can be found behind a gate which is behind the entrance to the area. | ||
|Available after opening this kingdom's Moon Rock. | |Available after opening this kingdom's Moon Rock. | ||
|- | |- | ||
!70 | !70 | ||
|style="text-align:center;"|[[File:SMO Seaside Moon 70.png|200px]]<br>The Spinning Maze: Search! | |style="text-align:center;"|{{anchor|The Spinning Maze: Search!}}[[File:SMO Seaside Moon 70.png|200px]]<br>The Spinning Maze: Search! | ||
| | |By dropping off one side of the Lighthouse, the player can find a Moon Pipe which leads to a bonus area. In this bonus area, Mario must collect five Moon Shards among many blue and yellow blocks that can be shifted by throwing Cappy at them. The only enemies here are [[Spiny|Spinies]]. | ||
|Available after opening this kingdom's Moon Rock. | |Available after opening this kingdom's Moon Rock. | ||
|- | |- | ||
!71 | !71 | ||
|style="text-align:center;"|[[File:SMO Seaside Moon 71.png|200px]]<br>The Spinning Maze: Open! | |style="text-align:center;"|{{anchor|The Spinning Maze: Open!}}[[File:SMO Seaside Moon 71.png|200px]]<br>The Spinning Maze: Open! | ||
| | |At the back of the area with the "The Spinning Maze: Search!" Power Moon, the player can find an opening which leads to a hidden room containing a treasure chest which contains the Power Moon. | ||
|Available after opening this kingdom's Moon Rock. | |Available after opening this kingdom's Moon Rock. | ||
|} | |} | ||
{{ | {{SMO kingdoms}} | ||
[[Category:Item locations|Power Moons in the Seaside Kingdom]] | [[Category:Item locations|Power Moons in the Seaside Kingdom]] | ||
[[Category:Super Mario Odyssey]] | [[Category:Super Mario Odyssey]] | ||
Latest revision as of 12:22, April 1, 2024
This is a list of the 71 Power Moons (70 regular Power Moons and 1 Multi Moon) that can be found in the Seaside Kingdom of Super Mario Odyssey.
| # | Power Moon | Location | Availability |
|---|---|---|---|
| 1 | 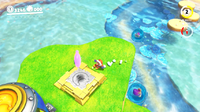 The Stone Pillar Seal |
This Power Moon can be found on top of a grassy platform in the middle of the area and can be reached by capturing a Gushen and floating up to it. Collecting it unplugs the first seal. | Available from the start. |
| 2 | 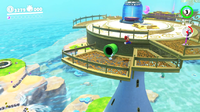 The Lighthouse Seal |
Mario must make it to the top of the Lighthouse in order to obtain this Power Moon. Collecting it unplugs the second seal. | Available from the start. |
| 3 | 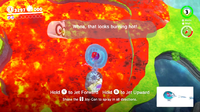 The Hot Spring Seal |
At the Hot Spring Island, Mario must capture a Gushen and spray the lava to make a safe path for him to collect the Power Moon, which is found underwater in the hot spring. Collecting it unplugs the third seal. | Available from the start. |
| 4 | 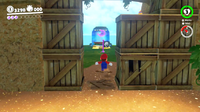 The Seal Above the Canyon |
Mario must make it through the Rolling Canyon area with the shells and past the wall of crates to find this Power Moon. Collecting it unplugs the fourth and final seal. | Available from the start. |
| 5 | 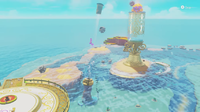 The Glass Is Half Full! |
Mario must defeat Mollusque-Lanceur, after which he will be rewarded with a Multi Moon. | Available after breaking all four seals. |
| 6 | 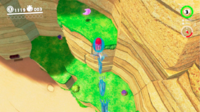 On the Cliff Overlooking the Beach |
To the right of the Odyssey near the two Goombas wearing pirate hats, the player can find this Power Moon on a high cliff. Mario must capture a Gushen in order to obtain it. | Available from the start. |
| 7 | 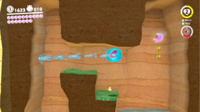 Ride the Jetstream |
The player can find a hidden alcove to the right of the Odyssey near the Binoculars. Mario must capture a Gushen and float up into the alcove and then right to find this Power Moon above a shallow pool of water. | Available from the start. |
| 8 | 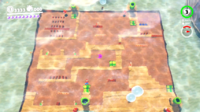 Ocean-Bottom Maze: Treasure |
Near the Glass Palace checkpoint, the player can find a set of four 8-Bit Pipes which all lead to an 8-Bit section flat on the underwater floor. Mario must make it successfully through this 8-Bit section to obtain the Power Moon. | Available from the start. |
| 9 | 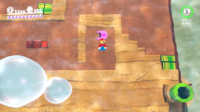 Ocean-Bottom Maze: Hidden Room |
In the same 8-Bit area as the "Ocean-Bottom Maze: Treasure" Power Moon, Mario must enter the bottom right 8-Bit Pipe. When he enters the section, he must kick a Koopa Troopa shell into a Brick Block that is blocking the entrance to a hidden alcove containing the Power Moon. | Available from the start. |
| 10 | 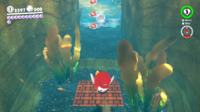 Underwater Highway Tunnel |
To the northwest of the Lighthouse checkpoint, the player can find three Cheep Cheeps swimming in front of a short tunnel. The player can capture one of the Cheep Cheeps and find a small hole covered by Brick Blocks. Mario must break through these blocks to find the Power Moon hidden inside the hole. | Available from the start. |
| 11 | 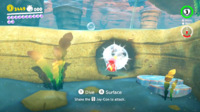 Shh! It's a Shortcut! |
Near the Ocean Trench East checkpoint, the player must capture a Cheep Cheep and then go a little to the left to find a hole with a path leading to the Power Moon inside. | Available from the start. |
| 12 | 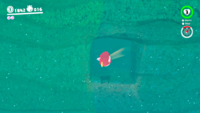 Gap in the Ocean Trench |
Near the Ocean Trench East checkpoint, the player must capture a Cheep Cheep and swim forward and down to see the Sphynx. A hole can be found on the right side wall near the Sphynx which leads to a path with the Power Moon at the end. | Available from the start. |
| 13 | 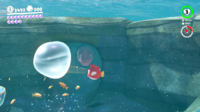 Slip Through the Nesting Spot |
Near the Hot Spring Island checkpoint, the player must capture a Cheep Cheep and find a hole to the northeastern side of the area. Mario must avoid the Maw-Rays inside the hole to obtain this Power Moon. | Available from the start. |
| 14 | 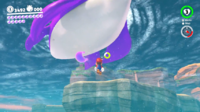 Merci, Dorrie! |
The player can find this Power Moon floating underneath the purple Dorrie that swims around the area. | Available from the start. |
| 15 | 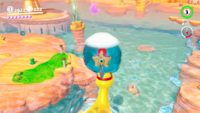 Bonjour, Dorrie! |
The player can find this Power Moon floating high above the yellow Dorrie that swims around the area. It can be obtained by capturing Glydon on the Lighthouse and flying into it or by capturing a Gushen and floating into it. | Available after collecting the "The Glass Is Half Full!" Multi Moon. |
| 16 | 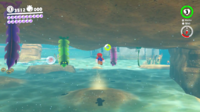 Under a Dangerous Ceiling |
Near the Ocean Trench East checkpoint, the player can find this Power Moon by ground pounding a glowing spot on a mound found among many Komboos walking on the ceiling above. | Available from the start. |
| 17 | 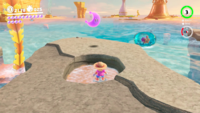 What the Waves Left Behind |
Near the Rolling Canyon checkpoint, the player can find this Power Moon in a circular hole among the gray rock path. Mario must defeat the Komboo protecting it and ground pound the spot to obtain it. | Available from the start. |
| 18 | 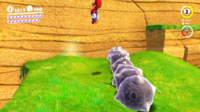 The Back Canyon: Excavate! |
On the left side of the Rolling Canyon checkpoint, the player can find this Power Moon by going on a few grassy platforms to find it hidden on a glowing spot with a Moonsnake rolling in its path. Mario must ground pound the glowing spot to obtain the Power Moon. | Available from the start. |
| 19 | 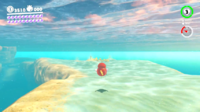 Bubblaine Northern Reaches |
Near the Ocean Trench East checkpoint, the player can find three small mounds along with a larger mound in the middle of the three. Mario must ground pound each mound which each has a glowing spot and then ground pound the large middle mound to obtain this Power Moon. Each time Mario pounds the mounds, a group of Komboos will appear. | Available from the start. |
| 20 | 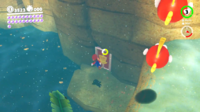 Wriggling on the Sandy Bottom |
Near the Lighthouse, the player can find two Cheep Cheeps swimming. Under them is a hidden door which leads to a bonus area. In this bonus area, Mario must ground pound the Lurker to obtain the Power Moon. | Available from the start. |
| 21 | 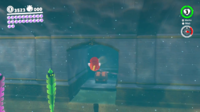 Glass Palace Treasure Chest |
The player can find this Power Moon underneath the Glass Palace in a treasure chest near three swimming Cheep Cheeps and a group of Komboos. | Available from the start. |
| 22 | 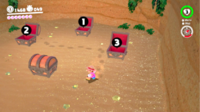 Treasure Trap Hidden in the Inlet |
Near the Beach House checkpoint, the player can find a small hole underneath the water in a river to the left of the checkpoint. Inside is an area with four treasure chests. Mario must open each treasure chest in the correct order to obtain this Power Moon.
The order of the treasure chests is the same order that was used to get the Treasure in the Ocean Cave Power Star in Super Mario 64's Jolly Roger Bay. |
Available from the start. |
| 23 | 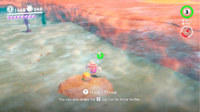 Sea Gardening: Inlet Seed |
In the small river to the right of the Beach House checkpoint, the player can find a seed sitting underwater on the ground. Mario must pick up the seed and bring it to one of the flower pots on the roof of the Beach House. He must wait for the Power Moon to sprout from a vine, or use a Gushen's water attack to accelerate the growth process. | Available from the start. |
| 24 | 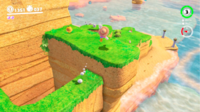 Sea Gardening: Canyon Seed |
At the end of the area near the "The Back Canyon: Excavate!" Power Moon, the player can find a seed. Mario must pick up the seed and bring it to one of the flower pots on the roof of the Beach House. He must wait for the Power Moon to sprout from a vine, or use a Gushen's water attack to accelerate the growth process. | Available from the start. |
| 25 | 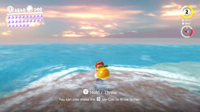 Sea Gardening: Hot-Spring Seed |
Near the Hot Spring Island checkpoint, the player can find a seed sitting on a rocky platform along with a Gushen. Mario must pick up the seed and bring it to one of the flower pots on the roof of the Beach House. He must wait for the Power Moon to sprout from a vine, or use a Gushen's water attack to accelerate the growth process. | Available from the start. |
| 26 | 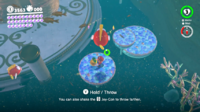 Sea Gardening: Ocean Trench Seed |
Near the Ocean Trench East checkpoint and sitting next to the Sphynx, the player can find a seed sitting underwater. Mario must pick up the seed and bring it to one of the flower pots on the roof of the Beach House. He must wait for the Power Moon to sprout from a vine, or use a Gushen's water attack to accelerate the growth process. | Available from the start. |
| 27 | 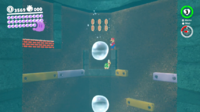 Seaside Kingdom Timer Challenge 1 |
Near the Hot Spring Island checkpoint, the player can find a hole underwater containing a ground-pound switch. Mario must hit the switch and then quickly make it through a short 8-Bit section to obtain the Power Moon before the switch's effect wears off. | Available from the start. |
| 28 | 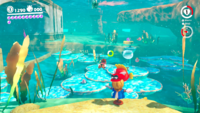 Seaside Kingdom Timer Challenge 2 |
Near the Glass Palace, the player can find a scarecrow underwater. Mario must throw Cappy onto the scarecrow and then quickly swim over to the Power Moon before the timer runs out. | Available after collecting the "The Glass Is Half Full!" Multi Moon. |
| 29 | 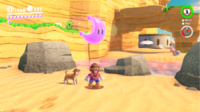 Found on the Beach! Good Dog! |
Near the Odyssey, the player can find a Nintendog wearing a fedora. Mario must guide the Nintendog around the area with the binoculars to find a glowing spot near the gray rocks. The Nintendog will start trying to dig it up, but Mario must ground pound the spot to obtain the Power Moon. | Available after collecting the "The Glass Is Half Full!" Multi Moon. |
| 30 | 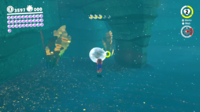 Moon Shards in the Sea |
Near the Rolling Canyon checkpoint, the player can find a scarecrow underwater. Throwing Cappy onto the scarecrow opens up a gate leading to a hidden underwater area. Mario must collect all five Moon Shards in the area while avoiding Maw-Rays to obtain this Power Moon. | Available from the start. |
| 31 | 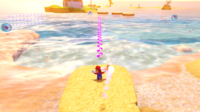 Taking Notes: Ocean Surface Dash |
Near the Beach House checkpoint, the player can find a rainbow-colored treble clef. Mario must throw Cappy at the Rocket Flower next to it and run across the water and collect the line of notes to obtain this Power Moon. A Gushen can also be used to complete this. | Available from the start. |
| 32 | 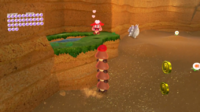 Love by the Seaside |
Mario must capture and create a Goomba Tower and meet with Goombette, who can be found on a platform in the Rolling Canyon path with the shells. She will reward Mario with the Power Moon when he meets her. | Available from the start. |
| 33 | 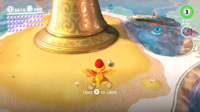 Lighthouse Leaper |
Mario must go to the top of the Lighthouse and capture Glydon. He must fly over to a Bubblainian who is found near the Glass Palace. Upon doing so, the Bubblainian will be impressed by Mario's flying abilities and will reward him with the Power Moon. | Available after collecting the "The Glass Is Half Full!" Multi Moon. |
| 34 | 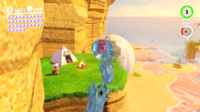 Good Job, Captain Toad! |
Mario must capture a Gushen and take it to the end of the Rolling Canyon path. Mario can find Captain Toad on a higher platform near the "The Seal Above the Canyon" Power Moon, who will reward Mario with the Power Moon when he speaks to him. | Available from the start. |
| 35 | 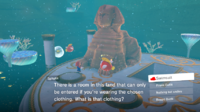 Ocean Quiz: Good! |
Near the Ocean Trench East checkpoint, the player can find the Sphynx in the deep area to the southwest of the checkpoint. If Mario can answer five of its questions correctly, the player will be rewarded with a Power Moon. The answers are "Bubblaine", "Four", "Attack", "Resort Outfit", and "To ask questions". | Available from the start. |
| 36 | 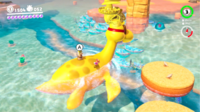 Shopping in Bubblaine |
The player can purchase this Power Moon from the yellow Crazy Cap shop for 100 gold coins. | Available from the start. |
| 37 | 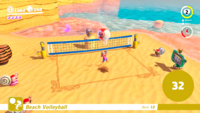 Beach Volleyball: Champ |
In the Beach Volleyball minigame, Mario must hit the ball back and forth 15 times in a row to obtain this Power Moon. | Available after collecting the "The Glass Is Half Full!" Multi Moon. |
| 38 | 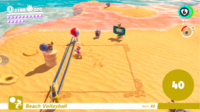 Beach Volleyball: Hero of the Beach! |
In the Beach Volleyball minigame, Mario must hit the ball back and forth 100 times in a row to obtain this Power Moon. | Available after collecting the "The Glass Is Half Full!" Multi Moon. |
| 39 | 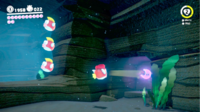 Looking Back in the Dark Waterway |
The player can find a hole with a few coin rings which leads to the Underwater Tunnel to the Lighthouse. In the first part with the three swimming Cheep Cheeps, Mario can find this Power Moon inside a small hole in the wall to the left side. | Available from the start. |
| 40 | 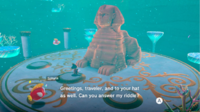 The Sphynx's Underwater Vault |
Near the Ocean Trench East checkpoint, the player can find the Sphynx in the deep area to the southwest of the checkpoint. If Mario can answer one of its questions correctly, the Sphynx will open up a doorway which leads to an underwater area with a treasure chest containing the Power Moon. | Available from the start. |
| 41 | 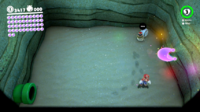 A Rumble on the Seaside Floor |
Near the Odyssey, the player can find a Warp Pipe on the wall which takes Mario to a room. Inside this room, Mario must ground pound a certain part of the floor to obtain this Power Moon. It can be found more easily if the player has the rumble effect on their controller activated. | Available from the start. |
| 42 | 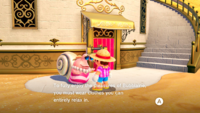 A Relaxing Dance |
The player must purchase the Resort Hat and Resort Outfit or the Sunshine Shades and Sunshine Outfit from the purple Crazy Cap shop and then talk to a Bubblainian who will unlock a door to the Beach House. Inside, Mario must dance with two other Bubblainians for a few seconds, after which Mario will be rewarded with a Power Moon. | Available from the start. |
| 43 | 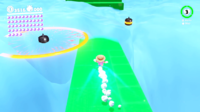 Wading in the Cloud Sea |
Near the Beach House, the player can find a higher cliff with a Mini Rocket on top of it which leads to a bonus area. In this bonus area, Mario must make it through a large chasm filled with clouds and enemies such as Pulse Beams and Burrbos. | Available from the start. |
| 44 | 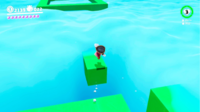 Sunken Treasure in the Cloud Sea |
In the area with the "Wading in the Cloud Sea" Power Moon, the player can find a thin pathway hidden by clouds that is off of the normal route. Following this path leads to a square platform with a treasure chest hidden in more clouds that contains the Power Moon. | Available from the start. |
| 45 | 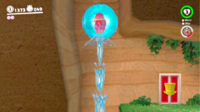 Fly Through the Narrow Valley |
To the right of where the Beach Volleyball minigame is played, the player can find a hidden alcove with a door that leads to a bonus area. The player must capture a Gushen first to reach it. Inside the bonus area, Mario must capture multiple Gushens to make it past several bottomless pits and pits of poisoned water. | Available from the start. |
| 46 | 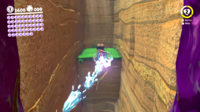 Treasure Chest in the Narrow Valley |
In the area with the "Fly Through the Narrow Valley" Power Moon, the player can find a treasure chest past the part where Mario normally falls down to collect the aforementioned Power Moon. This treasure chest contains another Power Moon. | Available from the start. |
| 47 | 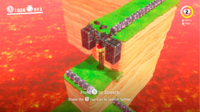 Hurry and Stretch |
In the northeast of the kingdom underwater, the player can find an alcove with a door which leads to a bonus area. In this bonus area, Mario must capture a few Uproots and make it through an upwards area infested with Moonsnakes and rising lava. Even in Assist Mode, Mario will die and lose 10 coins if he touches lava. | Available from the start. |
| 48 | 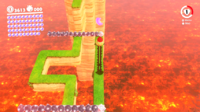 Stretch on the Side Path |
In the area with the "Hurry and Stretch" Power Moon in the part with the narrow path, the player can find this Power Moon floating above the right side and must stretch upwards to collect it. | Available from the start. |
| 49 | 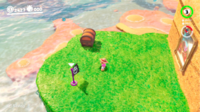 Secret Path to Bubblaine! |
This Power Moon can be found on top of the Diving Platform. To reach it, the player must travel through a painting located in a different kingdom:
|
Available from the start (Mushroom Kingdom). Available after defeating Bowser in the Moon Kingdom (Bowser's Kingdom). |
| 50 | 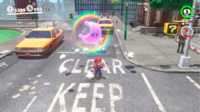 Found with Seaside Kingdom Art |
Near the gray boulders to right of the Odyssey and up on a higher platform, the player can find a piece of Hint Art. The Hint Art shows the word "KEEP" written in a blocky design with a Power Moon above the first "E". The player must travel back to the Metro Kingdom, where they can find the words "KEEP CLEAR" written on the ground near the Main Street Entrance. Mario must ground pound where the Power Moon is shown on the Hint Art to obtain it. | Available from the start. |
| 51 | 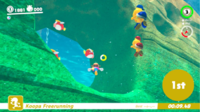 Seaside Kingdom Regular Cup |
At the Island above Ocean Trench East, the player can find a Koopa Troopa hosting the Koopa Freerunning mini-game. Mario must enter the race and then reach the finish line in first place to be awarded a Power Moon. | Available after defeating Bowser in the Moon Kingdom. |
| 52 | 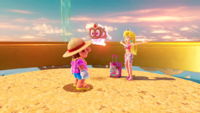 Peach in the Seaside Kingdom |
Mario must meet Peach at the top of the water fountain by jumping into one of the geysers. | Available after talking to the Toad outside Peach's Castle (Mushroom Kingdom). |
| 53 | 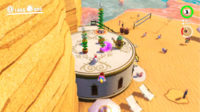 Above the Parasol: Catch! |
The player can find this Power Moon floating above the umbrella to the left of the Beach House. Mario can either jump on the umbrella to catch it or capture a Gushen and float to it. | Available after opening this kingdom's Moon Rock. |
| 54 | 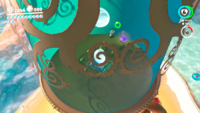 What Shines Inside the Glass |
This Power Moon can be found at the very bottom on the inside of the Glass Tower. | Available after opening this kingdom's Moon Rock. |
| 55 | 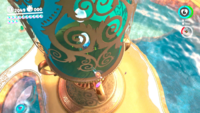 A Fine Detail on the Glass |
This Power Moon can be found on the Glass Tower on one if its handle designs. | Available after opening this kingdom's Moon Rock. |
| 56 | 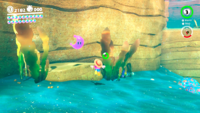 Underwater Highway West: Explore! |
This Power Moon can be found to the west of the kingdom near a couple of rolling Moonsnakes. | Available after opening this kingdom's Moon Rock. |
| 57 | 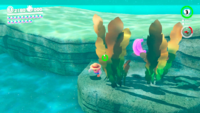 Underwater Highway East: Explore! |
This Power Moon can be found to the east of the kingdom near the Hot Spring Island checkpoint. | Available after opening this kingdom's Moon Rock. |
| 58 | 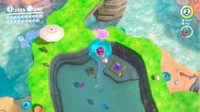 Rapid Ascent on Hot Spring Island |
This Power Moon can be found high above the larger pool in the Hot Spring Island and can be obtained by capturing a Gushen. | Available after opening this kingdom's Moon Rock. |
| 59 | 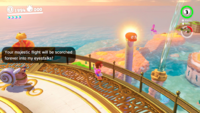 A Light Next to the Lighthouse |
The player can find this Power Moon by throwing and spinning Cappy onto the top of the pole that is used to get to the top of the Lighthouse. | Available after opening this kingdom's Moon Rock. |
| 60 | 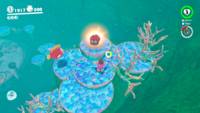 The Tall Rock Shelf in the Deep Ocean |
The player can find this Power Moon near the Ocean Trench East checkpoint near the Sphynx. To obtain it, Mario must throw and spin Cappy onto a small glowing rock that is sticking out of the ground to the right in the deep area. | Available after opening this kingdom's Moon Rock. |
| 61 | 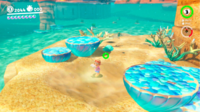 At the Base of the Lighthouse |
The player can find this Power Moon by ground pounding a glowing spot in between two blue rock formations underwater near the Lighthouse. | Available after opening this kingdom's Moon Rock. |
| 62 | 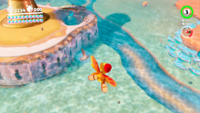 Bird Traveling Over the Ocean |
The player can find this Power Moon by capturing a Gushen and catching a bird that is seen flying around the kingdom. | Available after opening this kingdom's Moon Rock. |
| 63 | 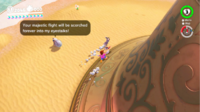 Caught Hopping at Glass Palace! |
The player can find a rabbit roaming around the Glass Tower and must catch it to obtain this Power Moon. | Available after opening this kingdom's Moon Rock. |
| 64 | 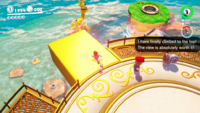 Seaside Kingdom Timer Challenge 3 |
The player must throw Cappy onto a scarecrow at the top of the Lighthouse and must quickly make it to the Power Moon which can be seen on a far away platform in the water. | Available after opening this kingdom's Moon Rock. |
| 65 | 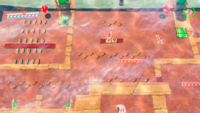 Taking Notes: Ocean-Bottom Maze |
In the 8-Bit area with the "Ocean-Bottom Maze: Treasure" Power Moon, the player can find a rainbow-colored treble clef. Mario must touch it and then quickly collect all of the notes that appear. | Available after opening this kingdom's Moon Rock. |
| 66 | 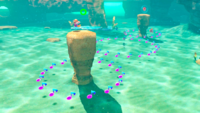 Taking Notes in the Sea |
Near the Glass Palace checkpoint, the player can find a rainbow-colored treble clef on top of a column underwater. The player must touch it and quickly collect the three circles of notes before they disappear. | Available after opening this kingdom's Moon Rock. |
| 67 | 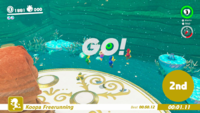 Seaside Kingdom Master Cup |
At the Island above Ocean Trench East, the player can find a Koopa Troopa hosting the Koopa Freerunning mini-game. Mario must enter the race and then reach the finish line in first place to be awarded a Power Moon. | Available after opening this kingdom's Moon Rock and collecting the "Seaside Kingdom Regular Cup" Power Moon. |
| 68 | 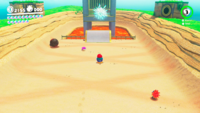 Aim! Poke! |
Near the Rolling Canyon checkpoint, the player can find a Moon Pipe underwater, which leads to a bonus area. In this bonus area, Mario must capture a Pokio and knock a few boulders into breakable blocks that are blocking the path and a gate to the Power Moon. | Available after opening this kingdom's Moon Rock. |
| 69 | 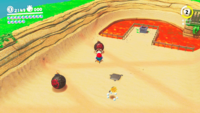 Poke! Roll! |
In the area with the "Aim! Poke!" Power Moon, the player must capture a Pokio and knock a boulder into a single breakable block that can be found behind a gate which is behind the entrance to the area. | Available after opening this kingdom's Moon Rock. |
| 70 | 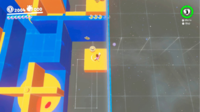 The Spinning Maze: Search! |
By dropping off one side of the Lighthouse, the player can find a Moon Pipe which leads to a bonus area. In this bonus area, Mario must collect five Moon Shards among many blue and yellow blocks that can be shifted by throwing Cappy at them. The only enemies here are Spinies. | Available after opening this kingdom's Moon Rock. |
| 71 | 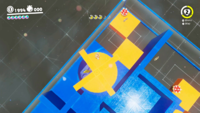 The Spinning Maze: Open! |
At the back of the area with the "The Spinning Maze: Search!" Power Moon, the player can find an opening which leads to a hidden room containing a treasure chest which contains the Power Moon. | Available after opening this kingdom's Moon Rock. |