Gusty Glade (Donkey Kong Country 2: Diddy's Kong Quest): Difference between revisions
m (Bot: Automated text replacement (-(\|[\n ]*)song([\n ]*=) +\1track\2)) |
No edit summary |
||
| (6 intermediate revisions by 4 users not shown) | |||
| Line 9: | Line 9: | ||
|after=[[Parrot Chute Panic (Donkey Kong Country 2: Diddy's Kong Quest)|>>]] | |after=[[Parrot Chute Panic (Donkey Kong Country 2: Diddy's Kong Quest)|>>]] | ||
}} | }} | ||
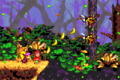
'''Gusty Glade''' is the twenty-fifth level in ''[[Donkey Kong Country 2: Diddy's Kong Quest]]'' and the third area of [[Gloomy Gulch]]. It takes place in the spooky woods and prominently features strong gusts of wind | '''Gusty Glade''' is the twenty-fifth level in ''[[Donkey Kong Country 2: Diddy's Kong Quest]]'' and the third area of [[Gloomy Gulch]]. It takes place in the spooky woods and prominently features strong gusts of [[wind]], powerful enough to propel the [[Kong]]s in the direction it blows, either left or right. The wind stops blowing in parts of the level, which is when the leaves fall down casually. A light windstorm sometimes occurs, which does not affect [[Diddy Kong|Diddy]] and [[Dixie Kong]], but it could indicate a forthcoming windstorm. Gusty Glade also features abysses, where the [[wind]] usually begins to blow again so that the [[Kong]]s can gross the gap. Gusty Glade has a few [[Barrel Cannon]] segments where the Kongs usually only have to blast out while the wind is not blowing so that they do not fall into a pitfall or a [[Zinger]]. [[Rattly]]'s [[animal crate]] is hidden behind the starting point, and a [[team up]] throw can be used to reach the area with it. If Rattly is freed, the Kongs can ride him up to the [[No Animal Sign]] about halfway through. | ||
Gusty Glade | |||
==Layout== | ==Layout== | ||
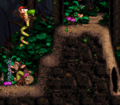
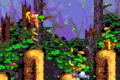
[[File:Gusty | [[File:Gusty Glade DKC2 GBA platforms.png|thumb|left|Gusty Glade in the Game Boy Advance version]] | ||
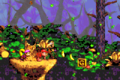
Diddy and Dixie begin the level in front of a tall, steep hill. They can optionally continue or open the Rattly Crate above the hill. A straight pathway with a pair of Klampons on it is to the right of the tall hill. Once the enemies are passed, a strong wind begins to blow the heroes towards a large alcove with a Click-Clack in it. There is a [[DK Barrel]] above this alcove. Some stair-like structures follow with a few more Klampons marching down them. A second gap is present after the last stair, and a Banana Coin floats within it. On the other side of the gap, the Kongs can find a pathway that winds around a raised piece of land with two Spinies and a [[Treasure Chest | Diddy and Dixie begin the level in front of a tall, steep hill. They can optionally continue or open the Rattly Crate above the hill. A straight pathway with a pair of Klampons on it is to the right of the tall hill. Once the enemies are passed, a strong wind begins to blow the heroes towards a large alcove with a Click-Clack in it. There is a [[DK Barrel]] above this alcove. Some stair-like structures follow with a few more Klampons marching down them. A second gap is present after the last stair, and a [[Banana Coin]] floats within it. On the other side of the gap, the Kongs can find a pathway that winds around a raised piece of land with two Spinies and a [[Treasure Chest]], containing the [[KONG Letters|letter K]], on it. | ||
Another large abyss is ahead, but it can be crossed if the heroes ride on the hard gusts of wind. A gap much wider follows, and dozens of thin, pillar-like platforms are in it. Most of these platforms hold a Neek or a Klampon, but two of them carry the letter O and a [[DK Barrel]]. After the final pillar, the Kongs approach another large gap that they can cross with the wind's help. There are some stair-like structures on the opposite side of the abyss, and Klampons and Spinies walk along them. Another abyss is ahead, and this time, the wind cannot help the Kongs cross it, as a high platform must be reached. However, a hook floats in the center of the gap to assist the heroes in crossing. After they pass the gap, they can find a pathway leading to another gap. A small hill with a [[No Animal Sign]] is on the pathway, and Rattly disappears when it is passed, if he had been found previously. An Auto Fire Barrel with the [[Star Barrel]] above it is above the gap mentioned previously. | Another large abyss is ahead, but it can be crossed if the heroes ride on the hard gusts of wind. A gap much wider follows, and dozens of thin, pillar-like platforms are in it. Most of these platforms hold a Neek or a Klampon, but two of them carry the letter O and a [[DK Barrel]]. After the final pillar, the Kongs approach another large gap that they can cross with the wind's help. There are some stair-like structures on the opposite side of the abyss, and Klampons and Spinies walk along them. Another abyss is ahead, and this time, the wind cannot help the Kongs cross it, as a high platform must be reached. However, a hook floats in the center of the gap to assist the heroes in crossing. After they pass the gap, they can find a pathway leading to another gap. A small hill with a [[No Animal Sign]] is on the pathway, and Rattly disappears when it is passed, if he had been found previously. An Auto Fire Barrel with the [[Star Barrel]] above it is above the gap mentioned previously. | ||
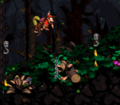
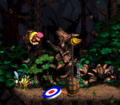
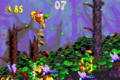
[[File:Gusty Glade DKC2 shot 3.png|thumb|Dixie hovers over the letter G.]] | [[File:Gusty Glade DKC2 shot 3.png|thumb|Dixie hovers over the letter G.]] | ||
This barrel immediately blasts the primates onto a solid piece of land on the other side of the gap, where a Kannon is present. A wide alcove is ahead with a Kutlass in it. The Kongs' path is blocked by a high wall near here. However, they can climb to the top of the wall, which has a DK Barrel on it, with the use of a hook hanging in the air. Two Kutlass enemies are on the other side of the wall, and one of them can be found on a raised piece of land with a treasure chest, containing a [[kannonball]], on it. Another treasure chest that contains the letter N is under this piece of land. Three gaps are farther ahead. The Kongs must be cautious of a pair of Zingers as they cross the first gap. The second gap, which a simple jump can help them cross, is followed by a small platform holding a [[ | This barrel immediately blasts the primates onto a solid piece of land on the other side of the gap, where a Kannon is present. A wide alcove is ahead with a Kutlass in it. The Kongs' path is blocked by a high wall near here. However, they can climb to the top of the wall, which has a DK Barrel on it, with the use of a hook hanging in the air. Two Kutlass enemies are on the other side of the wall, and one of them can be found on a raised piece of land with a treasure chest, containing a [[Cannonball|kannonball]], on it. Another treasure chest that contains the letter N is under this piece of land. Three gaps are farther ahead. The Kongs must be cautious of a pair of Zingers as they cross the first gap. The second gap, which a simple jump can help them cross, is followed by a small platform holding a [[Cannon|kannon]]. The third abyss is very wide, and not even the wind can blow the heroes all the way across. Luckily, hooks float above the gap that they can use to pass it. The wind blows as they use the hooks to their advantage, and it can push them in the wrong direction as they hold onto the objects. Once the primates overcome the large abyss, they can reach large area of land with a gap in the center of it. A raised piece of land is behind the gap that can be used to cross it. As the Kongs walk along it, a Kannon shoots at them. A DK Barrel wobbles on the section of ground below the enemy. Three Barrel Cannons are present in a wide abyss ahead. The barrels, placed in a upward position, must be used to guide the primates over the abyss. | ||
When they blast the heroes into the air, they are sent upwards, so they must shift to the right after exiting the barrels to land in the following cannon. However, the wind can blow them in the wrong direction if they shoot at the wrong time. When the Kongs finally pass the abyss, they find themselves on a tall hill with a Kannon on the bottom of it. A wide gap with a [[DK Coin]] above it is near the foe. The wind can help the heroes cross the abyss and land on a platform with another abyss right after it. The letter G is in this gap, which can be passed with the aid of the wind. An even wider pit follows. This time, the wind is an inconvenience to the Kongs, and they must use Barrel Cannons to cross. As they blast out of the barrels, which, as before, shoot them upwards, the wind pushes them around. They must wait for the correct time to shoot so that the wind puts them in the right place. A Zinger is on the other side of the abyss next to the [[End of Level Target]], whose prizes include a Banana Bunch, Banana | When they blast the heroes into the air, they are sent upwards, so they must shift to the right after exiting the barrels to land in the following cannon. However, the wind can blow them in the wrong direction if they shoot at the wrong time. When the Kongs finally pass the abyss, they find themselves on a tall hill with a Kannon on the bottom of it. A wide gap with a [[DK Coin|Video Game Hero Coin]] above it is near the foe. The wind can help the heroes cross the abyss and land on a platform with another abyss right after it. The letter G is in this gap, which can be passed with the aid of the wind. An even wider pit follows. This time, the wind is an inconvenience to the Kongs, and they must use Barrel Cannons to cross. As they blast out of the barrels, which, as before, shoot them upwards, the wind pushes them around. They must wait for the correct time to shoot so that the wind puts them in the right place. A Zinger is on the other side of the abyss next to the [[End of Level Target]], whose prizes include a [[Banana Bunch]], a [[Banana Coin]], or a [[Red Balloon]]. The Kongs can win a prize from it before leaving the level if they blast down from the last Barrel Cannon. | ||
{{br}} | {{br}} | ||
==Enemies== | ==Enemies== | ||
The following enemies appear in the following quantities: | |||
<gallery> | |||
Click Clack DKC2.png|[[Click Clack]] (1) | |||
Flitter DKC2.png|[[Flitter]] (5, Bonus Area only) | |||
Kannon DKC2 enemy.png|[[Kannon]] (3) | |||
Klampon DKC2.png|[[Klampon]] (11) | |||
Kutlass DKC2 yellow.png|[[Kutlass]] (yellow) (4) | |||
Neek DKC2.png|[[Neek]] (6) | |||
Spiny DKC2.png|[[Spiny (Donkey Kong Country 2: Diddy's Kong Quest)|Spiny]] (4) | |||
| | Zinger DKC2 yellow.png|[[Zinger]] (yellow) (4) | ||
</gallery> | |||
| | |||
== | ==Items and objects== | ||
The following items and objects appear in the following quantities: | |||
<gallery> | |||
Banana Coin.png|[[Banana Coin]] (3) | |||
DK Barrel.png|[[DK Barrel]] (4) | |||
| | Treasure Chest DKC2.png|[[Treasure chest]] (3) | ||
</gallery> | |||
===KONG Letters=== | |||
*'''K:''' In a treasure chest by two Spinies. | |||
*'''O:''' On the last platform of a series of small ones guarded by Neeks and Klampons. | |||
*'''N:''' Shortly after the Star Barrel, there are two Chests, each guarded by a Kutlass. The bottom one has the letter 'N'. | |||
*'''G:''' In an abyss just after the Video Game Hero Coin, following after two bananas. | |||
===Key items=== | |||
*'''[[DK Coin|Cranky's Video Game Hero Coin]]:''' Right after the last Kannon is an abyss, and the Video Game Hero Coin is floating high above in the center. It cannot be reached from a normal jump, so the Kongs can either bounce off the Barrels fired by a nearby Kannon or Dixie can use her Ponytail Whirl move to reach the Video Game Hero Coin just before the gap. | |||
*'''[[Golden feather]] (Game Boy Advance version only):''' Right after the End of Level Target, the Kongs must try to climb up the level exit. By jumping, this reveals a hidden hook, allowing them to jump at the top of the structure where the golden feather is. | |||
*'''[[Photograph]] (Game Boy Advance version only):''' At the very start, the Kongs must use team up to go behind the level entrance. Aside from a Rattly Crate, there is also a photograph leaning against the leftmost wall. It is high up, so the Kongs can only reach it by using team up or by jumping at it while riding Rattly. The photograph is of Rattly himself, as seen in the twelfth page of the [[Scrapbook (Donkey Kong Country series)|scrapbook]]. | |||
== | ==Bonus Levels== | ||
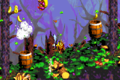
{ | {{multiframe|[[File:Gusty Glade Bonus Area 1.png|200px]] [[File:Gusty Glade Bonus Area 2.png|200px]]|size=420|The first and second Bonus Levels respectively}} | ||
Gusty Glade has two [[Bonus Level]]s, listed by type: | |||
| | |||
| | |||
*'''''Find the Token!''''': Just before the No Animal Sign are two bananas that lead up to a Bonus Barrel. They Kongs can enter it with Rattly or by using team up. Their objective is to cross a large gap by bouncing on Flitters, and reach the end Kremkoin. The Bonus Area has a time limit of 10 seconds. If the Kongs hit an enemy or fall down the pit, they lose. A light gust also blows in the Bonus Area. | |||
*'''''Collect the Stars!'''''<br>Shortly after the Star Barrel, the Kongs can find two Kutlass, each with a Chest. The Kongs must pick up the upper Chest on the hill and ram it into either Kutlass, revealing the [[Cannonball|kannonball]]. Diddy and Dixie must carefully carry it across two gaps, the first one is patrolled by two Zingers, then throw it into a [[Cannon|kannon]], which takes them to the Bonus Area. The Kongs' objective is to collect 65 stars under 40 seconds by blasting from an Arrow Barrel, and collect the resulting Kremkoin. There are no pitfalls in this Bonus Level. | |||
! | |||
{{br}} | {{br}} | ||
==Gallery== | ==Gallery== | ||
===Super Nintendo Entertainment System=== | ===Super Nintendo Entertainment System=== | ||
<gallery> | <gallery> | ||
Gusty GladeSNES1.png|The Kongs collect Rattly behind the level entrance. | |||
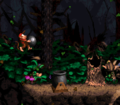
Gusty Glade DKC2 hooks.png|The Kongs jump between hooks. | Gusty Glade DKC2 hooks.png|The Kongs jump between hooks. | ||
Gusty Glade Bonus Barrel 1 SNES.png|The Kongs and Rattly sit below the first Bonus Barrel. | Gusty Glade Bonus Barrel 1 SNES.png|The Kongs and Rattly sit below the first Bonus Barrel. | ||
Gusty Glade DKC2 shot.png|Diddy carries a Kannonball over a pit. | Gusty Glade DKC2 shot.png|Diddy carries a Kannonball over a pit. | ||
Gusty Glade DKC2 Kannon.png|Diddy jumps over a Kannonball fired by a Kannon. | Gusty Glade DKC2 Kannon.png|Diddy jumps over a Kannonball fired by a Kannon. | ||
GustyGladeSNES3.png|The Kongs can reach the | GustyGladeSNES3.png|The Kongs can reach the Video Game Hero Coin by bouncing off the barrel fired by Kannon. | ||
Gusty Glade DKC2 end.png|The End of Level Target | Gusty Glade DKC2 end.png|The End of Level Target | ||
</gallery> | </gallery> | ||
| Line 168: | Line 91: | ||
|Jap=かぜのもり | |Jap=かぜのもり | ||
|JapR=Kaze no Mori | |JapR=Kaze no Mori | ||
|JapM= | |JapM=Windy Woods | ||
|Spa=Claro Borrascoso | |Spa=Claro Borrascoso | ||
|SpaM=Gusty Glade | |SpaM=Gusty Glade | ||
| | |Fre=Fatale Rafale | ||
| | |FreM=Fatal Gust | ||
|Ger=Sturmwald | |Ger=Sturmwald | ||
|GerM=Storm Forest | |GerM=Storm Forest | ||
| Line 178: | Line 101: | ||
|ItaM=Sadistic Gusts | |ItaM=Sadistic Gusts | ||
}} | }} | ||
{{DKC2}} | {{DKC2}} | ||
[[Category:Crocodile Isle]] | [[Category:Crocodile Isle]] | ||
[[Category: | [[Category:Haunted forests]] | ||
[[Category:Donkey Kong Country 2: Diddy's Kong Quest levels]] | [[Category:Donkey Kong Country 2: Diddy's Kong Quest levels]] | ||
Latest revision as of 16:33, January 20, 2024
| Level | |
|---|---|
| Gusty Glade | |

| |
| Level code | 5 - 3 |
| World | Gloomy Gulch |
| Game | Donkey Kong Country 2: Diddy's Kong Quest |
| Music track | Forest Interlude |
| << Directory of levels >> | |
Gusty Glade is the twenty-fifth level in Donkey Kong Country 2: Diddy's Kong Quest and the third area of Gloomy Gulch. It takes place in the spooky woods and prominently features strong gusts of wind, powerful enough to propel the Kongs in the direction it blows, either left or right. The wind stops blowing in parts of the level, which is when the leaves fall down casually. A light windstorm sometimes occurs, which does not affect Diddy and Dixie Kong, but it could indicate a forthcoming windstorm. Gusty Glade also features abysses, where the wind usually begins to blow again so that the Kongs can gross the gap. Gusty Glade has a few Barrel Cannon segments where the Kongs usually only have to blast out while the wind is not blowing so that they do not fall into a pitfall or a Zinger. Rattly's animal crate is hidden behind the starting point, and a team up throw can be used to reach the area with it. If Rattly is freed, the Kongs can ride him up to the No Animal Sign about halfway through.
Layout[edit]

Diddy and Dixie begin the level in front of a tall, steep hill. They can optionally continue or open the Rattly Crate above the hill. A straight pathway with a pair of Klampons on it is to the right of the tall hill. Once the enemies are passed, a strong wind begins to blow the heroes towards a large alcove with a Click-Clack in it. There is a DK Barrel above this alcove. Some stair-like structures follow with a few more Klampons marching down them. A second gap is present after the last stair, and a Banana Coin floats within it. On the other side of the gap, the Kongs can find a pathway that winds around a raised piece of land with two Spinies and a Treasure Chest, containing the letter K, on it.
Another large abyss is ahead, but it can be crossed if the heroes ride on the hard gusts of wind. A gap much wider follows, and dozens of thin, pillar-like platforms are in it. Most of these platforms hold a Neek or a Klampon, but two of them carry the letter O and a DK Barrel. After the final pillar, the Kongs approach another large gap that they can cross with the wind's help. There are some stair-like structures on the opposite side of the abyss, and Klampons and Spinies walk along them. Another abyss is ahead, and this time, the wind cannot help the Kongs cross it, as a high platform must be reached. However, a hook floats in the center of the gap to assist the heroes in crossing. After they pass the gap, they can find a pathway leading to another gap. A small hill with a No Animal Sign is on the pathway, and Rattly disappears when it is passed, if he had been found previously. An Auto Fire Barrel with the Star Barrel above it is above the gap mentioned previously.

This barrel immediately blasts the primates onto a solid piece of land on the other side of the gap, where a Kannon is present. A wide alcove is ahead with a Kutlass in it. The Kongs' path is blocked by a high wall near here. However, they can climb to the top of the wall, which has a DK Barrel on it, with the use of a hook hanging in the air. Two Kutlass enemies are on the other side of the wall, and one of them can be found on a raised piece of land with a treasure chest, containing a kannonball, on it. Another treasure chest that contains the letter N is under this piece of land. Three gaps are farther ahead. The Kongs must be cautious of a pair of Zingers as they cross the first gap. The second gap, which a simple jump can help them cross, is followed by a small platform holding a kannon. The third abyss is very wide, and not even the wind can blow the heroes all the way across. Luckily, hooks float above the gap that they can use to pass it. The wind blows as they use the hooks to their advantage, and it can push them in the wrong direction as they hold onto the objects. Once the primates overcome the large abyss, they can reach large area of land with a gap in the center of it. A raised piece of land is behind the gap that can be used to cross it. As the Kongs walk along it, a Kannon shoots at them. A DK Barrel wobbles on the section of ground below the enemy. Three Barrel Cannons are present in a wide abyss ahead. The barrels, placed in a upward position, must be used to guide the primates over the abyss.
When they blast the heroes into the air, they are sent upwards, so they must shift to the right after exiting the barrels to land in the following cannon. However, the wind can blow them in the wrong direction if they shoot at the wrong time. When the Kongs finally pass the abyss, they find themselves on a tall hill with a Kannon on the bottom of it. A wide gap with a Video Game Hero Coin above it is near the foe. The wind can help the heroes cross the abyss and land on a platform with another abyss right after it. The letter G is in this gap, which can be passed with the aid of the wind. An even wider pit follows. This time, the wind is an inconvenience to the Kongs, and they must use Barrel Cannons to cross. As they blast out of the barrels, which, as before, shoot them upwards, the wind pushes them around. They must wait for the correct time to shoot so that the wind puts them in the right place. A Zinger is on the other side of the abyss next to the End of Level Target, whose prizes include a Banana Bunch, a Banana Coin, or a Red Balloon. The Kongs can win a prize from it before leaving the level if they blast down from the last Barrel Cannon.
Enemies[edit]
The following enemies appear in the following quantities:

Click Clack (1)

Flitter (5, Bonus Area only)

Kannon (3)

Klampon (11)

Kutlass (yellow) (4)

Neek (6)

Spiny (4)

Zinger (yellow) (4)


Items and objects[edit]
The following items and objects appear in the following quantities:

Banana Coin (3)

DK Barrel (4)

Treasure chest (3)


KONG Letters[edit]
- K: In a treasure chest by two Spinies.
- O: On the last platform of a series of small ones guarded by Neeks and Klampons.
- N: Shortly after the Star Barrel, there are two Chests, each guarded by a Kutlass. The bottom one has the letter 'N'.
- G: In an abyss just after the Video Game Hero Coin, following after two bananas.
Key items[edit]
- Cranky's Video Game Hero Coin: Right after the last Kannon is an abyss, and the Video Game Hero Coin is floating high above in the center. It cannot be reached from a normal jump, so the Kongs can either bounce off the Barrels fired by a nearby Kannon or Dixie can use her Ponytail Whirl move to reach the Video Game Hero Coin just before the gap.
- Golden feather (Game Boy Advance version only): Right after the End of Level Target, the Kongs must try to climb up the level exit. By jumping, this reveals a hidden hook, allowing them to jump at the top of the structure where the golden feather is.
- Photograph (Game Boy Advance version only): At the very start, the Kongs must use team up to go behind the level entrance. Aside from a Rattly Crate, there is also a photograph leaning against the leftmost wall. It is high up, so the Kongs can only reach it by using team up or by jumping at it while riding Rattly. The photograph is of Rattly himself, as seen in the twelfth page of the scrapbook.
Bonus Levels[edit]


Gusty Glade has two Bonus Levels, listed by type:
- Find the Token!: Just before the No Animal Sign are two bananas that lead up to a Bonus Barrel. They Kongs can enter it with Rattly or by using team up. Their objective is to cross a large gap by bouncing on Flitters, and reach the end Kremkoin. The Bonus Area has a time limit of 10 seconds. If the Kongs hit an enemy or fall down the pit, they lose. A light gust also blows in the Bonus Area.
- Collect the Stars!
Shortly after the Star Barrel, the Kongs can find two Kutlass, each with a Chest. The Kongs must pick up the upper Chest on the hill and ram it into either Kutlass, revealing the kannonball. Diddy and Dixie must carefully carry it across two gaps, the first one is patrolled by two Zingers, then throw it into a kannon, which takes them to the Bonus Area. The Kongs' objective is to collect 65 stars under 40 seconds by blasting from an Arrow Barrel, and collect the resulting Kremkoin. There are no pitfalls in this Bonus Level.
Gallery[edit]
Super Nintendo Entertainment System[edit]
The Kongs collect Rattly behind the level entrance.
The Kongs jump between hooks.
The Kongs and Rattly sit below the first Bonus Barrel.
Diddy carries a Kannonball over a pit.
Diddy jumps over a Kannonball fired by a Kannon.
The Kongs can reach the Video Game Hero Coin by bouncing off the barrel fired by Kannon.
The End of Level Target


Game Boy Advance[edit]
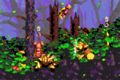
Location of the Rattly Crate and photograph.
Diddy and Dixie cross a series of small platforms with Rattly.
The Kongs use hooks to cross over a pit.
The Kongs and Rattly in the first Bonus Area.
The Kongs use Barrel Cannons to cross the wide gap.
The Kongs stand near a pit guarded by Zingers.
The Kongs are at the letter G.


Names in other languages[edit]
| Language | Name | Meaning |
|---|---|---|
| Japanese | かぜのもり Kaze no Mori |
Windy Woods |
| French | Fatale Rafale |
Fatal Gust |
| German | Sturmwald |
Storm Forest |
| Italian | Raffiche Sadiche |
Sadistic Gusts |
| Spanish | Claro Borrascoso |
Gusty Glade |