Blazing Bazukas: Difference between revisions
m (Text replacement - "(\[\[:?Category:[A-L][^\]\|\n]+[^t]) Levels(\]|\|)" to "$1 levels$2") |
No edit summary |
||
| (9 intermediate revisions by 4 users not shown) | |||
| Line 1: | Line 1: | ||
{{ | {{level infobox | ||
|image=[[File:Blazing Bazukas DKC3.png]] | |image=[[File:Blazing Bazukas DKC3.png]] | ||
|code=4 - 4 | |code=4 - 4 | ||
|world=[[Mekanos]] | |world=[[Mekanos]] | ||
|game=''[[Donkey Kong Country 3: Dixie Kong's Double Trouble!]]'' | |game=''[[Donkey Kong Country 3: Dixie Kong's Double Trouble!]]'' | ||
| | |track=Nuts and Bolts | ||
|before=[[Ripsaw Rage|<<]] | |before=[[Ripsaw Rage|<<]] | ||
|after=[[Low-G Labyrinth|>>]] | |after=[[Low-G Labyrinth|>>]] | ||
}} | }} | ||
'''Blazing Bazukas''' is the nineteenth [[level]] in ''[[Donkey Kong Country 3: Dixie Kong's Double Trouble!]]'' and the fourth level of [[Mekanos]]. The level takes place in a factory. [[Bazuka]]s first appear in Blazing Bazukas, as the main and titular enemy. They shoot either [[barrel]]s, [[Steel | '''Blazing Bazukas''' is the nineteenth [[level]] in ''[[Donkey Kong Country 3: Dixie Kong's Double Trouble!]]'' and the fourth level of [[Mekanos]]. The level takes place in a factory. [[Bazuka]]s first appear in Blazing Bazukas, as the main and titular enemy. They shoot either [[barrel]]s, [[Iron Barrel|Steel Barrel]]s, or [[TNT Barrel]]s at [[Dixie Kong|Dixie]] and [[Kiddy Kong|Kiddy]]. To get across gaps, the [[Kong]]s are often required to bounce from barrels or Steel Barrels. The Kongs must avoid contact with the TNT Barrels, which injure them. Sometimes the Kongs must jump at a [[Switch Barrel]] to change the type of barrel that Bazuka fires. Only one [[Buzz (enemy)|Buzz]] appears in the main level, guarding a Switch Barrel, but a few more appear in a [[Bonus Level]]. During the first half, the Kongs can go behind a Bazuka after it is defeated to enter an [[Animal Barrel]] that turns them into [[Squitter]]. | ||
==Layout== | ==Layout== | ||
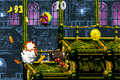
[[File: | [[File:Blazing Bazukas GBA Bonus Barrel 1.png|thumb|left|Blazing Bazukas in the Game Boy Advance version]] | ||
The level begins one simple barrel-shooting Bazuka that leads up to a barrel that will shoot the monkeys onto a rope, which has a [[DK Barrel]] to the far left. The Kongs should continue east, then they fall down, continue east, and defeat a Krimp. Continuing east, the apes must use the help of a Bazuka's barrels to cross a | The level begins one simple barrel-shooting Bazuka that leads up to a barrel that will shoot the monkeys onto a rope, which has a [[DK Barrel]] to the far left. The Kongs should continue east, then they fall down, continue east, and defeat a Krimp. Continuing east, the apes must use the help of a Bazuka's barrels to cross a [[bubbling cauldron]]. From here is the letter K and two shooting barrels. While in the second, the player must use good timing to decide when to grab onto the rope being hindered by a Bazuka and it's [[TNT Barrel]]s. If the Kongs fall down, they will fall into lava. Going east, the Kongs will find a barrel that will shoot them up to a [[No Animal Sign|No Squitter Sign]], which is odd, since Squitter is not found beforehand. Continuing west, there will be a TNT Barrel, which can be used to protect against a Bazuka attacking with the same weapon. Right behind the Bazuka the Kongs can turn into Squitter. Using Squitter, they can get the nearby letter O. Going west, there will be a barrel, that, if jumped into, will allow access to two platforms. On the one to the Left there is the [[Star Barrel]]. | ||
If the apes go left after the Star Barrel, they will find a Buzz, which can be easily defeated with Squitter. The Buzz here is guarding a Switch Barrel. When the barrel is touched it will turn the TNT Barrels of a Bazuka found across a gap to the right into normal barrels. The monkeys should then go to this aforementioned Bazuka, and use it's barrels to jump across to the other side. With Squitter, this is not necessary. He can just fall down and walk to the right, make a web platform, and hop over the Bazuka. Past here is the No Squitter Sign, which will give the Kongs a [[ | If the apes go left after the Star Barrel, they will find a Buzz, which can be easily defeated with Squitter. The Buzz here is guarding a Switch Barrel. When the barrel is touched it will turn the TNT Barrels of a Bazuka found across a gap to the right into normal barrels. The monkeys should then go to this aforementioned Bazuka, and use it's barrels to jump across to the other side. With Squitter, this is not necessary. He can just fall down and walk to the right, make a web platform, and hop over the Bazuka. Past here is the No Squitter Sign, which will give the Kongs a [[bear coin]]. Continuing east, the monkeys will pass a Krimp, and then climb onto a rope on which they must jump over the TNT Barrels from a nearby Bazuka. Just above the Bazuka is a barrel which will shoot [[Dixie Kong|Dixie]] and [[Kiddy Kong|Kiddy]] onto yet another Bazuka. This one also shoots TNT Barrels, and the Kongs must shoot past them to fall and find some [[Banana]]s. Continuing west, they will find the letter N and a barrel that will shot them up to a rope. They must go west on this rope to avoid a Bazuka, and, after falling down, find a DK Barrel and two Krimps. When they go east, they must shoot up to avoid two more Bazukas. After going east from the last Bazuka the fall down past a Bazuka and find two Krimps. Past these Kremlings is a bazuka that will lead to a barrel with the letter G and the final Bazuka in the level. Past here is the flagpole. | ||
==Enemies== | ==Enemies== | ||
The following enemies appear in the following quantities: | |||
<gallery> | |||
Bazuka DKC3.png|[[Bazuka]] (16) | |||
Buzz DKC3 green.png|[[Buzz (enemy)|Buzz]] (green) (3) | |||
Karbine DKC3.png|[[Karbine]] (1) | |||
Krimp DKC3.png|[[Krimp]] (10) | |||
</gallery> | |||
|[[ | |||
==Items and objects== | ==Items and objects== | ||
The following items and objects appear in the following quantities: | |||
<gallery> | |||
Bear Coin.png|[[Bear coin]] (1) | |||
DK Barrel.png|[[DK Barrel]] (3) | |||
SwitchBarrel.png|[[Switch Barrel]] (2) | |||
</gallery> | |||
|[[Bear | ===K-O-N-G Letters=== | ||
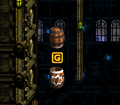
[[File:Blazing Bazukas O.png|thumb|The letter O]] | |||
*'''K:''' Found after the second Bazuka in the level. | |||
|[[ | *'''O:''' High above the ground proceeding Squitter's Animal Barrel. | ||
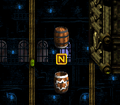
|[[ | *'''N:''' Proceeding two Krimp, the "N" Letter is above an Auto Fire Barrel. | ||
*'''G:''' Following brief tightrope climbing with a Bazuka that shoots TNT Barrels, the "G" Letter is above a barrel cannon. | |||
{{br}} | |||
=== | ===DK Coin=== | ||
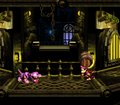
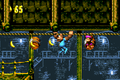
[[File:Blazing Bazukas GBA Koin.png|thumb|The Koin of Blazing Bazukas, in the Game Boy Advance version]] | |||
After the letter O, Squitter must enter an Auto-Fire Barrel which blasts him up. Instead of continuing in that direction, Squitter must blast himself in an upper-left direction to land on a platform with a Koin. A Bazuka is firing barrels at it from another platform to the very left. Squitter must create web platforms to cross a gap to the left and touch a Switch Barrel above the Bazuka, turning its barrels into Steel Barrels. Squitter must then go right back behind the Koin. As Koin faces Squitter to the right, a Steel Barrel hits Koin from behind and defeats him. A [[DK Coin]] is left behind as a reward. | |||
{{br}} | |||
| | |||
| | |||
==Bonus Levels== | ==Bonus Levels== | ||
{| | {{multiframe|[[File:Blazing Bazukas Bonus Level 1.png|200px]] [[File:Blazing Bazukas Bonus Level 2.png|200px]]|size=420|The first and second Bonus Levels respectively}} | ||
Blazing Bazukas has two [[Bonus room|Bonus Levels]], listed by type: | |||
*'''''Find the Coin!''''': After transforming into Squitter, he must backtrack to the right and create some web platforms to ascend a wide, open area in the ceiling. Squitter must take a narrow path to the right and shoot web projectiles to break TNT Barrels fired by a Bazuka. When Squitter reaches the Bazuka, he must jump into a [[Bonus Barrel]] in a gap in the ceiling. In the Bonus Level, Squitter has 20 seconds to get the [[Bonus Coin (Donkey Kong franchise)|Bonus Coin]] on the other side. He must go straight ahead across some bubbling cauldrons while shooting web projectiles at some Buzzes along the way. | |||
*'''''Find the Coin!''''': When the Kongs encounter the third Bazuka from the letter N, Dixie must jump to and use her [[Helicopter Spin]] to go across a wide gap. The Bonus Barrel is floating above a platform to the left. Alternatively, the Kongs can go into a Barrel Cannon just before the Bazuka. When the Bazuka a barrel fires past the Barrel Cannon, the Kongs must blast to the left and bounce off the barrel to land onto a platform with the Bonus Barrel above. In the Bonus Level, the Kongs have 25 seconds to get the Bonus Coin. They must go left and enter a Barrel Cannon, then blast up to some barrels shot by a Bazuka. They must bounce across the barrels to the right to reach the Bonus Coin on a platform above the Bazuka. | |||
|[[File:Blazing Bazukas Bonus Level | {{br}} | ||
|'''''Find the Coin!''''' | |||
==Gallery== | ==Gallery== | ||
<gallery> | <gallery> | ||
Blazing Bazukas K.png|The letter K | |||
Blazing Bazukas DKC3 Bazuka.png|Kiddy encounters a Bazuka | Blazing Bazukas DKC3 Bazuka.png|Kiddy encounters a Bazuka | ||
Blazing Bazukas DKC3 Krimp.png|Dixie holds a barrel at a Krimp | Blazing Bazukas DKC3 Krimp.png|Dixie holds a barrel at a Krimp | ||
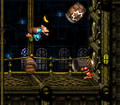
Blazing Bazukas DKC3 Buzz and Switch Barrel.png|Squitter approaches a Buzz guarding a Switch Barrel | Blazing Bazukas DKC3 Buzz and Switch Barrel.png|Squitter approaches a Buzz guarding a Switch Barrel | ||
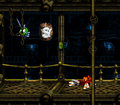
Blazing Bazukas DKC3 Dixie over TNT Barrel.png|Dixie jumps over a TNT Barrel | Blazing Bazukas DKC3 Dixie over TNT Barrel.png|Dixie jumps over a TNT Barrel | ||
Blazing Bazukas N.png|The letter N | |||
Blazing Bazukas G.png|The letter G | |||
BlazingBazukas-GBA.png|The Kongs climb across a rope in the Game Boy Advance version | |||
Blazing Bazukas GBA Bonus Level 2.png|The second bonus level in the Game Boy Advance version | |||
Blazing Bazukas GBA | |||
Blazing Bazukas GBA Bonus Level 2.png|The second bonus level | |||
</gallery> | </gallery> | ||
| Line 116: | Line 71: | ||
|Spa=Bazooka en Llamas | |Spa=Bazooka en Llamas | ||
|SpaM=Bazooka in Flames | |SpaM=Bazooka in Flames | ||
| | |Fre=Bazookas Blagueurs | ||
| | |FreM=Joker Bazukas | ||
|Ger=Furioses Flinten-Feuer | |Ger=Furioses Flinten-Feuer | ||
|GerM=Furious Shotgun Fire | |GerM=Furious Shotgun Fire | ||
| Line 123: | Line 78: | ||
|ItaM=Bazooka in Flames | |ItaM=Bazooka in Flames | ||
}} | }} | ||
{{DKC3}} | {{DKC3}} | ||
[[Category:Factories]] | [[Category:Factories]] | ||
[[Category:Donkey Kong Country 3: Dixie Kong's Double Trouble! levels]] | [[Category:Donkey Kong Country 3: Dixie Kong's Double Trouble! levels]] | ||
Latest revision as of 17:07, January 20, 2024
| Level | |
|---|---|
| Blazing Bazukas | |

| |
| Level code | 4 - 4 |
| World | Mekanos |
| Game | Donkey Kong Country 3: Dixie Kong's Double Trouble! |
| Music track | Nuts and Bolts |
| << Directory of levels >> | |
Blazing Bazukas is the nineteenth level in Donkey Kong Country 3: Dixie Kong's Double Trouble! and the fourth level of Mekanos. The level takes place in a factory. Bazukas first appear in Blazing Bazukas, as the main and titular enemy. They shoot either barrels, Steel Barrels, or TNT Barrels at Dixie and Kiddy. To get across gaps, the Kongs are often required to bounce from barrels or Steel Barrels. The Kongs must avoid contact with the TNT Barrels, which injure them. Sometimes the Kongs must jump at a Switch Barrel to change the type of barrel that Bazuka fires. Only one Buzz appears in the main level, guarding a Switch Barrel, but a few more appear in a Bonus Level. During the first half, the Kongs can go behind a Bazuka after it is defeated to enter an Animal Barrel that turns them into Squitter.
Layout[edit]

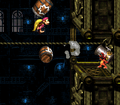
The level begins one simple barrel-shooting Bazuka that leads up to a barrel that will shoot the monkeys onto a rope, which has a DK Barrel to the far left. The Kongs should continue east, then they fall down, continue east, and defeat a Krimp. Continuing east, the apes must use the help of a Bazuka's barrels to cross a bubbling cauldron. From here is the letter K and two shooting barrels. While in the second, the player must use good timing to decide when to grab onto the rope being hindered by a Bazuka and it's TNT Barrels. If the Kongs fall down, they will fall into lava. Going east, the Kongs will find a barrel that will shoot them up to a No Squitter Sign, which is odd, since Squitter is not found beforehand. Continuing west, there will be a TNT Barrel, which can be used to protect against a Bazuka attacking with the same weapon. Right behind the Bazuka the Kongs can turn into Squitter. Using Squitter, they can get the nearby letter O. Going west, there will be a barrel, that, if jumped into, will allow access to two platforms. On the one to the Left there is the Star Barrel.
If the apes go left after the Star Barrel, they will find a Buzz, which can be easily defeated with Squitter. The Buzz here is guarding a Switch Barrel. When the barrel is touched it will turn the TNT Barrels of a Bazuka found across a gap to the right into normal barrels. The monkeys should then go to this aforementioned Bazuka, and use it's barrels to jump across to the other side. With Squitter, this is not necessary. He can just fall down and walk to the right, make a web platform, and hop over the Bazuka. Past here is the No Squitter Sign, which will give the Kongs a bear coin. Continuing east, the monkeys will pass a Krimp, and then climb onto a rope on which they must jump over the TNT Barrels from a nearby Bazuka. Just above the Bazuka is a barrel which will shoot Dixie and Kiddy onto yet another Bazuka. This one also shoots TNT Barrels, and the Kongs must shoot past them to fall and find some Bananas. Continuing west, they will find the letter N and a barrel that will shot them up to a rope. They must go west on this rope to avoid a Bazuka, and, after falling down, find a DK Barrel and two Krimps. When they go east, they must shoot up to avoid two more Bazukas. After going east from the last Bazuka the fall down past a Bazuka and find two Krimps. Past these Kremlings is a bazuka that will lead to a barrel with the letter G and the final Bazuka in the level. Past here is the flagpole.
Enemies[edit]
The following enemies appear in the following quantities:


Items and objects[edit]
The following items and objects appear in the following quantities:

Bear coin (1)

DK Barrel (3)

Switch Barrel (2)


K-O-N-G Letters[edit]

- K: Found after the second Bazuka in the level.
- O: High above the ground proceeding Squitter's Animal Barrel.
- N: Proceeding two Krimp, the "N" Letter is above an Auto Fire Barrel.
- G: Following brief tightrope climbing with a Bazuka that shoots TNT Barrels, the "G" Letter is above a barrel cannon.
DK Coin[edit]

After the letter O, Squitter must enter an Auto-Fire Barrel which blasts him up. Instead of continuing in that direction, Squitter must blast himself in an upper-left direction to land on a platform with a Koin. A Bazuka is firing barrels at it from another platform to the very left. Squitter must create web platforms to cross a gap to the left and touch a Switch Barrel above the Bazuka, turning its barrels into Steel Barrels. Squitter must then go right back behind the Koin. As Koin faces Squitter to the right, a Steel Barrel hits Koin from behind and defeats him. A DK Coin is left behind as a reward.
Bonus Levels[edit]


Blazing Bazukas has two Bonus Levels, listed by type:
- Find the Coin!: After transforming into Squitter, he must backtrack to the right and create some web platforms to ascend a wide, open area in the ceiling. Squitter must take a narrow path to the right and shoot web projectiles to break TNT Barrels fired by a Bazuka. When Squitter reaches the Bazuka, he must jump into a Bonus Barrel in a gap in the ceiling. In the Bonus Level, Squitter has 20 seconds to get the Bonus Coin on the other side. He must go straight ahead across some bubbling cauldrons while shooting web projectiles at some Buzzes along the way.
- Find the Coin!: When the Kongs encounter the third Bazuka from the letter N, Dixie must jump to and use her Helicopter Spin to go across a wide gap. The Bonus Barrel is floating above a platform to the left. Alternatively, the Kongs can go into a Barrel Cannon just before the Bazuka. When the Bazuka a barrel fires past the Barrel Cannon, the Kongs must blast to the left and bounce off the barrel to land onto a platform with the Bonus Barrel above. In the Bonus Level, the Kongs have 25 seconds to get the Bonus Coin. They must go left and enter a Barrel Cannon, then blast up to some barrels shot by a Bazuka. They must bounce across the barrels to the right to reach the Bonus Coin on a platform above the Bazuka.
Gallery[edit]
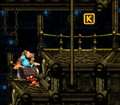
The letter K
Kiddy encounters a Bazuka
Dixie holds a barrel at a Krimp
Squitter approaches a Buzz guarding a Switch Barrel
Dixie jumps over a TNT Barrel
The letter N
The letter G
The Kongs climb across a rope in the Game Boy Advance version
The second bonus level in the Game Boy Advance version


Names in other languages[edit]
| Language | Name | Meaning |
|---|---|---|
| Japanese | タルタルパニック Tarutaru panikku |
Barrel Barrel Panic |
| French | Bazookas Blagueurs |
Joker Bazukas |
| German | Furioses Flinten-Feuer |
Furious Shotgun Fire |
| Italian | Bazooka in Fiamme |
Bazooka in Flames |
| Spanish | Bazooka en Llamas |
Bazooka in Flames |