|
|
| (481 intermediate revisions by 2 users not shown) |
| Line 1: |
Line 1: |
| ==Locations== | | ==Locations== |
| ===Setting=== | | ===Setting=== |
| *World adventure on Mario's home world, broadly framed similarly to Super Mario Bros. 3
| | ===Courses=== |
| *Kingdoms are sprawling, vast spaces filled with nooks and crannies
| | ====Overview==== |
| *Largest spaces of any Mario game at the time of its release
| | ====Table==== |
| *The are environmentally diverse, often reflecting their placement on the globe
| | ==Characters== |
| *Nearly the entirety of the landscape is tangible and interactable
| | ===Playable characters=== |
| *Break from recent 3D entries; the physical appearance of an object sometimes betray their function
| | ===Non-playable characters=== |
| *Each kingdom has unique topography, flora, fauna
| | ==Enemies and obstacles== |
| *Most of them are home to an NPC that support their own cultures and societies, and this is also reflected in the landscape
| | ===Enemies=== |
| *Ruins, buildings are embedded in the landscape
| | As of July 2024, not all enemies have publicized English names. They are listed here with Romanizations of their Japanese ones. |
| *Three of the kingdoms are on the moon, where gravity is weaker; moon is a prominent, recurring fixture in the sky on the earth kingdoms, and it is the site of the narrative climax
| | {|class="wikitable sortable" style="width:100%;text-align:center" |
| *Many details are exclusively conveyed in the flavor text of the brochure
| | |-style="color:white;background:#FF2400" |
| *compared to works of Jules Vern, and named after Homer's text; components of the game are similar to Journey to the West
| | !rowspan=2 width=10%|Name |
| | | !rowspan=2 class=unsortable|Description |
| | | !colspan=2 class=unsortable|Courses |
| *return of sandbox-style 3D action ''Super Mario'' - aligned with Mario 64 and Sunshine (why though? What made them want to do this again?)
| | !rowspan=2|New |
| *Game embraces surrealism and artistic realism - devs wanted to surprise the player (like Mario 64 character design principals)
| | |-style="color:white;background:#FF2400" |
| | | !width=8%|First |
| ===Kingdoms=== | | !width=8%|Last |
| *[[Mission]]s are referred to as objectives in this game; they are story-driven scenarios
| |
| *Not all objectives reward the player with a moon; vice versa, the act of locating a moon does not complete the objective
| |
| *Indeed, most tokens are not tied to objectives at all
| |
| *completing objectives permanently changes the kingdom; completing all of the objectives of a visited kingdom rids the NPCs of their problem, and physical elements of the landscape improve; some areas and moons only become available after Mario has completed the objectives
| |
| | |
| *Largely unilateral traversal between kingdoms, like World Galaxy Map in SMG2
| |
| | |
| *kingdoms can be divided into:
| |
| **large kingdoms that have 100 regional coins
| |
| **small kingdoms that have 50 regional coins
| |
| **boss kingdoms that have no regional coins, only have 10.5 moons that only appear after the the Moon Rock is struck
| |
| | |
| <center>
| |
| {|width=65% class="wikitable" | |
| !colspan="3"style="background:#FF2400;color:white;"|Kingdoms
| |
| |- | | |- |
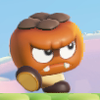
| |colspan="3"style="background:#B79819;color:white;"|[[File:SMO 8bit Odyssey.png|30x30px]] '''Main game''' | | |style="background:white"|[[File:Goomba model SMBW.png|100x100px]]<br>[[Goomba]] |
| | |align=left|Squat mushroom creatures that walk along the ground and are weak to all attacks. Direct contact damages Mario unless he stomps them on the head. Touching sleeping Goombas does not harm him, but this startles them awake. In some courses Goombas lack the space to move and instead sit on the ground, disgruntled.<ref name=sekai2>{{cite|author=Kai, editor|date=9 Feb. 2024|url=topics.nintendo.co.jp/article/3c24e9ec-6583-401a-a5ab-818180c2c0a8|title=マリオたちの行く手を阻む。フラワー王国の個性豊かな敵キャラクターをご紹介。~その2~【ワンダーの世界へ Vol.14】|publisher=Nintendo Official Site|language=ja|accessdate=9 Feb. 2024}}</ref> During the [[Wonder Effect]] in [[Sproings in the Twilight Forest]], their bodies greatly extend to varying heights. In some other Wonder Effects, Mario is [[Goomba Mario|transformed into one]]. Goombas are the most common enemies. |
| | |[[Welcome to the Flower Kingdom!]] |
| | |[[The Final Test Wonder Gauntlet]] |
| | |— |
| |- | | |- |
| !width=16% style="background:#D3CA6B;"|01. [[Cap Kingdom]] <small>(Bonneton)</small><br>{{chart icon|SMO-totalM}}×31 {{chart icon|SMO-totalC}}×50 {{chart icon|SMO-totalF}}×3 {{chart icon|SMO-totalB}}×1
| | |style="background:white"|[[File:SMBW Hefty Goomba.png|100x100px]]<br>[[Hefty Goomba]] |
| !colspan="2"width=34% style="background:#D3CA6B;"|Objectives and Power Moons
| | |align=left|Larger Goombas. Stomping Hefty Goombas split them into two normal-sized ones. In some courses, they drift down on dandelion seeds. |
| | |[[The Sharp Trial: Launch to Victory]] |
| | |[[The Final Battle! Bowser's Rage Stage]] |
| | |— |
| |- | | |- |
| |rowspan="5"align=center style="background:#FFFFFF"|[[File:SMO Art - Cap Kingdom.jpg|200x200px]] | | |style="background:white"|[[File:SMBW Big Goomba.png|100x100px]]<br>[[Big Goomba]] |
| |width=17%|{{chart icon|SMO-CappyM}} [[Cappy of the Cap Kingdom]] | | |align=left|The largest Goombas. Stomping them splits them into two Hefty Goombas. |
| |width=17%|{{chart icon|SMO-CappyM}} [[To the Top of Top-Hat Tower]] | | |[[The Sharp Trial: Launch to Victory]] |
| | |[[The Final Battle! Bowser's Rage Stage]] |
| | |— |
| |- | | |- |
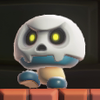
| |{{chart icon|SMO-CappyM}} [[The Kingdom Next Door]] | | |style="background:white"|[[File:SMBW Bone Goomba.png|100x100px]]<br>[[Bone Goomba]] |
| |{{chart icon|SMO-Moon}} Frog-Jumping Above the Fog | | |align=left|Boneheaded Goombas that are impervious to [[fireball]]s. Unlike other skeletal enemies, Bone Goombas are not undead. They are revealed to be living blue Goombas when stomped, which knocks away the skull covering their head. |
| | |[[Pipe-Rock Plateau Palace]] |
| | |[[Sunbaked Desert Palace]] |
| | |— |
| |- | | |- |
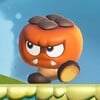
| |{{chart icon|SMO-Moon}} Frog-Jumping from the Top Deck | | |style="background:white"|[[File:SMBW screenshot Goombrat.png|100x100px]]<br>[[Goombrat]] |
| |{{chart icon|SMO-Moon}} Cap Kingdom Timer Challenge 1 | | |align=left|Little {{wp|persimmon}}-like Goombas. Goombrats sometimes float down on dandelion seeds. Collisions with Bloomps bounce them away and, if equipped, destroy their seed. Unlike Goombas, Goombrats turn around when they reach the edge of platforms. |
| | |[[Here Come the Hoppos]] |
| | |[[Taily's Toxic Pond]] |
| | |— |
| |- | | |- |
| |{{chart icon|SMO-Moon}} Good Evening, Captain Toad! | | |style="background:white"|[[File:SMBW Big Goombrat Walking.jpg|100x100px]]<br>[[Kodeka Kakibō]] |
| |{{chart icon|SMO-Moon}} Shopping in Bonneton | | |align=left|Big Goombrats. Like Hefty Goombas, stomping them causes them to split into two normal-sized Goombrats. They similarly float on dandelion seeds. |
| | |colspan=2|[[Bloomps of the Desert Skies]] |
| | |— |
| |- | | |- |
| |{{chart icon|SMO-Moon}} Skimming the Poison Tide | | |style="background:white"|[[File:SMBW Artwork Trompette (Brown).png|100x100px]]<br>[[Trompette]] (Brown) |
| |{{chart icon|SMO-Moon}} ''[[List of Power Moons in the Cap Kingdom|Click here for the remaining moons...]]'' | | |align=left|Goomba-like mushroom enemies of varying heights. Struck Trompettes fall back and knock out any enemies behind them or collect coins for Mario. The brown ones walk off the edge of platforms like Goombas. |
| | |[[Bulrush Coming Through!]] |
| | |[[Fungi Mines Special Dangerous Donut Ride]] |
| | |{{chart icon|new}} |
| |- | | |- |
| |colspan="3"align=center|TBW<br>'''Unlock criteria:''' begin a new save file (first visit); collect 5 Power Moons in the Cascade Kingdom (revisit) | | |style="background:white"|[[File:SMBW Artwork Trompette (Purple).png|100x100px]]<br>Trompette (Purple) |
| | |align=left|Purple-colored Trompettes turn around when they reach the edge of platforms. |
| | |[[Bulrush Coming Through!]] |
| | |[[POOF! Badge Challenge Crouching High Jump I]] |
| | |{{chart icon|new}} |
| |- | | |- |
| !width=16% style="background:#D3CA6B;"|02. [[Cascade Kingdom]] <small>(Fossil Falls)</small><br>{{chart icon|SMO-totalM}}×42 {{chart icon|SMO-totalC}}×50 {{chart icon|SMO-totalF}}×6 {{chart icon|SMO-totalB}}×1
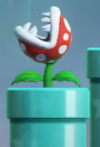
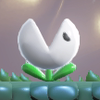
| | |style="background:white"|[[File:SMBW screenshot Piped Piranha Plant.png|100x100px]]<br>[[Piranha Plant]] |
| !colspan="2"width=34% style="background:#D3CA6B;"|Objectives and Power Moons
| | |align=left|Carnivorous plants that sit in [[Warp Pipe|pipes]]. They pop out of them with snapping jaws in consistent intervals, tilting their heads towards Mario. Piranha Plants do not emerge if he stands next to or on their pipes. Some Piranha Plants occur outside of pipes, and some are even rooted to the ceiling, where they perpetually snap. |
| | |[[Piranha Plants on Parade]] |
| | |[[The Final-Final Test Badge Marathon]] |
| | |— |
| |- | | |- |
| |rowspan="5"align=center style="background:#FFFFFF"|[[File:SMO Art - Cascade Kingdom.jpg|200x200px]] | | |style="background:white"|[[File:Big Piranha Plant SMBW.jpg|100x100px]]<br>[[Big Piranha Plant]] |
| |{{chart icon|SMO-Moon}} [[Our First Power Moon]] | | |align=left|The giant Piranha Plants occur inside [[Warp Pipe|giant pipes]], in which they behave like the normal-sized ones. In some areas, they are rooted to the ground and snap from side to side. Big Piranha Plants take three hits from [[fireball]]s to defeat. |
| |{{chart icon|SMO-MoonM}} [[Multi Moon Atop the Falls]] | | |[[Piranha Plants on Parade]] |
| | |[[The Semifinal Test Piranha Plant Reprise]] |
| | |— |
| |- | | |- |
| |{{chart icon|SMO-Moon}} Chomp Through the Rocks | | |style="background:white"|[[File:SMBW Singing Piranha Plants Artwork.png|100x100px]]<br>[[Trottin' Piranha Plant]] |
| |{{chart icon|SMO-Moon}} Behind the Waterfall | | |align=left|Walking Piranha Plants that exit their pipes to pursue Mario. Some even enter other pipes or walk along ceilings. Trottin' Piranha Plants sing in unison during certain Wonder Effects. |
| | |[[Piranha Plants on Parade]] |
| | |[[The Semifinal Test Piranha Plant Reprise]] |
| | |{{chart icon|new}} |
| |- | | |- |
| |{{chart icon|SMO-Moon}} On Top of the Rubble | | |style="background:white"|[[File:SMBW Big Trottin' Piranha Plant.png|100x100px]]<br>[[Big Run Run Packun]] |
| |{{chart icon|SMO-Moon}} Treasure of the Waterfall Basin | | |align=left|Big Trottin' Piranha Plants take three strikes from fireballs to be defeated, like stationary Big Piranha Plants. They otherwise behave like normal-sized Trottin' Piranha Plants, but emerge from and retreat into giant pipes. |
| | |[[Piranha Plants on Parade]] |
| | |[[The Semifinal Test Piranha Plant Reprise]] |
| | |{{chart icon|new}} |
| |- | | |- |
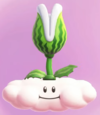
| |{{chart icon|SMO-Moon}} Above a High Cliff | | |style="background:white"|[[File:Melon Piranha.png|100x100px]]<br>[[Melon Piranha Plant]] |
| |{{chart icon|SMO-Moon}} Across the Floating Isles | | |align=left|Piranha Plants that look like [[watermelon]]s. They spit seeds that damage Mario, but they can be jumped on without taking damage. This allows Mario to cross large gaps, or ascend tall platforms. Yoshis can eat and spit the seeds back at them and other enemies. Melon Piranha Plants are otherwise defeated when stomped. |
| | |[[Countdown to Drop Down]] |
| | |[[The Final-Final Test Badge Marathon]] |
| | |{{chart icon|new}} |
| |- | | |- |
| |{{chart icon|SMO-Moon}} Cascade Kingdom Timer Challenge 1 | | |style="background:white"|[[File:SMBW Screenshot Fire Piranha.png|100x100px]]<br>[[Fire Piranha Plant]] |
| |{{chart icon|SMO-Moon}} ''[[List of Power Moons in the Cascade Kingdom|Click here for the remaining moons...]]'' | | |align=left|Piranha Plants that spit fireballs. They emerge from pipes and aim their heads towards Mario's position before firing. Some Fire Piranha Plants spit multiple fireballs at once. |
| | |[[Upshroom Downshroom]] |
| | |[[The Semifinal Test Piranha Plant Reprise]] |
| | |— |
| |- | | |- |
| |colspan="3"align=center|TBW<br>'''Unlock criterion:''' complete "The Kingdom Next Door" | | |style="background:white"|[[File:Fire piranha big full.png|100x100px]]<br>[[Big Fire Piranha]] |
| | |align=left|The giant Fire Piranha Plants are rooted to the earth and require three strikes from fireballs to defeat. They spit multiple fireballs at once. |
| | |colspan=2|[[Upshroom Downshroom]] |
| | |— |
| |- | | |- |
| !width=16% style="background:#D3CA6B;"|03. [[Sand Kingdom]] <small>(Tostarena)</small><br>{{chart icon|SMO-totalM}}×93 {{chart icon|SMO-totalC}}×100 {{chart icon|SMO-totalF}}×10 {{chart icon|SMO-totalB}}×2
| | |style="background:white"|[[File:SMBW Bone Piranha.png|100x100px]]<br>[[Bone Piranha Plant]] |
| !colspan="2"width=34% style="background:#D3CA6B;"|Objectives and Power Moons
| | |align=left|Skeletal Piranhas. They behave like the living plants, but they are immune to fire. Bone Piranha Plants are heightened during the Wonder Effect in Fluff-Puff Peaks Palace. |
| | |colspan=2|[[Fluff-Puff Peaks Palace]] |
| | |— |
| |- | | |- |
| |rowspan="5"align=center style="background:#FFFFFF"|[[File:SMO Art - Sand Kingdom.jpg|200x200px]] | | |style="background:white"|[[File:SMBW Trottin' Bone Piranha.png|100x100px]]<br>[[Bone Run Run Packun]] |
| |{{chart icon|SMO-MoonSand}} [[Atop the Highest Tower]] | | |align=left|Trottin' Bone Piranha Plants. Like the stationary ones, they are resistant to fireballs and heighten during their course's Wonder Effect. |
| |{{chart icon|SMO-MoonSand}} [[Moon Shards in the Sand]] | | |colspan=2|[[Fluff-Puff Peaks Palace]] |
| | |{{chart icon|new}} |
| |- | | |- |
| |{{chart icon|SMO-MoonMSand}} [[Showdown on the Inverted Pyramid]] | | |style="background:white"|[[File:Music Note Piranhas.png|100x100px]]<br>[[Note Piranha Plant]] |
| |{{chart icon|SMO-MoonMSand}} [[The Hole in the Desert]] | | |align=left|Blazing Piranha Plants spit by [[Bowser]]. Their movement is in synch with the music of the battle and encourages rhythmic dodges from Mario. Note Piranha Plants are only defeated by strikes from [[Elephant Mario]] or tossed [[bubble]]s. |
| | |colspan=2|[[The Final Battle! Bowser's Rage Stage]] |
| | |{{chart icon|new}} |
| |- | | |- |
| |{{chart icon|SMO-MoonSand}} Overlooking the Desert Town | | |style="background:white"|[[File:Giant Note Piranha.png|100x100px]]<br>[[Big Note Piranha Plant]] |
| |{{chart icon|SMO-MoonSand}} Alcove in the Ruins | | |align=left|Big Note Piranha Plants are too large to be avoided through normal [[jump]]s and are invincible. During later phases of the battle, Big Note Piranha Plants fall the sky and break into the normal-sized ones when they collide with the floor. |
| | |colspan=2|[[The Final Battle! Bowser's Rage Stage]] |
| | |{{chart icon|new}} |
| |- | | |- |
| |{{chart icon|SMO-MoonSand}} On the Leaning Pillar | | |style="background:white"|[[File:WonderPackunSMBW.png|100x100px]]<br>[[Wonder Packun]] |
| |{{chart icon|SMO-MoonSand}} Hidden Room in the Flowing Sands | | |align=left|Piranha Plants with long stalks that appeared after Bowser collected the [[Wonder Flower]] at the start of the game. They guard locked levels and can be eliminated by collecting enough [[Wonder Seed]]s, reverting to normal Piranha Plants. |
| | |colspan=2|[[Petal Isles]] |
| | |{{chart icon|new}} |
| |- | | |- |
| |{{chart icon|SMO-MoonSand}} Secret of the Mural | | |style="background:white"|[[File:CloudPiranhaSMBW.png|100x100px]]<br>[[Cloud Piranha]] |
| |{{chart icon|SMO-MoonSand}} ''[[List of Power Moons in the Sand Kingdom|Click here for the remaining moons...]]'' | | |align=left|Black, cloudy Piranha Plants made of smoke that protect Castle Bowser and continuously swirl around him. They are vanquished by a [[Royal Seed]]. |
| | |colspan=2|[[Petal Isles]] |
| | |{{chart icon|new}} |
| |- | | |- |
| |colspan="3"align=center|TBW<br>'''Unlock criterion:''' collect 5 Power Moons in the Cascade Kingdom | | |style="background:white"|[[File:MuncherSMBW.png|100x100px]]<br>[[Muncher]] |
| | |align=left|Black plants often found in large groups. |
| | |[[Muncher Fields]] |
| | |[[The Final-Final Test Badge Marathon]] |
| | |— |
| |- | | |- |
| !width=16% style="background:#D3CA6B;"|04. [[Lake Kingdom]] <small>(Lake Lamode)</small><br>{{chart icon|SMO-totalM}}×44 {{chart icon|SMO-totalC}}×50 {{chart icon|SMO-totalF}}×7 {{chart icon|SMO-totalB}}×1
| | |style="background:white"|[[File:SMBW Nipper.png|100x100px]]<br>[[Nipper Plant]] |
| !colspan="2"width=34% style="background:#D3CA6B;"|Objectives and Power Moons
| | |align=left|Little white plants that damage the player in contact. They can walk on walls and ceilings. |
| | |[[Muncher Fields]] |
| | |[[KO Arena Petal Meddle]] |
| | |— |
| |- | | |- |
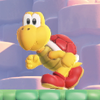
| |rowspan="5"align=center style="background:#FFFFFF"|[[File:SMO Art - Lake Kingdom.jpg|200x200px]] | | |style="background:white"|[[File:SMBW screenshot Troopa red.png|100x100px]]<br>[[Koopa Troopa]] (Red) |
| |{{chart icon|SMO-MoonMLake}} [[Broodals Over the Lake]] | | |align=left|Common turtle enemies that walk along the ground. When Koopa Troopas walk into each other, they knock their shells together before turning around as a way of saying "hello" to each other.<ref name=sekai2/> Stomping Koopa Troopas knocks them [[Unshelled Koopa Troopa|out of their shells]], which can be picked up and tossed along the ground as a projectile. Koopa Troopas with different colored shells have unique behaviors. The red-shelled ones turn around when the reach the edge of platforms. |
| |{{chart icon|SMO-MoonLake}} Dorrie-Back Rider | | |[[Scram, Skedaddlers!]] |
| | |[[The Final Test Wonder Gauntlet]] |
| | |— |
| |- | | |- |
| |{{chart icon|SMO-MoonLake}} Cheep Cheep Crossing | | |style="background:white"|[[File:SMBW screenshot Troopa green.png|100x100px]]<br>Koopa Troopa (Green) |
| |{{chart icon|SMO-MoonLake}} End of the Hidden Passage | | |align=left|Green-shelled Koopa Troopas walk off edges at the end of platforms, but otherwise behave the same as the red-shelled ones. |
| | |[[Up 'n' Down with Puffy Lifts]] |
| | |[[Raarghs in the Ruins]] |
| | |— |
| |- | | |- |
| |{{chart icon|SMO-MoonLake}} What's in the Box? | | |style="background:white"|[[File:SMBW screenshot Troopa pink.png|100x100px]]<br>[[Rolla Koopa]] |
| |{{chart icon|SMO-MoonLake}} On the Lakeshore | | |align=left|Pink-shelled Koopa Troopas on roller skates. Rolla Koopas quickly skate along the ground and leap across gaps. They often occur in groups that skate together in the same direction. |
| | |[[Rolla Koopa Derby]] |
| | |[[The Final Test Wonder Gauntlet]] |
| | |{{chart icon|new}} |
| |- | | |- |
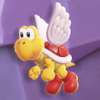
| |{{chart icon|SMO-MoonLake}} From the Broken Pillar | | |style="background:white"|[[File:SMBW screenshot Paratroopa red.png|100x100px]]<br>[[Koopa Paratroopa]] (Red) |
| |{{chart icon|SMO-MoonLake}} Treasure in the Spiky Waterway | | |align=left|Winged Koopa Troopas. Stomping Koopa Paratroopas makes them lose their wings and become normal Koopa Troopas. The red-shelled ones fly through the air. |
| | |[[Sproings in the Twilight Forest]] |
| | |[[The Final Test Wonder Gauntlet]] |
| | |— |
| |- | | |- |
| |{{chart icon|SMO-MoonLake}} Lake Gardening: Spiky Passage Seed | | |style="background:white"|[[File:SMBW screenshot Paratroopa green.png|100x100px]]<br>Koopa Paratroopa (Green) |
| |{{chart icon|SMO-MoonLake}} ''[[List of Power Moons in the Lake Kingdom|Click here for the remaining moons...]]'' | | |align=left|Green Koopa Paratroopas bounce along the ground. |
| | |[[Up 'n' Down with Puffy Lifts]] |
| | |[[Armads on the Roll]] |
| | |— |
| |- | | |- |
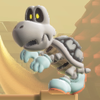
| |colspan="3"align=center|TBW<br>'''Unlock criterion:''' collect 16 Power Moons in the Sand Kingdom or Wooded Kingdom | | |style="background:white"|[[File:SMBW Screenshot Dry Bones.png|100x100px]]<br>[[Dry Bones]] |
| | |align=left|Undead Koopa Troopas that walk along the ground. Stomping Dry Bones causes them to collapse into a pile of bones for a brief period of time, but this does not defeat them. They are unphased by fireballs. |
| | |[[Pipe-Rock Plateau Palace]] |
| | |[[Deep Magma Bog Palace]] |
| | |— |
| |- | | |- |
| !width=16% style="background:#D3CA6B;"|05. [[Wooded Kingdom]] <small>(Steam Gardens)</small><br>{{chart icon|SMO-totalM}}×80 {{chart icon|SMO-totalC}}×100 {{chart icon|SMO-totalF}}×10 {{chart icon|SMO-totalB}}×2
| | |style="background:white"|[[File:ShovaForeground.png|100x100px]]<br>[[Shova]] |
| !colspan="2"width=34% style="background:#D3CA6B;"|Objectives and Power Moons
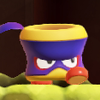
| | |align=left|Burly [[Koopa (species)|Koopa]]s in helmets and large gloves. Shovas push objects in the environment and contact with one head on simply pushes back Mario. Touching it anywhere else is damaging to him. The objects being pushed by Shovas can be pushed back against, often solving a puzzle in the level when it is shoved into a divot. For most attacks, Shovas take three hits to defeat. |
| | |[[Swamp Pipe Crawl]] |
| | |[[Secrets of Shova Mansion]] |
| | |{{chart icon|new}} |
| |- | | |- |
| |rowspan="5"align=center style="background:#FFFFFF"|[[File:SMO Art - Wooded Kingdom.jpg|200x200px]] | | |style="background:white"|[[File:SMBW Screenshot Hammer Bro.png|100x100px]]<br>[[Hammer Bro]] |
| |{{chart icon|SMO-MoonWooded}} [[Road to Sky Garden]] | | |align=left|Helmeted Koopas that toss [[hammer]]s. Hammer Bros often occur in pairs and leap between rows of platforms. Like the ''[[Super Mario Maker]]'' titles, Yoshis can eat Hammer Bros. |
| |{{chart icon|SMO-MoonMWooded}} [[Flower Thieves of Sky Garden]] | | |[[Pipe-Rock Plateau Palace]] |
| | |[[The Final Test Wonder Gauntlet]] |
| | |— |
| |- | | |- |
| |{{chart icon|SMO-MoonWooded}} [[Path to the Secret Flower Field]] | | |style="background:white"|[[File:Sea Turtle Enemy.png|100x100px]]<br>[[Snortoise]] |
| |{{chart icon|SMO-MoonMWooded}} [[Defend the Secret Flower Field!]] | | |align=left|Finned Koopas similar to {{wp|softshell turtle}}s. Snortoises swim swiftly underwater and turn around when they reach a wall. On land, they slowly crawl. Like Koopa Troopas and Swirlypods, stomping a Snortoise makes it receed into its shell and makes to available to be grabbed. |
| | |[[Robbird Cove]] |
| | |[[Downpour Uproar]] |
| | |{{chart icon|new}} |
| |- | | |- |
| |{{chart icon|SMO-MoonWooded}} Behind the Rock Wall | | |style="background:white"|[[File:SMBW Screenshot Lakitu.png|100x100px]]<br>[[Lakitu]] |
| |{{chart icon|SMO-MoonWooded}} Back Way Up the Mountain | | |align=left|[[Lakitu's Cloud|Cloud]]-riding Koopas. They closely follow Mario and toss Spiny Eggs at him from the top of the screen. If a Lakitu is stomped, its cloud becomes available to ride. In some courses, three Lakitus appear together in a large cloud and toss yellow Spike Balls. During the Wonder Effect of Cruising with Linking Lifts, they throw coins, power-ups, and [[Wonder Token]]s. |
| | |[[Countdown to Drop Down]] |
| | |[[Expert Badge Challenge Invisibility II]] |
| | |— |
| |- | | |- |
| |{{chart icon|SMO-MoonWooded}} Rolling Rock in the Woods | | |style="background:white"|[[File:SMBW screenshot Spiny Egg.png|100x100px]]<br>[[Spiny Egg]] |
| |{{chart icon|SMO-MoonWooded}} Caught Hopping in the Forest! | | |align=left|The retracted form of Spinies tossed by Lakitus. When they make contact with the ground, they become Spinies. Spiny Eggs damage Mario on contact. |
| | |colspan=2|[[Countdown to Drop Down]] |
| | |— |
| |- | | |- |
| |{{chart icon|SMO-MoonWooded}} Thanks for the Charge! | | |style="background:white"|[[File:SMBW screenshot Spiny.png|100x100px]]<br>[[Spiny]] |
| |{{chart icon|SMO-MoonWooded}} ''[[List of Power Moons in the Wooded Kingdom|Click here for the remaining moons...]]'' | | |align=left|Spiked, stout Koopas. The spikes protect them from being jumped on and damage Mario on contact, but they are weak to indirect attacks like fireballs. Spinies walk off the edge of platforms like green-shelled Koopa Troopas. |
| | |[[Countdown to Drop Down]] |
| | |[[Where the Rrrumbas Rule]] |
| | |— |
| |- | | |- |
| |colspan="3"align=center|TBW<br>'''Unlock criterion:''' collect 16 Power Moons in the Sand Kingdom or 8 in the Lake Kingdom | | |style="background:white"|[[File:Kamek SMBW Direct.png|100x100px]]<br>[[Kamek]] |
| | |align=left|Bowser's adviser – a broom-riding [[Magikoopa]]. Kamek summons [[Battleship]]s on the overworld map to inhibit Mario's progress. He otherwise appears in certain cutscenes with Bowser and [[Bowser Jr.]] |
| | |[[Fluff-Puff Peaks Flying Battleship]] |
| | |[[Deep Magma Bog Flying Battleship]] |
| | |— |
| |- | | |- |
| !width=16% style="background:#D3CA6B;"|06. [[Cloud Kingdom]] <small>(Nimbus Arena)</small><br>{{chart icon|SMO-totalM}}×9 {{chart icon|SMO-totalF}}×1 {{chart icon|SMO-totalB}}×1
| | |style="background:white"|[[File:SMBW Screenshot Buzzy Beetle.png|100x100px]]<br>[[Buzzy Beetle]] |
| !colspan="2"width=34% style="background:#D3CA6B;"|Objectives and Power Moons
| | |align=left|Koopas with shells that protect them from fire damage. They can be found walking in lava. |
| | |[[Raarghs in the Ruins]] |
| | |[[Dragon Boneyard]] |
| | |— |
| |- | | |- |
| |rowspan="5"align=center style="background:#FFFFFF"|[[File:SMO CLOUD.jpg|200x200px]] | | |style="background:white"|[[File:Spike SMBW.png|100x100px]]<br>[[Spike]] |
| |{{chart icon|SMO-CappyM}} [[Hat-to-Hat Combat]] | | |align=left|Big-mouthed Koopas that spit [[Spike Ball]]s. Spikes remain still and are usually elevated above the ground. The Spike Balls they spit-up are indestructible and roll along the ground. During a particular Wonder Effect, the Spikes roll the Spike Balls in rhythm to the music. |
| |{{chart icon|SMO-Moon}} Picture Match: Basically a Goomba | | |[[Angry Spikes and Sinkin' Pipes]] |
| | |[[The Final Test Wonder Gauntlet]] |
| | |— |
| |- | | |- |
| |{{chart icon|SMO-Moon}} Peach in the Cloud Kingdom | | |style="background:white"|[[File:SMBW screenshot Fire Spike.png|100x100px]]<br>[[Fire Gabon]] |
| |{{chart icon|SMO-Moon}} Digging in the...Cloud? | | |align=left| Red Spikes that spit balls of flame. Unlike normal Spikes, the balls tossed by Fire Gabons fly horizontally through the air. |
| | |[[Wavy Ride through the Magma Tube]] |
| | |[[KO Arena Magma Flare-Up]] |
| | |{{chart icon|new}} |
| |- | | |- |
| |{{chart icon|SMO-Moon}} High, High Above the Clouds | | |style="background:white"|[[File:SMBW Skedaddler.png|100x100px]]<br>[[Skedaddler]] |
| |{{chart icon|SMO-Moon}} Crossing the Cloud Sea | | |align=left|Shelled squirrel-like creatures that frantically runaway from Mario when he is near. They fire large projectile seeds back at him as they skedaddle. These can be held by Yoshis and fired back. |
| | |[[Scram, Skedaddlers!]] |
| | |[[Wiggler Race Mountaineering!]] |
| | |{{chart icon|new}} |
| |- | | |- |
| |{{chart icon|SMO-Moon}} Taking Notes: Up and Down | | |style="background:white"|[[File:BulrushArtworkWonder2.png|100x100px]]<br>[[Bulrush]] |
| |{{chart icon|SMO-Moon}} Picture Match: A Stellar Goomba! | | |align=left|Herding [[dinosaur]]s in tracksuits. Bulrushes idly remain still until Mario is near, at which point they snort and charge at him. They destroy [[Hard Block]]s in their path and leap at the end of upward slopes. Charging Bulrushes do not turn around if Mario leaps over them, and they are briefly stunned when they collide with indestructible terrain. Bulrushes can be safely stood on like platforms, and a large stampeding herd materializes during certain Wonder Effects. Bulrushes otherwise appear on the savanna portion of the [[Pipe-Rock Plateau]], grazing. |
| | |[[Bulrush Coming Through!]] |
| | |[[The Final Battle! Bowser's Rage Stage]] |
| | |{{chart icon|new}} |
| |- | | |- |
| |{{chart icon|SMO-Moon}} King of the Cube! | | |style="background:white"|[[File:SMBW Hoppo.png|100x100px]]<br>[[Hoppo]] |
| |{{chart icon|SMO-Moon}} The Sixth Face | | |align=left|Round-bodied hippopotamuses found on Pipe-Rock Plateau. Hoppos idly walk across the ground and unlike most enemies, they do not damage Mario on contact. Touching them instead causes them to roll along the ground. In most areas, they ultimately roll between gaps in the terrain and become wedged. They can be bounced on like [[trampoline]]s to reach higher areas. In a Wonder Effect, they occur floating in space and function like [[Bumper (Super Mario series)|bumper]]s. |
| | |[[Here Come the Hoppos]] |
| | |[[The Final Test Wonder Gauntlet]] |
| | |{{chart icon|new}} |
| |- | | |- |
| |colspan="3"align=center|TBW<br>'''Unlock criterion:''' collect 8 Power Moons in the Lake Kingdom or 16 in the Wooded Kingdom | | |style="background:white"|[[File:SMBW screenshot Hippo Fat roll big.png|100x100px]]<br>[[Wonder Koronporin]] |
| | |align=left|A giant Hoppo that appears during certain Wonder Effects. In Here Come the Hoppos, it is necessary to reach the Wonder Flower. |
| | |[[Here Come the Hoppos]] |
| | |[[The Final Test Wonder Gauntlet]] |
| | |{{chart icon|new}} |
| |- | | |- |
| !width=16% style="background:#D3CA6B;"|07. [[Lost Kingdom]] <small>(Forgotten Isle)</small><br>{{chart icon|SMO-totalM}}×35 {{chart icon|SMO-totalC}}×50 {{chart icon|SMO-totalF}}×4
| | |style="background:white"|[[File:SMBW screenshot Climby Snail.png|100x100px]]<br>[[Swirlypod]] |
| !colspan="2"width=34% style="background:#D3CA6B;"|Power Moons
| | |align=left|Snail enemies that adhere to surfaces, found crawling along floors, walls, and ceilings. Like Koopa Troopas, a stomp knocks them out of their shell and makes it a useable projectile. The unshelled Swirlypods are left dazed and vulnerable. When they stir, they try to reenter their shells if they are still on the ground. |
| | |[[Bulrush Coming Through!]] |
| | |[[Taily's Toxic Pond]] |
| | |{{chart icon|new}} |
| |- | | |- |
| |rowspan="5"align=center style="background:#FFFFFF"|[[File:SMO LOST.jpg|200x200px]] | | |style="background:white"|[[File:SMBWScreenshotUnknownSnailEnemy.png|100x100px]]<br>[[Kodeka Maimai]] |
| |{{chart icon|SMO-Moon}} Atop a Propeller Pillar | | |align=left|Big Swirlypods. They function like the smaller ones, but their shells are so big that they can only be picked up by [[Elephant Mario]]. |
| |{{chart icon|SMO-Moon}} Below the Cliff's Edge | | |[[Swamp Pipe Crawl]] |
| | |[[The Anglefish Trial: Ready, Aim, Fly!]] |
| | |{{chart icon|new}} |
| |- | | |- |
| |{{chart icon|SMO-Moon}} Inside the Stone Cage | | |style="background:white"|[[File:ExtendoSproing.png|100x100px]]<br>[[Sproing]] |
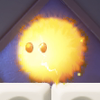
| |{{chart icon|SMO-Moon}} On a Tree in the Swamp | | |align=left|Goomba-like enemies that protract their springy bodies when approached by Mario. Sproings are typically shrouded in darkness, but their bodies are briefly illuminated under certain conditions. In these moments, it is revealed that they look like acorns. |
| | |[[Sproings in the Twilight Forest]] |
| | |[[The Final Test Wonder Gauntlet]] |
| | |{{chart icon|new}} |
| |- | | |- |
| |{{chart icon|SMO-Moon}} Over the Fuzzies, Above the Swamp | | |style="background:white"|[[File:SMBW screenshot Cloud Menace small.png|100x100px]]<br>[[Smogrin]] |
| |{{chart icon|SMO-Moon}} Avoiding Fuzzies Inside the Wall | | |align=left|Grimacing storm clouds with trailing bodies. They hover back-and-forth or up-and-down. Stomping on the trailing clouds clears, but Mario must stomp on their heads to truly defeat them. Smogrins aspire to become {{wp|cumulonimbus cloud}}s.<ref name=sekai2/> |
| | |[[Bulrush Coming Through!]] |
| | |[[Missile Meg Mayhem]] |
| | |{{chart icon|new}} |
| |- | | |- |
| |{{chart icon|SMO-Moon}} Inside the Rising Stone Pillar | | |[[File:Big Mokumokumo.png|100x100px]]<br>[[Kodeka Mokumokumo]] |
| |{{chart icon|SMO-Moon}} Enjoying the View of Forgotten Isle | | |align=left|Larger Smogrins. They behave like the normal-sized ones, but they are not trailed by small clouds. |
| | |[[KO Arena Fluff-Puff Kerfuff]] |
| | |[[Expert Badge Challenge Spring Feet II]] |
| | |{{chart icon|new}} |
| |- | | |- |
| |{{chart icon|SMO-Moon}} On the Mountain Road | | |style="background:white"|[[File:SMBW screenshot Cloud Menace big.png|100x100px]]<br>[[Deka Mokumokumo]] |
| |{{chart icon|SMO-Moon}} ''[[List of Power Moons in the Lost Kingdom|Click here for the remaining moons...]]'' | | |align=left|The largest Smogrins. With the exception of their size, they are indistinguishable from Kodeka Mokumokumo and behave the same way. |
| | |[[KO Arena Fluff-Puff Kerfuff]] |
| | |[[Expert Badge Challenge Spring Feet II]] |
| | |{{chart icon|new}} |
| |- | | |- |
| |colspan="3"align=center|TBW<br>'''Unlock criterion:''' complete "Hat-to-Hat Combat" | | |style="background:white"|[[File:SMBWScreenshotUnknownWheelChainLeashDryBones-likeEnemy.png|100x100px]]<br>[[Revver]] |
| | |align=left|Skeletal dog-like enemies on wheels. Their chain leash is grabbable, and pulling back on it sends Revvers rolling forward like {{wp|pullback motor|pullback motor toys}}. They are defeated when they collide with a wall or obstacle. Stomping on one otherwise stuns it for a brief period of time. |
| | |[[Rolling-Ball Hall]] |
| | |[[Hot-Hot Hot!]] |
| | |{{chart icon|new}} |
| |- | | |- |
| !width=16% style="background:#D3CA6B;"|08. [[Metro Kingdom]] <small>(New Donk City)</small><br>{{chart icon|SMO-totalM}}×85 {{chart icon|SMO-totalC}}×100 {{chart icon|SMO-totalF}}×10 {{chart icon|SMO-totalB}}×1
| | |style="background:white"|[[File:UnknownFlounderEnemySMBW.png|100x100px]]<br>[[Smackerel]] |
| !colspan="2"width=34% style="background:#D3CA6B;"|Objectives and Power Moons
| | |align=left|{{wp|Flatfish}} that hide under sand on the seafloor. Smackerels rapidly swim upward with snapping jaws when Mario is detected above. They destroy blocks and defeat enemies in their path. Smackerels can only be stomped as the descend, when their white flank are facing the screen. Attempting to touch them otherwise damages Mario. |
| | |colspan=2|[[Leaping Smackerel]] |
| | |{{chart icon|new}} |
| |- | | |- |
| |rowspan="5"align=center style="background:#FFFFFF"|[[File:SMO Art - Metro Kingdom.jpg|200x200px]] | | |style="background:white"|[[File:Giga Smackerel.png|100x100px]]<br>[[Wonder Haiden]] |
| |{{chart icon|SMO-MoonMMetro}} [[The Scourge on the Skyscraper]] | | |align=left|A large Smackerel that appears during the Wonder Effect in Leaping Smackerel and chomps through earth, destroying it. |
| |{{chart icon|SMO-MoonMetro}} [[A Fresh Start for the City|Drummer on Board!]] | | |colspan=2|[[Leaping Smackerel]] |
| | |{{chart icon|new}} |
| |- | | |- |
| |{{chart icon|SMO-MoonMetro}} [[A Fresh Start for the City|Guitarist on Board!]] | | |style="background:white"|[[File:SMBW screenshot Cheep Cheep.png|100x100px]]<br>[[Cheep Cheep]] |
| |{{chart icon|SMO-MoonMetro}} [[A Fresh Start for the City|Bassist on Board!]] | | |align=left|Pudgy red fish. They swim horizontally through water. They are defeated when stomped. |
| | |[[Leaping Smackerel]] |
| | |[[Search Party Item Park]] |
| | |— |
| |- | | |- |
| |{{chart icon|SMO-MoonMetro}} [[A Fresh Start for the City|Trumpeter on Board!]] | | |style="background:white"|[[File:SMBW screenshot Hidey Nudibranch.png|100x100px]]<br>[[Sluglug]] |
| |{{chart icon|SMO-MoonMetro}} [[Powering Up the Station]] | | |align=left|Spiked {{wp|nudibranch}} enemies that emerge from underwater pipes. Sluglugs must be struck five times to be fully defeated, but each hit forces them to incrementally recede into their pipes. Their head's distance from the pipe determines the amount of hits necessary. |
| | |[[Leaping Smackerel]] |
| | |[[Wiggler Race Swimming!]] |
| | |{{chart icon|new}} |
| |- | | |- |
| |{{chart icon|SMO-MoonMMetro}} [[A Traditional Festival!]] | | |style="background:white"|[[File:SMBWScreenshotUnknownDivingBirdEnemy.png|100x100px]]<br>[[Robbird]] |
| |{{chart icon|SMO-MoonMetro}} Inside an Iron Girder | | |align=left|Flying {{wp|kingfisher}} enemies that dive into water. They flyoff as they exit, taking any [[coin]]s they touch with them. |
| | |colspan=2|[[Robbird Cove]] |
| | |{{chart icon|new}} |
| |- | | |- |
| |{{chart icon|SMO-MoonMetro}} Swaying in the Breeze | | |style="background:white"|[[File:SMBW Artwork Urchin.png|100x100px]]<br>[[Urchin]] |
| |{{chart icon|SMO-MoonMetro}} ''[[List of Power Moons in the Metro Kingdom|Click here for the remaining moons...]]'' | | |align=left|Sea creatures covered in spines. While underwater, Urchins float in the water, without moving. On land, they roll along the ground like balls. Direct contact with Urchins damages Mario, but indirect means of attack defeats them. |
| | |[[Robbird Cove]] |
| | |[[Downpour Uproar]] |
| | |— |
| |- | | |- |
| |colspan="3"align=center|TBW<br>'''Unlock criterion:''' collect 10 Power Stars in the Lost Kingdom | | |style="background:white"|[[File:SMBW Bubble Bird Enemy.png|100x100px]]<br>[[Blewbird]] |
| | |align=left|Shelled bird enemies that fire their beaks like {{wp|blowgun}}s. The beaks extend into platforms upon hitting opposing walls. When a Blewbird is defeated, another emerges from the ground to take its place. During Wonder Effects, Blewbirds blow [[bubble]]s that can be used as bouncy platforms. |
| | |[[Blewbird Roost]] |
| | |[[The Final Test Wonder Gauntlet]] |
| | |{{chart icon|new}} |
| |- | | |- |
| !width=16% style="background:#D3CA6B;"|09. [[Snow Kingdom]] <small>(Shiveria)</small><br>{{chart icon|SMO-totalM}}×57 {{chart icon|SMO-totalC}}×50 {{chart icon|SMO-totalF}}×4 {{chart icon|SMO-totalB}}×1
| | |style="background:white"|[[File:SMBWscreenshotOutmaway.png|100x100px]]<br>[[Outmaway]] |
| !colspan="2"width=34% style="background:#D3CA6B;"|Objectives and Power Moons
| | |align=left|Masked snow creatures. Outmaways are often on top of elevated platforms, where they kick giant [[Ice Block]]s that emerge from the ground before them. They otherwise occur walking along the ground like Goombrats. Outmaways are weak to most attacks, but attempting they kick away tossed Koopa Shells back at Mario. |
| | |[[Outmaway Valley]] |
| | |[[A Final Uncharted Area: Poison Ruins]] |
| | |{{chart icon|new}} |
| |- | | |- |
| |rowspan="5"align=center style="background:#FFFFFF"|[[File:SMO Art - Snow Kingdom.png|200x200px]] | | |style="background:white"|[[File:SMBWScreenshotUnknownBoxingWiggler-likeEnemy.png|100x100px]]<br>[[Pokipede]] (Green) |
| |{{chart icon|SMO-MoonSnow}} [[The Cake Thief's Parting Gift|The Icicle Barrier]] | | |align=left|[[Wiggler]]-like centipedes that swiftly move along [[track]]s. Pokipedes punch as they move, clearing falling [[snow block]]s. Stomping on their unguarded tail or tossing three fireballs at them defeats them. Touching any other part of a Pokipede damages Mario unless he is in his Drill or Elephant forms. |
| |{{chart icon|SMO-MoonSnow}} [[The Cake Thief's Parting Gift|The Ice Wall Barrier]] | | |[[Pokipede Pass]] |
| | |[[Wiggler Race Spelunking!]] |
| | |{{chart icon|new}} |
| |- | | |- |
| |{{chart icon|SMO-MoonSnow}} [[The Cake Thief's Parting Gift|The Gusty Barrier]] | | |style="background:white"|[[File:Red pokipede.png|100x100px]]<br>Pokipede (Red) |
| |{{chart icon|SMO-MoonSnow}} [[The Cake Thief's Parting Gift|The Snowy Mountain Barrier]] | | |align=left|The red-clad Pokipedes move much more rapidly than the green ones. |
| | |[[Pokipede Pass]] |
| | |[[Wiggler Race Spelunking!]] |
| | |{{chart icon|new}} |
| |- | | |- |
| |{{chart icon|SMO-MoonMSnow}} [[The Bound Bowl Grand Prix]] | | |style="background:white"|[[File:SMBWScreenshotUnknownOwlEnemy.png|100x100px]]<br>[[Whohoo]] |
| |{{chart icon|SMO-MoonSnow}} Entrance to Shiveria | | |align=left|Owl enemies that swoop down from upside-down nests on ceilings. Whohoos destroy snow blocks as they fly and sometimes carry coins with them. If undefeated, they grow tired and return to their nests. |
| | |colspan=2|[[Pokipede Pass]] |
| | |{{chart icon|new}} |
| |- | | |- |
| |{{chart icon|SMO-MoonSnow}} Behind Snowy Mountain | | |style="background:white"|[[File:Melicondor.png|100x100px]]<br>[[Condart]] |
| |{{chart icon|SMO-MoonSnow}} Shining in the Snow in Town | | |align=left|Hovering dart-like birds. When Mario crosses their line of sight, Condarts forcefully propel themselves at him, destroying [[Brick Block]]s in their path and lodging themselves into opposing terrain. While lodged, they are briefly immobile and vulnerable to attack. They either slam themselves into floors or walls, depending on the direction they face. Condarts apparently lose their memories on impact.<ref name=sekai2/> |
| | |[[Condarts Away!]] |
| | |[[The Desert Mystery]] |
| | |{{chart icon|new}} |
| |- | | |- |
| |{{chart icon|SMO-MoonSnow}} Atop a Blustery Arch | | |style="background:white"|[[File:JumpTogeJump.jpg|100x100px]]<br>[[Zip-Zap]] |
| |{{chart icon|SMO-MoonSnow}} ''[[List of Power Moons in the Snow Kingdom|Click here for the remaining moons...]]'' | | |align=left|Living bolts concealed in storm clouds. Zip-Zaps occur in groups. They leap vertically from the clouds in set intervals and shock Mario on contact. They are defeated only by bubbles. |
| | |colspan=2|[[Cruising with Linking Lifts]] |
| | |{{chart icon|new}} |
| |- | | |- |
| |colspan="3"align=center|TBW<br>'''Unlock criterion:''' collect 20 Power Stars in the Metro Kingdom or 10 in the Seaside Kingdom | | |style="background:white"|[[File:HakandoruDry.jpg|100x100px]]<br>[[Condrop]] |
| | |align=left|Helmeted birds that fly in straight horizontal lines. Condrops carry enemies or items as they travel. When Mario is detected below, they screech and drop them. Some Condrops have coins trailing after them. |
| | |[[Cruising with Linking Lifts]] |
| | |[[The Final Test Wonder Gauntlet]] |
| | |{{chart icon|new}} |
| |- | | |- |
| !width=16% style="background:#D3CA6B;"|10. [[Seaside Kingdom]] <small>(Bubblaine)</small><br>{{chart icon|SMO-totalM}}×73 {{chart icon|SMO-totalC}}×100 {{chart icon|SMO-totalF}}×10 {{chart icon|SMO-totalB}}×1
| | |style="background:white"|[[File:SMBW Bob-omb.png|100x100px]]<br>[[Bob-omb]] |
| !colspan="2"width=34% style="background:#D3CA6B;"|Objectives and Power Moons
| | |align=left|Walking bombs. Stomps or tossed fireballs lights their fuse and renders them immobile. They can be picked up and tossed to destroy objects and enemies, but they damage Mario if they go off in his hands. |
| | |colspan=2|[[Fluff-Puff Peaks Flying Battleship]] |
| | |— |
| |- | | |- |
| |rowspan="5"align=center style="background:#FFFFFF"|[[File:SMO Seaside Kingdom.jpg|200x200px]] | | |style="background:white"|[[File:Firework-Bobomb.png|100x100px]]<br>[[Baboom]] |
| |{{chart icon|SMO-MoonSeaside}} [[The Glass Is Half Empty!|The Stone Pillar Seal]] | | |align=left|Firework Bob-ombs composed of three segments. When struck, Babooms ignite. They discharge each body segment, one by one, into the sky. They explode at the height of their arch, destroying [[crate]]s and defeating enemies in their blast radius. The fireworks do not damage Mario, and he can carry Babooms to direct them at desired targets. |
| |{{chart icon|SMO-MoonSeaside}} [[The Glass Is Half Empty!|The Lighthouse Seal]] | | |[[Fluff-Puff Peaks Flying Battleship]] |
| | |[[KO Arena Magma Flare-Up]] |
| | |{{chart icon|new}} |
| |- | | |- |
| |{{chart icon|SMO-MoonSeaside}} [[The Glass Is Half Empty!|The Hot Spring Seal]] | | |style="background:white"|[[File:BulletBillMK8.png|100x100px]]<br>[[Bullet Bill]] |
| |{{chart icon|SMO-MoonSeaside}} [[The Glass Is Half Empty!|The Seal Above the Canyon]] | | |align=left|Missiles fired from [[Bill Blaster]]s. They fly horizontally. Bullet Bills are defeated by all means of attack. |
| | |[[Fluff-Puff Peaks Flying Battleship]] |
| | |[[The Semifinal Test Piranha Plant Reprise]] |
| | |— |
| |- | | |- |
| |{{chart icon|SMO-MoonMSeaside}} [[The Glass Is Half Empty!|The Glass Is Half Full!]] | | |style="background:white"|[[File:BullsEyeBillSMBW.png|100x100px]]<br>[[Renketsu Search Killer]] |
| |{{chart icon|SMO-MoonSeaside}} On the Cliff Overlooking the Beach | | |align=left|Serpentine [[Bull's-Eye Bill]]s. While launched, Renketsu Search Killers directly target Mario and will change their course of direction mid-air to pursue him. |
| | |colspan=2|[[KnuckleFest Bowser's Blazing Beats]] |
| | |{{chart icon|new}} |
| |- | | |- |
| |{{chart icon|SMO-MoonSeaside}} Ride the Jetstream | | |style="background:white"|[[File:SMBW screenshot Blasted Bill.png|100x100px]]<br>[[Missile Meg]] |
| |{{chart icon|SMO-MoonSeaside}} Ocean-Bottom Maze: Treasure | | |align=left|Long-bodied Bullet Bills launched from off-screen blasters. Missile Megs fly through the air horizontally. Their backs can be stood on like platforms, but contact immediately knocks them out and causes them to slowly descend. Mario loses a life if he does not get off by the time it descends past he boundary of the bottom screen. During certain Wonder Effects, Missile Megs fly horizontally and do not lose altitude when stood on. Their exhaust is also rainbow-colored. |
| | |[[Missile Meg Mayhem]] |
| | |[[The Final-Final Test Badge Marathon]] |
| | |{{chart icon|new}} |
| |- | | |- |
| |{{chart icon|SMO-MoonSeaside}} Ocean-Bottom Maze: Hidden Room | | |style="background:white"|[[File:Smallseeker.jpg|100x100px]]<br>[[Seeker Bullet Bill]] |
| |{{chart icon|SMO-MoonSeaside}} ''[[List of Power Moons in the Seaside Kingdom|Click here for the remaining moons...]]'' | | |align=left|Bullet Bills fhat directly target Mario when he is near. Most Seeker Bullet Bills are fastened to terrain by their suction cup-like exhaust ports, bobbing back-and-forth in rhythm to the music as they wait for targets. They rapidly swing their arms and turn their heads to Mario's position before launching, flashing red. Once launched, Seeker Bullet Bills do not change their course of direction. When they collide with opposing terrain, they fasten themselves to it, positioned to launch back at Mario if he is within their sights. They are damaged like normal Bullet Bills, but they can also be lured into [[Poison (obstacle)|poison]]. There are rotating hexagonal objects in the ceiling that launch Seeker Bullet Bills like Bill Blasters. |
| | |colspan=2|[[Evade the Seeker Bullet Bills!]] |
| | |{{chart icon|new}} |
| |- | | |- |
| |colspan="3"align=center|TBW<br>'''Unlock criterion:''' collect 20 Power Stars in the Metro Kingdom or 10 in the Snow Kingdom | | |style="background:white"|[[File:Bigseeker.jpg|100x100px]]<br>[[Deka Chase Killer]] |
| | |align=left|Big Seeker Bullet Bills. They have a bigger attack radius than the normal-sized ones, but otherwise behave the same way. |
| | |colspan=2|[[Evade the Seeker Bullet Bills!]] |
| | |{{chart icon|new}} |
| |- | | |- |
| !width=16% style="background:#D3CA6B;"|11. [[Luncheon Kingdom]] <small>(Mount Volbono)</small><br>{{chart icon|SMO-totalM}}×72 {{chart icon|SMO-totalC}}×100 {{chart icon|SMO-totalF}}×10 {{chart icon|SMO-totalB}}×2
| | |style="background:white"|[[File:SMBW Hoppycat.png|100x100px]]<br>[[Hoppycat]] |
| !colspan="2"width=34% style="background:#D3CA6B;"|Objectives and Power Moons
| | |align=left|Spiked creatures that copy Mario's jumping movements, often ascending platforms with him or popping out of pits. They otherwise compress their bodies and shiver in place, tracking Mario with their eyes. Hoppycats can be used to break blocks. The spikes on their back damage Mario on contact. Though not easily visible, the bottom of Hoppycats are lined with teeth. |
| | |[[The Hoppycat Trial: Hop, Hop, and Awaaay]] |
| | |[[Wiggler Race Spelunking!]] |
| | |{{chart icon|new}} |
| |- | | |- |
| |rowspan="5"align=center style="background:#FFFFFF"|[[File:SMO Art - Luncheon Kingdom.jpg|200x200px]] | | |style="background:white"|[[File:Red Hoppycat screenshot.png|100x100px]]<br>[[Wonder Hoppin]] |
| |{{chart icon|SMO-MoonLuncheon}} [[The Broodals Are After Some Cookin']] | | |align=left|A Hoppycat that jumps extremely high. Its body has turned orange due to rigorous training.<ref name=sekai2/> |
| |{{chart icon|SMO-MoonLuncheon}} [[Under the Cheese Rocks]] | | |colspan=2|[[The Midway Trial: Hop to It]] |
| | |{{chart icon|new}} |
| |- | | |- |
| |{{chart icon|SMO-MoonMLuncheon}} [[Big Pot on the Volcano: Dive In!]] | | |style="background:white"|[[File:WonderEffectHoppycat.jpg|100x100px]]<br>[[Deka Hoppin]] |
| |{{chart icon|SMO-MoonLuncheon}} [[Climb Up the Cascading Magma]] | | |align=left|Large Hoppycats that appear during certain Wonder Effects. They jump straight through earth, destroying it. |
| | |[[The Hoppycat Trial: Hop, Hop, and Awaaay]] |
| | |[[The Final Test Wonder Gauntlet]] |
| | |{{chart icon|new}} |
| |- | | |- |
| |{{chart icon|SMO-MoonMLuncheon}} [[Cookatiel Showdown!]] | | |style="background:white"|[[File:AnglefishIdle.jpg|100x100px]]<br>[[Anglefish]] |
| |{{chart icon|SMO-MoonLuncheon}} Piled on the Salt | | |align=left|Tirangular fish that leap from water in high arches when Mario is near. The arch of their jumps is dependent on Mario's position and conveyed by the light-blue glow of their flanks. In certain Wonder Effects, Anglefish shine green and fly through the air. |
| | |[[The Anglefish Trial: Ready, Aim, Fly!]] |
| | |[[The Final Test Wonder Gauntlet]] |
| | |{{chart icon|new}} |
| |- | | |- |
| |{{chart icon|SMO-MoonLuncheon}} Lurking in the Pillar's Shadow | | |style="background:white"|[[File:SMBW Screenshot Gamboo (Green).png|100x100px]]<br>[[Gamboo]] (Green) |
| |{{chart icon|SMO-MoonLuncheon}} Atop the Jutting Crag | | |align=left|Walking bamboo enemies. Gamboos emerge from the ground and stack together to form towers. Individuals that can be picked up and tossed once stomped. During some Wonder Effects, Gamboos dance to the music. The green ones walk off the edge of platforms. |
| | |[[The Midway Trial: Hop to It]] |
| | |[[The Semifinal Test Piranha Plant Reprise]] |
| | |{{chart icon|new}} |
| |- | | |- |
| |{{chart icon|SMO-MoonLuncheon}} Is This an Ingredient Too?! | | |style="background:white"|[[File:TakeboPurple.png|100x100px]]<br>Gamboo (Purple) |
| |{{chart icon|SMO-MoonLuncheon}} ''[[List of Power Moons in the Luncheon Kingdom|Click here for the remaining moons...]]'' | | |align=left|Purple-colored Gamboos turn around when the reach the edge of platforms. |
| | |[[The Midway Trial: Hop to It]] |
| | |[[The Final Test Wonder Gauntlet]] |
| | |{{chart icon|new}} |
| |- | | |- |
| |colspan="3"align=center|TBW<br>'''Unlock criterion:''' collect 10 Power Stars in the Snow Kingdom or the Seaside Kingdom | | |style="background:white"|[[File:Gold Takebo.jpg|100x100px]]<br>[[Metal Takebō]] (Gold) |
| | |align=left|The metallic Gamboos are impervious to fire. When near an electric surge, they conduct the electricity for a brief period of time. Touching Metal Takebō in this state damages Mario. The gold-rimmed ones walk off the edge of platforms. |
| | |[[Missile Meg Mayhem]] |
| | |[[KnuckleFest Bowser's Blazing Beats]] |
| | |{{chart icon|new}} |
| |- | | |- |
| !width=16% style="background:#D3CA6B;"|12. [[Ruined Kingdom]] <small>(Crumbleden)</small><br>{{chart icon|SMO-totalM}}×12 {{chart icon|SMO-totalF}}×1 {{chart icon|SMO-totalB}}×1
| | |style="background:white"|[[File:Silver Takebo.jpg|100x100px]]<br>Metal Takebō (Silver) |
| !colspan="2"width=34% style="background:#D3CA6B;"|Objectives and Power Moons
| | |align=left|The silver-rimmed Gamboos turn around when the reach the edge of platforms. |
| | |[[Missile Meg Mayhem]] |
| | |[[KnuckleFest Bowser's Blazing Beats]] |
| | |{{chart icon|new}} |
| |- | | |- |
| |rowspan="5"align=center style="background:#FFFFFF"|[[File:SMO RUIN.jpg|200x200px]] | | |style="background:white"|[[File:Green Sugarstar SMBW.jpg|100x100px]]<br>[[Sugarstar]] (Green) |
| |{{chart icon|SMO-MoonM}} [[Battle with the Lord of Lightning!]] | | |align=left|Shimmering enemies similar to {{wp|konpeitō}}. Sugarstars appear in groups and move through the air in unison. Different groups move in different patterns and their paths can be tracked by the trailing streaks they leave in the sky. When struck Sugarstars are temporarily reduced to undamaging black cores, but they regenerate their crystalline exterior in a few seconds. |
| |{{chart icon|SMO-Moon}} In the Ancient Treasure Chest | | |[[The Sugarstar Trial: Across the Night Sky]] |
| | |[[The Final-Final Test Badge Marathon]] |
| | |{{chart icon|new}} |
| |- | | |- |
| |{{chart icon|SMO-Moon}} Roulette Tower: Climbed | | |style="background:white"|[[File:SMBW screenshot Magenta Snowflakes of Doom.png|100x100px]]<br>Sugarstar (Purple) |
| |{{chart icon|SMO-Moon}} Roulette Tower: Stopped | | |align=left|The purple-colored Sugarstars are speedier than the green ones. |
| | |[[The Sugarstar Trial: Across the Night Sky]] |
| | |[[The Final-Final Test Badge Marathon]] |
| | |{{chart icon|new}} |
| |- | | |- |
| |{{chart icon|SMO-Moon}} Peach in the Ruined Kingdom | | |style="background:white"|[[File:Konk Direct.png|100x100px]]<br>[[Konk]] (Yellow) |
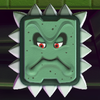
| |{{chart icon|SMO-Moon}} Caught on a Big Horn | | |align=left|Metal Thwomp-like enemies. Yellow-rimmed Konks slide along ceilings and slam down when Mario is detected below. They slowly rise back to the ceiling and can be used like rising [[Lift]]s, but Mario will be crushed if he is still on top of them when the recollide with the ceiling. Konks are indestructible. |
| | |[[Jewel-Block Cave]] |
| | |[[An Uncharted Area: Wubba Ruins]] |
| | |{{chart icon|new}} |
| |- | | |- |
| |{{chart icon|SMO-Moon}} Upon the Broken Arch | | |style="background:white"|[[File:Blue Konk.png|100x100px]]<br>Konk (Blue) |
| |{{chart icon|SMO-Moon}} Rolling Rock on the Battlefield | | |align=left|The blue-rimmed Konks slide across the floor and thrust themselves skyward to strike Mario. |
| | |[[Jewel-Block Cave]] |
| | |[[An Uncharted Area: Wubba Ruins]] |
| | |{{chart icon|new}} |
| |- | | |- |
| |{{chart icon|SMO-Moon}} Charging Through an Army | | |style="background:white"|[[File:Giant Konk SMBW.jpg|100x100px]]<br>[[Wonder Gottsun]] |
| |{{chart icon|SMO-Moon}} The Mummy Army's Curse | | |align=left|A giant yellow Konk that appears from above during the Wonder Effect in Jewel-Block Cave. It crushes anything directly below it, including terrain. |
| | |colspan=2|[[Jewel-Block Cave]] |
| | |{{chart icon|new}} |
| |- | | |- |
| |colspan="3"align=center|TBW<br>'''Unlock criterion:''' collect 18 Power Stars in the Luncheon Kingdom | | |style="background:white"|[[File:ArmadSMBW.png|100x100px]]<br>[[Armad]] |
| | |align=left|Armadillo creatures that live in the [[Sunbaked Desert]]. They curl into a ball when Mario draws near and rapidly roll towards him. They also curl up when they reach a slope to roll downhill. Stomping Armads causes them to curl as well, but they are motionless and undamaging in this context. They can be picked up and tossed. Some Armads are trailed by coins as they roll. |
| | |[[Armads on the Roll]] |
| | |[[Sunbaked Desert Special Pole Block Allure]] |
| | |{{chart icon|new}} |
| |- | | |- |
| !width=16% style="background:#D3CA6B;"|13. [[Bowser's Kingdom]] <small>([[Bowser's Castle]])</small><br>{{chart icon|SMO-totalM}}×64 {{chart icon|SMO-totalC}}×100 {{chart icon|SMO-totalF}}×12 {{chart icon|SMO-totalB}}×3
| | |style="background:white"|[[File:SMBW Pokey.png|100x100px]]<br>[[Pokey]] |
| !colspan="2"width=34% style="background:#D3CA6B;"|Objectives and Power Moons
| | |align=left|Segmented [[cactus]] enemies that shimmy back-and-forth across the ground. Pokeys are of varying heights, with some so tall that they are difficult to work around. Stomping one as Small or Super Mario damages him, but they are vulnerable to indirect attacks like fireballs or Elephant Mario's trunk. Doing so knocks away individual segments, shortening them and making them easier to circumnavigate. Pokeys are defeated immediately when their heads are struck. During the Wonder Effect of Armads on the Roll, the speed of Pokeys rapidly increases. |
| | |colspan=2|[[Armads on the Roll]] |
| | |— |
| |- | | |- |
| |rowspan="5"align=center style="background:#FFFFFF"|[[File:SMO BOWSER.jpg|200x200px]] | | |style="background:white"|[[File:Mumsie.png|100x100px]]<br>[[Mumsy]] |
| |{{chart icon|SMO-MoonBowser}} [[Infiltrate Bowser's Castle!]] | | |align=left|Mummy enemies enwrapped in loose cloth. The end of the cloth can be grabbed and pulled back to defeat them. Mumsies are of varying heights, with the tallest ones requiring the longest pulls to fully unfurl their bodies. They are otherwise difficult to defeat, with stomps, ground pounds, and fireballs ineffective. When Mumsies reach the ends of platforms, they turn around. |
| |{{chart icon|SMO-MoonBowser}} [[Smart Bombing]] | | |[[The Desert Mystery]] |
| | |[[Sunbaked Desert Special Pole Block Allure]] |
| | |{{chart icon|new}} |
| |- | | |- |
| |{{chart icon|SMO-MoonBowser}} [[Big Broodal Battle]] | | |style="background:white"|[[File:SMBW Ninji.png|96px]]<br>[[Ninji]] |
| |{{chart icon|SMO-MoonMBowser}} [[Showdown at Bowser's Castle]] | | |align=left|Impish ninja enemies. They dance in rhythm in their debut level's Wonder Effect. |
| | |[[Ninji Jump Party]] |
| | |[[Break Time! Raise the Stage]] |
| | |— |
| |- | | |- |
| |{{chart icon|SMO-MoonBowser}} Behind the Big Wall | | |style="background:white"|[[File:Bloomp (green render) - SMBW.png|100x100px]]<br>[[Bloomp]] (Green) |
| |{{chart icon|SMO-MoonBowser}} Treasure Inside the Turret | | |align=left|{{wp|Balloonfish}} enemies that fly through the sky. Bloomps are inflated by Blaster-like turrets before release. Mario can bounce on their back to reach distant areas, but each bounce makes the ridden Bloomp deflate a little until eventually disappearing. Striking them from below defeats them. |
| | |[[Bloomps of the Desert Skies]] |
| | |[[The Final-Final Test Badge Marathon]] |
| | |{{chart icon|new}} |
| |- | | |- |
| |{{chart icon|SMO-MoonBowser}} From the Side Above the Castle Gate | | |style="background:white"|[[File:Bloomp (pink render) - SMBW.png|100x100px]]<br>Bloomp (Purple) |
| |{{chart icon|SMO-MoonBowser}} Sunken Treasure in the Moat | | |align=left|The purple Bloomps fly faster than the green ones. Other colored varieties appear during certain Wonder effects. |
| | |[[Bloomps of the Desert Skies]] |
| | |[[The Final-Final Test Badge Marathon]] |
| | |{{chart icon|new}} |
| |- | | |- |
| |{{chart icon|SMO-MoonBowser}} Past the Moving Wall | | |style="background:white"|[[File:Giga Bloomp.png|100x100px]]<br>[[Wonder Būsuke]] |
| |{{chart icon|SMO-MoonBowser}} ''[[List of Power Moons in Bowser's Kingdom|Click here for the remaining moons...]]'' | | |align=left|Big Bloomps filled with confetti. Mario bounces on Wonder Būsuke during certain Wonder Effects, but they do not deflate. |
| | |[[Flight of the Bloomps]] |
| | |[[Sunbaked Desert Special Pole Block Allure]] |
| | |{{chart icon|new}} |
| |- | | |- |
| |colspan="3"align=center|TBW<br>'''Unlock criterion:''' complete "Battle with the Lord of Lightning!" | | |style="background:white"|[[File:Snootle.png|100x100px]]<br>[[Snootle]] |
| | |align=left|Round tumbling creatures that bounce around the immediate area. Some Snootles bounce Goombas around. |
| | |colspan=2|[[Valley Fulla Snootles]] |
| | |{{chart icon|new}} |
| |- | | |- |
| !width=16% style="background:#D3CA6B;"|14. [[Moon Kingdom]] <small>(Honeylune Ridge)</small><br>{{chart icon|SMO-totalM}}×38 {{chart icon|SMO-totalC}}×50 {{chart icon|SMO-totalF}}×5 {{chart icon|SMO-totalB}}×2
| | |style="background:white"|[[File:SMBW Big Snootle.png|100x100px]]<br>[[Deka Korobū]] |
| !colspan="2"width=34% style="background:#D3CA6B;"|Objectives and Power Moons
| | |align=left|A big Snootle that withholds a [[10-flower coin]]. It otherwise behaves like normal-sized Snootles. |
| | |colspan=2|[[Valley Fulla Snootles]] |
| | |{{chart icon|new}} |
| |- | | |- |
| |rowspan="5"align=center style="background:#FFFFFF"|[[File:SMO MOON.jpg|200x200px]] | | |style="background:white"|[[File:SnakePotWonder.png|100x100px]][[File:TsubochanWonder.png|100x100px]]<br>[[Serpont]] |
| |{{chart icon|SMO-CappyM}} [[Bowser's Moon Wedding]] | | |align=left|Little snakes with [[Jar|pots]] on their heads. Serponts slowly slither while their heads are covered. Striking them breaks their pots, exposing their heads and enabling them to move quickly. |
| |{{chart icon|SMO-MoonMoon}} Shining Above the Moon | | |[[Color-Switch Dungeon]] |
| | |[[KO Arena Sunbaked Skirmish]] |
| | |{{chart icon|new}} |
| |- | | |- |
| |{{chart icon|SMO-MoonMoon}} Along the Cliff Face | | |style="background:white"|[[File:Lil' Sparky SMBW.png|100x100px]]<br>[[Lil Sparky]] |
| |{{chart icon|SMO-MoonMoon}} The Tip of a White Spire | | |align=left|Energized balls of fire that tightly roll around platforms. They illuminate the space around them and shock Mario on contact. |
| | |[[Color-Switch Dungeon]] |
| | |[[The Final-Final Test Badge Marathon]] |
| | |— |
| |- | | |- |
| |{{chart icon|SMO-MoonMoon}} Rolling Rock on the Moon | | |style="background:white"|[[File:Hothead SMBW.png|100x100px]]<br>[[Hothead]] |
| |{{chart icon|SMO-MoonMoon}} Caught Hopping on the Moon! | | |align=left|Big Sparkies. Hotheads move more slowly than Lil Sparkies, but they also have a larger [[:MarioWiki:Glossary#H|hitbox]] and illuminate a larger amount of space. |
| | |[[Color-Switch Dungeon]] |
| | |[[The Final-Final Test Badge Marathon]] |
| | |— |
| |- | | |- |
| |{{chart icon|SMO-MoonMoon}} Cliffside Treasure Chest | | |style="background:white"|[[File:DarkMarioScreenshot.png|100x100px]]<br>[[Rift Mario]] |
| |{{chart icon|SMO-MoonMoon}} Moon Kingdom Timer Challenge 1 | | |align=left|A shadowy doppelgänger that mimics Mario's movement during certain Wonder Effects. In multiplayer, Rift Mario chases the player with the crown. It can be temporarily stunned by fireballs and nearby activated POW Blocks. It disappears when the Wonder Seed is touched, but it can be permanently defeated beforehand if struck by fireballs fifty times. |
| | |[[Color-Switch Dungeon]] |
| | |[[Beware of the Rifts]] |
| | |{{chart icon|new}} |
| |- | | |- |
| |{{chart icon|SMO-MoonMoon}} Taking Notes: On the Moon's Surface | | |style="background:white"|[[File:Dark Nokonoko.jpg|81px]]<br>[[Dark Nokonoko]] |
| |{{chart icon|SMO-MoonMoon}} ''[[List of Power Moons in the Moon Kingdom|Click here for the remaining moons...]]'' | | |align=left|Dark entities that look like Koopa Troopas. They appear during the Wonder Effect in Beware of the Rifts and damage Mario on contact. Like Rift Mario, they disappear when the Wonder Seed is grabbed. |
| | |colspan=2|[[Beware of the Rifts]] |
| | |{{chart icon|new}} |
| |- | | |- |
| |colspan="3"align=center|TBW<br>'''Unlock criterion:''' collect 8 Power Stars in Bowser's Kingdom | | |style="background:white"|[[File:ThwompSMBW.png|100x100px]]<br>[[Thwomp]] |
| | |align=left|Grimacing stones. Thwomps suspend themselves above ground and slam into the earth below when they detect Mario underneath. Crushing him makes him lose a live. Directly touching Thwomps, even grounded ones, is damaging. They are invincible to all attacks. |
| | |[[Sunbaked Desert Palace]] |
| | |[[Petal Isles Special Way of the Goomba]] |
| | |— |
| |- | | |- |
| |colspan="3"style="background:#6AAAC4;color:white;"|[[File:SMO Asset Sprite Odyssey (Yellow Sail).png|30x30px]] '''The Odyssey Continues...''' | | |style="background:white"|[[File:Baby Thwomp (long).png|100x100px]]<br>[[Shoomp]] |
| | |align=left|Enemies that look like baby Thwomps of varying widths. They occur on terrain that rocks back and forth, causing their spiked bodies to slide left-and-right. Contact with their sides damages Mario, and being between them and a wall makes him lose a life. Their backs are harmless and can be stood on like platforms. The terrain apparently is invocative of a rocking cradle for Shoomps.<ref name=sekai1>{{cite|author=Kai, editor|date=26 Jan. 2024|url=www.nintendo.com/jp/topics/article/f6d2505a-dd79-410d-b350-b2b2036213f0|title=マリオたちの行く手を阻む。フラワー王国の個性豊かな敵キャラクターをご紹介。~その1~【ワンダーの世界へ Vol.13】|publisher=Nintendo Official Site|language=ja|accessdate=11 Jul. 2024}}</ref> |
| | |colspan=2|[[Another Uncharted Area: Swaying Ruins]] |
| | |{{chart icon|new}} |
| |- | | |- |
| !width=16% style="background:#BDDAE5;"|15. [[Mushroom Kingdom (Super Mario Odyssey)|Mushroom Kingdom]] <small>([[Peach's Castle]])</small><br>{{chart icon|SMO-totalM}}×104 {{chart icon|SMO-totalC}}×100 {{chart icon|SMO-totalF}}×5 {{chart icon|SMO-totalB}}×6
| | |style="background:white"|[[File:MechakoopaSMBW.png|100x100px]]<br>[[Mechakoopa]] |
| !colspan="2"width=34% style="background:#BDDAE5;"|Power Moons
| | |align=left|Mechanical Koopas with keys on their backs. |
| | |colspan=2|[[Petal Isles Flying Battleship]] |
| | |— |
| |- | | |- |
| |rowspan="5"align=center style="background:#FFFFFF"|[[File:Peach's Castle side view.png|200x200px]] | | |style="background:white"|[[File:Flying Mechakoopa.png|100x100px]]<br>[[Flying Mechakoopa]] |
| |{{chart icon|SMO-MoonMushroom}} Perched on the Castle Roof | | |align=left|Airborne Mechakoopas. They ascend from the bottom screen until they match Mario's position, then directly pursue him. Flying Mechakoopas conduct nearby electricity and make them briefly damaging to touch. Stomping them makes them collapse on the ground and usable as a projectile, like their grounded counterparts. |
| |{{chart icon|SMO-MoonMushroom}} Pops Out of the Tail | | |[[Deep Magma Bog Flying Battleship]] |
| | |[[High-Voltage Gauntlet]] |
| | |{{chart icon|new}} |
| |- | | |- |
| |{{chart icon|SMO-MoonMushroom}} Caught Hopping at Peach's Castle! | | |style="background:white"|[[File:Taily.png|100x100px]]<br>[[Taily]] |
| |{{chart icon|SMO-MoonMushroom}} Gardening for Toad: Garden Seed | | |align=left|{{wp|Pitcher plant}} enemies that stand on the ceiling with tail-like vines hanging down. Tailys periodically release spiked fruits that damage Mario on contact. Mario can be defeat them when pulling their vines, or by striking them with in his [[Drill Mario|Drill form]]. In one particular course, yellow, red, and blue Tailys appear. |
| | |[[Taily's Toxic Pond]] |
| | |[[KO Arena Fungi Funk]] |
| | |{{chart icon|new}} |
| |- | | |- |
| |{{chart icon|SMO-MoonMushroom}} Gardening for Toad: Field Seed | | |style="background:white"|[[File:Boo SMBW.png|100x100px]]<br>[[Boo]] |
| |{{chart icon|SMO-MoonMushroom}} Gardening for Toad: Pasture Seed | | |align=left|Ghostly enemies that only follow players that are facing away from them, and stop when looked at. |
| | |[[Light-Switch Mansion]] |
| | |[[KO Arena Fungi Funk]] |
| | |— |
| |- | | |- |
| |{{chart icon|SMO-MoonMushroom}} Gardening for Toad: Lake Seed | | |style="background:white"|[[File:SMBW King Boo.png|75px]]<br>[[King Boo]] |
| |{{chart icon|SMO-MoonMushroom}} Grow a Flower Garden | | |align=left|The king of Boos. In this game, King Boo is nearly the whole height of the slowly as the camera follows him, similar to a [[Boohemoth]] from ''[[New Super Mario Bros. 2]]''. |
| | |[[Light-Switch Mansion]] |
| | |[[The Final Battle! Bowser's Rage Stage]] |
| | |— |
| |- | | |- |
| |{{chart icon|SMO-MoonMushroom}} Mushroom Kingdom Timer Challenge | | |style="background:white"|[[File:SMBW Screenshot Door Enemy.png|100x100px]]<br>[[Noknok]] |
| |{{chart icon|SMO-MoonMushroom}} ''[[List of Power Moons in the Mushroom Kingdom|Click here for the remaining moons...]]'' | | |align=left|Monsters disguised as normal [[Warp Door|door]]s. They expose themselves when Mario tries to open them, an action accompanied by a fearful scream. Noknoks give chase once expose. |
| | |[[Light-Switch Mansion]] |
| | |[[The Final Battle! Bowser's Rage Stage]] |
| | |{{chart icon|new}} |
| |- | | |- |
| |colspan="3"align=center|TBW<br>'''Unlock criterion:''' complete "Bowser's Moon Wedding" | | |style="background:white"|[[File:SMBW Screenshot Wubba.png|100x100px]]<br>[[Wubba]] |
| | |align=left|Underground slimes. Wubbas slide back and forth and swim through larger bodies of goo. Some occur clinging to ceilings and walls. Few have coins in their bodies. Mario [[Wubba Mario|transforms into a Wubba]] during certain Wonder Effects. |
| | |[[An Uncharted Area: Wubba Ruins]] |
| | |[[KO Arena Fungi Funk]] |
| | |{{chart icon|new}} |
| |- | | |- |
| !width=16% style="background:#BDDAE5;"|16. [[Dark Side]] <small>(Rabbit Ridge)</small><br>{{chart icon|SMO-totalM}}×26 {{chart icon|SMO-totalF}}×1 {{chart icon|SMO-totalB}}×5
| | |style="background:white"|[[File:WingChomps.png|100x100px]]<br>[[Gnawsher]] (Black) |
| !colspan="2"width=34% style="background:#BDDAE5;"|Objectives and Power Moons
| | |align=left|Winged [[Chain Chomp|Chomp]]-like enemies with golden eyes and teeth that chomp through blocks. |
| | |[[Gnawsher Lair]] |
| | |[[The Final Test Wonder Gauntlet]] |
| | |{{chart icon|new}} |
| |- | | |- |
| |rowspan="5"align=center style="background:#FFFFFF"|[[File:DarkSide SMO.png|200x200px]] | | |style="background:white"|[[File:RedGnawsher.png|100x100px]]<br>Gnawsher (Red) |
| |{{chart icon|SMO-MoonM}} [[Arrival at Rabbit Ridge!]] | | |align=left|TBW |
| |{{chart icon|SMO-Moon}} Captain Toad on the Dark Side! | | |[[Gnawsher Lair]] |
| | |[[KO Arena Magma Flare-Up]] |
| | |{{chart icon|new}} |
| |- | | |- |
| |{{chart icon|SMO-Moon}} Breakdown Road: Hurry! | | |style="background:white"|[[File:MawmawIdle.jpg|100x100px]]<br>[[Maw-Maw]] |
| |{{chart icon|SMO-Moon}} Breakdown Road: Final Challenge! | | |align=left|{{wp|Giant salamander}} enemies that chase and eat anything and everything in their path, even other enemies. After chasing for a period of time, they become exhausted and stop. |
| | |[[Maw-Maw Mouthful]] |
| | |[[The Final Test Wonder Gauntlet]] |
| | |{{chart icon|new}} |
| |- | | |- |
| |{{chart icon|SMO-Moon}} Invisible Road: Rush! | | |style="background:white"|[[File:Rrrumba.png|100x100px]]<br>[[Rrrumba]] |
| |{{chart icon|SMO-Moon}} Invisible Road: Secret! | | |align=left|Little {{wp|Armadillidiidae|pillbug}}-like creatures in breakable [[boulder]]-like shells. They roll at Mario when he is near, and also rolls down slopes. |
| | |colspan=2|[[Where the Rrrumbas Rule]] |
| | |{{chart icon|new}} |
| |- | | |- |
| |{{chart icon|SMO-Moon}} Vanishing Road Rush | | |style="background:white"|[[File:SMBW Artwork Raargh.png|100x100px]]<br>[[Raargh]] |
| |{{chart icon|SMO-Moon}} Vanishing Road Challenge | | |align=left|Maned [[Blargg]]s that emerge from walls and ceilings. They roar and fling themselves in a straight line when Mario is in their line of sight. Raarghs fall apart when they collide with the opposing terrain, but new ones emerge to take their place after a few seconds. Raarghs are large and often the same width as the corridors in which they are encountered, making them difficult to avoid. |
| | |colspan=2|[[Raarghs in the Ruins]] |
| | |{{chart icon|new}} |
| |- | | |- |
| |{{chart icon|SMO-Moon}} Yoshi Under Siege | | |style="background:white"|[[File:SMBW Screenshot Lava Bubble.png|100x100px]]<br>[[Lava Bubble]] |
| |{{chart icon|SMO-Moon}} ''[[List of Power Moons in the Dark Side|Click here for the remaining moons...]]''
| | |align=left|Incandescent drops of [[lava]] that leap vertically from greater magma pools. Direct contact damages Mario. |
| |-
| | |colspan=2|[[Pull, Turn, Burn]] |
| |colspan="3"align=center|TBW<br>'''Unlock criteria:''' complete "Bowser's Moon Wedding" and accumulate 250 Power Stars
| | |— |
| |-
| |
| !width=16% style="background:#BDDAE5;"|17. [[Darker Side]] <small>(Culmina Crater)</small><br>{{chart icon|SMO-totalM}}×3 {{chart icon|SMO-totalF}}×1
| |
| !colspan="2"width=34% style="background:#BDDAE5;"|Objective
| |
| |-
| |
| |rowspan="1"align=center style="background:#FFFFFF"|[[File:DarkerSide.png|200x200px]]
| |
| |colspan="2"|{{chart icon|SMO-MoonM}} [[Long Journey's End]]
| |
| |-
| |
| |colspan="3"align=center|TBW<br>'''Unlock criteria:''' complete "Bowser's Moon Wedding" and accumulate 500 Power Stars
| |
| |}
| |
| </center>
| |
| | |
| ===2D Areas===
| |
| (mention [[gravity field]]s.)
| |
| | |
| ===The ''Odyssey''===
| |
| {{main|Odyssey}}
| |
| The game's main form of transportation that transports the player to the different kingdoms. During the game, a certain number of Power Moons is required to power up the Odyssey, unlocking the next kingdom with the exception of the Cap Kingdom, the Cascade Kingdom, and the Mushroom Kingdom. The Odyssey can be entered by entering a door, by entering an exhaust pipe like a Warp Pipe on the back of the Odyssey, and by ground-pounding a panel on the top of the Odyssey. Inside the Odyssey is a closet where the player can change their clothes, a chair that the player can sit on, and a bed that the player can nap on. The Odyssey can also be decorated on the inside and outside with decorations and souvenirs that can be bought at Crazy Cap locations. The Odyssey also contains a [[Checkpoint Flag]].
| |
| | |
| ===Crazy Cap===
| |
| {{main|Crazy Cap}}
| |
| | |
| ===Moon Rocks===
| |
| | |
| ==Characters==
| |
| ===Playable characters===
| |
| {|width=100% cellspacing=0 border=1 cellpadding=3 style="border-collapse:collapse;background:#f5f5f5"
| |
| |-style="background:#FF2400;color:white;"
| |
| !width=12%|Name
| |
| !Description
| |
| |-
| |
| |align=center style="background:#f4a9ae"|[[File:SMO Art - Mario.png|100px]]<br>'''[[Mario]]'''
| |
| |style="background:#ffe4e1"|The hero of the [[Mushroom Kingdom]] and the game's protagonist. ''Super Mario Odyssey'' has Mario going on a world voyage to stop the forced marital union between [[Princess Peach]] and [[Bowser]]. Considered a return to form, Mario's advanced movement options from ''[[Super Mario 64]]'' and ''[[Super Mario Sunshine]]'' return alongside completely new abilities. Many of these involve his new traveling companion, Cappy.
| |
| |-
| |
| |align=center style="background:#6fc8cc"|[[File:SMO Art - E3 Char4.png|100px]]<br>'''[[Cappy]]'''
| |
| |style="background:#c7e9ea"|A white [[Bonneter]] that resembles a top hat. He joins Mario on his journey to help rescue his sister Tiara, who was also kidnapped by Bowser. Cappy takes on the form of [[Mario Cap|Mario's cap]] during the game and can be tossed at characters and objects, allowing Mario to temporarily "[[capture]]" their form. In multiplayer, the second player controls Cappy while the first controls Mario directly, somewhat similar to how multiplayer worked with the [[Co-Star Luma]] in ''[[Super Mario Galaxy 2]]''.
| |
| |}
| |
| | |
| ===Non-playable characters===
| |
| [[File:SMO Screenshot NPCs.jpg|thumb|250px|Various characters together in the Moon Kingdom. A member from each major community is present.]]
| |
| Most of the kingdoms are inhabited by people that are suited to their land's topography. Outside of dialogue, the culture, history, and nature of these people can be reviewed on their respective kingdom's brochure. In the kingdoms ransacked by Bowser, the stolen wedding article is usually a {{wp|national treasure}} and the theft makes the people distressed. Many are forced to attend Bowser's wedding in the [[Moon Kingdom]]. After [[Princess Peach]] is rescued and the wedding articles are returned to their respective lands, many of these people can be found outside of their own kingdom, exploring the world. Generally, if a character is wearing a hat, it cannot be [[capture]]d, but a few species include both hatted and hatless individuals. Unlike enemies, [[Mario]] can [[jump]] on characters without harming them, and the ones wearing hats twirl when struck by [[Cappy]].
| |
| | |
| ''Super Mario Odyssey'' is the first ''[[Super Mario (series)|Super Mario]]'' game to include more than ten different non-playable characters since ''[[Super Mario Galaxy 2]]'' ([[List of games by date#2010|2010]]), and most of them are wholly new. In addition to the characters listed below, an [[8-bit character]] of [[Rosalina]] is in [[Honeylune Ridge]] and [[Rabbit Ridge]]. There are outfits sold at the [[Crazy Cap]] based on [[Waluigi]], [[Diddy Kong]], and [[Wario]]. Several shops and streets in [[New Donk City]] are named after characters from the ''[[Donkey Kong Country (series)|Donkey Kong Country]]'' series. [[Mr. Game & Watch]] appears on the minigame icons.
| |
| | |
| {|width=100% cellspacing=0 border=1 cellpadding=3 style="border-collapse:collapse;background:#f5f5f5"
| |
| |-style="background:#FF2400;color:white;"
| |
| !width=12%|Name
| |
| !Description
| |
| !width=15%|Locations
| |
| |-
| |
| |align=center style="background:#FFFFFF"|[[File:SMO Art - Wedding Peach.png|100x100px]]<br>[[Princess Peach]]
| |
| |The ruler of the Mushroom Kingdom. She is kidnapped by [[Bowser]] who aims to {{wp|Forced marriage|force her into marriage}}. The game's story revolves around [[Mario]]'s quest to stop the marriage and save her. The two are [[Princess Peach#Friends and love interests|very close]]. Once rescued, Mario attempts to {{wp|Marriage proposal|propose}} to her himself before being interrupted by Bowser, leading to both being rejected. After returning home, she gifts hats to all of her subjects and pursues her own worldwide voyage with Tiara. She can be found in revisited kingdom, and gives Mario a [[Power Moon]] once spoken to.
| |
| |align=center|All kingdoms except the [[Dark Side]] and [[Darker Side]]
| |
| |-
| |
| |align=center style="background:#FFFFFF"|[[File:SMO Artwork Tiara.png|100x100px]]<br>[[Tiara]]
| |
| |[[Cappy]]'s younger sister. She is kidnapped by Bowser and forced to serve as Peach's bridal veil. She develops a bond with Peach while captured, and they decide to travel the world together once rescued.
| |
| |align=center|All kingdoms except the [[Dark Side]] and [[Darker Side]]
| |
| |-
| |
| |align=center style="background:#FFFFFF"|[[File:SMO Artwork Bonneter (Male).png|75x75px]][[File:SMO Artwork Bonneter (Female).png|75x75px]]<br>[[Bonneter]]s
| |
| |The dapper people of [[Cap Kingdom|Bonneton]]. Much of their home is ransacked by Bowser while he was looking for an appropriate bridal veil. Bonneters are capable of [[capture|controlling other beings]] and [[Bonneter biologist|at least one]] takes interest in the physiology of other creatures. They can transform into hats and will use this ability to hide on other people's heads. Bonneters are otherwise known for building and living in hat-shaped [[airship]]s. They are similar to {{wp|tsukumogami}}.
| |
| |align=center|[[Cap Kingdom]], [[Moon Kingdom]], [[Darker Side]]{{footnote|main|A}}
| |
| |-
| |
| |align=center style="background:#FFFFFF"|[[File:SMO Artwork Frog.png|100x100px]]<br>[[Frog]]s {{chart icon|SMO-capture}}
| |
| |Frogs are fast swimmers and capable of reaching great heights by [[jump]]ing. They wear hats as part of their defense strategy, which must be knocked-off to be [[capture]]d. The sole frog found on [[Moon Kingdom|Honeylune Ridge]] was brought to the [[moon]] by the first moonwalkers.
| |
| |align=center|[[Cap Kingdom]], [[Moon Kingdom]], [[Darker Side]]
| |
| |-
| |
| |align=center style="background:#FFFFFF"|[[File:SMO Artwork Hint Toad.png|100x100px]]<br>[[Hint Toad]]
| |
| |The bespectacled member of the [[Toad Brigade]]. If given 50 [[coin]]s, Hint Toad marks the location of an uncollected [[Power Moon]] on the Travel Map. He is always located near the ''[[Odyssey]]''{{'}}s landing site within a kingdom, in close proximity to Uncle amiibo and Talkatoo.
| |
| |align=center|All kingdoms except the [[Darker Side]]
| |
| |-
| |
| |align=center style="background:#FFFFFF"|[[File:SMO Artwork Uncle amiibo.png|100x100px]]<br>[[Uncle amiibo]]
| |
| |Uncle amiibo is a robot that responds to scanned [[amiibo]]. For most figures, he will send them out into a visited kingdom to track down the location of an uncollected Power Moon. Some instead cause Uncle amiibo to gift him [[Crazy Cap#Luigi Cap|clothing]] based on the figure. Unlike most characters, Uncle amiibo can be stood on like a [[platform]] and does not cower when an [[#enemies and obstalces|enemy]] is nearby. He calls Mario "sport."
| |
| |align=center|All kingdoms except the [[Darker Side]]
| |
| |-
| |
| |align=center style="background:#FFFFFF"|[[File:SMO Artwork Talkatoo.png|100x100px]]<br>[[Talkatoo]]
| |
| |A talking parrot. It provides the names for uncompleted [[mission]]s, but only up to three at a time. Talkatoo squawks in fear when an enemy is nearby and will not provide hints when prompted.
| |
| |align=center|All kingdoms except the [[Darker Side]]
| |
| |-
| |
| |align=center style="background:#FFFFFF"|[[File:SMO Artwork Tostarenan (Blue).png|75x75px]][[File:SMO Artwork Tostarenan (Green).png|75x75px]]<br>[[Tostarenan]]s
| |
| |The music-loving people of [[Sand Kingdom|Tostarena]]. Bowser indirectly burdens them with a cold snap when he steals their [[Binding Band]]. Tostarenans look like {{wp|calavera}}s and wear sombreros to keep the sun out of their eyes, which they also sell to tourists. Some dance to the rhythm of nearby music, shaking their maracas. [[Slots]] are ran by Tosterenans across several kingdoms. They are related to the [[Chincho]] enemies that roam the desert at night. The [[Desert Wanderer]] is a Tostarenan.
| |
| |align=center|[[Cascade Kingdom]],{{footnote|main|C}} [[Sand Kingdom]], [[Metro Kingdom]], [[Luncheon Kingdom]], [[Moon Kingdom]], [[Mushroom Kingdom (Super Mario Odyssey)|Mushroom Kingdom]], [[Darker Side]]{{footnote|main|A}}
| |
| |-
| |
| |align=center style="background:#FFFFFF"|[[File:SMO Artwork Sheep.png|100x100px]]<br>[[Sheep]]
| |
| |Sheep try to flee when approached. Striking one causes it to bounce into the air and direct it towards a desired direction. Mario occasionally encounters herders that have lost their sheep. They award him a Power Moon for retrieving them all.
| |
| |align=center|[[Sand Kingdom]], [[Wooded Kingdom]],{{footnote|main|D}} [[Mushroom Kingdom (Super Mario Odyssey)|Mushroom Kingdom]]
| |
| |-
| |
| |align=center style="background:#FFFFFF"|[[File:SMO Artwork Moe-Eye.png|100x100px]]<br>[[Moe-Eye]]s {{chart icon|SMO-capture}}
| |
| |Fleet-footed beings that resemble {{wp|Moai|moai statues}}. They have inhabited Tostarena since ancient times. Moe-Eyes do not speak and are timid by nature. They run away if approached. Pressing {{button|switch|Y}} draws the sunglasses over the eyes of a captured Moe-Eye, allowing Mario to see invisible footpaths and platforms. However, it moves very slowly in this state.
| |
| |align=center|[[Sand Kingdom]], [[Moon Kingdom]]
| |
| |-
| |
| |align=center style="background:#FFFFFF"|[[File:SMO Artwork Sphynx.png|100x100px]]<br>[[Sphynx]]
| |
| |The Sphynx is an obstructive figure who gives a quiz when prompted. If all of its questions are answered correctly, it grants Mario access to a hidden room. Typically reserved and posh, the Sphynx becomes progressively snarky as Mario answers questions correctly and will mock him when incorrect. Completing every quiz unlocks the final one of [[Darker Side|Culmina Crater]], in which it is revealed the Sphynx asks questions because it enjoys Mario and Cappy's company.
| |
| |align=center|[[Cascade Kingdom]],{{footnote|main|D}} [[Sand Kingdom]], [[Wooded Kingdom]], [[Seaside Kingdom]], [[Moon Kingdom]], [[Darker Side]]
| |
| |-
| |
| |align=center style="background:#FFFFFF"|[[File:SMO Artwork Jaxi.png|100x100px]]<br>[[Jaxi]]
| |
| |A cat-like beast that can be ridden across Tostarena. It allows Mario to ride it after paying a one-time fee of 30 coins. The Jaxi is very fast and nearly indestructible, but it is difficult to turn or stop. It can run across [[poison (obstacle)|poison]] and send enemies flying. It is implied that the [[Jaxi Statue|statues]] around Tostarena Ruins are Jaxis themselves in an immobile state, and that Jaxis can shift between these states at will.
| |
| |align=center|[[Sand Kingdom]]
| |
| |-
| |
| |align=center style="background:#FFFFFF"|[[File:SMO Glydon Artwork.png|100x100px]]<br>[[Glydon]] {{chart icon|SMO-capture}}
| |
| |Glydon is a world traveler similar to a {{wp|Draco (lizard)|draco lizard}}, seeking great heights to glide from. When captured, Glydon can be used like a {{wp|paraglider}} to glide across great distances. Shaking the controller keeps him airborne longer. He does not sink into [[quicksand]].
| |
| |align=center|[[Sand Kingdom]], [[Wooded Kingdom]], [[Lost Kingdom]], [[Seaside Kingdom]], [[Darker Side]]
| |
| |-
| |
| |align=center style="background:#FFFFFF"|[[File:SandKingdomKoopaSMO.jpg|100x100px]][[File:SMO Screenshot Koopa (Trace-Walking) 3.jpg|100x100px]]<br>[[Koopa Troopa|Koopa]]s (Trace-Walking)
| |
| |Koopas are turtle-like creatures. Some host a game called [[Koopa Trace-Walking|Trace-Walking]]. They reward Mario with a Power Moon if he successfully follows the disappearing route they lay out on the surrounding ground. Each Trace-Walking host is a different color and wears a hat tied to the visited kingdom. Though members of the [[Koopa (species)|Koopa family]], they are harmless and seem to be unaffiliated with Bowser.
| |
| |align=center|[[Sand Kingdom]], [[Snow Kingdom]], [[Moon Kingdom]]
| |
| |-
| |
| |align=center style="background:#FFFFFF"|[[File:SMO Artwork Koopa (Freerunning).png|100x100px]]<br>Koopas ([[Koopa Freerunning|Freerunning]])
| |
| |A quartet of Koopas called the [[Roving Racers]] that challenge Mario to a race. If victorious, he is awarded a Power Moon. Each Koopa is a different color and progress through the kingdom differently from one another. After Mario wins a kingdom's Regular Cup and breaks the kingdom's Moon Rock, the purple Koopa is replaced with a much more challenging gold one for the Master Cup.
| |
| |align=center|All kingdoms except the [[Dark Side]] and [[Darker Side]]
| |
| |-
| |
| |align=center style="background:#FFFFFF"|[[File:SMO Artwork Lakitu.png|100x100px]]<br>[[Lakitu]]s {{chart icon|SMO-capture}}
| |
| |[[Lakitu's Cloud|Cloud]]-riding Koopas that like fishing. Capturing one allows Mario to fish for [[Cheep Cheep]]s and other creatures in bodies of water.
| |
| |align=center|[[Sand Kingdom]], [[Lake Kingdom]], [[Snow Kingdom]], [[Bowser's Kingdom]]
| |
| |-
| |
| |align=center style="background:#FFFFFF"|[[File:SMO Artwork Goombette.png|100x100px]]<br>[[Goombette]]s
| |
| |Pink [[Goomba]]s in {{wp|mushroom hat}}s. They flee if Mario comes near, but are affectionate if approached as a captured Goomba. Doing so awards the player a Power Moon.
| |
| |align=center|[[Sand Kingdom]], [[Lake Kingdom]], [[Wooded Kingdom]], [[Seaside Kingdom]], [[Luncheon Kingdom]], [[Mushroom Kingdom (Super Mario Odyssey)|Mushroom Kingdom]]
| |
| |-
| |
| |align=center style="background:#FFFFFF"|[[File:SMO Artwork Lochlady (Blue).png|100x100px]]<br>[[Lochlady|Lochladies]]
| |
| |{{wp|Merfolk}} that live in [[Lake Kingdom|Lake Lamode]]. They are world-renowned fashion designers. Their treasured [[Lochlady Dress]] is stolen by Bowser. Lochladies are of a gentle nature. Many can be can found swimming underwater. A trio of beret-wearing Lochladies called the [[Style Sisters]] give Mario Power Moons when he wears specific outfits for them.
| |
| |align=center|[[Lake Kingdom]], [[Moon Kingdom]], [[Darker Side]]{{footnote|main|A}}
| |
| |-
| |
| |align=center style="background:#FFFFFF"|[[File:SMODorrieModel.png|100x100px]]<br>[[Dorrie]]s
| |
| |Gentle giants that resemble {{wp|plesiosaur}}s. In most contexts, Dorries swim with their backs above the water and can be stood on like platforms. Most Dorries are blue, but there are yellow and purple individuals in [[Bubblaine]] that bear the kingdom's Crazy Cap shops. Dorries speak in a distinct language that sounds similar to whale songs.
| |
| |align=center|[[Lake Kingdom]], [[Seaside Kingdom]], [[Mushroom Kingdom (Super Mario Odyssey)|Mushroom Kingdom]], [[Darker Side]]
| |
| |-
| |
| |align=center style="background:#FFFFFF"|[[File:SMO Artwork Steam Gardener.png|100x100px]]<br>[[Steam Gardener]]s
| |
| |Robots that tend to the [[flower (environmental object)|flowers]] of the [[Wooded Kingdom|Steam Gardens]]. Their [[Soirée Bouquet]]s are harvested by [[Torkdrift]] for Bowser's wedding. Most Steam Gardeners are yellow and spray water, but a few are silver and dispense [[Seed (Super Mario Odyssey)|giant seed]]s when [[Cap Throw|struck]]. Despite being robots, Steam Gardeners are emotive, can function underwater, and are sensitive to the cold. [[Small bird]]s often roost on their heads. They rely on moon-fueld charging stations for energy and their exhaust comes out as harmless water vapor.
| |
| |align=center|[[Wooded Kingdom]], [[Moon Kingdom]], [[Darker Side]]{{footnote|main|A}}
| |
| |-
| |
| |align=center style="background:#FFFFFF"|[[File:SMO Artwork Rabbit.png|100x100px]]<br>[[Rabbit]]s
| |
| |Rabbits run away from Mario, but they can be slowed down and approached if hit by Cappy. They give Mario a Power Moon if he catches up to them. Only the gray-colored, earthbound rabbits run from Mario. The many white-colored ones of [[Dark Side|Rabbit Ridge]] do not.
| |
| |align=center|All kingdoms except the [[Lake Kingdom]] and [[Darker Side]]
| |
| |-
| |
| |align=center style="background:#FFFFFF"|[[File:SMO Artwork New Donker (Male).png|100x100px]][[File:SMO Artwork New Donker (Female).png|100x100px]]<br>[[New Donker]]s {{chart icon|SMO-capture}}
| |
| |The denizens of [[New Donk City]]. A [[Mechawiggler]] is draining their city of its power when first encountered, causing a citywide blackout. New Donkers are business-oriented and drably clothed, contributing to the perception that they are too serious. However, New Donkers are kind when spoken to and known to throw festivals. A pair host the [[Jump-Rope Challenge]], and the hatless blonde ones can be captured to play with an [[RC Car]]. The Crazy Cap franchise was established by New Donkers.
| |
| |align=center|[[Cascade Kingdom]],{{footnote|main|C}} [[Sand Kingdom]], [[Metro Kingdom]], [[Bowser's Kingdom]], [[Moon Kingdom]], [[Mushroom Kingdom (Super Mario Odyssey)|Mushroom Kingdom]], [[Darker Side]]{{footnote|main|A}}
| |
| |-
| |
| |align=center style="background:#FFFFFF"|[[File:SMO Art - Pauline.png|100x100px]]<br>[[Pauline|Mayor Pauline]]
| |
| |The mayor of New Donk City and an old friend of Mario's. After defeating the Mechawiggler, she puts on a [[A Traditional Festival!|rooftop concert]] in commemoration of his heroism. Pauline is passionate about music and is the {{wp|Virtual band|singer}} behind "[[Jump Up, Super Star!]]" She is a popular figure in New Donk City, with her profile etched into the city's [[regional coin]] and likeness displayed around the city. A park is named after her. Women wear a hat designed after her own.<ref>{{cite|quote=Isn't my hat just fabulous?! I model my style after {{chart icon|SMO-Pauline}} Mayor Pauline!|author=[[New Donker]] in the [[Metro Kingdom]]|title=''[[Super Mario Odyssey]]'' by [[Nintendo EPD]]|format=North American Localization|date=2017|publisher=[[Nintendo of America]]}}</ref> During "[[List of Power Moons in the Metro Kingdom|A Request from the Mayor]]", Pauline speaks of her traumatic [[Donkey Kong (game)#Story|encounter]] with [[Donkey Kong]], and how the experience made her who she is today.
| |
| |align=center|[[Metro Kingdom]], [[Moon Kingdom]], [[Darker Side]]
| |
| |-
| |
| |align=center style="background:#FFFFFF"|[[File:SMO Artwork Band.png|100x100px]]<br>[[Band (Super Mario Odyssey)|Band]]
| |
| |Mayor Pauline and the four backup musicians recruited by Mario for the New Donk City Festival. These musicians are a bassist, a guitarist, a drummer, and a trumpeter. Each band member awards Mario a Power Star when initially encountered.
| |
| |align=center|[[Metro Kingdom]], [[Darker Side]]
| |
| |-
| |
| |align=center style="background:#FFFFFF"|[[File:SMO Artwork Shiverian.png|100x100px]]<br>[[Shiverian]]s
| |
| |The seal-like people of [[Shiveria]]. Bowser has stolen their famous [[Frost-Frosted Cake]] for his wedding. They have warm dispositions and enjoy baking. Some affectionately refer to Mario as "mustache man." Despite being of a cold-adapted arctic species, Shiverians visit other kingdoms without issue once Peach has been rescued, including Tostarena.
| |
| |align=center|[[Snow Kingdom]], [[Moon Kingdom]], [[Darker Side]]{{footnote|main|A}}
| |
| |-
| |
| |align=center style="background:#FFFFFF"|[[File:SMO Artwork Shiverian Racer.png|100x100px]]<br>[[Shiverian Racer]]s {{chart icon|SMO-capture}}
| |
| |These Shiverians compete in the [[Bound Bowl Grand Prix]], a race where they bound along a circuit. Most Shiverian Racers are capped, but one self-doubting individual is not and can be captured. This allows Mario to compete in the grand prix. There are six competing Shiverian Racers, each one a different color and speed.
| |
| |align=center|[[Sand Kingdom]],{{footnote|main|E}} [[Snow Kingdom]]
| |
| |-
| |
| |align=center style="background:#FFFFFF"|[[File:SMO Artwork Shiverian Elder.png|100x100px]]<br>[[Shiverian Elder]]
| |
| |The patriarch of Shiveria, and the ultimate judge of the Bound Bowl Grand Prix. He is the one who awards the winner. In Shiverian culture, the Shiverian Elder is the only one permitted to make the Frost-Frosted Cake.
| |
| |align=center|[[Snow Kingdom]]
| |
| |-
| |
| |align=center style="background:#FFFFFF"|[[File:SMO Artwork Bubblainian (Male).png|75x75px]][[File:SMO Artwork Bubblainian (Female).png|75x75px]]<br>[[Bubblainian]]s
| |
| |Snail-like people that run a seaside resort in Bubblaine. When first encountered, the boss [[Mollusque-Lanceur]] is drinking all of their [[Sparkle Water]], much to their dismay. Bubblainians are carefree and enjoy relaxation. They retract into their shells when jumped on or approached by an enemy. They can be encountered "breathing" freshwater, and can extend their eyestalks like scopes.
| |
| |align=center|[[Seaside Kingdom]], [[Moon Kingdom]], [[Darker Side]]{{footnote|main|A}}
| |
| |-
| |
| |align=center style="background:#FFFFFF"|[[File:SMO Artwork Coach.png|100x100px]]<br>[[Coach (Super Mario Odyssey)|Coach]]
| |
| |The [[Beach Volleyball (Super Mario Odyssey)|Beach Volleyball]] coach of Bubblaine. He encourages Mario to play when he approaches the court, and awards him Power Stars for keeping pace with him. Unlike other Bubblainians, the coach does not retract into his shell when Mario jumps on him, instead serving him like a volleyball. He calls Mario "volley bro."
| |
| |align=center|[[Seaside Kingdom]]
| |
| |-
| |
| |align=center style="background:#FFFFFF"|[[File:SMO Artwork Dog.png|100x100px]]<br>[[Nintendog|Dog]]
| |
| |The dog only appears in a visited kingdom when its boss has been defeated. It leads Mario to [[glowing spot]]s and sniffs out Power Moons for him. It otherwise follows Mario and barks for him if he crosses a barrier that it cannot, such as a body of water. It cannot be harmed by enemies. The dog can play fetch with Mario, catching and returning Cappy after a Cap Throw, and occasionally appears inside the ''Odyssey''. It resembles a {{wp|Shiba Inu}}.
| |
| |align=center|[[Sand Kingdom]], [[Metro Kingdom]], [[Seaside Kingdom]], [[Moon Kingdom]], [[Mushroom Kingdom (Super Mario Odyssey)|Mushroom Kingdom]], ''[[Odyssey]]''
| |
| |-
| |
| |align=center style="background:#FFFFFF"|[[File:SMO Artwork Volbonans.png|100x100px]]<br>[[Volbonan]]s {{chart icon|SMO-capture}}
| |
| |Fork people that live at the base of [[Mount Volbono]]. They are world-renowned for their cooking, which is made out of the giant vegetables, salts, and [[Meat (object)|meats]] that surround the volcano. Their most important dish, the [[Stupendous Stew]], is appropriated by Bowser and monopolized by [[Cookatiel]]. It is the main fixture of their annual Cooking Carnival, during which people from around the world are invited to try their stew. Most Volbonans sleep embedded into walls, suspended above ground. They can be captured in this state, and used to fling Mario across great distances like [[Pole (bollard)|pole]]s. Some actively encourage Mario to do this. Volbonans apparently have ears.<ref>{{cite|quote=That brook is sweet on the ears.|author=[[Volbonan]] in the [[Mushroom Kingdom (Super Mario Odyssey)|Mushroom Kingdom]]|title=''[[Super Mario Odyssey]]'' by [[Nintendo EPD]]|format=North American Localization|date=2017|publisher=[[Nintendo of America]]}}</ref>
| |
| |align=center|[[Luncheon Kingdom]], [[Moon Kingdom]], [[Darker Side]]{{footnote|main|A}}
| |
| |-
| |
| |align=center style="background:#FFFFFF"|[[File:SMO Poochy.png|100x100px]]<br>[[Poochy]]
| |
| |A spotted creature from [[Yoshi's Island (location)|Yoshi's Island]]. Poochy largely only appears in [[Hint Art]], pictured near glowing spots. He makes a physical appearance swimming in the poisonous pond of [[Bowser's Castle]]. Fishing him up as a captured Lakitu awards Mario a Power Moon.
| |
| |align=center|[[Bowser's Kingdom]]
| |
| |-
| |
| |align=center style="background:#FFFFFF"|[[File:SMO Artwork Captain Toad.png|100x100px]]<br>[[Captain Toad]]
| |
| |The captain of the Toad Brigade. Captain Toad is traveling the world concurrently with Mario and he can be found in most kingdoms. He is usually hidden and gifts Mario a Power Moon when found.
| |
| |align=center|[[Cap Kingdom]], [[Cascade Kingdom]], [[Sand Kingdom]], [[Lake Kingdom]], [[Wooded Kingdom]], [[Lost Kingdom]], [[Metro Kingdom]], [[Seaside Kingdom]], [[Snow Kingdom]], [[Luncheon Kingdom]], [[Bowser's Kingdom]], [[Moon Kingdom]], [[Mushroom Kingdom (Super Mario Odyssey)|Mushroom Kingdom]], [[Dark Side]]
| |
| |-
| |
| |align=center style="background:#FFFFFF"|[[File:SMO Artwork Toad.png|100x100px]][[File:SMO Artwork Banktoad.png|100x100px]]<br>[[Toad (species)|Toad]]s
| |
| |Denizens of the Mushroom Kingdom that come in a variety of colors. Most Toads only appear in other kingdoms after Princess Peach has been rescued. The exception is the Toad Brigade, who makes recurring appearances beforehand. They run a Crazy Cap inside their [[Starshroom]]. Hint Toad, Captain Toad, and Toadette are members of this team. [[Jammin' Toad]] gives Mario a Power Moon if he plays a specific piece from the [[List of Super Mario Odyssey in-game music|Music List]].
| |
| |align=center|[[Lost Kingdom]], [[Metro Kingdom]], [[Bowser's Kingdom]], [[Moon Kingdom]], [[Mushroom Kingdom (Super Mario Odyssey)|Mushroom Kingdom]], [[Dark Side]], [[Darker Side]]{{footnote|main|A}}
| |
| |-
| |
| |align=center style="background:#FFFFFF"|[[File:SMO Artwork Toadette.png|100x100px]]<br>[[Toadette|Archivist Toadette]]
| |
| |The newest member of the Toad Brigade. She keeps records of Mario's feats inside [[Peach's Castle]], and enthusiastically gifts him Power Moons for reaching specific milestones. Most of the listed Power Moons in the Mushroom Kingdom are only obtainable from Toadette.
| |
| |align=center|[[Mushroom Kingdom (Super Mario Odyssey)|Mushroom Kingdom]]
| |
| |-
| |
| |align=center style="background:#FFFFFF"|[[File:SMO Snapshot Yoshi.jpg|100x100px]]<br>[[Yoshi]] {{chart icon|SMO-capture}}
| |
| |Yoshi is a [[dinosaur]]-like creature with a long tongue. He is found inside of an [[Yoshi's Egg|egg]] on the roof of Peach's Castle. Capturing him grants Mario access to unique moves such as the [[Flutter Jump]] and the [[Swallow|ability to swallow enemies]]. Unlike most captures, Mario can still perform many of his usual jumping actions as Yoshi. He has a [[Yoshi's House|house]] on the outskirts of Peach's Castle.
| |
| |align=center|[[Mushroom Kingdom (Super Mario Odyssey)|Mushroom Kingdom]], [[Dark Side]], [[Darker Side]]
| |
| |-
| |
| |align=center style="background:#FFFFFF"|[[File:SMO-Luigi Art.png|100x100px]]<br>[[Luigi]]
| |
| |Mario's younger twin brother and the host of [[Balloon World]]. Luigi initially appears in the Mushroom Kingdom after Princess Peach has been rescued, where he explains the premise of Balloon World when prompted. The more points Mario accumulates in Balloon World, the more balloons show up fastened to Luigi. He responses to his brother in different ways depending on the outfit he is wearing. If Mario is wearing a wedding outfit, Luigi mistakenly believes that he had recently gotten married and expresses dismay that he was not told.
| |
| |align=center|[[Cap Kingdom]], [[Cascade Kingdom]], [[Sand Kingdom]], [[Lake Kingdom]], [[Wooded Kingdom]], [[Lost Kingdom]], [[Metro Kingdom]], [[Snow Kingdom]], [[Luncheon Kingdom]], [[Bowser's Kingdom]], [[Moon Kingdom]], [[Mushroom Kingdom (Super Mario Odyssey)|Mushroom Kingdom]]{{footnote|main|F}}
| |
| |}
| |
| <references group=note/>
| |
| | |
| ==Enemies and obstacles==
| |
| ===New enemies===
| |
| {|width=100% cellspacing=0 border=1 cellpadding=3 style="border-collapse:collapse;background:#FFFFFF"
| |
| |-style="background:#FF2400;color:white;"
| |
| !width=10%|Name
| |
| !Description
| |
| !width=13%|Locations
| |
| !width=6%|Spoils
| |
| |-
| |
| |align=center|[[File:Astro-Lanceur Icon SMO.png|100x100px]]<br>[[Astro-Lanceur]]
| |
| |Octopus enemies found on the [[moon]]. Astro-Lanceurs float above the surface and fire projectile shells from their siphons. [[Ground Pound|Ground-pounding]] the starburst-shaped symbol on one's helmet defeats it. Astro-Lanceurs have an implicit relationship with [[Mollusque-Lanceur]].
| |
| |align=center|[[Moon Kingdom]]
| |
| |align=center|{{chart icon|SMO-Coin}}×8
| |
| |-
| |
| |align=center|[[File:Big Poison Piranha Plant Icon SMO.png|100x100px]]<br>[[Big Poison Piranha Plant]]
| |
| |[[Big Piranha Plant]]s the spit [[Poison (obstacle)|poison]]. The poison pools on the nearby earth like a puddle, making the immediate area more hazardous. [[Cappy]] clears the poisons when tossed. Throwing him directly at a Big Poison Piranha Plant traps him in its mouth, but weighs its head down, leaving it vulnerable to being [[stomp]]ed.
| |
| |align=center|[[Wooded Kingdom]], [[Metro Kingdom]], [[Dark Side]]
| |
| |align=center|{{chart icon|SMO-Coin}}×6<br>{{chart icon|SMO-Moon}}×1
| |
| |-
| |
| |align=center|[[File:SMO Artwork Bitefrost.png|100x100px]]<br>[[Bitefrost]]
| |
| |Icy predators that hide underground and snake their way between raised earth. A silhouette of their face appears below the surface and can be tracked. One rises from the earth and snaps its jaw shut if Mario is standing above its silhouette. Only the bite damages Mario; a Bitefrost can otherwise be stood on like a platform. The ones in the Luncheon Kingdom appear pink from having embedded their bodies with salt instead of snow.
| |
| |align=center|[[Snow Kingdom]], [[Luncheon Kingdom]]
| |
| |align=center|{{chart icon|cross}}
| |
| |-
| |
| |align=center|[[File:SMO Broode's Chain Chomp Capture.png|100x100px]]<br>[[Madame Broode|Broode's Chain Chomp]] {{chart icon|SMO-capture}}
| |
| |[[Madame Broode]]'s pet, a golden [[Big Chain Chomp]] named Chain Chompikins. It snaps at Mario and pulls Madame Broode forward as it does. She also launches it like a {{wp|yo-yo}} to strike Mario. Capturing Broode's Chain Chomp and pulling it back sends launches it into the boss. This is the only way to damage her.
| |
| |align=center|[[Cascade Kingdom]], [[Moon Kingdom]]
| |
| |align=center|None
| |
| |-
| |
| |align=center|[[File:Burrbo Icon SMO.png|100x100px]]<br>[[Burrbo]]
| |
| |Colorful chestnut creatures. They pop out of the ground when Mario draws near and lunge towards him. Burrbos damage Mario on contact, but are defeated when struck by Cappy. They usually occur in groups, and endlessly emerge from the earth if Mario is near.
| |
| |align=center|[[Cascade Kingdom]], [[Metro Kingdom]], [[Seaside Kingdom]], [[Bowser's Kingdom]], [[Mushroom Kingdom (Super Mario Odyssey)|Mushroom Kingdom]], [[Dark Side]], [[Darker Side]]
| |
| |align=center|{{chart icon|SMO-Coin}}×1
| |
| |-
| |
| |align=center|[[File:SMO Artwork Burrbo (Crumbleden).png|100x100px]]<br>Burrbo ([[Ruined Kingdom|Crumbleden]])
| |
| |These Burrbos are embedded into the [[Ruined Dragon]]'s body. They emerge from the top of the dragon's head to defend him from Mario.
| |
| |align=center|[[Ruined Kingdom]], [[Mushroom Kingdom (Super Mario Odyssey)|Mushroom Kingdom]]
| |
| |align=center|{{chart icon|SMO-Coin}}×1
| |
| |-
| |
| |align=center|[[File:Chincho Icon SMO.png|100x100px]]<br>[[Chincho]]
| |
| |Undead [[Tostarenan]]s encountered at night and in dimly lit areas. Chinchos emerge from the ground and pursue Mario on sight. If left unattacked, they retreat back into the ground. Failing certain [[treasure chest]] puzzles causes Chincos to appear. Tossing Cappy briefly stuns a Chincho, but stomping on it defeats it. The Jaxi can defeat hoards of them instantly.
| |
| |align=center|[[Sand Kingdom]], [[Wooded Kingdom]], [[Seaside Kingdom]], [[Ruined Kingdom]], [[Mushroom Kingdom (Super Mario Odyssey)|Mushroom Kingdom]]
| |
| |align=center|{{chart icon|SMO-Coin}}×1
| |
| |-
| |
| |align=center|[[File:Gushen Icon SMO.png|100x100px]]<br>[[Gushen]] {{chart icon|SMO-capture}}
| |
| |A floating octopus enemy that inhabits a [[water]] ball, which it uses as a resource for its surging attack. When captured, Gushens can be used to spray water streams horizontally or vertically, offering powerful boosts of speed. Gushens are also capable of sending multiple water bursts in all directions, damaging surrounding enemies. Their water balls decrease as more water is used, but they can be recharged by coming into contact with a body of water.
| |
| |align=center|[[Sand Kingdom]], [[Seaside Kingdom]], [[Mushroom Kingdom (Super Mario Odyssey)|Mushroom Kingdom]]
| |
| |align=center|{{chart icon|SMO-Coin}}×1
| |
| |-
| |
| |align=center|[[File:SMO Artwork Komboos.png|100x100px]]<br>[[Komboo]]
| |
| |Underwater kelp creatures that rise from the floor of waterbodies. They pursue Mario when he is near. Though defeated when struck by Cappy, Komboos are highly cohesive in most areas and endlessly emerge from the ground, making it easy to be overwhelmed.
| |
| |align=center|[[Lake Kingdom]], [[Seaside Kingdom]]
| |
| |align=center|{{chart icon|SMO-Coin}}×1
| |
| |-
| |
| |align=center|[[File:Magmato Icon SMO.png|100x100px]]<br>[[Magmato]]
| |
| |Rolling tomato enemies that home-in on Mario. Striking one causes it to fall apart into a puddle of molten pulp. A captured [[Lava Bubble]] can swim in these puddles, enabling it to cross large stretches of terrain it normally could not.
| |
| |align=center|[[Luncheon Kingdom]], [[Darker Side]] | |
| |align=center|{{chart icon|SMO-Coin}}×1
| |
| |-
| |
| |align=center|[[File:Moonsnake Icon SMO.png|100x100px]]<br>[[Moonsnake]]
| |
| |A form of life originating from the Moon, resembling a bar of [[Spike Ball]]s rotating around an axis. While in general fixed to one spot, some Moonsnakes can move on predetermined paths. Moonsnakes are indestructible.
| |
| |align=center|[[Seaside Kingdom]], [[Moon Kingdom]], [[Dark Side]], [[Darker Side]]
| |
| |align=center|{{chart icon|cross}}
| |
| |-
| |
| |align=center|[[File:Poison Piranha Plant Icon SMO.png|100x100px]]<br>[[Poison Piranha Plant]] {{chart icon|SMO-capture}}
| |
| |A [[Piranha Plant]] that is able to shoot poison balls, which leave small injurious puddles on the ground. These can be cleaned up with Cappy. Throwing Cappy at one Poison Piranha Plant stuffs the mouth of the enemy and blocks it from spitting poison balls for a short time, enabling Mario to simply kick it and destroy it. Throwing a rock at the Poison Piranha Plant has a similar effect, but it also enables Mario to capture the enemy. While captured, it can be used to spit bubbles of poison in any desired direction.
| |
| |align=center|[[Wooded Kingdom]], [[Metro Kingdom]], [[Dark Side]]
| |
| |align=center|{{chart icon|SMO-Coin}}×1
| |
| |-
| |
| |align=center|[[File:Pokio Icon SMO.png|100x100px]]<br>[[Pokio]] {{chart icon|SMO-capture}}
| |
| |A stubby enemy that pokes its sharp bill to attack Mario. While captured, Pokios can be used in the same fashion to attack enemies. They can also cling to certain walls with their bills and fling themselves in a direction, which is useful for escalating said walls.
| |
| |align=center|[[Seaside Kingdom]], [[Bowser's Kingdom]], [[Darker Side]]
| |
| |align=center|{{chart icon|SMO-Coin}}×1
| |
| |-
| |
| |align=center|[[File:Sherm Icon SMO.png|100x100px]]<br>[[Sherm]] {{chart icon|SMO-capture}}
| |
| |A robotic vehicle that attacks by shooting small projectiles out of its turret. Sherms can be captured and maneuvered to destroy masses of [[block]]s and enemies. They can be defeated with a Ground Pound.
| |
| |align=center|[[Wooded Kingdom]], [[Metro Kingdom]], [[Moon Kingdom]], [[Dark Side]]
| |
| |align=center|{{chart icon|SMO-Coin}}×1
| |
| |-
| |
| |align=center|[[File:SMO Artwork Snow Cheep Cheep.png|100x100px]]<br>[[Cheep Cheep|Snow Cheep Cheep]] {{chart icon|SMO-capture}}
| |
| |A Cheep Cheep that swims around [[? Block]]s and [[Brick Block]]s. Aside from being flexible swimmers, Snow Cheep Cheeps allow Mario to survive under the [[freezing water]]s of the Snow Kingdom when captured. They can be defeated with a Ground Pound.
| |
| |align=center|[[Snow Kingdom]]
| |
| |align=center|{{chart icon|SMO-Coin}}×1
| |
| |-
| |
| |align=center|[[File:Stairface Ogre Icon SMO.png|100x100px]]<br>[[Stairface Ogre]]
| |
| |A brutish, sturdy enemy carrying a mallet. Stairface Ogres' stiff movements allow them to only sidestep or walk directly forward. They try to catch and crush Mario with their mallets, which are shaped like staircases and can be climbed to reach their top sides. Here, they can receive a Ground Pound to fall asunder. Another way to defeat a Stairface Ogre is by sticking a Pokio's bill into the glowing hole on its forehead.
| |
| |align=center|[[Metro Kingdom]], [[Bowser's Kingdom]]
| |
| |align=center|{{chart icon|SMO-Coin}}×6
| |
| |-
| |
| |align=center|[[File:SMO Artwork T-Rex.png|100x100px]]<br>[[T-Rex]] {{chart icon|SMO-capture}}
| |
| |A [[dinosaur]] found in either very dark or sunny areas. Though a few individuals are harmless as they are always sleeping (and can be captured immediately), others roam around a set path, chasing Mario down when they spot him. In order to stun a T-Rex, it has to be lured into a large wall or tree as it charges at Mario, leaving it dizzy and ready to capture. While captured, the T-Rex can be used to effortlessly rampage through fossil blocks and large numbers of enemies. The enemy can only be temporarily used, as Cappy claims it is too large to handle. The only way to defeat a T-Rex is by having it drop into an [[pit|abyss]].
| |
| |align=center|[[Cascade Kingdom]], [[Wooded Kingdom]], [[Metro Kingdom]]
| |
| |align=center|None
| |
| |-
| |
| |align=center|[[File:Trapeetle Icon SMO.png|100x100px]]<br>[[Trapeetle]]
| |
| |A mechanical insect that spawns continuously from a spot in the ground. Trapeetles threatfully approach Mario, trying to grab Cappy, which they then use to charge into Mario. Trapeetles explode upon contact with something and can thus be used to bombard cracked rocks that conceal items or block away passages.
| |
| |align=center|[[Lost Kingdom]]
| |
| |align=center|None
| |
| |-
| |
| |align=center|[[File:Tropical Wiggler Icon SMO.png|100x100px]]<br>[[Tropical Wiggler]] {{chart icon|SMO-capture}}
| |
| |Concertinaing [[Wiggler]]s endemic to the Forgotten Isle. A passive, although dangerous, enemy that moves by extending its body from one spot to another. The segments of its body are each topped by one spike, making the enemy impossible to jump on. Capturing a Tropical Wiggler enables Mario to make use of its stretching abilities, helpful for crossing over to other platforms. Although invincible for the most part, Tropical Wigglers can be defeated by having them fall into a pit of [[poison (obstacle)|poison]] or by throwing a [[hammer]] at them as a [[Hammer Bro]], as it can be seen in the Moon Kingdom.
| |
| |align=center|[[Lost Kingdom]], [[Moon Kingdom]]
| |
| |align=center|None
| |
| |-
| |
| |align=center|[[File:Uproot Icon SMO.png|100x100px]][[File:SMO Artwork Uproot.png|100x100px]]<br>[[Uproot]] {{chart icon|SMO-capture}}
| |
| |A malevolent plant with extendable feet. Uproots spawn from dirt manholes and roam around the surrounding area. When they spot Mario, they rush over to him and attack by springing themselves with their feet and assaulting him from above. When captured, Uproots can be used in a similar way to reach high areas and push up impeding platforms, as well as destroy rows of [[Brick Block]]s.
| |
| |align=center|[[Wooded Kingdom]], [[Seaside Kingdom]], [[Darker Side]]
| |
| |align=center|{{chart icon|SMO-Coin}}×1
| |
| |-
| |
| |align=center|[[File:Urban Stingby Icon SMO.png|100x100px]]<br>[[Urban Stingby]]
| |
| |Mosquito-like [[Stingby|Stingbies]]. An insect enemy that spawns from a larva. Urban Stingbies slowly patrol around a spot, quickly noticing Mario if he is in proximity. When attacking, Urban Stingbies take enough momentum to head violently into Mario, but they explode as they crash into something. The attack can affect other enemies. Urban Stingbies can be defeated one time by any sign of attack, including a [[jump]] or a Cap Throw.
| |
| |align=center|[[Metro Kingdom]], [[Darker Side]]
| |
| |align=center|{{chart icon|SMO-Coin}}×1
| |
| |-
| |
| |align=center|[[File:Urban Stingby Larva Icon SMO.png|100x100px]]<br>[[Urban Stingby|Urban Stingby Larva]]
| |
| |Larval Urban Stingbies., which morphs into its mature variant shortly after appearing onscreen. Urban Stingby Larvae are completely inoffensive and can be defeated with a [[kick]].
| |
| |align=center|[[Metro Kingdom]]
| |
| |align=center|{{chart icon|SMO-Coin}}×1
| |
| |-
| |
| |align=center|[[File:Yoofoe Icon SMO.png|100x100px]]<br>[[Yoofoe]]
| |
| |A large levitating robot that is equipped with a set of two or four spike bars, which it spins continuously around. The enemy drops an endless supply of [[Goomba]]s and [[Spike Ball]]s. The Goombas can be captured and be formed into a tower, enabling Mario to reach the top of the Yoofoe and pound it to deal damage. Two hits are necessary to bring a Yoofoe down, giving out a valuable item, such as a [[Power Moon]] or [[Life-Up Heart]].
| |
| |align=center|[[Wooded Kingdom]], [[Bowser's Kingdom]], [[Darker Side]]
| |
| |align=center|{{chart icon|SMO-Moon}}×1
| |
| |}
| |
| | |
| ===Returning enemies===
| |
| {|width=100% cellspacing=0 border=1 cellpadding=3 style="border-collapse:collapse;background:#FFFFFF"
| |
| |-style="background:#FF2400;color:white;"
| |
| !width=10%|Name
| |
| !Description
| |
| !width=13%|Locations
| |
| !width=6%|Spoils
| |
| |-
| |
| |align=center|[[File:Banzai Bill Icon SMO.png|100x100px]]<br>[[Banzai Bill]] {{chart icon|SMO-capture}}
| |
| |Large missile. Banzai Bills slowly swerve off their initial trajectory to home-in on [[Mario]]. They are defeated when [[stomp]]ed. Capturing a Banzai Bill enables Mario to cross wide gaps and blast through obstacles with {{button|switch|Y}}. Shaking the controller causes it to accelerate. A captured Banzai Bill eventually flashes red and self-destructs, forcing Mario off.
| |
| |align=center|[[Wooded Kingdom]], [[Snow Kingdom]], [[Moon Kingdom]], [[Dark Side]]
| |
| |align=center|{{chart icon|SMO-Coin}}×6
| |
| |-
| |
| |align=center|[[File:Big Chain Chomp Icon SMO.png|100x100px]]<br>[[Big Chain Chomp]] {{chart icon|SMO-capture}}
| |
| |The Big Chain Chomp behaves identically to the normal-sized one. Striking a Chain Chomp with the captured Big Chain Chomp can trigger a chain reaction, where it is flung into another nearby Chain Chomp.
| |
| |align=center|[[Cascade Kingdom]]
| |
| |align=center|None
| |
| |-
| |
| |align=center|[[File:Bullet Bill Icon SMO.png|100x100px]]<br>[[Bullet Bill]] {{chart icon|SMO-capture}}
| |
| |Missiles fired from [[Bill Blaster]]. Bullet Bills directly target Mario when he is in close proximity. Mario can lure Bullet Bills towards cages and [[block (Super Mario Odyssey)|blocks]] to destroy them. In 2D areas, Bullet Bills maintain straight trajectories. Within the [[Inverted Pyramid]], these Bullet Bills become 3D when they reach the end of the wall-bound 2D area. A captured Bullet Bill can be used to reach distant areas. Shaking the controller causes it to pickup speed, but it detonates sooner. [[Knucklotec|Knucklotec's Fist]]s function just like Bullet Bills when captured.
| |
| |align=center|[[Sand Kingdom]], [[Wooded Kingdom]], [[Cloud Kingdom]], [[Metro Kingdom]], [[Moon Kingdom]], [[Mushroom Kingdom (Super Mario Odyssey)|Mushroom Kingdom]], [[Dark Side]]
| |
| |align=center|{{chart icon|SMO-Coin}}×1
| |
| |-
| |
| |align=center|[[File:Chain Chomp Icon SMO.png|100x100px]]<br>[[Chain Chomp]] {{chart icon|SMO-capture}}
| |
| |Metal enemies with snapping jaws. Chain Chomps are fastened to the ground and lunge towards Mario when near. Jumping on one briefly stuns it, but does not inflict damage. Chain Chomps can only be defeated by a captured T-Rex. A captured Chain Chomp is similar to a {{wp|pullback toy}}. Pulling the Chain Chomp to the farthest extent it can and letting go sends it flying in the opposite direction. This can be used to destroy [[stone wall]]s, strike bull's-eyes, and and unseal hidden areas. This action also forces Mario out of the Chain Chomp.
| |
| |align=center|[[Cascade Kingdom]]
| |
| |align=center|None
| |
| |-
| |
| |align=center|[[File:Chargin' Chuck Icon SMO.png|100x100px]]<br>[[Chargin' Chuck]] {{chart icon|SMO-capture}}
| |
| |Burly [[Koopa (species)|Koopa]]s in football gear. Chargin' Chucks remain still until Mario is near, who they try to charge through. Knocking-off their helmet leaves them vulnerable to a stomp. A captured Chargin' Chuck can bash through obstacles and enemies without flinching or receiving damage.
| |
| |align=center|[[Ruined Kingdom]], [[Moon Kingdom]]
| |
| |align=center|{{chart icon|SMO-Coin}}×3
| |
| |-
| |
| |align=center|[[File:Cheep Cheep Icon SMO.png|100x100px]]<br>[[Cheep Cheep]] {{chart icon|SMO-capture}}
| |
| |Pudgy red fish. Some swim in circles, while others swim back and forth in set paths. Cheep Cheeps damage Mario on contact. They can be defeated with a ground pound or jump. A captured Cheep Cheep swims faster and is more versatile underwater than Mario, but it flails weakly if brought to land. [[Lakitu]]s fish for Cheep Cheeps, the largest of which hold [[Power Moon]]s. There is a [[Lochlady]] who finds Cheep Cheeps adorable.
| |
| |align=center|[[Sand Kingdom]], [[Lake Kingdom]], [[Seaside Kingdom]]
| |
| |align=center|{{chart icon|SMO-Coin}}×1<br>{{chart icon|SMO-Moon}}×1
| |
| |-
| |
| |align=center|[[File:Coin Coffer Icon SMO.png|100x100px]]<br>[[Coin Coffer]] {{chart icon|SMO-capture}}
| |
| |Purse-like creatures filled with coins. Coin Coffers are nonconfrontational and usually invisible. One becomes exposed when it is bumped into. Jumping on a Coin Coffer makes it spit out one coin, and jumping on it sequentially makes it spit out as many as eight before being defeated. Ground-pounding one makes it release eight all at once. A captured Coin Coffer can fire coins as projectile, but this depletes Mario's own coin count. Shaking the controller makes it rapidly fire coins in 360°.
| |
| |align=center|[[Sand Kingdom]], [[Wooded Kingdom]]
| |
| |align=center|{{chart icon|SMO-Coin}}×8
| |
| |-
| |
| |align=center|[[File:SMO 8bit Donkey Kong.png|100x100px]]<br>[[Donkey Kong]]
| |
| |A great ape that tosses projectile [[barrel]]s down [[girder]]s. He first appears in the final 2D section of the [[A Traditional Festival!|New Donk City Festival]], an area similar to [[25m]]. Donkey Kong is defeated when all four of the [[? Block]]s he is on are struck. Donkey Kong kidnapped [[Pauline|Mayor Pauline]] [[Donkey Kong (game)|many years ago]], something she reflects on during "[[List of Power Moons in the Metro Kingdom|A Request from the Mayor]]".
| |
| |align=center|[[Metro Kingdom]], [[Darker Side]]
| |
| |align=center|None
| |
| |-
| |
| |align=center|[[File:Fire Bro Icon SMO.png|100x100px]]<br>[[Fire Bro]] {{chart icon|SMO-capture}}
| |
| |Helmeted Koopas that toss fireballs and leap across platforms erratically. Fire Bros are defeated when stomped. Shaking the controller as a captured Fire Bro makes it toss a [[fireball]] that can light [[lantern]]s and defeat enemies. A captured Fire Bro also reaches greater heights than Mario when it jumps.
| |
| |align=center|[[Wooded Kingdom]], [[Luncheon Kingdom]]
| |
| |align=center|{{chart icon|SMO-Coin}}×1
| |
| |-
| |
| |align=center|[[File:Fire Piranha Plant Icon SMO.png|100x100px]]<br>[[Fire Piranha Plant]] {{chart icon|SMO-capture}}
| |
| |Carnivorous plants that spit fireballs. Their heads flash orange before firing. A Fire Piranha Plant is defeated when stomped, or when kicked with Cappy trapped in its mouth. Fire Piranha Plants automatically engulf Cappy when he makes contact, and this prevents them from being captured. It only becomes capturable when a [[Rock (Super Mario series)|rock]] is knocked into its mouth first. A captured Fire Piranha Plant spits fireballs in a 360° radius from a fixed position. The fireballs can defeat enemies and light lanterns.
| |
| |align=center|[[Lost Kingdom]], [[Metro Kingdom]], [[Luncheon Kingdom]]
| |
| |align=center|{{chart icon|SMO-Coin}}×1
| |
| |-
| |
| |align=center|[[File:Fuzzy Icon SMO.png|100x100px]]<br>[[Fuzzy]]
| |
| |Prickly creatures that move back and forth along dotted [[track]]s. In some areas, these tracks bring Fuzzies from 2D areas into 3D ones. Fuzzies are usually found in groups. They damage Mario on contact.
| |
| |align=center|[[Wooded Kingdom]], [[Cloud Kingdom]], [[Lost Kingdom]], [[Metro Kingdom]], [[Moon Kingdom]], [[Mushroom Kingdom (Super Mario Odyssey)|Mushroom Kingdom]], [[Darker Side]]
| |
| |align=center|{{chart icon|cross}}
| |
| |-
| |
| |align=center|[[File:Goomba Icon SMO.png|100x100px]]<br>[[Goomba]] {{chart icon|SMO-capture}}
| |
| |Squat mushroom creatures that chase Mario when he is in their line of sight. Goombas are defeated when stomped. A captured Goomba can stack on top of another one to make a [[Goomba Tower]]. Control is shifted to whichever Goomba is on the bottom. A Goomba Tower can be used to reach high platforms and press [[Goomba button]]s. A captured Goomba also maintains stable footing on ice, and can receive Power Moons from [[Goombette]]s. Most Goombas are members of [[Bowser's Minions|Bowser's army]], but the ones in [[Goomba Woods]] are apparently unaffiliated. [[Yoofoe]] expels Goombas.
| |
| |align=center|[[Cascade Kingdom]], [[Sand Kingdom]], [[Lake Kingdom]], [[Wooded Kingdom]], [[Cloud Kingdom]], [[Metro Kingdom]], [[Snow Kingdom]], [[Seaside Kingdom]], [[Luncheon Kingdom]], [[Bowser's Kingdom]], [[Mushroom Kingdom (Super Mario Odyssey)|Mushroom Kingdom]], [[Darker Side]]
| |
| |align=center|{{chart icon|SMO-Coin}}×1
| |
| |-
| |
| |align=center|[[File:Hammer Bro Icon SMO.png|100x100px]]<br>[[Hammer Bro]] {{chart icon|SMO-capture}}
| |
| |Helmeted Koopas that toss [[hammer]]s. They otherwise behave like Fire Bros. A captured Hammer Bro can throw hammers to defeat enemies and break [[Cheese|cheese rock]]s. Hammer Bros in the Luncheon Kingdom toss [[frying pan]]s instead of hammers and wear chef hats.
| |
| |align=center|[[Cloud Kingdom]], [[Metro Kingdom]], [[Luncheon Kingdom]], [[Moon Kingdom]], [[Dark Side]]
| |
| |align=center|{{chart icon|SMO-Coin}}×1
| |
| |-
| |
| |align=center|[[File:Klepto Icon SMO.png|100x100px]]<br>[[Klepto]]
| |
| |A condor that steals hats. Klepto kidnaps Cappy when encountered, depriving Mario of his abilities. It flies away from Mario when he draws near, but periodically stops to roost on a [[Ruin|Rising Stone Pillar]]. Mario must ground-pound it to knock Klepto out and save Cappy.
| |
| |align=center|[[Lost Kingdom]]
| |
| |align=center|{{chart icon|SMO-Cappy}}×1
| |
| |-
| |
| |align=center|[[File:SMO 8bit Koopa Troopa.png|100x100px]]<br>[[Koopa Troopa|Koopa]] (Green)
| |
| |Green-shelled turtle enemies only found in 2D areas. Stomping a Koopa makes it retract into its [[Koopa Shell|shell]], which can be used as a sliding projectile. Green Koopas walk off the sides of platforms. The Koopas that appear in 3D areas are harmless non-playable characters.
| |
| |align=center|[[Cascade Kingdom]], [[Metro Kingdom]], [[Seaside Kingdom]], [[Ruined Kingdom]]
| |
| |align=center|{{chart icon|SMO-ShellG}}×1
| |
| |-
| |
| |align=center|[[File:SMO 8bit Koopa Troopa Red.png|100x100px]]<br>Koopa (Red)
| |
| |Red-shelled Koopas turn around when the reach the edge of a platform.
| |
| |align=center|[[Cloud Kingdom]], [[Bowser's Kingdom]]
| |
| |align=center|{{chart icon|SMO-ShellR}}×1
| |
| |-
| |
| |align=center|[[File:Lava Bubble Icon SMO.png|100x100px]]<br>[[Lava Bubble]] {{chart icon|SMO-capture}}
| |
| |Incandescent drops of [[lava]]. Contact burns Mario. They leap vertically from lava and through [[grated platform|Wire Net Platform]]s. A captured Lava Bubble can traverse through lava and use [[lava cannon]]s. Shaking the controller causes it to horizontally leap through the air, twirling. Making contact with solid ground makes the Lava Bubble disappear and forces Mario out of the capture. A captured Lava Bubble can also light lanterns and is used during the battle with [[Cookatiel]]. | |
| |align=center|[[Cloud Kingdom]], [[Lost Kingdom]], [[Luncheon Kingdom]], [[Mushroom Kingdom (Super Mario Odyssey)|Mushroom Kingdom]], [[Darker Side]] | |
| |align=center|None | |
| |-
| |
| |align=center|[[File:Maw-Ray Icon SMO.png|100x100px]]<br>[[Maw-Ray]]
| |
| |Giant {{wp|moray eel}} enemies that dwell in underwater caves. They quickly lunge towards Mario when he is near.
| |
| |align=center|[[Seaside Kingdom]], [[Mushroom Kingdom (Super Mario Odyssey)|Mushroom Kingdom]]
| |
| |align=center|{{chart icon|cross}}
| |
| |-
| |
| |align=center|[[File:Mini Goomba Icon SMO.png|100x100px]]<br>[[Mini Goomba]]
| |
| |Little Goombas. Like normal-sized ones, they charge towards Mario when near. Mini Goombas are usually in groups of eight. In story-related objectives, Mini Goombas appear in the overworld before normal Goombas. They otherwise occur underground in [[glowing spot]]s and inside [[crate]]s. They are defeated when stomped by Mario or struck by Cappy.
| |
| |align=center|[[Cap Kingdom]], [[Cascade Kingdom]], [[Sand Kingdom]], [[Lake Kingdom]], [[Wooded Kingdom]], [[Lost Kingdom]], [[Metro Kingdom]], [[Seaside Kingdom]], [[Bowser's Kingdom]], [[Mushroom Kingdom (Super Mario Odyssey)|Mushroom Kingdom]]
| |
| |align=center|{{chart icon|SMO-Coin}}×1
| |
| |-
| |
| |align=center|[[File:Parabones Icon SMO.png|100x100px]]<br>[[Parabones]] {{chart icon|SMO-capture}}
| |
| |Winged [[Dry Bones]]. They pursue Mario on sight, but they cannot ascend or descend, so they can easily be obstructed. Parabones crumble into a pile of bones when stomped, but reassemble after a few seconds. They are only defeated if they crumble above a bottomless [[pit]] or lava. A captured Parabones can fly. Rapidly pressing {{button|switch|A}} makes it flap its wings.
| |
| |align=center|[[Bowser's Kingdom]], [[Moon Kingdom]]
| |
| |align=center|None
| |
| |- | | |- |
| |align=center|[[File:Paragoomba Icon SMO.png|100x100px]]<br>[[Paragoomba]] {{chart icon|SMO-capture}} | | |style="background:white"|[[File:Track-riding Lava Bubble.png|100x100px]]<br>[[Lava Blobble]] |
| |Winged Goombas that fly back and forth in set paths. They are defeated when stomped. A captured Paragoomba can fly like a Parabones.
| | |align=left|Large Lava Bubble-like enemies that ride on tracks. |
| |align=center|[[Cap Kingdom]], [[Wooded Kingdom]] | | |colspan=2|[[Deep Magma Bog Flying Battleship]] |
| |align=center|{{chart icon|SMO-Coin}}×1
| | |{{chart icon|new}} |
| |- | | |- |
| |align=center|[[File:Pulse Beam SMO.jpg|100x100px]]<br>[[Pulse Beam]] | | |style="background:white"|[[File:SMBWScreenshotUnknownCorn KernelEnemy.png|100x100px]][[File:SMBW Screenshot Popcorn Enemy.png|100x100px]]<br>[[Kerpop]] |
| |Spiked mechs that discharge shockwaves. Pulse Beams are inert by default, but they discharge when struck by Cappy or another Pulse Beam's shockwave, causing a circular {{wp|feedback|feedback loop}}. This can be used to clear obstacles, but makes an area more dangerous to traverse. Jumping on a Pulse Beam damages Mario. | | |align=left|Corn kernel enemies that slowly walk along the ground. When Kerpops make contact with heated sources like [[Hot-Hot Rock]]s they turn into bouncy pieces of popcorn that make them more difficult to avoid. Kerpops apparently give off a savory aroma in this state. |
| |align=center|[[Sand Kingdom]], [[Seaside Kingdom]], [[Mushroom Kingdom (Super Mario Odyssey)|Mushroom Kingdom]], [[Darker Side]]
| | |[[Hot-Hot Hot!]] |
| |align=center|{{chart icon|cross}}
| | |[[KO Arena Magma Flare-Up]] |
| | |{{chart icon|new}} |
| |- | | |- |
| |align=center|[[File:Spiny Icon SMO.png|100x100px]]<br>[[Spiny]] | | |style="background:white"|[[File:Fryguy-like Enemy.png|100x100px]]<br>[[Li'l Scorcher]] |
| |Squat, spiked Koopas. They chase Mario when he is near. Spinies are briefly stunned and shoved backwards when struck by Cappy, and they damage Mario when jumped on. Spinies are only defeated when knocked off the edge of a platform or when struck by a thrown item, like a [[Seed (Super Mario Odyssey)|seed]].
| | |align=left|Enflamed enemies that spit slow-moving fireballs at Mario. Li'l Scorchers occur on floors and ceilings. Despite resembling flames, they can be safely stomped on to defeat them. They are also defeated when doused with water or struck by bubbles. |
| |align=center|[[Cap Kingdom]], [[Cloud Kingdom]], [[Snow Kingdom]], [[Seaside Kingdom]], [[Luncheon Kingdom]], [[Bowser's Kingdom]]
| | |colspan=2|[[Deep Magma Bog Palace]] |
| |align=center|{{chart icon|SMO-Coin}}×1 | | |{{chart icon|new}} |
| |-
| |
| |align=center|[[File:Ty-Foo Icon SMO.png|100x100px]]<br>[[Ty-foo]] {{chart icon|SMO-capture}}
| |
| |Giant [[Foo]]-like enemies that blow strong [[wind]]s at consistent intervals. The gusts blow enemies, items, Cappy, and Mario himself off of platforms. There are hidden areas in the Snow Kingdom where Ty-foos blow wooden blocks along stretches of ice that can be used as platforms. A captured Ty-foo can blow wind itself with {{button|switch|Y}} and safely float above hazards. Shaking the controller strengthens the power of the wind.
| |
| |align=center|[[Cascade Kingdom]], [[Snow Kingdom]] | |
| |align=center|{{chart icon|cross}}
| |
| |} | | |} |
|
| |
|
| ===Obstacles=== | | ===Obstacles=== |
| {|width=100% cellspacing=0 border=1 cellpadding=3 style="border-collapse:collapse;background:#FFFFFF"
| |
| |-style="background:#FF2400;color:white;"
| |
| !width=10%|Name
| |
| !Description
| |
| !width=19%|Locations
| |
| |-
| |
| |-
| |
| |align=center|[[File:SMO Asset Model Banzai Bill Cannon.png|100x100px]]<br>[[Banzai Bill Cannon]]
| |
| |Giant cannons that shoot [[Banzai Bill]]s.
| |
| |align=center|[[Wooded Kingdom]], [[Snow Kingdom]], [[Moon Kingdom]], [[Dark Side]]
| |
| |-
| |
| |align=center|[[File:SMO 8bit Barrel.png|100x100px]]<br>[[Barrel]]
| |
| |Projectile barrels tossed down [[girder]]s by [[Donkey Kong]]. Contact damages [[Mario]].
| |
| |align=center|[[Metro Kingdom]], [[Darker Side]]
| |
| |-
| |
| |align=center|[[File:SMO Asset Model Bill Blaster.png|100x100px]]<br>[[Bill Blaster]]
| |
| |Cannons that shoot [[Bullet Bill]]s.
| |
| |align=center|[[Sand Kingdom]], [[Wooded Kingdom]], [[Cloud Kingdom]], [[Metro Kingdom]], [[Moon Kingdom]], [[Mushroom Kingdom (Super Mario Odyssey)|Mushroom Kingdom]], [[Dark Side]]
| |
| |-
| |
| |align=center|[[File:SMO Screenshot Boulder (Obstacle).jpg|100x100px]]<br>[[Boulder]] / [[Shell (Super Mario Odyssey)|Shell]] / [[Pepper (object)|Pepper]]
| |
| |Rolling rocks. They break when they collide with a wall. Striking Mario damages him. [[Bowser]] and [[Chargin' Chuck]]s can break them while [[capture]]d. Equivalent obstacles appear in some kingdoms, including [[Shell (Super Mario Odyssey)|shell]]s and [[Pepper (object)|pepper]]s.
| |
| |align=center|[[Seaside Kingdom]], [[Luncheon Kingdom]], [[Bowser's Kingdom]], [[Moon Kingdom]], [[Darker Side]]
| |
| |-
| |
| |align=center|[[File:SMO Screenshot Cannon.jpg|100x100px]]<br>[[Rotating defense mechanism]]
| |
| |A [[cannon]] above the [[Wooded Kingdom#Secret Flower Field Entrance|Secret Flower Field Entrance]] that fires rolling [[cannonball]]s. Striking each of its four rotating panel with a [[Sherm]]'s bullets destroys it.
| |
| |align=center|[[Wooded Kingdom]]
| |
| |-
| |
| |align=center|[[File:SMO Screenshot Freezing Water.jpg|100x100px]]<br>[[Freezing water]]
| |
| |Water that, when swum in, gradually covers the screen in frost. If the player stays in freezing water for too long, the player will take damage. When capturing a Snow Cheep Cheep or a Gushen, the player does not take damage from frozen water, and frost does not cover the screen.
| |
| |align=center|[[Snow Kingdom]]
| |
| |-
| |
| |align=center|[[File:SMO Screenshot Ice.jpg|100x100px]]<br>[[Ice]]
| |
| |TBW
| |
| |align=center|[[Sand Kingdom]], [[Snow Kingdom]]
| |
| |-
| |
| |align=center|[[File:SMO Screenshot Lava.jpg|100x100px]]<br>[[Lava]]
| |
| |TBW
| |
| |align=center|[[Lost Kingdom]], [[Seaside Kingdom]], [[Luncheon Kingdom]], [[Moon Kingdom]], [[Darker Side]]
| |
| |-
| |
| |align=center style="background:#FFFFFF"|[[File:SMO Screenshot Lava Geyser (Moon Kingdom).jpg|100x100px]]<br>[[Lava Geyser]]
| |
| |A hazard that damages Mario in the same way as lava. It can be safely jumped on by capturing a Lava Bubble.
| |
| |align=center|[[Luncheon Kingdom]], [[Moon Kingdom]], [[Darker Side]]
| |
| |-
| |
| |align=center|[[File:SMO 8bit Oil Drum.png|100x100px]]<br>[[Oil drum]]
| |
| |A stationary hazard in 8-bit sections that damages Mario if touched.
| |
| |align=center|[[Metro Kingdom]], [[Darker Side]]
| |
| |-
| |
| |align=center|[[File:SMO Screenshot Poison.jpg|100x100px]]<br>[[Poison (obstacle)|Poison]]
| |
| |A hazard that, when touched, instantly defeats Mario. In some areas, poison moves in [[poison wave|waves]].
| |
| |align=center|[[Cap Kingdom]], [[Sand Kingdom]], [[Wooded Kingdom]], [[Lost Kingdom]], [[Metro Kingdom]], [[Snow Kingdom]], [[Bowser's Kingdom]]
| |
| |-
| |
| |align=center|[[File:SMO Screenshot Quicksand.jpg|100x100px]]<br>[[Quicksand]]
| |
| |TBW
| |
| |align=center|[[Sand Kingdom]]
| |
| |-
| |
| |align=center|[[File:Spike Trap SMO render.png|100x100px]]<br>[[Spike Trap]]
| |
| |An obstacle that, when touched, causes Mario to lose one hit point.
| |
| |align=center|[[Lake Kingdom]], [[Bowser's Kingdom]]
| |
| |-
| |
| |align=center|[[File:SMO Screenshot Turret.jpg|100x100px]]<br>[[Turret]]
| |
| |An object attached to walls that fires [[firework bomb]]s.
| |
| |align=center|[[Seaside Kingdom]], [[Bowser's Kingdom]]
| |
| |-
| |
| |align=center|[[File:Wind SMO.jpg|100x100px]]<br>[[Wind]]
| |
| |An obstacle that pushes Mario in the direction it blows.
| |
| |align=center|[[Cascade Kingdom]], [[Snow Kingdom]]
| |
| |}
| |
|
| |
| ===Bosses=== | | ===Bosses=== |
| Bosses are listed in the order that they are first encountered. Bosses are organized into two categories: "The Broodals", mid-bosses that make recurring appearances throughout the game, and the larger "kingdom bosses". Bosses are listed in the order that they are first encountered within these respective categories.
| |
| {|width=100% cellspacing=0 border=1 cellpadding=3 style="border-collapse:collapse;background:#FFFFFF"
| |
| |-style="background:#FF2400;color:white;"
| |
| !width=10%|Name
| |
| !Description
| |
| !width=19%|Locations
| |
| |-
| |
| !colspan=3 style="background:#FF7733;"|The Broodals
| |
| |-
| |
| |align=center|[[File:Topper-SMO.jpg|100x100px]]<br>[[Topper]]
| |
| |As the leader of the [[Broodals]], Topper prances around the boss field, occasionally spinning his hats in a circle. To defeat him, [[Mario]] must knock all of his hats off using [[Cappy]], then [[jump]] on him. After being hit, Topper enters one of his hats and sends the others whirling around the field. Mario then has to repeat this process. In later fights, Topper has many more hats to knock off and takes three hits to defeat.
| |
| |align=center|[[Cap Kingdom]], [[Bowser's Kingdom]], [[Dark Side]]
| |
| |-
| |
| |align=center|[[File:SMO-HarietArtwork.jpeg|100x100px]]<br>[[Hariet]]
| |
| |Being the only girl among the Broodals, Hariet hops in place, throwing [[bomb]]s that explode into a puddle of [[lava]]. To defeat her, Mario must throw Cappy at the large bomb she throws, sending it to her, knocking off her hat, then jumping on her. After being hit, Harriet enters her hat and flies around the field, dropping bombs. Mario then has to repeat this process twice. In later fights, she throws two bombs at a time.
| |
| |align=center|[[Sand Kingdom]], [[Bowser's Kingdom]], [[Dark Side]]
| |
| |-
| |
| |align=center|[[File:SMO Art - Spewart.jpg|100x100px]]<br>[[Spewart]]
| |
| |Being short and stout, Spewart sprays poison in a large ring around him. To defeat him, Mario must clear a path through the poison, knock his hat off, and jump on him. After being hit, Spewart enters his hat and whirls around the field, leaving poison in his path. Mario has to repeat this process twice. In later fights, Spewart sprays more poison.
| |
| |align=center|[[Wooded Kingdom]], [[Luncheon Kingdom]], [[Dark Side]]
| |
| |-
| |
| |align=center|[[File:SMO Rango.jpg|100x100px]]<br>[[Rango]]
| |
| |As the tallest Broodal, Rango throws his sawblade-like hat in a half circle. To defeat him, Mario must throw Cappy at his hat to flip it over, revealing a [[Hat Trampoline]], and jump on it to boost his jump to his head. After being hit, Rango enters his hat and bounces around. Mario has to repeat this process twice. In later fights, Rango has two hats to throw.
| |
| |align=center|[[Lake Kingdom]], [[Snow Kingdom]], [[Dark Side]]
| |
| |-
| |
| !colspan=3 style="background:#FF7733;"|Kingdom bosses
| |
| |-
| |
| |align=center|[[File:Madame Broode Artwork SMO.jpg|100x100px]]<br>[[Madame Broode]]
| |
| |As the boss of the Broodals, Madame Broode sends her Chain Chompikins at Mario. To defeat her, Mario must knock Chain Chompikins' hat off and capture it, avoiding Madame Broode's swipes and sending it rocketing towards her. After being hit, she sends Chain Chompikins rocketing towards Mario. Mario has to repeat this process twice. In later fights, Chain Chompikins has more hats.
| |
| |align=center|[[Cascade Kingdom]], [[Moon Kingdom]]
| |
| |-
| |
| |align=center|[[File:SMO Artwork Knucklotec.png|100x100px]]<br>[[Knucklotec]]
| |
| |Knucklotec, the guardian of the [[Binding Band]], slams his fists down to Mario. To defeat him, Mario must lure one of Knucklotec's fists into an icy patch and capture it, avoiding ice crystals and slamming the fist into his own face. After being hit, Knucklotec sends his fists rocketing towards Mario. Mario has to repeat this process twice. In later fights, [[Chincho]]s are on the field.
| |
| |align=center|[[Sand Kingdom]], [[Mushroom Kingdom (Super Mario Odyssey)|Mushroom Kingdom]]
| |
| |-
| |
| |align=center|[[File:Torkdrift Artwork SMO.jpg|100x100px]]<br>[[Torkdrift]]
| |
| |Being a flower-stealing UFO, Torkdrift fires lasers. To defeat it, Mario must capture an Uproot and break the three flowers incased by blocks by stretching, then doing the same on the now-revealed glass dome. After being hit, Torkdrift fires circular lasers that Mario must stretch over. Mario has to repeat this process twice. In later fights, there are [[Pulse Beam]]s that Torkdrift targets.
| |
| |align=center|[[Wooded Kingdom]], [[Mushroom Kingdom (Super Mario Odyssey)|Mushroom Kingdom]]
| |
| |-
| |
| |align=center|[[File:SMO Art - Bowser.png|100x100px]]<br>[[Bowser]] {{chart icon|SMO-capture}}
| |
| |Being the King of the [[Koopa (species)|Koopas]] himself, Bowser throws his hats at Mario. To defeat him, Mario must throw Cappy at the hat with punching gloves twice; make his way to Bowser, dodging his [[Spike Ball]]s and fire ring; and punch him. Mario has to repeat this process twice. In the later fights taking place in the Moon Kingdom, Bowser [[Fire Breath|breathes fire]] in a large circle after being hit. After those fights, Mario needs to [[capture]] Bowser in order to complete the section.
| |
| |align=center|[[Cloud Kingdom]], [[Moon Kingdom]], [[Darker Side]]
| |
| |-
| |
| |align=center|[[File:Mechawiggler Artwork SMO.jpg|100x100px]]<br>[[Mechawiggler]]
| |
| |Being a caterpillar-like robot, Mechawiggler fires energy balls from its pods. To defeat it, Mario must capture a [[Sherm]] and fire at all of the pods, rendering Mechawiggler weak to rapid fire. After being hit, it opens portals and charges between them. Mario has to repeat this process once. In later fights, Mechawiggler is twice the size.
| |
| |align=center|[[Metro Kingdom]], [[Mushroom Kingdom (Super Mario Odyssey)|Mushroom Kingdom]]
| |
| |-
| |
| |align=center|[[File:Mollosque-Lanceur Artwork SMO.jpg|100x100px]]<br>[[Mollusque-Lanceur]]
| |
| |As the Dauphin of Bubblaine, Brigadier Mollusque-Launceur III, or Mollusque-Launcer, fires spiked bombs and torpedoes. To defeat him, Mario must capture a [[Gushen]] and spray water onto his head. After being hit, Mollusque-Launcer spins around extremely fast, rendering himself temporarily invincible. Mario has to repeat this process twice. In later fights, the arena has no bottom, meaning Mario has to constantly fly with the Gushen.
| |
| |align=center|[[Seaside Kingdom]], [[Mushroom Kingdom (Super Mario Odyssey)|Mushroom Kingdom]]
| |
| |-
| |
| |align=center|[[File:Cookatiel Artwork SMO.jpg|100x100px]]<br>[[Cookatiel]]
| |
| |Being a bird hungry for stew, Cookatiel coughs up vegetables. To defeat it, Mario must capture a [[Lava Bubble]] and swim up Cookatiel's vomit to reach its head. Mario has to repeat this process twice. In later fights, there are [[Moonsnake]]s in the stewpot.
| |
| |align=center|[[Luncheon Kingdom]], [[Mushroom Kingdom (Super Mario Odyssey)|Mushroom Kingdom]]
| |
| |-
| |
| |align=center|[[File:Ruined Dragon Artwork SMO.jpg|100x100px]]<br>[[Ruined Dragon]]
| |
| |As the Lord of Lightning, the Ruined Dragon fires electric saws that roll around the field. To defeat him, Mario must dodge rings of lightning, remove all of the stakes from his head, and ground-pound where his helmet usually is, all in the short time that the dragon's head is down. Mario has to repeat this process twice. In later fights, the Ruined Dragon makes patterns of lightning rings that are more difficult to dodge.
| |
| |align=center|[[Ruined Kingdom]], [[Mushroom Kingdom (Super Mario Odyssey)|Mushroom Kingdom]]
| |
| |-
| |
| |align=center|[[File:Robobrood Artwork SMO.jpg|100x100px]]<br>[[RoboBrood]]
| |
| |A giant mech owned by the [[Broodals]]. The RoboBrood fires bombs and rings as well as stamping its giant feet. To defeat it, Mario must capture a [[Pokio]] and poke the bombs back at it, making it fall over. Mario must then climb the robot, then poke at the nearest Broodal-containing dome. After being hit, the RoboBrood dashes with glowing feet across the field. Mario has to repeat this process three times. In later fights, Mario must capture a [[Hammer Bro]] instead of a Pokio.
| |
| |align=center|[[Bowser's Kingdom]], [[Dark Side]]
| |
| |}
| |
|
| |
| ==Items and objects== | | ==Items and objects== |
| ===Items=== | | ===Items=== |
| These are collectibles and wearable objects.
| |
| {|width=100% cellspacing=0 border=1 cellpadding=3 style="border-collapse:collapse;background:#F5F5F5"
| |
| |-style="background:#FF2400;color:white;"
| |
| !width=12%|Name
| |
| !width=38%|Description
| |
| !width=12%|Name
| |
| !width=38%|Description
| |
| |-
| |
| |align=center style="background:#FFFFFF"|[[File:SMO Artwork Power Moon.png|100x100px]]<br>[[Power Moon]]s
| |
| |Objects that power the ''[[Odyssey]]''. Power Moons are scattered throughout the [[Earth|world]], sometimes [[glowing spot|buried]], concealed in objects, or [[Lurker|lurking]] underground. Some are tied to story-specific [[mission|objective]]s that are completed upon being collected. Accumulating Power Moons expand the ''Odyssey''{{'}}s sail and enables it to reach new kingdoms. Glowing [[Moon Rock]]s break apart into these moons once struck. Power Moons are a source of energy throughout the world, and are of implied cultural significance across multiple cultures. It is implied that the [[Power Star]]s of prior games are the same object, just differently shaped.
| |
| |align=center style="background:#FFFFFF"|[[File:SMO Asset Model Multi Moon.png|100x100px]]<br>[[Multi Moon]]s
| |
| |Multi Moons represent three Power Moons and are collected from story-related objects. Most of them are held by bosses. In addition to rescuing [[Princess Peach]], Mario needs to collect all Multi Moons in order for Moon Rocks to start glowing.
| |
| |-
| |
| |align=center style="background:#FFFFFF"|[[File:SMO Moon Shard.png|100x100px]]<br>[[Moon Shard]]s
| |
| |Moon Shards represent one-fifth of a Power Moon. Collecting all five in an area causes them to merge into a collectible Power Moon.
| |
| |align=center style="background:#FFFFFF"|[[File:SMO Artwork Coin.png|100x100px]]<br>[[Coin]]s
| |
| |Coins can be used to buy items, Power Moons, and outfits at the [[Crazy Cap]]. They are accepted across all kingdoms. Mario loses ten coins when he loses a [[Extra life|life]], and experiences a [[Game Over]] if he has no coins on hand. In [[Balloon World]], collecting coins extends the [[Time Limit|timer]], and Mario is rewarded a large sum whenever he increases his rank. Coins sometimes occur in [[Coin pile|stack]]s or are [[Hidden Coin|invisible]].
| |
| |-
| |
| |align=center style="background:#FFFFFF"|[[File:SMO Artwork Regional Coin (Metro Kingdom).png|100x100px]]<br>[[Regional coin]]s
| |
| |Purple coins that are only useable in the kingdom they occur in. They are used to purchase souvenirs and outfits in the local Crazy Cap. Unlike normal coins, there is a set amount of regional coins in a kingdom that can only be collected once. Regional coins have different designs depending on the kingdom they are used in.
| |
| |align=center style="background:#FFFFFF"|[[File:SMO Artwork Note.png|100x100px]]<br>[[Note]]s
| |
| |Touching a large note causes a string of small notes to appear in the immediate area for a limited period of time. Collecting all of them rewards Mario with a Power Moon.
| |
| |-
| |
| |align=center style="background:#FFFFFF"|[[File:SMO Artwork Heart.png|100x100px]]<br>[[Heart (item)|Heart]]s
| |
| |Collecting a heart restores one wedge in Mario's [[Health Meter]]. If the Health Meter is full, he receives five coins instead.
| |
| |align=center style="background:#FFFFFF"|[[File:SMO Artwork Life-Up Heart.png|100x100px]]<br>[[Life-Up Heart]]s
| |
| |Large hearts that increase Mario's Health Meter from three to six. In Assist Mode, a Life-Up Heart increases Mario's health to nine. If Mario is already under the effect of a Life-Up Heart and is at full health, touching one awards him ten coins.
| |
| |-
| |
| |align=center style="background:#FFFFFF"|[[File:Bubble SMO.jpg|100x100px]]<br>[[Bubble]]s
| |
| |Air bubbles appear underwater, released by [[Bubbler (object)|bubbler]]s or [[Checkpoint Flag]]s. Some items are encapsulated by bubbles. In Assist Mode, Mario is protected inside a bubble and returned to safety when he falls near a hazard.
| |
| |align=center style="background:#FFFFFF"|[[File:SMO Artwork Key.png|100x100px]]<br>[[Key]]s
| |
| |Collecting a key opens a nearby [[locked panel|Keyhole Pedestal]], releasing a Power Moon.
| |
| |-
| |
| |align=center style="background:#FFFFFF"|[[File:SMO Asset Model Seed.png|100x100px]]<br>[[Seed (Super Mario Odyssey)|Seed]]s
| |
| |Acorn-like seeds with yellow {{wp|Calybium and cupule|caps}}. Tossing a seed into a flowerpot causes a sunflower-like plant to grow and release a Power Moon. The seeds are usually scattered across a visited kingdom, distant from their corresponding flowerpots.
| |
| |align=center style="background:#FFFFFF"|[[File:SMO Screenshot Giant Seed.jpg|100x100px]]<br>[[Seed (Super Mario Odyssey)|Giant seed]]s
| |
| |Large, brown-capped seeds dispensed by silver [[Steam Gardener]]s. A giant seed grows into a [[Beanstalk]] when tossed into an enclosed patch of dirt.
| |
| |-
| |
| |align=center style="background:#FFFFFF"|[[File:SMO Asset Model Turnip.png|100x100px]]<br>[[Turnip]]s
| |
| |Vegetables that can be plucked from the ground. When tossed into [[Stupendous Stew]], Mario is rewarded with coins. The Golden Turnips release Power Moons when thrown in.
| |
| |align=center style="background:#FFFFFF"|[[File:SMO Artwork Rock.png|100x100px]]<br>[[Rock (Super Mario series)|Rock]]
| |
| |Most rocks break when kicked or thrown, releasing coins. Glowing rocks contain Power Moons and require multiple strikes to break. Kicking a rock into the mouth of a [[Fire Piranha Plant]] or [[Poison Piranha Plant]] render them [[Capture|capturable]].
| |
| |-
| |
| |align=center style="background:#FFFFFF"|[[File:SMO Artwork Rocket Flower.png|100x100px]]<br>[[Rocket Flower]]s
| |
| |Tossing [[Cappy]] at a Rocket Flower fastens it to Mario's back, propelling him with a burst of speed. He is fast enough to ascend slopes. Collecting multiple Rocket Flowers makes him run even faster. They
| |
| |align=center style="background:#FFFFFF"|[[File:SMO Hat.png|75x75px]][[File:SMO Umbrella.png|75x75px]][[File:SMO Purse.png|75x75px]]<br>[[Pauline's lost items]]
| |
| |[[Pauline|Mayor Pauline]]'s original hat, parasol, and handbag. They are hidden in [[Metro Kingdom|New Donk City]]. Each one can be brought to Pauline as a potential birthday present, but the only one she accepts is the handbag.
| |
| |-
| |
| |align=center style="background:#FFFFFF"|[[File:SMO Asset Model Yoshi Egg.png|100x100px]]<br>[[Yoshi's Egg]]
| |
| |The egg that holds [[Yoshi]]. Striking it releases him. If Yoshi is in a dangerous situation or left uncaptured for a brief period of time, he reseals himself inside the egg. Yoshi's Egg can then be found in the original spot it was located.
| |
| |align=center style="background:#FFFFFF"|[[File:SMO Artwork Berry.png|100x100px]]<br>[[Fruit (Yoshi food)|Fruit]]s
| |
| |Yoshi's favorite food. He can eat them while captured, which fills up a corresponding fruit meter. Filling the meter completely rewards Mario with a Power Moon. Fruits can only be consumed once.
| |
| |-
| |
| |align=center style="background:#FFFFFF"|[[File:Mario with Balloon SMO.jpg|100x100px]]<br>Balloons
| |
| |The targets of Balloon World. In the Hide It mode, Mario must place his own balloon somewhere within the visited kingdom. During Find It, he must locate the balloon hidden by another player within a limited period of time.
| |
| |align=center style="background:#FFFFFF"|[[File:Find Band Members in the Seaside Kingdom SMO.jpg|100x100px]]<br>Instruments
| |
| |In the Playing in VR mode, collecting all notes causes a musical instrument to appear in the visited area. It must be carried and returned to the local [[#Non-playable character|non-playable character]] to complete the objective. The recoverable instruments include a grand piano, trombones, microphones, saxophones, and a keyboard.
| |
| |}
| |
|
| |
| ===Power-ups=== | | ===Power-ups=== |
| Items(???) that transform Mario's appearance and give him unique abilities.
| | ===Wonder-effect forms=== |
| {|width=100% cellspacing=0 border=1 cellpadding=3 style="border-collapse:collapse;background:#f5f5f5"
| | ===Badges=== |
| |-style="background:#FF2400;color:white;"
| |
| !width=12%|Power-up / Action
| |
| !width=15%|Form
| |
| !Description
| |
| |-
| |
| |align=center style="background:#FFFFFF"|[[File:SMO Art - Goomba Capture.png|100x100px]]<br>[[Capture|Target]]
| |
| |align=center style="background:#FFFFFF"|[[File:SMO Artwork Splash.png|100x100px]]<br>Captured form
| |
| |Definitely touch upon.
| |
| |-
| |
| |align=center style="background:#FFFFFF"|[[File:Mario Amiibo Artwork.png|100x100px]]<br>Scan an [[amiibo]] of Mario
| |
| |align=center style="background:#FFFFFF"|[[File:SMO 8bit Mario Invincible.gif|100x100px]]<br>[[Invincible Mario|8-Bit Invincible Mario]]
| |
| |Definitely counts.
| |
| |}
| |
| | |
| ===Clothing===
| |
| {{Main|Crazy Cap#Clothing}}
| |
| {|width=100% class="wikitable"
| |
| |-style="background:#FF2400;color:white;"
| |
| !width=12%|Article
| |
| !width=15%|Outfit
| |
| !In-game description
| |
| !Availability
| |
| !width=6%|Price
| |
| |-style="text-align:center"
| |
| |style="background:#FFFFFF"|[[File:SMO Mario Cap.png|75x75px]]<br>[[Mario Cap]]
| |
| |rowspan="2" style="background:#FFFFFF"|[[File:SMO Artwork Mario.jpg|100px]]<br>Mario Outfit
| |
| |''A red hat that has seen its fair share of adventures.''
| |
| |Starting hat
| |
| |—
| |
| |-style="text-align:center"
| |
| |style="background:#FFFFFF"|[[File:SMO Mario Suit.png|75x75px]]<br>Mario Suit
| |
| |''This tried-and-true outfit has weathered many adventures.''
| |
| |Starting suit
| |
| |—
| |
| |- style="text-align:center"
| |
| |style="background:#FFFFFF"|[[File:SMO Sombrero.png|75x75px]]<br>Sombrero
| |
| |rowspan="2" style="background:#FFFFFF"|[[File:SMO Artwork Mario (Sombrero and Poncho).jpg|100px]]<br>Sombrero and Poncho
| |
| |''Traditional Tostarenan hat. Keeps the sun out of your eyes and just plain fun to wear.''
| |
| | After reaching the [[Sand Kingdom]].
| |
| |{{chart icon|SMO-CoinSand}} 5
| |
| |- style="text-align:center"
| |
| |style="background:#FFFFFF"|[[File:SMO Poncho.png|75x75px]]<br>Poncho
| |
| |''Traditional folk dress of the Tostarena region. Keeps the sun off and the breezes on.''
| |
| | After reaching the [[Sand Kingdom]].
| |
| |{{chart icon|SMO-CoinSand}} 10
| |
| |- style="text-align:center"
| |
| |style="background:#FFFFFF"|[[File:SMO Explorer Hat.png|75x75px]]<br>Explorer Hat
| |
| |rowspan="2" style="background:#FFFFFF"|[[File:SMO Artwork Mario (Explorer Outfit).jpg|100px]]<br>Explorer Outfit
| |
| |''Just because the territory is uncharted doesn’t mean your head should be uncovered.''
| |
| | After reaching the [[Wooded Kingdom]].
| |
| |{{chart icon|SMO-CoinWooded}} 5
| |
| |- style="text-align:center"
| |
| |style="background:#FFFFFF"|[[File:SMO Explorer Outfit.png|75x75px]]<br>Explorer Outfit
| |
| |''Clothes that keep you comfortable even in the deepest heart of the wilderness.''
| |
| | After reaching the Wooded Kingdom.
| |
| |{{chart icon|SMO-CoinWooded}} 10
| |
| |- style="text-align:center"
| |
| |style="background:#FFFFFF"|[[File:SMO Mario's Top Hat.png|75x75px]]<br>Mario's Top Hat
| |
| |rowspan="2" style="background:#FFFFFF"|[[File:SMO Art - Wedding Mario.png|100px]]<br>Wedding Outfit
| |
| | {{anchor|Mario's Top Hat}}''A white silk hat, perfect for the biggest day of one's life.''
| |
| | Mario - Wedding (''Super Mario'' series) amiibo or after reaching [[Moon Kingdom]].
| |
| |—
| |
| |- style="text-align:center"
| |
| |style="background:#FFFFFF"|[[File:SMO Mario's Tuxedo.png|75x75px]]<br>Mario's Tuxedo
| |
| | {{anchor|Mario's Tuxedo}}''An exquisite coat with tails. WARNING: Do not engage in plumbing while wearing.''
| |
| | Mario - Wedding (''Super Mario'' series) amiibo or after reaching [[Moon Kingdom]].
| |
| |—
| |
| |}
| |
| | |
| ===Objects=== | | ===Objects=== |
| Objects are interactable elements of the environment that cannot be picked up or collected by [[Mario]]. For objects that primarily function as obstructions or hazards, see [[#Obstacles|above]].
| |
| {|width=100% cellspacing=0 border=1 cellpadding=3 style="border-collapse:collapse;background:#F5F5F5"
| |
| |-style="background:#FF2400;color:white;"
| |
| !width=12%|Name
| |
| !Description
| |
| |-
| |
| !colspan=3 style="background:#FF7733;"|Trigger objects
| |
| |-
| |
| |align=center style="background:#FFFFFF"|[[File:SMO Screenshot Gold Bowser Statue (Left).jpg|100x100px]][[File:SMO Screenshot Gold Bowser Statue (Right).jpg|100x100px]]<br>[[Bowser Statue|Bowser statue (gold)]]
| |
| |One of these two Bowser statues is destroyed when its corresponding [[Broodals|Broodal]] is defeated. Destroying both opens the door to the final courtyard of [[Bowser's Castle]]. These statues are representations of [[Bowser]]'s dominion over this land. The one on the left is modeled after {{wp|Raijin}}. The one on the right is modeled after {{wp|Fūjin}}.
| |
| |-
| |
| |align=center style="background:#FFFFFF"|[[File:SMO Artwork Coin Ring.jpg|100x100px]]<br>[[Coin ring]]
| |
| |Passing through a coin ring rewards Mario with three [[coin]]s. Their placement sometimes convey the ideal trajectory for Mario to take.
| |
| |-
| |
| |align=center style="background:#FFFFFF"|[[File:SMO Asset Model Goomba Button.png|100x100px]]<br>[[Goomba button]]
| |
| |Goomba buttons release Power Moons when triggered. One requires a certain number of [[Goomba]]s in a [[capture]]d [[Goomba Tower|tower]] to be pressed.
| |
| |-
| |
| |align=center style="background:#FFFFFF"|[[File:SMO Lost Brochure C.png|100x100px]]<br>[[Ground-Pound Switch]]
| |
| |Buttons that trigger nearby changes in the environment when ground-pounded. The starburst symbol on the button also appears on [[Astro-Lanceur]]s, [[Stairface Ogre]]s, and the ''[[Odyssey]]''.
| |
| |-
| |
| |align=center style="background:#FFFFFF"|[[File:SMO Artwork Hat Launcher.png|100x100px]]<br>[[Hat Launcher]]
| |
| |Striking a Hat Launcher with Cappy fires him in the direction it is facing and brings him farther than a normal Cap Throw would. Hat Launchers are generally needed to solve puzzles and access distant switches.
| |
| |-
| |
| |align=center style="background:#FFFFFF"|[[File:SMO Bowser Brochure C.png|100x100px]]<br>[[Hole (Super Mario Odyssey)|Hole]]
| |
| |Indentations in soft walls. Some of them release a Power Moon or item when jabbed by a [[Capture#Pokio|captured Pokio]]'s beak. They apparently were used by archers at some point in the history of [[Bowser's Castle]].
| |
| |-
| |
| |align=center style="background:#FFFFFF"|[[File:Locked Panel SMO.jpg|100x100px]]<br>[[Locked panel|Keyhole Pedestal]]
| |
| |The pedestal breaks open and releases a Power Moon when a nearby [[key]] is collected.
| |
| |-
| |
| |align=center style="background:#FFFFFF"|[[File:Lever Switch SMO.jpg|100x100px]]<br>[[Lever Switch]]
| |
| |Levers that physically change the surrounding area, usually by granting Mario access to a new area by making a door or bridge appear. It is pulled when struck by Cappy.
| |
| |-
| |
| |align=center style="background:#FFFFFF"|[[File:Mysterious Cube SMO.jpg|100x100px]]<br>[[Moon Rock]]
| |
| |A Moon Rock appears in most of the kingdoms. Once [[Princess Peach]] has been rescued and all [[Multi Moon]]s have been collected, the Moon Rocks begin to glow and shift. Striking one sends it skyward, where it burst into a multitude of new [[Power Moon]]s to collect.
| |
| |-
| |
| |align=center style="background:#FFFFFF"|[[File:P-Switch SMO.jpg|100x100px]]<br>[[P Switch]]
| |
| |Stepping on a P Switch changes an element in the immediate environment.
| |
| |-
| |
| |align=center style="background:#FFFFFF"|[[File:SMO Artwork Scarecrow.png|100x100px]]<br>[[Scarecrow (object)|Scarecrow]]
| |
| |Striking a scarecrow leaves Mario without Cappy for a brief period of time. In the overworld, striking a scarecrow triggers a brief Timer Challenge with temporary platforms. In some subareas, Mario must navigate an obstacle course-like area without Cappy's abilities.
| |
| |-
| |
| !colspan=3 style="background:#FF7733;"|Climbable objects
| |
| |-
| |
| |align=center style="background:#FFFFFF"|[[File:SMO Screenshot Bar.jpg|100x100px]]<br>[[Wire|Bar]]
| |
| |Horizontal bars embedded into the side of terrain. Mario can swing from them to reach distant areas.
| |
| |-
| |
| |align=center style="background:#FFFFFF"|[[File:SMO Screenshot Vine.jpg|100x100px]]<br>[[Beanstalk]]
| |
| |A beanstalk grows when a [[Seed (Super Mario Odyssey)|giant seed]] is thrown into an enclosed patch of dirt. The plant can be clung to like a pole to hidden areas that would otherwise be inaccessible. Growing and climbing a beanstalk is the only way Mario can leave the Deep Woods.
| |
| |-
| |
| |align=center style="background:#FFFFFF"|[[File:SMO Screenshot Pole.jpg|100x100px]]<br>[[Pole]]
| |
| |Mario clings to a pole by jumping onto it. He can ascend, descend, and change which face of the pole he is on by moving {{button|switch|leftstick}}. Pressing {{button|switch|a}} makes Mario jump from whichever face he is on. Poles vary widely in design, length, and shape. Cappy can twirl at the top of most poles, similar to other knob-like structures, and this sometimes produces a coin. Cables are sometimes strung between poles that Mario can ride along as a captured spark pylon. He can destroy poles as a captured T-Rex.
| |
| |-
| |
| |align=center style="background:#FFFFFF"|[[File:SMO Screenshot Plaster Wall.jpg|100x100px]]<br>[[Soft wall]]
| |
| |The soft walls of Bowser's Castle can be pierced by a Pokio's beak and used to cross distant areas. They can be made of plaster, [[:File:SMO Screenshot Wood.jpg|wood]], or soft metal. Some moving sections look like [[rotating dial]]s and [[wooden pendulum|swinging pendulum]]s.
| |
| |-
| |
| !colspan=3 style="background:#FF7733;"|Strikable objects
| |
| |-
| |
| |align=center style="background:#FFFFFF"|[[File:SMO 8bit Cat Mario.png|50x50px]][[File:SMO 8bit Cat Peach.png|50x50px]][[File:SMO 8bit Rosalina.png|50x50px]]<br>[[File:SMO 8bit Luigi.png|50x50px]][[File:SMO 8bit Captain Toad.png|50x50px]]<br>[[8-bit character]]s
| |
| |Animated sprites that are hidden in 3D areas. Striking the ones found on walls causes them to release items. The most recurring sprites are Pixel Cat Marios and 8-bit Cat Peaches, which release 10 coins and a heart, respectively. 8-bit Rosalina only appears on the [[Dark Side]] and [[Darker Side]], releasing 10 coins just like Cat Mario. Pixel Cat Marios are also hidden in bushes on the general overworld. Pixel Luigis appear too, hidden underground. Finding one awards Mario with 200 coins. They were replaced with Pixel Captain Toads for limited period of time.
| |
| |-
| |
| |align=center style="background:#FFFFFF"|[[File:SMO Screenshot Boombox.jpg|100x100px]]<br>[[Boombox]]
| |
| |Boomboxes play {{wp|Diegetic music|music within their immediate vicinity}}. During the main game, striking one briefly interrupts the music with the sound of [[Bowser]] laughing. After [[Princess Peach]] is rescued, striking a boombox instead makes it play "[[Jump Up, Super Star!]]" with Japanese lyrics.
| |
| |-
| |
| |align=center style="background:#FFFFFF"|[[File:SMO Screenshot Flower (Spin Throw).jpg|100x100px]]<br>[[Flower (Spin Throw)]]
| |
| |Low-growing flowers that grow in rings. Tossing Cappy causes them to bloom briefly before closing again. Having all of the flowers bloom simultaneously rewards Mario with an item. Because most of these flowers grow in rings, the most effective way to cause concurrent blooming is to have Mario stand in the center and perform a [[Spin Throw]].
| |
| |-
| |
| |align=center style="background:#FFFFFF"|[[File:SMO Ruined Brochure C.png|100x100px]]<br>[[Glowing spot]]
| |
| |In most kingdoms, there are glowing protrusions on the ground that [[Nintendo Switch#Joy-Con|rumble]] under Mario's feet. Ground-pounding one flattens it with the surrounding terrain and forces an item or [[Mini Goomba]]s to the surface. Some glowing spots are more subtle, being flat with the surrounding ground or underneath another object. Glowing spots are what are most often hinted at on Hint Art, and the [[Nintendog|dog]] will Mario to ones nearby. Small birds sometimes congregate around glowing spots.
| |
| |-
| |
| |align=center style="background:#FFFFFF"|[[File:SMO Artwork Hat Trampoline.png|100x100px]]<br>[[Hat Trampoline]]
| |
| |Hat Trampolines send Mario [[Spin Jump#Super Mario Odyssey|twirling]] into the sky and gently descend. Most of them are closed when encountered, but striking the red flower with Cappy or an attack from Mario causes it to open for a moment.
| |
| |-
| |
| |align=center style="background:#FFFFFF"|[[File:SMO Screenshot Dispersible Objects.jpg|100x100px]][[File:SMO Screenshot Construction Barrel.jpg|100x100px]]<br>{{Conjectural|Kickable objects}}
| |
| |Light objects in the environment that are sent flying when [[kick]]ed or struck by Cappy, sometimes rewarding Mario with a coin. Most kingdoms have at least one iteration of this kind of object. Examples include: cardboard boxes, [[tire (object)|tires]], {{wp|construction barrel}}s, garbage bags, a {{wp|Ball (gridiron football)|gridiron football}}, tin cans, [[bean]]s, and small mushrooms. Some of these have unique properties to themselves. For example, carboard boxes are only launched when hit by Cappy. They can be stood on like platforms and flattened with a ground pound. Knocking garbage into a dumpster releases an item, and knocking a bean into Stupendous Stew awards Mario with a coin.
| |
| |-
| |
| |align=center style="background:#FFFFFF"|[[File:SMO Screenshot Lamppost.jpg|100x100px]]<br>[[Knob-like structure]]s
| |
| |Protrusions in the environment. Striking one with Cappy gets him hooked to the top and swing around it as if it were a {{wp|hatstand}} until the player lets go of {{button|switch|y}}. Doing this often rewards Mario with a coin. If the knob-like structure is glowing, it releases a Power Moon once spun on. Each kingdom has multiple knob-like structures that match the surrounding topography. Examples include: {{wp|Street light|lampposts}}, walkway lights, [[airship]]s, horns, fountains, [[Jaxi Statue]]s, parking meters, fire hydrants, pumpkins, iron fences, spires, and the [[Tail Tree]]. Some structures have secondary behaviors. For example, an iron fence spews fire when Cappy spins on its top. Most climbable trees and poles have dual purposes as knob-like structures. The latter can be found on the [[Starshroom]] and the ''Odyssey''.
| |
| |-
| |
| |align=center style="background:#FFFFFF"|[[File:SMO 8bit Koopa Shell.png|100x100px]]<br>[[Koopa Shell]]
| |
| |[[Stomp]]ing on a [[Koopa Troopa|Koopa]] makes it recede into its shell, which can then be sent sliding on contact. A Koopa Shell bounces back when it collides with a wall, which can hurt Mario.
| |
| |-
| |
| |align=center style="background:#FFFFFF"|[[File:SMO Screenshot Lantern.jpg|100x100px]]<br>[[Lantern]]
| |
| |Striking a lantern's flame extinguishes it and sometimes releases an item. Lighting the lanterns around [[Mount Volbono]] is needed to obtain some Power Moons and gain access to certain areas.
| |
| |-
| |
| |align=center style="background:#FFFFFF"|[[File:SMO Cap Brochure C.png|100x100px]]<br>[[Stump|Post]]
| |
| |Ground-pounding a post embeds it into the earth and sometimes releases a coin. Striking one with Cappy pulls it from the ground, and sometimes causes more coins to appear. Dislodging posts sometimes causes more substantial changes in the area.
| |
| |-
| |
| |align=center style="background:#FFFFFF"|[[File:SMO Screenshot Rock (Breakable).jpg|100x100px]][[File:SMO Luncheon Brochure C.png|100x100px]]<br>Rock wall / [[Cheese|Cheese rock]]
| |
| |These walls are chipped away when struck by a projectile, such as a [[Hammer Bro]]'s [[frying pan]] or a [[Sherm]]'s bullets. The walls sometimes obscure pipes and Power Moons.
| |
| |-
| |
| |align=center style="background:#FFFFFF"|[[File:SMO Garbage.jpg|100x100px]]<br>{{Conjectural|Rockable objects}}
| |
| |Objects that rock slightly when struck by Cappy or jumped on, but are not sent flying and fall back into place. Hitting one sometimes releases a coin. Most kingdoms have an iteration of this object that matches the topography. Examples include: potted succulents, construction barriers, [[bin]]s, trashcans, tables, [[barrel]]s, and easels.
| |
| |-
| |
| |align=center style="background:#FFFFFF"|[[File:Slots-Metro.jpg|100x100px]]<br>[[Slots]]
| |
| |A game hosted by [[Tostarenan]]s in several kingdoms. Individual slots cycle between three images of an item. Striking the image projected by a single slot causes it to stop. Getting all slots to stop on the same image rewards Mario with the item.
| |
| |-
| |
| |align=center style="background:#FFFFFF"|[[File:SMO Screenshot Snow.jpg|100x100px]]<br>[[Snow]]
| |
| |The deep snow in Shiveria is cleared when Cappy is thrown through it. Some snow conceals doors and objects of interest.
| |
| |-
| |
| |align=center style="background:#FFFFFF"|[[File:SMO Screenshot Stone Wall.jpg|100x100px]]<br>[[Stone wall]]
| |
| |The stone walls in Fossil Falls break apart when struck by a [[Chain Chomp]] or rammed by a [[T-Rex]]. Doing so grants access to other areas or exposes secrets. The [[stone spire]] is held upright by stone walls and collapses when struck by a captured Chain Chomp. Stone walls are embedded with fossils and some are shaped like dinosaur vertebrae.
| |
| |-
| |
| |align=center style="background:#FFFFFF"|[[File:SMO Screenshot Sword.jpg|100x100px]]<br>Sword
| |
| |The swords in Crumbelden are buried to the hilt. Like a post, Cappy pulls one from the ground when he is thrown at it, sometimes rewarding Mario with a coin. Some of these swords are used to hold a giant {{wp|kabuto}} to the [[Ruined Dragon]]'s head. Pulling all of the swords causes the kabuto to fall off, exposing the dragon's weak point.
| |
| |-
| |
| |align=center style="background:#FFFFFF"|[[File:SMO Artwork Wedding Announcement Poster.png|100x100px]]<br>[[Poster (object)|Wedding announcement poster]]
| |
| |Posters promoting [[Bowser's Moon Wedding]], splayed on the walls of the surrounding area. Striking one makes it fall away and rewards Mario with a coin. The posters advertising the Cooking Carnival in [[Peronza Plaza]] behave the same way.
| |
| |-
| |
| |align=center style="background:#FFFFFF"|[[File:SMO Screenshot Yellow Turnstile.jpg|100x100px]]<br>[[Yellow turnstile]]
| |
| |Yellow turnstiles occur in areas accessed by Moon Pipes. Striking one of its walls makes it rotate 90°.
| |
| |-
| |
| !colspan=3 style="background:#FF7733;"|Capturable objects
| |
| |-
| |
| |align=center style="background:#FFFFFF"|[[File:SMO Artwork Binoculars.png|100x100px]]<br>[[Binoculars]] {{chart icon|SMO-capture}}
| |
| |Green, telescopic devices. Capturing one causes the head-like unit to launch into the sky like a rocket and give Mario a distant, adjustable view. Zooming in on certain targets makes a Power Moon appear.
| |
| |-
| |
| |align=center style="background:#FFFFFF"|[[File:SMO Screenshot Boulder.jpg|100x100px]]<br>[[Boulder]] {{chart icon|SMO-capture}}
| |
| |A giant rock in the Deep Woods. Capturing the boulder allows Mario to move it, granting access to a hidden alcove.
| |
| |-
| |
| |align=center style="background:#FFFFFF"|[[File:SMO Screenshot Bowser Statue.jpg|100x100px]]<br>[[Bowser Statue|Bowser statue]] {{chart icon|SMO-capture}}
| |
| |Only one of the stone Bowser statues in the Underground Moon Cavern is capturable. Shifting it exposes a hole containing a Power Moon.
| |
| |-
| |
| |align=center style="background:#FFFFFF"|[[File:SMO Artwork Cactus.png|100x100px]]<br>[[Cactus]] {{chart icon|SMO-capture}}
| |
| |Desert plants that damage Mario on contact, leaving needles embedded in his nose. Most cactuses are squat and round. Striking one of them with Cappy knocks it away and releases a coin. Knocking one into another cactus can cause a [[:File:SMO Screencap Cactus.gif|chain reaction]], where the last cactus drops eight coins. Tall cactuses also appear that are only knocked away when struck by the Jaxi. One near the [[Desert Oasis (Super Mario Odyssey)|Desert Oasis]] is covered with small birds and can be captured. Moving it exposes a glowing spot.
| |
| |-
| |
| |align=center style="background:#FFFFFF"|[[File:SMO Artwork Jizo.png|100x100px]]<br>[[Jizo]] {{chart icon|SMO-capture}}
| |
| |Most Jizo are found near the [[Bowser's Kingdom#Souvenir Shop|Souvenir Shop]]. Mario is invincible as a captured Jizo and resembles his [[Statue Mario|Statue form]] from previous games. It is heavy enough to trigger P Switches, but can only move in short hops.
| |
| |-
| |
| |align=center style="background:#FFFFFF"|[[File:SMO Asset Model Letter.png|100x100px]]<br>[[Letter (Super Mario Odyssey)|Letter]] {{chart icon|SMO-capture}}
| |
| |Five letter statues appear in [[Metro Kingdom#City Outskirts/Main Street Entrance|Squawks Park]] after Princess Peach has been rescued. Capturing each one and arranging them to spell "M-A-R-I-O" rewards Mario with a Power Moon.
| |
| |-
| |
| |align=center style="background:#FFFFFF"|[[File:SMO Screenshot Manhole.jpg|100x100px]]<br>[[Manhole]] {{chart icon|SMO-capture}}
| |
| |Some manholes block access to underground areas in New Donk City. Capturing one enables Mario to move it out of the way. The big green manhole blocks access to the [[Underground Power Plant]].
| |
| |-
| |
| |align=center style="background:#FFFFFF"|[[File:Meat cracked SMO.png|100x100px]]<br>[[Meat (object)|Meat]] {{chart icon|SMO-capture}}
| |
| |A piece of meat sits at the top of the [[Luncheon Kingdom#Meat Plateau|Meat Plateau]], encrusted with salt. Capturing it enables Mario to shake the salt off and attract Cookatiel. This is the only capture that can only be captured once. It is not present in subsequent revisits to Mount Volbono.
| |
| |-
| |
| |align=center style="background:#FFFFFF"|[[File:SMO Asset Model Mini Rocket.png|100x100px]]<br>[[Mini Rocket]] {{chart icon|SMO-capture}}
| |
| |Holding {{button|switch|b}} launches the Mini Rocket and brings Mario to a distant subarea.
| |
| |-
| |
| |align=center style="background:#FFFFFF"|[[File:SMO Picture Match Part (Goomba) Capture.png|100x100px]][[File:SMO Picture Match Part (Mario) Capture.png|100x100px]]<br>[[Picture Match|Picture Match Part]] {{chart icon|SMO-capture}}
| |
| |The capturable puzzle pieces in [[Picture Match]]. The player can rotate and shift the piece before letting go to align with the silhouette. Two puzzles are in the game: one resembles a Goomba, the other Mario.
| |
| |-
| |
| |align=center style="background:#FFFFFF"|[[File:SMO Screenshot Pole (Bollard).jpg|100x100px]]<br>[[Pole (bollard)|Pole]] {{chart icon|SMO-capture}}
| |
| |Roadside bollards. Capturing one and flicking backward with {{button|switch|leftstick}} flings Mario in the opposite direction. If along the ground, he can maintain momentum and go into another move like the [[roll]]. Poles appear fastened to the side of walls in some areas. Captured [[Volbonan]]s behave similarly.
| |
| |-
| |
| |align=center style="background:#FFFFFF"|[[File:SMO Screenshot Puzzle Part (Lake Kingdom).jpg|100x100px]][[File:SMO Screenshot Puzzle Part (Metro Kingdom).jpg|100x100px]]<br>[[Puzzle Part]] {{chart icon|SMO-capture}}
| |
| |Puzzle Parts are restricted to 3×3 grids. Capturing one allows Mario to roll it by turning it on its faces. Landing it in the slot adjacent to the grid on the correct face solves the puzzle and rewards Mario with a Power Moon.
| |
| |-
| |
| |align=center style="background:#FFFFFF"|[[File:SMO RC Car Capture.png|100x100px]]<br>[[RC Car]] {{chart icon|SMO-capture}}
| |
| |Toy taxis used in the [[RC Car Challenge]]. Capturing a blonde, hatless [[New Donker]] allows Mario to control an RC Car. The controls match those of a real {{wp|RC car}}, with the {{button|switch|leftstick}} accelerating and the {{button|switch|rightstick}} steering. RC Cars are restricted to toy circuits. Lapping the circuit within a certain amount of time rewards Mario with a Power Moon. This time is recorded by the Rankings Board.
| |
| |-
| |
| |align=center style="background:#FFFFFF"|[[File:SMO Spark pylon Capture.png|100x100px]]<br>[[Spark pylon]] {{chart icon|SMO-capture}}
| |
| |Mario becomes a ball of electric energy when he captures a spark pylon. The ball can travel along powerlines. Shaking the controller increases his speed and causes him to briefly go off course to collect nearby coins.
| |
| |-
| |
| |align=center style="background:#FFFFFF"|[[File:SMO Asset Model Taxi.png|100x100px]]<br>[[Taxi]] {{chart icon|SMO-capture}}
| |
| |Taxis are driven along the roads in New Donk City and stop if Mario is in their way. Taxis launch Mario into the air like [[Trampoline|Springboard]]s when he jumps on them. One parked taxi is capturable. Propelling it with the {{button|switch|leftstick}} brings Mario to a hidden, stormy area.
| |
| |-
| |
| |align=center style="background:#FFFFFF"|[[File:Tree SMO.png|100x100px]]<br>[[Tree]] {{chart icon|SMO-capture}}
| |
| |In most areas, trees are immobile and can be climbed like poles. The design and species of tree varies by kingdom. A cartoonish tree in the [[Deep Woods]], incongruent with the realistic conifers of the same kingdom, can be captured and moved, exposing a glowing spot. The palm trees in Tostarena have broad fronds that can be stood on like platforms.
| |
| |-
| |
| |align=center style="background:#FFFFFF"|[[File:SMO Screenshot Zipper.jpg|100x100px]]<br>[[Zipper (Super Mario Odyssey)|Zipper]] {{chart icon|SMO-capture}}
| |
| |Zippers seal hidden alcoves and doorways in the terrain. Capturing one allows Mario to unzip the area. In Lake Lamode, unzipping certain areas makes the wall fall away, but remain useable as a flat platform.
| |
| |-
| |
| !colspan=3 style="background:#FF7733;"|Transportation objects
| |
| |-
| |
| |align=center style="background:#FFFFFF"|[[File:SMO Asset Model 8-Bit Pipe.png|100x100px]]<br>[[8-bit pipe]]
| |
| |Blocky pipes. Entering one transforms Mario into an [[:File:SMO 8bit Mario.png|8-bit sprite]] and brings him a flat, 2D area on the perpendicular wall. Exiting an 8-bit pipe returns him to normal.
| |
| |-
| |
| |align=center style="background:#FFFFFF"|[[File:SMO Asset Model Lava Cannon.png|100x100px]]<br>[[Lava cannon]]
| |
| |Lava cannons sit in lava. One launches a captured [[Lava Bubble]] to distant pools, often circumventing solid terrain that Lava Bubbles cannot traverse otherwise.
| |
| |-
| |
| |align=center style="background:#FFFFFF"|[[File:Moon Pipe SMO.jpg|100x100px]]<br>[[Moon Pipe]]
| |
| |Moon Pipes only appear once the Moon Rock of the visited kingdom is struck. They bring Mario to surreal, otherworldly subareas with their own Power Moons to collect.
| |
| |-
| |
| |align=center style="background:#FFFFFF"|[[File:Motor Scooter SMO render.png|100x100px]]<br>[[Motor scooter]]
| |
| |An old-fashioned motor scooter that can be ridden by Mario. Pressing {{button|switch|y}} makes the scooter accelerate, and {{button|switch|b}} makes Mario jump with it. The motor scooter is faster than Mario can be used to avoid speedy hazards. Bringing it to a rooftop [[parking lot]] awards Mario with a Power Moon.
| |
| |-
| |
| |align=center style="background:#FFFFFF"|[[File:SMO Asset Model Pipe.png|100x100px]]<br>[[Warp Pipe|Pipe]]
| |
| |Entering a pipe brings Mario to a new area. Mario can circumvent the entrance animation with a ground pound or [[roll]].
| |
| |-
| |
| |align=center style="background:#FFFFFF"|[[File:SMO Screenshot Red Door.png|100x100px]]<br>[[Red door]]
| |
| |These doors fling open when struck by Cappy. They lead to subareas with Power Moons to collect. There are similar blue doors that only open when a nearby scarecrow is struck.
| |
| |-
| |
| |align=center style="background:#FFFFFF"|[[File:SMO Artwork Hat Catapult.png|100x100px]]<br>[[Slingshot]]
| |
| |Striking a slingshot with Cappy flings Mario over distant areas.
| |
| |-
| |
| |align=center style="background:#FFFFFF"|[[File:SMO Artwork Warp Hole.png|100x100px]]<br>[[Painting|Warp hole]]
| |
| |A small [[painting]]. It [[warp]]s Mario to the location in the frame, often a kingdom he has yet to visit. There is one hidden in ten of the kingdoms. Large paintings are locked away into towers around [[Peach's Castle]]. These paintings lead to rematches against the kingdom bosses.
| |
| |-
| |
| !colspan=3 style="background:#FF7733;"|Blocks and containers
| |
| |-
| |
| |align=center style="background:#FFFFFF"|[[File:SMO Artwork Question Block.png|100x100px]]<br>[[? Block]]
| |
| |Floating blocks that contain items. It expels its contents when struck by Mario or Cappy. They become Steel Blocks when their content is exhausted. [[Coin Block|Some ? Blocks]] can be struck in rapid succession to release up to ten coins. Some are [[Hidden Block|hidden]] and become visible when struck or when viewed as a captured Moe-Eye. The ones in New Donk City look like traffic signals and are fastened to poles.
| |
| |-
| |
| |align=center style="background:#FFFFFF"|[[File:SMO Screenshot Block (Sand Kingdom).jpg|100x100px]][[File:SMO Screenshot Block (Bowser's Kingdom).jpg|100x100px]]<br>[[Block (Super Mario Odyssey)|Block]]
| |
| |Grounded blocks made of stone or metal that cannot be broken by Mario under normal circumstances. Glowing ones contain Power Moons. Only strong enemies like Bullet Bills, Banzai Bills, Sherms, and Stairface Ogres can break these blocks. Pokios can knock [[firework bomb]]s into them to break them. Their design varies by kingdom. In two subareas, the blocks are suspended in the air.
| |
| |-
| |
| |align=center style="background:#FFFFFF"|[[File:Brick Block SMO.jpg|100x100px]]<br>[[Brick Block]]
| |
| |Some Brick Blocks are [[Coin Block]]s that release up to ten coins when struck in rapid succession like ? Blocks. Others are empty and fall apart when struck. Brick Blocks are incorporated into the boss fight with [[Torkdrift]].
| |
| |-
| |
| |align=center style="background:#FFFFFF"|[[File:SMO Screenshot Crate.jpg|100x100px]]<br>[[Crate]]
| |
| |Crates sometimes contain items, Power Moons, Mini Goombas, or flocks of small birds. They take two strikes to fully break. Crates are sometimes stacked on top of another.
| |
| |-
| |
| |align=center style="background:#FFFFFF"|[[File:SMO Screenshot Dumpster.jpg|100x100px]]<br>[[Dumpster]]
| |
| |Knocking garbage into some open dumpsters makes it release a Life-Up Heart or Power Moon. This also closes the lid.
| |
| |-
| |
| |align=center style="background:#FFFFFF"|[[File:SMO Asset Model Cage.png|100x100px]]<br>[[Cage|Moon Cage]]
| |
| |These cloche-like domes encapsulate Ground-Pound Switches, Moon Pedestals, and Power Moons. They open when a nearby task is completed.
| |
| |-
| |
| |align=center style="background:#FFFFFF"|[[File:SMO Nut.jpg|100x100px]]<br>[[Nut (Super Mario Odyssey)|Nut]]
| |
| |{{wp|Walnut}}-like fruits found throughout the Steam Gardens, rooted to the sides of walls and the ground. Cracking open a nut reveals it contained a Power Moon. Several nuts can only be reached as a captured Uproot.
| |
| |-
| |
| |align=center style="background:#FFFFFF"|[[File:Steel Block SMO.jpg|100x100px]]<br>[[Empty Block|Steel Block]]
| |
| |Blocks that contain nothing and cannot be broken. Coin Blocks and ? Blocks become these when their contents are exhausted.
| |
| |-
| |
| |align=center style="background:#FFFFFF"|[[File:SMO Artwork Treasure Chest.png|100x100px]]<br>[[Treasure chest]]
| |
| |Wooden chests contain items and fling open when struck. In some areas, treasure chests need to be open in a specific order to obtain a Power Moon. Failing to do so makes the treasure chests disappear an Chincos emerge from the ground. They reappear once all Chincos are defeated.
| |
| |-
| |
| !colspan=3 style="background:#FF7733;"|Platforms
| |
| |-
| |
| |align=center style="background:#FFFFFF"|[[File:SMO Screenshot Falling Platform.jpg|100x100px]]<br>[[Crumbling walkway|Falling Platform]]
| |
| |Platforms that break once stood on and slowly descend before disappearing. The [[vanishing platform]]s that appear in a Timer Challenge and the giant [[moon platform]]s in the [[Underground Moon Caverns]] function like Falling Platforms.
| |
| |-
| |
| |align=center style="background:#FFFFFF"|[[File:SMO Screenshot Floating Corn.jpg|100x100px]]<br>[[Floating corn]]
| |
| |Corncobs floating in lava. Standing on one end of floating corn causes it to roll in that direction.
| |
| |-
| |
| |align=center style="background:#FFFFFF"|[[File:SMO Screenshot Flower Road.jpg|100x100px]]<br>[[Flower Road]]
| |
| |Pressing a P Switch causes a Flower Road to form a nearby bridge across [[pit|bottomless pit]]s. It gradually recedes at the rear and will disappear beneath Mario's feet if he does not keep pace with it.
| |
| |-
| |
| |align=center style="background:#FFFFFF"|[[File:SMO Moon Moon 37.png|100x100px]]<br>[[Giant Swing (object)|Giant Swing]]
| |
| |Pendulous blocks that swing across empty space. They are briefly parallel with the ground at the fullest arch of the swing, allowing them to briefly be stood on.
| |
| |-
| |
| |align=center style="background:#FFFFFF"|[[File:SMO Screenshot Girder.jpg|100x100px]]<br>[[Girder]]
| |
| |Iron girders extend over bottomless pits and create narrow gaps between which Mario can [[Wall Jump]]. Some girders are hollow and can be entered, while others are [[Swinging Scaffolding]]s suspended by chains. In 2D areas, [[Donkey Kong]] tosses [[barrel]]s down girders.
| |
| |-
| |
| |align=center style="background:#FFFFFF"|[[File:Hill SMO.png|100x100px]]<br>[[Hill]]
| |
| |Metal columns carried by a lava flow. They are pushed deeper into lava as they pass under grating, but rise back up.
| |
| |-
| |
| |align=center style="background:#FFFFFF"|[[File:SMO Screenshot Hip Drop Move Lift.jpg|100x100px]]<br>[[Hip Drop Move Lift]]
| |
| |A circular lift in the Cloud Kingdom. Ground-pounding its center launches it skyward.
| |
| |-
| |
| |align=center style="background:#FFFFFF"|[[File:Lift SMO.jpg|100x100px]]<br>[[Lift]]
| |
| |Moving platforms. Their design and context for moving are generally informed by the environment. Some are fastened to [[track]]s.
| |
| |-
| |
| |align=center style="background:#FFFFFF"|[[File:SMO Artwork Moon Pedestal.png|100x100px]]<br>[[Moon Pedestal]]
| |
| |Moon Pedestals are flush with the ground. Power Moons appear above them, either by completing a nearby task or just inherently in the environment.
| |
| |-
| |
| |align=center style="background:#FFFFFF"|[[File:SMO Screenshot Movable Cover.jpg|100x100px]]<br>[[Movable cover]]
| |
| |Platforms that can be vertically raised by a captured Uproot.
| |
| |-
| |
| |align=center style="background:#FFFFFF"|[[File:SMO 8bit Mushroom Platform.png|100x100px]]<br>[[Mushroom Platform]]
| |
| |Platforms rising above [[poison (obstacle)|poison]] in a 2D area. They appear in pairs. Standing on one Mushroom Platform causes it to sink under Mario's weight and the other to rise. They return to their original positions when he jumps off.
| |
| |-
| |
| |align=center style="background:#FFFFFF"|[[File:Cap Cloud SMO.jpg|100x100px]]<br>[[Mysterious Cloud]]
| |
| |Striking a Mysterious Cloud with Cappy temporarily transforms it into a broad, cloud platform. It only lasts for a few seconds before returning to its original state.
| |
| |-
| |
| |align=center style="background:#FFFFFF"|[[File:SMO Screenshot Propeller Pillar.jpg|100x100px]]<br>[[Propeller Pillar]]
| |
| |Rotating ruin platforms on climbable poles in the [[Lost Kingdom|Forgotten Isle]]. They rotate clockwise in set intervals. Similar platforms called [[Gear (Super Mario Odyssey)|Gear]]s appear in the Luncheon Kingdom.
| |
| |-
| |
| |align=center style="background:#FFFFFF"|[[File:SMO Screenshot Push-Block.jpg|100x100px]]<br>[[Push-Block]]
| |
| |Protrusions that shift in and out of walls.
| |
| |-
| |
| |align=center style="background:#FFFFFF"|[[File:SMO Screenshot Rising Stone Pillar.jpg|100x100px]]<br>[[Ruin|Rising Stone Pillar]]
| |
| |Stair-like pillar platforms. One's position shifts when the elevated pillar is ground-pounded.
| |
| |-
| |
| |align=center style="background:#FFFFFF"|[[File:SMO Screenshot Rotating Platform.jpg|100x100px]]<br>[[Rotating platform]]
| |
| |Oblong platforms in the Underground Power Plant. One lights up and rotates around its pivot point for a brief period of time when struck by Cappy. It slows down before stopping completely.
| |
| |-
| |
| |align=center style="background:#FFFFFF"|[[File:SMO Sand Geysers.jpg|100x100px]]<br>[[Sand Geyser]]
| |
| |Sand Geysers rise and fall out of [[quicksand]] around [[Tostarena Ruins]]. A fully risen geyser can be used as a platform. An actively rising Sand Geyser carries Mario to its top, potentially keeping him from sinking into the quicksand.
| |
| |-
| |
| |align=center style="background:#FFFFFF"|[[File:SMO Screenshot Seesaw.jpg|100x100px]]<br>[[Seesaw]]
| |
| |Lifts that tilt under Mario's weight. They only appear during a Timer Challenge.
| |
| |-
| |
| |align=center style="background:#FFFFFF"|[[File:SMO Screenshot Spinning Saucepan.jpg|100x100px]]<br>[[Spinning saucepan]]
| |
| |Rotating platforms attached to the side of Mount Volbono. One side of a spinning saucepan is lava, the other solid earth. They rotate in set intervals that can be timed.
| |
| |-
| |
| |align=center style="background:#FFFFFF"|[[File:SMO Screenshot Swing.jpg|100x100px]]<br>[[Swing]]
| |
| |Lifts that sway back and forth like [[pendulum]]s.
| |
| |-
| |
| |align=center style="background:#FFFFFF"|[[File:SMO Screenshot Tapering Platform.jpg|100x100px]]<br>[[Tapering platform]]
| |
| |Platforms that submerge in lava in set intervals, then rise back up. Only the center of the platform is consistently above lava.
| |
| |-
| |
| |align=center style="background:#FFFFFF"|[[File:T Rex trampoline SMO.jpg|100x100px]]<br>[[Hat trampoline (Cascade Kingdom)|Trampoline]]
| |
| |Trampolines bounce Mario high into the air. Ground-pounding the surface makes him jump higher. There are variants of trampoline in most kingdoms that match the surround environment. Examples include parasols, {{wp|awning}}s, taxis, and [[Mushroom Trampoline|big mushroom]]s.
| |
| |-
| |
| |align=center style="background:#FFFFFF"|[[File:SMO Screenshot Transparent Platform 1.jpg|100x100px]][[File:SMO Screenshot Transparent Platform 2.jpg|100x100px]]<br>[[Transparent Platform]]
| |
| |Invisible platforms and lifts that can only be seen as a captured [[Moe-Eye]]. Some Transparent Platforms outpace Moe-Eye with drawn shades, necessitating traversal without the platforms being visible.
| |
| |-
| |
| |align=center style="background:#FFFFFF"|[[File:SMO Screenshot Wire Net Platform.jpg|100x100px]]<br>[[Grated platform|Wire Net Platform]]
| |
| |Chain-link lifts that appear above lava. Some Wire Net Platforms are attached to tracks that bring them through lava directly. Fiery hazards and Lava Bubbles can phase through them.
| |
| |-
| |
| !colspan=3 style="background:#FF7733;"|Wildlife
| |
| |-
| |
| |align=center style="background:#FFFFFF"|[[File:SMO Screenshot Hawk.jpg|100x100px]]<br>[[Bird (big)|Bird]]
| |
| |Hawks found soaring above Tostarena. They carry Power Moons and release them when struck. These birds fly in consistent patterns that can be tracked.
| |
| |-
| |
| |align=center style="background:#FFFFFF"|[[File:SMO Screenshot Butterfly.jpg|100x100px]]<br>[[Butterfly]]
| |
| |A giant butterfly in the Forgotten Isle that releases a Power Moon when struck. It is potentially an {{wp|Imago|imaginal}} [[Tropical Wiggler]]. Smaller butterflies with more realistic designs appear in other kingdoms.
| |
| |-
| |
| |align=center style="background:#FFFFFF"|[[File:SMO Artwork Penguin.png|100x100px]]<br>[[Penguin]]
| |
| |Small birds of Shiveria. They are skittish and take flight when approached. One carries a Power Moon.
| |
| |-
| |
| |align=center style="background:#FFFFFF"|[[File:SMO Artwork Small Animal (Chipmunk).png|100x100px]]<br>[[Small animal]]
| |
| |Ground animals that quickly runaway when approached. Doggedly pursuing one eventually makes it disappear, leaving behind a coin. There are four species of small animal: chipmunks, rats, geckos, and [[crab]]s. Which animals appear where depends on the environment of the visited kingdom. No small animals occur in the lunar kingdoms, and crabs are the only ones that occur underwater.
| |
| |-
| |
| |align=center style="background:#FFFFFF"|[[File:SMO Artwork Small Bird (Hat).png|100x100px]]<br>[[Small bird]]
| |
| |Little birds that fly away when approached, but may land on Mario's nose when he sleeps. Small birds congregate around objects of interest, some of which are otherwise cryptically hidden. A few carry Power Moons and release them when struck. There is a unique species of small bird found in most of the kingdoms, some of which resemble real-world species such as {{wp|scarlet macaw}}s, {{wp|blue jay}}s, and {{wp|Eurasian tree sparrow}}s. Doves, pigeons, penguins, and [[seagull]]s serve the same role as small birds within their respective kingdoms.
| |
| |-
| |
| |align=center style="background:#FFFFFF"|[[File:SMO Artwork Small UFO.png|100x100px]]<br>[[UFO|Small UFO]]
| |
| |The small UFO appears in the Moon Kingdom once its Moon Rock has been struck. It behaves like the earthbound small birds. The small UFO is similar to [[Torkdrift]], but their relationship is not clear.
| |
| |-
| |
| !colspan=3 style="background:#FF7733;"|Wedding articles
| |
| |-
| |
| |align=center style="background:#FFFFFF"|[[File:SMO Asset Model Binding Band.png|100x100px]]<br>[[Binding Band]]
| |
| |An ancient ring beneath the [[Inverted Pyramid]], worn by [[Knucklotec]]. After being stolen by Bowser, the pyramid rises from the dunes and sends the Sand Kingdom into a cold snap. The returned article can be ground-pounded for a Power Moon.
| |
| |-
| |
| |align=center style="background:#FFFFFF"|[[File:SMO Asset Model Frost-Frosted Cake.png|100x100px]]<br>[[Frost-Frosted Cake]]
| |
| |The traditional reward for the [[Bound Bowl Grand Prix]], baked by the [[Shiverian Elder]]. It appears in the background of the [[Snowline Circuit]] once returned.
| |
| |-
| |
| |align=center style="background:#FFFFFF"|[[File:SMO Screenshot Lochlady Dress.jpg|100x100px]]<br>[[Lochlady Dress]]
| |
| |The national treasure of Lake Lamode, worn by Princess Peach for most of the game. Its theft leaves the [[Lochlady|Lochladies]] despaired. Once returned, the dress is put back on display. Its mannequin is a glowing knob-like structure that releases a Power Moon.
| |
| |-
| |
| |align=center style="background:#FFFFFF"|[[File:SMO Screenshot Soiree Bouquet.jpg|100x100px]]<br>[[Soirée Bouquet]]
| |
| |Flowers cultivated by [[Steam Gardener]]s on the [[Sky Garden Tower]] and in the [[Secret Flower Field]]. Most of the flowers are stolen by the [[Broodals]] and [[Torkdrift]] for Bowser's wedding, and they are incorporated into Peach's bouquet. They recolonize these areas once each of their's respective boss is defeated.
| |
| |-
| |
| |align=center style="background:#FFFFFF"|[[File:SMO Glass Tower Model Souvenir.png|100x100px]]<br>[[Sparkle Water]]
| |
| |[[Water]] from the carbonated sea of Bubblaine. [[Mollusque-Lanceur]] inhibits the fountains and keeps locals from using the water. Defeating the boss makes the fountains flow again and the Sparkle Water accessible to everyone again.
| |
| |-
| |
| |align=center style="background:#FFFFFF"|[[File:SMO Screenshot Stupendous Stew.jpg|100x100px]]<br>[[Stupendous Stew]]
| |
| |The national dish of the Volbonans, served in [[Peronza Plaza]] for the Cooking Carnival. The stew is as hot as lava, burning Mario. Knocking certain vegetables into Stupendous Stew releases coins or moons. It is briefly apprehended by Cookatiel and is served at Bowser's wedding.
| |
| |-
| |
| !colspan=3 style="background:#FF7733;"|Other objects
| |
| |-
| |
| |align=center style="background:#FFFFFF"|[[File:SMO Screenshot Arrow Sign.jpg|100x100px]]<br>[[Arrow Sign]]
| |
| |Signs that direct players towards the intended path of a visited area. Mario usually has the option to deviate from the recommended direction. Arrow Signs spin when struck by Cappy.
| |
| |-
| |
| |align=center style="background:#FFFFFF"|[[File:SMO Screenshot Bubbler.jpg|100x100px]]<br>[[Bubbler (object)|Bubbler]]
| |
| |Creates air bubbles.
| |
| |-
| |
| |align=center style="background:#FFFFFF"|[[File:SMO Artwork Checkpoint Flag.png|100x100px]]<br>[[Checkpoint Flag]]
| |
| |Checkpoint Flags appear in most kingdoms and on the ''Odyssey''. Dying brings the player to the last Checkpoint Flag they touched or hit with Cappy. The player can also warp to any Checkpoint Flag they previously touched or hit with Cappy by selecting it on the map. Touching an underwater Checkpoint Flag or hitting one with Cappy spawns a bubble.
| |
| |-
| |
| |align=center style="background:#FFFFFF"|[[File:SMO Screenshot Flower (Mushroom Kingdom).jpg|100x100px]]<br>[[Flower (environmental object)|Flower]] / Bush
| |
| |Flora that rustles when Mario walks through it or strikes it with Cappy. Disturbed vegetation sometimes discharges items such as [[coin pile|coin stacks]]. The species of flowers and bushes in a kingdom are unique from one another, reflecting each one's unique environment. The bushes in the Cap Kingdom can be flattened with a ground-pound, releasing a coin.
| |
| |-
| |
| |align=center style="background:#FFFFFF"|[[File:SMO Wooded Kingdom Hint Art.png|100x100px]][[File:SMO Dark Side Hint Art 10.png|100x100px]]<br>[[Hint Art]]
| |
| |Artwork that cryptically hints at the locality of a Power Moon. The kingdom depicted in a piece of Hint Art never correlates with kingdom the piece occurs in.
| |
| |-
| |
| |align=center style="background:#FFFFFF"|[[File:SMO Artwork Jaxi Stand.png|100x100px]]<br>[[Jaxi Stand]]
| |
| |Jaxi Stands summon the Jaxi when prompted. Cappy can swing on the top of one like a knob-like structures. Jaxi Stands express fear when an enemy is near, suggesting they may be alive.
| |
| |-
| |
| |align=center style="background:#FFFFFF"|[[File:SMO Artwork Ranking Board.png|100x100px]]<br>[[Rankings Board]]
| |
| |The Rankings Board tracks the player's World Ranking and Friend Ranking in most [[minigame]]s, namely the [[Jump-Rope Challenge]], [[Beach Volleyball (Super Mario Odyssey)|Beach Volleyball]], RC Car Challenge, [[Bound Bowl Grand Prix]], and [[Koopa Freerunning]]. Mario can view this ranks by prompting it. The Rankings Board tracks Mario's movements when near and can be jumped on like a non-playable character. It appears in every kingdom except for the Dark Side and Darker Side, normally near the green [[Roving Racers|Roving Racer]].
| |
| |-
| |
| |align=center style="background:#FFFFFF"|[[File:SMO Artwork Paper Lantern.png|100x100px]]<br>[[Crazy Cap|Souvenirs]]
| |
| |Souvenirs are sold in [[Crazy Cap]] stores and can only be purchased with [[regional coin]]s. Once purchased, the souvenir appears inside the Odyssey and it a visual indication of progress.
| |
| |-
| |
| |align=center style="background:#FFFFFF"|[[File:SMO Sticker - Fossil Falls.png|100x100px]]<br>[[Crazy Cap|Stickers]]
| |
| |Stickers are also sold in Crazy Cap stores and purchased with regional coins. One is placed on the exterior of the Odyssey when purchased.
| |
| |-
| |
| |align=center style="background:#FFFFFF"|[[File:SMO Screenshot Board.jpg|100x100px]]<br>[[Sign|Travel Tip]]
| |
| |Signs that contain information on actions. Some are fastened to walls, while others are staked into the ground. Like Arrow Signs, staked Travel Tips spin when struck by Cappy.
| |
| |}
| |
|
| |
| ==Notes and references==
| |
| ===Notes===
| |
| {{footnote|note|A|Does not appear until "[[Bowser's Moon Wedding]]" is completed and the [[Toad (species)|Toad]] outside [[Peach's Castle]] is spoken to.}}
| |
| {{footnote|note|B|Starts to appear in most of the kingdoms after completing "Bowser's Moon Wedding".}}
| |
| {{footnote|note|C|Appears here after "A Tourist in the Metro Kingdom!" is completed.}}
| |
| {{footnote|note|D|Only appears here after the kingdom's Moon Rock is shattered.}}
| |
| {{footnote|note|E|Only appears here after "Bowser's Moon Wedding" is completed.}}
| |
| {{footnote|note|F|Added in [[#Updates|Ver. 1.2.0]] on 21 February, 2018.}}
| |
|
| |
| ===References===
| |
| <references/>
| |


