Rockin' Relics
| Level | |||||||
|---|---|---|---|---|---|---|---|
| Rockin' Relics | |||||||

| |||||||
| Level code | 4-A | ||||||
| World | Sea Breeze Cove | ||||||
| Game | Donkey Kong Country: Tropical Freeze | ||||||
| |||||||
Rockin' Relics is the first secret level of Sea Breeze Cove in Donkey Kong Country: Tropical Freeze and its Nintendo Switch port of the same name.
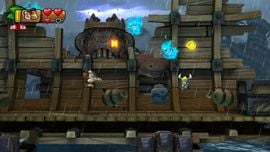
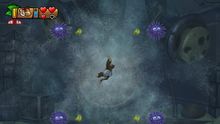
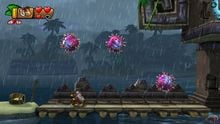
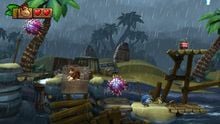
The level takes place both above and in the water, during a thunderstorm. At regular intervals, Jōmon-like statues are powered by lightning strikes, causing them to launch attached objects, such as platforms and urchin balls, high up in the air. Remarkably, two gigantic one-eyed statues exist in the level, each briefly pushing a shipwreck-like structure and powerfully flinging any character standing on the ship. Although the Kongs never interfere with electricity in this level, they can be sprung into obstacles such as urchin balls and get injured. Urchin balls sometimes appear to be lined up and bounced up in the air in various patterns, and though they can fall back down on the Kongs and hurt them, they can be destroyed using Cranky Kong's Cane Bounce. A few underwater portions feature enormous bellow-powered pipes that suck and push water, creating a whirlpool and pulling nearby objects inward and outward. This includes bananas and Sea Urchins, as well as the Kongs themselves.
The music of this stage is also played during Irate Eight and is an arrangement of "Lockjaw's Saga" from Donkey Kong Country 2: Diddy's Kong Quest. The music is mixed in underwater portions with notes from "Aquatic Ambience". All of these were composed by David Wise.
In Time Attack mode, a time of 1:25.00 is required to get a gold medal, a time of 1:50.00 for silver, and a time of 2:10.00 for bronze.
Overview[edit]
The level begins with a few electrified platforms, along with a few Snaggles. The next segment features urchin-like globes being pushed up by electrified platforms, and another segment with electrified platforms over water follows. The Kongs must then head underwater, and evade an expanding and contracting current created by a huge pipe. After passing a Mama Saw, the Kongs must rise to the surface and reach the first checkpoint.
The next segment consists of a tremor shipwreck with Tucks, followed by more electrified platforms and urchin-like globes. A few vines follow, along with several more Snaggles. The Kongs are then led underwater to another expanding and contracting current, which is followed by the second checkpoint.
Another tremor platform follows, and is followed by two swaying platforms with Hootzes near them. A segment with Barrel Cannons follows, leading directly to the Slot Machine Barrel.
Secret Exit[edit]
In order to reach this portal, the player needs the aid of Cranky Kong. In the segment with urchin-like globes jumping in arc patterns, Cranky Kong must carefully bounce with his cane from one of the urchins to reach a high-up vine and a platform containing a portal. Following this secret exit unlocks Shoal Atoll.
Collectibles[edit]
KONG Letters[edit]
- K: Just after the first Hootz, the letter K is located just below an electrified platform.
- O: In the second set of urchin-like globes, the Kongs must stick to the platforms that the globes rest on and follow the "wave" produced by the shocks to the letter O.
- N: Just after the second checkpoint, the Kongs must bounce on the tremor platform to reach the letter N while avoiding the Blue Hootz guarding it.
- G: In the series of Barrel Cannons leading to the Slot Machine Barrel, the Kongs must time their launch on one of them to collect the letter G.
Puzzle Pieces[edit]
- Just before the first Painguin Tucks, the Kongs must pound a trapdoor to access a Bonus Area. As with all other Bonus Areas, the Kongs must collect all bananas before time runs out to collect the Puzzle Piece.
- The Kongs must collect all bananas in the first expanding and contracting current to unveil the Puzzle Piece.
- On the tremor platform just after the first checkpoint, the Kongs must collect all bananas to unveil the Puzzle Piece.
- Just before the second set of urchin-like globes, the Kongs must dive down to a hidden alcove where they have to collect all banana bunches to unveil the Puzzle Piece.
- Just before the first vine, the Kongs must enter a skull Blast Barrel just below the pier and get launched into a Bonus Area. As with all other Bonus Areas, the Kongs must collect all bananas before time runs out to collect the Puzzle Piece.
- The Kongs must collect all bananas in the second expanding and contracting current while avoiding the Sea Urchins to unveil the Puzzle Piece.
- Just after the letter N, the Kongs must collect the Banana Bunch on the right of the two swaying platforms, then collect all of the bananas that appear to unveil the Puzzle Piece.
- Just before the series of Barrel Cannons, the Kongs must head to the right and dive underwater to find the Puzzle Piece.
- When reaching the Slot Machine Barrel, the Kongs must intentionally miss it first to reach another set of Barrel Cannons and collect the Puzzle Piece.
Enemies[edit]
- Snaggles
- Tucks
- Painguin Tucks
- Hootzes
- Gordos
- Red Finleys
- Mama Saws
- Pointy Tucks
- Waldoughs
- Sea Urchins
- Blue Hootzes
Gallery[edit]
Naming[edit]
Internal names[edit]
| Game | File | Name | Meaning
|
|---|---|---|---|
| Donkey Kong Country: Tropical Freeze | content/Worlds/w04_ocean/l0a_ocean_poppers.pak | l0a_ocean_poppers.pak | Ocean Level A: Poppers |
Names in other languages[edit]
| Language | Name | Meaning | Note(s) | Ref. |
|---|---|---|---|---|
| Japanese | はねる!ラングィビーチ Haneru! Rangwi Bīchi |
Jump! Snaggles Beach | [?] | |
| French | Statues sursauteuses | Jumping statues | [?] | |
| German | Aqua Marter | Aqua Torture | [?] | |
| Italian | Statue salterine | Jumping statues | [?] | |
| Spanish | Tótems traicioneros | Treacherous Totems | [?] |


