Slime Climb (Donkey Kong Country 2: Diddy's Kong Quest): Difference between revisions
7feetunder (talk | contribs) mNo edit summary |
No edit summary |
||
| (22 intermediate revisions by 8 users not shown) | |||
| Line 1: | Line 1: | ||
{{ | {{italic title|id=yes}} | ||
{{ | {{level infobox | ||
|image=[[File:Slime Climb.png]] | |||
|image=[[File:Slime Climb.png | |||
|code=3 - 5 | |code=3 - 5 | ||
|world=[[Krem Quay]] | |world=[[Krem Quay]] | ||
|game=''[[Donkey Kong Country 2: Diddy's Kong Quest]]'' | |game=''[[Donkey Kong Country 2: Diddy's Kong Quest]]'' | ||
| | |track=Jib Jig | ||
|before=[[Rattle Battle (Donkey Kong Country 2: Diddy's Kong Quest)|<<]] | |before=[[Rattle Battle (Donkey Kong Country 2: Diddy's Kong Quest)|<<]] | ||
|after=[[Bramble Blast (Donkey Kong Country 2: Diddy's Kong Quest)|>>]] | |after=[[Bramble Blast (Donkey Kong Country 2: Diddy's Kong Quest)|>>]] | ||
}} | }} | ||
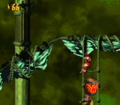
'''Slime Climb''' is the fifteenth level of ''[[Donkey Kong Country 2: Diddy's Kong Quest]]''. It is | '''Slime Climb''' is the fifteenth level of ''[[Donkey Kong Country 2: Diddy's Kong Quest]]'' and the fifth level of [[Krem Quay]]. It is another vertical rigging level, just like [[Mainbrace Mayhem (Donkey Kong Country 2: Diddy's Kong Quest)|Mainbrace Mayhem]] and [[Topsail Trouble (Donkey Kong Country 2: Diddy's Kong Quest)|Topsail Trouble]] from the first world, [[Gangplank Galleon (world)|Gangplank Galleon]]. Slime Climb has rising water which has the rare, invincible enemy, [[Snapjaw (Donkey Kong Country 2: Diddy's Kong Quest)|Snapjaw]], who follows [[Diddy Kong|Diddy]] and [[Dixie Kong]] throughout the level. The Kongs must avoid getting into the water or else the Snapjaw charges at them and bites them. Many other types of enemies appear in the level, the two most common being [[Flitter]]s and [[Click-Clack]]s. There are two [[Invincibility Barrel|Exclamation Point Barrel]]s, which grants temporary invincibility, including from Snapjaw. The first Exclamation Point Barrel is required for the Kongs to safely enter the first [[Bonus Level]] underwater, and the second one is required for them to safely collect the [[DK Coin|Video Game Hero Coin]], as well as a [[golden feather]] in the [[Donkey Kong Country 2 (Game Boy Advance)|Game Boy Advance version]]. | ||
==Layout== | |||
[[File:Slime Climb DKC2 GBA.png|thumb|left|Slime Climb in the Game Boy Advance version]] | |||
The Kongs begin the level on a yard that is positioned above the water but under a trio of [[banana]]s. Two more yards are ahead of here: The first holds a single Click-Clack, and the other carries two. A [[Banana Coin]] is between the two yards, and a super-jump or a [[team up]] move is required to reach it without falling into the water because of its location. The third yard in this area is also placed under some ropes with an arrow formed by bananas on it. They must climb upwards with these ropes, as directed by the arrow, in order to reach some higher yards that hold a Click-Clack and a [[DK Barrel]]. As they climb the ropes, the water rises, but then stops when they get on the yards. There are three smaller yards to the left of here, and as the heroes travel along with them, the water rises again. The first two yards hold one Click-Clack each, and the second one also holds a Kruncha. | |||
The [[KONG Letters|letter K]] floats between the first two of the three yards as well, but it can only be grabbed with a super-jump or a team up move if the primates do not want to fall into the water. Some ropes are in front of the third yard, and they can be climbed to reach some platforms placed around some masts. Before the water rises too much, they must travel to the east by jumping from one platform to the next. One of the platforms holds a Klomp, and a Banana Coin is after this platform in a gap. Soon, the duo reaches a small yard with a Kruncha on it. Some more platforms attached to the sides of masts are to the left of here, and the heroes must use them to climb higher. As they jump from one platform to the next, a trio of Klomps try to impede in their progress; they also come up to a [[crate]] as they head across the area. Fortunately, the water ceases to rise as they move along these platforms. However, it begins to rise again soon after when they reach a nearby set of ropes, which hold a Klinger and an arrow pointing upwards that is formed by bananas. | |||
[[ | |||
If the primates climb to the top of these ropes, they can find a straight tightrope to their right and a yard above this, which they can jump from to reach a hidden [[Blast Barrel]]. This barrel can shoot them through a shortcut, into the letter O, and onto some yards found shortly before the Star Barrel. If the two friends climb along the tightrope to their right in the area under the Blast Barrel, they come past a Zinger and onto a larger set of ropes that hold a few Klingers. A DK Barrel is to the right of the ropes, which can lead the Kongs up to a separate group of ropes that are positioned to the right of the letter O. A Klinger also slides along these ropes, which can help them climb to a group of yards that support a pair of Click-Clacks. When the heroes reach this area, the water rises under the yards and stops. A Blast Barrel is hidden high in the air to the left of here, and it can shoot the primates to many bananas, and then into an additional Blast Barrel that immediately blasts them to the [[Star Barrel]] on a different yard. If the Kongs head to the right from the location of the previous yard, which holds the two Click-Clacks, they can reach the yard with the Star Barrel above it. A Banana Bunch is hidden in a gap to the left of it. | |||
If the Kongs head east from the Star Barrel, they reach a separate yard that holds a Kannon, who stands in front of an Exclamation Point Barrel. Some ropes hang above it, and as they climb to the top of them, they break through a DK Barrel and the water begins to rise again. The ropes lead onto a yard that is placed near a tilted yard that they must travel down to reach a more leveled yard with a Neek on it and a Flitter and a Banana Bunch above it. An angled yard is just ahead, and it must be traveled along to reach another yard that is tilted upwards. A gap is between the yards, and a Banana Coin is located in it. After they cross this gap, they reach the tilted yard, which is positioned next to a leveled yard with Click-Clacks on it. Some ropes dangle above these yards, and as they are climbed, the primates must watch out for a Zinger. Shortly after passing this foe, they reach a higher yard with a gap to the right of it. In order to cross this gap and reach the large set of ropes after it, they must either hover with Dixie's [[Helicopter Spin]] or use a Flitter in the gap to bounce onto them. | |||
If the Kongs head east from the Star Barrel, they reach a separate yard that holds a Kannon, who stands in front of an | |||
The ropes hold a pair of Klingers, who climb up and then slide down on them. An additional Flitter is to the right of here, and the primates can bounce on it to cross a small gap and reach a yard that is tilted upwards. As they reach the end of the yard, they discover a smaller and leveled yard with a Click-Clack on it. There are some ropes above here that they must climb on order to progress. A Zinger flies in their way as they head up the ropes. At the top of the rope set, they can find another set of ropes to the left of them, which they must jump to if they want to escape from the rising water. The letter N is at the bottom of these ropes, which a Zinger flies over. They can find an additional set of ropes to the right of here, but a Zinger moves between the two rope sets. After the heroes pass this foe and reach the ropes, they must climb upwards past a pair of Zingers in order to reach a straight tightrope that they must climb along to find a wide gap with some Flitters above it. They must bounce on these moving Flitters to cross. | The ropes hold a pair of Klingers, who climb up and then slide down on them. An additional Flitter is to the right of here, and the primates can bounce on it to cross a small gap and reach a yard that is tilted upwards. As they reach the end of the yard, they discover a smaller and leveled yard with a Click-Clack on it. There are some ropes above here that they must climb on order to progress. A Zinger flies in their way as they head up the ropes. At the top of the rope set, they can find another set of ropes to the left of them, which they must jump to if they want to escape from the rising water. The letter N is at the bottom of these ropes, which a Zinger flies over. They can find an additional set of ropes to the right of here, but a Zinger moves between the two rope sets. After the heroes pass this foe and reach the ropes, they must climb upwards past a pair of Zingers in order to reach a straight tightrope that they must climb along to find a wide gap with some Flitters above it. They must bounce on these moving Flitters to cross. | ||
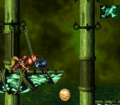
[[File:Slime Climb DKC2 shot 4.png|thumb|Dixie Kong hovers towards a Klomp on a platform.]] | [[File:Slime Climb DKC2 shot 4.png|thumb|Dixie Kong hovers towards a Klomp on a platform.]] | ||
As they cross this area, the water ceases to rise, after rising to slightly under the Kongs. On the other side of the gap, they can find some more ropes that they must climb to the top of to make their way onto a large yard with a Banana Bunch-stealing Klobber on it. Before the water reaches the Kongs, they must hurry onto a tilted yard nearby that holds another Banana Bunch-stealing Klobber. If they cross the gap following this yard, they make their way onto another yard that supports a Kruncha. A rope set is above this foe, and the duo must climb to the top of it in order to reach another yard with a smaller yard above it. Once they get on the first yard, the water stops rising, but if they hop onto the yard above it, which holds a [[kannonball]], it starts to climb again. There are four platforms attached to masts ahead of here; three of them hold Klomps, but the last of them supports a [[ | As they cross this area, the water ceases to rise, after rising to slightly under the Kongs. On the other side of the gap, they can find some more ropes that they must climb to the top of to make their way onto a large yard with a Banana Bunch-stealing Klobber on it. Before the water reaches the Kongs, they must hurry onto a tilted yard nearby that holds another Banana Bunch-stealing Klobber. If they cross the gap following this yard, they make their way onto another yard that supports a Kruncha. A rope set is above this foe, and the duo must climb to the top of it in order to reach another yard with a smaller yard above it. Once they get on the first yard, the water stops rising, but if they hop onto the yard above it, which holds a [[Cannonball|kannonball]], it starts to climb again. There are four platforms attached to masts ahead of here; three of them hold Klomps, but the last of them supports a [[Cannon|Kannon]], which they can load with the nearby kannonball. The platforms must be used to progress to a small gap with a Flitter in it. They can use this Flitter to cross the gap and then reach a yard with some ropes above it. | ||
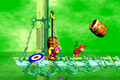
Once they reach the top of these ropes, they jump onto a yard that holds two Click-Clacks, and the water ceases to rise. An Exclamation Point Barrel is hidden in the top-left corner of this area, and if the primates hit it, they become invincible temporarily. They can use this short-lived ability to grab a [[DK Coin|Video Game Hero Coin]] hidden under the level's exit in the water. In the [[Game Boy Advance]] version of the game, a [[golden feather]] is also hidden in the water to the left of the coin. The [[End of Level Target]] is on the other side of a gap from the location of the Kongs' location at this point. They can cross this gap by bouncing off of a pair of Flitters that fly in it, and then by accessing a Barrel Cannon that can shoot them onto the nearby yard. This yard holds the End of Level Target, which the Kongs must hit in order to complete the level. If they hit this target immediately after shooting out of the previous Barrel Cannon, they win a prize from it (either a Banana, a Banana Bunch, or a Banana Coin). A Barrel Cannon is placed to the right of the End of Level Target, and it can blast the heroes into the Barrel Cannon placed to the left of it. | |||
==Enemies== | |||
The following enemies appear in the following quantities: | |||
<gallery> | |||
Click Clack DKC2.png|[[Click-Clack]] (13) | |||
Flitter DKC2.png|[[Flitter]] (12) | |||
Kannon DKC2 enemy.png|[[Kannon]] (1) | |||
Klinger DKC2.png|[[Klinger]] (7) | |||
Klobber DKC2 yellow.png|[[Klobber]] (yellow) (2) | |||
Klomp DKC2.png|[[Klomp]] (7) | |||
Kruncha DKC2 blue.png|[[Kruncha]] (blue) (3) | |||
Neek DKC2.png|[[Neek]] (1) | |||
Zinger DKC2 yellow.png|[[Zinger]] (yellow) (9) | |||
</gallery> | |||
==Items and objects== | |||
The following items and objects appear in the following quantities: | |||
<gallery> | |||
Banana Bunch DKC SNES.png|[[Banana Bunch]] (4) | |||
Banana Coin.png|[[Banana Coin]] (3) | |||
Crate DKC2.png|[[Crate]] (1) | |||
DK Barrel.png|[[DK Barrel]] (5) | |||
Invincibility Barrel.png|[[Invincibility Barrel|Exclamation Point Barrel]] (2) | |||
Kannonball.png|[[Cannonball|Kannonball]] (6) | |||
</gallery> | |||
=== | ===KONG Letters=== | ||
*Shortly after the | *'''K:''' Shortly after the first DK Barrels, the Kongs encounter the first Kruncha, and the letter K floats beneath the yard that it walks on and can only be reached from a roll jump. | ||
* | *'''O:''' After encountering the first Zinger, Diddy and Dixie must climb up a grid of ropes and pass three Klingers. Another grid of ropes appears to the left, which the letter O itself is floating to the left of. | ||
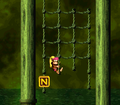
*'''N:''' Shortly after passing the Star Barrel, the Kongs find a group of bananas in the shape of an up arrow. They must climb up the grid of ropes, and to their left is another grid of ropes. The letter N is hanging from a rope at the bottom-left of the grid. | |||
*'''G:''' To the left of the kannonball, there is a trail of bananas leading west. The Kongs must follow the bananas by swimming through the water. At the very left they reach a hidden yard with two Banana Bunches, a DK Barrel, and the letter G. | |||
=== | ===Key items=== | ||
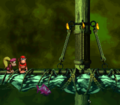
[[File:Slime Climb | [[File:Slime Climb DK Coin.png|thumb|The Video Game Hero Coin is just below the End of Level Target]] | ||
*'''[[DK Coin|Cranky's Video Game Hero Coin]]:''' At the very top of the level, the Kongs can find the second Exclamation Point Barrel floating in midair. Diddy and Dixie can reach the barrel by using their [[team up]] move. Once they reach it, the Kongs must quickly go into the water and swim all the way to the right. They can obtain the Video Game Hero Coin on a platform beneath where the End of Level Target is located. | |||
*'''[[Golden feather]] (Game Boy Advance version only):''' The golden feather is near the Video Game Hero Coin. After reaching the Exclamation Point Barrel, the Kongs must jump into the water and swim to the left, beneath the yard they were on. The golden feather appears underneath the yard near the end. If they are quick enough, Diddy and Dixie can also obtain the Video Game Hero Coin. | |||
{{br}} | |||
==Bonus Levels== | |||
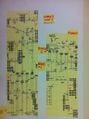
{{multiframe|[[File:Slime Climb Bonus Level 1.png|200px]] [[File:Slime Climb GBA Bonus Level 2.png|200px]]|size=420|The first and second Bonus Levels respectively}} | |||
Slime Climb has two [[Bonus Level]]s, listed by their type: | |||
*'''Collect the Stars!''': Right after the Star Barrel, there is a Kannon in the same spot as an Exclamation Point Barrel. While invincible, Diddy and Dixie must travel down and follow a diagonal trail of bananas which lead them to a [[Bonus Barrel]]. The objective is to collect 70 stars within 25 seconds. The Bonus Level is set in a small symmetrical area, with each side having 35 stars and a hook on each of the farthest ends to catch the Kongs when they fall. The Kongs start the Bonus Level on a platform at the bottom-middle, and a single column of rope grids appear above them. Diddy and Dixie can climb both sides of the rope grid to collect every star next to it. They can reach the other stars by jumping at them. After the Kongs collect every star, a Kremkoin appears above the starting platform. | |||
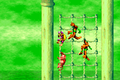
* | *'''Destroy Them All!''': After collecting the letter N, Diddy and Dixie must climb more ropes. They eventually reach a platform with a yellow Klobber. From here, the Kongs must go to a Kruncha and climb up a single column of ropes. The [[Cannonball|kannonball]] is on a yard above the ropes, and the Kongs must pick it up, carry it by three [[Klomp]]s, and put it into a [[Cannon|Kannon]]. In the Bonus Level, the Kongs have 25 seconds to defeat five enemies: sorted from the bottom to the top, there are three Flitters and two Zingers, all of which are flying over a gap on the right. The Kongs start on a yard on the left, which has a [[DK Barrel]] at the edge. A straight vertical column of ten platforms appear over the yard, half of which each have a kannonball that the Kongs can use to defeat each of the Zingers, while the Flitters can be reached from a team up throw. After every enemy is defeated, a Kremkoin appears on a yard at the top. | ||
==Gallery== | ==Gallery== | ||
<gallery> | <gallery> | ||
Slime Climb DKC2 shot.png|Diddy Kong throws a Click-Clack | Slime Climb DKC2 start.png|The start of the level | ||
Slime Climb DKC2 | Slime Climb DKC2 shot.png|Diddy Kong throws a Click-Clack at the start of the level | ||
Slime Climb DKC2 letter K.png|The location of the letter K | |||
Slime Climb DKC2 shot 2.png|Diddy Kong stands at the beginning of the level. | |||
Slime Climb DKC2 shot 3.png|The Kongs climb up some ropes and progress to a yard. | |||
Slime Climb DKC2 letter N.png|The location of the letter N | |||
Slime Climb concept drawing.jpg|Concept art of Slime Climb, which also features witty comments from Snapjaw | |||
Slime Climb concept drawing 2.jpg|Another concept art of Slime Climb | |||
Slime Climb GBA Klomp crate.png|Dixie throws a crate at a Klomp in the Game Boy Advance version | |||
Slime Climb GBA Klingers.png|Diddy and Dixie climb a rope, left of two Klingers in the Game Boy Advance version | |||
Slime Climb GBA Golden Feather.png|The location of the golden feather in the Game Boy Advance version | |||
Slime Climb GBA end.png|The end of the level in the Game Boy Advance version | |||
</gallery> | </gallery> | ||
==Names in other languages== | ==Names in other languages== | ||
{{foreign names | {{foreign names | ||
|Jap=しずむナンパ船 | |||
|JapR=Shizumu Nanpasen | |||
|JapM=Sinking Shipwreck | |||
|Spa=Escalada Fangosa | |Spa=Escalada Fangosa | ||
|SpaM=Muddy Climb | |SpaM=Muddy Climb | ||
| | |Fre=Ascension Visqueuse | ||
| | |FreM=Slimy Ascension | ||
|Ita=Fuga dal Naufragio | |||
|ItaM=Escape from the Shipwreck | |||
|Ger=Kletterschleim | |Ger=Kletterschleim | ||
|GerM=Climb Slime | |GerM=Climb Slime | ||
}} | |||
{{DKC2}} | {{DKC2}} | ||
[[Category:Pirate areas]] | |||
[[Category:Crocodile Isle]] | [[Category:Crocodile Isle]] | ||
[[Category:Donkey Kong Country 2: Diddy's Kong Quest | [[Category:Donkey Kong Country 2: Diddy's Kong Quest levels]] | ||
Latest revision as of 16:20, January 20, 2024
| Level | |
|---|---|
| Slime Climb | |

| |
| Level code | 3 - 5 |
| World | Krem Quay |
| Game | Donkey Kong Country 2: Diddy's Kong Quest |
| Music track | Jib Jig |
| << Directory of levels >> | |
Slime Climb is the fifteenth level of Donkey Kong Country 2: Diddy's Kong Quest and the fifth level of Krem Quay. It is another vertical rigging level, just like Mainbrace Mayhem and Topsail Trouble from the first world, Gangplank Galleon. Slime Climb has rising water which has the rare, invincible enemy, Snapjaw, who follows Diddy and Dixie Kong throughout the level. The Kongs must avoid getting into the water or else the Snapjaw charges at them and bites them. Many other types of enemies appear in the level, the two most common being Flitters and Click-Clacks. There are two Exclamation Point Barrels, which grants temporary invincibility, including from Snapjaw. The first Exclamation Point Barrel is required for the Kongs to safely enter the first Bonus Level underwater, and the second one is required for them to safely collect the Video Game Hero Coin, as well as a golden feather in the Game Boy Advance version.
Layout[edit]

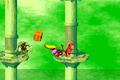
The Kongs begin the level on a yard that is positioned above the water but under a trio of bananas. Two more yards are ahead of here: The first holds a single Click-Clack, and the other carries two. A Banana Coin is between the two yards, and a super-jump or a team up move is required to reach it without falling into the water because of its location. The third yard in this area is also placed under some ropes with an arrow formed by bananas on it. They must climb upwards with these ropes, as directed by the arrow, in order to reach some higher yards that hold a Click-Clack and a DK Barrel. As they climb the ropes, the water rises, but then stops when they get on the yards. There are three smaller yards to the left of here, and as the heroes travel along with them, the water rises again. The first two yards hold one Click-Clack each, and the second one also holds a Kruncha.
The letter K floats between the first two of the three yards as well, but it can only be grabbed with a super-jump or a team up move if the primates do not want to fall into the water. Some ropes are in front of the third yard, and they can be climbed to reach some platforms placed around some masts. Before the water rises too much, they must travel to the east by jumping from one platform to the next. One of the platforms holds a Klomp, and a Banana Coin is after this platform in a gap. Soon, the duo reaches a small yard with a Kruncha on it. Some more platforms attached to the sides of masts are to the left of here, and the heroes must use them to climb higher. As they jump from one platform to the next, a trio of Klomps try to impede in their progress; they also come up to a crate as they head across the area. Fortunately, the water ceases to rise as they move along these platforms. However, it begins to rise again soon after when they reach a nearby set of ropes, which hold a Klinger and an arrow pointing upwards that is formed by bananas.
If the primates climb to the top of these ropes, they can find a straight tightrope to their right and a yard above this, which they can jump from to reach a hidden Blast Barrel. This barrel can shoot them through a shortcut, into the letter O, and onto some yards found shortly before the Star Barrel. If the two friends climb along the tightrope to their right in the area under the Blast Barrel, they come past a Zinger and onto a larger set of ropes that hold a few Klingers. A DK Barrel is to the right of the ropes, which can lead the Kongs up to a separate group of ropes that are positioned to the right of the letter O. A Klinger also slides along these ropes, which can help them climb to a group of yards that support a pair of Click-Clacks. When the heroes reach this area, the water rises under the yards and stops. A Blast Barrel is hidden high in the air to the left of here, and it can shoot the primates to many bananas, and then into an additional Blast Barrel that immediately blasts them to the Star Barrel on a different yard. If the Kongs head to the right from the location of the previous yard, which holds the two Click-Clacks, they can reach the yard with the Star Barrel above it. A Banana Bunch is hidden in a gap to the left of it.
If the Kongs head east from the Star Barrel, they reach a separate yard that holds a Kannon, who stands in front of an Exclamation Point Barrel. Some ropes hang above it, and as they climb to the top of them, they break through a DK Barrel and the water begins to rise again. The ropes lead onto a yard that is placed near a tilted yard that they must travel down to reach a more leveled yard with a Neek on it and a Flitter and a Banana Bunch above it. An angled yard is just ahead, and it must be traveled along to reach another yard that is tilted upwards. A gap is between the yards, and a Banana Coin is located in it. After they cross this gap, they reach the tilted yard, which is positioned next to a leveled yard with Click-Clacks on it. Some ropes dangle above these yards, and as they are climbed, the primates must watch out for a Zinger. Shortly after passing this foe, they reach a higher yard with a gap to the right of it. In order to cross this gap and reach the large set of ropes after it, they must either hover with Dixie's Helicopter Spin or use a Flitter in the gap to bounce onto them.
The ropes hold a pair of Klingers, who climb up and then slide down on them. An additional Flitter is to the right of here, and the primates can bounce on it to cross a small gap and reach a yard that is tilted upwards. As they reach the end of the yard, they discover a smaller and leveled yard with a Click-Clack on it. There are some ropes above here that they must climb on order to progress. A Zinger flies in their way as they head up the ropes. At the top of the rope set, they can find another set of ropes to the left of them, which they must jump to if they want to escape from the rising water. The letter N is at the bottom of these ropes, which a Zinger flies over. They can find an additional set of ropes to the right of here, but a Zinger moves between the two rope sets. After the heroes pass this foe and reach the ropes, they must climb upwards past a pair of Zingers in order to reach a straight tightrope that they must climb along to find a wide gap with some Flitters above it. They must bounce on these moving Flitters to cross.

As they cross this area, the water ceases to rise, after rising to slightly under the Kongs. On the other side of the gap, they can find some more ropes that they must climb to the top of to make their way onto a large yard with a Banana Bunch-stealing Klobber on it. Before the water reaches the Kongs, they must hurry onto a tilted yard nearby that holds another Banana Bunch-stealing Klobber. If they cross the gap following this yard, they make their way onto another yard that supports a Kruncha. A rope set is above this foe, and the duo must climb to the top of it in order to reach another yard with a smaller yard above it. Once they get on the first yard, the water stops rising, but if they hop onto the yard above it, which holds a kannonball, it starts to climb again. There are four platforms attached to masts ahead of here; three of them hold Klomps, but the last of them supports a Kannon, which they can load with the nearby kannonball. The platforms must be used to progress to a small gap with a Flitter in it. They can use this Flitter to cross the gap and then reach a yard with some ropes above it.
Once they reach the top of these ropes, they jump onto a yard that holds two Click-Clacks, and the water ceases to rise. An Exclamation Point Barrel is hidden in the top-left corner of this area, and if the primates hit it, they become invincible temporarily. They can use this short-lived ability to grab a Video Game Hero Coin hidden under the level's exit in the water. In the Game Boy Advance version of the game, a golden feather is also hidden in the water to the left of the coin. The End of Level Target is on the other side of a gap from the location of the Kongs' location at this point. They can cross this gap by bouncing off of a pair of Flitters that fly in it, and then by accessing a Barrel Cannon that can shoot them onto the nearby yard. This yard holds the End of Level Target, which the Kongs must hit in order to complete the level. If they hit this target immediately after shooting out of the previous Barrel Cannon, they win a prize from it (either a Banana, a Banana Bunch, or a Banana Coin). A Barrel Cannon is placed to the right of the End of Level Target, and it can blast the heroes into the Barrel Cannon placed to the left of it.
Enemies[edit]
The following enemies appear in the following quantities:

Click-Clack (13)

Flitter (12)

Kannon (1)

Klinger (7)

Klobber (yellow) (2)

Klomp (7)

Kruncha (blue) (3)

Neek (1)

Zinger (yellow) (9)


Items and objects[edit]
The following items and objects appear in the following quantities:

Banana Bunch (4)

Banana Coin (3)

Crate (1)

DK Barrel (5)

Kannonball (6)


KONG Letters[edit]
- K: Shortly after the first DK Barrels, the Kongs encounter the first Kruncha, and the letter K floats beneath the yard that it walks on and can only be reached from a roll jump.
- O: After encountering the first Zinger, Diddy and Dixie must climb up a grid of ropes and pass three Klingers. Another grid of ropes appears to the left, which the letter O itself is floating to the left of.
- N: Shortly after passing the Star Barrel, the Kongs find a group of bananas in the shape of an up arrow. They must climb up the grid of ropes, and to their left is another grid of ropes. The letter N is hanging from a rope at the bottom-left of the grid.
- G: To the left of the kannonball, there is a trail of bananas leading west. The Kongs must follow the bananas by swimming through the water. At the very left they reach a hidden yard with two Banana Bunches, a DK Barrel, and the letter G.
Key items[edit]

- Cranky's Video Game Hero Coin: At the very top of the level, the Kongs can find the second Exclamation Point Barrel floating in midair. Diddy and Dixie can reach the barrel by using their team up move. Once they reach it, the Kongs must quickly go into the water and swim all the way to the right. They can obtain the Video Game Hero Coin on a platform beneath where the End of Level Target is located.
- Golden feather (Game Boy Advance version only): The golden feather is near the Video Game Hero Coin. After reaching the Exclamation Point Barrel, the Kongs must jump into the water and swim to the left, beneath the yard they were on. The golden feather appears underneath the yard near the end. If they are quick enough, Diddy and Dixie can also obtain the Video Game Hero Coin.
Bonus Levels[edit]


Slime Climb has two Bonus Levels, listed by their type:
- Collect the Stars!: Right after the Star Barrel, there is a Kannon in the same spot as an Exclamation Point Barrel. While invincible, Diddy and Dixie must travel down and follow a diagonal trail of bananas which lead them to a Bonus Barrel. The objective is to collect 70 stars within 25 seconds. The Bonus Level is set in a small symmetrical area, with each side having 35 stars and a hook on each of the farthest ends to catch the Kongs when they fall. The Kongs start the Bonus Level on a platform at the bottom-middle, and a single column of rope grids appear above them. Diddy and Dixie can climb both sides of the rope grid to collect every star next to it. They can reach the other stars by jumping at them. After the Kongs collect every star, a Kremkoin appears above the starting platform.
- Destroy Them All!: After collecting the letter N, Diddy and Dixie must climb more ropes. They eventually reach a platform with a yellow Klobber. From here, the Kongs must go to a Kruncha and climb up a single column of ropes. The kannonball is on a yard above the ropes, and the Kongs must pick it up, carry it by three Klomps, and put it into a Kannon. In the Bonus Level, the Kongs have 25 seconds to defeat five enemies: sorted from the bottom to the top, there are three Flitters and two Zingers, all of which are flying over a gap on the right. The Kongs start on a yard on the left, which has a DK Barrel at the edge. A straight vertical column of ten platforms appear over the yard, half of which each have a kannonball that the Kongs can use to defeat each of the Zingers, while the Flitters can be reached from a team up throw. After every enemy is defeated, a Kremkoin appears on a yard at the top.
Gallery[edit]
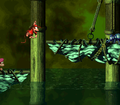
The start of the level
Diddy Kong throws a Click-Clack at the start of the level
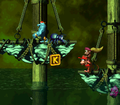
The location of the letter K
Diddy Kong stands at the beginning of the level.
The Kongs climb up some ropes and progress to a yard.
The location of the letter N
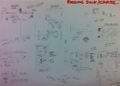
Concept art of Slime Climb, which also features witty comments from Snapjaw
Another concept art of Slime Climb
Dixie throws a crate at a Klomp in the Game Boy Advance version
Diddy and Dixie climb a rope, left of two Klingers in the Game Boy Advance version
The location of the golden feather in the Game Boy Advance version
The end of the level in the Game Boy Advance version


Names in other languages[edit]
| Language | Name | Meaning |
|---|---|---|
| Japanese | しずむナンパ船 Shizumu Nanpasen |
Sinking Shipwreck |
| French | Ascension Visqueuse |
Slimy Ascension |
| German | Kletterschleim |
Climb Slime |
| Italian | Fuga dal Naufragio |
Escape from the Shipwreck |
| Spanish | Escalada Fangosa |
Muddy Climb |